Chinese regulatory filings have confirmed key production details for the Freelander 8, the first model from the revived Freelander brand, a joint venture between Chery and Jaguar Land Rover.
The SUV is scheduled to launch in China later this year, with right-hand-drive testing underway and an Australian launch targeted for around 2027.
The filings show a large SUV positioned well above the size of previous Freelander models. It measures up to 5185mm in length, 2050mm in width and 1898mm in height, with a 3040mm wheelbase. Kerb weight is listed at 2980kg for range-extender and plug-in hybrid variants, while gross vehicle weight is 3495kg.
The Freelander 8 will be built on an 800V architecture developed by Chery and will be offered in electric, plug-in hybrid and extended-range electric versions. The range-extender model uses a 1.5-litre petrol engine producing 105kW, operating solely as a generator for the electric drivetrain. The battery system is supplied by CATL and supports DC fast charging at up to 350kW, with claimed fuel consumption of 0.76L/100km.
Chassis equipment is said to include twin-chamber air suspension, an electronic limited-slip differential and an automatic all-terrain management system. A roof-mounted LiDAR unit scans road and terrain conditions and feeds data into the vehicle’s control systems. Driver assistance software comes from Huawei via its Qiankun ADS platform, with a Snapdragon 8397 processor from Qualcomm handling computer duties.
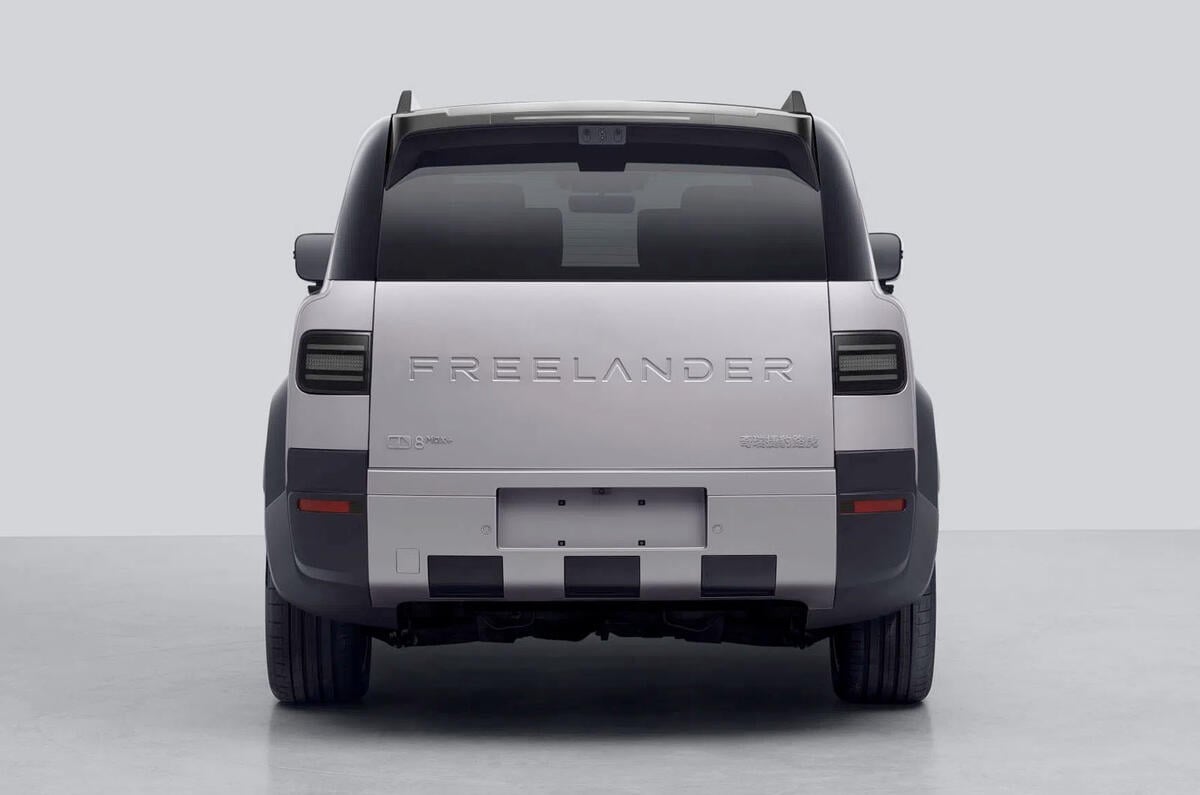
Inside, the cabin is expected to feature a pillar-to-pillar display, a secondary touchscreen and physical rotary controls. The interior is configured as a six-seat layout in a 2-2-2 arrangement across three rows.
The Freelander 8 is the first of six models planned under the revived brand over the next five years.
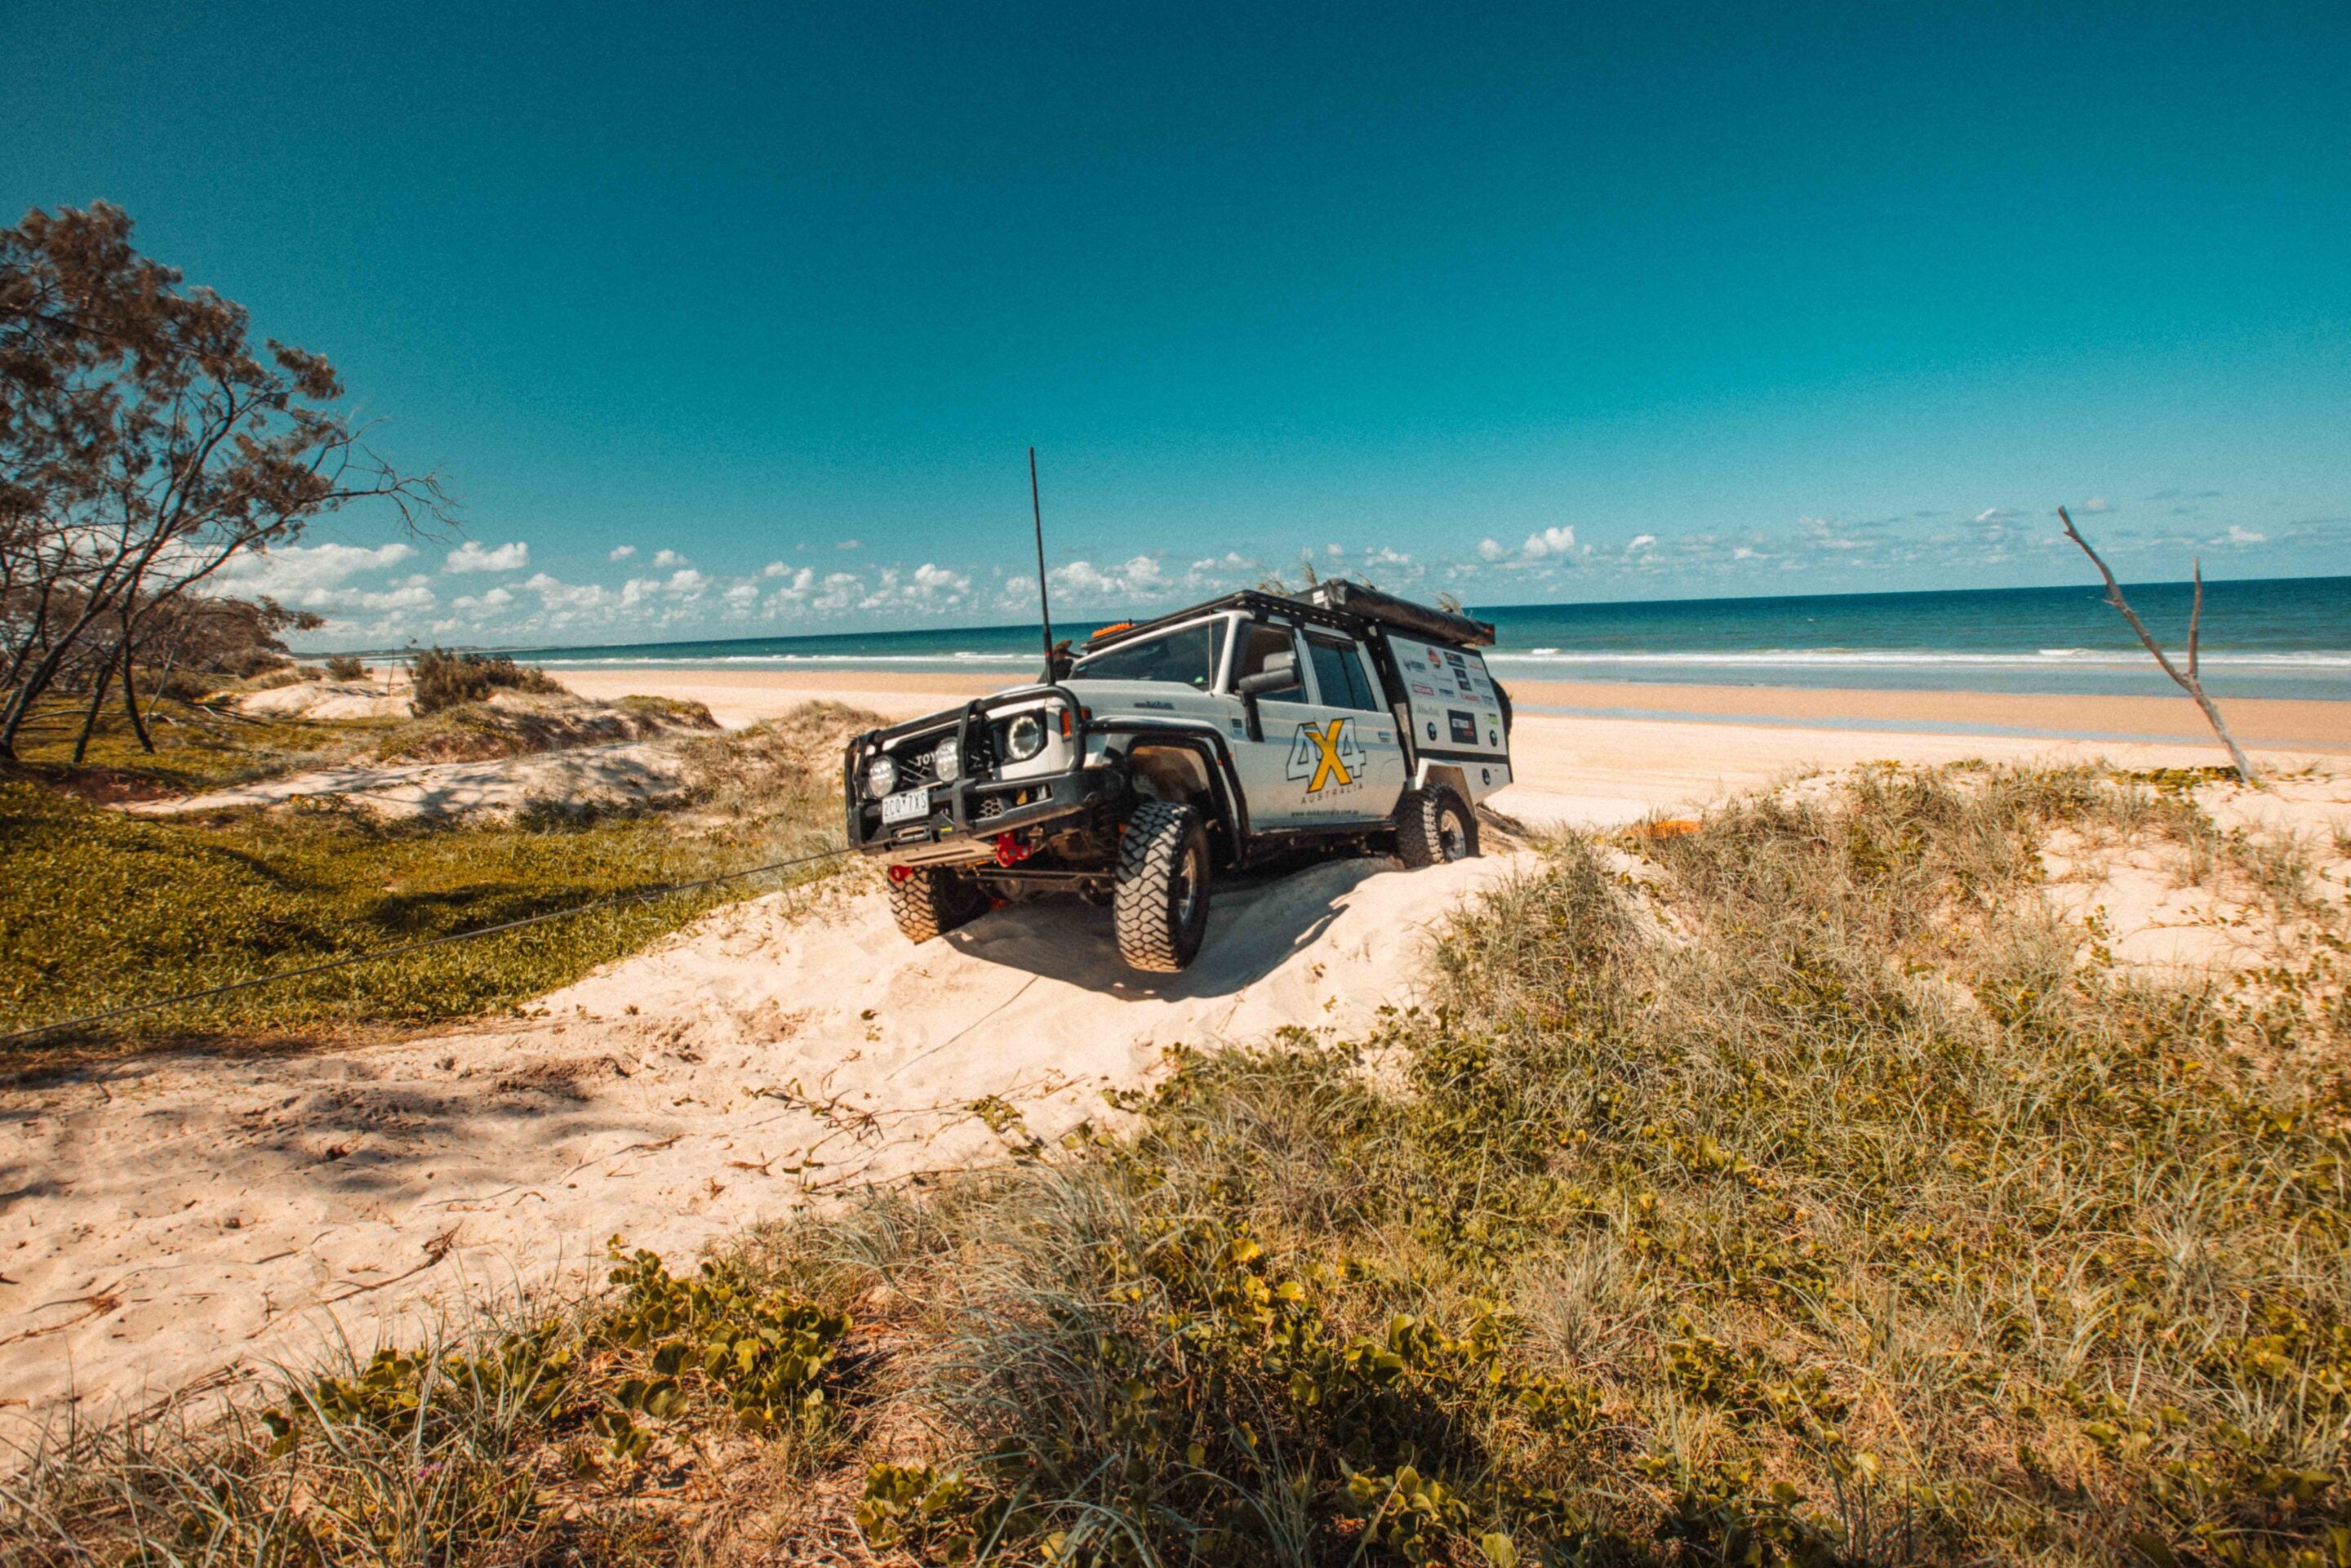
Hitting the beaches of the South-East Queensland, carving up the Simpson Desert, or threading your way along a remote coastal track, driving on soft sand is one of the most rewarding and humbling experiences a 4×4 can offer.
Get it right and you’ll be grinning from ear to ear. Get it wrong and you’ll be digging out your tyres along with your pride. Sand driving demands respect, preparation, and a bit of know-how. Here are the five main things you need to get right before you hit the tracks.
JUMP AHEAD
- Tyre pressure if everything
- Watch the waterline
- Know your clearance
- Pack recovery gear and know how to use it
- Respect the environment and everyone in it
- FAQs
1. Tyre pressure is everything
This is the single most important thing you can do before you hit the sand, and yet it’s still the step that catches out more drivers than any other.
When you air down, your tyre’s footprint increases dramatically. Instead of a small, firm contact patch fighting against the surface, you get a longer, flatter profile that floats across the sand rather than digging into it.
As a general rule, drop to somewhere between 16 and 25psi for beach driving, but treat that as a starting point rather than gospel. A heavily loaded LandCruiser towing a camper trailer will behave differently to a stock Jimny, so adjust accordingly and don’t be afraid to go lower if you’re struggling. Soft, fine beach sand will typically need lower pressures than the coarser, firmer stuff you’ll find further inland.
Once you’re back on the blacktop, get those pressures back up before you hit highway speeds or you’ll be chewing through rubber and killing your fuel economy. Carry a quality compressor and a reliable pressure gauge. Mean Mother and Ironman 4×4 both make solid portable compressor setups worth keeping in the kit.
2. Watch the waterline
Saltwater and 4x4s have a complicated relationship, and not a good one.
Salt is relentlessly corrosive, working its way into brake components, diff housings, chassis rails and electrical connections long after you’ve left the beach. Give the water’s edge a wide berth where you can and stick to the drier sand above the tide line. More importantly, keep a constant eye on the tide itself. What looks like a wide, forgiving run of hard-packed sand at low tide can turn into a narrow, wheel-sucking bog within an hour when the water comes back in.
Check the tide charts before you head out, know which direction it’s moving, and always have an exit plan. Getting cut off by the tide is not a story you want to be telling, especially when your recovery kit is locked in a rig that’s now surrounded by knee-deep saltwater.
If you do cop a splash, get home and give the whole underbody a thorough rinse with fresh water as soon as you can. Don’t leave it until the weekend.
3. Know your clearance
Sand is deceptive.
It looks smooth and manageable right up until the moment your chassis is resting on a crest and all four wheels are spinning in the air.
Dunes, crests, and soft-sided tracks all present real risks of high-centring your rig, where the undercarriage makes contact with the ground before the tyres do, effectively beaching you. Before you head to K’gari, the Tip Track, or anywhere else that demands serious sand driving, know exactly how much ground clearance your wagon is running. If it’s not enough, think seriously about a suspension lift and some quality aftermarket protection.
Approach crests with momentum but not recklessness, and if you’re unsure what’s on the other side, get out and walk it first. Two minutes on foot can save you two hours of digging.
4. Pack recovery gear and know how to use it
Spend enough time driving on sand and you will get bogged. It’s not a question of if, it’s when.
The difference between a minor inconvenience and a full-blown ordeal comes down to what you’ve got in the back of the ute and whether you know how to use it properly. Every sand-going 4×4 should be carrying a solid set of traction boards. Maxtrax are the benchmark for a reason, but Terrain Tamer also stock quality recovery gear worth a look.
Pack a long-handled shovel for digging out around the tyres and under the chassis, and a hi-lift jack for getting a bogged wheel clear so you can pack boards underneath. If you’re running a winch, good. Warn and Runva both make reliable units that have proven themselves in the field. But sand offers very little to anchor off, so a ground anchor or a deadman setup using your spare tyre buried deep is worth knowing how to rig.
Better still, travel with at least one other vehicle whenever the country allows it. A snatch strap between two rigs and someone who knows what they’re doing will get you out of almost anything. Practice your recovery before you need it in anger.
5. Respect the environment and everyone in it
Beach and desert environments are fragile, and they don’t recover quickly from people doing the wrong thing.
A few seconds of wheel-spinning stupidity can leave marks that last far longer than your trip, and the cumulative damage from vehicles doing the wrong thing has already cost 4×4 owners access to plenty of tracks that previous generations took for granted.
Drive at a sensible, controlled speed. Not because the rangers are watching, but because high speed on soft, unpredictable sand is how rollovers happen and how ecosystems get wrecked. Stick to designated vehicle areas, stay well clear of nesting sites and vegetation lines, and follow local access rules to the letter. Checking access conditions before you leave through your state’s national parks authority takes five minutes and can save a wasted trip or a hefty fine.
And when you pack up and head home, take everything with you. Every piece of rubbish, every stake, every scrap of packaging. The tracks you love exist because people before you treated them with respect. Return the favour.
FAQs
Q: What tyre pressure should I run on sand?
A: Most 4x4s will need to drop to between 16 and 25psi for sand driving. Heavier, more loaded vehicles generally need to go lower. Always re-inflate to normal highway pressures before returning to sealed roads.
Q: Can I drive my 4×4 through saltwater?
A: It’s best avoided where possible. Salt accelerates corrosion in brake components, diff housings, and chassis rails. If you do get wet, rinse the underbody thoroughly with fresh water as soon as possible.
Q: What recovery gear do I need for beach driving?
A: At minimum: traction boards, a long-handled shovel, and a hi-lift jack. A winch and ground anchor add serious capability if you’re heading somewhere remote. Always travel with at least one other vehicle if the country allows it.
Q: What are the best destinations in Australia for beach driving?
A: K’gari (formerly Fraser Island) is the most iconic, with hundreds of kilometres of beach tracks, freshwater lakes, and coloured sand cliffs. Stockton Beach in New South Wales offers big dunes and hard-packed runs close to Newcastle.
In Western Australia, Steep Point and the Coral Coast are worth the effort. The Coorong in South Australia is flat, fast, and seriously remote once you get further in. Wherever you go, check access permits, tide charts, and local conditions before you leave.
Q: What are the best destinations in Australia for sand dune driving?
A: The Simpson Desert is the benchmark, with more than a thousand parallel dunes and Big Red just outside Birdsville as the headline act. The Strzelecki Desert offers a similar challenge with less traffic. The dunes around Lancelin in Western Australia are a popular training ground for newer drivers, close to Perth and forgiving enough to build confidence.
Further north, Broome and the Gibb River Road corridor offer genuine remote-area dune driving. Wherever you’re headed: air down before you hit the dunes, know your escape route off every crest, and never tackle big dune country solo.
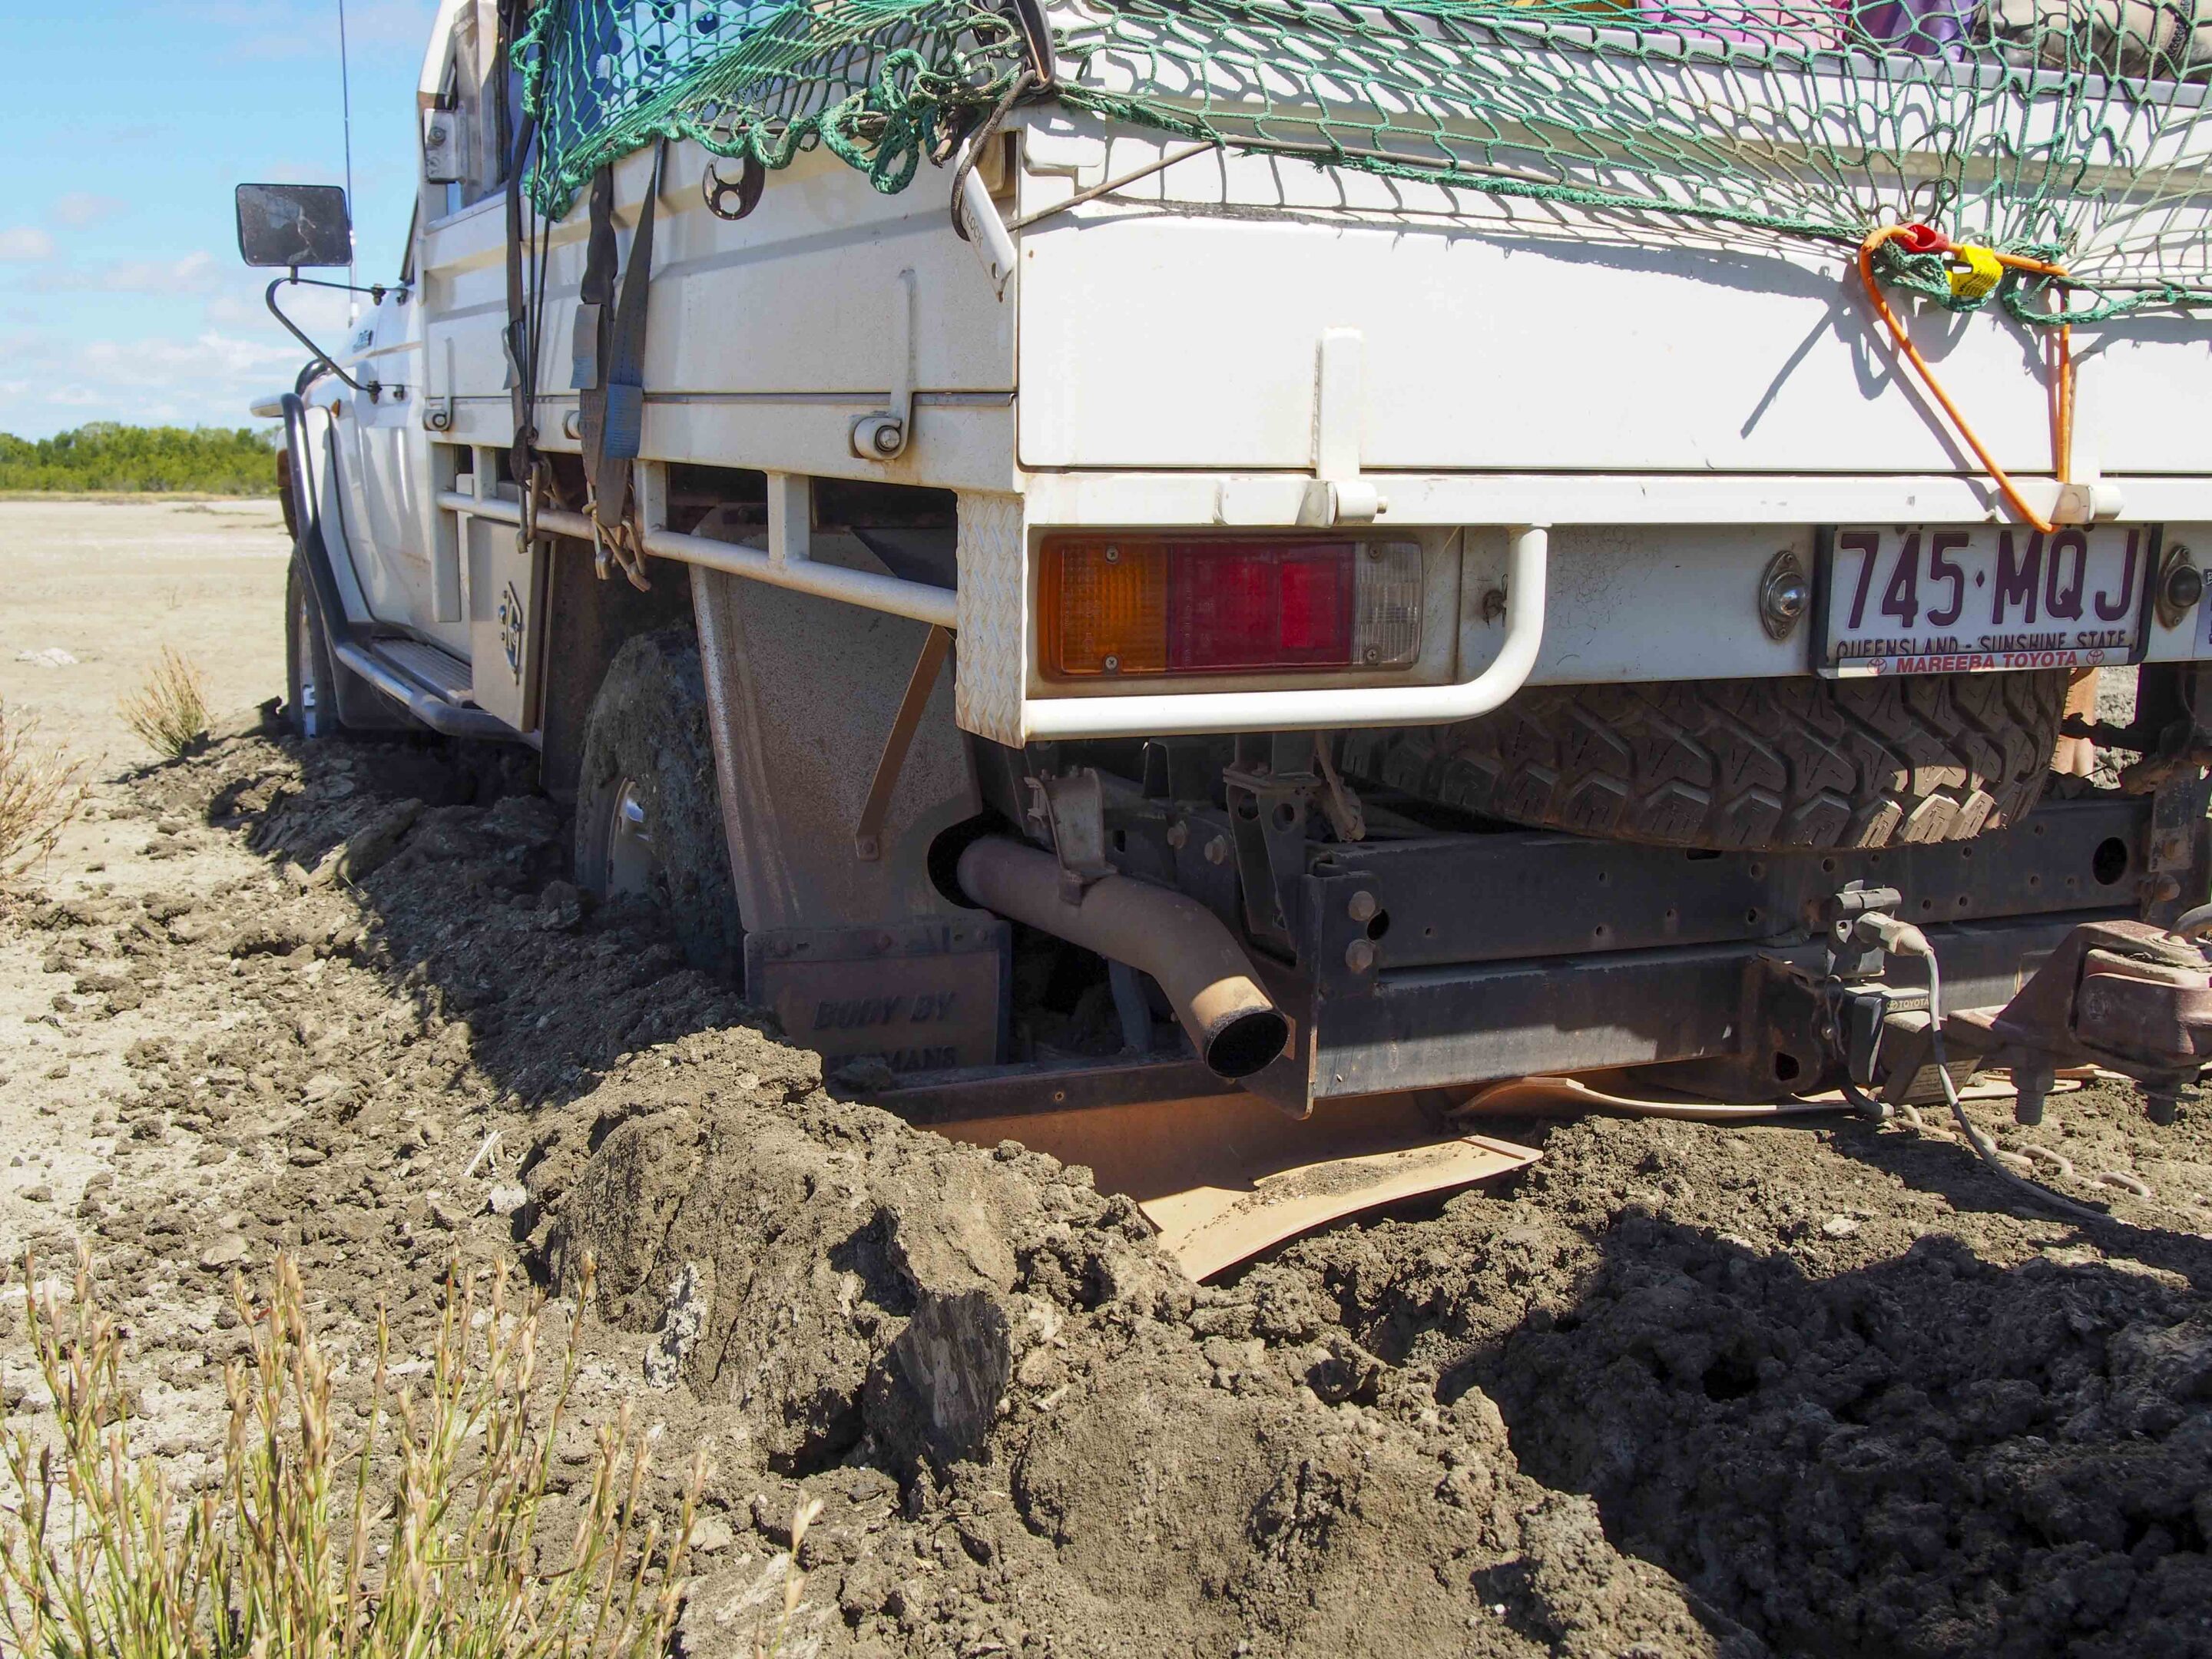
All too often we hear folks talking about their new 4×4 and say it will mainly see on-road use with maybe an easy beach drive on occasion.
It’s as if driving on a beach is easy but, in reality, you’re more likely to get bogged in sand than in any other off-road conditions, and you’re more likely to lose that new 4×4 to an incoming tide than from some off-road incident out in the bush.
I love heading out bush, even on short trips to a mate’s place to boil the billy or pass Lakelands, south of Cooktown, to cast lures for barra and sooty grunters in the Laur and Normanby rivers. But it’s the country north of Cooktown on the Starkey Track where offroad adventure begins, sand dunes and rutted sandy and windy bulldust tracks that terminate at amazing fishing spots.
It’s in my front yard as I live in Mareeba, the gateway to the Cape and the Northern Gulf. A mate and I often go on a day trip by getting an early start, though mostly we make the most of the escape and camp for a night or more, sitting around a friendly campfire under a starry sky, listening to howling dingoes.
But a trip can go wrong in seconds unless one is aware and prepared for the pitfalls, bogs, slashed tyres and other unforeseen events. It’s all about preparation and driving to the conditions, something I have been doing for decades in my quest for adventures. Allow me to provide you with some handy bush-driving skills that have been part of my life.
JUMP AHEAD
Sand driving tips
We all tend to drive overloaded vehicles because of touring gear or a roof rack stacked with kit from the likes of ARB or Rhino-Rack. I run the Toyo A/T tyres on my HiLux at 40psi on bitumen and 36psi on hard dirt roads, but let them down to 12psi on sand dunes. Corrugated roads are best done at 30psi.
When driving in soft sand, highly inflated tyres will get you bogged before you get started and while some drivers reckon that wide tyres are better they actually push up more sand in front of the tyres and increase the risk of sticks and stones damaging bulging sidewalls. Don’t be fooled that tyres with low air pressures will ‘roll’ over obstacles without being damaged because they ‘flex’ better; the vulnerable sidewalls are exposed at low pressures.
Setting the correct tyre pressure will depend on the weight of the vehicle and the terrain. Some sand, especially on damp beaches, tends to be hard. Always drive on the tidal section of a beach, not on the soft sand above it, because that is where birds and turtles lay their eggs.
Soft sand will bog a 4×4, but getting stuck can be largely avoided by lowering tyre pressures down to 16psi or lower. Deflated tyres can roll off the rims when cornering or from hitting an obstacle, so slow down to crawl-speed to avoid popping a tyre off the rim. If you have a flat on a beach, changing the wheel on an incoming tide is risky. Drive as high as possible above the high tide mark when doing so.
The headlands of many beaches are rocky and driving on aired-down tyres could result in a shredded sidewall from sharp rocks. Even smooth rocks can cause tyre damage. It’s wise to pump tyres up on long rocky beach sections to minimise the chance of sidewall damage.
Many beaches have springs and running creeks that wash out deep holes. If you happen to run into one it can be hard yakka getting your 4×4 out. I know a former commercial fisherman who lost his trayback when he ran into a spring hole on a beach north of Pormpuraaw – the vehicle has now rusted away…
Dunes are tricky and often too steep to traverse because of fine deep sand. Wide, aired-down tyres and speed are best for dunes, but be slow on the crest if you don’t know what is on the other side of it. Drive over one too fast and you may launch into space. Be careful on unstable slopes, especially if the vehicle loses traction and drifts down it, trapped in a fine sand avalanche. Trying to turn when this happens may result in a roll over on a steep slope. Be careful braking; instead, let the natural friction of the sand and its suction to control stops.
Bush track driving
The bush tracks through monsoon woodlands turn from corrugation in the early stages of the dry season to bulldust or heavy sand at the end of it. The bulldust is very capable of dry bogging vehicles. When traversing such tracks it’s best to air down to half the pressure of your sealed-road pressures, whether you’re running standard rubber or something more aggressive from BFGoodrich.
Unlike beach driving, it’s impossible to get any speed up on winding, timber-lined and sandy bush tracks. Use low range, third gear when conditions demand it. The problem is that sand sucks tyres in; just stop to see how it piles up about the wheels. This increases drag and the wider the foot print the more drag. Speed will get you through most patches, but as bush tracks often have deep potholes and washouts, take care when doing so.
If you don’t air down you can get dry bogged in this stuff when your vehicle progressively slows down and runs out of power. I have aired-down and still got bogged down because I was towing a heavy boat trailer. You must lower trailer tyre pressure also.
Avoid using the brakes and rely on the gears. Lock auto transmissions in the preferred gear and mode before entering sandy sections, not after you are bogged and need a winch or the recovery boards to get you out.
Bulldust worries newcomers, but it won’t bog you unless you hit a deep hole and are hung up with the vehicle sitting firm and flush on the hard centre and the wheels unable to grip on a soft bottom. It’s rare but it happens, especially after a road train convoy has gone over it. The fine talcum-powder-like dust penetrates everything; a good reason to turn up the aircon to full bore when entering a long stretch. Use the windscreen wipers when it splashes over the bonnet… and it will.
Something to remember is that as with the sand on beaches and dunes, bulldust is firmer in the morning, or when damp from a shower. The same applies to beach sand which is best driven over on a receding tide.
Bush tracks often hide exposed roots, rocks and even fallen trees that are covered in sand or bulldust. Keep an eye open for them or it may mean suspension damage or a tyre change, an unpleasant job in bulldust.
Take care on dirt and gravel roads where gravel is piled up in the centre. Be wary when changing lanes’ at speed because the vehicle will fish-tail and roll, which is almost guaranteed if you are towing a trailer/van when it crosses the centre pile. Many such roll-overs happen on the Cape’s Peninsula Developmental Road, with most drivers having no clue what happened. The same occurs when driving on low-pressure tyres and taking corners at 100km/h, and the rubber rolls off the rim. Game over…
Recovery basics
Bogs happen when you suddenly hit a soft patch or run out of engine power to get you over the top of a dune or across a long stretch of heavy sand.
The first thing to do is to stop, because spinning wheels dig down deeper and can damage your vehicle’s gearbox. If there is another vehicle with you it’s an easy escape with a snatch strap, while a winch hooked up with a sand anchor (or buried tyre) is another method when stuck on a beach or dune. On tree-lined bush tracks it’s simple to hook the winch cable to a tree, though in the damp parts and after the wet season, small trees will pull out from the ground.
One of the easiest means of un-bogging a vehicle from sand is with recovery boards, whether they’re MaxTrax or another quality brand. However, don’t forget to carry a long-handled shovel in case some digging about the wheels is required. Avoid short-handled and survival shovels if you want to avoid a bad back.
If you head off the dirt roads and onto monsoon forest tracks on the Cape, or pretty much anywhere in the tropical north, you will encounter conditions as described. Plan for them because it can all go wrong in a split second…
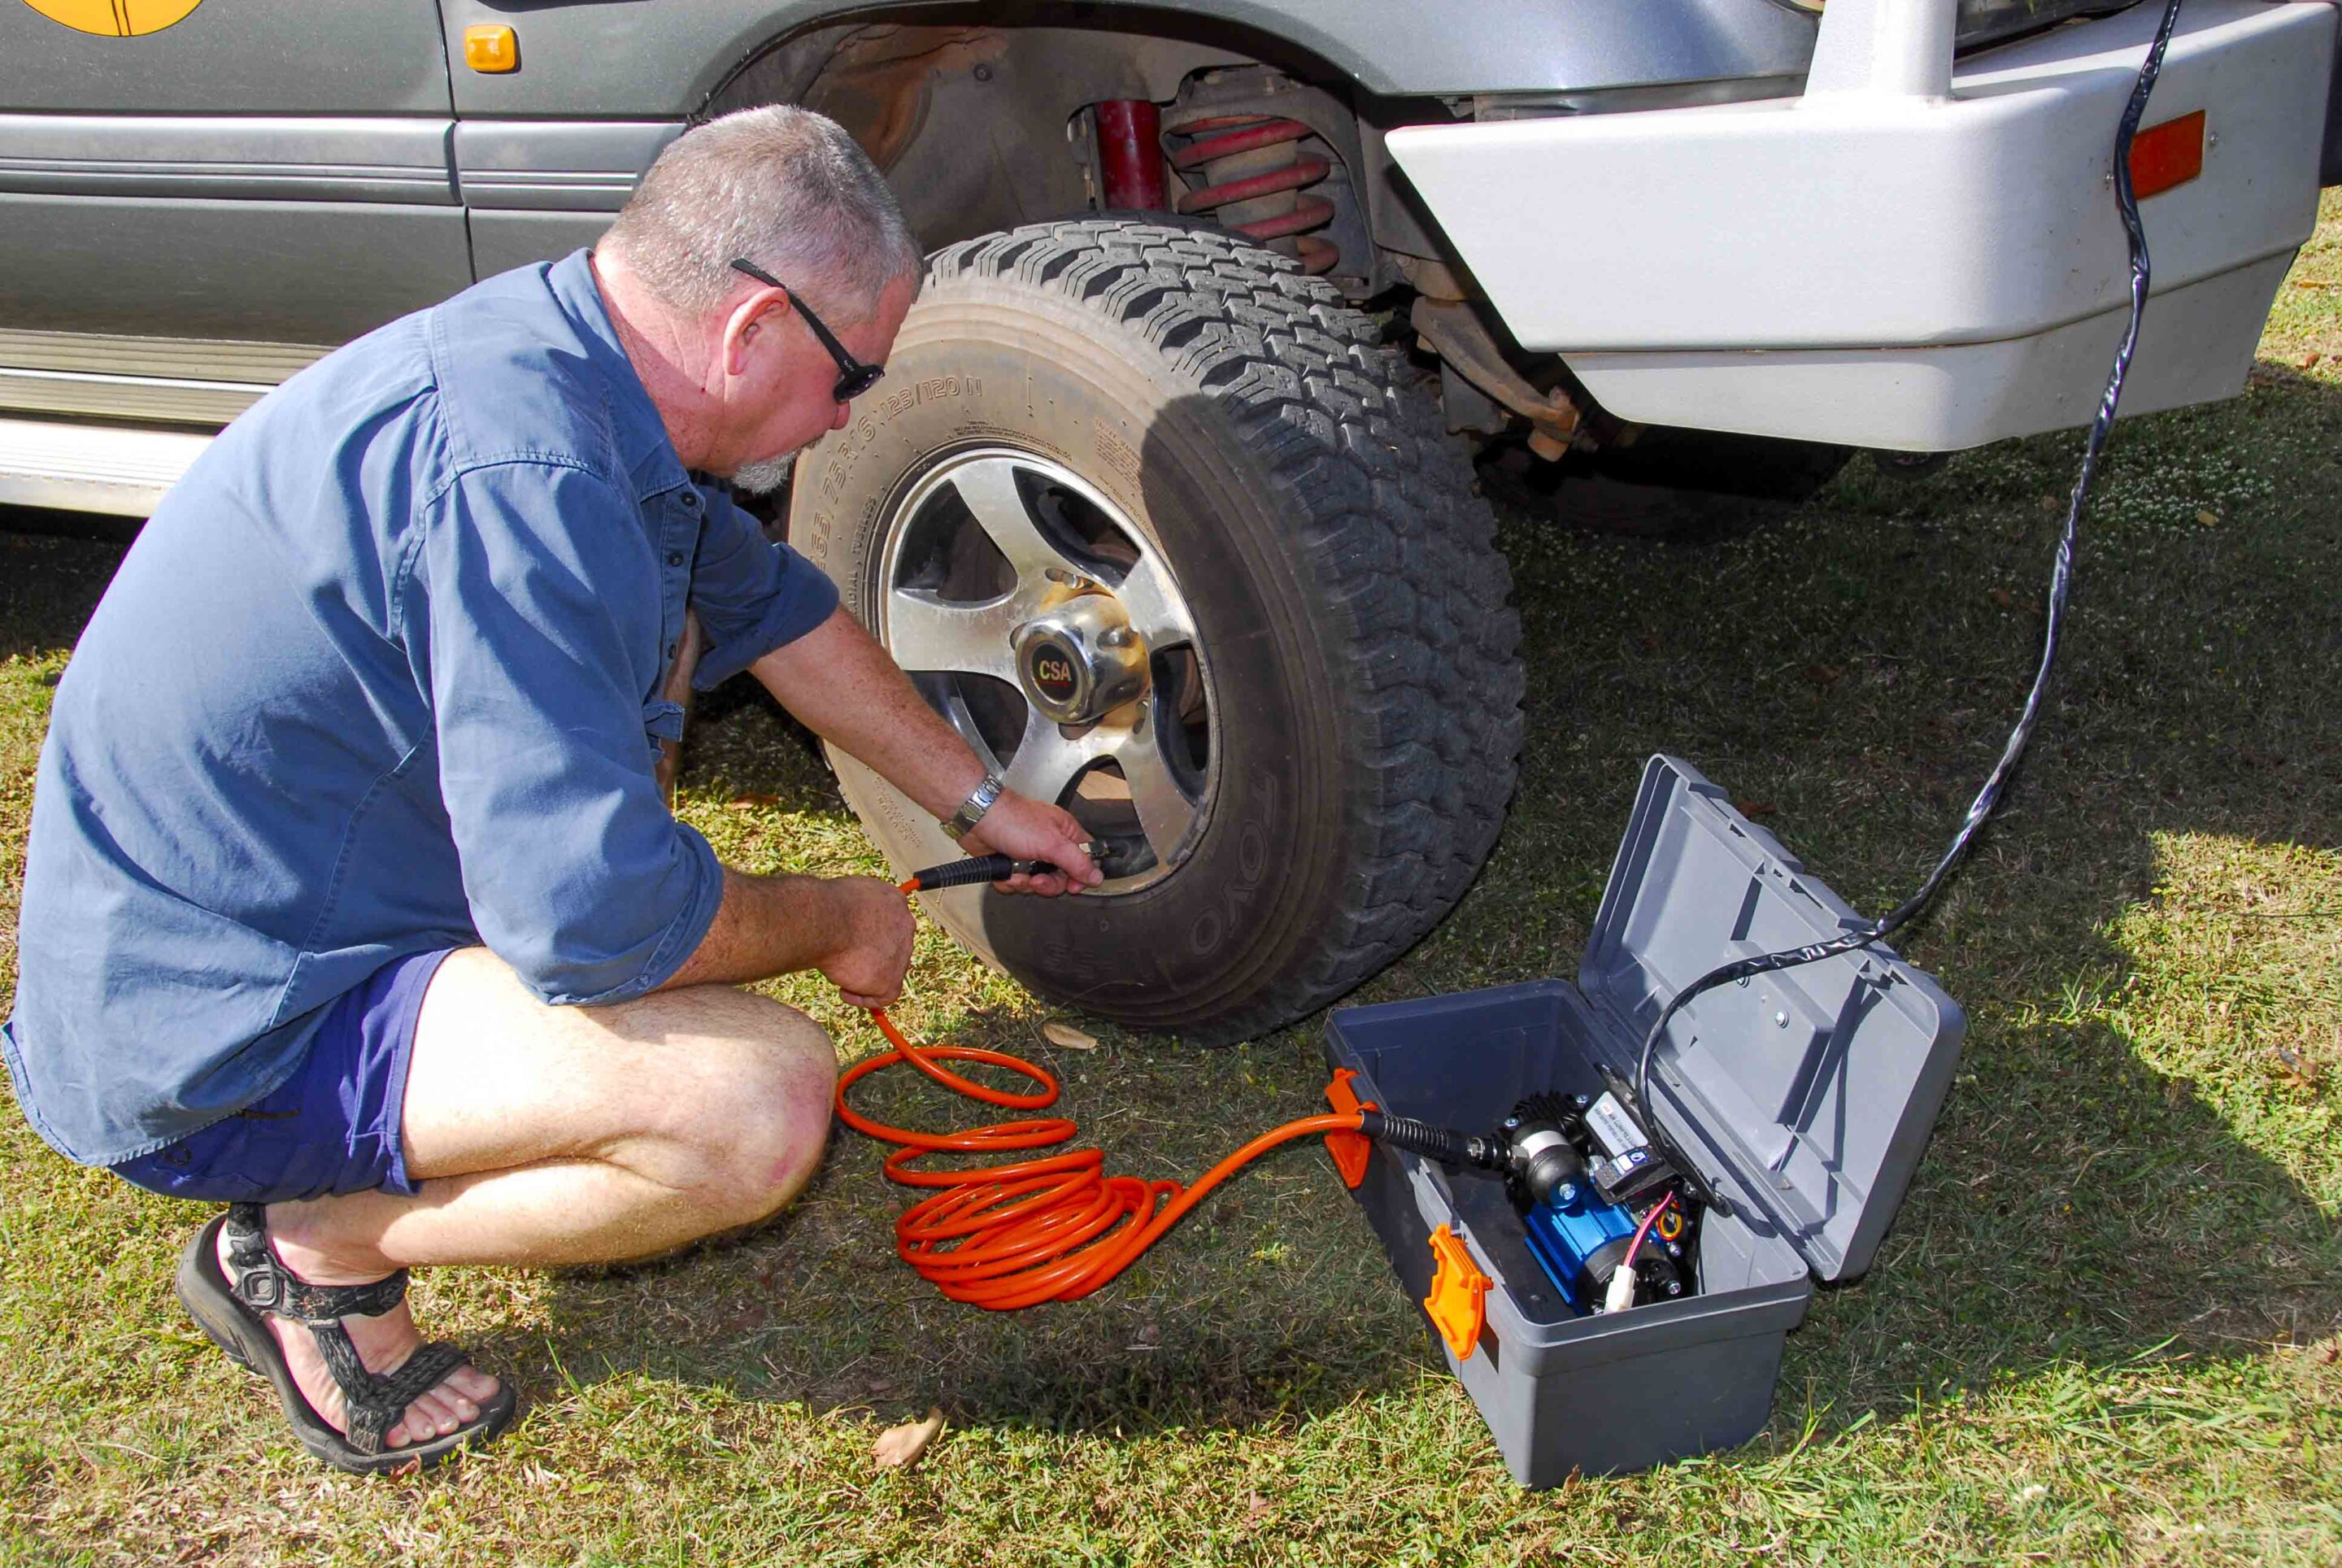
Essential 4×4 gear
Carry recovery gear when heading into the wilderness. It starts with a reliable air compressor; buy the best you can afford, not a $30 special as it won’t pump large 4×4 tyres up. A quality unit from ARB will last the distance. You will also need a tyre gauge and deflator set.
A winch is handy, but you can spend a lifetime in the bush and never use one. I carry a 50-year-old Tirfor hand winch that has seen some heavy work. Backing the winch is a recovery kit, including an extra 10,000lb breaking strain snatch strap. I carry two and have used both to recover vehicles. What applies to winches applies to MaxTrax recovery boards, but when you do need them they are invaluable. They are not that heavy and are easy to store and carry.
A spare 10t hydraulic jack lives in my tool kit. It’s used for changing tyres instead of the Toyota jack. Have a long-handled shovel. Avoid trench shovels; they are only good for a walk in the scrub with a toilet roll.
A few days back, old mate and I went hunting on a property that has been in limbo for years. The tracks are in disrepair and only used by buggies and quadbikes, with some sections so tight that we had to use an axe to cut small trees down; a good reason to carry an axe or one of those nifty battery-operated chainsaws.
FAQs
Q: What tyre pressure should I run in sand?
A: It depends on vehicle weight, but generally around 12 to 16psi for soft sand, while keeping speeds low to avoid rolling a bead.
Q: Is driving on beaches safe?
A: It can be, but it carries risks like tides, soft patches, and hidden washouts. Always drive near the tidal zone and avoid soft upper sand.
Q: What’s the most common cause of getting bogged?
A: Loss of momentum in soft sand or bulldust, or carrying too much speed control without enough tyre pressure adjustment.
Q: Do I really need recovery gear for light off-roading?
A: Yes. Even easy tracks can turn quickly. At minimum, carry recovery boards, a compressor, and a rated snatch strap.
Q: Are wider tyres better in sand?
A: Not necessarily. Wider tyres can float more but also push up sand and increase sidewall risk if pressures are too high or too low.
Rhino-Rack has introduced a new Low Profile Roof Top Tent built with a focus on lighter weight, quicker setup, and more usable roof space. At 69kg excluding the ladder, it sits slim and low on the roofline while still packing in a range of practical features.
The headline feature is the integrated accessory channels built into the hard top. Rather than a dedicated sleeping space, the tent doubles as a mounting platform, useful for 4WDers already building out their kit with extra lighting for the Simpson or a solar panel setup for extended Kimberley runs.
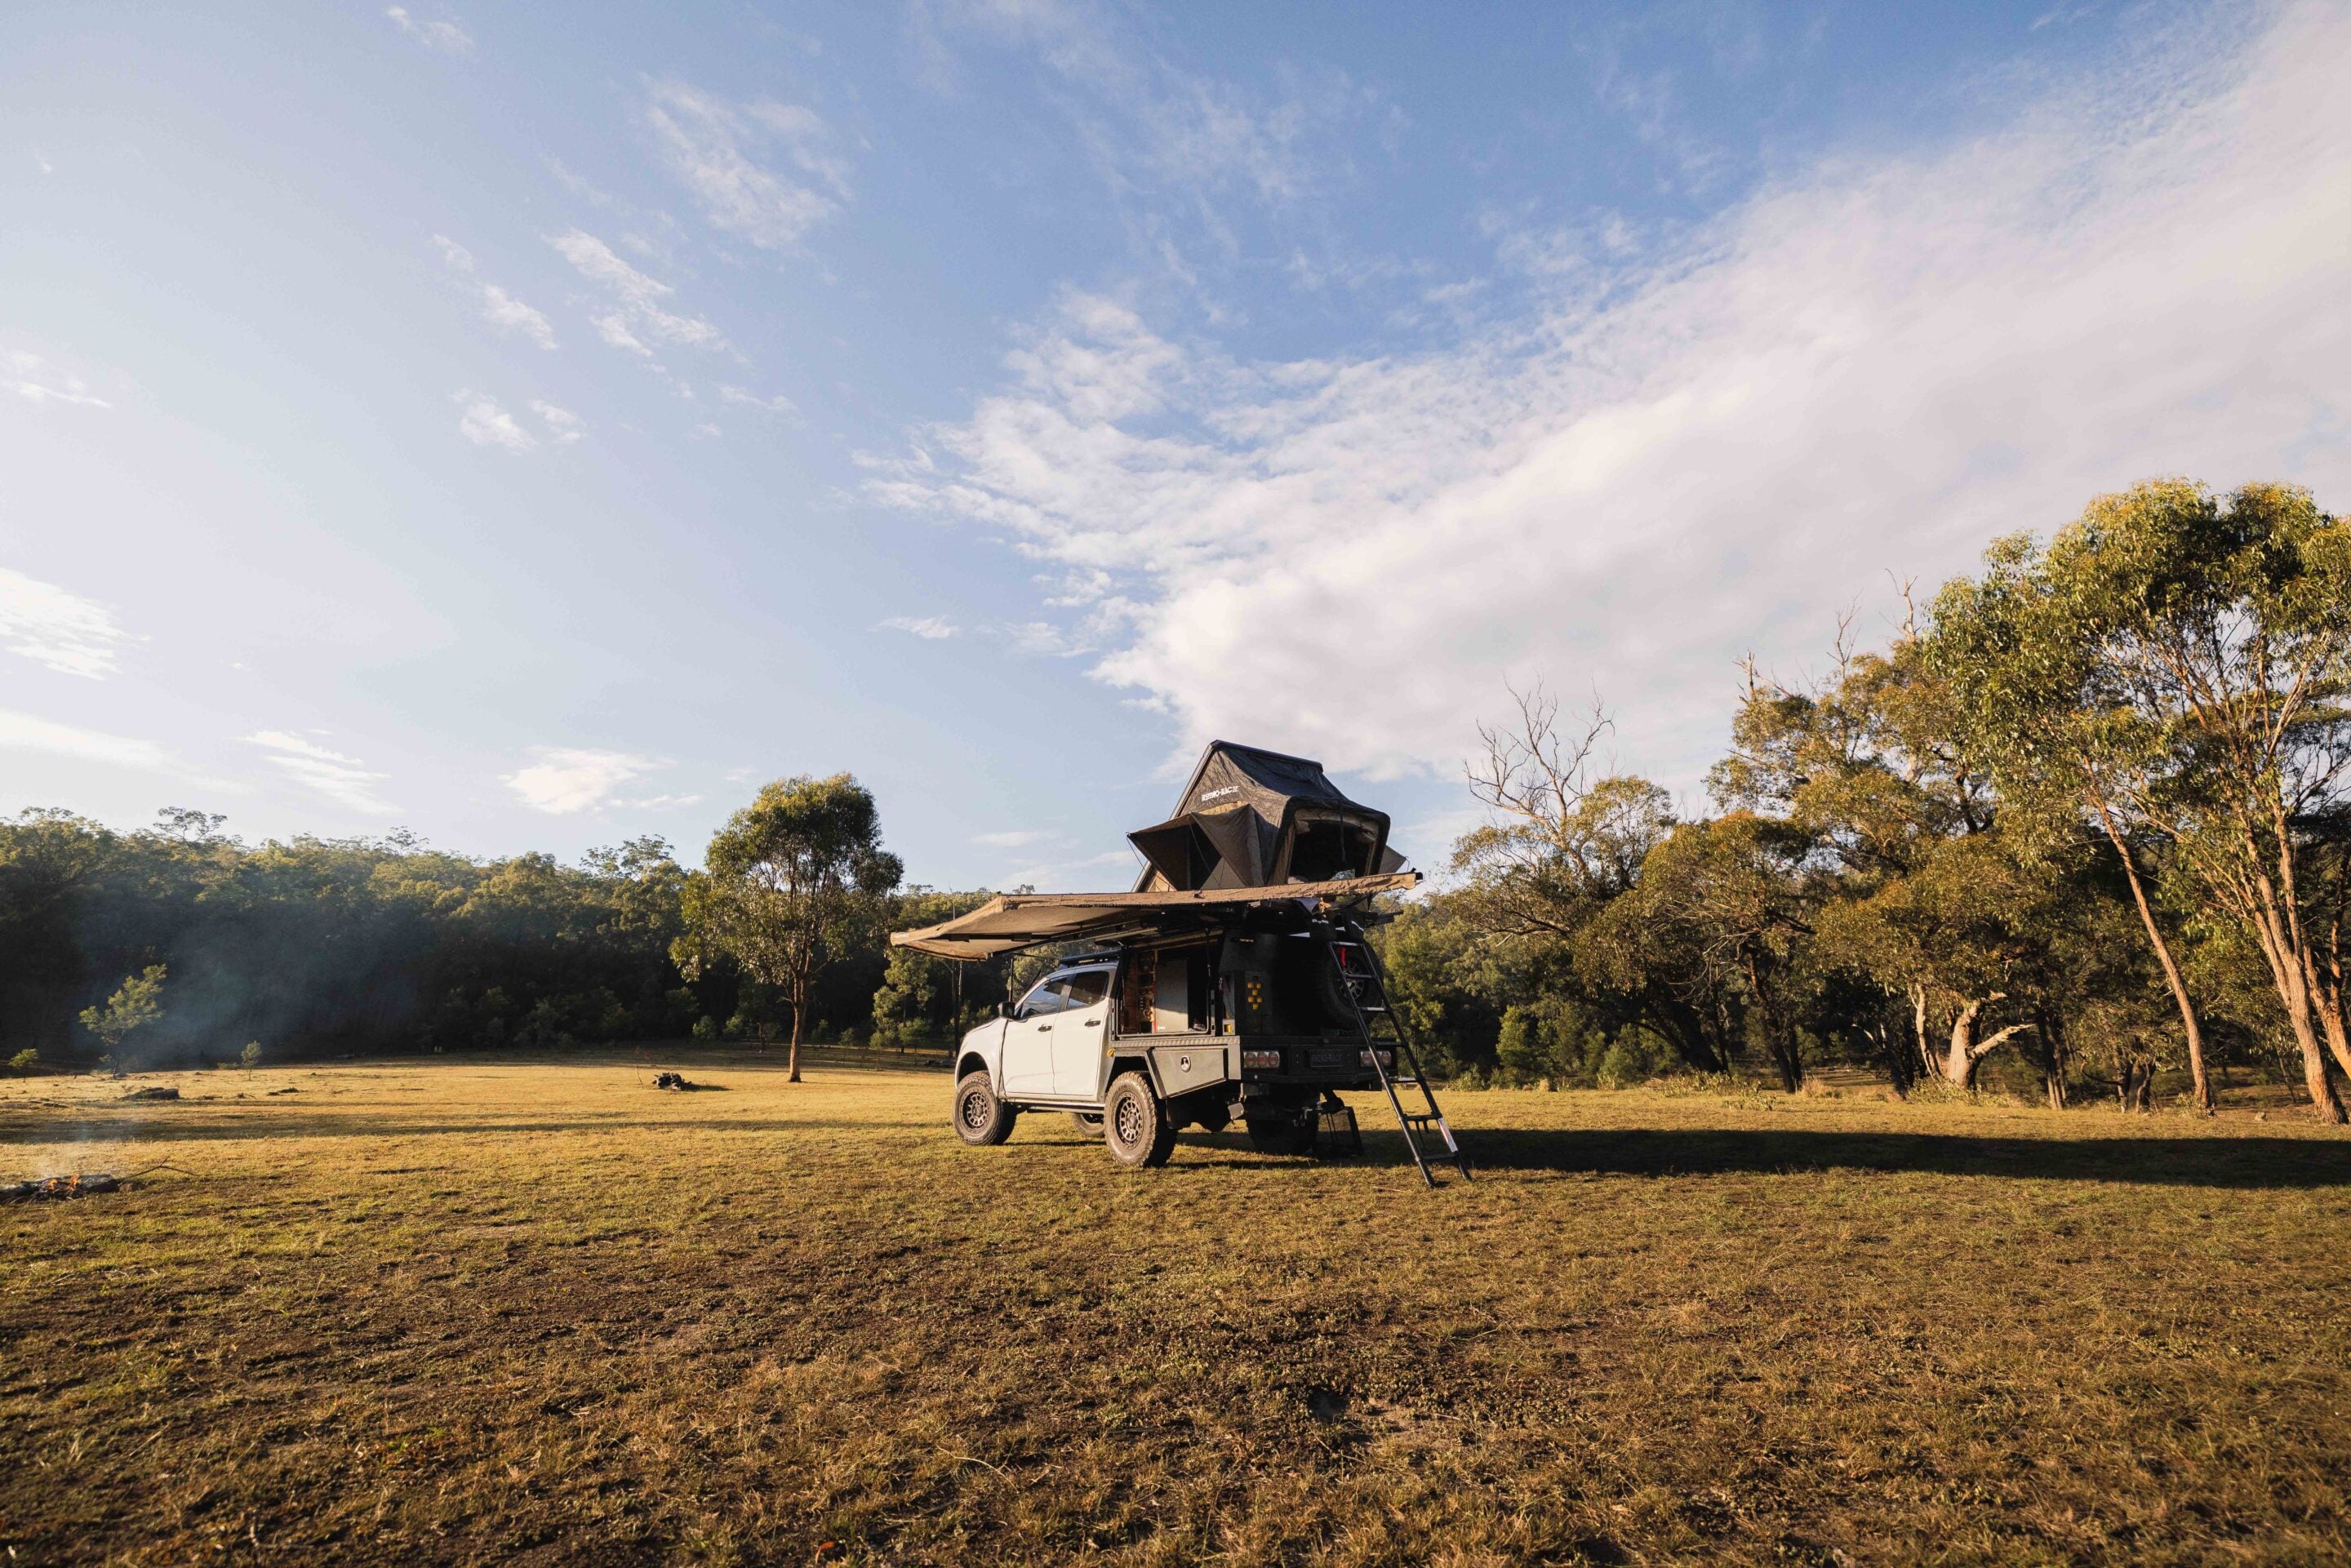
Setup and pack-down have been prioritised. Gas struts handle opening and closing, and a quick release mounting system comes supplied with brackets for fast installation and removal. For travellers swapping between a roof tent and a canoe on the Murray or a bike rack for High Country weekends, it should slot into most existing touring builds without much fuss.
Inside, dual-side mesh windows keep airflow and visibility sorted, which counts for a lot on warm nights. Integrated LED lighting connects to an external power source with adjustable brightness, and a built-in USB power board handles charging duties for devices or accessories. A dedicated pass-through via the heater tubing port keeps cabling tidy when wired into a vehicle or canopy battery system, a detail that matters on longer runs.
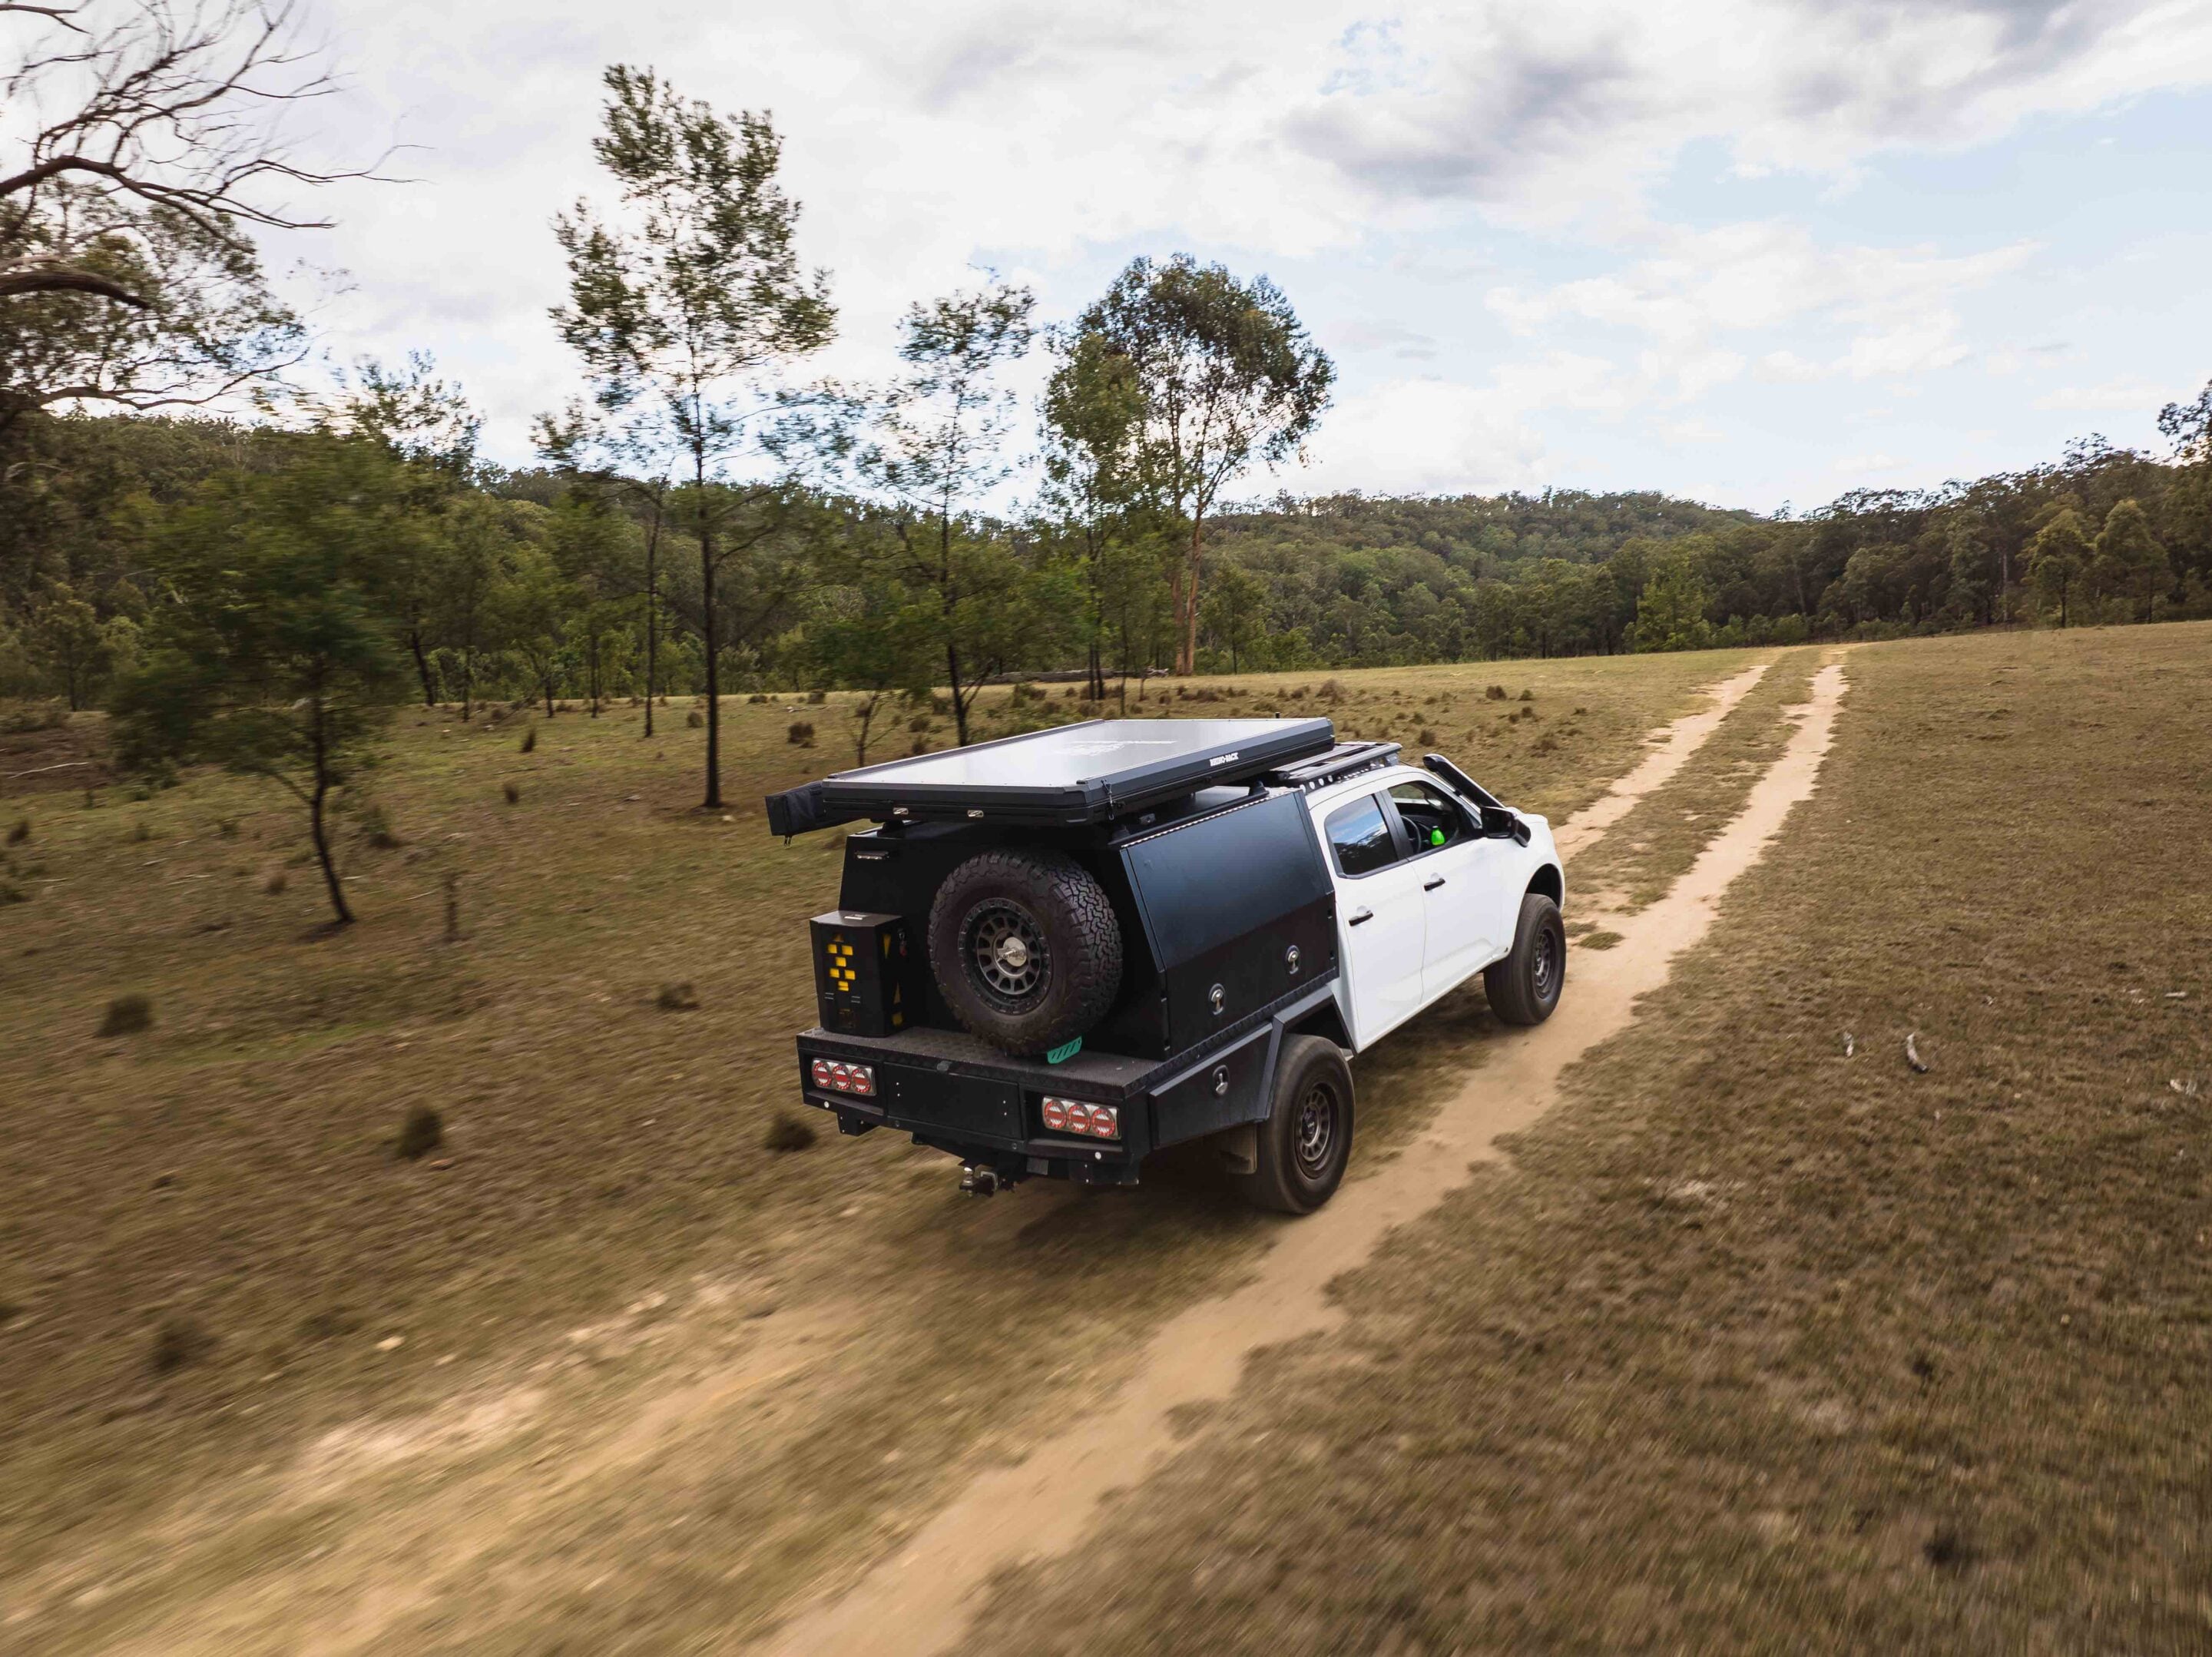
A dedicated heat tubing port and internal lighting channels support all-season use, handy for seasonal trips through the Vic High Country or Snowy Mountains. Ladder mounting points on both the side and rear provide flexible access to suit different vehicle setups. Inside there’s an organiser with multiple storage pockets plus a clear pocket sized for a tablet.
Boot bags on the outside keep muddy footwear out of the sleeping area after a day on the snotty tracks around Moreton Island or the Flinders Ranges, and a 70mm double-layer mattress rounds out the package.
The Low Profile Roof Top Tent from Rhino-Rack ships as a complete kit with the tent, ladder, mounting system, and all hardware and tools needed for installation.
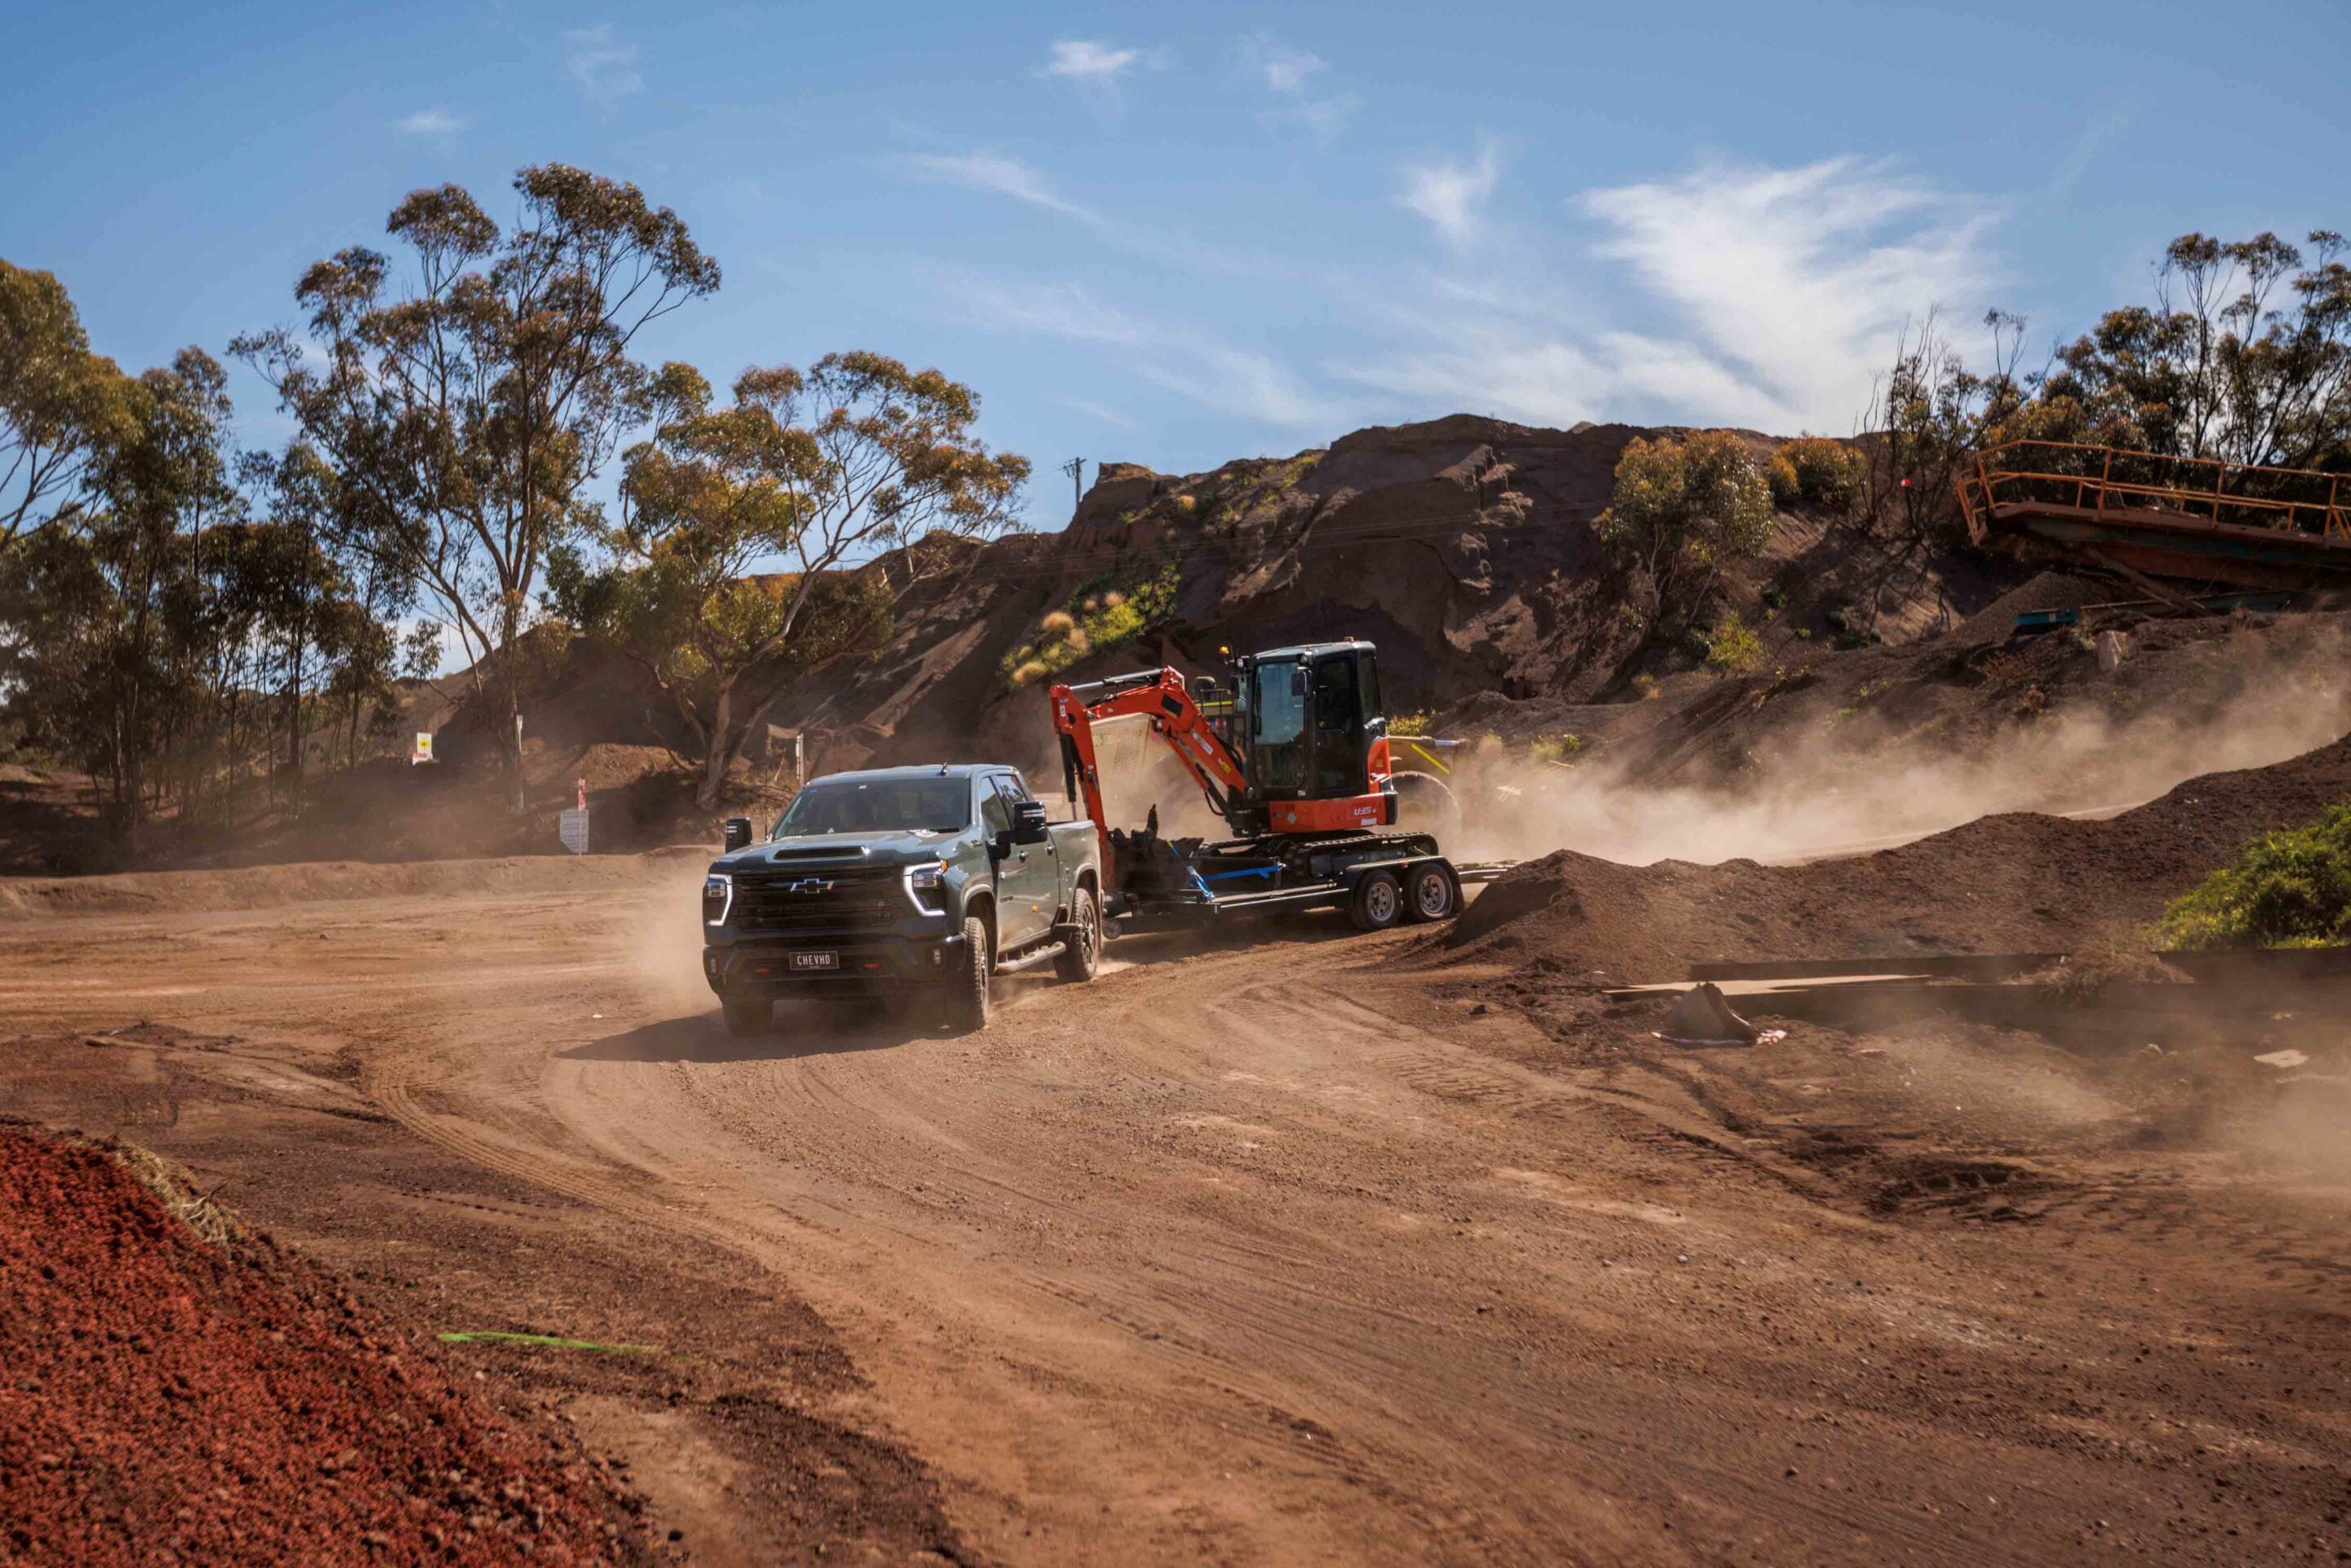
For most 4WD owners, NB2 is irrelevant.
A well-sorted LandCruiser or Patrol build, even one kitted out for a serious run up the Gibb River Road or across the Simpson, will never get close to the weight threshold that triggers it. But for owners pushing larger American platforms like the Chevrolet Silverado 2500 and Ram 2500 into full expedition territory, NB2 is something worth understanding before the build starts, not after.
What does NB2 actually mean?
NB2 is an Australian vehicle classification under the Design Rules for goods vehicles with a Gross Vehicle Mass greater than 4.5 tonnes and up to 12 tonnes. The full breakdown looks like this:
- NA: up to 3,500kg GVM. Where most touring 4x4s live.
- NB1: 3,500kg to 4,500kg GVM. Where some heavily engineered builds end up.
- NB2: 4,500kg to 12,000kg GVM. Commercial and expedition territory.
- NC: above 12,000kg GVM.
A stock LandCruiser 300 Series sits well inside NA. Even a comprehensively built Patrol wagon with a long range tank, dual batteries and a REDARC power system stays there comfortably. NB2 is a different world.
When does a build cross into NB2?
The trigger is the certified GVM, not the actual loaded weight on a given trip.
Once a vehicle is formally engineered and certified above 4,500kg GVM, it moves into NB2 classification. That certification covers the chassis, suspension, braking system and tyres, and it has to be signed off by a qualified engineer. You cannot simply add weight to a Silverado 2500 HD or Ram 2500 and assume the vehicle is compliant at that mass. The engineering approval has to come first.
In Australia, many of these larger American platforms are imported and registered within NB1 or at the top of NA. Others, particularly those converted into full slide-on expedition rigs or fitted with substantial aluminium touring bodies, are engineered and certified into NB2 territory once the final build weight is calculated.
Why these platforms end up in the conversation
Weight accumulates fast on a serious touring rig.
A typical long range setup might include a steel bullbar, winch, dual spare wheels, an ARB or MSA canopy, drawer system, Engel or Dometic fridge, long range fuel tank, dual battery system, REDARC management, solar panels, water storage and a full recovery kit. Each item is manageable. Together, they add up to several hundred kilograms before anyone has packed a bag.
On a Silverado 2500 HD or Ram 2500, owners building for extended remote travel often go further still. Slide-on campers designed for the Tanami or the Old Telegraph Track, full aluminium expedition bodies, satellite communication gear, Lazer Lamps lighting setups, the kind of kit that makes Cape York in the wet season a realistic proposition rather than a gamble. At that point, staying within 4,500kg GVM can become genuinely difficult, and NB2 classification becomes the only compliant path forward.
What changes once a vehicle is NB2?
Compliance requirements step up considerably.
The engineering certification process is thorough and non-negotiable. Every major system gets assessed: chassis integrity, suspension load ratings, brake performance at the certified GVM, and tyre load ratings. A Ram 2500 fitted with a substantial expedition body cannot simply be assumed capable of handling that weight without a qualified engineer confirming it on paper.
There are licensing implications as well. In most Australian states and territories, a vehicle over 4,500kg GVM requires at least a Light Rigid licence to drive legally. For touring builds where more than one person might be getting behind the wheel, that is a practical consideration worth sorting out well before the rig heads north toward the Kimberley.
Why some builders accept the complexity
The straightforward answer is payload.
Operating inside NA or NB1 on a heavily built rig means constantly managing weight against the legal limit. NB2 certification gives the builder more room to work with. Greater water capacity for remote crossings. Larger fuel range for runs across the Nullarbor or into the Simpson. More substantial power systems without the anxiety of sitting at the edge of a payload figure.
For the right build, NB2 is not a compromise. It is what the build actually requires to operate safely and legally.

The practical trade-offs
Larger vehicles cost more to run, more to maintain and more to engineer correctly.
Moving into NB2 adds cost and complexity at every stage: the initial certification, the ongoing compliance, the Light Rigid licensing requirement. Heavier rigs are also harder work on tighter tracks. The Munja Track and the more technical high country routes reward lighter, more nimble platforms. A fully laden NB2 expedition truck is not the right tool for every job.
Is NB2 worth considering?
For most 4WD owners, no. A properly planned LandCruiser, Patrol or Ranger build handles the vast majority of Australian touring without approaching 4,500kg GVM, provided weight is managed sensibly from the start.
For owners building a Silverado 2500 HD or Ram 2500 into a serious long range expedition rig, the answer is more nuanced. NB2 is not a shortcut or an upgrade. It is a compliance framework for heavier vehicles that are genuinely built to carry more. If the build demands it, the classification exists for exactly that reason. The key is understanding it early, because designing a compliant NB2 build from scratch is a very different proposition to trying to certify one that was never planned that way.
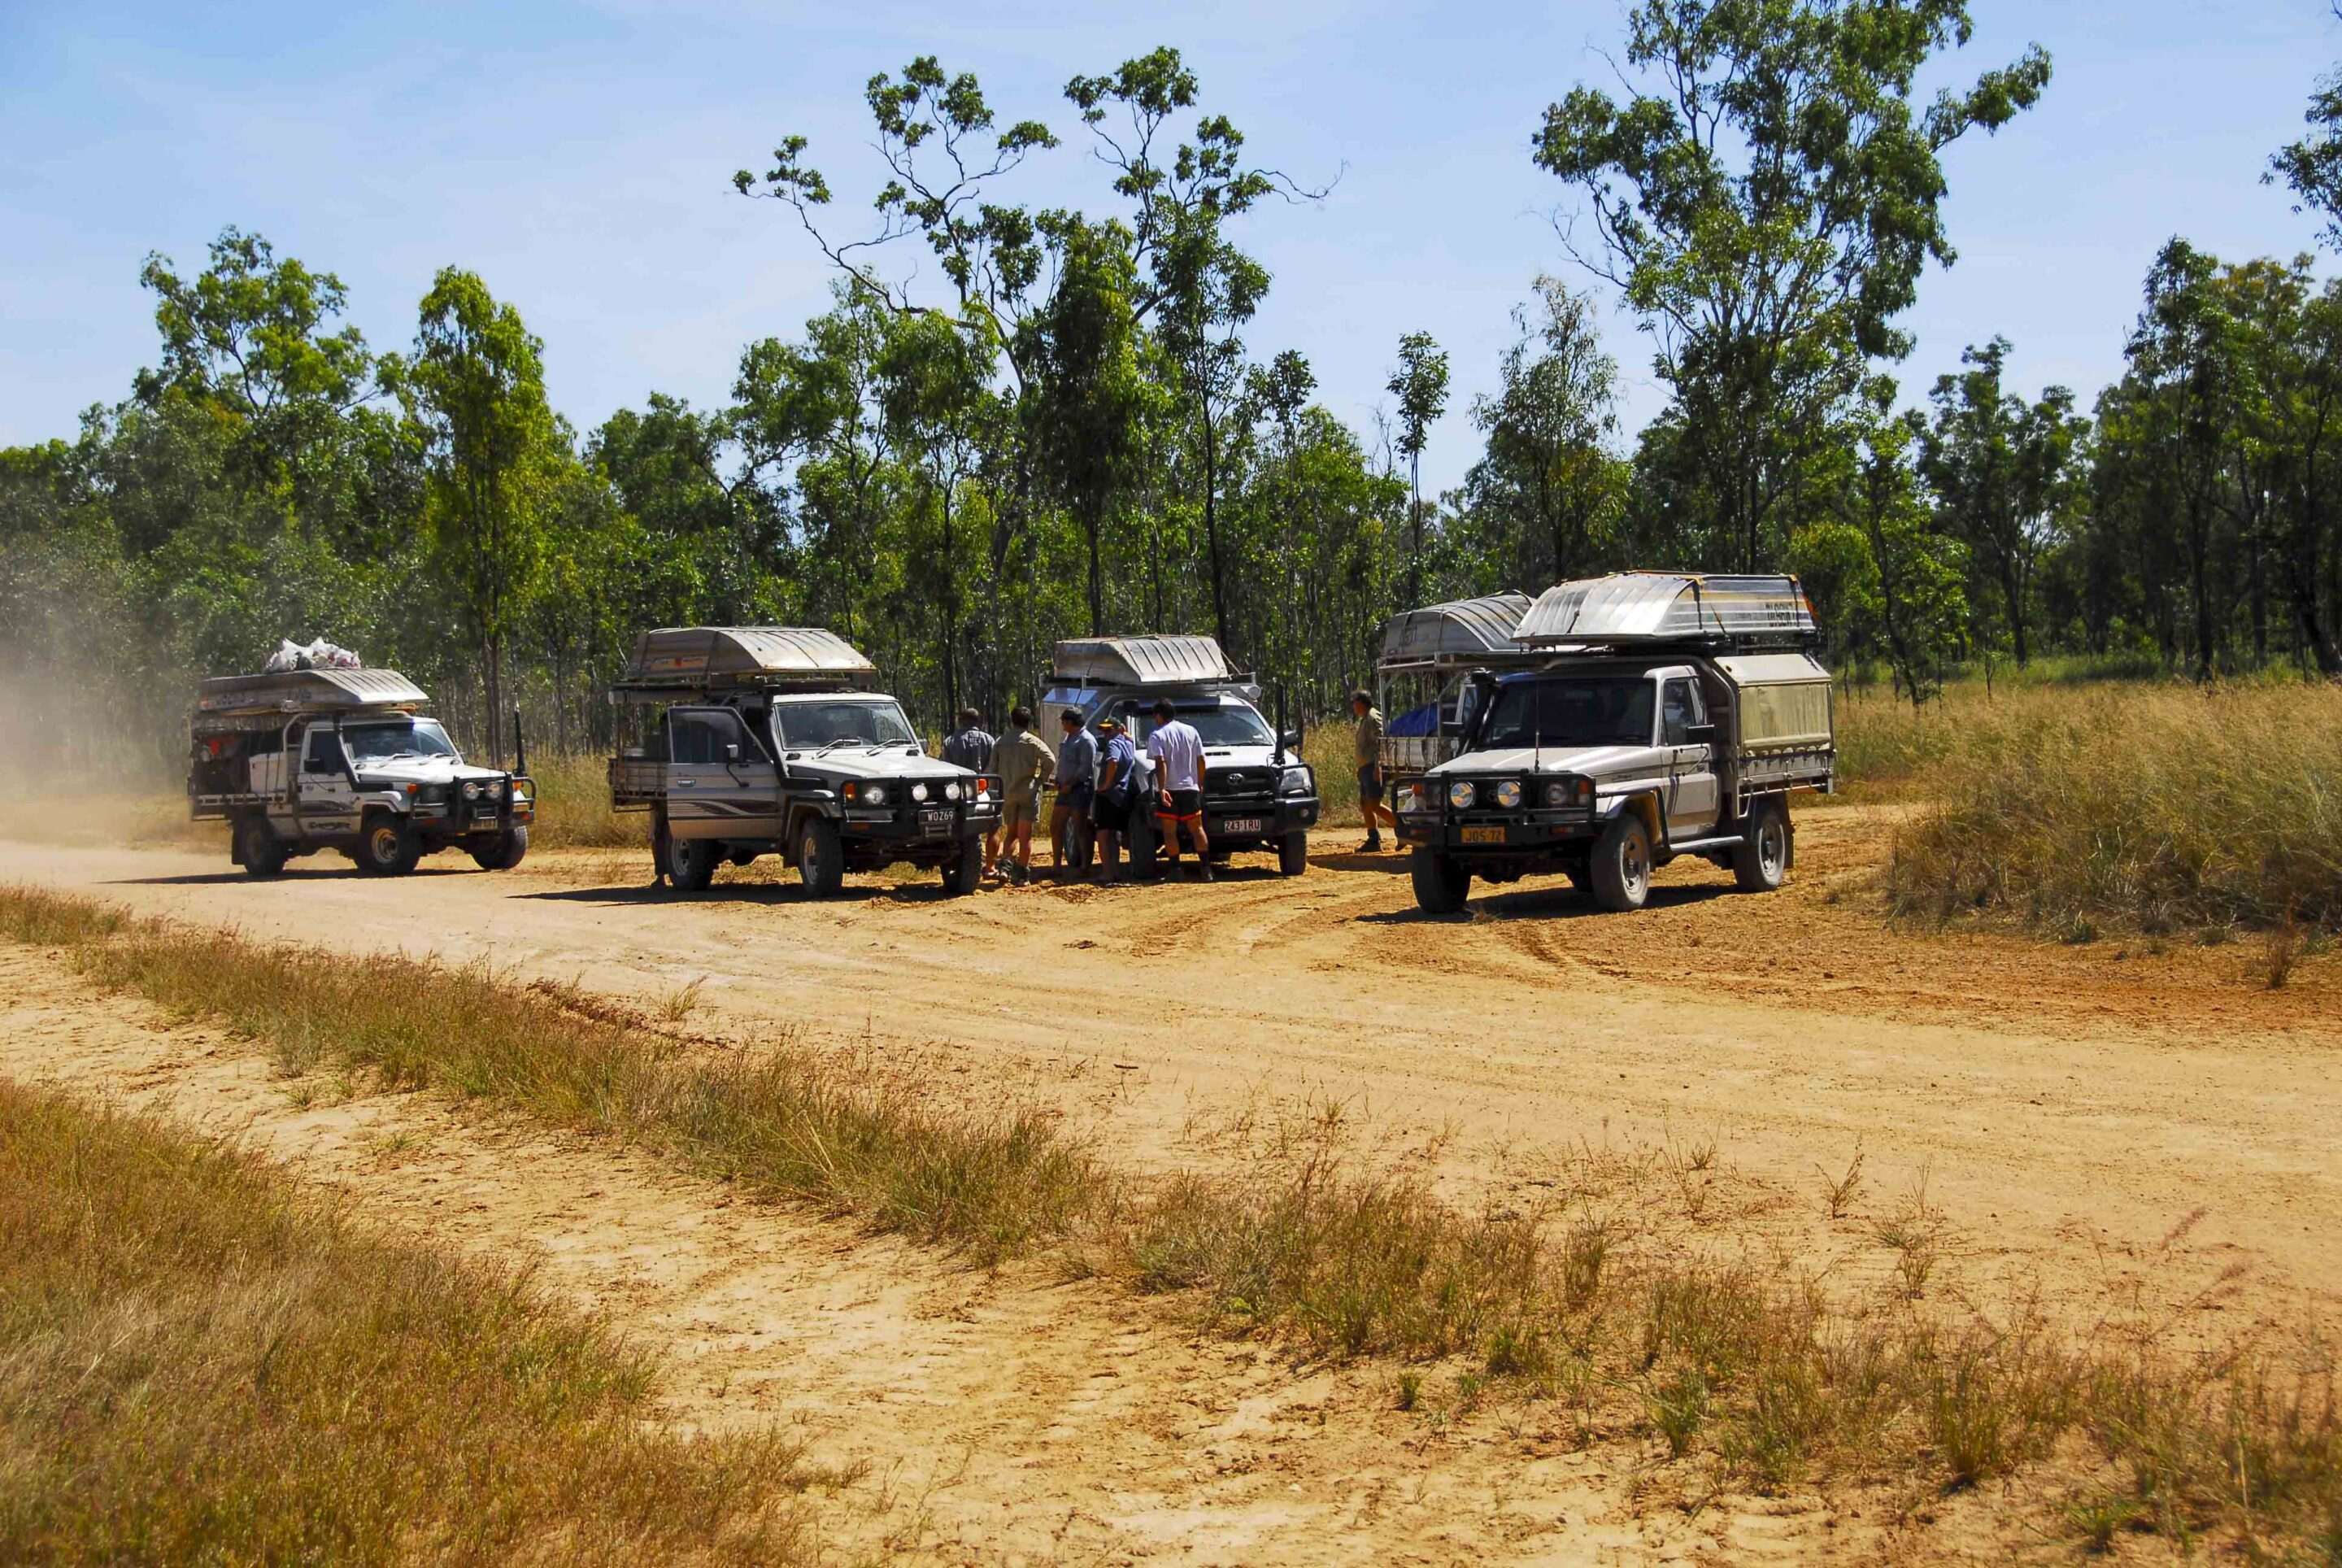
Most convoy problems aren’t caused by bad terrain or bad luck. They’re caused by one person doing their own thing, be it wrong spacing, no radio call, a line change nobody mentioned.
Small habits that don’t seem like much on their own, but multiply fast across a group. One vehicle tailgating kicks up enough dust to blind the next two. One unannounced deviation splits the convoy at a junction. One driver who’s never quite ready adds twenty minutes to every stop. Ask anyone who’s done the Gibb River Road in a group of eight, or nursed a convoy through the Munja Track: the terrain rarely breaks trips. People do.
None of what follows is complicated. But it only works if everyone actually does it.
1. Don’t lose sight of the vehicle behind you
If you can’t see the vehicle behind you at any turn, intersection or track split, stop and wait.
That’s it. No radio required, no guesswork, no doubling back three kilometres later because someone missed the turnoff to the campsite. Anyone who’s lost half a convoy at the Connie Sue Highway junction in the Gibson Desert knows exactly what a ten-second pause at the right moment is worth.
2. Don’t tailgate
On dusty corrugated tracks, the kind you get for long stretches on the Oodnadatta or the Tanami, sitting too close to the vehicle in front means you’re driving blind. On technical terrain, it means you’ve got nowhere near enough time to react if they stop suddenly or need to adjust their line.
It also puts quiet pressure on the driver ahead to hold a pace they might not be comfortable with – which is how mistakes happen. If you’re eating their dust, you’re too close. Back off.
3. Use the radio properly
Most groups run channel 18 UHF as a default, and a decent radio – a GME mounted properly and tested before you leave – makes a real difference to clarity over distance. But none of that matters if the channel is full of chatter when something actually needs calling.
Keep it short. “Soft edge, left side, after the crest” is more useful than a thirty-second description of what it looked like. Call what the next driver needs to know, then get off the channel.
4. Be ready when the convoy is moving
Everyone’s been there: Twelve vehicles packed and waiting, one still faffing around with a roof bag or hunting for sunscreen. The first time, fine. By the third stop outside Birdsville or halfway up Cape York, it’s grinding on people.
It’s not about perfection. It’s about being broadly ready when the group is ready. That rhythm adds up over a full day, and losing it at every stop makes everything slower and more tiring than it needs to be.
5. Call out hazards for the vehicles behind
Just because your rig walked through it doesn’t mean the next one will. A washed-out edge that your 285s just clipped on a tight line could drop someone else’s vehicle a foot sideways, especially if they’re running a longer wheelbase or a heavier build. A loose climb that felt fine in a Prado might be a completely different story in a loaded Troopy.
Call it out. Even a quick “rocky line, stay left” gives the next person a chance to set up properly rather than finding out mid-obstacle.
6. Don’t stop in stupid spots
Pulled up on a blind corner. Halfway through a water crossing. Sitting on the crest of a climb, the kind you get approaching Old Andado or working through the Tip Track, where nobody behind can see you until they’re already committed.
If you need to stop, think about where. A good pull-off gives the convoy room to stack up without anyone being forced into a bad position. Choosing poorly, especially repeatedly, is the kind of thing that earns you a nickname.
7. Stick to the agreed pace
Drive too fast and you’ll stretch the convoy until someone misses a turn. Drive too slowly on easy open sections and you lose the day’s momentum and make the trip feel longer than it is.
The goal isn’t uniform speed, it’s consistency. A rhythm that suits the slowest capable vehicle and adjusts when conditions actually demand it. Convoy driving is a group activity, not a procession of individuals who happen to be heading the same way.
8. Don’t change the plan without saying so
Spotted a better line? Think there’s a shortcut worth trying? Great, say so on the radio first.
Taking a different route, turn or track without a word creates immediate confusion for everyone behind you. Half the group follows the deviation. Half sticks to the original. Now you’ve got two separate convoys trying to figure out where the other half went. Run it by the group. It takes ten seconds.
9. Help with recoveries
When someone gets stuck, and someone eventually will, the group response matters. Not everyone needs to grab the Bushranger snatch strap or rig up the MaxTrax, but everyone should do something. Spotting, shovelling, shifting gear out of the way, relaying instructions … all of it helps.
Standing at the back of the group watching while three people do all the work is the kind of thing people remember. And not fondly.
10. Leave the ego out of it
Convoys have a way of surfacing this. The driver who has to push harder than the group. Who won’t take advice on a line. Who turns every obstacle into a personal challenge rather than a shared decision.
It’s not impressive, and it costs the group time. The drivers who make convoy trips genuinely enjoyable are usually the calm ones; the ones who know their limits, think about the group, and don’t need the trip to be about them.
A few other things worth mentioning:
- Show up with a full tank. Running low mid-route delays everyone, and finding fuel between Marla and Finke isn’t a given.
- Test your radio before you leave, not when you need it. A flat battery or a loose antenna connection discovered at the first obstacle is nobody’s favourite surprise.
- Get to the pre-trip briefing. Repeating it on the track for latecomers wastes time and patience.
- Check your tyre pressures. Wrong pressures don’t just affect you, they slow the whole group down. Most tracks warrant dropping to 28-32 psi on unsealed roads; anything technical and you’re going lower.
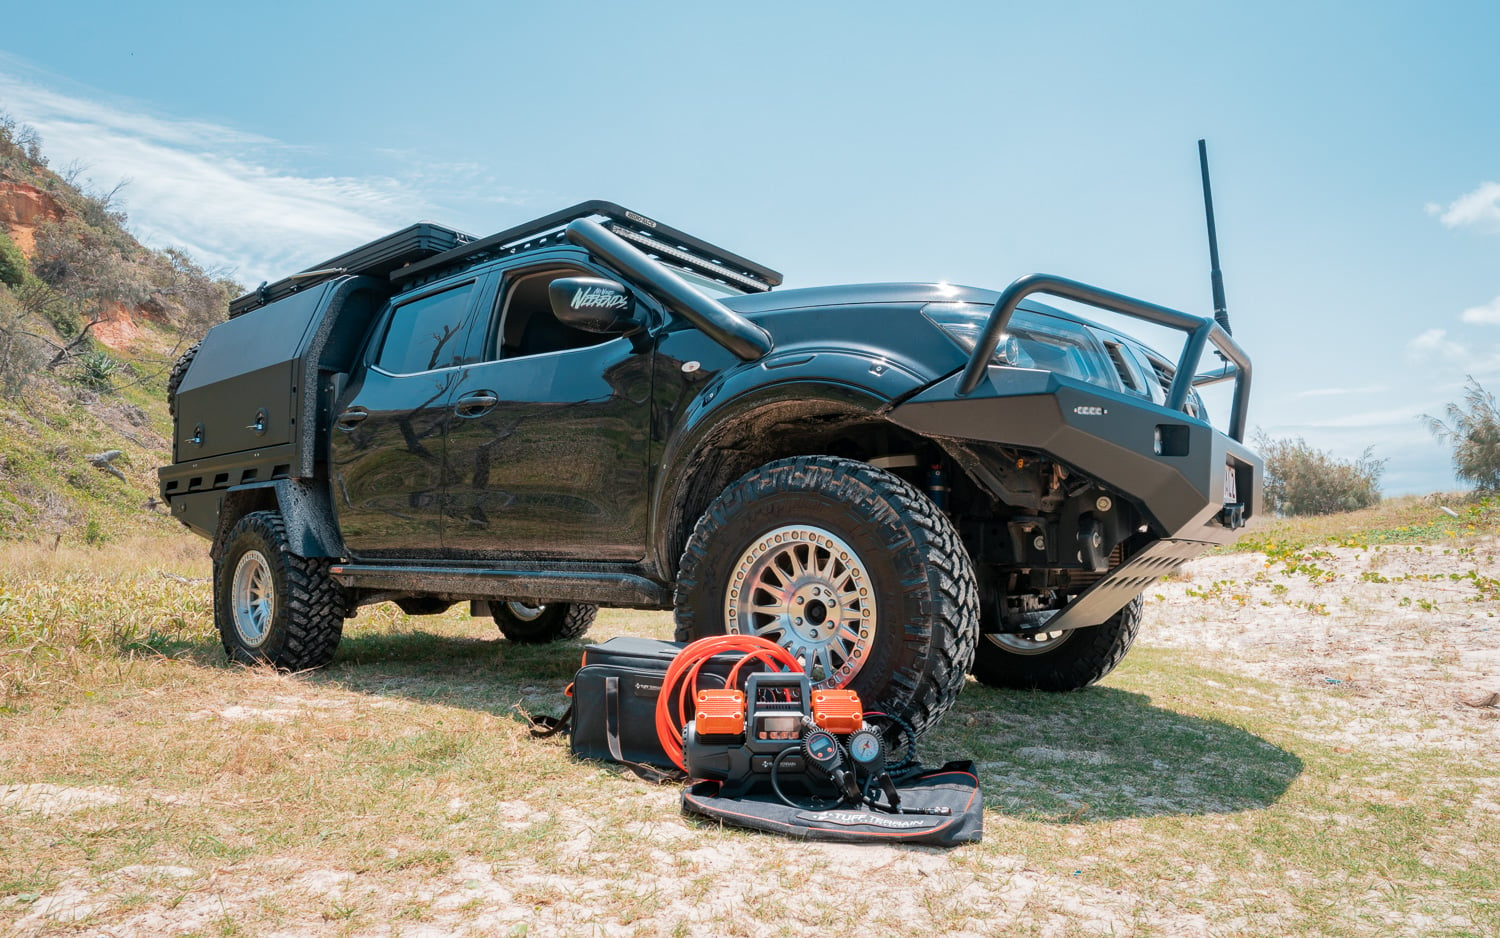
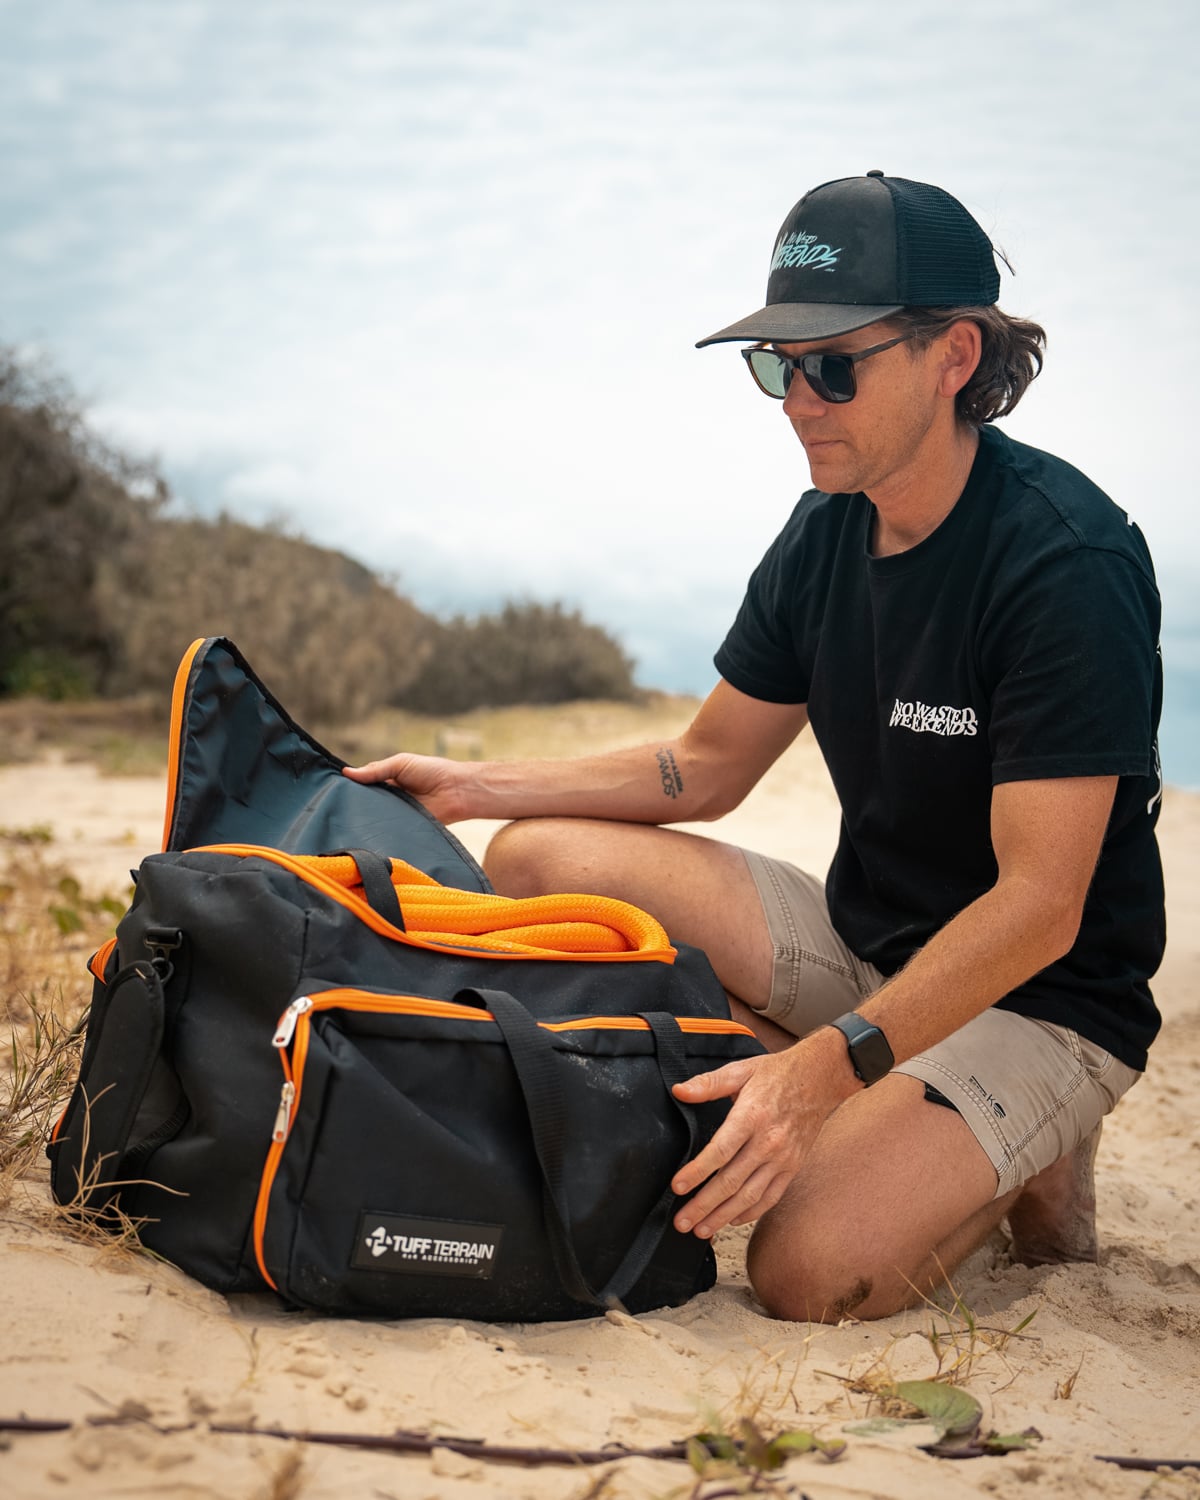
Ask any experienced four-wheel driver what the most important gear in their setup is, and recovery gear will be right up there.
Because the reality is simple – if you’re heading off-road, at some point you’re going to get stuck. Whether it’s soft sand, sloppy mud or a rutted-out hill climb, having the right recovery gear (and knowing how to use it) is what gets you moving again safely. A proper kit isn’t just about having one strap in the back – it’s about having a system where each component works together.
The basics: Where most recoveries start
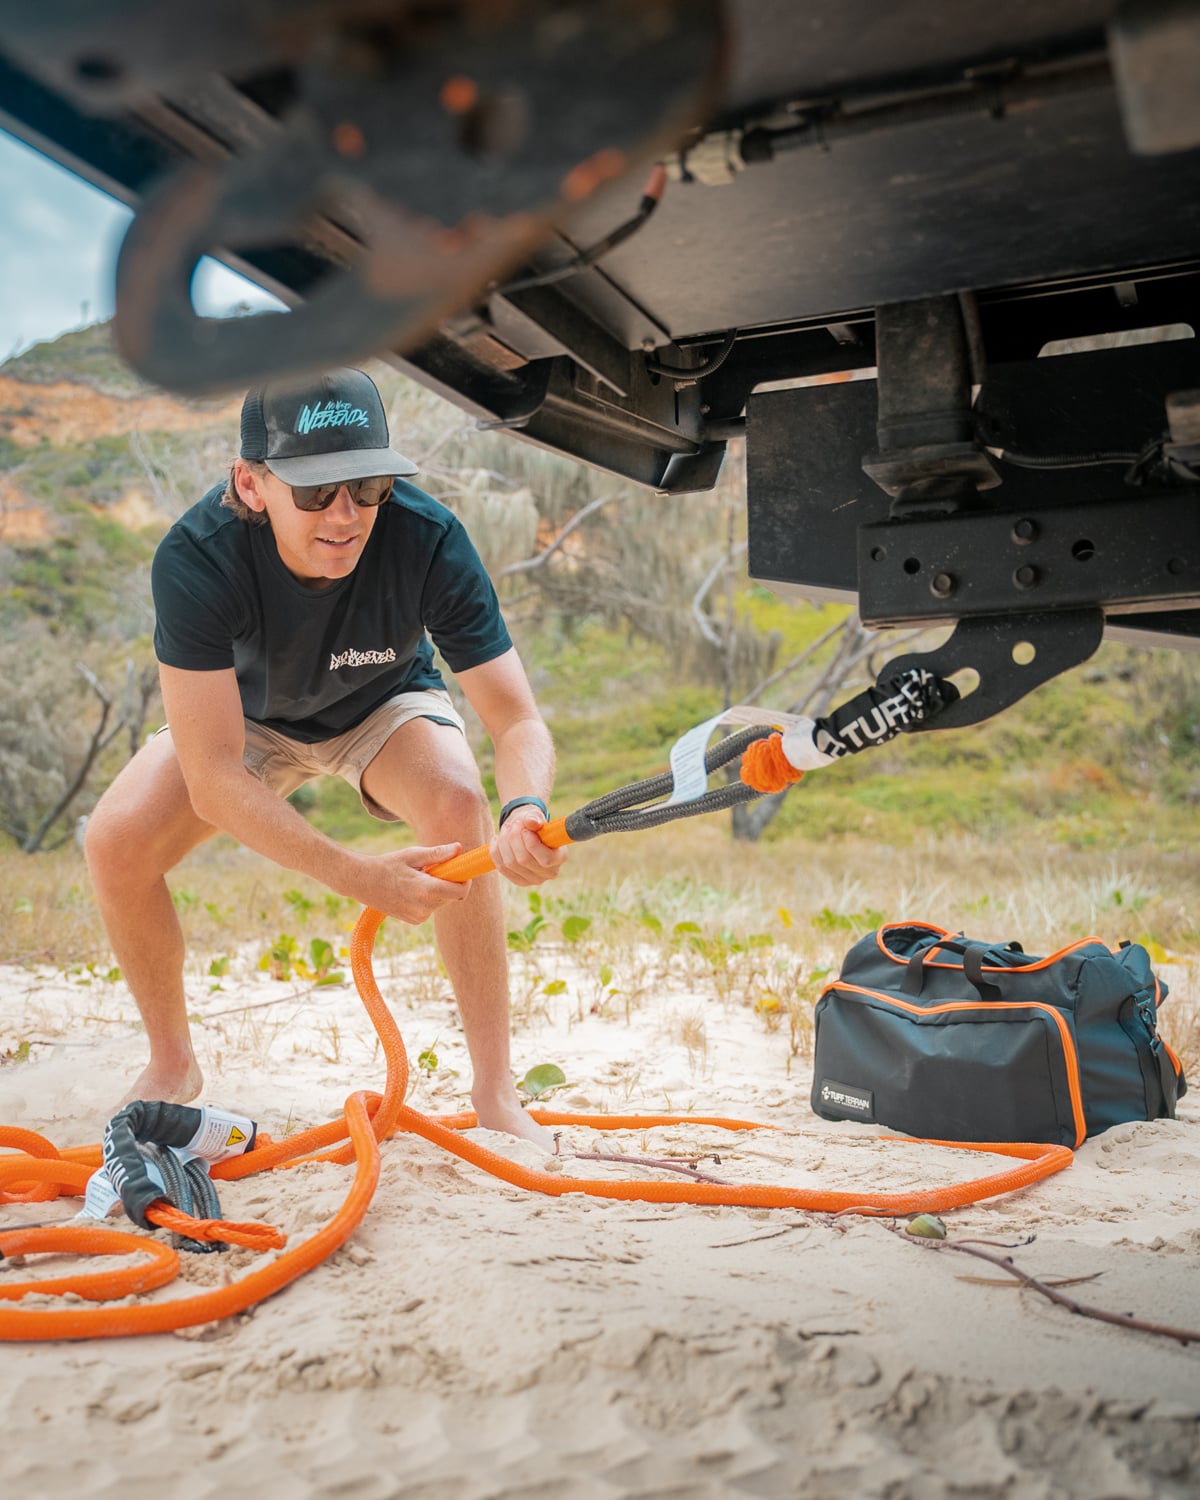
For most touring setups, recovery begins with a snatch recovery – the classic two-vehicle setup.
At the centre of that is a snatch strap, which is designed to stretch under load and then recoil, using stored energy to pull a bogged vehicle free . But the strap is just one part of the equation. To connect everything safely, you’ll need:
- Rated recovery points on both vehicles
- Soft shackles or rated shackles to join components
- A properly rated strap matched to vehicle weight
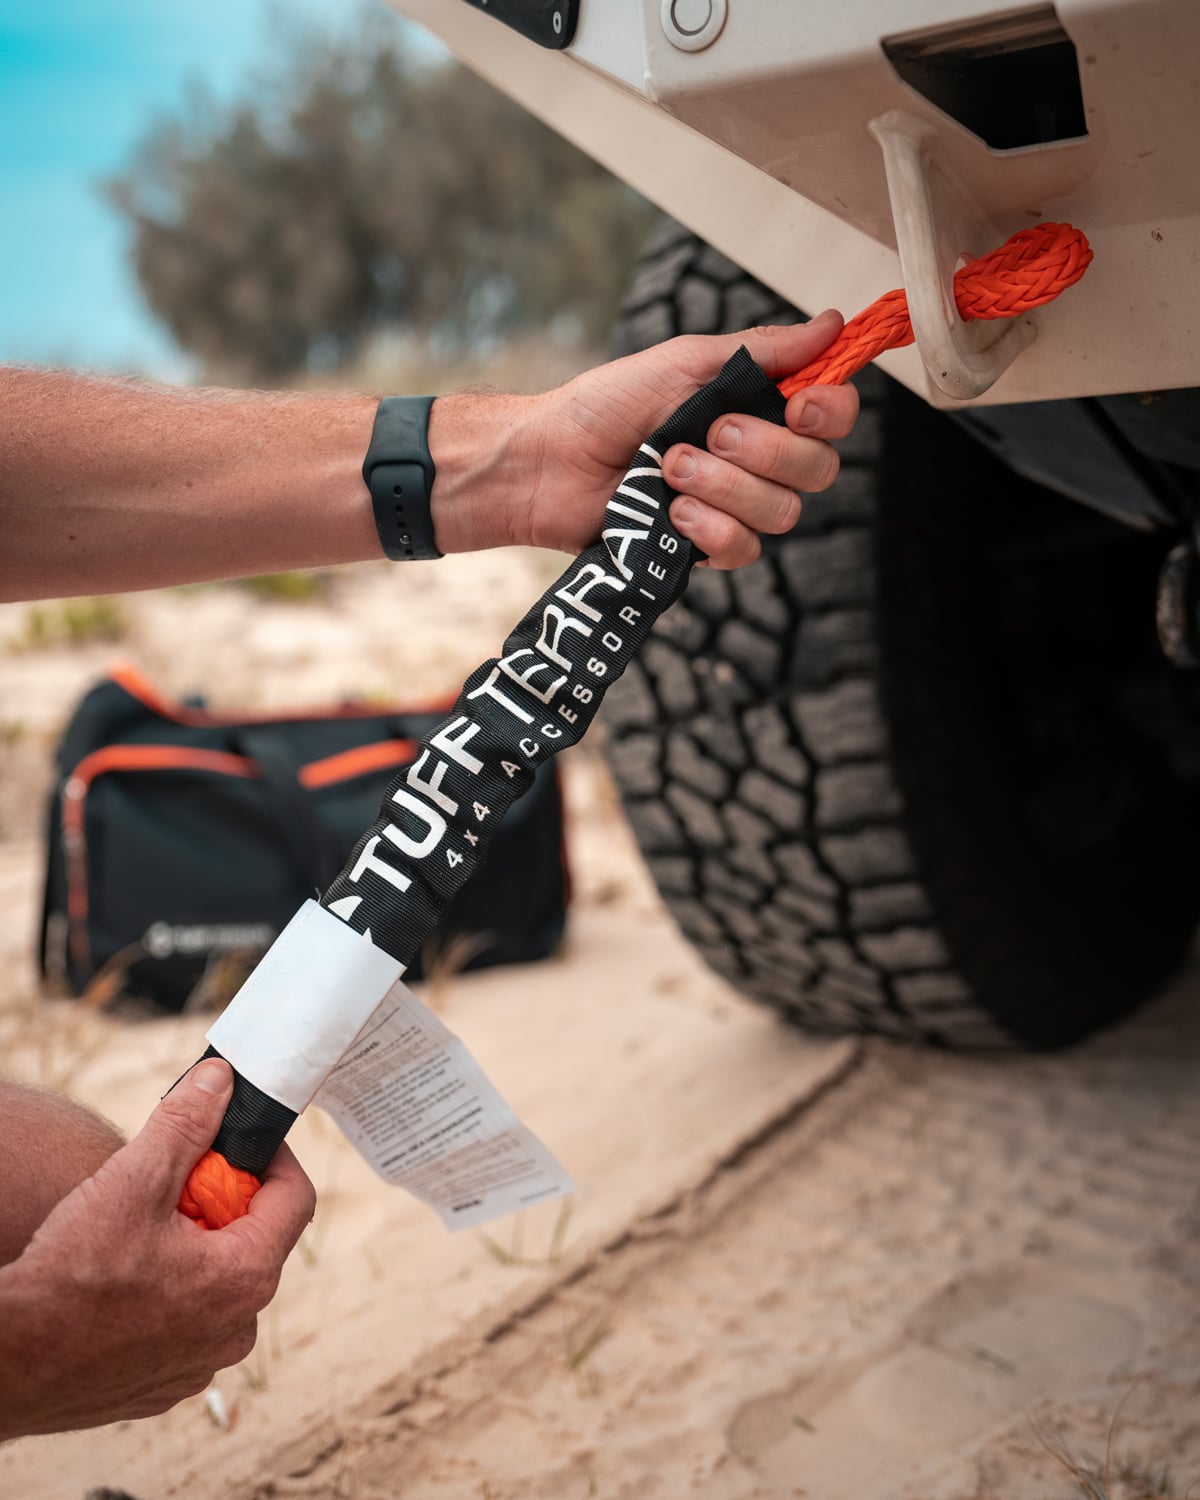
Modern kits – like those in the Tuff Terrain range – tend to lean heavily on soft shackles, and for good reason. They’re lighter, easier to handle and eliminate the risk of a heavy steel shackle becoming a projectile if something fails.
Soft shackles, straps and ropes: The core kit
A solid recovery setup starts with a few key items you’ll use regularly.
- Snatch straps and kinetic ropes: This is your go-to for sand and mud recoveries. A snatch strap or kinetic rope stretches under load, applying force gradually rather than with a harsh jolt. Kinetic ropes, which are becoming more common in modern kits, offer smoother load delivery and are often easier on both vehicles.
- Soft shackles: These replace traditional steel shackles in most setups. Made from synthetic rope, they’re strong, lightweight and far safer to handle. They’re also far easier to use in real-world conditions – no seized pins, no rattling around in the tray, and no damage to recovery points.
- Recovery hitches and connection points: If your vehicle runs a tow hitch receiver, a recovery hitch gives you a proper rated connection point. It’s a simple addition but critical for safe recoveries.
The key takeaway here is that everything needs to be rated and designed for recovery use – not just whatever is handy on the vehicle .
Stepping it up: Controlled and more complex recoveries
Once you move beyond basic snatch recoveries, your gear starts working together in more technical ways.
- Tree trunk protectors: If you’re using a winch, a tree trunk protector becomes essential. It wraps around an anchor point (like a tree), spreading the load and protecting both the environment and your gear. It’s a simple piece of kit, but it’s what allows safe anchoring when there’s nothing else around.
- Winch extension straps: Sometimes your winch line just won’t reach. That’s where an extension strap or rope comes in, giving you extra reach without overloading your system. These are especially handy in steep or remote terrain where anchor points aren’t ideal.
- Snatch rings: Snatch rings have become increasingly popular as a lighter, simpler alternative to traditional pulley blocks. Paired with a soft shackle, they allow you to change the direction of a winch pull; double your winching power; and reduce load on the winch. Compared to older-style steel snatch blocks, they’re lighter, simpler and easier to pack.
Putting it all together: How a recovery system works
The key to a good recovery setup isn’t just having gear – it’s understanding how it all links together. A typical setup might look like this:
- Snatch recovery: strap + soft shackles + rated recovery points
- Winch recovery: winch line + tree trunk protector + soft shackles
- Advanced recovery: winch + extension strap + snatch ring for mechanical advantage
Most complete recovery kits combine these elements into one package, which is why you’ll often see kits including straps, shackles, protectors and recovery accessories all in one bag.
Safety matters more than anything
Recovery is one of the highest-risk parts of four-wheel driving. When things go wrong, they go wrong quickly. Five non-negotiables are:
- Only use rated recovery points
- Never attach to a tow ball
- Stand clear of straps under load
- Use a dampener where possible
- Check all gear for damage before use
Even the best gear won’t help if it’s used incorrectly.
Building a practical recovery kit
You don’t need to go overboard. The following combination will cover the majority of real-world scenarios – from simple beach recoveries through to more technical winch setups. A well-rounded kit should include:
- Snatch strap or kinetic rope
- Soft shackles
- Tree trunk protector
- Winch extension strap
- Snatch ring
- Recovery hitch (if applicable)
- Gloves and storage bag
The bottom line
Recovery gear isn’t just another accessory – it’s essential equipment for anyone leaving the bitumen.
The good news is modern gear has come a long way. With lighter materials, safer designs and more versatile setups – like those seen across the Tuff Terrain recovery range – it’s easier than ever to build a kit that’s both capable and practical.
Get the basics right, understand how each piece works together, and you’ll be in a far better position when the tracks turn soft and the wheels stop turning.
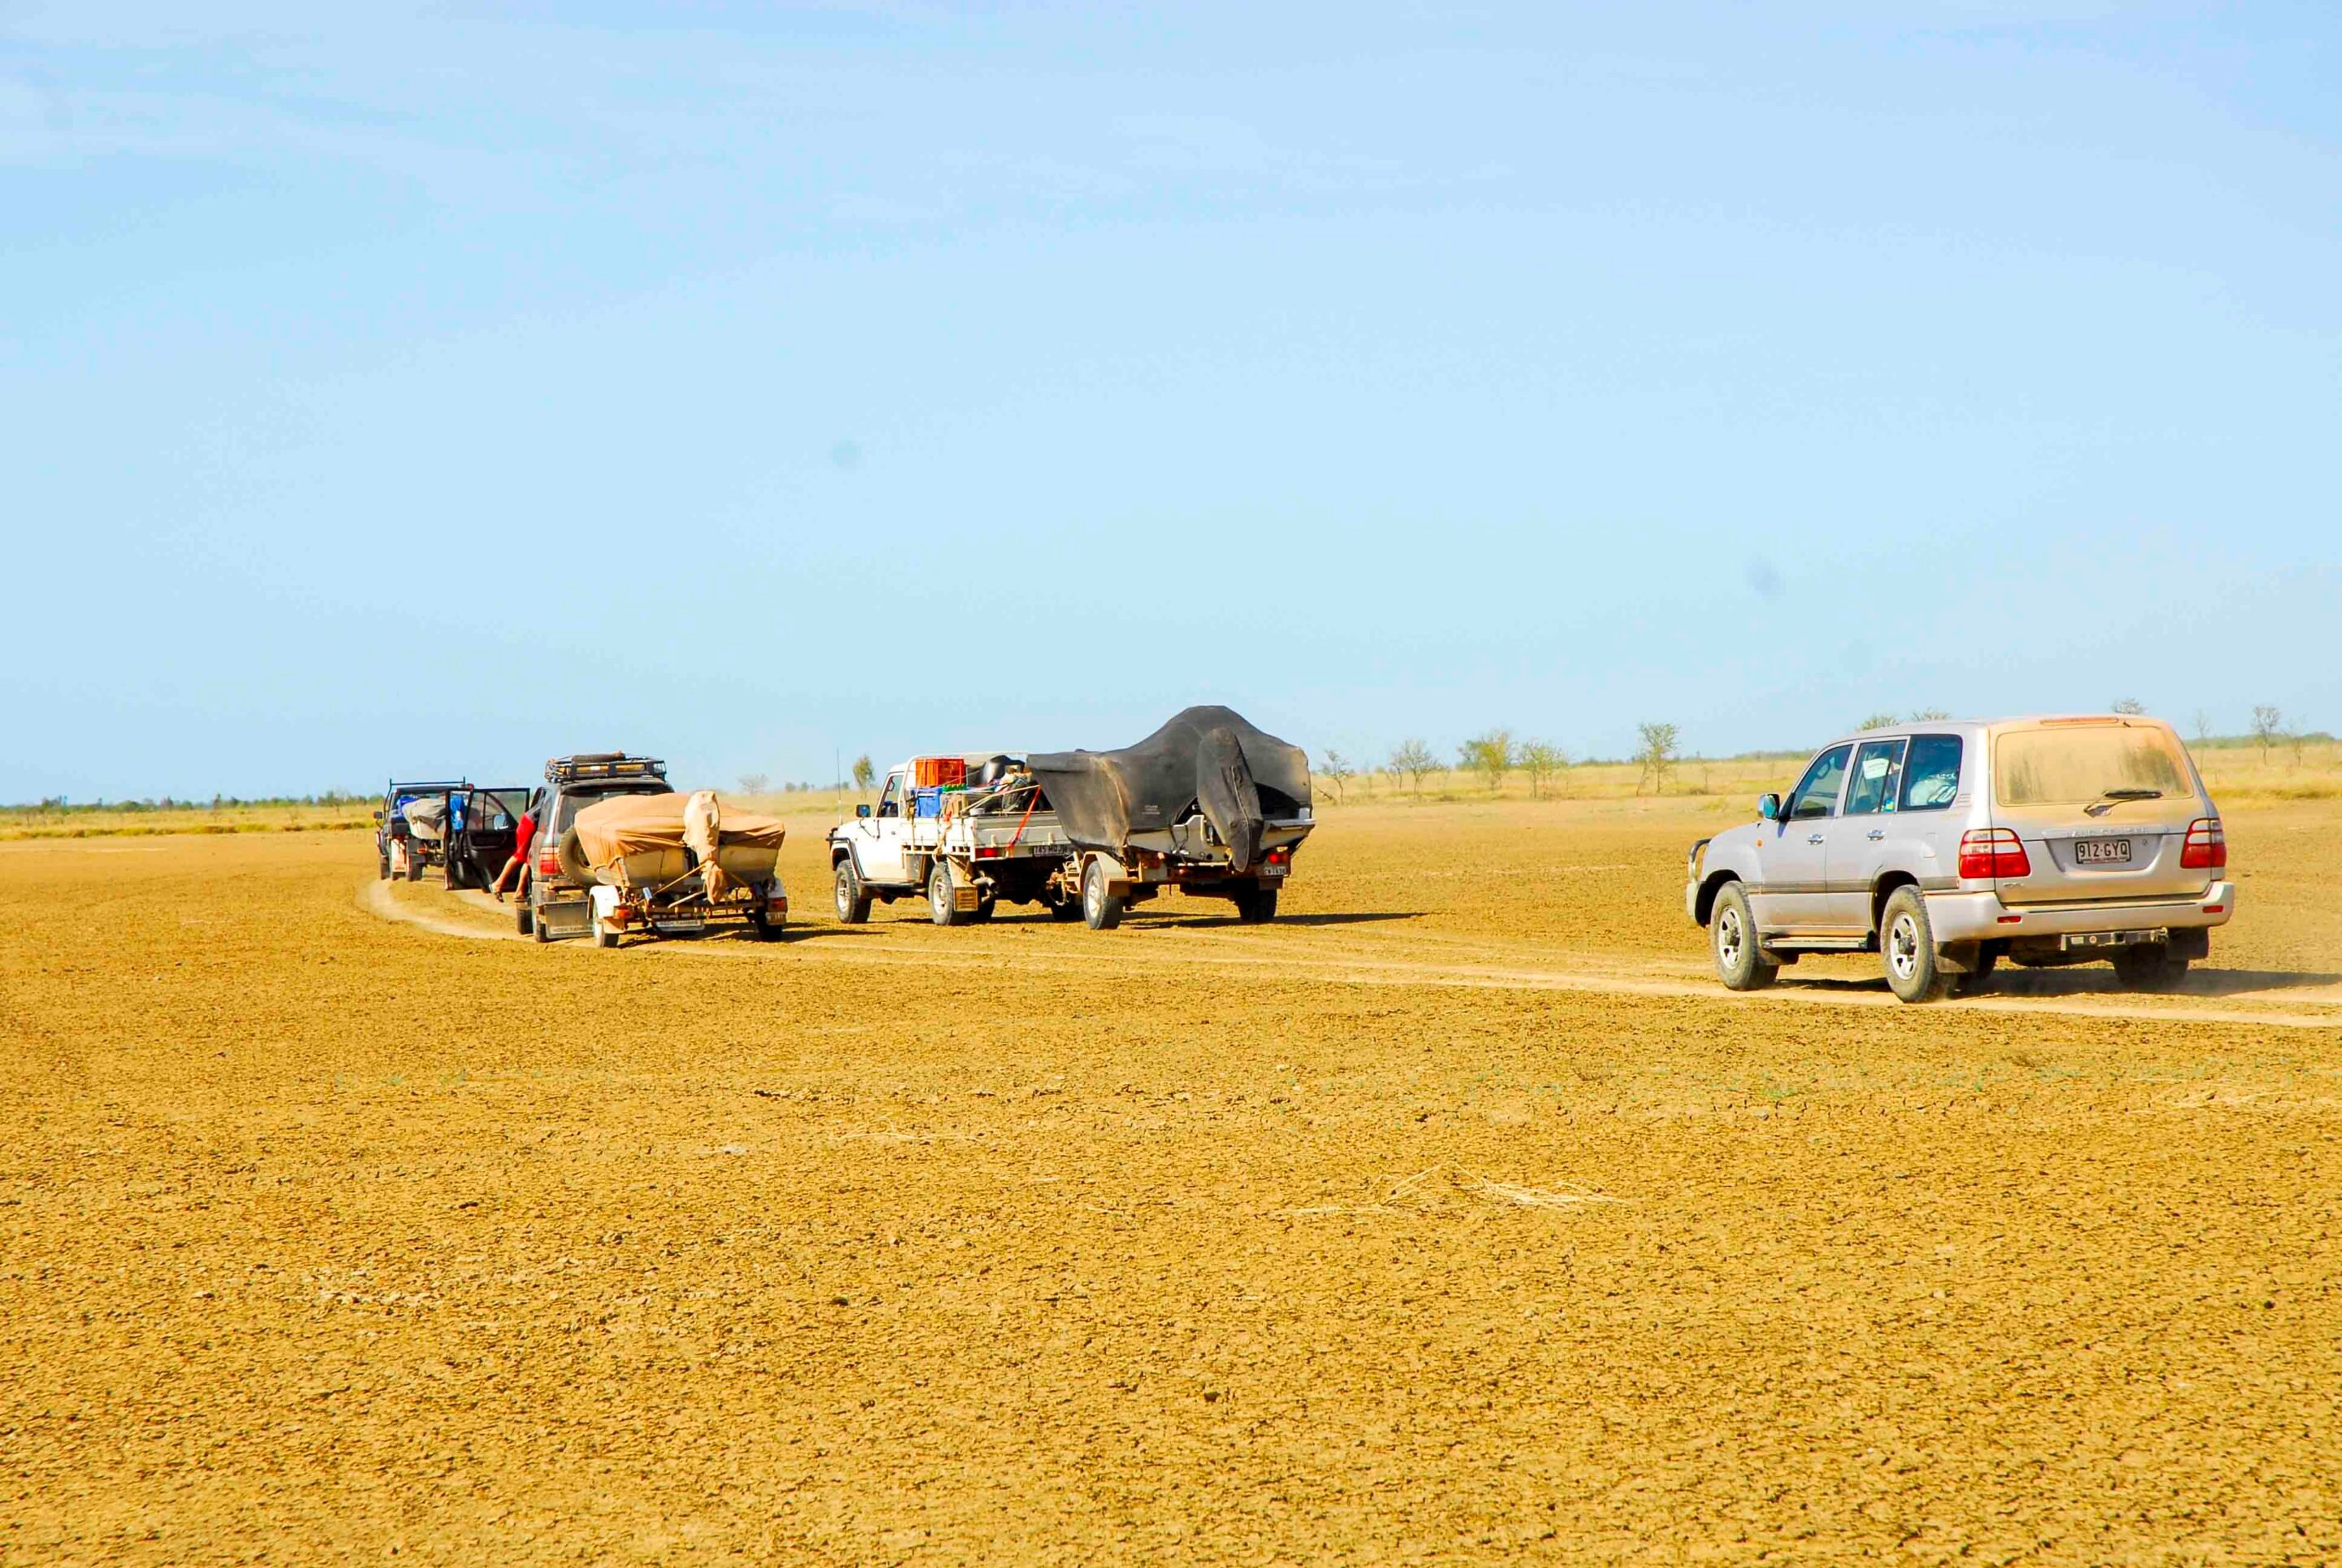
There is something about Australia’s deserts that gets under your skin – the silence, the scale and the feeling that you are a very small part of a very big landscape.
It is exactly what draws so many of us back time and time again. But those same qualities that make desert travel so rewarding are the ones that can turn a simple mistake into a serious situation. Out here there is no roadside assistance, no phone signal and no servo around the corner. When you head into desert country you are relying on your preparation, your judgement and the gear you carry. Desert travel is not about being fearless – it is about being ready.
These are the five things every 4×4 adventurer should have when heading into remote desert country. Not the flashy extras or the latest trends – just the solid essentials that keep you safe, self-sufficient and confident to explore further than the bitumen.
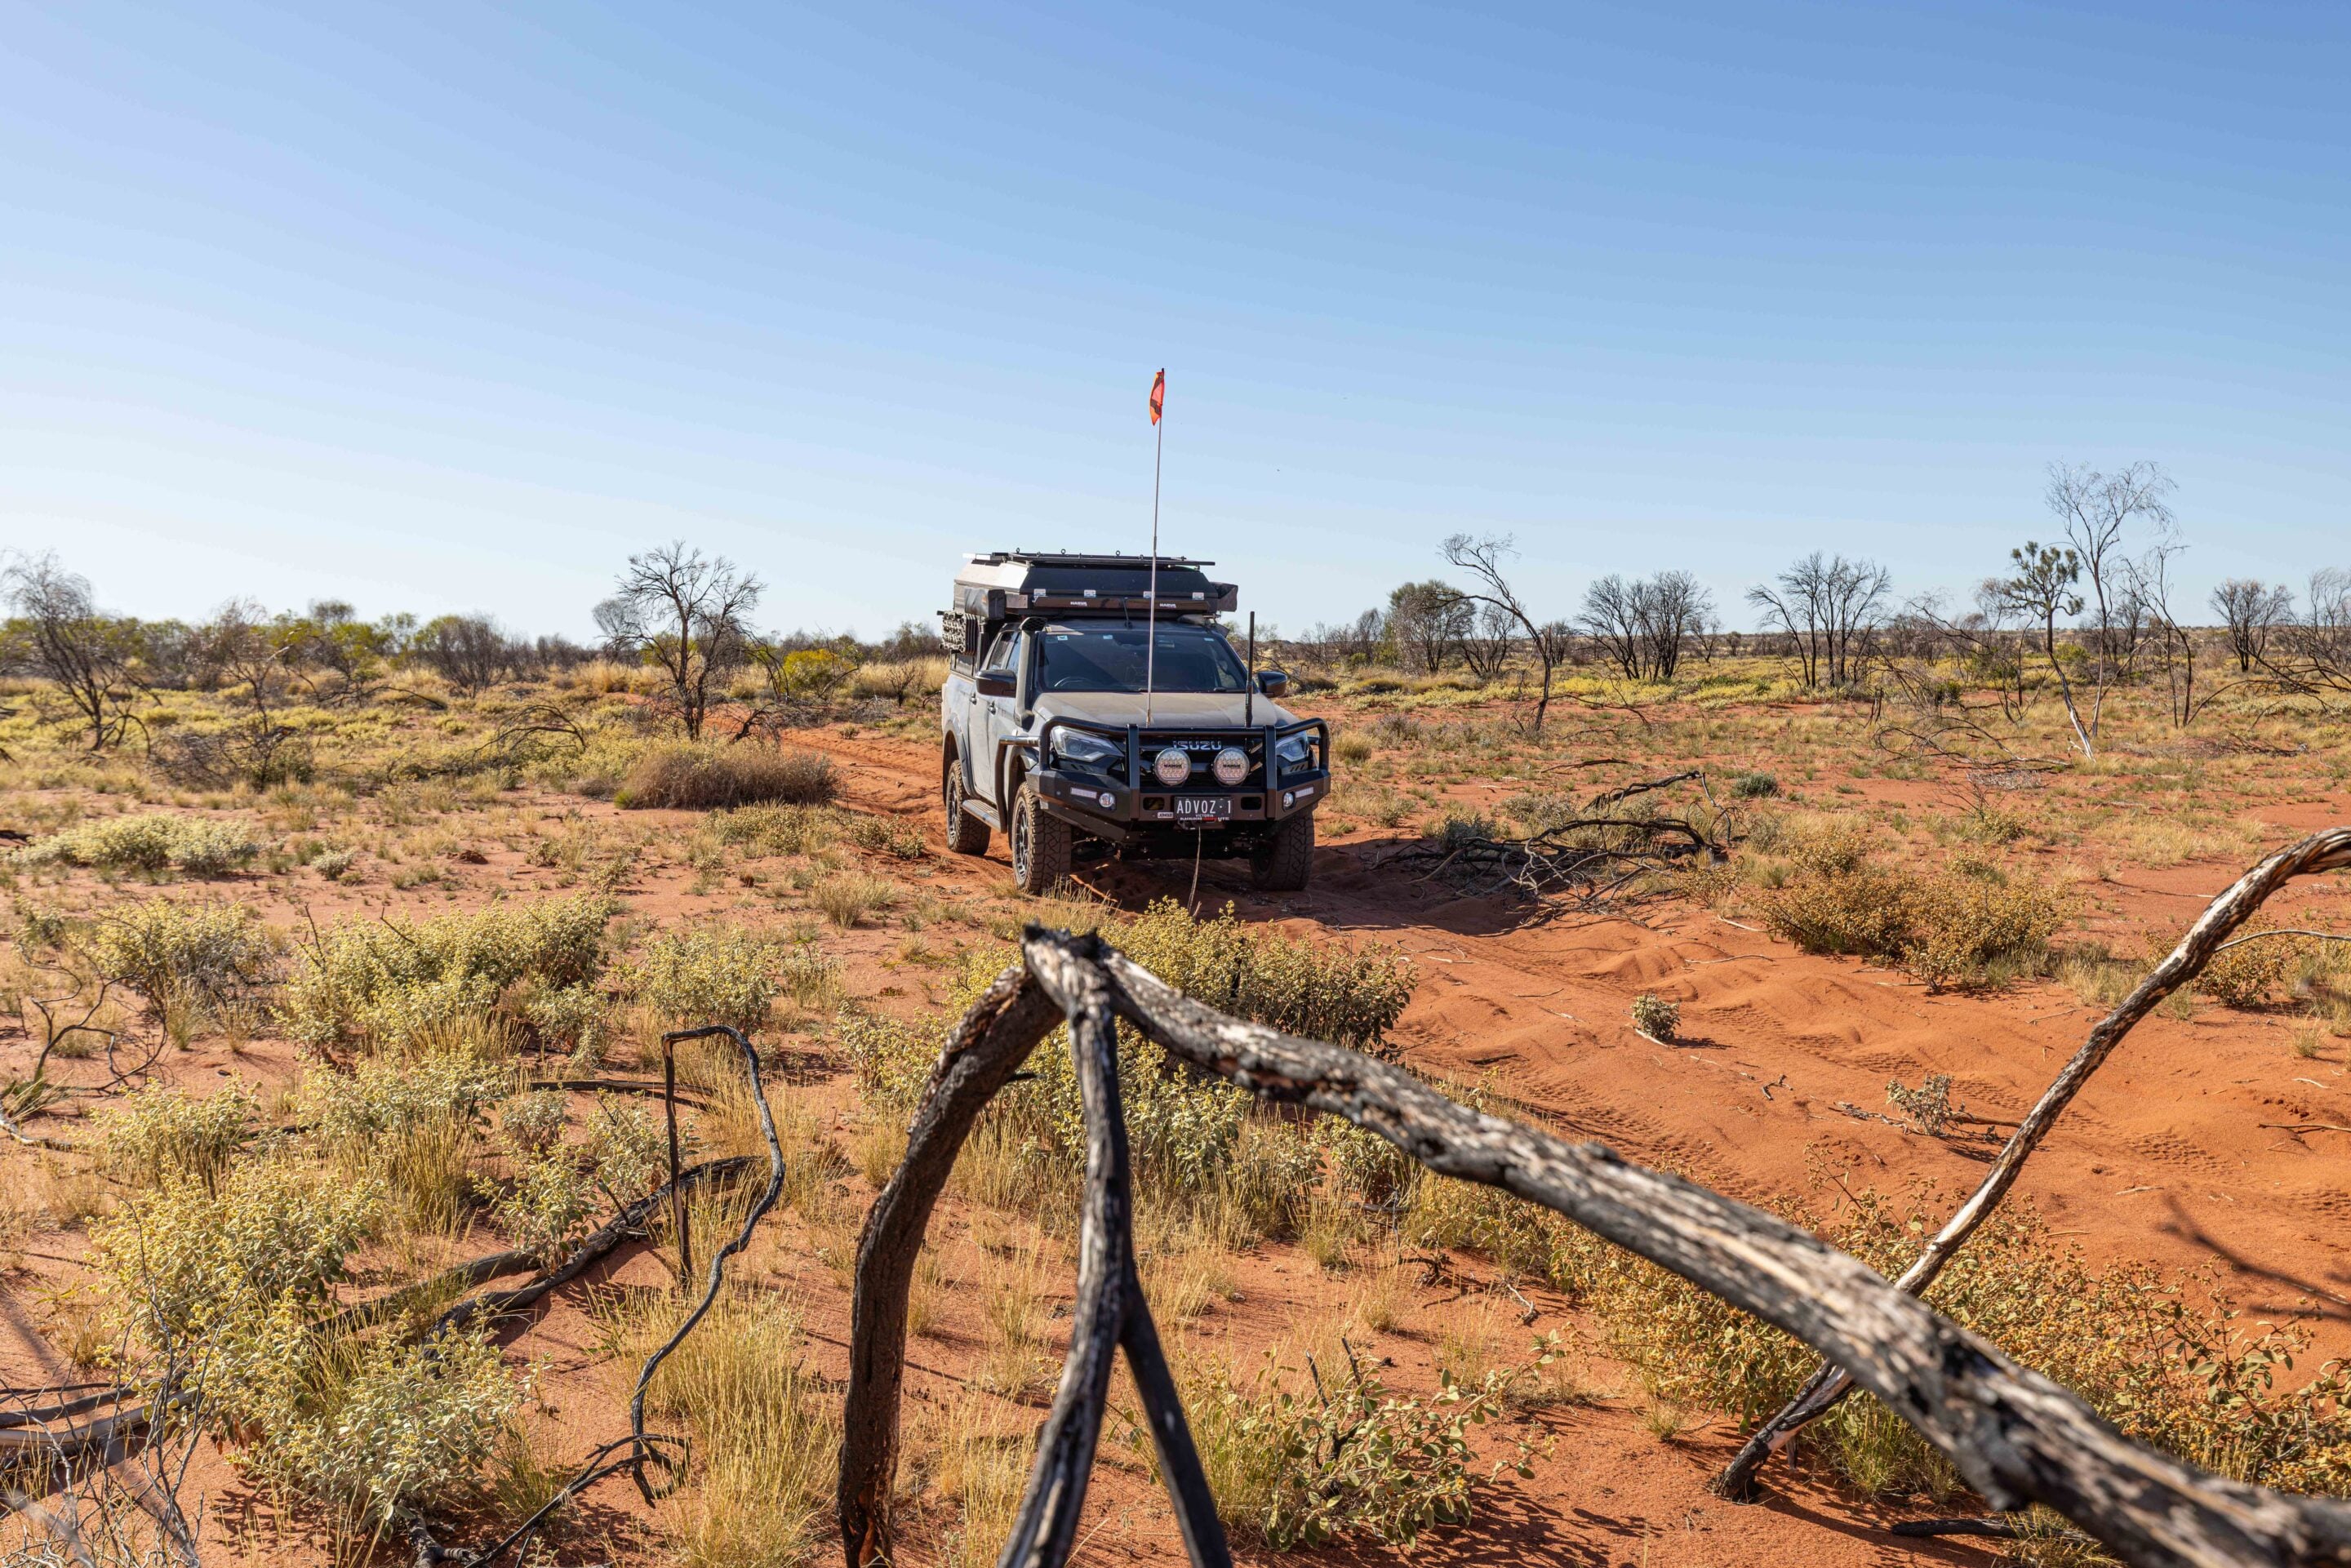
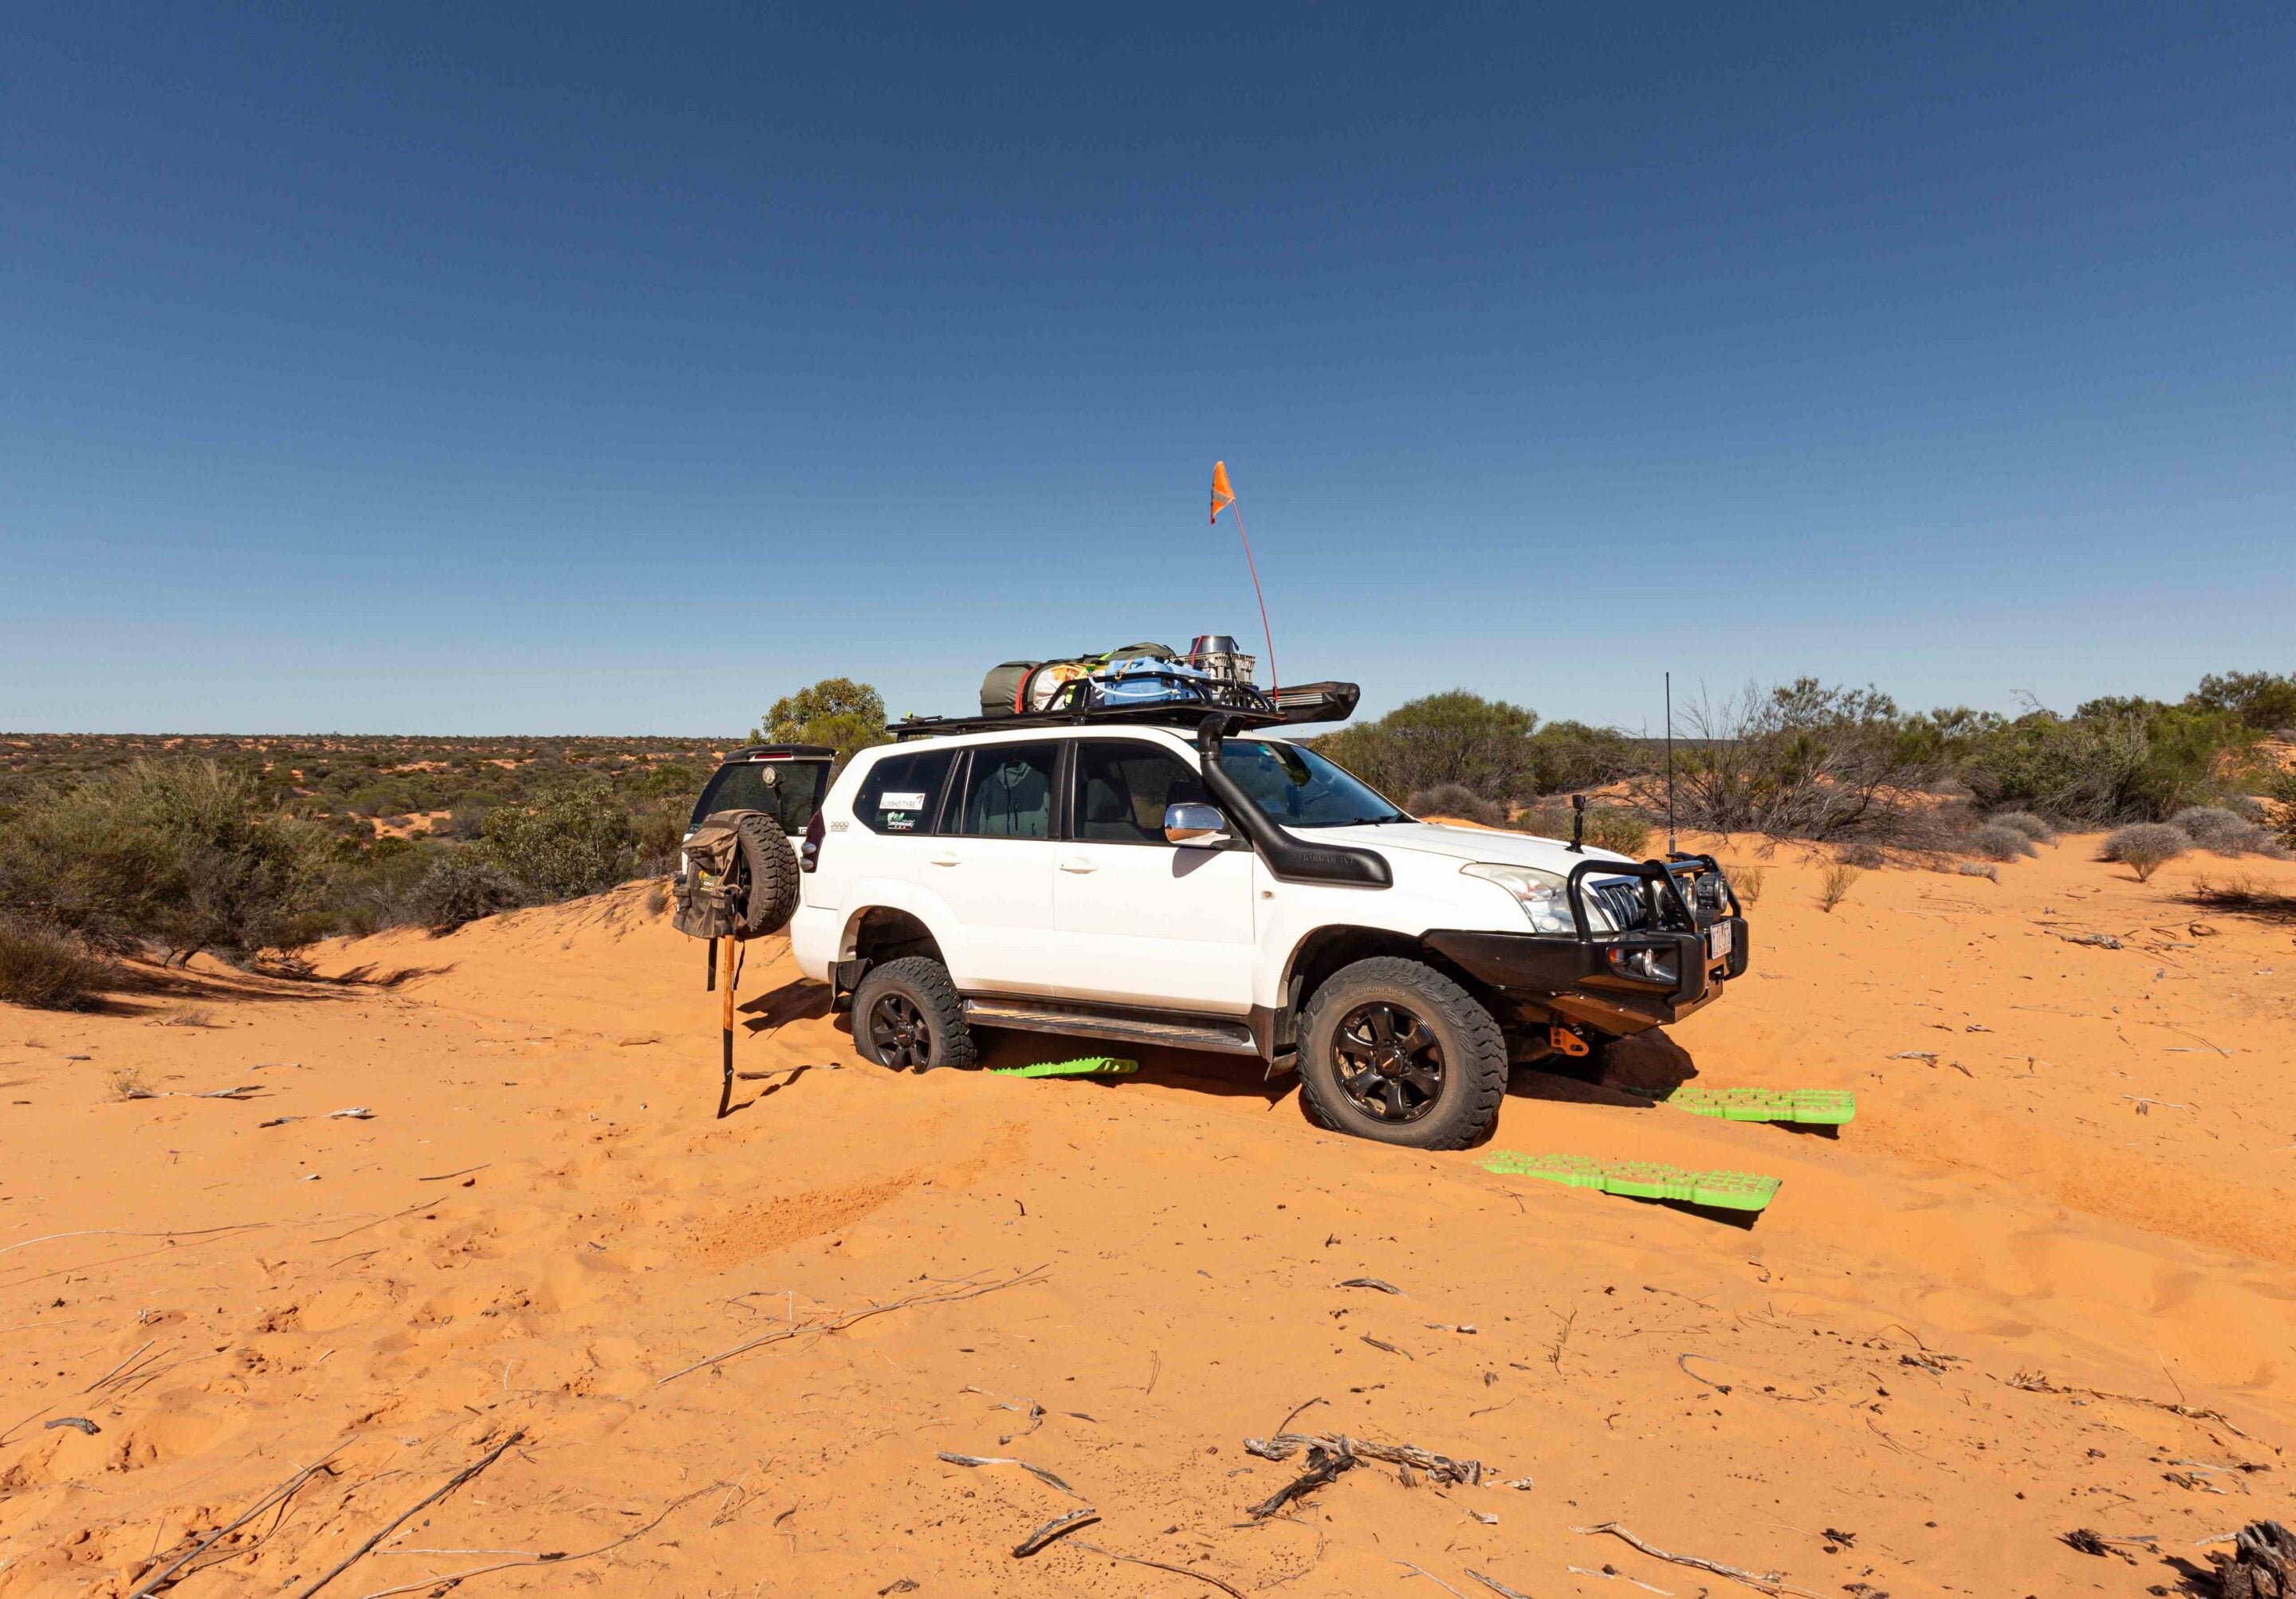
1. Sand flag
A sand flag is one of the simplest pieces of safety equipment you can bolt onto your four-wheel drive, yet it is often the one that saves lives.
When you are driving in desert country – especially among sand dunes – visibility becomes your biggest challenge. Tracks twist and turn. Crests hide what is coming. Dust hangs in the air long after the last vehicle has passed.
In places like the Simpson Desert, a sand flag is not just a good idea – it is compulsory. The reason is simple. When two vehicles meet on the crest of a dune there is very little time to react. A bright fluorescent flag gives the driver approaching from the other side a vital early warning that someone is coming. It can mean the difference between slowing down in time and a head-on collision.
But the Simpson is not the only place where a sand flag matters. Any desert track with blind rises and soft dunes is a place where visibility is limited. Len Beadell’s iconic routes – such as the Gunbarrel Highway, the Connie Sue and the Anne Beadell Highway – all feature sections where a sand flag can be the only thing visible above the scrub.
Even beach driving benefits from a sand flag. When you are climbing dunes near popular coastal areas, other drivers can appear out of nowhere. A flag gives everyone more time to react.
Choosing a sand flag is not complicated. Most 4×4 accessory stores stock dedicated kits, but a homemade option can work just as well as long as it meets the guidelines. The flag must be fluorescent and clearly visible. It should measure at least 300mm by 290mm. I used to run an old UHF aerial mounted to the roof rack, wrapped in red electrician’s tape and topped by a fluorescent flag.
Mounting height is just as important as the flag itself. If fitted to the bullbar, the top of the flag needs to sit at least 3.5m from the ground. If mounted to a roof rack, it must be at least 2m above the mounting point. This ensures the flag is visible above the vehicle and surrounding terrain.
A sand flag is not about ticking a rulebook box – it is about protecting yourself, your passengers and the people travelling in the opposite direction. In remote desert country, that responsibility sits with all of us.
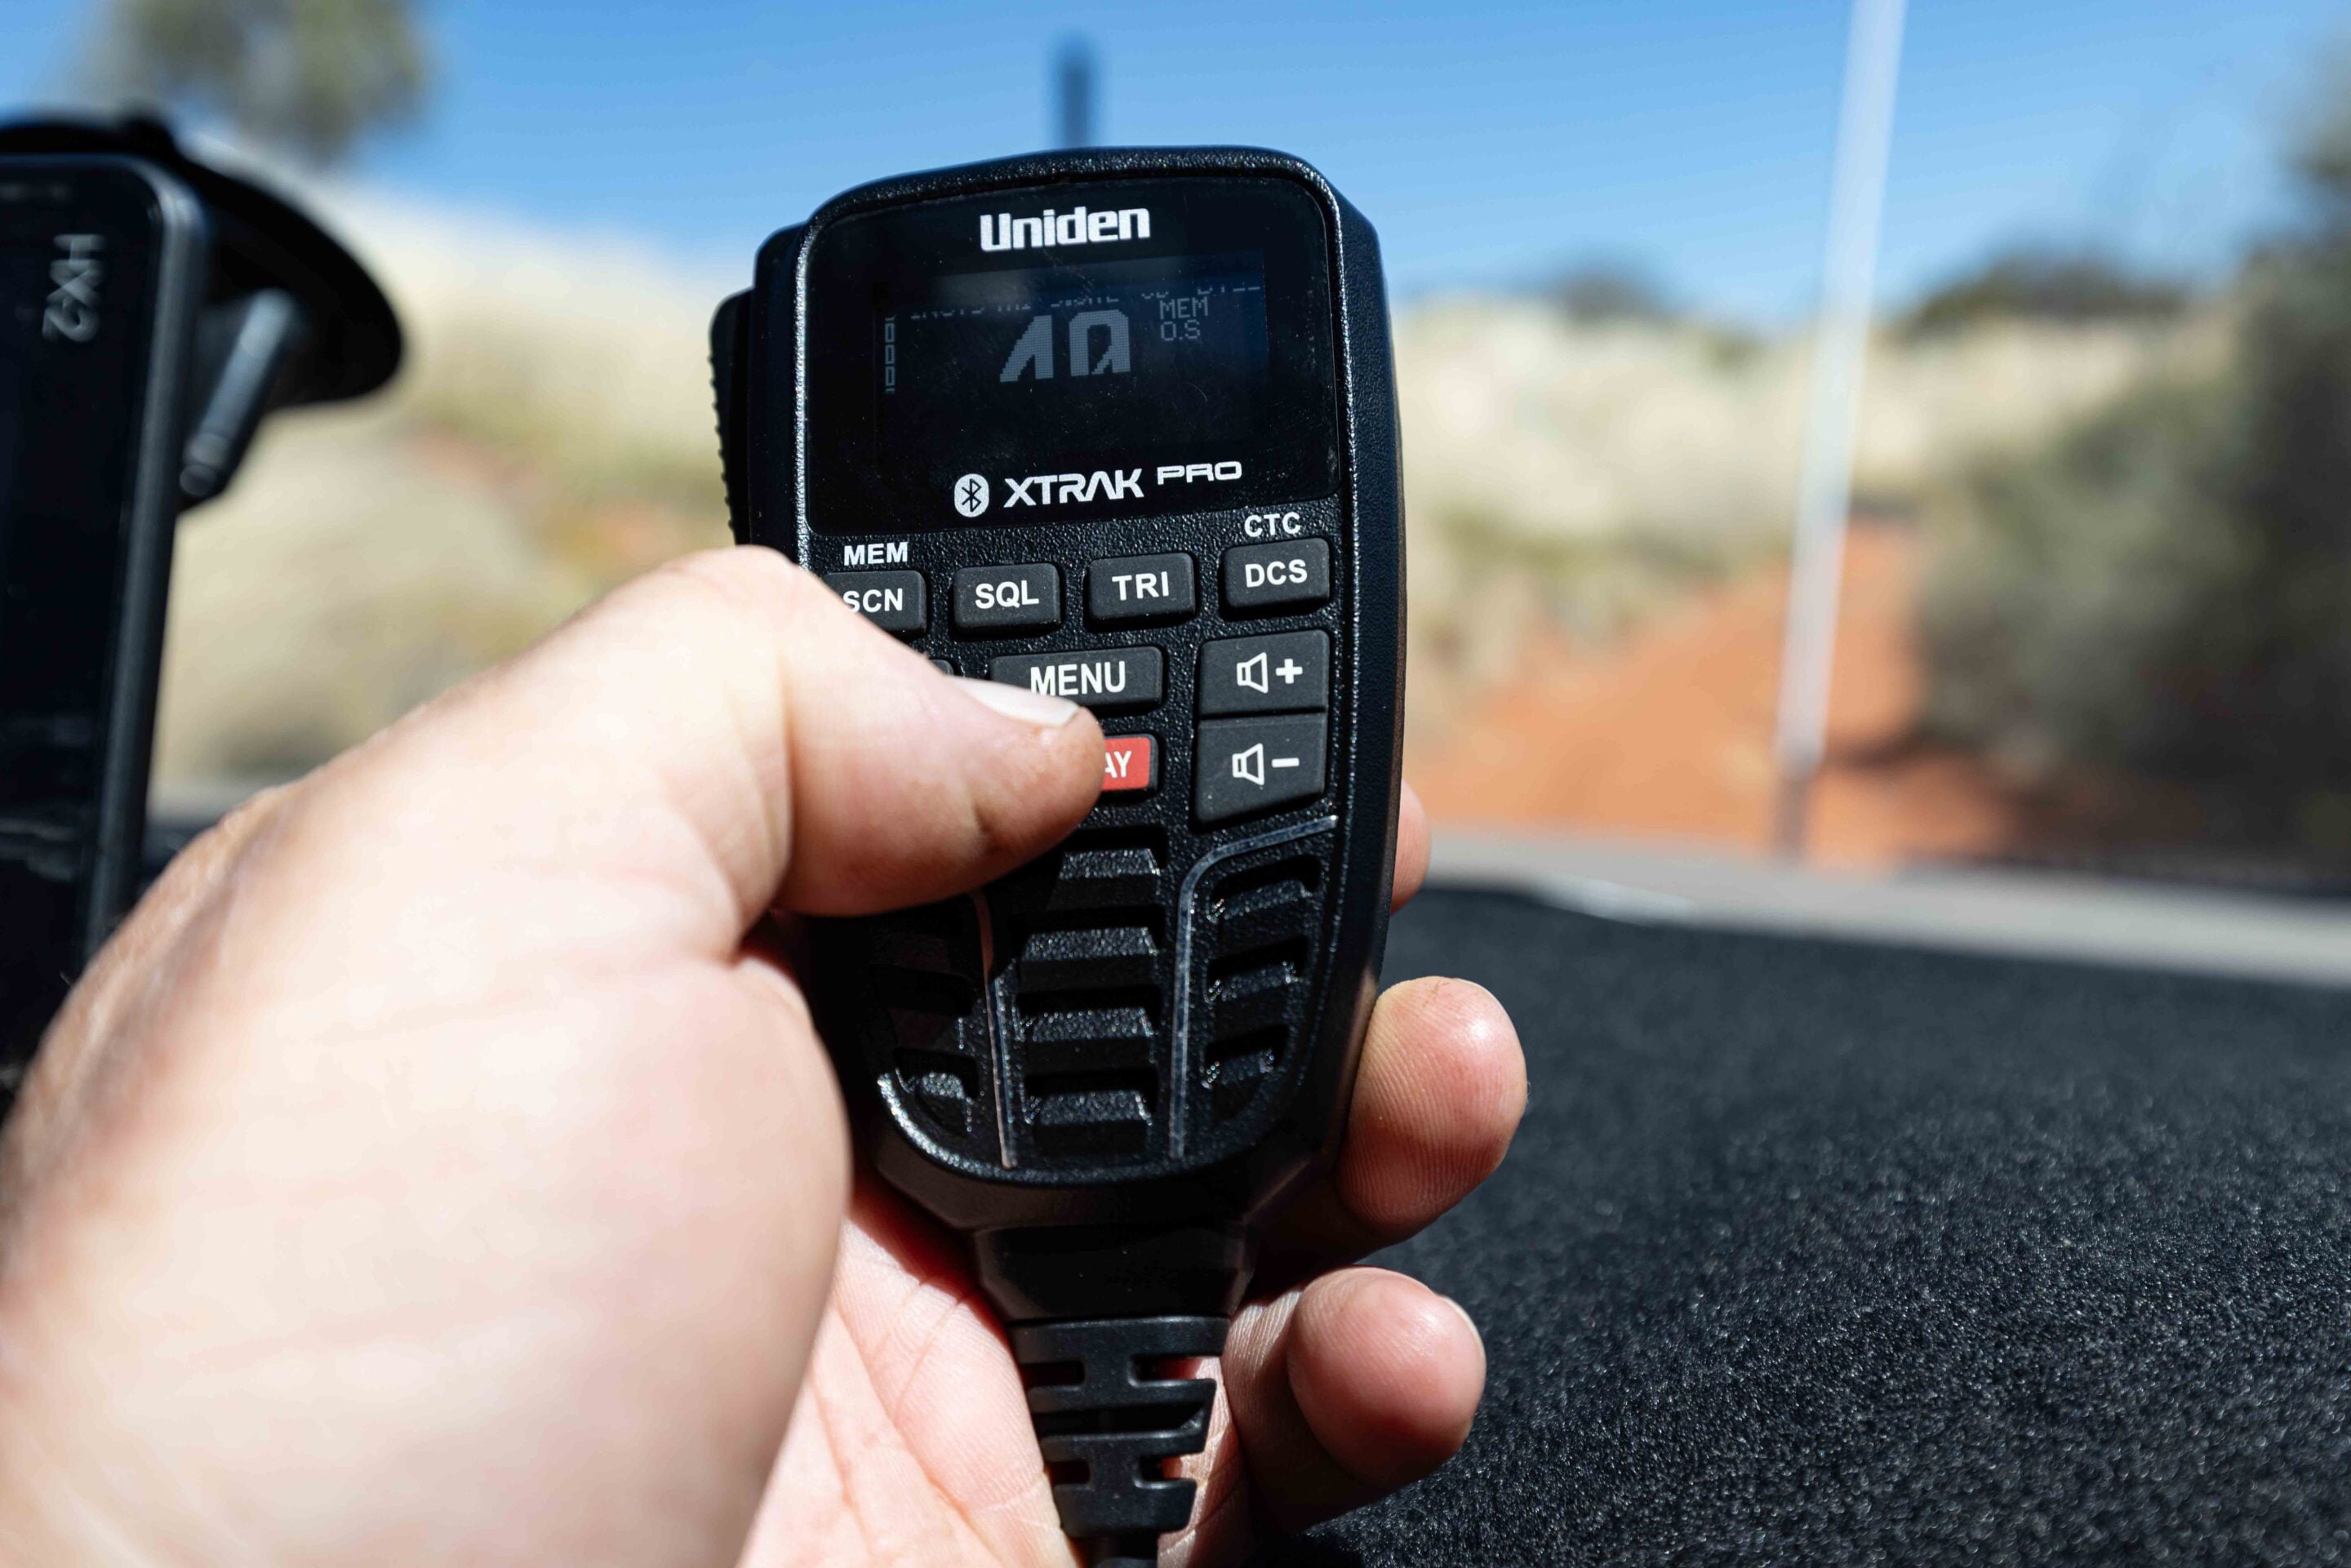
2. UHF radio
In the desert, communication is everything. When something goes wrong, being able to talk to other travellers can change the outcome of a situation in seconds. That is why a UHF radio is one of the most valuable tools you can carry into remote desert country.
Many people see a UHF as nothing more than a way to talk to mates in convoy or listen to truck drivers swap stories. But in desert travel it becomes a critical safety device. It allows you to share your location, warn others of hazards and listen for approaching vehicles long before you see them.
Channel 10 is widely recognised as the desert travel channel and is the recommended channel for the Simpson Desert. Along major routes such as the QAA Line and French Line you will find marked call points where drivers announce their position and direction of travel. A simple call – such as “eastbound vehicle at dune 15” – can prevent a dangerous encounter moments later.
Experienced desert travellers often keep one radio permanently tuned to channel 10 while using another channel for convoy chatter. It might sound excessive, but it keeps the safety channel clear for important information. When you are hundreds of kilometres from help, clear communication becomes a form of insurance.
It is also important to use the right channels for the right reasons. In the desert and on major highways, channels such as 10, 18 and 40 are used for safety and information. They are not the place for long conversations about camp cooking or last night’s footy score. Keeping those channels clear helps everyone.
A good quality UHF with a properly mounted aerial will give you several kilometres of range – often more in open desert terrain. That range can be the difference between handling a situation yourself and needing outside help. I noticed on a recent CSR trip that my 3.0dBi UHF antenna was not well suited to dune country, so I plan to upgrade to a 6.6dBi aerial for my next desert adventure.
When travelling remotely, a UHF radio does more than keep you in touch. It keeps you connected to the wider travelling community. And in the desert, that community is often your first line of support.
3. Paper maps
We live in a time when navigation has never been easier.
Satellite systems and digital maps have put incredible tools in the hands of every traveller. Units like the Hema X2 and Garmin Overlander, along with apps such as Newtracs, allow us to pinpoint our location within metres. Tracks, campsites and fuel stops appear with a tap of the screen.
But the desert has a way of reminding us that technology is never foolproof. Batteries go flat, screens crack and units overheat. Sometimes the simplest things – dust and vibration – can bring electronics to an end at the worst possible moment.
This is why paper maps still deserve a permanent place in every desert travel kit. A good quality map gives you a broader understanding of the country you are travelling through. It shows not just where you are, but where you can go if plans change. Alternative routes, old tracks, water points and emergency exits all become part of your decision-making.
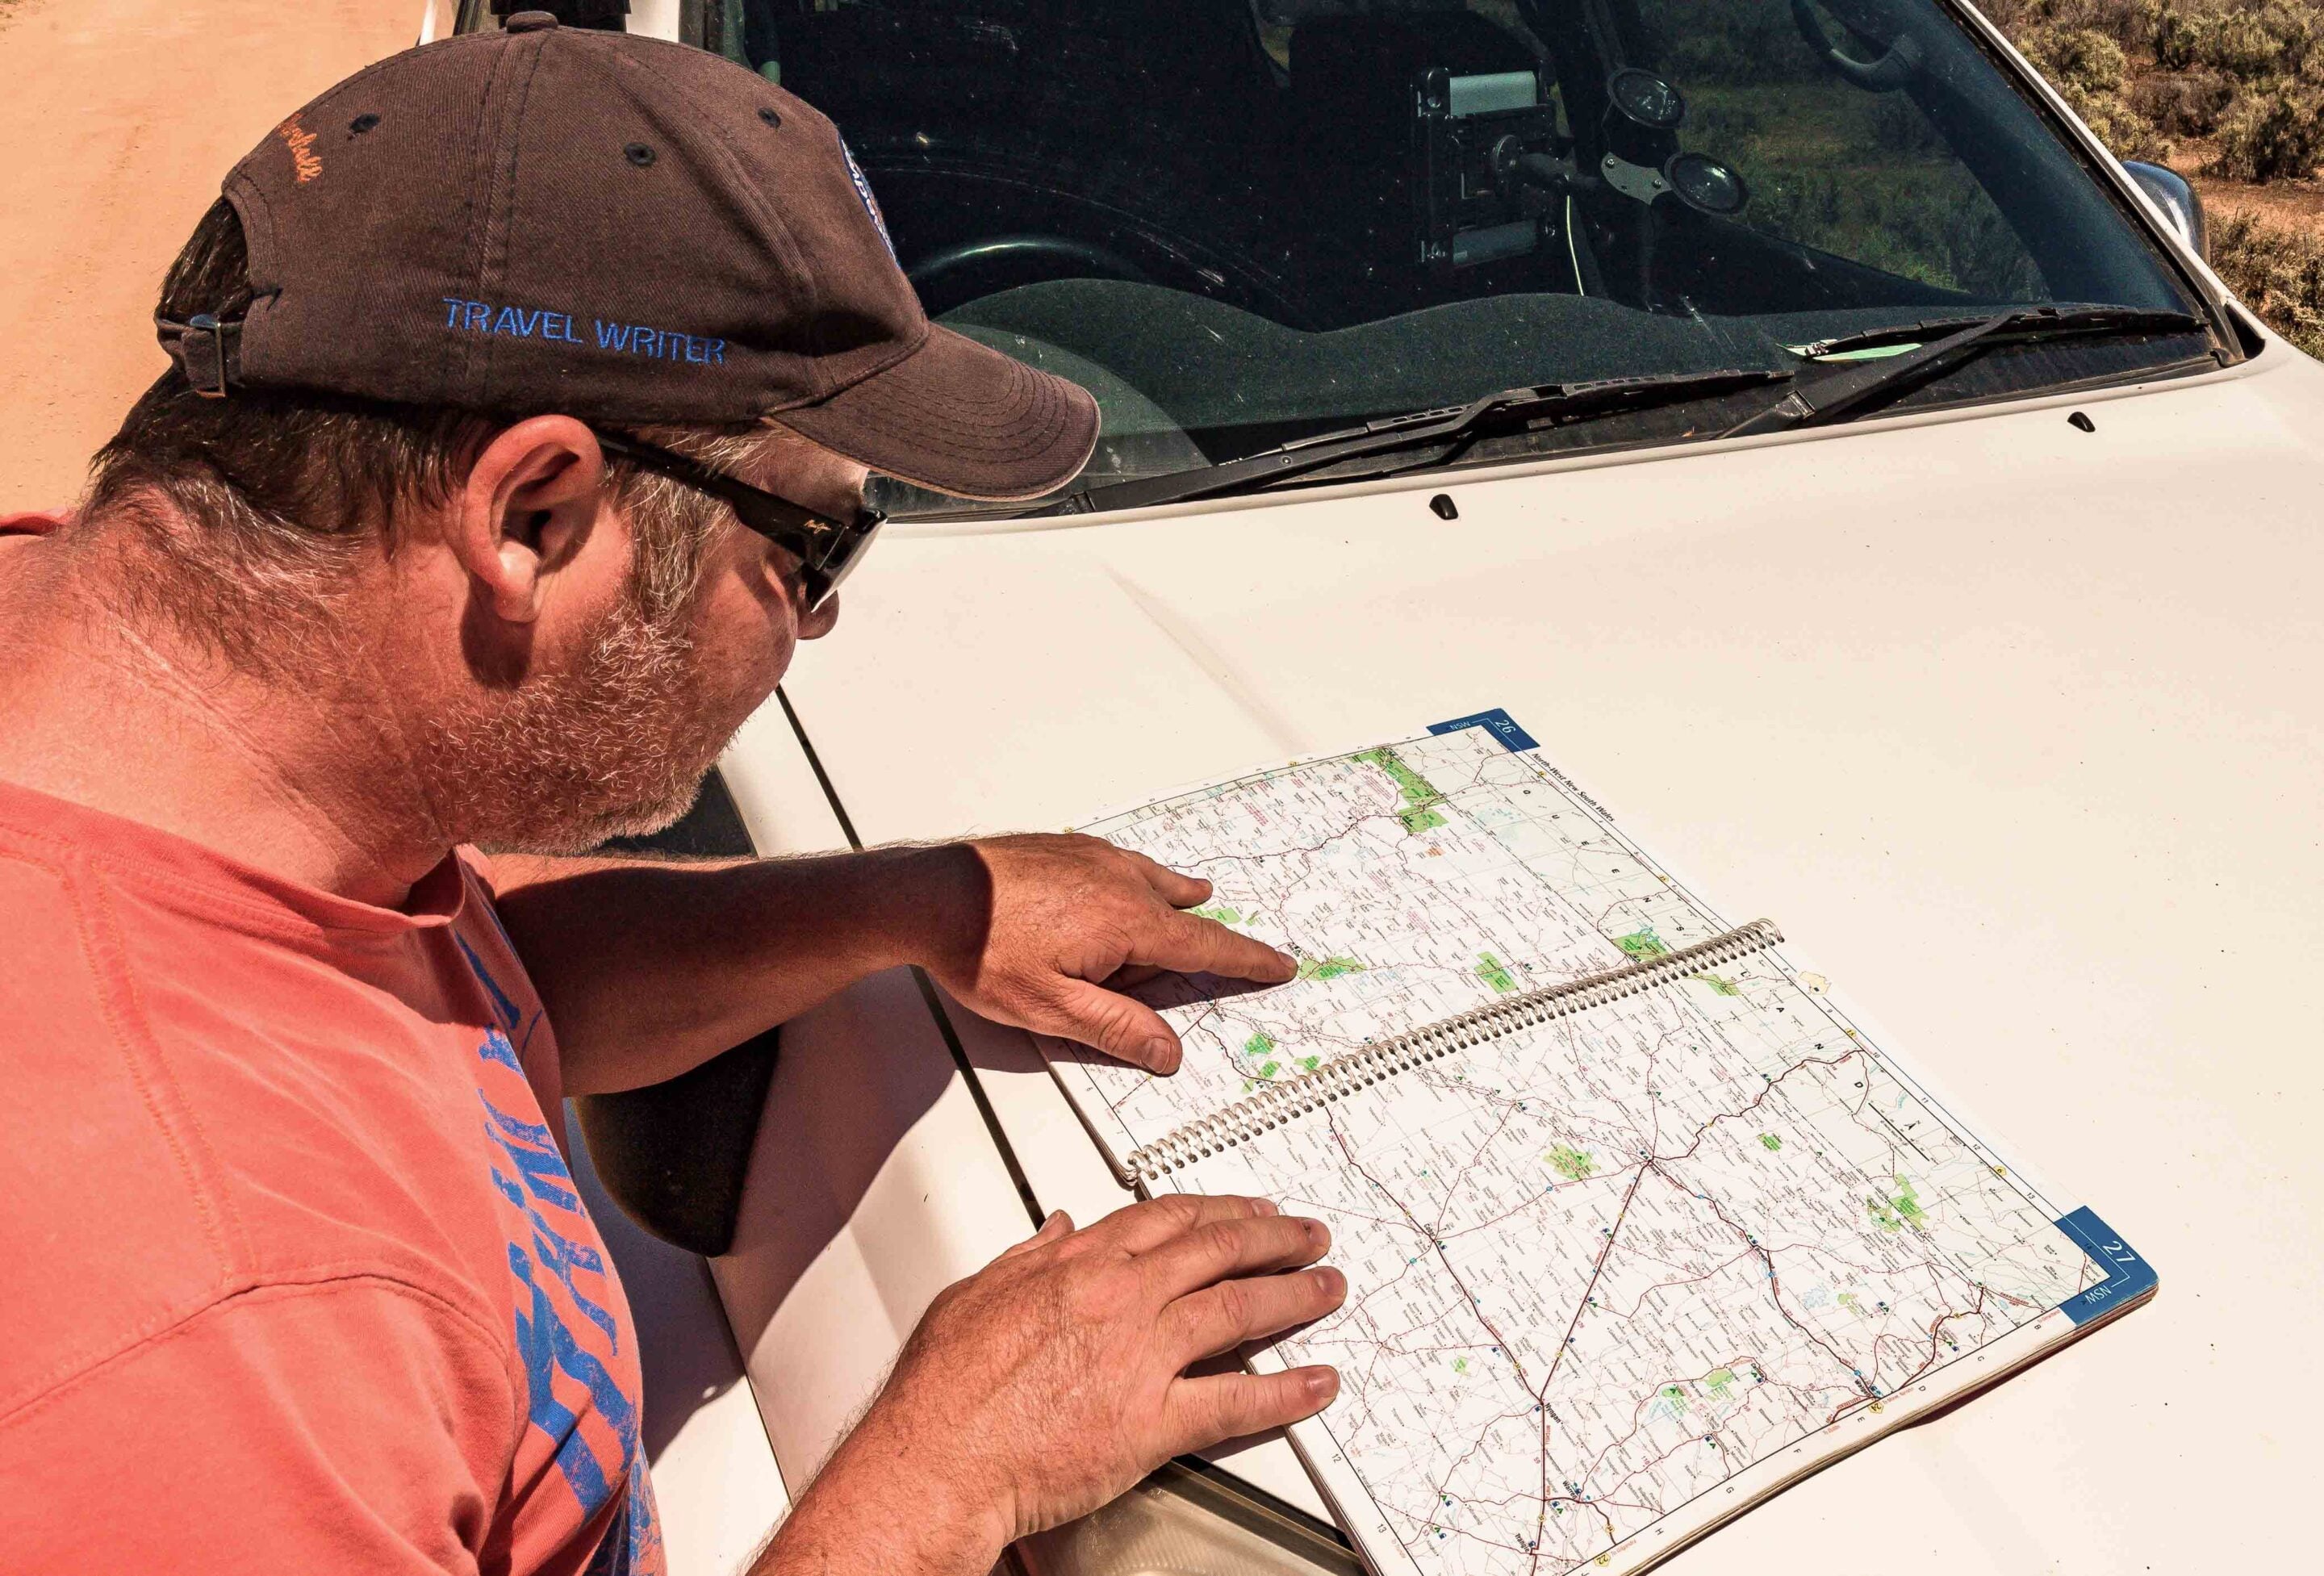
Knowing how to read a map is a skill every outback traveller should develop. It does not require advanced training – just a basic understanding of scale, direction and landmarks. Pair that map with a simple handheld compass and you have a navigation system that works anywhere, anytime, without power.
A compass is often overlooked because it seems old-fashioned, but it remains one of the most reliable tools you can carry. It tells you where north is, no matter what. From there everything else falls into place.
In the desert, redundancy is not about being paranoid – it is about being practical. Carrying both electronic navigation and paper maps means you always have a backup. When you are far from help, that backup can become your primary lifeline.
Navigation is not just about finding your way forward – it is about knowing how to get out if you need to. And in remote desert country, that knowledge brings confidence.
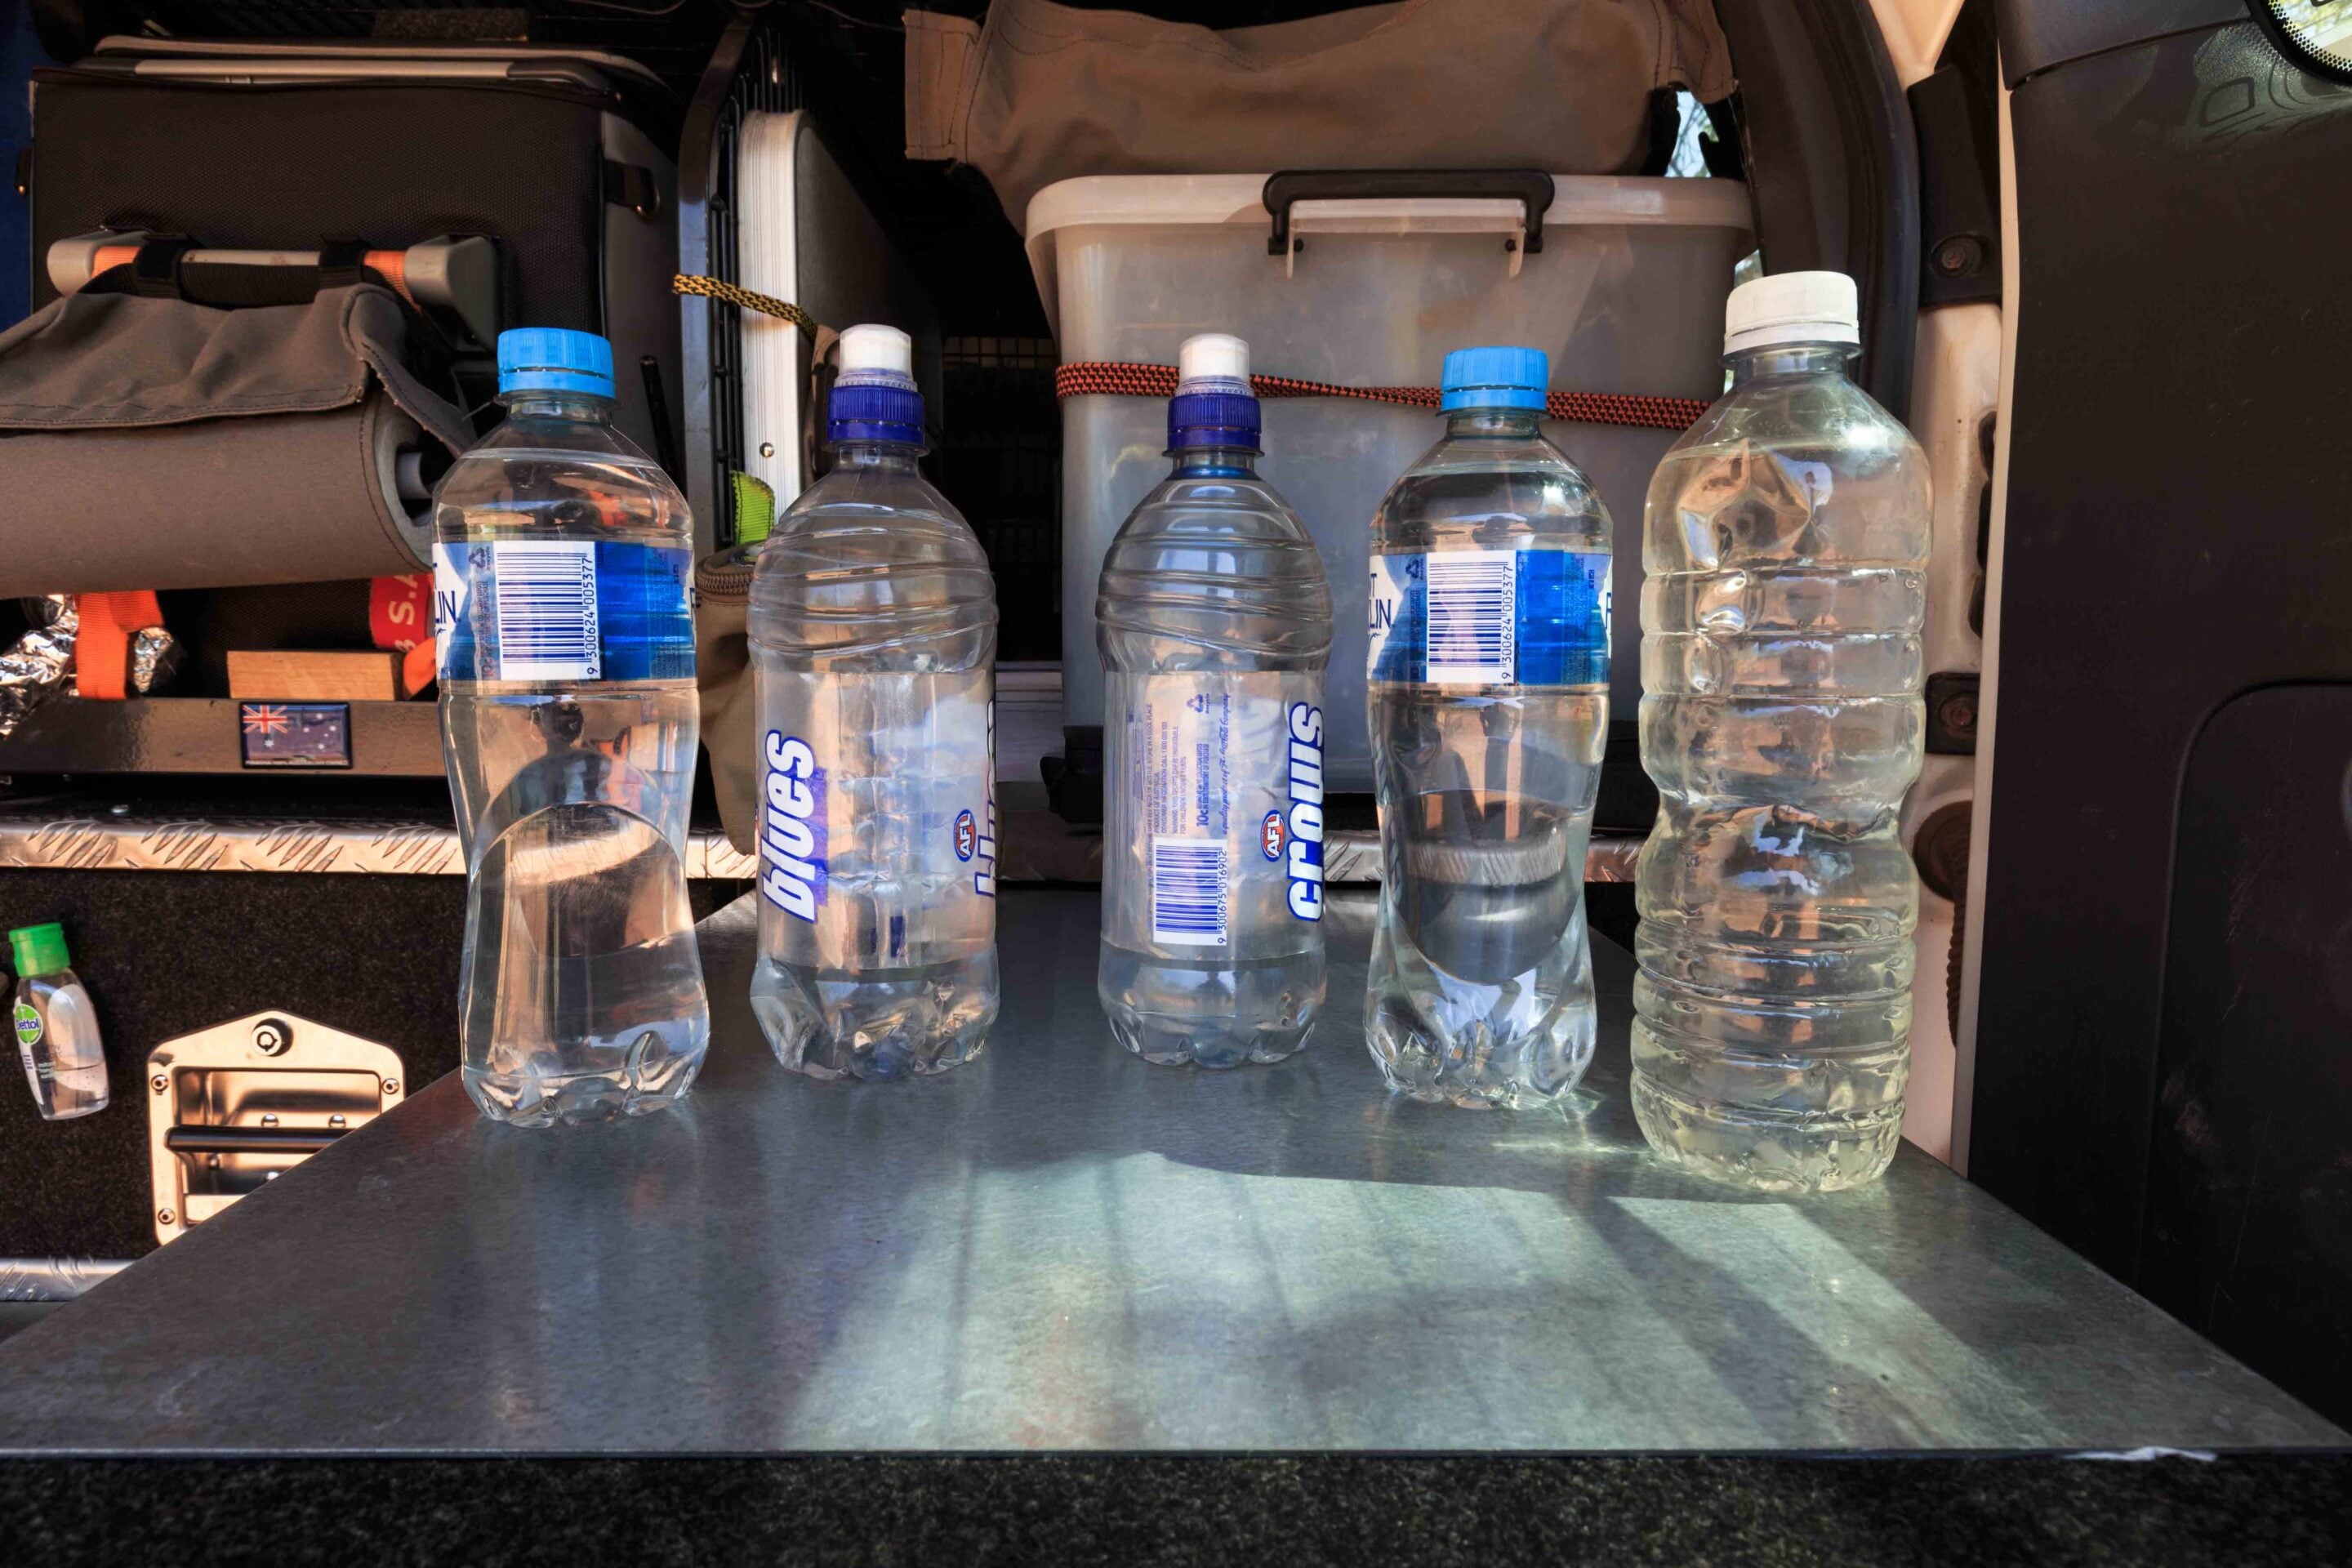
4. Water
If there is one item that defines survival in the desert, it is water. You can travel for weeks with minimal food. You can manage with limited comfort. But without water, everything stops.
The human body is made up of about 60 per cent water. Every cell, every organ and every system relies on it. Water regulates body temperature, keeps joints moving and helps flush toxins from the body. Without it, the effects of dehydration begin quickly and escalate fast.
In cool, shaded conditions a person might survive close to a week without water. In the heat of the desert that time frame shrinks dramatically. Three or four days can be enough for dehydration to become life-threatening. In extreme temperatures, even less.
An adult needs at least 4L of water per day just to stay alive in hot conditions. That is not for comfort or luxury. That is simply to keep the body functioning. In severe heat, a person can lose up to 1.5L of fluid per hour through sweating alone. If that fluid is not replaced, the risk of heat exhaustion and heatstroke rises quickly.
For desert travel the rule is simple. Carry more water than you think you will need – then carry some more. Plan for breakdowns, delays and detours. Plan for the day when the track is slower than expected and the heat is higher than forecast.
How you store your water is just as important as how much you carry. Relying on a single tank or container is a risk. A cracked tank or leaking fitting can cost you everything. Spread your water across multiple containers so that one failure does not leave you stranded.
Water is not just for drinking. It is for cooking, washing wounds, cleaning eyes full of dust and keeping yourself functioning when conditions are tough. In remote desert country, water is not a convenience – it is life itself.
Every desert traveller should treat water with the respect it deserves. Because when everything else fades away, water is what keeps you going.
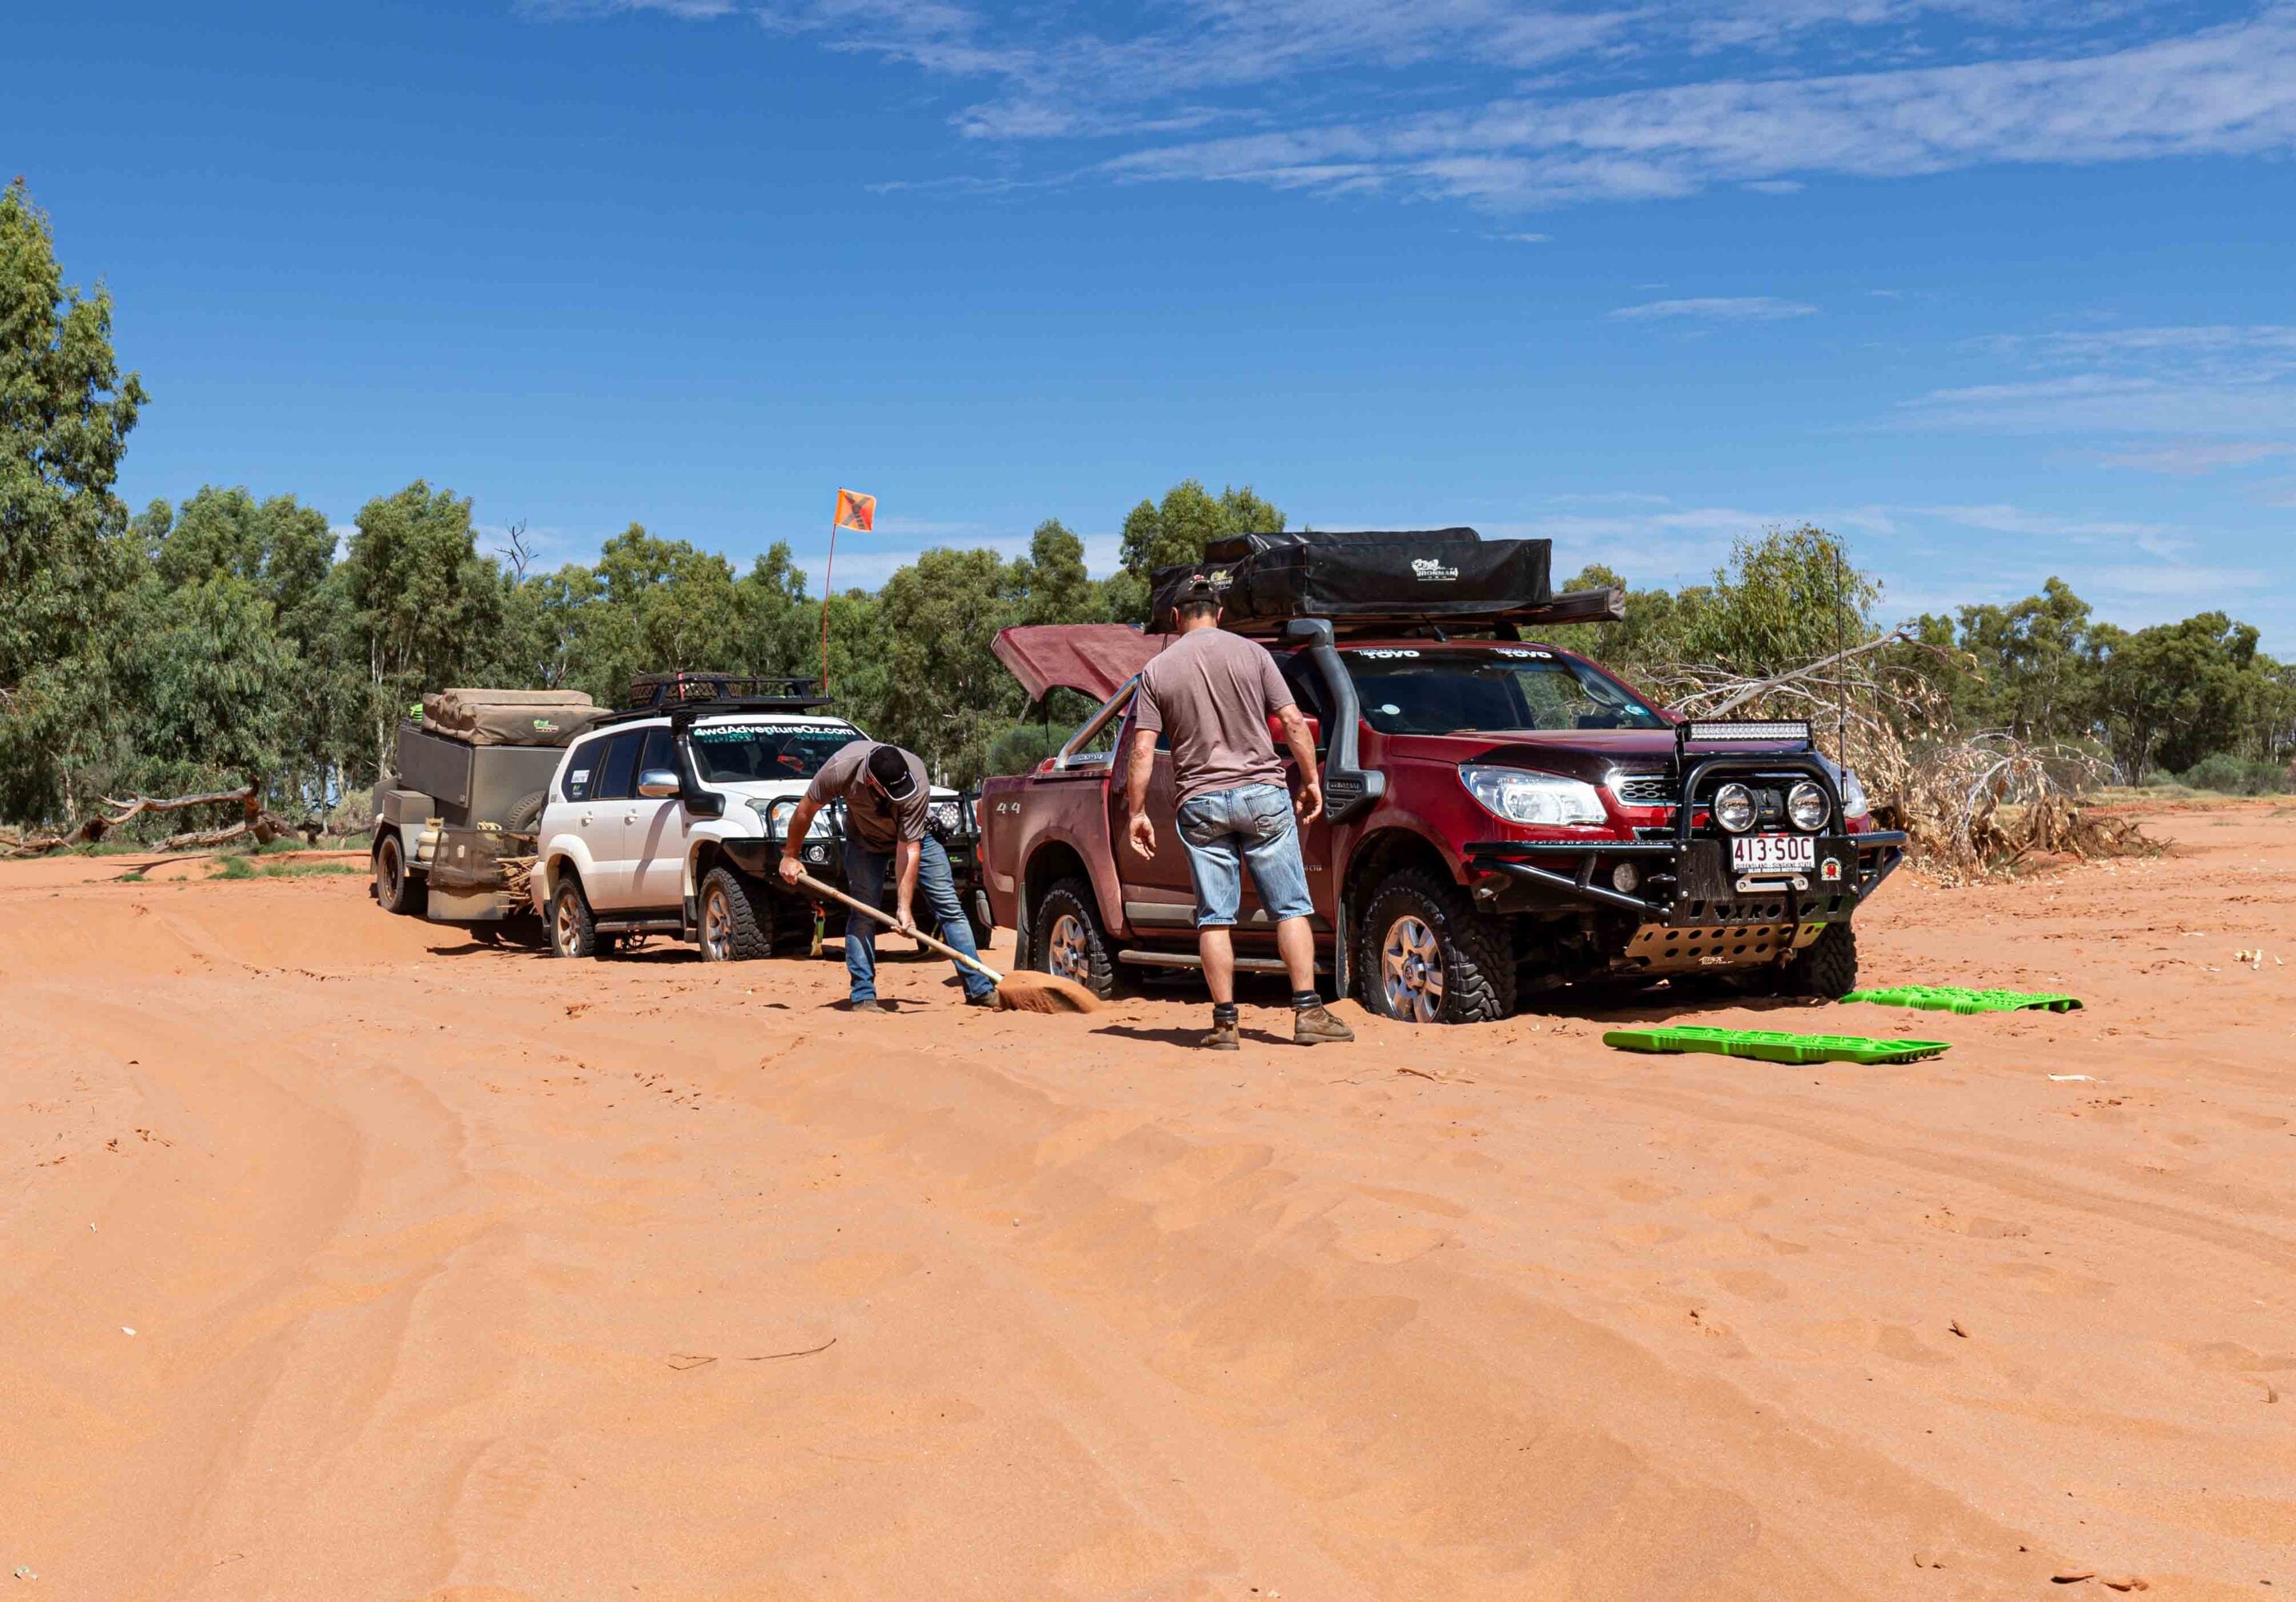
5. Recovery gear
Getting bogged in the desert is part of the experience.
No matter how skilled you are or how well prepared your vehicle might be, soft sand and steep dunes have a way of catching everyone out eventually. What matters is not whether you get stuck, but how you deal with it when you do.
Recovery in desert country is not about rushing – it is about thinking clearly and working methodically. The best recoveries are often the calmest ones. When you feel frustration creeping in, that is the time to stop, boil the billy and take a breath. A few minutes of clear thinking can prevent hours of hard labour or expensive damage.
Every desert touring vehicle should carry a basic recovery kit. At a minimum, this includes a long-handled shovel, a quality set of recovery tracks, rated shackles, a kinetic rope and properly rated recovery points on the vehicle. These items will handle the vast majority of situations you are likely to encounter.
A shovel is often the most powerful recovery tool you own. Clearing sand from in front of tyres and diffs can turn an impossible situation into a simple drive-out. Recovery tracks add traction where tyres struggle, especially on soft dune faces.
Rated recovery points are critical. Never attach a strap or winch line to anything that is not designed for the load. A failed recovery point can become a deadly projectile. Safety must always come first.
For those travelling solo or tackling more challenging routes, a winch adds another layer of security. In the desert, winching is not always straightforward due to the lack of solid anchor points. This is where a snatch block, a static extension rope or even a sand anchor can make all the difference.
But owning recovery gear is only half the story. Knowing how to use it properly is what really counts. Take the time to learn correct techniques and attend a recovery course if you can. Practise in controlled environments before you need those skills in the middle of nowhere.
In remote travel, self-reliance is everything. The better prepared you are, the more confident you become. And when you are confident, you can relax and truly enjoy the adventure rather than worry about what might go wrong.
Extra advice
Desert travel strips things back to the basics.
Out there the distractions fade away, and what remains is you, your 4×4 and the country stretching to the horizon. It is one of the most honest ways to travel Australia, but it also demands respect – respect for the environment, for the distances involved and for the reality that help is never close.
The gear you carry is not about fear; it is about freedom. Freedom to explore further, to take the long way around and to camp where the silence is louder than the engine ever was. When you know you are prepared, you travel with confidence rather than caution. You enjoy the moments instead of worrying about what might go wrong.
A sand flag, a UHF, proper navigation, enough water and the right recovery gear are not glamorous additions to your build. They will never draw a crowd at the pub, but they are the difference between a trip that stays in your memory for all the right reasons and one you would rather forget.
The desert will always be bigger than any of us, and that is part of its magic. Travel it well, travel it prepared and it will reward you with experiences that no highway ever could.
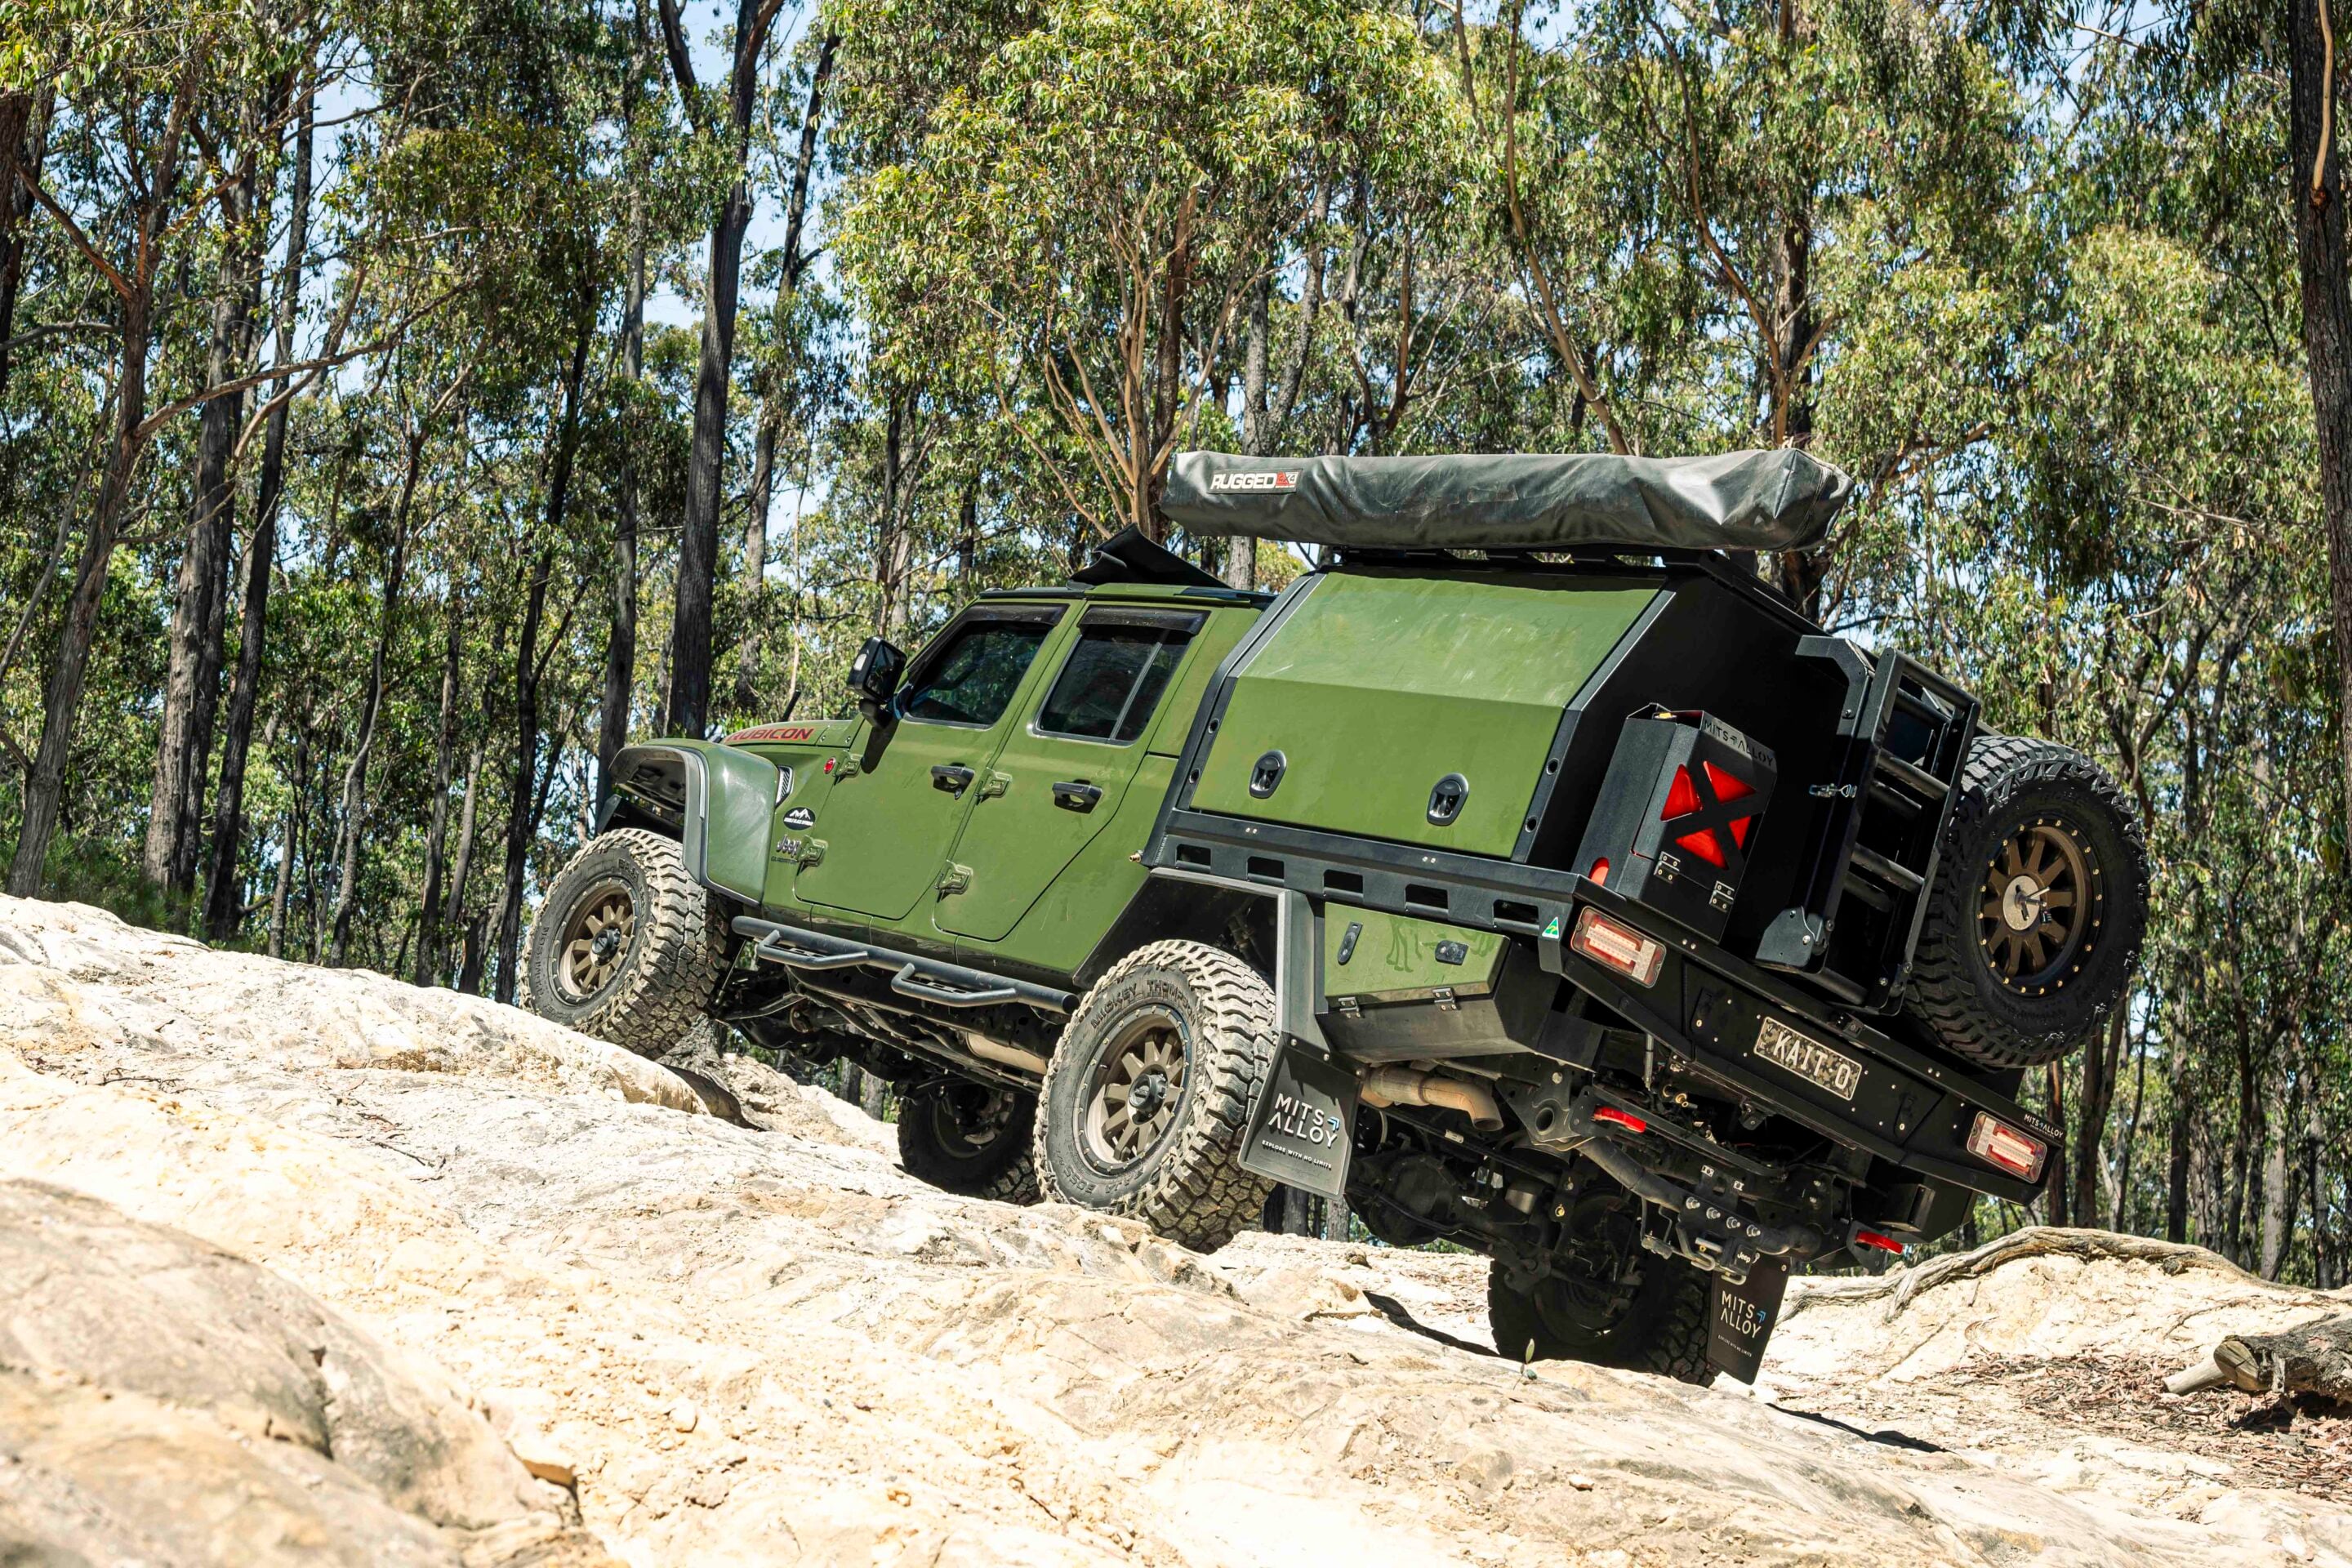
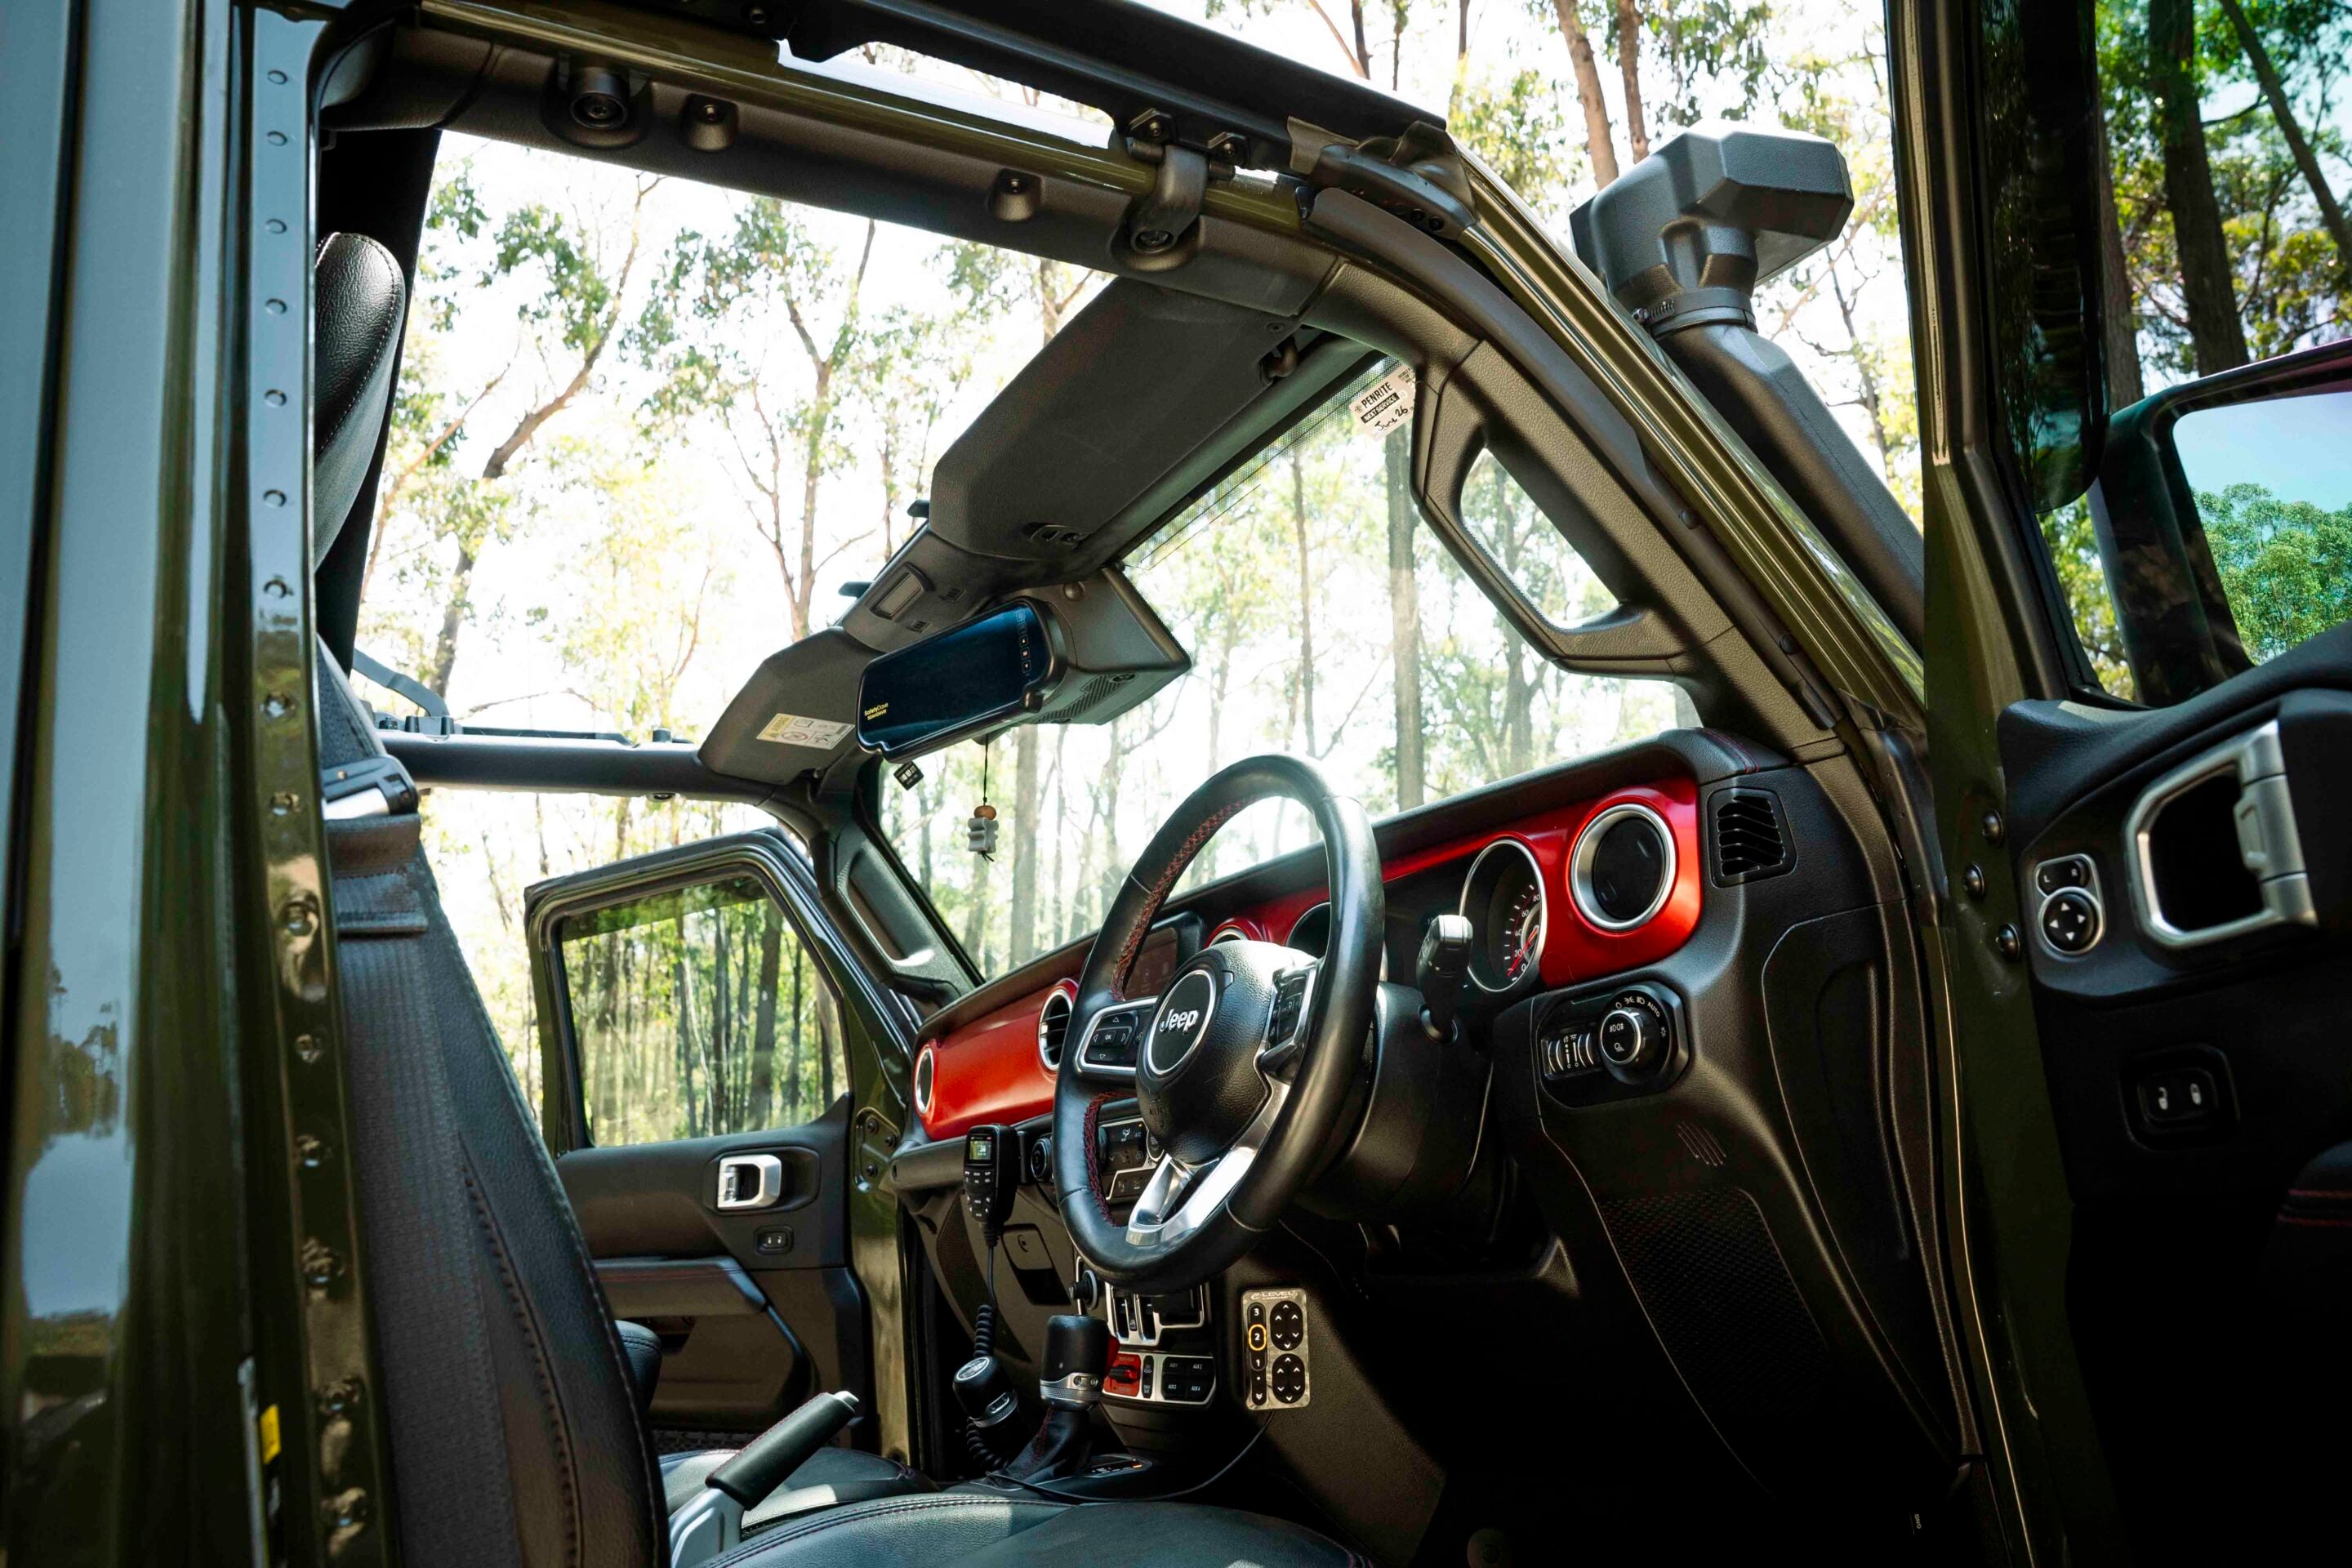
The Jeep Gladiator has been a hit in the USA but, unfortunately, it hasn’t enjoyed the same following here in Australia.
That doesn’t mean the Gladiator isn’t a good thing – quite the opposite, in fact – and Jeep’s ute makes an excellent off-road touring vehicle. And when we say off-road, the Rubicon is built for serious challenges straight out of Toledo. That’s not to say you can’t improve on what Jeep created, and that’s exactly what Vijay has done with this Gladiator Rubicon. At its core, the Gladiator is a long-wheelbase Jeep Wrangler ute – or pick-up in Jeep-speak.
“I’m a fan of ‘beast-looking’ trucks, and I felt the Jeep Gladiator delivers that look, along with the mechanicals to make it a great 4×4 both on- and off-road,” Vijay says.
Like the Wrangler, the Gladiator is now only available in top-of-the-line Rubicon specification in Australia, and that means heavy-duty live axles with locking diffs front and rear, long-travel suspension, a disconnecting front swaybar to aid articulation, proper rock rails, and ultra-low gearing for superior off-road crawling.
Unfortunately, Australian-delivered Jeeps get smaller tyres than they do in the USA, where 35s are standard on a Rubicon and some models even come off the showroom floor wearing 37-inch off-road rubber. Vijay Kumar didn’t let the smaller tyre size dissuade him from purchasing a new Gladiator Rubicon, as he had bigger plans for his Jeep.
AccuAir suspension transforms capability
With the help of Bill Barbas from Jeep specialist workshop Double Black Offroad, Vijay has transformed his Gladiator into an unstoppable off-road tourer. We featured Bill’s own Gladiator a few years ago, and it’s the lessons learnt on that vehicle – and other Jeeps – that he now applies when building customer rigs.
A great example of this is the AccuAir suspension system fitted to both Gladiators. This system replaces the standard coil springs with air bellows at each corner. Height sensors work with the onboard air system, allowing the Jeep to be dropped low for easy loading or raised up to five inches above stock to clear obstacles on the track.
The compressor and air tank are mounted under the chassis, and the system is self-levelling when parked on uneven ground or when the load in the canopy changes. It’s a setup that retains excellent wheel travel while adding the versatility of adjustable ride height. Bill also fitted Teraflex HD ball joints and a Synergy draglink to optimise the suspension package.
The AccuAir suspension is a Mopar-approved accessory in the USA, where it can be fitted to a new Jeep at the dealership. Here in Australia, Double Black Offroad is the place to source and fit an AccuAir kit. The state-of-the-art suspension setup works superbly to keep the 34-inch Mickey Thompson Baja Boss tyres planted. Extra clearance at the front comes courtesy of a set of Double Black Offroad front fender extensions.

Touring-ready canopy and off-grid setup
Jeep Wranglers might be great off-road rigs, but they are limited as touring 4x4s due to a lack of interior and cargo space.
The Gladiator overcomes this problem, but you’re still left with an open and unsecured ute bed at the rear. The best fix – as many Australian four-wheel drivers have discovered – is to ditch the tub and replace it with a service body-style canopy.
“I chose to fit the canopy to accommodate our camping needs and our two fur babies,” explained Vijay.
The Mits Alloy setup on the back of the Gladiator features an aluminium canopy mounted to a flatbed tray, so it can be removed if Vijay wants to use the Jeep as a ute. Inside, the canopy houses a Dometic upright fridge, a slide-out pantry and kitchen, soundbar speakers, Redarc RedVision power management, an auxiliary battery, an inverter, and plenty of storage.
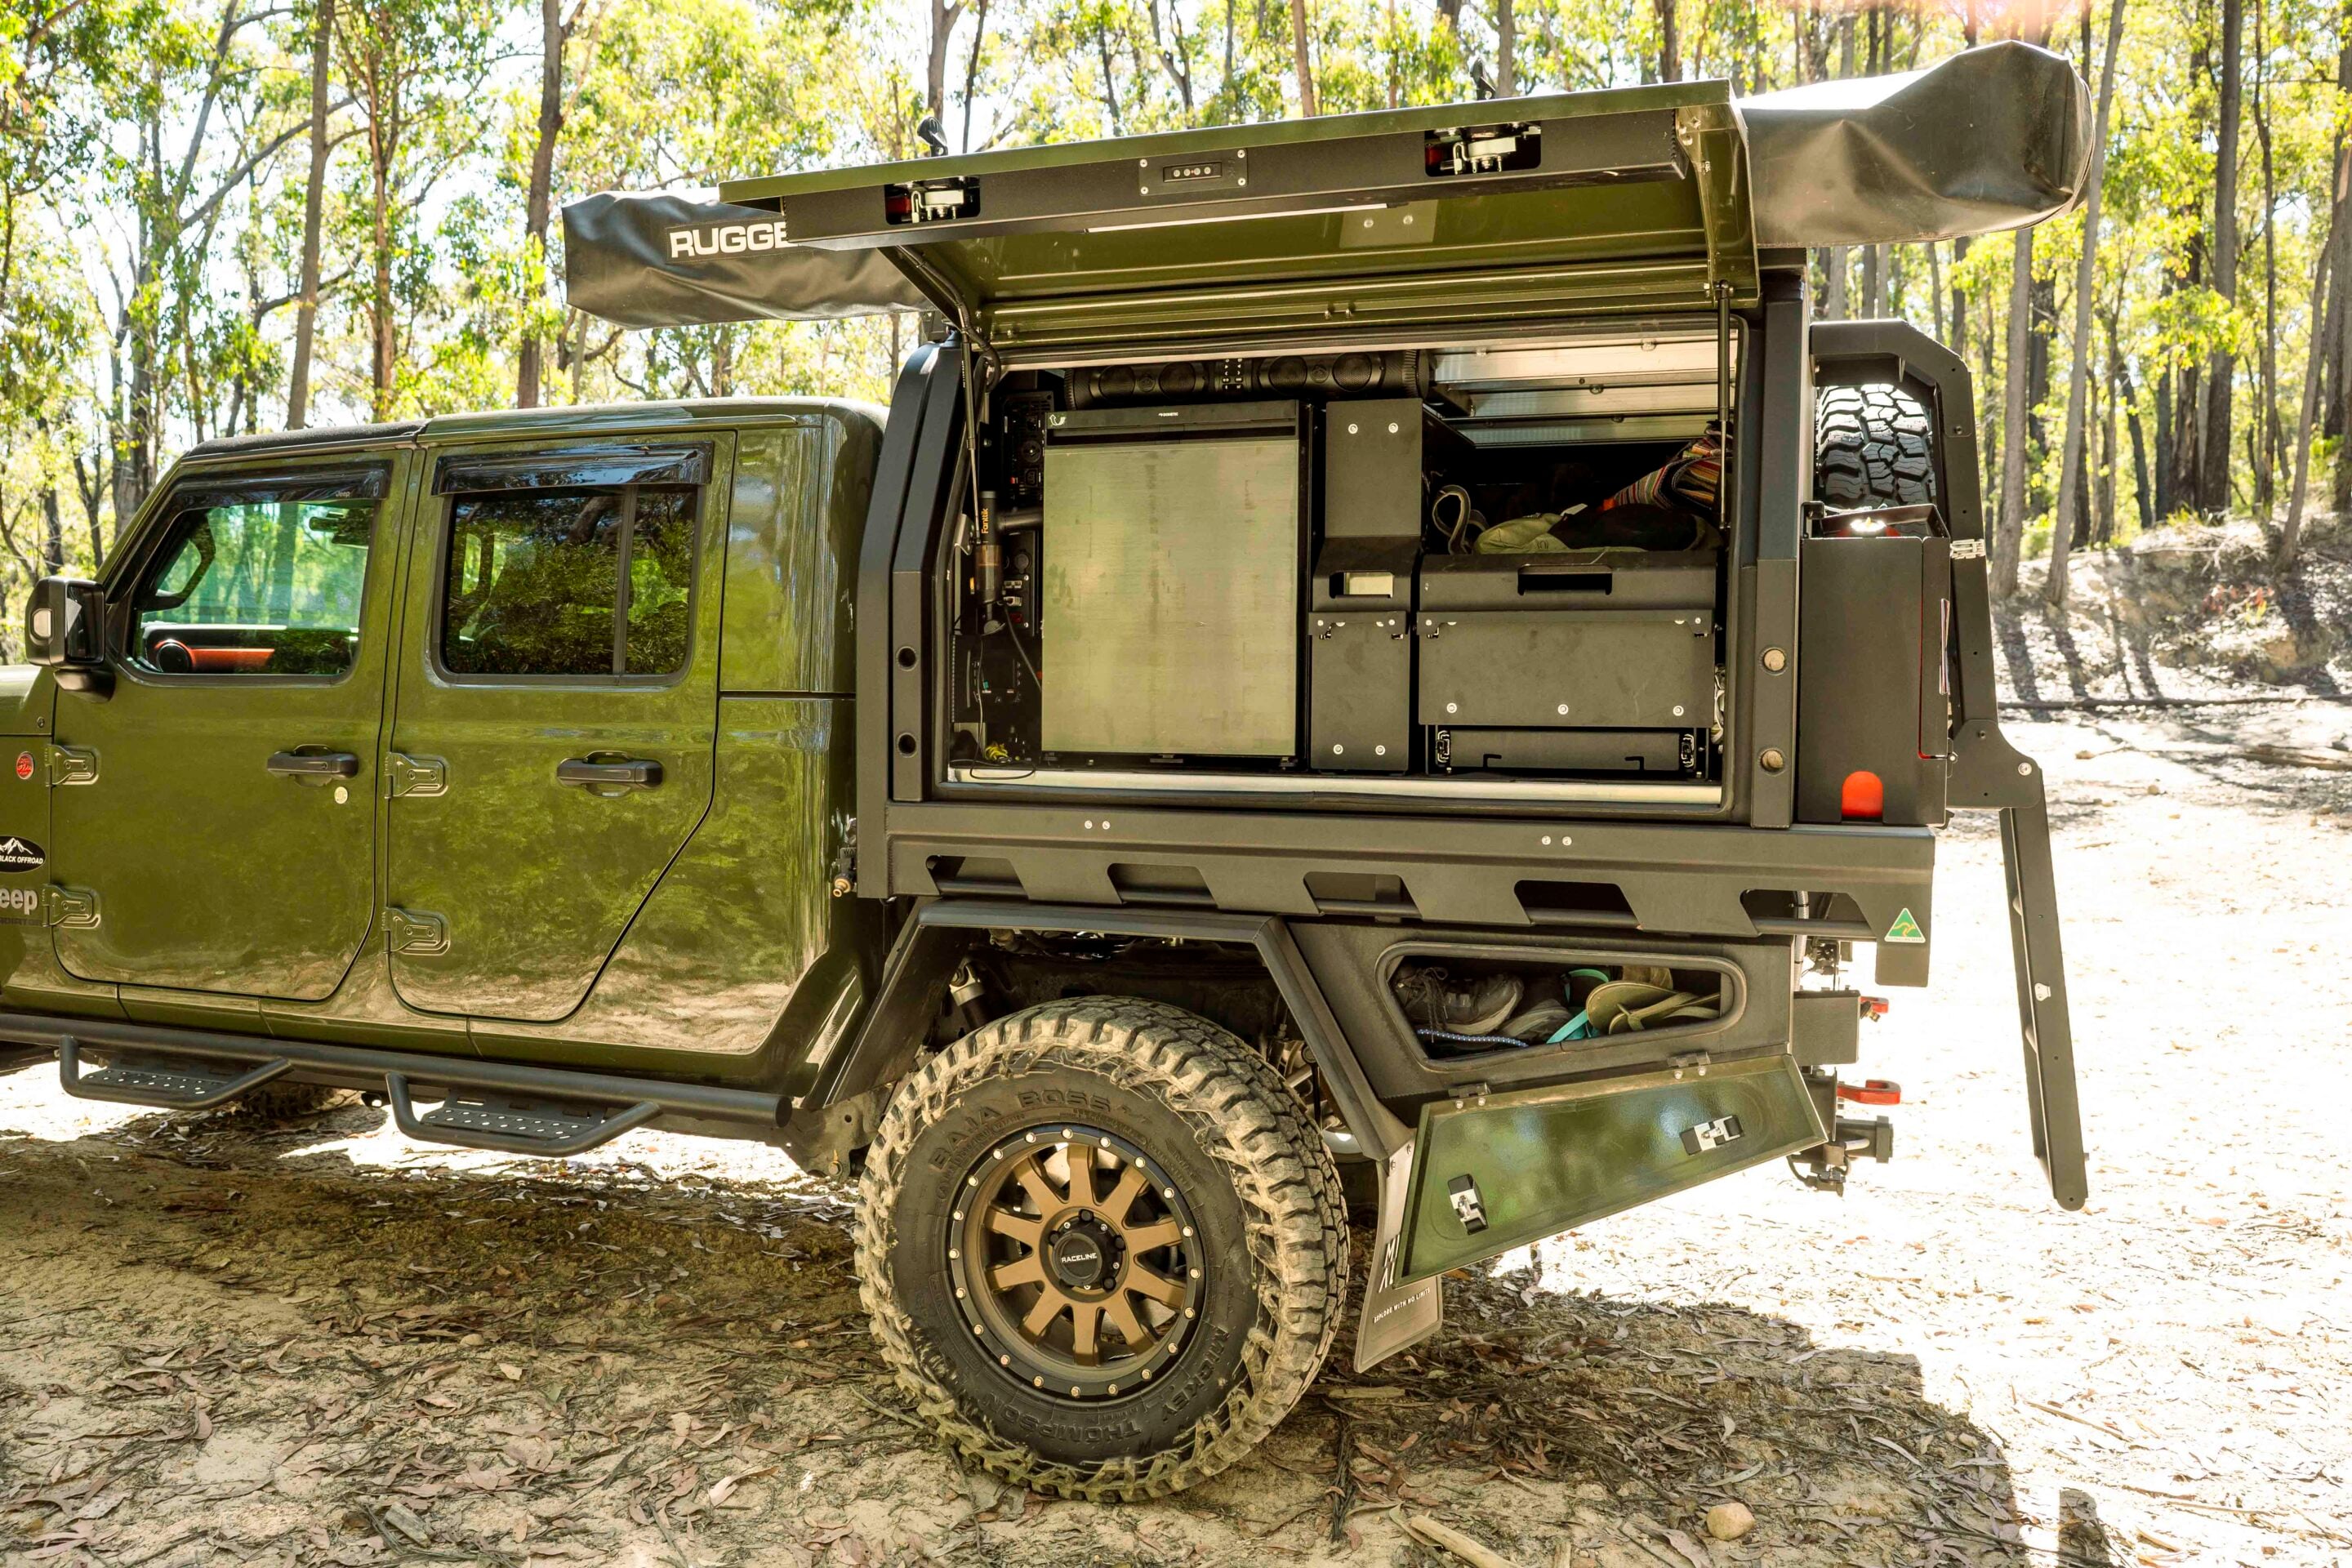
There’s more storage under the tray in tapered toolboxes, while up top you’ll find a 180-degree awning and solar panels. A bank of KC HiLiTES lights is mounted atop the headboard to illuminate the tracks at night. The Mits Alloy canopy has been set up to support all of Vijay and his family’s needs on camping trips.
“It makes more sense to have a canopy with proper storage so things are convenient at all times,” Vijay said.
Other gear on the Jeep includes an Ironman ‘Raid’ front bumper with a Warn Evo 12 winch tucked inside for recovery duties. The intake snorkel comes from Rugged Ridge, while UHF communications are handled by GME.
The Gladiator build is comprehensive, transforming the Jeep pick-up into an all-in-one off-grid touring 4×4 with exceptional off-road capability, and Vijay couldn’t be happier. It’s still a fresh build, and Vijay says he’s enjoying exploring its capabilities and refining the setup as he heads for the hills in the Victorian High Country and other locations around Melbourne.
List of mods, upgrades and accessories
- AccuAir air suspension system (air bellows replacing coil springs)
- Onboard air system with compressor and air tank (AccuAir setup)
- Teraflex HD ball joints
- Synergy draglink
- 34-inch Mickey Thompson Baja Boss tyres
- Double Black Offroad front fender extensions
- Mits Alloy flatbed tray conversion
- Mits Alloy aluminium service body-style canopy
- Dometic upright fridge
- Slide-out pantry and kitchen setup (canopy fit-out)
- Integrated soundbar speakers (canopy interior)
- Redarc RedVision power management system
- Auxiliary battery system
- Under-tray tapered toolboxes
- 180-degree awning
- Roof-mounted solar panels
- KC HiLiTES lighting (mounted on headboard)
- Ironman ‘Raid’ front bumper
- Warn Evo 12 winch (integrated into bumper)
- Rugged Ridge snorkel
- GME UHF radio communications system
There’s no handbook handed out when you buy your first 4×4.
No dealer throws in a pamphlet explaining convoy etiquette, track courtesy or the little things experienced drivers just expect everyone to know. Instead, most people learn the hard way – usually after annoying someone on a track, getting called out over UHF, or realising they’ve made a rookie mistake everyone else spotted immediately.
Like most tight-knit communities, Aussie 4WDing has its own unspoken code. It’s not about gatekeeping or acting like there’s only one right way to do things. It’s about respect – for other drivers, for the tracks we all use, and for the bush itself.
Whether you’re new to four-wheel driving or have been hitting dirt for years, these are the unwritten rules every 4×4 driver should know.
1. Wave to oncoming drivers
It sounds simple, but the classic two-finger wave is still one of the strongest traditions in Australian 4WDing.
Whether it’s a finger lift off the steering wheel, a quick nod or a proper hand-up through the windscreen, acknowledging another driver is just part of the culture. It’s not compulsory, but it’s one of those small things that keeps the community feel alive out on remote tracks. Ignore everyone and you’ll stand out – and not in a good way.
2. Air down before the track forces you to
Few things scream “first trip out” like hitting a rough track at highway pressures.
Lowering tyre pressures improves traction, smooths out corrugations and reduces the punishment your suspension cops over rough terrain. It also helps protect the track by letting the tyre flex rather than dig in. If everyone else is pulling over to air down and you’re still rolling along untouched, you’ve probably missed a key step.
3. Leave gates exactly how you found them
Open stays open. Closed stays closed.
It doesn’t matter what you think is more convenient or whether it looks like no livestock are around. If someone before you left it a certain way, there’s usually a reason. Get this wrong on private land and you’ll quickly find out how important it is to respect access agreements.
4. Don’t sit up someone’s backside on obstacles
Watching another vehicle tackle a climb or crossing is useful. Sitting right behind them while they’re trying to pick a line is not.
Drivers need space to reverse, reposition or recover if things go wrong. Crowding them adds pressure and increases risk for everyone involved. Give people room to work the obstacle, not a rearview mirror full of your bull bar.
5. Recovery gear isn’t a fashion accessory
Maxtrax on the roof, a winch on the bar and a shovel on the side look the part – but none of it matters if you don’t know how to use them.
Recovery situations are where small mistakes become big problems. If you’re carrying gear, you should know how it works before you need it in anger. Out on the tracks is not the time to be learning from scratch.
6. Keep UHF chatter useful
Convoy comms matter.
Short, clear and relevant radio calls help keep everyone safe and moving smoothly. Calling hazards, blind corners and directions is useful. Twenty minutes of unrelated noise is not. And if someone calls for quiet on the radio, there’s usually a reason.
7. Pack out everything you brought in
This one should be obvious, but it still gets ignored.
Campsites, tracks and rest stops are not rubbish bins. Every bit of waste left behind increases the chances of access restrictions down the line. That includes recovery holes, broken gear and the “I’ll pick it up later” mindset.
8. Don’t let your build write cheques your skills can’t cash
Big tyres and expensive mods don’t automatically equal capability.
Some of the most experienced drivers are in near-stock rigs, while heavily modified vehicles sit stuck on the sidelines. Skill, judgement and patience matter more than spec sheets. Knowing your limits is part of being a good driver.
9. Help others when you can
One of the best parts of 4WDing in Australia is how often people stop to help.
If someone’s stuck or broken down, checking in is just what you do. You don’t need to become everyone’s recovery crew, but a bit of help or advice goes a long way. Chances are, you’ll need it one day too.
10. Track closed means track closed
Not “closed unless you think you can make it”. Not “closed unless your setup is capable”.
Closed means closed. Track closures protect people, the environment and future access. Ignoring them doesn’t just risk fines – it puts long-term access at risk for everyone.
Special mentions
- Don’t stop in blind spots or narrow sections unless you absolutely have to
- If you’re unsure, stop and walk the obstacle first
- Be self-sufficient – don’t rely on others to get you out
- Don’t spin tyres unnecessarily just to “push through it”
- Keep convoy spacing consistent – not tailgating or strung out miles apart
- When turning in a convoy, wait at intersections until the vehicle behind is in sight before proceeding