
Hybridisation appears to have put petrol-fuelled combustion engines back on the menu for 4×4 vehicles.
I don’t know if that’s simply because hybrid systems are easier to adapt to petrol internal combustion engines (ICE) than diesel-fuelled ICEs, or because hybrid systems are improving efficiency to bring it closer to diesel performance. It should be noted that we will be seeing hybrid-boosted diesel-fuelled powertrains in 4×4 vehicles very soon, but so far they all operate with petrol ICEs.
When Toyota fitted its hybridised, turbocharged 3.5-litre V6 engine to the Toyota Tundra pick-up truck and the Lexus LX 700h, Toyota Australia saw the opportunity to give petrol fuel another try in the popular LandCruiser model.
Toyota discontinued the petrol V8 engine during the reign of the 200 Series due to a lack of sales, but as the brand now likes to spruik that it offers some form of electrification across all of its models, this powertrain provided the perfect opportunity to bring petrol back to LandCruiser. It must have helped the cause that the Tundra and Lexus both ride on the same TNGA-F platform as the LC300, so the transplant should have been relatively easy and cost-effective.
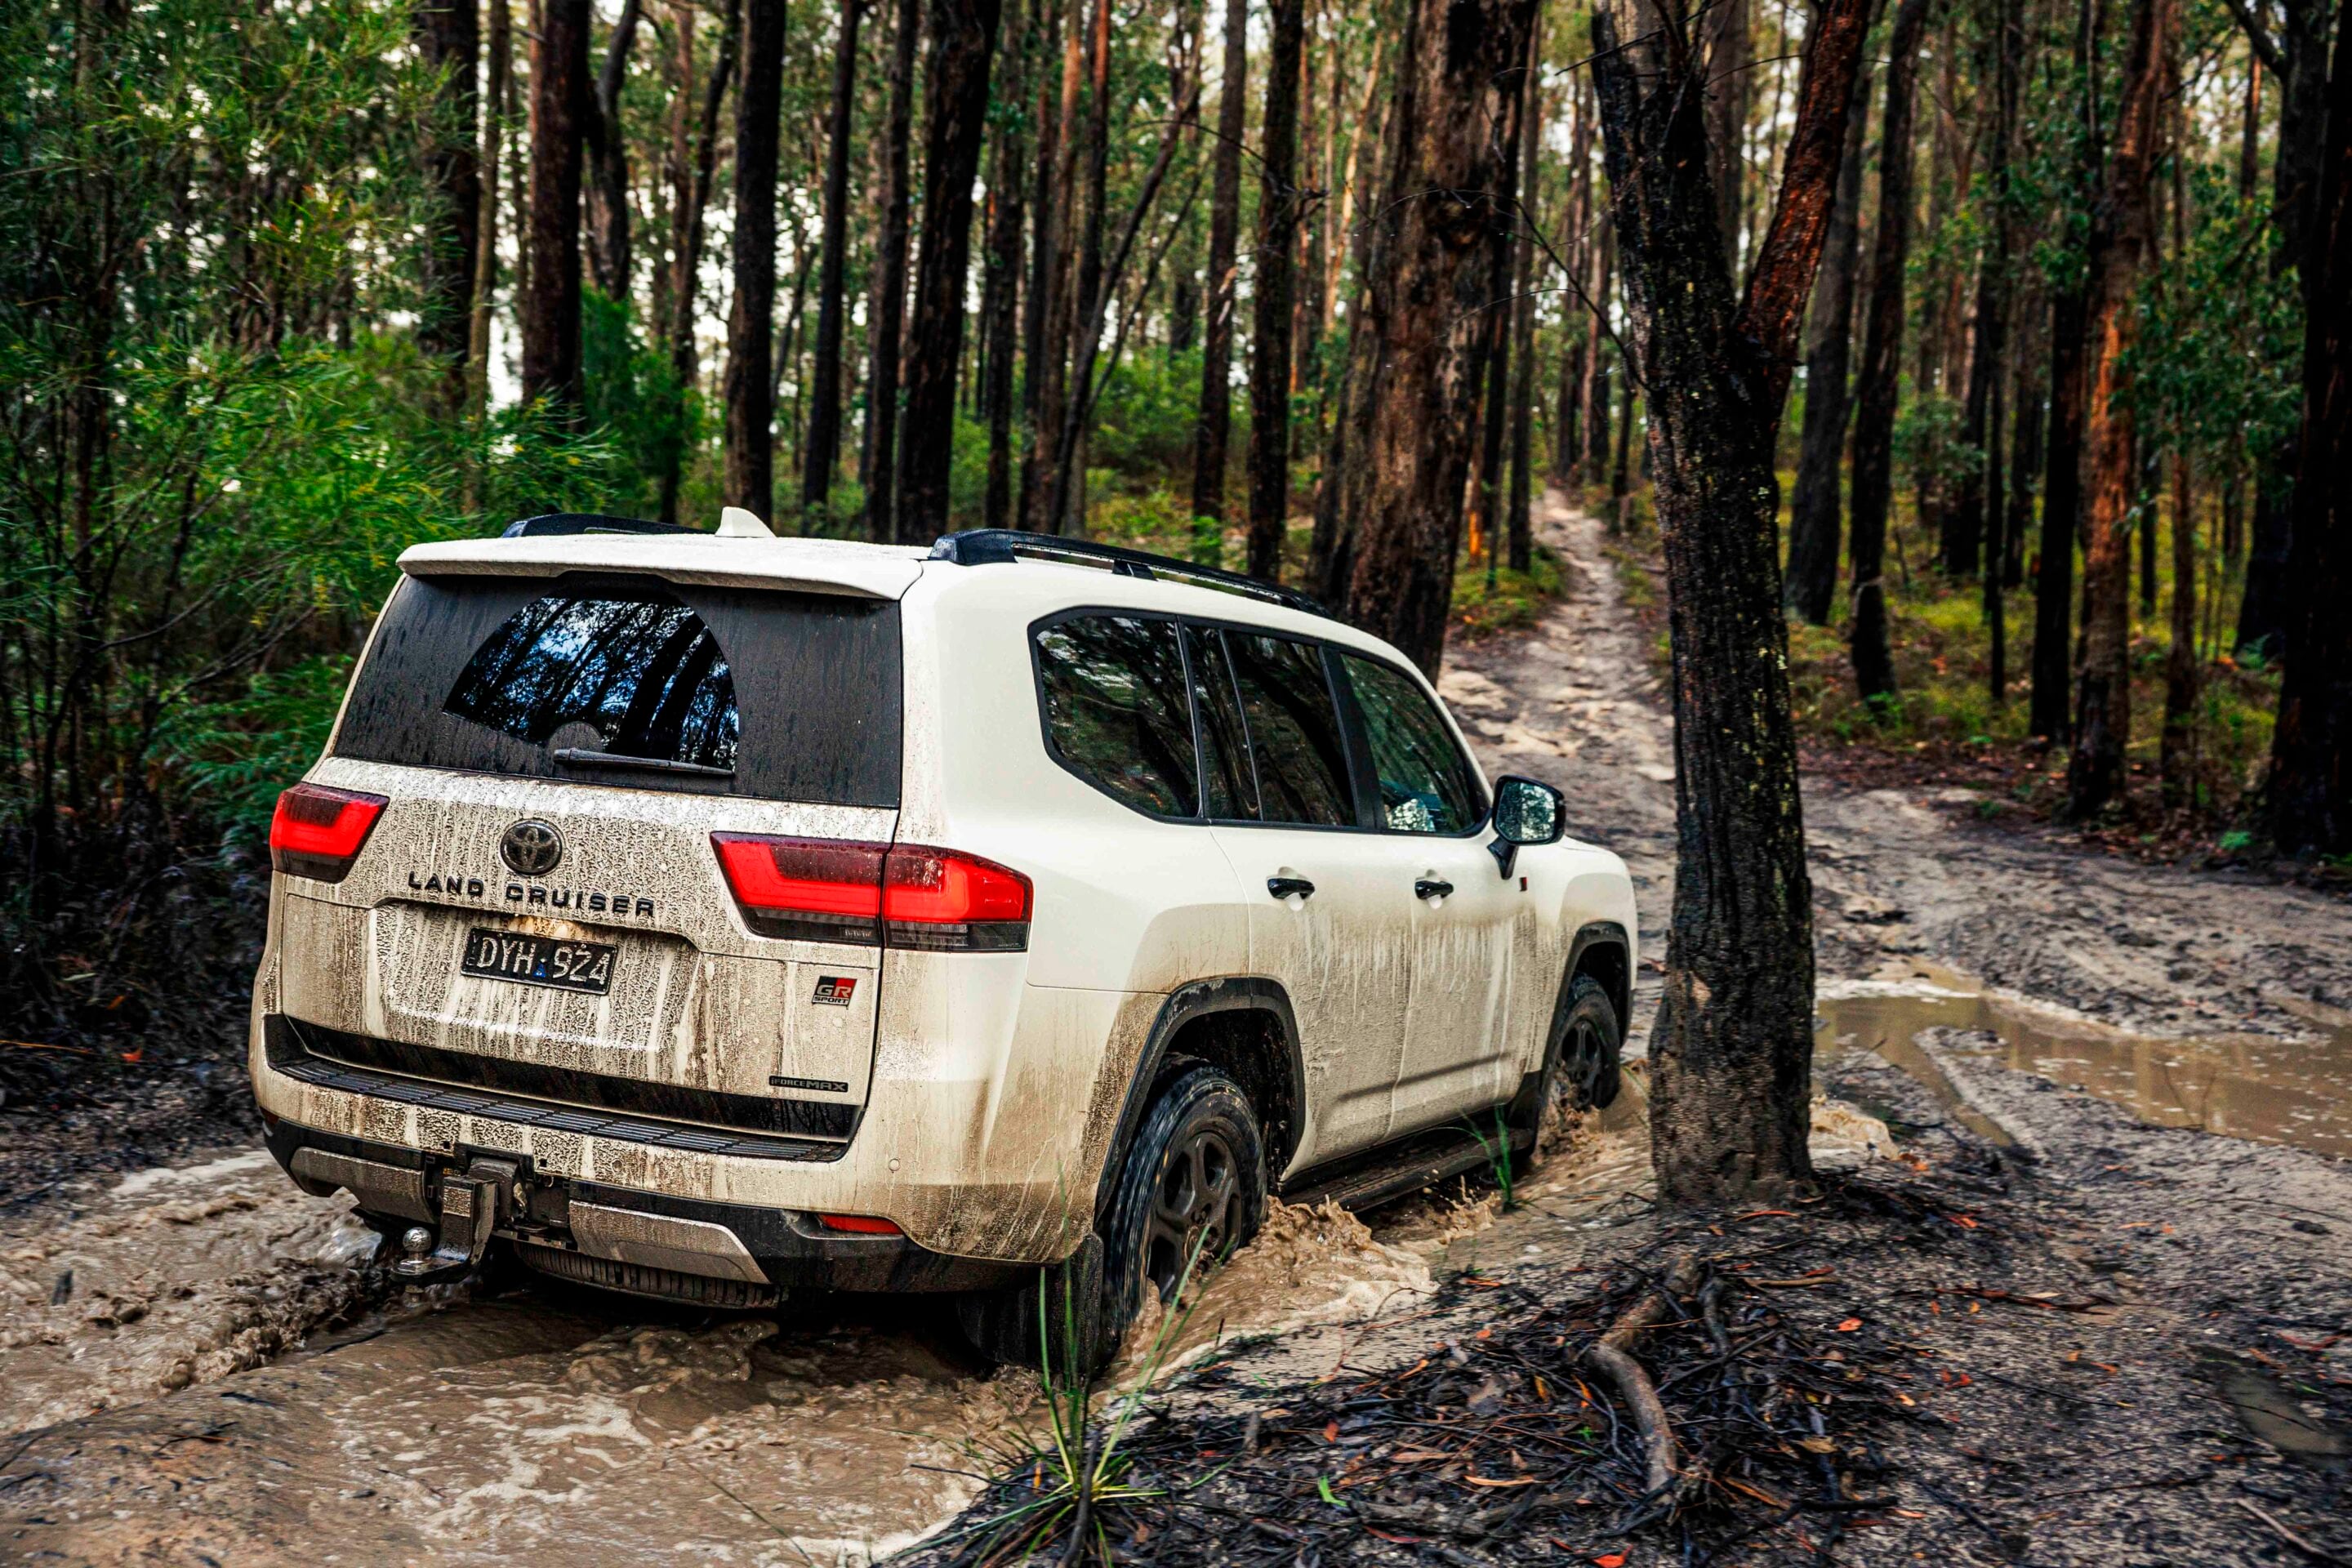
Petrol-hybrid powertrain
The twin-turbo 3.5-litre V6 single-motor hybrid system generates claimed combined outputs of 341kW and 790Nm to deliver performance to the LandCruiser.
The combination of petrol engine and hybrid power means you get the performance with relative efficiency. The electric power system uses an air-cooled 6.5Ah, 288V nickel-metal hydride (NiMH) battery that is installed in a waterproof tray beneath the rear luggage space. For this reason, the Performance Hybrid powertrain is only offered in five-seat versions of the LC300 and only in the high-end grades. The placement of the battery does raise the floor height in the cargo area a smidge, but it’s not enough to be a real negative.
Pricing
Toyota Australia is only offering the petrol-hybrid powertrain in two variants of the LC300 range: the Sahara ZX at $156,740 and the GR Sport at $155,990.
By comparison, the diesel-fuelled variants of the same two models cost $137,790 for the GR Sport and $138,790 for the Sahara ZX, so the price of the hybrid is a big step up.
After sampling the Sahara ZX Performance Hybrid at the launch earlier this year, this was our first chance to try out the drivetrain in the GR Sport on familiar Melbourne tracks.
Off-road equipment
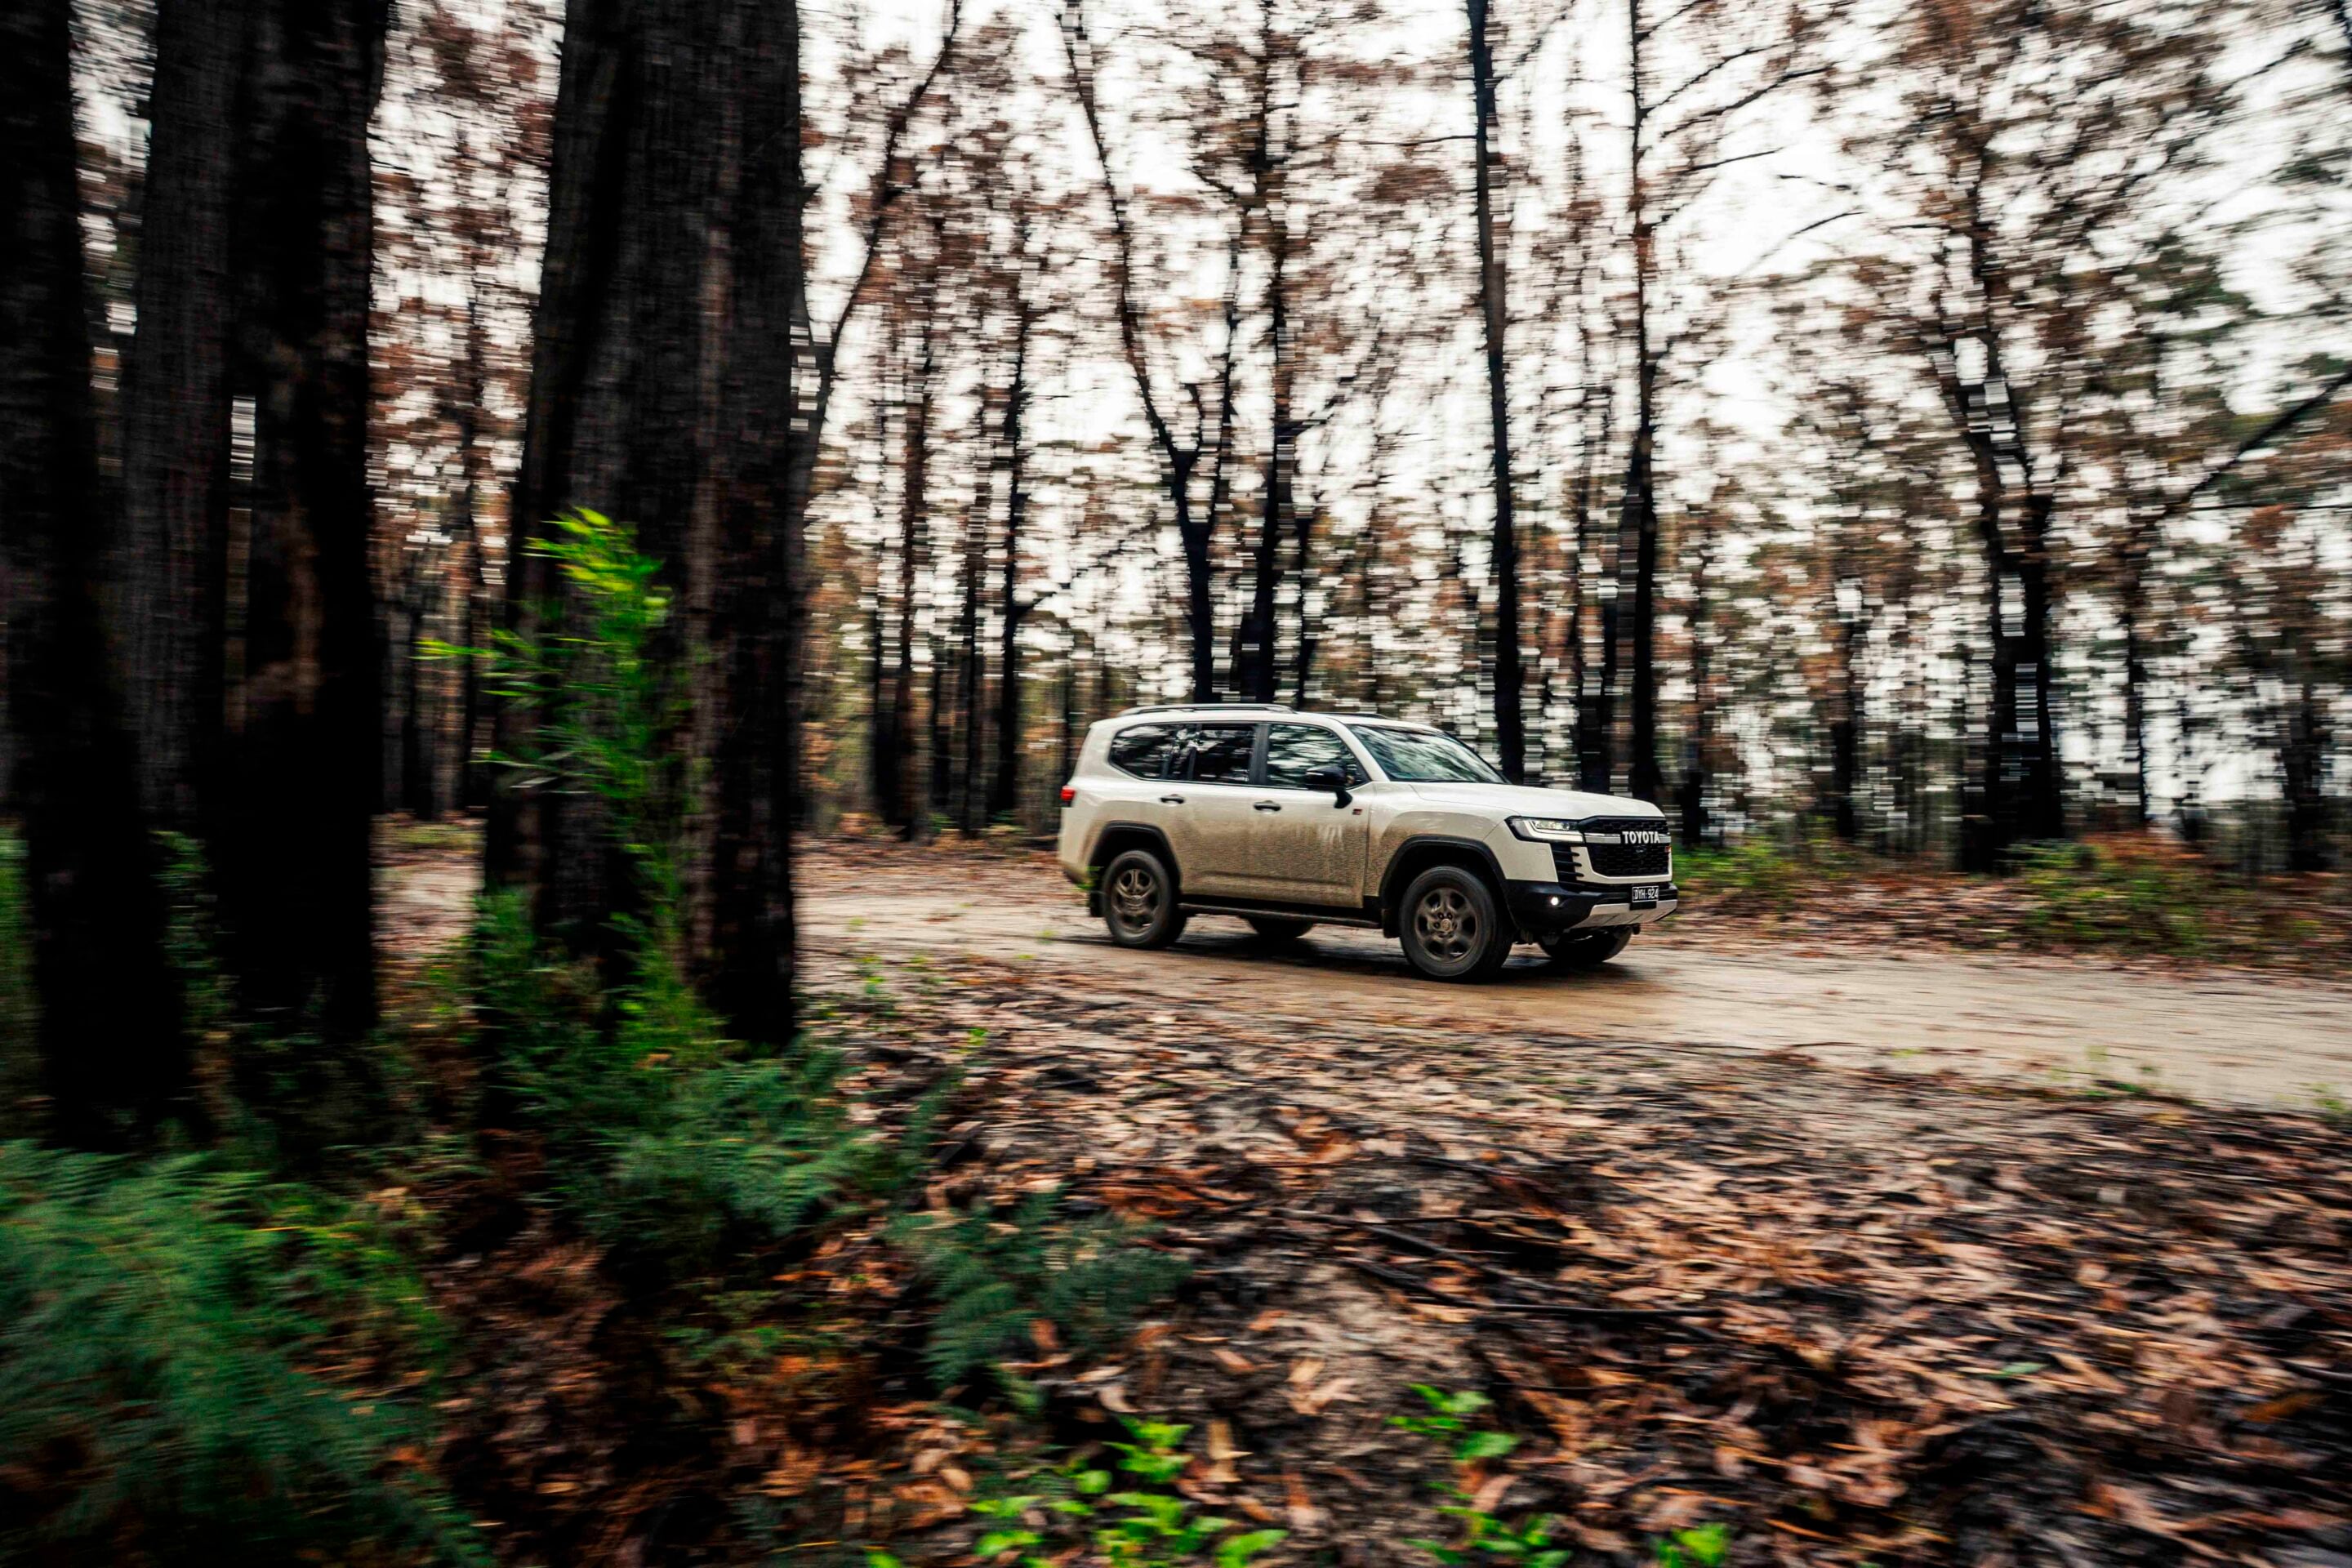
The GR Sport is the most off-road-ready model in the LC300 showroom, regardless of the fuel used.
This is thanks to front and rear locking differentials for improved traction, 18-inch tyres for more choice and a better ride, and e-KDSS suspension that adds extra wheel travel for improved traction off-road. There are also additional modes in the Multi-Terrain Select system to make the most of the hardware.
The GR Sport also gets a model-specific grille, wheels, badging and red highlights in and around the Cruiser. The Performance Hybrid Cruisers are five-seat only, while some other models in the LC300 range offer seating for seven.
Off-road performance
It’s those added extras in the GR Sport that give the driver the confidence to take on more difficult off-road terrain or unexpected obstacles.
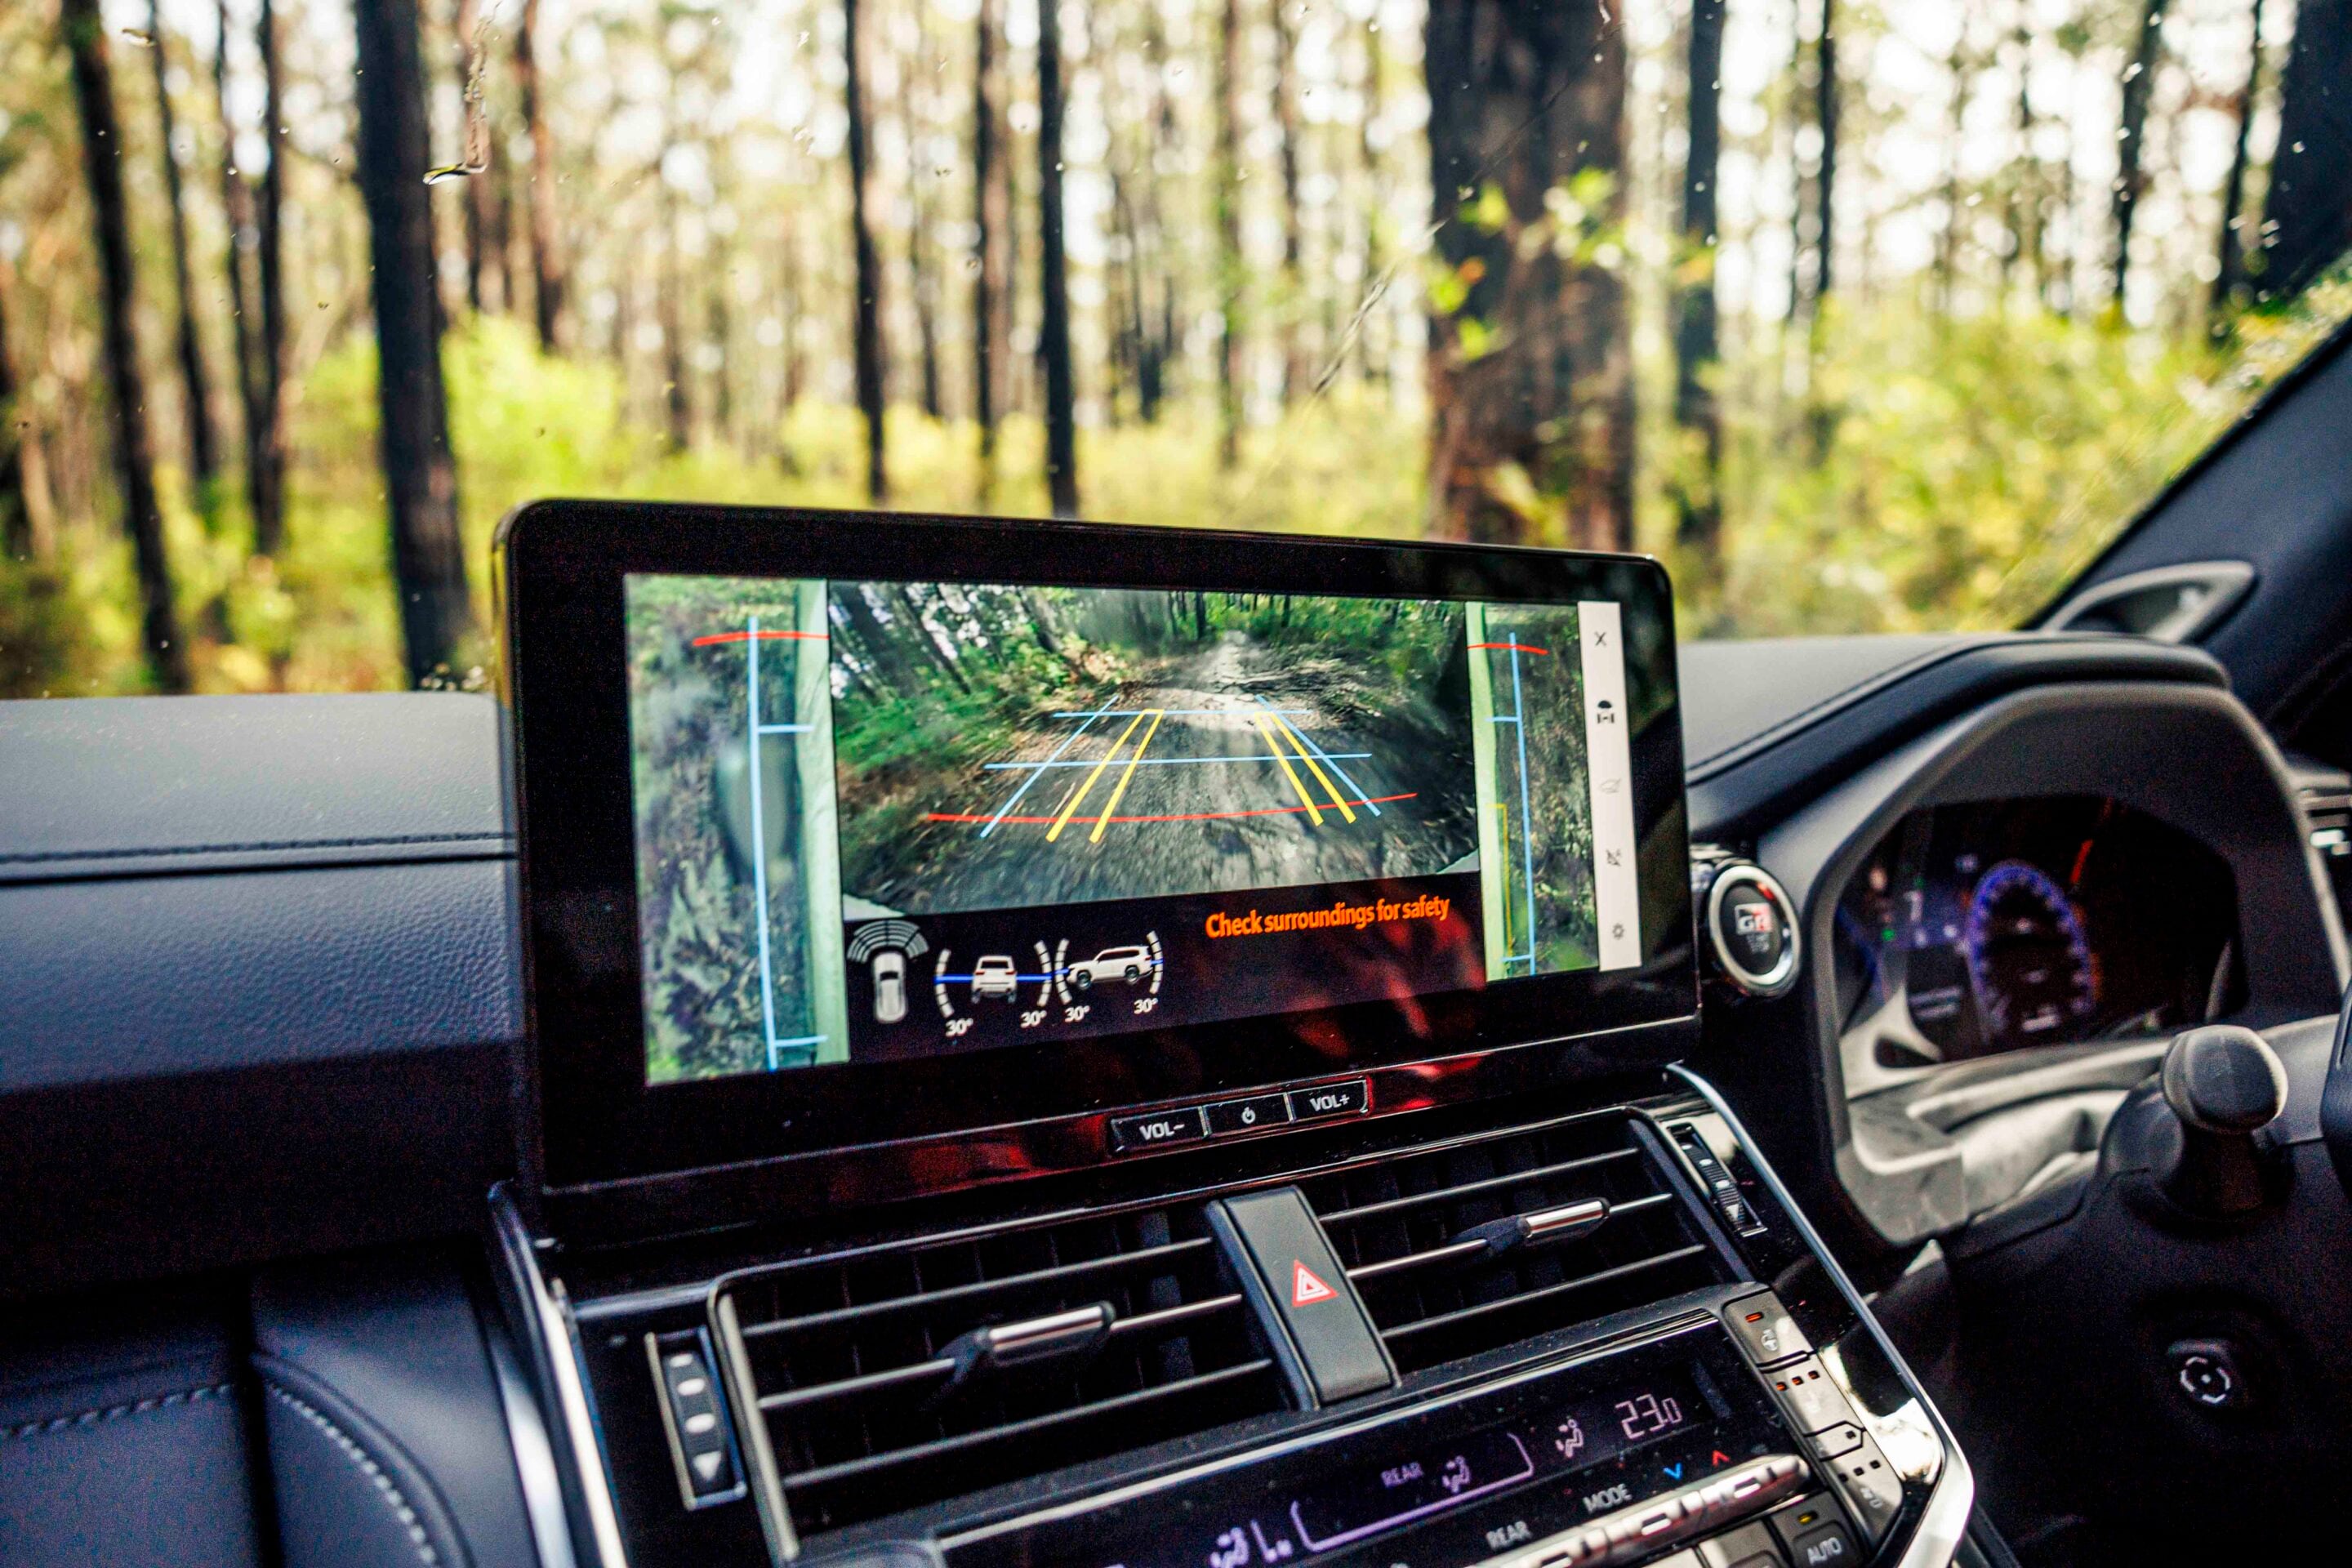
On our drive we came across a track with flooded ruts and holes, but we had a fair idea they weren’t too deep. Still, they looked boggy, so we activated the Cruiser’s full off-road armoury just to be sure: low range, front and rear diff locks engaged and Mud & Ruts selected in the MTS.
LandCruisers have always had pretty good articulation from the rear live axle, but this is enhanced by the clever e-KDSS controlling the sway bars, allowing the heavy LC300 to crawl through the ruts while the locked diffs limit wheelspin in the boggy conditions.
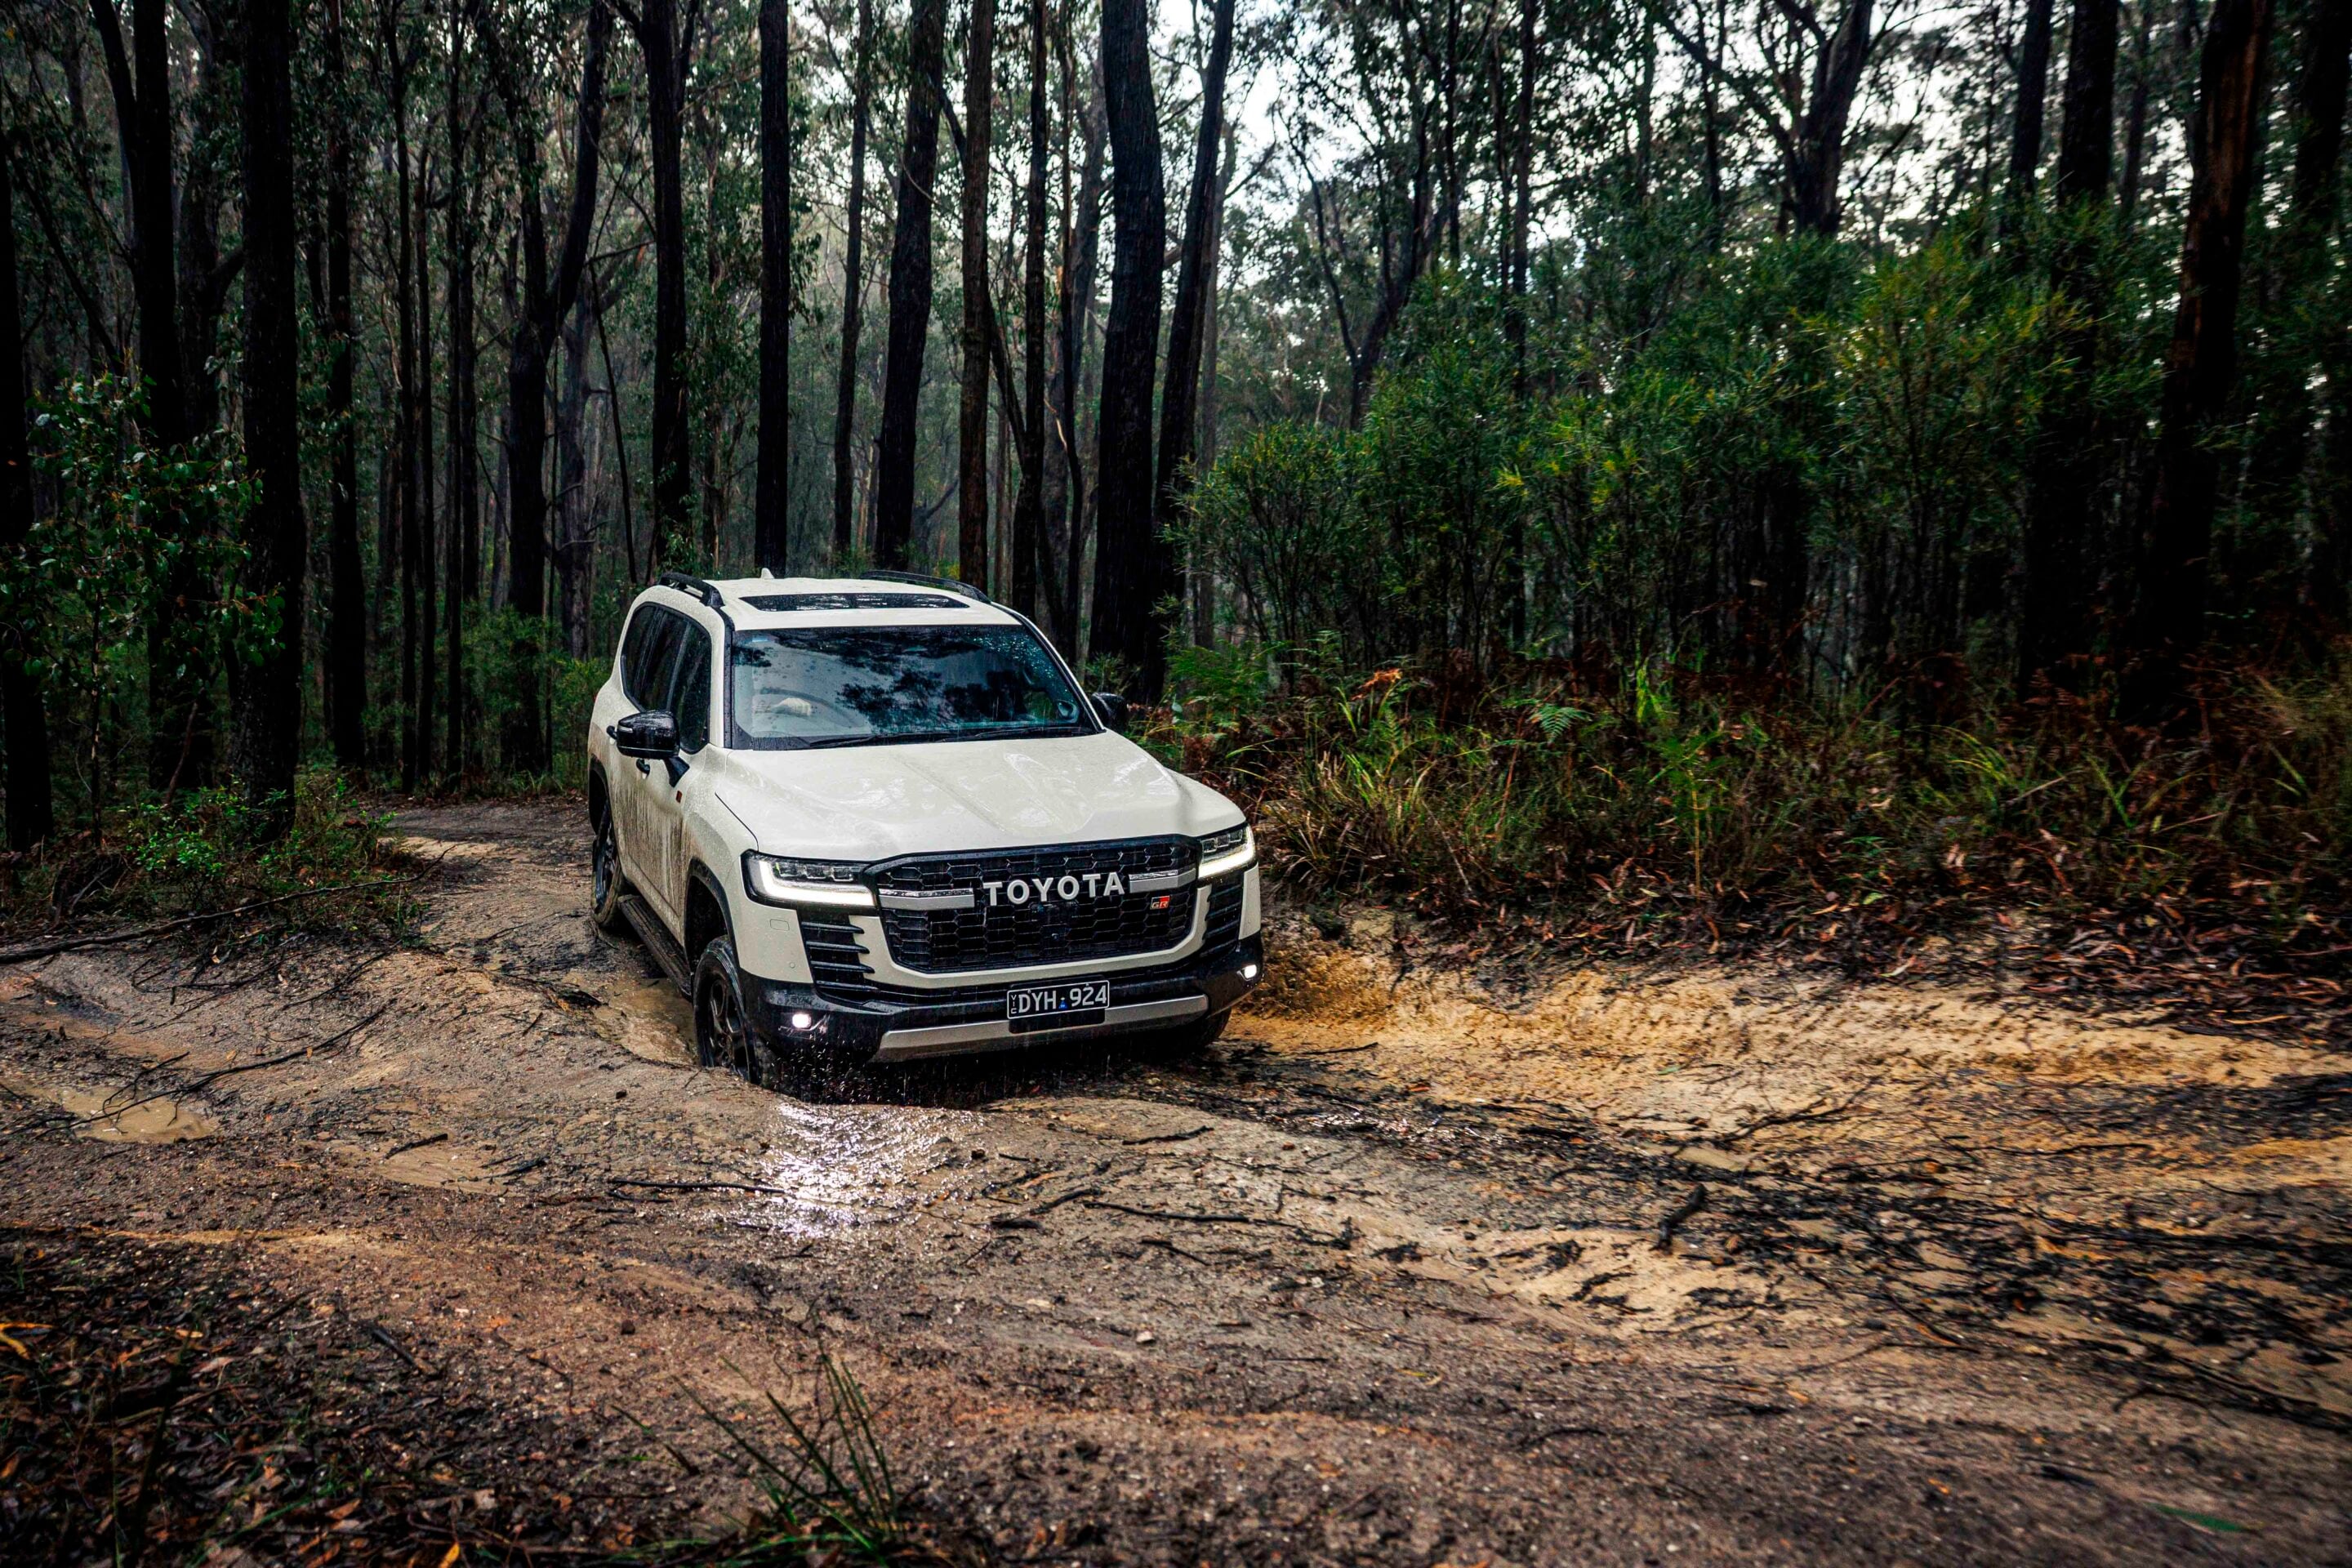
You could feel the suspension working beautifully, slinking its way across the crevasses in a way you wouldn’t expect of a big wagon that also has excellent on-road dynamics. It’s a system that works, and works well, which is all the more appreciated when driving on the modest OE tyres. We didn’t need Crawl Control or the tight-turn function, but they’re only a button press away if required.
If there was any complaint, it was the time it took to get the three lockers to engage after selecting them. It took longer than I would have liked, with the locker lights flashing on the dash until they could be coaxed in.
| Off-road specification | Measurement |
|---|---|
| Approach angle | 31 |
| Ramp-over angle | 21 |
| Departure angle | 24 |
| Ground clearance | 231mm |
| Wading depth | 700mm |
On-road performance
As mentioned, the LC300 is an accomplished on-road tourer, with e-KDSS again playing its part in the dynamics.
The GR Sport delivers a sure-footed and stable performance on wet gravel roads and highways alike. The performance of the petrol-hybrid powertrain is a revelation compared with previous Cruisers, and the electric assistance provides diesel-like torque at the bottom end while the turbocharged V6 carries that performance through the upper rev range. The LC300 Performance Hybrid is the most powerful and quickest LandCruiser ever offered in Australia, and drivers will appreciate its strong performance.
Interior and equipment
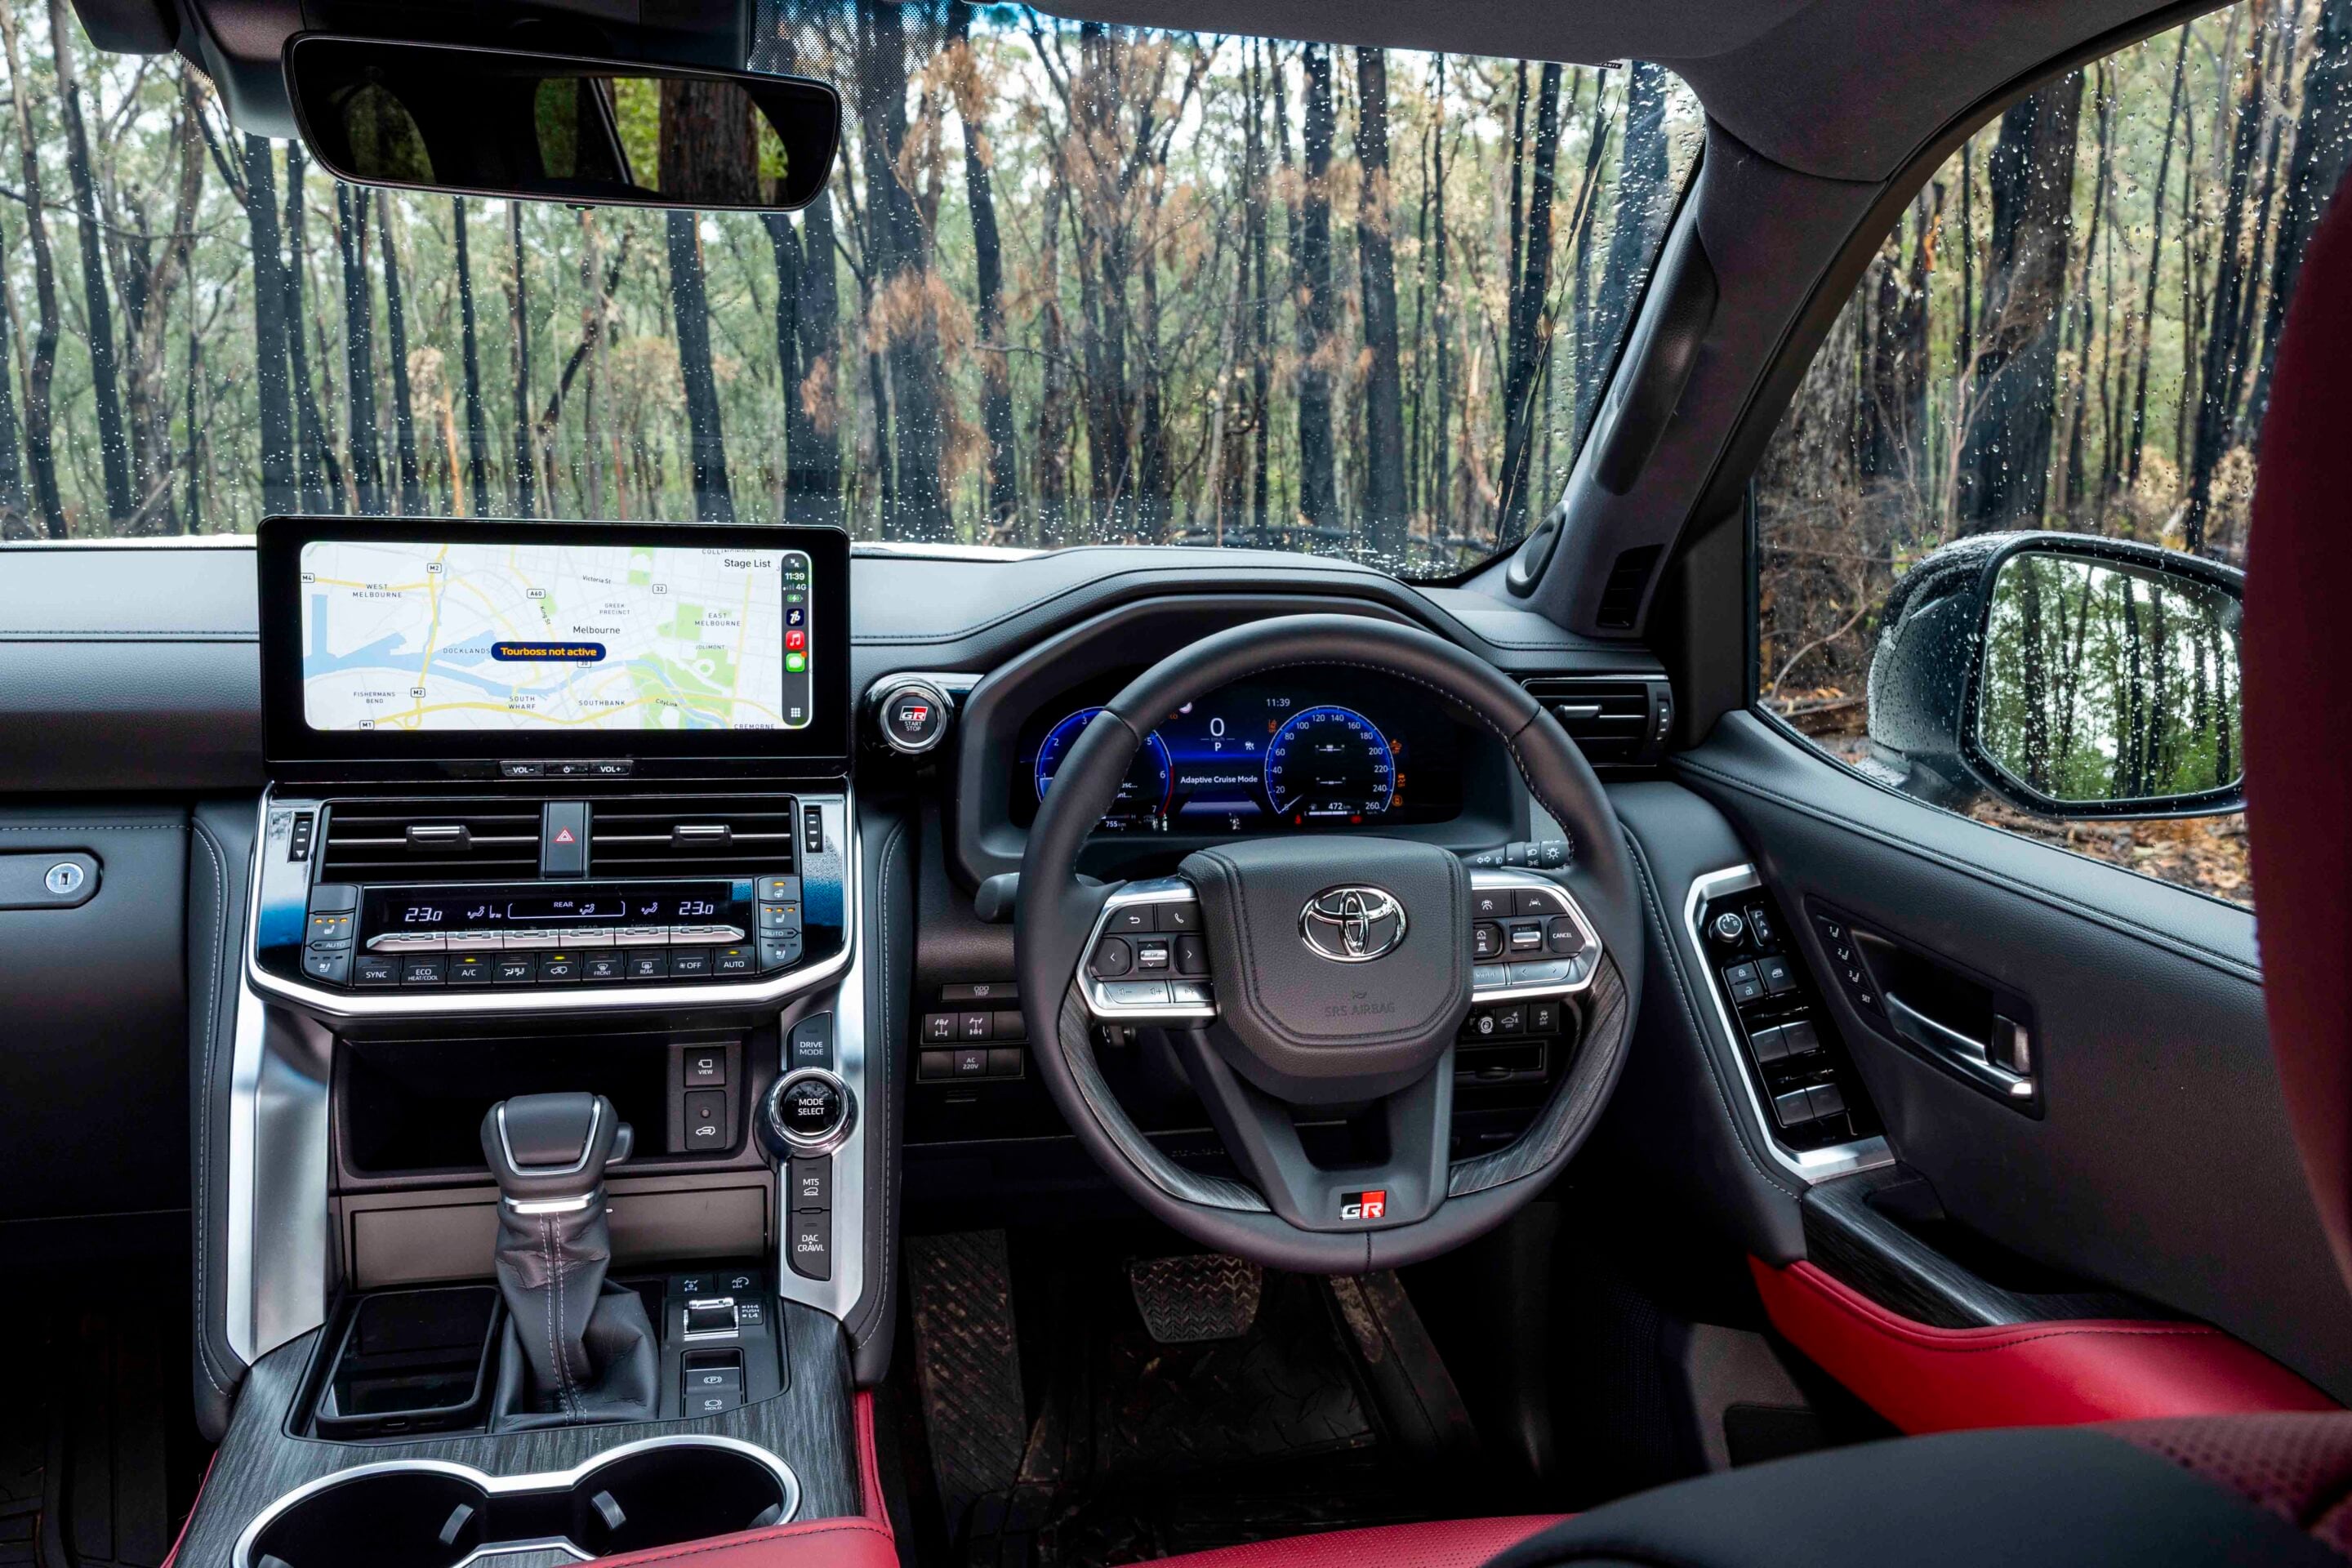
As the two Performance Hybrid LC300s are both high-end models, they come loaded with features. Both are luxurious inside, while the GR Sport gets red trim accents and GR badging to give it a sportier look.
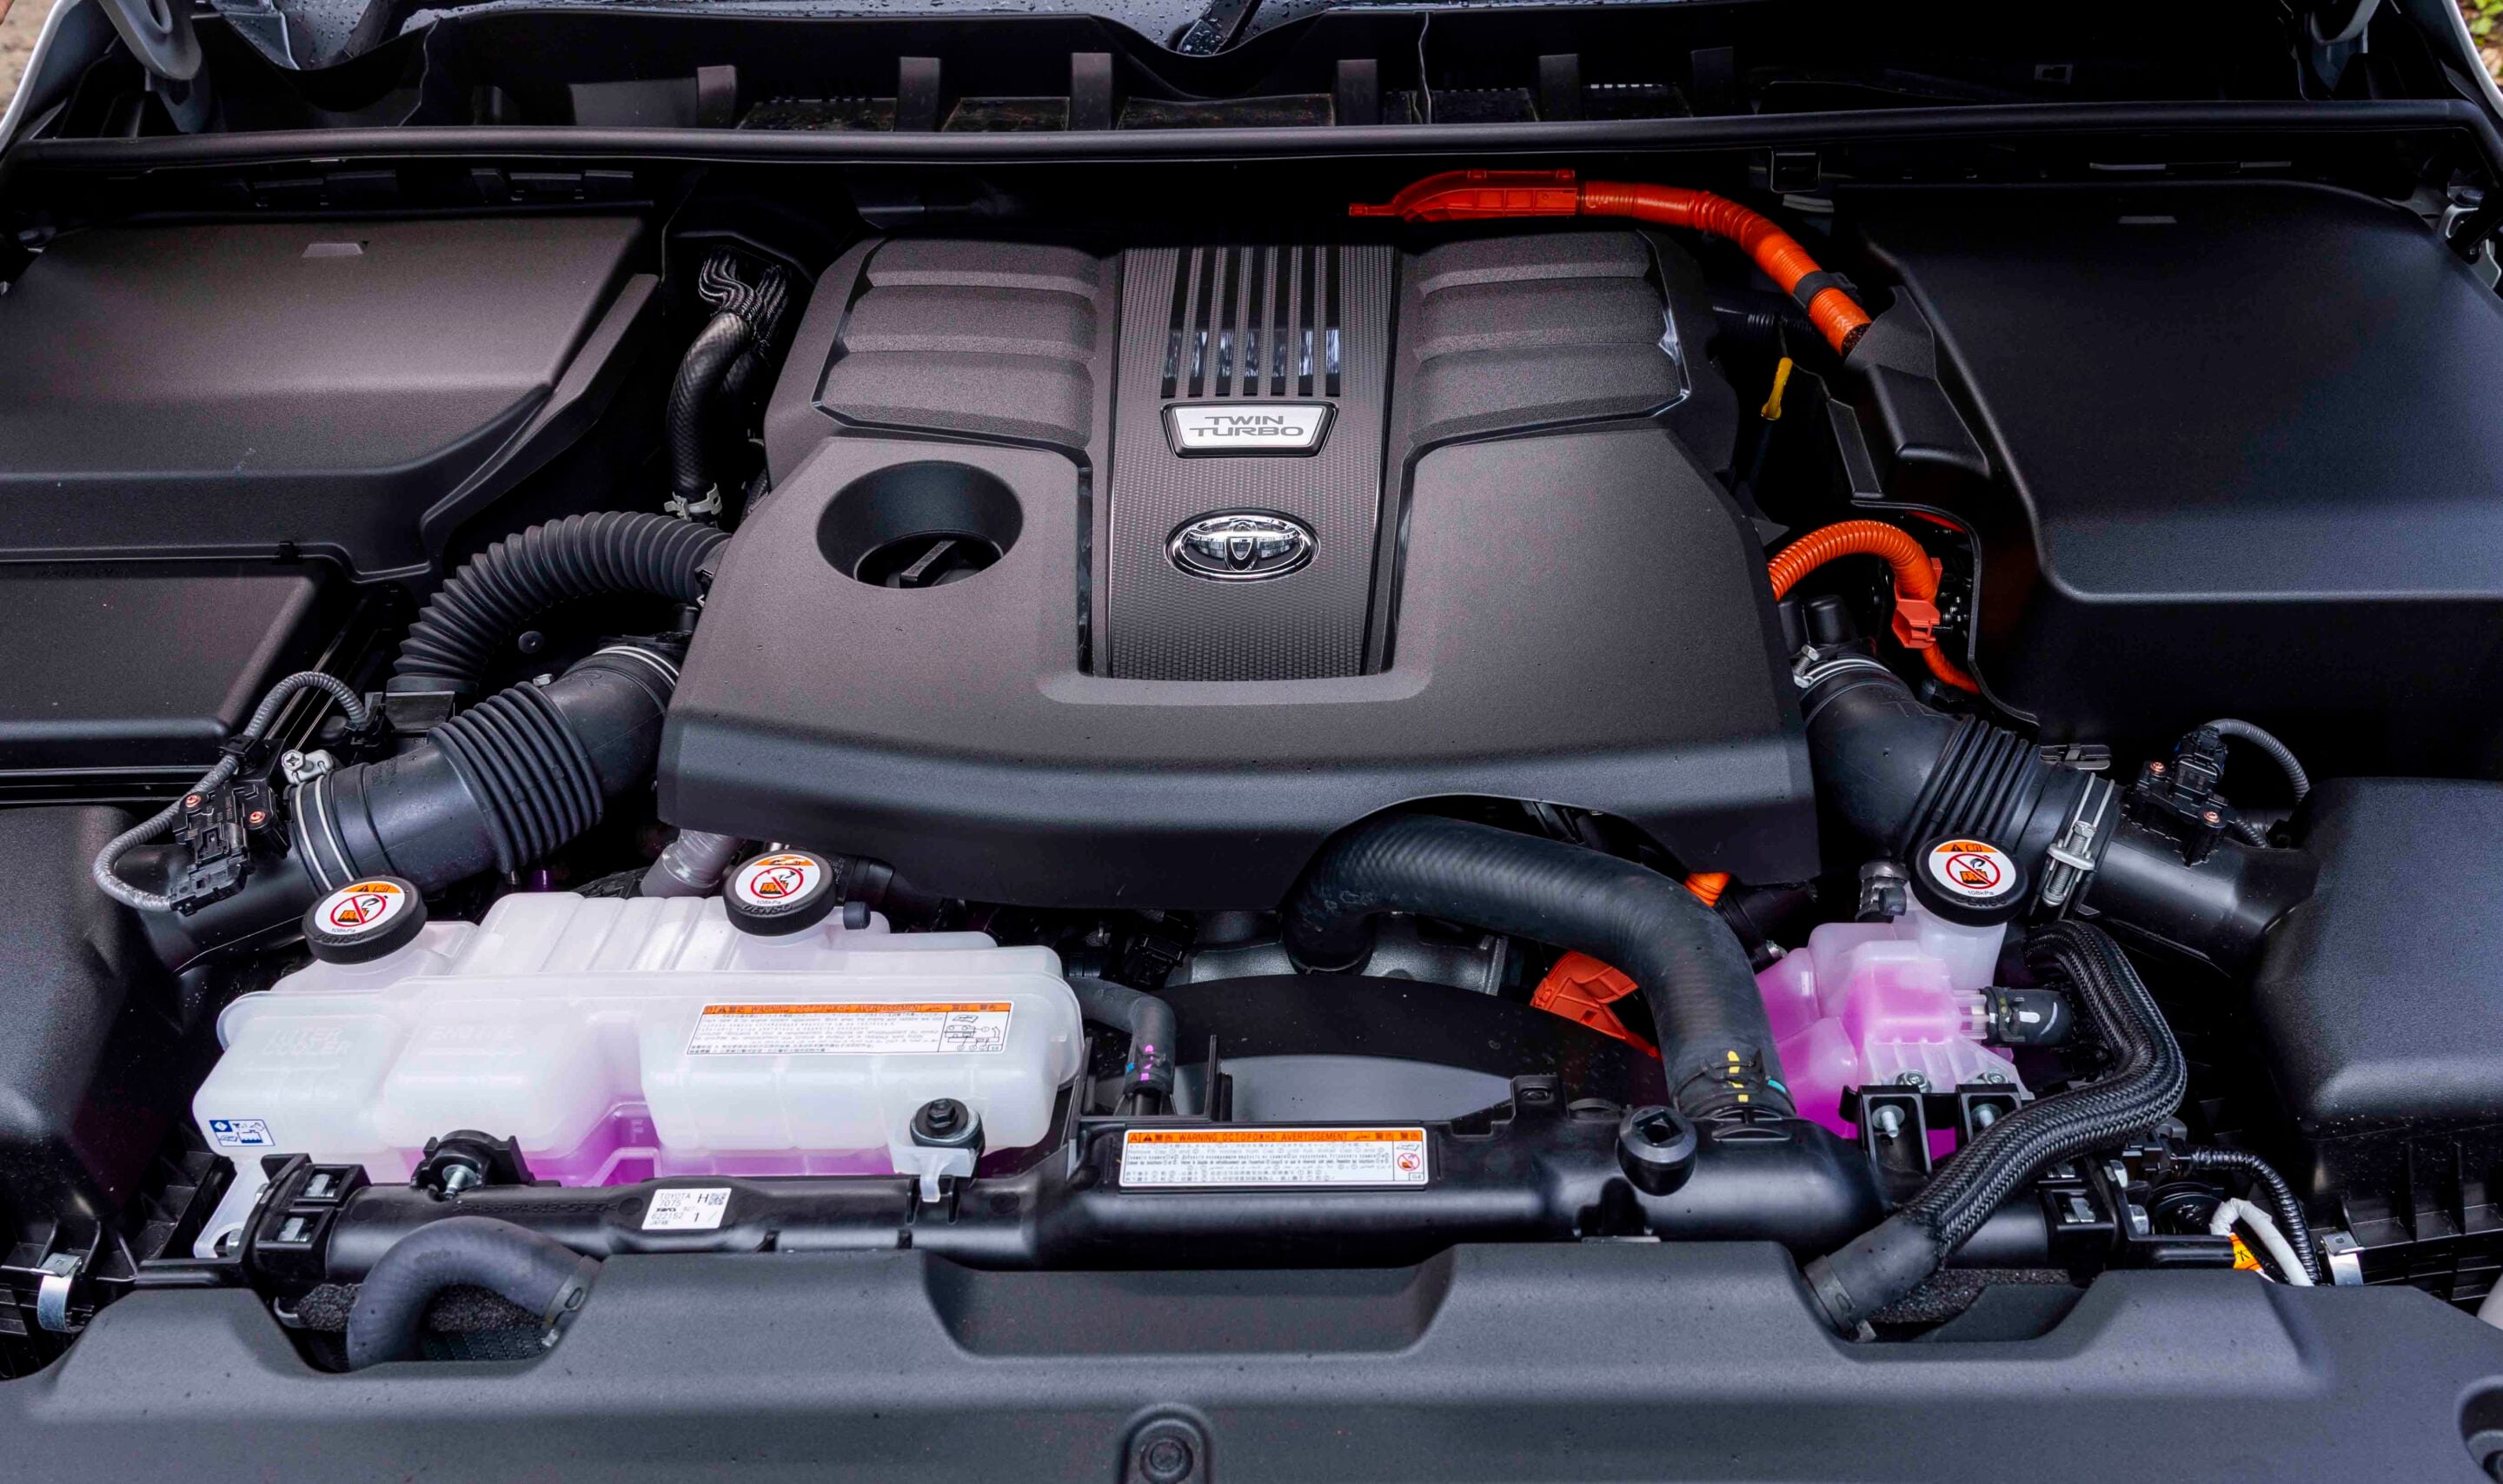
Inside, passengers are made comfortable with leather-accented seats with heating and cooling, heated outboard seats in the second row, a 14-speaker sound system, head-up display, heated steering wheel, cooler box in the console, rear-seat entertainment (headphones not included), four-zone climate control and wireless phone charging among its features. It’s the same cabin specification as the diesel GR Sport LandCruiser.
Verdict
That’s the good thing about the Performance Hybrid versions of the LandCruiser 300: Aside from the bigger fuel tank, the petrol model carries over all the 4×4 hardware and technology of the diesel models.
For the GR Sport, that means class-leading off-road equipment to get the Cruiser through tough terrain or around the country on your lap of the map.
The LandCruiser Performance Hybrid models share the same five-year/unlimited-kilometre Toyota warranty as the rest of the range, along with capped-price servicing for the first five years or 100,000km at $450 per service. Those services come every six months or 10,000km, whichever comes first, which is the same as the diesel-fuelled LC300, so there’s little, if any, cost saving there.
The Performance Hybrid powertrain requires 95RON or higher fuel, so depending on current prices, fuel costs will probably be higher for the petrol than the diesel once you factor in the petrol model’s higher consumption.
Most touring four-wheel drivers will still choose the diesel engine option, but it’s good to know there’s an alternative for those who don’t want diesel for whatever reason – and it’s a bloody good one.
Specs
| Specifications | |
|---|---|
| Price | $156,060 + ORC |
| Engine | Twin-turbo petrol V6 with single-motor hybrid system |
| Capacity | 3445cc |
| Max power | 341kW |
| Max torque | 790Nm |
| Transmission | 10-speed automatic |
| 4X4 system | Full-time/dual-range |
| Crawl ratio | N/A |
| Construction | Five-door wagon on ladder-frame chassis |
| Front suspension | Double wishbone with coils and e-KDSS |
| Rear suspension | Live axle on links and coils with e-KDSS |
| Wheels & tyres | 18×7.5J alloy, 265/65R18 |
| Kerb weight | 2715kg |
| GVM | 3380kg |
| GCM | 6750kg |
| Towing capacity | 3500kg |
| Payload | 665kg |
| Seats | 5 |
| Fuel tank | 98L PULP |
| ADR fuel consumption | 10.0L/100km |
| On-test fuel consumption | 14.8L/100km |
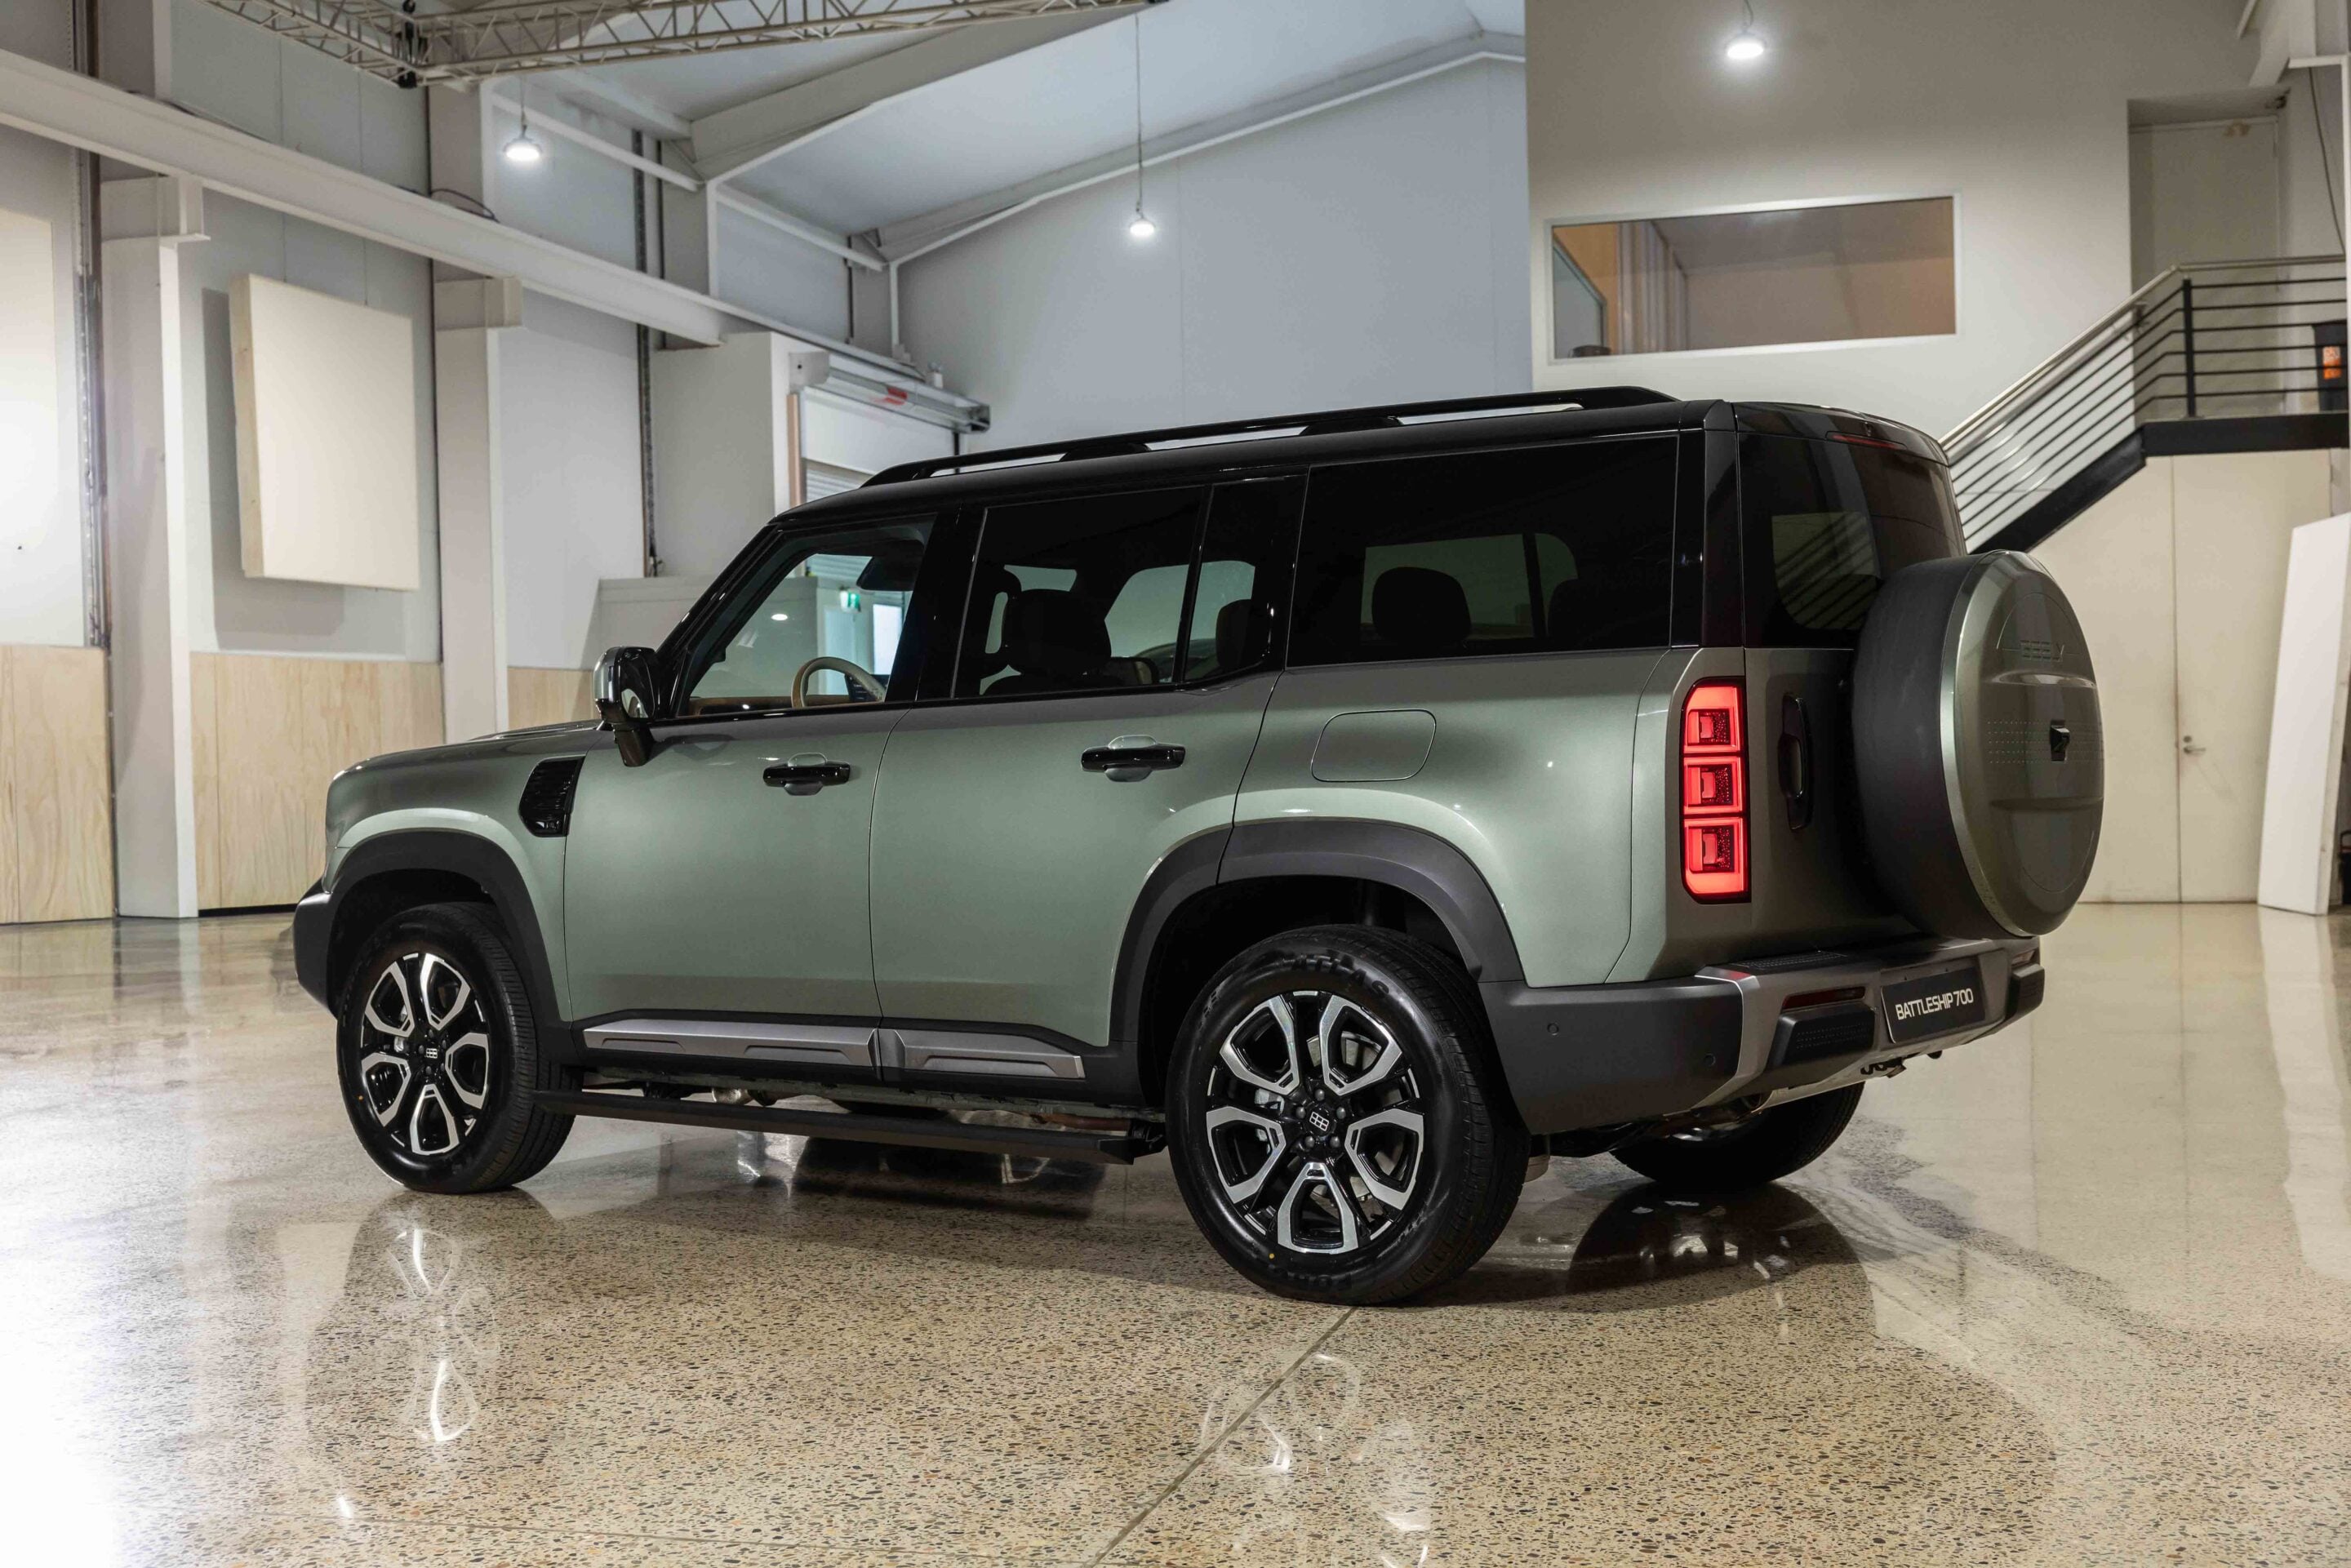
Geely has confirmed its Battleship 700 PHEV off-road SUV will launch in Australia in the second half of 2027, with a tri-motor all-wheel-drive system producing a claimed 830kW.
The five-seat Battleship 700 is powered overseas by a 2.0-litre turbocharged four-cylinder engine paired with a 47kWh battery pack. Its tri-motor all-wheel-drive system incorporates an integrated differential lock, with Geely claiming up to 170km of electric-only driving range.
The SUV has 233mm of ground clearance and an 800mm claimed water-wading depth, along with 20-inch wheels. It also features a ‘Waltz’ U-Turn function designed to allow the vehicle to manoeuvre on the spot.
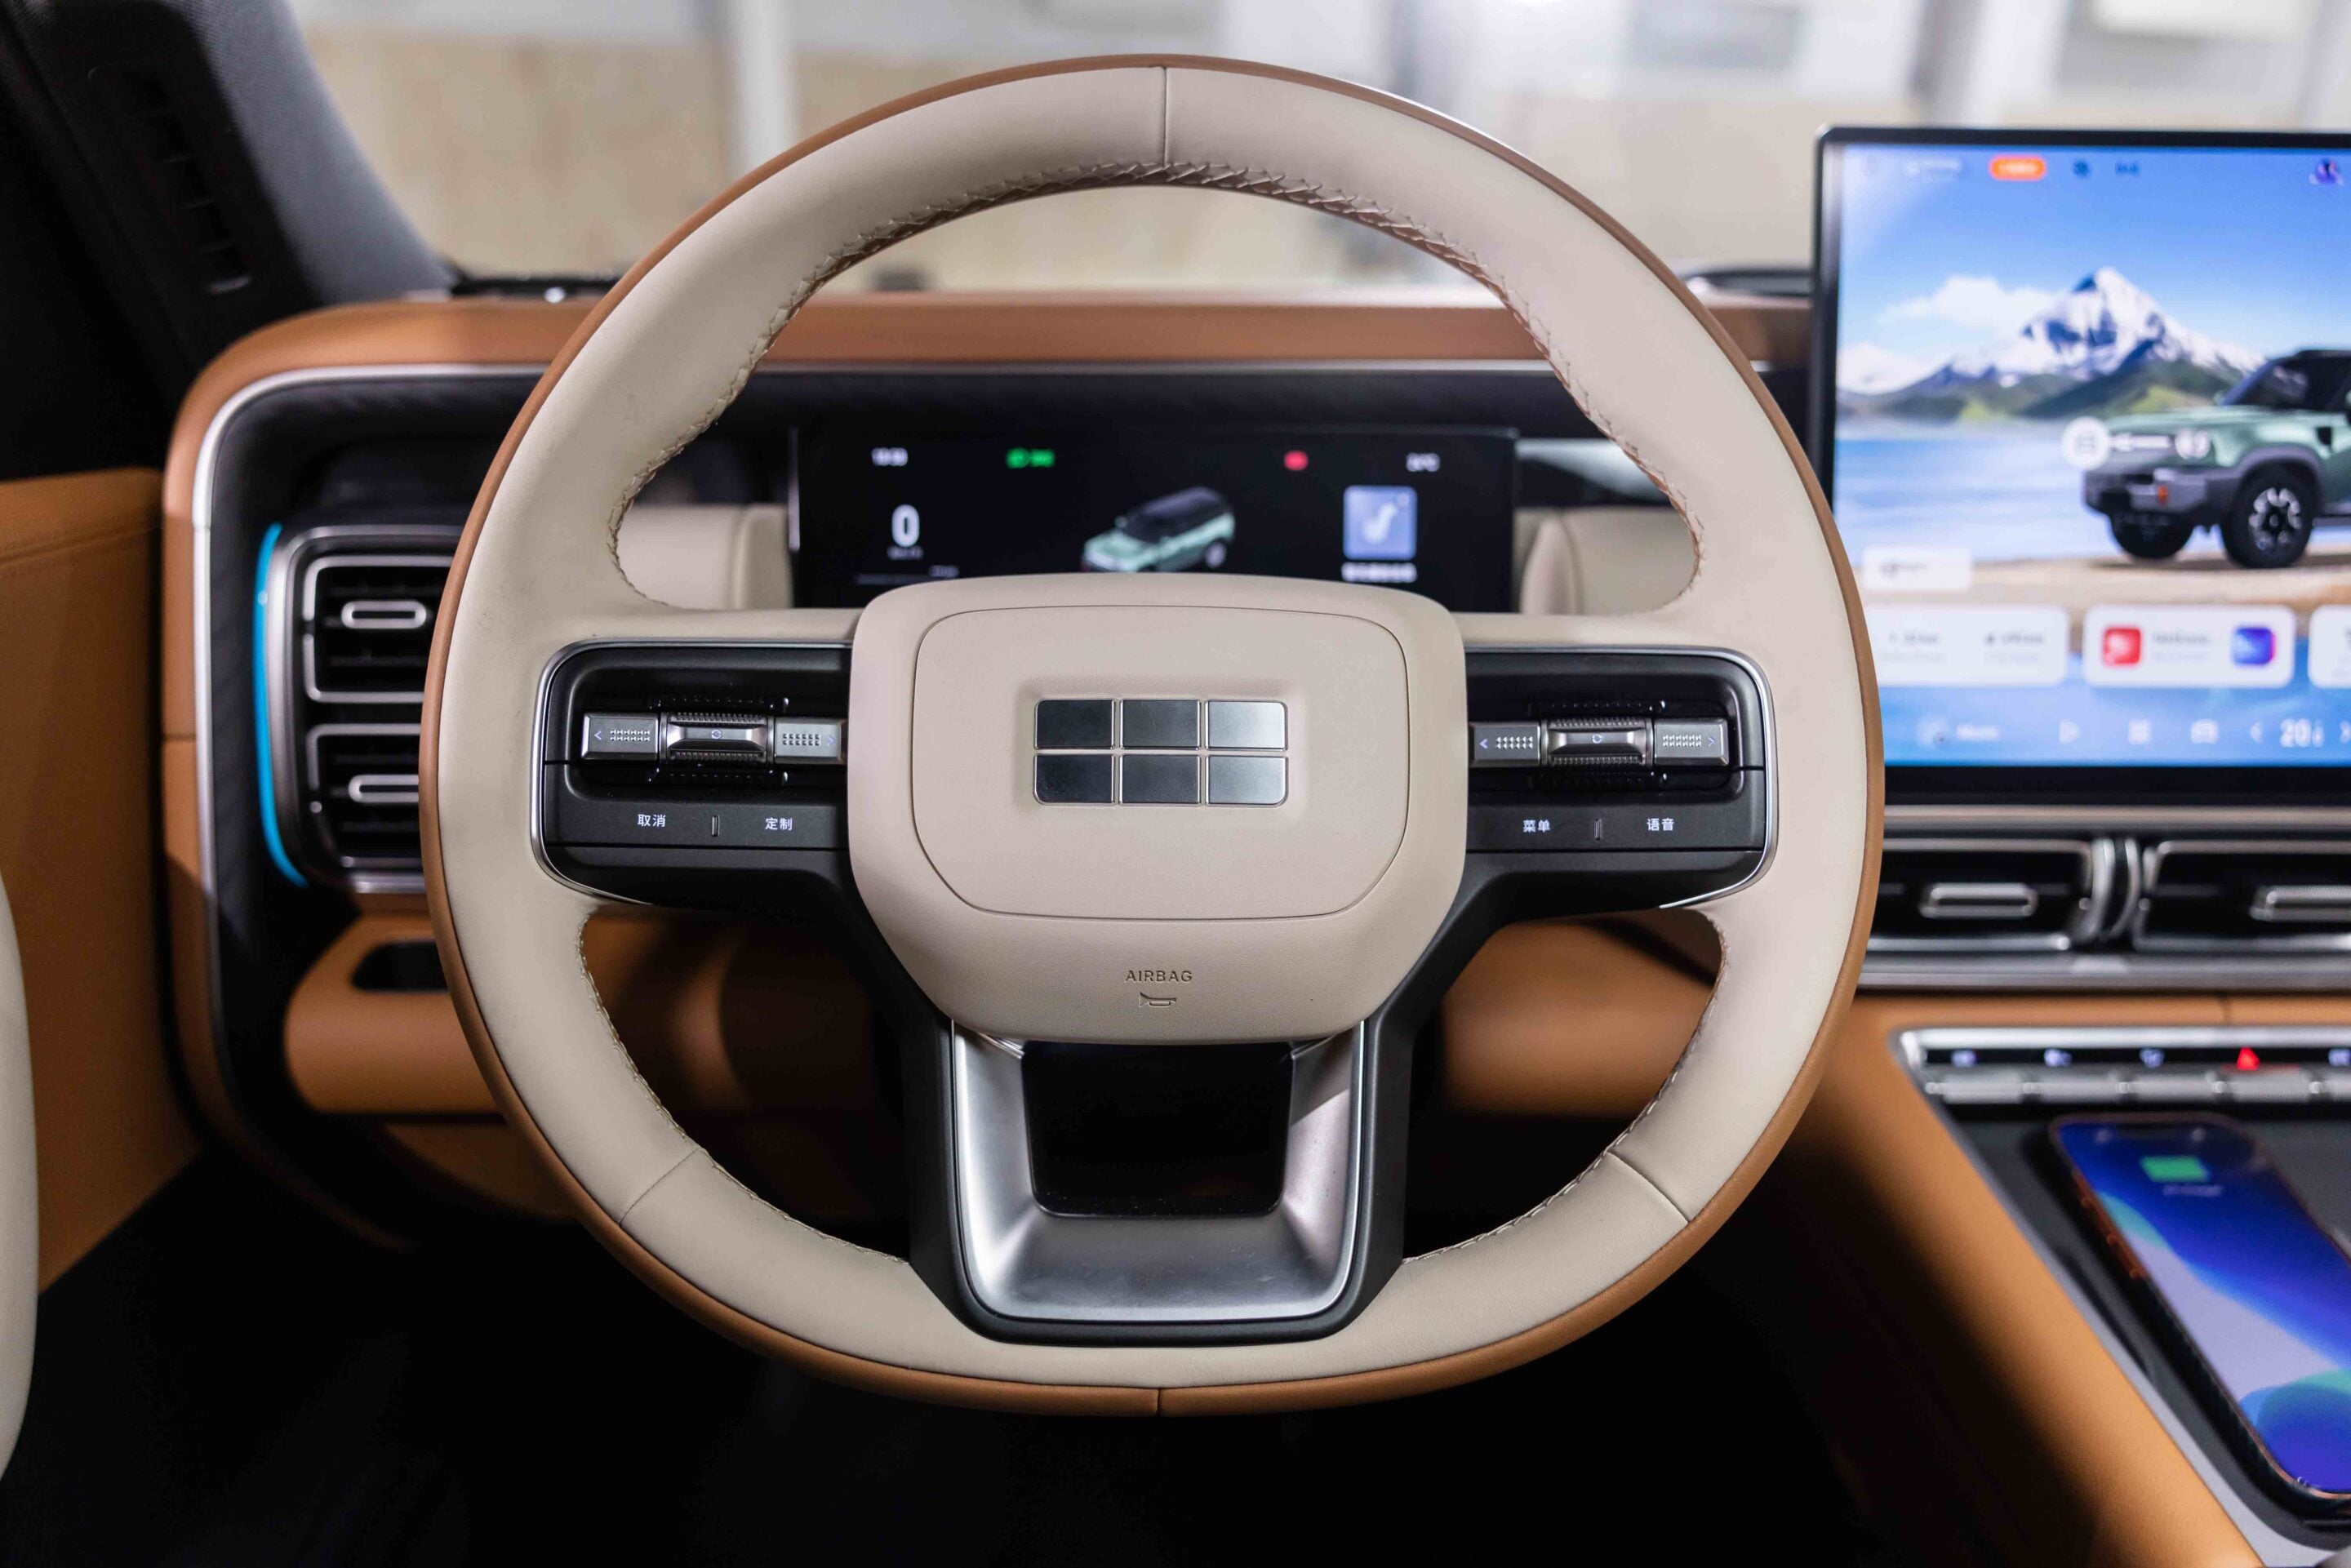
Cabin equipment includes a panoramic sunroof, 12.3-inch and 15.6-inch screens, a centre-console heating and cooling compartment, independent rear air-conditioning and a 23-speaker sound system.
Australian specifications, pricing and the exact launch timing will be announced closer to its arrival in the second half of 2027. The Battleship 700 is one of six Geely models planned for Australia in 2027, with the MONJARO EM-i SUV and Emgrand L EM-i sedan also confirmed for local launch in the first half of the year.
Geely Auto Group is a Chinese automotive company headquartered in Hangzhou and part of Zhejiang Geely Holding Group, with vehicle brands including Geely, Lynk & Co and Zeekr.
Key specifications
- Powertrain: Plug-in hybrid
- Engine: 2.0-litre turbocharged four-cylinder
- Battery: 47kWh
- Drive: Tri-motor AWD
- System output: 830kW
- Electric range: Up to 170km
- Ground clearance: 233mm
- Water wading: 800mm
- Wheels: 20-inch
- Seats: Five
- Australian launch: Second half of 2027
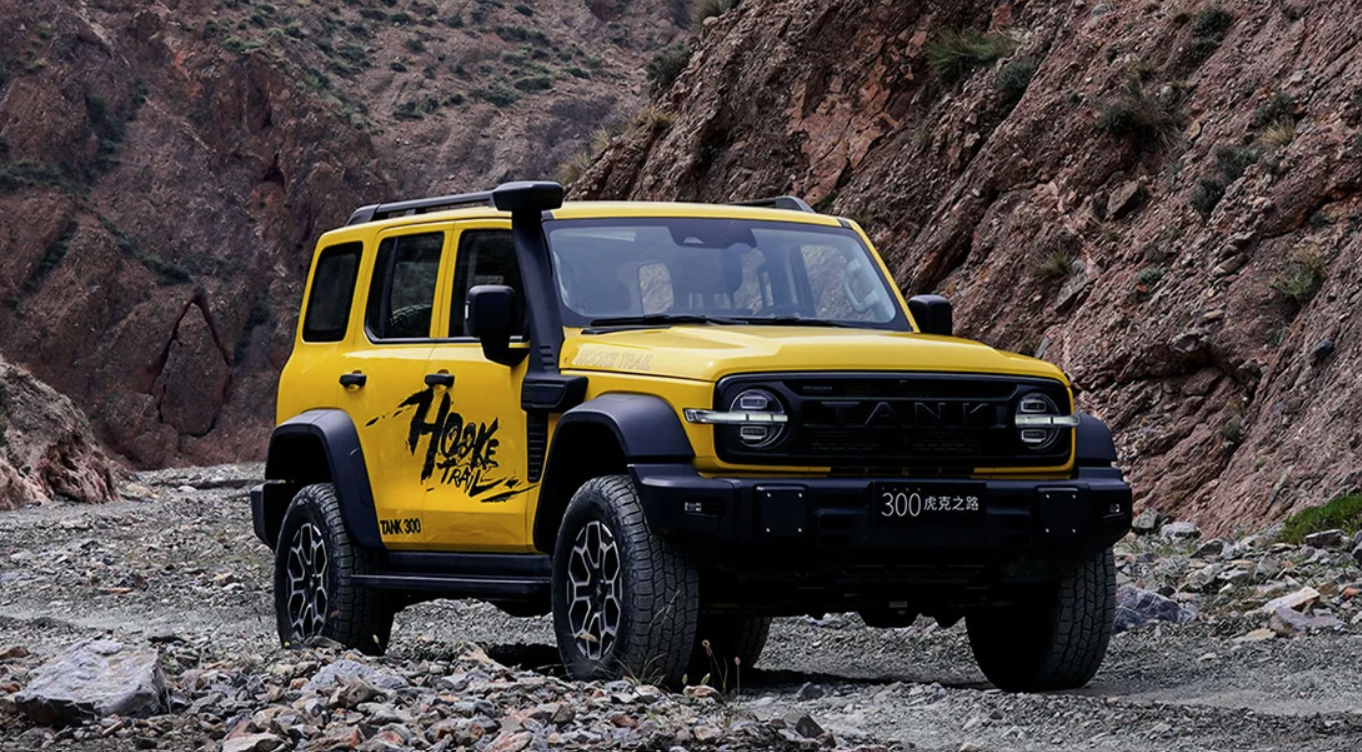
GWM has started taking pre-orders for the Tank 300 Hooke Trail Edition in China, a heavily reworked version of its off-road SUV aimed at the Jeep Wrangler that replaces the standard model’s independent front suspension with a solid axle.
First shown at the 2025 Shanghai Motor Show, the production Hooke Trail Edition is based on the longer-wheelbase Tank 300L (a Chinese-market model) and uses solid axles front and rear, along with three locking differentials, low range and increased suspension travel.
The front axle has been redesigned with strengthened components and an electronically disconnecting anti-roll bar. GWM claims more than 500mm of wheel articulation, while ground clearance is 245mm. Other claimed off-road figures include a 41-degree approach angle, 34-degree departure angle and 850mm wading depth. The Hooke Trail Edition runs 18-inch wheels with 265/70R18 tyres, while the revised suspension can clear 35-inch tyres and accommodate 40-inch rubber with modifications.
Despite being shown alongside GWM’s new 4.0-litre twin-turbo V8 at Shanghai, the production Hooke Trail Edition uses the 2.0-litre turbocharged four-cylinder, producing 170kW and 400Nm and driving through a nine-speed automatic. The vehicle has a 3010mm wheelbase, compared with 2750mm for the standard Tank 300, and measures 4886mm long, 1984mm wide and 1960mm high.
What are the chances of it coming to Australia?
GWM has not confirmed an Australian launch for the Hooke Trail Edition.
The Tank 300 is already sold locally, but there is currently no Australian timing or specification for the live-axle variant. If GWM does pursue an Australian launch, the Chinese-market vehicle would need to meet Australian regulatory and homologation requirements before it could be sold here.
Tank 300 Hooke Trail Edition key specs
- Engine: 2.0-litre turbo petrol four-cylinder
- Power: 170kW
- Torque: 400Nm
- Transmission: Nine-speed automatic
- 4WD: Mechanical four-wheel drive, low range and three locking differentials
- Suspension: Solid axles front and rear
- Wheelbase: 3010mm
- Ground clearance: 245mm
- Approach/departure: 41/34 degrees
- Wading depth: 850mm
- Wheel articulation: More than 500mm
- Factory wheels/tyres: 18-inch, 265/70R18
GWM has confirmed Australian pricing for its new Cannon Hi4-T plug-in hybrid ute, with the dual-cab available from $47,990 driveaway for eligible ABN buyers until October 31, 2026.
The $47,990 figure comes from a limited-time $2000 driveaway bonus. The standard ABN driveaway price for the Lux is $49,990, while private buyers pay $50,990 before the bonus, or $48,990 with it.
The Ultra is priced from $53,990 driveaway for ABN buyers, dropping to $51,990 with the bonus. Private buyers pay $1000 more, and customers who choose the standard driveaway price can instead receive a $2000 fuel card.
Once the launch offer expires, the Hi4-T Lux will start at $49,990 driveaway for eligible ABN buyers, making it Australia’s cheapest PHEV 4×4 ute on a standard ABN driveaway price. The JAC Hunter PHEV Pro is priced at $49,988 plus on-road costs, while the Hunter X costs $54,844 plus on-roads. The BYD Shark starts at $55,900 plus on-road costs for the Dynamic, rising to $57,900 for the Premium and $62,900 for the Performance, while the Ford Ranger PHEV starts at $59,000 driveaway for the XL.
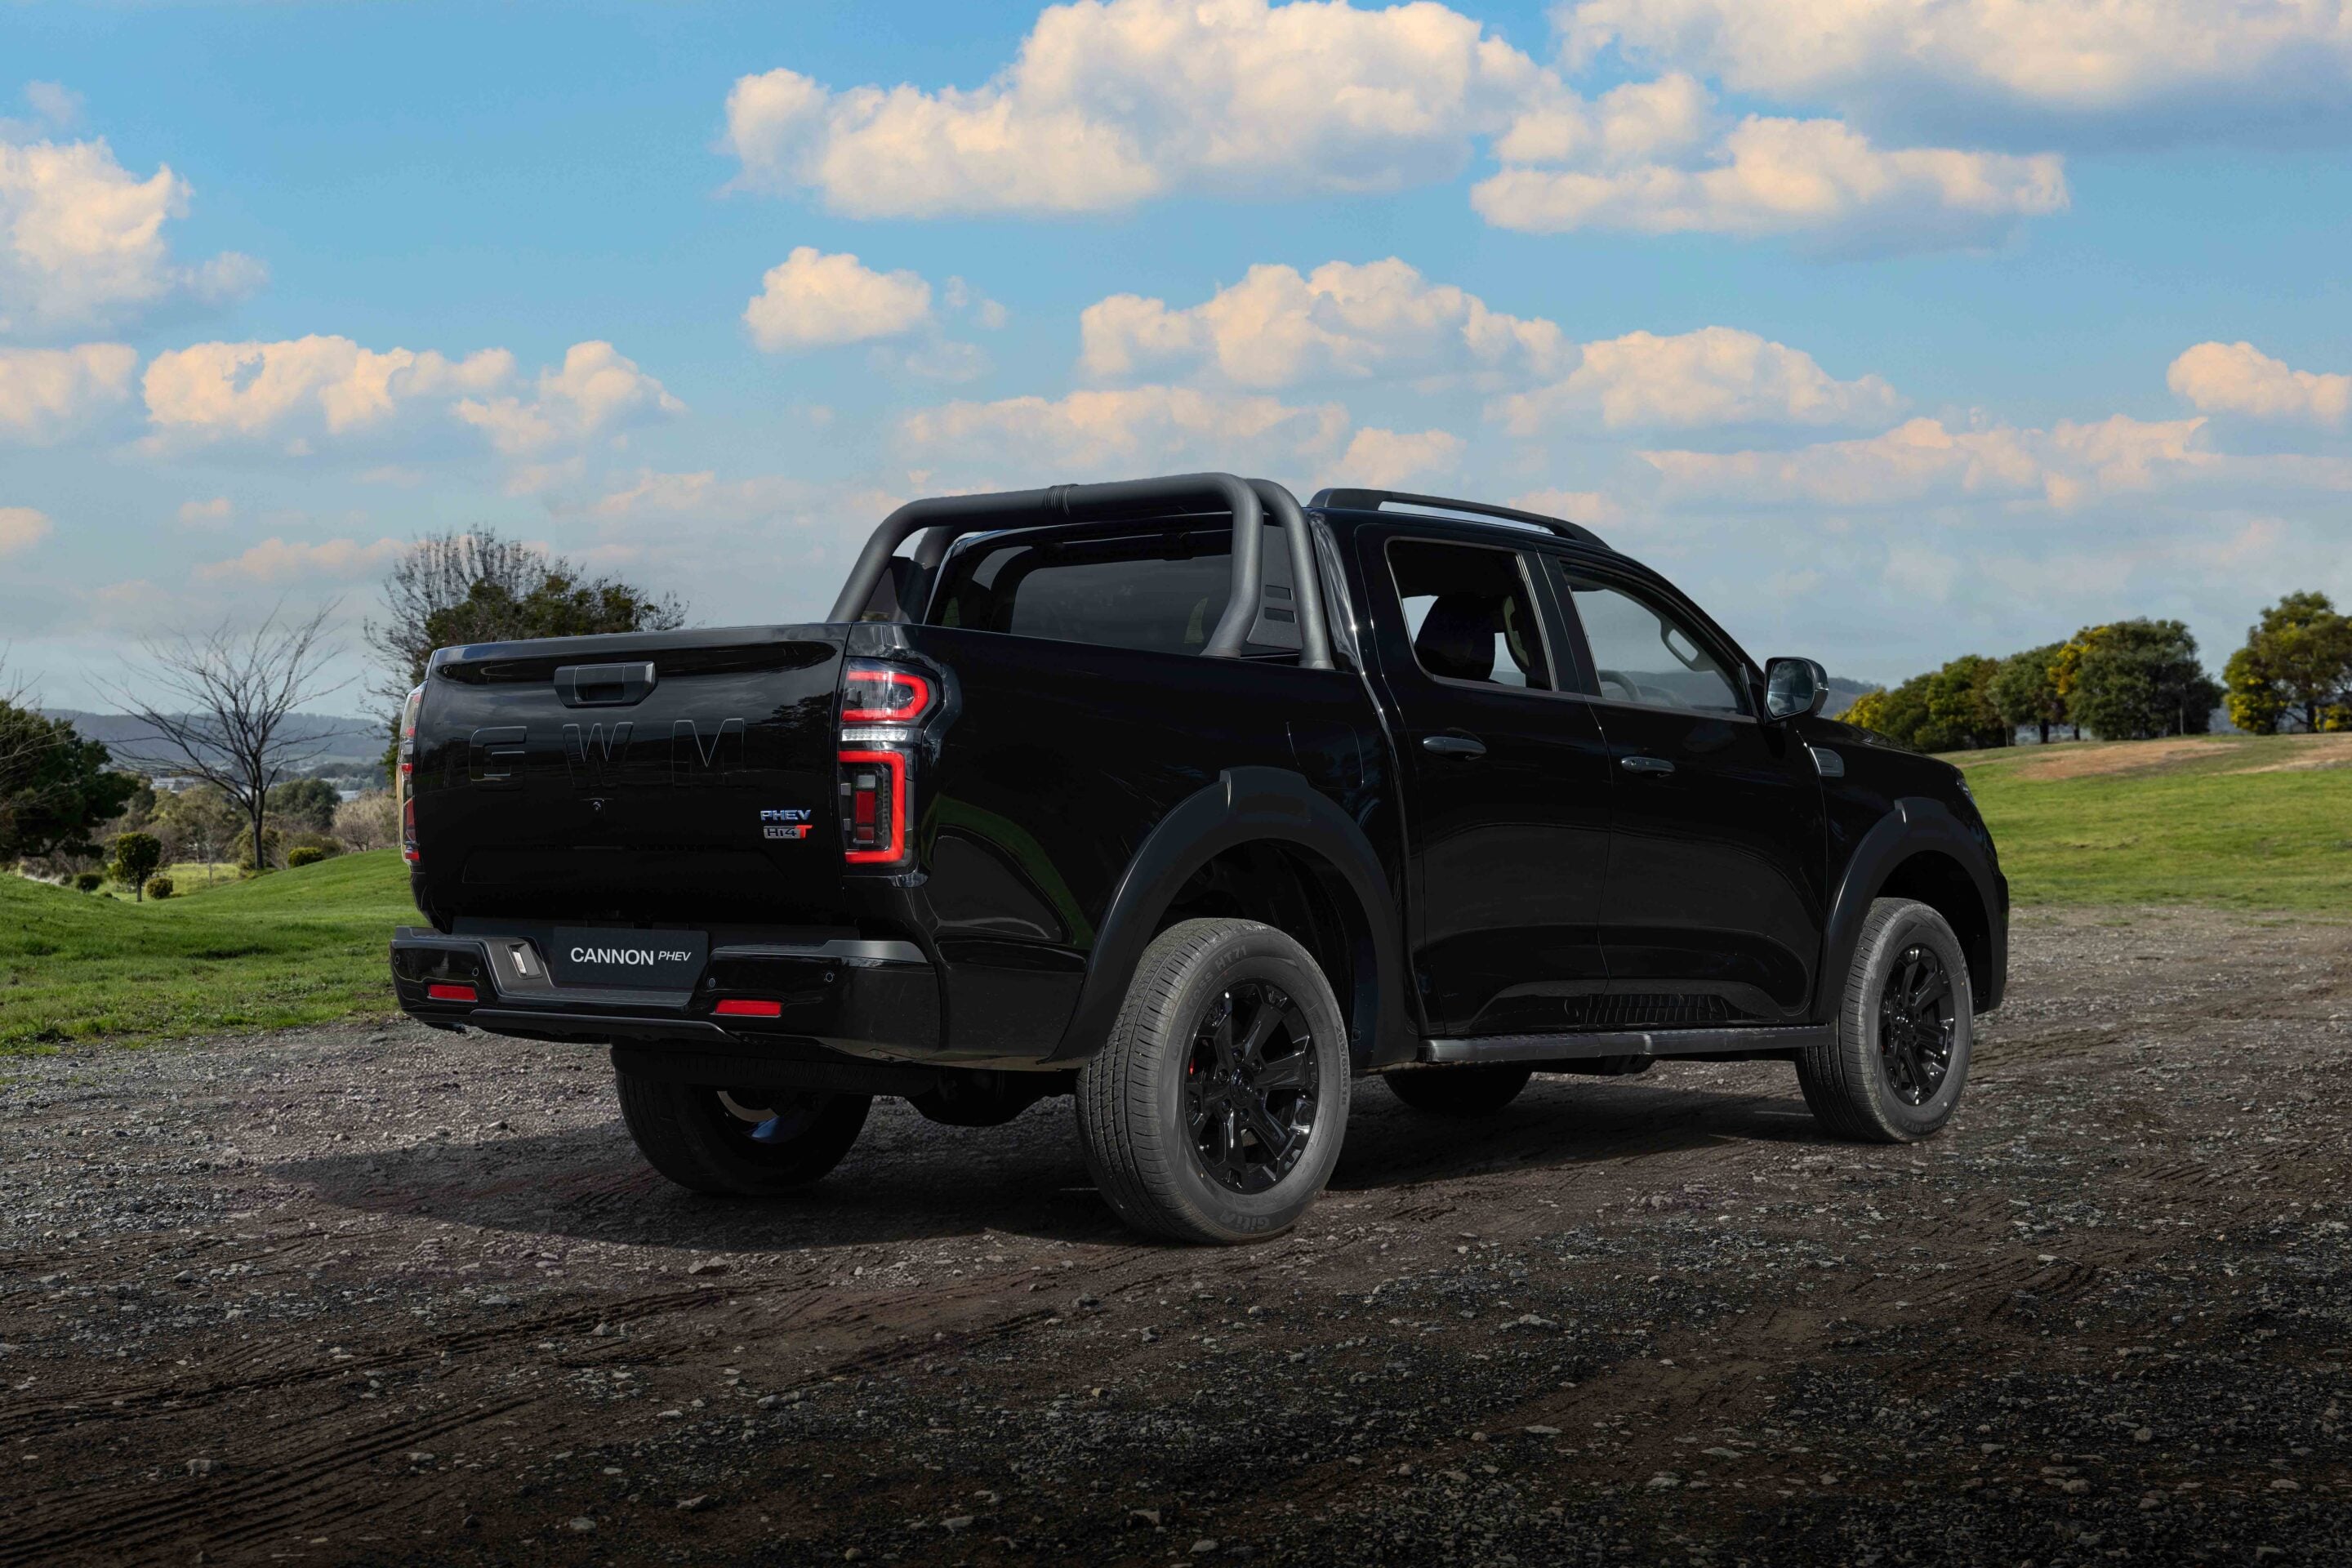
The Hi4-T will be offered in Lux and Ultra grades, with both using a 2.0-litre turbo-petrol engine and GWM’s Hi4-T plug-in hybrid system. Combined outputs are rated at 310kW and 750Nm, while the ute retains a mechanical four-wheel-drive system and is rated to tow up to 3500kg braked.
| Model | ABN holders | Private buyers | Launch offer |
|---|---|---|---|
| Cannon Hi4-T Lux | $49,990 driveaway | $50,990 driveaway | $2000 driveaway bonus or $2000 fuel card |
| Cannon Hi4-T Ultra | $53,990 driveaway | $54,990 driveaway | $2000 driveaway bonus or $2000 fuel card |
3.5-tonne towing and 115km EV range
The Hi4-T combines plug-in hybrid power with a conventional mechanical 4WD system.
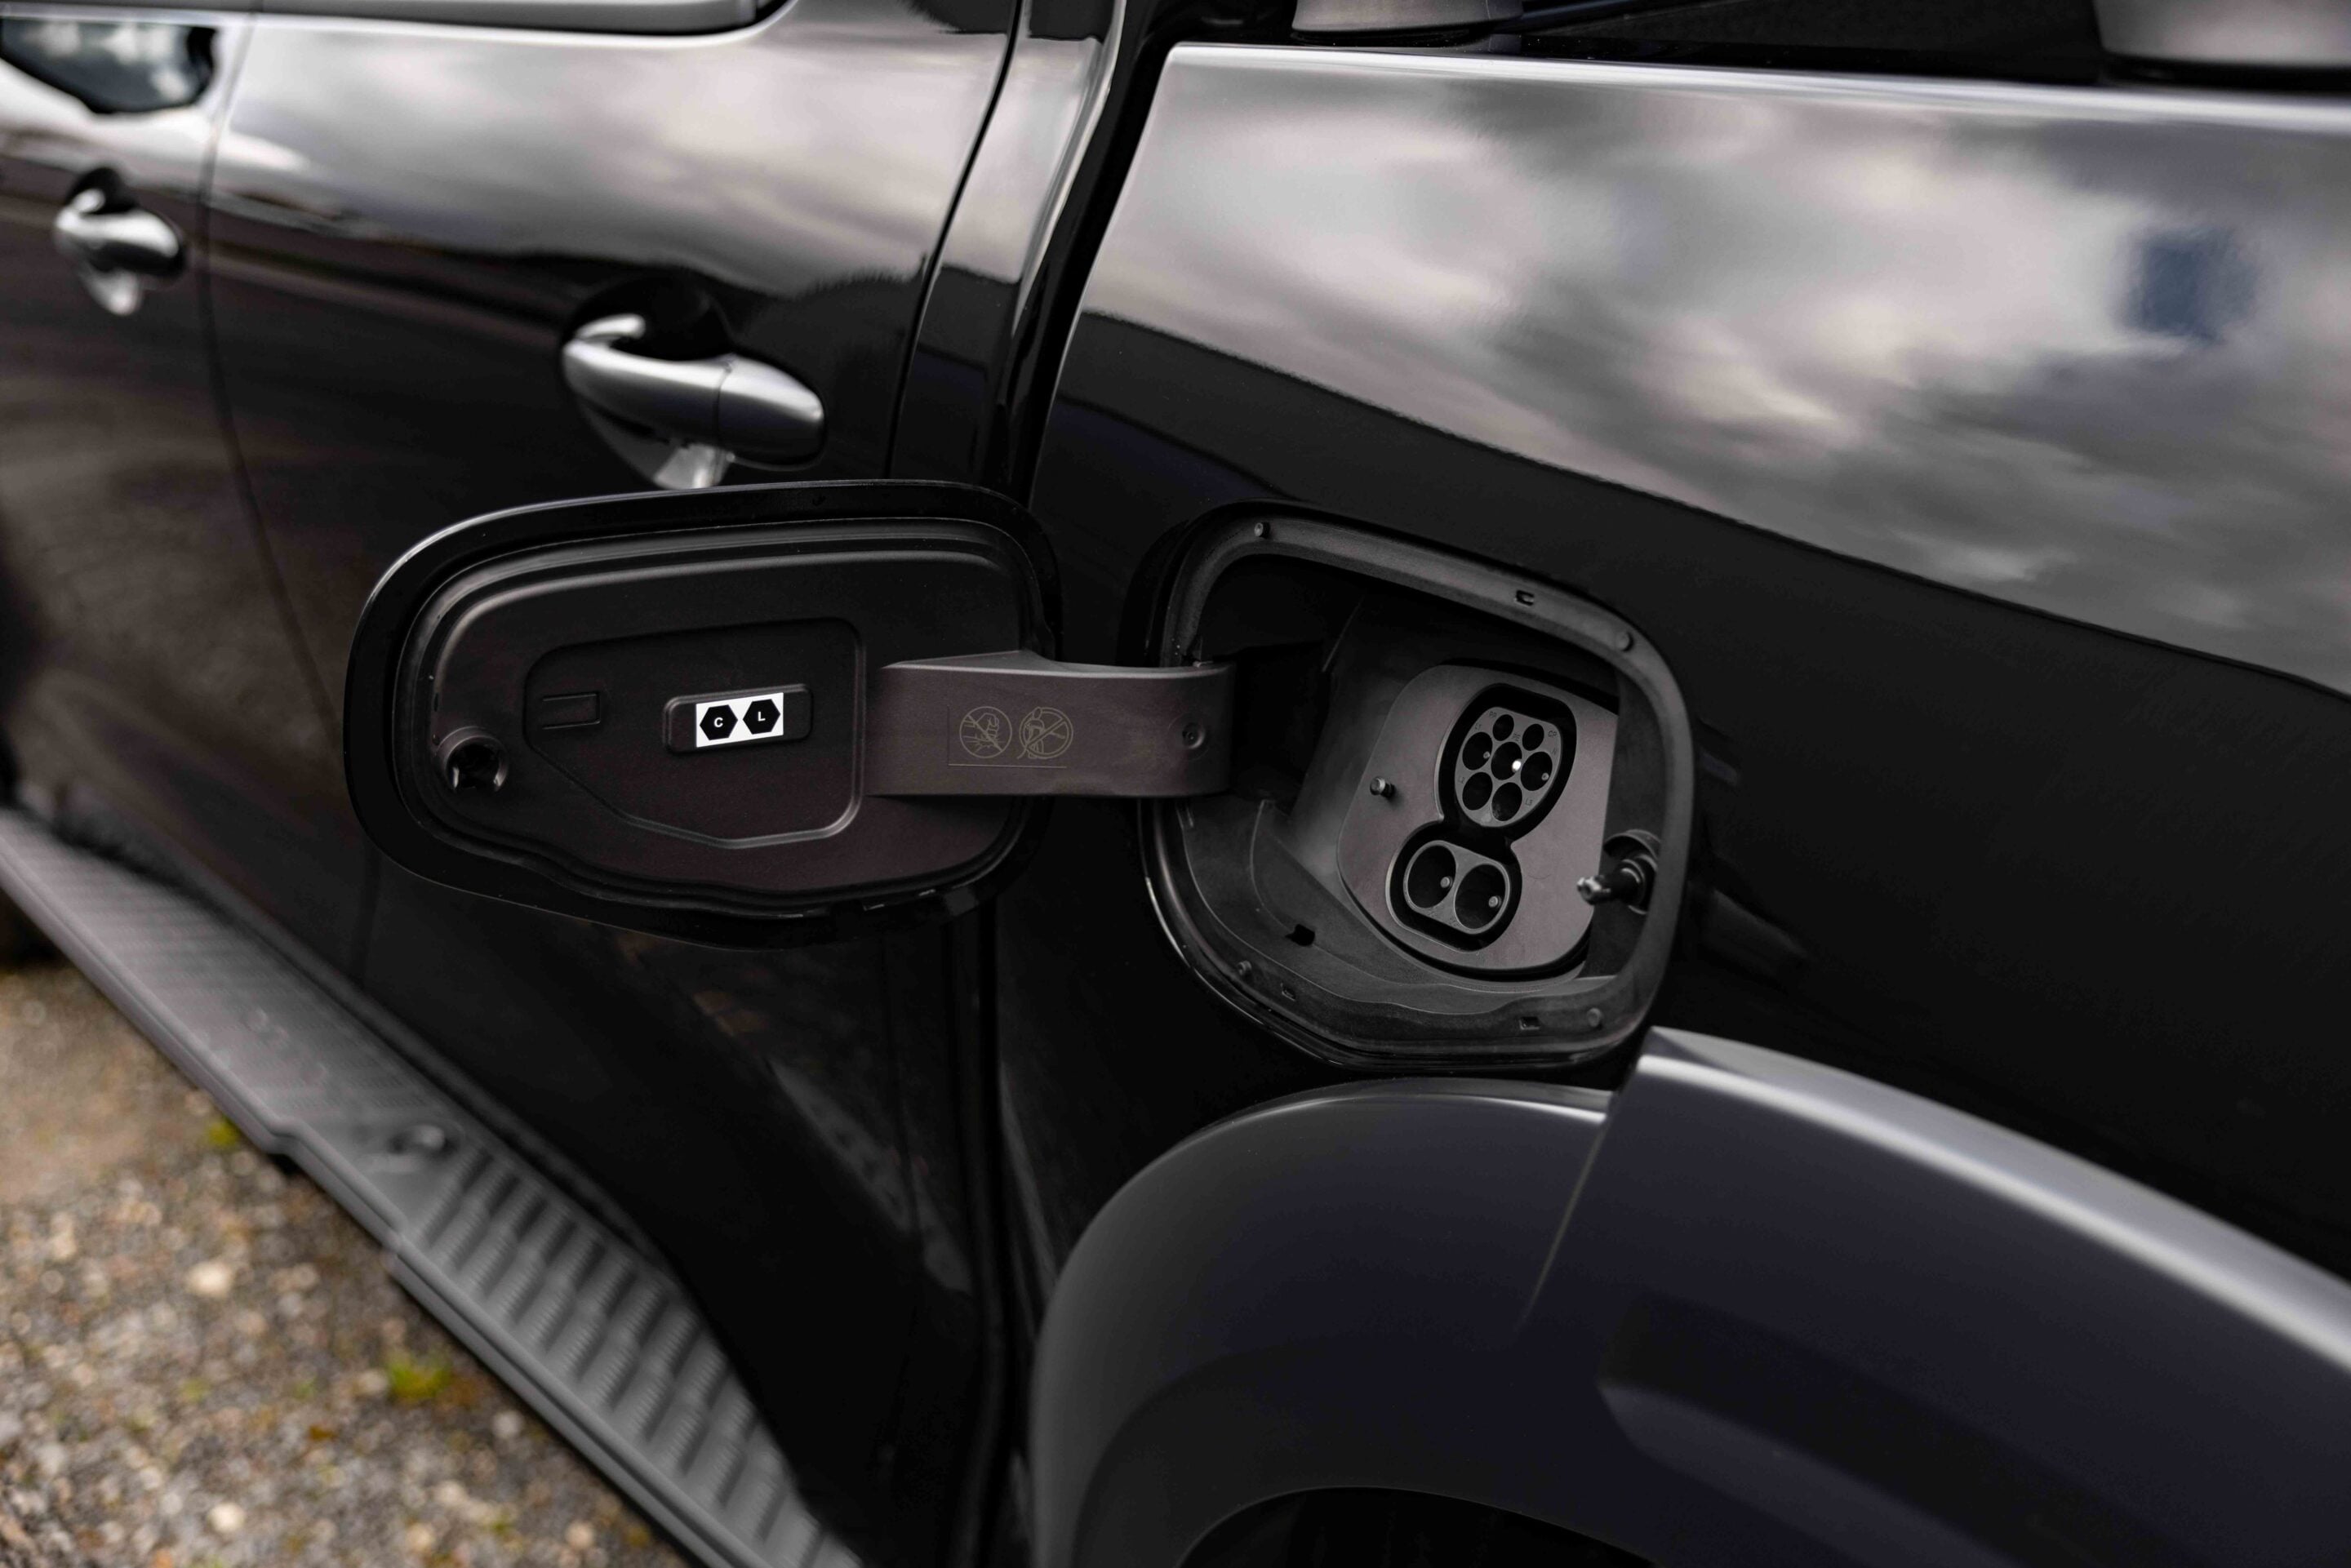
The Hi4-T architecture uses electric drive alongside a mechanical transmission and 4WD hardware, giving it the capability for towing and off-road driving rather than relying solely on electric motors. A 33.1kWh battery provides up to 115km of electric-only range on the NEDC test cycle. DC charging is supported at up to 110kW, with GWM claiming the battery can charge from 30 to 80 per cent in as little as 18 minutes.
For longer trips, GWM claims a combined petrol-and-electric driving range of up to 1037km from a single tank and charge, with claimed fuel consumption of 2.4L/100km. As with all lab figures, real-world range and consumption will vary according to driving conditions, load and how frequently the battery is charged.
The 3500kg braked towing rating puts the Hi4-T among the higher-capacity electrified utes available in Australia. It also gets Vehicle-to-Load functionality, with 230V outlets in the tub and up to 6kW of discharge power, which could be useful for running electrical equipment while touring or camping.
“GWM is taking a very deliberate approach to building a ute range that gives Australian customers genuine choice, rather than asking them to compromise around a single powertrain or specification,” said John Kett, GWM Australia Chief Operating Officer.
“The Cannon Hi4-T PHEV is an important part of that strategy. It gives us a second PHEV ute with a distinct proposition, complementing the Cannon Alpha while broadening the choice available to customers. Alongside the arrival of our new-generation 3.0-litre diesel, it demonstrates that GWM is prepared to invest across different technologies and segments to meet the changing needs of Australian drivers,” Kett said.
| Specification | Cannon Hi4-T PHEV Lux Dual Cab | Cannon Hi4-T PHEV Ultra Dual Cab |
|---|---|---|
| Gross Combined Mass (GCM) | 6400kg | 6400kg |
| Gross Vehicle Mass (GVM) | 3420kg | 3420kg |
| Vehicle Tare Weight | 2525kg | 2530kg |
| Kerb Weight | 2585kg | 2585kg |
| Payload | 835kg | 835kg |
| Max Braked Towing Capacity | 3500kg | 3500kg |
| Unbraked Towing Capacity | 750kg | 750kg |
| Downball Weight | 350kg | 350kg |
Blacked-out styling and new interior tech
Both grades get the same black exterior treatment, including a black sports bar, matte-black grille, door handles and mirror covers, black side steps, 18-inch black alloy wheels and red brake calipers. The Hi4-T also becomes the first GWM vehicle in Australia to use a 15.6-inch touchscreen running the company’s Coffee OS software.
The ute is expected to arrive at Australian GWM dealers from mid-October 2026, with pre-orders now open. Equipment levels and Australian specifications are listed below.
| Specification | 2026 GWM Cannon Hi4-T PHEV Lux Dual Cab |
|---|---|
| Length | 5416mm |
| Width | 1947mm |
| Height | 1884mm |
| Wheelbase | 3230mm |
| Minimum ground clearance | 232mm |
| Wading depth | 500mm |
| Approach angle | 26° |
| Departure angle | 23° |
| Breakover angle | 19° |
| Turning circle (kerb to kerb) | 13.1m |
| Fuel tank | 75L |
| Seating capacity | 5 |
What the Lux gets
- 18-inch black alloy wheels
- Full-size steel spare wheel
- Black front grille
- Black side steps
- Black roof rails
- Black door handles and mirror caps
- Black sports bar
- Spray-on tub liner
- Auto LED headlights with DRLs
- LED tail-lights and sequential indicators
- 15.6-inch touchscreen infotainment system
- GWM Coffee OS
- Wireless Apple CarPlay and Android Auto
- DAB+ digital radio
- Six-speaker audio
- 10.25-inch digital instrument cluster
- Wireless phone charger
- Comfort-Tek leather seats
- Adaptive cruise control and Intelligent Cruise Control
- Electronic park brake with auto hold
- Hill ascent and descent control
- Rear parking sensors and reversing camera
- Blind-spot monitoring
- Rear cross-traffic alert with braking
- Seven airbags
- Full suite of collision avoidance and lane-keeping systems
The Ultra adds
- Leather-accented seats
- Six-way power-adjustable driver’s seat
- Four-way power-adjustable front passenger seat
- Heated and ventilated front seats
- 60:40 split-fold rear seats with centre armrest
- Electronic sunroof
- Heated steering wheel
- Ambient interior lighting
- Auto-dimming rear-view mirror
- 360-degree camera
- Front parking sensors
- Rear privacy glass
- USB outlet for dash camera
The MGU9 EV will be priced from $78,990 plus on-road costs when it arrives in Australia from Q4 2026. Australia will be the first market globally to launch the electric ute.
“At $78,990 plus on-road costs, we believe the MGU9 EV offers a compelling combination of capability, performance and technology, and we’re excited that Australia will be the first market globally to be able to get behind the wheel,” said Dimitri Andreatidis, Marketing Director at MG Motor Australia.
As reported earlier this week, the MGU9 EV uses a 102.2kWh LFP battery and dual electric motors producing 325kW and 700Nm, with all-wheel drive.
It has a claimed 430km WLTP driving range, 3500kg braked towing capacity, 750kg unbraked towing capacity and 685kg payload. Four-wheel Electronic Air Suspension is fitted. The 325kW/700Nm powertrain delivers a claimed 0–100km/h time of 5.8 seconds.
The MGU9 EV has a 236-litre frunk and 6.6kW vehicle-to-load (V2L) capability, with 2.2kW available through an internal power outlet. Charging is supported at up to 11kW on AC and 115kW on DC, with MG quoting around 42 minutes for a 20 to 80 per cent DC charge.
The cabin gets leather front seats, dual 12.3-inch displays, wireless Apple CarPlay and Android Auto, 15W wireless charging and an eight-speaker JBL sound system. The driver’s seat has heating, ventilation and massage functions.
The MGU9 EV will be sold through MG’s nationwide dealer network and covered by a seven-year warranty when serviced within the MG dealer network.
| Specification | MG MGU9 EV |
|---|---|
| Powertrain | Dual-motor AWD EV |
| Battery | 102.2kWh LFP |
| Power | 325kW |
| Torque | 700Nm |
| WLTP range | 430km |
| 0–100km/h | 5.8 seconds |
| AC charging | 11kW |
| DC charging | 115kW |
| DC 20–80% | 42 minutes |
| Braked towing | 3500kg |
| Unbraked towing | 750kg |
| Payload | 685kg |
| Frunk | 236L |
| V2L | 6.6kW external / 2.2kW internal |
| Suspension | Four-wheel Electronic Air Suspension |
| Safety rating | 5-Star ANCAP |
The new Nissan Patrol will have more room for passengers and luggage than the outgoing Y62, while its braked towing capacity increases to 3700kg across the Australian range.
Nissan Australia has released more details of the new Patrol ahead of its arrival here, with the biggest practical changes centred on passenger space, cargo capacity and towing.
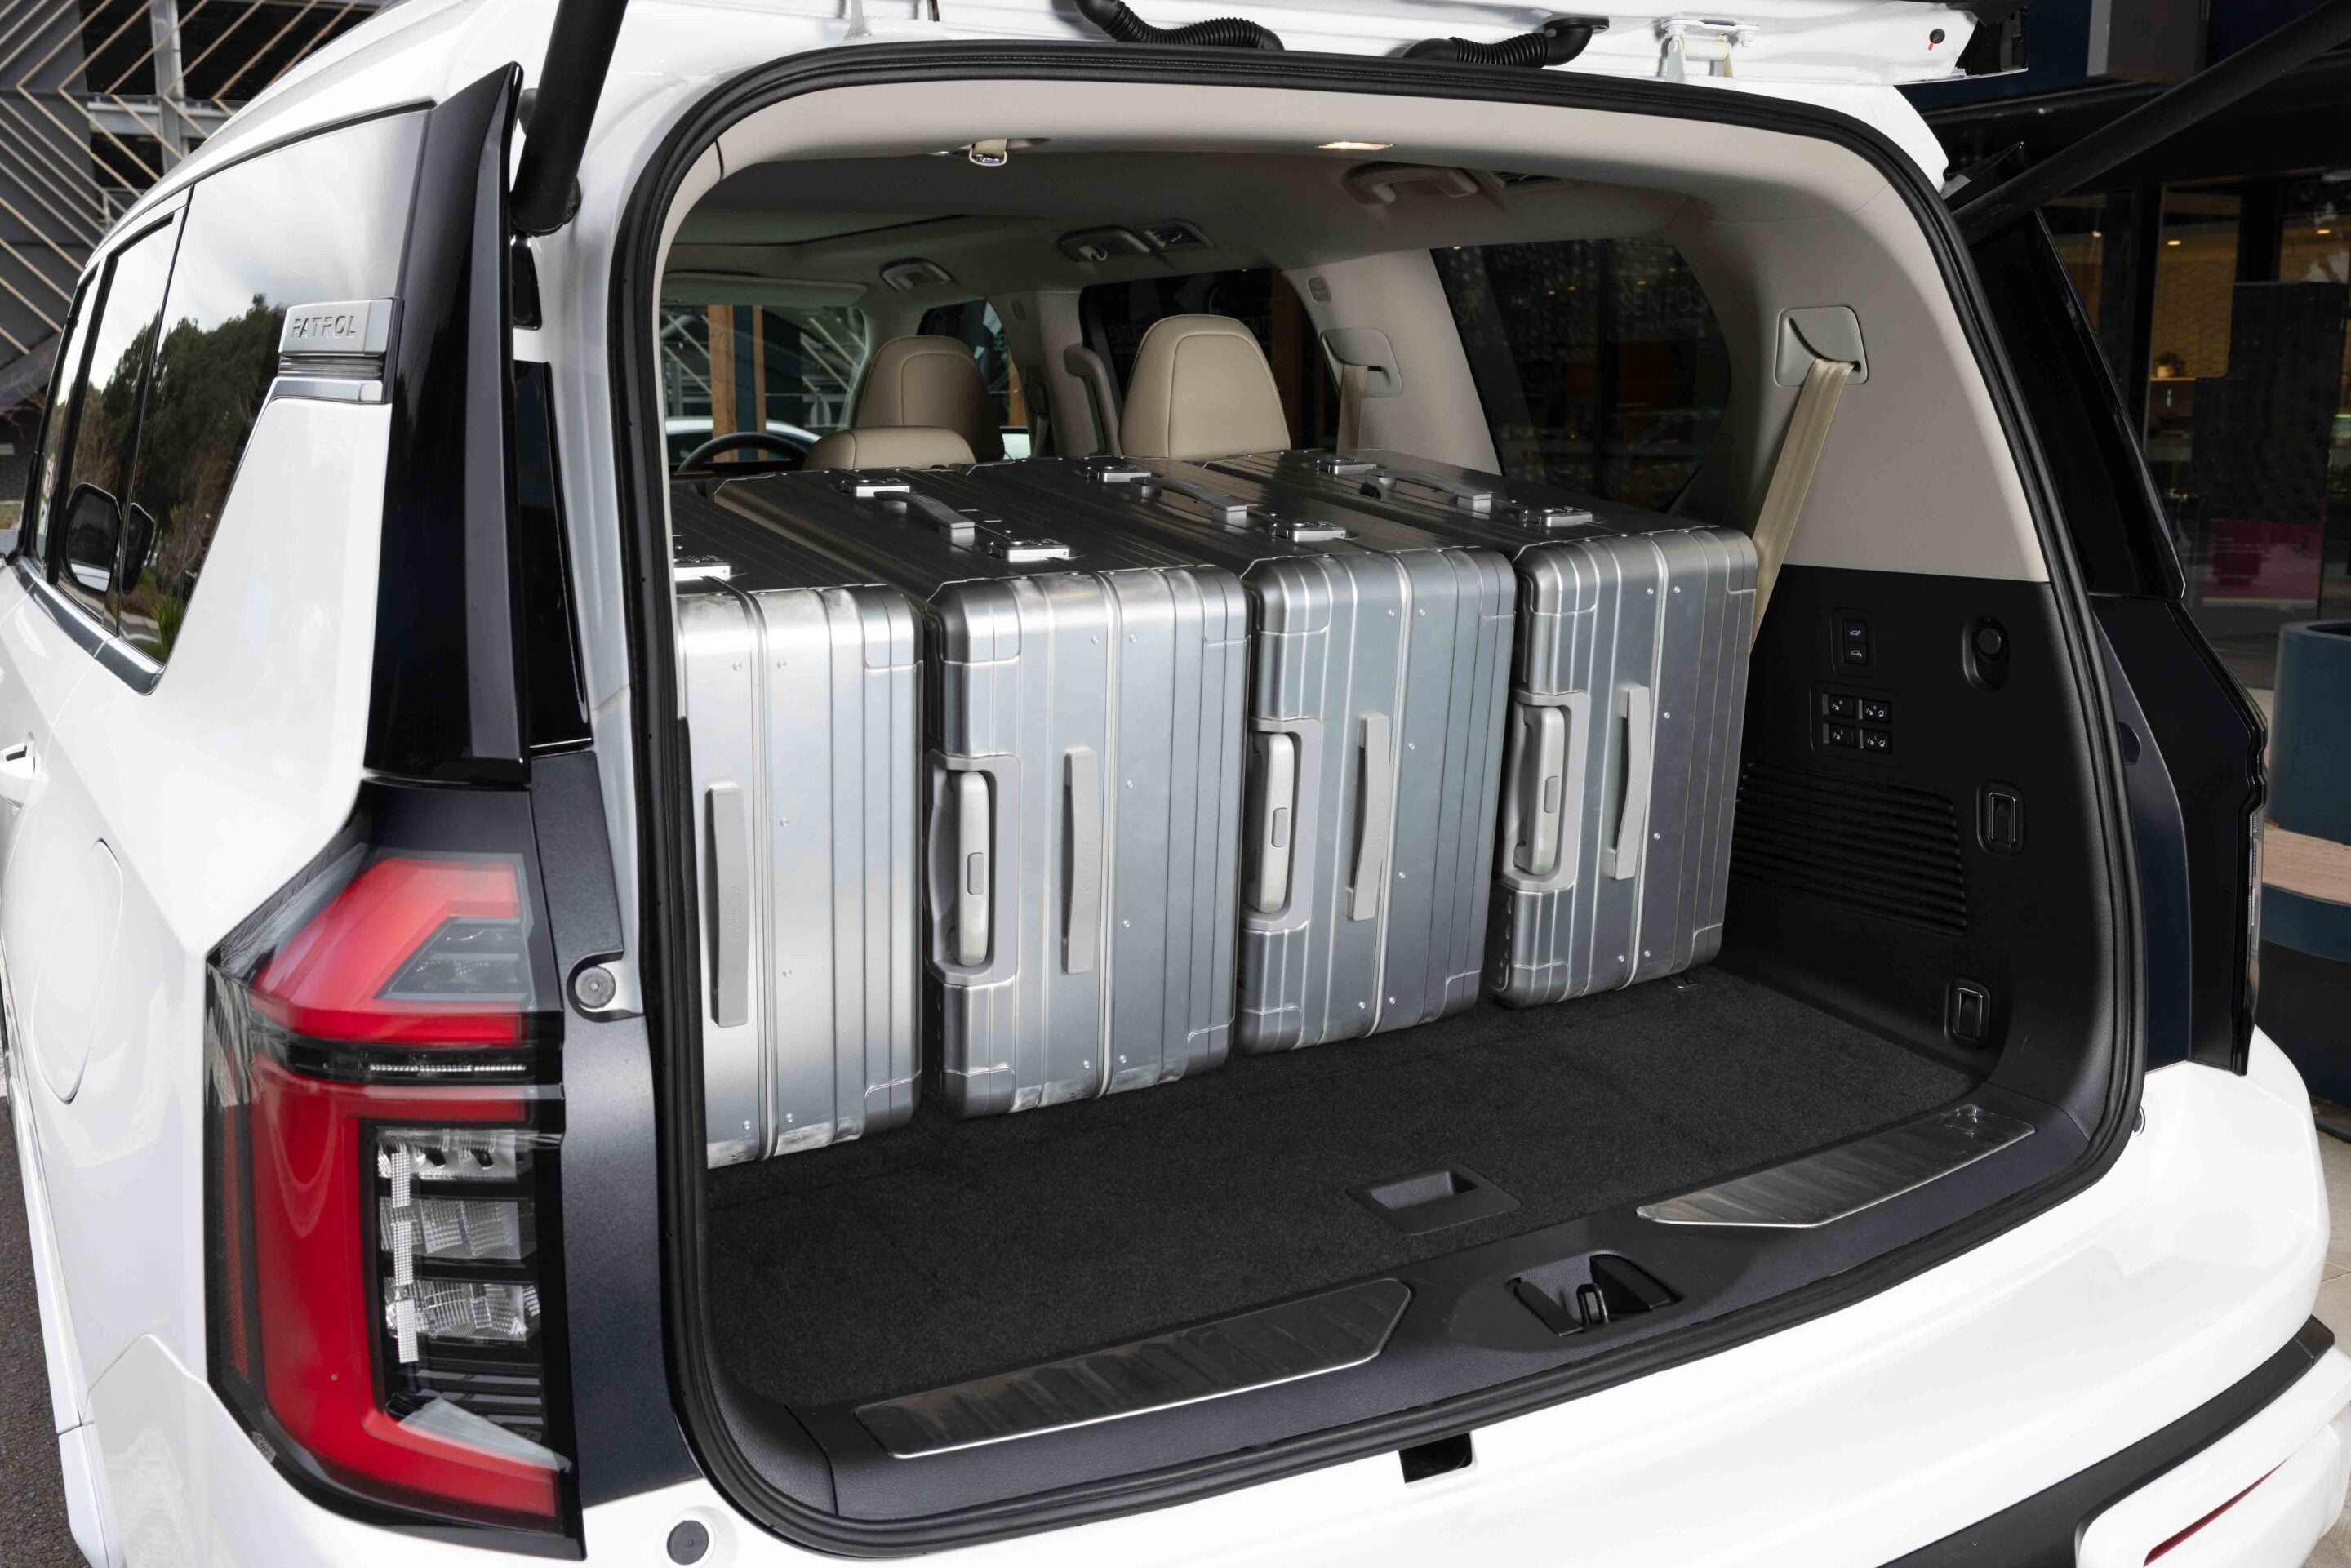
Cargo capacity increases to 577 litres with all three rows in use, 1594 litres with the third row folded and 2749 litres with both rear rows folded. Those figures represent increases of 110, 181 and 127 litres respectively over the outgoing Y62 Patrol.
The second and third rows can also be folded to create a near-flat cargo floor, which should make it easier to load larger items. PRO-4X and Ti-L Reserve grades get adaptive air suspension that can lower the vehicle to make loading the cargo area easier.
Nissan Oceania Managing Director Steve Milette said the changes were focused on improving the Patrol’s practicality for passengers and families.
“The all-new Patrol’s improvements extend beyond its exterior design and powertrain, with particular attention given to the needs of passengers and families. The Patrol has always been valued by Australian families for its space, comfort and versatility. With the all-new model, we’ve taken those attributes to another level.
“From significantly increased third-row space and greater second-row legroom to more usable cargo capacity and 3,700kg braked towing capability‡ across the range, the all-new Patrol has been engineered to be even more capable of meeting the demands of Australian families.”
More room across all three rows
The second row can slide fore and aft, giving passengers up to 250mm more legroom than the Y62 when positioned at the rear of its travel.
A new tilt-and-glide function also makes access to the third row easier, including when a child seat is fitted to the second row. Third-row space gets a substantial increase, with 75mm more hip room and 66mm more knee room than the Y62. Moving the second row to its forward-most position provides up to 253mm more legroom, while outboard third-row passengers gain 84mm of heel clearance.
The third row also gets a flatter floor, while a wider sidestep is fitted across the range to make getting into and out of the rear seats easier. Nissan says the changes are intended to make the third row more suitable for three passengers rather than simply serving as occasional seating.
Up front, all grades gain more hip, shoulder and legroom, along with a higher driver eyeline. The front and second-row seats use a new ‘Zero Gravity’ structure with high-damping foam designed to reduce vibrations over rough and corrugated roads. Seat massage is available for the driver on Ti-L+ and for both front occupants on Ti-L Reserve.
3700kg towing across the range
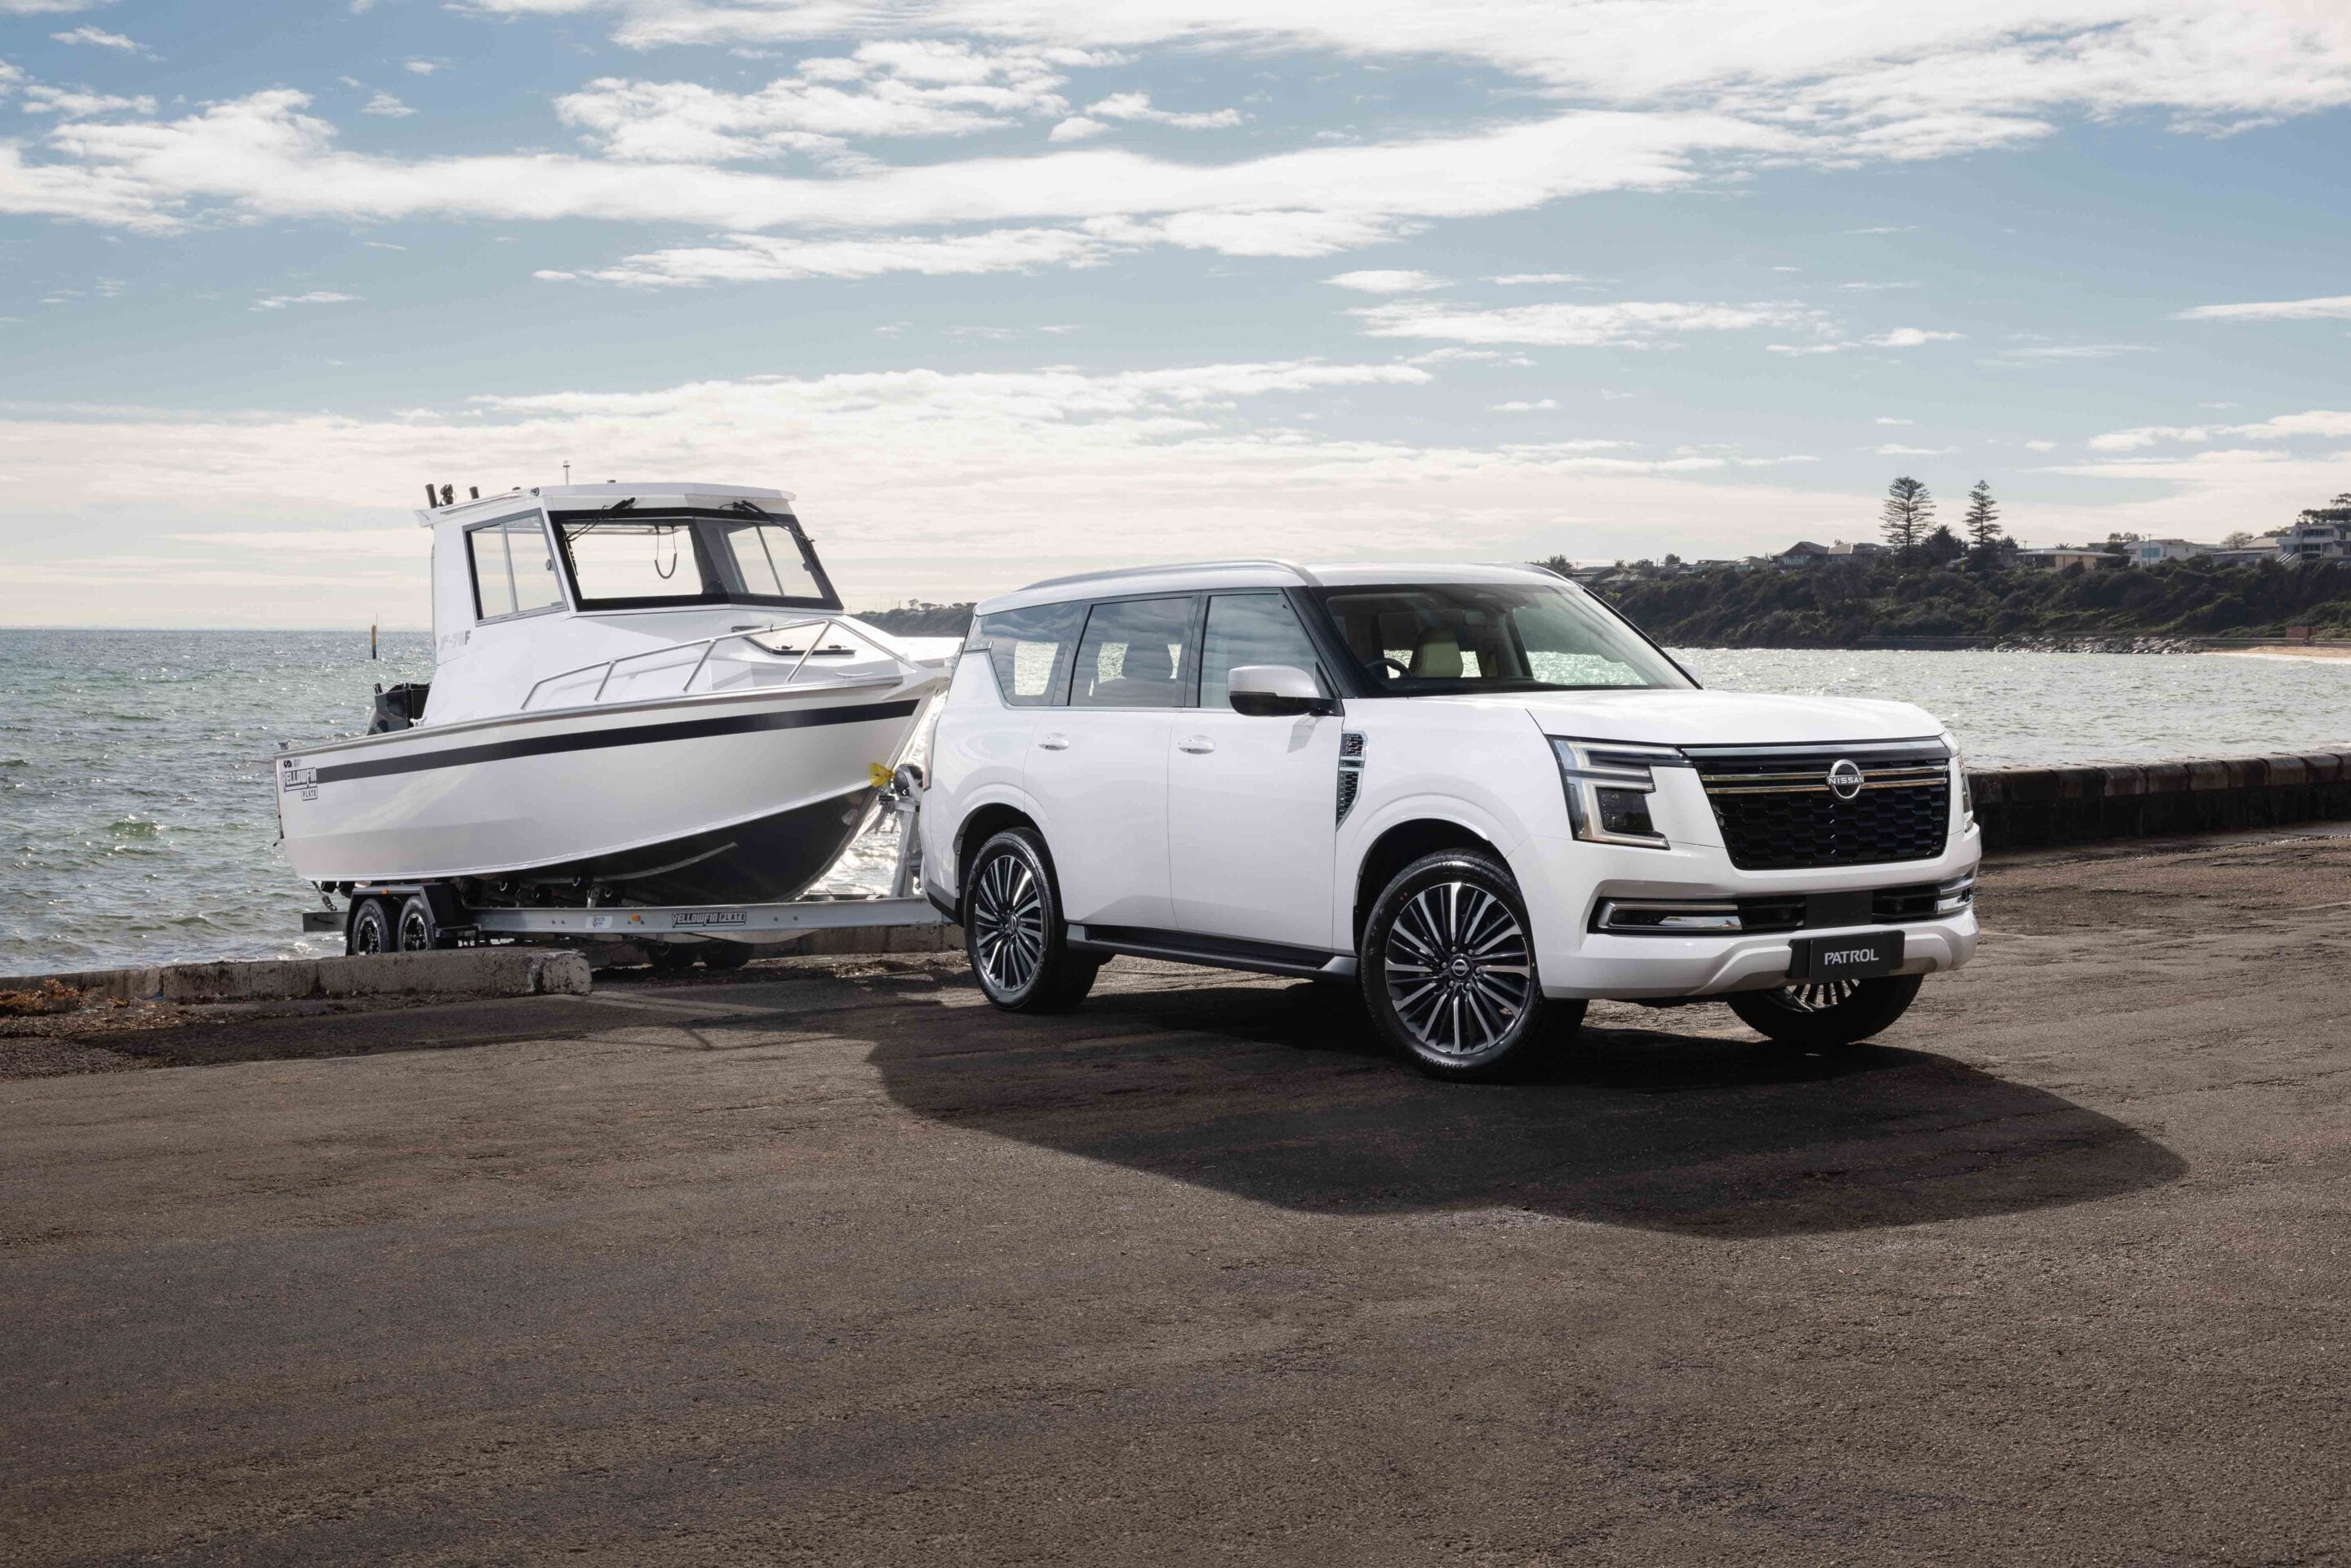
The new Patrol’s braked towing capacity increases by 200kg to 3700kg across the range.
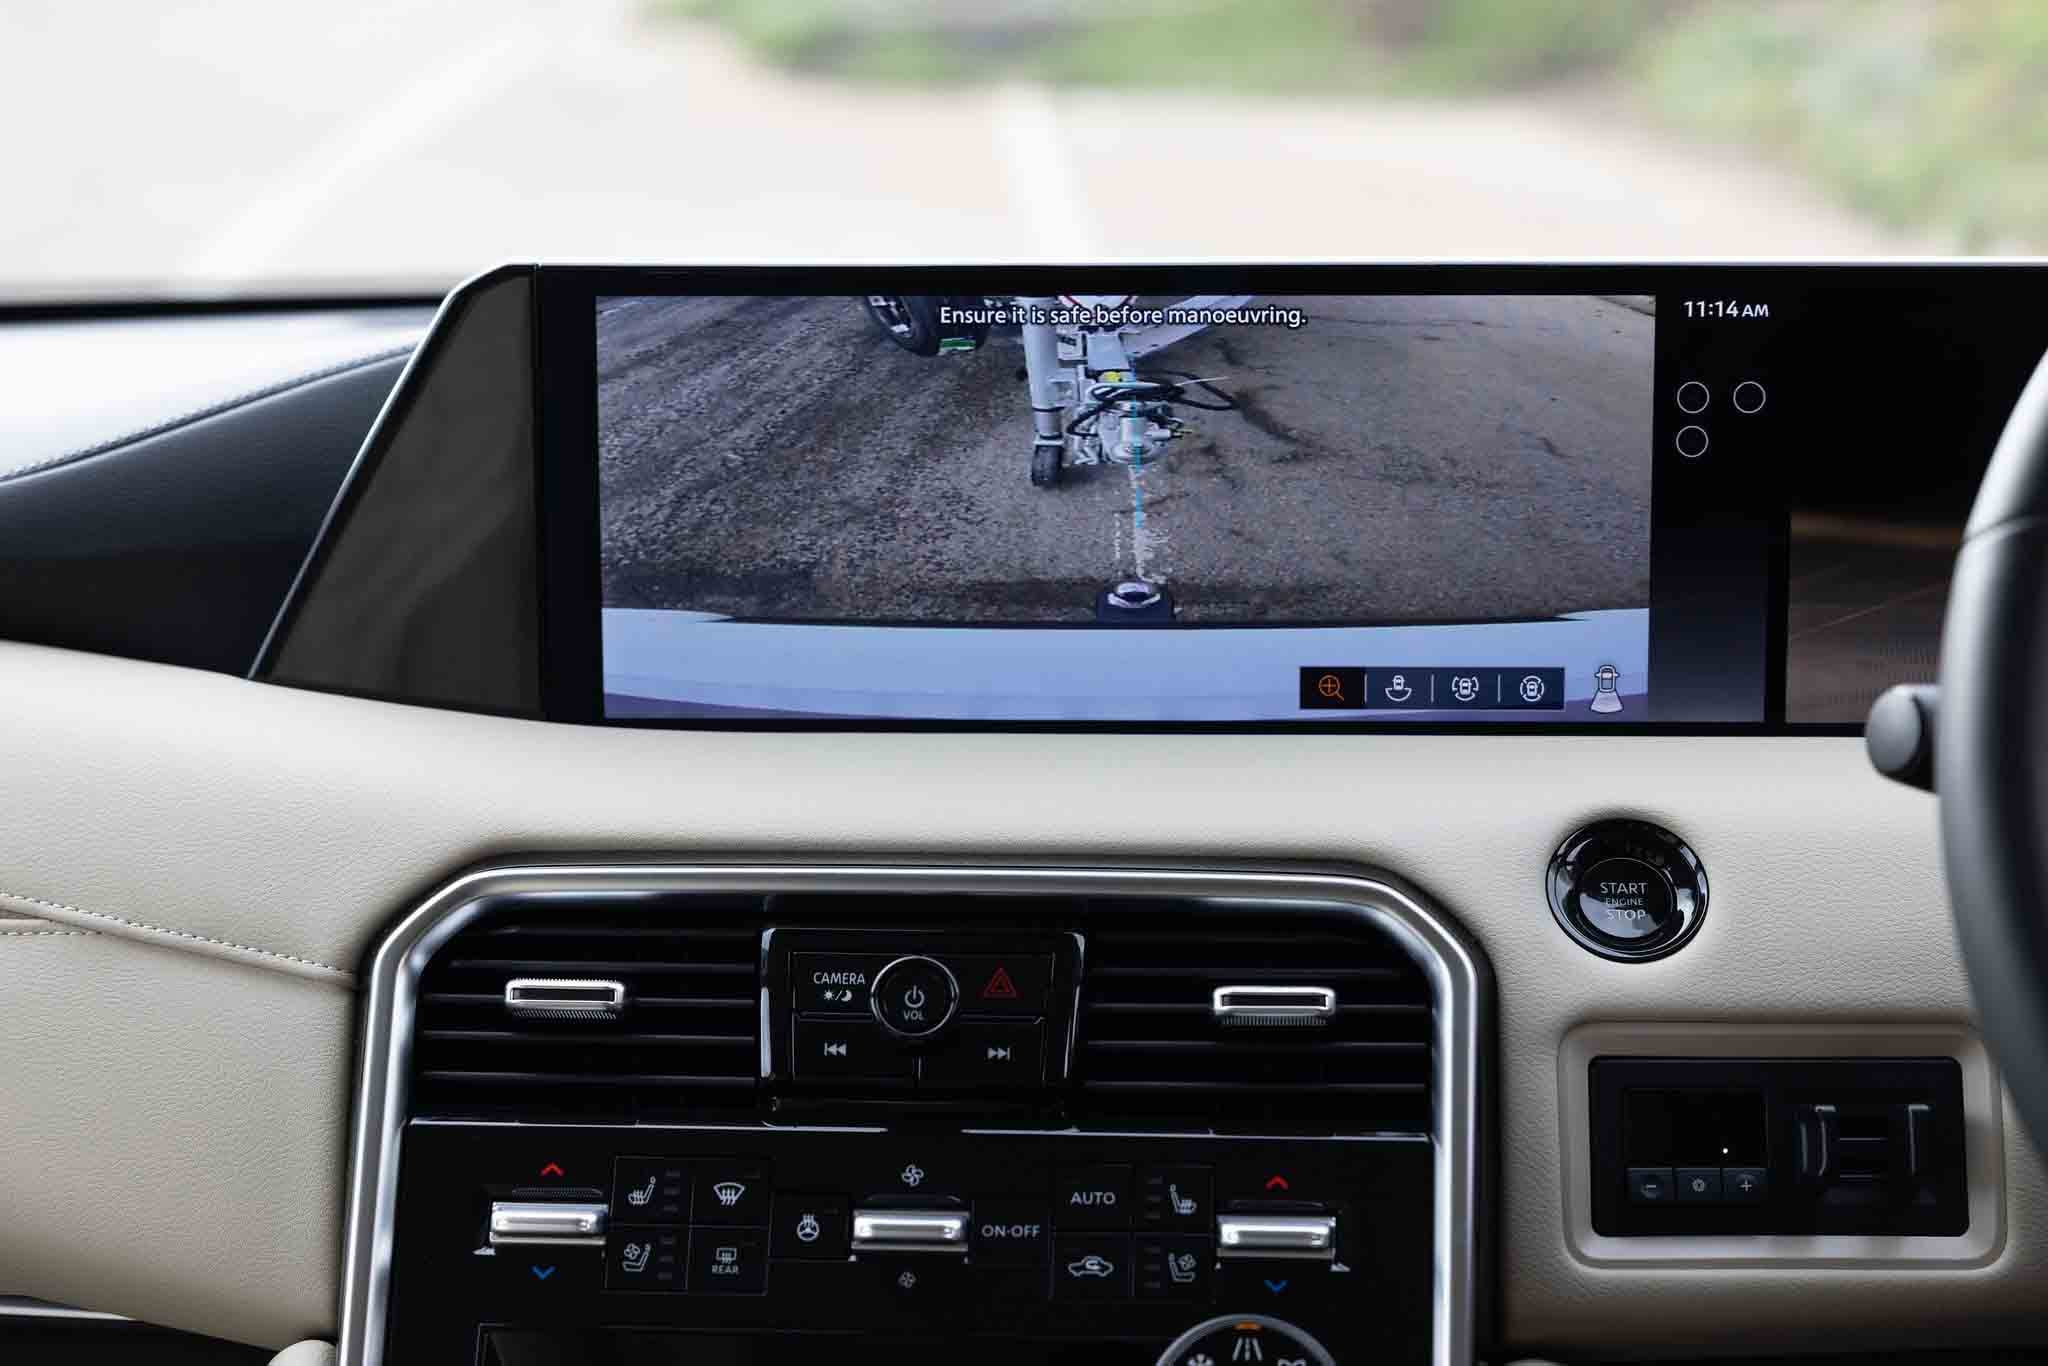
Nissan will offer a range of tow tongue and tow ball configurations as at-cost accessories, including a configuration supporting the full 3700kg rating. Trailer Blind Spot Warning is now fitted across the range, joining Trailer Sway Control. PRO-4X and Ti-L Reserve grades add Trailer Docking Support to help align the tow bar with a trailer coupling, while both grades get an electric trailer brake controller as standard.
The Patrol range starts at $98,990 for the Ti and extends to $145,990 for the Ti-L Reserve, with the range powered by a 3.5-litre twin-turbo petrol V6 producing 317kW and 700Nm, paired with a nine-speed automatic and full-time 4WD with 4H and 4L. The range also gets an electronic rear differential lock, while the PRO-4X adds adaptive air suspension, all-terrain tyres and a dedicated off-road front bumper.
The all-new Nissan Patrol is due to reach Australian customers in the first quarter of 2027.
The essential info
- Cargo capacity: 577L with all three rows in use
- Cargo capacity: 1594L with third row folded
- Cargo capacity: 2749L with second and third rows folded
- Second-row legroom: Up to 250mm more than Y62
- Third-row hip room: 75mm more than Y62
- Third-row knee room: 66mm more than Y62
- Third-row legroom: Up to 253mm more with second row moved forward
- Third-row heel clearance: 84mm more for outboard occupants
- Braked towing capacity: 3700kg
- Engine: 3.5-litre twin-turbo petrol V6
- Power: 317kW
- Torque: 700Nm
- Transmission: Nine-speed automatic
- 4WD: Full-time 4WD with 4H and 4L
- Rear differential: Electronic locking differential
- Starting price: $98,990
- Top-spec price: $145,990
- Australian deliveries: Q1 2027
A touring 4WD can place far greater demands on its suspension than a standard vehicle.
A canopy, drawers, fridge, rooftop tent, recovery gear, extra fuel and water all add weight, while towing a camper trailer adds another load to the vehicle. That extra weight changes how the 4WD sits, rides and handles. It can also affect suspension travel, braking and how much capacity is left within the vehicle’s weight ratings.
Choosing suspension for a loaded touring 4WD isn’t simply a matter of picking a lift height or ordering the heaviest springs available. The setup needs to suit how much weight the vehicle carries, where that weight sits and whether it’s there all the time or only when you’re heading away.
The best place to start is with actual vehicle weights. Weighing the 4WD in its normal touring configuration, including front and rear axle weights, gives you the information needed to select springs and shocks for the vehicle you actually drive.
Why loaded touring changes suspension requirements
A stock or lightly modified 4WD and a fully loaded touring rig can have very different suspension requirements.
A vehicle carrying permanent touring equipment needs to support that weight every kilometre, while one that only gets loaded for occasional trips needs to cope with a much wider range of weights. Add a camper trailer and the suspension also has to deal with the extra load transferred through the towball.
The vehicle’s accessories, passengers, fuel, water and camping equipment all contribute to its laden weight, while their position affects how that weight is distributed between the front and rear axles.
The most useful numbers when selecting load-specific suspension are the vehicle’s actual weight and its front and rear axle weights. Weigh the 4WD in the condition you expect to travel, including passengers, fuel, water, camping equipment and permanent accessories. If you’re towing, include the trailer ball weight in the assessment. A heavy bull bar and winch can increase front axle weight, while drawers, a canopy, fridge, spare wheel and water can add plenty of weight at the rear.
Those figures give a suspension specialist like Superior Engineering a much better basis for selecting spring rates than the vehicle model or a generic “heavy-duty” recommendation.
| Use | Suspension considerations |
|---|---|
| Light touring | Balanced spring rates and good ride quality |
| Permanent touring load | Springs matched to constant front and rear loads |
| Heavy touring load | Appropriate spring rate and shock valving |
| Touring plus camper trailer | Vehicle load and trailer ball weight considered together |
| Heavy modified touring rig | Payload, axle ratings, GVM and compliance requirements |
Spring rate matters more than lift height
When suspension is being selected for a loaded touring vehicle, spring rate matters more than simply deciding how much lift you want.
The spring needs to support the actual load while maintaining appropriate ride height and usable suspension travel. A spring that’s too soft can allow the vehicle to sag under load, while one that’s unnecessarily stiff can make the 4WD uncomfortable when unloaded and limit suspension movement.
Front and rear spring rates also need to be considered separately. A heavy bull bar and winch add weight at the front, while drawers, a canopy, fridge, water and other touring equipment can put considerably more weight over the rear axle.
There isn’t one universal “touring” spring rate. It comes down to the vehicle’s actual load and how that load is distributed. Constant-load springs are designed for vehicles that carry extra weight most of the time. They’re suited to a 4WD with permanent touring equipment where the extra load is always present. Variable-load setups are better suited to vehicles that spend much of their time relatively lightly loaded but gain a lot of weight when preparing for a trip.
Going for the heaviest spring available isn’t necessarily the better option. If the spring rate is too high for the vehicle’s normal load, the result can be a harsh unloaded ride and reduced ability for the suspension to articulate over uneven ground.
Matching shocks to the load
Springs support the vehicle’s weight, while shock absorbers control suspension movement.
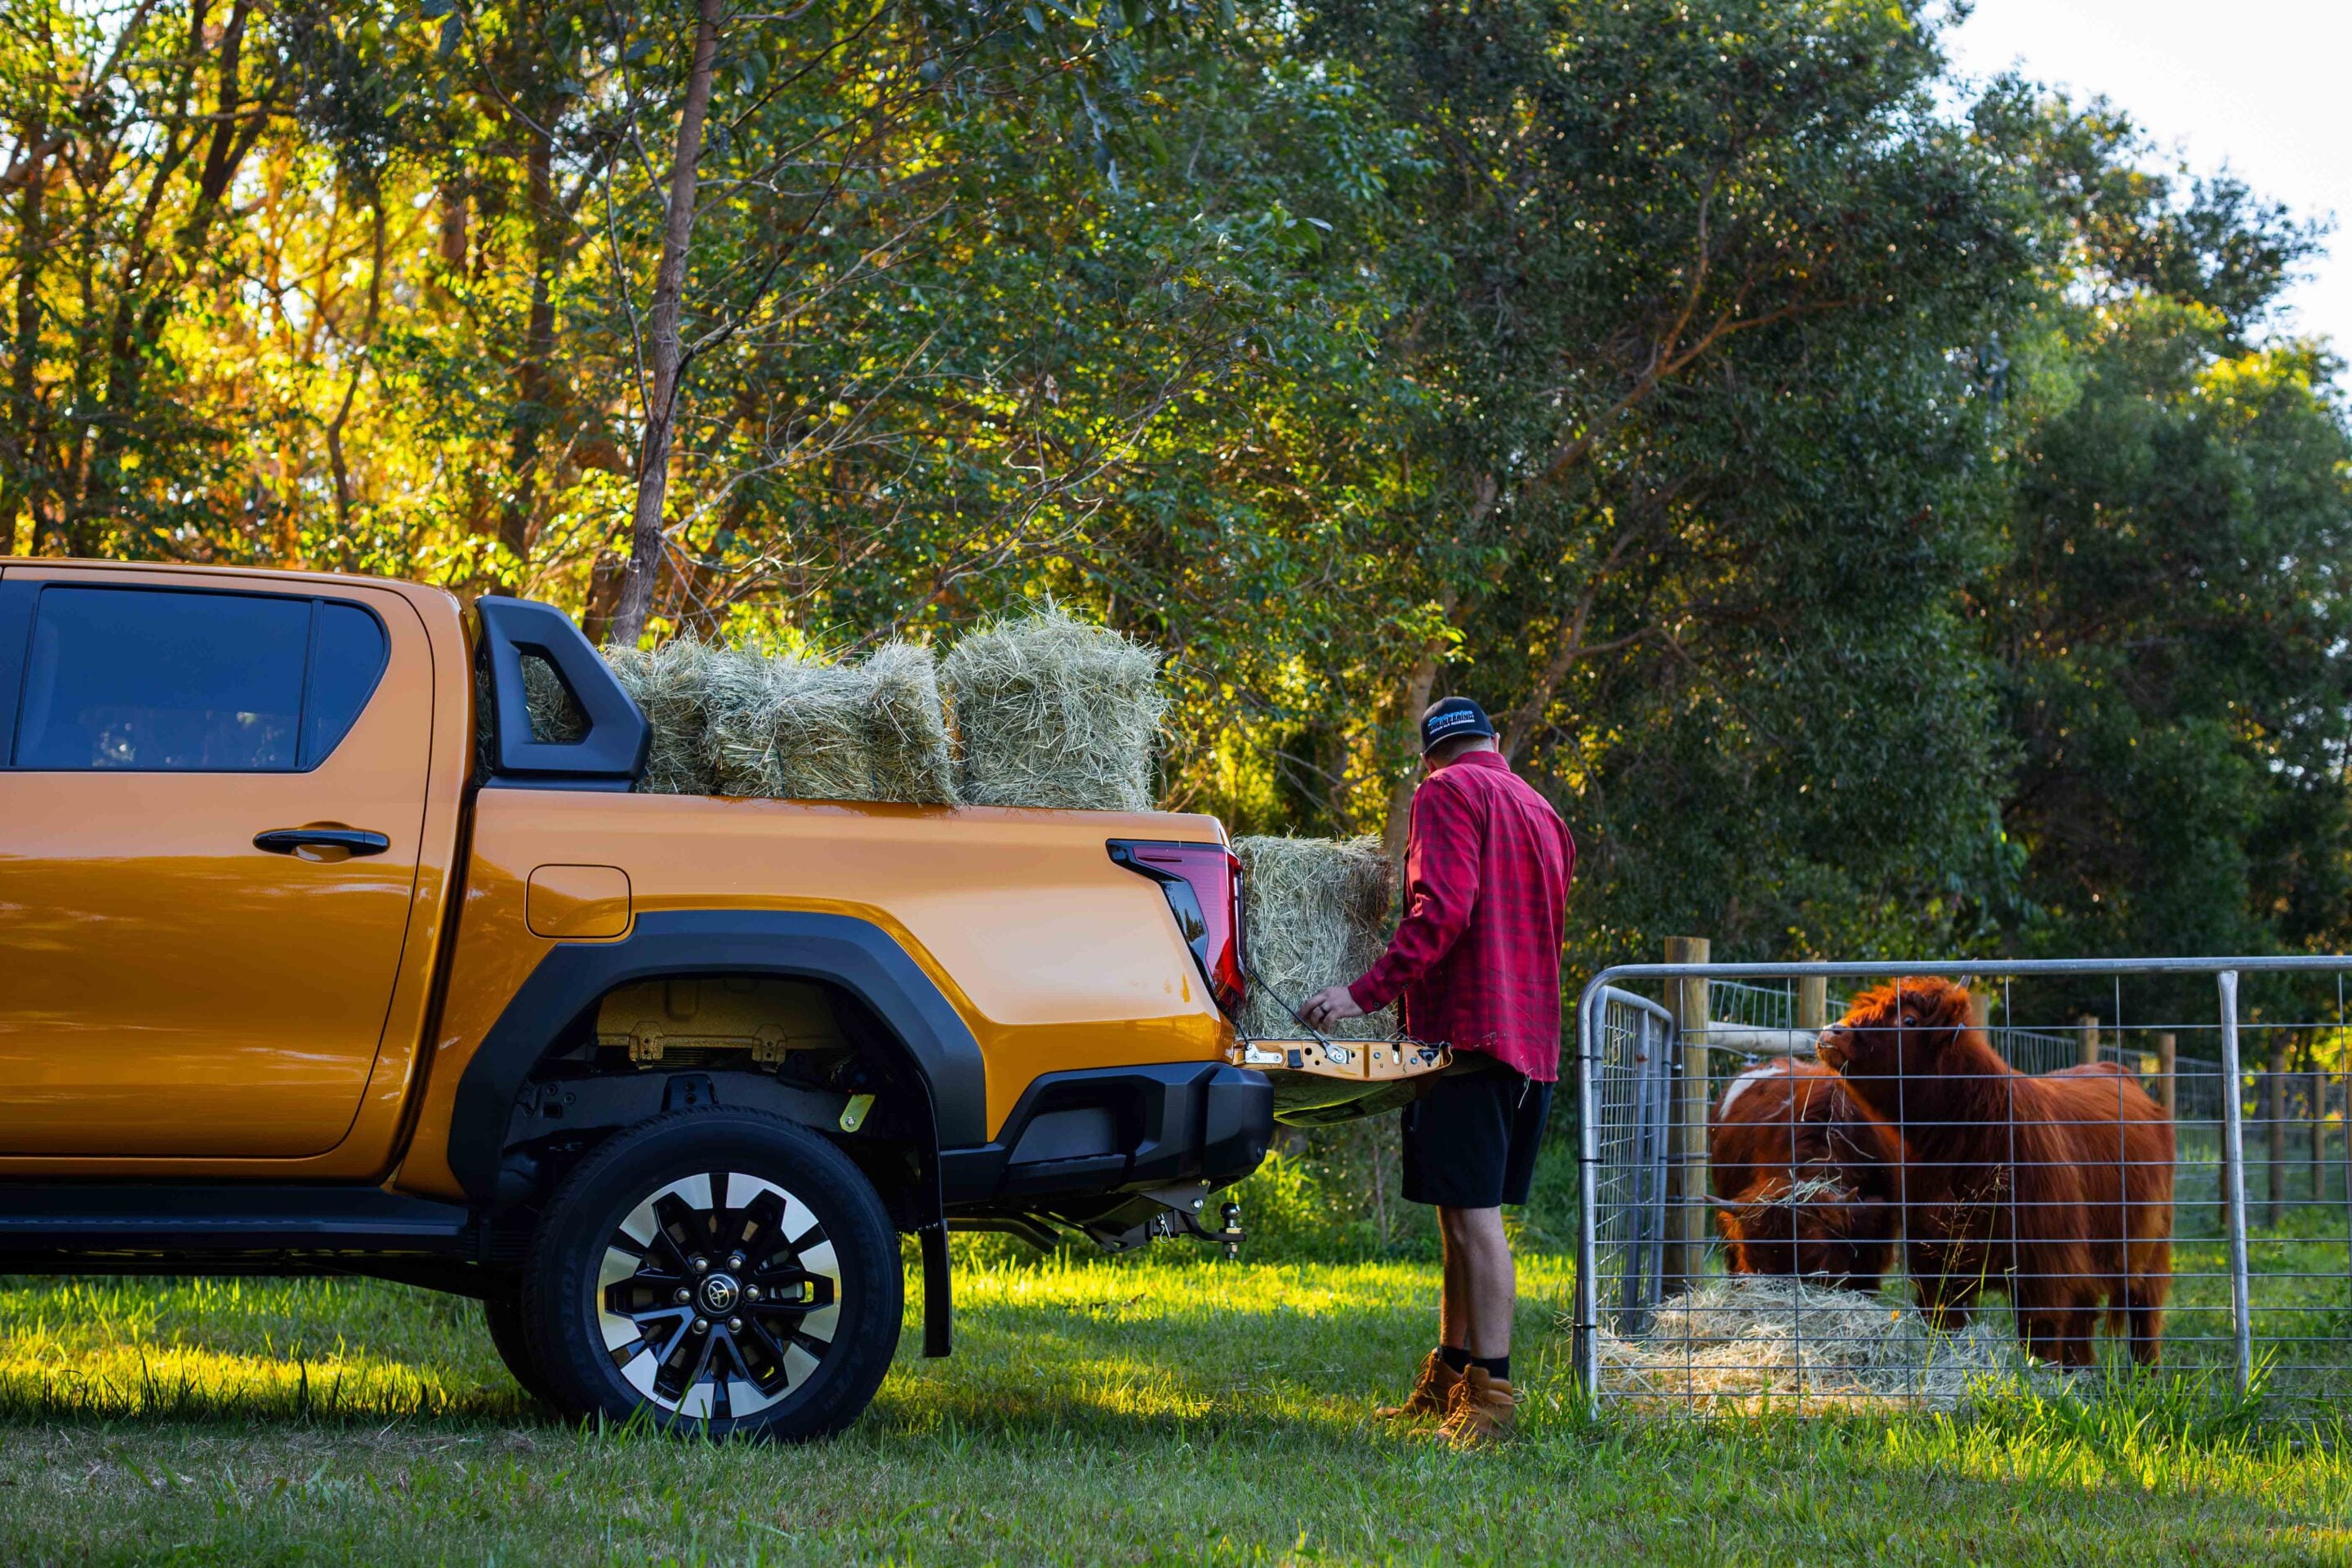
Once a 4WD is carrying a lot more mass, the shocks need to control that extra weight. Shock valving needs to be considered alongside spring rate rather than treating shocks as a one-size-fits-all component.
A vehicle carrying a constant heavy load can require different valving from one that only carries that weight occasionally. Terrain and intended use also matter, particularly for vehicles spending long periods on corrugations or tackling demanding off-road tracks.
More specialised shock designs can suit certain applications. Remote-reservoir shocks can provide extra oil volume and heat-management capability, while bypass shocks, more commonly seen in high-speed off-road use, offer greater scope for specialised damping control. Neither is automatically required for a touring 4WD. The shock needs to suit the vehicle, load and type of driving.
Adding weight can change how a 4WD responds to steering inputs, corners and uneven terrain. The effect can be more noticeable when a vehicle carries a heavy touring load high on the body or when its suspension has been modified.
Sway bars and other load-related handling components can form part of the overall suspension package, including disconnectable sway bars where extra articulation is needed for off-road touring. Their suitability needs to be considered alongside spring rates, shocks, vehicle weight and intended use rather than treated as an isolated upgrade.
Towing adds another load
A camper trailer changes things because some of the trailer’s weight is transferred through the towball.
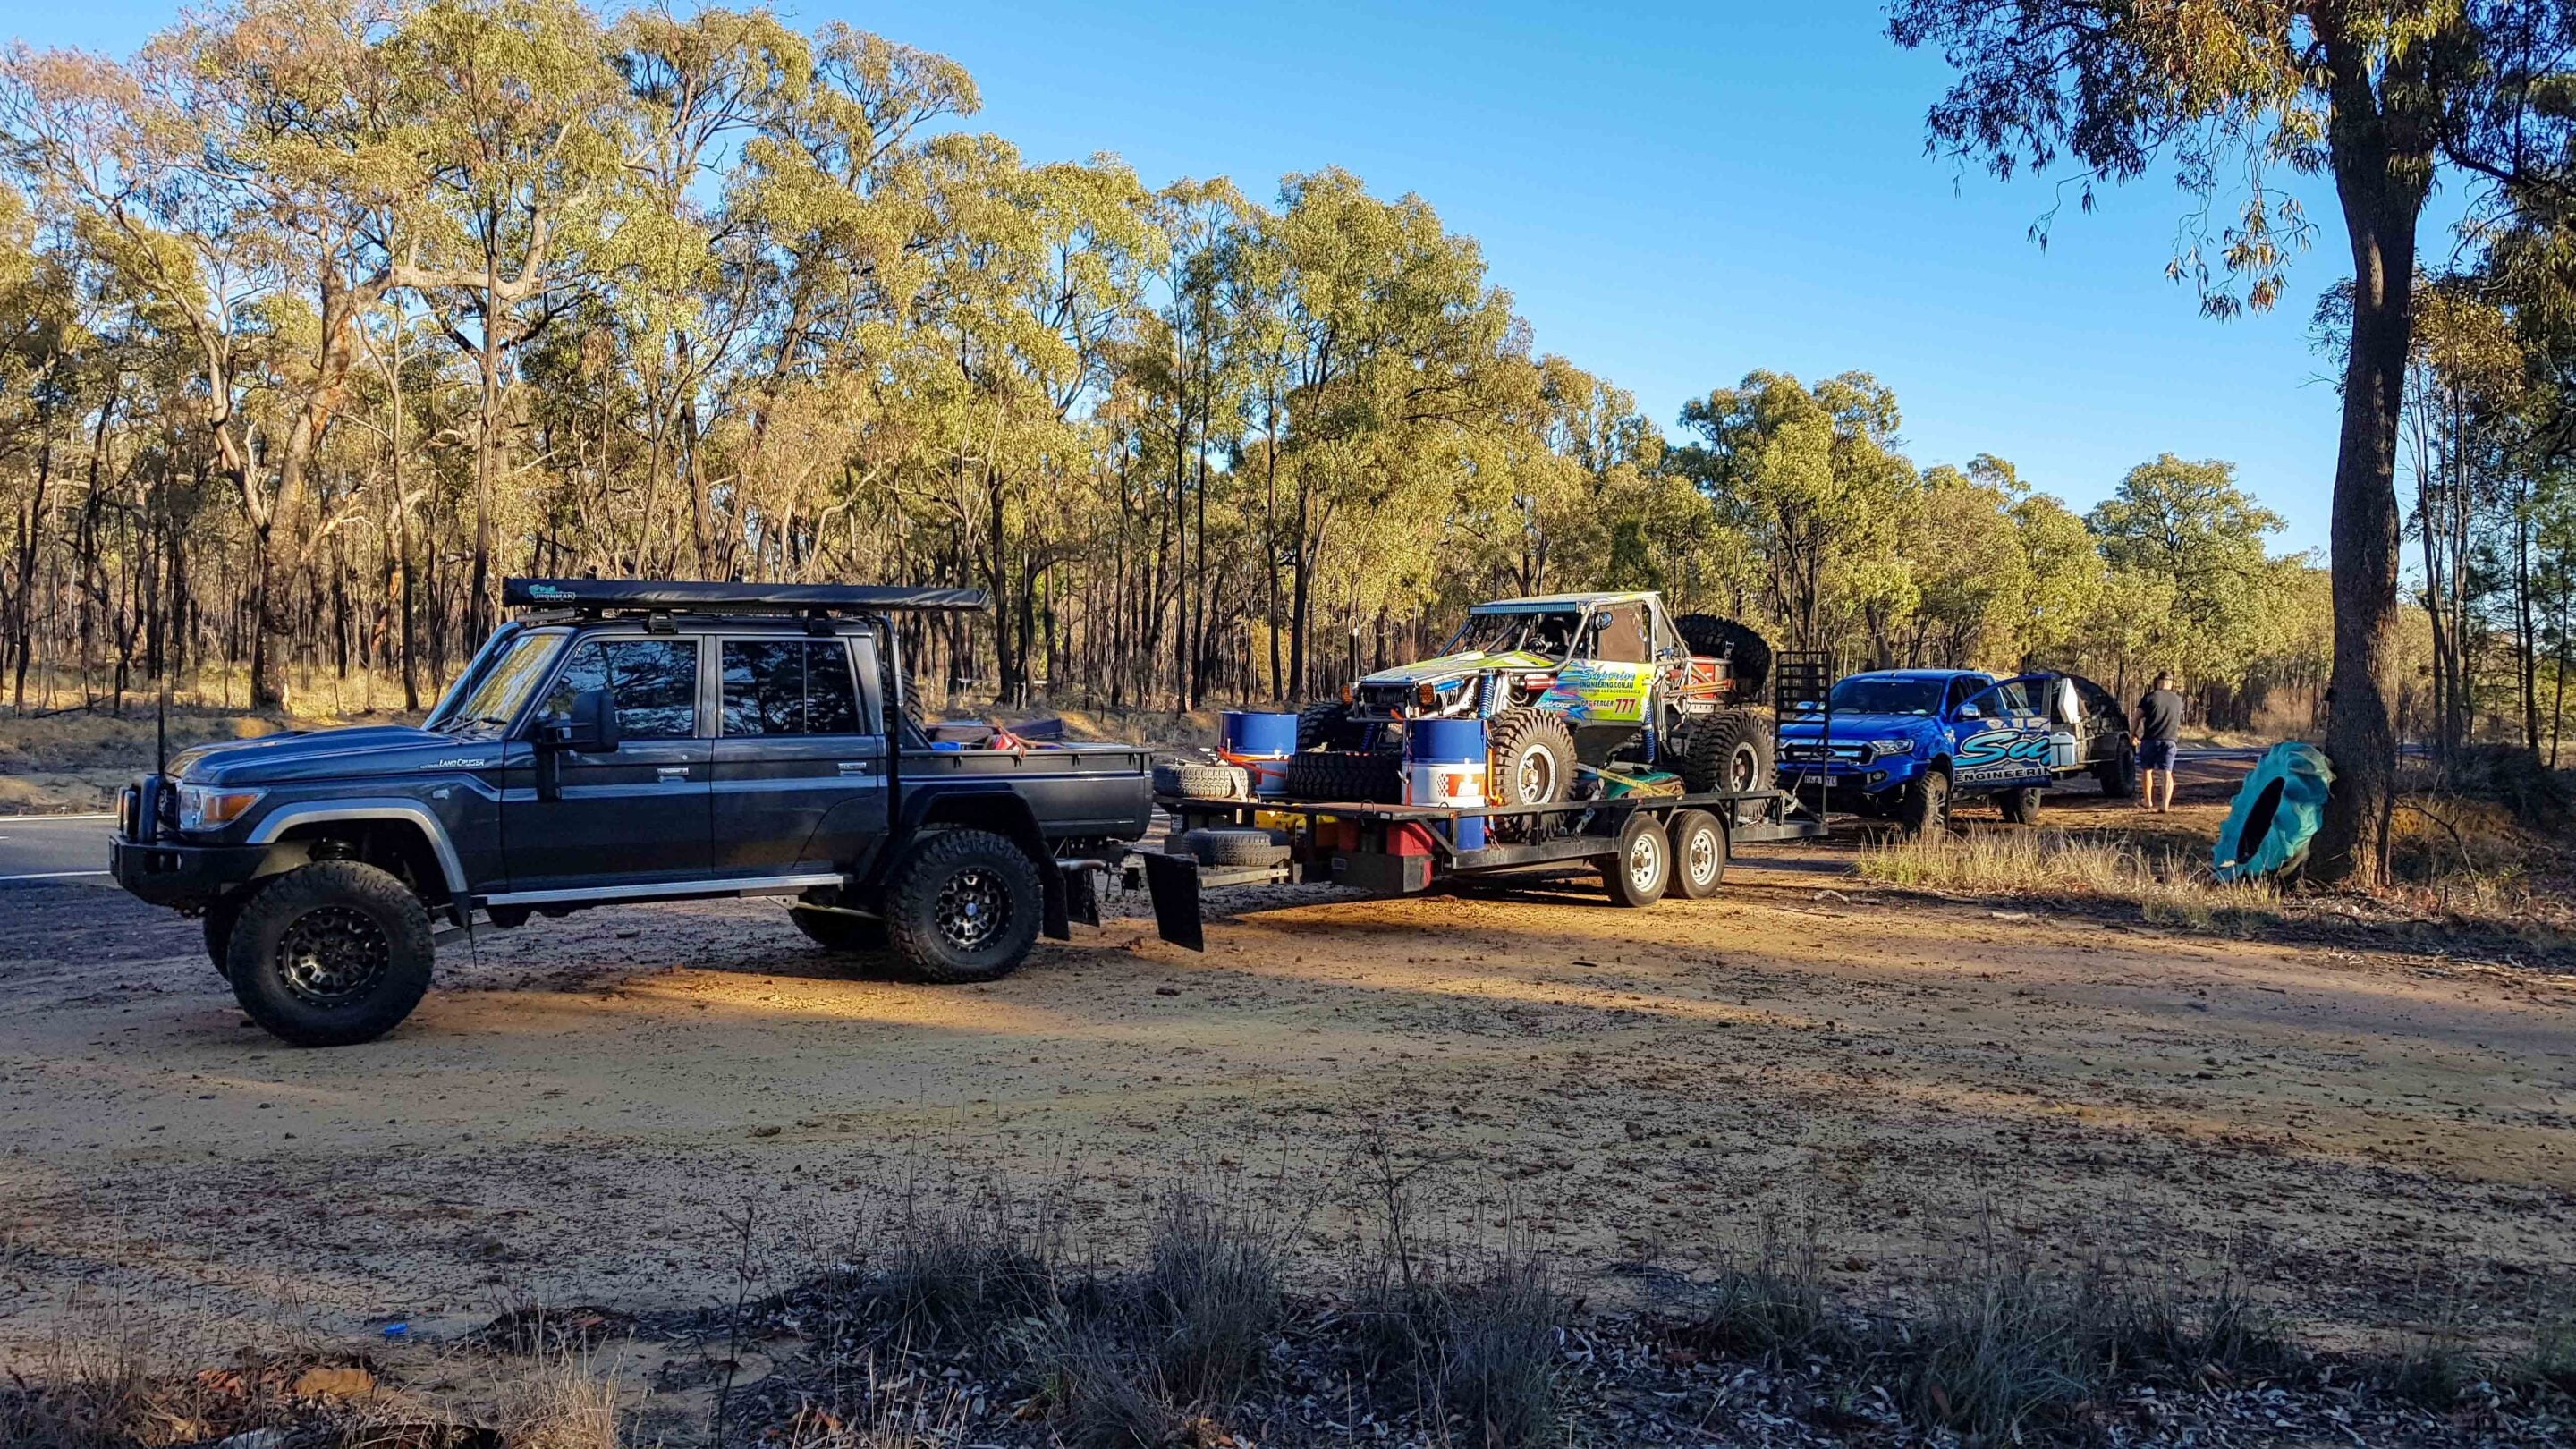
That ball weight is transferred into the tow vehicle and contributes to its axle loading. A 4WD with a heavy canopy, drawers, fridge and water system may already have significant rear axle loading before the trailer is connected. A setup designed around the vehicle’s camping equipment alone may not be appropriate once a camper trailer is added. The vehicle’s actual towing configuration should be part of the suspension assessment from the beginning.
Airbags or auxiliary load-assist systems can be useful where the vehicle’s load varies a lot or extra rear support is needed for a particular application. They don’t remove the need to select an appropriate primary spring. A vehicle carrying a constant heavy load still needs a spring rate suited to that load rather than relying on airbags to compensate for an unsuitable setup.
For vehicles that alternate between unloaded daily driving and heavily loaded touring, an auxiliary system can be one way of managing the change in load. The best option comes down to how much the vehicle’s weight varies and what it is being used for.
When does a GVM upgrade become necessary?
A suspension upgrade doesn’t automatically increase how much weight a vehicle can legally carry.
Every 4WD has applicable weight ratings, including its GVM and axle ratings. Once accessories, passengers and touring equipment are added, the available payload can reduce quickly.
For heavily modified touring vehicles, a GVM upgrade kit may be necessary where the extra equipment and intended load would otherwise push the vehicle beyond its original rating. These kits can involve specific suspension components and compliance requirements, depending on the vehicle and the applicable approval.
A GVM upgrade also doesn’t mean axle ratings or other applicable limits can be ignored. Requirements for GVM upgrades and their legal recognition vary between states, territories and countries, so check the requirements that apply to your vehicle before making modifications.
Which setup suits your touring load?
The suspension setup should reflect how the vehicle is actually used, not just how much lift it has.
Light touring: If the vehicle only carries camping equipment occasionally and spends most of its time unloaded, a variable-load setup can avoid unnecessarily stiff suspension during everyday driving.
Heavy touring: A vehicle with permanent drawers, canopy, fridge, fuel, water and other equipment needs springs matched to those constant loads, with shock valving suited to the resulting weight.
Touring and towing: If the vehicle carries a heavy touring load and regularly tows a camper, both the laden vehicle and trailer ball weight need to be considered when selecting the suspension.
What suspension does your touring 4WD need?
For loaded touring, suspension isn’t about chasing the highest spring rate or greatest lift. It needs to support the vehicle’s actual load while providing appropriate damping, handling and suspension travel.
Before buying, get the 4WD weighed in its touring configuration and obtain front and rear axle weights. Take those figures, along with details of any trailer and its ball weight, to a suspension specialist or experienced fitter like Superior Engineering.
That gives you a suspension setup based on the load the vehicle actually carries, helping avoid springs that are too soft for the job or unnecessarily stiff for the way you use the 4WD.
The HEMI V8 is returning to the local Ram line-up after a two-year production hiatus, with the 6.4-litre petrol engine joining the Ram 2500 Heavy Duty range in the new Warlock variant.
The Ram 2500 Warlock will be sold in Australia for the first time, priced from $157,950 plus on-road costs. Customer deliveries are due to commence next month, with the first examples rolling off Ram Trucks Australia’s remanufacturing assembly line in Melbourne earlier this month.
The 6.4-litre HEMI V8 produces 306kW at 5600rpm and 582Nm at 4000rpm, with an eight-speed automatic transmission and selectable two-wheel-drive high, four-wheel-drive high and four-wheel-drive low modes. The petrol V8 sits alongside the Cummins diesel in the Ram Heavy Duty range rather than replacing it.
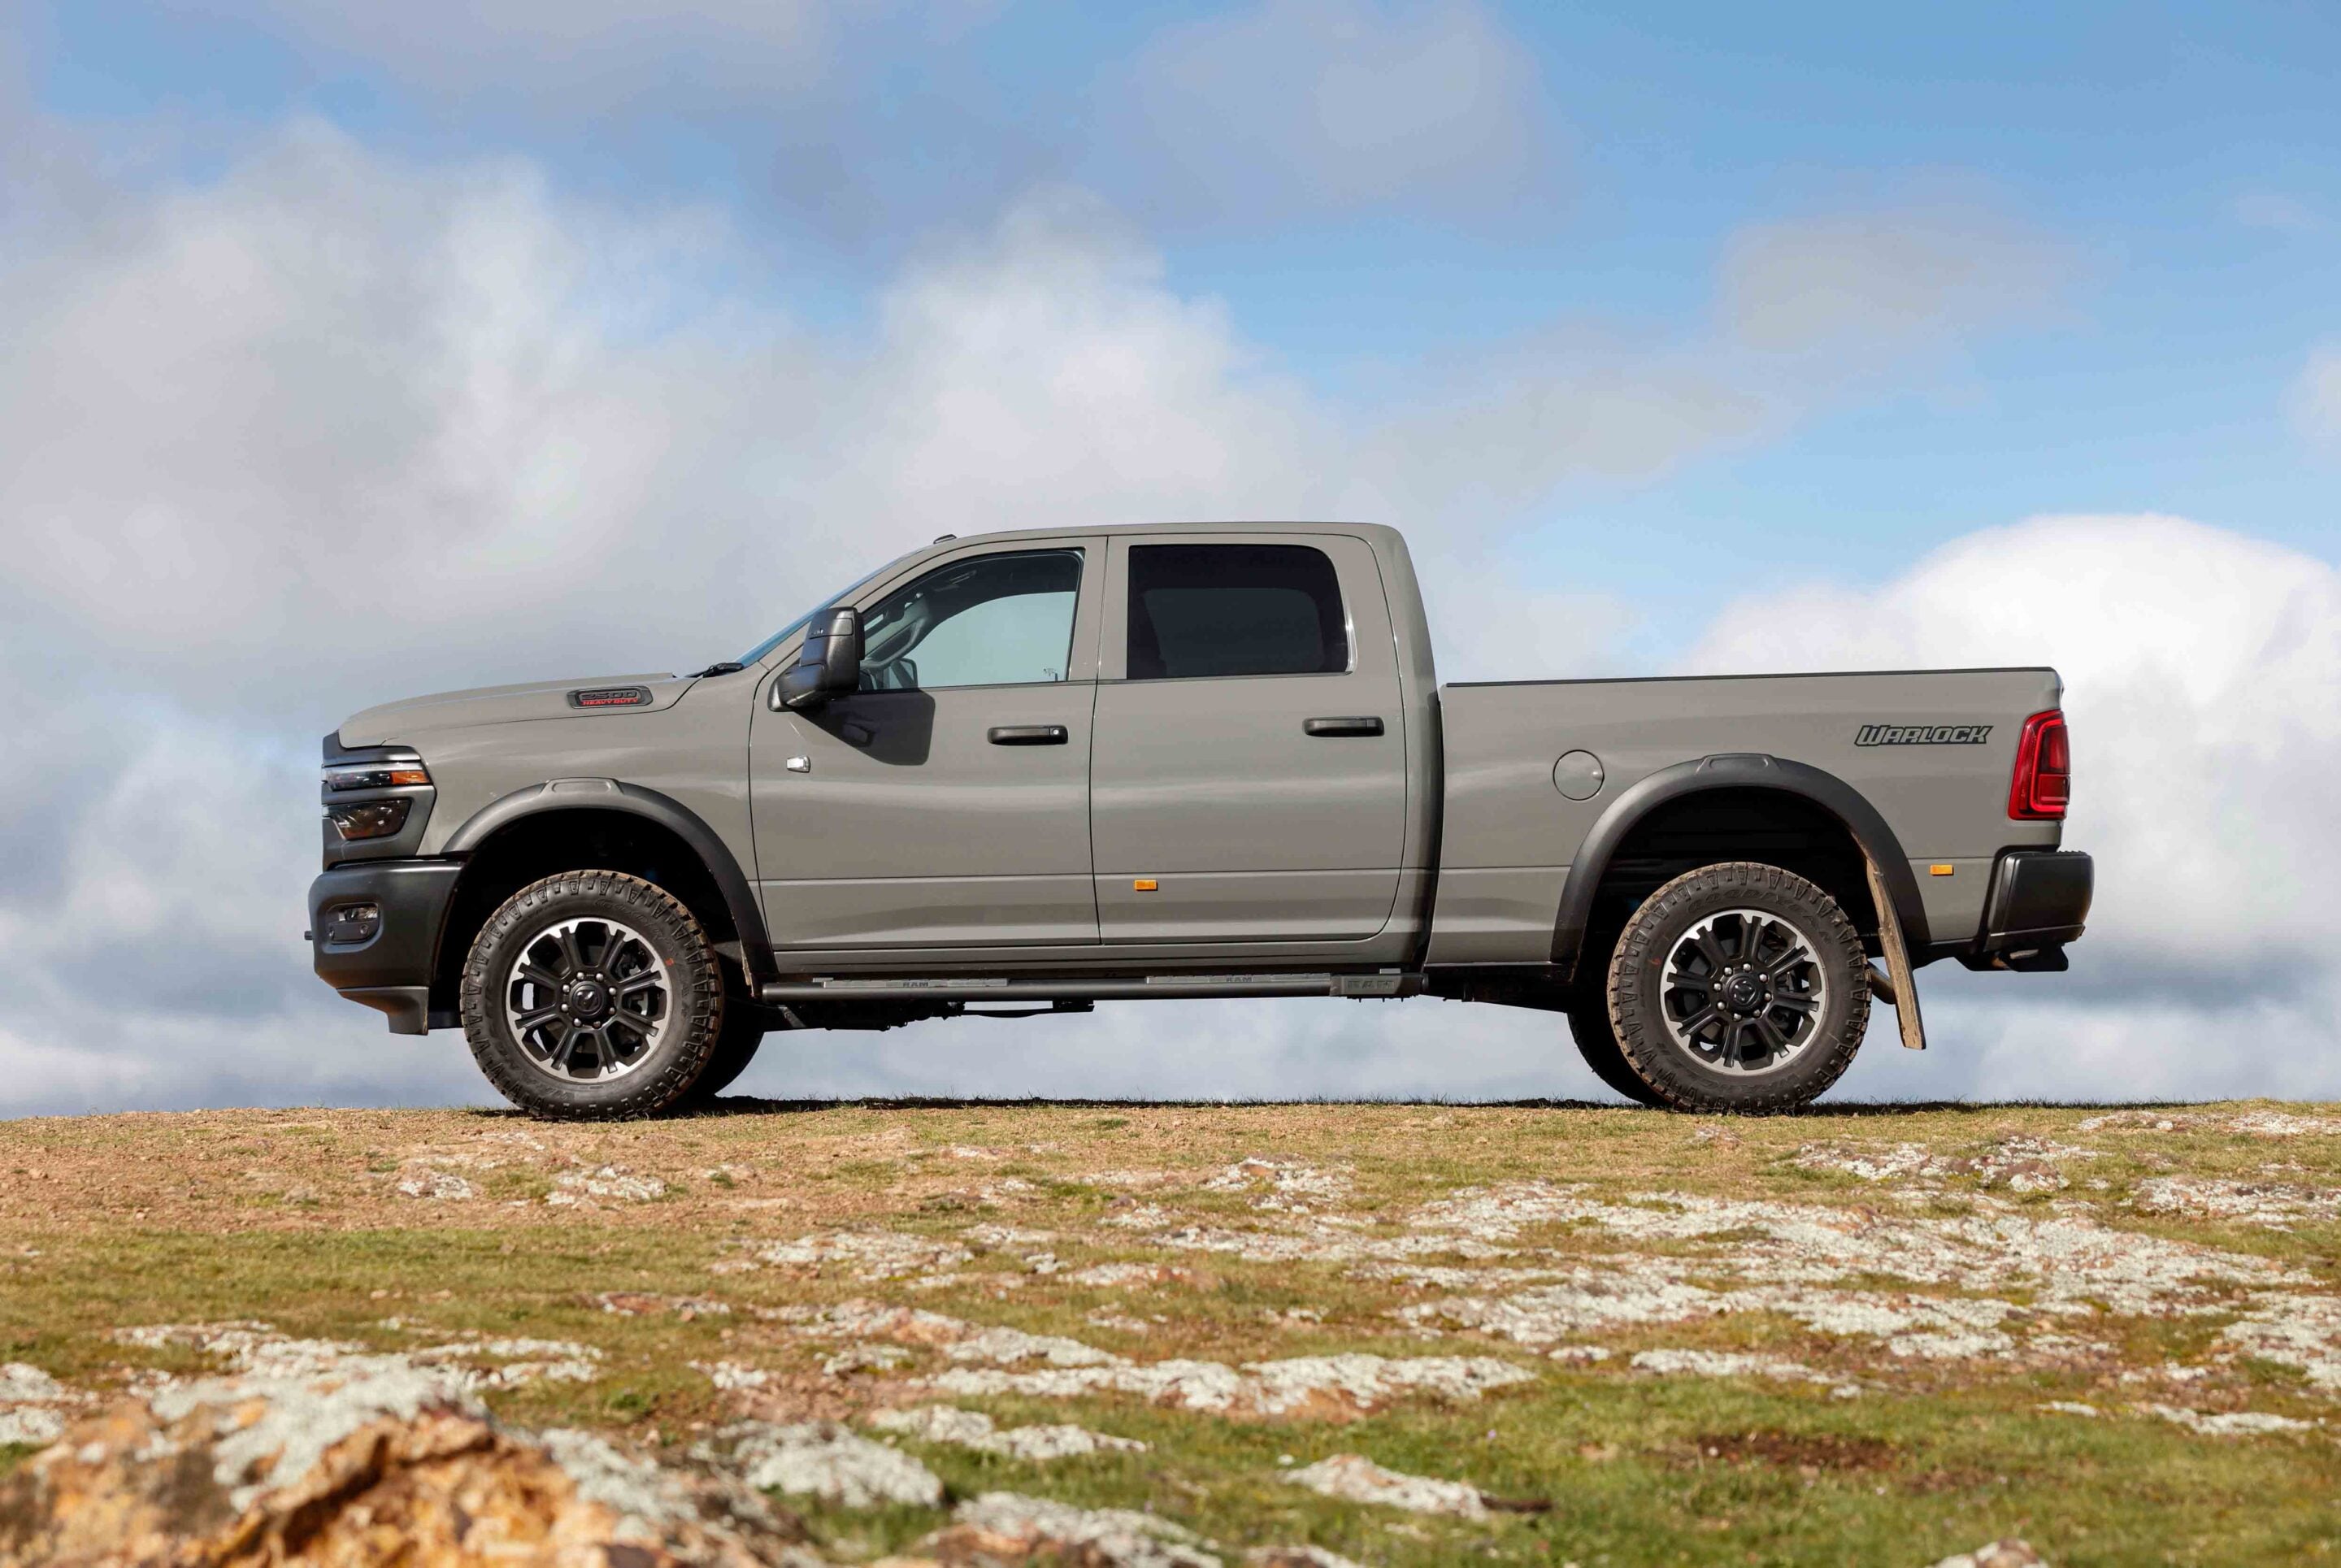
The Warlock is an off-road-inspired version of the Ram 2500 Heavy Duty, with Bilstein suspension, 20-inch alloy wheels and 285/60 R20 all-terrain tyres. It also gets black fender flares, side steps, bumpers, mirror scalps and a black front fascia, along with Warlock decals and a spray-in bed-liner.
The 2500 measures 6066mm long, 2220mm wide excluding the mirrors and 2043mm high, with a 3785mm wheelbase. It has a 4495kg GVM and 1275kg payload, while kerb weight is listed at 3220kg. Towing capacity is rated at 3500kg with a 50mm tow ball and 4500kg with a 70mm tow ball. That rises to 6700kg when fitted with a genuine gooseneck accessory and air brakes, while GCM is listed at 10,001kg.
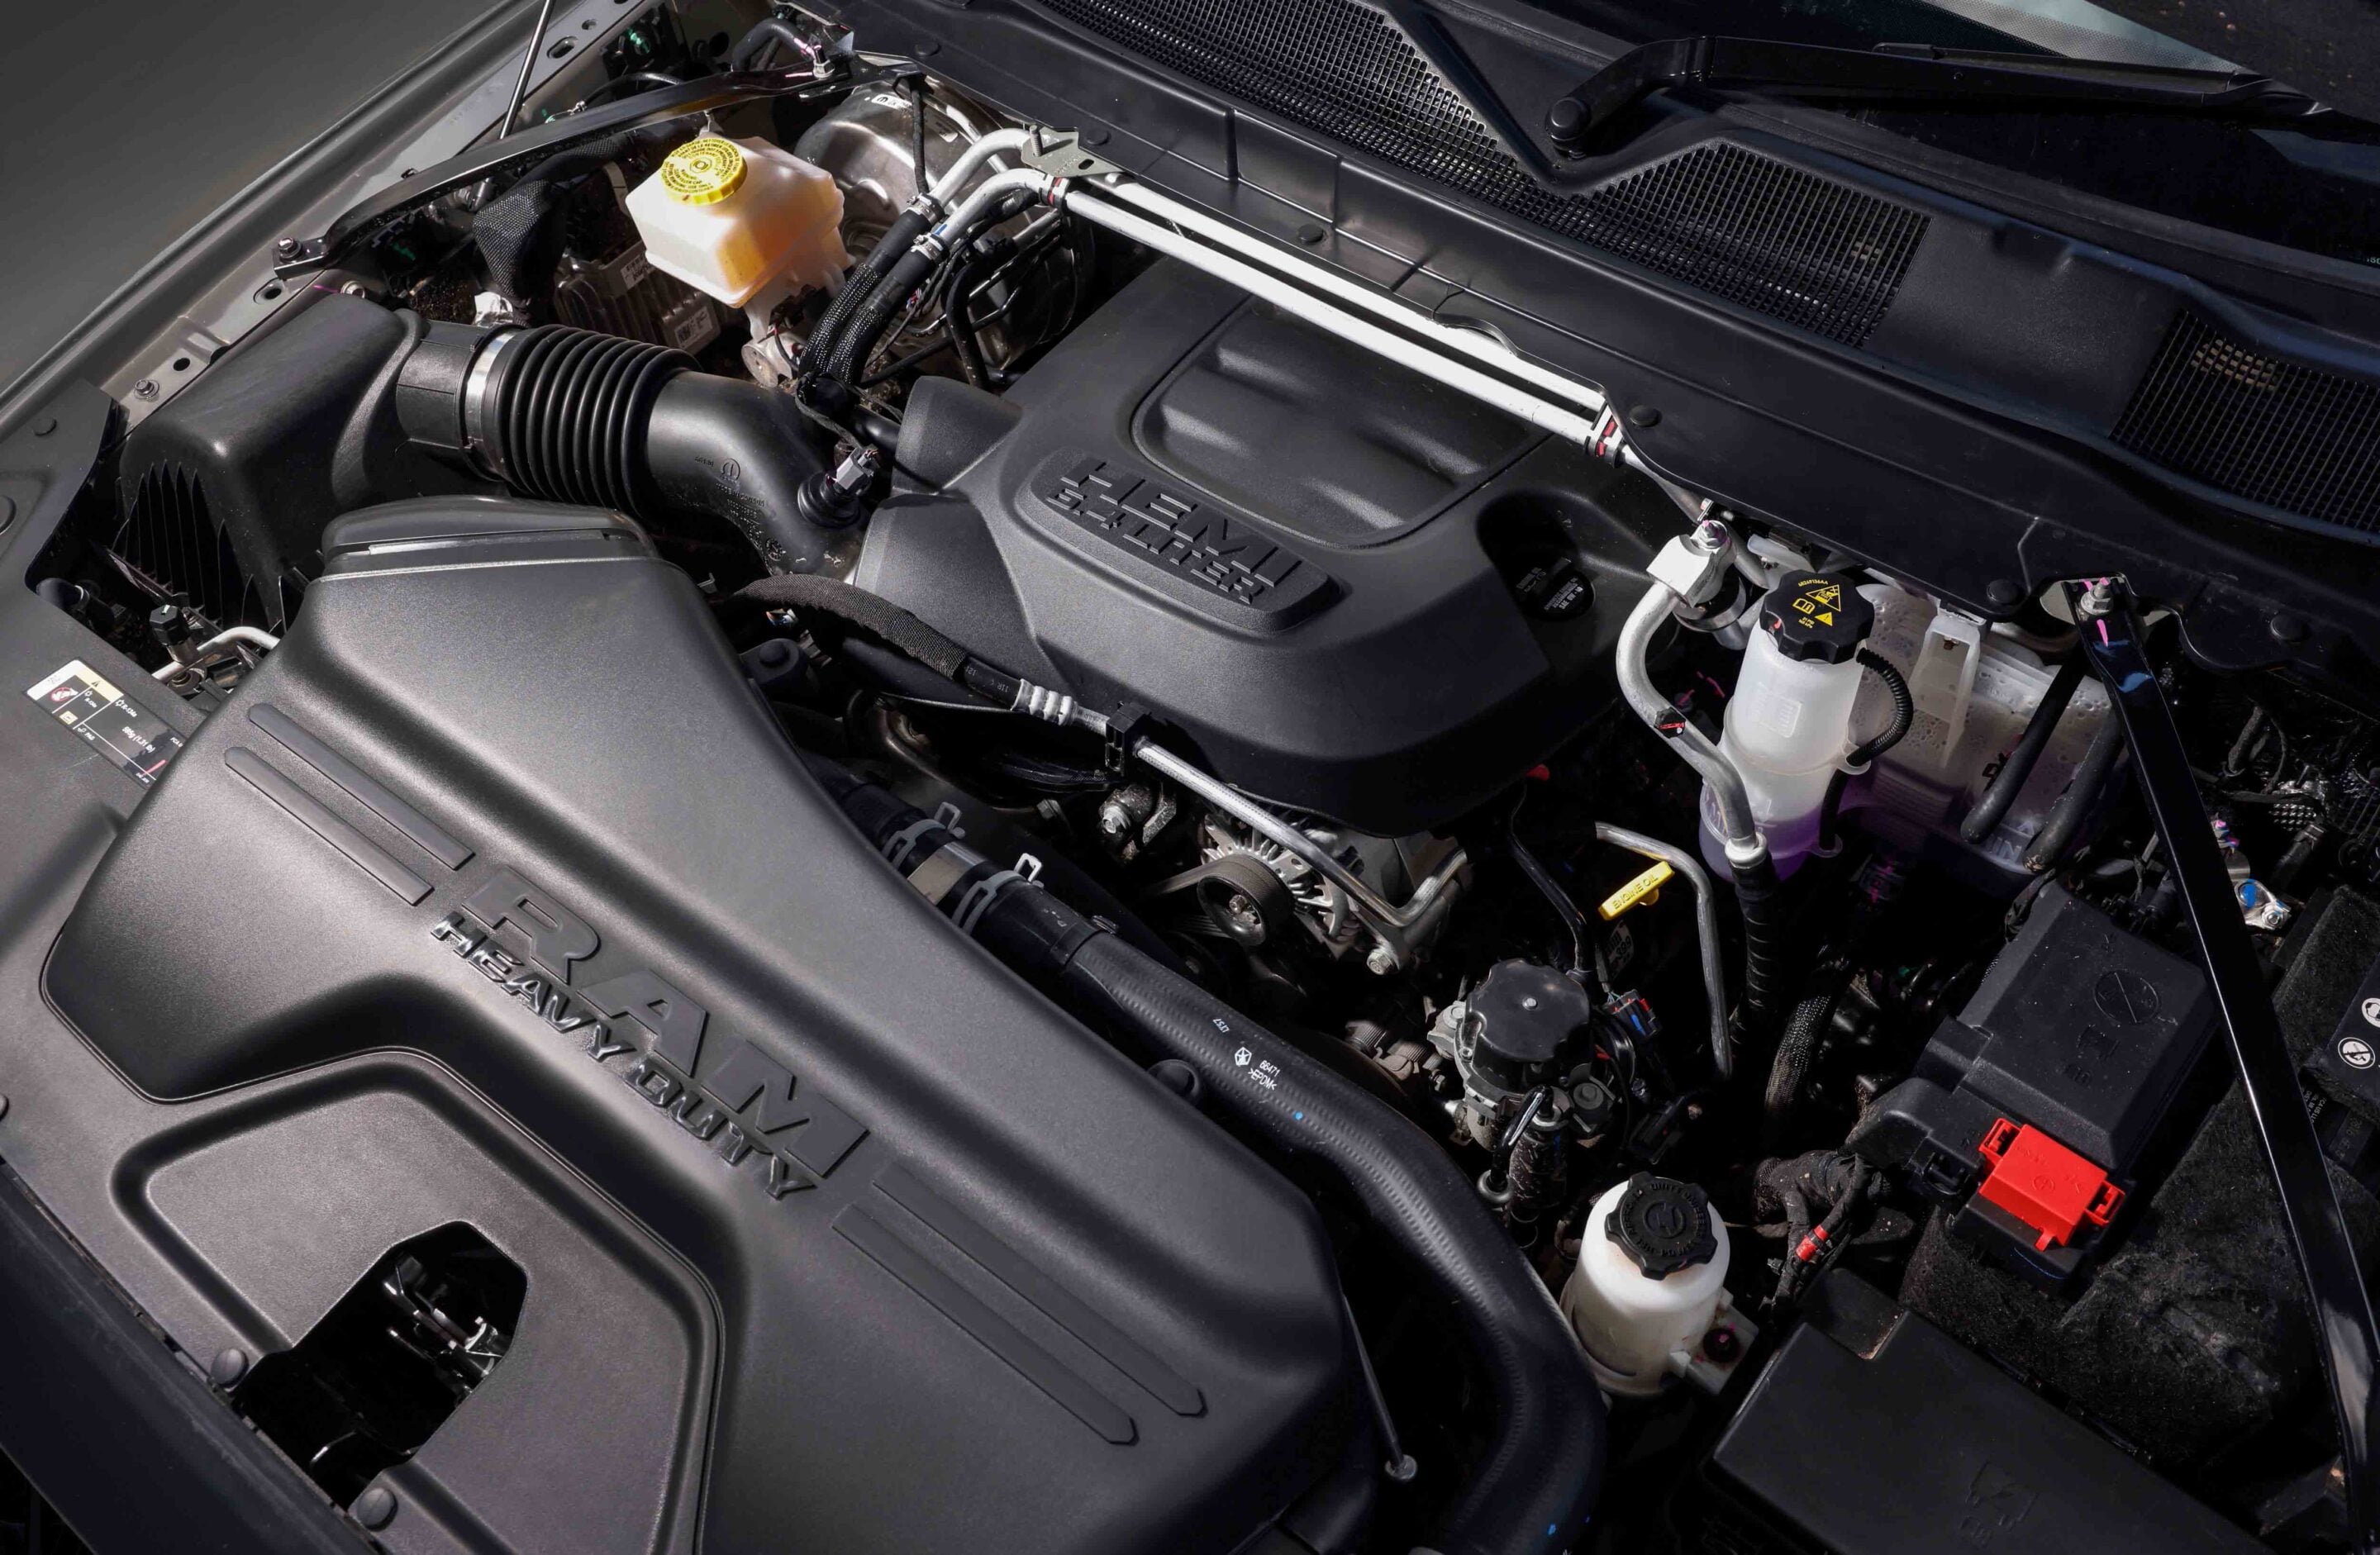
“Australian customers told us loud and clear they wanted the HEMI V8 to come back, and the Warlock was our first opportunity to do so,” said Jeff Barber, the General Manager of Ram Trucks Australia. “We had also been exploring the option of an off-road inspired Ram 2500 Heavy Duty model for some time, so the Warlock was the perfect opportunity to bring the HEMI V8 back and deliver customers a broader choice.
“The Cummins diesel is still very much a part of the Ram 2500 and 3500 Heavy Duty line-up, but we know there are also customers who want the HEMI V8. We have seen a market shift towards Heavy Duty in recent years, as customers get even more serious and more demanding with what they want from a truck – whether it’s for work or play.
“So when we were assessing the suitability of the Warlock for our market, we decided to go all in and bring the HEMI V8 back with it.”
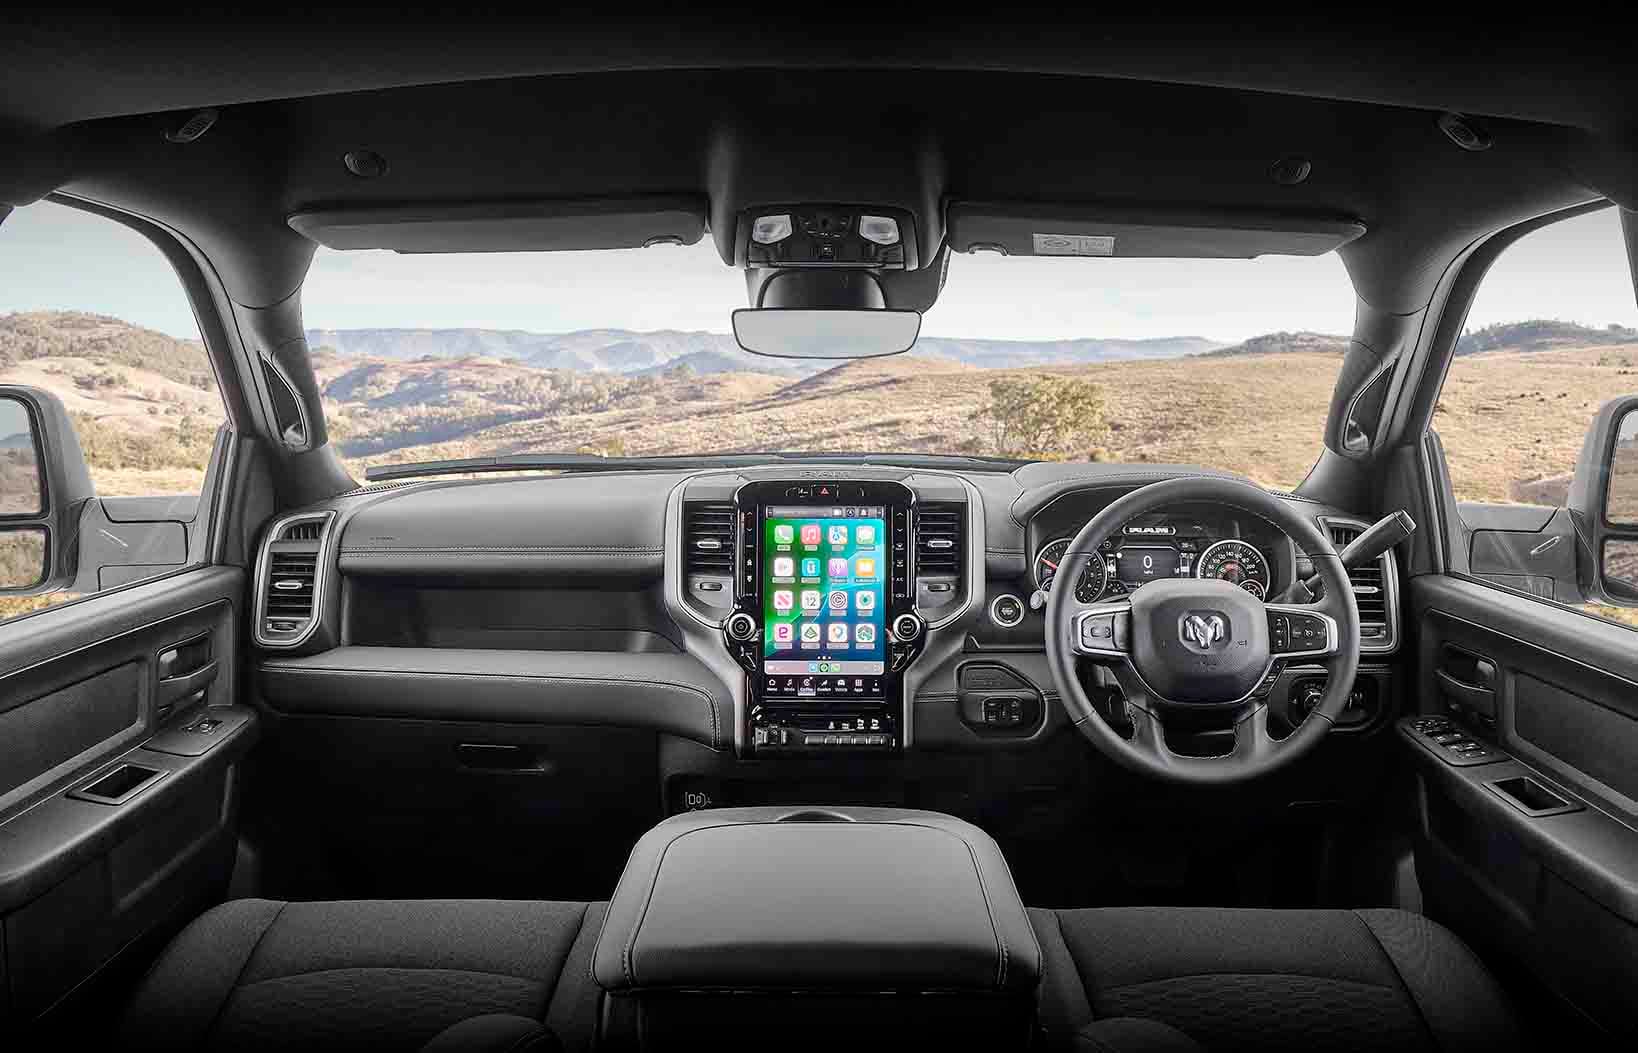
The Warlock last appeared in Australia in July 2020 in 1500 guise, priced from $104,450 and powered by the 5.7-litre HEMI V8 with 291kW and 556Nm. The locally remanufactured special edition featured a factory one-inch suspension lift, Rebel-style grille, 20-inch alloys, RamBox storage and a 4500kg braked towing capacity. The Warlock name has continued in the US, where it is now applied to the current-generation Ram 1500 and remains part of the 2026 range.
The return of the 6.4-litre HEMI also comes as Ram prepares to bring the Ram 1500 TRX back to Australia in the first half of 2027. The performance pick-up will use an uprated supercharged 6.2-litre HEMI V8 and is priced from $259,950 plus on-road costs, with initial Australian production allocations set to be limited.
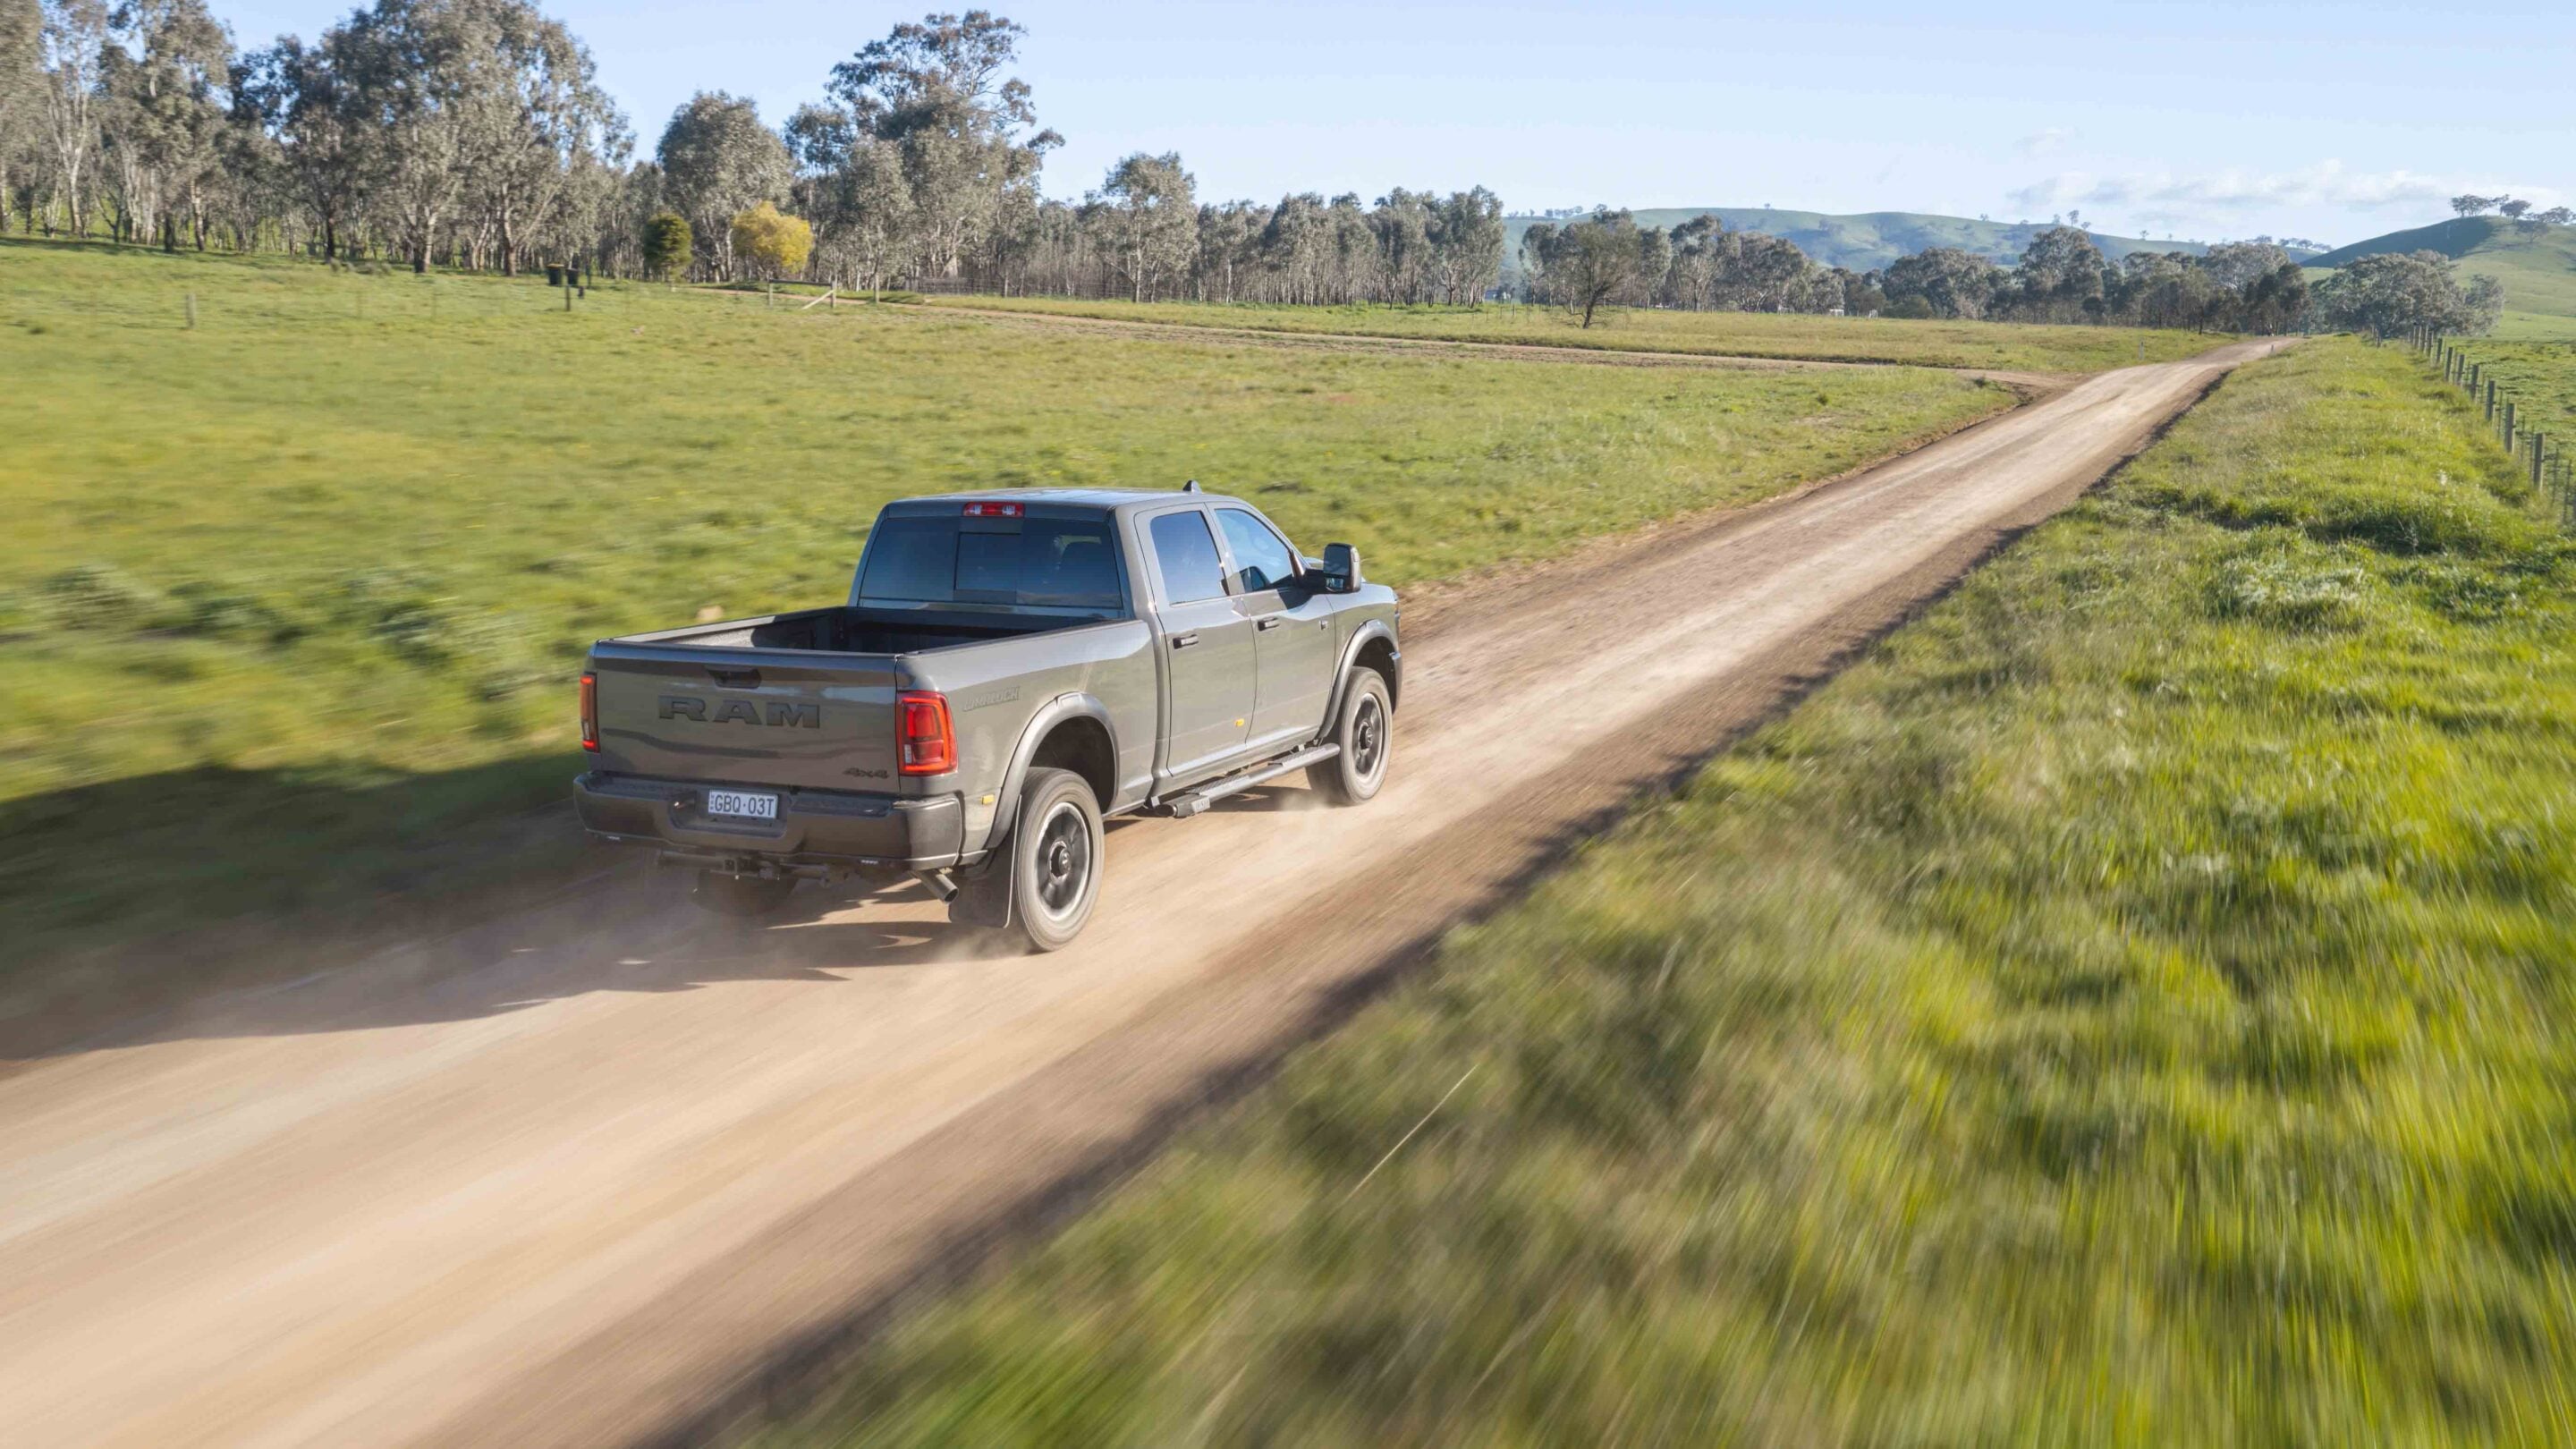
The previous HEMI V8 offered locally was a 5.7-litre Ram 1500 Limited, with the last example remanufactured in late 2024.
Five colours will be available, with metallic paint adding $950 to the manufacturer’s recommended retail price. Service intervals are set at 12 months or 12,000km, whichever comes first, while warranty coverage is three years or 100,000km, whichever occurs first.
The arrival of the Warlock comes less than 12 months after Ram Trucks Australia introduced a major facelift and technology upgrade for its Heavy Duty range, described as the biggest change to the line-up since 2021.
| Specifications | Ram 2500 Warlock HEMI V8 |
|---|---|
| Engine | 6.4-litre HEMI V8 petrol |
| Power | 306kW @ 5600rpm |
| Torque | 582Nm @ 4000rpm |
| Transmission | 8-speed automatic |
| Drivetrain | 2WD high, 4WD high, 4WD low |
| Final drive ratio | 3.73:1 |
| Fuel tank | 117 litres |
| Length | 6066mm |
| Width (excluding mirrors) | 2220mm |
| Height | 2043mm |
| Wheelbase | 3785mm |
| Turning circle | 14.6m |
| Approach angle | 22.9 degrees |
| Departure angle | 25.8 degrees |
| Rampover angle | 22 degrees |
| Kerb weight | 3220kg |
| Payload | 1275kg |
| Gross Vehicle Mass | 4495kg |
| Gross Combination Mass | 10,001kg |
| Towing capacity (50mm tow ball) | 3500kg |
| Towing capacity (70mm tow ball) | 4500kg |
| Towing capacity (gooseneck and air brakes) | 6700kg |
| Service intervals | 12 months/12,000km, whichever occurs first |
| Warranty | Three years/100,000km, whichever occurs first |
Ram 2500 Warlock: Standard equipment
- Black front fascia and headlight surrounds
- Black front and rear bumpers
- Black fender flares
- Black side steps
- Black mirror scalps
- Warlock decals
- 20-inch alloy wheels, up from 18-inch on Laramie
- 285/60 R20 all-terrain tyres, versus highway-terrain tyres on Laramie
- Bilstein off-road shock absorbers
- Coil-spring rear suspension
- LED headlights
- Spray-in bed-liner
- 12-inch infotainment screen
- Six seats, with a centre console when the middle front seat is not in use
- Forward collision warning and autonomous emergency braking, including pedestrian and cyclist detection
- Radar cruise control
- Speed sign recognition
- Rear-view camera
- Front and rear parking sensors
- Blind-zone warning
- Rear cross-traffic alert
- Driver fatigue monitoring
- Updated lane-keeping assistance
- Tow-bar receiver and 12-pin wiring harness
- Trailer sway control
- Valve-type tyre-pressure monitors
Hydrogen-powered cars use electricity to drive their wheels, but instead of storing all that energy in a large battery, they generate electricity onboard using hydrogen.
A hydrogen fuel-cell electric vehicle (FCEV) is therefore an electric vehicle, but its energy source and refuelling process are different from a battery electric vehicle (BEV). With Toyota confirming production of its hydrogen fuel-cell HiLux for 2028, the technology is set to become another powertrain option for the familiar ute, alongside its existing petrol, diesel, hybrid and battery-electric versions.
How does a hydrogen fuel-cell car work?
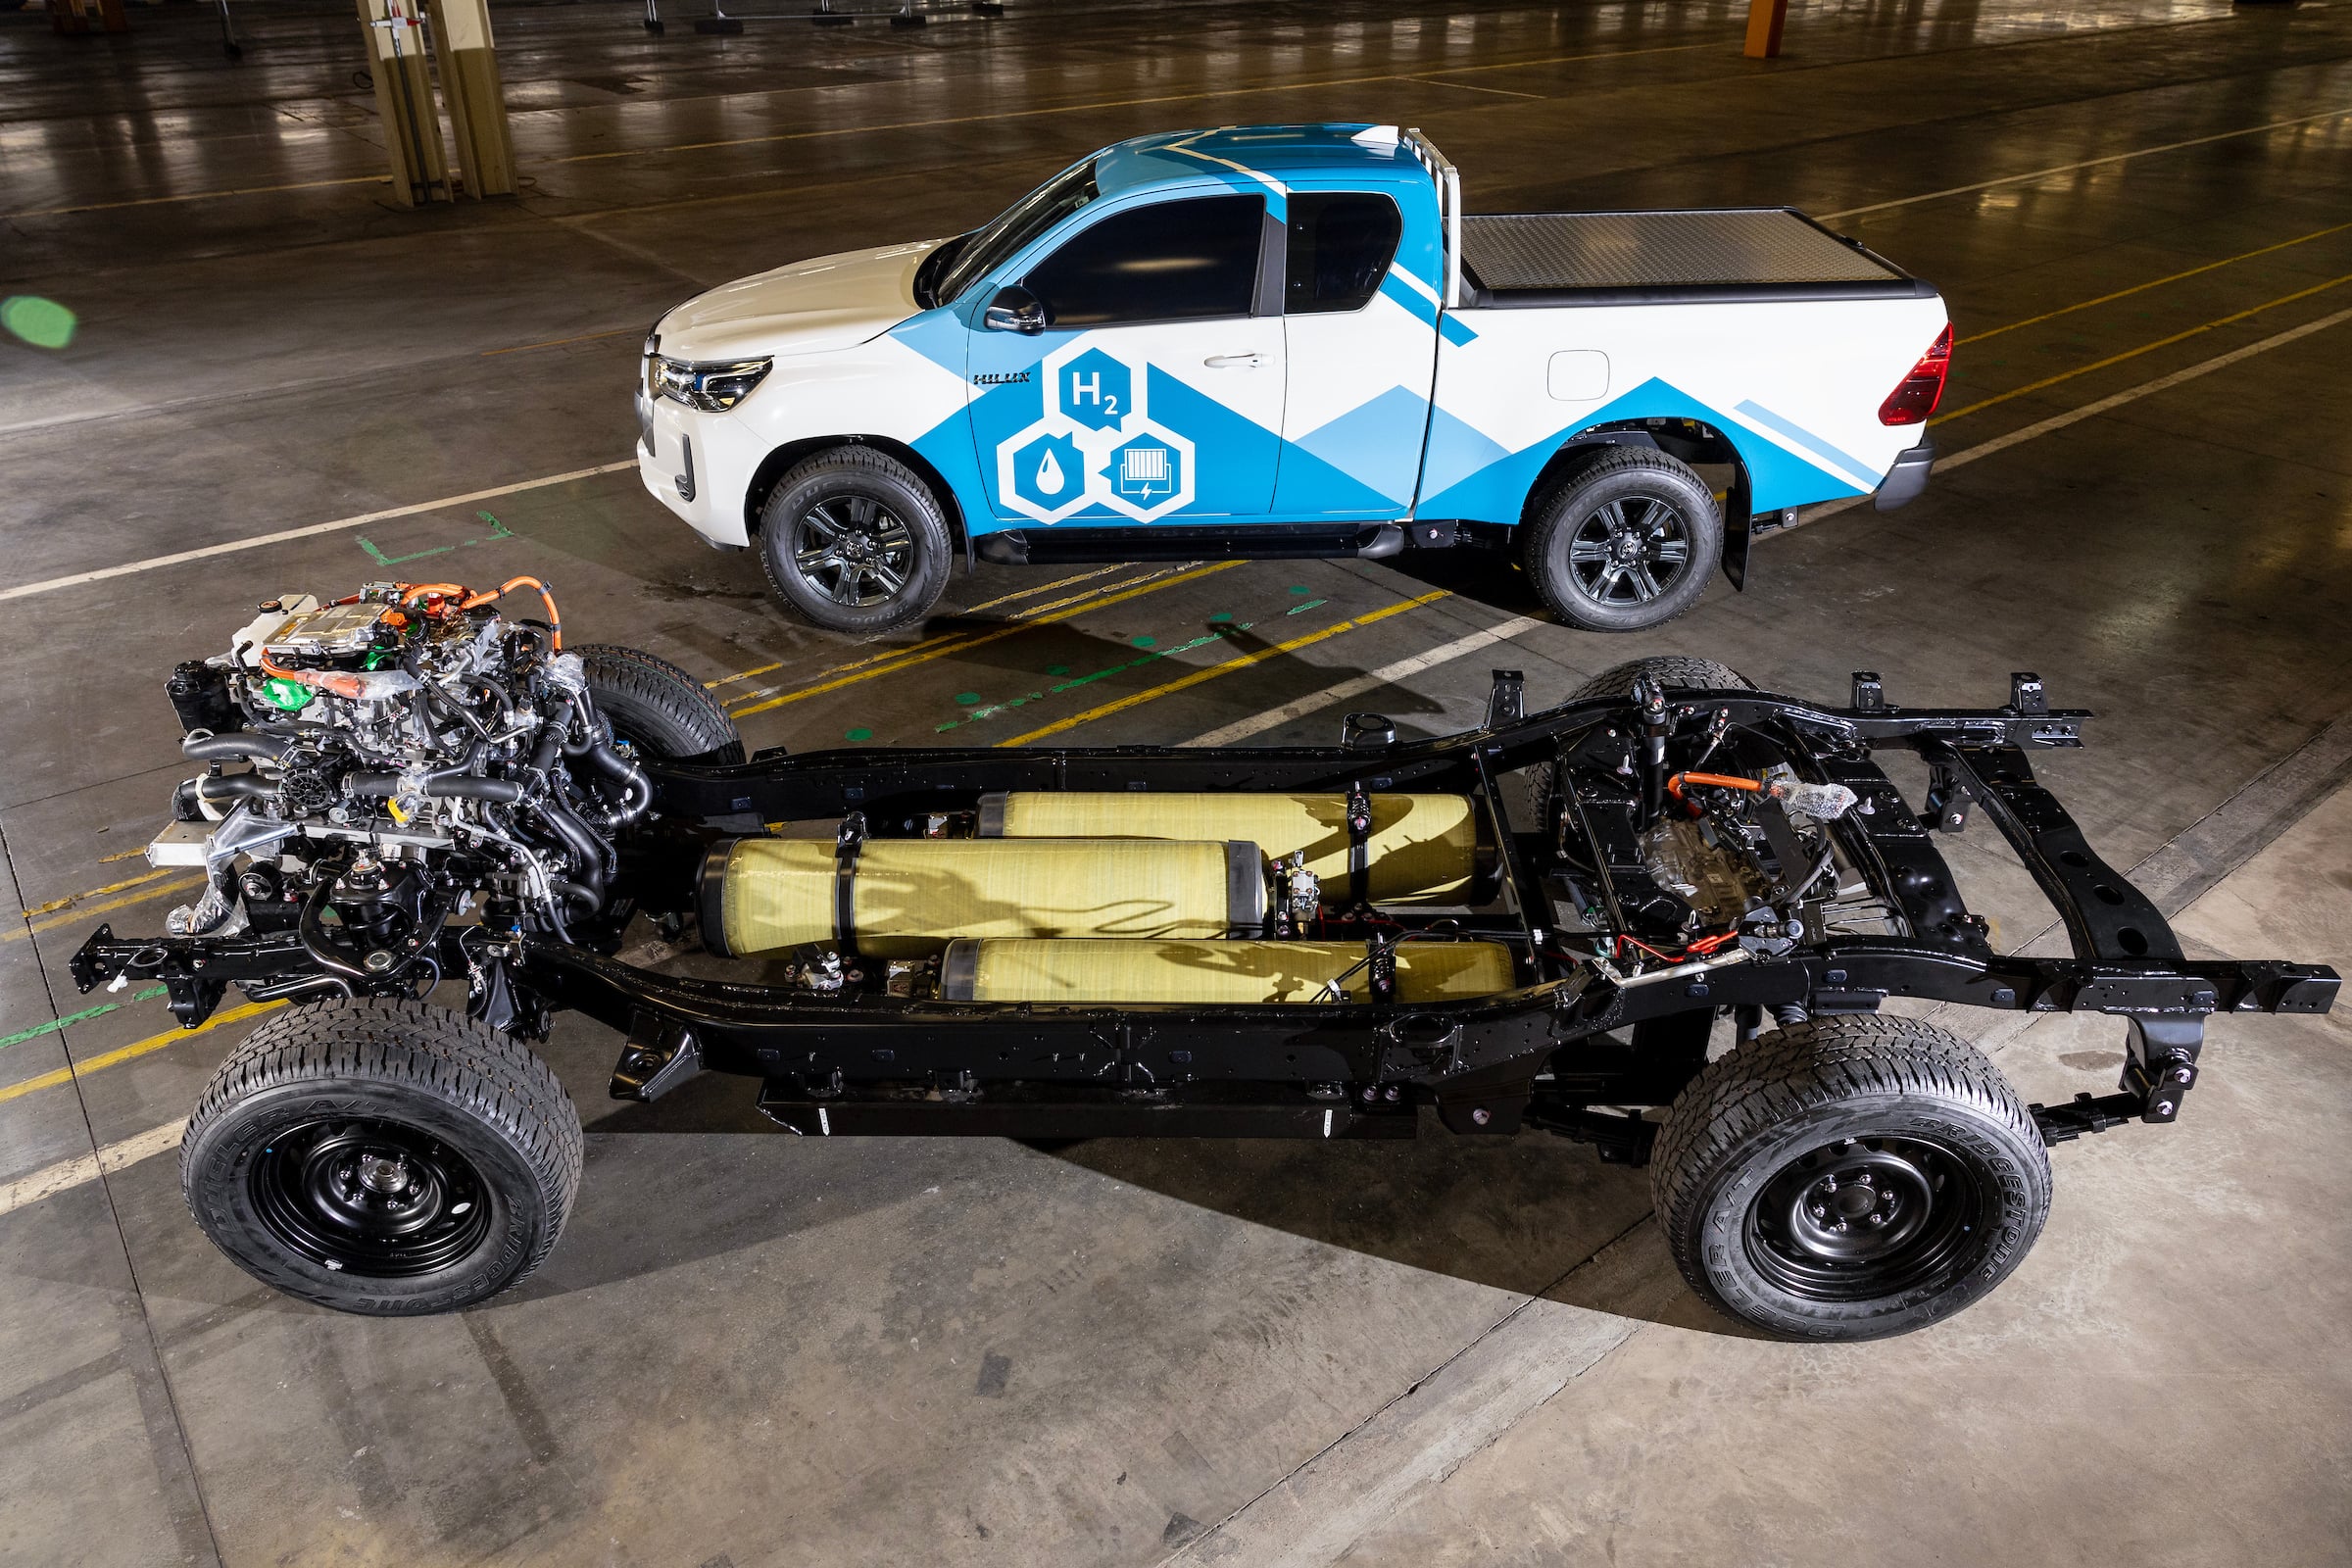
An FCEV stores compressed hydrogen in high-pressure tanks, typically mounted within the vehicle’s structure. When the vehicle is running, hydrogen is fed from the tanks into the fuel-cell stack, while oxygen is drawn from the surrounding air.
Inside the fuel-cell stack, hydrogen is separated into protons and electrons. The protons pass through a special membrane, while the electrons are forced through an external electrical circuit. That flow of electrons creates the electricity used to power the vehicle’s electric motor.
The protons then combine with oxygen and the returning electrons on the other side of the membrane, producing water and heat. There is no combustion involved, so the fuel-cell system doesn’t burn hydrogen in the way a petrol or diesel internal-combustion engine burns fuel.
The electricity generated by the fuel cell can be used to drive the electric motor, while a battery provides additional power when required and captures energy during regenerative braking. Under hard acceleration, for example, the battery can supplement the fuel cell, while energy recovered during deceleration can be stored for later use.
The electric motor then drives the wheels in much the same way as it does in a BEV. In the hydrogen HiLux, the key difference from the battery-electric version is where the vehicle gets its electricity: the BEV stores electricity in a large battery, while the FCEV generates it onboard from hydrogen.
Is hydrogen safe?
Hydrogen is highly flammable, so FCEVs such as the hydrogen HiLux use specially designed high-pressure tanks, fuel systems and safety controls.
The tanks are engineered and tested to withstand the pressures involved, while sensors and shut-off systems can isolate the hydrogen supply if a problem is detected.
Hydrogen is also lighter than air, meaning it rises and disperses quickly if released rather than pooling around the vehicle. As with any vehicle, safety depends on the vehicle’s design, maintenance and compliance with applicable safety standards.
Hydrogen vs petrol and diesel
A petrol or diesel vehicle uses an internal-combustion engine to burn fuel and produce mechanical power. An FCEV uses a different type of powertrain, with a fuel-cell system converting hydrogen into electricity that powers an electric motor.
That means the hydrogen HiLux will have electric drive rather than a conventional petrol or diesel internal-combustion engine. The fuel-cell reaction produces water, with no CO₂ or other combustion emissions from the vehicle’s tailpipe. However, the overall emissions associated with hydrogen depend on how the hydrogen is produced.
Hydrogen vs BEV and PHEV
A BEV stores its energy in a large rechargeable battery and is charged from an external electricity supply. An FCEV instead stores hydrogen and generates electricity onboard, so it is normally refuelled with hydrogen rather than plugged in to replenish its main energy source.
A PHEV combines a rechargeable battery and electric motor with a petrol or diesel internal-combustion engine, whereas an FCEV uses a fuel-cell system and electric motor instead of a conventional combustion engine. In simple terms, a BEV stores electricity in a large battery, a PHEV combines battery power with an ICE, and an FCEV uses hydrogen to generate electricity onboard.
Toyota’s hydrogen HiLux therefore shares its electric drive characteristics with the HiLux BEV, but carries its energy in hydrogen rather than relying primarily on a large battery.
How is a hydrogen car refuelled?
Instead of plugging into a charger, the driver connects a hydrogen refuelling nozzle to the vehicle.
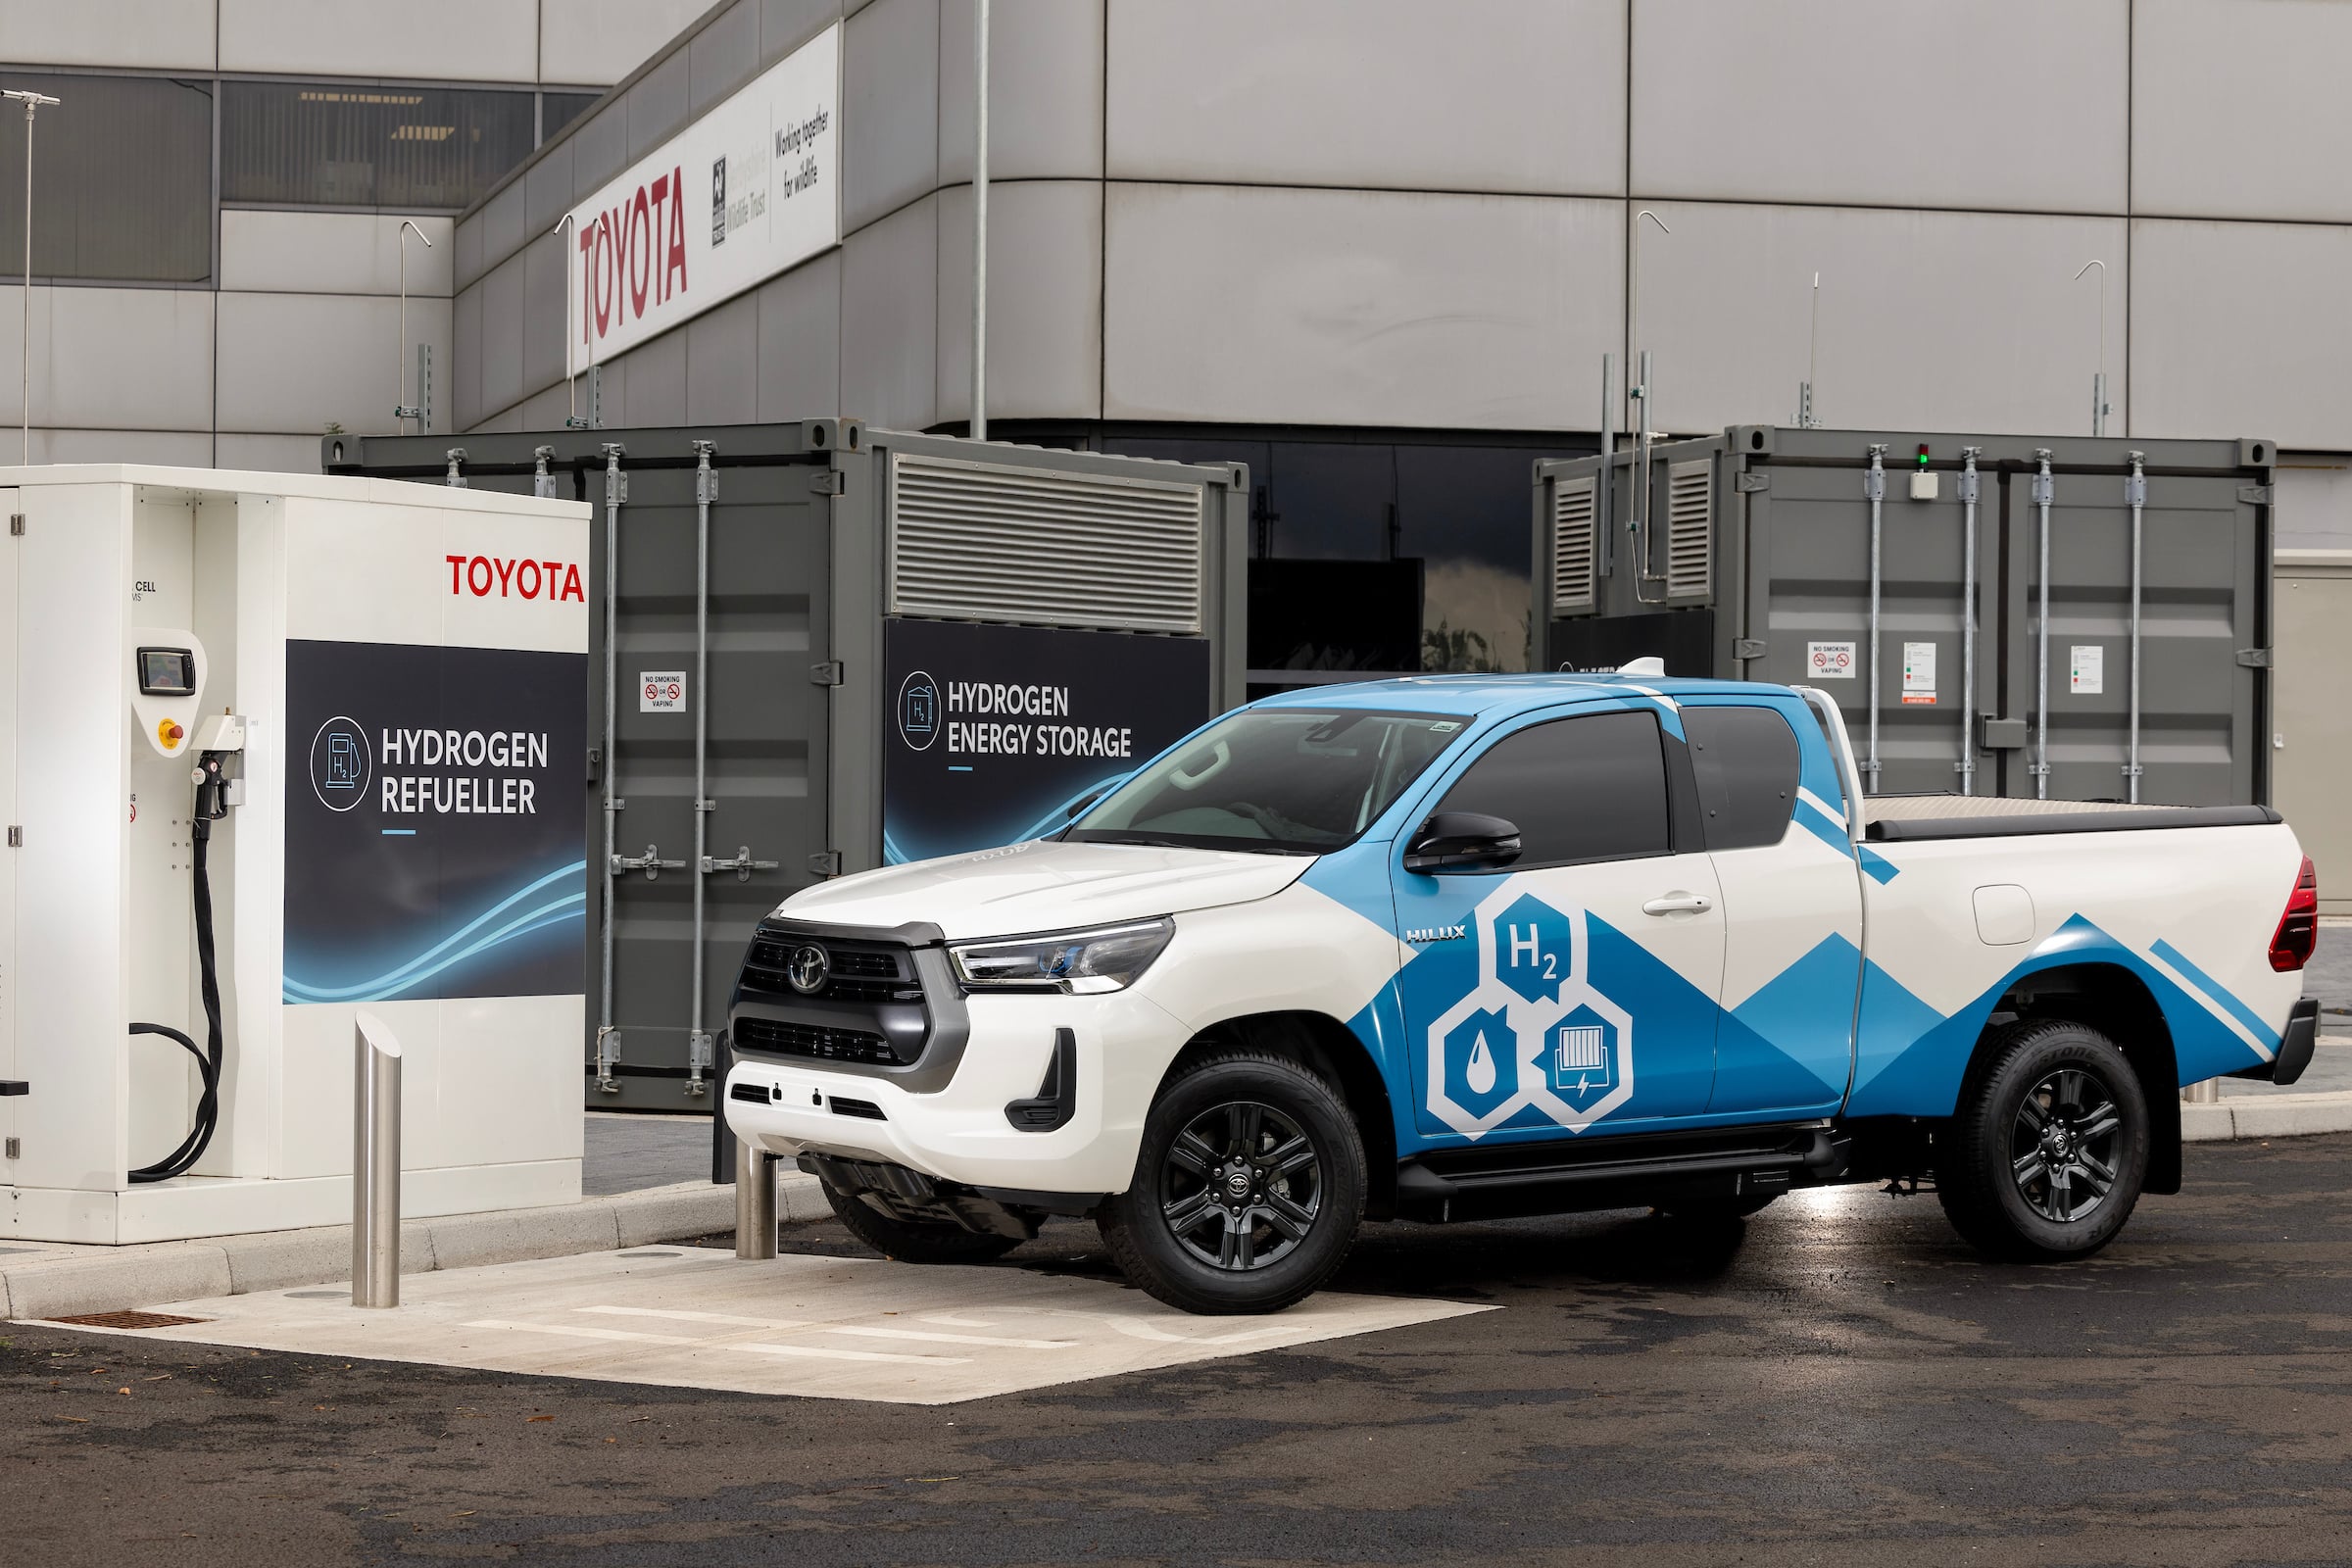
Compressed hydrogen is transferred into the vehicle’s tanks and used by the fuel-cell system to generate electricity. This makes the process more like conventional refuelling than charging an EV. For the hydrogen HiLux, this means replenishing its energy supply at a hydrogen station rather than connecting it to an EV charger, although hydrogen refuelling infrastructure is currently far less widespread.
Toyota is targeting more than 400km of WLTP driving range for the production hydrogen HiLux, with the vehicle also targeting up to 2500kg of towing capacity.
Why use hydrogen?
Hydrogen offers electric propulsion without relying primarily on a large traction battery.
That makes it a technology manufacturers are considering for applications where range, payload, towing and refuelling time are important. For a ute such as the HiLux, those factors are particularly relevant. Hydrogen has high energy content by mass, making it a potential option for applications where carrying a large amount of stored energy without a very large battery is important. However, hydrogen requires high-pressure tanks because it has relatively low energy density by volume.
The trade-off is the need for dedicated hydrogen production, transport and refuelling infrastructure, with the environmental benefits also depending on how the hydrogen is produced.
Toyota’s hydrogen HiLux is confirmed for production in 2028 and will use the company’s third-generation hydrogen fuel-cell technology.
Hydrogen car FAQs
Do hydrogen cars have an engine?
A hydrogen fuel-cell vehicle doesn’t have a conventional petrol or diesel internal-combustion engine. Instead, it uses a fuel-cell system to generate electricity, which powers an electric motor that drives the wheels. In that sense, it has a different powertrain rather than simply a different type of internal-combustion engine.
Do hydrogen cars need to be charged?
No, not in the same way as a BEV. An FCEV is normally refuelled with compressed hydrogen, which is stored in onboard tanks and converted into electricity as the vehicle drives.
What comes out of a hydrogen car’s exhaust?
The fuel-cell reaction produces water, so there are no direct CO₂ emissions from the vehicle’s tailpipe. However, the overall emissions associated with hydrogen depend on how the hydrogen is produced.
How far can a hydrogen car travel?
Range varies between vehicles, but Toyota is targeting more than 400km of WLTP range for its hydrogen-powered Hilux. Actual range will depend on factors including driving conditions, load, speed and towing.
Is hydrogen better than a battery electric vehicle?
The two technologies have different strengths and requirements rather than one being universally better. A BEV stores electricity in a large battery, while an FCEV generates electricity onboard from hydrogen, so the choice depends on factors such as vehicle use, range, payload, refuelling or charging requirements and available infrastructure.
Hydrogen pros and cons
Pros
- Electric drive: Delivers electric-motor drive without relying on a large traction battery
- Fast refuelling: Hydrogen can be refuelled rather than requiring a lengthy battery recharge
- Long-distance potential: High energy density makes hydrogen relevant to longer-range and heavier vehicles
Cons
- Limited infrastructure: Hydrogen refuelling stations are far less widespread than fuel stations and EV chargers
- Hydrogen production: Environmental benefits depend heavily on how the hydrogen is produced
- Storage and complexity: High-pressure hydrogen tanks and fuel-cell systems add cost and engineering complexity
Toyota Europe has confirmed its hydrogen fuel-cell electric HiLux will enter production in 2028, adding another powertrain option to the ninth-gen ute.
The production confirmation was made at IAA Transportation in Hannover, Germany, with the HiLux FCEV set to use a third-generation hydrogen fuel-cell system producing 300kW
Early target figures for the hydrogen-powered HiLux include a driving range of more than 400km on the WLTP cycle and the ability to tow up to 2500kg.
Hydrogen HiLux joins expanding range
The FCEV will join the recently introduced HiLux BEV, with Toyota now offering battery-electric versions across its entire European LCV range.
Toyota’s multi-path approach is designed to provide different powertrain technologies for different customer and operating requirements. Depending on the market and model, its LCV range includes battery-electric, 48V hybrid and diesel powertrains, with some diesel engines capable of running on renewable HVO fuel.
“While our BEV results are strong, we believe the scale of the decarbonisation challenge facing Europe requires every available technology to play a role,” said Till Conrad, Toyota Motor Europe Executive Vice President, Sales. “Different customers have different operational requirements, which is why there is no single solution for every business. Toyota continues to offer the right technology for the right application.”
BEVs currently account for 22 per cent of Toyota Professional sales in Europe, compared with a market average of around 11 per cent; while in Australia, 27,089 BEVs were sold in August 2026, accounting for 24.9 per cent of the new-vehicle market.
Hydrogen HiLux expected to follow in Australia
Australia is already part of Toyota’s electrified HiLux strategy, with the battery-electric version now on sale locally. The hydrogen fuel-cell HiLux is also expected to follow in Australia around the time of its European introduction in 2028.
If it arrives locally, the FCEV would give the HiLux another alternative to its existing diesel and battery-electric powertrains. Toyota has not yet detailed Australian specifications for the hydrogen model.
What we know
- Production confirmed for 2028
- Third-generation hydrogen fuel-cell system
- 300kW output
- More than 400km WLTP target range
- Up to 2500kg towing capacity
- Hydrogen fuel-cell electric powertrain
- Based on the ninth-generation Hilux
- Joins the HiLux BEV, 48V hybrid and diesel powertrains
- Hilux BEV is already on sale in Australia
- Hydrogen-powered HiLux is expected to follow in Australia around the time of its European introduction
- Toyota’s diesel LCVs include engines capable of running on HVO renewable fuel