As the saying goes, what goes up, must come down, and this is obviously true of four-wheel driving. If you drive up a hill, eventually you’re going to have to come back down. 

And depending on the conditions, driving downhill can be a lot scarier than driving uphill. As the vehicle speed picks up on descent, your instinct will be to apply the brakes to slow down, but in particularly steep and slippery conditions this can result in the front wheels locking, which will lead to a loss of steering control … and you definitely don’t want this to happen. Even if the vehicle is equipped with an anti-lock braking system (ABS), stomping on the brake pedal can be next to useless if there’s not much traction available.

Firstly, take a good look at the terrain ahead, so you are aware of what to expect when driving down the hill and what you need to avoid. You also need to understand how your vehicle works, what features it is equipped with that will aid your descent, and how to best set it up for the terrain ahead.


How to assess the terrain before a steep descent

In any off-road driving situation, it is important to have a handle on the terrain you’re about to drive.

Sometimes you can judge this from the driver’s seat, by looking out the windows and by feeling how the vehicle responds to steering, accelerator and brake inputs; but sometimes the best way to see what’s coming up is to get out of the vehicle and walk the track first.

In the case of descents, you will need to ascertain how steep the hill is and what condition the track is in, looking out for off-camber sections, undulations and washouts, as well as obstacles such as rocks, holes, muddy sections, vegetation and tree roots.

You should also look for potential hazards off to the sides of the track, such as rocks or trees that may cause a problem if you stray from the track, or dangerous drop-offs that need to be avoided. While you’re walking the track, feel around with your feet to gauge how much traction is available.

You should also keep an eye out for run-off areas and suitable anchor points in case you need to use recovery gear to belay the vehicle safely down any treacherous sections. If you have a capable person travelling with you who can act as a spotter to direct you from outside the vehicle, find a good place for them to stand so they are visible to you but will not be in danger if you lose vehicle control.

Make sure the driver and the spotter understand the hand signals that will be used, and if radios are available they should communicate with each other via in-vehicle and handheld UHFs.

1

Before you head off-road

The more intimate the knowledge you have of your vehicle, the easier you will find it to drive in off-road situations.

In the case of steep descents there are certain vehicle attributes to be aware of and to know how to use, such as how to lock hubs (where fitted) and engage four-wheel drive in part-time 4×4 vehicles, or how to ensure the centre diff is locked in full-time 4×4 vehicles.

Most 4x4s with genuine off-road capability will also have low-range gearing, and you will need to know how to engage this before starting a descent. In old-school 4x4s, low range is mechanically selected via a lever, whereas many modern vehicles will have an electronic dial or a button to select low range.

No matter what type your vehicle is equipped with, make sure you know how to use it and ensure that low range is selected when you need it to be; there’s usually a light on the dash to indicate this. Some 4×4 vehicles will have a super-low first gear ratio, sometimes called a crawler gear, and this should be selected for steep descents.

6

Other vehicle features that can aid safe descents include electronic traction aids such as ABS, traction control, hill descent control and selectable drive modes, while mechanically locking diffs are also beneficial.

On some vehicles, even the handbrake (or park brake) can be a useful tool for steep descents, but this is of greatest benefit on vehicles where the handbrake is a transmission-mounted drum set-up, so when applied it operates on all four wheels. An effective handbrake that only operates on the rear wheels can also be helpful, as it can retard progress without affecting steering, but such a set-up doesn’t really offer a lot of braking effect on steep descents, as most of the vehicle weight is over the front axle.

You should also be aware of the vehicle’s ground clearance and have an idea of how much suspension travel it has when tackling steep descents, as you will have a better understanding of what type of terrain you’ll be able to drive over before grounding the underside or running out of wheel travel. Of course, this only comes with experience; the more you drive the vehicle in different off-road situations, the easier it will become, and soon even the gnarliest descents will become second nature. But let’s not get ahead of ourselves.

1

Tyre pressures for steep off-road descents

Setting the correct tyre pressures to suit different terrain types is important when driving down steep off-road descents.

Lowering tyre pressures for off-road terrain lengthens the tyre footprint and provides more traction, and good traction is critically important on steep descents. Dropping air pressure also allows the tyres to more easily flex as they drive over uneven terrain such as sharp rocks and tree roots, which minimises the chance of tyre damage. If your vehicle is equipped with tough Light Truck (LT) tyres, you will be able to lower tyre pressures more than if it’s fitted with Passenger (P) construction tyres.

As a general rule, if your usual road pressures are around 35psi, and you’re running LT tyres on your vehicle, you can drop pressures to around 22psi for rough off-road tracks.


How to prepare your 4×4 before descending

Once you’ve examined the descent and you’re happy to proceed, you need to set up your vehicle for the task at hand.

Make sure your tyre pressures are set and your hubs are locked (if fitted), and then engage low range and select first gear, no matter whether your vehicle has a manual gearbox or an automatic transmission. If you find that first gear is too slow for the descent, you can always upshift to second, but if you start off in too-high a gear and the speed starts getting away from you, you won’t always be able to shift back down to first.

If the descent is quite undulating and there’s a chance you will exceed the vehicle’s suspension travel, engage the rear locker if fitted. This will ensure both rear wheels will rotate at the same speed even if one of them is lifted off the ground, which will give you more vehicle control on the descent. It will be much more difficult to steer the vehicle if you engage the front diff lock, so try to avoid doing so unless you become stuck.

1

If your vehicle is equipped with selectable drive modes such as ‘sand’, ‘rocks’ or ‘mud and ruts’, select the mode that best describes the terrain. These modes tailor the vehicle’s throttle response, traction control levels and ABS sensitivity to best suit the terrain. If you have height-adjustable suspension, select the highest mode for rocky or undulating descents where you think you’ll need all the ground clearance you can muster.

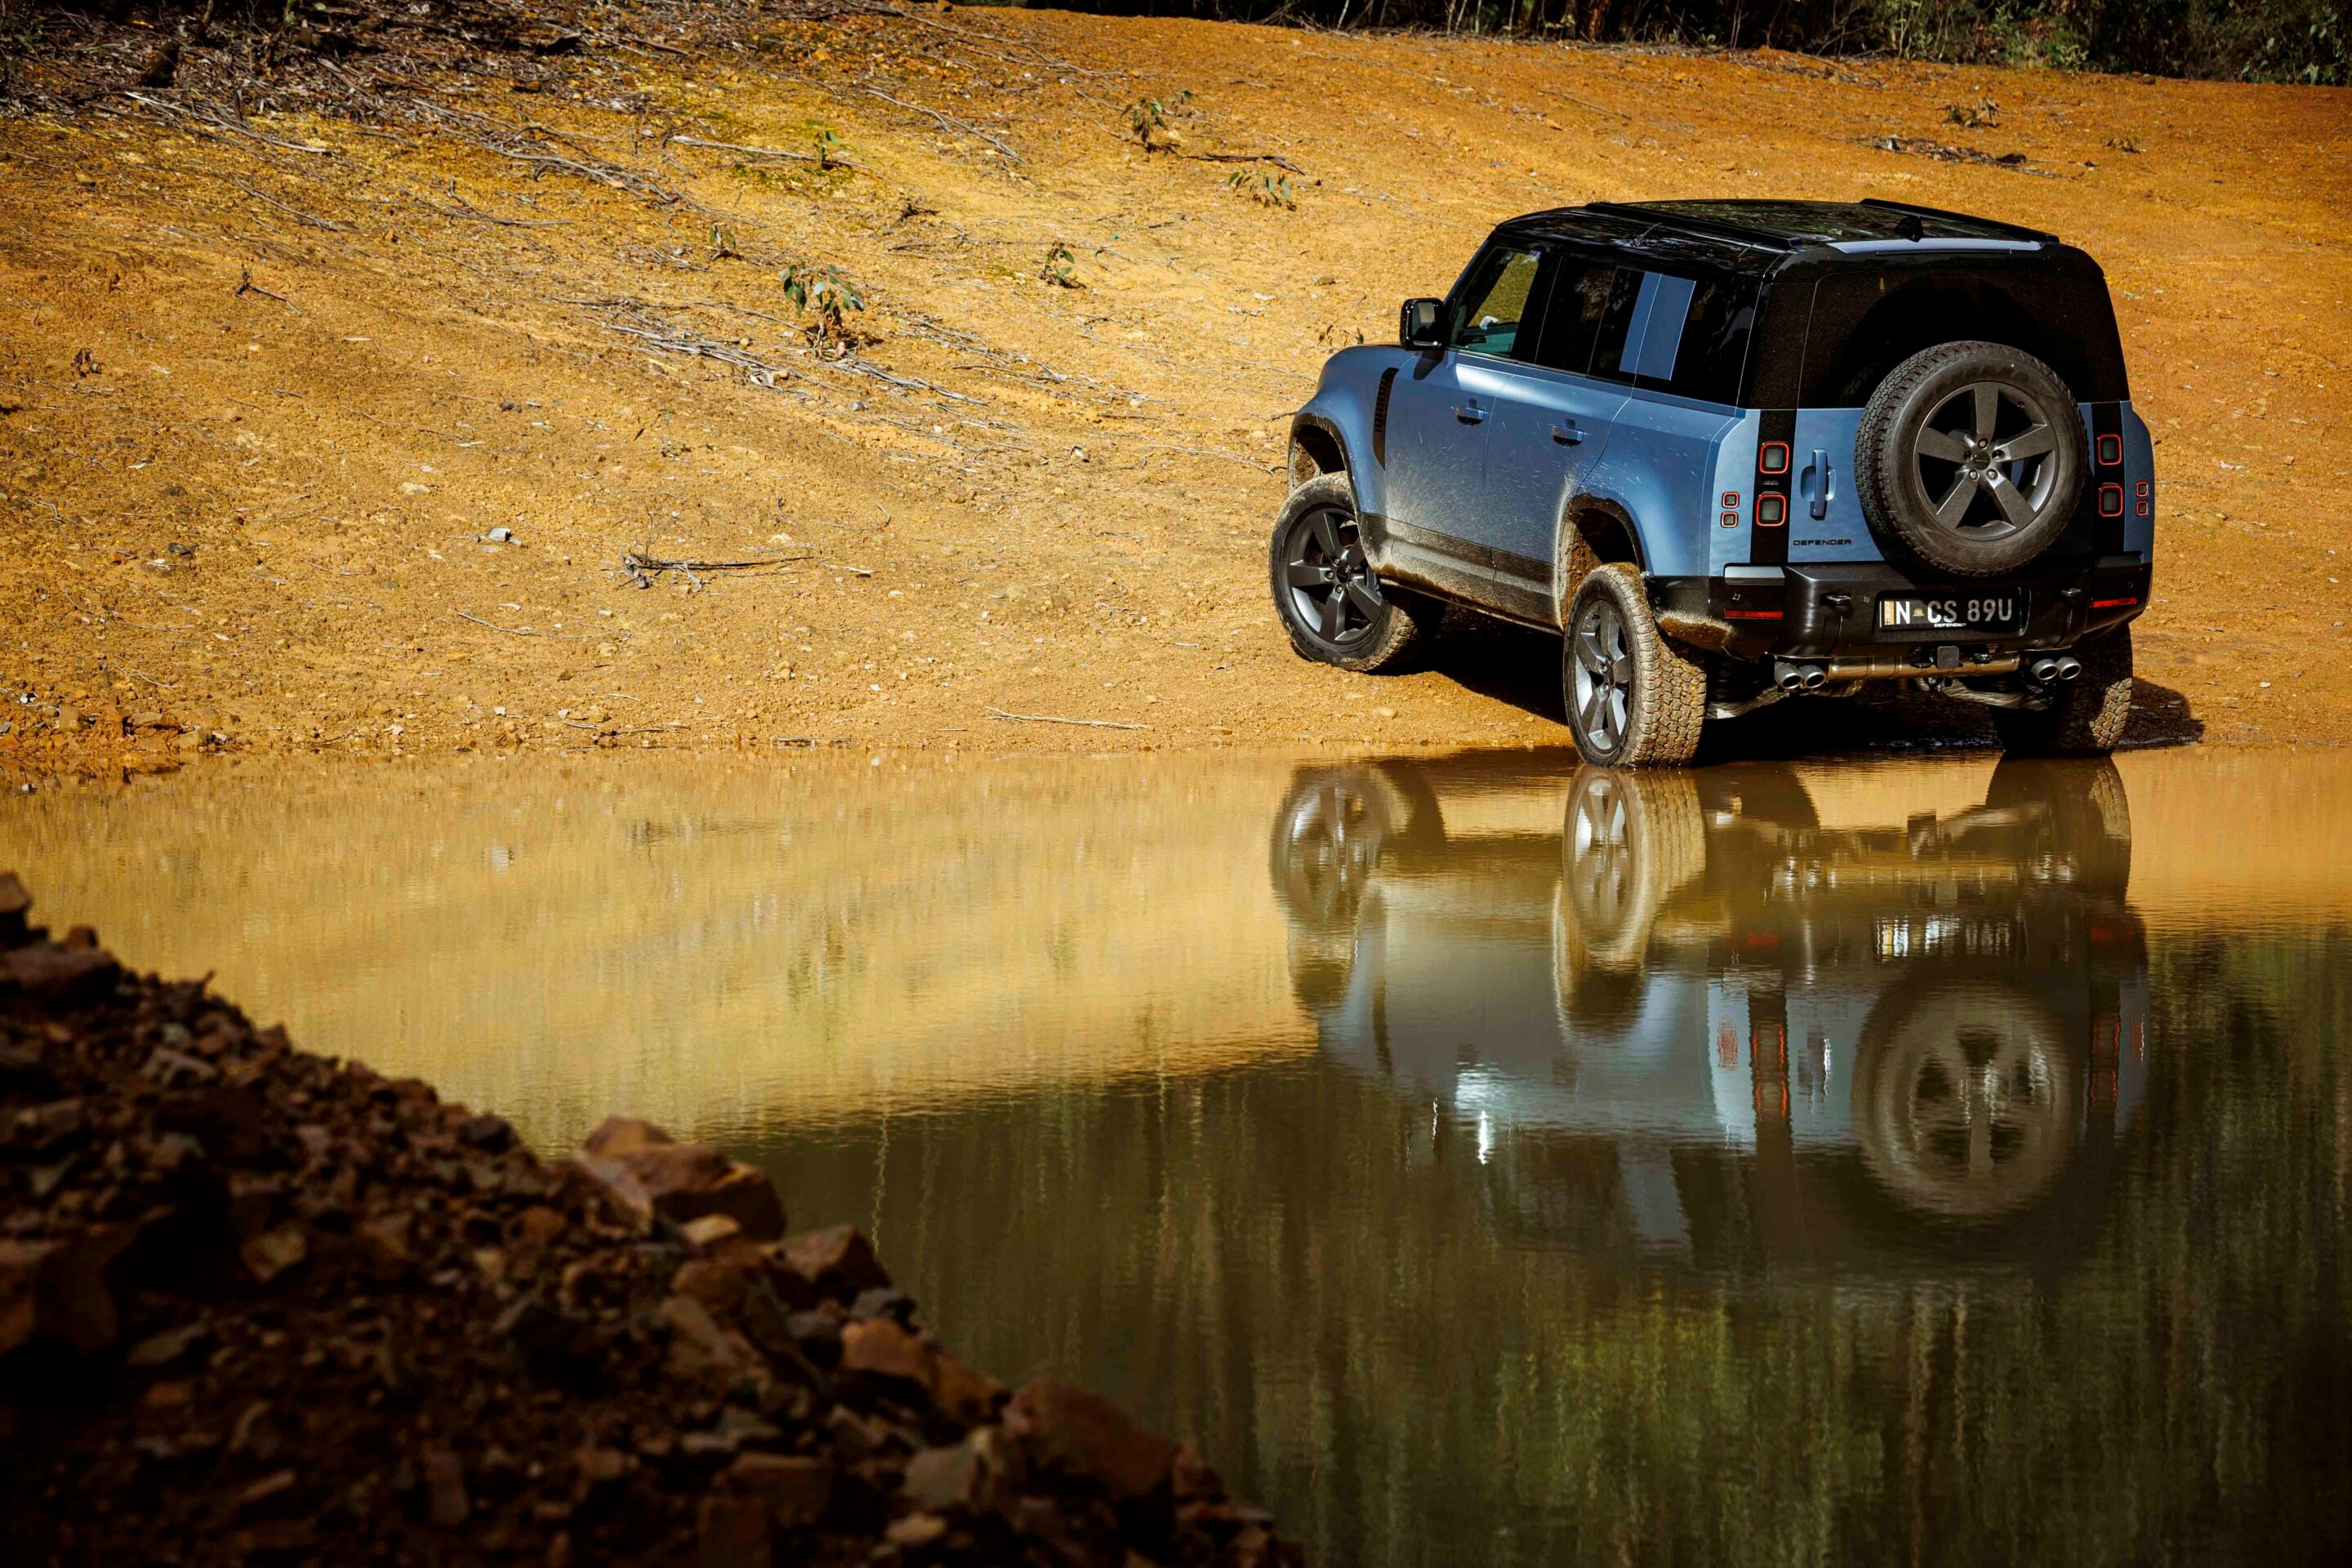
What about Hill Descent Control? The better HDC systems on the market allow you to adjust vehicle speed using the up and down cruise control buttons, usually in 1km/h increments down to as low as 1km/h, but even these systems are not suited to all steep descents. HDC systems rely on the vehicle’s brakes to keep speed in check, and although they can do this without the wheels locking up, on very long descents, such as those you might find in alpine regions, using the brakes will generate a lot of heat. This heat not only affects the brakes themselves but also other mechanical components such as wheel hubs and axle seals.

Bear in mind that you’ll occasionally find water crossings at the bottom of steep descents; if you do, give your vehicle’s mechanical components time to cool down before plunging into cold water. If you don’t, water can get sucked in through the seals, contaminating the oil in the engine, gearbox, transfer case and diffs.

1

How to safely drive down a steep hill

Once you’ve set the vehicle up to tackle the descent, gradually release the brakes, drive slowly over the edge, and let gravity do the work for you.

Unless the hill is extremely steep and the vehicle’s low-range gearing isn’t keeping speed in check, try to avoid applying the brakes. On a long descent, you might feel the speed is too slow in low-range first, but only shift up to second or third if you know you’ll be able to safely slow down again if you need to, such as for a tricky section of track up ahead.

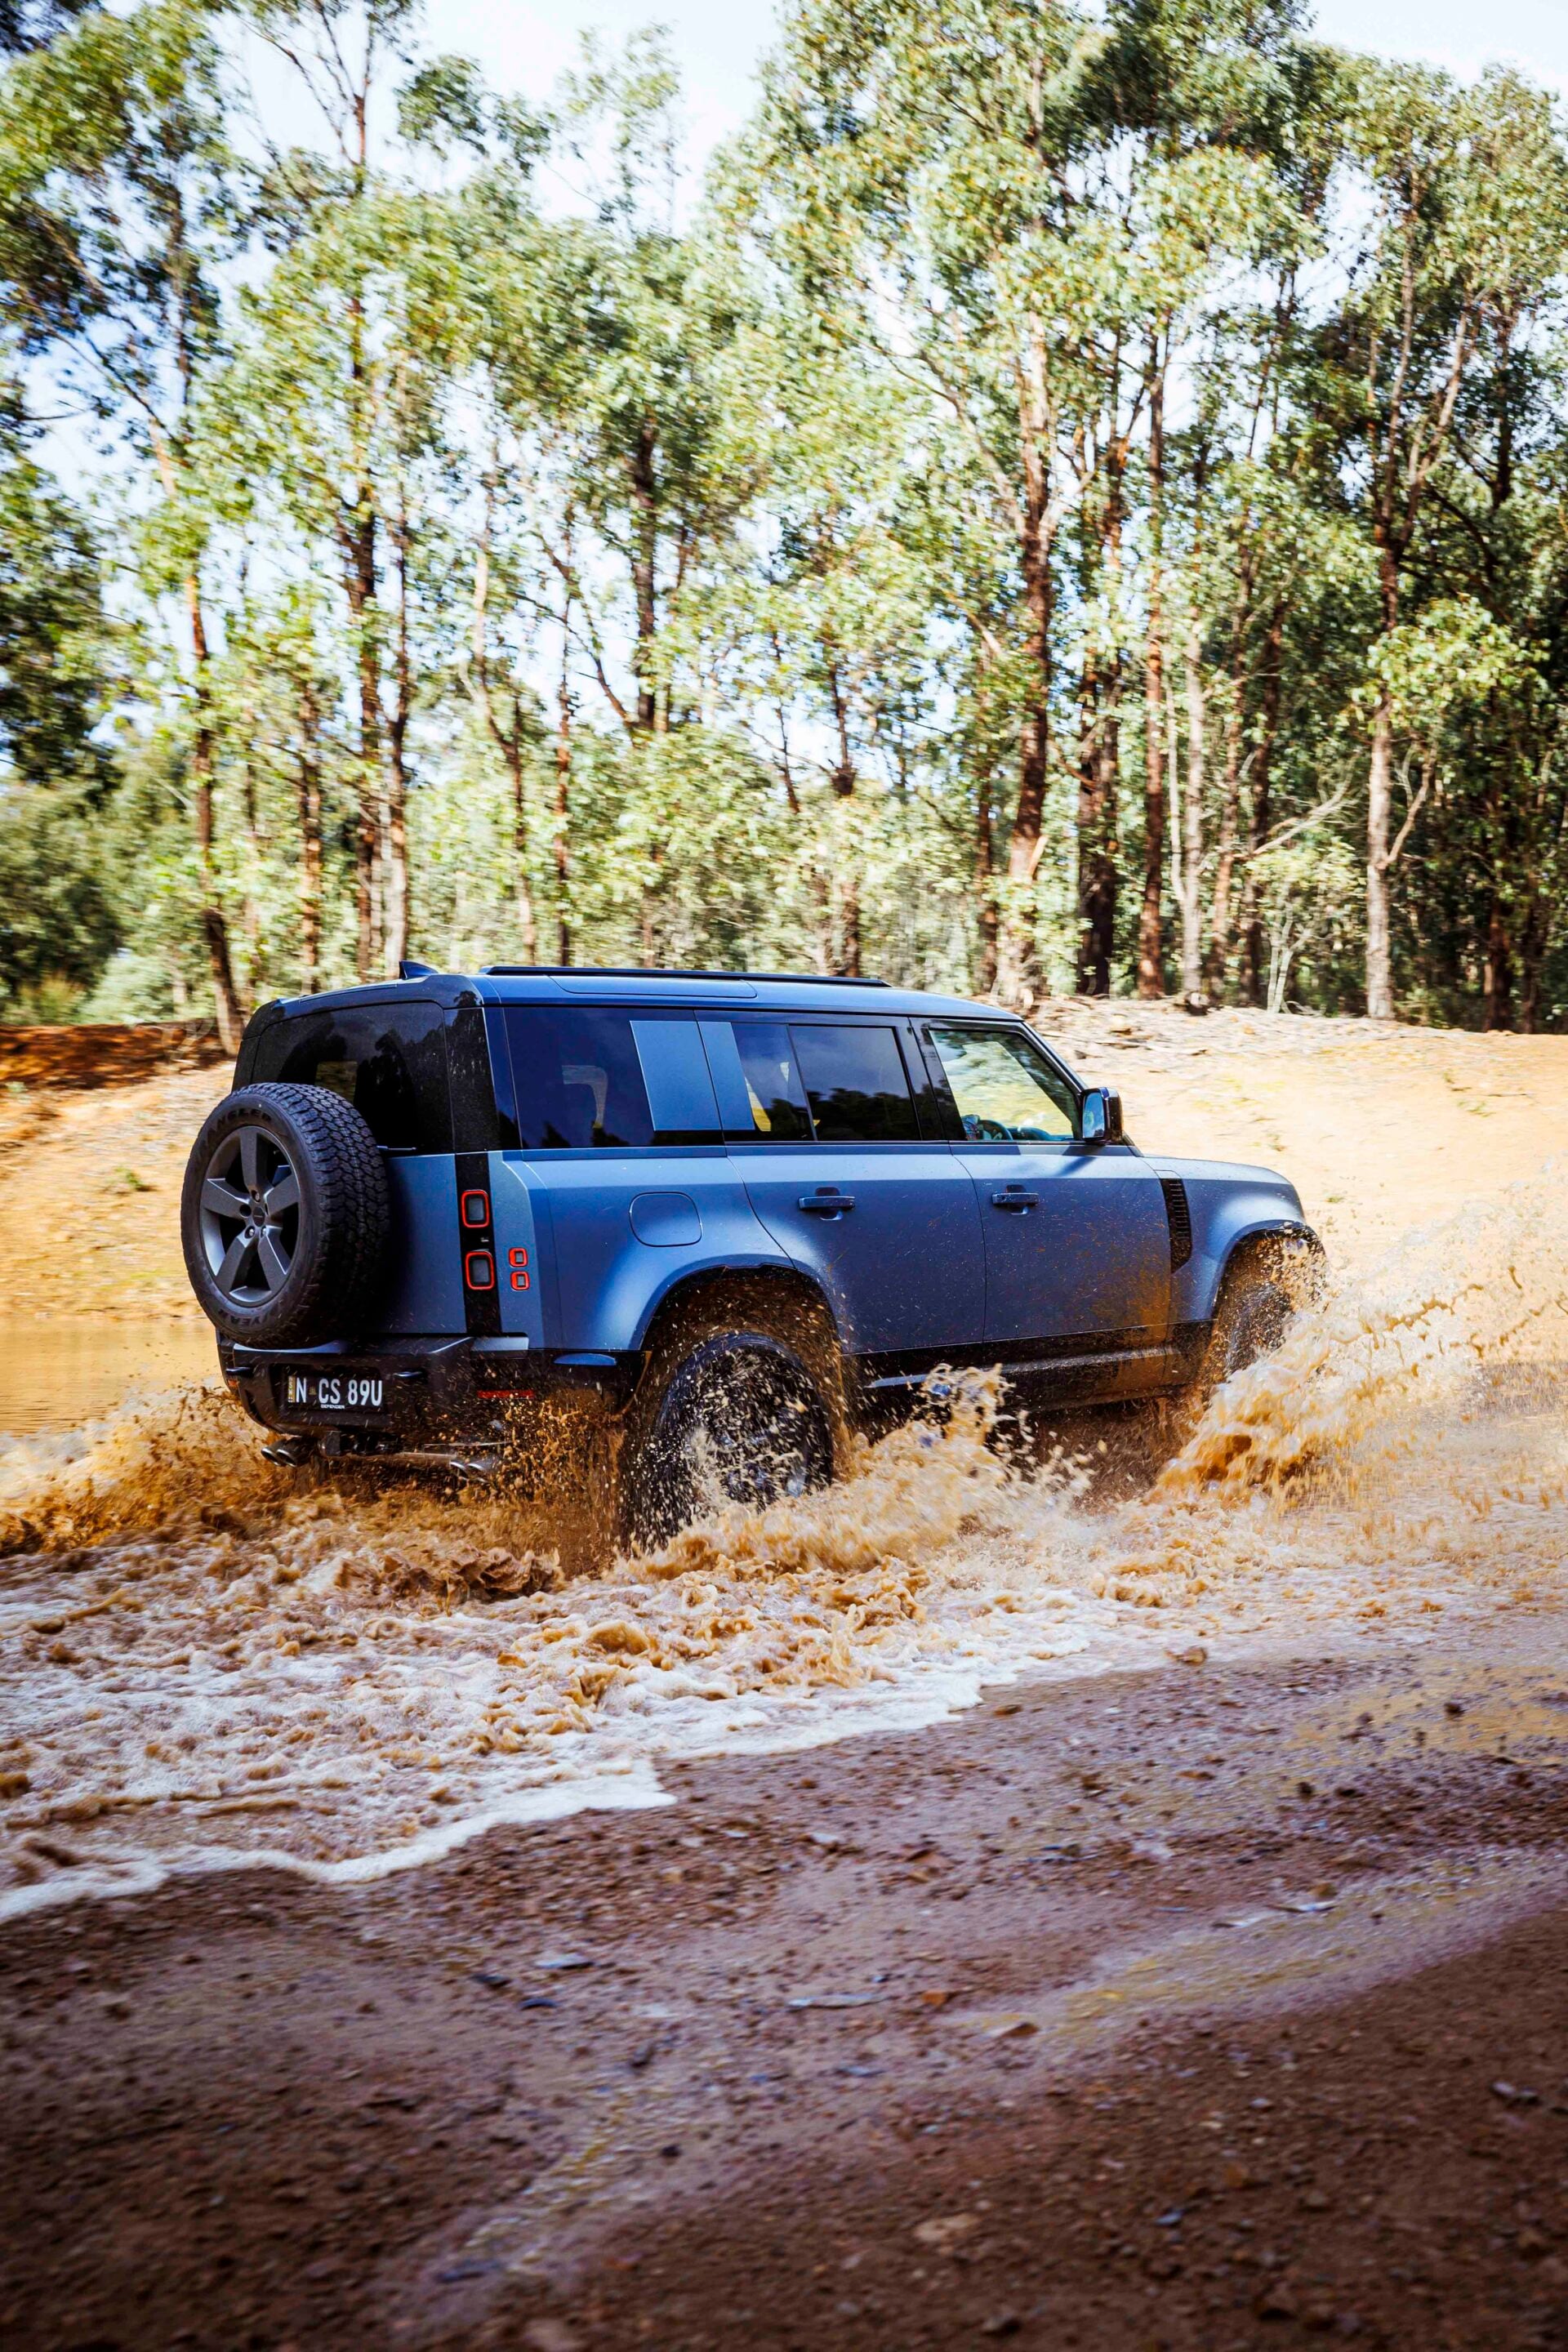
As you descend the hill, you will need to adjust the speed to suit the changing track conditions. If the track is muddy, make sure any vehicles ahead have cleared the descent before you set off. There will often be visible wheel tracks in muddy terrain; if you can see that these tracks lead to where you want to go, and you think you have enough available ground clearance, drive in the tracks rather than trying to fight them. If the tracks are too deep or they spear off into the scrub, you’ll want to straddle them as much as possible, and then try to drive out of them if you slide in.

1

On a rocky descent with reasonable traction, you’ll probably need to use the brakes to ease over big drop-offs without damaging the vehicle, but don’t stab at the pedal, gently apply brake pressure to avoid wheel lock-up.

If driving a manual 4×4 vehicle and you’ve slowed down so much you’re going stall the engine, don’t worry; it’s better to stall than to push on the clutch pedal, because once that clutch is disengaged the vehicle can begin to roll down the hill and you will have little control over it. If you do stall, again don’t push on the clutch pedal; simply turn the key in low first with the clutch pedal out and the vehicle should start driving down the hill again.

On steep descents, you won’t always be able to see what’s directly ahead such as when driving over obstacles or cresting drainage mounds, so keep your speed in check in case there’s a steep drop on the other side. If you have a spotter and can stop before a tricky section of track, ask them to get out and direct you. If you are able to and want to stop on a steep descent for any reason, get on the UHF and let others in your party know what you’re up to so following vehicles don’t proceed until the track is clear.

Descending vehicles generally have right of way when they encounter oncoming vehicles climbing a track, but if there’s room and you are able to safely pull up, let oncoming vehicles go past. Finally, try to keep the vehicle pointed down the hill at all times and try to avoid driving across steep tracks or you could roll your vehicle.


How to safely descend steep sand dunes

Driving down steep sand dunes is very different to any other kind of descent. Sand dunes have a shallow windward side and a steep leeward side, and the latter, sometimes called the slip face, can be up to 34 degrees steep.

The method of safely descending a steep slip face is to slowly drive over the edge in low-range first or second gear and then let gravity do the work. You won’t need to apply braking pressure as the soft sand on the slip face will arrest vehicle speed, so stay off the brake pedal and point the vehicle directly down the face of the dune.

As you approach the base of the dune, get ready to accelerate, as this is where the sand is often at its softest, and the last thing you want to do after you’ve pulled off an impressive dune descent is get stuck at the bottom. Look out for abrupt drop-offs or step-ups though, as these could see the front of your rig digging into the sand if you hit them too fast.


What to do if you get into strife on a descent

The most difficult aspect of steep descents is keeping your speed in check, especially in slippery mud.

If you start off nice and slow, you will have a better chance of maintaining a steady speed on the descent, but if you start too fast it can be nigh impossible to slow down once your speed has picked up.

Whatever you do, try to avoid applying brake pressure, because if you lock up the front wheels, not only will you be unable to slow down, you also won’t be able to steer. Although it might seem counter-intuitive, sometimes the only way to regain steering on slippery downhill sections is to get on the accelerator and drive your way out. Once you have regained steering control, ease off the accelerator as soon as possible and try not to get on the brakes until there’s more traction available.

If you find yourself stopped halfway down a slippery, muddy hill, and you’re terrified by the prospect of completing the next part of the descent, try dropping your tyre pressures some more. I once dropped pressures to about 5psi to get out of a super slippery situation and was amazed at the traction it afforded me; but make sure you re-inflate the tyres as soon as it’s safe to do so to avoid damaging them.

driving onto beach
1

Recovery gear for steep 4×4 descents

If you end up in a situation where you have no steering control or you have inadvertently driven off the track, you’ll need to turn to your recovery gear.

On muddy hills a shovel can be used to dig artificial wheel tracks that can help you steer the vehicle, and on rocky tracks recovery boards can be used to bolster sections of track that might need building up.

If you’re in a convoy, sometimes the safest way to descend a steep bit of track hill is to belay off another vehicle using a winch. This can be slow and laborious, but it’s better to take your time than damage the vehicle. Always carry a complete recovery kit when driving off-road and make sure you know how to use it. A winch should be complemented by:


Job complete

Once you’ve made a safe descent, don’t forget to return vehicle settings to suit the terrain ahead, and reinflate your tyres if necessary.

If you heard any bangs and crashes on the way down, take a look around and under your rig to inspect for damage. Oh, and if you left your spotter halfway up the hill behind you, don’t leave without them.


What to do

  • Study the terrain ahead and walk the track if necessary
  • Know your vehicle systems and how to best use them
  • Adjust tyre pressures to suit the terrain
  • Use low-range gearing to keep your speed in check
  • Adjust vehicle speed to match the terrain

What not to do

  • Apply brakes and lock up the steering wheels
  • Descend the hill until vehicles have cleared the track
  • Stop on the track without warning others in your convoy
  • Disengage the clutch on a steep descent
  • Leave your spotter behind in the bush

Frequently Asked Questions

What gear should you use when descending a steep hill?

Make sure your tyre pressures are set and your hubs are locked (if fitted), and then engage low range and select first gear, no matter whether your vehicle has a manual gearbox or an automatic transmission.

Should you use the brakes when driving down a steep hill?

Unless the hill is extremely steep and the vehicle’s low-range gearing isn’t keeping speed in check, try to avoid applying the brakes. On a rocky descent with reasonable traction, you’ll probably need to use the brakes to ease over big drop-offs without damaging the vehicle, but gently apply brake pressure to avoid wheel lock-up.

What tyre pressures should you use for steep off-road descents?

As a general rule, if your usual road pressures are around 35psi, and you’re running LT tyres on your vehicle, you can drop pressures to around 22psi for rough off-road tracks.

Should you use Hill Descent Control on steep descents?

The better HDC systems on the market allow you to adjust vehicle speed using the up and down cruise control buttons, usually in 1km/h increments down to as low as 1km/h, but even these systems are not suited to all steep descents.

Should you use a diff lock when descending a steep hill?

If the descent is quite undulating and there’s a chance you will exceed the vehicle’s suspension travel, engage the rear locker if fitted. It will be much more difficult to steer the vehicle if you engage the front diff lock, so try to avoid doing so unless you become stuck.

What should you do if you lose steering control on a steep descent?

Whatever you do, try to avoid applying brake pressure, because if you lock up the front wheels, not only will you be unable to slow down, you also won’t be able to steer. Although it might seem counter-intuitive, sometimes the only way to regain steering on slippery downhill sections is to get on the accelerator and drive your way out.

How should you descend a steep sand dune?

The method of safely descending a steep slip face is to slowly drive over the edge in low-range first or second gear and then let gravity do the work. You won’t need to apply braking pressure as the soft sand on the slip face will arrest vehicle speed, so stay off the brake pedal and point the vehicle directly down the face of the dune.

What recovery gear should you carry for steep descents?

Always carry a complete recovery kit when driving off-road and make sure you know how to use it. A winch should be complemented by a winch-extension strap, a tree-trunk protector, snatch blocks and shackles. Make sure you have a long-handle shovel and recovery boards, and if travelling in convoy a snatch strap or kinetic recovery rope … and always wear protective gloves when using recovery gear.

What should you do after completing a steep descent?

Once you’ve made a safe descent, don’t forget to return vehicle settings to suit the terrain ahead, and reinflate your tyres if necessary. If you heard any bangs and crashes on the way down, take a look around and under your rig to inspect for damage.

MORE Advice from the experts!

Part 1: From the showroom to the tracks

“What kind of car is that?” It’s a question I’ve been asked many times in the first month of driving the Grenadier.

Is it a Land Rover? Is it electric? Is it Chinese? Not many people seem to know exactly what it is. The only other vehicle I’ve driven that causes this much confusion is my 1968 Country Buggy. Yep, Google it.

By now, most people know the story of why the Grenadier was created. Man drives Defender. Defender stops being made. Man decides to build his own four-wheel drive to replace his much-loved Defender – but better. That man is Sir Jim Ratcliffe, owner of Ineos, Manchester United and a large part of the Mercedes F1 team.

I owned a 2015 Defender back in 2023 in the UK, and I’ve also owned a 1976 VW Kombi. In many ways, the Kombi and Defender feel like a closer driving experience than the Defender and Grenadier. Yes, the Grenadier looks a little like an old Defender, but that’s where the similarities stop. I was lucky enough to go on a few of the Grenadier’s Australian development trips in the Outback a few years back. These were all pre-production vehicles and not final spec. They were rough and still being worked on by engineers, but even then I could tell they were highly capable, and I was looking forward to driving the production model.

1

Fast forward to late 2025 and I’m picking up my long-term Grenadier. I’ve gone for a Trialmaster Station Wagon in Scottish White (apparently named after one of Sir Jim’s Scottish mates and his white legs), powered by the BMW B57 diesel engine. I opted for steel wheels, leather trim, heated seats and Safari Windows. The base price is $120,000, plus $8670 in options.

The Trialmaster comes standard with front and rear diff locks, a raised air intake, Class III 1-7/8” NAS tow hitch and electrics, and an access ladder. I also had factory rubber mats added. There are no carpets in this vehicle and that’s exactly how I like it – rubber mats and a vinyl floor are the best.

The very first thing you notice when you drive a Grenadier is the steering. It doesn’t self-centre very quickly compared to most other vehicles. Once you’re aware of this and get used to the steering technique required, it’s fine. Just be ready for it. The Recaro seats are very comfortable and help soak up the kays, plus they look cool. Rear passengers also get a Recaro bench seat, and I like how high it sits you in the back. It’s great for kids, as it makes it easier to look out of the vehicle, placing rear passengers at a similar head height to those in the front.

I picked up the Grenadier just before the start of the summer holidays, and it’s proven to be a great beach vehicle. Having no carpets makes it super easy to get sand out, and the interior utility rails work well when you’ve got lots of gear to tie down in the back.

I strap the surfboards to the roof, with four factory rails fitted. I’m planning to get a roof rack, but more on that later. Running to and from the beach is fun, and the kids have found it to be a great family vehicle so far. It’s not really what this vehicle is designed for, though. Yes, it will do the day-to-day tarmac stuff just fine. The 550Nm of torque that the BMW engine pumps out makes keeping up with traffic easy as well.

It was time to head off-road, so I pointed it toward Lerderderg State Park. I’ve photographed and driven many four-wheel drives up here, so it’s a great place to get to know the Grenadier. The first thing I do once I hit the dirt is flick the low-range selector lever across to lock the centre diff. This also automatically turns off the ESC.

14

I leave it in high range to begin with. The ride on gravel roads is excellent and, as I start to push it a little harder, it actually feels light on its feet and keen to turn in sharply. I then head to some fairly steep, rutted tracks. I select low range and start driving up the first climb. The Grenadier has solid axles front and rear, which gives it excellent wheel articulation. I try engaging the rear diff lock and it just walks up the track. No need to even try the front diff lock – I need to find a harder track. That will have to wait until my next trip, though. My first experience off-road has shown that the Grenadier is highly capable, and I’m going to enjoy finding gnarlier places to drive it.

One thing that takes a while to get used to is having the speedo in the centre display rather than directly in front of you. Living in Victoria and constantly stressing about being 3km/h over the limit, I sort of wish it was straight ahead. My other small gripe is that the driver’s-side wiper misses a chunk of the windscreen near the A-pillar. It only becomes an issue if you really get the vehicle and screen super muddy, but I do notice it.

Plans? We’re going to throw some factory and non-factory accessories at the Grenadier while we have it, starting next month. Can’t wait.


Part 2: Mods tested in the Vic High Country

The Grenadier wave is alive and well. I used to get the Jeep wave back when I had a JK Wrangler and was wondering if Ineos owners would do the same. Well, they do! I even got a wave from a guy in a 110 Defender – maybe the sun was in his eyes?

This month has seen quite a few kays racked up in the Grenadier. I wish I could say they were all off-road kays; sadly not. As a daily driver, though, I’m really enjoying the Grenadier. It has such a nice ride – comfortable on the tarmac and even better when you hit the dirt. I think they’ve done a great job with the suspension tune.

I headed up to Mt Disappointment in Vic this month to shoot a HiLux vs Ranger comparo. One of the tracks we drove was pretty gnarly and it was the first time I needed the rear diff lock. Once engaged, the Grenadier just walked up in low range – no issue. The way it moulds itself to the terrain is amazing to watch. It also does all the hard work for you. I tried picking the worst lines and it just ate them up.

1

I used the freshly fitted Rhino-Rack Pioneer platform to photograph the utes from. I went for the three-quarter length option as it still allows me to open the safari windows. It was $3688 plus fitting. It’s great now – the factory ladder on the back door actually goes somewhere! I also fitted a set of MaxTrax up on the platform – thanks Matt.

A factory Ineos roo bar ($2720), rock sliders ($1921) and checker plates ($560) were also fitted. The roo bar is a smart design that works with the existing factory bumper. You just take a couple of caps off and it bolts straight on. Job done! The rock sliders are also well designed and solid. They bolt directly to the chassis rails and offer a twin-tube setup. The checker plates sit on top of the front guards and allow up to 120kg load. Luckily I’m only 103kg, so I’ve been up there quite often just because I can.

Hopefully I won’t have to test out the roo bar. The rock sliders, however, have had their first slide. Yes, it was a little painful, but I figure that’s what they’re for. They feel super strong and can take the weight of the Grenadier no worries. Plus, the scratches are underneath so I can’t see them.

MORE How to accessorise your Ineos Grenadier: Essential 4×4 mods
16

I had to top up the AdBlue this month. It gave me a warning that it was running low, which was handy. The front parking sensors have been triggering at random. Apparently it’s some dirt stuck on the edge of a sensor that’s setting it off. No big deal, as you can manually turn them off and it stops the beeping. I might try giving them a proper clean.

Next mods? I want to try a bigger tyre size. The standard 265s are fine and do a great job, but I’d love to see those guards filled a little more. Maybe a 295? Mud-terrains? Let’s see what happens.


Part 3: Bigger tyres give the Grenadier a boost in the bush

New tyres for the Grenadier this month. I had my local tyre store (thanks Tyrepower Mornington) fit five BFGoodrich Mud Terrain KM3s in a 295/70R17 size, at $590 each.

The original BFG All Terrains weren’t worn out and were still doing a great job; I just wanted to try a bigger size than the standard 265/70R17 tyres fitted as stock. I had a set of KM2s on a JK Wrangler about 15 years ago, so it is going to be interesting to see how the KM3s compare.

Standing the 295 Mud Terrains next to the original tyres, the size difference is noticeable without being extreme. I think it’s a worthwhile upgrade for the Grenadier, especially considering it’s on stock ride height and wheels. I also like that BFG has done away with the white lettering – I was never a fan. Clearance to the brake lines has reduced slightly, but I don’t think it will be an issue. There are also no signs of rubbing, even with the suspension fully articulated, which is reassuring.

29

With the first opportunity, I headed to the Yarra Valley in search of mud. It’s been a dry summer in Victoria, so finding mud hasn’t been easy. The only option was to head to Toolangi State Forest, where I knew I’d be guaranteed to find some. To get there, I had a fair amount of highway driving to cover. The KM3s are definitely louder on-road than the ATs, but nothing you couldn’t live with, even as a daily driver. You do feel a touch more tyre roll through corners because of the taller sidewalls, but overall the ride is better. It’s simply a more comfortable experience now, both on- and off-road.

Before any mud could be sprayed, I found Rocky Track, dropped the Grenadier into low range and began the climb. If you’re familiar with Rocky Track, you’ll know it’s a very challenging drive. I completed the first section fairly easily with the centre and rear diffs locked. The aggressive sidewalls on the KM3s helped bite into the rocks and push the Grenadier forward.

The second section is much tougher, and line choice really matters. With the front locker engaged, I continued to make forward progress. The rock rails were taking a beating and things were getting pretty serious. I’m confident the Grenadier would have made it to the end of Rocky Track, but I chose not to push on. With just the two of us in one vehicle, it wasn’t worth the risk. If we got stuck – or worse – there was no one around to help. It’s a serious track.

1

So my son William and I headed off in search of muddy tracks, and we found them. The KM3s performed exactly as you’d expect in sloppy conditions. Where the ATs would turn into slicks, the KM3s cleared mud far more effectively. I’m really impressed with the BFGoodrich Mud Terrain KM3s so far and happy I opted for the larger size.

They suit the Grenadier perfectly and make it an even more capable vehicle. I also fitted the new MAXTRAX Recovery Shovel this month. It’s a clever storage solution, with the shovel and extension handle integrating neatly with MKII and Extreme MAXTRAX boards. Hopefully I won’t need to use it too often.

One thing I would like for the Grenadier is a way to shade the safari windows. Don’t get me wrong, I really like them and at least one side is nearly always open, but there are times when the sun is directly overhead and some sort of shade system would be ideal. Maybe that’s my next mod?


Part 4: Grenadier to the rescue

Are you busy right now? We have a slight need for a tow from a 4×4.

This was a message I received on a rainy Wednesday afternoon at around 1pm. Do you need help? I wrote back. Yes please! The message had come from my son Charlie’s friend, Sylvan. He was in a hired MG hatchback on a steep dirt road, doing P-plater things, and it had just started raining heavily. Yes, I do have a 4×4, I thought. So, I headed off to try and help.

The first thing I thought when I arrived at the muddy location was that he had put in a decent effort to get that far down the track in a 2WD hatch! It was a rental car, after all. A car that, now, was going nowhere under its own steam.

1

We were on a slippery track between farms near Red Hill and the rain was getting heavier. At this point, I was very happy that I had recently switched to BFG Mud Terrains; they were about to get a proper workout. So, I positioned the Grenadier close enough to the stricken rental, secured the snatch strap and gave Sylvan some brief instructions. With the Grenadier in low range, I started to reverse up the track slowly, waiting for the slack to be taken up.

This gentle approach just didn’t work. As soon as the slack was gone, the INEOS was spinning all four wheels on the spot, gymkhana-style, and we were going nowhere. For a second, I thought we might actually be cooked here, as the track was getting worse by the minute. So, take two, and the plan this time was to use some speed and hopefully snatch the hatch into forward movement.

With Sylvan ready, it was go time. I also engaged the rear diff lock on this attempt. I drove the Grenadier backwards at a brisk pace and, when the slack took up this time, the MG lunged forward. Now the Grenadier was doing it easily and I towed the rental car all the way up the hill. Sylvan and I were both really impressed with how well the Grenadier got this job done. A quick pressure wash on the MG and no one will ever know!

1

This month, the Grenadier received some new bits in the form of an XSPEC 30L gravity-feed diesel tank with a 12V transfer pump (↗). On the passenger side, we also had an XSPEC storage locker (↗) and an XSPEC 20L lockable jerry can holder (↗) fitted with an ONTAP 22L portable shower (↗). These products were mounted to the Grenadier with the XSPEC rear-window utility frame (↗).

We tried out the ONTAP portable shower while out surfing for the day with my son William. It’s really simple to use. Just fill it up before you head out and then insert the plug into a 12V outlet. The Grenadier has one in the rear load area, which is great.

The storage locker next door is also really handy. I stored the hose and seven-function spray gun in there, along with some snacks. I could also see the shower system being really useful to spray down mountain bikes after a day off-road. All these products from Expedition HQ are well designed and very well integrated into the Grenadier. Hopefully, I won’t have to fill up the 30L diesel tank too often, as fuel prices this month were hectic!

9

Also this month, the Grenadier’s front windscreen took a beating. I was on a narrow country road – the type where you need to drop a wheel into the gravel – when a big tipper truck passed me in the opposite direction. It managed to throw up enough rocks that I had three cracks appear all at once. Great!

I feel the upright design of the Grenadier windscreen – much like my old Wrangler’s as well – makes it more prone to getting stone chips. Not much you can really do, though. The Grenadier is asking me to be serviced, so I’ll let you know next month what the INEOS dealer service experience is like.


Part 5: Mud and maintenance

A 15,000km service, new factory accessory and a proving-ground hill climb keep the Grenadier busy this month.

So after kindly asking me to have its first service done, I booked the Grenadier in at Cupra Brighton – yes, they service and sell Ineos as well. It’s the closest dealership to where I live on the Mornington Peninsula. Still, at 85km away it’s not really that close. This is the downside of having a vehicle from a smaller manufacturer; you just don’t have a dealership in every suburb. Hopefully the service is good and I will forget about the distance to get there.

The Grenadier was in for its first service at 15,000km. When I dropped the Grenadier off at the dealership, Lincoln, to his credit, made it all happen around my busy work schedule. It’s really great when a service centre has this flexibility, and also nice to deal with just one person who can get the job done efficiently.

1

I did feel bad that I dropped the Ineos in for service with mud dripping off it. Hopefully they were thinking that at least I use it properly, and not upset at me for making the workshop floors filthy. Sorry!

I received the call from Lincoln to come and pick up the Grenadier. It was ready to go. For the first service they changed the engine oil, air filter, HVAC filter, water-separator filter – so many filters! – and also changed the oil in the front and rear diffs. Total cost was $975.

They gave the Ineos the best clean it has ever had. It actually looked Scottish White again! While I’m not a fan of shiny tyre spray on 4×4 tyres, the BFG Mud-Terrains looked brand new and actually black for once. I have to admit I didn’t want to get it muddy for a week or so after that, so I stuck to mall crawling and posing with all the other pristine off-roaders on Sorrento’s main street.

1

Mods this month? I fitted an Ineos factory accessory, the Tailgate Table (↗). It bolts inside the larger rear door and sits flush when not being used. It’s simple to fold out and gives you a handy flat surface for tools, equipment or even campsite cooking gear. I use it to hold my camera bag when I’m out on a shoot and have the rear of the Grenadier opened up. The black finish means it blends in perfectly. It does occasionally give a little rattle when you’re on a really rough dirt road, but I can live with that.

The KM3s have been seeing some action as it’s winter now. I have put the rear skid plate to good use as well. Not many 4x4s have a factory rear bash plate and when I first saw it I thought it may be overkill. Recently, however, I have noticed wear marks on it, so it does get used and, in doing so, protects what’s under it – mostly the exhaust system. The front bash plate has also seen some action, as it now has a very slight bend to it.

The Grenadier spent much of the past month parked up at the airport as I have been on back-to-back automotive launches. I did get to have some fun though. One of these launches was at the former Holden Proving Ground at Lang Lang. While everyone was having lunch, I jumped in the Grenadier and headed out to the 4×4 test area. There is a fairly steep gravel climb that really tests a stock 4×4. Not everything makes it up here, so I went up in the Grenadier in high-range 4×4 with no drama at all.

1

Bored with that climb, I spotted a way steeper one that I think was designed for tanks to go up. I wanted to try it, but the angle seemed more than 45 degrees and it looked scary. Do I do it or not? I was also missing lunch, so with that I gave it a crack.

Low range and all three diffs locked, I started to climb. All I could see was sky and I thought it might topple backwards, such was the steepness of the thing. I gave it more throttle than I should’ve, as I wanted it over with.

The Grenadier popped over the top and I was up! It managed it really easily and I headed back before the pies got cold. 


Part 6: Final fling

After six months and nearly 24,000km, the Grenadier has gone back to INEOS.

Over the time I had it, it became part of the family. It wasn’t afraid of getting dirty, having kids clambering all over it or being driven hard. In fact, I think it enjoyed those things and loved the punishment.

It took a while to get used to the steering, as it was slow to self-centre. The 2026 Grenadier has an updated steering system that self-centres more quickly and naturally. I became accustomed to the steering in my vehicle, though, and actually quite liked it. It gave the Grenadier character.

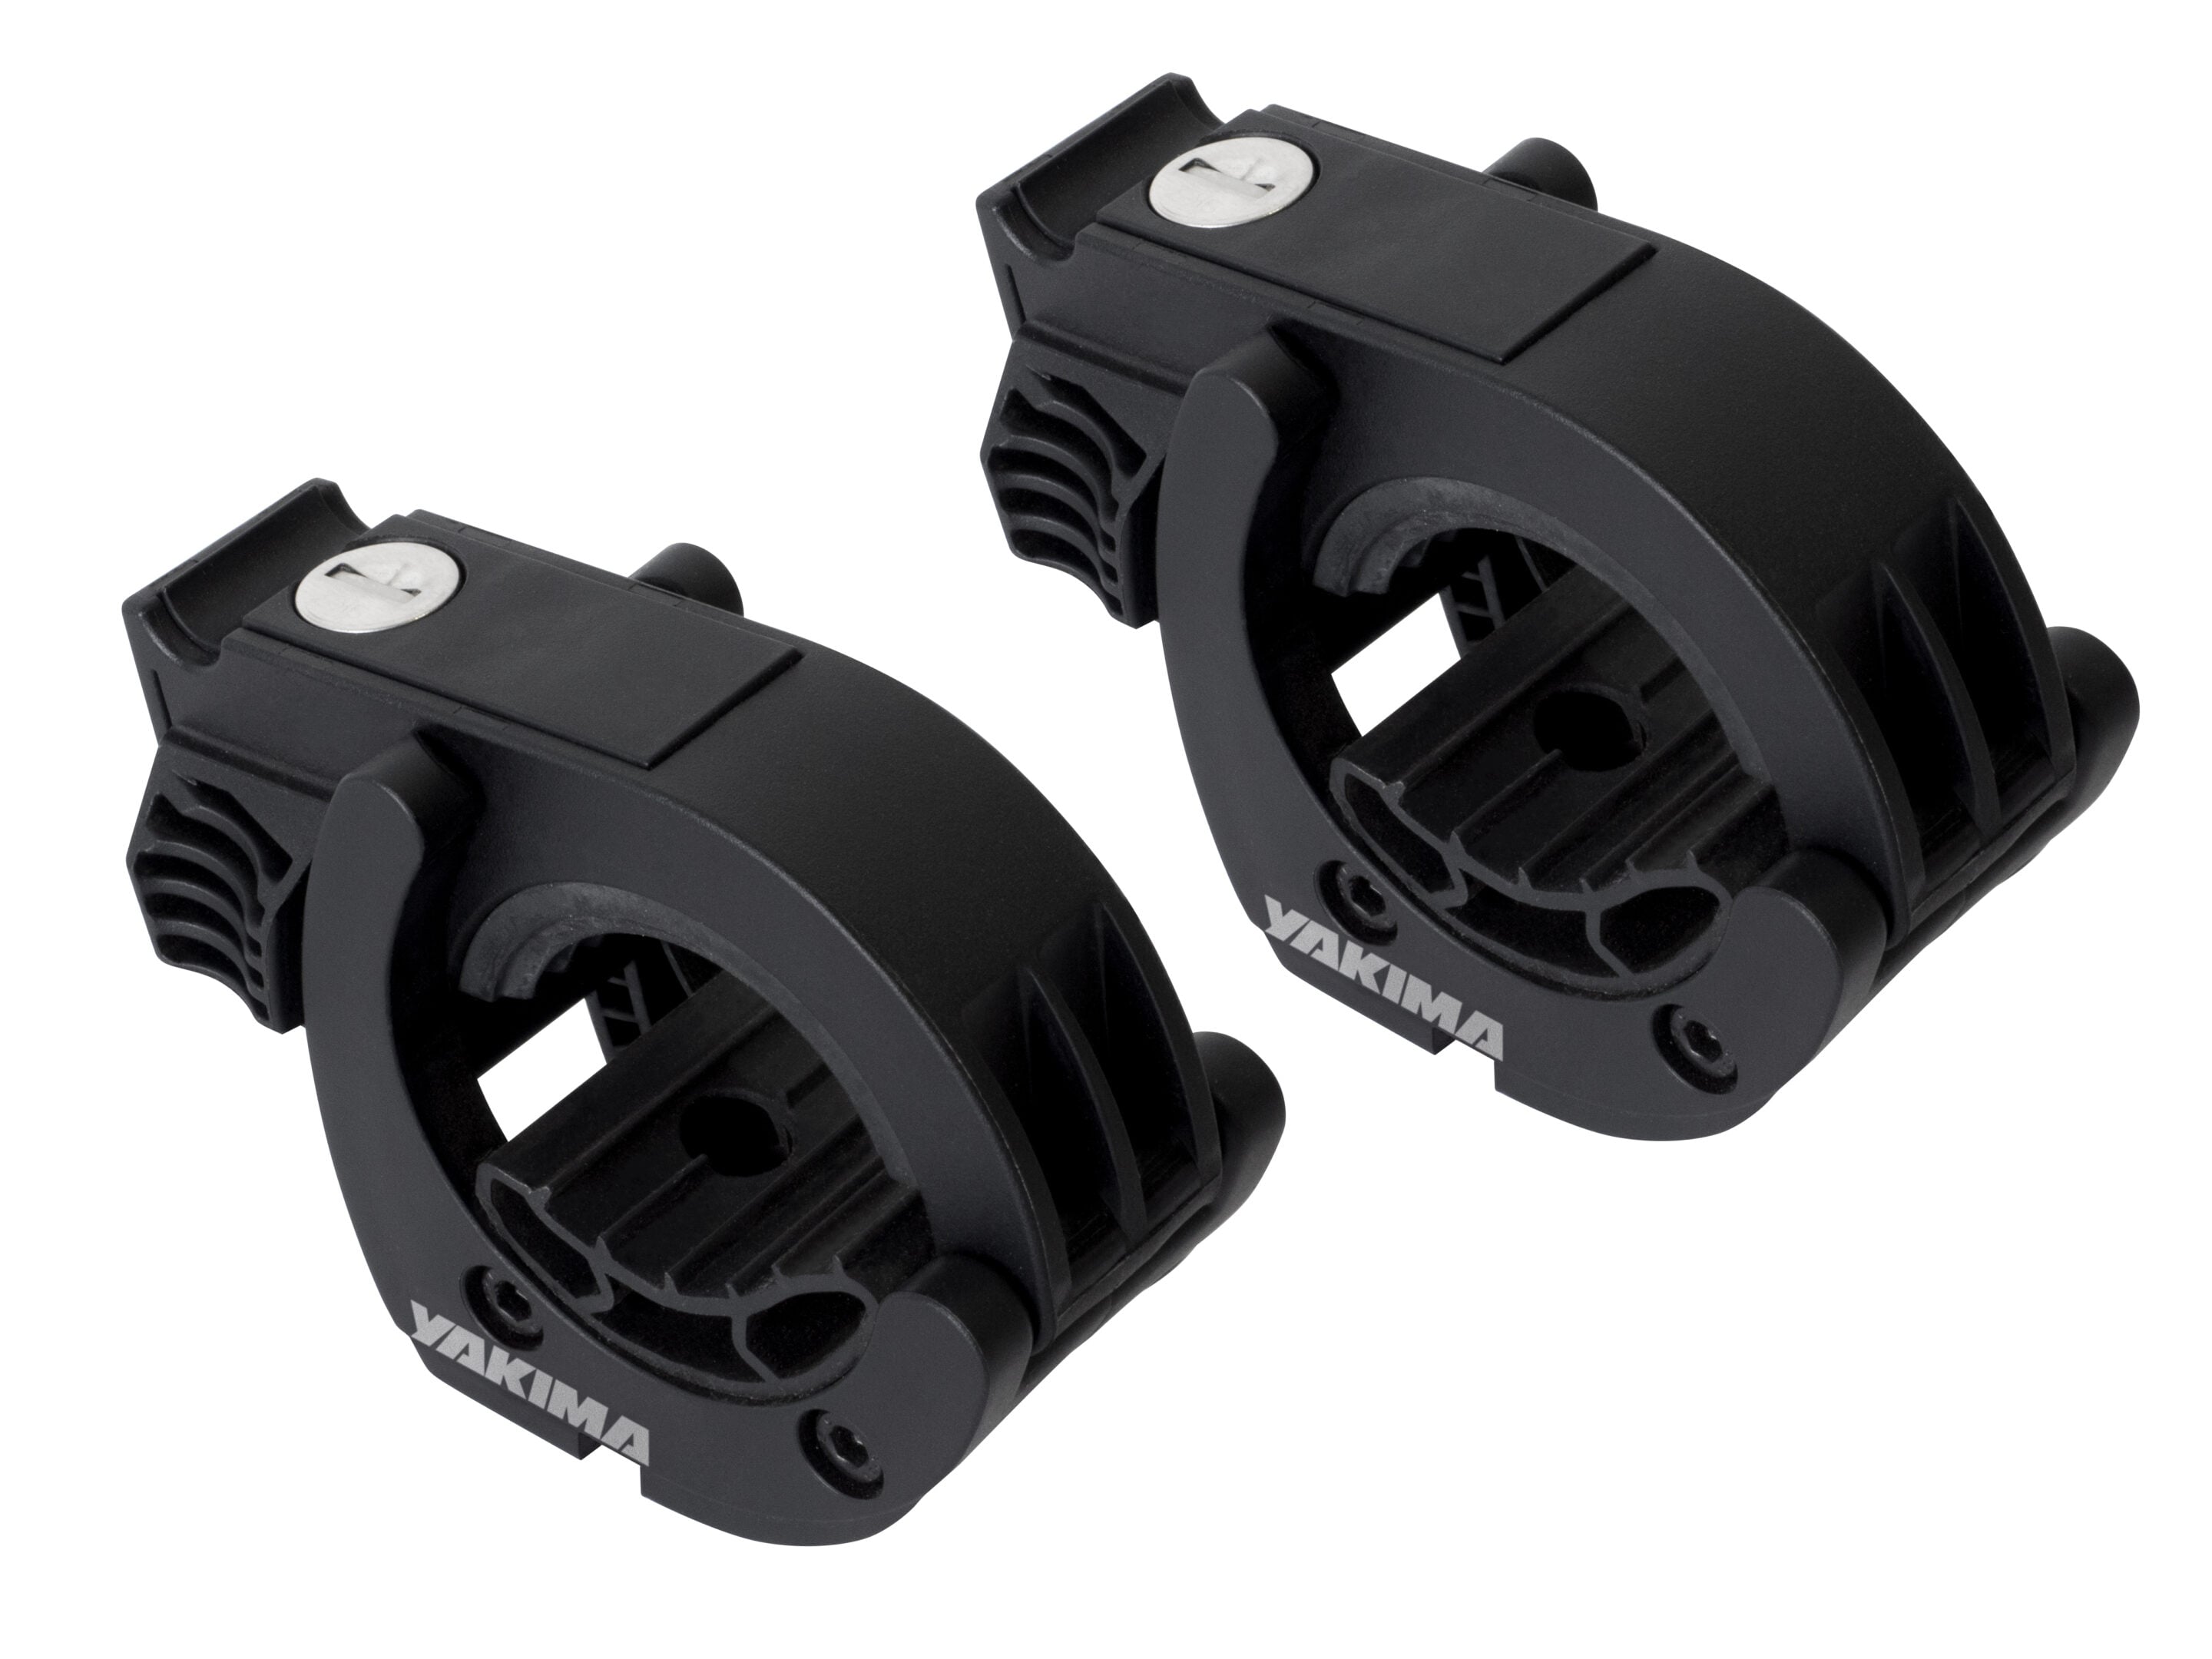
Before it went back, I still managed to have some fun in it this month and added another accessory in the form of a Yakima bike rack. I thought it was time to charge up my e-bike and start riding again. Because e-bikes are heavy, I needed a heavy-duty rack suited to off-road driving. I went for a Yakima StageTwo rack, priced at $1299 (↗), as it can carry two bikes weighing up to 32kg each. It also sits high and out of the way, so it is less likely to get hung up when driving off-road.

1

I decided to take the Grenadier back to Lerderderg State Park for our final adventure together. This was the first place I drove it properly, so it seemed fitting to finish where we started. The major difference was that I picked up the INEOS in summer and it was now the middle of winter.

Shortly after we arrived, it began to rain, which ramped up the difficulty. This time, though, the Grenadier was wearing BFGoodrich Mud-Terrain KM3s instead of the standard BFGoodrich All-Terrains, making them the perfect tyres for the conditions.

I’m always amazed by how much articulation the Grenadier has, especially at the rear. Watching it mould itself over the terrain never gets old. I reckon INEOS hit a sweet spot with the suspension tuning, making the 4×4 highly capable in the rough stuff while still keeping it comfortable and predictable on-road.

1

The KM3s have been great tyres and are surprisingly easy to live with on-road. I tackled most tracks in low range with the centre diff locked, only engaging the rear diff lock on some of the gnarlier uphill sections. Engaging the third diff lock – the front – feels like finding a cheat code in a PlayStation game. With all three locked, the Grenadier feels unstoppable. The suspension is a major plus, as I mentioned earlier. The BMW engine is a beast, with plenty of torque, and when paired with the eight-speed ZF automatic it makes the Grenadier feel both quick and exceptionally smooth.

The Recaro seats are excellent, and rear-seat passengers get them too, which is a great touch. The Grenadier is also simple to use: you just get in, turn the key – yes, an actual key – and go. There aren’t a million modes to choose from, and it doesn’t constantly beep at you or tell you how to drive. It feels solid and well built, like something you could own for a long time. It also comes well equipped from the factory while remaining easy to modify with aftermarket gear.

As for the negatives, the location of the USB-A and USB-C ports drove me nuts. They’re tucked away in the centre-console armrest and are awkward to access. The limited dealer network may also mean travelling some distance for servicing, depending on where you live. The only real issue I experienced occurred this month, when several ESC warning lights appeared. I took the Grenadier to Brighton INEOS, where the team checked it over, reset the system and sent me on my way.

24

Looking back over the past six months, it’s been great not only to drive the Grenadier and explore its huge capability, but also to add aftermarket gear and make it more suited to my needs. It was especially rewarding to see the vehicle progress from the prototype stage – including trips through the Australian outback – to spending six months with the production version.

I’d recommend the Grenadier to anyone looking for a highly capable off-roader that also works as a comfortable family 4×4. Best of all, it has loads of character. I’m really going to miss it.

MORE Grenadier news and reviews!

The Toyota HiLux has finally knocked the Ford Ranger off the top spot on the monthly sales charts, becoming Australia’s best-selling 4×4 ute in July 2026 after months of Ranger dominance.

According to the latest VFACTS report, Toyota sold a total of 4119 HiLux 4×4 variants in July, edging ahead of the Ranger’s 3827. The result is likely to reflect improved availability of new stock.

The Isuzu D-MAX, BYD Shark and Mitsubishi Triton were the next best-selling 4×4 utes, with 1292, 1216 and 1081 sales respectively. Further down the list, the newest utes to hit the Australian market are still finding their feet, with sales well behind the established players. Nissan’s Navara recorded just 212 sales in July, while Kia’s Tasman managed 355 units.

In the more budget-friendly segment, the GWM Cannon/Cannon Alpha recorded a combined 719 sales in July. LDV recorded 209 sales for the T60 and 162 for the Terron9, while the KGM Musso managed 179 sales ahead of its updated model, which is nearing release. The Foton Tunland recorded 139 sales, followed by the MGU9 with 85 and JAC T9 with just 57.

The Prado also secured the top spot for Toyota on the SUV charts, with 2082 sales in July. This put it ahead of the Ford Everest (1697), LandCruiser 300 Series (1399) and Isuzu MU-X (1080). 

In a one-two-three punch for Toyota, the Japanese brand remained Australia’s top-selling manufacturer in July 2026, with 20,409 sales, ahead of BYD on 7857, Kia on 6553, Mazda on 6458 and Ford on 6400. Interestingly, of the top five, BYD was the only brand to record year-on-year growth, up from 4607 sales in July 2025, while Toyota, Kia, Mazda and Ford all recorded declines.


LCV sales slide in July

Australia’s light commercial vehicle (LCV) segment recorded a significant decline in July 2026, with sales falling 14.4 per cent compared with the same month last year.

A total of 19,207 light commercial vehicles were sold in July 2026, down from 22,437 in July 2025. Year-to-date sales have also fallen 10.0 per cent, with 145,520 vehicles sold to the end of July compared with 161,737 over the same period last year.

The decline was even more pronounced in the PU/CC 4×4 segment, which fell 15.2 per cent year-on-year in July. Sales dropped from 17,351 units in July 2025 to 14,705 in July 2026. Year-to-date sales in the PU/CC 4×4 segment are down 11.6 per cent, with 110,858 vehicles sold to the end of July 2026 compared with 125,456 during the same period in 2025.


Petrol and diesel continue to fall

The shift away from petrol and diesel also continued to accelerate in July 2026 compared with July 2025. 

Diesel sales fell 21.6 per cent year-on-year to 24,773, while petrol sales dropped 30.2 per cent to 27,894. Meanwhile, EV sales more than tripled, rising 206.1 per cent from 6072 to 18,589. PHEV sales also surged 157.0 per cent, from 4031 to 10,359, while conventional hybrid sales increased 5.1 per cent, from 17,769 to 18,684.

Within the light commercial vehicle market, the broader trend was largely mirrored, with diesel sales down 15.3 per cent and petrol falling 33.0 per cent in July 2026 compared with July 2025. Electric LCV sales rose from just 23 to 285 units, while hybrid sales increased 42.1 per cent. PHEV sales, however, fell 8.9 per cent, likely reflecting the shift towards EVs.

Year to date, Australians have purchased 127,244 BEVs from all sources, representing 17.3 per cent of the total market. Federal Chamber of Automotive Industries chief executive Tony Weber warned that charging infrastructure needs to keep pace with the rapid growth in EV uptake.

“There is a risk that the rapid increase in electric vehicle uptake in 2026 will outpace the supply of public charging infrastructure. Governments and the private sector must work together to ensure that the public charging network meets growing demand particularly in regional areas and for motorists who do not have access to charging at home.

“Accessible and dependable charging will be critical to maintaining consumer confidence as electric vehicles become a larger part of Australia’s new-vehicle fleet,” Weber said.


Top-selling 4x4s in July 2026
1. Toyota Hilux4119
2. Ford Ranger3827
3. Toyota Prado2082
4. Ford Everest1697
5. Toyota LC3001399
6. Isuzu D-MAX1292
7. BYD Shark1216
8. Mitsubishi Triton1081
9. Isuzu MU-X1080
10. GWM Cannon/Cannon Alpha719
Top-selling 4x4s so far in 2026
1. Ford Ranger28,649
2. Toyota Hilux23,981
3. Ford Everest12,830
4. Toyota Prado11,184
5. BYD Shark10,709
6. Isuzu D-MAX10,704
7. Mitsubishi Triton9850
8. Isuzu MU-X8644
9. Toyota LC3007850
10. GWM Cannon/Cannon Alpha6443
MORE HiLux news and reviews!

The new Nissan Patrol is finally nearing its Australian launch, with Nissan confirming orders for the Y63 will open later this month ahead of its showroom arrival in the first quarter of 2027.

First revealed globally in September 2024, the Y63 has since been spotted testing on Australian roads, with spy shots circulating over the past few months. It marks a big change for the Patrol, with Nissan dropping the old 5.6-litre V8 for a 3.5-litre twin-turbo V6.

The new engine makes 317kW and 700Nm, with drive sent through a nine-speed automatic. That’s 19kW more power and 140Nm more torque than the outgoing Patrol, or increases of six percent and 25 percent respectively.

1

Nissan says peak torque also arrives earlier in the rev range, which should help when towing, climbing hills or tackling off-road conditions. The new V6 also gets some technology from Nissan’s GT-R program, including a scavenger oil pump designed to maintain consistent engine lubrication during extreme off-road driving, including steep inclines and off-camber terrain.

The new Patrol will also be available with Adaptive Air Suspension on selected grades. It can raise the Patrol in Off-Road Mode to improve its approach, breakover and departure angles, then lower the vehicle when parked to make it easier to get in and out or load cargo.

The suspension also automatically lowers at speeds above 90km/h and raises again below 70km/h. Nissan’s Intelligent Dynamic Damping, or e-Damper technology, will also be available with the Adaptive Air Suspension system, continuously adjusting to changing road and terrain conditions.

“For decades the Patrol has been a symbol of go-anywhere capability and trust, and it holds a special place with Australian customers,” said Steve Milette, Managing Director, Nissan Oceania. “The all-new Y63 Patrol honours that heritage while taking a significant leap forward. More powerful, more polished and more capable than ever before, we can’t wait to put it in our customers’ hands early next year.” 


Plenty of new cabin tech

The Y63 brings a long list of firsts for the Patrol, with Nissan adding plenty of new technology and comfort features. Selected grades will get the Monolith display with dual 14.3-inch screens, along with a Head-Up Display.

Front seats can be fitted with massage functions, while first- and second-row passengers get Nissan’s ‘zero-gravity’ seats. Biometric Cooling is another first for the Patrol and the segment, with the system monitoring passenger temperatures and adjusting the climate control when the vehicle is started.

Selected variants will also get a 12-speaker Klipsch premium audio system, using a 12-channel, 600-watt amplifier.

12

Australian Patrol details still to come

Nissan is yet to confirm the full Australian model range, which grades will get the various features, or the detailed specifications for each variant.

Pricing and the final grade structure will also be confirmed closer to launch. Orders open later this month, with first customer deliveries scheduled for the first quarter of 2027.


What we know so far


Frequently Asked Questions

When will the new Nissan Patrol arrive in Australia?

The first Y63 Patrol customer deliveries are scheduled for the first quarter of 2027.

When do Nissan Patrol Y63 orders open?

Nissan says Australian orders for the new Patrol will open later this month.

What engine does the new Nissan Patrol have?

The Y63 Patrol is powered by a 3.5-litre twin-turbo V6 petrol engine producing 317kW and 700Nm. It is paired with a nine-speed automatic transmission.

Does the new Nissan Patrol have air suspension?

Adaptive Air Suspension will be available on selected Y63 Patrol grades. In Off-Road Mode, it can raise the vehicle to improve its approach, breakover and departure angles.

How much will the new Nissan Patrol cost in Australia?

Nissan has not yet announced Australian pricing. Pricing, along with the full model range, grade structure and detailed specifications, will be confirmed closer to launch.

MORE Patrol news and reviews!

The upcoming Nissan Y63 Patrol is en route to Australia, with Nissan officially unveiling the seventh-generation Patrol at an event in Abu Dhabi in September 2024.

More recently, undisguised examples have been spotted testing on Australian roads, offering the clearest indication yet that Nissan’s local validation program is well underway. The sightings suggest the new large SUV is entering the final stages of development ahead of its anticipated Australian launch, with engineers putting the Y63 through local testing before it arrives in showrooms.

It has lost its V8 grunt, with Nissan confirming the new-look Y63 Patrol will instead employ a 3.5-litre twin-turbocharged V6 producing 317kW and 700Nm, while some overseas markets will also offer a 3.8-litre naturally aspirated V6 with 236kW and 386Nm. It may no longer have V8 power, but the Y63 is now the most powerful factory Patrol ever.

Want to know more? Here’s everything we know so far about the upcoming Nissan Y63 Patrol.

JUMP AHEAD


August 2026: Orders open this month, Australian arrival locked in for early 2027

Nissan has confirmed orders for the new Y63 Patrol will open in late August 2026, ahead of first Australian customer deliveries scheduled for the first quarter of 2027.

The new Patrol replaces the outgoing 5.6-litre V8 with a 3.5-litre twin-turbo V6 producing 317kW and 700Nm, paired with a nine-speed automatic. That represents six percent more power and 25 percent more torque than its predecessor.

Also revealed are a range of new features on selected grades, including Adaptive Air Suspension with Intelligent Dynamic Damping, Biometric Cooling, massage seats, ‘zero-gravity’ seating, a dual 14.3-inch Monolith display, Head-Up Display and a 12-speaker Klipsch audio system. Australian pricing, model grades and detailed specifications are still to be confirmed.


August 2026: Y63 spotted on Australian roads

The all-new Y63 Patrol has been spotted on Australian roads without camouflage, providing one of the clearest signs yet that the next-generation Y63 is nearing its local launch.

The photos shared by CarsGuide on its Facebook page (below) offer a glimpse of the production-ready SUV as Nissan continues local testing ahead of its expected Australian arrival.

The sightings suggest Nissan has entered the final stages of local validation before the Y63 reaches local showrooms. Testing in Australian conditions is an important step for a vehicle that has earned a strong reputation for its towing capability, long-distance comfort and off-road performance, helping ensure it is suited to the demands of local buyers.

The latest spy shots follow an earlier sighting shared by Bassam Khalaf in the Y63 Patrol Australia Facebook group, with photos uploaded earlier this year showing the next-generation SUV on local roads.

2

Images supplied by Bassam Khalaf via the Y63 Patrol Australia Facebook group

The Y63 represents the biggest overhaul of the Patrol in more than a decade. It replaces the outgoing V8 with a new twin-turbocharged V6 petrol engine, while also introducing a significantly more modern interior, updated technology and an expanded suite of advanced safety and driver assistance features.

Although Nissan Australia has not yet confirmed local pricing or an official launch date, the appearance of production-spec Y63 Patrols on Australian roads suggests preparations for its arrival are well underway. More details are expected in the lead-up to the new Patrol’s Australian debut as Nissan readies its flagship SUV for one of its most important markets.


October 2025: Nissan Patrol confirmed for Japan launch in 2027

Nissan will reintroduce the Patrol to the Japanese market in the first half of 2027.

This marks its return to the large SUV segment in Japan for the first time since the Safari ended production in 2007. The Safari was the name used in Japan (and some other markets) for what the rest of the world knows as the Nissan Patrol – specifically the Y60 and Y61 generations. Production of the Safari for the Japanese domestic market ended in 2007, even though the Patrol continued to be sold overseas (particularly in the Middle East, Australia and Africa).

1

August 2025: Premcar-tuned QX80 concepts revealed in US

Australia’s Premcar tweaks Y63 Infiniti show cars ahead of Y63 Patrol launch in Australia.

The Premcar badge was spotted on a pair of Infiniti QX80 show vehicles at the exclusive Quail event at Pebble Beach in California. The QX80 is the Infiniti version of the Nissan Patrol sold in the USA, and the Y63 platform is used for the current model there. The Y63 Patrol will replace the current Y62 in Australia in 2026, and the Infiniti show cars suggest that Premcar already has a package to improve the popular off-roader.


May 2025: Y63 Patrol to feature Aussie-made component

An Australian-made drivetrain housing will be a standard feature in every new Y63 Nissan Patrol built globally.

An important piece of equipment for the upcoming Nissan Y63 Patrol will be built in Australia at the brand’s Nissan Casting Australia Plant. The Australian factory based in Dandenong South, Victoria, will manufacture the final drive differential housing that will feature in every single Y63 Patrol produced. A key component of a vehicle’s drivetrain, the housing is a metal casing that protects the gears responsible for transferring power from the driveshaft to the wheels. This housing plays a vital role in ensuring smooth power delivery and protecting internal components from damage.


January 2025: US pricing confirmed

Potentially providing an indication of local pricing when the Y63 lobs in Australia, the all-new 2025 Nissan Patrol – dubbed the Armada in the USA – landed in dealerships across the United States at the end of 2024 with a Manufacturer’s Suggested Retail Price (MSRP) starting at US$56,520 (roughly AU$90,000).

That starting price is for the Armada SV 4×2. The most affordable 4×4 variant starts at US$59,520 (Armada SV 4×4; roughly AU$95,000), with the PRO-4X costing US$73,740 (roughly AU$118,000) and the range topping out with the Platinum Reserve at $79,990 (roughly AU$128,000). Comparatively, the current V8-powered Y62 Patrol is retailing in Australia for $88,900 (Ti), $101,600 (TiL) and $105,160 (Warrior).

1

This is the first time the US has seen the PRO-4X in the Armada arsenal, with the variant adding all-terrain tyres, an electronic locking rear diff, Adaptive Electronic Air Suspension, underbody skid plates and an increased approach angle.

The 2025 Armada is powered by a 3.5-litre V6 twin-turbo petrol engine, which is paired with a nine-speed automatic transmission.

ModelMSRP (USD)
Armada SV 4×2$56,520
Armada SL 4×2$62,970
Armada Platinum 4×2$69,930
Armada Platinum Reserve 4×2$76,990
Armada SV 4×4$59,520
Armada SL 4×4$65,970
Armada Platinum 4×4$72,930
Armada PRO-4X$73,740
Armada Platinum Reserve 4×4$79,990

September 2024: Y63 makes global debut

Nissan has officially unveiled its all-new Patrol, but there’s no confirmation on when we should expect to see the off-roader in Australia.

Revealed at an event in Abu Dhabi, the seventh-generation Patrol wears a strikingly different design compared to its predecessors; employs a V6 twin-turbo engine paired with a nine-speed automatic transmission; and features customisable adaptive air suspension. Read all about it ?


August 2024: Teaser image revealed, honouring 1967 Patrol

Nissan USA has provided a glimpse of the badge and grille of its new Patrol – known as the Armada over there – in a teaser photo honouring the 1967 Patrol.

The red Nissan badge could indicate this is a top-spec variant, but not much else can be garnered from the image. However, the company has also revealed further news relating to the upcoming Patrol will be released on September 3, 2024 (USA time).

The 60 Series was the second generation of the Nissan Patrol, following the original 4W60 Series Patrol that was introduced by Nissan in 1951. The first-gen conquered Mount Fuji in Japan before being exported around the world, including to Australia.

6

The reason the second-gen 1967 Patrol was chosen for this particular teaser shot is because it was the first generation of Nissan Patrol to be sold in the USA. It was a robust vehicle, too, with its ladder-style frame with leaf-spring suspension, 4.0-litre inline-six engine, three-speed manual transmission and selectable four-wheel drive, helping it become the first motor vehicle to cross the Simpson Desert – a feat achieved in 12 days in 1962.


July 2024: Presentation reveals Patrol silhouette

Nissan has revealed a glimpse of its next-gen Y63 Patrol, during an online presentation of the brand’s first-quarter financial results.

A shadowy outline of the Y63 – known as Armada in the USA – can be seen during the presentation, lurking behind its QX80 twin which it will share plenty of componentry. The QX80 – not expected to launch in Australia – will utilise a 336kW/698Nm 3.5-litre twin-turbo V6 petrol engine, prompting the expectation that the next Patrol will lose its V8 grunt.

2

An earlier roadmap presentation in March 2024 hinted that the next-gen Patrol would be unveiled between April 2024 and March 2025. The Armada/Patrol is now expected to debut in the USA by March 2025, with a Middle East launch also expected.

Nissan’s President and CEO, Makoto Uchida, said during the presentation that the combination of corrective measures and new launches will help drive the brand’s recovery from a slow Q1.


March 2024: 2025 Infiniti QX80 previews next-gen Patrol

Infiniti has lifted the covers off its QX80, a luxurious SUV that will share componentry with the highly anticipated next-gen Nissan “Y63” Patrol when it eventually arrives.


March 2024: Next Patrol and Navara teased in future roadmap

Next Nissan Patrol and Navara teased in future roadmap presentation, which confirmed the all-new Patrol – sold as the Armada in North America – will launch between April 2024 and March 2025.


October 2023: 2025 Nissan Patrol spy photos leak

The next-generation Nissan Patrol has been spied testing in the US, where it’s known as the Armada.

Published to the Instagram page of spy photo specialist KindelAuto [↗], the photos show the new Patrol in light camouflage, captured from the front three-quarter view. The camouflage obscures most details, as is its job, but we can see some muscular guards and a tall gill vent behind the front wheel arch.

The grille also appears wider than we’ve proposed in our recent renders (scroll down!), but we’ll wait on a clearer view before revisiting that.

1
1

2023 Nissan Patrol Warrior driven!


2025 Nissan Patrol imagined in new renderings

The new-generation 2025 Nissan Patrol is expected to be unveiled next year.

1

As detailed below, we have already imagined the new Patrol, but with the recent debut of the Infiniti QX Monograph concept, Theottle [↗] has re-created our vision of the upcoming model – including a more-rugged Warrior version.

While the QX Monograph remains a concept, it previews the forthcoming QX80 – the Nissan Patrol’s luxury twin once sold in Australia.

The upright shape is described as “anti-wedge”, allowing for a more spacious interior. The glasshouse now wraps around the entire vehicle, while pop-out door handles replace traditional units – at least for the Infiniti version.

1

The production version, expected in 2024, will likely resemble the concept with minor tweaks such as more conventional door frames, side mirrors, and smaller alloy wheels.

A production-ready Patrol prototype shown to US dealers was described as “Range Rover-like” with a more-rugged appearance, including new headlights and tail-lights, and an “all-new”, modernised interior.

1

It is reported the 2025 Nissan Patrol will swap its naturally aspirated V8 for a downsized, twin-turbo petrol V6.

The new Patrol, which could adopt the ‘Y63’ codename, will also sport larger screens, updated active safety features, and additional features above the current model launched in 2010.

Under the bonnet will reportedly be a 316kW twin-turbocharged V6 petrol engine matched to a nine-speed automatic transmission.

Our earlier story, below, continues unchanged.

1

2025 Nissan Patrol rendered

The next-generation 2025 Nissan Patrol off-roader is fast approaching.

US publication CarBuzz[↗] reports a concept previewing the second-generation Infiniti QX80 upper-large SUV will debut in June, dubbed QX80 Monograph. If that sounds familiar, a 2017 concept used the same name to preview the current QX80’s facelift, which arrived in Australia in early 2018 before the brand was shuttered locally by mid-2020.

What can we expect from the next Nissan Patrol?

1

What does all this mean for the new Nissan Patrol?

The current Nissan Patrol – also badged as the Armada in North America – serves as the basis for the Infiniti QX80, and this should continue in new-generation form.

It isn’t unusual for a luxury spin-off to be unveiled first. For example, the all-new Lexus LM people-mover was revealed this week ahead of the related Toyota Alphard later this year.

With the new Patrol’s global reveal expected within the next 18 months, and the recent news surrounding the next-gen Patrol-based Infiniti QX80, we’ve put together a pair of renderings imagining the all-new Patrol.

An evolutionary design with Nissan’s latest design language is expected for the new Patrol, with hints from the smaller X-Trail and Pathfinder – including split headlights and a full-width strip connecting slimmer tail-lights.

1

Not much is currently known about the 2025 Nissan Patrol; however, a report from early 2022 suggests it could switch to a twin-turbocharged petrol V6 – at least in North America.

Industry journal Automotive News was briefed by a Nissan dealership source in the United States, with the Patrol set to replace its current petrol V8 for a “more fuel-efficient” twin-turbo V6.

“Fuel efficiency is on everybody’s mind,” another insider told Automotive News. “If they can get the same horsepower and torque out of a V6, why not?”

1

However, tough new vehicle regulations in the United States require a 28.3 per cent reduction in emissions through 2026 – a stark contrast to laws in Australia and Middle Eastern countries where more relaxed emission laws are enjoyed. (For now.)

The difference could mean Australia’s Nissan Patrol will continue with the 5.6-litre V8 for a number of years, before potentially moving to the V6.

Arch-rival Toyota replaced its 4.5-litre twin-turbo diesel V8 with a 3.3-litre twin-turbo diesel V6 in the LandCruiser 300 Series in 2021, mated to a 10-speed automatic transmission, while some markets received the option of a 3.4-litre twin-turbo petrol V6. This turbo-petrol powertrain is available in Australia in the related Lexus LX600.

1

Nissan’s new twin-turbo V6 is tipped to be an all-new 3.5-litre unit paired with a nine-speed automatic transmission, though it’s believed to be unrelated to the Nissan Z’s engine. While details of the powertrain remain scarce, the new V6 would likely outperform the current petrol V8, which produces 298kW and 560Nm, with a six-speed automatic.

In addition to the twin-turbo V6, the Y63 may also feature an E-Power hybrid version to reduce emissions further. This would align with Nissan’s strategy to increase the number of electric and hybrid vehicles in its lineup. For local buyers, a more-rugged Patrol Warrior – set to debut later this year as a swansong for the current Y62 Patrol – should headline the new-generation range, provided the upcoming model proves popular.

1

As with the Navara Warrior, it will be ‘re-manufactured’ by Melbourne-based Premcar, with changes tipped to include added ground clearance via a suspension lift, additional underbody protection, all-terrain Cooper AT3 tyres, black badging, and a sticker kit. A teaser image also confirmed the presence of a side-exit exhaust for the 4.6-litre petrol V8.

The next-generation 2025 Nissan Patrol – potentially codenamed Y63 – is expected to debut in 2025.

MORE All Nissan Patrol News & Reviews
MORE Everything Nissan

Tyres are easy to forget about when everything’s working properly. A good set will get you down the highway, across corrugations and along the beach without much fuss, but it’s a different story when something goes wrong.

A slow leak, rising tyre temperature or sudden pressure loss might not seem like much at first. Keep driving, though, and it can turn into a damaged tyre, an expensive recovery or a very long walk for help. That’s where a tyre pressure monitoring system, or TPMS, comes in.

Checking your pressures before you leave is still essential, but it only tells you what’s happening at that point in time. Once you’re on the road, pressures and temperatures can change as the tyres heat up, the load changes or the road gets rough. A TPMS monitors what’s happening while you drive and gives you a warning when something isn’t right.


Why tyre pressure and temperature matter

Tyre pressure has a bigger impact on your 4WD than you might think. It affects how the vehicle handles, rides and puts its power down, as well as how much work the tyres have to do.

Run too much pressure and you can lose some of the tyre’s contact with the road, particularly on loose surfaces. Run too little and the tyre flexes more, creating extra heat and increasing the risk of damage. That matters even more when you’re carrying a big load or towing.

Off-road driving adds another variable. Dropping pressures can give you a bigger footprint and help the tyre conform to uneven ground, but you still need to keep track of where those pressures are sitting. Those tyres need to be aired back up before you head onto the highway, too.

Then there’s temperature. Tyres naturally get hotter as you drive, and some increase in pressure as they warm up is perfectly normal. But if one tyre starts getting significantly hotter than the others, or its pressure starts doing something unexpected, it could be telling you there’s a problem.

Monitoring both pressure and temperature gives you a better idea of what’s happening at each wheel. A tyre running hotter than the others, losing pressure or behaving differently can be an early indication that something needs attention.


The problem with tyre failures

Tyre failures rarely happen somewhere convenient. They’re even less welcome when you’re a few hundred kilometres from the nearest town.

There are plenty of things that can contribute to a tyre failure, including:

Towing adds another load to the equation, quite literally. A loaded 4WD and caravan combination puts considerably more work through its tyres, particularly over long highway runs. Caravan and trailer tyres are also easy to overlook because they’re out of sight, despite spending hours at highway speed carrying a serious load and dealing with potholes, corrugations and road debris.

1

How TPMS works, and why it matters when towing

A TPMS is pretty simple. Sensors fitted to the tyres measure pressure and temperature and send that information wirelessly to a display inside the vehicle.

You can see the readings for each tyre without pulling over and getting the pressure gauge out, while audible and visual alerts let you know if a tyre moves outside the pressure or temperature limits you’ve set. The benefit is that you’re getting information while you’re driving, rather than only checking the tyres before you leave. If a tyre starts losing pressure or running hotter than the others, you can pick up the change and investigate it before the problem becomes more serious.

This becomes particularly useful when towing. A loaded caravan or camper trailer changes the demands placed on the whole combination, while long highway runs can generate plenty of heat in the tyres. The trailer tyres are also easy to overlook because they’re out of sight, and you can’t feel one starting to lose pressure from the driver’s seat.

That matters even more the further you get from home. A puncture outside town is annoying, while a tyre failure hundreds of kilometres from the nearest tyre shop can become a much bigger problem, particularly when you’re travelling somewhere remote.

Remote touring can be hard on tyres, too. Heavy loads, long highway runs, corrugations, gravel roads, hot weather and changing terrain can all take their toll. A TPMS won’t prevent every tyre failure, but it can give you an early warning when pressure or temperature starts moving outside the expected range.

For a touring setup, that means you can keep an eye on the whole vehicle combination from the driver’s seat rather than relying on a problem to make itself obvious.


TPMS for off-road and beach driving

Tyre pressures are especially important when you hit the beach. Airing down gives the tyre a larger footprint and helps it float over soft sand, but once you’ve dropped the pressures, it’s useful to know where they’re sitting.

The same applies to rocky tracks and corrugations, where tyres are dealing with impacts, heat and changing loads that simply aren’t part of a normal commute. Keeping an eye on the readings can help you make better decisions about your pressures as conditions change.

When it’s time to leave the beach, you can also use the system to confirm the tyres are back at the appropriate pressure before you hit the bitumen.


Monitoring the whole vehicle combination

Before buying a TPMS, think about how many tyres you actually need to monitor.

For a standard 4WD, that’s generally the four road wheels plus the spare. Start towing a camper trailer or caravan and things get a bit more complicated. Tuff Terrain (↗) offers 5, 8 and 10-sensor TPMS kits, so you can choose a setup that matches what you’re actually driving.

The important thing is not to just count the tyres on the 4WD. If a tyre behind you goes flat, it’s still your problem.

1

External vs internal TPMS sensors

There are two main types of TPMS sensors: internal and external. Internal sensors sit inside the tyre, while external sensors screw onto the valve stem.

For a touring vehicle, external sensors make things pretty straightforward. There’s no need to remove the tyre from the wheel to install them, which makes them a practical option for DIY fitting. They’re also handy if your setup changes down the track and you need to move or add sensors.

Tuff Terrain’s TPMS range (↗) uses external wireless sensors, so you can fit the system without complicated vehicle modifications.


What should you look for in a premium TPMS?

Not all TPMS systems are created equal, so it’s worth looking beyond the fact that a system simply displays tyre pressure. For a touring setup, look for:

Tuff Terrain’s TPMS range (↗) covers these features, with systems designed for everything from a single 4WD through to larger touring combinations.

1

Choosing the right TPMS for your setup

The number of tyres you need to monitor should be the first consideration when choosing a TPMS. There’s little point fitting a system that only covers the 4WD when you’re regularly towing a caravan or camper trailer.

As mentioned above, Tuff Terrain offers three configurations to suit different touring setups. The 5 Sensor Kit (↗) covers the four tyres on the 4WD plus the spare, making it suited to most single-vehicle touring setups.

For a 4WD towing a camper trailer or smaller caravan, the 8 Sensor Kit (↗) adds four sensors for the trailer, allowing the entire combination to be monitored from the one display.

The 10 Sensor Kit (↗) is designed for larger caravans, trailers and multi-axle touring combinations where additional sensors are needed to cover every tyre.

The rest comes down to the features that matter for the way you travel. Real-time pressure and temperature monitoring, adjustable alarm thresholds, audible and visual alerts, reliable wireless range and an easy-to-read display all become more important when you’re spending long days on the road or travelling well away from home.

Tuff Terrain’s TPMS range (↗) gives you the option to match the system to your setup rather than trying to make a one-size-fits-all system work. Whether it’s a daily-driven 4WD, a camper trailer combination or a larger caravan, there’s a configuration designed to cover the tyres you’re actually relying on.

1

Frequently Asked Questions

Q: Do I really need a TPMS if I check my tyres before every trip?

A: Checking your tyres before every trip is essential, but it only tells you what’s happening before you leave. Pressure and temperature can change once you’re driving, particularly when towing, travelling long distances or driving in rough conditions. A TPMS keeps monitoring while you’re on the move.

Q: How accurate are TPMS systems?

A: A quality TPMS is designed to provide continuous pressure and temperature readings so you can identify changes while driving. Like any monitoring equipment, it should be used alongside regular manual tyre checks and maintenance.

Q: Can I use one TPMS for both my vehicle and caravan?

A: Yes. Tuff Terrain’s larger TPMS configurations are designed to monitor the tow vehicle and trailer from a single display. An 8-sensor kit suits many 4WD and camper trailer or smaller caravan combinations, while the 10-sensor kit provides additional coverage for larger touring setups.

Q: What happens if I lose pressure while driving?

A: A sudden pressure change can trigger the TPMS’s audible and visual alerts, giving you a warning that something needs attention. You can then slow down, pull over safely and investigate the problem before it becomes a bigger issue.

Q: Can a TPMS detect a puncture before I notice it?

A: A TPMS can alert you to a change in tyre pressure, including pressure loss from a puncture or leak. A slow leak may be picked up before it’s obvious from the driver’s seat, giving you a chance to stop and inspect the tyre.

Q: Is tyre temperature really important?

A: Yes. Tyre temperature gives you another indication of what’s happening inside the tyre. Monitoring temperature alongside pressure can help identify unusual conditions, particularly during heavy towing, long highway runs or hot-weather travel.

Q: Will a TPMS work off-road?

A: Yes. Tuff Terrain’s TPMS range is designed for touring applications and provides wireless pressure and temperature monitoring on and off sealed roads. It can also continue monitoring after you’ve aired down for sand or other off-road conditions.

Q: How many TPMS sensors do I need?

A: It depends on your setup. A 5-sensor kit is suited to most 4WDs and SUVs, including the spare. An 8-sensor kit adds coverage for a camper trailer or smaller caravan, while a 10-sensor kit is better suited to larger caravans, trailers and touring combinations with additional axles.

Q: How easy is TPMS installation?

A: Tuff Terrain’s external wireless sensors are designed to make installation straightforward without requiring the sensors to be installed inside the tyres. The system can be added to a touring vehicle without complicated vehicle modifications.

MORE Advice and products from Tuff Terrain

Chery has called in Premcar to put its first ute through a local testing and validation program, fine-tuning the Stockman’s ride and handling for Australian conditions ahead of its launch. 

Premcar has 30 years of experience developing, testing and engineering vehicles for Australian conditions, having worked on local programs for a range of global automotive manufacturers. Fresh from its work on the D27 Navara, it’ll now turn its spanners to the Stockman. 

“Chery has gone the extra mile with its first-ever Stockman ute,” said Bernie Quinn, CEO of Premcar. “Chery has created very specific attributes for the Stockman’s ride and handling and we are very pleased to help them test and validate their work in a variety of Australian conditions.”

2

Australia is a demanding market for utes, with buyers expecting them to handle everything from city streets and highways to off-road tracks. Chery says the local testing will help ensure the Stockman’s ride and handling are suited to Australian buyers.

“Australia is one of the world’s most demanding ute markets, and we know our customers expect a vehicle that performs confidently across everything from urban streets to highways, construction sites and remote off-road tracks,” said Lucas Harris, Chief Operating Officer, Chery Motor Australia. “Premcar has an outstanding reputation for engineering and vehicle validation, making them the ideal partner to help ensure Stockman is thoroughly tested and validated for Australian conditions before it reaches our customers.

“This partnership is another example of Chery investing locally to develop vehicles specifically for Australian drivers,” added Harris.

1

What we know about the Chery Stockman

The Stockman is due in Australia in the fourth quarter of 2026, launching with a 2.5-litre turbo-diesel PHEV powertrain producing a claimed 350kW and 800Nm.

It will offer up to 100km of electric-only range on the NEDC test cycle, with claimed fuel consumption of 2.0L/100km. Towing capacity is 3500kg braked and 750kg unbraked.

Off-road equipment will include four-wheel drive, all-terrain tyres, triple differential locks, crawl control and tight-turn assist. Ground clearance is rated at 247mm.

1

The Stockman measures 5450mm long, 2010mm wide and 1890mm tall, with a 3250mm wheelbase and a 1560mm x 1560mm cargo tub. It uses double wishbone front suspension and leaf springs at the rear, with suspension and driver assistance systems to be locally tuned for Australian models by Premcar.

Inside, the Stockman will get leather upholstery, heated and ventilated front seats, wireless charging, dual-zone climate control and premium audio.

A petrol-powered variant will join the range in 2027. Australian pricing, model grades and final specifications are yet to be confirmed, with more details due closer to the Stockman’s local arrival.

MORE Stockman news and reviews!

Imagine sliding down into Gunshot Creek in Cape York, or tackling that almost impossible climb up a sheer rock face, only to find your roof rack system parting ways with your 4×4. Ouch.

Then consider alternative racks that howl like a dingo at any speed above walking pace. How about not being able to stand on the cross beams for fear of bending them, not being able to simply tie your gear down, or not being able to fit into underground car parks because high-legged racks make you too tall in too many scenarios? Surely not. Surely none of the above could happen.

Yes, they have all happened with inferior racks. Given my need for a platform rack to suit my 2013 N70 HiLux, I went about my due diligence to sort the trash from the cash. It seems some rack systems are attached to the turret via pop rivets. Some have generous on-road load limits, but these diminish greatly in off-road situations. These are not the type of racks I wanted on my HiLux.

Although I won’t be loading my rack up with every kilo available in the ratings, I wanted peace of mind that I could carry enough gear for extended trips and not have to remove weight every time I went off-road. That’s insane and totally not doable while out and about.

1

Roof rack installation challenges 

Gone are the days of simply doing up a few nuts, bolts or Allen-key attachments to install or remove a set of crossbars, then easily attaching a basket on top.

Nope, the latest trend of vehicles featuring smooth rooflines is ideal for reduced wind resistance, but it creates difficulties when attaching racks. Most have an inbuilt track to which rails or various fittings are attached, allowing a rack, basket or platform to be mounted.

It’s these initial roof fittings that are important when it comes to allowing the maximum carrying weight. It’s also these very fittings that are, for some brands, pop-riveted to the roof – far from ideal.

1

Why I chose this rack 

Once I’d understood the failings of some other brands, my choice was simple. The ARB Base Rack system (↗) incorporates metal plates, acting as washers, secured on the underside of the roof. This means the roof lining needs to be dropped for access.

These metal plates are secured with nuts and bolts, making for a much sturdier mounting system that doesn’t lose load ratings when used off-road. I didn’t want to be bound by lighter loads while driving off-road, so the ARB system came out as a clear winner, even before considering its many other features.

Given each crossbeam is rated to 25kg, my rack, which incorporates five beams, can carry a theoretical 125kg – plenty enough for my needs and more than the roof load rating.

It’s important to understand the difference between dynamic and static loads and their ratings, which is outside the realm of this article, but suffice to say, this ARB system exceeds what can be loaded up top.

1

Cross beam design and strength 

ARB has chosen to manufacture its racks with the beams running east-west, across the vehicle, rather than north-south, from front to rear. This reduces the length of each beam, therefore reducing the chances of flexing or bending.

While most other racks and beams have inbuilt upper-surface slots to attach accessories, ARB has taken a different approach by utilising a dovetail design on each edge of every beam, as well as on the front, side and rear surrounds. This dovetail allows accessories to be fitted without taking up real estate on the top of each beam, and allows them to be easily slid along each beam to suit the load being attached.

Each beam is an extruded aluminium, hollow, single-seam section, complete with internal bracing for added strength and rigidity, while retaining light weight. The shape of the dovetails also enhances rigidity, so it serves more than just attachment purposes.

All crossbeams, the surrounding frame and integrated parts are welded together, with removable plastic end caps to help hide wiring looms if you choose to include lights on the rack. It’s a clever design that can expand, grow and adapt to your needs.


Roof rack accessories and mounting options 

While I opted for a flat rack design, guard-rail options allow for partial or full basket designs that can be added later if needed.

A multitude of product-specific brackets allow for easy fitting of items such as spare wheels, gas bottles, Hi-Lift jacks and traction boards. I’ve opted for a HiLux-dedicated wind deflector, a couple of tie-down eyebolt kits, a pair of spring-loaded tie-down kits, a pair of dedicated ratchet-strap kits and the wiring loom to suit a pair of side-mounted work lights, which I’ll use as camping lights.

1

Final verdict

I’m happy with my chosen rack system and accessories. I may add to the cache of extras as needed, such as a bracket to carry an LPG bottle.

The wind deflector does its job of reducing wind noise; however, it doesn’t eliminate it altogether. Being directly above the driver’s and front passenger’s heads makes it more noticeable. Regarding fuel consumption, I’ve noticed no appreciable difference between the previous two oval-shaped crossbars fitted to my HiLux and this ARB system – and that’s a good thing.

The complete system is a clever stroke of engineering, plus the build quality is superb. I reckon I’ve chosen the best rack system for my intended purpose and wouldn’t go back to anything lesser. While my system fits perfectly to my N70 HiLux, there are plenty of sizes available to suit smaller and larger dual-cabs, wagons and even a few vans. It’s best to check out the ARB website (↗) to find the perfect fit for your vehicle.

Given that the rack sits low and close to the cab, hand-washing is a little hard, which I accept. If I ever need to remove the rack, it’s only four bolts to separate the platform from the mounts, plus one waterproof Deutsch connector to unplug, then the whole thing can be lifted off. The only things left are four solidly mounted brackets, which are secured from under the cabin’s roof lining.

1

Frequently asked questions

Q: How is the ARB Base Rack mounted to the HiLux?

A: The system uses metal plates secured with nuts and bolts on the underside of the roof, creating a sturdier mounting system that doesn’t lose load ratings when used off-road.

Q: How much weight can the rack carry?

A: Each crossbeam is rated to 25kg. With five beams, the rack has a theoretical carrying capacity of 125kg, which is more than the roof load rating.

Q: What makes the crossbeam design different?

A: The beams run across the vehicle rather than front to rear, reducing their length and the chances of flexing or bending. They also feature dovetail designs for fitting accessories.

Q: What accessories can be fitted to the rack?

A: Product-specific brackets can be used for items including spare wheels, gas bottles, Hi-Lift jacks and traction boards. Guard rails can also be added to create partial or full basket designs.

Q: Does the ARB Base Rack increase wind noise or fuel consumption?

A: The wind deflector reduces wind noise, although it doesn’t eliminate it altogether. No appreciable difference in fuel consumption was noticed compared with the previous oval-shaped crossbars.

Q: How much does the ARB Base Rack system cost?

A: The RRP is $952 for the 1255 x 1285mm rack, $407 for the N70 HiLux mounting system and $188 for the wind deflector. 

MORE ARB news, products and reviews!

Remember the first time you tackled a steep hill climb off-road? I do, and I was petrified.

I was in my mate Beddo’s short-wheelbase Series II Land Rover and the climb in front of us seemed impossibly steep. He showed me how to engage low-range four-wheel drive by pulling back on the red lever, and then told me to select second gear. As I eased out the clutch, the little Landy leapt forward, surprising me with its low gearing, and it climbed that steep hill like a mountain goat, with me giggling nervously behind the steering wheel the whole way up.

The key to safely and successfully tackling any steep incline is to have a mechanical understanding of your 4×4 and how to best operate it, as well as to understand the characteristics of the hill climb itself. That mechanical understanding can be as basic as whether the vehicle has a manual or automatic transmission, or a single- or dual-range transfer case, or whether it is a part-time four-wheel drive with manual or auto free-wheeling hubs, or a full-time four-wheel drive with a locking centre diff.

It’s also important to know what kind of mechanical and/or electronic traction aids it’s armed with, and you should be aware of the available ground clearance, and understand how approach, departure and ramp-over angles will affect the vehicle’s capability, as well as what type of suspension it has and what tyres it’s fitted with.

When it comes to understanding the terrain, you need to know much more than how steep the hill climb is, including what the surface consists of, how much (or how little) traction is available, whether there are deep ruts or other obstacles, whether there are other hazards about, and whether there is somewhere safe to stop or turn around if you need to.

You should also be aware of suitable anchor points, such as big trees in case your initial attempt at the hill climb is unsuccessful and you need to use a winch. The best way to gauge what’s ahead of you on the track is to get out of your vehicle and walk it. Of course, you’re not going to do this for every steep hill climb you come across; but in the case of extreme climbs, it’s always best to err on the side of caution and have a look first.

While you’re looking, keep an eye out for obstacles and hazards, and cast your eyes beyond the track itself; if, for example, you’re on the saddle of a mountain range, be wary of off-camber sections of the track and long drop-offs on either side.


Tyre pressures for steep hill climbs

As with just about all off-road driving scenarios, setting the correct tyre pressures is critical for success when climbing steep hills.

The right pressure will depend on the vehicle, the tyres being run and the terrain type being tackled, but as a general rule, if you’re running light truck (LT) construction tyres and you drop pressures to around 22psi for steep rocky climbs or muddy hills, you will have a lot more traction available to you than if you run road pressures of 35psi or more.


How to set up your 4×4 for a steep climb

Choosing the right vehicle settings for any steep climb is vitally important to success.

If you drive an old-school part-time 4×4 with manually locking hubs, before you tackle a steep hill climb, you’ll need to lock the hubs, engage low range and (depending on the overall gearing of the vehicle) select second gear. Why not first gear low-range? If overall gearing is too low, you can end up with unwanted wheelspin and a loss of traction, so you’re better off selecting second gear low-range, which will hopefully provide low enough gearing that you can safely and smoothly tackle the incline without the engine stalling.

If the hill is exceptionally steep, however, you may have to select first gear low-range to make it up, in which case you should go easy enough on the throttle that you don’t end up spinning the wheels. If you drive an auto 4×4, you can simply select low-range and Drive for steep hill climbs and rely on the transmission to choose the best gear for you. Keep in mind, however, that if the transmission suddenly drops down to first gear at an inopportune time, you could still end up with unwanted wheelspin.

1

Some modern automatic transmissions have a second gear-start function that locks out first gear, enabling the vehicle to accelerate gradually on slippery surfaces such as ice without unwanted wheelspin; this first-gear lock-out also works well on steep inclines. Another option with some autos is to use the manual-shift function to select second gear which, depending on the transmission, should prevent it dropping down to first gear. Many modern computer-controlled automatic transmissions work in harmony with other vehicle systems like electronic traction control, and with Drive selected they will select the most appropriate gear for the hill climb and minimise the risk of unwanted wheel spin.

For those with a full-time 4×4 vehicle, ensure the centre diff is locked before you set off; this will ensure equal drive is apportioned between front and rear axles. Likewise, if you have across-axle diff locks, engaging these for steep climbs with deep ruts will prevent unwanted wheelspin if you lift a wheel in the air, but bear in mind that locking the front diff will make it more difficult to steer the vehicle, so if there are tight turns on the hill climb get ready to disengage the front locker if needed.

For those with 4x4s equipped with driver-selectable off-road modes, make sure you select the appropriate mode for the conditions ahead of you. If the steep climb is muddy and full of ruts, select the ‘Mud & Ruts’ mode, or whatever the equivalent mode is in your specific vehicle model, or if it’s a rocky climb select ‘Rock’ mode or equivalent. The different off-road mode settings tailor the way in which the vehicle behaves to suit different terrain types and, depending on the vehicle, these modes alter throttle response, power delivery, transmission response, traction-control sensitivity and various other parameters, so it really pays to set the mode to match the terrain.

1

How to safely tackle a steep 4×4 hill climb

With the track ahead surveyed and the vehicle set up to tackle the hill climb, you’re ready to go.

In a convoy, wait for the preceding vehicle to clear the track before setting off in case it becomes stuck or has to reverse down the hill for another attempt. And watch the vehicle ahead as it makes the climb; if successful, you could follow in its tracks, but if it becomes stuck, you’ll know what part of the track to avoid.

As you begin the climb, build up enough speed to maintain momentum as you climb over track irregularities and, in the case of manual vehicles, not stall the engine, but don’t go so fast or you could damage the vehicle. If you think you’re going too fast for the selected gear, make a quick upshift, but try to do so where the track is not at its steepest, and be ready to downshift if the engine starts to labour.

1

As you tackle the climb, you’ll need to adjust the steering angle and speed to suit changing track conditions. If not too deep, follow existing wheel ruts; if they’re deep and you think you might run out of ground clearance, straddle the ruts, but be careful if the ground is slippery as you could slide into the ruts anyway.

Sometimes you won’t be able to see what’s ahead, such as when climbing obstacles or cresting drainage mounds, so take it easy in case there’s a steep drop on the other side. On a positive note, drainage mounds on long steep climbs, such as those in alpine regions, can offer a chance for a rest stop … but be sure not to block the track if driving in a convoy with vehicles coming up behind, and, if you do stop, alert other vehicles via the UHF, letting them know where you’ve stopped and on what side of the track.

On steep sections or climbing obstacles, always try to keep the vehicle pointed straight up the track; and if traversing sideways across an incline, you could get in strife or even a rollover. What goes up must come down, and on most steep climbs there’s always a chance of facing oncoming traffic. Mostly, the vehicle climbing should give way to those descending, because going down a steep, slippery track you won’t often be able to pull up safely. Always look well-ahead for oncoming vehicles and for wider parts of track where it will be safe to pass.


What to do if your 4×4 won’t make the climb

Occasionally you might tackle a difficult hill climb that you won’t safely ascend on the first attempt, in which case you’ll come to a stop.

If you’re in a convoy, alert following vehicles to your predicament, and advise that they await further instruction/information (tell them to ‘standby’) while you assess the situation. If you stall a manual transmission 4×4 on a steep climb, and you need to back up; with the engine off select reverse (low range), let out the clutch, take your foot off the brake (the vehicle will not roll as it’s in gear) and, when you’re ready, turn on the ignition.

The engine will fire up and the vehicle will then commence a controlled descent in reverse gear. Regardless of the vehicle you are driving (manual or auto), if you need to reverse down a steep hill, use the vehicle’s engine braking to keep speed in check rather than relying solely on the brakes.

1

Most of the vehicle’s weight will be on the rear wheels as you reverse down the hill and if you stomp on the brake pedal you could lock up the front wheels and lose the ability to steer. If your vehicle is equipped with Hill Descent Control, activate it before reversing down the hill. If you need to continue reversing, try to find a safe place to turn around. It is much easier (and safer) to drive forwards down a hill than reverse down it. But don’t attempt to turn around on a steep or unstable section of track that could put your vehicle at risk of rolling over.

If your ascent was interrupted because you ran out of traction or ground clearance, and if it is safe to do so, sometimes the best way to make it over a difficult section of track is to back up a bit and have another go at it. If this is not an option, or you don’t feel safe doing so, it could be time to drag out the recovery equipment.

If a vehicle in front can safely back down to where you are, a snatch recovery might get you over the immediate obstacle, or if you have a winch and there is a handy anchor point, winching might be the best course of action. Sometimes you might just need to do a bit of track building by placing some rocks under the wheels or use a set of recovery boards to get out of your predicament.

How to 4x4 up steep hills
1

Whatever you do, take your time, and make a considered decision rather than rushing into it. Don’t forget to let the rest of the convoy know when you’re on the move again, and advise following vehicles what obstacle is ahead of them and the best way to manage it, so they will have a better chance of getting through without becoming stuck.

Once you’ve made it to the top of a steep hill climb, alert other vehicles in the convoy that it’s safe for them to proceed, and make sure you leave them enough space to safely stop once they have completed the ascent. Once at the summit, grab your camera and start taking photos of the spectacular vista before you.


Recovery gear for steep 4×4 hill climbs

Whenever you drive your vehicle off-road, you should always carry appropriate recovery gear. For steep hill climbs a winch is always handy, and it should be complemented with:

Your vehicle will need to be fitted with suitable recovery points front and rear. If you are tackling difficult terrain, Light Truck (LT) tyres with either an all-terrain or mud-terrain tread pattern will improve capability, as will a suspension lift. Under-vehicle protection is also a sound investment.

1

How a spotter can help on steep 4×4 climbs

On any difficult section of track, it pays to have a ‘spotter’ on the outside of the vehicle who can direct the driver and help out if any track building is required.

Clear and concise communication is key to a good driver/spotter relationship, whether that be via UHF radio, hand signals or a combination of both. When it comes to hand signals, ensure both the driver and spotter are on the same page and keep signals as simple as possible, such as using hands to indicate steering angle, whether to stop or whether to inch forwards. Before placing rocks under wheels, or setting up any recovery equipment, make sure the driver knows what is going on and that the vehicle is stationary with the brakes on.


What to do

  • Know your vehicle and how to best to use it
  • Understand the terrain ahead of you
  • Use momentum to your advantage
  • Lower tyre pressures to suit the terrain
  • Carry recovery equipment and comms gear

What not to do

  • Traverse sideways across steep tracks.
  • Drive until preceding vehicles have cleared the track
  • Stop without alerting other vehicles
  • Floor it in low-range first and spin wheels
  • Rush decisions if you get stuck.

Frequently Asked Questions

Q: What tyre pressures should you use for steep hill climbs?

A: The right pressure depends on the vehicle, tyres and terrain, but around 22psi can provide more traction than road pressures of 35psi or more when using LT construction tyres on steep rocky climbs or muddy hills.

Q: What gear should you use for a steep hill climb?

A: In an old-school part-time 4×4 with manually locking hubs, lock the hubs, engage low range and, depending on the vehicle’s overall gearing, select second gear. First gear low-range may be needed on exceptionally steep hills, but care should be taken to avoid wheelspin.

Q: Should you use low range for steep hill climbs?

A: Yes. Low range is used for steep hill climbs, with the appropriate gear selected according to the vehicle and terrain.

Q: Should you lock the centre diff for steep climbs?

A: If you have a full-time 4×4, ensure the centre diff is locked before setting off. This ensures equal drive is apportioned between the front and rear axles.

Q: When should you use diff locks on a steep climb?

A: Across-axle diff locks can help prevent unwanted wheelspin on steep climbs with deep ruts if a wheel lifts off the ground. However, locking the front diff can make the vehicle more difficult to steer.

Q: Should you use an off-road driving mode on a steep hill?

A: If your 4×4 has driver-selectable off-road modes, select the mode appropriate for the terrain. For example, use ‘Mud & Ruts’ for muddy, rutted climbs or ‘Rock’ mode for rocky climbs.

Q: What should you do if your 4×4 cannot make it up a steep hill?

A: If it is safe to do so, back up a bit and have another go at the difficult section. If this is not possible or you don’t feel safe doing so, use appropriate recovery equipment such as a snatch recovery, winch or recovery boards.

Q: Is it safe to reverse down a steep hill?

A: If you need to reverse down a steep hill, use engine braking to keep your speed in check rather than relying solely on the brakes. If equipped, Hill Descent Control can also be activated before reversing down the hill. If possible, find a safe place to turn around, as it is easier and safer to drive forwards down a hill than reverse down it.

Q: What recovery gear should you carry for steep hill climbs?

A: Useful recovery equipment includes a winch, winch extension strap, tree trunk protector, snatch blocks, shackles, snatch strap, long-handle shovel and recovery boards. Gloves should always be worn when using recovery equipment.

Q: Do you need a spotter for steep 4×4 climbs?

A: On difficult sections of track, a spotter can direct the driver and help with track building if required. Clear communication between the driver and spotter is important, using UHF radio, hand signals or a combination of both.

MORE Advice from the experts!

I thumbed the controller joystick and the drone responded, climbing higher, but the view didn’t change all that much as all I could see was a vast expanse of water where none was supposed to be.

We were on the Tallawana Track in the northern part of the Little Sandy Desert, about 10km west of Windy Corner, where water – any water – was a darn-sight rarity. Our little convoy of keen desert travellers had ground to a halt on what was, as it turned out, the edge of an enormous inland lake. The moral of this little snippet? Be prepared for anything, including turning back and finding another way … which was what we did!

Viv and I had first travelled these far-flung roads, known as the ‘Bomb Roads’ or the ‘Beadell Roads’, in 1984 and ’85, on two separate trips that took in all of the roads constructed by the legendary Len Beadell and his Gunbarrel Road Construction Party (GRCP).

These ‘Beadell Roads’ cover the vast desert country of western South Australia and adjoining Western Australia, north of the Indian-Pacific railway line and south of the Kimberley. They were constructed in the 1950s and ’60s to provide a road network and access for the Woomera rocket tests and the atomic bomb trials carried out at what we know as Emu and Maralinga.

1

Len Beadell had chosen the site of Woomera and its rocket range after WW2 when Britain wanted to test its long-range rocket capability and its A-bomb-making and detonation competence. The Woomera rocket range once covered 270,000sqkm and stretched from Woomera to the Indian Ocean north of Port Hedland. Today, managed by the RAAF, it’s still testing missiles and drones but only covers 122,000sqkm, though it is still the largest land-based missile testing range in the western world.

In all, there were more than 6000km of desert tracks constructed by the GRCP, the most important being the east-west Gunbarrel Highway. While the Gunbarrel was the first link across central Australia from east to west, others followed, including the Anne Beadell Highway and the Gary Junction Road, along with an interconnecting grid of north-south roads.

While a few other graded roads now cut across this huge landscape, many are restricted in use to mining exploration companies and Aboriginal communities. The one big exception to that is the Great Central Road (GCR), which takes in sections of the original Gunbarrel and is a well-maintained dirt road from Laverton in the west to Yulara in the heart of the country. Today, with ever-increasing sections of bitumen, this road is transforming access to this once-remote region.

1

Before you go: Permits, preparation and recovery

You’ll need permits for all the Beadell Roads and the GCR, and while most are easy and quick to get, make sure you do it in plenty of time just in case there is a hiccup.

They can be closed after wet weather, for Aboriginal Men’s Business and for weapons testing from Woomera, among other reasons. See each track info section below for details on permits.

We won’t go into too much detail here on what experience you need, how your vehicle should be maintained and set up, and what you need to carry. Suffice to say you’ll need to think seriously about fuel and water requirements, communication equipment, a comprehensive first-aid kit and a toolkit suitable for your vehicle. The latter should include, for modern vehicles, an OBD2 diagnostic scanner suitable for your vehicle.

Lastly, but most importantly, have an emergency plan if you break down and can’t fix it. Recovery insurance is a great backstop. For any actual recovery, we’d recommend Andy from Outback Tilt Tray & Recovery Services in Laverton, phone 0428 196 306. There are other recovery services scattered across the region.

1

Gunbarrel Highway

The Gunbarrel Highway was built in the mid-1950s, linking the Stuart Highway to Carnegie Station and Wiluna.

While parts of the original route have been bypassed or are now closed, most adventurous travellers love the 830km stretch from Warburton to Carnegie. There are no fuel or supplies between these two places. Warburton has fuel, a store and camping. From the Great Central Road, head via the Heather Highway to join the Gunbarrel. The track has no sand dunes but can be rough, with corrugations and washouts.

Highlights include the many Beadell plaques along the way, Camp Beadell (a good spot to stop), Mt Beadell and its monument, Everard Junction where the Gary Highway heads north, and Geraldton Bore (good water, camp and birdlife). Near Mungili Claypan (detour around the southern edge if wet), a track to the south leads to distant Empress Springs.

Conditions improve west of the claypan, though corrugations remain to Carnegie, where fuel and camping are available. From there, it’s 340km to Wiluna on a generally well-maintained gravel road, with fuel, supplies and the Canning-Gunbarrel Discovery Centre worth a visit.

1

Anne Beadell Highway

This east–west route offers a more remote and challenging alternative to the Gunbarrel or Gary Junction Road. Stretching 1380km from Coober Pedy to Laverton, conditions vary from smooth to heavily corrugated, while the Serpentine Lakes near the WA-SA border can be slippery and boggy after any rain.

The track mainly follows the interdunal valleys, though it does cross some dunes that can be tricky. This year, the section east of Emu Junction has been graded, improving that part of the drive. You need four separate permits to travel this route, so apply for them well beforehand. Fuel and limited supplies are only available at Ilkurlka Roadhouse, so check ahead.

Highlights include Tallaringa Conservation Park, Len Beadell’s plaques and the Totem-1 and Totem-2 atomic test sites near Emu Junction. West of the border, track conditions improve toward Ilkurlka, and along the way there are a couple of pleasant camp spots. West of Ilkurlka is Neale Junction where the Connie Sue Highway crosses the Anne Beadell. Here you’ll find a Beadell post and marker, with pleasant camping nearby.

Beyond there, the road stays much the same, passing Bishop Riley’s Pulpit and entering the Yeo Lakes Nature Reserve before arriving at the Yeo Homestead, its hut and a reasonable camping area. Further west again, you’ll come into an area of more recent mining activity, with numerous tracks here and there, and pass the ruins of the Yamarna HS. From Yamarna, a better dirt road continues to Laverton.

1

Connie Sue Highway

This is a fabulous drive through remote desert country.

But sadly many of the highlights that lay some distance off the road, and had previously been open for travellers to visit, have been closed by Aboriginal TOs in recent years. Still, there’s much to enjoy as you turn off the Great Central Road and head south to distant Rawlinna, or head north from the railway line.

In all, it is about 635km from Warburton to Rawlinna, but there is no fuel or services at Rawlinna, the closest being Cocklebiddy on the Eyre Highway, 160km south.


Gary Highway

This north-south route begins at Everard Junction on the Gunbarrel Highway and meets the Gary Junction Road 355km north and east of Kunawaritji.

The closest places for fuel are Warburton and Carnegie HS in the south, and Kunawaritji in the north, which means you’ll travel more than 600km between fuel stops. The southern section of the route from Everard Junction to Windy Corner has been the most traversed in recent years. You’ll pass some burnt-out vehicles along the way from spinifex-induced fires and skirt along the edge of Lake Cohen, which is a great spot to camp at any time and is magical if it has water in it.

North of Windy Corner, the route is more overgrown for some sections of the track and has been flooded for long periods. Not sure what the latest cyclones have done to the route, but it was challenging a couple of years back. Veevers Meteorite Crater and McPhersons Pillar are worthwhile detours, but the track to Veevers is pretty overgrown these days from what I’ve heard.

1

Gary Junction Road

This long-distance route, often called the Kintore-Kiwikurra Road, leads from the west coast north of Port Hedland to Central Australia and Alice Springs, and is a favoured drive of ours. In all, it covers some varied and delightful desert country, so take your time and enjoy the route.

From Marble Bar, inland from Port Hedland, to Alice Springs it is around 1700km, depending on which way you go between Alice and the Aboriginal community of Papunya. In all, there is about 1500km of unsealed road, varying from smooth and sandy to badly corrugated, especially east and west of Papunya.

Our favourite camps are Well 33 just out of Kunawaritji, Jupiter Well, Mount Tietkens in the Buck Hills, Liebig Bore west of Mt Liebig and the Finke River at the 2-Mile, at the western end of the MacDonnell Ranges. There are a number of Len Beadell plaques along this route, as well as his burnt-out ration truck at Kiwikurra.

1

Sandy Blight Junction Rd

Probably my favourite road in the region, this route, constructed in 1960, heads south from the Gary Junction Road near Kintore to the Great Central Road near Docker River, some 230km west of Yulara. In all, it is about 350km from one end of the Sandy Blight Road to the other.

At the northern end, Mt Leisler dominates the scene and we love camping close to where the now-lost Tietken Tree once stood, with Mt Leisler rearing up close behind us. Heading south, there are a number of Len’s blazed trees and plaques to discover, while some of the stands of whispering desert oaks are pure magic to camp among.

A sidetrack to a high vantage point in the Sir Frederick Range is not to be missed. Further south again, a track to the west leads a short distance to Bungabidy Rockhole, tucked in among the rugged hills of the Walter James Range.


Voakes Hill Road

Voakes Hill Road runs south for 275km from the Anne Beadell at Voakes Hill Junction to the railway town of Cook on the Trans-Australian Railway line. While the Voakes Hill Road drive itself is a relatively easy one, this is extremely remote country and the route is little used.


Callawa Track and Nyangumarta Highway

For all intents and purposes, the Wapet Road, come Kidson Track, now called the Nyangumarta Highway, has superseded the Callawa Track, which was first completed by Len and the GRCP in 1963.

The Callawa Track is no longer used and is overgrown. The Nyangumarta Highway, which has taken its place, runs from Kunawaritji to the Great Northern Highway just south of Sandfire Flat RH, a total distance of 650km. It is very remote country and little traversed.

1

Maralinga A-bomb site

No wandering on the Beadell Roads is complete without a visit to Maralinga, where seven A-bombs were detonated along with a heap of lesser nuclear trials between 1957 and 1963.

Len had selected the site for the tests at Maralinga in 1953 and the road from Emu to the new bomb site was built in 1955. Sadly, this road has been closed to travellers for many years. However, today you can join a tour and camp at Maralinga village before taking a tour to the bomb sites. It might sound expensive, but it is well worth it.


Great Central Road: the modern route across central Australia

Using sections of the original Gunbarrel Highway, this now-major route links Yulara and Central Australia to Laverton and the Goldfields region of WA.

All told, it is 1130km from Yulara to Laverton on what is generally a well-maintained unsealed road that is slowly but surely being covered in bitumen. Make sure you enjoy the drive along the southern edge of the Schwerin Mural Crescent, east of Warakurna, which we think is some of the finest desert country in Australia. Warakurna itself is worth an overnight stop, with Len’s grader housed nearby, while each morning the nearby Giles Weather Station releases a high-altitude weather balloon that is worth viewing.

While you mightn’t travel the whole route of the Great Central Road, you’ll probably end up doing sections of it depending on what other, more adventurous route you are going to drive. Remember, you do need permits for this road, but they are generally automatically issued once you apply.


*The Mt Davies Road, which once ran from the Gunbarrel Highway to Surveyor Generals Corner, is badly overgrown and permits to use it are impossible to obtain.

MORE WA travel yarns!