JAC has announced an End of Financial Year (EOFY) promotion for its JAC T9 diesel ute range, offering a $4000 fuel voucher to eligible buyers.
The offer applies to new JAC T9 diesel models purchased and delivered between May 1 2026 and June 30 2026, with the promotion ending on June 30. Customers will receive a $4000 fuel voucher issued by the dealership on delivery, or may instead take the equivalent value as a discount off the vehicle price.
The promotion excludes demonstrator, government and rental fleet vehicles, cannot be combined with other offers, and is available while stocks last. Fuel voucher terms and conditions are set by the issuing company, and JAC Motors Australia retains the right to extend, withdraw or change the offer at any time.
In the lead-up to EOFY, manufacturers and dealers typically roll out targeted incentives on existing stock as they aim to clear inventory before the end of the financial year, and this offer follows that seasonal pattern.
The T9 is powered by a 2.0-litre turbo-diesel engine producing 120kW and 410Nm, paired with an 8-speed automatic transmission and a part-time dual-range 4×4 system with a rear differential lock as standard.
We took a T9 off-road last year and found it to be a value-focused option that prioritises capability and equipment over refinement. It has solid off-road hardware including dual-range 4×4 and a rear diff lock, but the ride and overall refinement feel firm and less polished than more established rivals, positioning it more as a budget work ute than a comfort-focused lifestyle option.
JAC also expanded the T9 line-up last month with the introduction of the TradePro cab-chassis, a more work-focused variant aimed at tradies, fleet operators and small business buyers looking for a base platform they can customise with trays or service bodies.
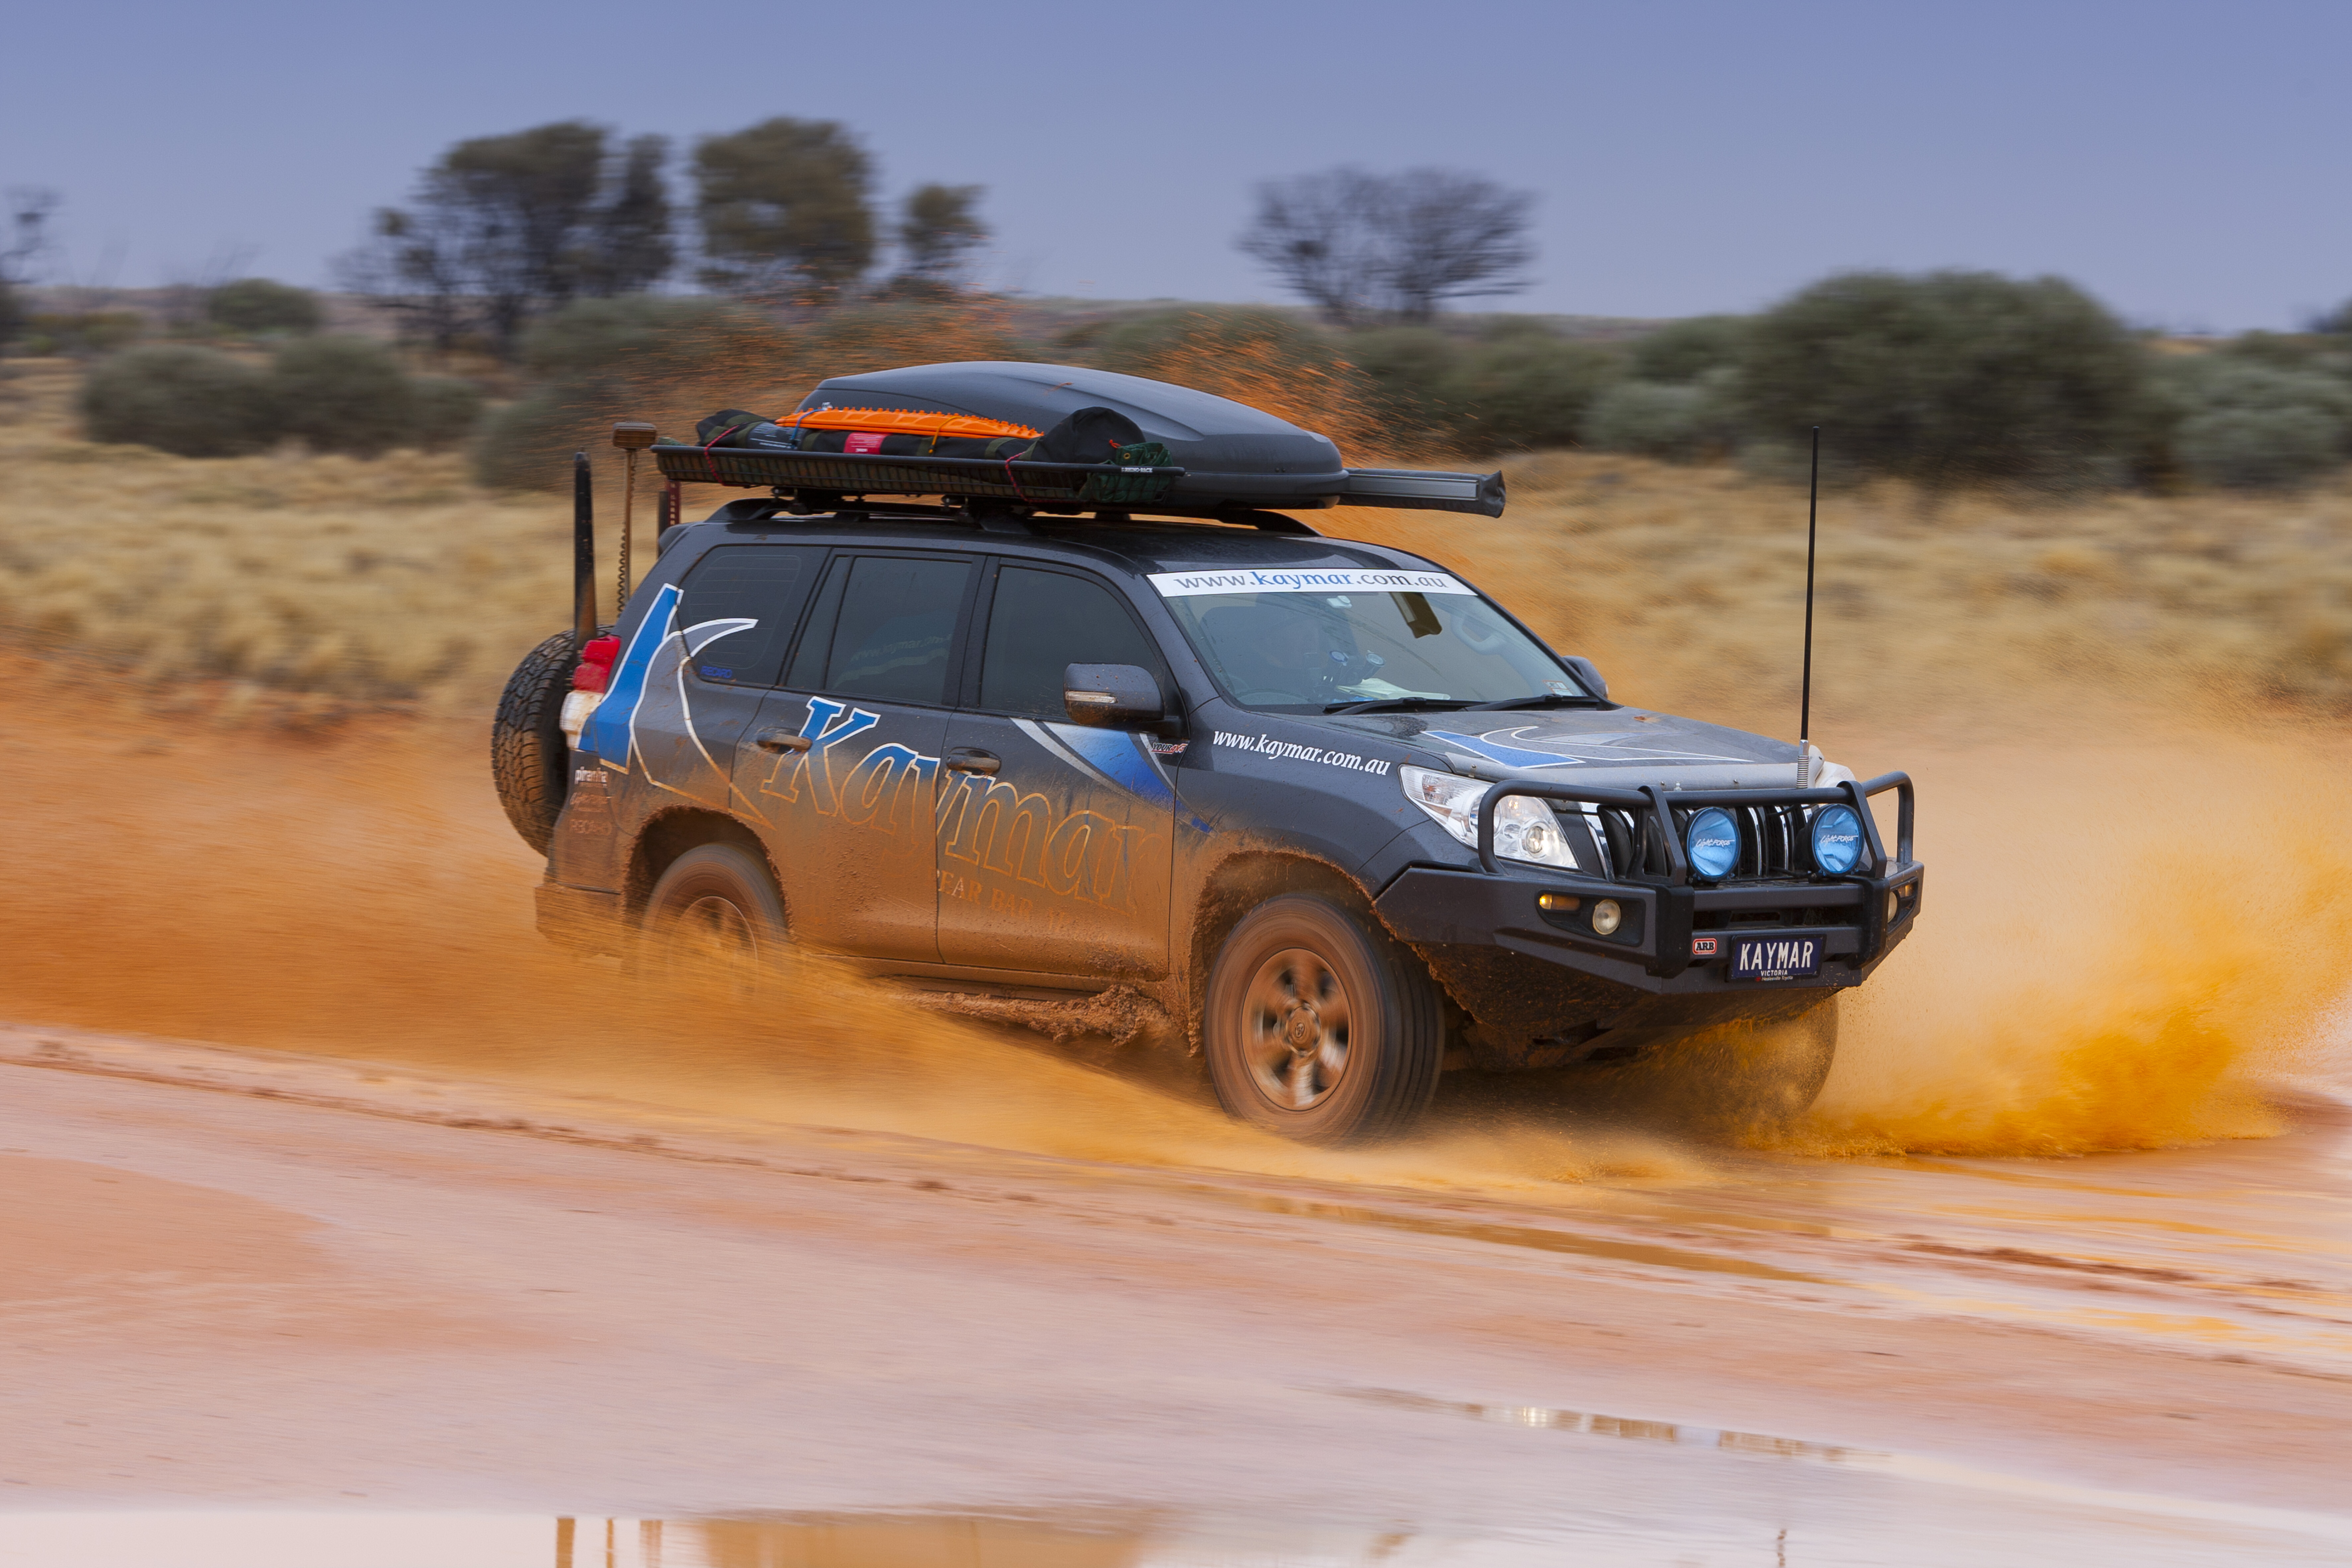
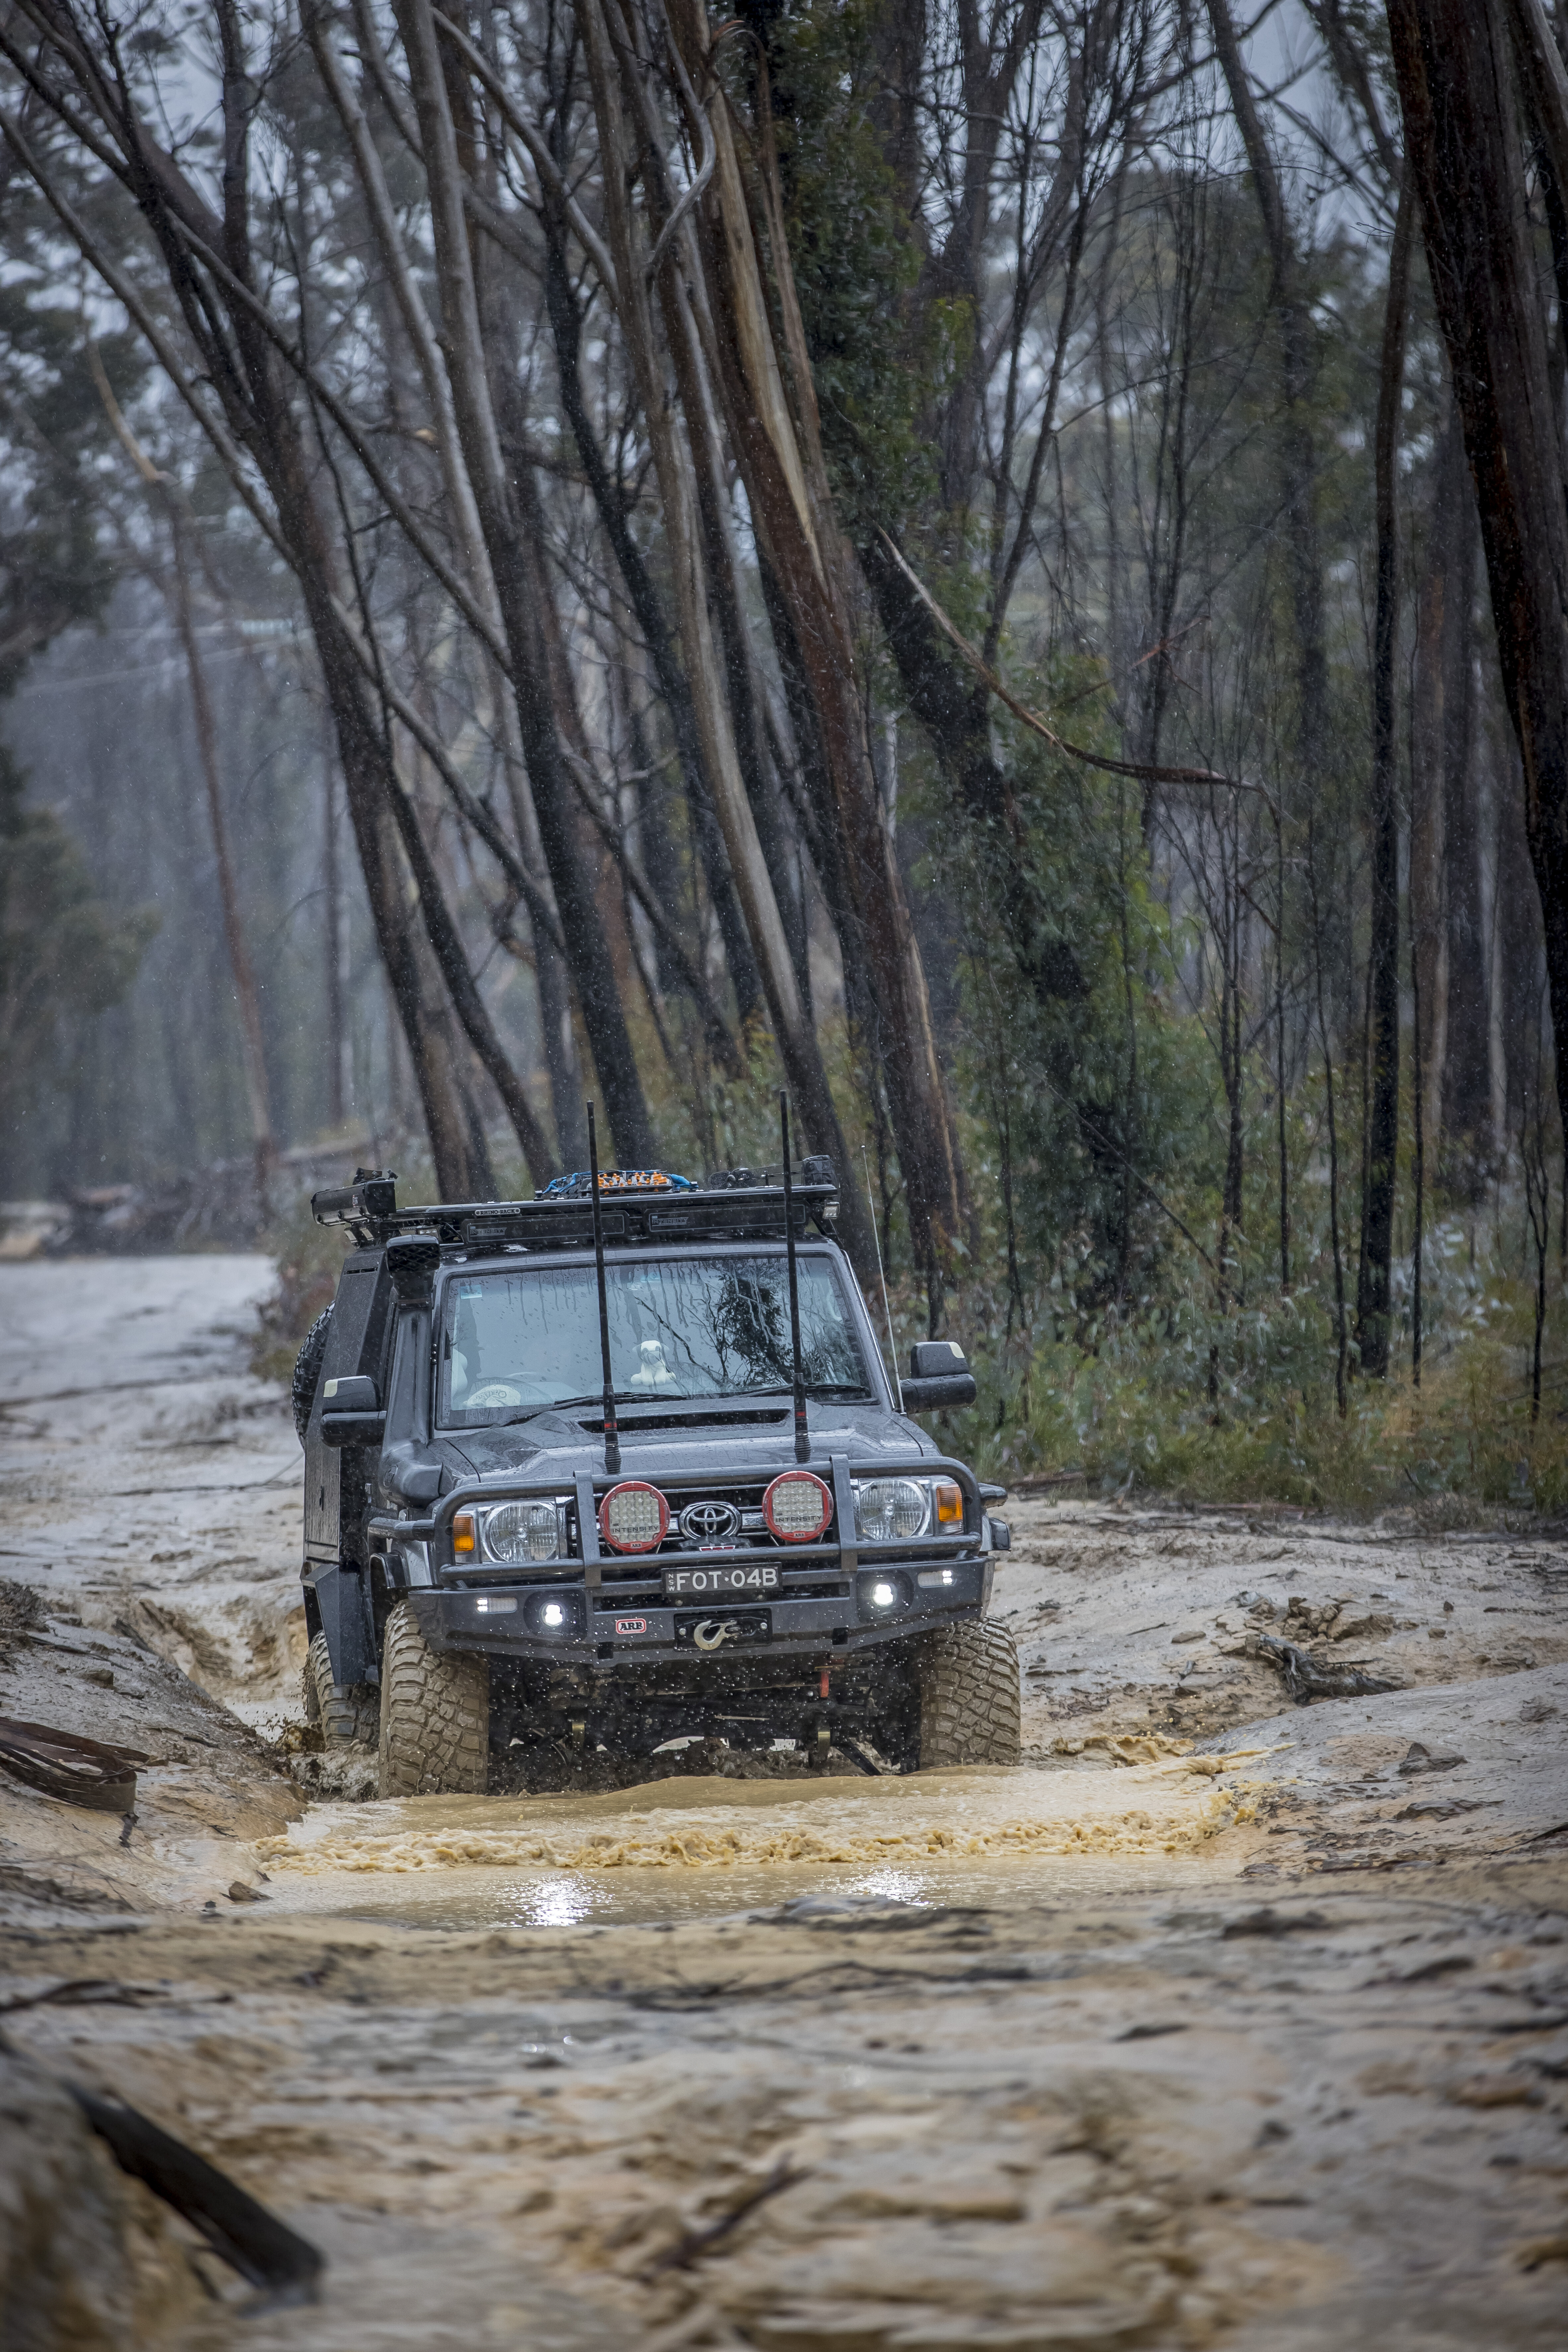
Mud wrestling might sound like fun, but it’s always a safer option to avoid the sticky, gloopy stuff if you can. Why? Because mud is no good for your 4×4; it can be damaging to paintwork, mechanical components, and your vehicle’s interior.
And it’s not just your vehicle that can cop damage when driving through mud. Aggressive mud-terrain tyres spinning furiously while trying to gain purchase can cause severe damage to roads and tracks, making it harder for following vehicles to get through – even after everything has dried up.
As well as vehicle and track damage, if things don’t go to plan in mud, you could end up stuck… and getting out can sometimes be extremely difficult.
So, the next time you’re driving along a track and tempted to drive through a big mud hole, a better option is to look for a way around it. Of course, sometimes there won’t be an alternative route, or you just might not be able to help yourself, in which case here’s what you’ll need to do.
JUMP AHEAD
- Vehicle preparation
- How to assess a mud hole
- Tyre pressures and recovery planning
- How to drive through mud
- How to recover a 4WD stuck in mud
- Post-mud inspection
- Common mistakes
- Types of mud
- Warning signs you’re losing traction
- FAQs
Vehicle preparation: Tyres, clearance and recovery gear
Your 4×4’s tyres are critical when it comes to maintaining forward progress on any off-road surface, and mud is no exception.
When driving in mud, aptly named mud-terrain tyres are the best choice. They have wide-open tread blocks that allow them to gain traction more easily in slippery mud, and they are also more able to clear mud when spinning than tyres with tighter tread patterns that can trap and hold on to mud. Some mud-terrain tyres also have tread blocks that continue over the tread face and onto the sidewalls (sometimes called side-biters) for additional traction in slippery conditions.
Mud-terrain tyres aren’t for everyone, however, as there are several compromises compared to less aggressive all-terrain or highway-terrain tyres. These include less on-road grip, increased road noise, and faster tyre wear. If you’re not willing to accept these compromises, all-terrain tyres are the next best choice for mud driving, but even highway-terrain tyres can still work well in mud if the correct tyre pressures are set… more on that later.
The next thing to consider is ground clearance. Mud is viscous and gets pushed around by spinning tyres, often resulting in deep wheel tracks. If your 4×4 drops into these, you can quickly run out of clearance and get “hung up” on the crown of a track. The more clearance you have, the less chance of getting stuck.
In most states and territories, you can legally increase ground clearance by up to 75mm by combining larger diameter tyres (+25mm) and a raised suspension system (+50mm).* You can go further in some areas with engineering approval or second-stage manufacturer compliance.
Other useful equipment includes front and rear differential locks, a quality snorkel, and extended breathers for differentials, gearbox, and transfer case. Ensure you have rated recovery points front and rear, and carry appropriate recovery gear.
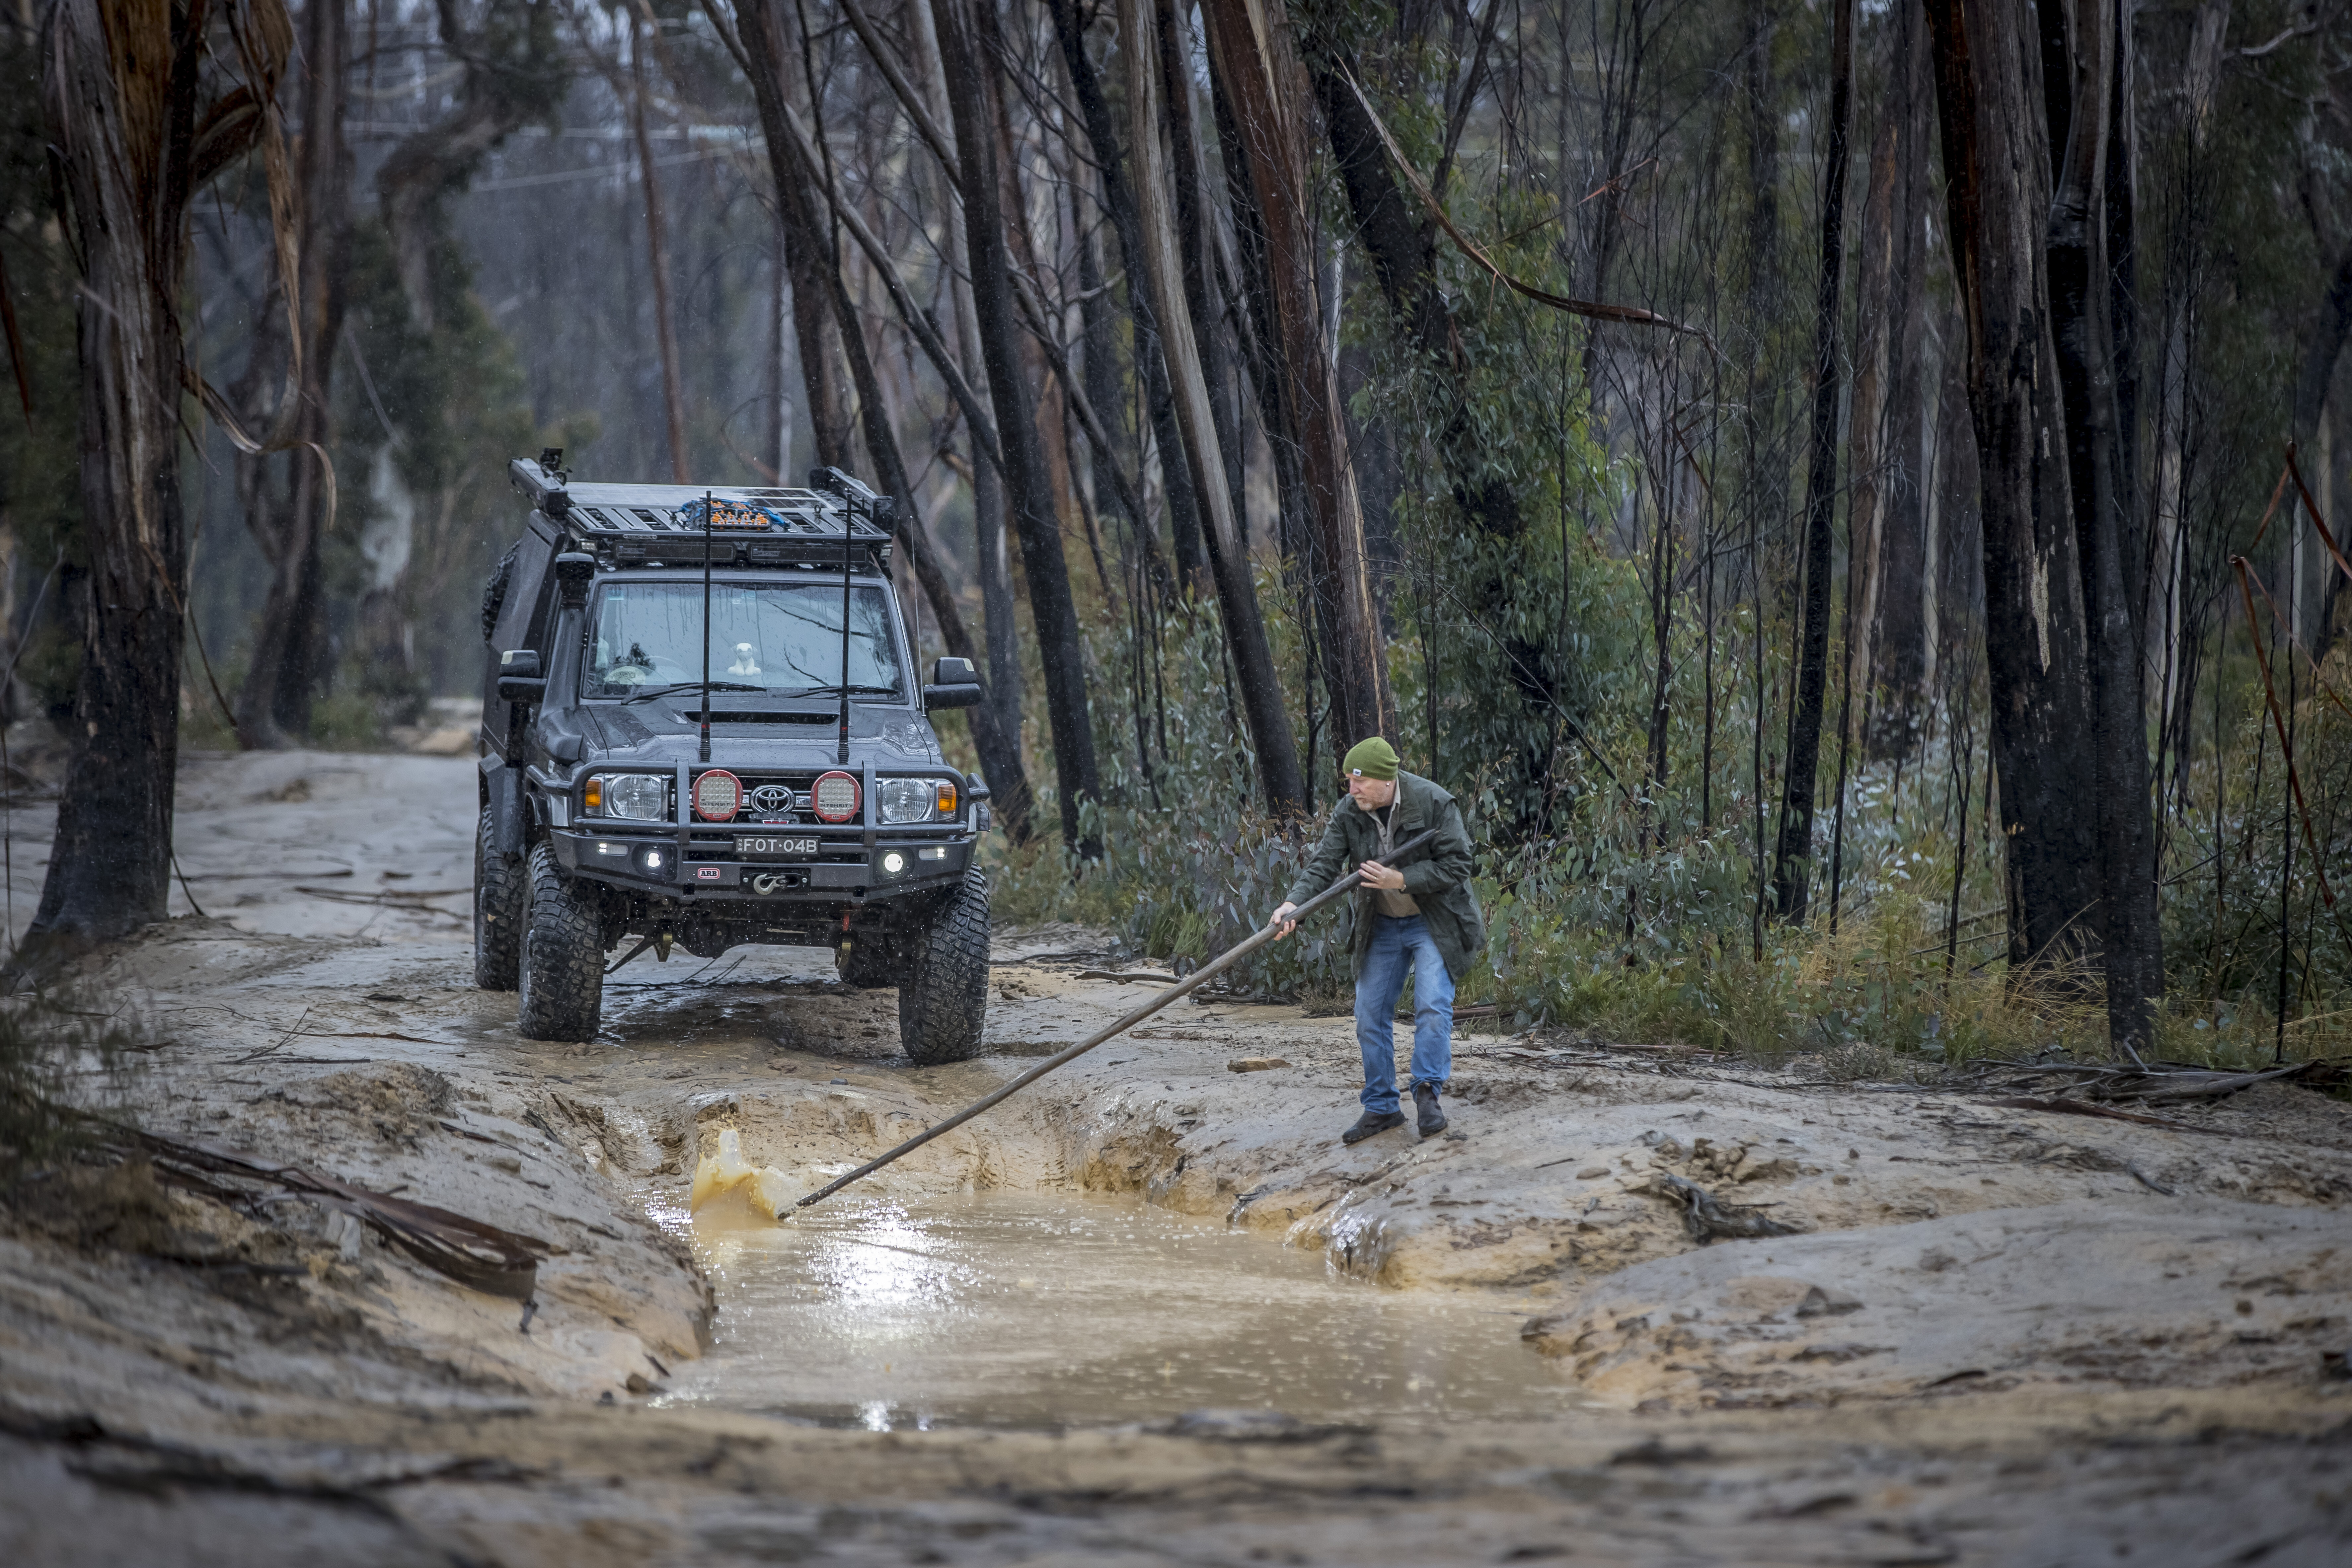
How to assess a mud hole
If you’re confronted by a big mud hole, you need to find out what’s beneath the surface. The best way to do this is with a big stick… unless you don’t mind getting wet and checking on foot. If you do, wear sturdy footwear.
Walk along each side of the mud hole and use your stick to gauge depth and firmness. Check whether the base is solid or sloppy, and assess how high the crown is to ensure you have enough clearance. Probe for hidden obstacles such as rocks, branches, or broken vehicle parts. You may need momentum to get through, so you don’t want to hit anything solid.
Also check for rocks or roots protruding from the sides that could damage tyres. This inspection also allows your vehicle time to cool. Dropping hot components into cold muddy water can cause rapid contraction and potentially suck mud past worn seals in gearboxes, transfer cases, and diffs.
If you’re on an outback road and encounter mud, slow down so you can choose your line carefully. Mistakes here can quickly lead to getting bogged. Even sealed roads in remote areas can hide mud along verges after rain, so be cautious when pulling off.
In desert regions, sticky mud can sit just below a crusty surface layer. If you break through, you could be stuck quickly. If you see existing tracks that exit the section, use them where possible as they’re likely to be compacted.
Tyre pressures and recovery planning
Tyre pressures are key. Lowering pressures increases the footprint of each tyre, helping them conform to uneven surfaces and gain traction.
How low depends on load and vehicle, but if you normally run 35psi on-road, you could safely drop to around 22psi for mud driving. Lower pressures increase the risk of tyre rollover or overheating, so avoid sudden steering inputs and excessive speed.
Always have an escape plan. If travelling with others, keep a snatch strap ready. If solo, ensure recovery boards and a shovel are accessible. If you have a winch, make sure all gear (extension straps, tree trunk protector, shackles, snatch blocks/rings) is ready and you have suitable anchor points.
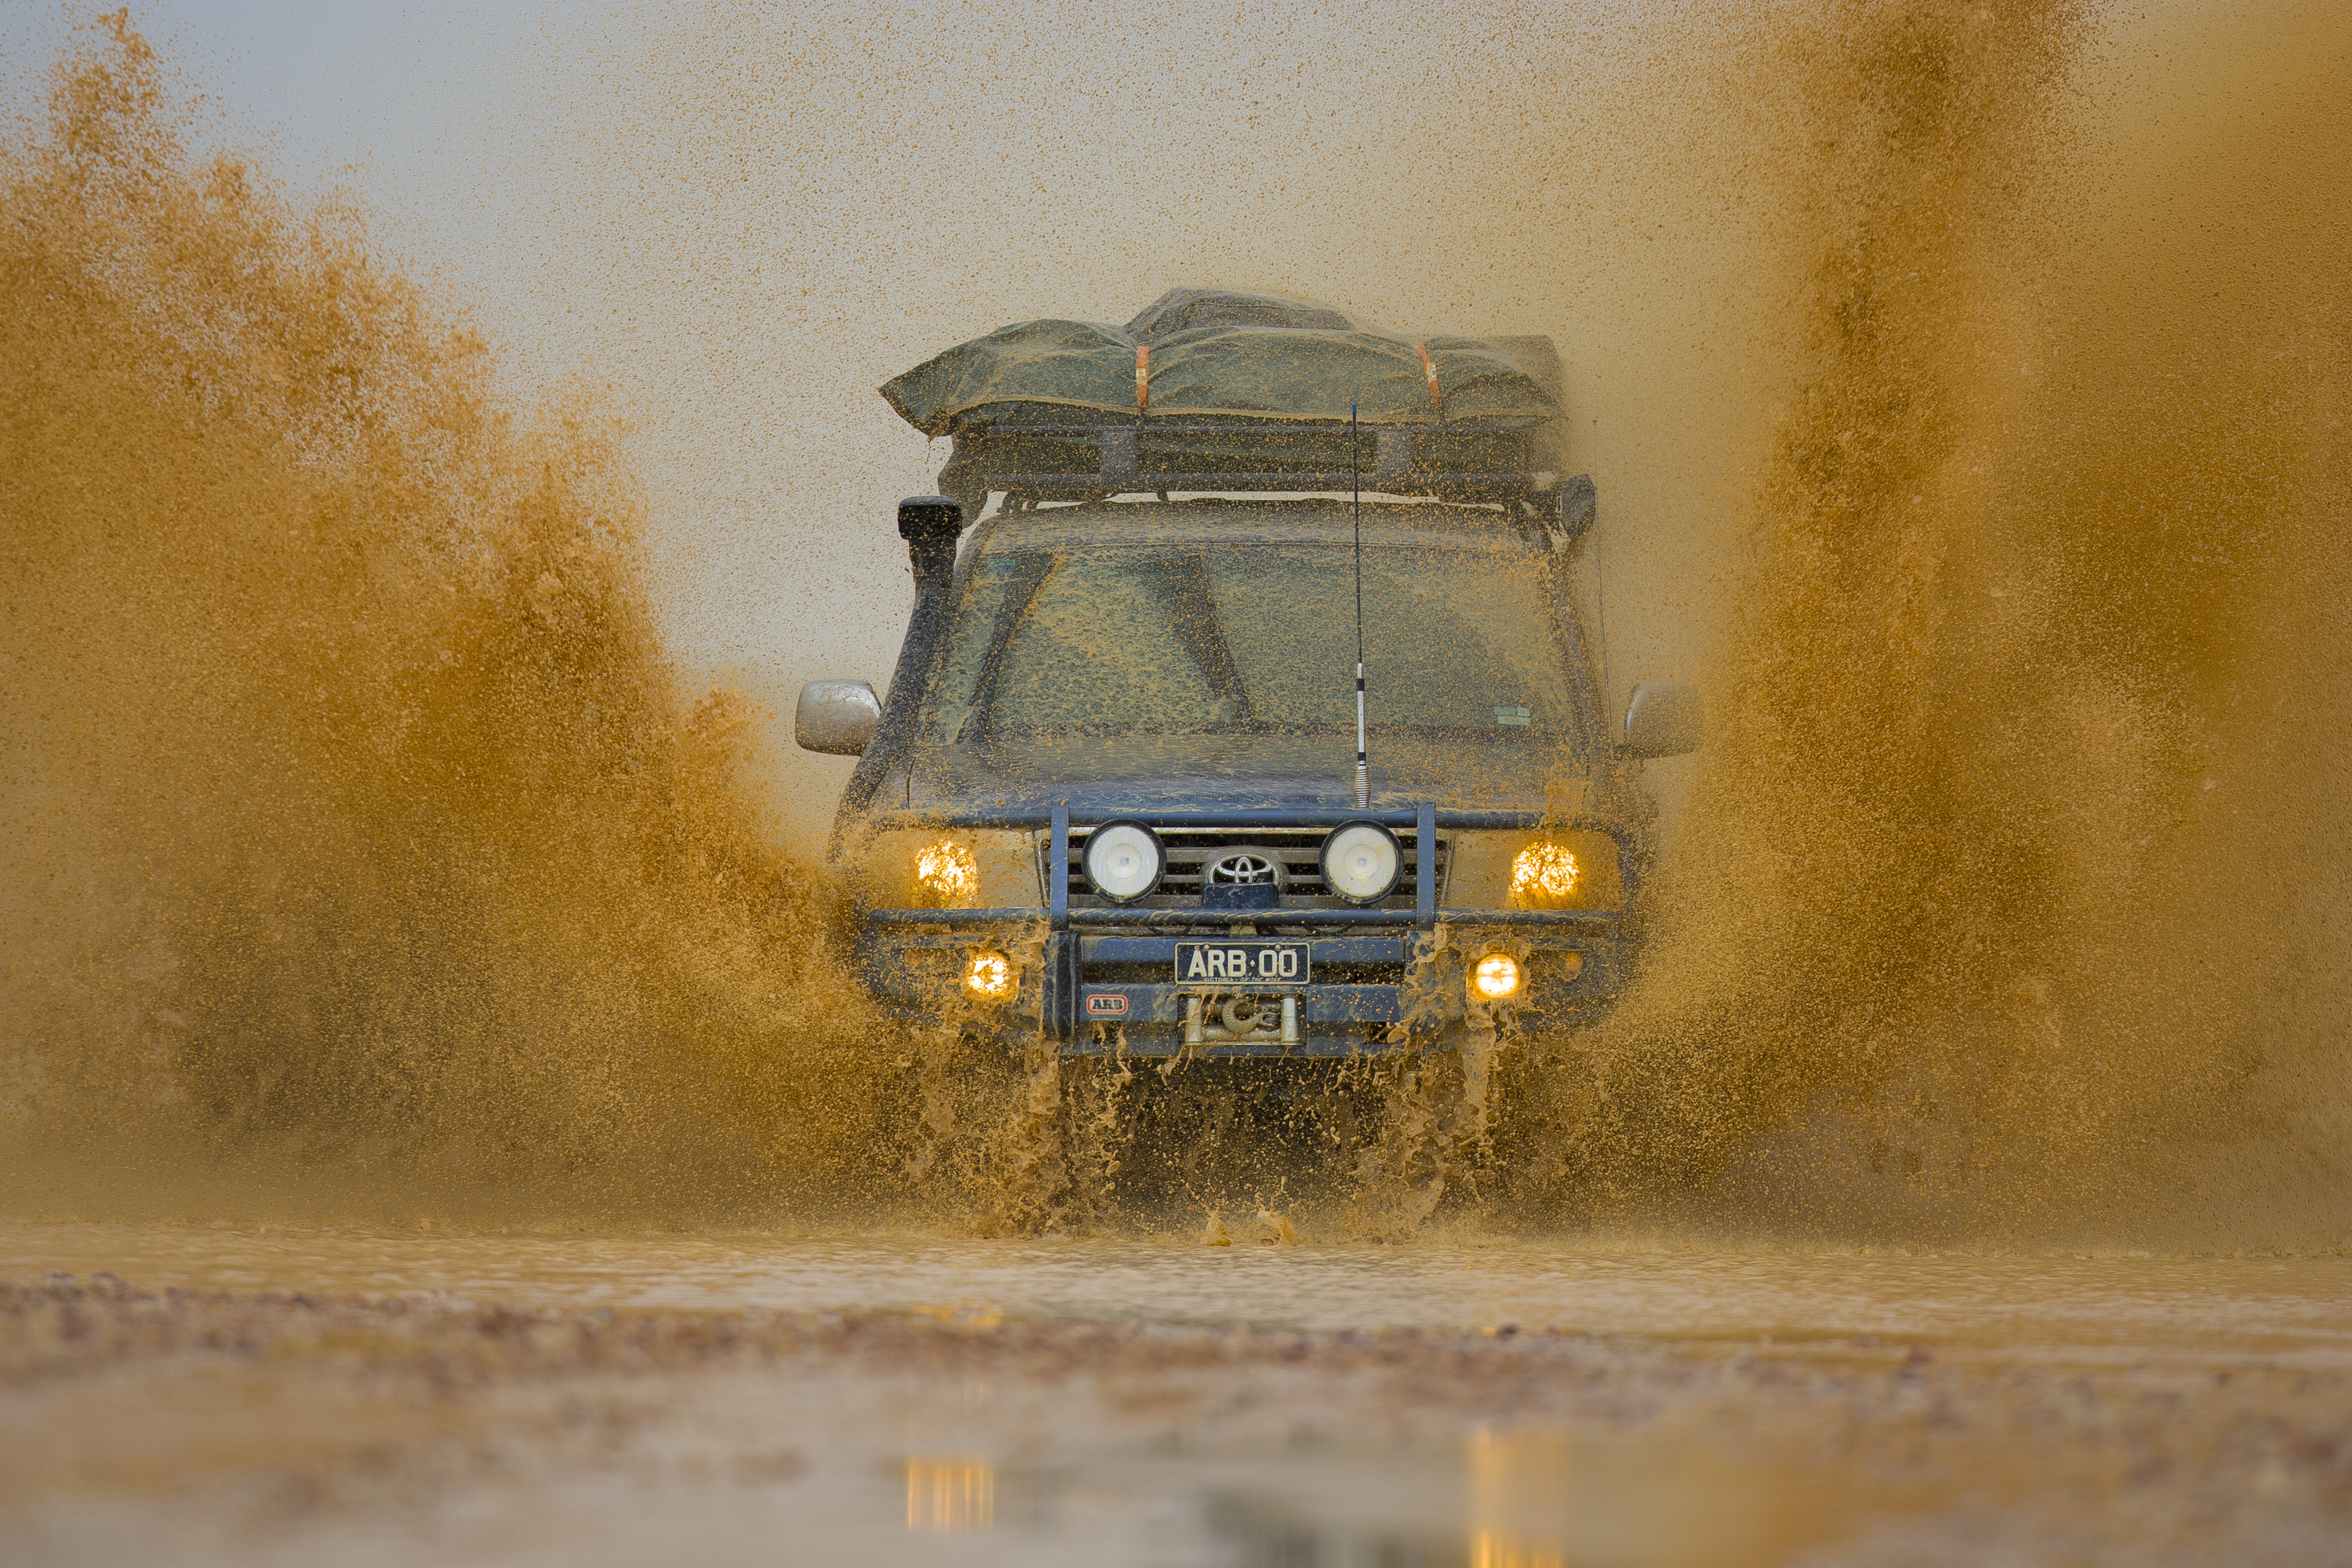
How to drive through mud: Gear selection, momentum and technique
You’re now ready to tackle the mud, so lock your hubs if fitted, make sure your vehicle is in 4×4, lock the centre diff if fitted, and select the gear that you think will result in enough speed and momentum to get you through the muddy section.
Low-range second or third is often a safe bet, but it will depend on your vehicle’s overall gearing and the mud you’re faced with; the key is to maintain enough speed to get you through to the other side, but not so much speed that you might damage your vehicle.
If your 4×4 has selectable drive modes, select the appropriate one for mud, which on many vehicles is labelled ‘mud and ruts’. This will tailor throttle response, automatic gear shifts and the behaviour of the traction-control system to suit the conditions. If you have diff locks on rear and/or front axles, lock them before driving into the mud, but be wary that locking your front diff will make it more difficult to steer the vehicle.

When driving through mud, keep engine revs up and try to avoid gear changes; in manual transmission vehicles, disengaging the clutch in mud can result in you losing momentum and quickly becoming stuck – you need to keep those wheels turning!
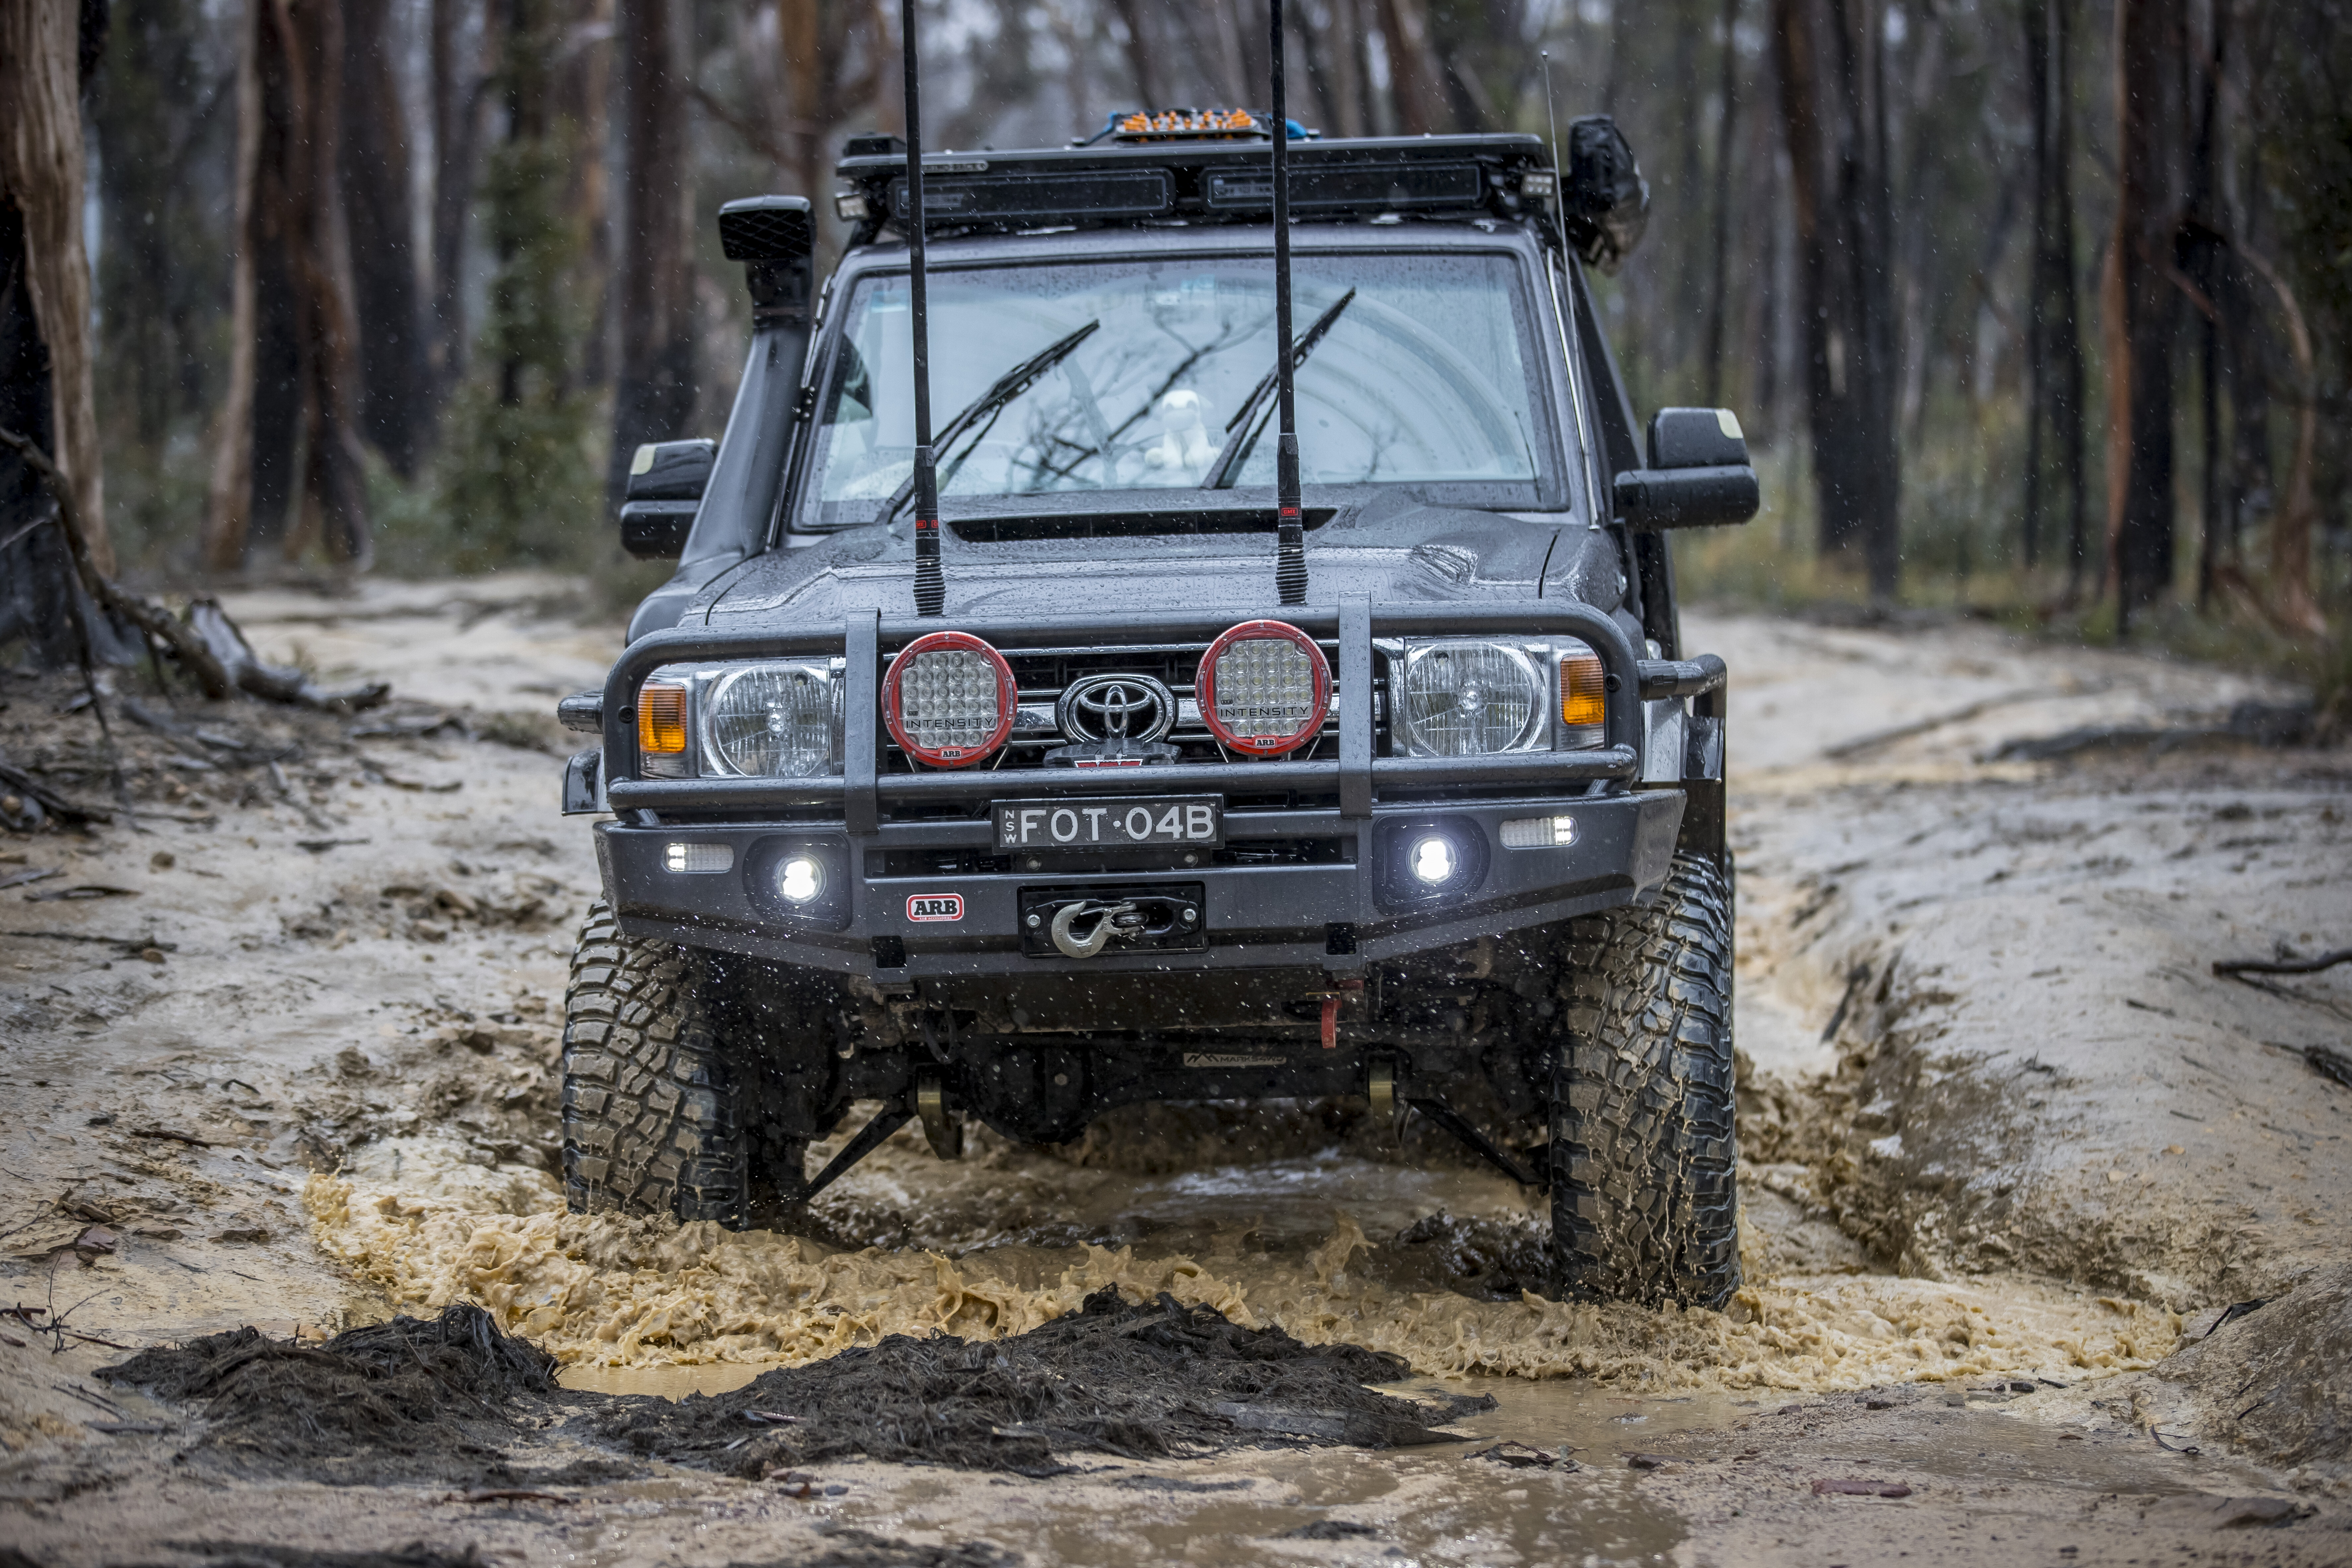
On the flipside, if you bury your wellie and your tyres start spinning furiously in mud, there’s a chance you could simply be digging yourself into the muck. If you start to lose traction, the trick is to find a happy medium between wheelspin and forward progress. There is an upside to your wheels spinning, and that is the rotational forces will help to clear mud from the tread blocks so the tyres will have more chance of gaining purchase.
If you start losing momentum but the wheels are still spinning, another trick is to quickly turn the steering wheel back and forth. This action gives the front tyres a chance to bite into the sides of ruts, which with any luck will help to drag your vehicle through the mud. The side-biters on mud-terrain tyres assist when employing this technique. You might have to straddle wheel tracks if they look too deep, but take care not to slide into the tracks.
Mud driving in hilly terrain can be fraught with danger, especially on steep descents. In these conditions you’ll want to rely on your vehicle’s low-range gearing as much as possible to keep speed in check instead of the brake pedal. On older vehicles without ABS, if you jump on the brakes and the front wheels lock up you will lose steering control. If this happens, dropping into existing wheel tracks can help point you in the right direction. On vehicles equipped with ABS, relying on the brakes can result in excessive braking distances. Slow and steady is the best technique for muddy descents.
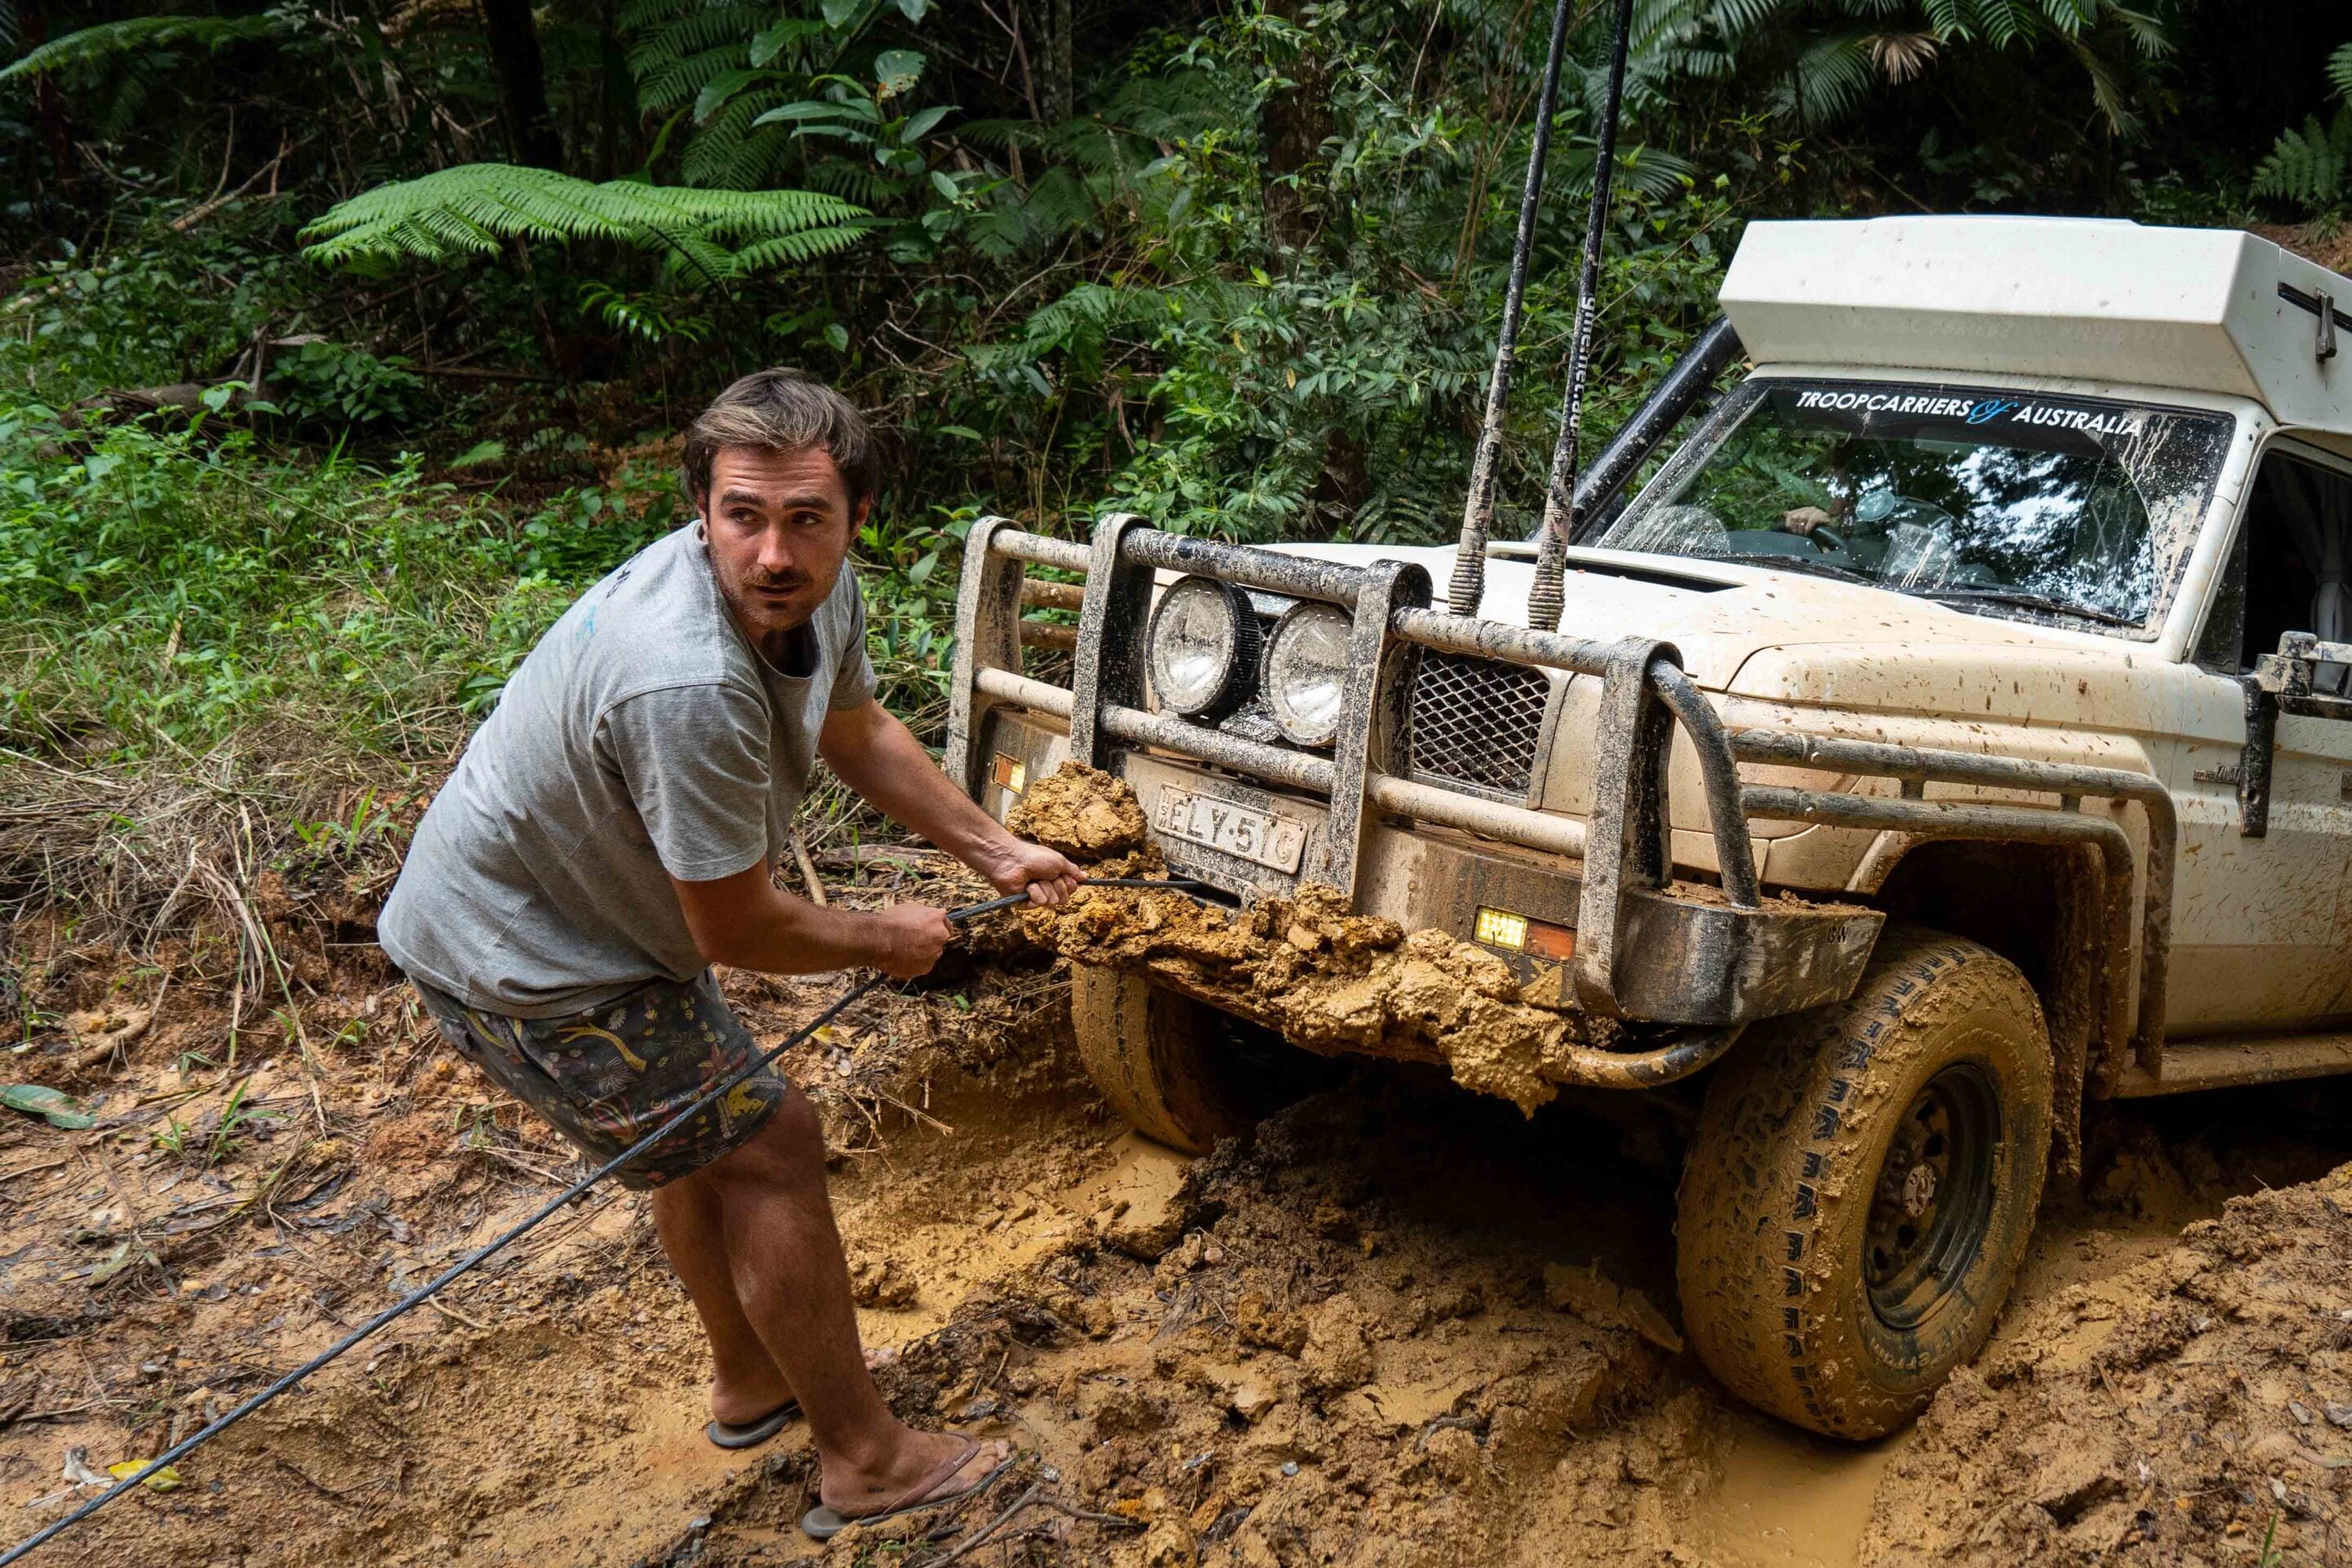
How to recover a 4WD stuck in mud
The first thing to do if you get stuck in the mud is to try and reverse out. Often the reason you become stuck is because mud builds up in front of the tyres, so if you can back up a bit and have another go with a bit more gusto you might just be able to make it out of your predicament.
If you can’t move in either direction, chances are much mud has built up under your vehicle, so you’ll need to grab your shovel and start clearing the mud away. Start by shovelling away the mud on front of the tyres, and then underneath your rig. Now could also be a good time to use your recovery boards. Wedge them in front of the front tyres, select low-range first and try to gently drive on to the recovery tracks. Once up and on to the tracks, try to build up speed and maintain momentum until you’ve reached firmer ground. This can take several attempts.
If you’re fortunate enough to be travelling with other vehicles, a tug with a snatch strap or kinetic recovery rope is one of the fastest ways to recover a vehicle from mud, but make sure you know what you’re doing, and always follow proper safety procedures.
If you need to winch yourself out of the mud, make sure you find a solid anchor point and use a double-line pull if you’re really stuck. Before you start winching, clear away as much mud as possible from in front of the tyres and under the vehicle.
Essential recovery gear
- Recovery boards
- Shovel
- Rated recovery points
- Snatch strap / kinetic rope
- Tyre deflator and inflator
- Winch and rigging kit (if fitted)
Post-mud inspection, cleaning and maintenance
Once you’re out of the mud, have a good look over your vehicle to check for damage.
When reinflating tyres, have a good look to make sure they are not damaged and check that mud hasn’t worked its way in-between the tyres and the wheels. Also have a good look inside the wheel rims to ensure there aren’t big clumps of mud in there that could throw them out of balance.
Make sure your mudflaps and wheel-arch flares are all in place and secured, and that the licence plates are still attached and not covered in mud. Also make sure your headlights, tail-lights and indicators are clean, as well as your windscreen, windows and mirrors.
Once you get home, clean your vehicle as soon as you can. The abrasive nature of dried out mud is no good for your vehicle’s paint, chrome or plastics. Give your rig a good clean underneath too, as mud can be hell on components such as clutches, wheel bearings and CV joints. Also have a good look in chassis rails for built-up mud that could result in corrosion issues down the track, and hose away any mud between the body and chassis, and around suspension components and fuel tanks.
Lift the bonnet and make sure the radiator, alternator and other components aren’t caked in mud. If they are, thoroughly clean them to prevent engine overheating or electrical failures. If you’ve been driving in deep mud holes, you should also check the engine, gearbox and diff oils to make sure no contaminants have worked their way into these mechanical components.
As I said at the start of this guide, it’s always a good option to try to avoid mud rather than drive through it if you can.
What to do
- Try to avoid mud if possible
- Lower tyre pressures appropriately
- Engage 4×4 and correct drive modes
- Maintain momentum
- Carry and prepare recovery gear
What not to do
- Enter mud without checking depth
- Lose momentum through unnecessary gear changes
- Brake heavily on muddy descents
- Pull off into unknown soft verges
- Leave mud caked on your vehicle
Common mistakes when driving in mud
Even experienced 4×4 drivers get caught out in mud. Most recoveries aren’t caused by bad luck, they’re caused by avoidable mistakes.
- One of the most common errors is entering mud without properly checking the depth or base firmness. What looks manageable on the surface can hide soft, bottomless sections underneath.
- Overusing throttle is another classic mistake. Spinning the tyres aggressively might feel like progress, but it usually just digs the vehicle deeper into the mud.
- Stopping in the middle of a mud section is also a major problem. Once momentum is lost, the vehicle can settle quickly into ruts and become much harder to recover.
- Incorrect tyre pressures can also work against you. Running them too high reduces traction, while going too low without understanding load and terrain increases the risk of tyre rollover or de-beading.
- Finally, poor recovery preparation before entering mud is a frequent issue – having gear buried in the back of the vehicle or no clear exit plan often turns a simple crossing into a recovery situation.
Different types of mud and why it matters
Not all mud behaves the same, and understanding the difference can help you decide whether to proceed, reroute, or avoid it entirely.
- Sticky clay mud is one of the most challenging types. It packs heavily into tread blocks, builds resistance quickly, and can turn tyres into slicks almost instantly.
- Sandy mud, often found near beaches or desert fringes, can appear stable but collapse without warning. It tends to offer inconsistent traction and can change rapidly under load.
- Waterlogged topsoil is deceptive. It often looks firm enough to support a vehicle but will give way suddenly once weight is applied, leading to rapid bogging.
- Saltpan mud crust is particularly dangerous in remote areas. A hard surface layer can hide deep, soft mud underneath, meaning the ground can fail without any obvious warning.
Warning signs you’re losing traction in mud
Recognising the early signs of trouble can make the difference between driving through and getting stuck.
- A sudden loss of forward momentum, even while maintaining throttle input, is often the first indication that traction is fading.
- If the steering starts to feel heavy, vague, or unresponsive, it may mean the tyres are no longer biting into a firm surface.
- Increasing wheelspin without corresponding movement is another clear sign that the vehicle is starting to lose effective traction.
- You may also notice the vehicle beginning to “sit down” into the track as the mud compresses and builds underneath the chassis.
- Finally, if the ruts are rapidly deepening under your tyres, it’s a strong indicator that the surface is failing and recovery may soon be required.
FAQs: 4WD tips and safety
Do I need mud-terrain tyres for driving in mud?
Not strictly. Mud-terrain tyres perform best due to their open tread design, but quality all-terrain tyres can still work well if tyre pressures are adjusted correctly. Highway-terrain tyres can manage light mud in some conditions, but traction will be more limited.
How low should I drop tyre pressures in mud?
It depends on vehicle load and setup, but as a general guide, if you normally run around 35psi on-road, dropping to roughly 20-25psi can improve traction. Always balance grip with the risk of tyre rollover, overheating, or de-beading.
Is it better to drive fast or slow through mud?
Neither extreme works well. You need controlled momentum – enough speed to keep moving, but not so much that you lose control or damage the track. Excess wheelspin usually digs you in deeper.
Should I use 4WD high or low range in mud?
Low range is usually preferred for deeper or more technical mud as it helps maintain steady torque and control.
What’s the biggest mistake people make in mud?
Stopping momentum or overusing wheelspin. Both can quickly bog the vehicle. Poor line choice and failing to assess depth before entering are also common causes of recovery situations.
Can mud damage my 4WD?
Yes. Mud can damage paint, clog mechanical components, overheat brakes, and contaminate bearings or oils if it enters seals or breathers. It can also stress tyres and driveline components during recovery attempts.
Is it safe to use traction control in mud?
Yes, but it depends on the system. In some vehicles, traction control can help manage wheelspin. In deeper mud, however, it may reduce momentum, which is sometimes needed to keep moving.
What should I always carry for mud driving?
Essential recovery gear includes a shovel, recovery boards, rated recovery points, a snatch strap or kinetic rope (if travelling with others), tyre deflator and inflator, and a winch if fitted.
What’s the safest way to recover a stuck 4WD in mud?
Start with self-recovery: reverse out if possible, clear mud around tyres, and use recovery boards. If that fails, a controlled snatch recovery or properly rigged winch pull is next – always using rated gear and safe procedures.
How do I clean my vehicle after driving in mud?
Wash thoroughly as soon as possible, including the underbody, wheel arches, chassis rails, and engine bay (carefully). Dried mud is abrasive and can lead to corrosion and component wear if left untreated.
When you spend weekends building, modifying and testing a 4×4, insurance stops being just a formality.
For us here at 4X4 Australia, it’s part of the build, and part of being able to push vehicles hard without worrying about the financial fallout if something goes wrong. Over the years we’ve run multiple project vehicles, each packed with the best modifications, accessories and touring gear available in Australia. Protecting these rigs isn’t as simple as ticking “comprehensive” on a standard car policy, and that’s why we’ve consistently used Club 4X4 Insurance.
Builds, modifications and real-world value
Our project vehicles never stay stock for long. They’re lifted, reinforced, packed with drawers, rooftop tents, bull bars, winches, lighting, and gear that makes them capable off-road.
Club 4X4 allows us to insure modifications and accessories at agreed value, including installation costs. That clarity has meant that if a rig takes a hard hit on a track, we’re not left partially uncovered.
One of our most significant builds in recent years has been the 79 Series, a rig we chose not just for its legendary durability but also because it represents the pinnacle of what a modern 70 Series should be for tough touring and heavy use. This VDJ79 is one of the last V8 diesel 79s offered in Australia, and from the outset it’s been treated as a working project designed to be lived in and pushed hard off-road.
From a Terrain Tamer suspension and GVM upgrade to carefully selected protection, recovery gear and touring accessories, every stage of this build has been about real-world capability, not showroom shine. To protect all of this investment – both the base vehicle and the modifications – we’ve relied on Club 4X4, which recognises aftermarket upgrades, off-road use and recovery costs. Having a policy that covers the full build allows us to test the LandCruiser in demanding environments with confidence, knowing both the vehicle and our work are fully insured.
Off-road use and recovery
Off-road driving is treated as normal use. Whether it’s tracks, beaches, fire trails or remote touring routes, Club 4X4 recognises that 4x4s exist to go off the bitumen.
Club 4X4 coverage applies wherever you’re legally allowed to drive in Australia. Combined with included off-road recovery cover, we can tackle soft sand, mud or creek crossings without fretting about unexpected costs. For rigs heavily loaded with gear and modifications, that support is invaluable.
Touring and personal gear are also covered. Fridges, camping equipment, recovery kits, and tools are part of the package for any serious project build. Club 4X4’s personal effects cover protects this equipment even when it isn’t bolted to the vehicle, giving an extra layer of security on extended trips. What Club 4X4 does exceptionally well is align its policies with how we actually build and drive our vehicles.
The takeaway for project builds
Across years of testing and touring, using Club 4X4 has meant our project vehicles are insured for real-world use: Modifications are valued correctly, off-road incidents are recognised, recovery is supported, and gear is protected. For builds like our 79 Series, that’s not just peace of mind, it’s a practical necessity.
When you’re pushing rigs hard, living out of them, and testing the limits of what a modern 4×4 can do, having insurance that actually understands your vehicle and how you use it makes a big difference.
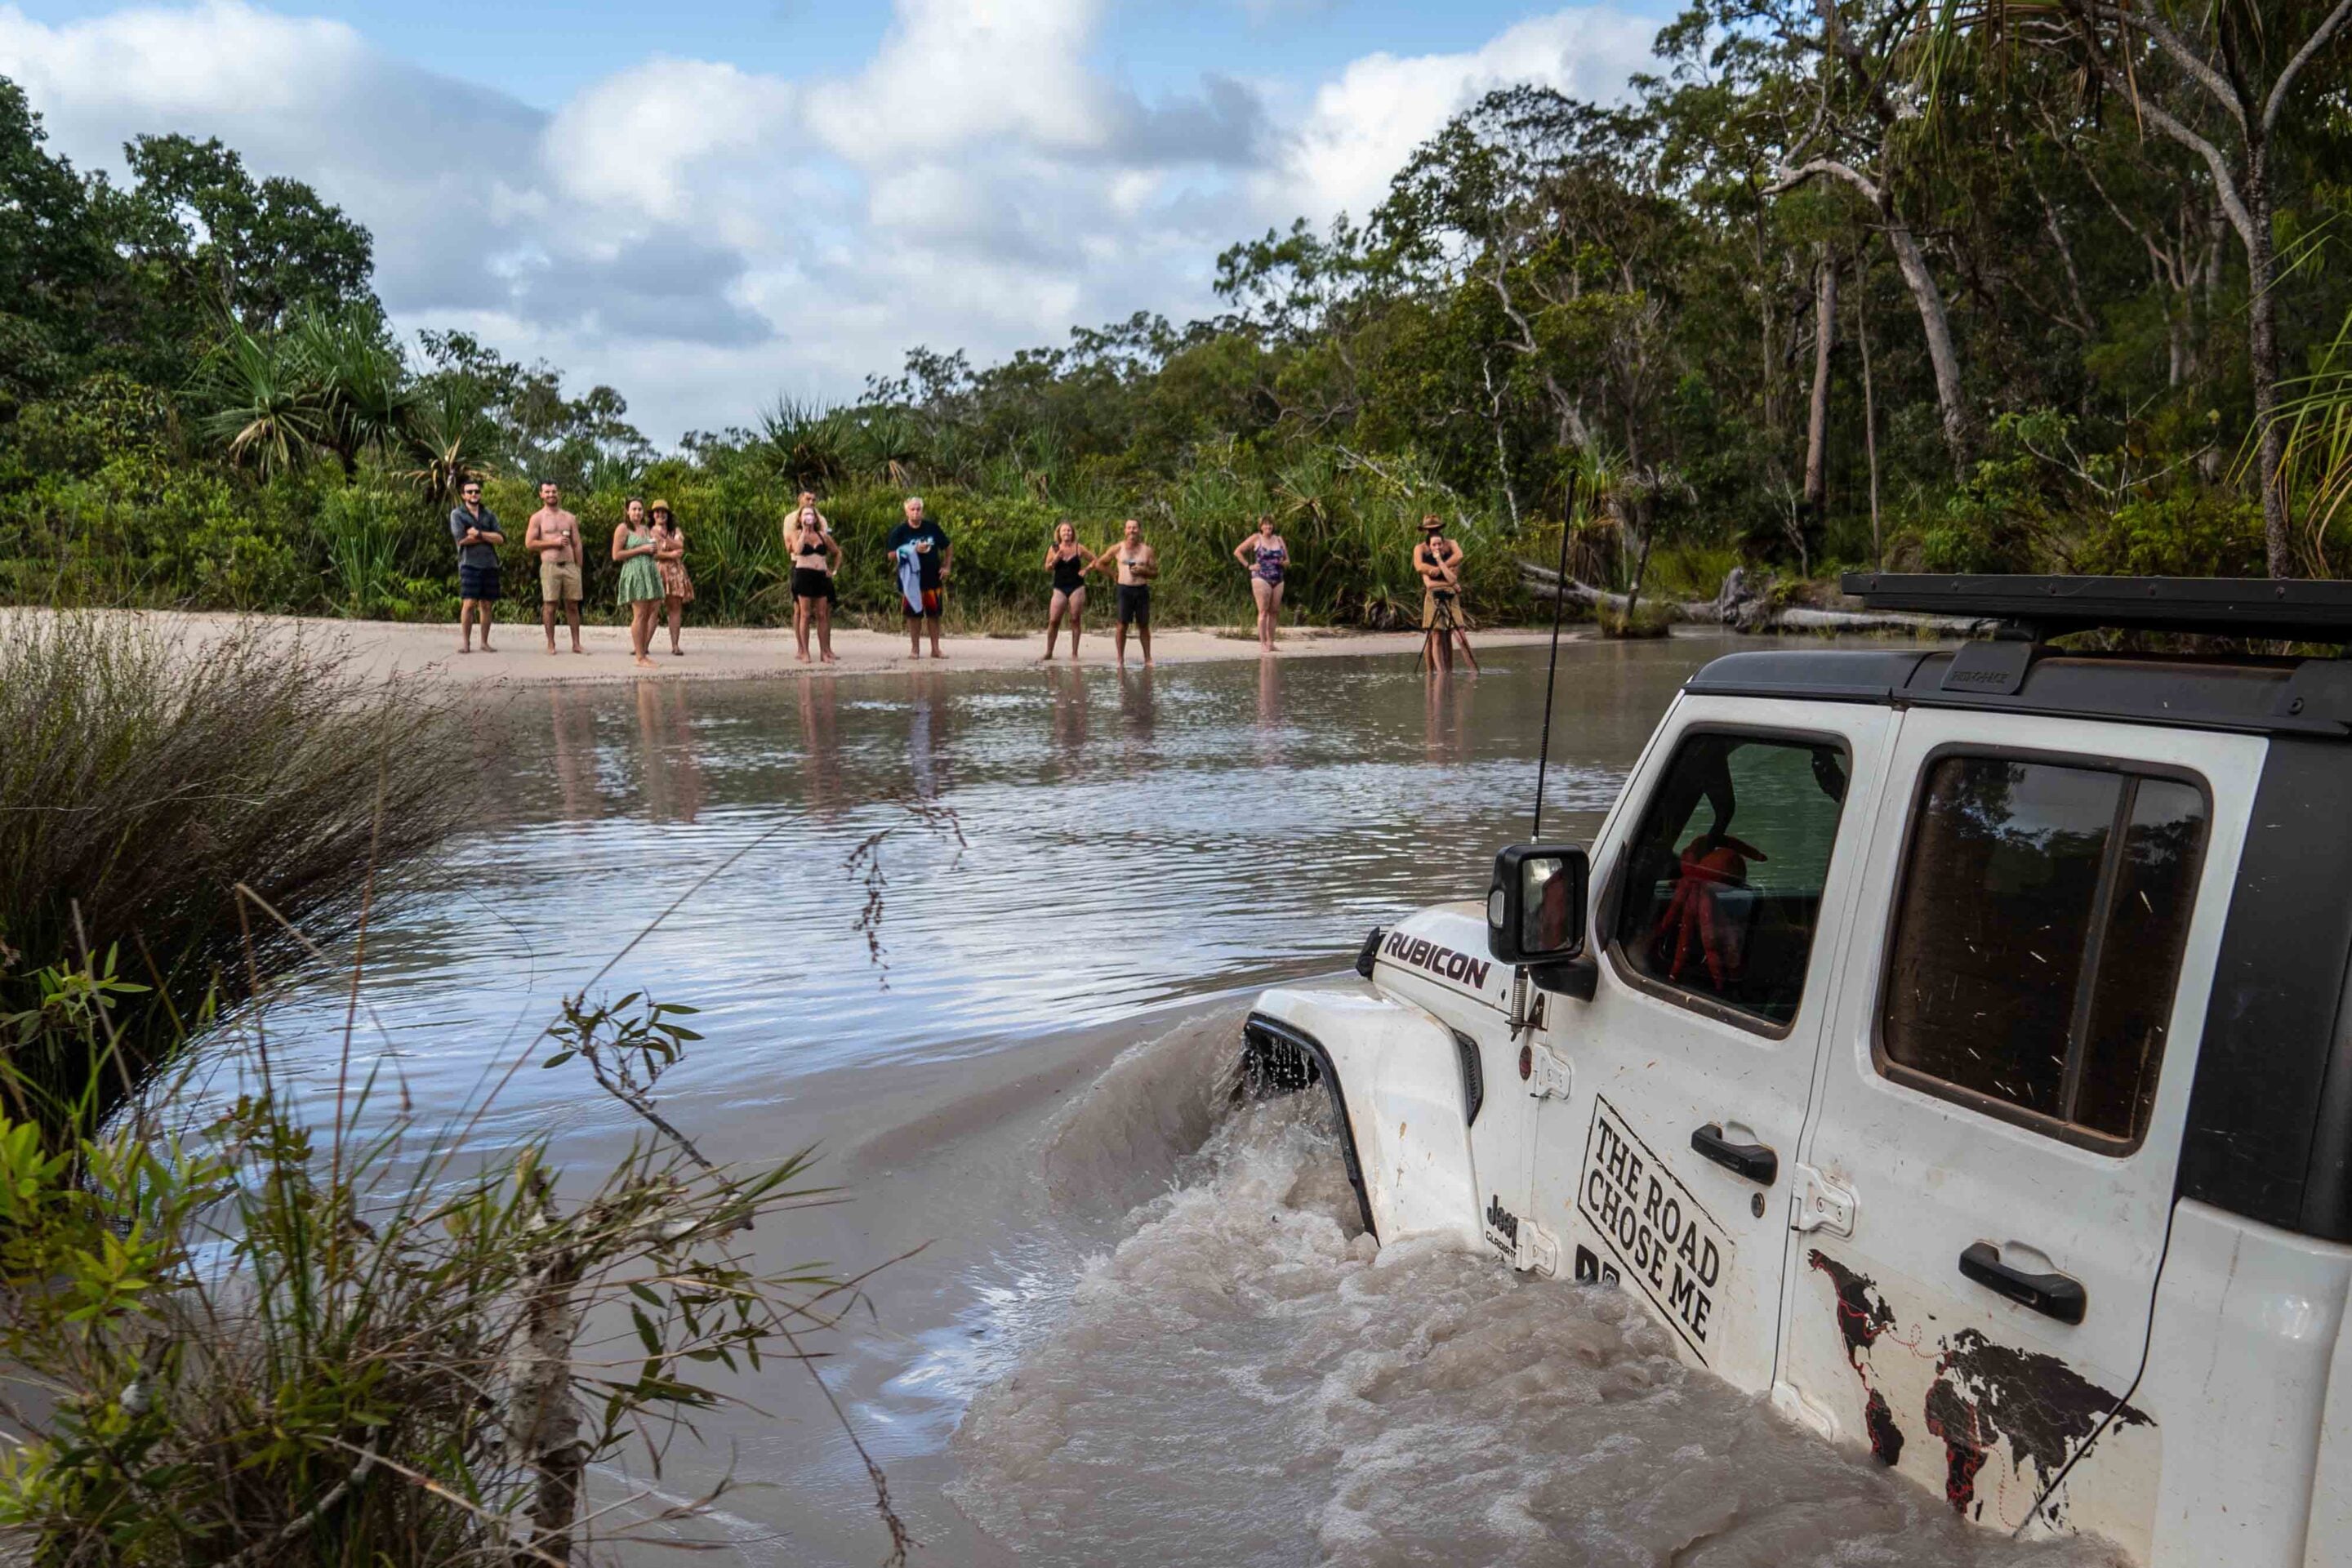
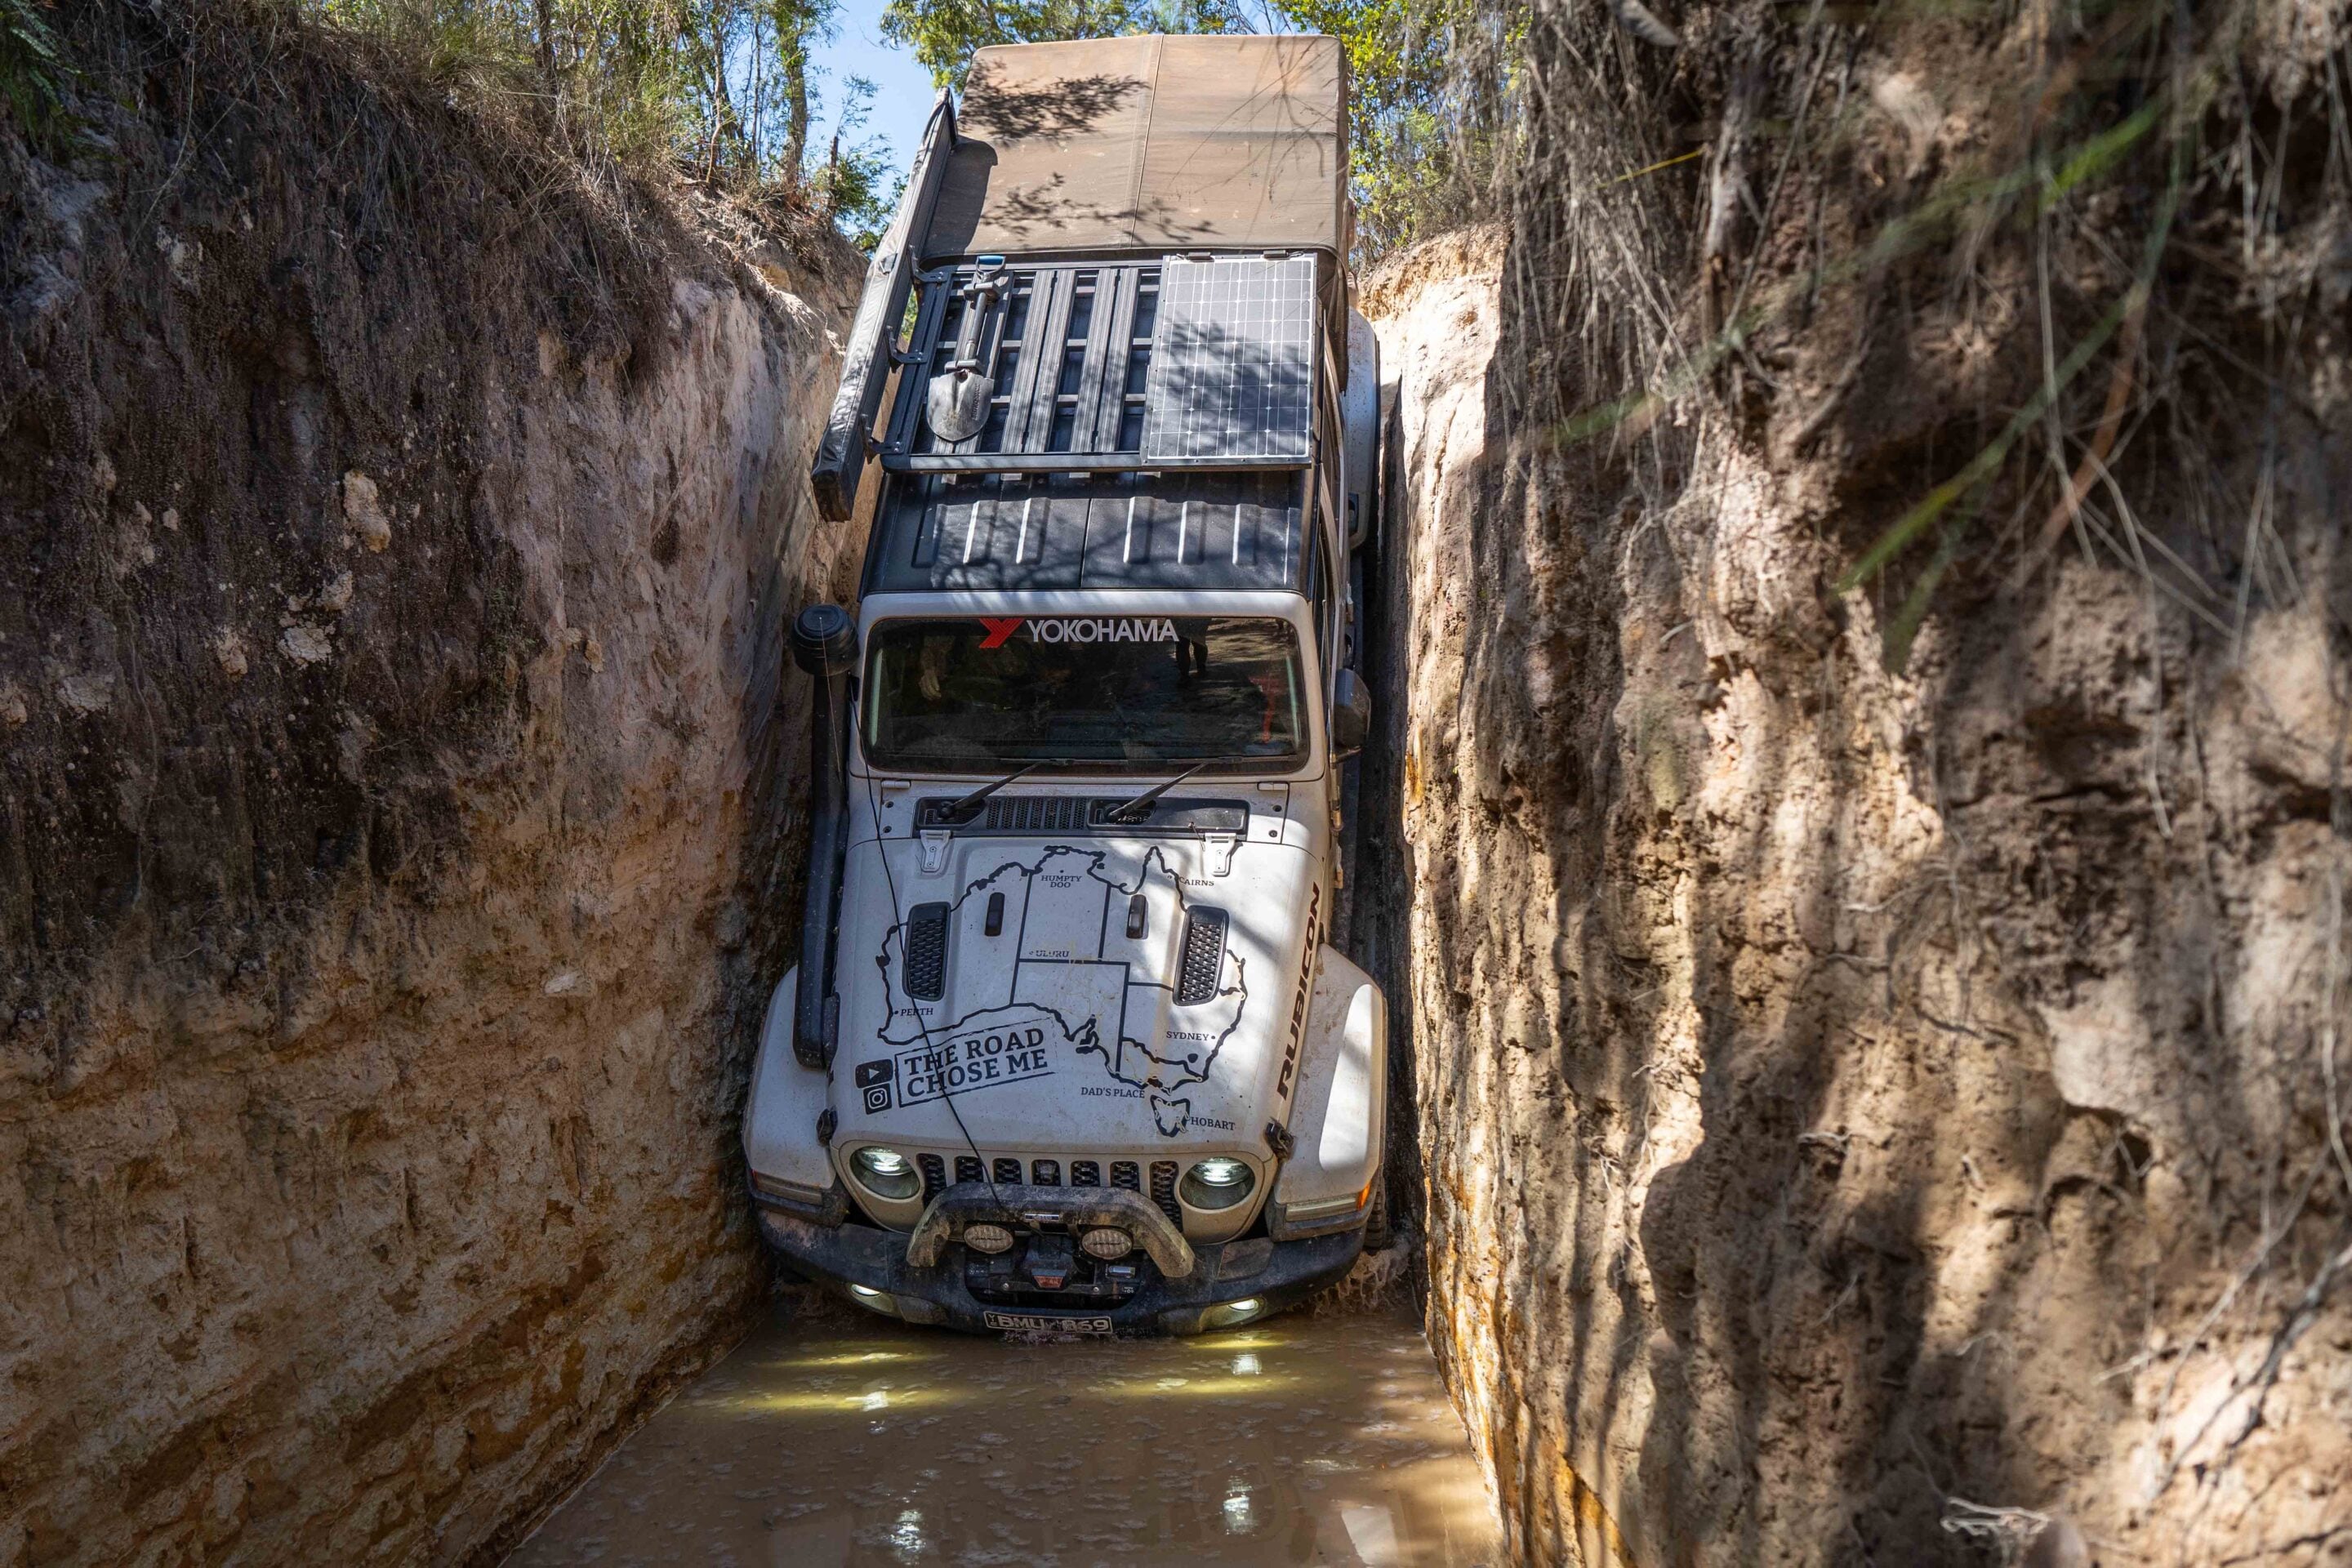
While I’m technically in the driver’s seat, what I’m doing can’t really be called sitting.
With the Jeep nearly vertical, the steering wheel is directly below me and I’m pushing hard to keep my body off the dashboard and my back against the seat. I can barely see the tip of the bonnet; beyond it, walls of dirt and mud fill my vision.
With only an inch or two on either side, my mirrors are folded in and all my concentration is focused on Josh – the only thing keeping me centred between the vertical mud walls. With my view completely blocked I have no choice but to trust his judgement. I’m gripping the winch controller in my right hand, desperately hoping to avoid the worst-case scenario of getting stuck vertically at the bottom of the mud trench.
While hanging helplessly on the edge, I can’t help thinking this is a really bad idea. But with no alternative I ease off the brakes, inching the Jeep over what is, for all intents and purposes, a cliff. At the point of no return gravity takes over, Kristy lets out a scream and Josh jumps backwards to avoid the wave of mud.
After days of intense four-wheel driving in remote Cape York, I’ve just dropped into Gunshot – probably Australia’s most infamous 4×4 obstacle.
Old Telegraph Track: Cape York’s iconic 4×4 route
Cape York, in the far north-east of Australia, is one of the wildest and most remote corners of what is already a very wild and remote continent.
During early settlement the extreme remoteness made outside communication almost impossible, so – in typical colonial fashion – an ambitious plan to build a telegraph line the length of Cape York was set in motion in 1883.
The thick, jungle-like rainforest and scrubland did not give in easily. The initial survey alone took two years, followed by another two years of hard manual labour during construction. The track was cut roughly two chains wide (about 40yd), and teams of men were assigned to maintain it – a herculean task after the monsoonal rains each season during the annual wet.
The telegraph track remained the only way to access the far northern tip of Cape York for more than 100 years, until the Peninsula Development Road (PDR) was completed in 1986. At that point the original telegraph line was replaced by microwave transmission and later fibre optic.
For all intents and purposes the Old Tele is now abandoned and hasn’t seen any maintenance or trail repairs since 1986. The severely rutted and muddy track now stands as the mecca of remote technical four-wheel driving in Australia, and since COVID the route has been busier than ever. Tens of thousands of keen four-wheel drivers descend each year during the dry season, eager to put their vehicles and off-road driving skills to the test.
With countless deep river crossings, stunning waterfalls, mud holes, tree roots, rock shelves, soft sand and plenty of slippery climbs, the multi-day track really does have something for everyone. Although the Tele is only 170km long – tiny by Australian standards – it packs a punch, with almost every kilometre driven in low range. Simply reaching the end in one piece is an achievement to be proud of. Bonus points if you do it without drowning your vehicle.
Aussie 4×4 culture on the Old Tele
It’s no secret that plenty of Aussies love four-wheel driving, and the Old Tele is akin to Graceland for many of them.
With sticky humidity even in the dry season, a well-stocked fridge is essential on the Tele – many seem to contain more beer than drinking water. From sunrise to sunset I rarely see anyone without a cold beer in hand, and the rate of consumption is impressive. Somehow, I’m still impressed that most people manage to stay on their feet.
Without a doubt these mad-keen Aussies are an incredible bunch. They’re always the first to jump in and offer help whenever the need arises – which it often does in these parts. A highlight of the Old Tele is watching other vehicles tackle each obstacle and, like any good sporting venue, the characters in the crowd are often as entertaining as the main event. Make no mistake – this is raw Aussie culture on show.
Forming the Cape York convoy
We’ve been exploring the remote tracks of Far North Queensland with an eclectic crew of people and vehicles from around the country who have affectionately dubbed us ‘The Americans’.
That’s partly because we’re driving a Jeep and partly because of Katie’s accent, which stands out like a sore thumb. For the record, Katie is Canadian – but nobody around here seems to know the difference. Josh and Georgie drive a heavily loaded Troopie, while Brad and Kristy pilot a modified TD42 Patrol. Josh has nerves of steel and isn’t afraid of monster wheel lifts or deep mud holes, while Brad and Kristy have a background in competitive 4×4 winch challenges. I bring the least to the table in terms of highly technical four-wheel driving, and I’m extremely happy to have their skills and experience on the team.
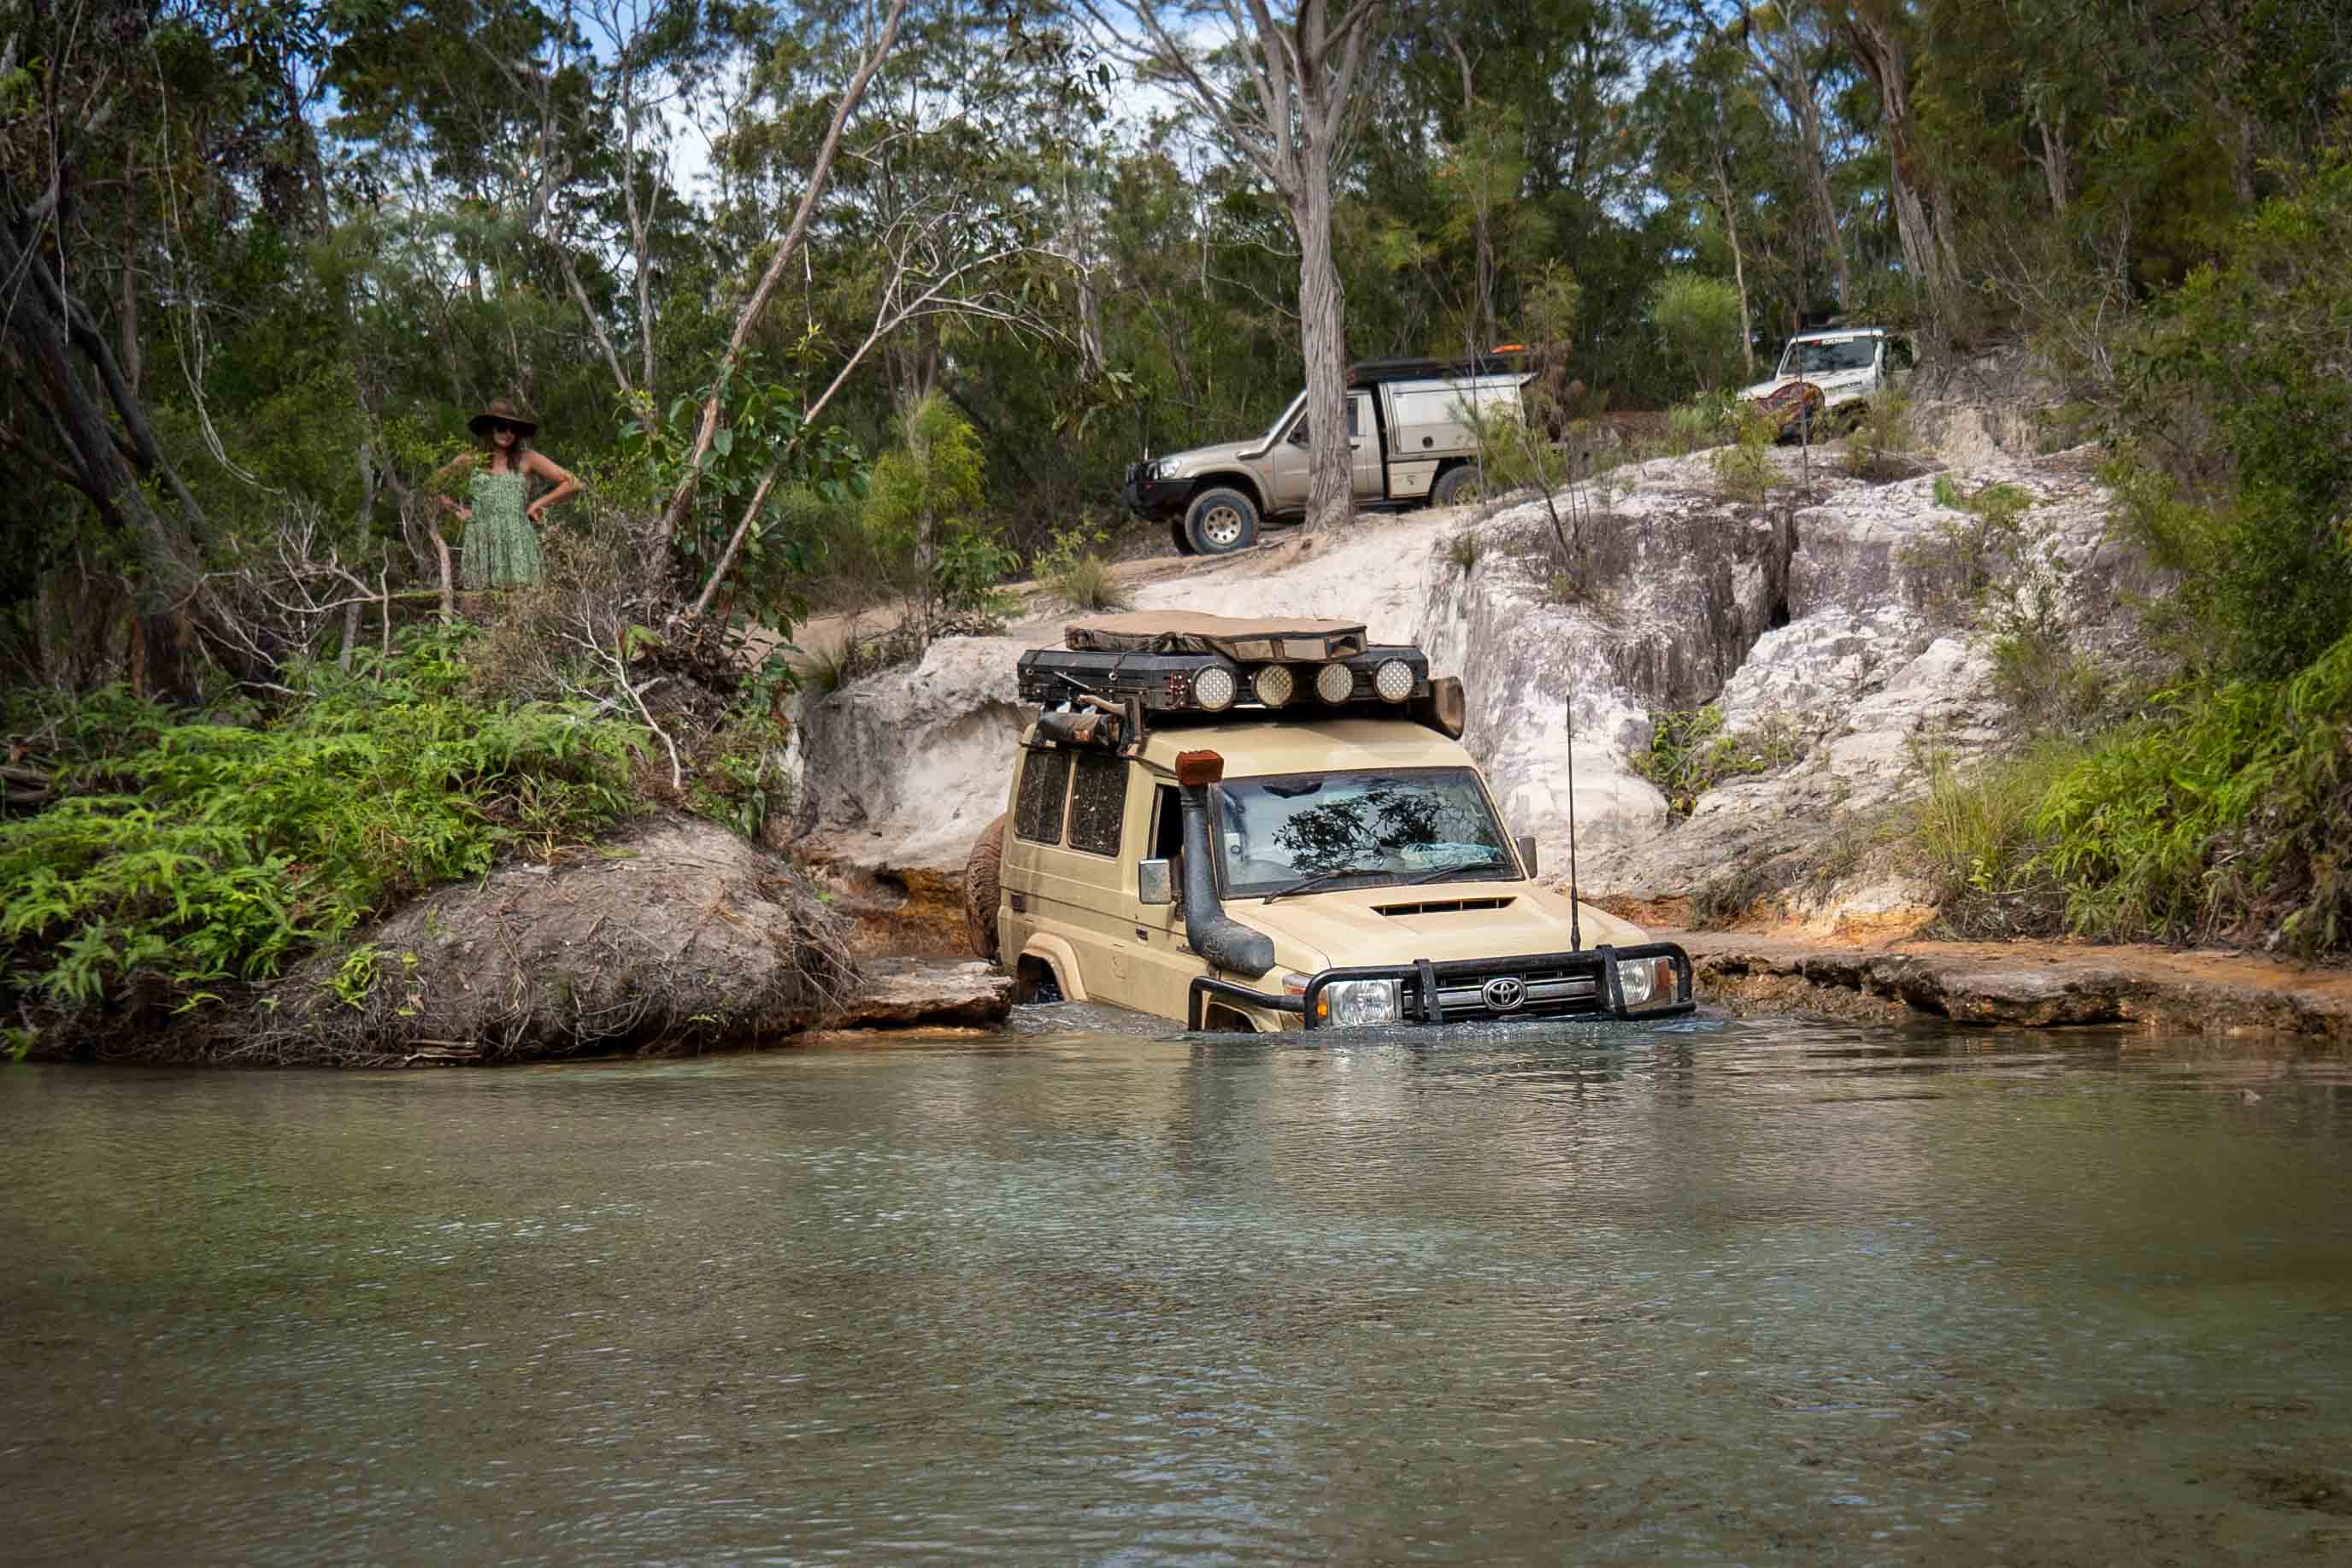
After just a few minutes on the track we arrive at Palm Creek, the first major obstacle. With a near-vertical entry and exit, Palm Creek is intimidating enough to make many would-be adventurers turn around before they’ve even begun. As Josh and I scout the line and spot each other down into the creek, we meet India and Luke – a young couple driving a well-worn 1995 HZJ75 LandCruiser. Happy for the company, they join us to round out our ragtag team of adventurers.
Early lessons on the Old Tele
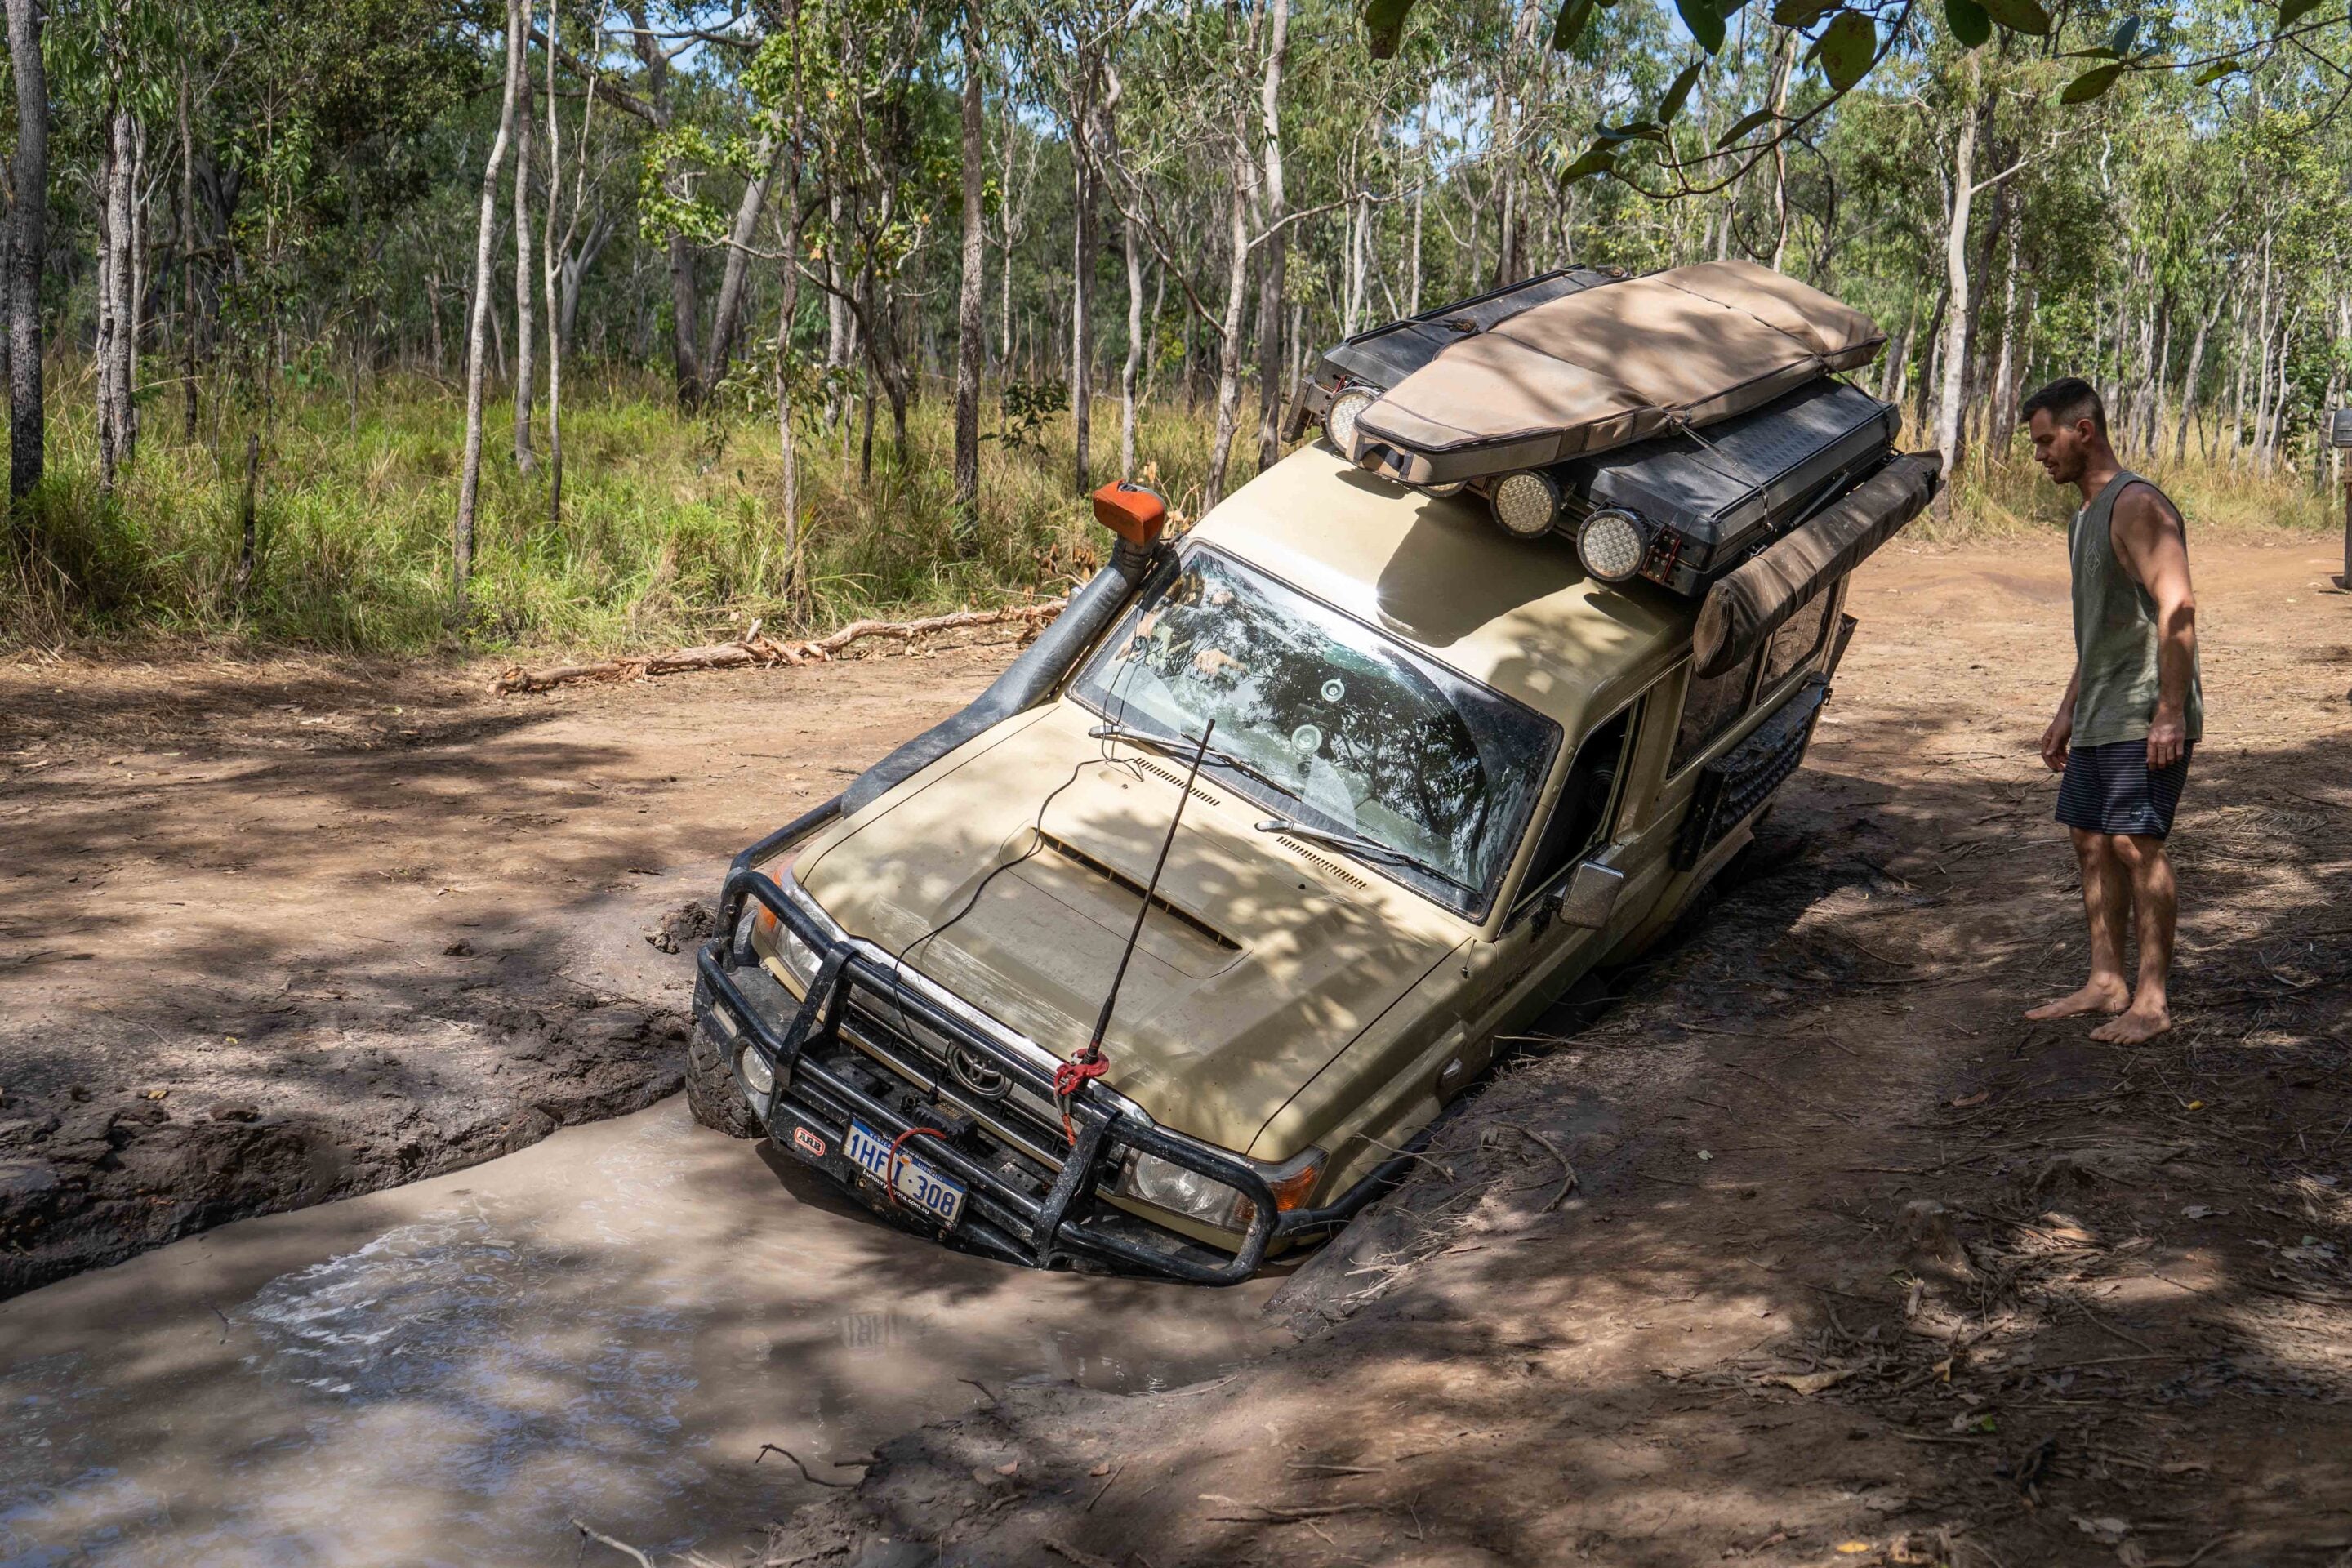
It quickly becomes clear that the severity of any obstacle can be judged by the number of vehicle bumpers, mufflers, licence plates and pieces of plastic trim hanging from nearby trees.
It’s almost a rite of passage to leave anything that breaks off behind in a nearby tree, and on the most rutted climbs the trees seem to carry more plastic than leaves. Only an hour into the track Josh drops into a dark, murky mud hole that is so severely off-camber the big Cruiser nearly tips over.
Not wanting to push our luck, the rest of the convoy skirts the hole on the narrowest of bypass lines, happy to get through unscathed. While the heavy LandCruiser is prone to wheel lifts, it soon becomes clear that the Gladiator’s longer wheelbase – and far less weight on the roof – works to my advantage. The Jeep feels far more planted, easily articulating through the complex terrain.

Different 4×4 setups, different driving styles
All the vehicles in our convoy are set up differently, and each driver has their own unique driving style.
Watching and learning from each vehicle helps improve my own skills – sometimes showing what to do and sometimes what not to do. While the dramatic vertical entries of many river crossings and obstacles like Gunshot make for great photos, they don’t require a great deal of driving skill. With a good spotter it’s simply a matter of slow and steady, and almost any vehicle is capable of sliding to the bottom in a spray of mud. Getting up and out the other side, however, is a different story.
All the major river crossings have steep, rutted exits made wet and slippery by the convoy of vehicles before us. Lumps and holes in the deep tyre ruts test a vehicle’s articulation, and any vehicle without diff locks quickly becomes stuck with a wheel on each axle spinning helplessly in the air.
Brad in the GU Patrol is happiest using a very healthy dose of right foot, resulting in plenty of wheelspin and action. This makes for great spectating, and we all stand well back, never quite sure what will happen next. Driving the Old Tele is often a spectator sport, and we let out shrieks and cheers whatever the outcome.
Luke in the old Cruiser is always keen for one more attempt, though his leaf springs and open diffs let him down on many occasions. The Cruiser usually only needs the smallest of winch pulls to get moving again, and we’re all impressed time and again by how well it keeps up with our newer and vastly more expensive vehicles.
Josh in the big Cruiser is a master at staying cool, and I’m always impressed watching him crawl through huge wheel lifts without a care in the world. He knows his vehicle and its limits extremely well and isn’t afraid to walk the line between success and a flop. On a few occasions we dash over to jump on the front bumper or side rails to make absolutely certain it won’t go over, and thankfully it never does.
For my part, I’m repeatedly impressed by how the big Gladiator performs on the technical climbs. With the Jeep in low-range first and both diff locks engaged, it walks to the top of the biggest obstacles on the Old Tele without lifting a wheel or even a tyre slipping. It does this so often – and makes everything look so easy – that Brad can’t help but nickname it ‘Gracie’, because it’s just so graceful.
Unexpected natural beauty along the track
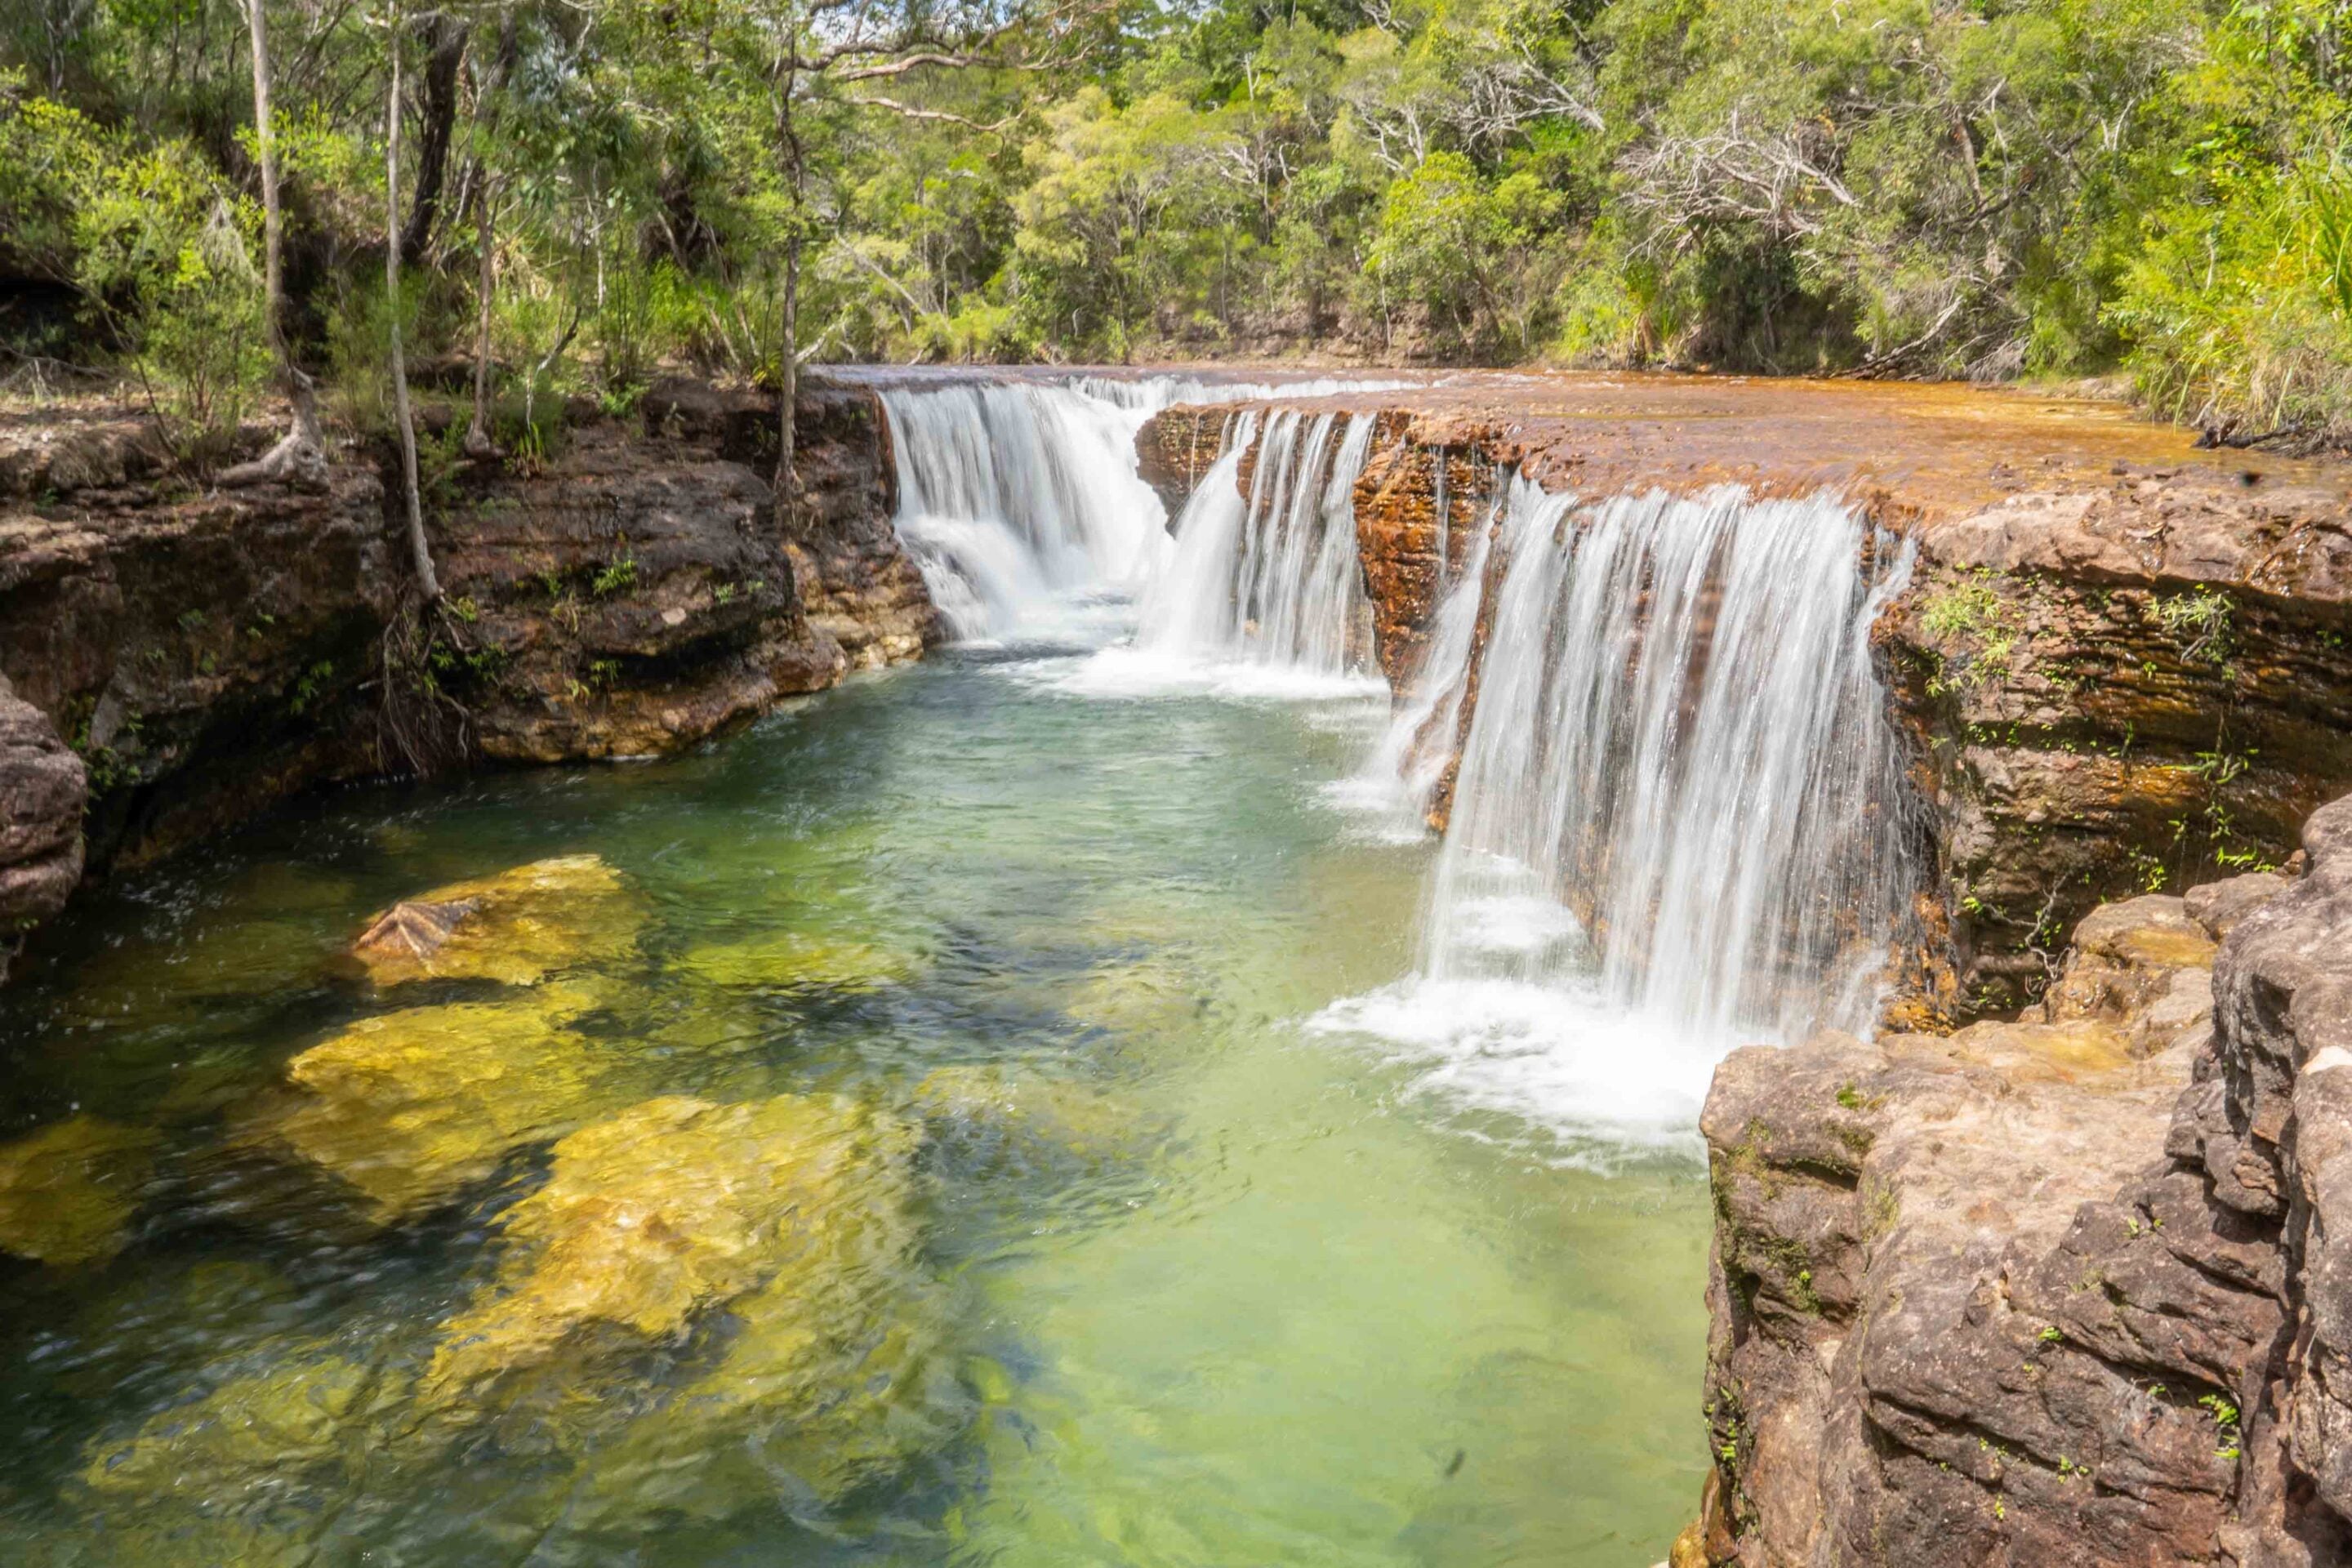
While everyone flocks to the Old Tele for the four-wheel drive adventure, the natural wonders on and around the track are nothing short of breathtaking. The rivers flow crystal clear and, in the sticky heat and humidity, we jump in at every opportunity.
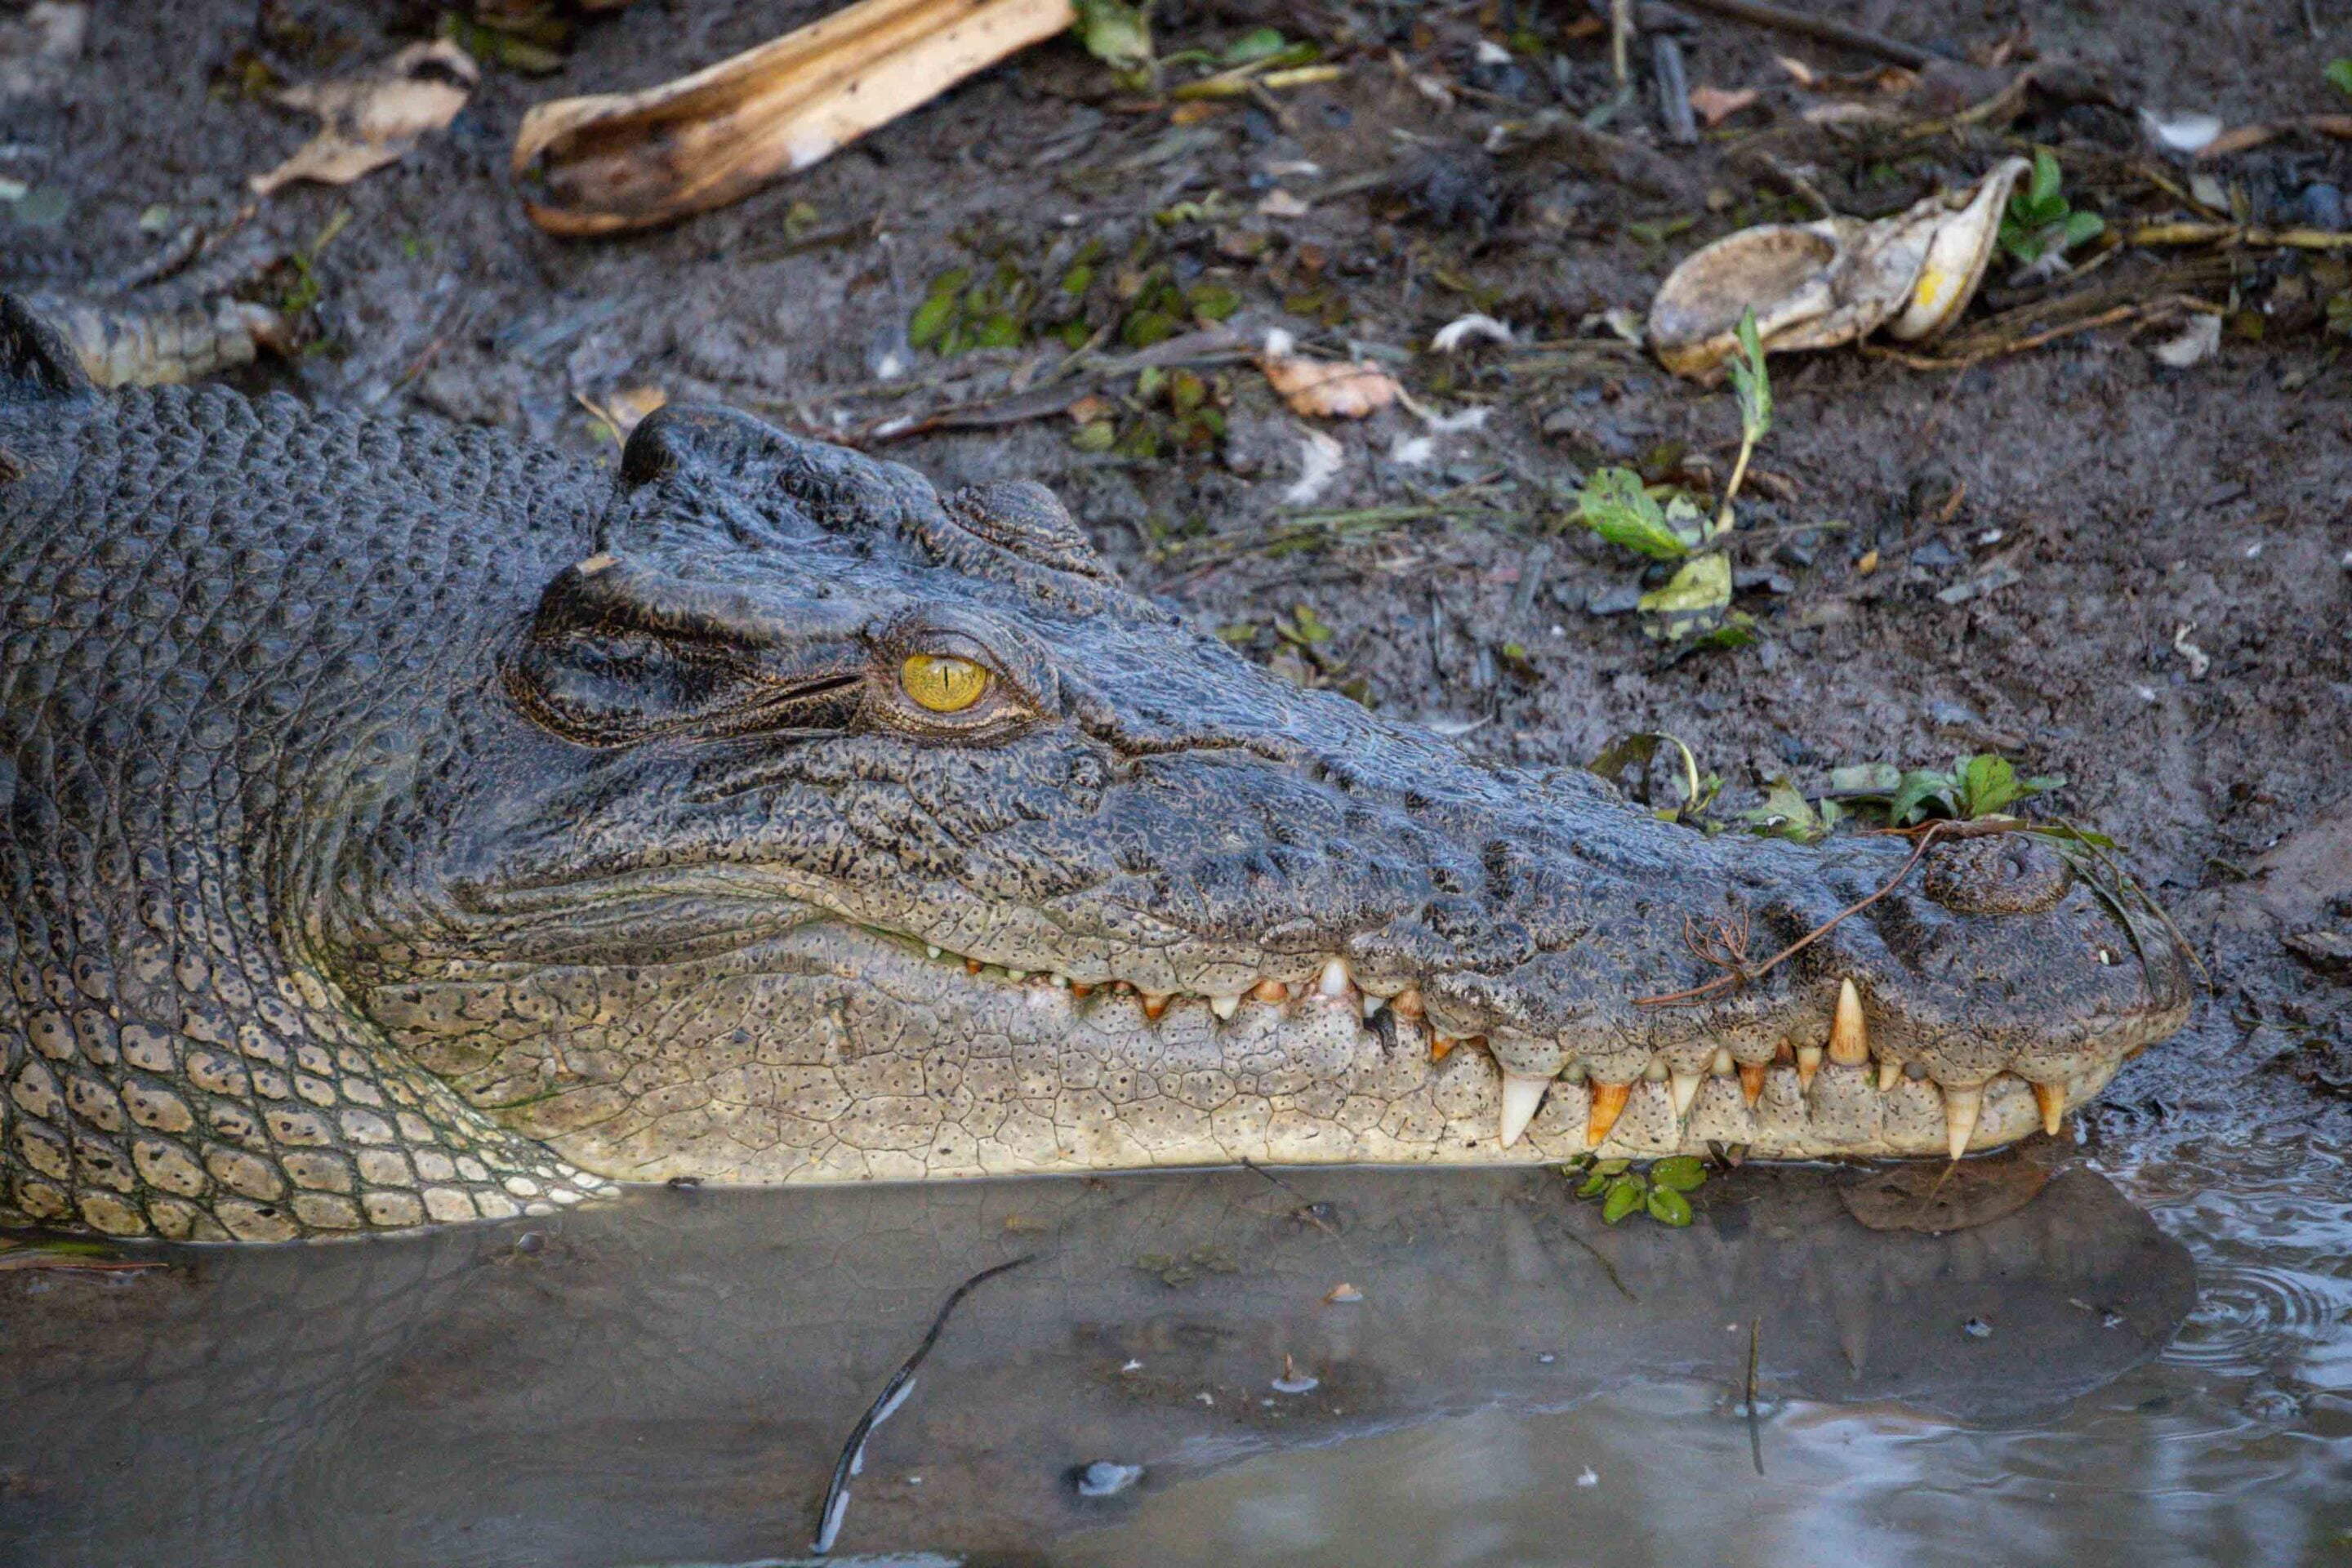
We’re deep in the northern tropics of Australia, which normally means swimming in any body of water is strictly off limits thanks to the huge population of saltwater crocodiles. The rivers on the Old Tele are a bit of an oddity, however, and for whatever reason no large crocs have been spotted here for years. Nobody else appears to be having problems, so we take that as good enough for us and jump right in.
Compared to the dusty scrubland around the track, Fruit Bat Falls is paradise. Crystal-clear Eliot Creek cascades over a large rock shelf to form a stunning swimming pool at the perfect temperature for a dip. Exploring around the falls I’m excited to discover a carnivorous pitcher plant. The sandy soil here is extremely poor in minerals, so these plants have adapted a clever method of getting what they need elsewhere – by eating flies and other insects.
Similar to a Venus flytrap, insects are lured into the pitcher by sweet nectar and can’t escape the slippery pit before being digested by enzymes within. While this isn’t the best outcome for the flies, the number of plants scattered around the area shows the strategy works very well.
Another 20 minutes north we spend hours swimming at the equally stunning Eliot and Twin Falls. Scattered across a few hundred metres are swimming holes, waterfalls, canyons and rock formations. There’s enough current to be swept gently through the features, while the surrounding rocks provide great entertainment in the form of cliff jumping. After a couple of days on the track, I’m confident sitting under a waterfall counts as a shower.
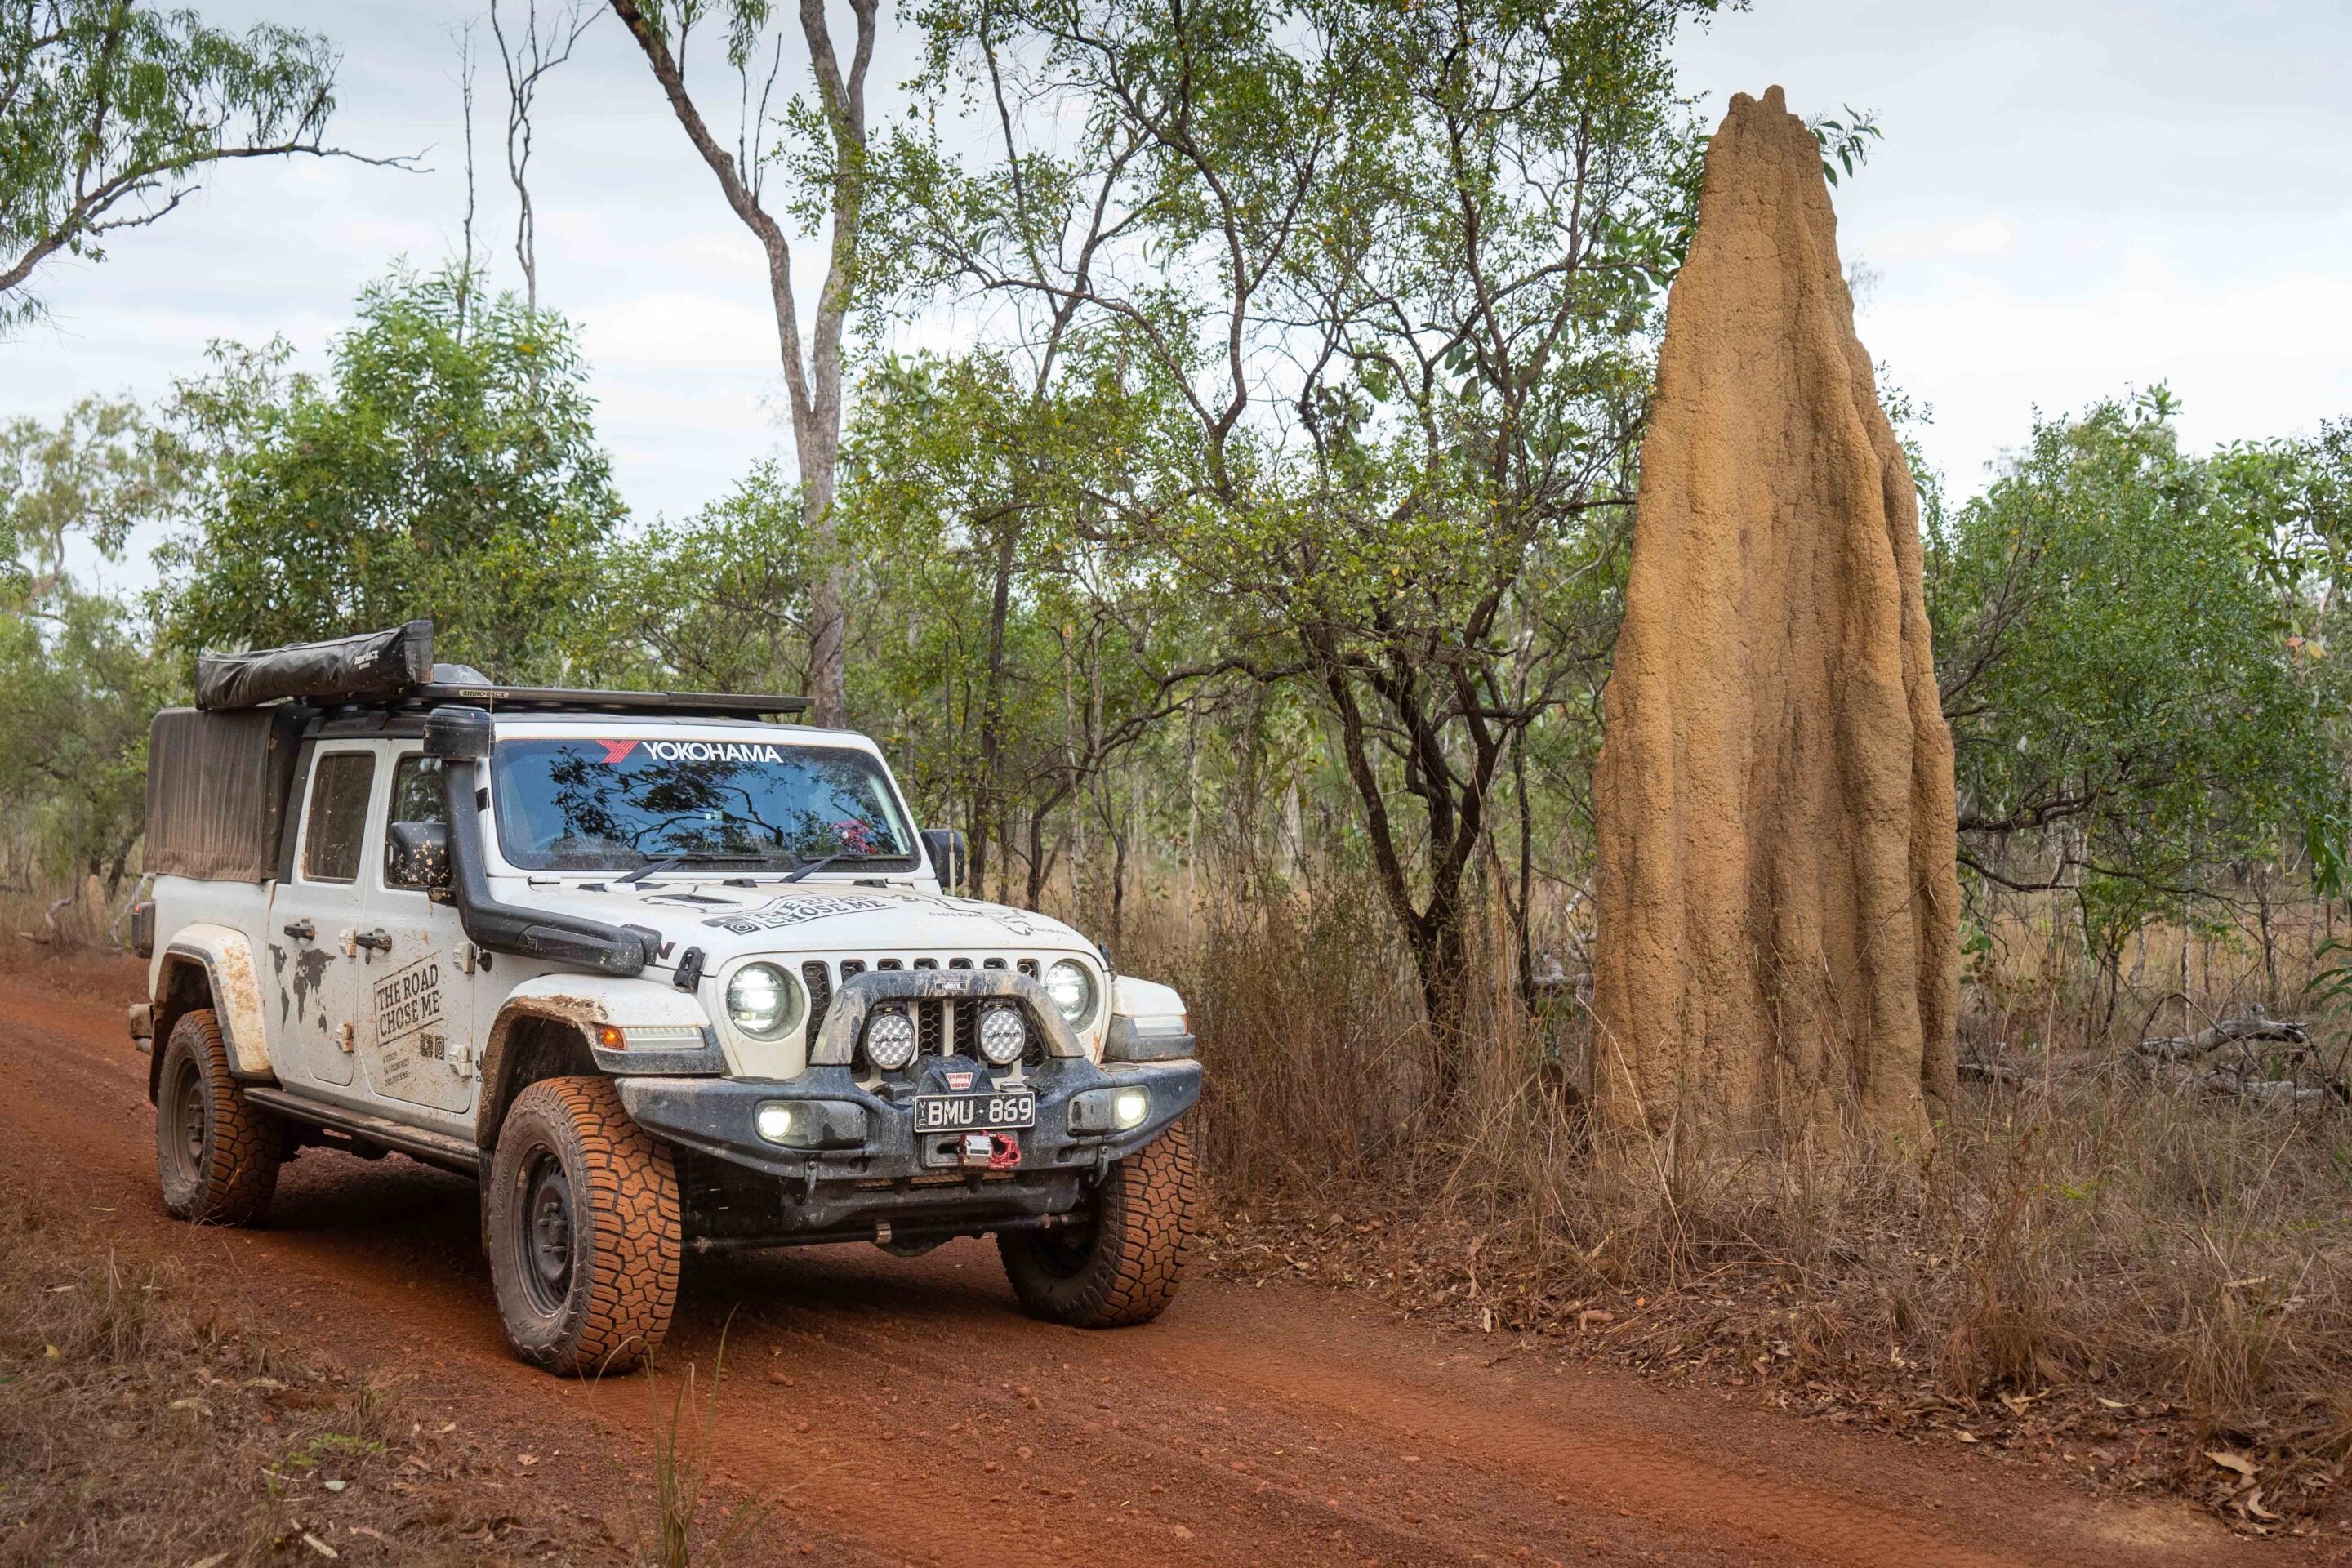
In places the dense jungle gives way to dry, dusty scrubland and as we move further north we encounter enormous termite mounds. These towering dirt columns are often taller than me and are built by billions of termites to keep their colony safely above the seasonal monsoon rains, when more than 2500mm can fall in just a few months. The architecture of these mounds has been studied for decades.
They’re carefully oriented to the points of the compass to maximise cooling in the breeze while minimising heat from the sun. Across northern Australia termites build nests in a variety of designs, each perfectly adapted to the local environment. Every mound is intricate and unique, with an interior resembling a honeycomb lattice that houses the ingenious termites.
Iconic Old Tele 4×4 obstacles
The Old Tele contains some of Australia’s most infamous 4×4 obstacles, many with memorable names like Mistake Creek, Gunshot and Cockatoo Creek.
Each one is different, and I always get a shot of adrenaline as I park the Jeep and jump out to scout the line with our crew. Each year the track changes slightly thanks to the massive water flow during the wet season, so you never quite know what you’re going to get.
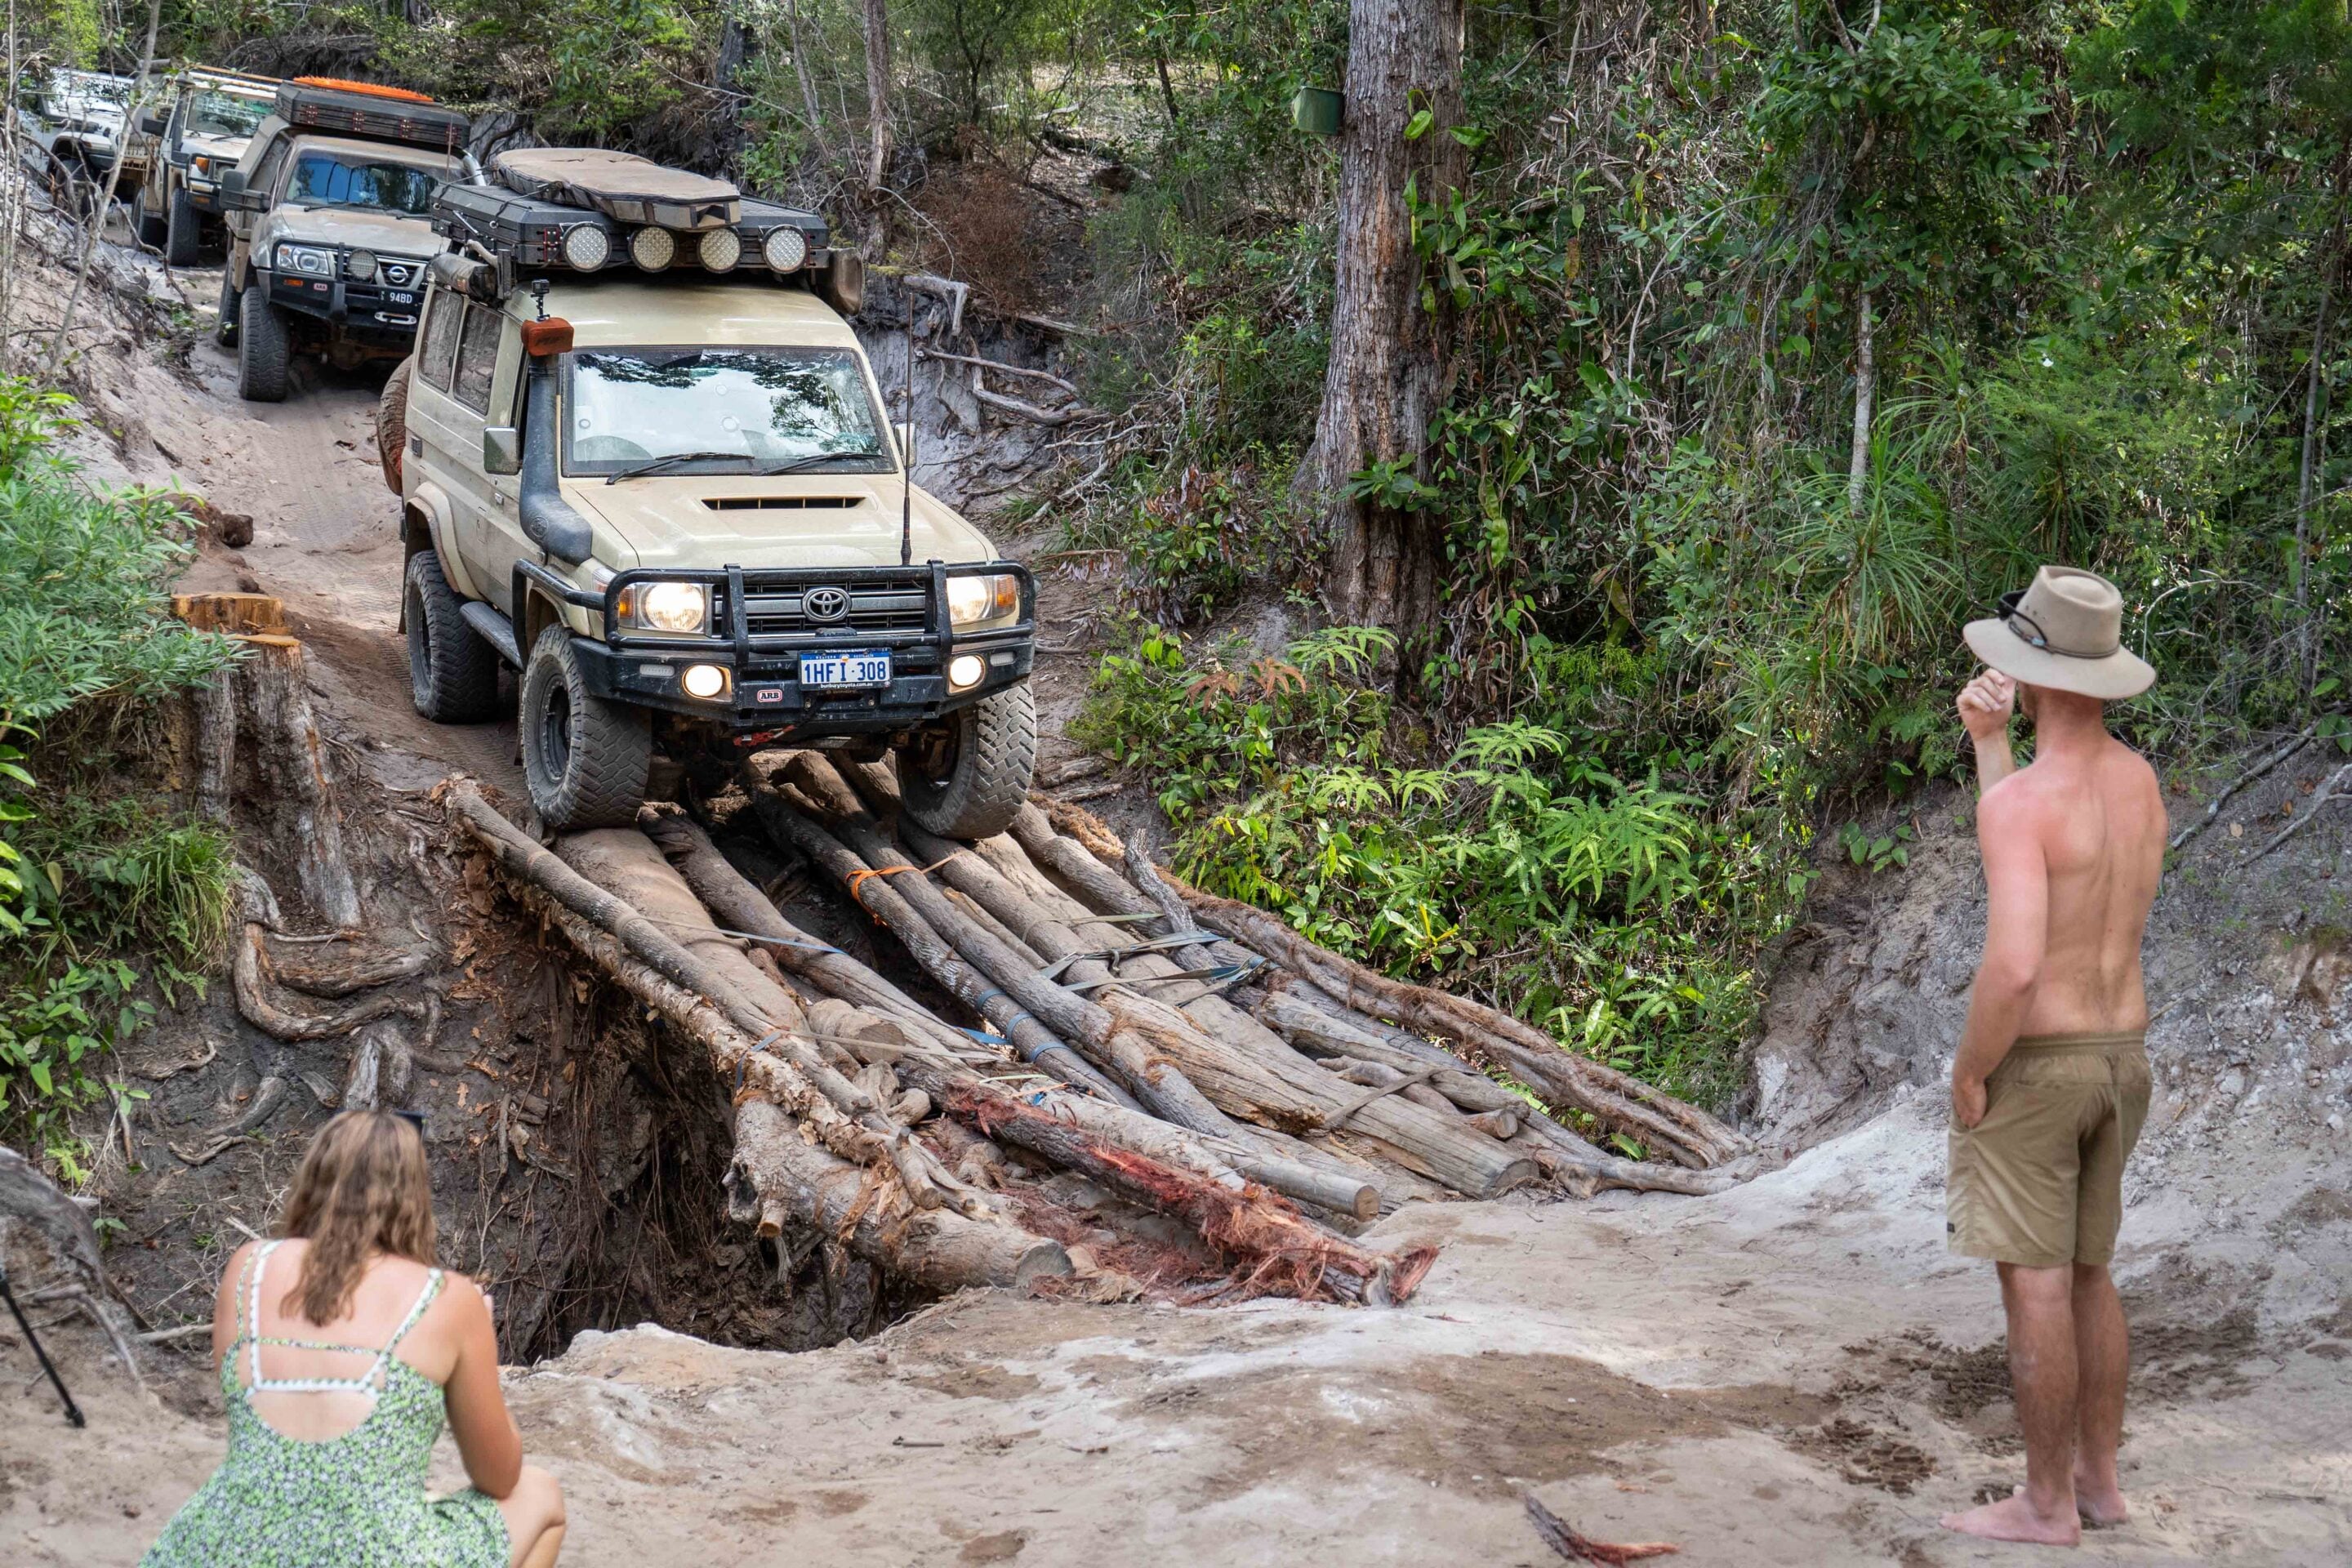
The Sydney Harbour Bridge is undoubtedly Australia’s most famous bridge, though the abomination at Cypress Creek is probably photographed just as often. The haphazard log bridge has to be seen to be believed, and even walking across it feels like a bad idea. It’s rebuilt each year from whatever logs and ratchet straps can be found lying around, and Josh is quick to point out that none of the logs are long enough to span the entire gap – a very unnerving thought. The Gladiator is more than a tonne lighter than Josh’s Cruiser, so I’m more than happy to let him go first.
We fall into a steady routine as we scout each obstacle and work together to get through. Afterwards we jump in for a swim and watch the next group tackle the challenge, quietly hoping for some excitement. Each obstacle presents its own challenges, and I find myself exhausted at the end of each day from concentrating on rock ledges, holes and off-camber sections of track. With such a well-equipped team we encounter no major problems, only rarely using Maxtrax or a winch line to prevent panel damage on the towering mud walls.
Our sense of achievement after clearing each obstacle is real, and we let off steam in the evenings playing on rope swings and reliving the day around the campfire. It’s easy to see why people return year after year, stretching the track from four days into two weeks of spectating, swimming and lapping the bigger obstacles.
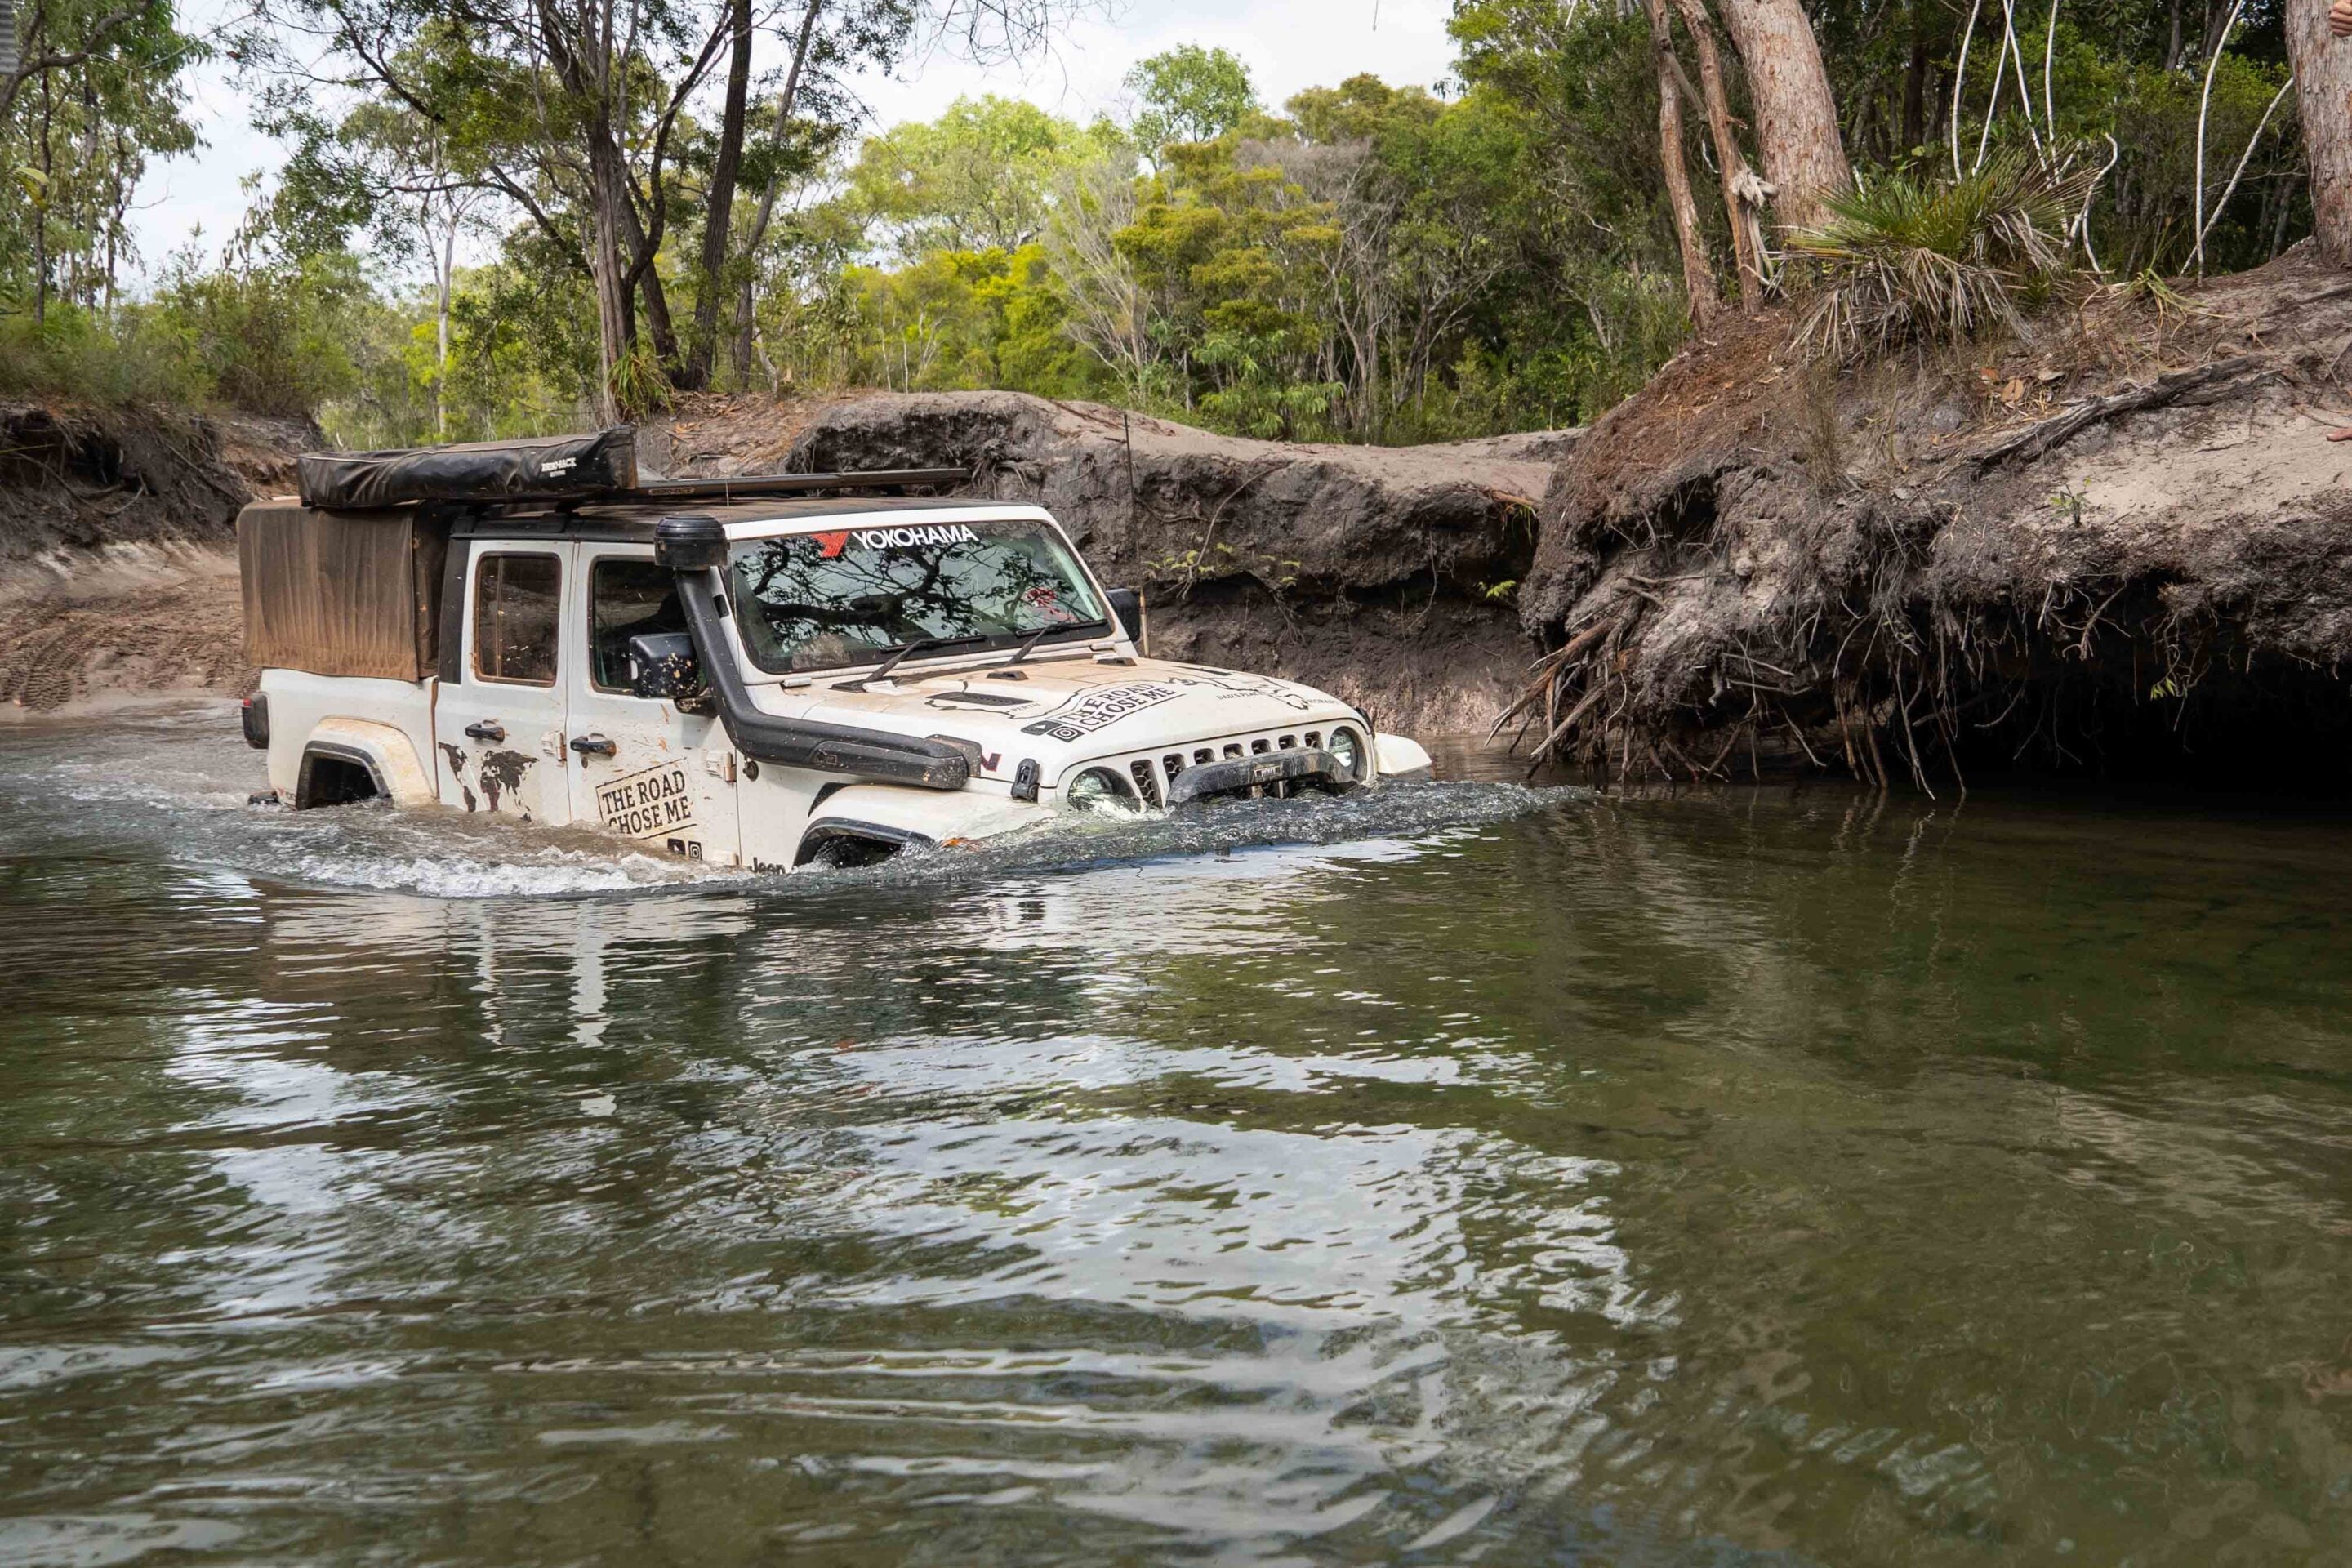
Nolan’s Creek final crossing carnage
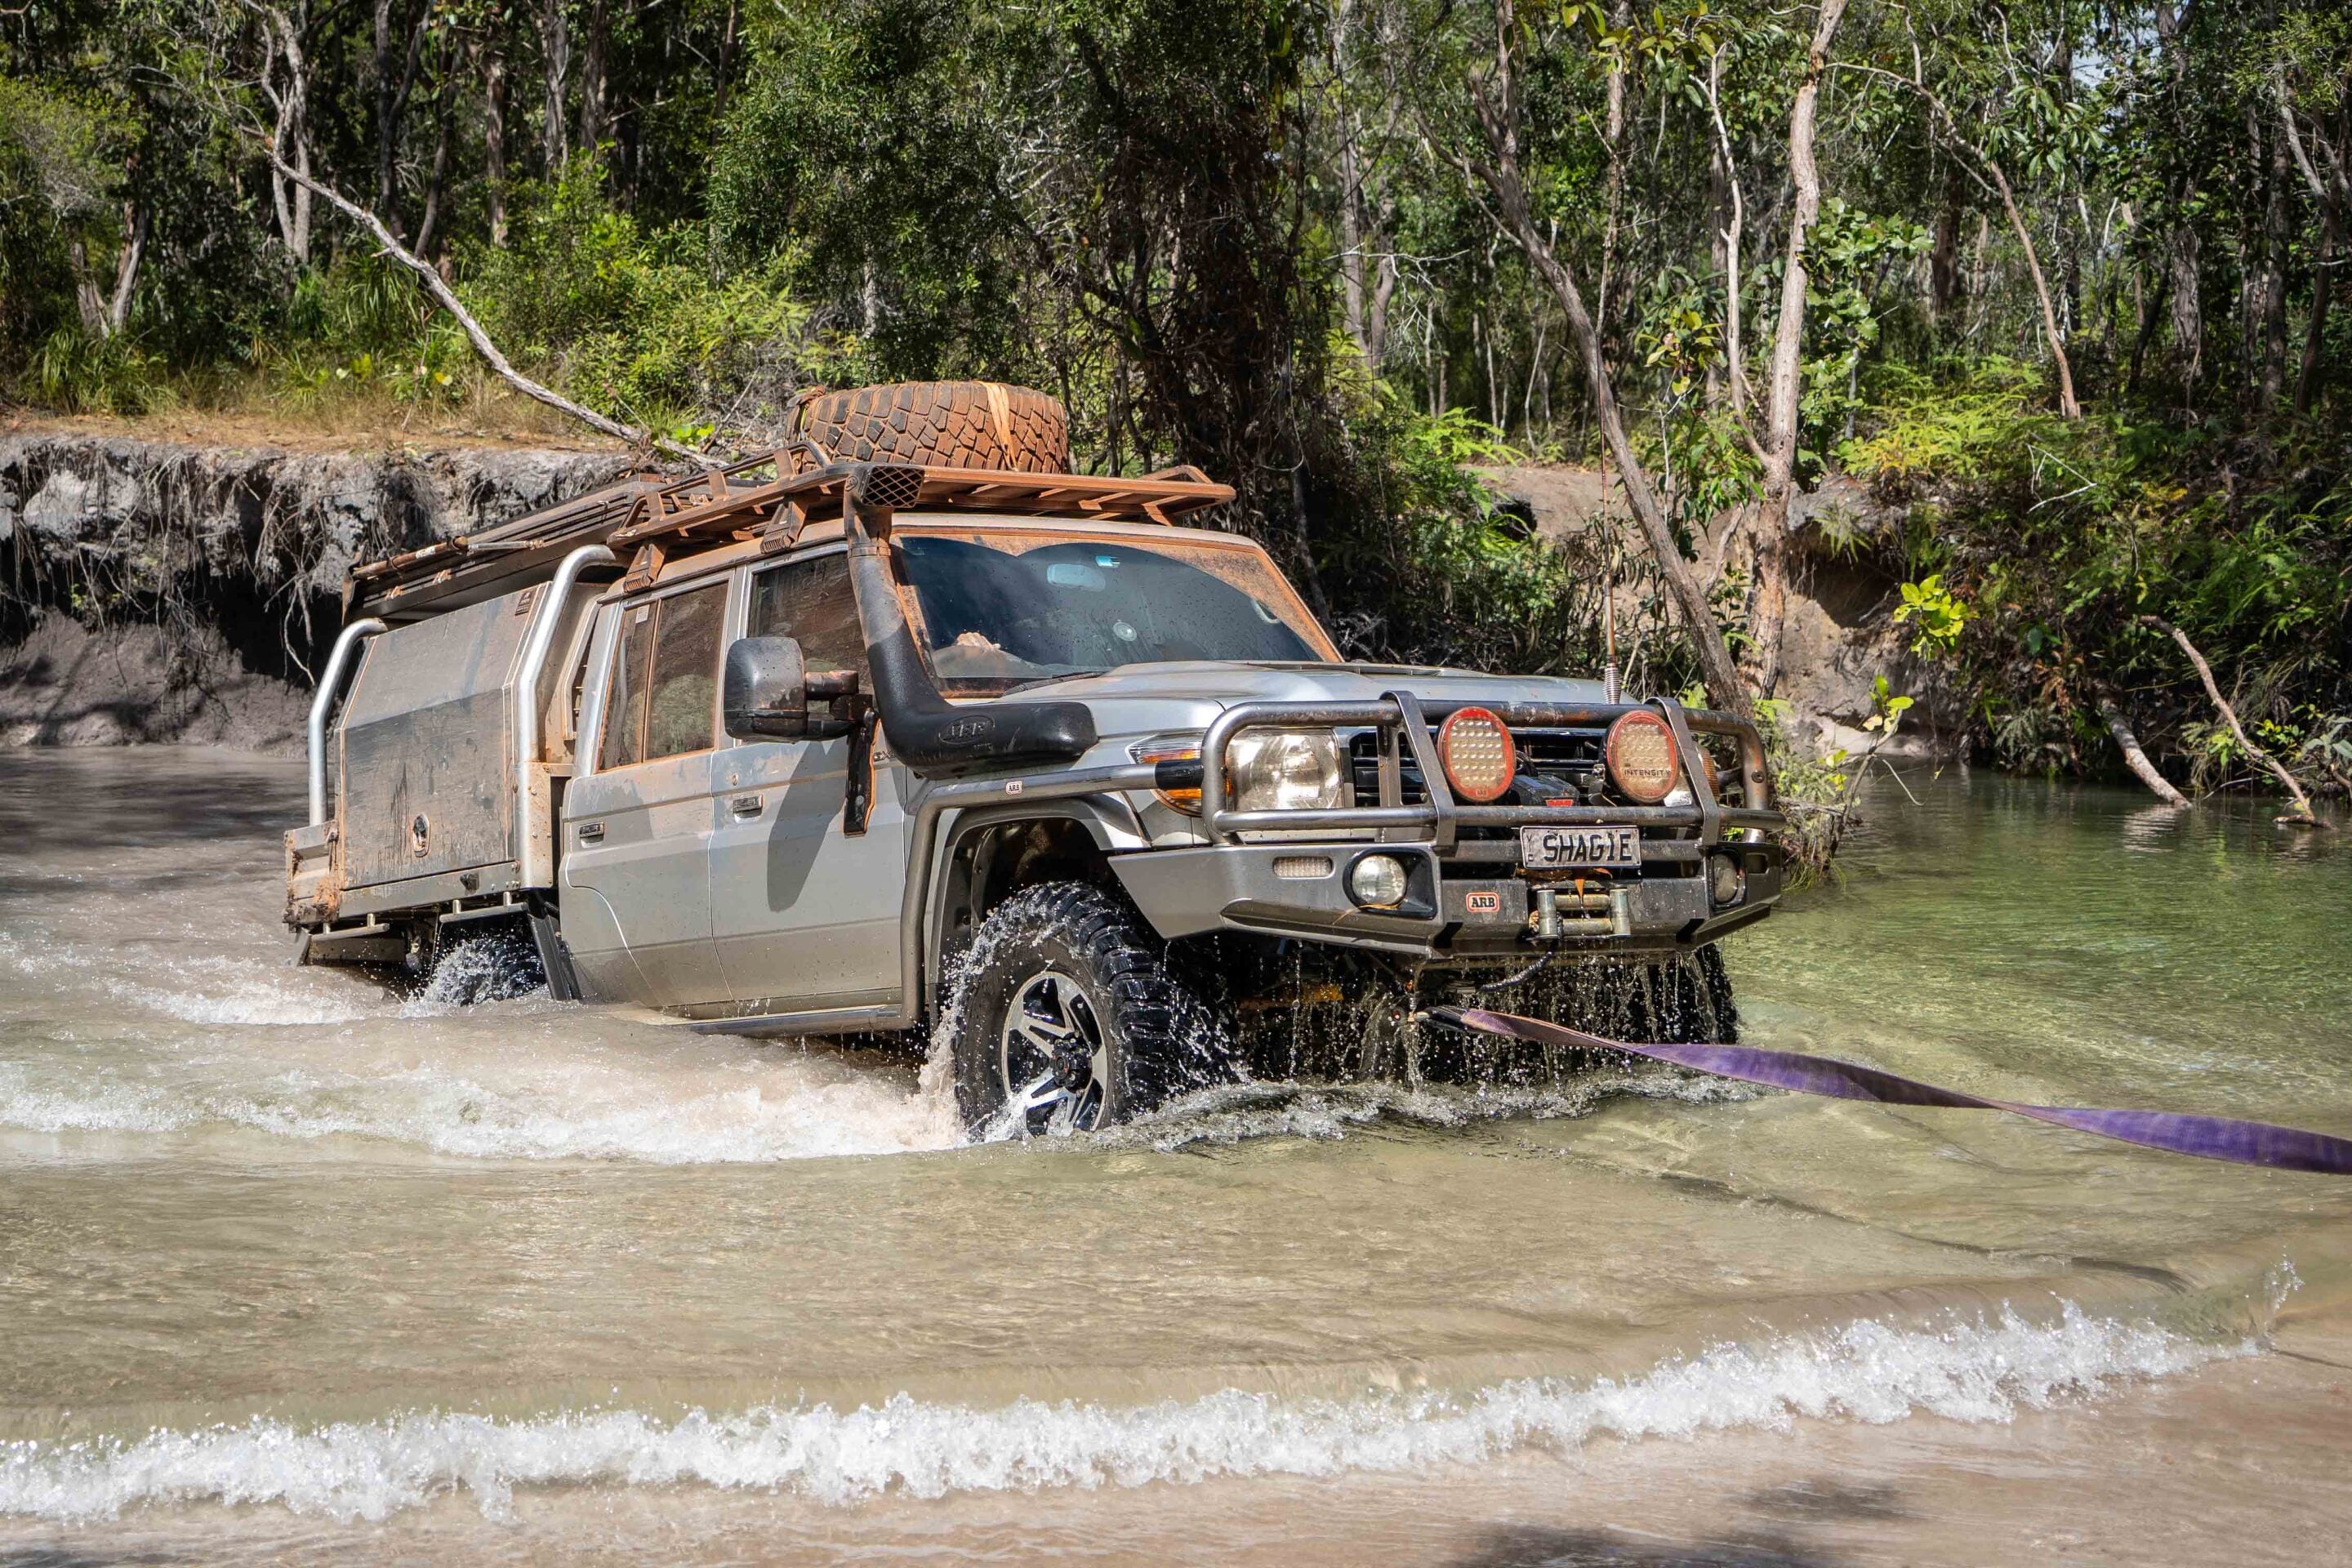
The final river crossing on the Tele is probably responsible for more drowned 4x4s than any other river in Australia.
Deceptively, neither the entry nor the exit of Nolan’s Creek looks particularly steep or difficult, and thankfully we’re warned it’s the sandy bottom that catches people out. Even a well-equipped 4×4 will see water lapping over the bonnet, which is deep enough to induce panic. With exhaustion setting in after days on the track and the end literally in sight, extra throttle can seem like the safest option.
Unfortunately for the uninitiated, the sandy bottom combined with the flowing water behaves like quicksand, and just a hint of wheelspin will quickly sink a heavy 4×4. Even experienced drivers are tempted to add more throttle, and the resulting feedback loop often ensures a lengthy stay in deep water.
Arriving at Nolan’s right on sunset, we decide it’s wise to make camp for the night. In the morning we’ve barely put the coffee on to boil before the viewing gallery begins forming on the far bank. With a reputation for providing plenty of carnage and drowned vehicles, locals and travellers drive off the PDR to Nolan’s Creek, setting up deck chairs and coolers of beer just to watch. On a busy day upwards of 50 vehicles will cross while dozens of people in the peanut gallery cheer and offer suggestions. By the time we’re ready to cross, the pressure is palpable.
The old Cruiser is the lowest and least capable vehicle in our convoy, and it needs a little TLC. After adding silicone to the broken snorkel we also throw a tarp over the front of the bonnet – extra insurance to keep river water out of the engine. With thoughts of quicksand in mind I lead our team across, concentrating on driving smoothly while maintaining momentum. With the Jeep set up as a quick recovery vehicle, I keep a close eye as each vehicle in our convoy fords the flowing river without incident.
I park high on the bank and walk back to join the peanut gallery, hoping to witness some carnage. With such a big crowd the temptation to put on a show proves too much, and in just 15 minutes I watch three separate vehicles become helplessly stuck in the deep water. Just as predicted, any amount of throttle only makes the problem worse, and without a vehicle ready to provide a quick pull one LandCruiser sits with water lapping over the bonnet for a solid 4 minutes while the owner waves frantically. When it finally reaches dry land, a cascade of water pours from each door – though thankfully the engine continues to idle, highlighting the value of a quality snorkel.
Why the Old Telegraph Track stands out
I’ve spent years overlanding around the world on my own, with the unspoken goal of getting as far from people as possible.
Seeing myself as some kind of lone-wolf Indiana Jones, I set out solo along the Pan-American Highway and later circumnavigated Africa. Without a support vehicle, border helpers or even any friends, I was a one-man expedition. I had to rely on my own wit and skill to tackle each new challenge, and I thoroughly enjoyed the intense feeling of self-reliance. Solo adventures are often very serious and, looking back, there’s almost never much laughing.
Never before have I driven a track as social as the Old Tele, and it was an absolute riot. Even when the going got tough or stressful, we worked together to think things through, make a plan and keep moving forward without any vehicle damage or terrifying moments. Of course there were plenty of pranks along the way, and having someone yell ‘STOP’ as you drive over a sketchy log bridge is a surefire adrenaline spike. Circling the wagons each night around the communal campfire was the perfect way to relive the day’s adventures, laugh and celebrate our triumphs. The memories are so strong I honestly can’t imagine what the Tele would be like solo.
There was a constant stream of vehicles and people all around us, and seeing familiar faces at each obstacle became both reassuring and entertaining. Each group had different levels of sunburn and alcohol consumption and, while I wouldn’t want to join all of them, everyone finished the track – and everyone was grinning like mad at the shared sense of achievement.
Waiting for the ferry to cross the mighty Jardine River later that afternoon, there was one common sentiment among all the various groups:
I cannot wait to come back!
Some of you might remember Murray Brooks’ super-neat, cherry-red extra-cab GU Patrol we featured a few years back. It’s one of the best and most well set-up old-school Patrols in recent memory.
With a booming business designing and fabricating trays and canopies at Trig Point, and a growing family, the old GU just wasn’t going to service Murray’s future needs.
“I was looking for a car with similar capability as the Patrol, yet more seats and space,” Murray told us. “I considered building a dual cab version of the Patrol, yet time was tight and tidy 4,8 patrols were getting harder to find. We considered a 79 dual cab, yet as a business display vehicle they are very common and can be a lot of work to set up as a comfortable tourer. I also looked at everything from ute converted 200 series to American trucks.”
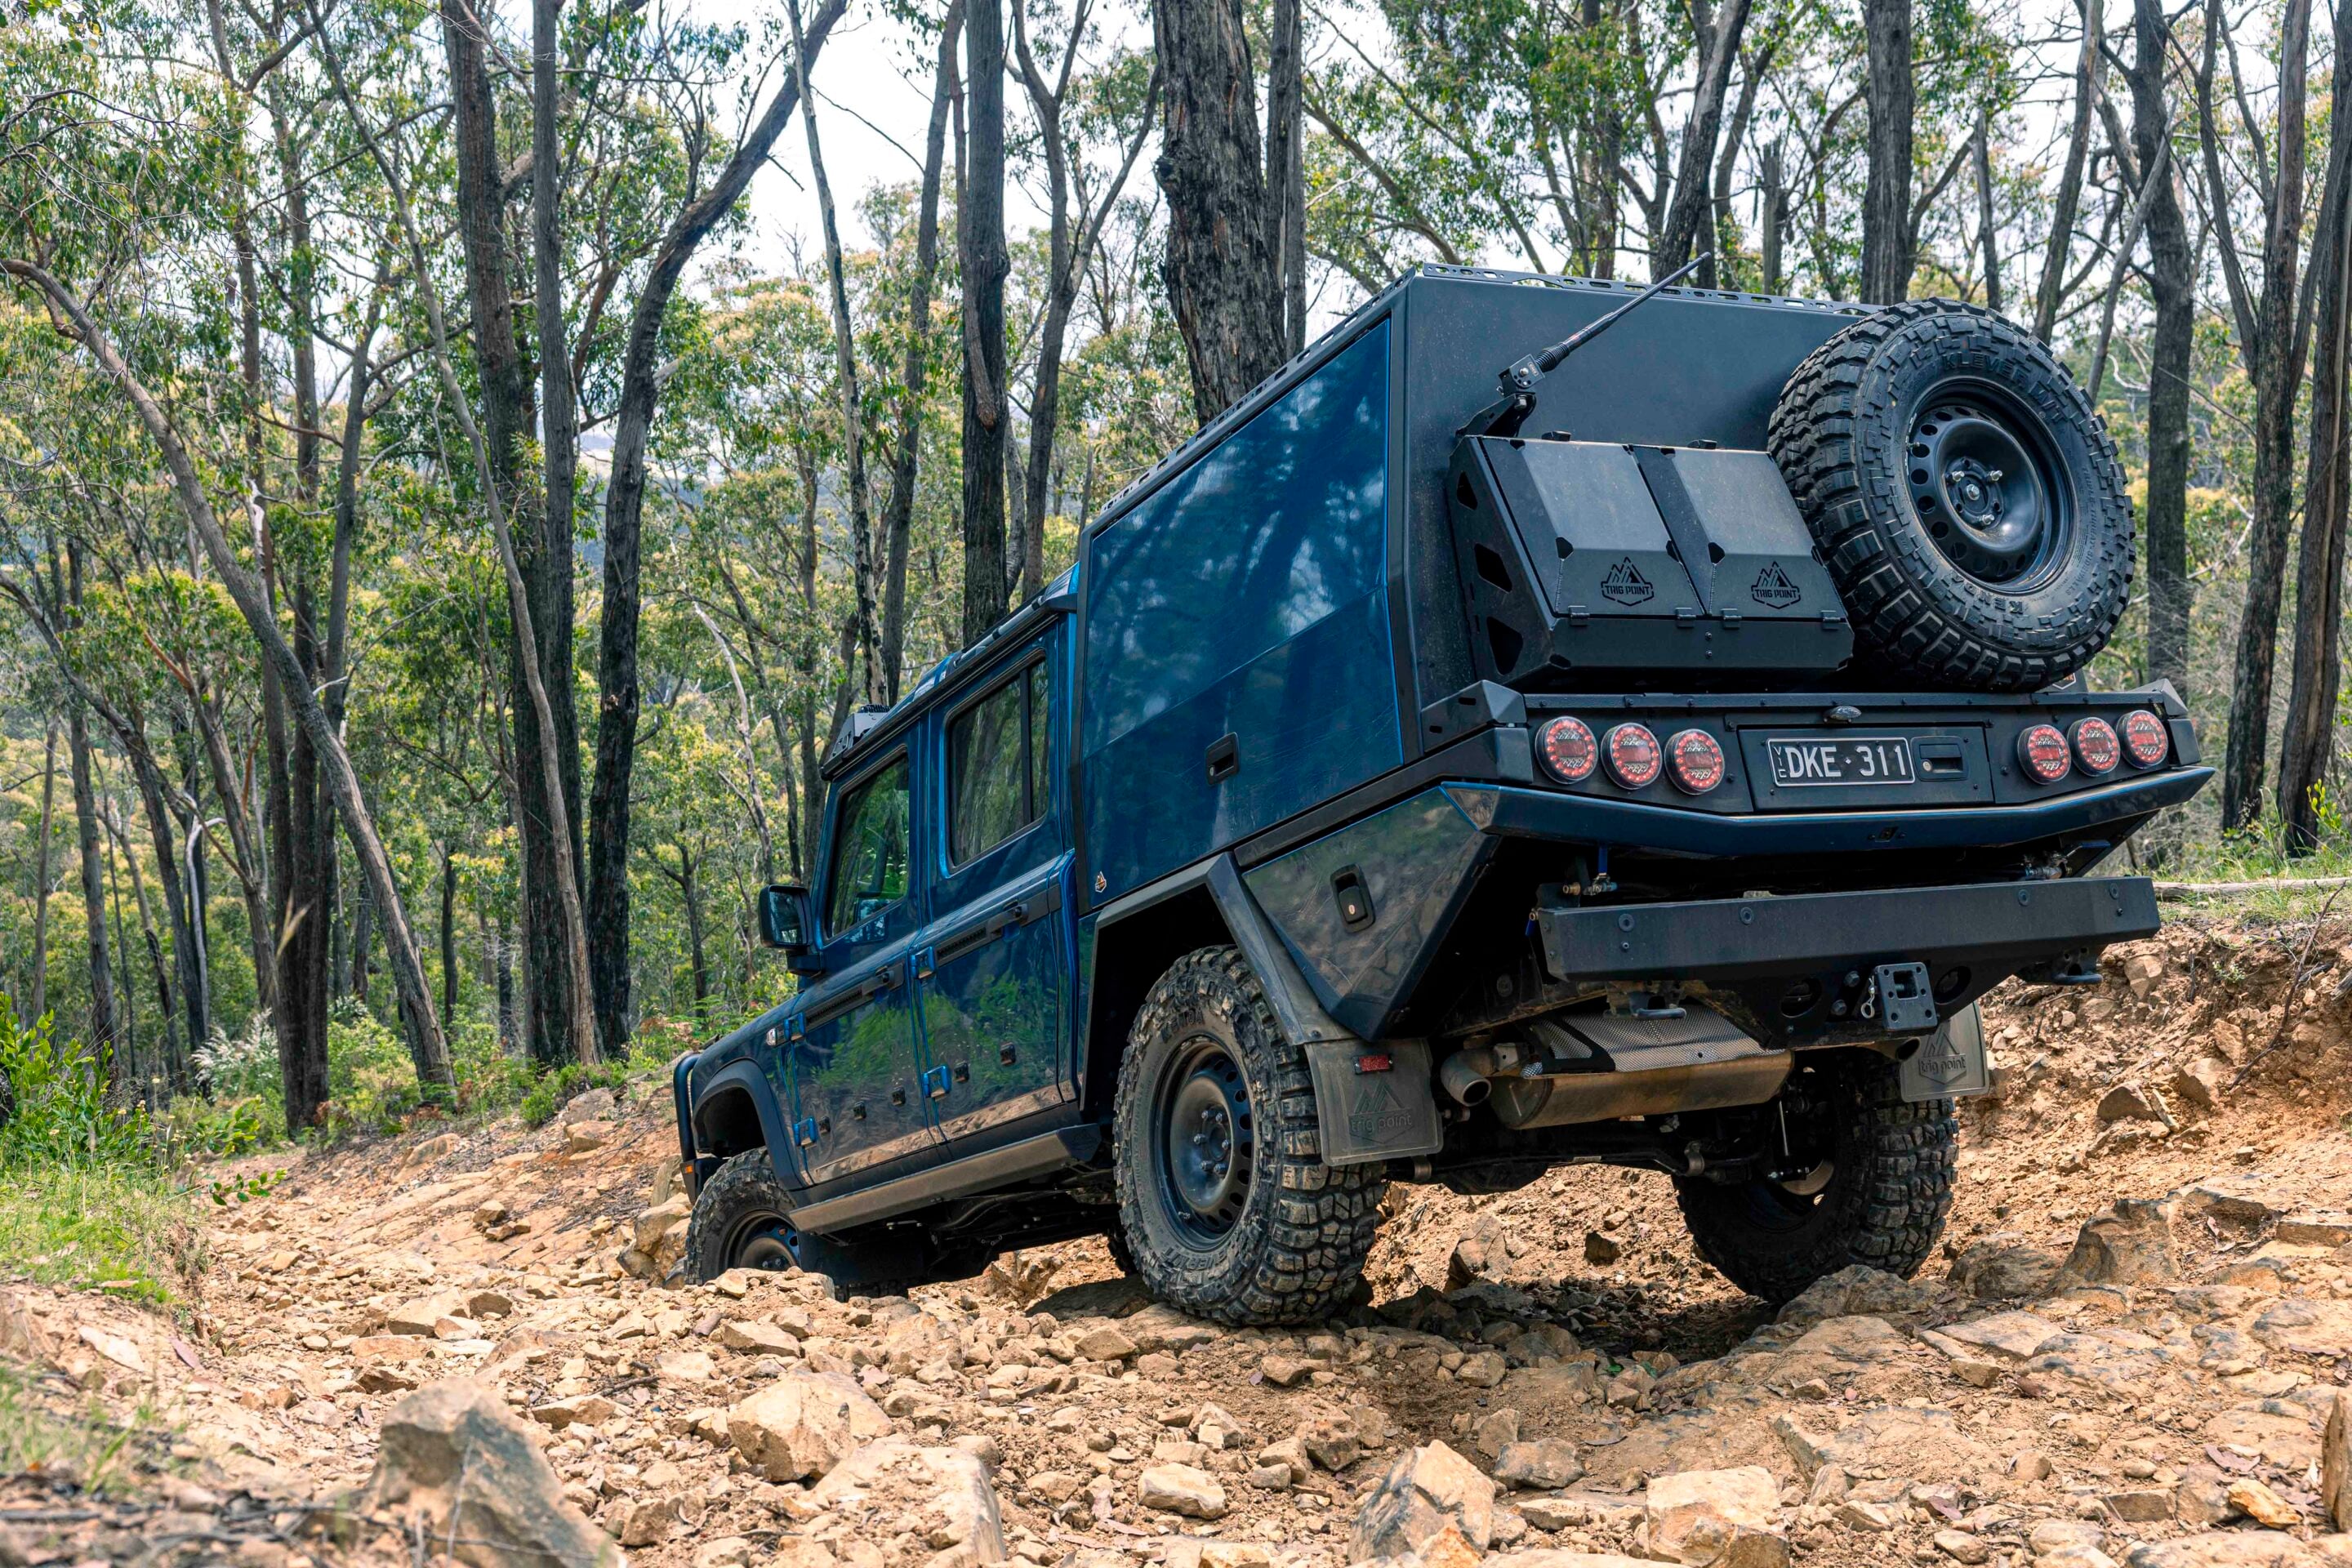
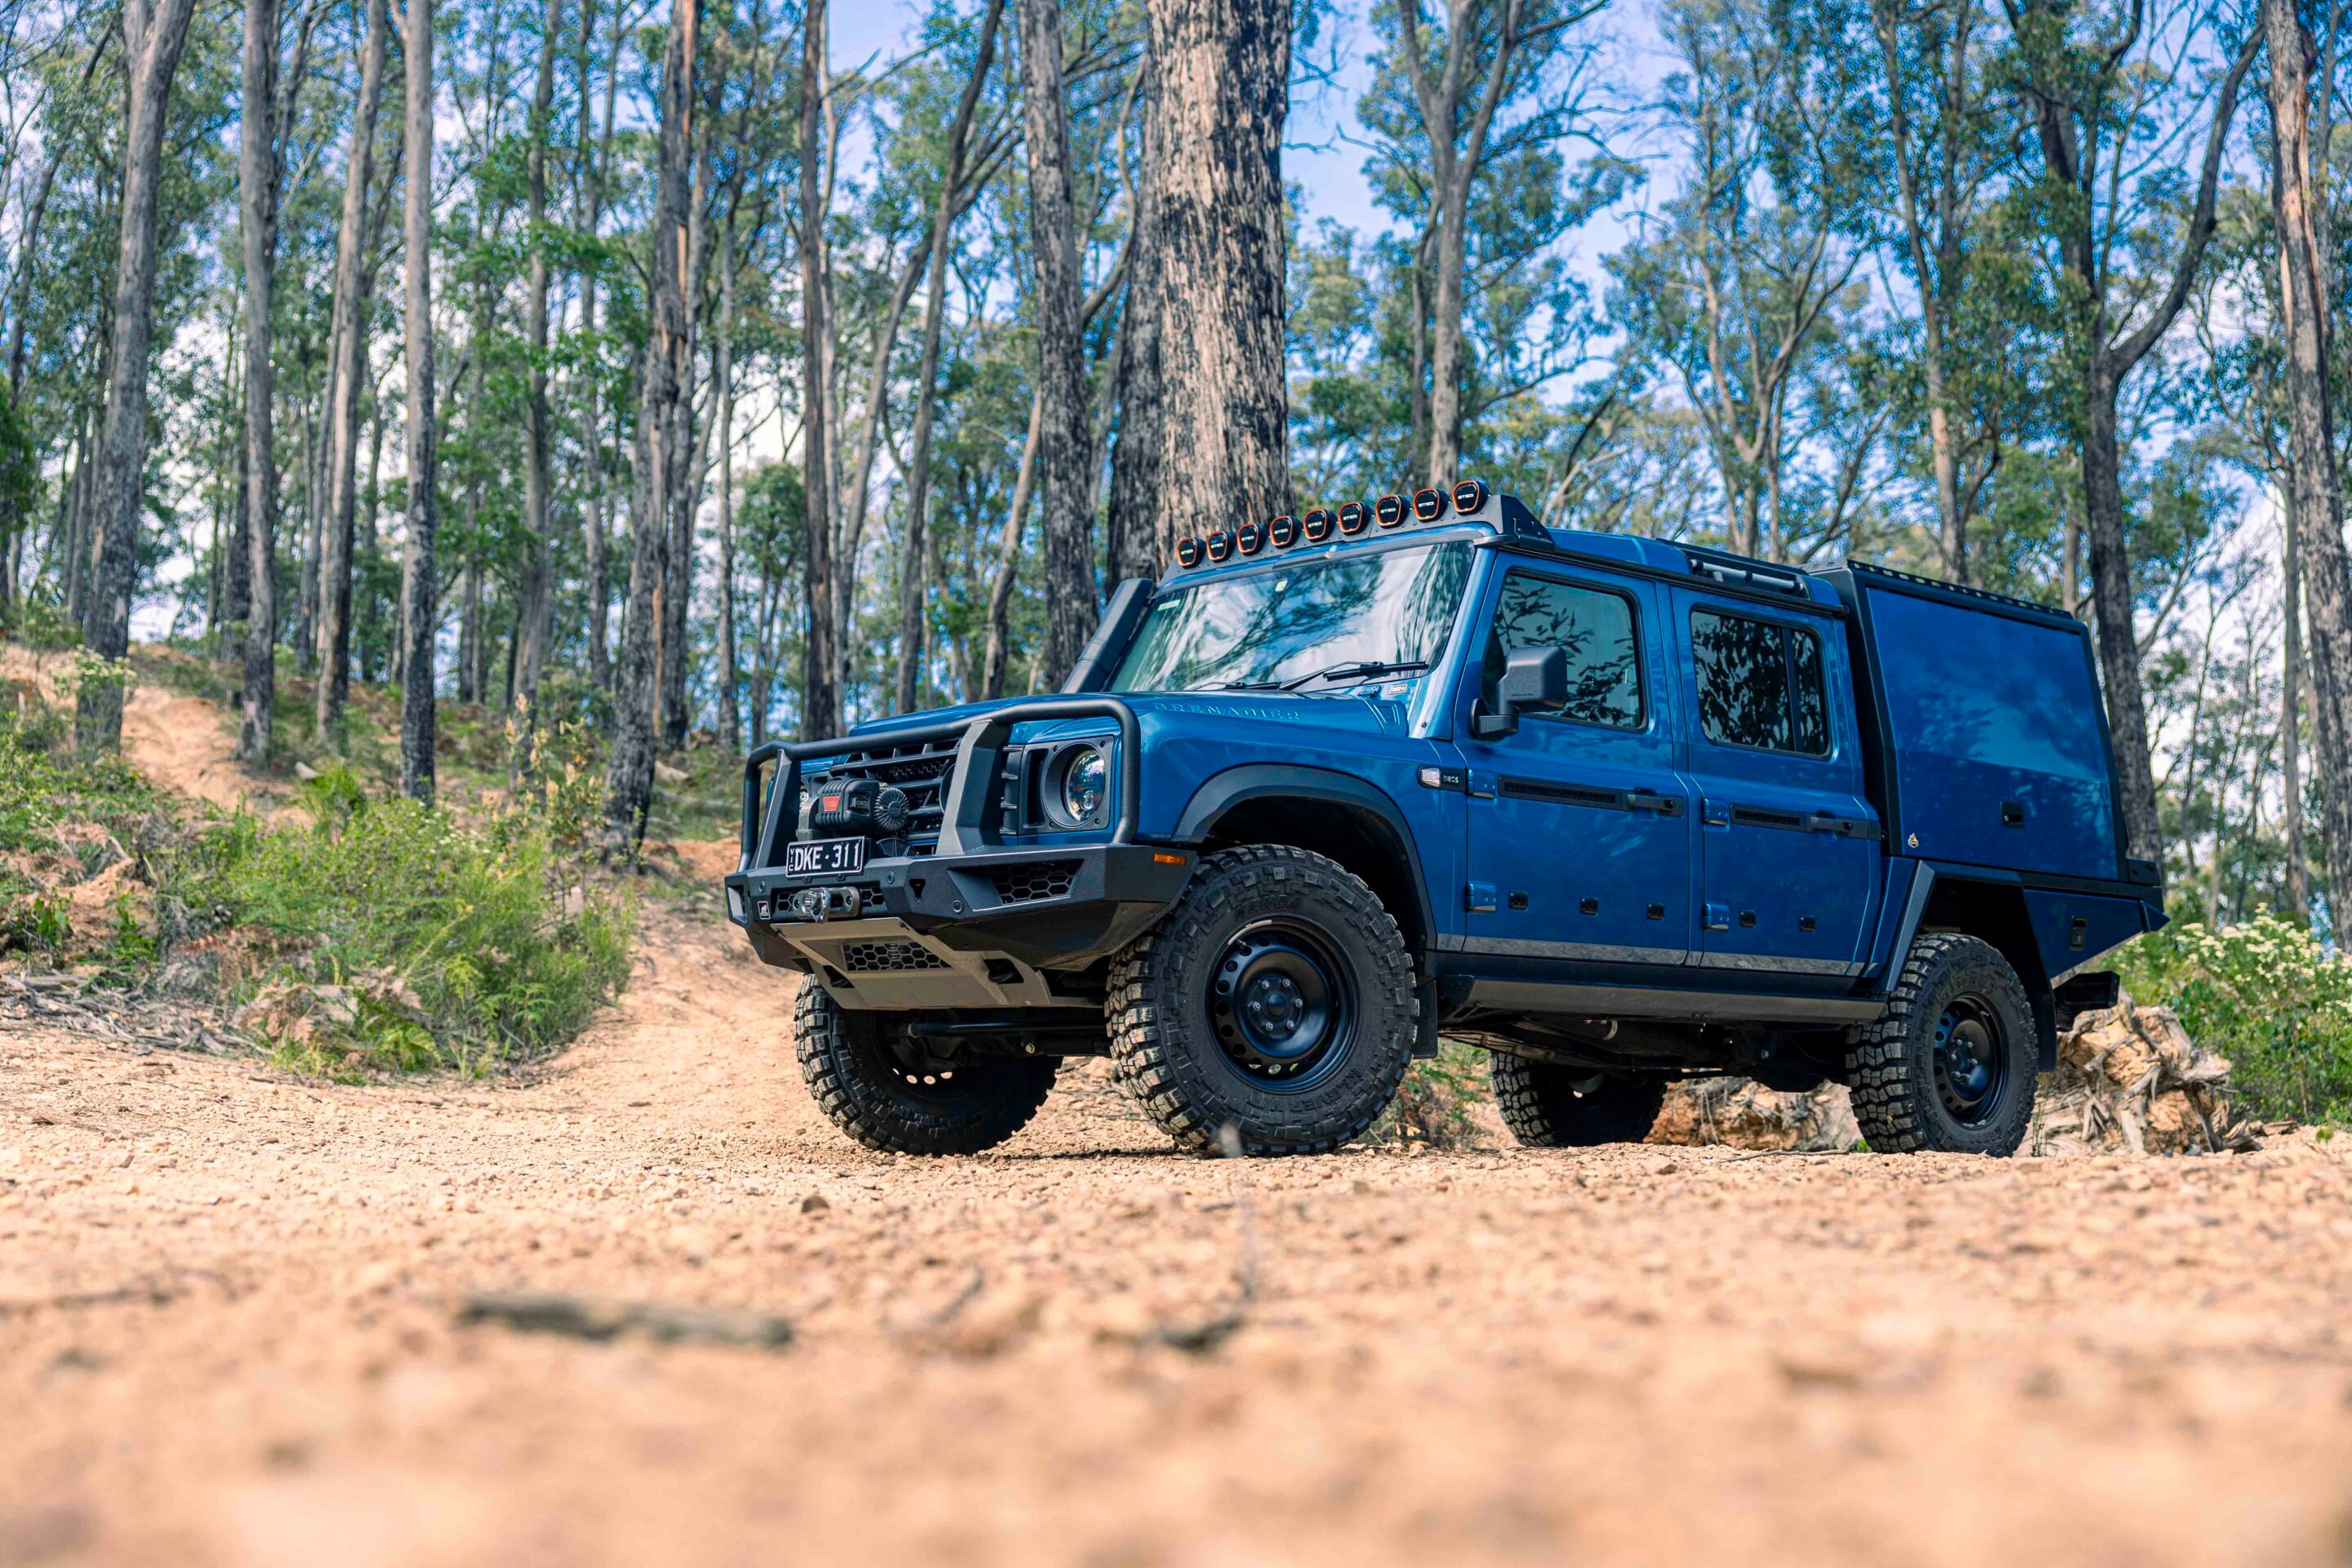
Casting his engineer’s eye over all the available options, Murray eventually settled on the then-new Ineos Quartermaster.
“It is large enough for family touring, yet small enough to still fit comfortably down High Country tracks,” said Murray. “I also really admired Ineos’ goals of bringing back some of the capability and durability which has been lost from some modern 4x4s.”
Why the Quartermaster Trialmaster was chosen
Murray chose his Quartermaster in Trialmaster specification, as it comes with much of the off-road hardware he wanted in a family 4×4.
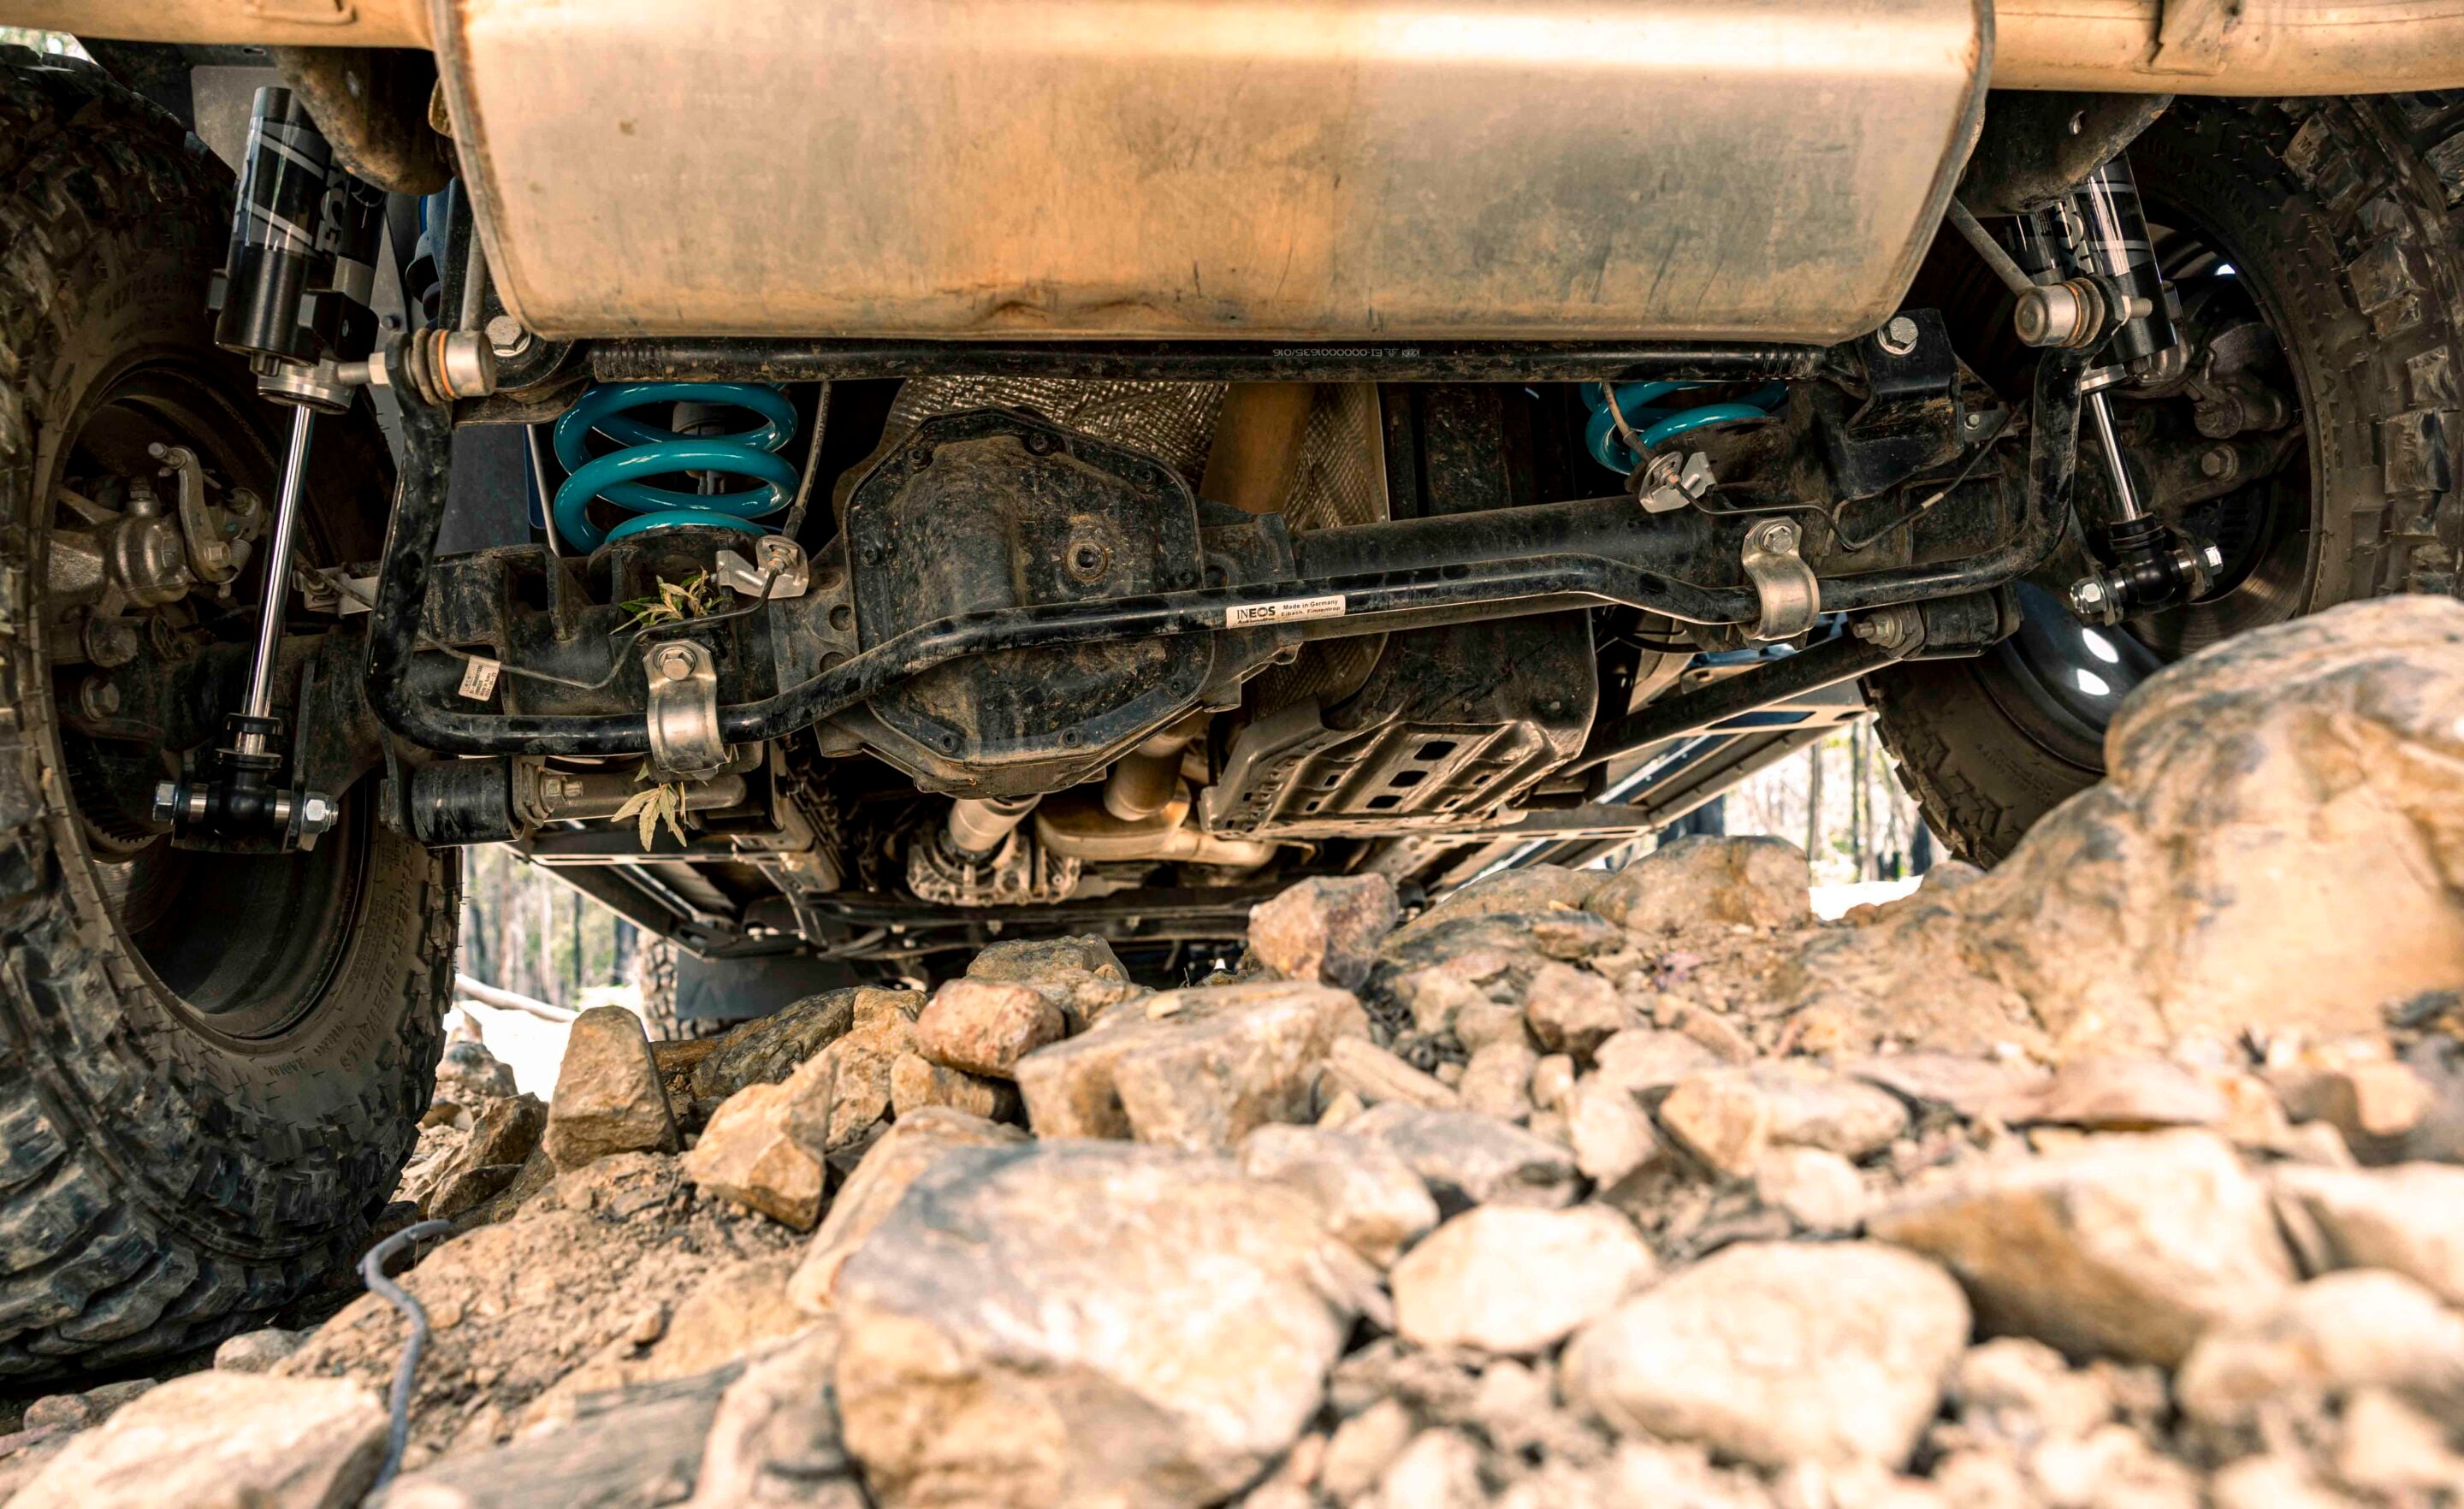
“Live axles, factory diff locks, snorkel and coil springs all round. They (Ineos) have partnered with great manufacturers from BMW to Recaro and Magna Steyr to put together a unique vehicle,” Murray says.
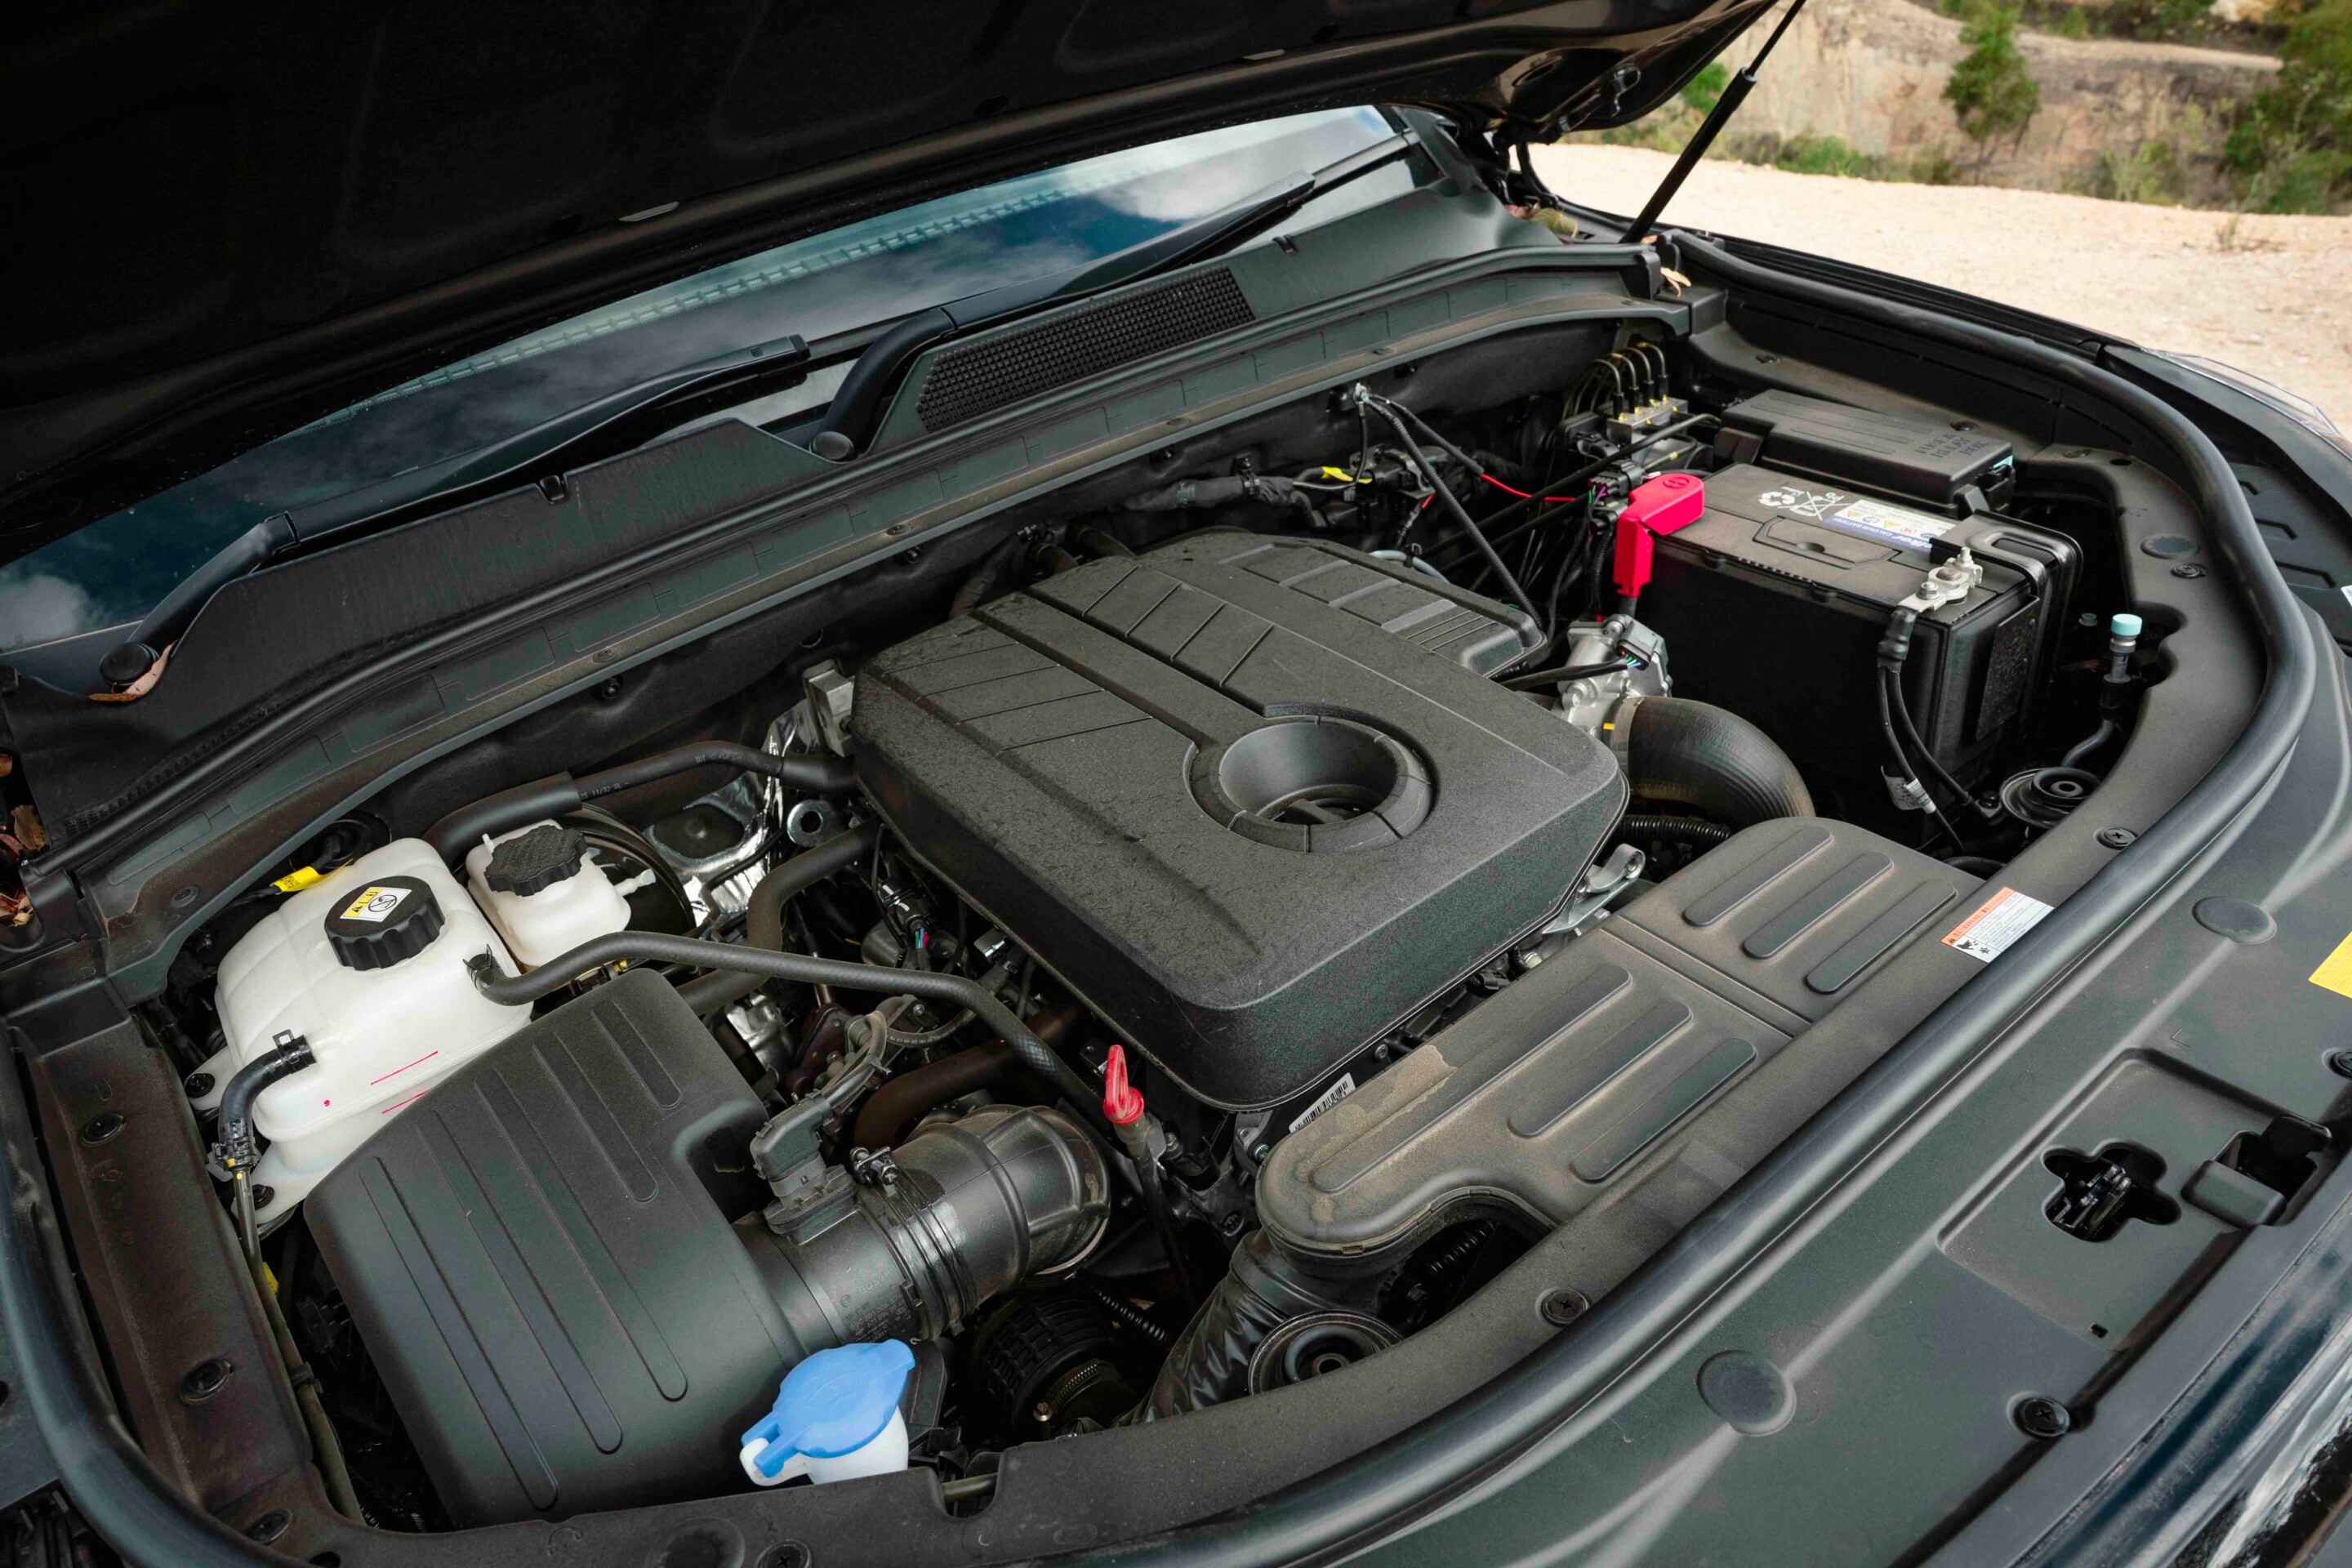
He chose the diesel option of the BMW inline six-cylinder engine, which is vastly different to the 4.8-litre inline six in his old Patrol. Backed by an automatic transmission and dual-range transfer case, the driveline didn’t require any modifications for the style of off-road touring that Murray enjoys.
Bespoke canopy
Of course, the Quartermaster was going to serve as Trig Point’s development mule for its products and, while Murray was at work designing on the computer, the ute got by with a cut-down Toyota tray on the back.
“With such a unique shape to the vehicle, we had to develop a new canopy size to suit it,” recalled Murray. “Ineos has a unique way of doing everything from tray mounts to lights.”
This made it a significant job and investment for Trig Point, especially when you consider the size of the Ineos market compared to other utes on sale. The size and shape of the vehicle also required extra attention, with a larger-than-usual design.
“We settled on a 1790 tray base, which is longer than our standard 1700 dual-cab size, and a much more upright stance to match the Ineos cabin,” Murray told us. “We went with a 1550mm tray-mounted canopy on this.”
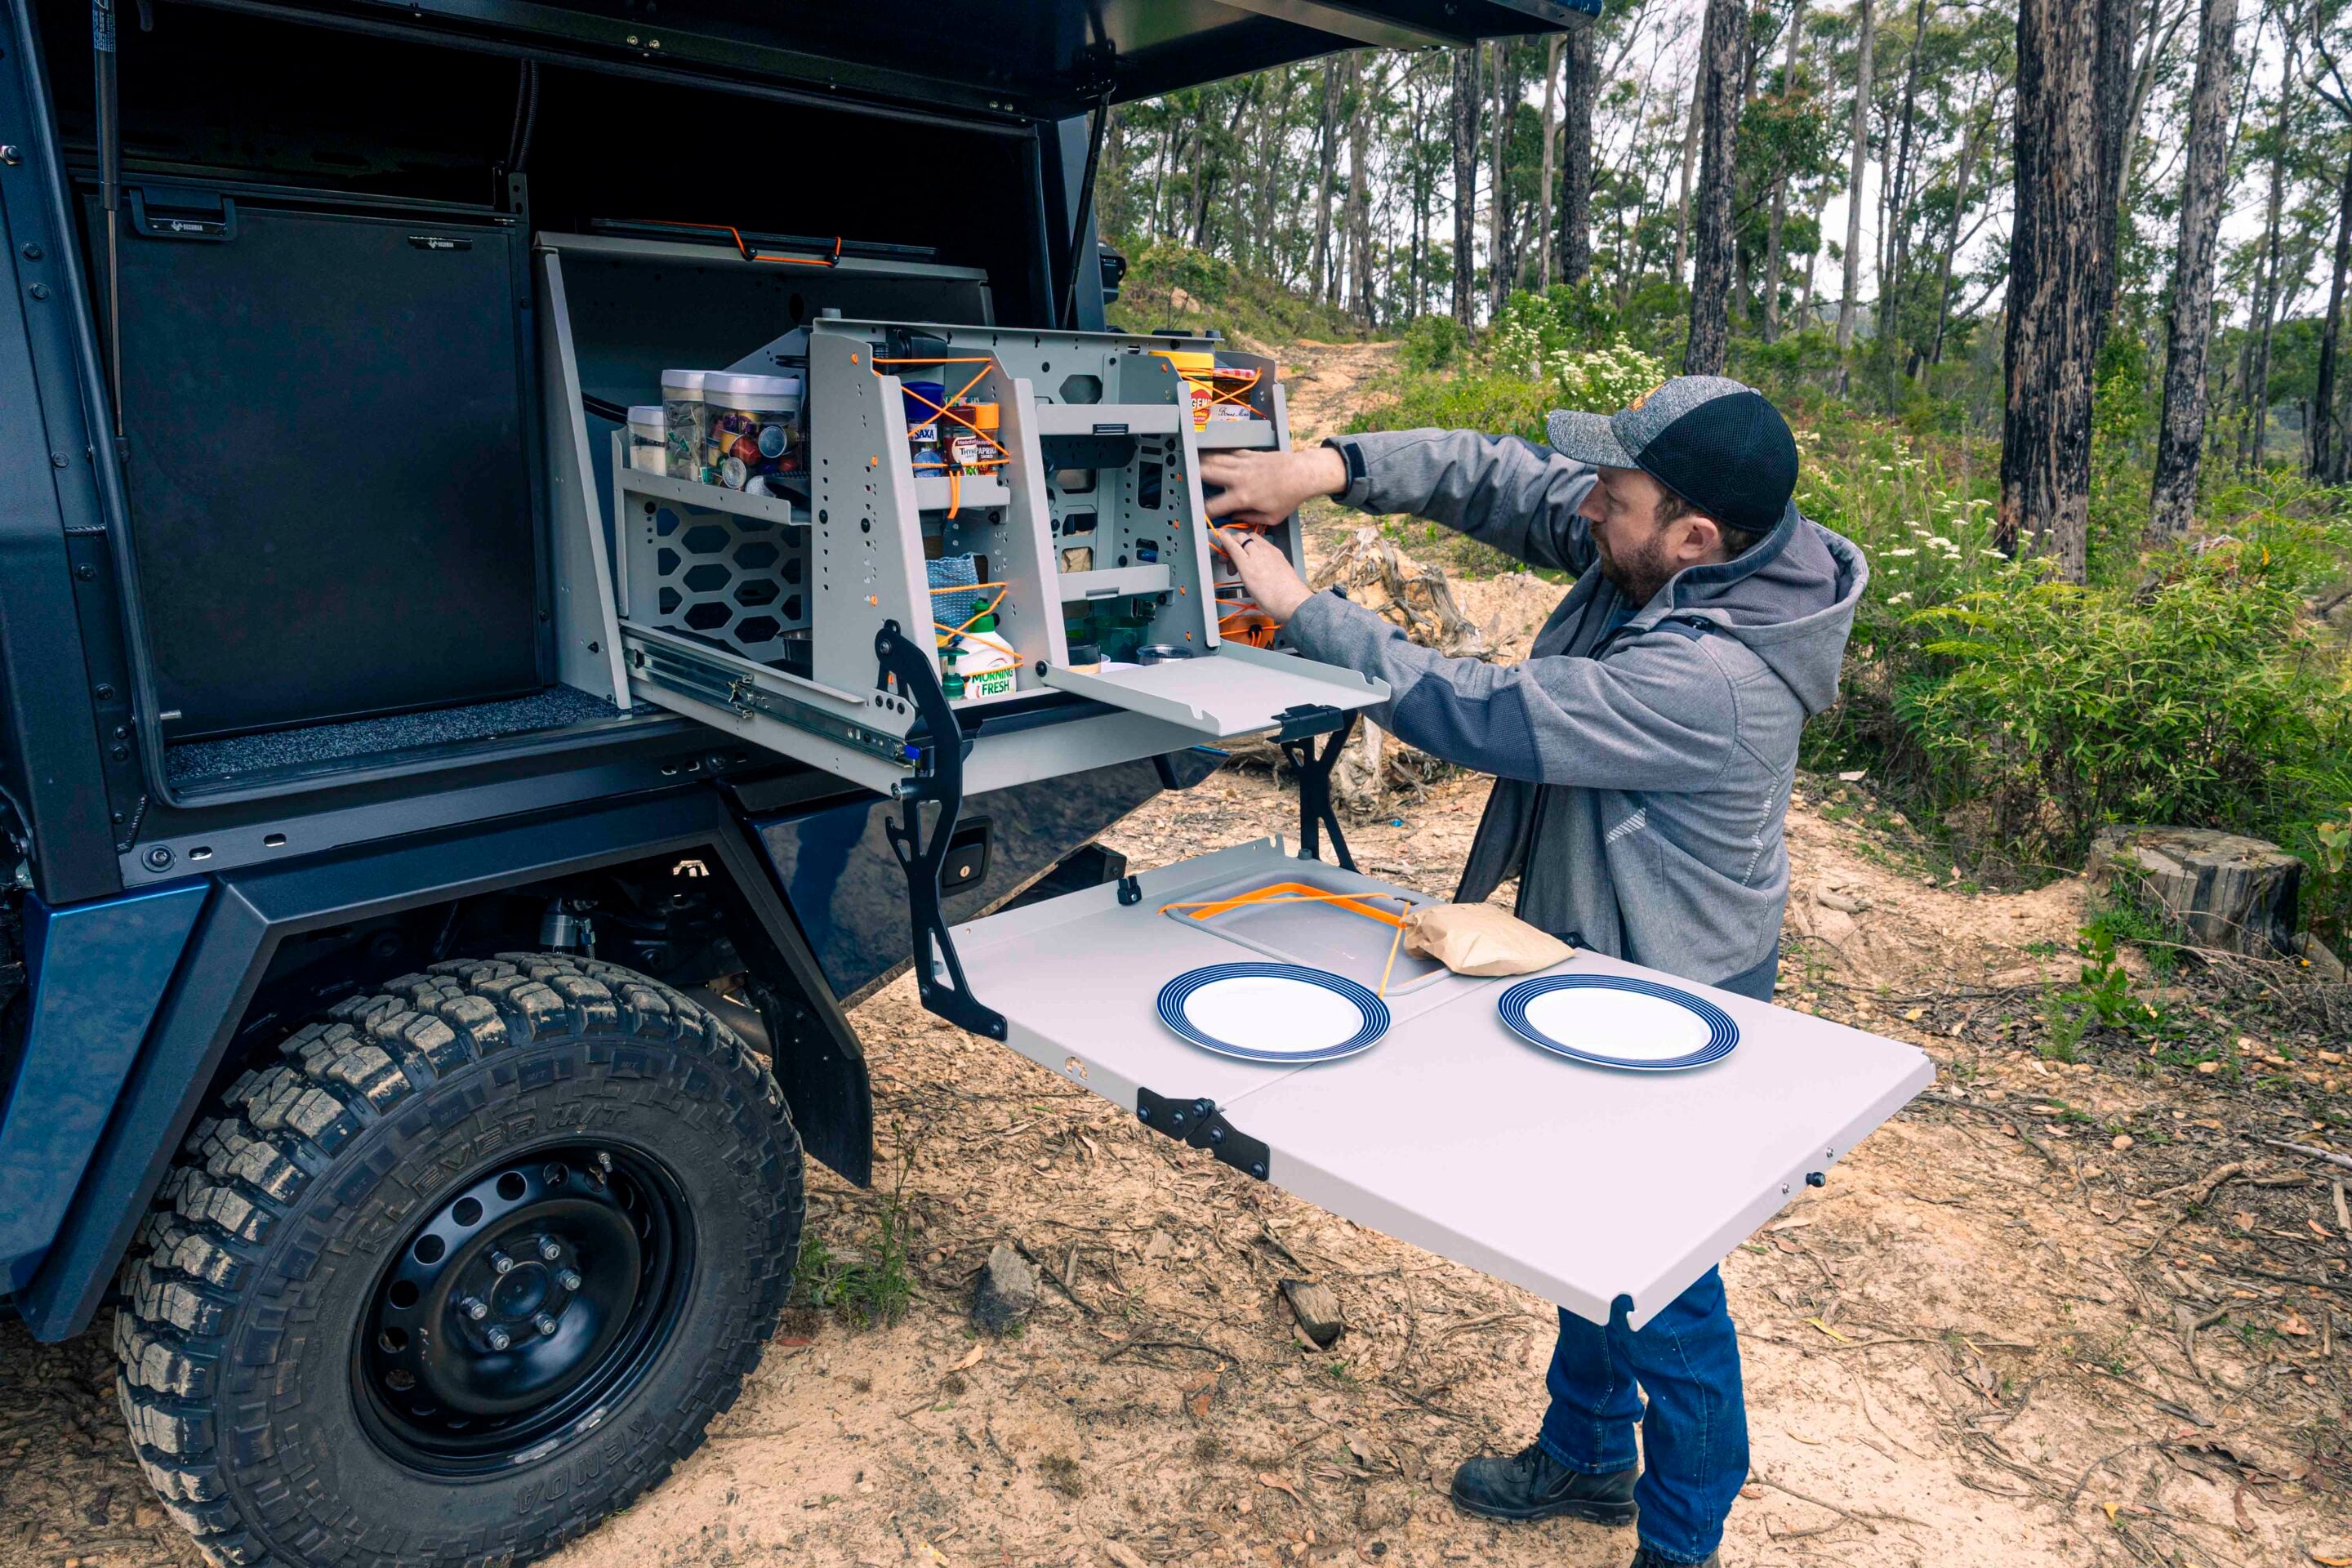
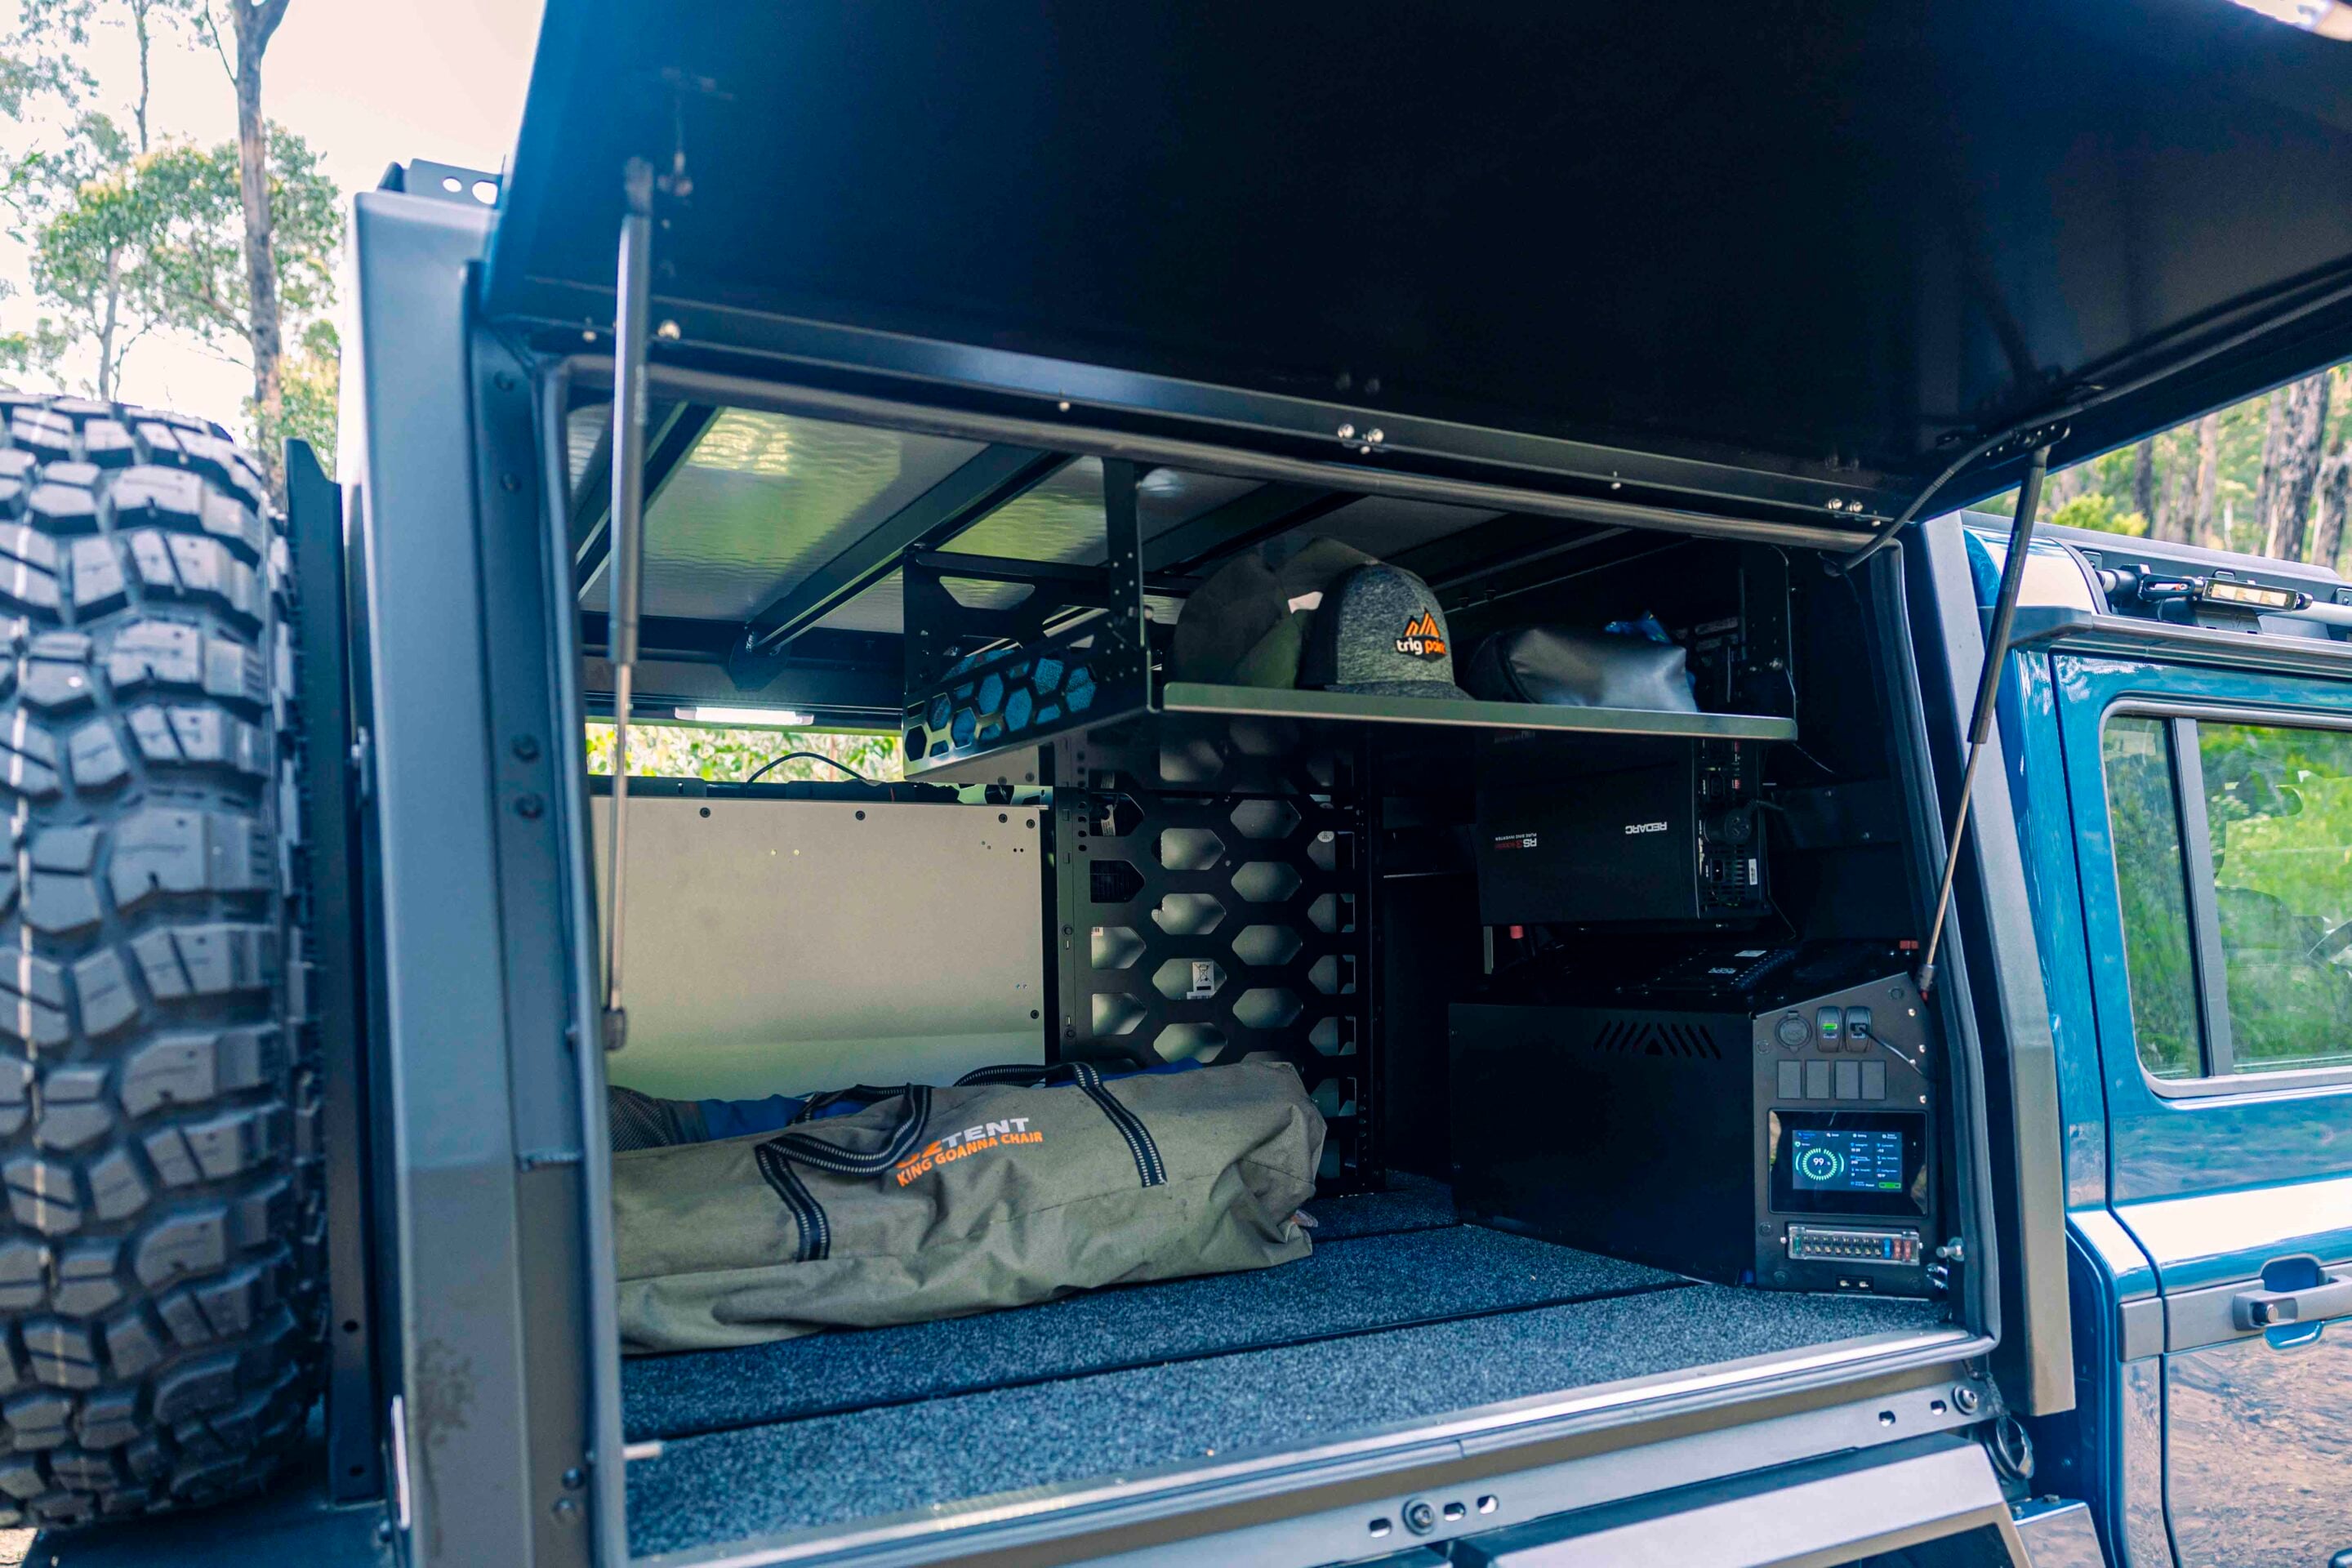
Inside the canopy is a showcase of Trig Point’s clever workmanship. There’s a trig Point fold-out kitchen with wash basin, Travel Buddy oven, fold down table and extra storage space.
The Trialmaster runs a dual-battery system as standard, but Murray has added a third battery in the canopy to power the inverter and accessories. This is a 200Ah Invicta Xero lithium unit charged via a 50A Redarc DC-DC charger and feeding a Redarc 2000W inverter.
While the passenger’s side of the canopy is taken up by the Bushman fridge and kitchen setup, the driver’s side is left with more space for carrying additional gear when needed.
Underslung toolboxes house the ARB air compressor and hoses, while a trundle drawer at the rear provides additional secure storage. As you’d expect from the owner of Trig Point’s personal four-wheel drive, the canopy is a well thought-out and comprehensive setup. A pair of jerrycan holders are mounted to the rear of the canopy alongside a spare wheel and tyre, while a 50-litre water tank is mounted underneath and fed to the tap via an electric pump.
The rest of the build
The canopy for the Ineos was second nature to Murray and the team at Trig Point, but there’s plenty more involved in creating a competent off-road family tourer.
While Ineos delivers a solid base to build on, and the standard locking differentials and dual-battery system help, there’s always more to be done. A set of 35×10.5 Kenda mud-terrain tyres were fitted to the stock Ineos steel wheels, giving the vehicle that tall-and-skinny look. Underneath, Murray opted for a set of 50mm taller Dobinsons coils and Fox Racing 2.0 shocks.
There are very limited choices for bullbars and protection equipment available for Ineos vehicles, so protecting Murray’s Quartermaster came after working with local suppliers and designing and making his own. The bull bar is a Toro bar from local manufacturer Offroad Animal but it was modified to accommodate the Warn 8274 high-mount winch.
“The factory winch option on the Ineos only has 10m of usable rope, which really isn’t enough,” said Murray. “With the high-mount winch I get 45m-plus of usable rope and a nice fast line speed.”
More custom fabrication was needed when looking for side steps and sliders for the vehicle, and this was done in-house at Trig Point.
“We haven’t done side steps before, so we developed these simply because we couldn’t get anything we liked. They ended up being a great combination of steel and alloy – as strong as a rock slider, yet as light as a protection step.”
Build summary
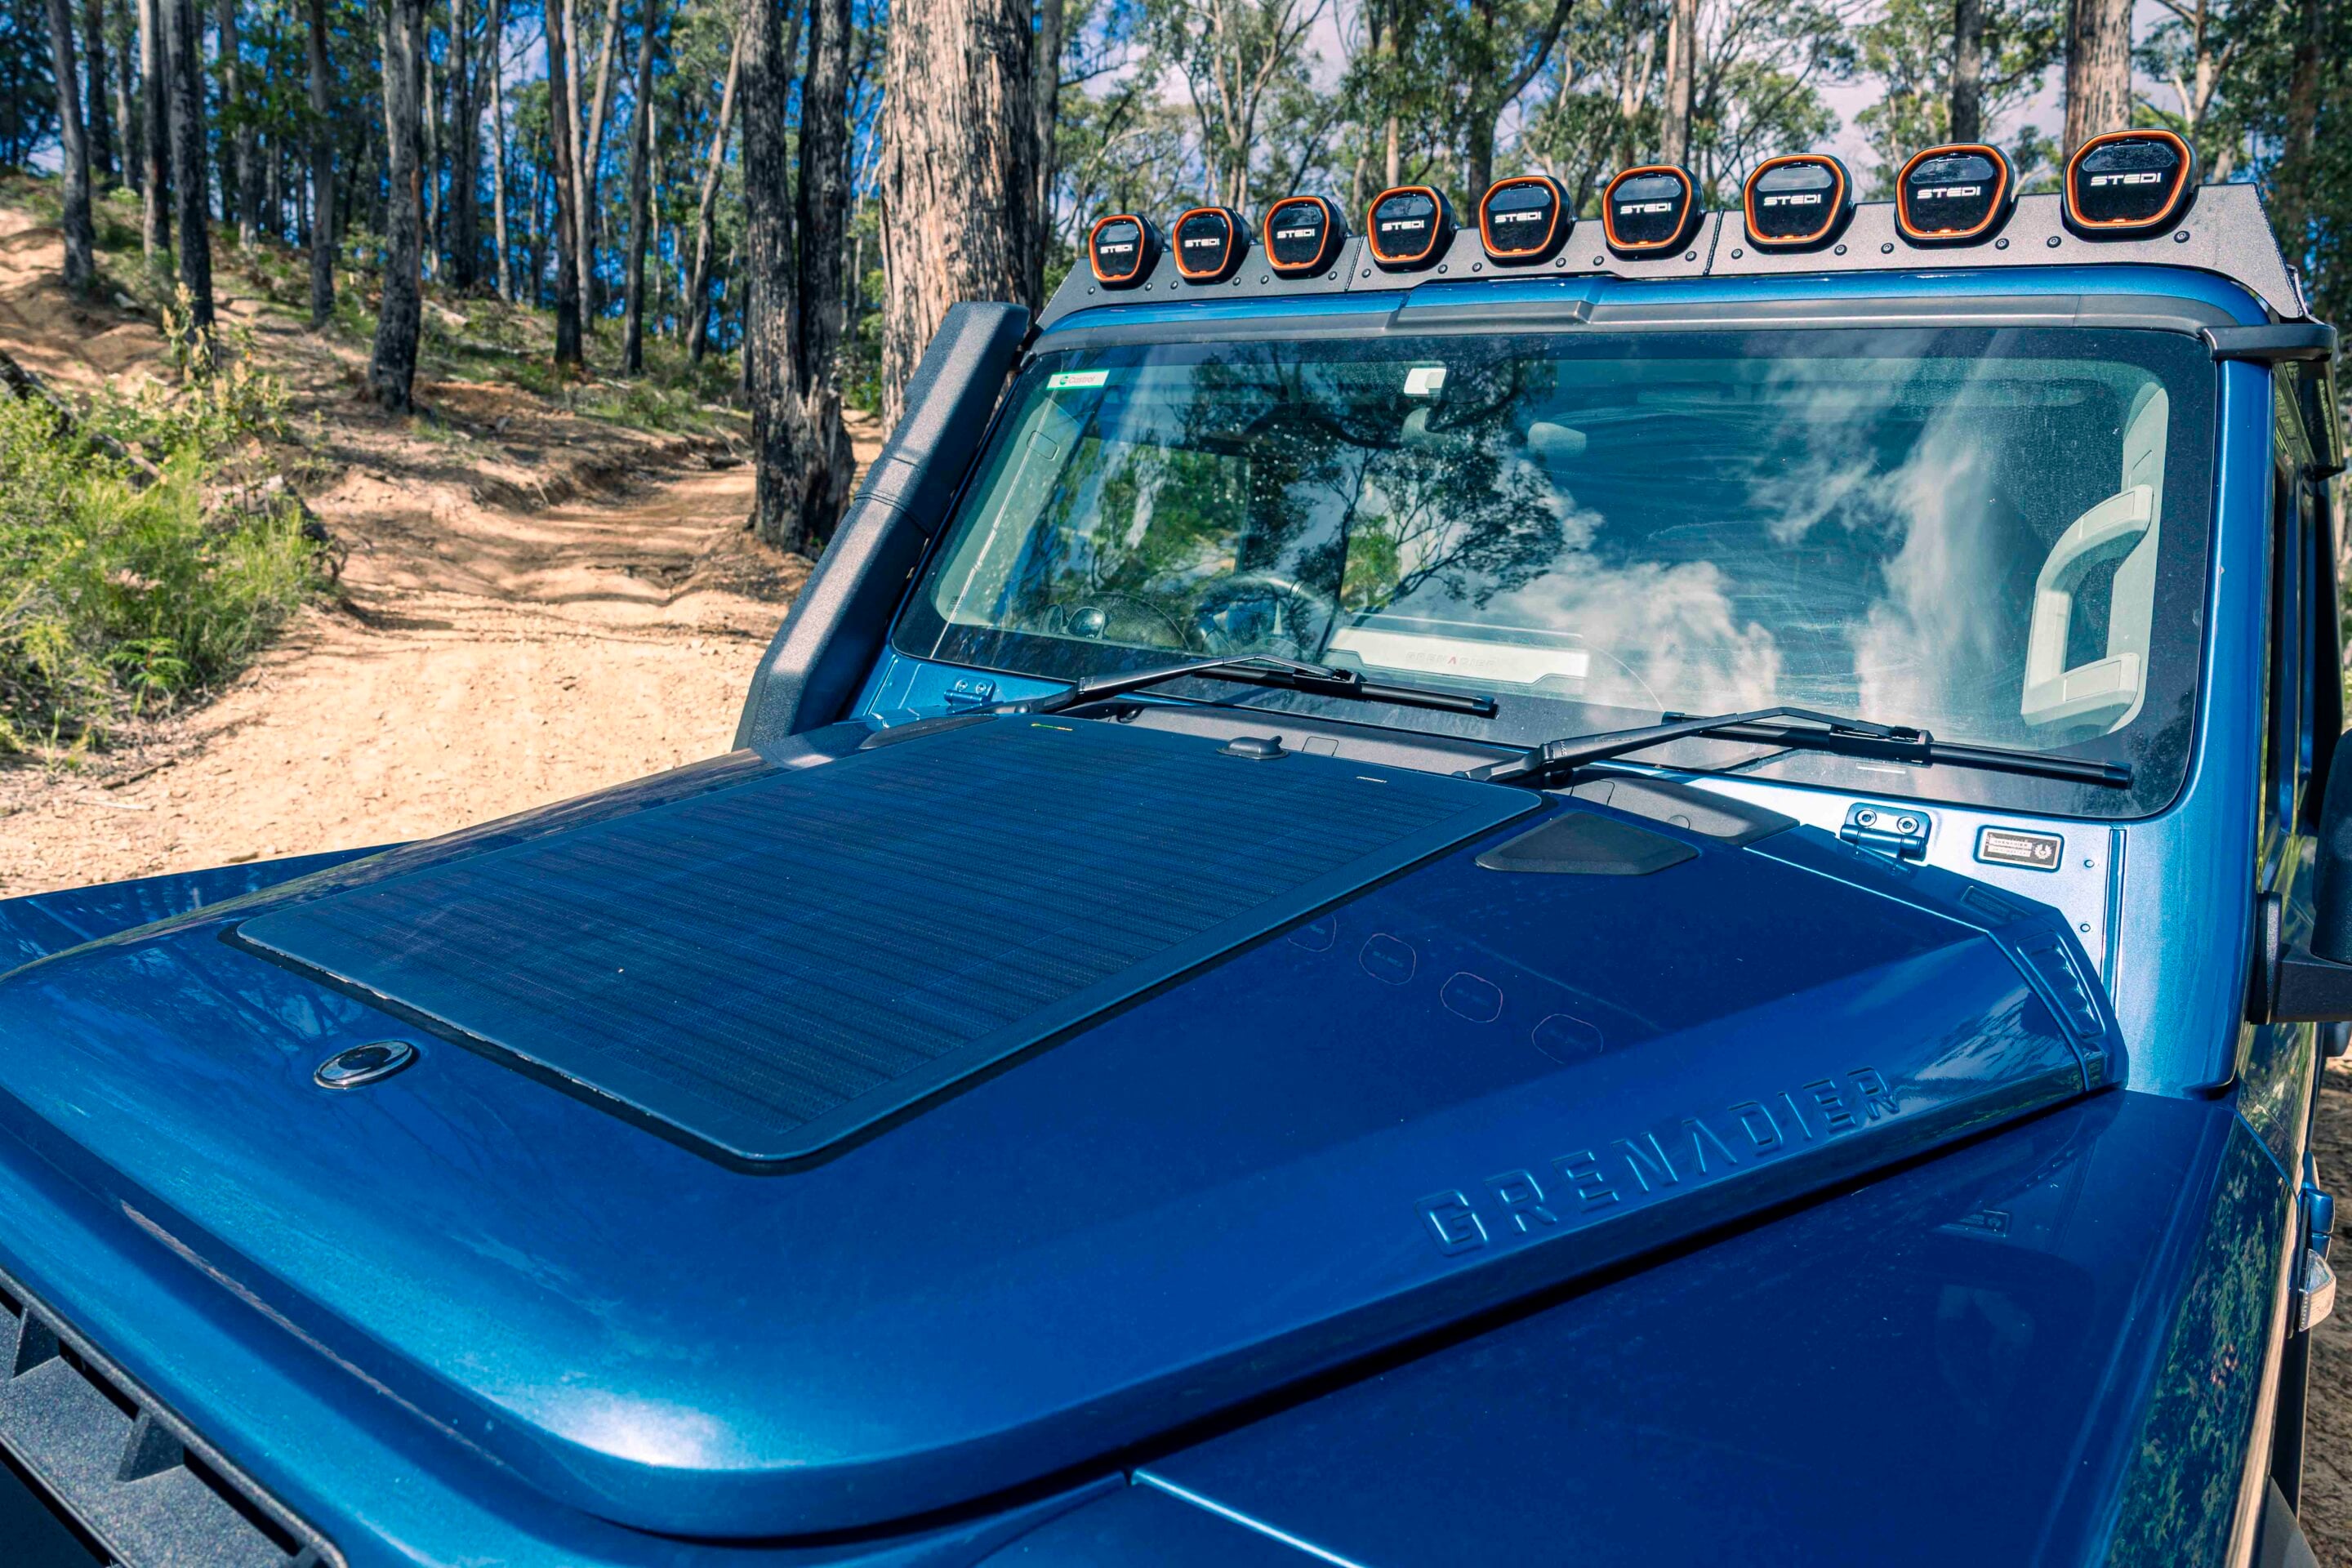
There’s more custom fabrication from Trig Point up on top of the vehicle.
With the bullbar modified to accommodate the high-mount winch, it limited the space available for mounting driving lights, so Murray went to the roof where he designed and fabricated a housing for nine Stedi Evo Mini driving lights. Stedi Micro-Touch work lights are used down the sides, and they are all wired in using the pre-wiring included in the Ineos and the switches in the roof console.
The challenges of building a relatively new vehicle, and the limited products available for it, were partly overcome by having a world-class manufacturing team to assist with the build. Murray’s forethought and expertise have allowed him to create a vehicle that ticks all the boxes for family adventures while also showcasing the excellent work done at Trig Point.
All accessories and modifications
- Toro bull bar from Offroad Animal, modified to accommodate a Warn 8274 high-mount winch
- Warn 8274 high-mount winch
- Roof-mounted driving light housing (Trig Point custom fabrication)
- 9× Stedi Evo Mini driving lights (roof-mounted)
- Stedi Micro-Touch work lights (side-mounted)
- Trig Point custom side steps (steel and alloy construction)
- Trig Point custom tray-mounted canopy
- 1790mm tray base (custom development)
- 1550mm tray-mounted canopy
- Fold-out canopy kitchen system (wash basin, Travel Buddy oven, fold-down table, extra storage)
- Bushman fridge
- Underslung toolboxes (including ARB air compressor and hoses)
- Rear trundle drawer (canopy storage)
- Rear-mounted jerry can holders
- Rear-mounted spare wheel and tyre
- 50-litre underslung water tank with electric pump system
- 35×10.5 Kenda mud-terrain tyres
- Dobinsons coil springs (+50mm lift)
- Fox Racing 2.0 shock absorbers
- Third auxiliary battery (200Ah Invicta Xero lithium)
- 50A Redarc DC-DC charger
- Redarc 2000W inverter
- Custom electrical integration using factory pre-wiring and roof console switching system
Budget-focused 4×4 utes are the flavour of the month, as new brands flood into the Australian market, each wanting a slice of the lucrative and popular 4×4 ute pie.
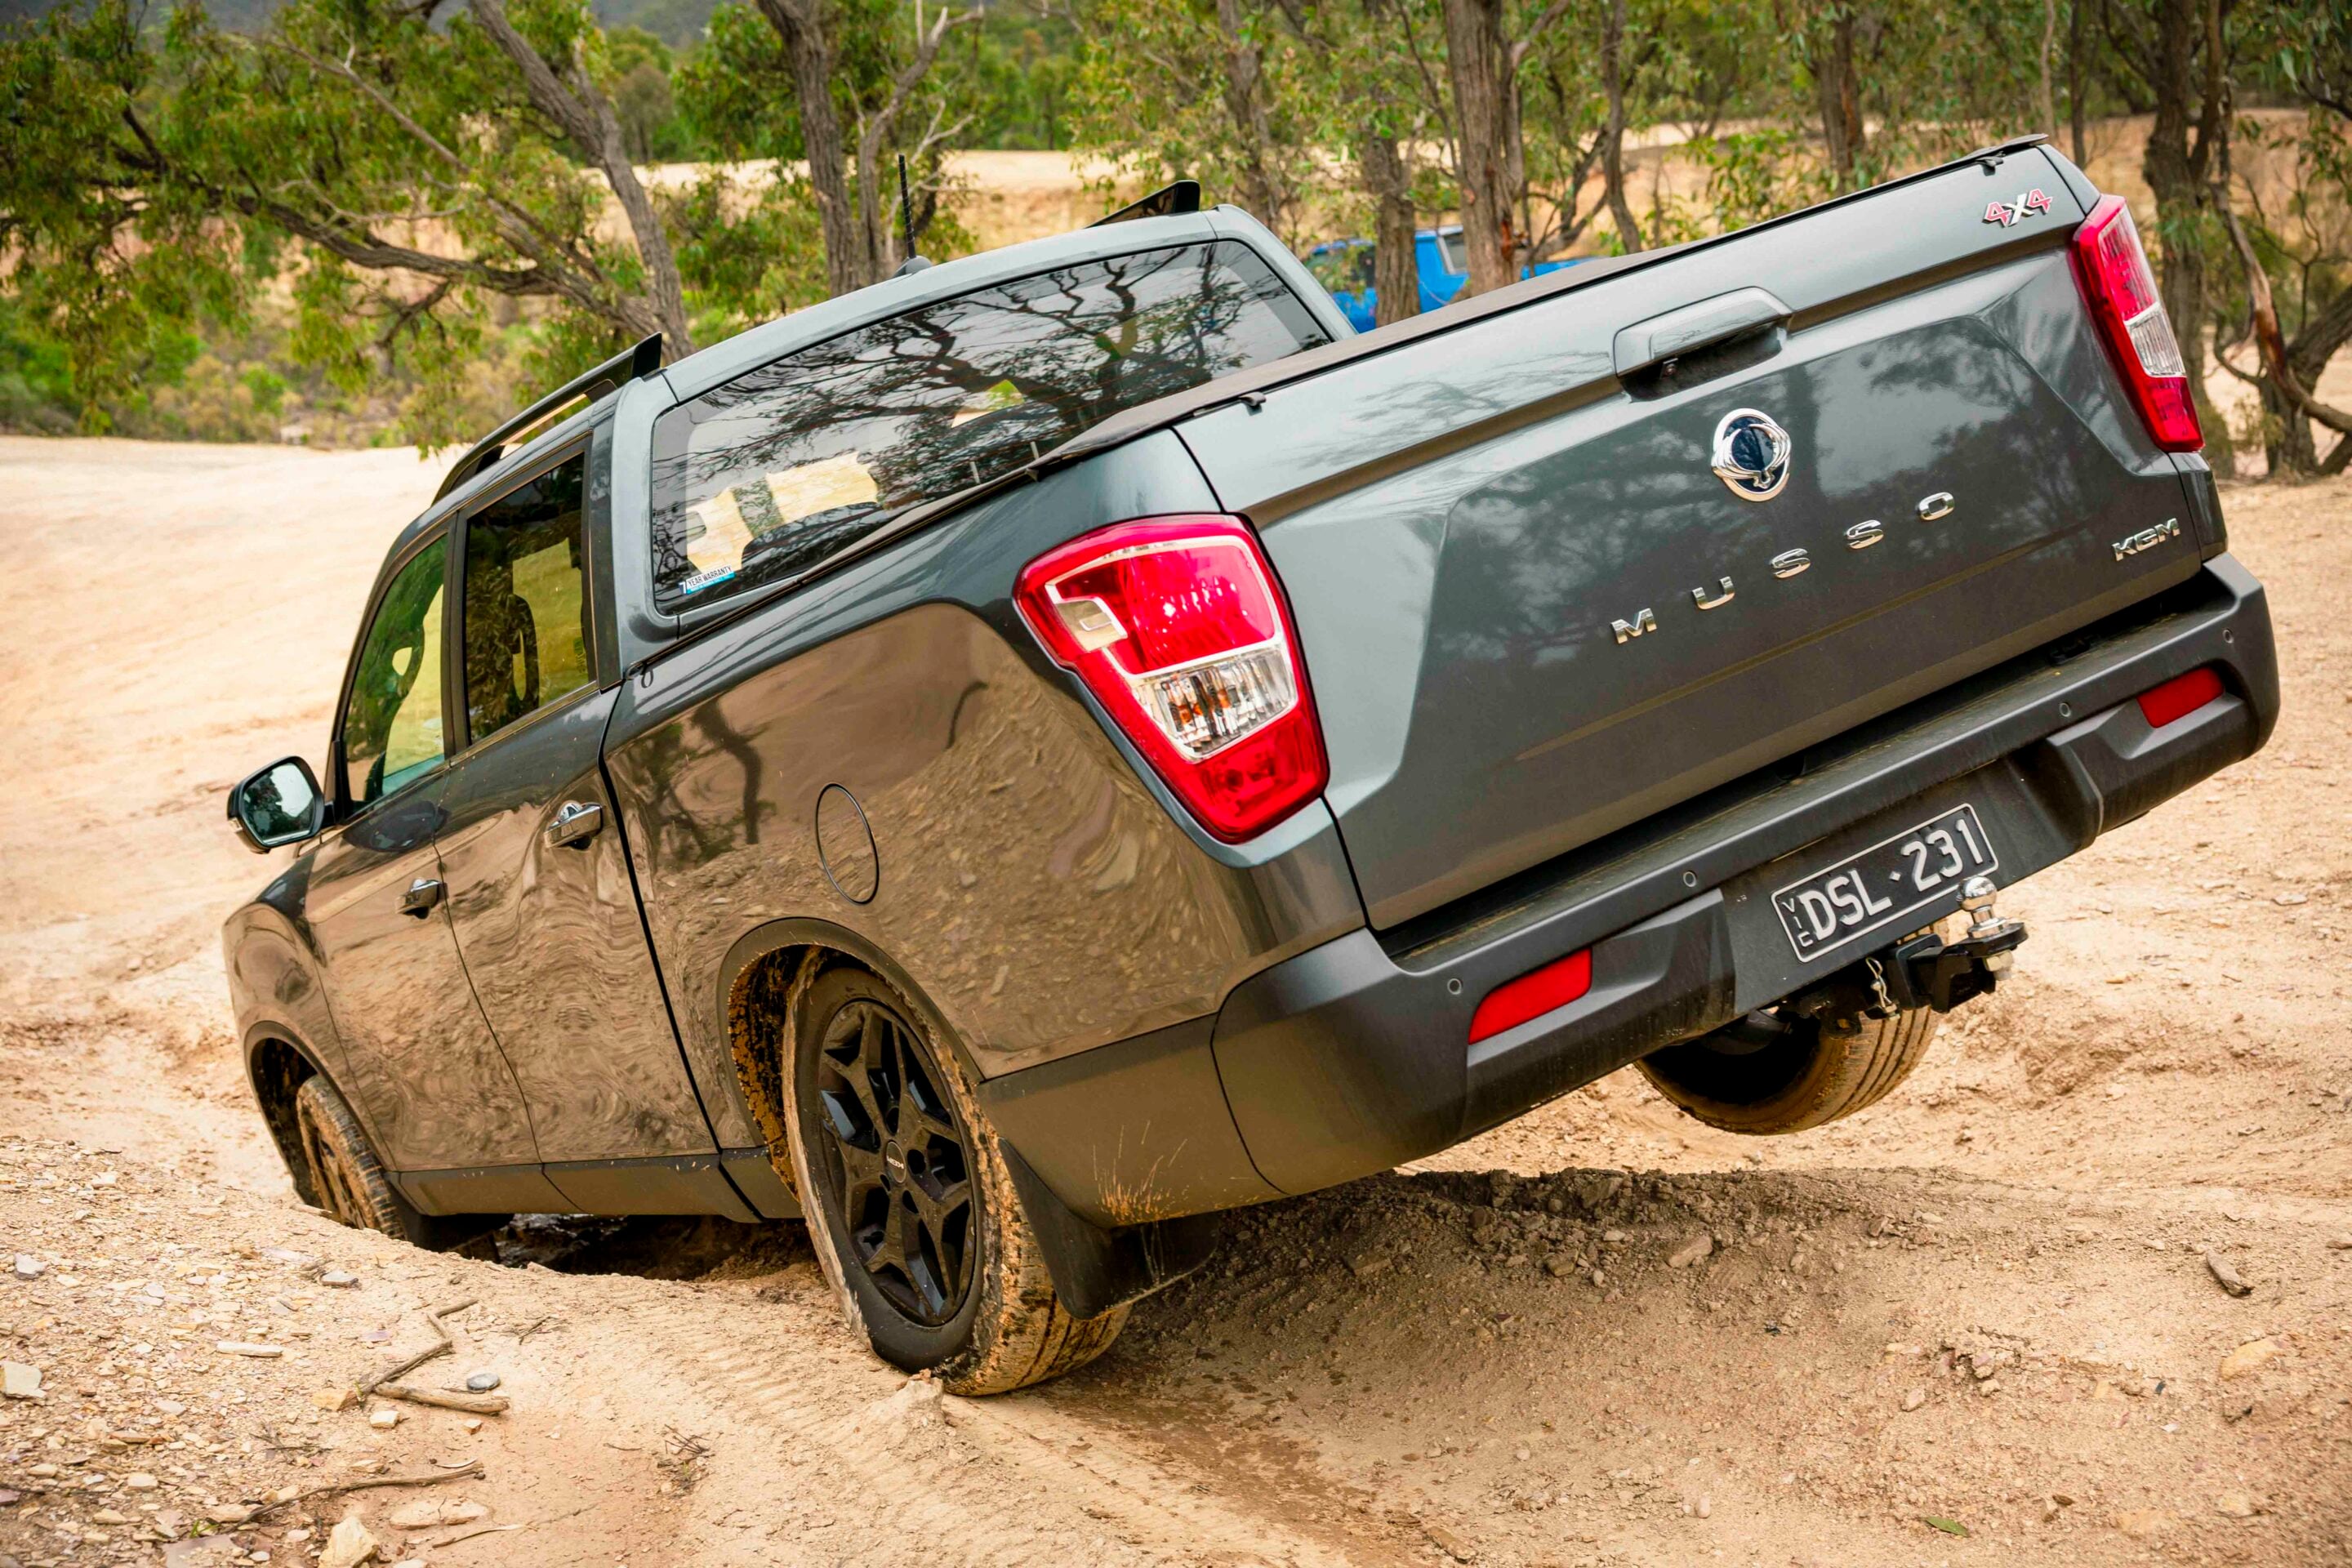
Our favourite budget 4×4 ute has for a long time been the SsangYong – now KGM – Musso. We’ve liked it not just for being more affordable than most of its more popular competitors, but also for its simple and rugged construction and its ability to get the job done without fuss or fanfare.
Despite being eight years old now, and after a mid-life refresh, the current Musso has stuck to its guns and still delivers on what it promises.
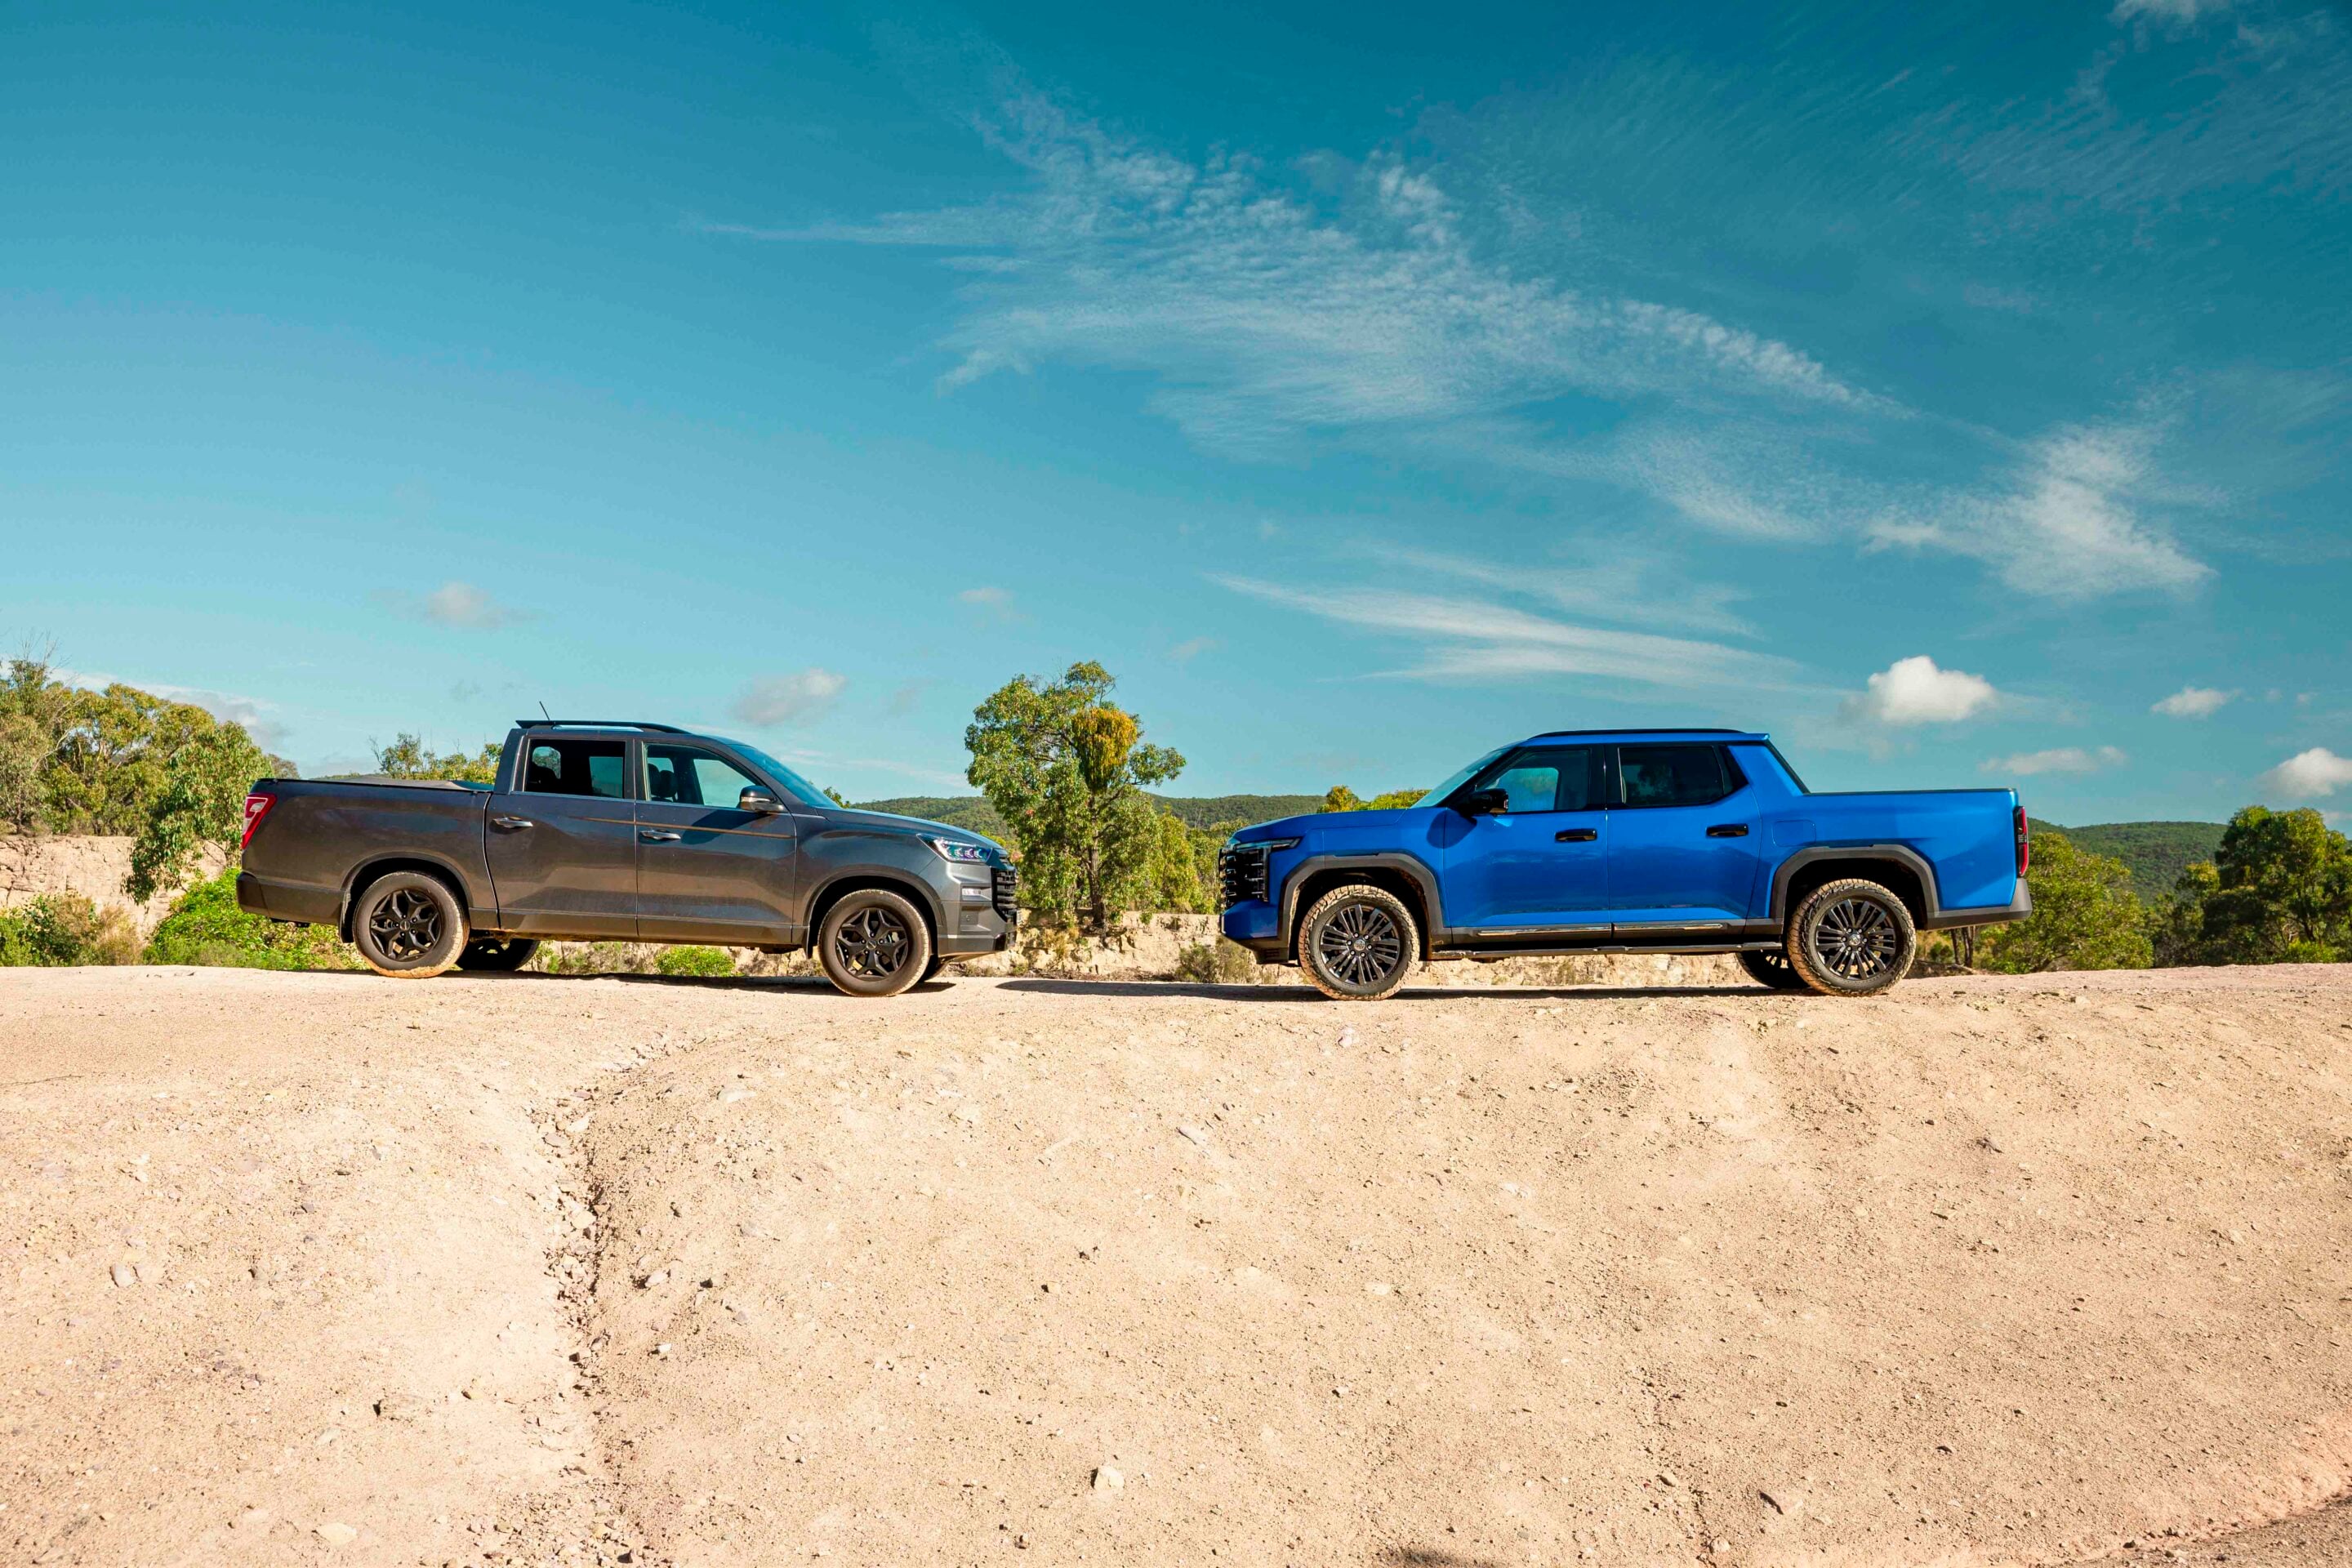
To see how the KGM Musso stacks up against the latest competitors in the segment, we’ve paired it with one of the newest 4×4 utes (at the time of writing), the MG U9 pick-up in its top-spec configuration, the U9 Explore Pro, which retails for $61,000. Likewise, our KGM Musso Ultimate XLV is also the top-spec variant, but it comes in at a more affordable $53,000.
JUMP AHEAD
KGM Musso Ultimate XLV
The XLV in the model name designates a longer wheelbase and tray, with an extra 300mm of tub length, stretching to a huge 1600mm. The wheelbase is increased by 210mm, which leaves a bit more overhang at the back.
The XLV might be the longer of the Musso utes, but it looks small when parked next to the MG U9. The Chinese-made MG measures 5500mm long, 2265mm wide and 1874mm tall, while the Musso XLV comes in at 5415mm long, 1885mm wide and 1810mm high. It doesn’t help that the MG looks as though it was styled using Lego bricks. It’s big and brash and demands attention, while the Korean-made Musso appears more refined and stylish.
Musso powertrain and performance
Under the bonnet of the Musso is KGM’s 2.2-litre single-turbo diesel engine that makes a claimed 133kW at 4000rpm and 400Nm of torque.
It’s not a powerhouse, but paired with the six-speed automatic transmission and part-time dual-range 4×4 system, it’s adequate for what’s needed. The rear differential is an auto-locker that senses wheel slip and locks when needed; there is no driver-selectable diff lock for off-road use.
We’ve done plenty of miles in these over the years, on all sorts of tracks and terrain, and have never had a fault to mention. It’s dependable, capable and will do most of what any owner will ask of it.
The wide cabin and tray ride on a ladder-frame chassis with an IFS front end and a live axle under the back. The Ultimate-grade Musso gets a multi-link coil-spring arrangement here, as opposed to the leaf springs under the back of lower-grade Mussos, and it works well on both sealed and gravel roads.
The Musso is a delight to drive on-road, be it for daily chores or heading out of town. The spacious and well-equipped cabin makes for comfortable travel, and the added features in the Ultimate bring a touch of luxury to the ride. The Musso’s wide stance gives it a solid grip on the road, making it a sweet touring vehicle, while the powertrain gets along well enough, even if it isn’t the gruntiest out there.
Off-road, the Musso is like most midsize utes in that its IFS lifts wheels easily, losing grip at the front end. The rear tyres stay planted; however, the ETC is slow-acting and the vehicle has an auto-locking rear diff instead of a driver-activated one. This means it needs to spin the wheels before it locks the axles, which could be the split second between getting stuck or not. With a driver-activated diff lock, it could be engaged before the obstacle, resulting in cleaner, safer and easier progression.
A huge plus for the Musso is the range of Australian-developed off-road accessories available from Ironman 4×4. The kit includes replacement suspension, which gives the vehicle more ground clearance – something that is certainly appreciated in the long-wheelbase XLV. This is a great partnership and the equipment can tailor your Musso for better performance, be it for work or off-road play. The 2100kg Musso Ultimate XLV has a 2880kg GVM, 6380kg GCM and a 3500kg towing rating.
It might be getting long in the tooth, but the Musso remains a great value-for-money proposition for a 4×4 ute. The 2027 Musso will arrive later in 2026 with a more modern look inside and out, and the rumour is that not a lot has changed under the skin – and that’s a good thing for the enduring Musso.
| Musso off-road specs | |
|---|---|
| Departure angle | 25 |
| Rampover angle | 20 |
| Approach angle | 29 |
| Wading depth | 550mm |
| Ground clearance | 220mm |
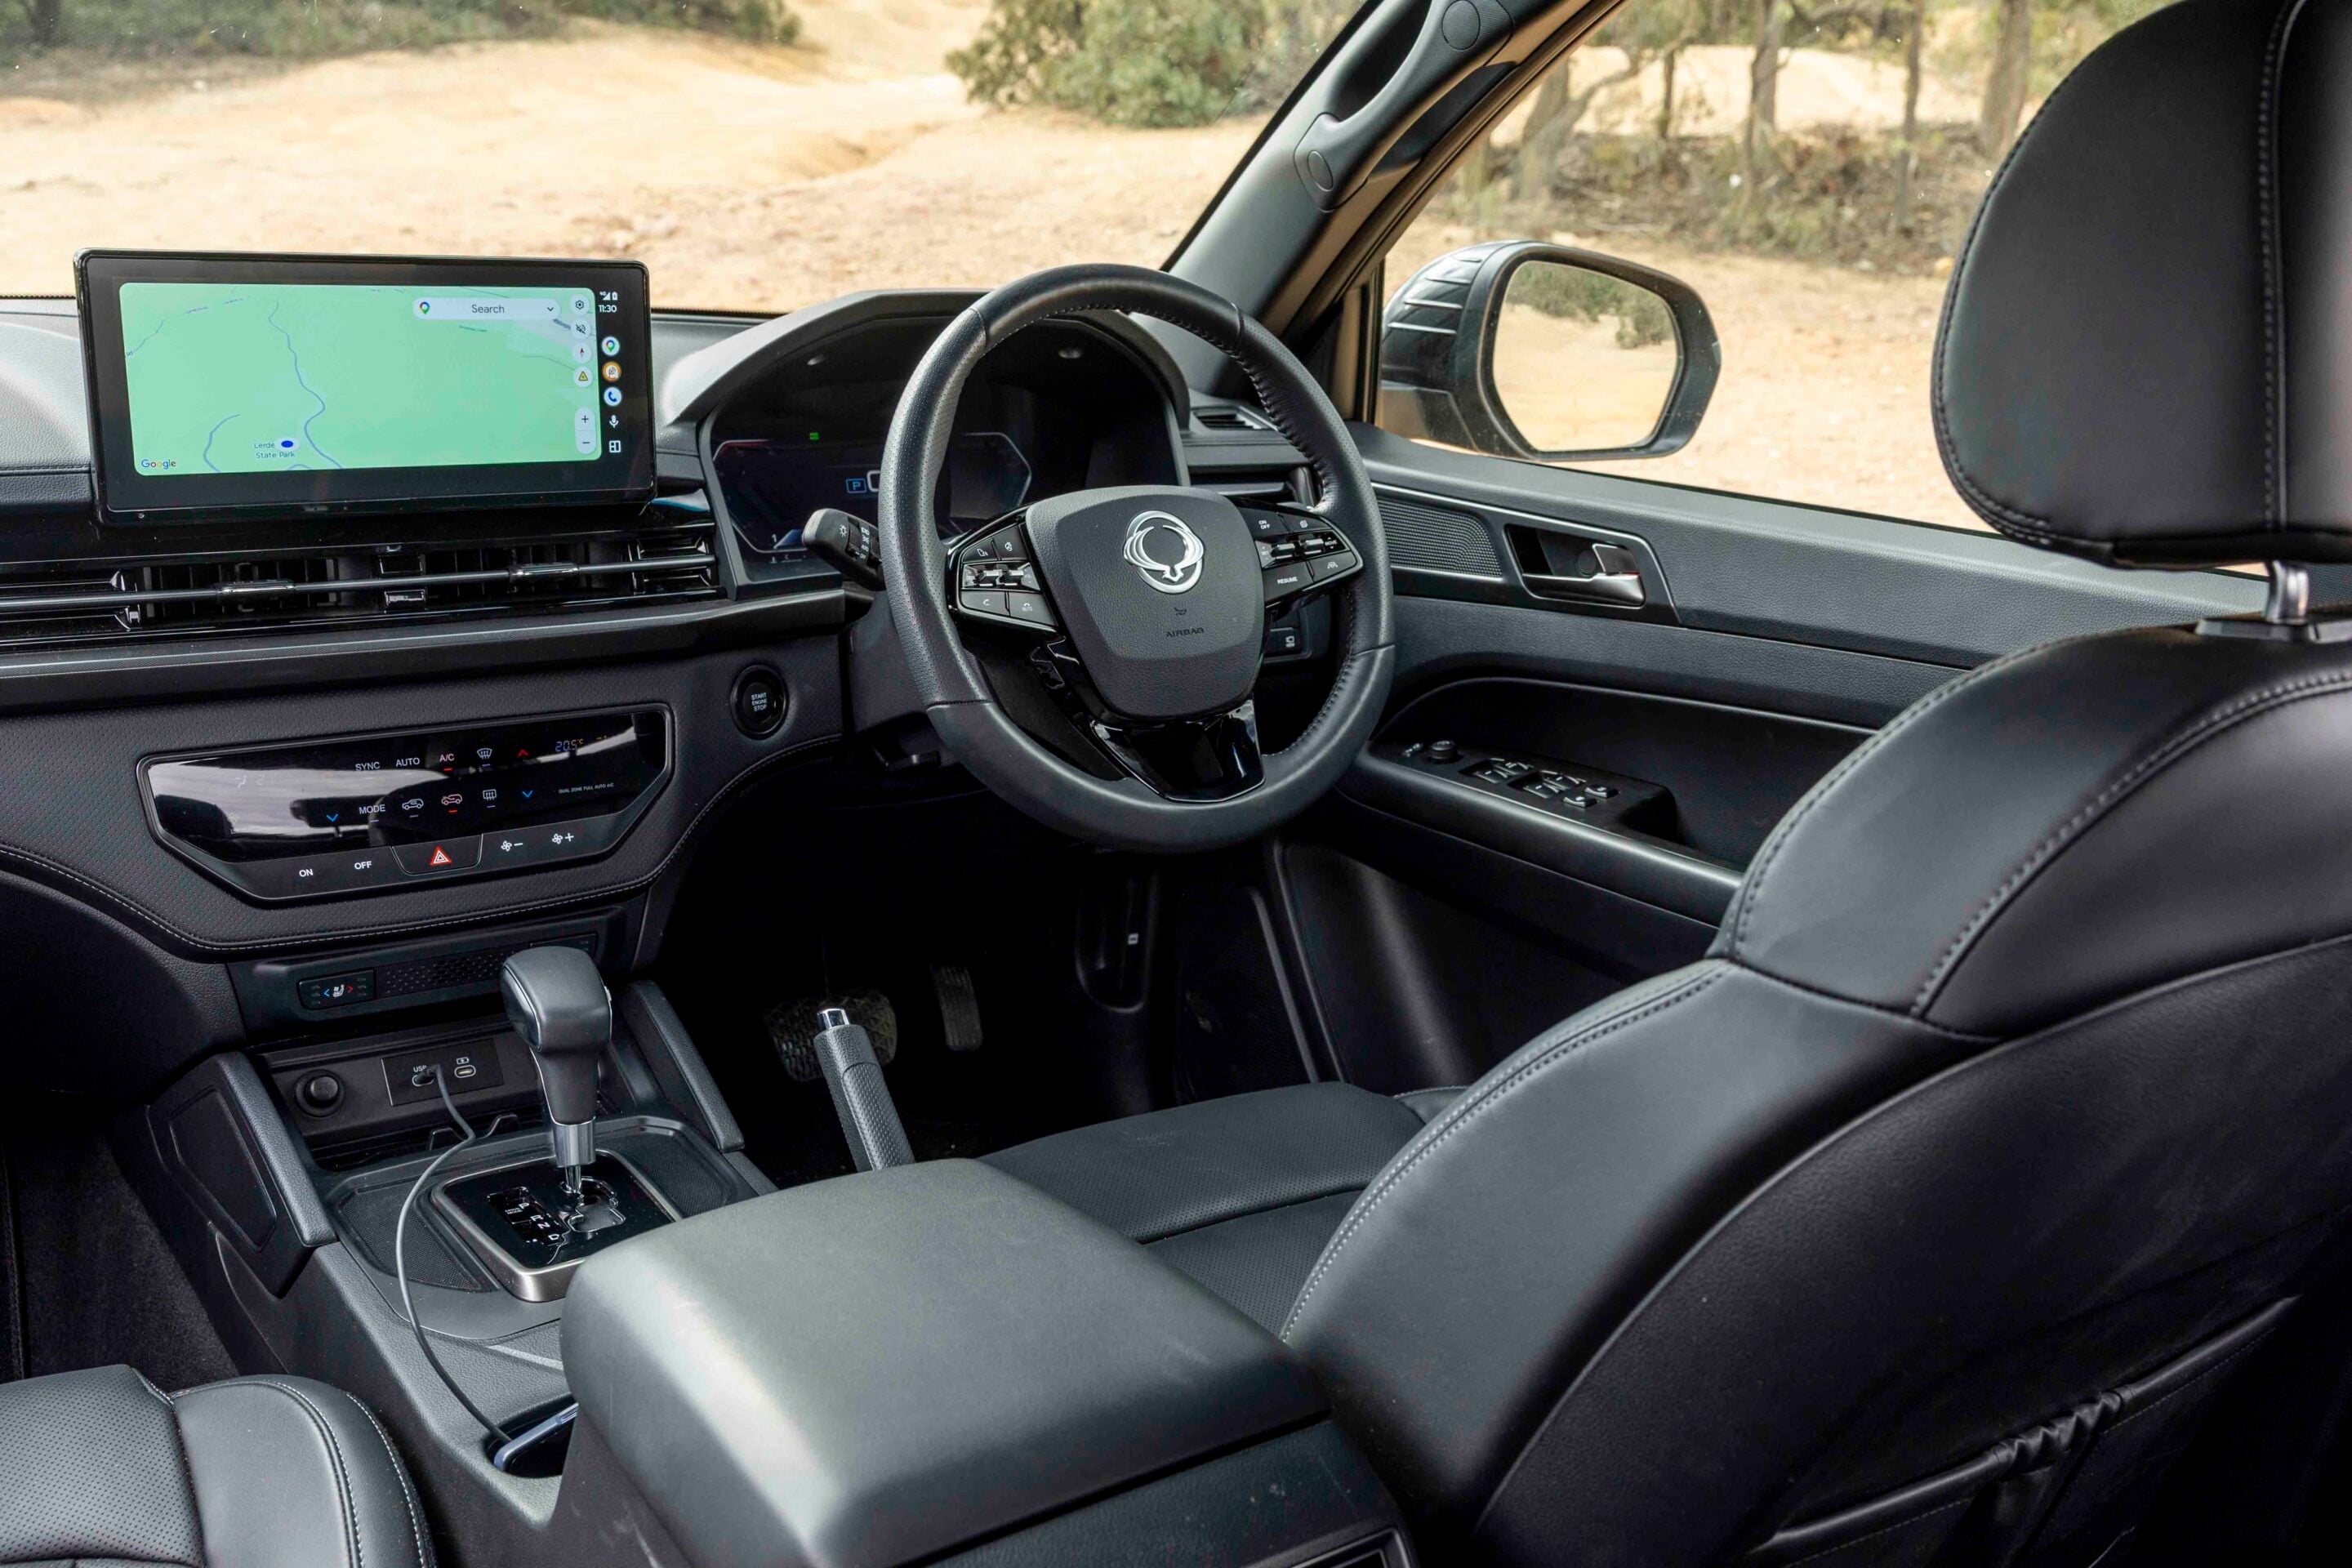
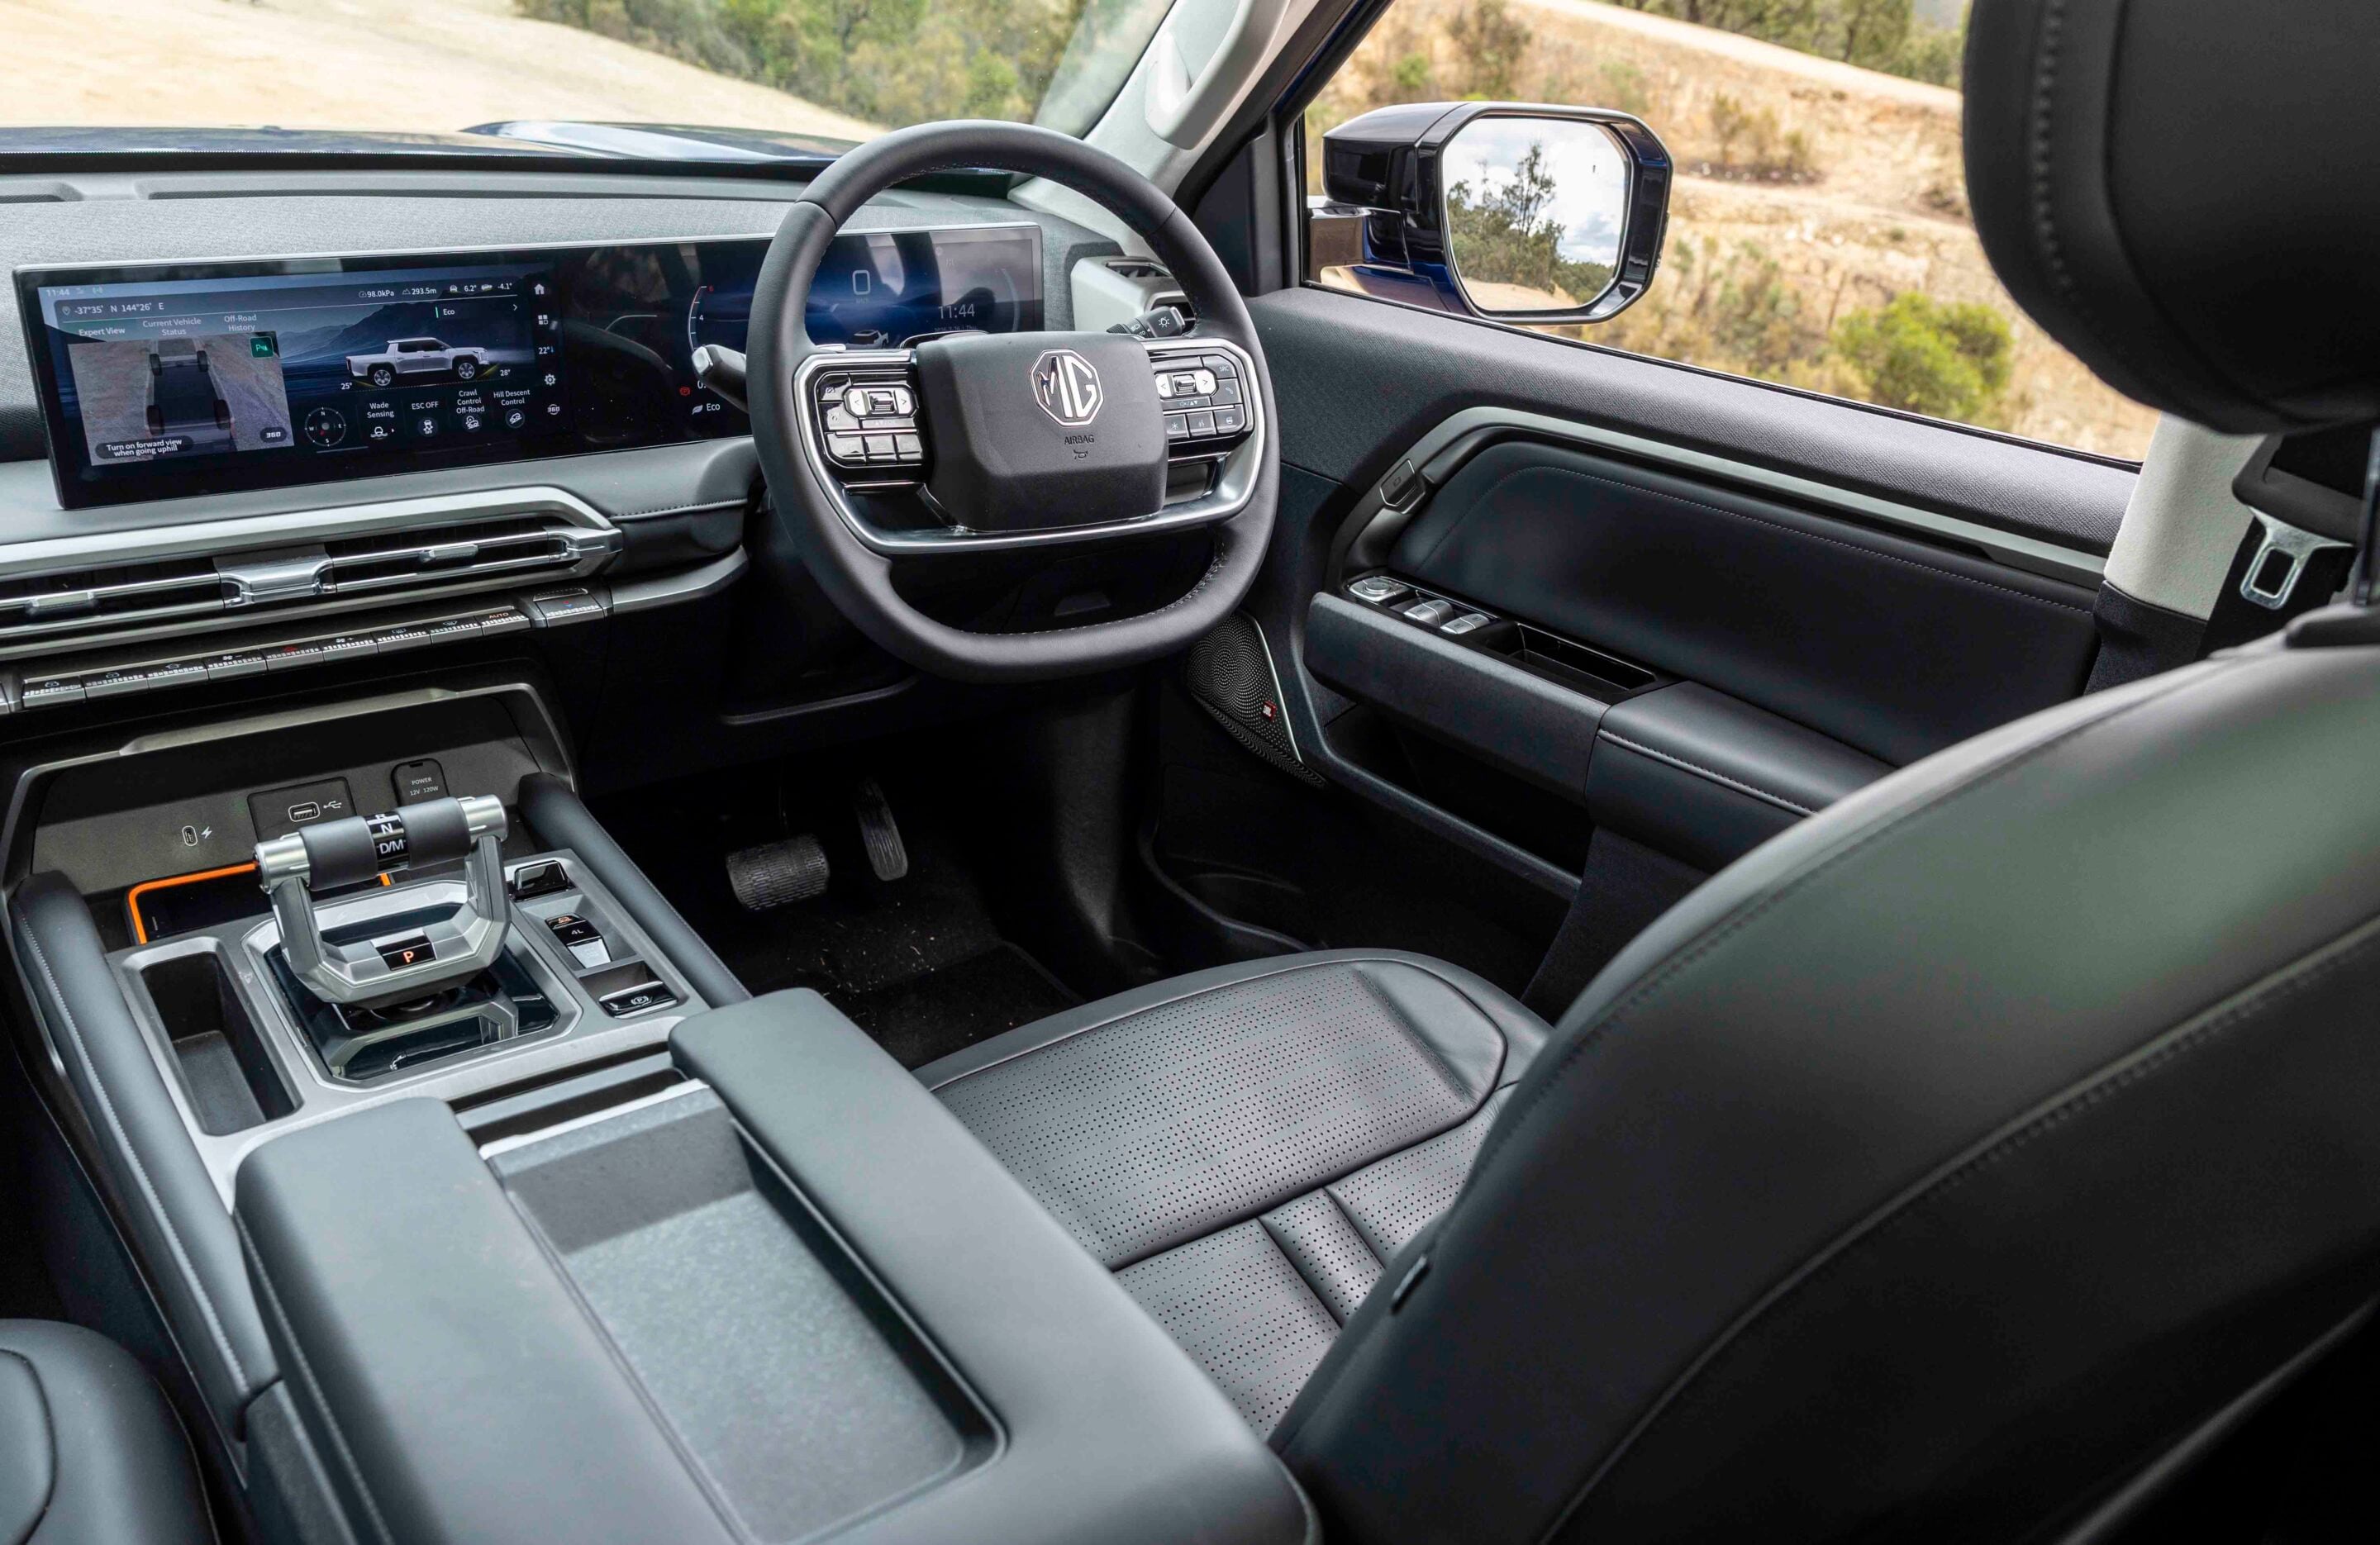
Musso interior
The Musso’s cabin was the widest in the class when the model debuted and, even though newer vehicles have matched it, we still appreciate the space it gives passengers in both the front and back.
The broad dashboard features 12.3-inch multimedia and driver’s display screens, the former offering Apple CarPlay and Android Auto connectivity, although Android is cable connection only. The multimedia screen is left largely black unless you connect to either of these third-party apps, but most users will subscribe to one or the other.
The seat trims are a leather-like material, and the front seats have power adjustment plus heating and cooling, while the rear pew offers heating for the outer positions. It’s a plain and unfussy cabin, but it’s not lacking anything you really want. The Musso features all the usual ADAS and safety systems you expect in 2026, plus a TPMS, which is more useful than most of the others.
Musso ownership and warranty
The Musso is covered by a seven-year, unlimited-kilometre warranty. Roadside assistance is available as part of KGM’s Travel Upgrade plan. Services are scheduled every 15,000km and are fixed-price as per the service schedule.
MG U9 Explore Pro
While the Musso might be showing its age, the U9 from MG is an all-new product for 2026. The platform, driveline and exterior design are shared with the LDV Terron 9, but there are some differences.
The reborn MG brand went about things a little differently to anything else in the market (except the LDV) when it came to designing its big utility. While it is a double-cab ute built on a ladder-frame chassis and powered by a four-cylinder diesel engine backed by an automatic transmission and a dual-range transfer case, things stray from the norm when you look under the skin.
MG U9 powertrain and performance
The U9 is powered by a 2.5-litre single-turbo diesel that MG claims is the most powerful in the segment, with a claimed 160kW and 520Nm coming from the four-cylinder engine.
They are big numbers, especially when compared to those of the Musso, but on the road and tracks it doesn’t feel that much more powerful than the established Korean ute. The engine is backed by a conventional eight-speed automatic transmission, a dual-range transfer case and triple locking differentials.
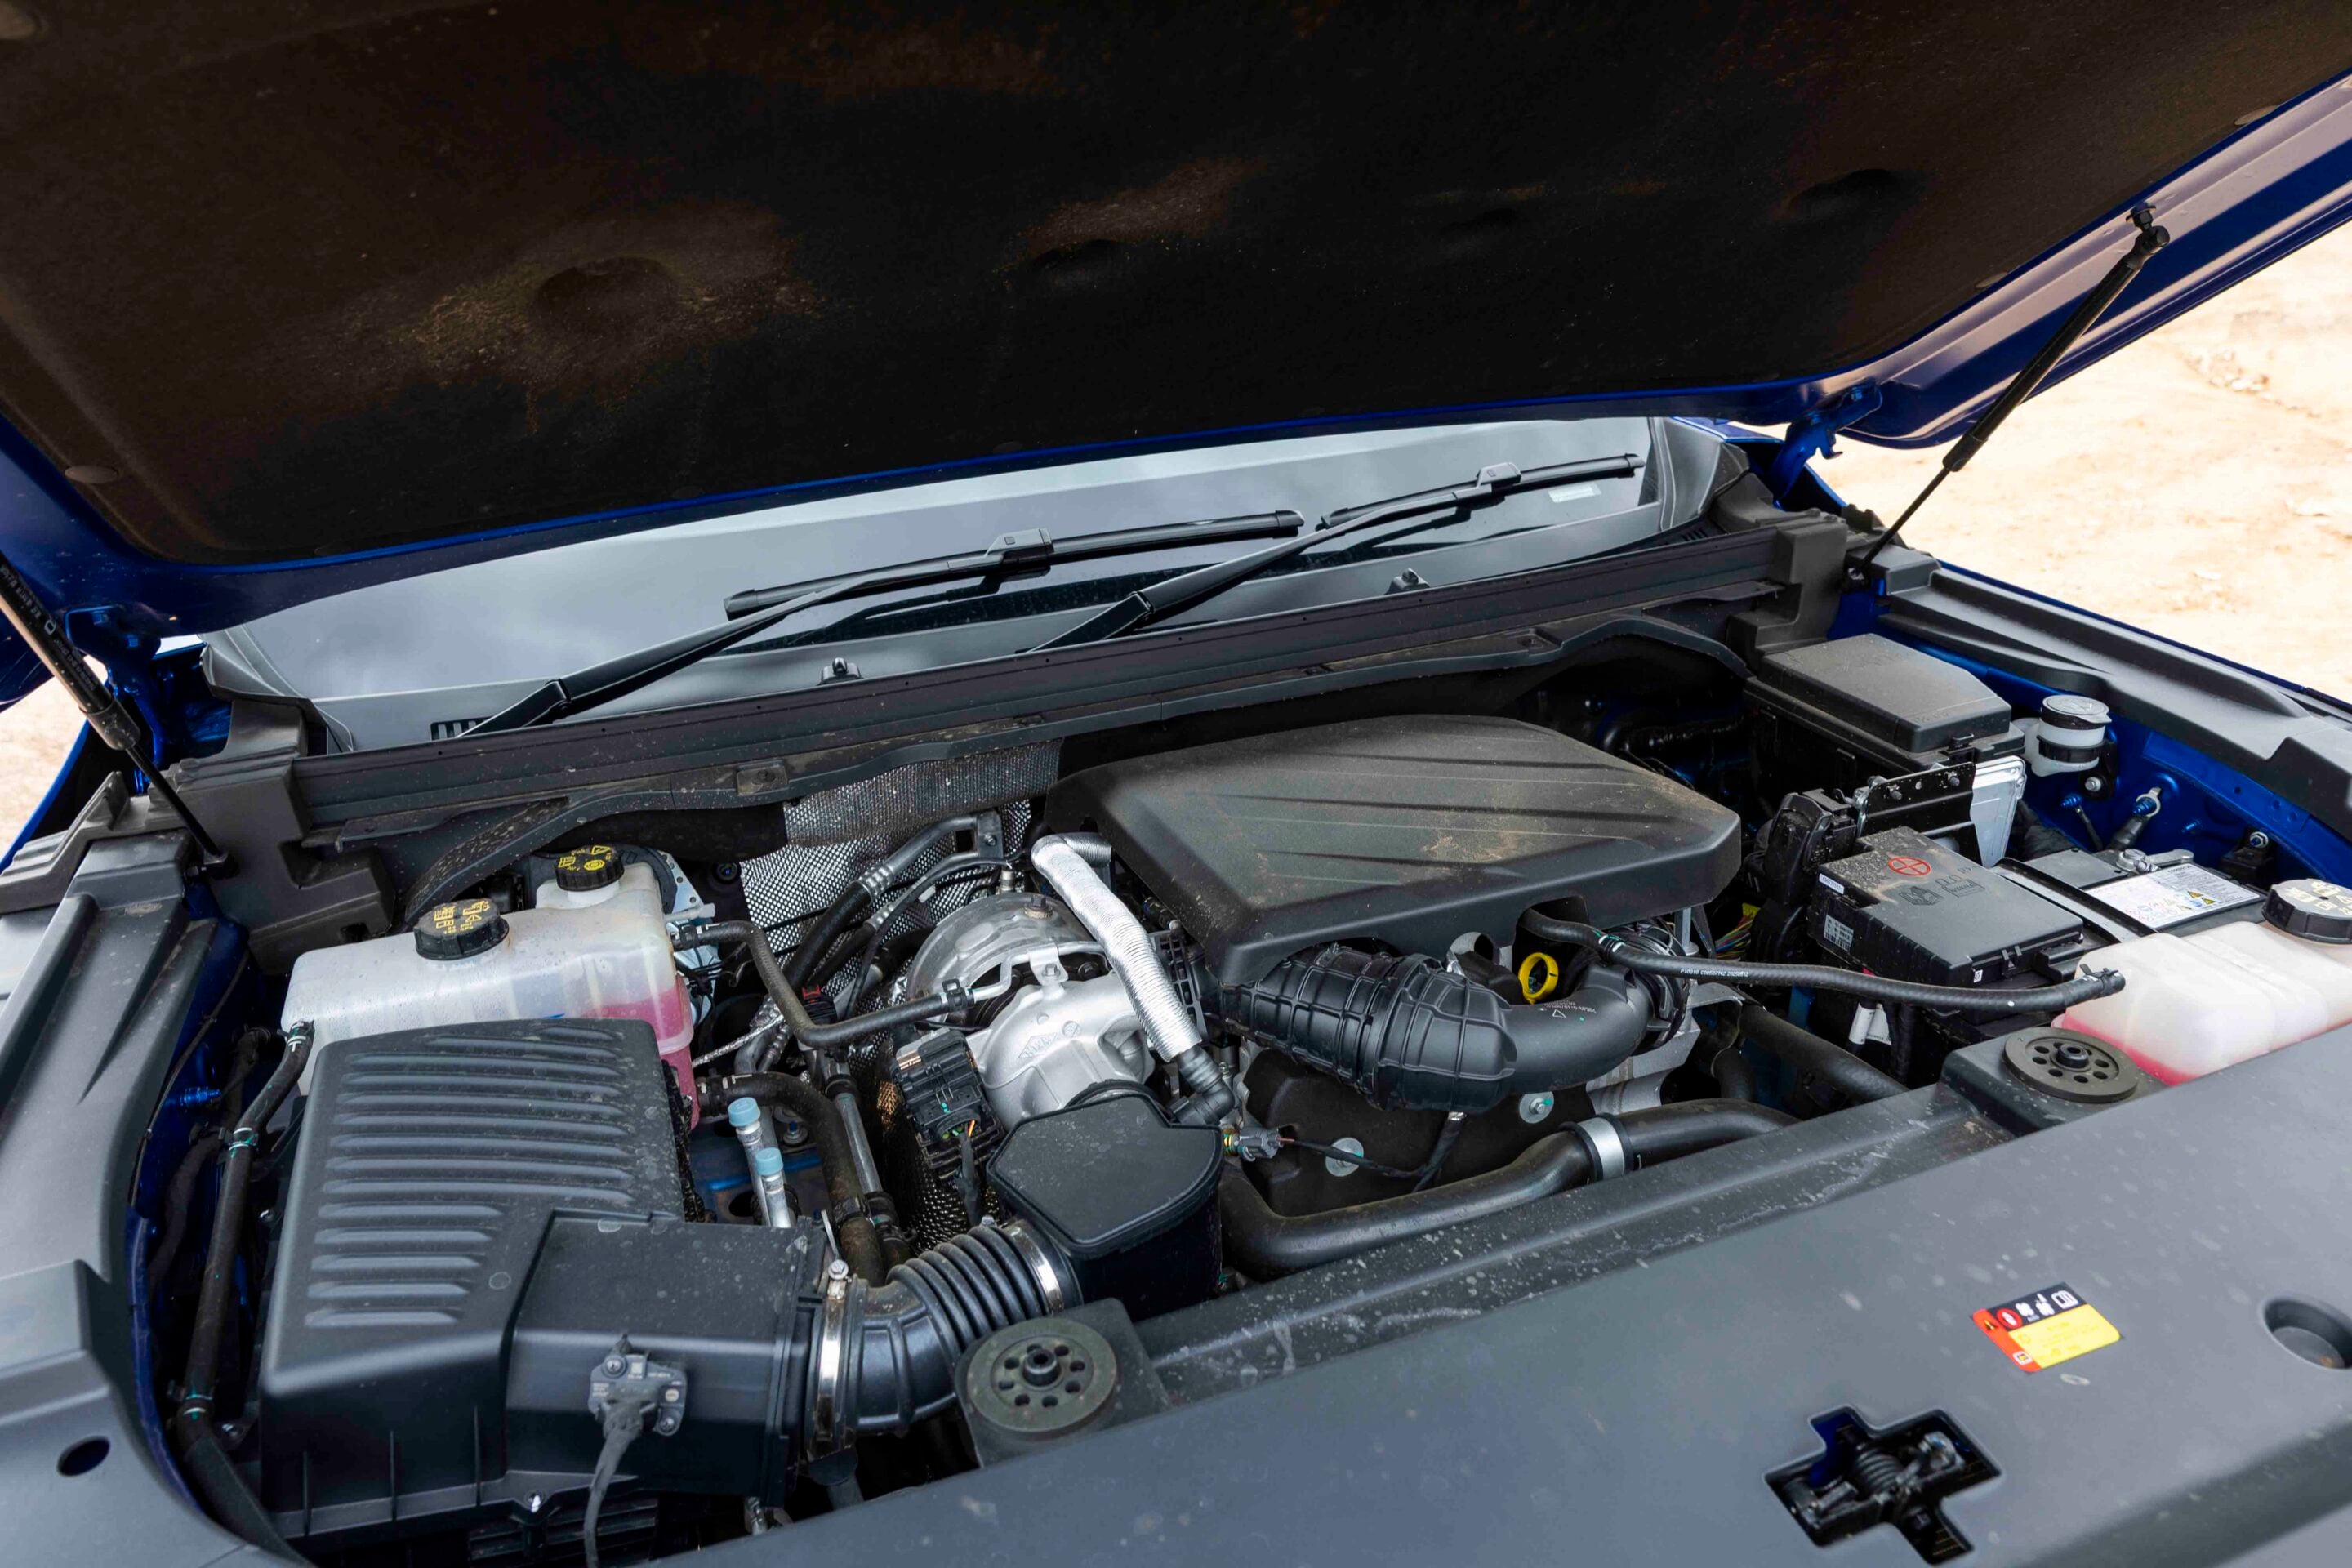
The diff locks are driver-activated after pressing a button on the console to bring up a menu on the screen to select the lockers. Strangely, there is no way to lock the centre diff in high range, which hobbles the MG on steep, loose tracks. The Explore Pro is the only model in the three-vehicle U9 range to get the locking front diff.
Another aspect of the U9 is its rear differential, which is part of an independent rear suspension set-up. While IRS set-ups are more commonly found under passenger cars and light-duty SUVs, where improved dynamics and comfort take precedence over load capacity, the U9 still manages a 3500kg towing capacity and a 770kg payload in the Explore Pro model, and up to 870kg in the entry-level Explore model. The rear axle under the U9 is rated to 1200kg.
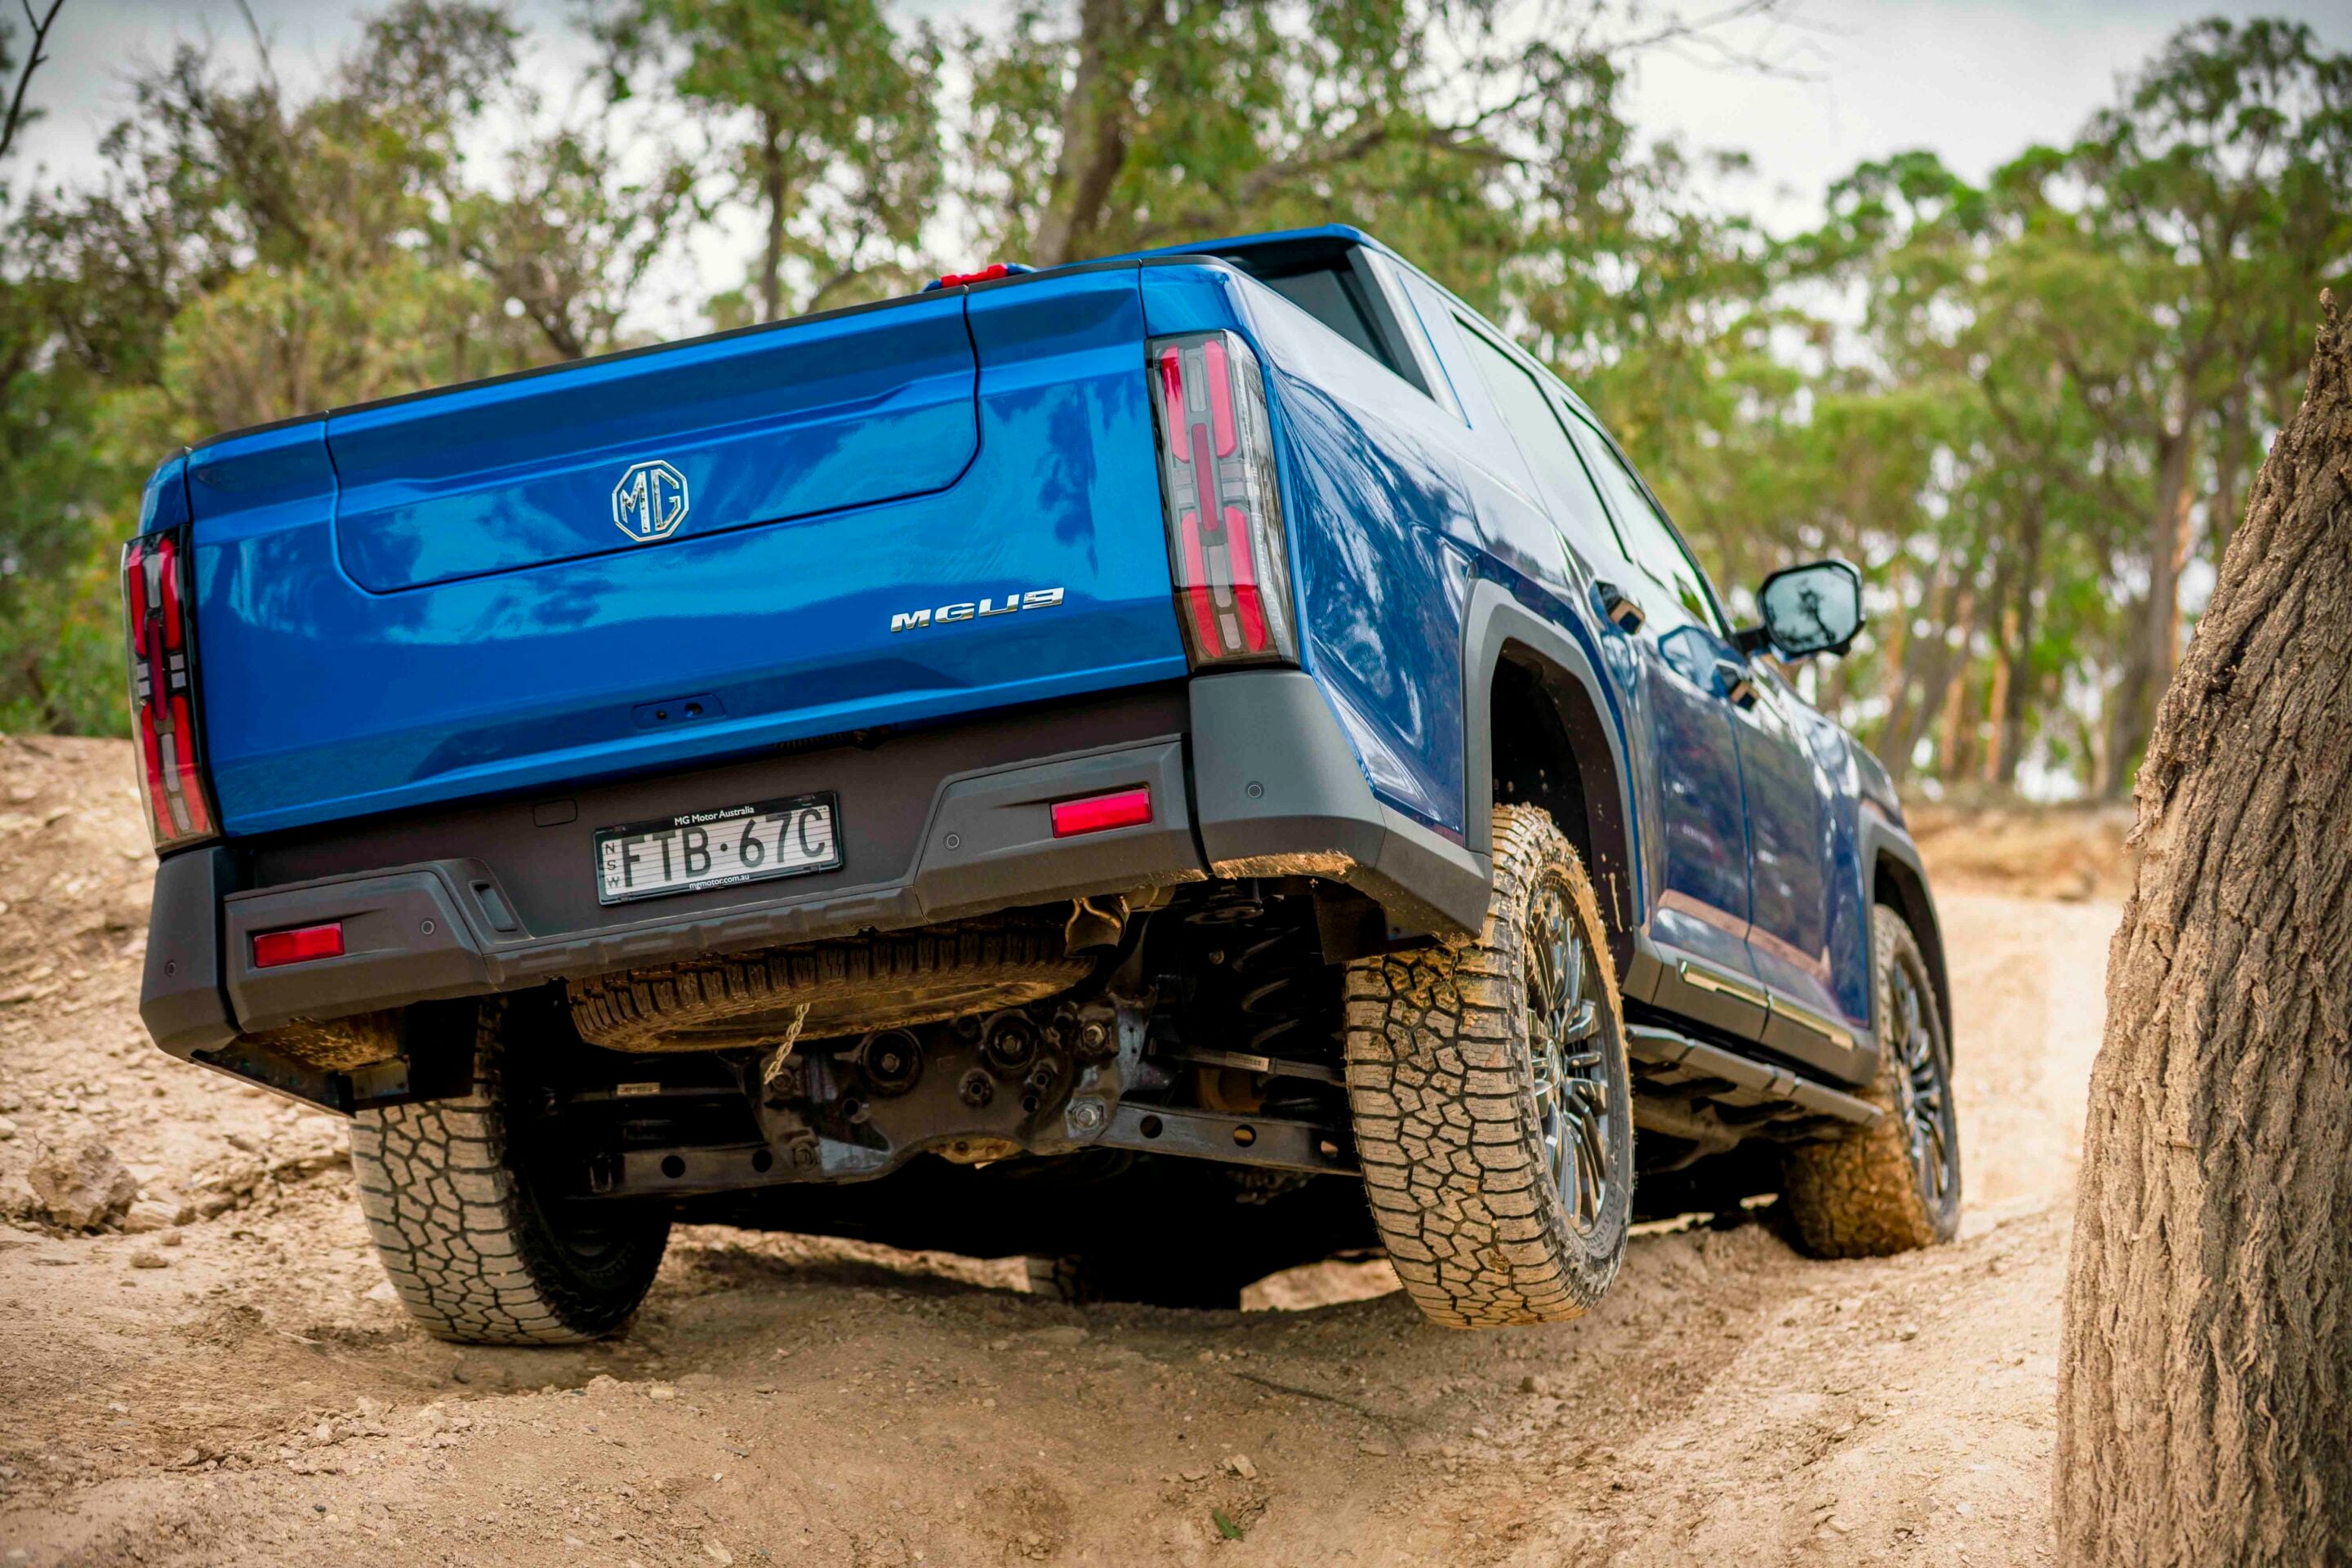
The front suspension is a conventional wishbone and coil IFS set-up.The short control arms of the IFS and IRS configuration severely limit wheel travel, so the U9 picks up its all-terrain tyres easily when off-road. The ETC is slow-reacting, so the U9 really needs its diff locks to tackle off-road terrain. When it’s all locked up, the U9 feels unstoppable. If you prefer gimmicks over lockers, the U9 offers eight drive modes for different track conditions, but they are made redundant by the locking diffs.
The short-travel suspension slams the tyres into potholes, giving a sometimes rough ride in the MG. The U9 Pro rides on 275/65R20 Falken Wildpeak tyres and, while we would normally stay away from 20-inch wheels and low-profile rubber for off-road use, the Falkens still have plenty of sidewall and give the ute a tougher look with improved off-road traction and durability.
| MG U9 off-road specs | |
|---|---|
| Departure angle | 23.4 |
| Rampover angle | 23 |
| Approach angle | 22.8 |
| Wading depth | 570mm |
| Ground clearance | 215mm |
MG U9 interior
The U9’s cabin is wide, spacious and loaded with equipment.
It’s probably one of the most tech-laden set-ups in any ute, but that’s not always a good thing, with some functions being overcomplicated. I found it annoying that some of the buttons on the console and HVAC controls still lead you to the multimedia screen to make your selection, rather than operating directly.
The front seats are leather-trimmed and are heated and ventilated, with power adjustment and massage for the driver. Front seat passengers are faced with a wide and bluff dashboard housing a pair of 12.3-inch screens, one each for the multimedia and the driver’s information.
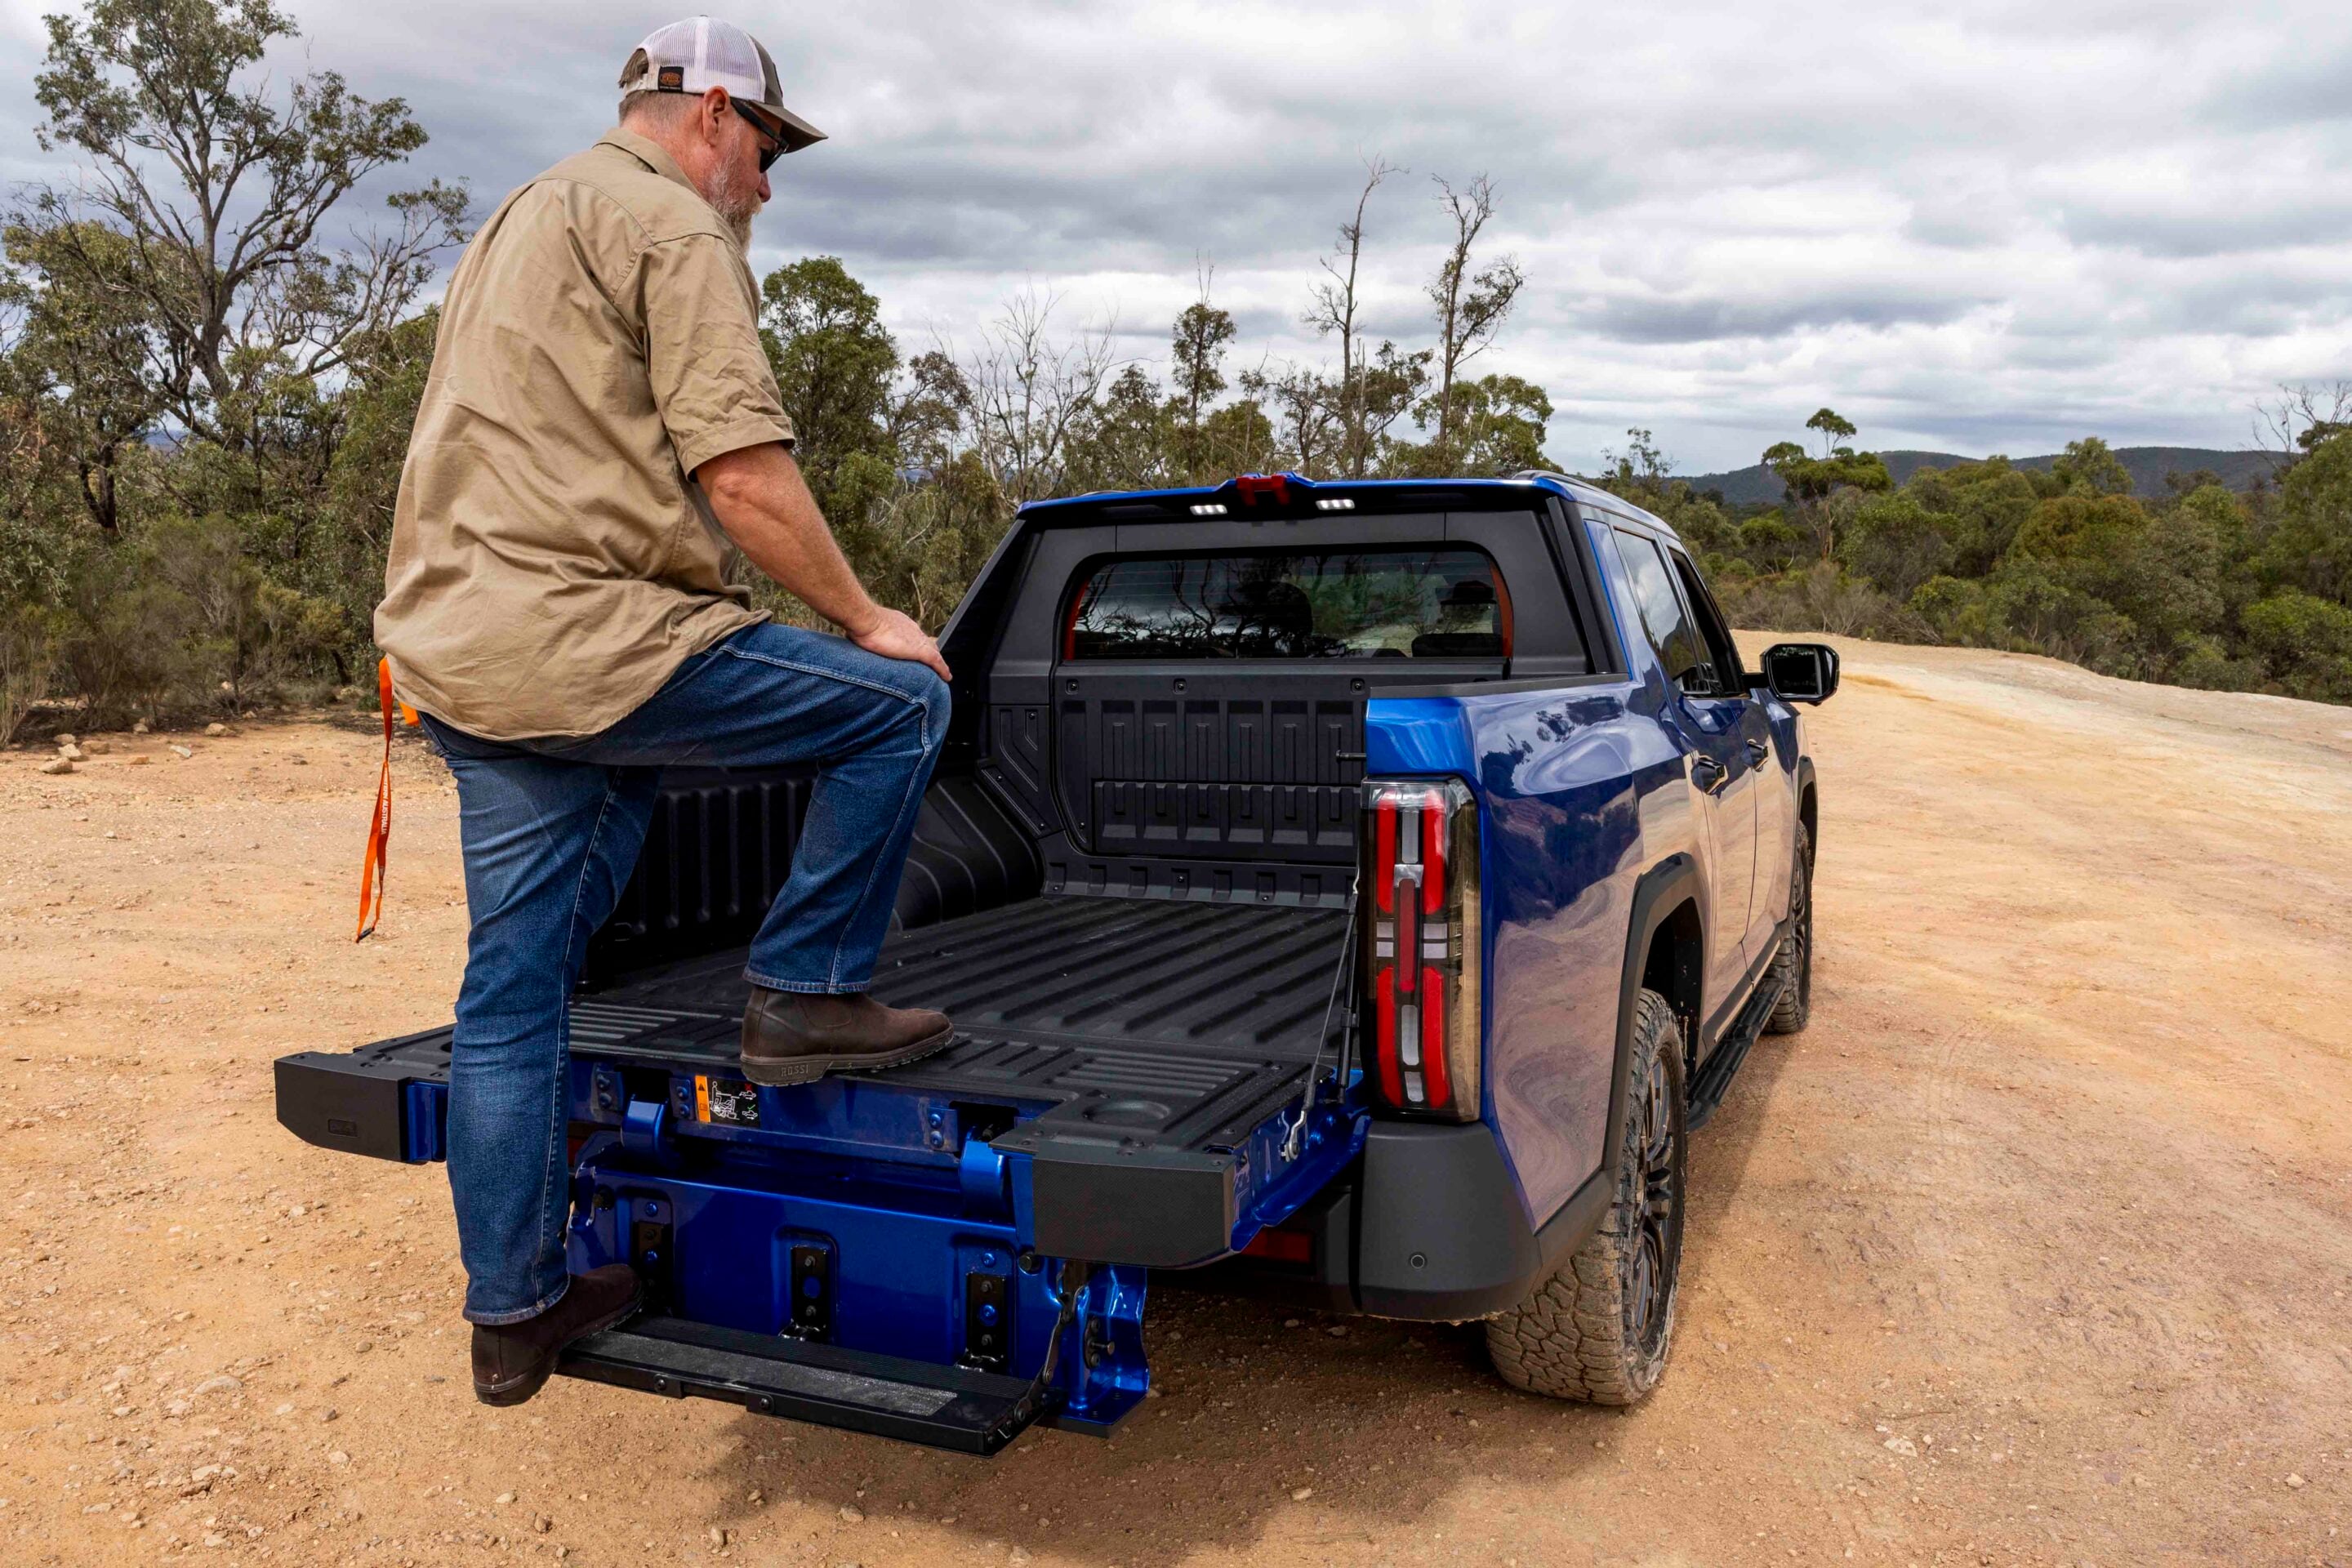
The digital rear-view mirror gives a poor and distorted view of what’s behind the U9 while driving. Luckily, the rear-view camera gives a clean and well-defined image on the multimedia screen when reversing the 5.5-metre-long ute. The back seat is likewise leather-clad and includes heating for the outer positions, as well as a recline function that gives a more comfortable seating position.
This is made possible due to the lack of a bulkhead between the cabin and the load bed. With no panel there, back seat users are able to open a flap between the folded rear seats and the tray to carry long items. It’s a useful feature that is unique in this category, made possible by the one-piece side panels running from the door pillars back to the rear of the tray. This also means that you can’t remove the cargo area to fit a tray or service body like you can on most other utes in the market.
MG U9 ownership and warranty
MG vehicles come with a seven-year, unlimited-kilometre warranty. This can be extended to 10 years or 250,000km (whichever comes first) for MG passenger vehicles intended for personal use, and up to seven years or 200,000km (whichever comes first) for MG light commercial vehicles, by completing scheduled servicing with an authorised MG dealer.
If you exceed these kilometre limits during the period of your standard warranty, the extended warranty will not apply. Roadside assistance is available, and service prices are fixed for the first 12 months.
Verdict
Sometimes it’s the simple things that do the best job. While the current KGM Musso might be getting old and is set for replacement later this year, it doesn’t miss out on anything you could want in a 4×4 ute, be it for work or play.
It’s a well-proven platform and drivetrain that includes all the safety and convenience features you would expect, and the ability to kit it up with off-road accessories from Ironman 4×4 puts it in a great place. Yes, the accessory range is limited, but it comprises a lot more than you will readily find for the MG U9.
The MG might be newer, bigger and certainly brasher, but the brand still has a way to go before it sorts its ute out. Some of the controls are overcomplicated, and other elements – like the digital rear-view mirror – feel like tech for tech’s sake and don’t work as well as simpler solutions.
The MG having front and rear locking diffs isn’t just a nicety in the U9 – it’s essential, as the slow ETC and short wheel travel would leave it compromised without them. Further refinement and development of the U9 platform will make it a killer 4×4 ute in the future, but for now the well-proven Musso gets our vote.
Specs
| KGM Musso Ultimate XLV | MG U9 Explore Pro | |
|---|---|---|
| Price | $51,550 drive away | $60,990 |
| Engine | I4 turbo-diesel | I4 turbo-diesel |
| Capacity | 2157cc | 2499cc |
| Max power | 133kW @ 4000rpm | 163kW @ 3800rpm |
| Max torque | 400Nm from 1400-2800rpm | 520Nm from 1500-2500rpm |
| Transmission | 6-speed automatic | 8-speed automatic |
| 4×4 system | Part-time 4×4 with high and low range | On-demand high-range 4×4 and locked low-range 4×4 |
| Construction | 4-door cabin and tub on separate chassis | 4-door cabin and tub on separate chassis |
| Front suspension | IFS with coil springs | IFS with coil springs |
| Rear suspension | Live axle, 5-link with coil springs | IRS with coil springs |
| Tyres | 255/60R18 on alloy wheels | 275/65R20 on alloy wheels |
| Kerb weight | 2090kg | 2450kg |
| GVM | 288kg | 3320kg |
| Payload | 1010kg | 770kg |
| Towing | 3500kg | 3500kg |
| GCM | 6380kg | 6500kg |
| Seating | 5 | 5 |
| Fuel tank | 75L | 80L |
| ADR fuel consumption | 8.6L/100km | 7.9L/100km |
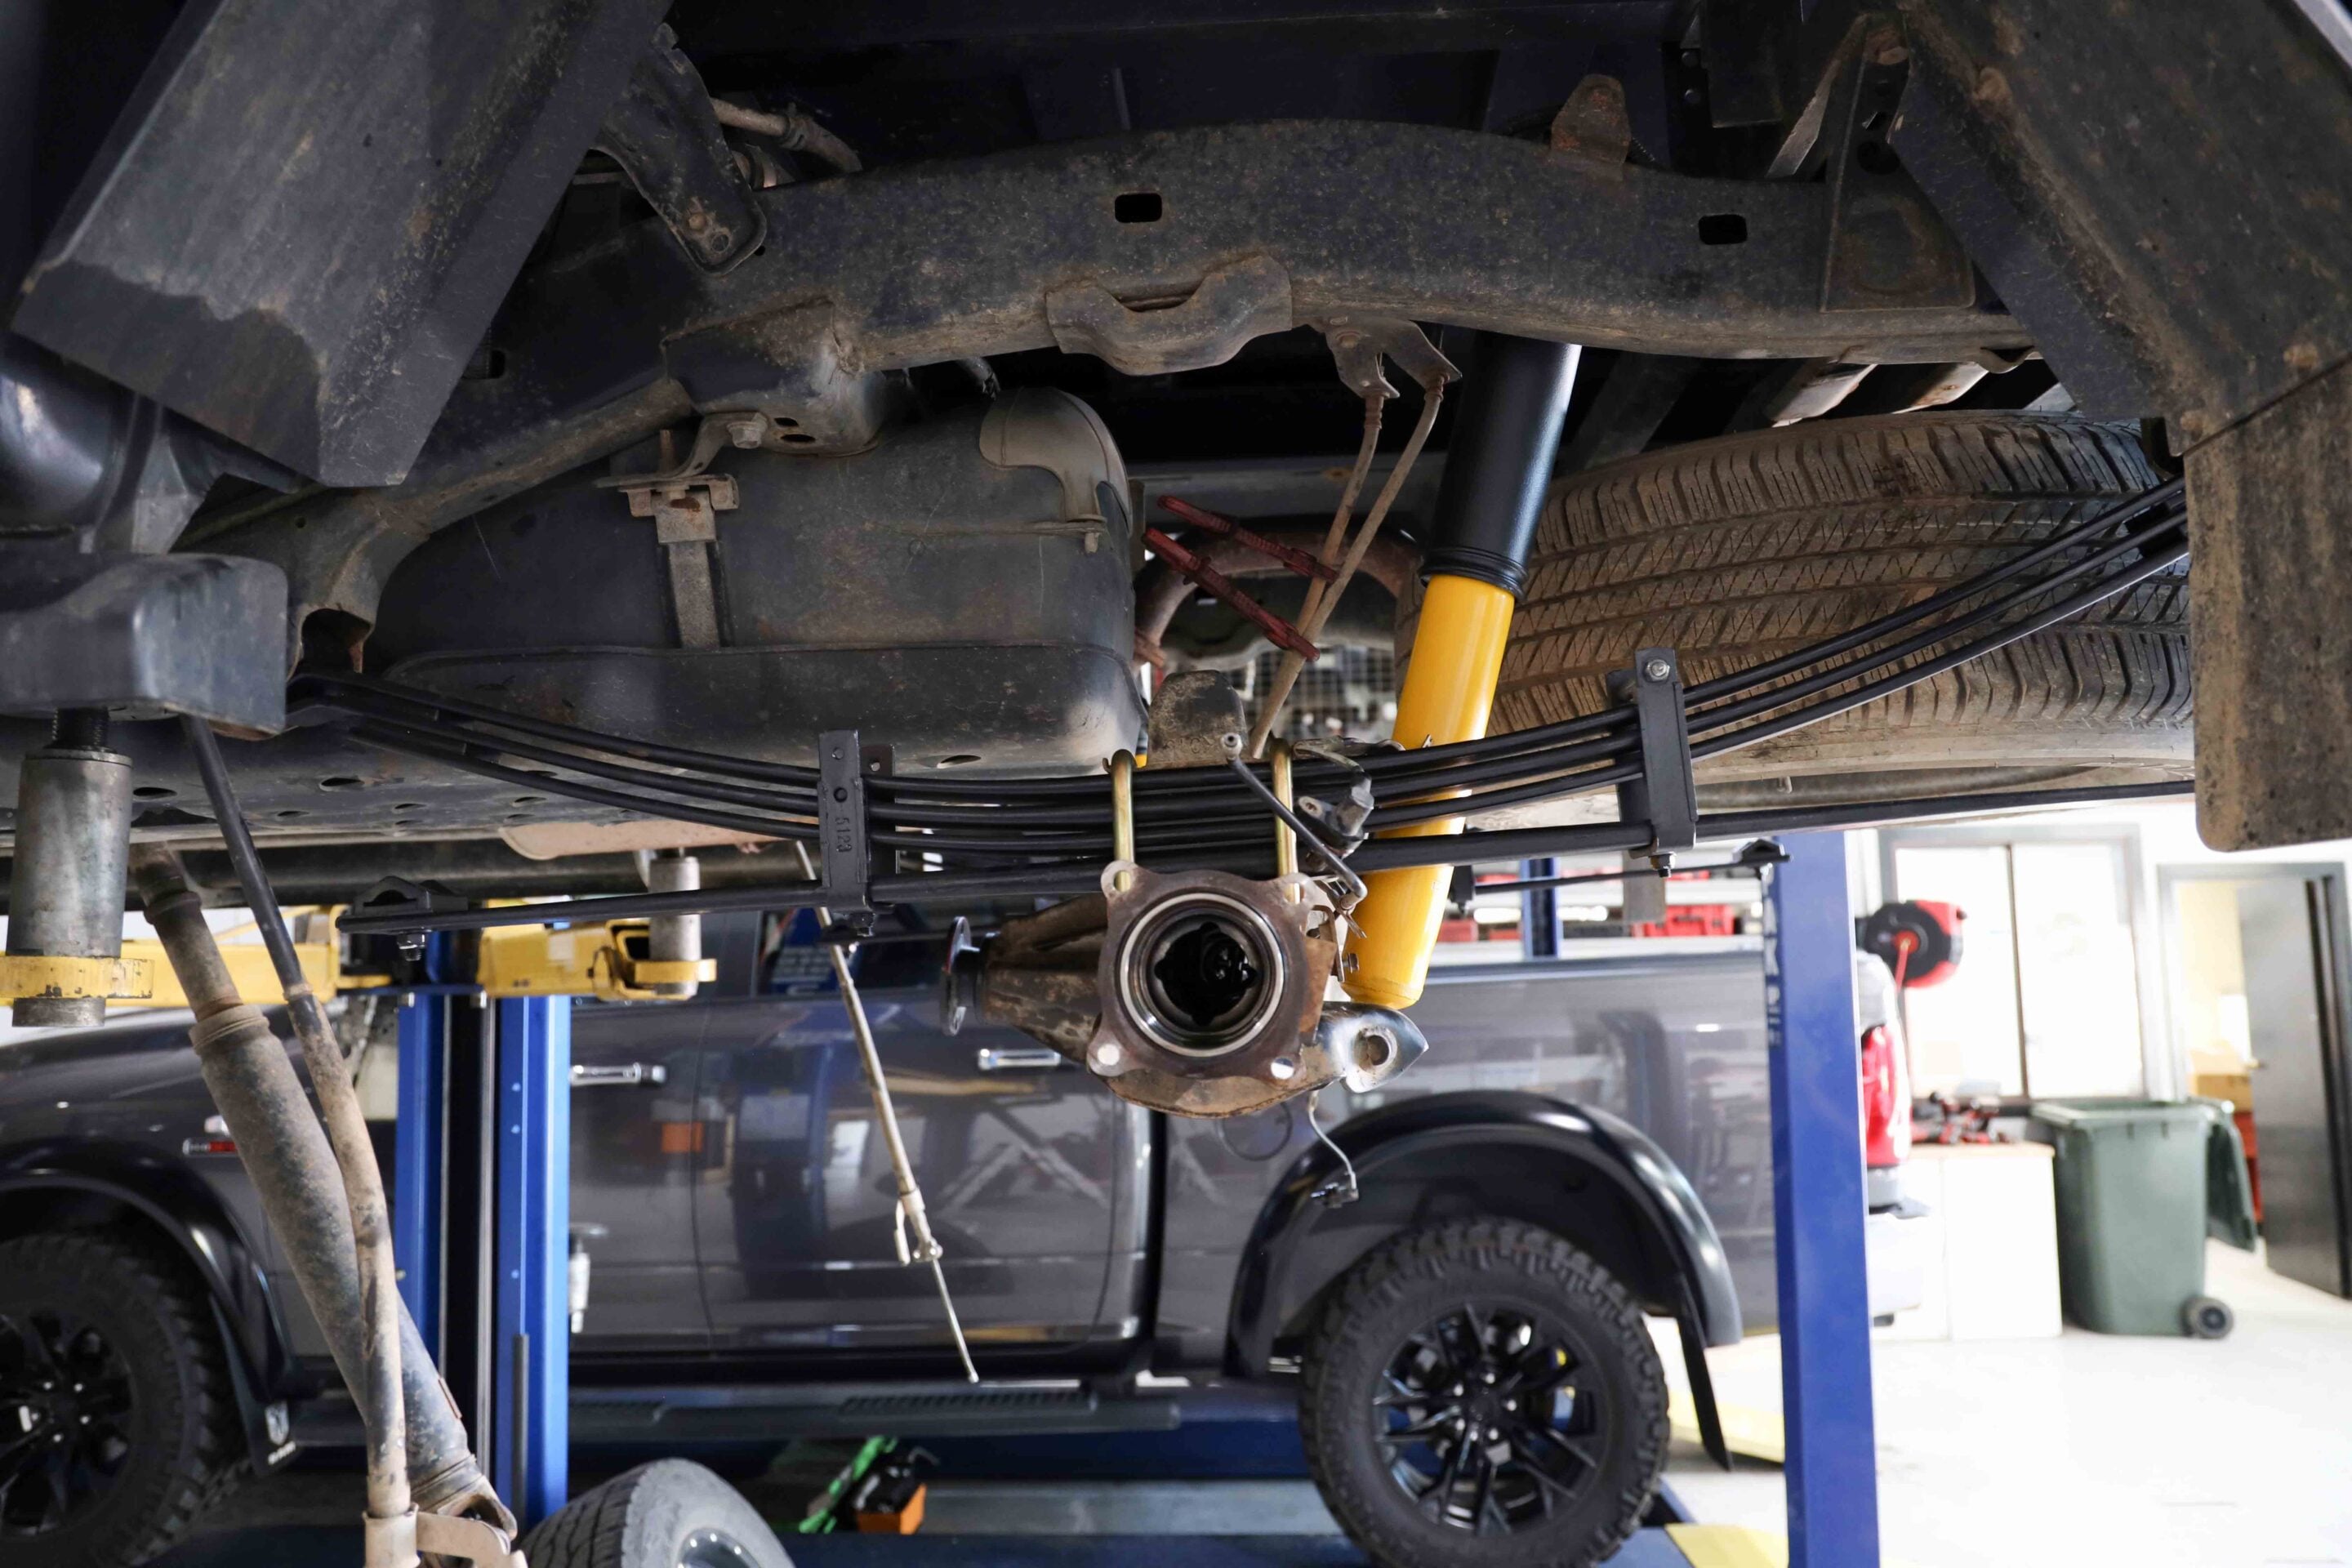
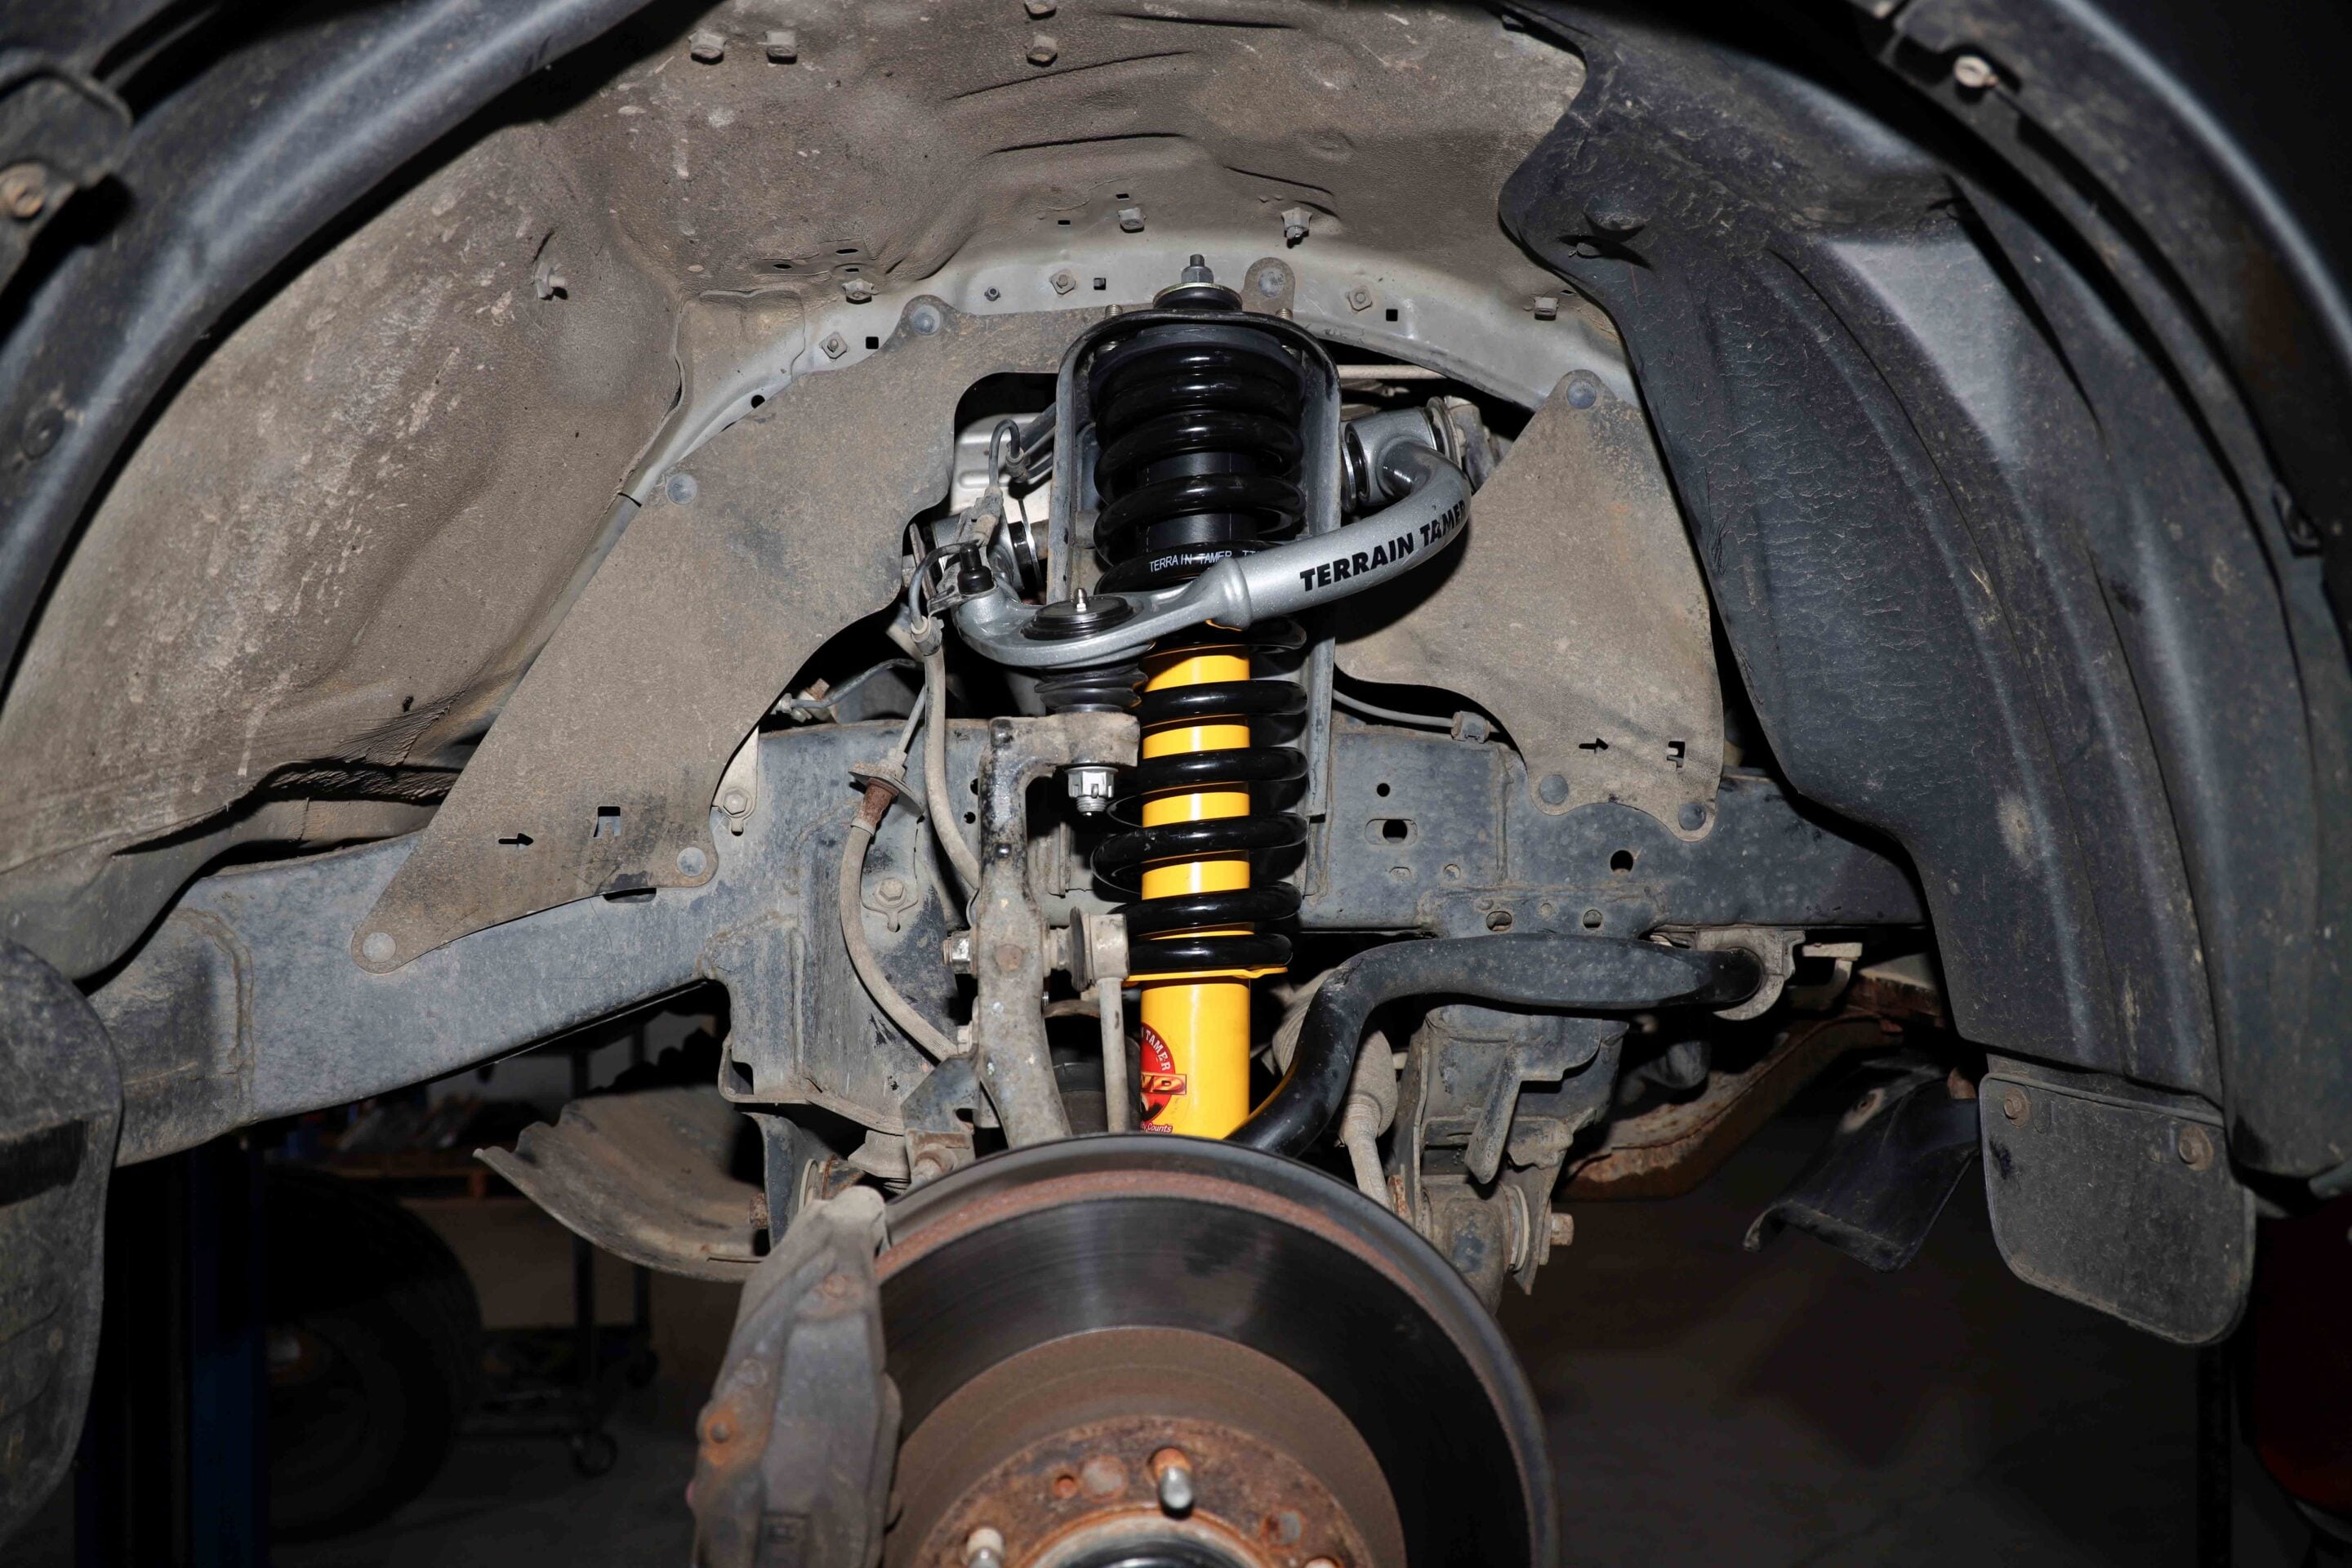
Given my success using Terrain Tamer front Smart coils (progressively rated coil springs) and rear parabolic leaves (progressively rated leaf spring packs), matched with their twin-tube shocks on my Troopy for nearly 10 years, it was an easy choice when it came time to fit suspension to my HiLux.
Yeah, I know there are plenty of higher-spec shocks on the market – monotubes, remote resi’s, bypass and adjustables – but I’m happy with the ever-reliable jack-of-all-trades twin-tube design. They work, and they’re reliable… simple!
Nope, there’s no way I’d step back in time to a standard semi-elliptic leaf spring pack, as per a horse-and-cart setup. Nor would I settle for a constant load rate in the coils. Having that progressive rate on both front and rear suspension helps iron out the smaller, low-speed thuds just as well as the heavier, high-speed hits, keeping the HiLux on track at all times – taming the terrain, as such!
Why I chose Terrain Tamer
The Terrain Tamer kit I chose is rated to provide a 40mm lift with a load range of 400 to 700kg for the rear parabolic leaf packs. I also opted for the heavier-duty coil kit up front, rated for a 50–100kg load, to account for the bullbar and winch – more on that later.
When I purchased the HiLux, the condition of the existing aftermarket suspension was unknown. Yes, it was a quality Old Man Emu kit, but I didn’t know its load ratings or overall condition. Plus, it all looked low for my liking, suggesting it may have been a standard-height kit installed by the previous owner. Either way, the Terrain Tamer upgrade delivered a noticeable improvement in both ride height and stance.
Yeah, I know I should have added all the heavy gear to my HiLux before fitting the suspension. No, that didn’t happen! See, it turns out I’ve got a fair old wait ahead for my chosen bullbar to arrive. Same goes for the winch I wanted to run and test. Plus, the dual-battery system and general storage still need to be installed in the canopy.
Given that I know exactly what I’ll be adding weight-wise to both the front and rear, and how the HiLux will be used, I figured it was a safe bet to let the suspension jump the fitting queue. Besides, how long can a fella stare at mechanical presents sitting on the shed floor? The temptation was too much!
Heavy duty upper control arms
As well as the coils up front, I opted for a pair of heavy-duty Terrain Tamer upper control arms to be fitted at the same time. Put simply, they offer superior strength over OE, incorporate greaseable bushes, and enable the wheel alignment to be set correctly.
While it’s a whole article in itself, in brief the upper control arms allow caster and camber to be properly tuned to suit the new suspension height. They also provide increased articulation and help maintain an optimal tyre contact patch through correct wheel alignment, both on- and off-road, improving tyre wear and grip.
I believe upper control arms should be fitted to any independent front suspension vehicle at the time of a suspension lift.
How does it now perform on- and off-road?
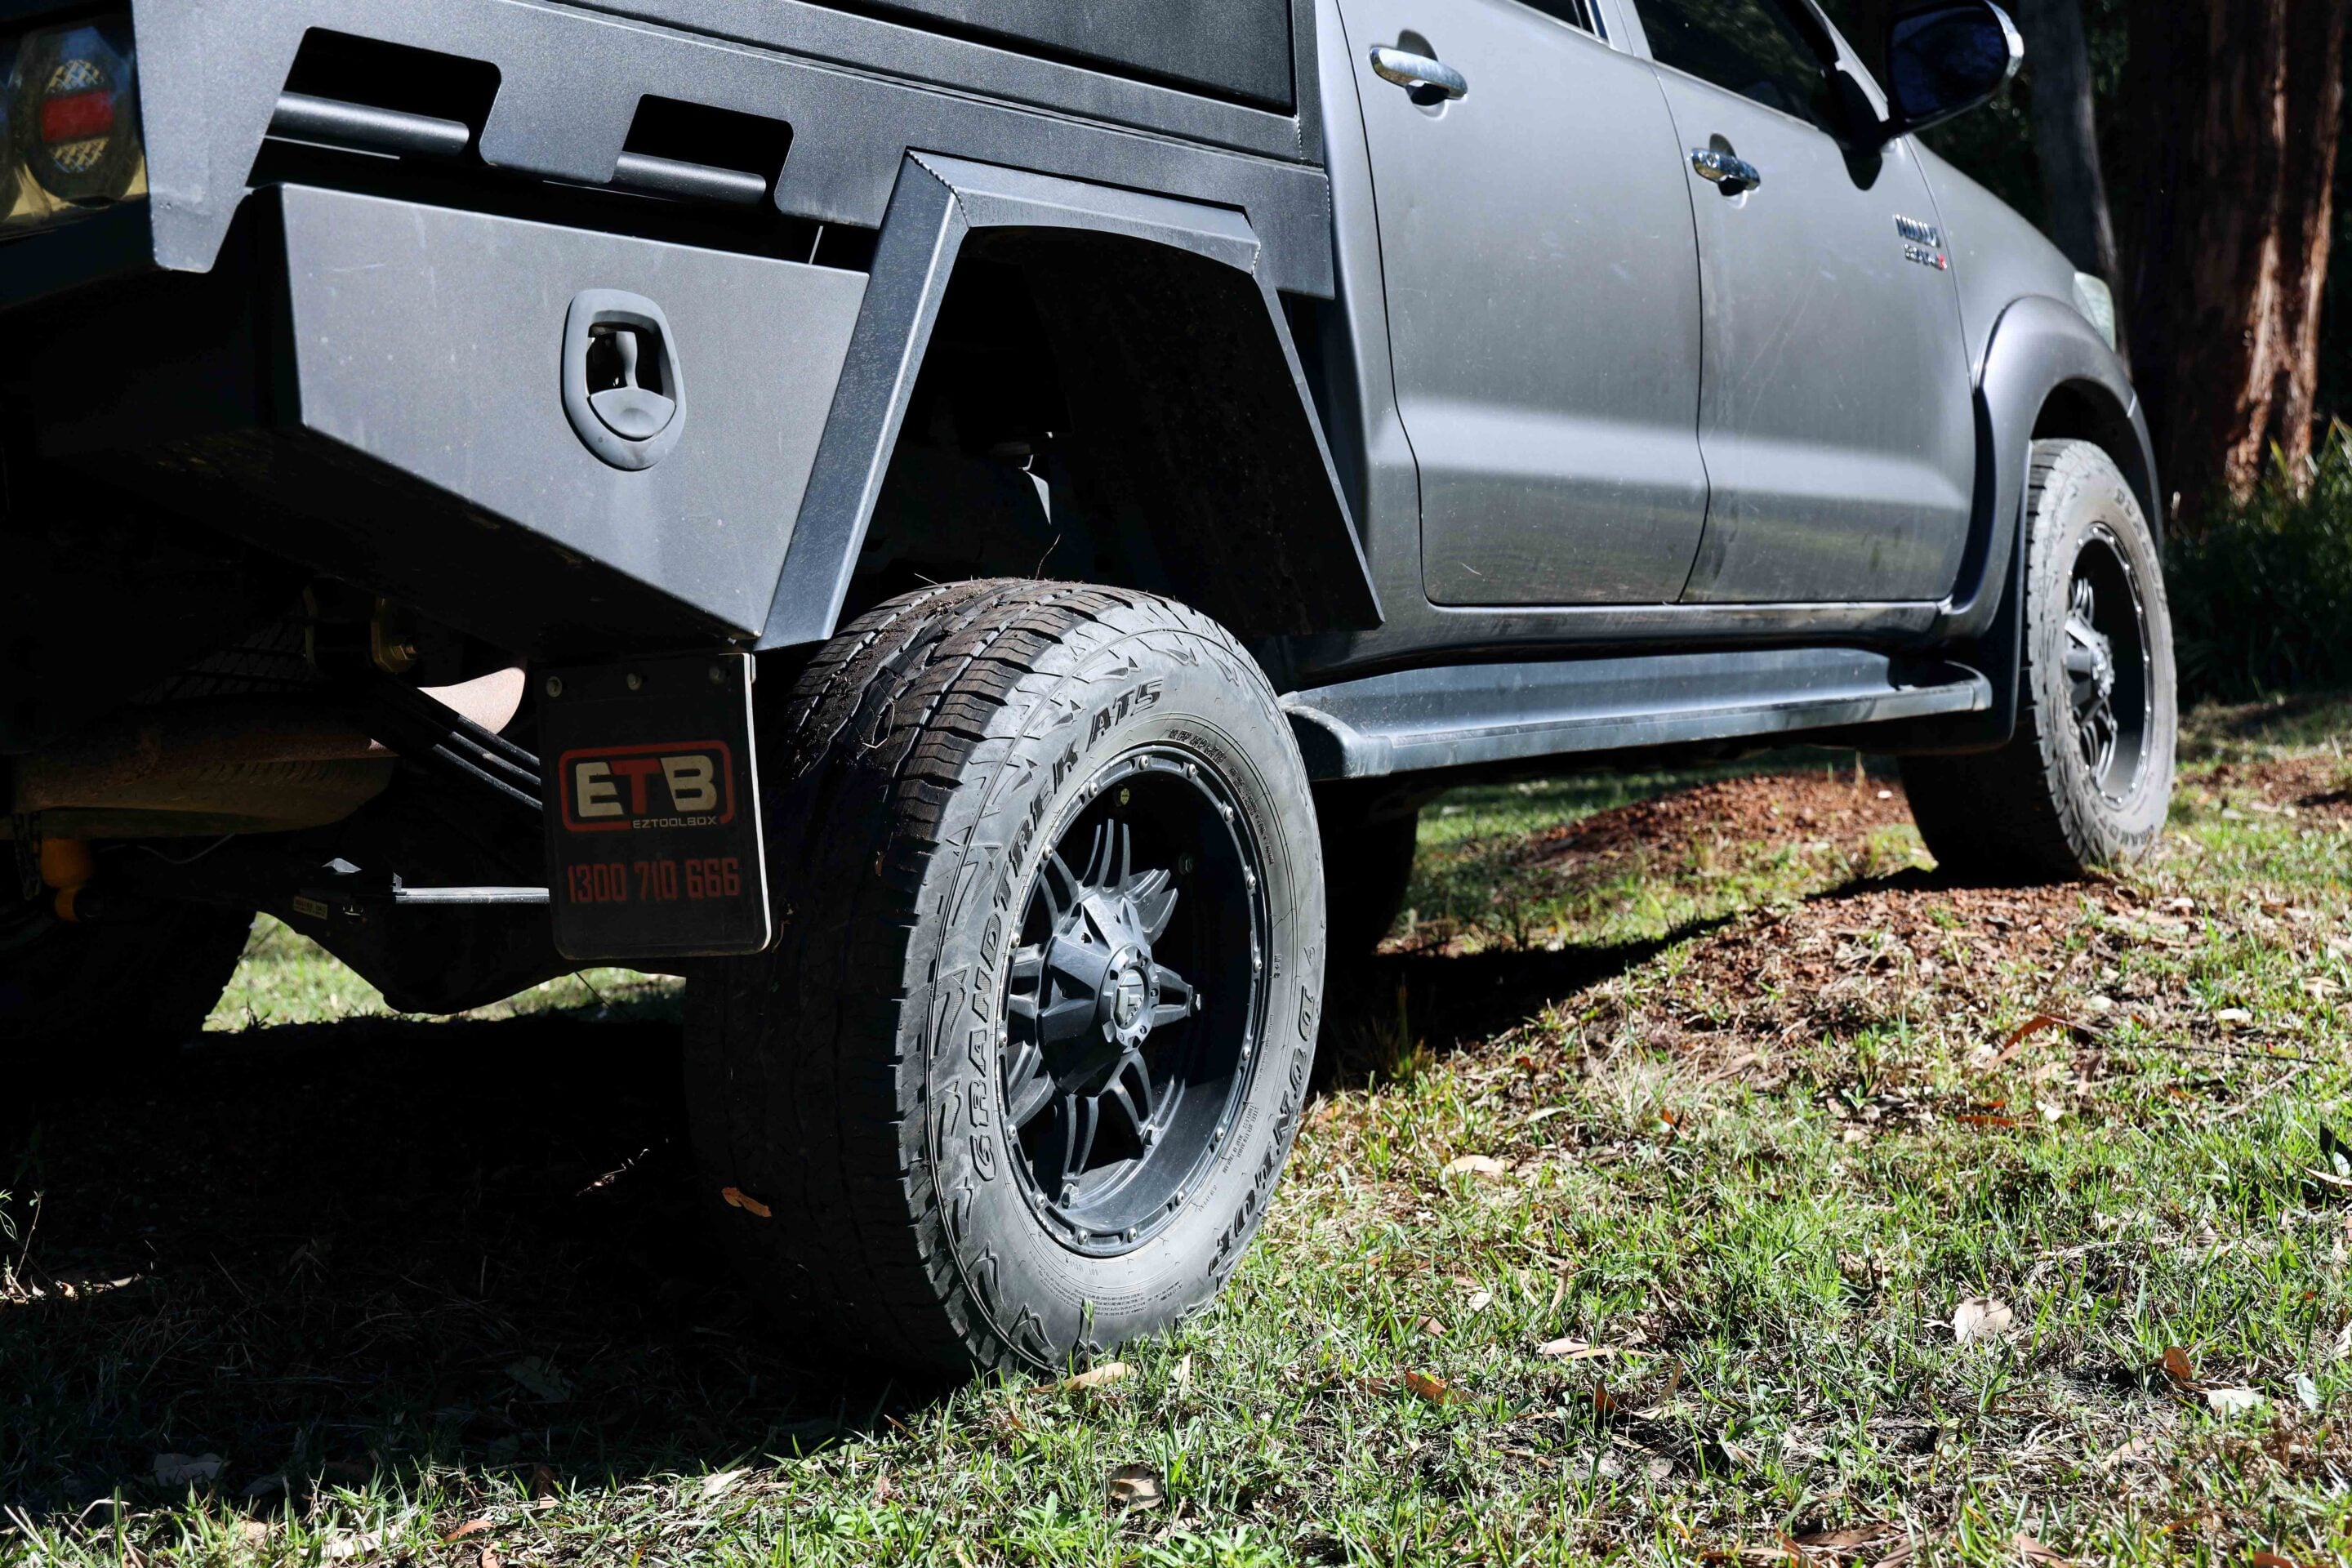
Considering my HiLux is still empty in the canopy and doesn’t yet have the weight of a bullbar or winch, the ride is astonishingly good for a dual-cab ute – albeit a little firm without the load to settle it down.
Within 10 minutes of leaving the workshop, I spent an hour testing it on my local dirt tracks. Along with a stint on the freeway, medium-speed corrugations, dips and ruts, and some slow-speed crawling were all covered to ensure the ride quality and off-road ability met expectations.
The real test will come once the HiLux is fully kitted out and driven daily around town, along with the bigger trips out bush we have planned. So stay tuned for updates on how the Terrain Tamer gear fares with all the weight on board.
Chery’s electrified off-road sub-brand is officially heading to Australia, with the new iCaur marque set to launch locally in early 2027.
Currently sold in China as iCar, the brand is expected to adopt the iCaur name for Australia due to trademark issues, bringing with it a range of boxy electrified SUVs aimed at buyers chasing rugged 4×4-inspired styling with hybrid and EV drivetrains.
The local rollout is expected to begin with the V27 large SUV, followed by the smaller V25, as Chery expands its growing local SUV portfolio.
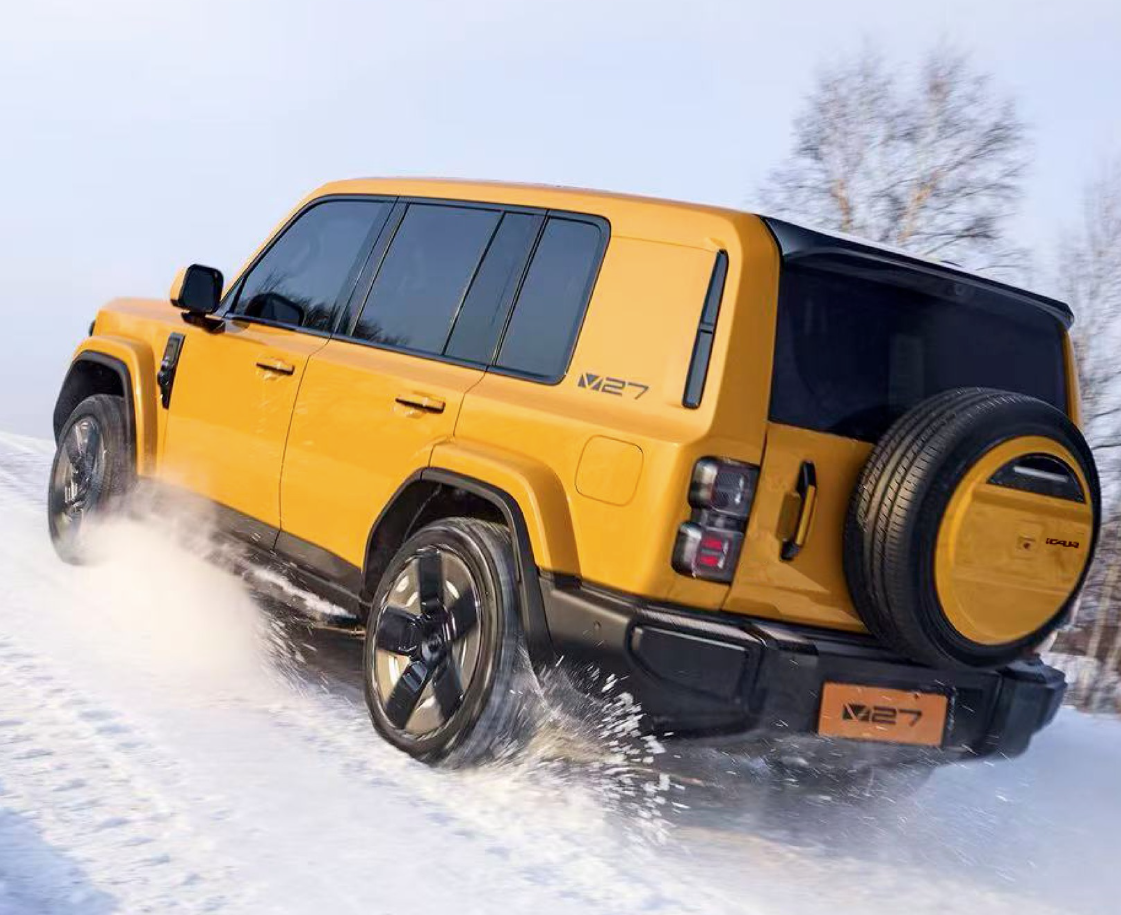
V27 leads the charge
First unveiled globally at a launch event in Dubai in 2025, the V27 shapes as iCaur’s flagship and recently appeared in right-hand-drive form at the 2026 Beijing Motor Show, a key step ahead of Australian production.
Positioned as an electrified alternative in the large-SUV segment, the V27 measures 5045mm long, 1976mm wide and 1894mm high, riding on a 2900mm wheelbase.
Under the skin is a 1.5-litre turbocharged four-cylinder petrol engine operating as a generator in an extended-range electric vehicle (EREV) setup, supplying power to the battery and electric motors rather than directly driving the wheels.

In all-wheel-drive form, the V27 produces 335kW, backed by a 34kWh battery pack. Claimed performance figures include:
- 150km electric-only driving range
- Up to 995km total range
- 0-100km/h in 5.9 seconds
Unlike a conventional plug-in hybrid, the petrol engine works to continuously recharge the battery, allowing extended touring capability without relying solely on external charging infrastructure.
Styling leans heavily into retro off-roader cues, with squared wheel arches, circular lighting elements and upright proportions. While it wears the tough-truck look, the V27 uses a unibody-based platform rather than traditional body-on-frame construction, positioning it more as a family touring SUV with light off-road capability.
V25 also confirmed; V23 remains a possibility
Joining the V27 will be the mid-size V25, expected to measure around 4800mm long. Still under development, it is expected to use extended-range electric technology and is due for a global reveal in mid-2026, ahead of its local arrival.
The compact V23 remains under consideration for Australia. Already sold in China, it features an 81kWh battery, 155kW and 292Nm, and a claimed 430km driving range. Local timing has not yet been confirmed.
Dedicated dealer network planned
iCaur is expected to operate through its own dedicated retail network rather than sharing showroom space with Chery’s existing brands.
More details on Australian specifications, dealer locations and final launch timing are expected later in 2026, ahead of first local deliveries in 2027.
The Toyota Prado has been a mainstay of the Australian 4×4 scene for more than 30 years.
It’s a right-size 4×4 wagon that suits many users – from families in the city to those roaming the wide brown land. Add in that legendary Toyota four-wheel drive reputation and you can see why it’s been the chosen rig for so many Australians.
When a vehicle is popular in this market, our vibrant aftermarket industry quickly jumps on it to give owners the accessories and modifications they want and need. When Toyota launched the 250 Series Prado in 2024, Australian aftermarket players were scrambling to get their hands on one and start developing touring products.
The 250 Series delivered a bigger and better-equipped Prado that improved on its predecessor in most ways, but it also came with a major design flaw that the aftermarket was only too happy to rectify.
The 250 Series uses Toyota’s 48-volt starter-generator system and the components for that are mounted under the floor in the cargo area. This means the floor now sits higher than it normally would and, if your Prado has third-row seating, the seats fold on top of the floor instead of into it like they did on previous models.
This design has serious consequences for a touring 4×4 where you might want to mount a fridge, drawer system or other accessories in the back – let alone simply carrying gear there. This is where the aftermarket comes to the rescue.
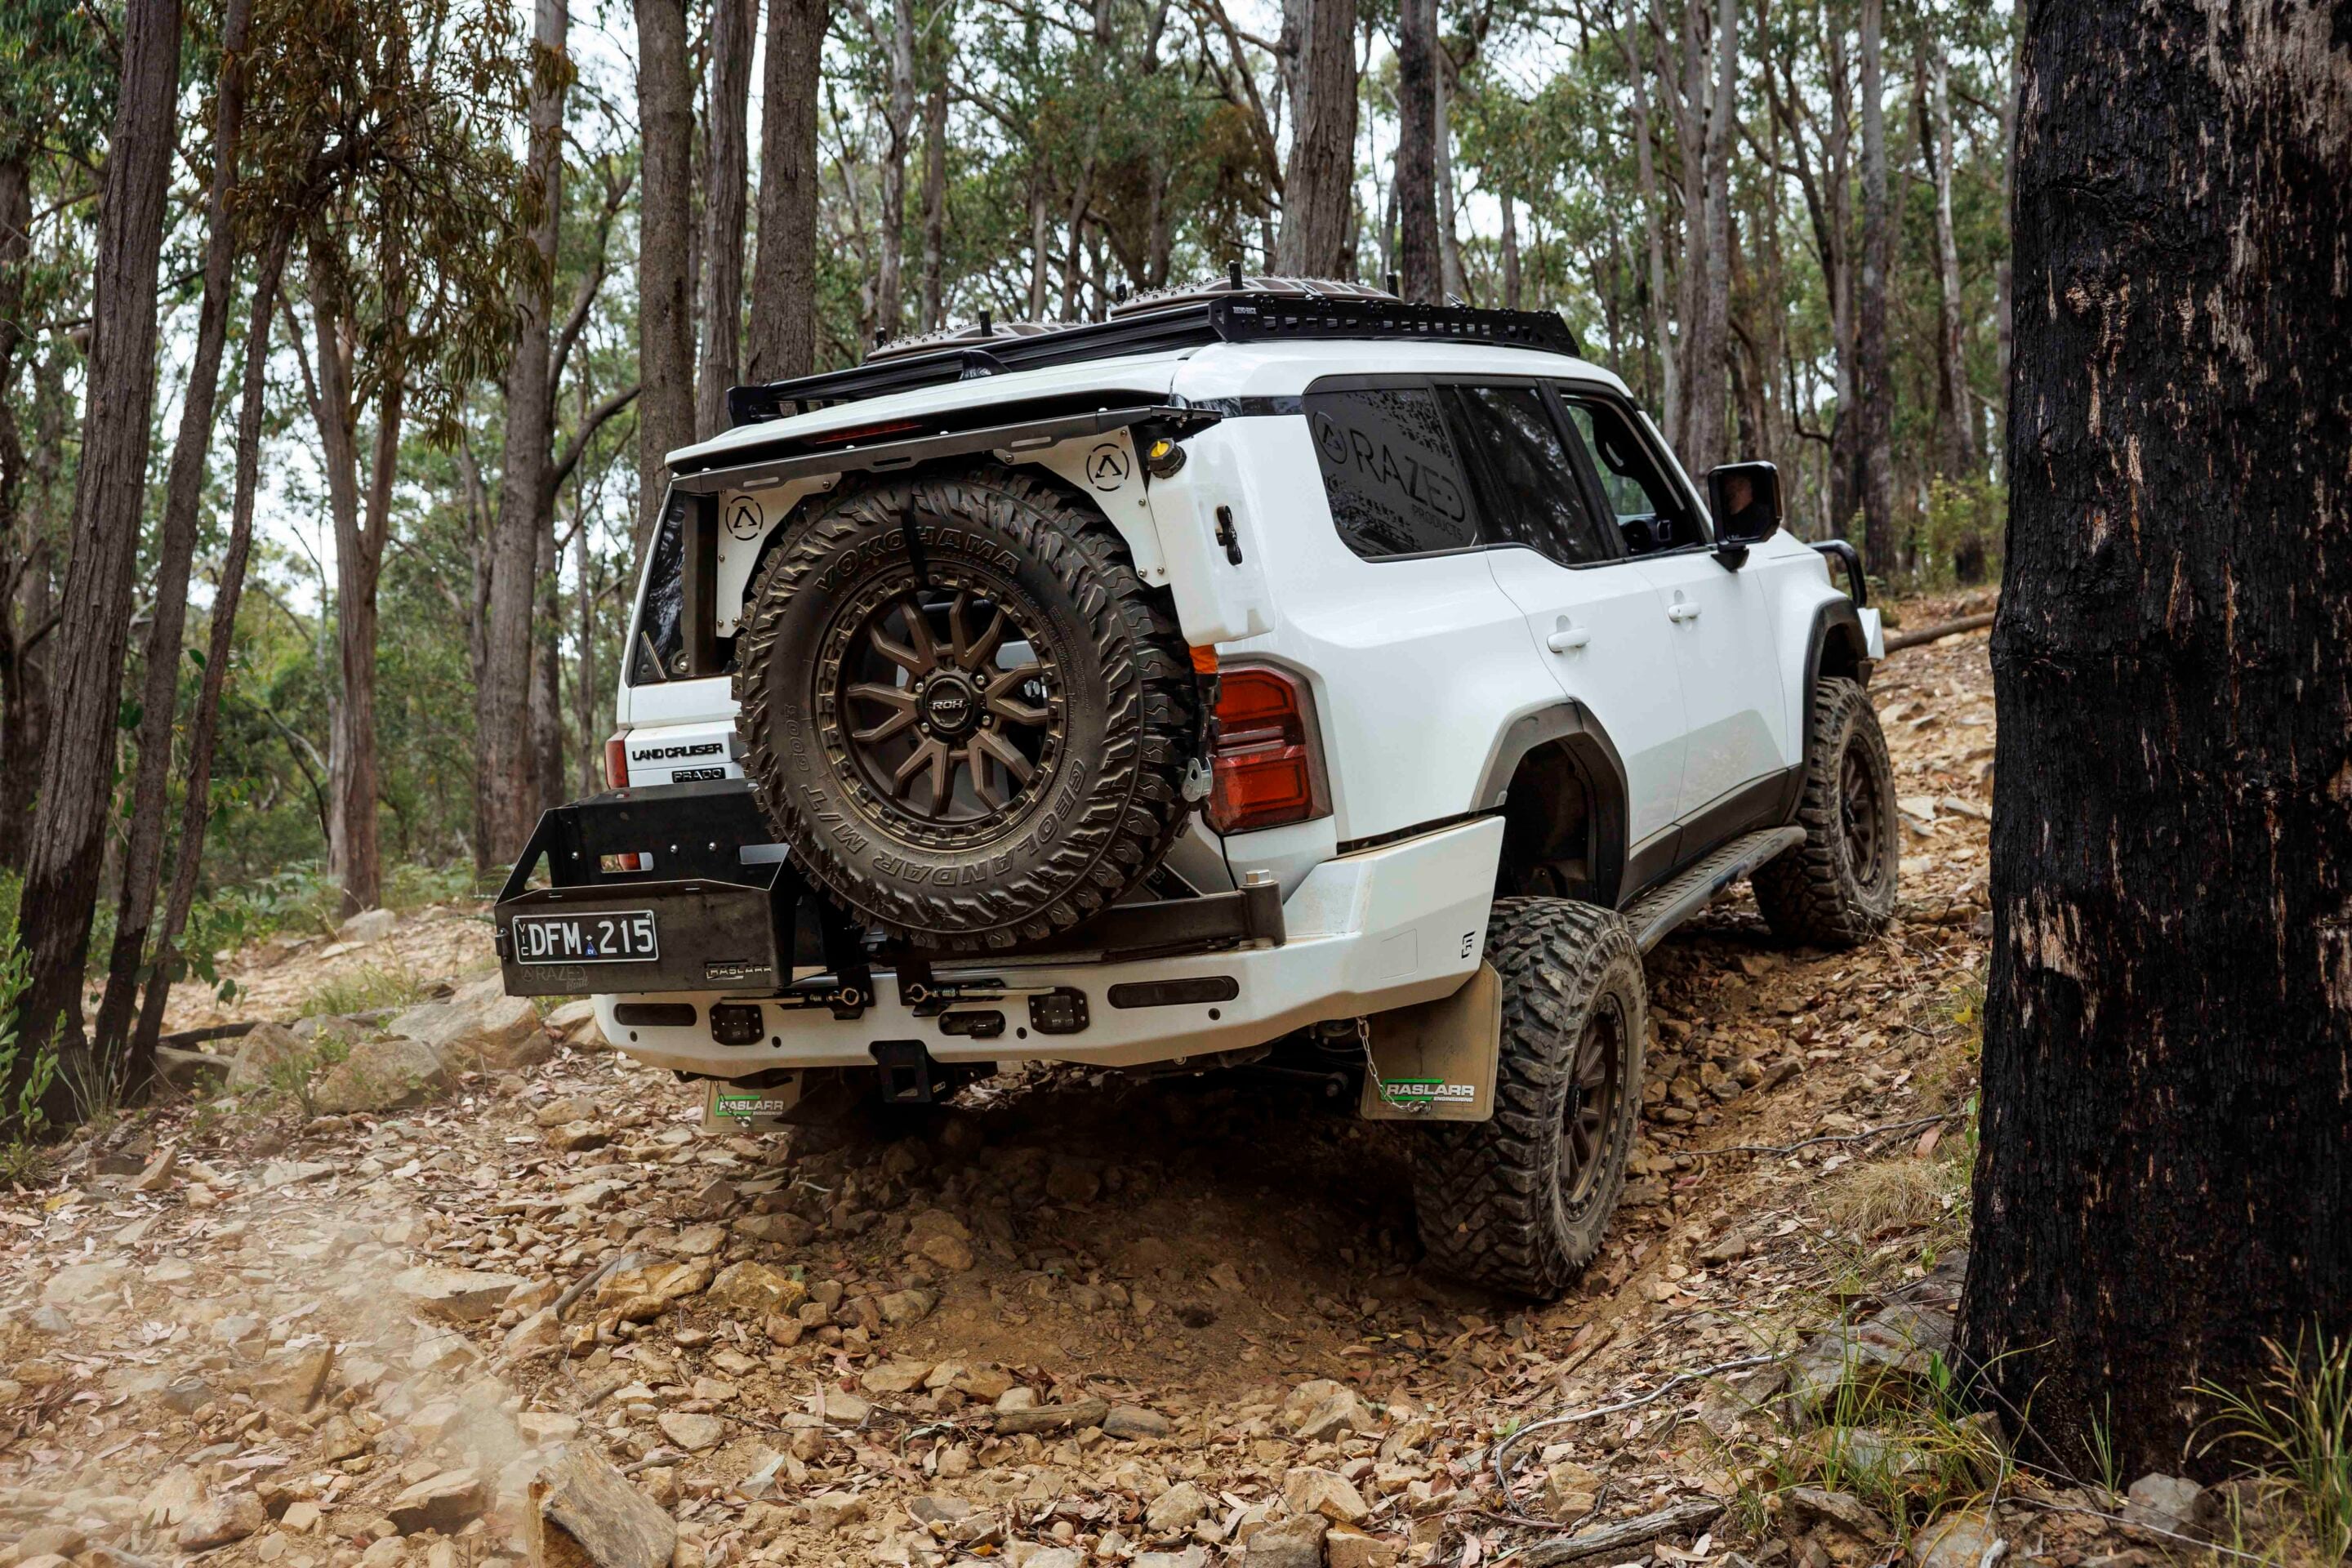
Razed Products has been designing and manufacturing clever storage accessories in its Melbourne factory for several years, and false floors and cargo fit-outs are among its specialties. Developing a solution for the back of the 250 was a priority when the model was released, and the team soon had a vehicle to work with and developed solutions for both five- and seven-seat Prados, as well as the Lexus GX550.
Designing and developing the cargo solution was only part of the plan for this Prado. Owner Rob wanted to turn his GXL Prado into a fully equipped touring rig with all the best gear on board.
Protection, touring hardware and rear-end integration
Starting with protection equipment, Rob turned to another innovative Melbourne company for front and rear bars.
Raslarr Engineering used Rob’s Prado to develop products for the 250 Series. The Raslarr ‘Dallas’ bullbar is a full-bar design made using 3mm and 6mm steel and incorporates a winch cradle, recovery points, fog lights, driving-light mounts and provisions for factory ADAS sensors and cameras. The bars are ADR-compliant and proudly made in Melbourne.
The winch fitted is a Carbon 12K unit, while a pair of Stedi Evo Quad driving lights provide long-range illumination and suit the squared-off styling of the Prado.
Moving to the back of the vehicle we find more of Raslarr’s handiwork with the rock sliders and rear bar. The rear bar works with the factory towbar and retains the original sensors and cameras while adding steel protection across the rear and lower quarters. It also incorporates a swing-out spare-wheel carrier, a jerry can holder and the ability to carry a tyre up to 35-inches. Raslarr powder-coated the bars to match the Prado’s white paintwork.
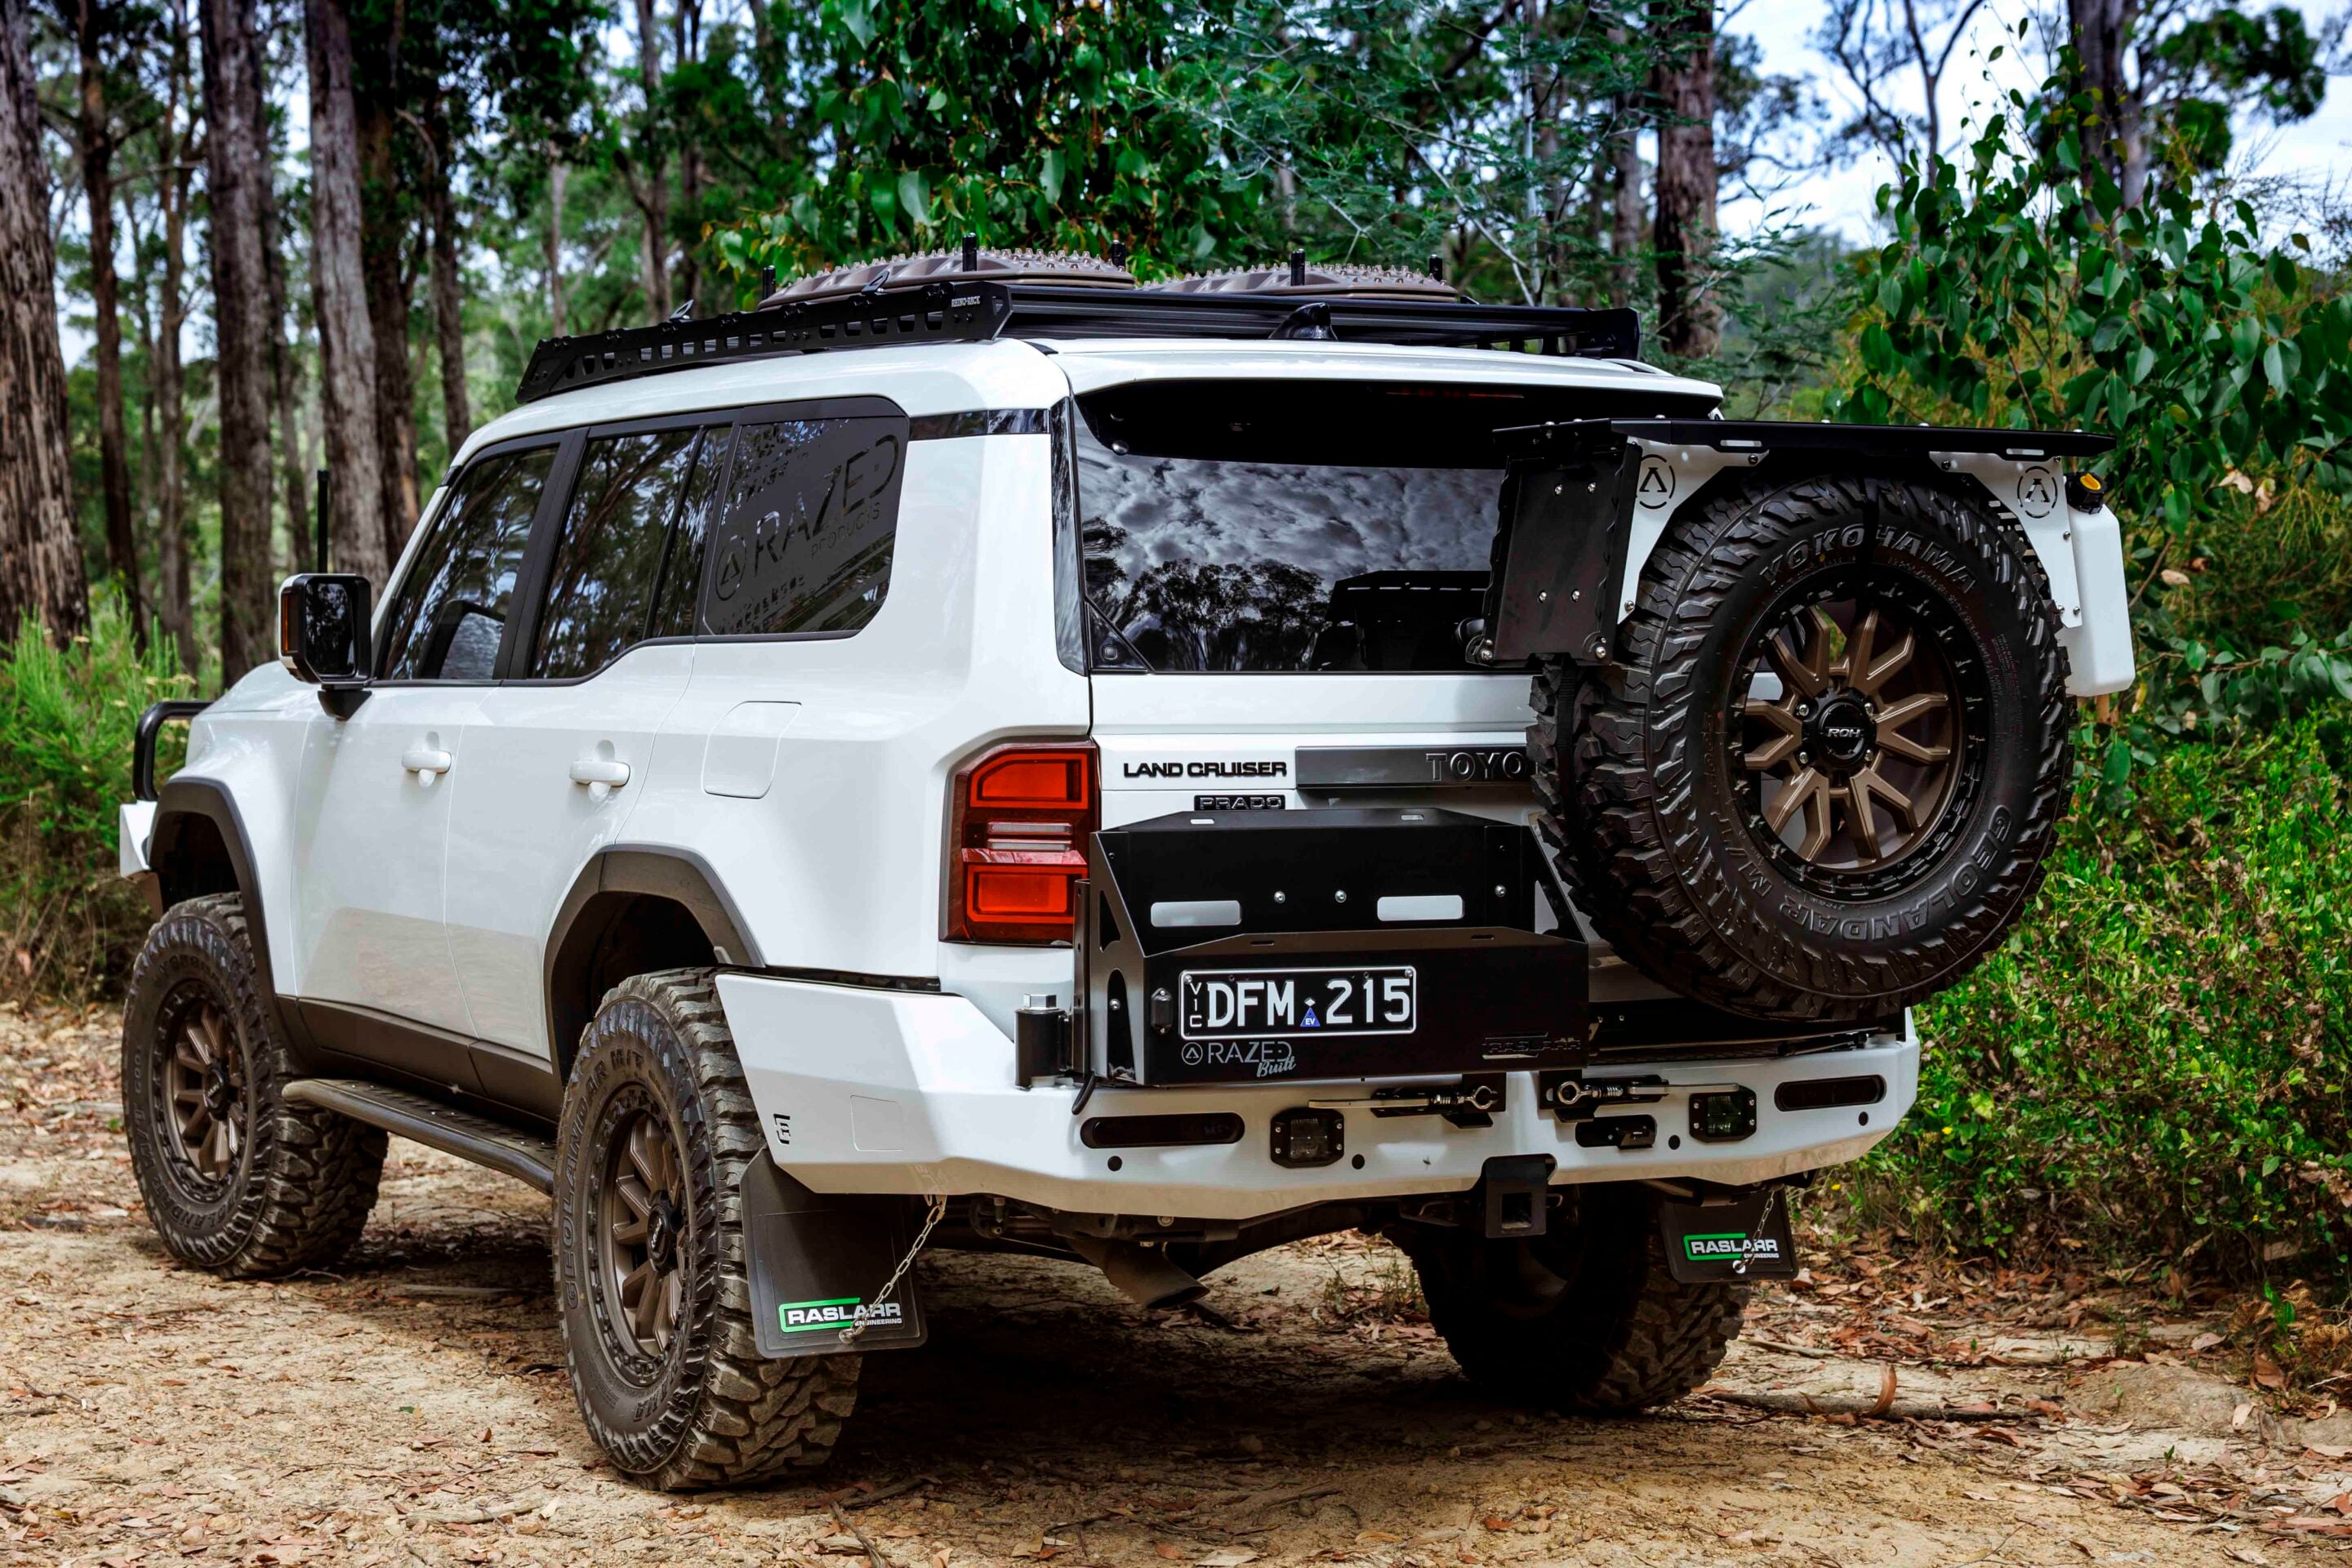
While looking at the rear bar it’s also worth mentioning the Razed Products spare-wheel tray, which creates a flat platform for carrying gear and offers additional storage options, including gas bottles and the Rotopax water tank seen on this vehicle.
Underbody protection again comes from Razed, with 5mm aluminium plates protecting the engine sump, radiator, front diff, driveshaft, transmission, transfer case and AdBlue tank. Diving further underneath we find a full Dobinsons MRR remote-reservoir suspension setup designed to keep the wheels and tyres in check and the body under control on rough tracks.
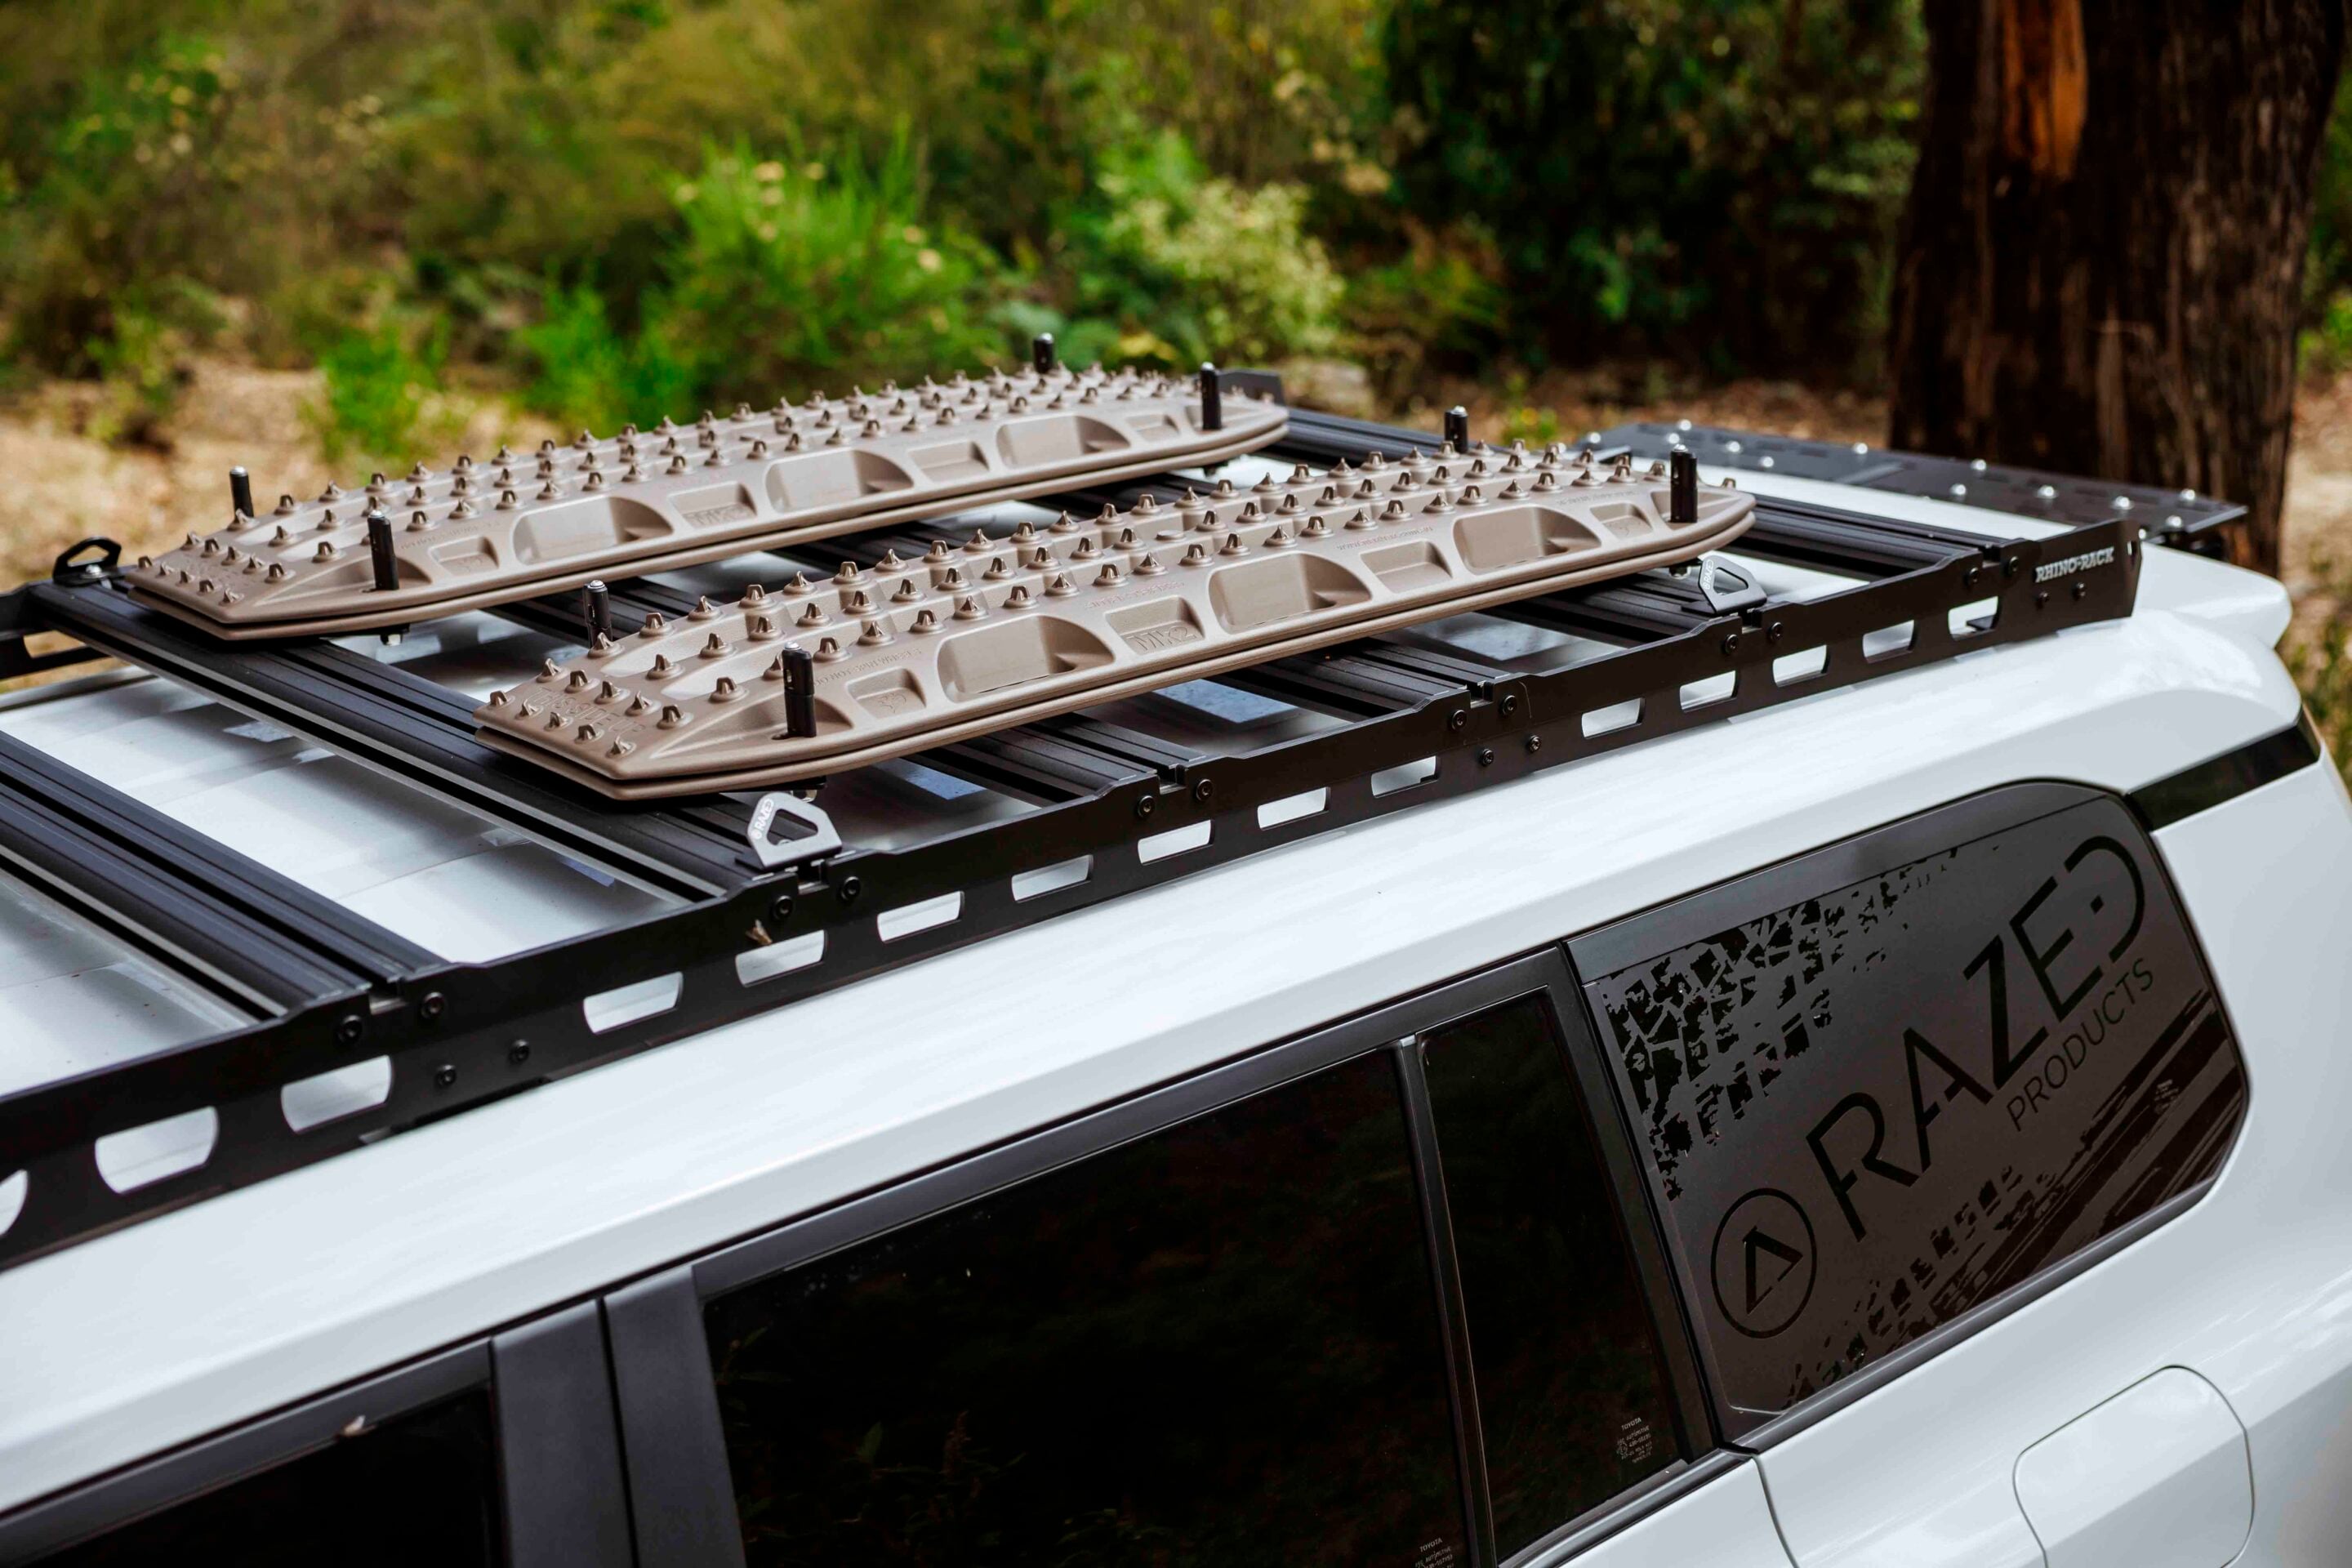
Up top there’s a Rhino-Rack Reconn platform developed specifically for the 250 Series. Razed also produces a range of handy attachments and tie-down points for securing gear to roof racks and you can see a few of them fitted here. The Maxtrax mounts are also from Razed and, cleverly, the mounting pins fold flat against the rack when you’re not carrying recovery boards.
A fully integrated cargo and electrical system
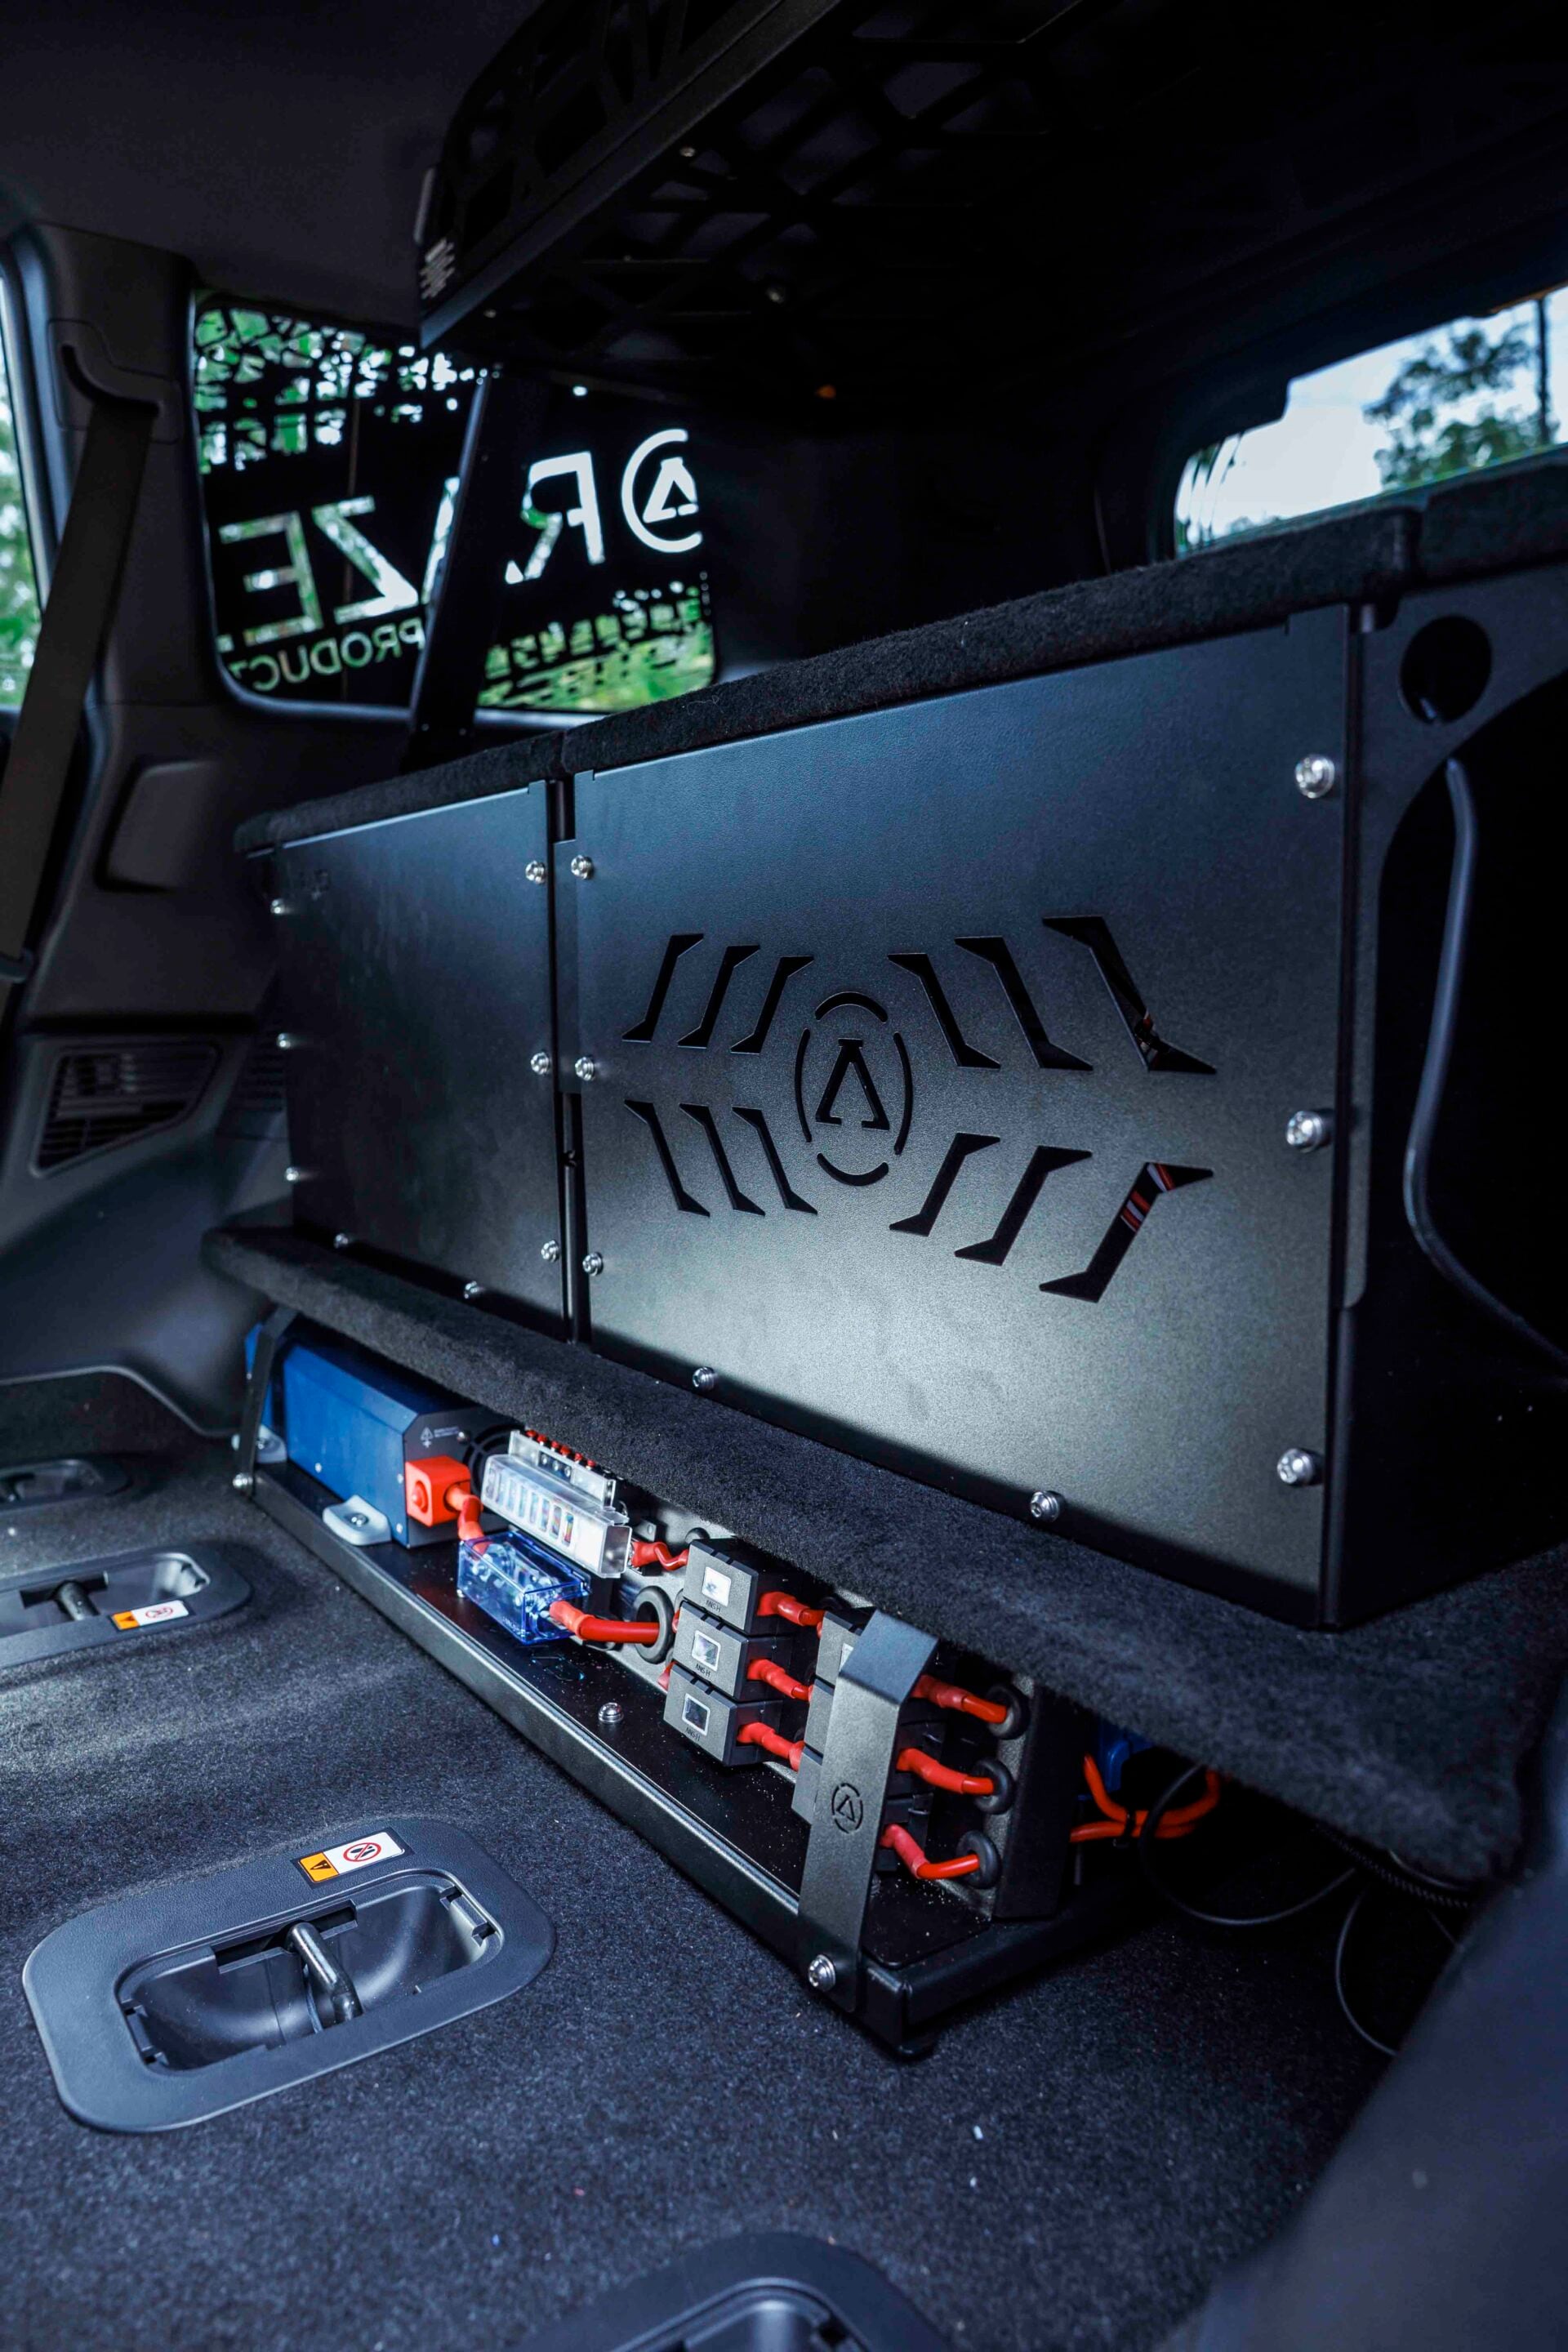
The height of Razed’s innovation is found in the back of the Prado.
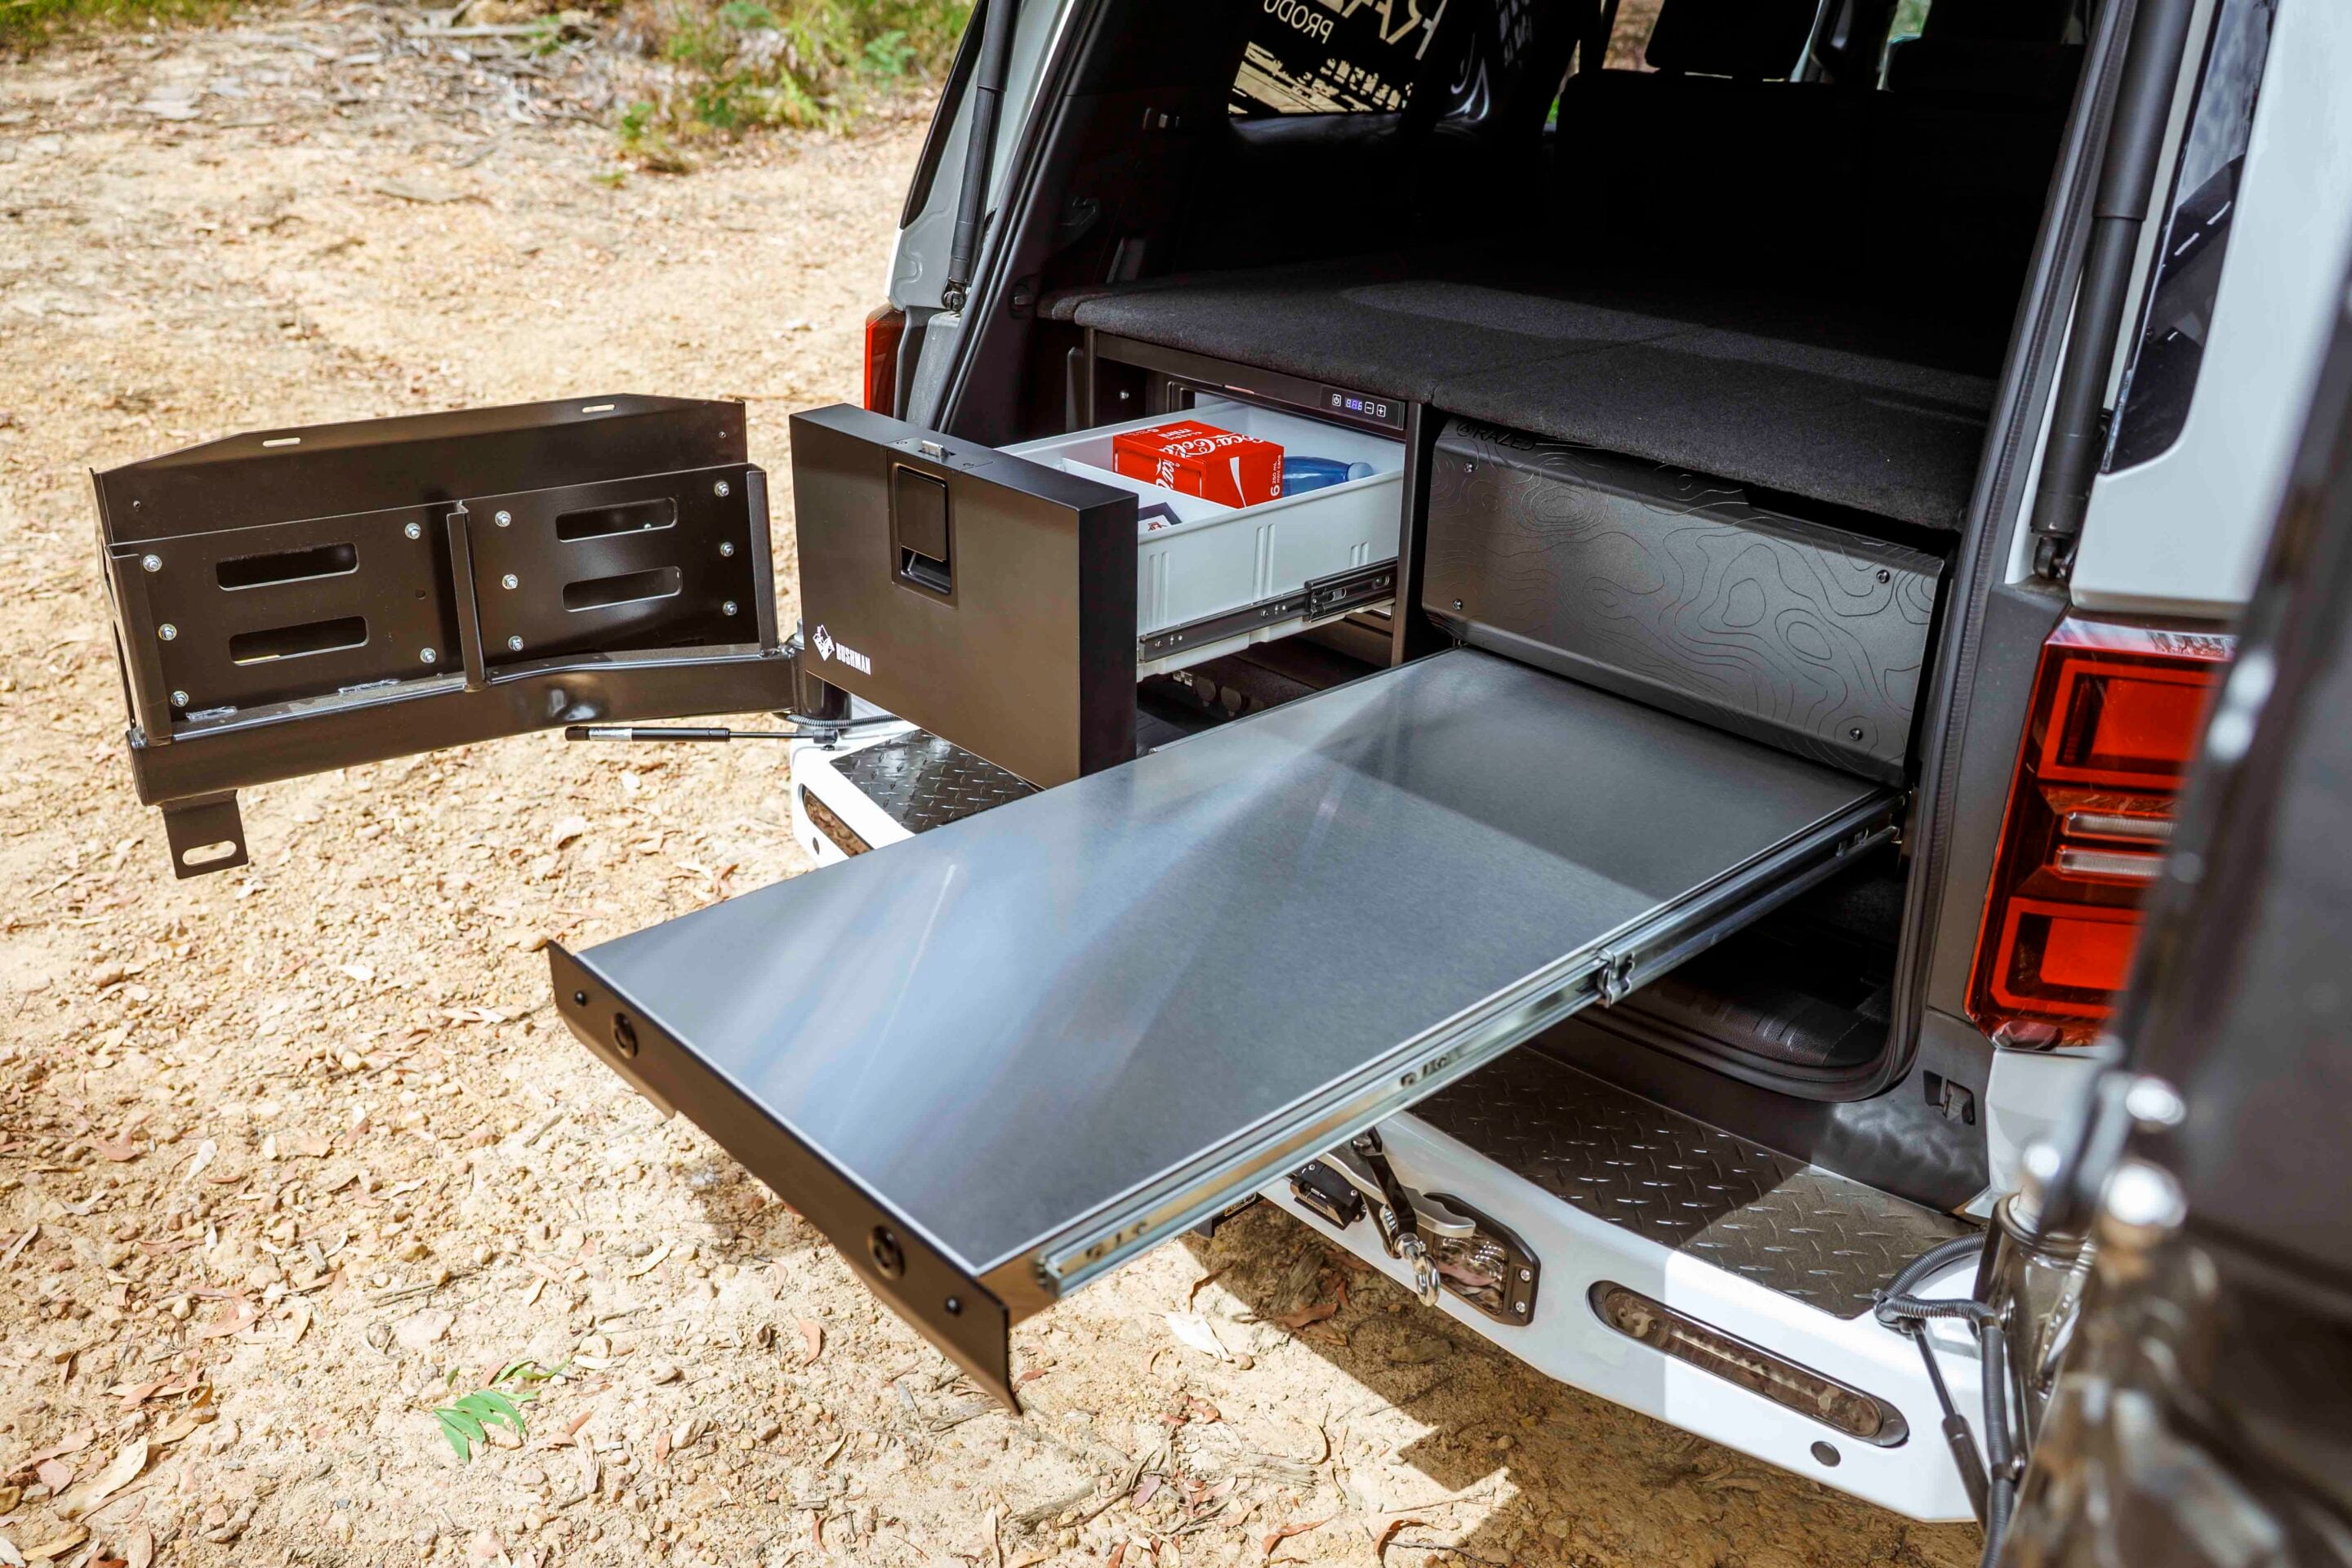
This GXL started life as a seven-seat model, so the appropriate kit was used. After removing the plastic floor Toyota fits, along with the side storage bins and the metal cover over the 48-volt system hardware, a steel frame is fitted around the electronics. A carpet-covered 17mm timber floor is then installed, along with aluminium storage bins and infills to replace the original plastic units.
That’s simplifying the process somewhat, but the kit is designed so it can be installed by anyone reasonably handy with tools. The floor leaves space underneath for auxiliary 12-volt system hardware, and mounting the floor to the steel frame gives it the strength and stability needed to securely attach items such as fridges and drawers.
In this build there’s a Razed ‘Altitude’ drawer on the driver’s side. Underneath sits the 12-volt setup comprising a Lifetek Lithium LiFePO4 (310Ah) battery, Victron Orion XS 50A DC/DC charger, Victron SmartSolar MPPT 100/50 charger, and an Invicta 2000W 12V–240V inverter. Also tucked neatly out of sight is an ARB air compressor mounted in the quarter panel on a Razed bracket, with an outlet at the rear of the cargo area.
A showcase of Australian aftermarket capability
The Australian aftermarket accessories industry is known globally for producing some of the best products for four-wheel drive vehicles, and Rob’s Prado is a prime example of that ingenuity and clever design. By teaming up with innovative local manufacturers and working with the Razed team, Rob has taken what is already regarded as one of the best 4×4 wagons on the market and improved it in almost every way.
All accessories and products
- Raslarr ‘Dallas’ bullbar
- Carbon 12K winch
- Stedi Evo Quad driving lights
- Raslarr rock sliders
- Raslarr rear bar (swing-out spare wheel carrier, jerry can holder, sensor integration)
- Razed Products spare-wheel tray
- Rotopax water tank
- Gas bottle mounting provision (spare-wheel tray system)
- Razed 5mm aluminium underbody protection plates
- Dobinsons MRR remote-reservoir suspension system
- Rhino-Rack Reconn platform
- Razed roof rack attachments and tie-down points
- Razed Maxtrax mounts
- Maxtrax recovery boards
- Razed false floor / cargo fit-out system (7-seat Prado kit)
- Steel cargo frame system (integrated 48V hardware housing)
- Carpet-covered 17mm timber cargo floor
- Aluminium storage bins and infills
- Razed ‘Altitude’ drawer system
- Lifetek Lithium LiFePO4 310Ah battery
- Victron Orion XS 50A DC/DC charger
- Victron SmartSolar MPPT 100/50 solar charger
- Invicta 2000W 12V–240V inverter
- ARB air compressor (quarter panel mounted)
- Rear cargo area air outlet system (Razed bracket)
The Ineos Grenadier wagon and Quartermaster pick-up have been designed and built with long-distance overland expeditions in mind.
Taking inspiration from the original Land Rover, Ineos has created a traditional four-wheel drive on a separate chassis, with live axles, coil springs, dual-range gearing, locking differentials, and a boxy but functional body and cabin.
It’s no surprise that as adventurous travellers have bought into the Ineos platform, aftermarket manufacturers and workshops have jumped on board to produce products, accessories and complete fit-outs to prepare these vehicles for whatever adventures their owners have in mind.
One such company is Expedition HQ in Queensland. Expedition HQ isn’t just an Ineos dealer; with a background in building fully outfitted expedition trucks under the SLRV brand, the team knows what’s needed for overland travel, not only in Australia but globally.
Not everyone wants a large expedition truck like the SLRV vehicles, so when the Ineos arrived it provided the perfect option for customers looking for something more compact but still highly capable. With the choice of the Grenadier wagon and Quartermaster double-cab pick-up, the Ineos is becoming an increasingly popular platform.
When the team at Expedition HQ saw that we had a new Grenadier Trialmaster in our shed, they jumped on board to supply some functional accessories suited to the way we use the vehicle.
Purpose-built Grenadier upgrades
Expedition HQ sources high-quality gear for Ineos vehicles from around the world, as well as manufacturing its own products under the X-Spec brand. Everything from storage solutions to suspension kits and even portal axles is available to build an Ineos to your specifications.
For our Grenadier, it supplied an auxiliary fuel tank with mounts and a transfer pump, a lockable pantry with a fold-down table, and a lockable jerry can holder with an On-Tap tank and shower. Just the sort of gear Cristian can use with his boys at the beach or when heading out mountain biking.
Simple fuel range upgrade
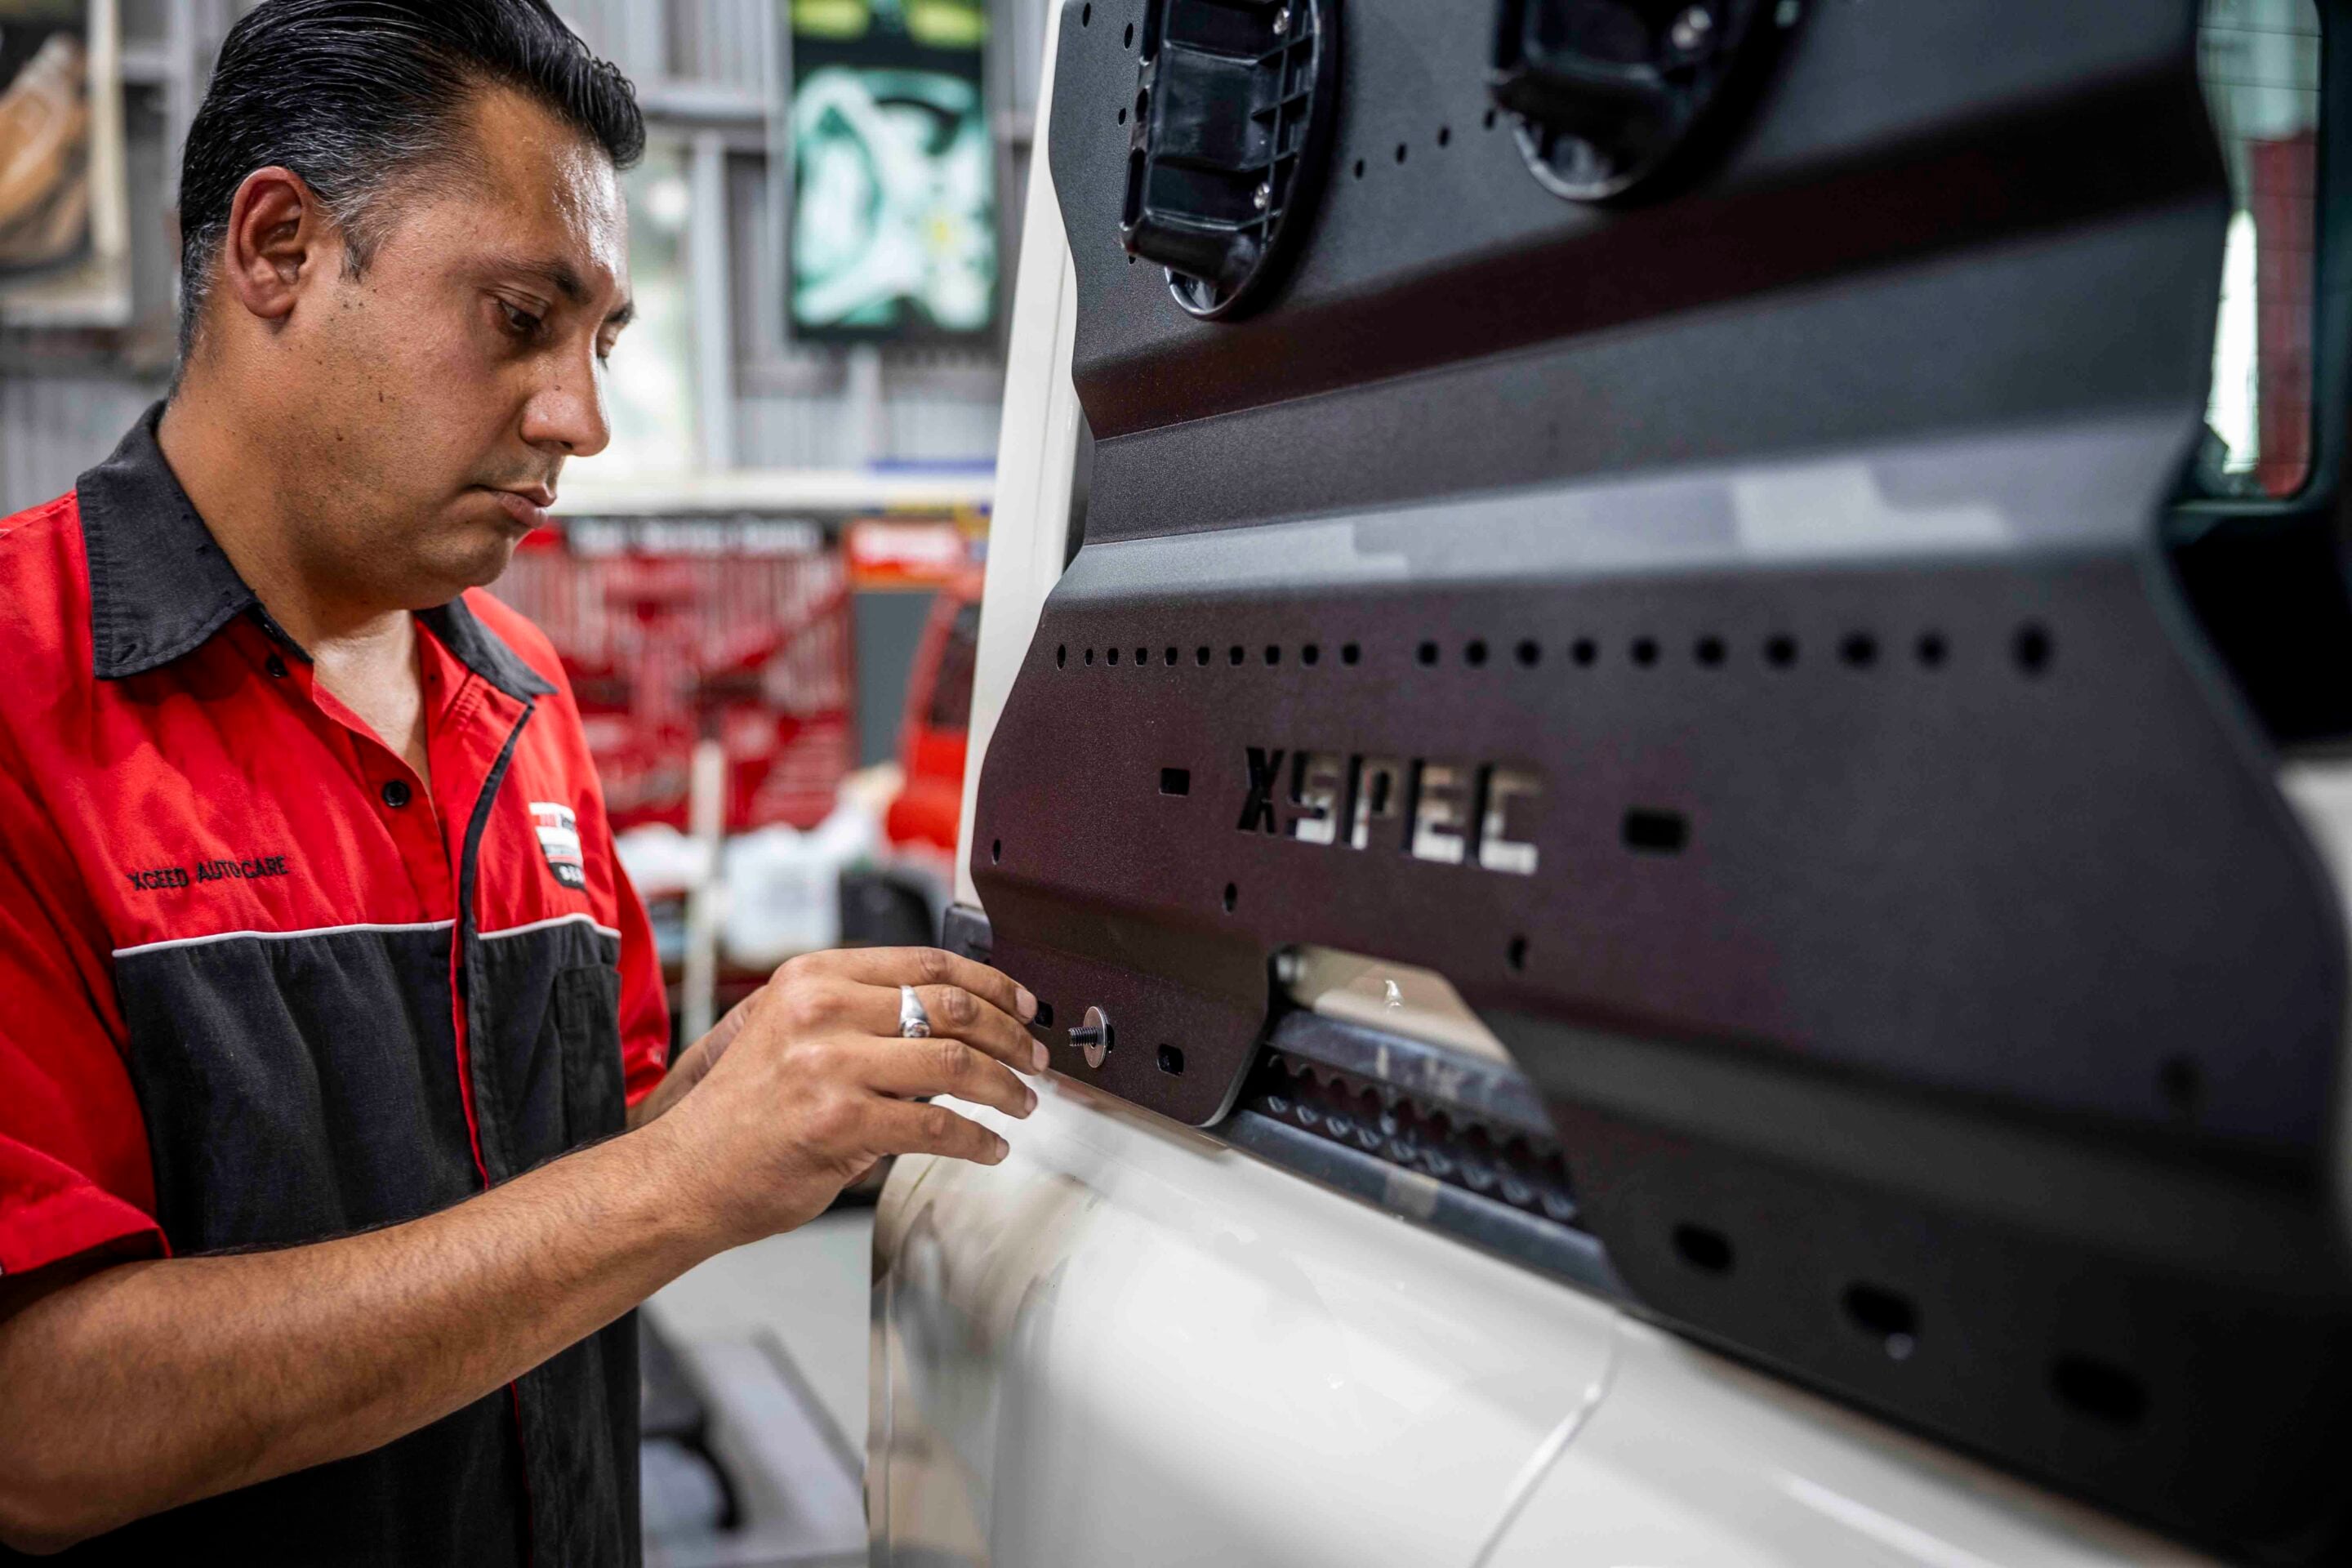
First up, we’re taking a look at the X-Spec 30L gravity-feed diesel tank.
Ineos fits the Grenadier with a 90L fuel tank. That might be sufficient for green-laning in Pomgolia, but it’s hardly enough for touring in Australia, let alone the global expeditions many owners will build a Grenadier for. While it’s not a full-size auxiliary tank mounted under the chassis, Expedition HQ’s 30L unit provides a handy addition to complement the factory fuel capacity.
Expedition HQ has designed and manufactured a mounting frame that positions the tank on the driver’s side of the wagon, directly above the fuel filler. This allows fuel to be gravity-fed into the main tank using a jiggler hose, without needing to remove the tank from its mount. Even better, you can use a 12-volt transfer pump to move fuel to the main tank, and Expedition HQ offers a pump kit to suit.
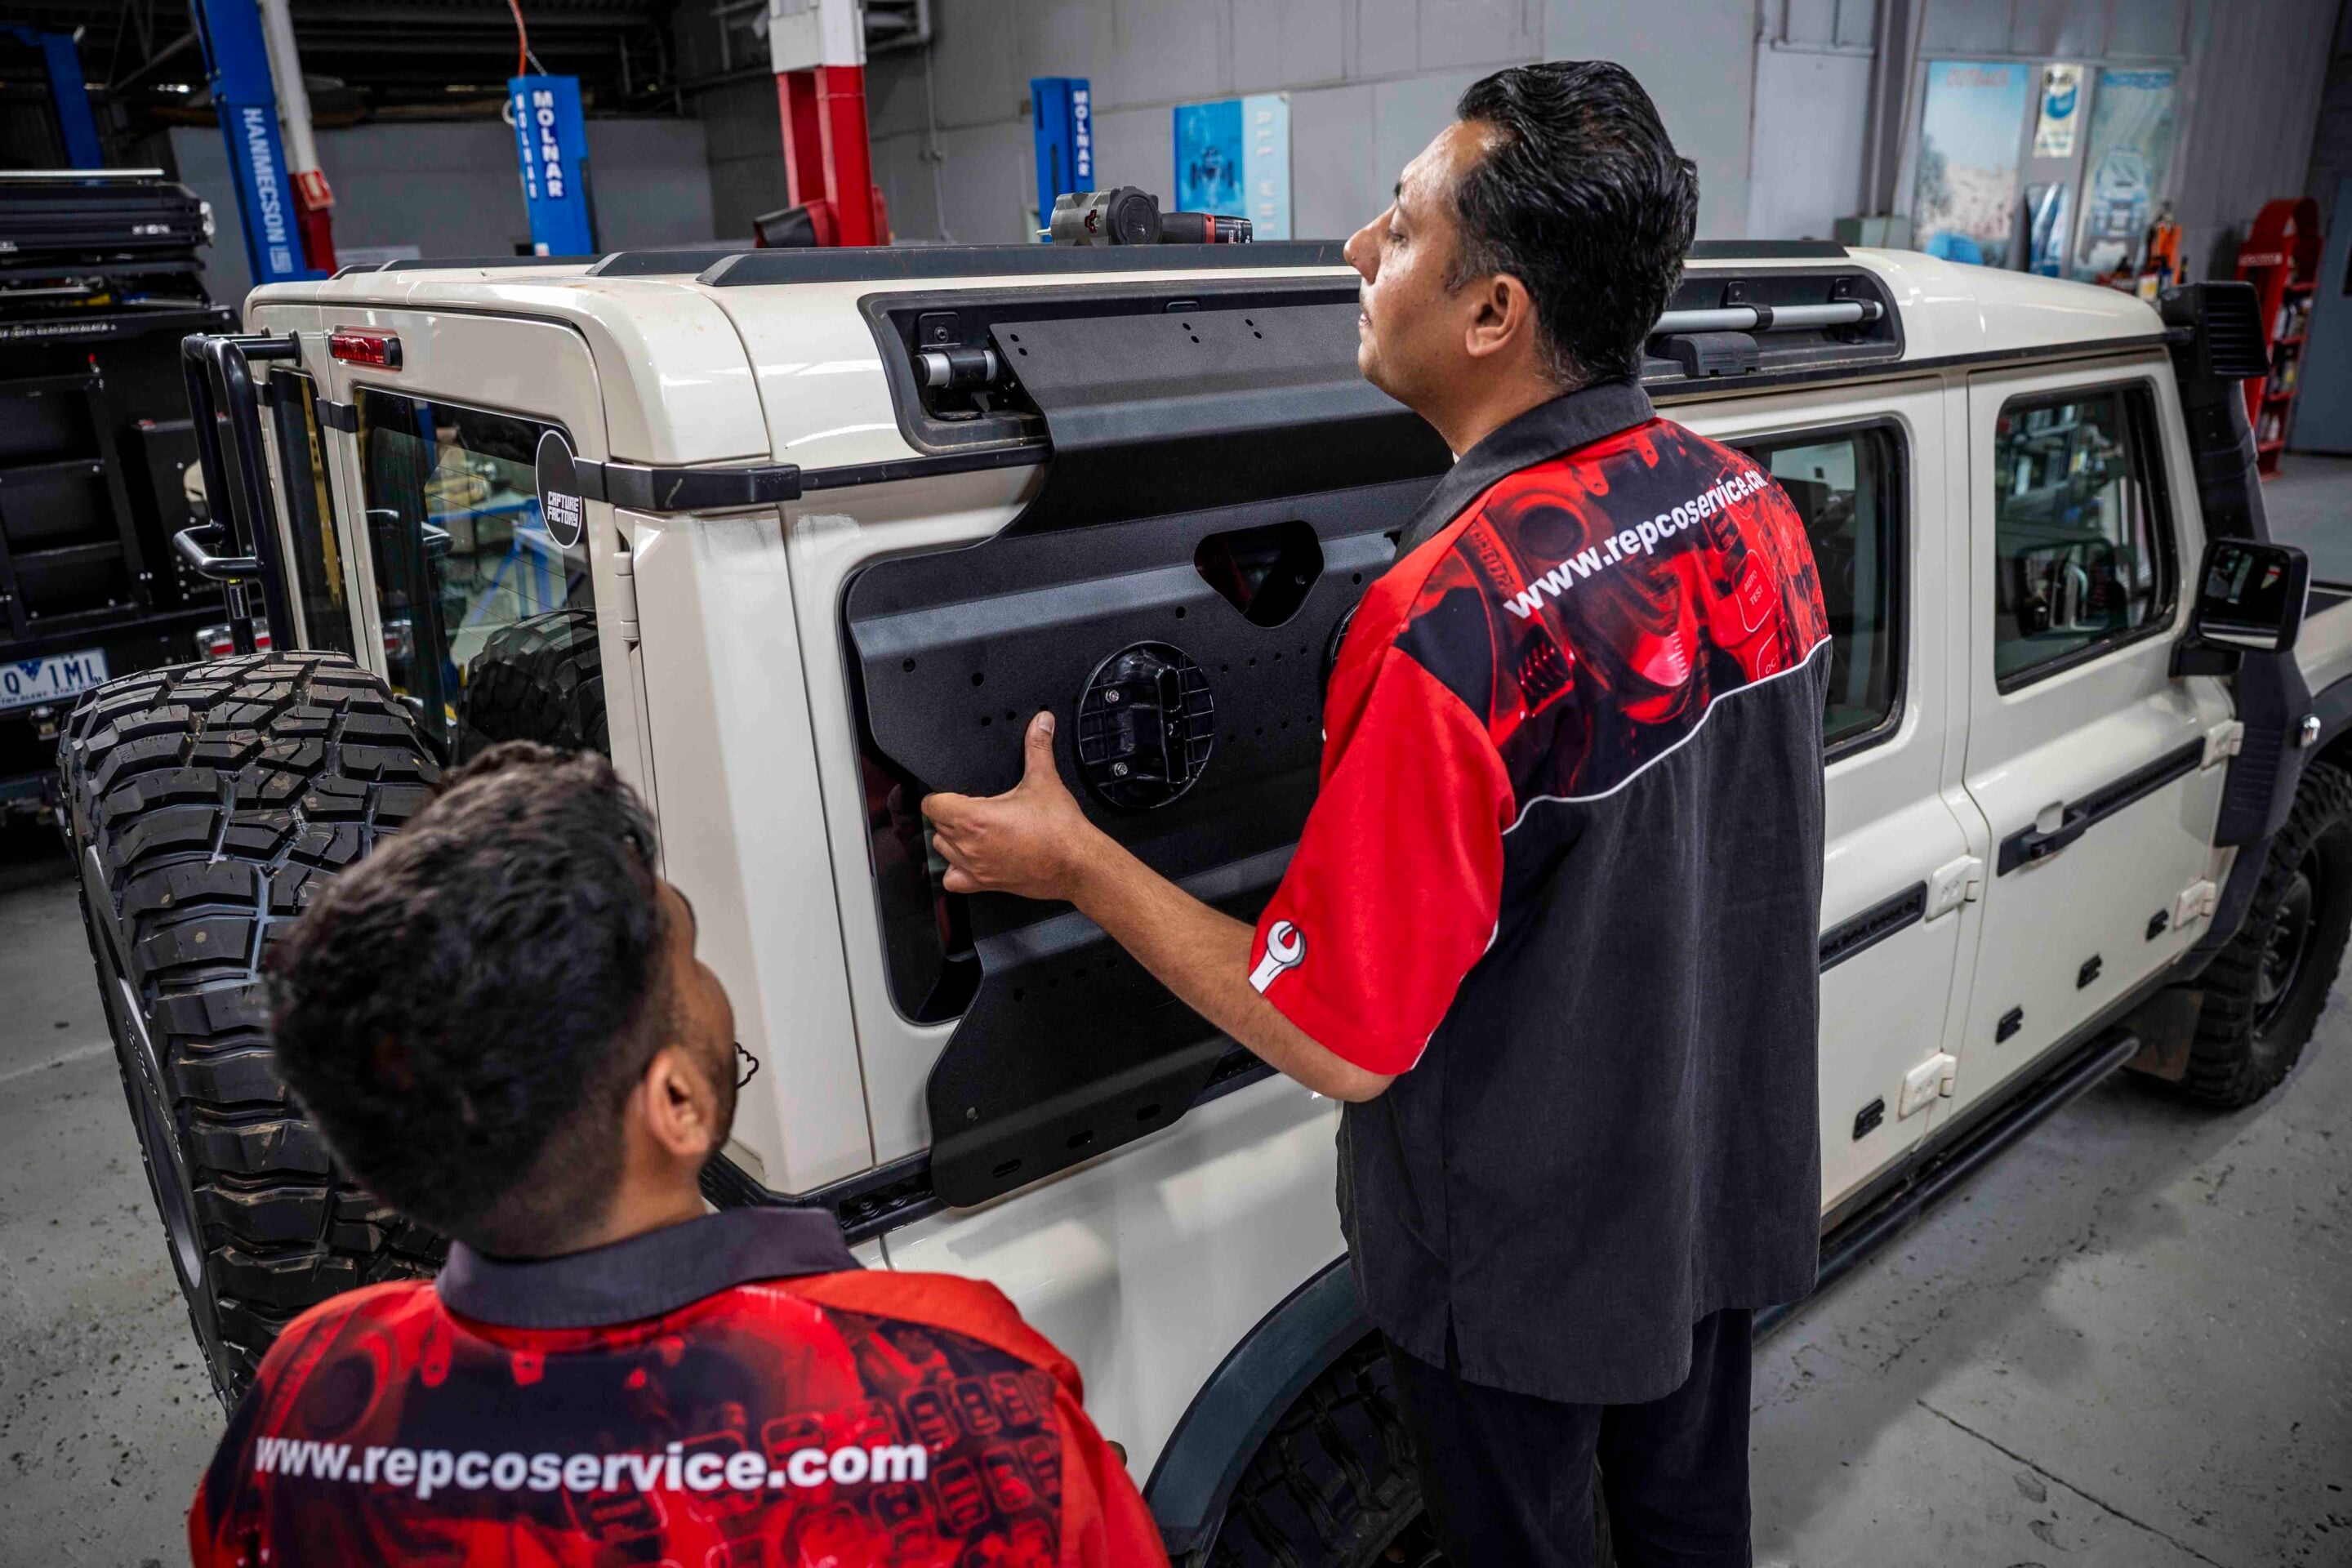
The mounting plate is designed to sit securely over the rear side window, following its shape, and is powder-coated for a durable and tidy finish. The tank itself is purpose-built for diesel fuel and locks securely to the mounting frame. It’s a simple, well-engineered solution for increasing fuel capacity. It is priced at $399 plus installation, and if you want the 12-volt pump that will set you back a bit extra.
Our X-Spec diesel fuel tank was fitted by the team at Xceed Autocare in Braybrook, who did an excellent job with great care and attention to detail.
Our Grenadier is fitted with a Rhino-Rack platform, and its mounts interfere with the X-Spec bracket mounting points, so a minor modification was required for fitment. We’re told this isn’t an issue with the factory Ineos roof rack.
- RRP: $399 plus installation