NOTE: This story was first published on January 19.
- Part 1: Victorian Grampians
- Part 2: Limestone Coast
- Part 3: Strzelecki Track
- Part 4: Bruder EXP-6 caravan
- Part 5: Great Southern Eyre
- Part 6: Nullarbor, Goldfields and magical beaches
- Part 7: The Great South-West
- Part 8: Dirk Hartog Island
- Part 9: Ningaloo Coastline
- Part 10: The Kimberley
- Part 11: What a year!
- Part 12: Karijini National Park
- Part 13: Bush versus beach
- Part 14: Catch-and-cook lifestyle
- Part 15: Meet-up at Rainbow Beach
- Part 16: Magical K’gari
- Part 17: Dollars and sense
- Part 18: Top tips for a family hike
- Part 19: Queensland’s stunning Central Coast
- Part 20: Golden Outback
- Part 21: Building bonds
- Part 22: Southern Cape York
- Part 23: Ol’ Tele adventures
- Part 24: North Tele
- Part 25: Final chapter
Part 1: Victorian Grampians
The mountain ranges of north-east Victoria were one the highlights of our travels and definitely one of the most challenging 4WD treks of the first part of our trip.
We were wondering what we were getting ourselves into when local Victorians would say “the Grampians have nothing on Vic High Country” but we were up for the challenge.
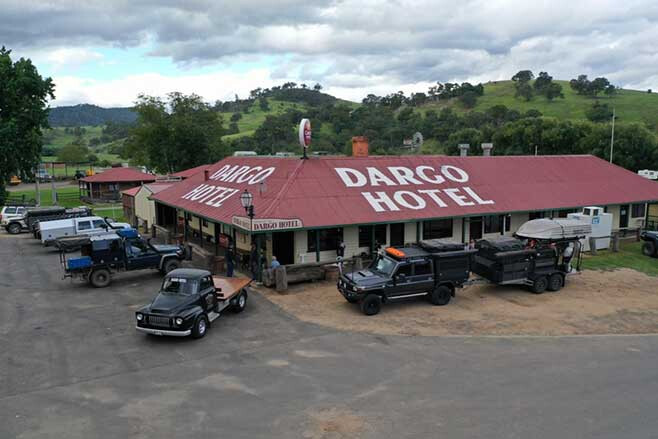
We drove along the Victorian south coast and headed inland towards Dargo, with the Dargo Hotel being our first stop and meeting point with some mates.
The hotel is an icon and boasts a strong community feel. Despite the impact and anxiety the first month of COVID brought, we felt welcomed and part of the community having just walked through the doors. Dargo is a great but tiny community and well-worth a stop at the pub for a beer or for the night. We camped on pub grounds, with amenities available for a small fee.
1
The following day we joined a convoy of four-wheel drives heading into the mountains to a beautiful free camp spot by the fresh, flowing creek at Talbotville. There was a drop toilet available but no other facilities and we had to be completely self-sufficient, which is how we like it. It was here we would base ourselves for a few days while we hit some 4WD tracks.
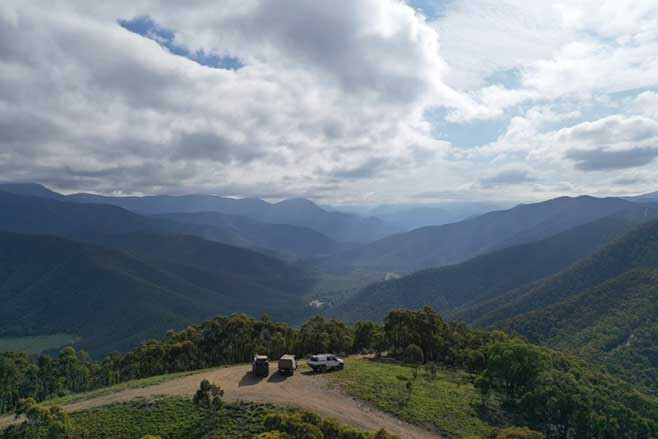
Our mates with us had some ATVs and, along with the 79 Series, they were put to good use. The best and most challenging drive we did in this part of our travels was the Billy Goat Bluff track. Whilst it is not for the faint-hearted, the views are absolutely spectacular, offering 360-degree views of the Victorian Alps.
Billy Goat Bluff track is only seven kilometres long, but as one of the steepest in Victoria it ascends 1200m and took us around two hours from camp to get to the top. When people said to us “You’ve just got to commit” they weren’t lying, and our 79 (as light as we could make it) reliably and steadily climbed the mountain.
At the summit, there is a parking area and we were very lucky to catch the sun starting to go down from the Pinnacles – a once in a lifetime opportunity. We took the same amount of time, if not longer, getting down, as we had to slowly creep along the loose, rocky surface to get safely back to camp.
1
Once we tested out the tracks and many water crossings around Talbotville, we had an overnighter at Scotts Reserve just out of the quaint historical town of Woods Point. You can’t go through this town without the photo opportunity at the abandoned service station. It is still in its original form from the gold-mining era of the late 19th century when the town was alive with many shops and even a hospital. There are many small camp spots around here, complete with drop toilets and fire pits.
Our next stop was another High Country icon – Craig’s Hut, where we camped nearby. As we learnt while visiting, Craig’s Hut was originally built for a prop in The Man From Snowy River film and has been a tourist attraction ever since. We spent a sunset at Craig’s Hut, which again provided spectacular views over the mountains. Toilets are available but there are no other amenities; our RTT and a good campfire were all we needed.
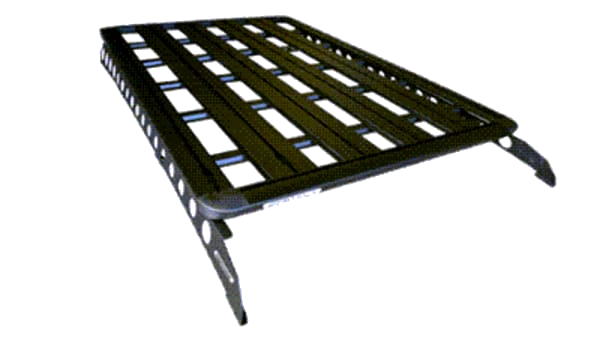
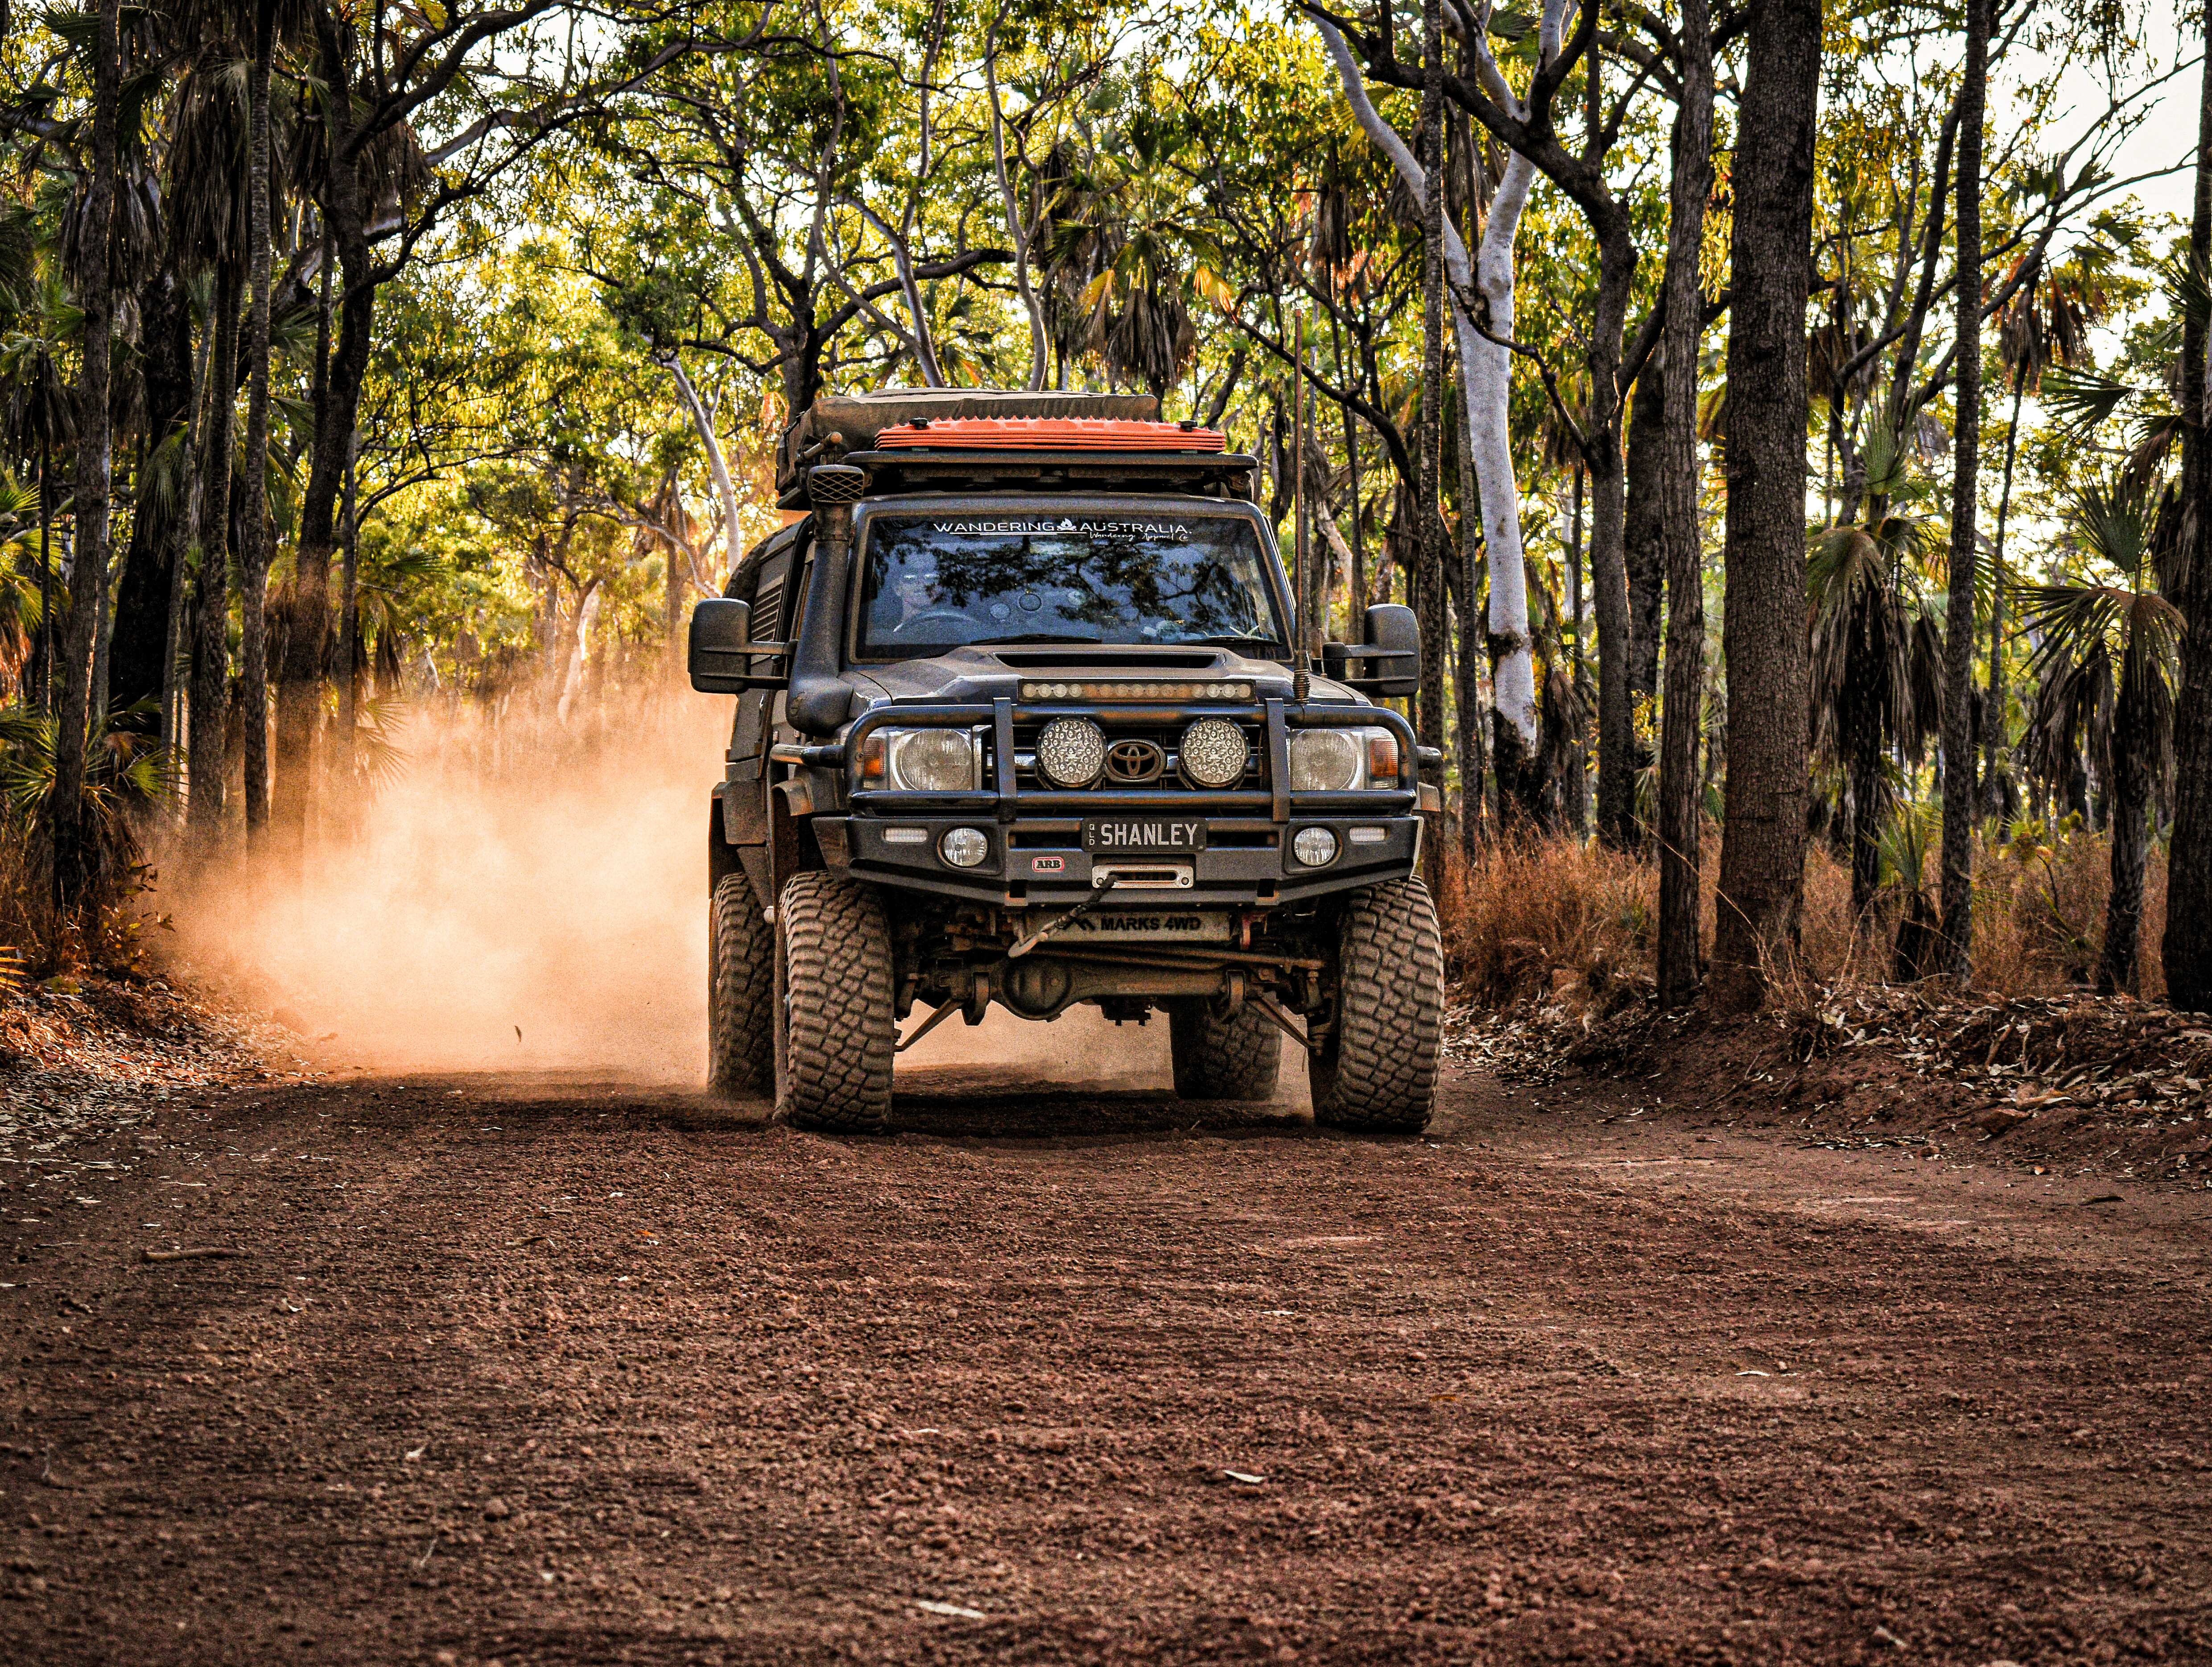
LAP OF OZ: 79 Series + Bruder combo
It was so helpful to travel with Victorian locals who have experience with the area, and we would highly recommend ensuring you’re confident with mountain tracks before embarking on an adventure in the High Country. It definitely pushed the big 79 to her limits, but she didn’t let us down … as always. For Brendan, our lover of heights and mountain ranges, this is an item well and truly ticked off his bucket list!
The Victorian High Country has spectacular views with an adrenalin rush included and is highly recommended … and there’s still plenty left for us to explore!
Part 2: Limestone Coast
Oh, how we have missed the South Australian landscape!
We have found SA to be an untouched wilderness. It’s almost like the South Australians have kept it a secret so it stays that way, which we completely understand. It was new to us to see farmland reaching to the sea, and the rugged coastline along the Southern Ocean was just awe-inspiring.
As we are now back in SA over on the western side, we have been reminiscing about our 2020 adventures on the eastern side of this fabulous state. Last year we travelled from Renmark over to the Barossa, down through Adelaide and the Fleurieu, fabulous KI and back up to the Limestone Coast along to Victoria.
While we have many stories and piccies from SA, we want to share our time along the Limestone Coast with you, where we decided to base ourselves for a week at Kingston SE, 30 minutes’ drive north of Robe.
1
We stayed at a privately owned campground known as ‘Will’s Beach Shack’ owned by, not surprisingly, a little legend called Will! He has a 10-acre property just out of Kingston and for $10 a night there was private beach access, hot showers and water available.
Brendan had the opportunity to get the dirt bikes off the trailer and hit the sand for a 20km run on the beach to explore. We spent a fair bit of time in Kingston, stocking up on food, doing some school work and checking out the local jetty and beach.
Heading south on the Limestone Coast, we were then joined by Josh and Mikayla from @travelling.campers to hit the sand tracks from Robe to Beachport. It was certainly an action-packed day full of sun, surf and lots of beach driving. Again, an adventure most 4WD enthusiasts could tackle; although, a bit of sand driving experience wouldn’t go unnoticed.
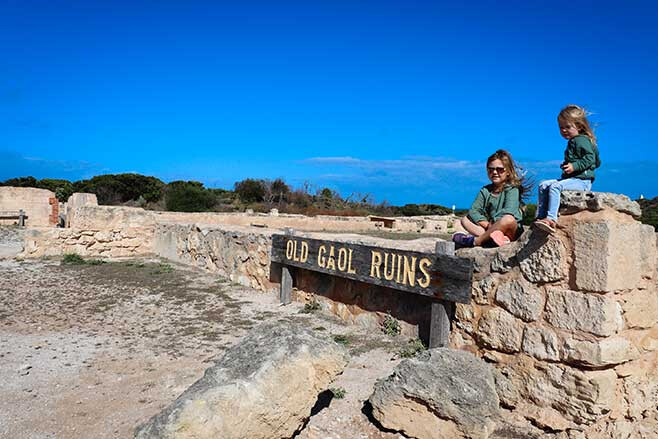
Before tackling the tracks to Beachport, we checked out the vibrant coastal town that is Robe. Being the biggest and most well-known town of this area, Robe offers boutique shopping, cafes and a historic old pub with a great little beer garden. We went to see the gaol ruins which the girls loved learning about, and spent some time driving around the hilltops where there is breathtaking views and many walking tracks. While we didn’t stay in Robe, it would be a great place to base yourself for a week.
1
We left there bright and early, Mahalia coffee in hand (gorgeous little coffee and gift shop) and headed south, entering the beach at Little Dip Conservation Park. There were spectacular ocean views all the way along the coastline, and plenty of UHF banter to keep us entertained.
The beach driving is relatively straightforward with lower tyre pressures and tide knowledge, however closer to the water there were some very soft spots as Brendan discovered bogging the big 79 to its diffs. With the help of the MaxTrax and some good ol’ fashioned digging, we were back on track and headed for Nora Creina. This is a gated settlement of a few houses and, well, let’s just say, clothes are very optional.
BEST 4X4 TRACKS: Close to Adelaide
Just north of Beachport we spent the late afternoon playing around in the sand dunes where there is sand for days and we imagined careering around in dune buggies. Nevertheless, it was so much fun in the cars and we did manage to get lost in the dunes with our trusty Hema maps helping us out. The kids (and the adults!) did so well considering we spent a good 10 hours in the car – we all crashed as soon as we got back to camp.
Our time spent on the Limestone Coast was, like most of our trip, full of adventure and wonder, and we will definitely be heading back to do more exploring. We highly recommend it for a good variety of experiences and a great family time.
Untl next month … go wander!
Part 3: Strzelecki Track
As I write this, I look over the beautiful Southern Ocean from the Lincoln National Park on the fabulous Eyre Peninsula, South Australia.
Well, we have been from beach to beach in five days and what a five days that was. We have travelled from the northern Sunshine Coast, Qld to the upper Eyre Peninsula along the famous Strzelecki Track. This is an experience we won’t forgot and the kids (and us!) have learnt so much from it.
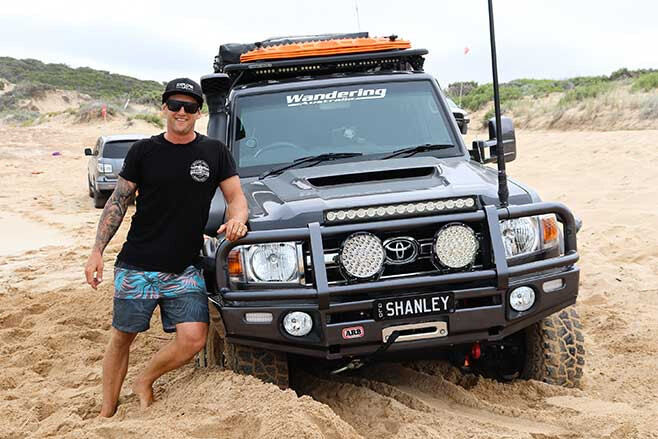
We started our travels from the coast with a stop in Toowoomba for some small repairs to the rig and a quick once-over by the team at Mick Tighe 4X4 & Outdoor, thanks guys!
We then headed west on our first big day of driving. Our mates Josh and Ellen from @79series travelled with us and provided great company and support. We would really recommend doing something like this as a group. Knowing there is another vehicle, supplies and knowledge if we needed it, puts your mind at rest.
2
We knew if something happened to one of the vehicles or vans or heaven forbid, one of us, we have double the equipment and manpower to deal with it. Thankfully the trip was uneventful and travelling with another likeminded family made it so much more enjoyable.
Our first day of driving was Toowoomba to Bollon, a total of 481km and around six hours with stops. It was only the beginning but we were ready for a camp that night and found a beautiful waterhole with a well-maintained campsite along the Wallam Creek.
This is a free campground with a flushing toilet maintained by the locals. Let this be an opportunity for me to say how welcoming the locals in all the small outback towns of both Western Qld and SA are. Everyone we met was always so friendly and happy to help out with any local advice.
The next day was our longest driving day in kilometres travelling from Bollon to the Dig Tree near the Qld/SA border. The farther we drove, the redder the dirt became, the less trees we saw and the higher the thermometer rose! Along the way, around 200km from the nearest town, we came across a family running low on fuel that had travelled up through SA.
2
After checking they had enough food and water, we pointed them in the direction of a nearby mine site that may have some unleaded as we weren’t carrying this. This is a good reminder to plan ahead and take plenty of supplies and extra fuel. When talking to the locals, they said they come across this too often and many people get stranded in the great outback.
Arriving at camp around 6pm, we were all ready for a dip in the Cooper Creek and camped at the Dig Tree campground. This is definitely a bucket-list item, just to say you’ve done it and we learnt some modern Australian history.
Situated on the Nappa Merrie Station in Qld, the Dig Tree has been well looked after and preserved and tells a story of the early explorers. Brahe, Burke and Wills the most famous of them and who in 1861, set up camp at the Dig Tree for four months. There is an abundance of information around both the Dig Tree and Nappa Merrie Station at the site and was a good reminder for our iPad-savvy Bella of how far we have come and how lucky we are to have the modern conveniences we do.
Escaping the flies and heat, we set off reasonably early on our third day of travel heading for the border and beyond. Stopping in at Innamincka for a cold beer at 10am(!) and a look around, again we were greeted with welcoming hospitality, before hitting the Strzelecki Track through outback SA.

2
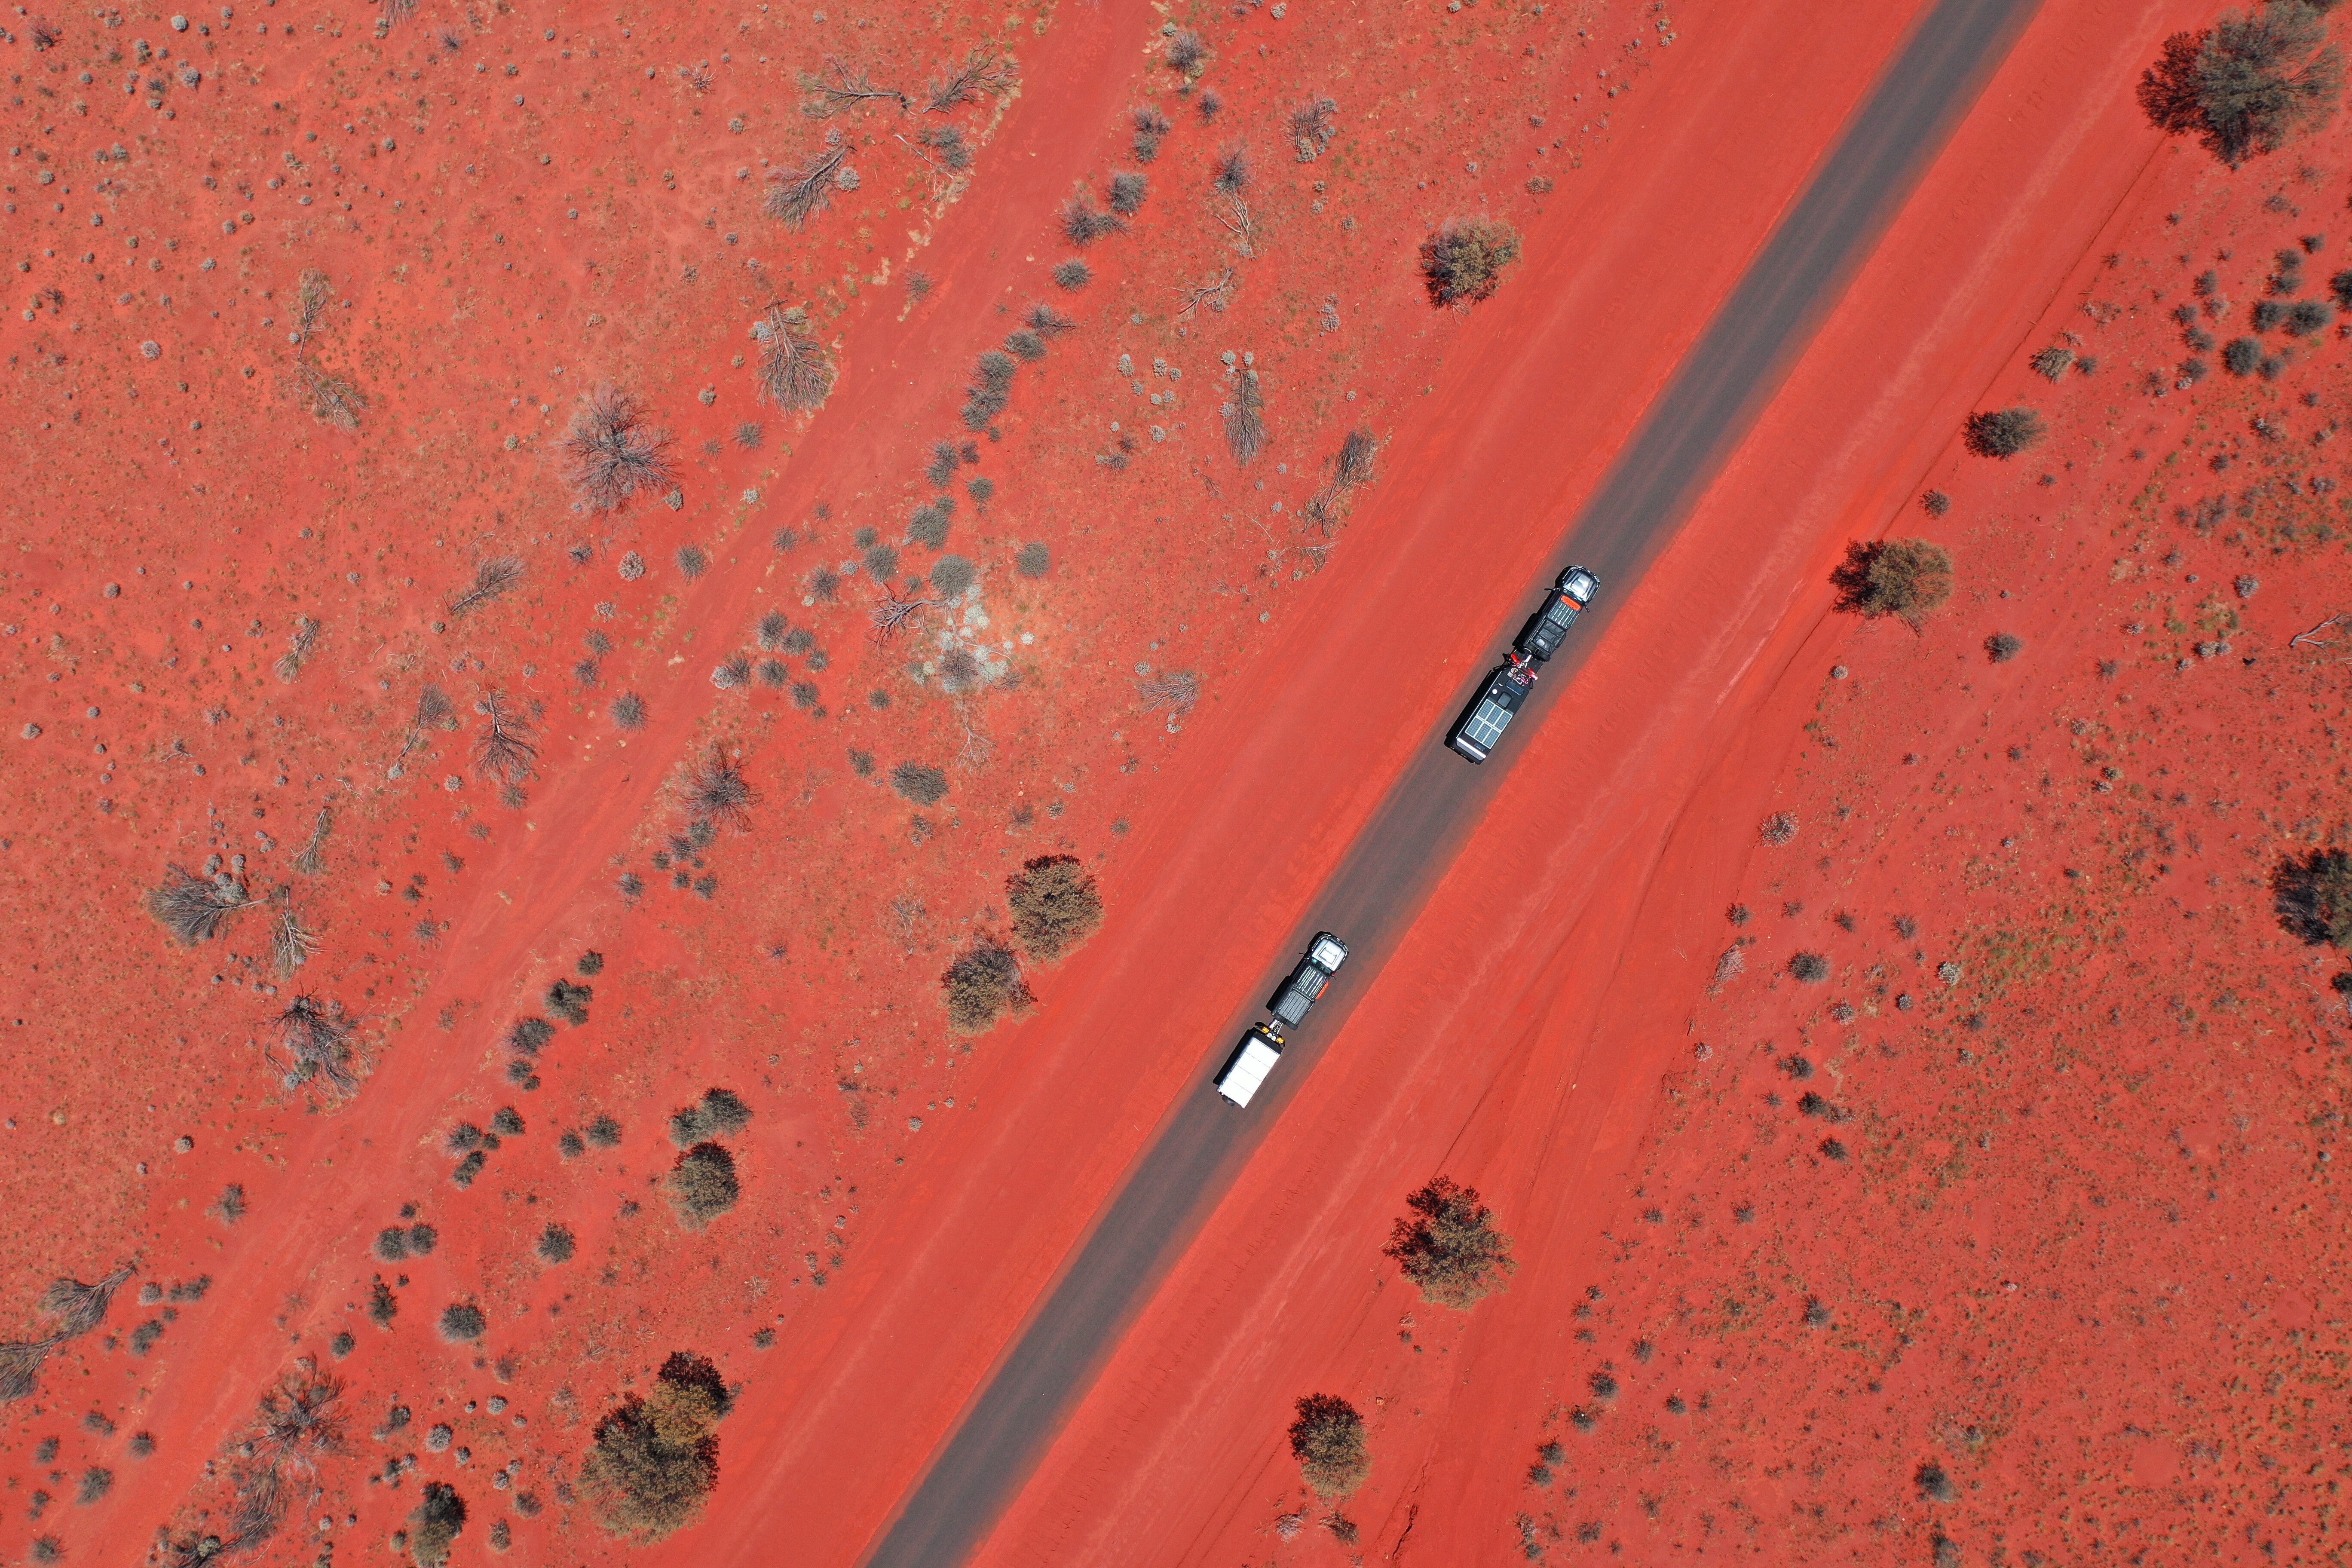
It seems we have learnt the ‘Strez’ ain’t what it used to be! It is now well-maintained with many mining trucks traversing it daily. However, it is still not to be taken lightly as there are patches of corrugations and bull dust, and forever-changing road and weather conditions. With patchy to no reception, it is beneficial to have plenty of fuel, supplies and a two-way on channel 40 to keep in the loop with the truckies.
After a quick lunch stop literally in the middle of nowhere, we then cut off the Strez on to a track towards Arkaroola village. This was much slower going as it was rougher, but we still managed to do around 80km/h. This is definitely one road to check conditions and previous weather on, as we saw evidence of people getting stuck in the mud.
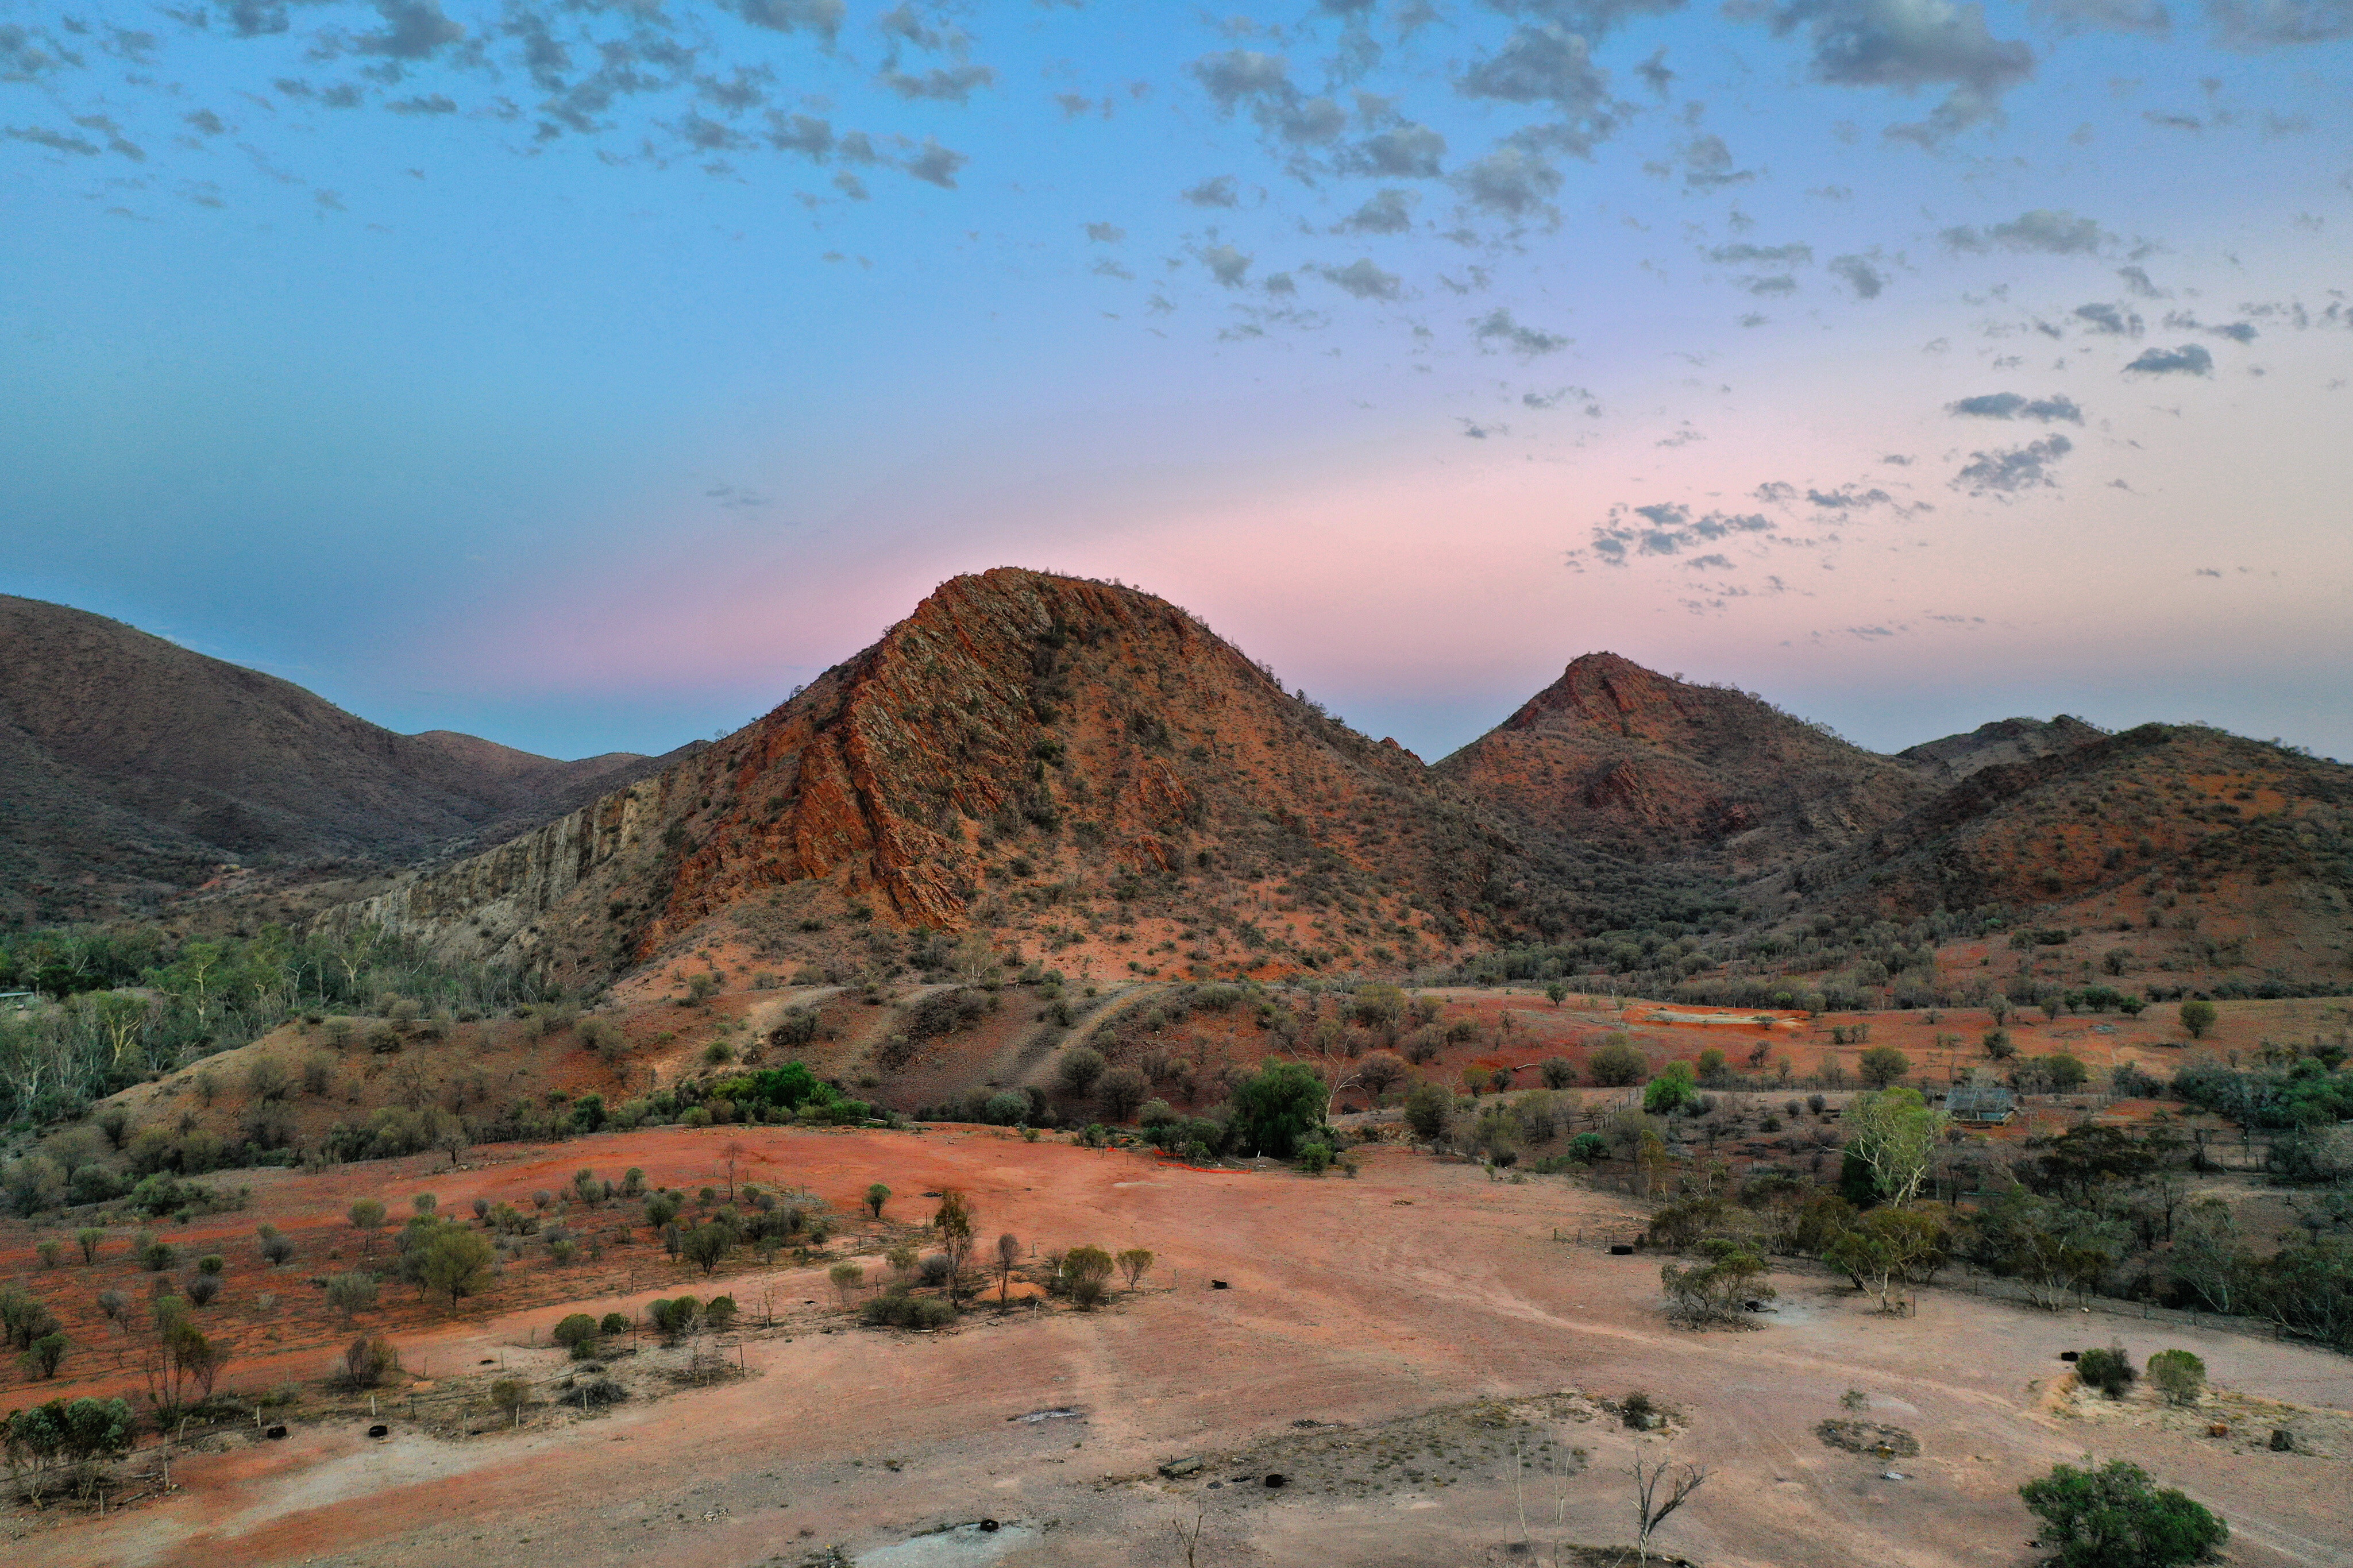
Arkaroola, nestled in the northern Flinders Ranges, is a great little campground complete with fuel bowsers, restaurant, astronomy observatory, rock wallaby feeding and a swimming pool.
On our final day of travel, we were looking forward to the black top and hit the highway bound for the Eyre Peninsula. This was a great drive around the Flinders Ranges and we plan on getting back to explore it one of these days. So, as you can tell, the Strez was only a small part of our trip from shore to shore, and we are so glad we went through the middle of Australia to tick it off the bucket list and teach our kids about outback Australia.
A big thanks to Josh, Ellen, Will and Tom from @79series for being great travel buddies. Now onto the Eyre Peninsula and all that SA has to offer.
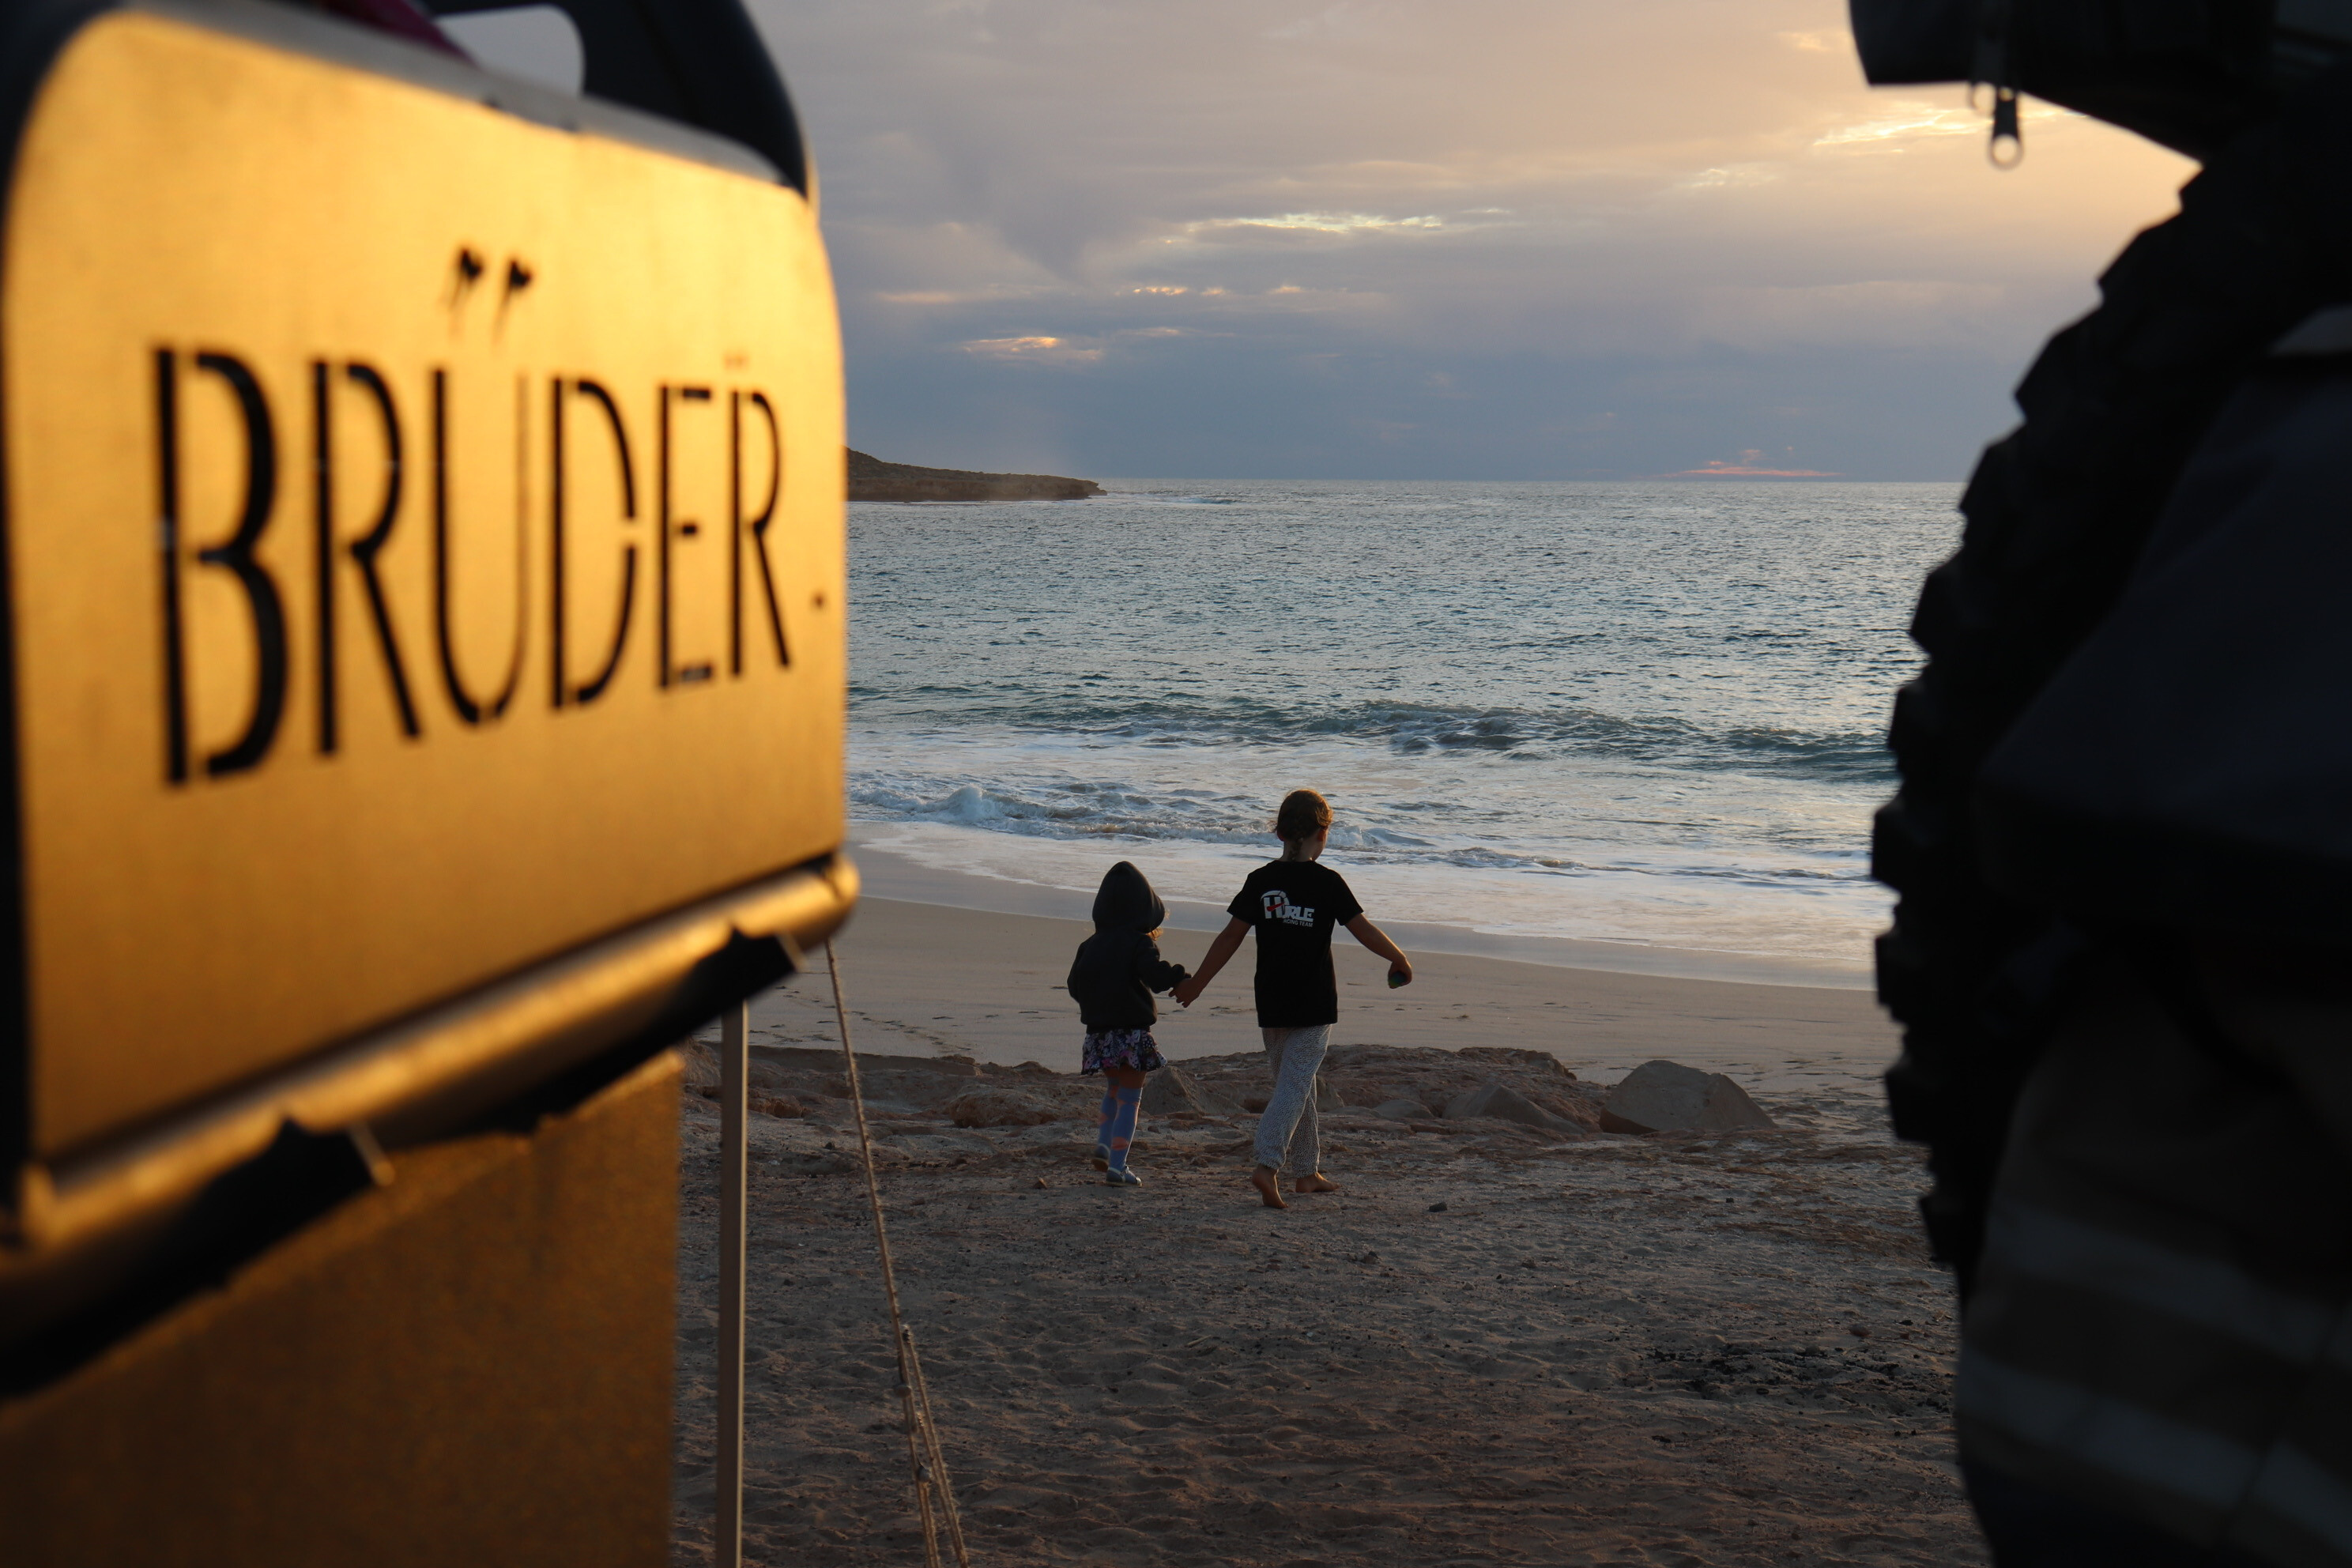
Part 4: Bruder EXP-6 caravan
WHILE on the road, we get asked multiple times a week about our Bruder van, and besides “How much does it cost?” the most popular question we get is “Why did you choose the Bruder?”
Can we just say we believe there is no such thing as the ultimate set-up? Everyone is different, everyone has different needs, wants and budgets. It blows our mind the amount of different camping options available and we have had the privilege of meeting many families on the road with such a variety of set-ups.
As most people do, we underwent the evolution of camping and started out in a double swag in our late teens and twenties when we had not a care in the world and I must say, it is a lot easier this way.
1
When our first little munchkin arrived, we upgraded to a canvas tent which suited us just fine to camp with. It was after the arrival of our second that we decided we needed something bigger and we found Patriot Campers on the Gold Coast was exactly what we were looking for.
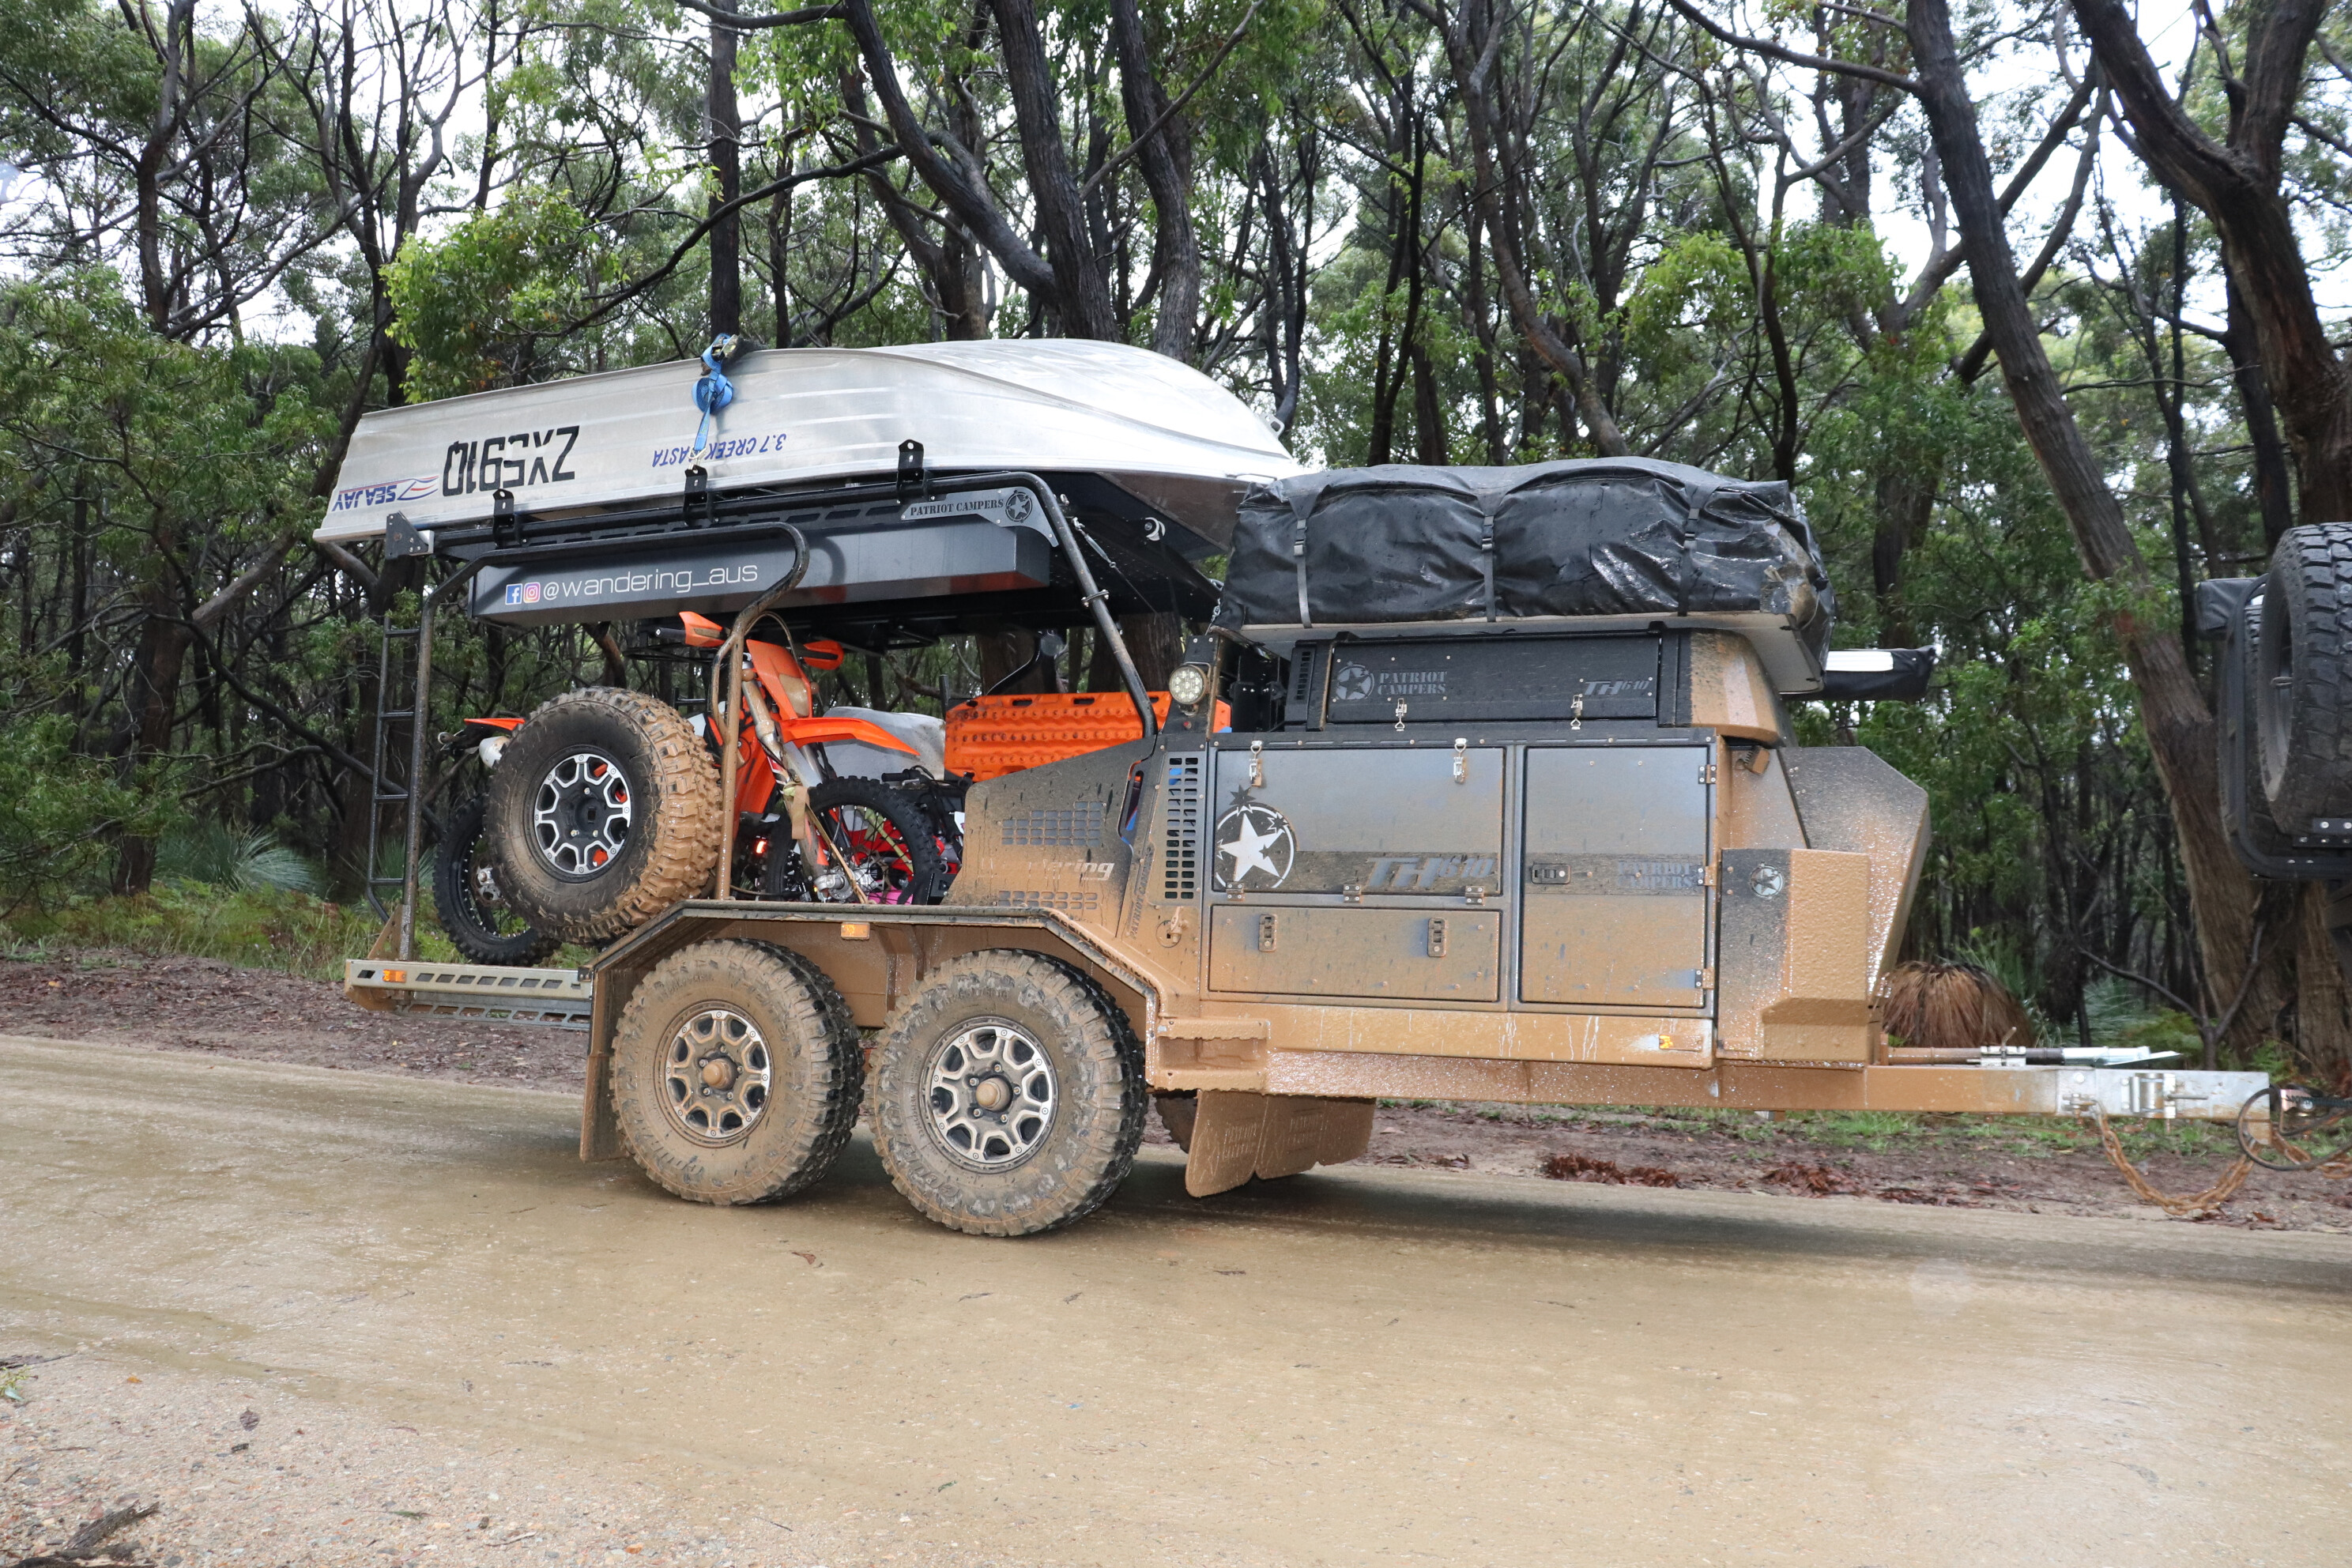
In November of 2017 we picked up our Patriot Camper TH 610. This was a good compromise giving us a bed and kitchen as well as a large trailer to carry all the toys on our adventures. With the hit of the pandemic and a change in our plans we then decided to change to the Bruder caravan for further comfort and living space. Unfortunately, Brendan had to sacrifice the boat and bikes and hasn’t let me forget it!
The Patriot TH610 Toy Hauler is the ultimate boy’s weekender. It can go anywhere and is rugged and tough. Hands down the best feature of the TH610 is the flat bed tray and boat loader so you can carry the boat, bikes, firewood, ATV or many other toys. The kitchen and living area is equipped with a 50L fridge, Redarc electronics and pantry. We added a kitchen extension on the tray to include a gas cooker and further storage.
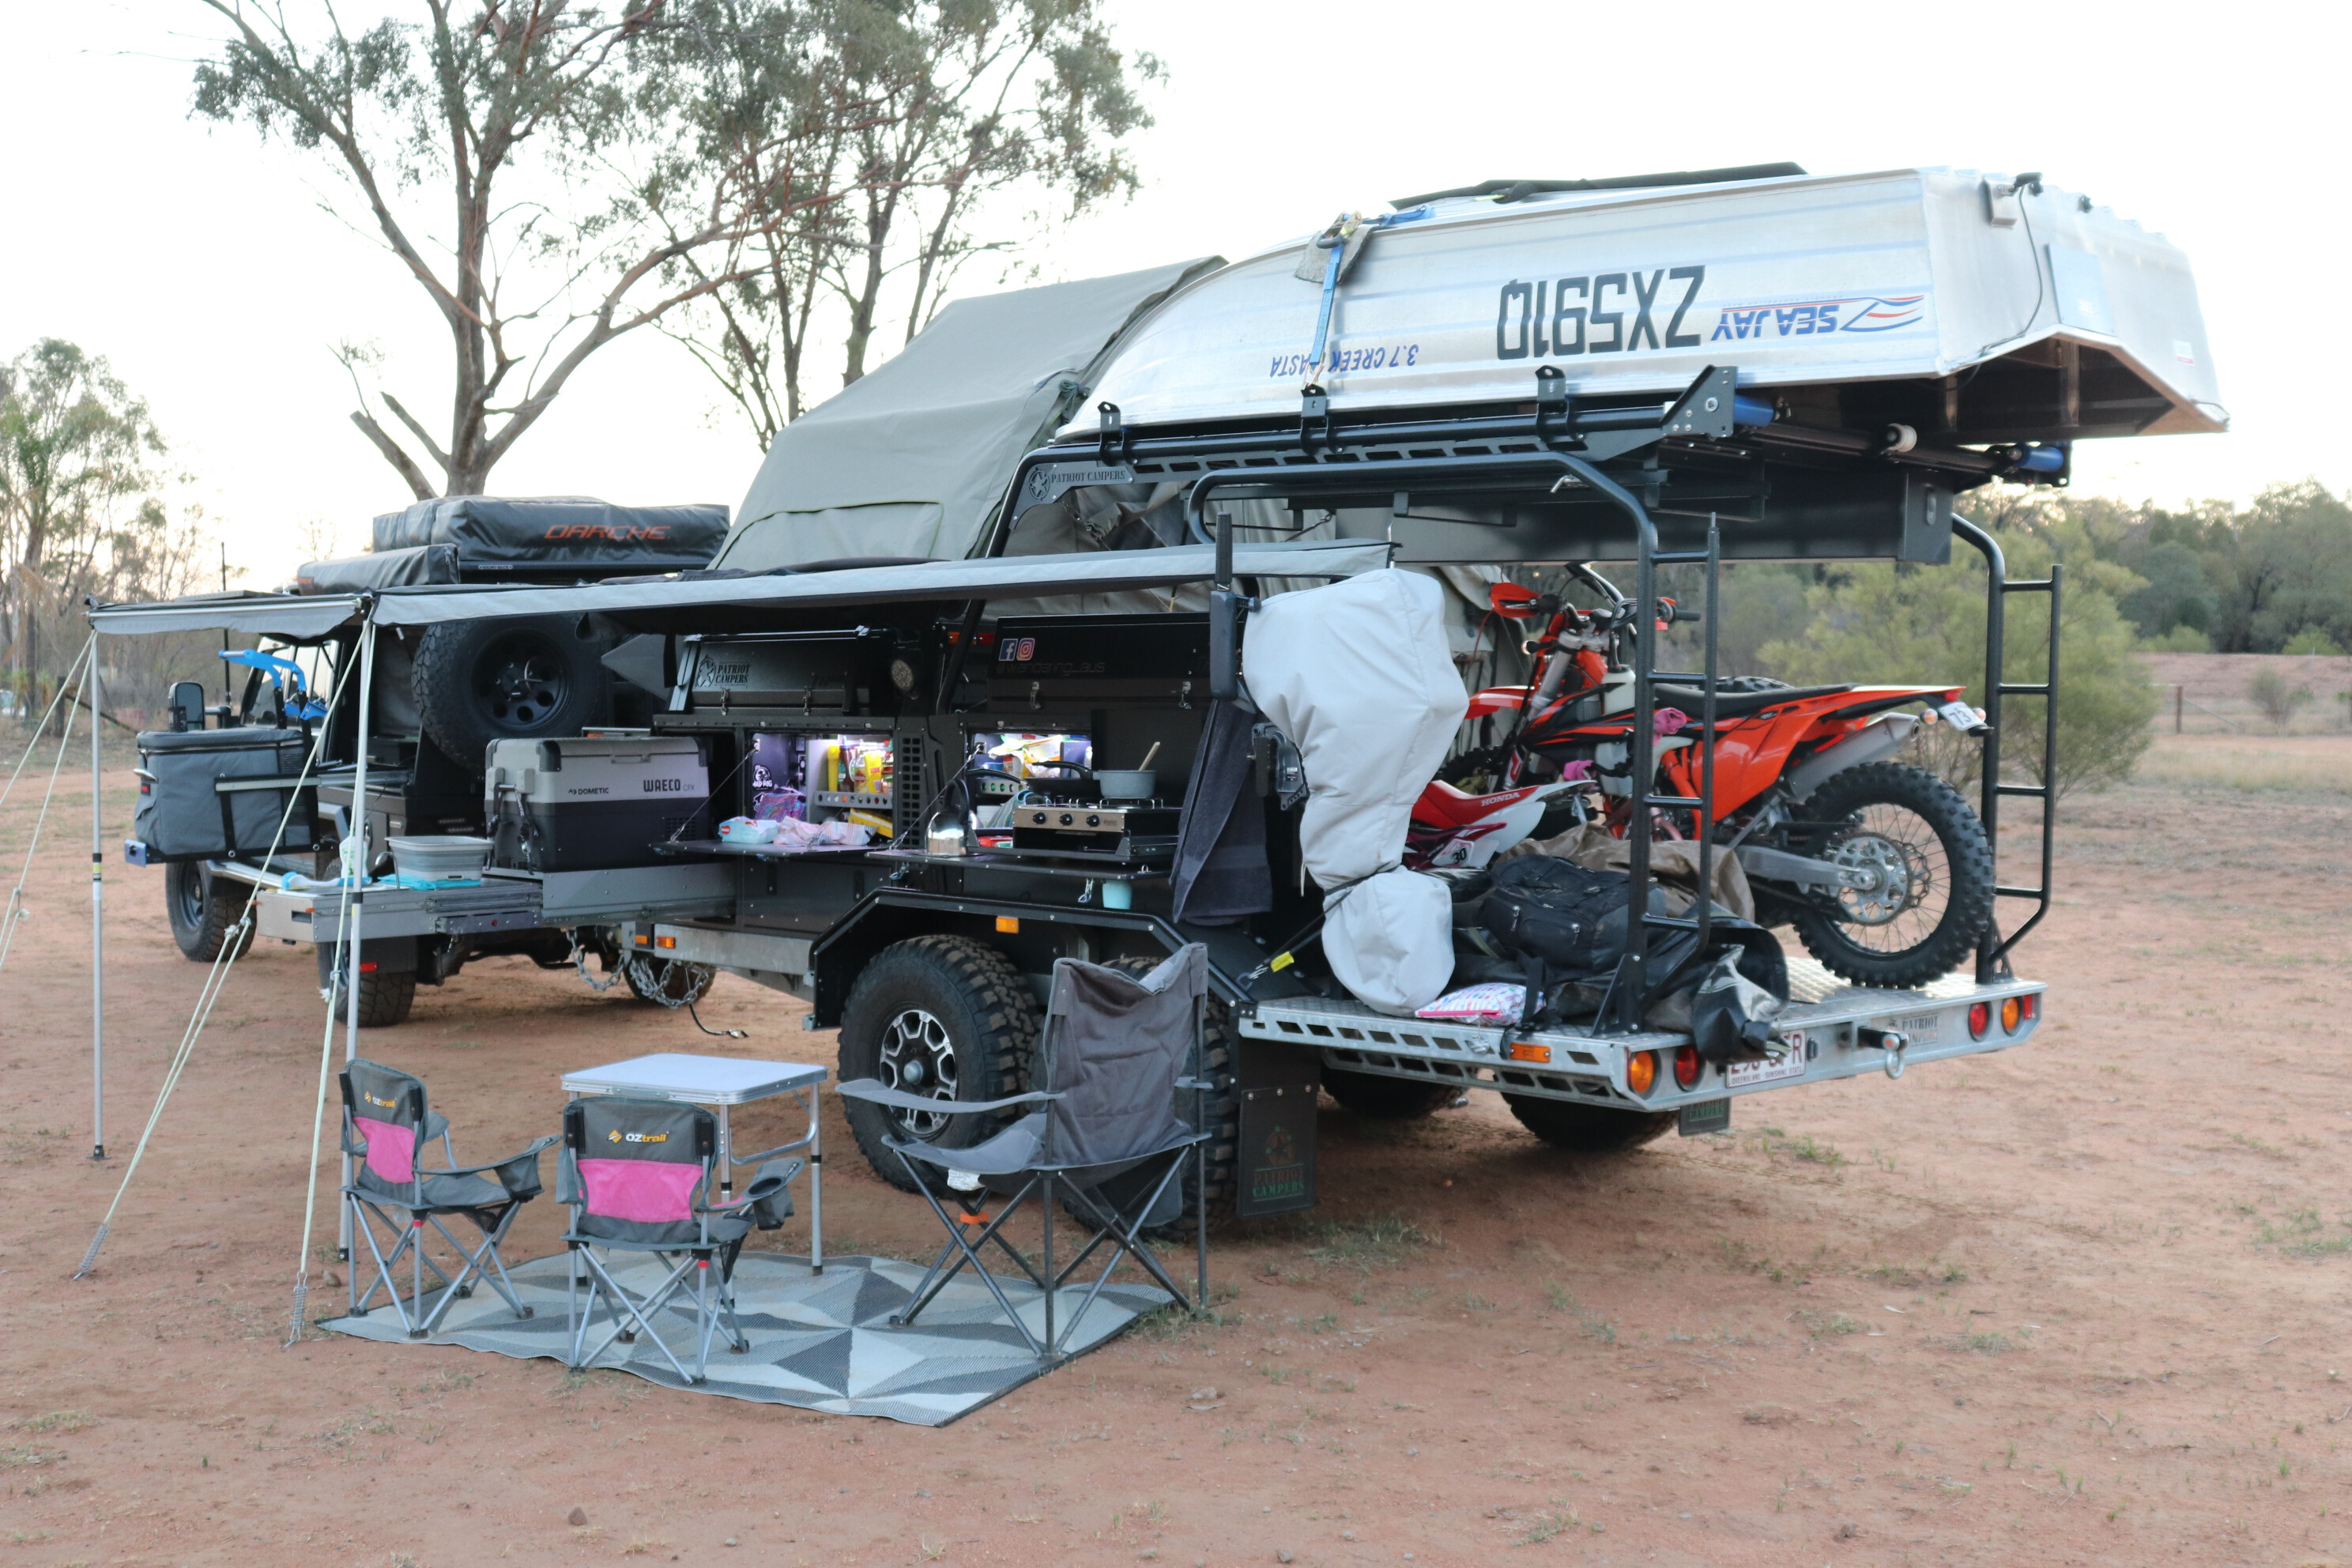
1
On the other side of the camper, we had a canvas rooftop tent with a queen-size bed and zip-on extra room for the kids. The Patriot had plenty of storage in the hull of the trailer, however given it was a large box space, it needed to be organised and well-packed to easily access what we needed. We loved the outdoor living that our Patriot offered and it was great for a fun-filled weekend away with mates, which seems exactly what Justin had in mind when he designed it.
However, after having our toy hauler for a few years and with our lap of Australia being interrupted by a pandemic, we decided to change things up a bit. We wanted less set-up as we were living full-time on the road and Nikita wanted a few more creature comforts with an indoor toilet and shower. Brendan had already fallen in love with the Bruder and after a quick tour in person we signed on the dotted line.
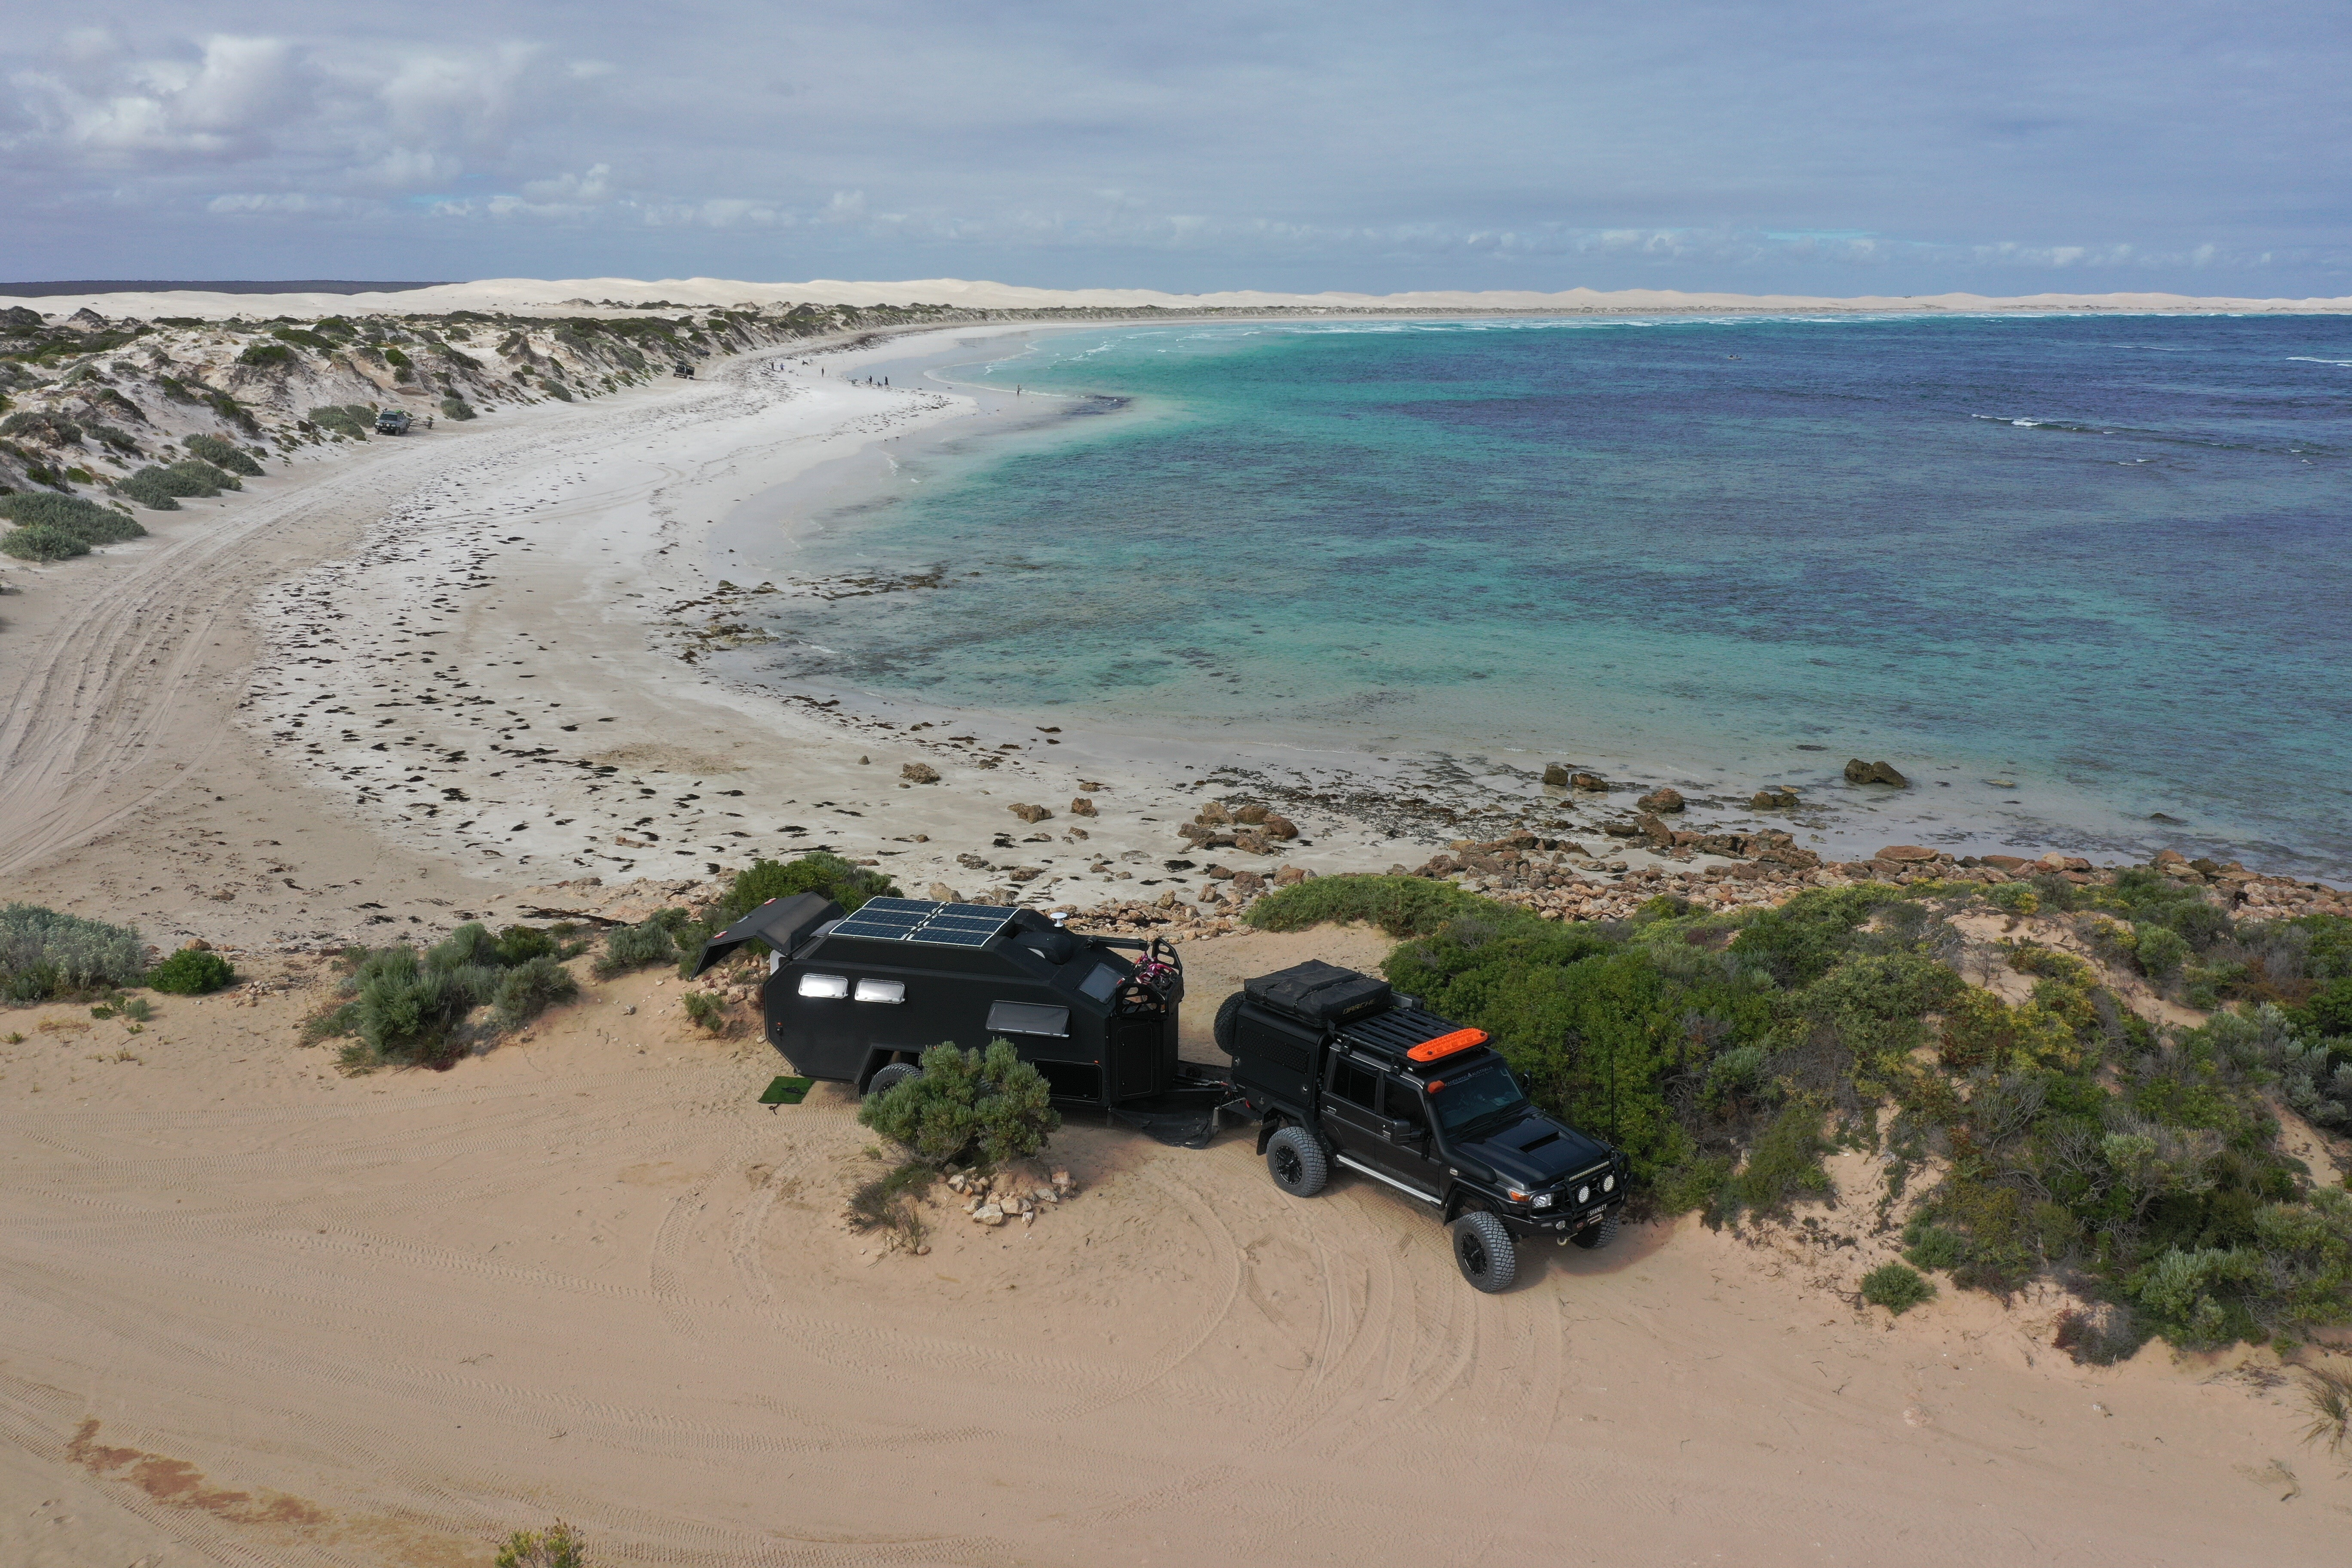
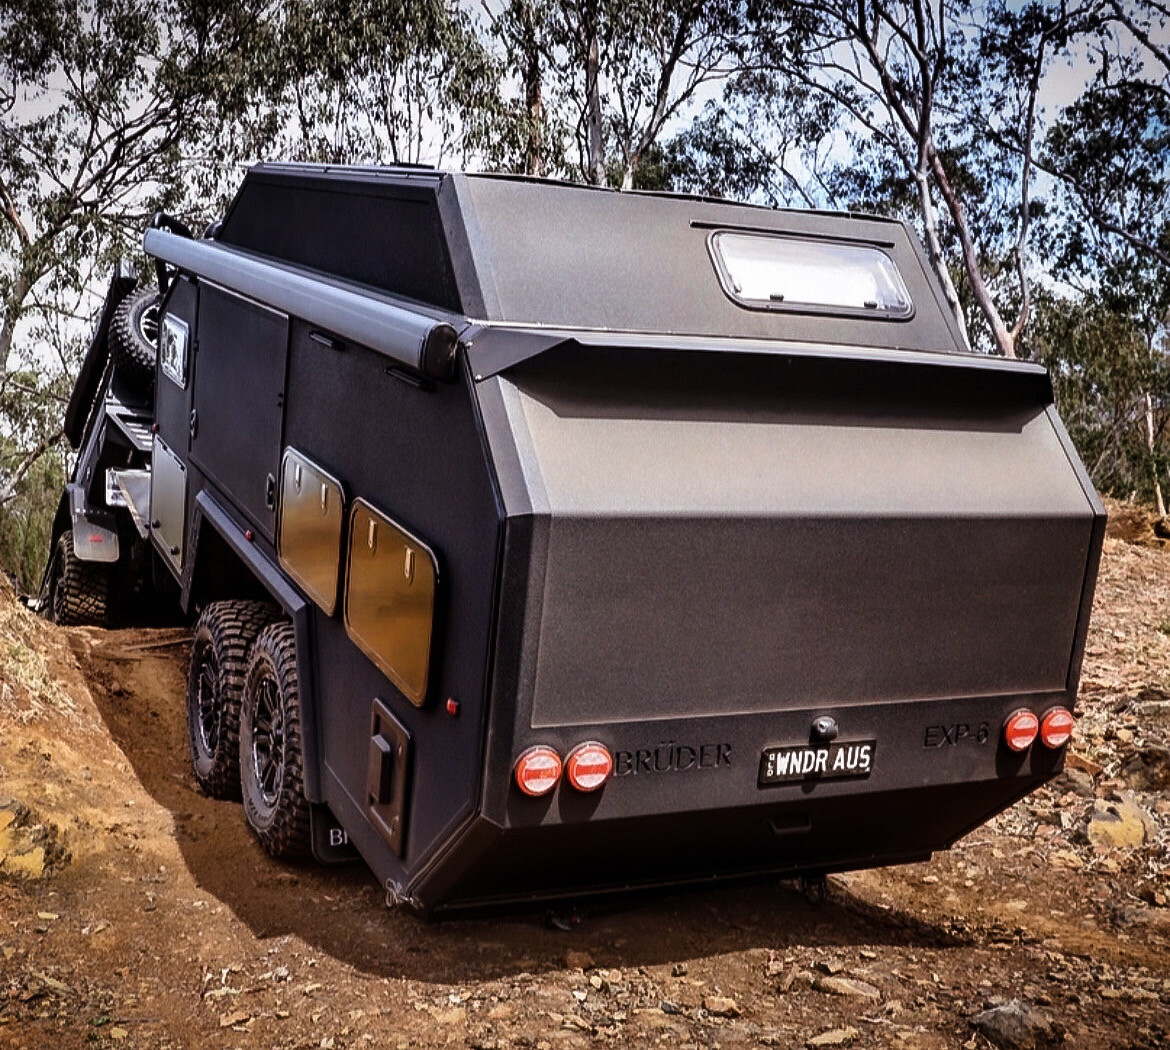
The Bruder is an off-road caravan with go-anywhere capabilities. The standout for Bruder is the suspension and all-in-one electronic Garmin system. It is cleverly designed and nothing has been forgotten. With a crazy amount of storage, we had no problem fitting everything we need for a year although I must say after three months on the road, we have already sent two parcels home of stuff we ‘thought we would need’!
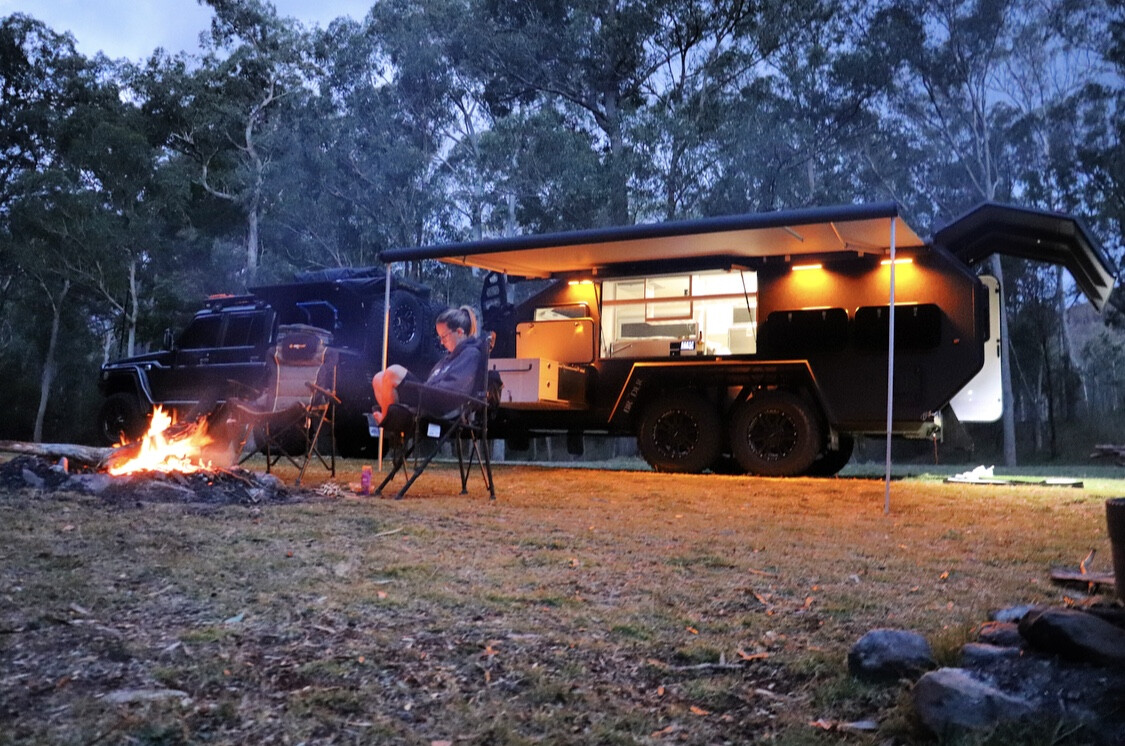
1
Bruder is luxury-plus but maintains the ruggedness of an off-road van. However, if you are looking for an expansive indoor living space this is not the van for you as it sacrifices indoor space for a compact off-road rig. We love living outdoors and the indoor-outdoor two-way kitchen suits us perfectly.
As any traveller will agree, what you tow all depends on your vehicle, weight capabilities, where you want to travel to and what you want to do with it. We maintain that no van, camper, tent or travelling set-up is perfect and what suits one person will not suit another.No matter the cost, the most important thing is getting out there with family and friends and enjoying everything this wonderful country has to offer. Travelling life is all about experiencing the wonders of nature, meeting likeminded great people and having the experience of a lifetime whether it be for a night, a year or more.
Part 5: Great Southern Eyre
The tail end of our summer this year was spent discovering South Australia’s gorgeous Eyre Peninsula. Spanning from Spencer Gulf in the east to the Great Australian Bight in the west, with the Gawler Ranges forming the northern border, make for pretty specky scenery.
The eastern side of the triangle that is the Eyre is dotted with many little seaside towns, all unique in their own right. A favourite of ours along here was Tumby Bay. It is most famous for its mural and silo art. We spent a glorious morning strolling around town admiring the various murals, each with their own meaning, and the silo art on the edge of town beautifully represents the small-town culture along the Eyre Peninsula.
Down at the tip of the Eyre, Port Lincoln not only provides an opportunity to top-up on supplies and services but is also a gateway to the unspoiled beauty where the Spencer Gulf meets the Southern Ocean. We stayed a week at Engine Point in Lincoln National Park and were so spoilt with unreal weather and relaxing beach days. Most of the national park is accessible for 2WDs and large ’vans, and there’s plenty of low-cost camping on this great stretch of coastline.

1
We took a day trip to Memory Cove, where the crystal-clear water and stunning beach was well-worth the work to get here. In order to access the gated Memory Cove, you need to get a key from the Port Lincoln Visitor Information Centre, 20 kilometres from the national park, which you hire for 24 hours with a $50 deposit.
The road into Memory Cove isn’t challenging, but it’s very rocky and therefore a slow trip that definitely requires 4WD. It took us around two hours one way and, whilst we did a day trip without the ’van, you are able to camp there; although, the sites are only suitable for tents and small camper trailers.
After Lincoln National Park, we headed to Whaler’s Way for a slightly different experience. Whaler’s Way, at the very bottom of the Eyre and around 45km from Port Lincoln, is a privately owned property offering clifftop camping and untouched coastline. Unlike the national park, Whaler’s Way has been largely uninterrupted with slightly terrifying cliff edges, beautiful natural caves and plenty of wildlife. Brendan and Bella climbed down the cliffs at sunrise and sat with a colony of seals just doing their thing in the wild. We had a great couple of nights exploring the bottom of the Eyre.
1
Most famous for its oysters, Coffin Bay on the southwest Eyre was different to what we expected. It’s a quaint, sleepy little town with not much more than a caravan park, IGA and many, many oyster farms. We spent Australia Day exploring Coffin Bay National Park which, we argue, is even better scenery than Lincoln National Park.
There are spectacular lookouts accessible by 2WD and great sand tracks to explore by 4WD. Pull up anywhere along the beach to enjoy fishing, swimming, fresh oysters and a beer or three! The beaches just get better and better as you travel up the west coast of the Eyre Peninsula. You can choose any number of free beach camp spots to stay at. One of our favourites was Greenly Beach just above Coffin Bay, where we had the whole place to ourselves and the serenity was divine.
Moving up the coast, Streaky Bay is a good stopover for supplies and to base yourself to explore the surrounding area. We highly recommend Tahlia (Woolshed) caves and the Tub, offering natural beauty easily accessible by 2WD – plus there are timber walkways and stairs to explore.
2
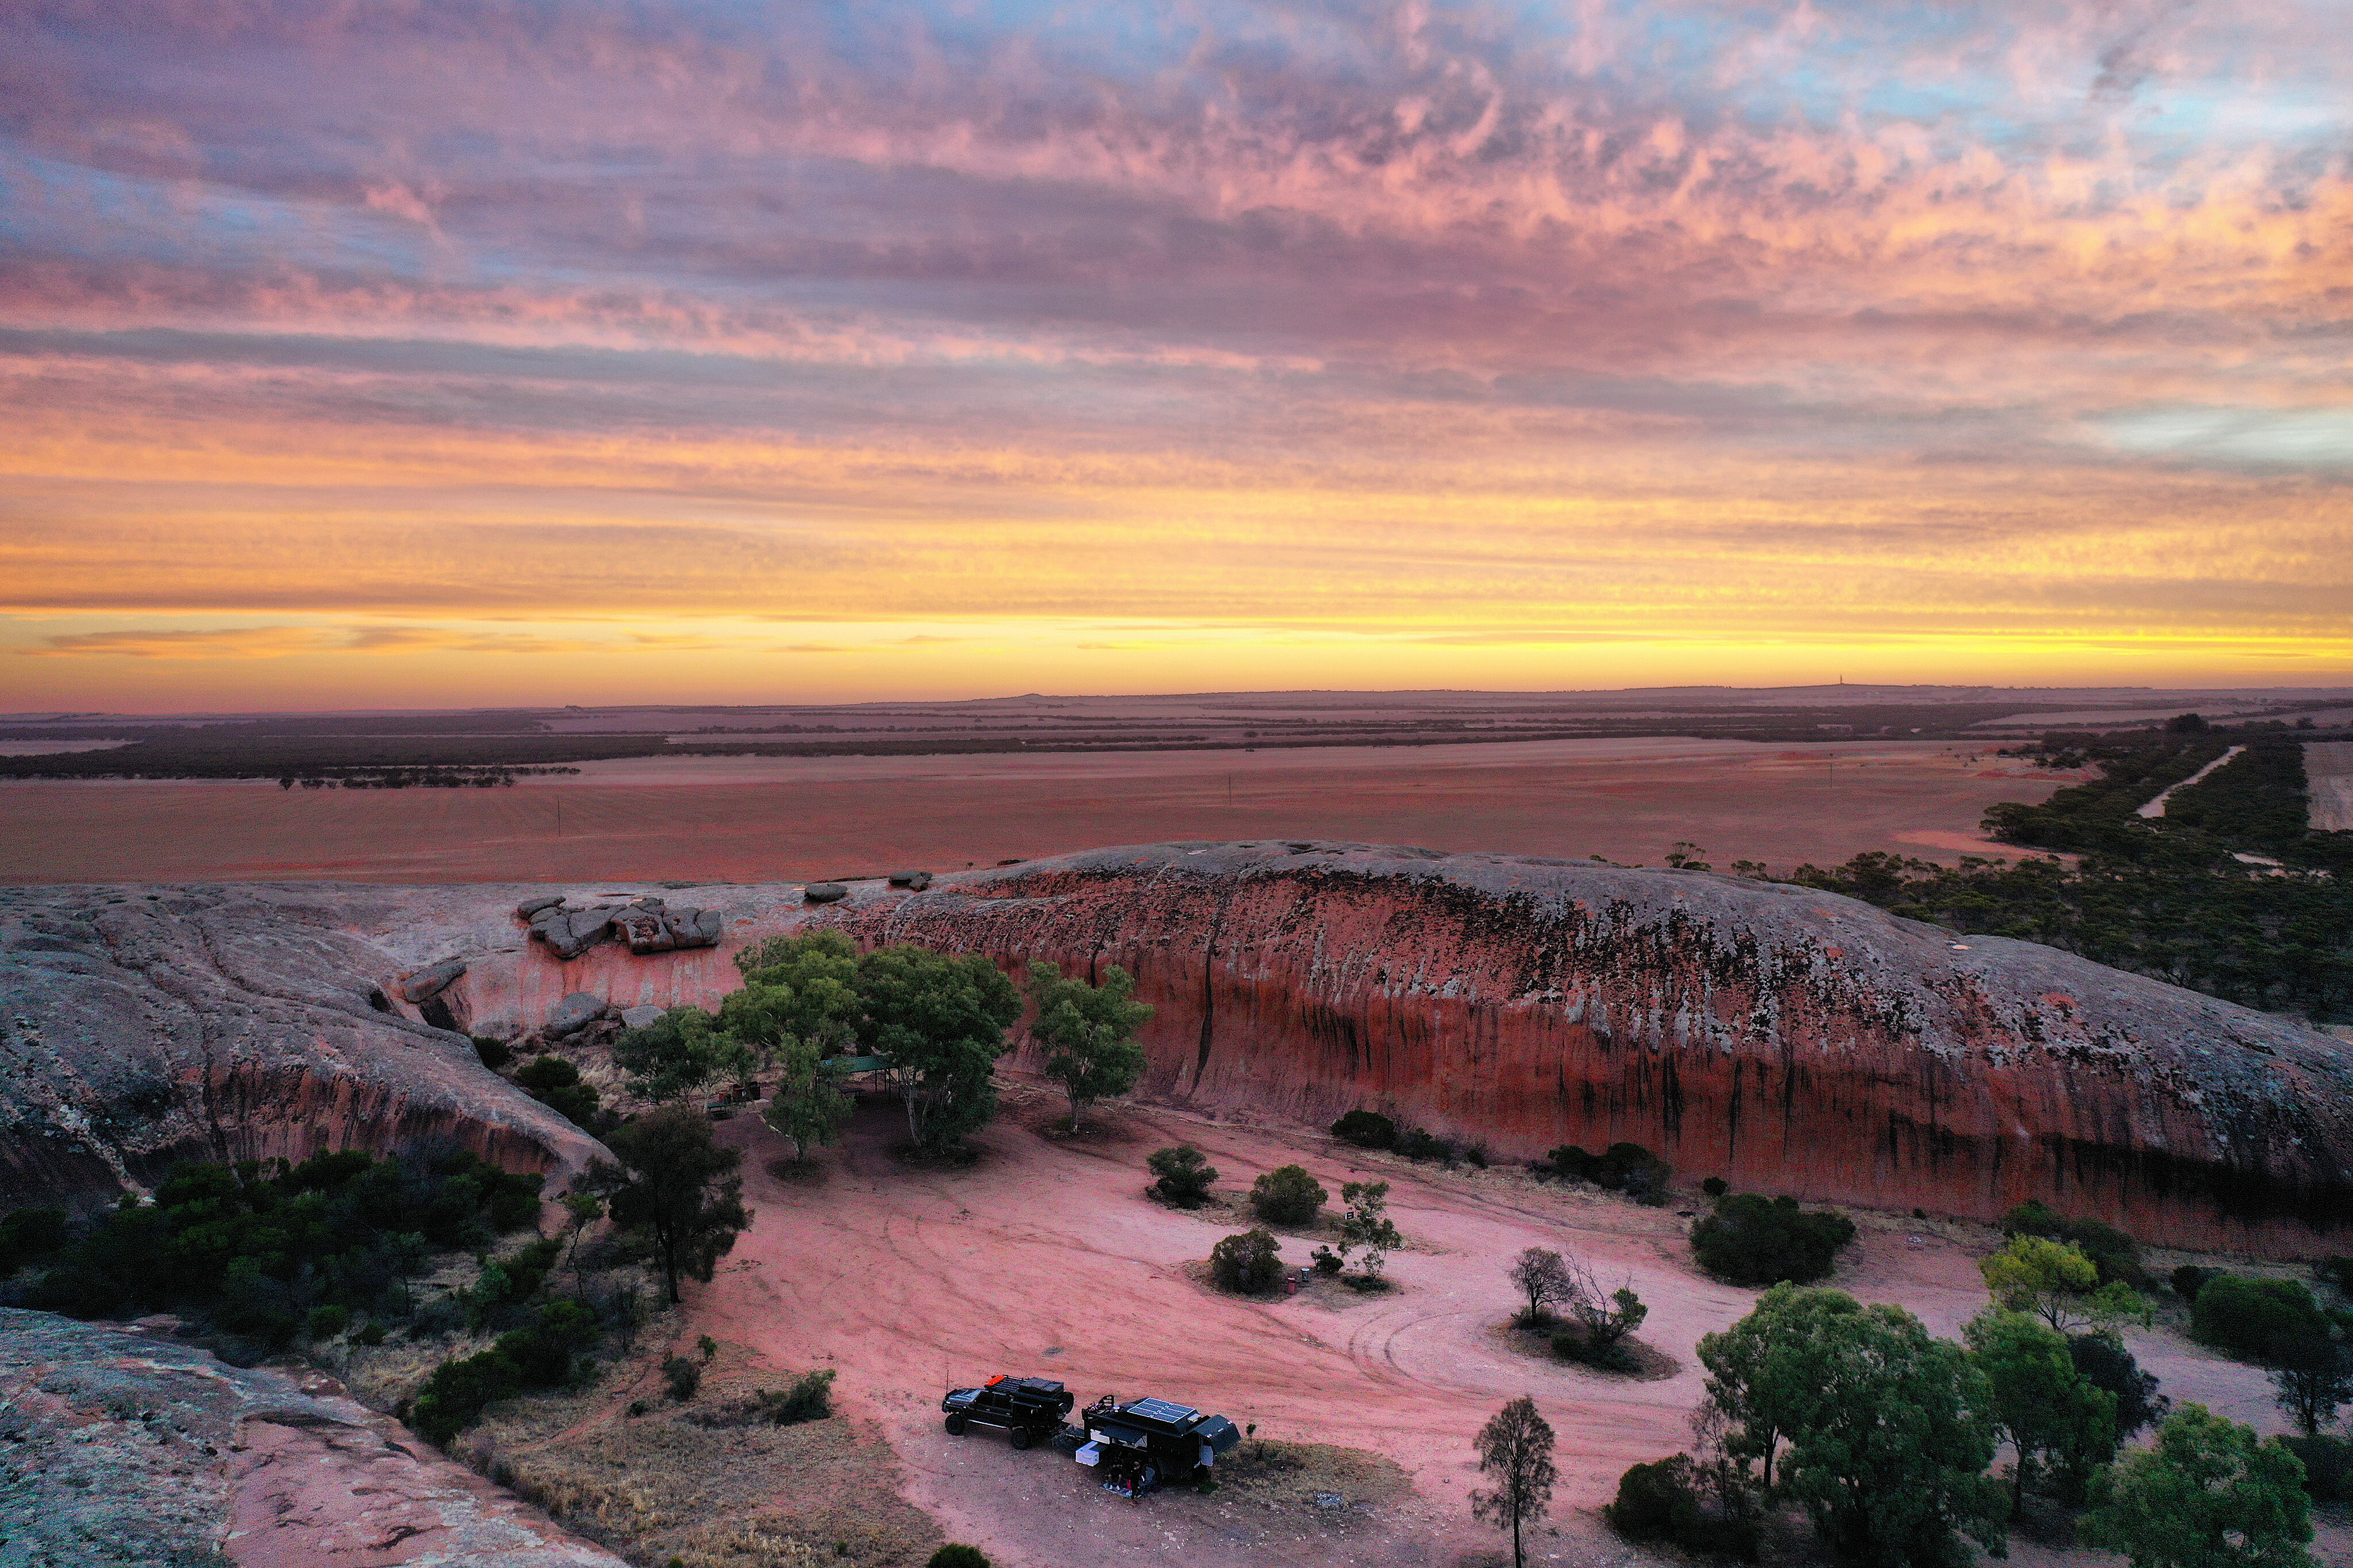
While we didn’t visit too much along the inland route of the Eyre, we did check out the small town of Kimba, known for its amazing silo art and for being the mid-point across Australia. After getting the compulsory photo with the halfway sign, we headed out to Pildappa Rock – very similar to Wave Rock in WA but much less commercialised and a peaceful little camp. There are no facilities here, but there is a great rock formation you can climb and walk all over for awesome sunset views of the surrounding farmland.
One of the final destinations for many at the north-western Eyre Peninsula is Perlubie Beach. This is a fantastic beach camp with flushing toilets and great, little thatched beach huts free for use. This becomes the ‘party beach’ most of the time, and we had a fantastic couple of days partying with many other travelling families. This was also where we were introduced to razorfish, and there were blue swimmer crabs aplenty!
Once the rain set in, we headed for Ceduna before hitting up the Nullarbor which we can tell you all about next month.
Until then, Go Wander!
Part 6: Nullarbor, Goldfields and magical beaches
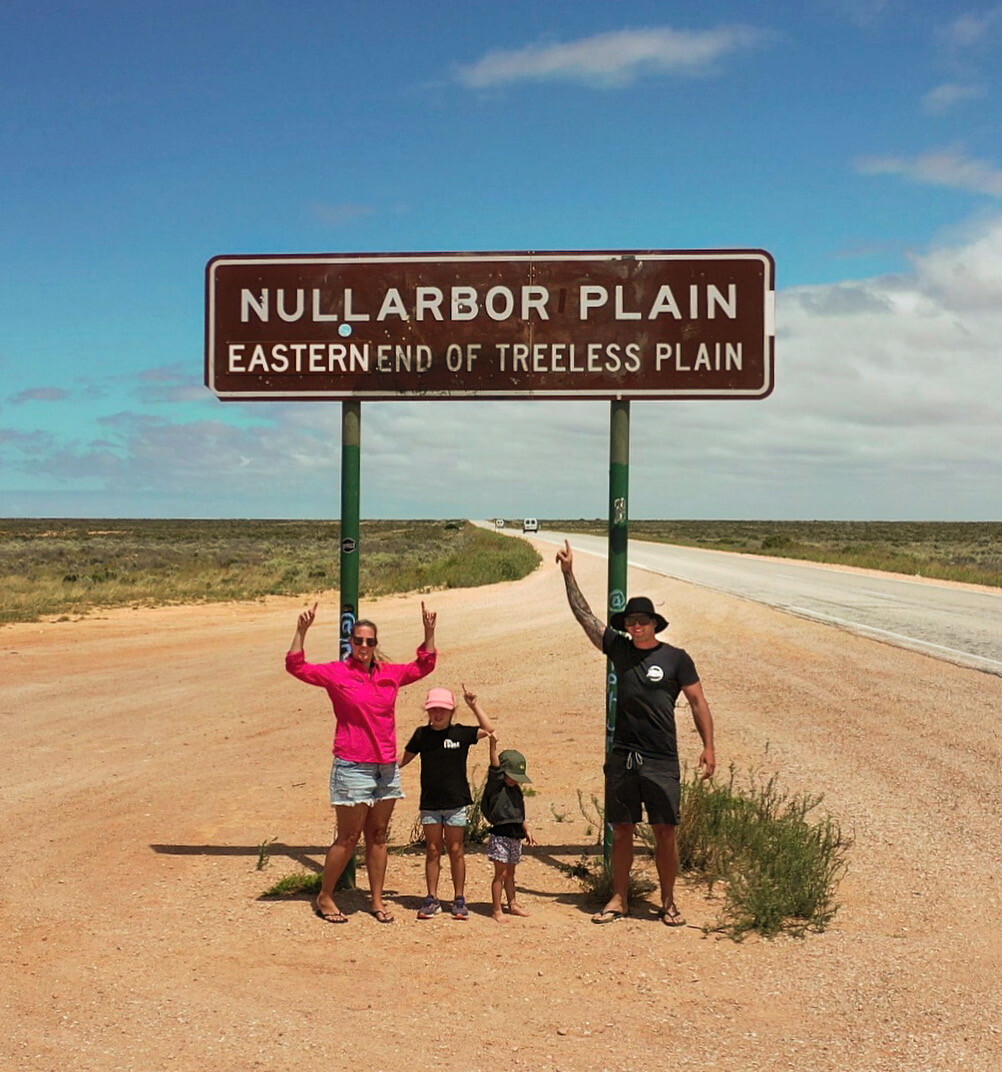
The Nullarbor Plain – around 1000 kilometres of … not much really, but it’s definitely a tick-it-off item. We headed west, bound for our largest state earlier this year and, besides the Gibb River Road, the Nullarbor is probably the most iconic way to get to Western Australia.
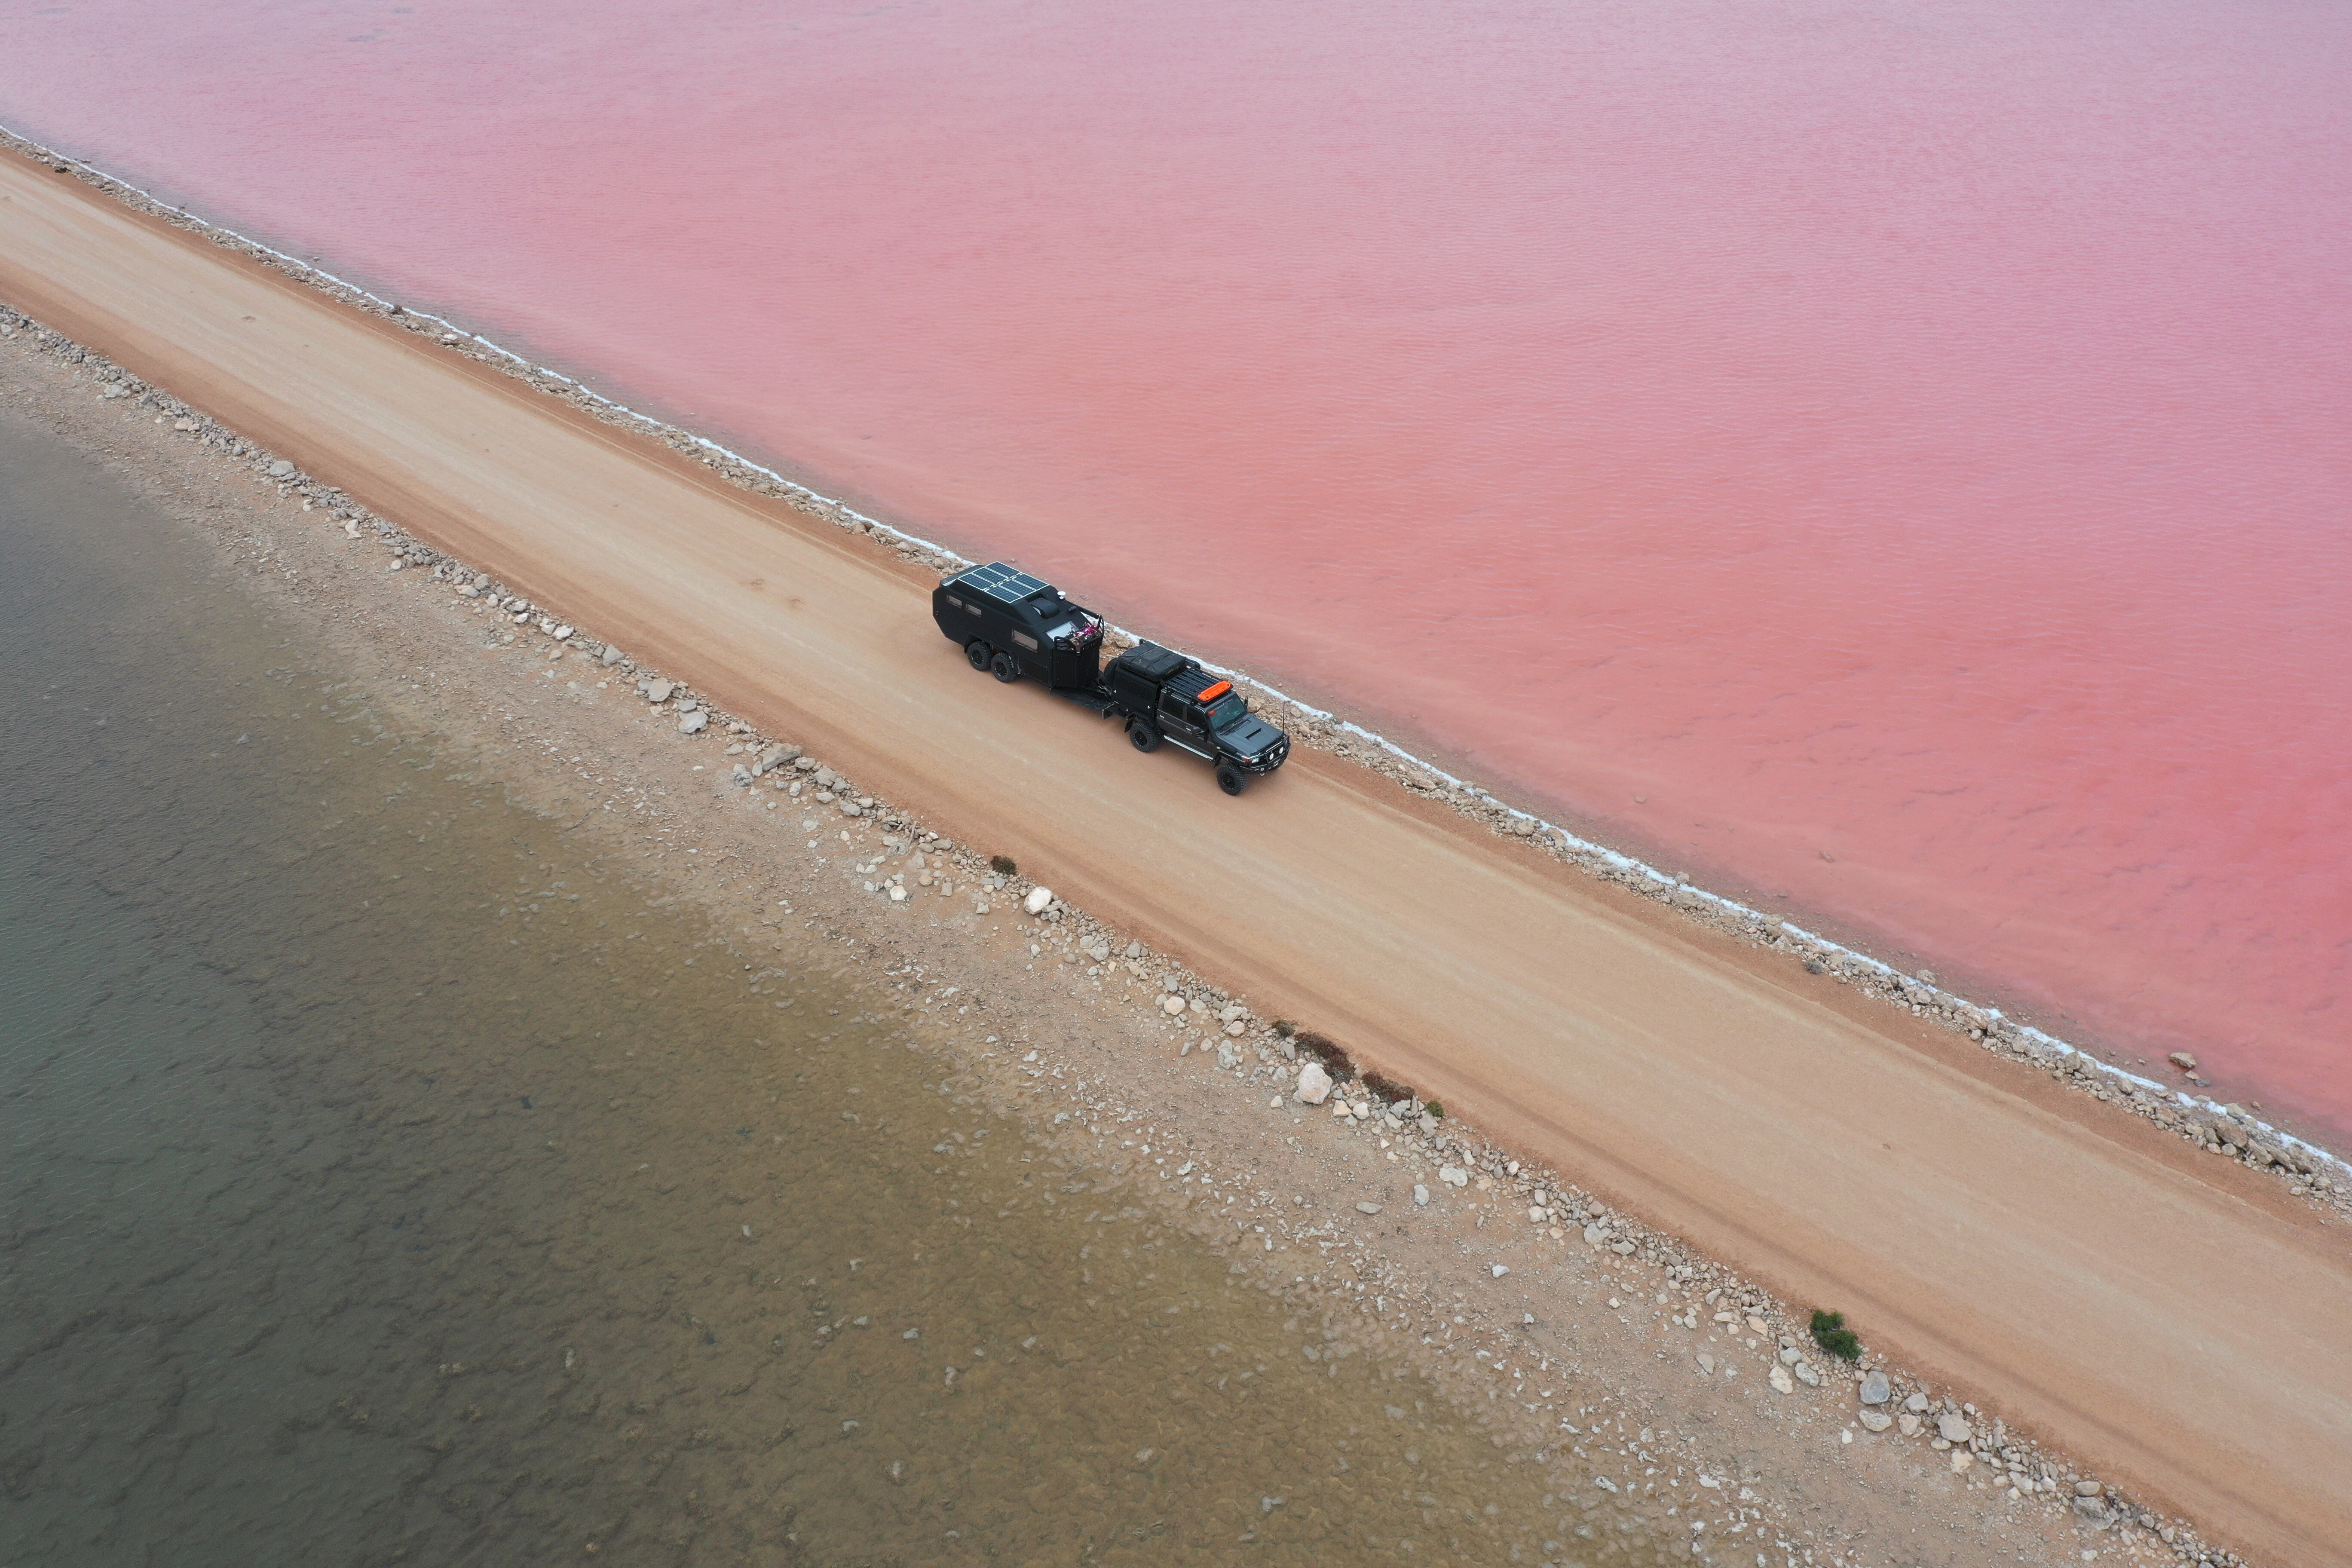
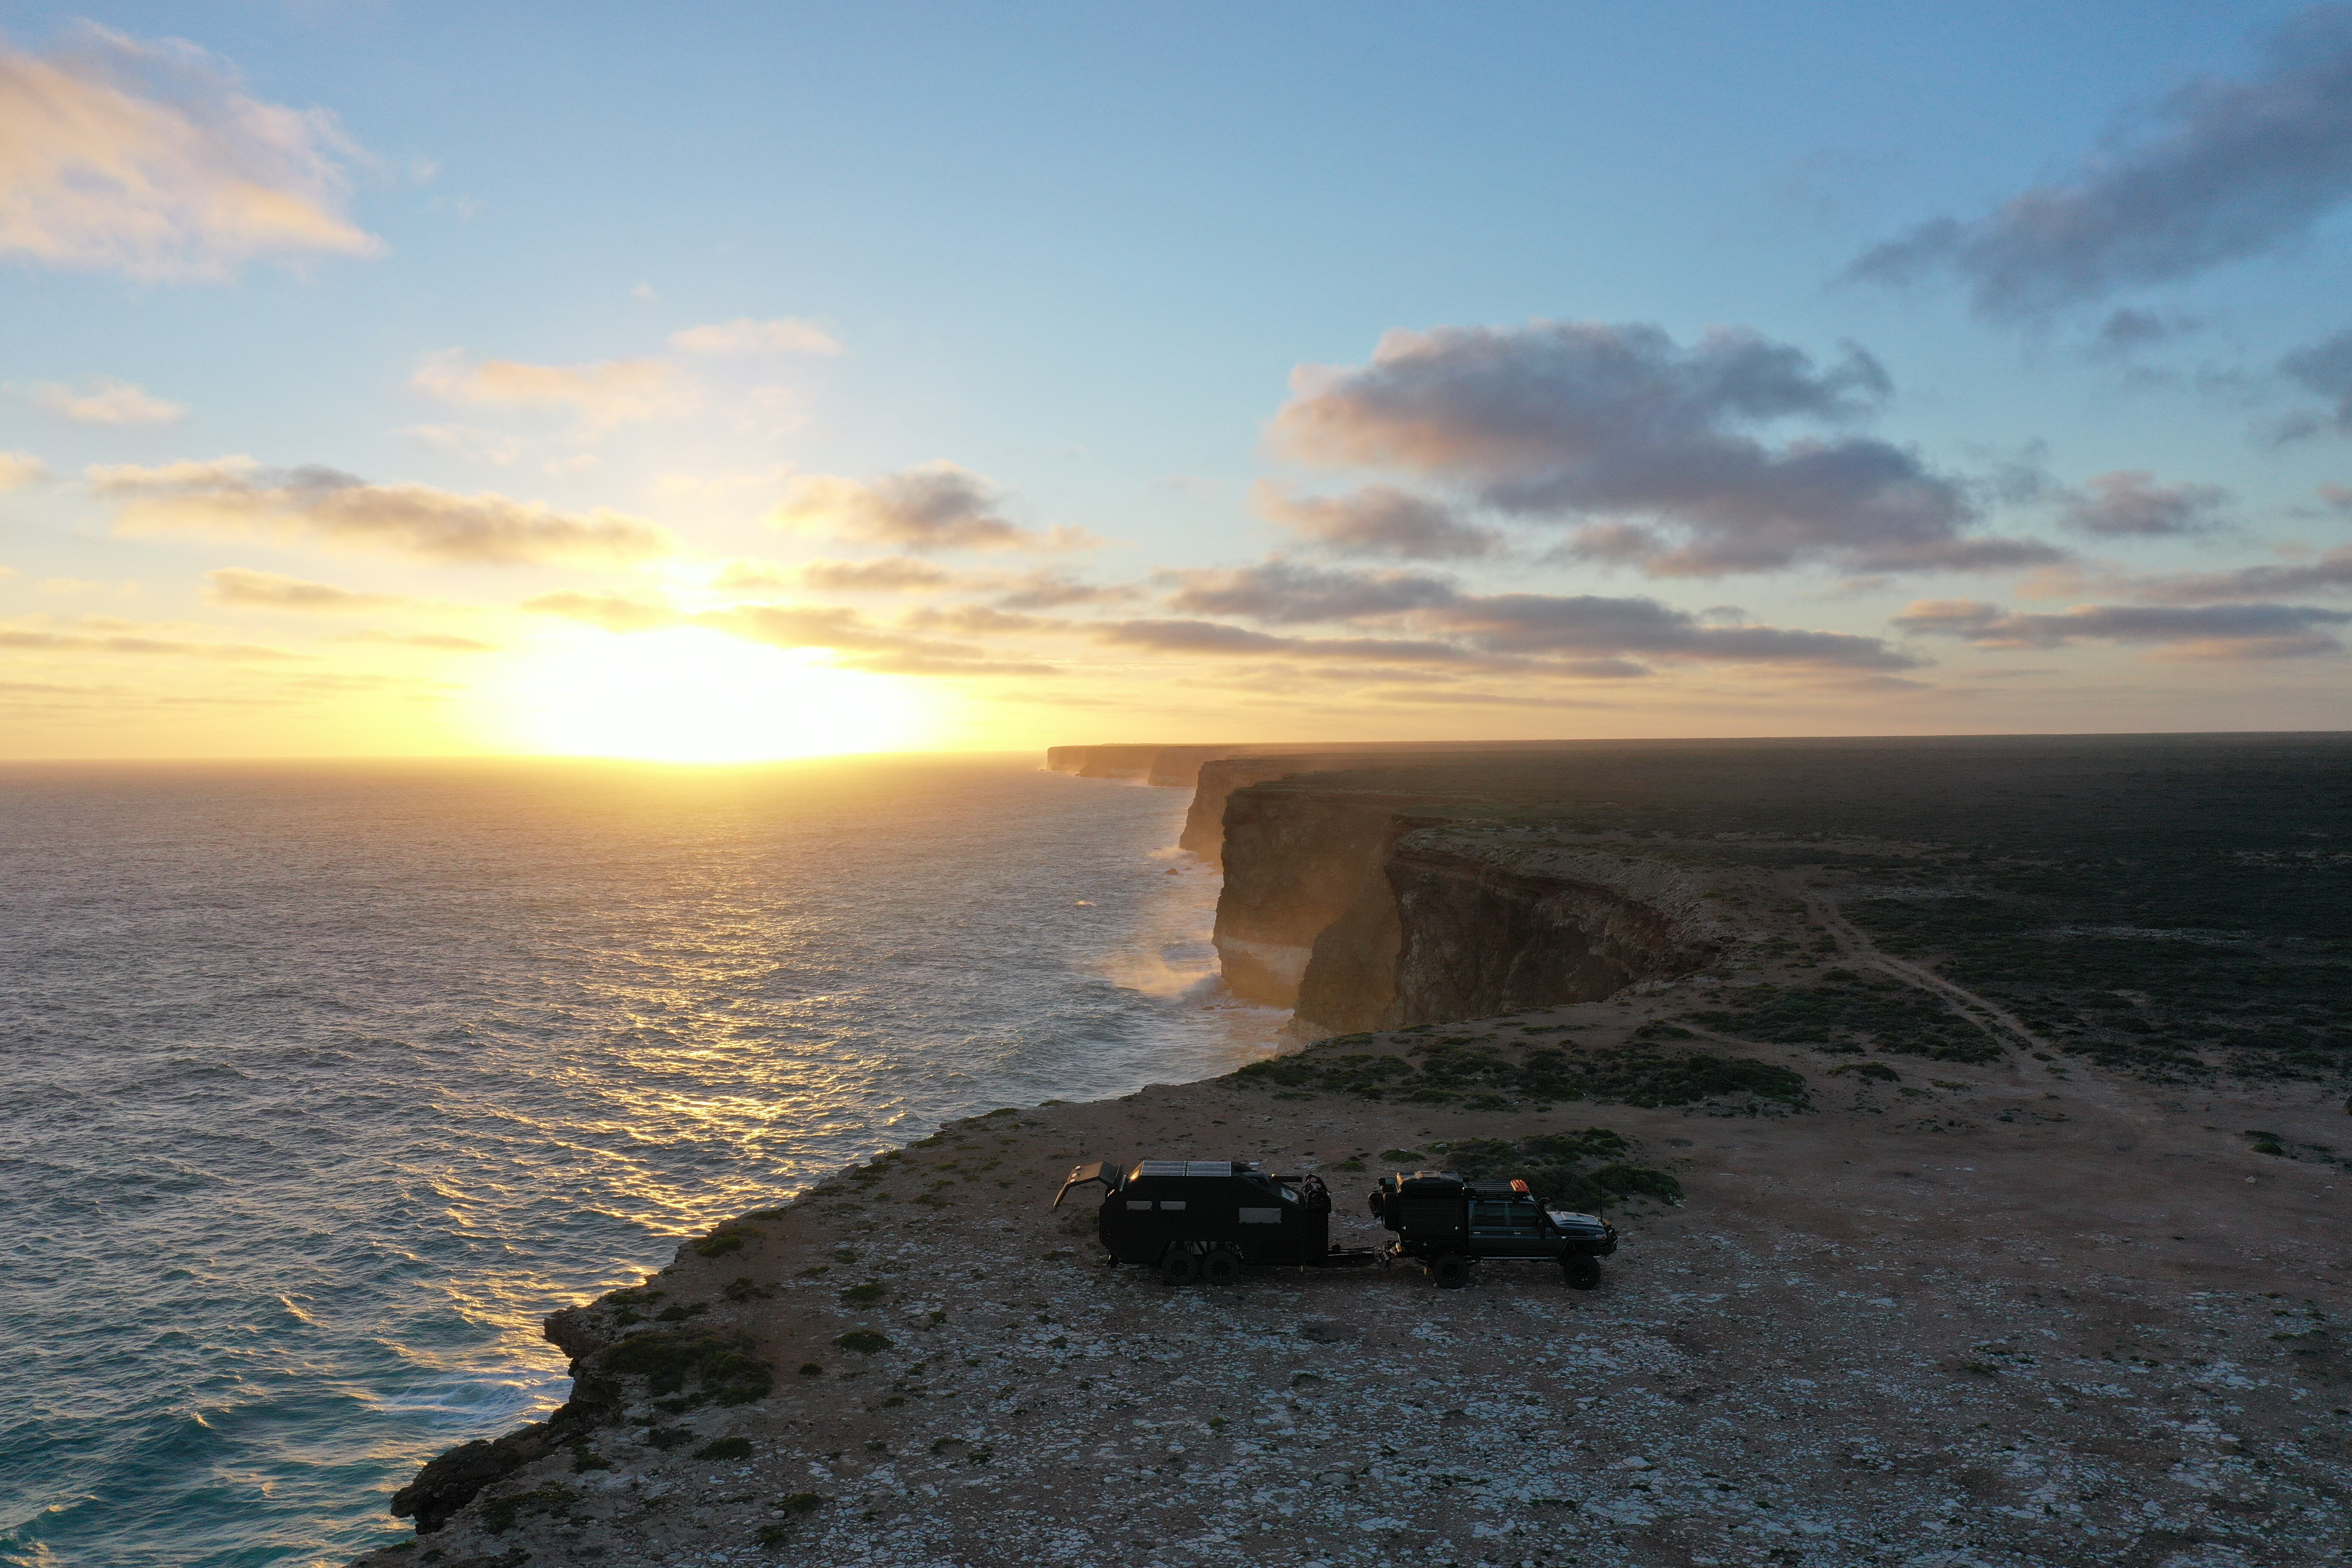
Before hitting this mighty stretch, we enjoyed the most western parts of South Australia which included Scott’s Beach at Fowlers Bay and Bunda Cliffs, where we spent a night stopover at each. Bunda Cliffs are breathtaking, forming part of the Great Australian Bight and providing us with a spectacular sunset. Following these coastline cliffs, there are many lookouts, caves and points of interest to check out.
We hit the road bright and early bound for WA the following day, with only an hours’ drive to Border Village, where there are plenty of facilities available.
1
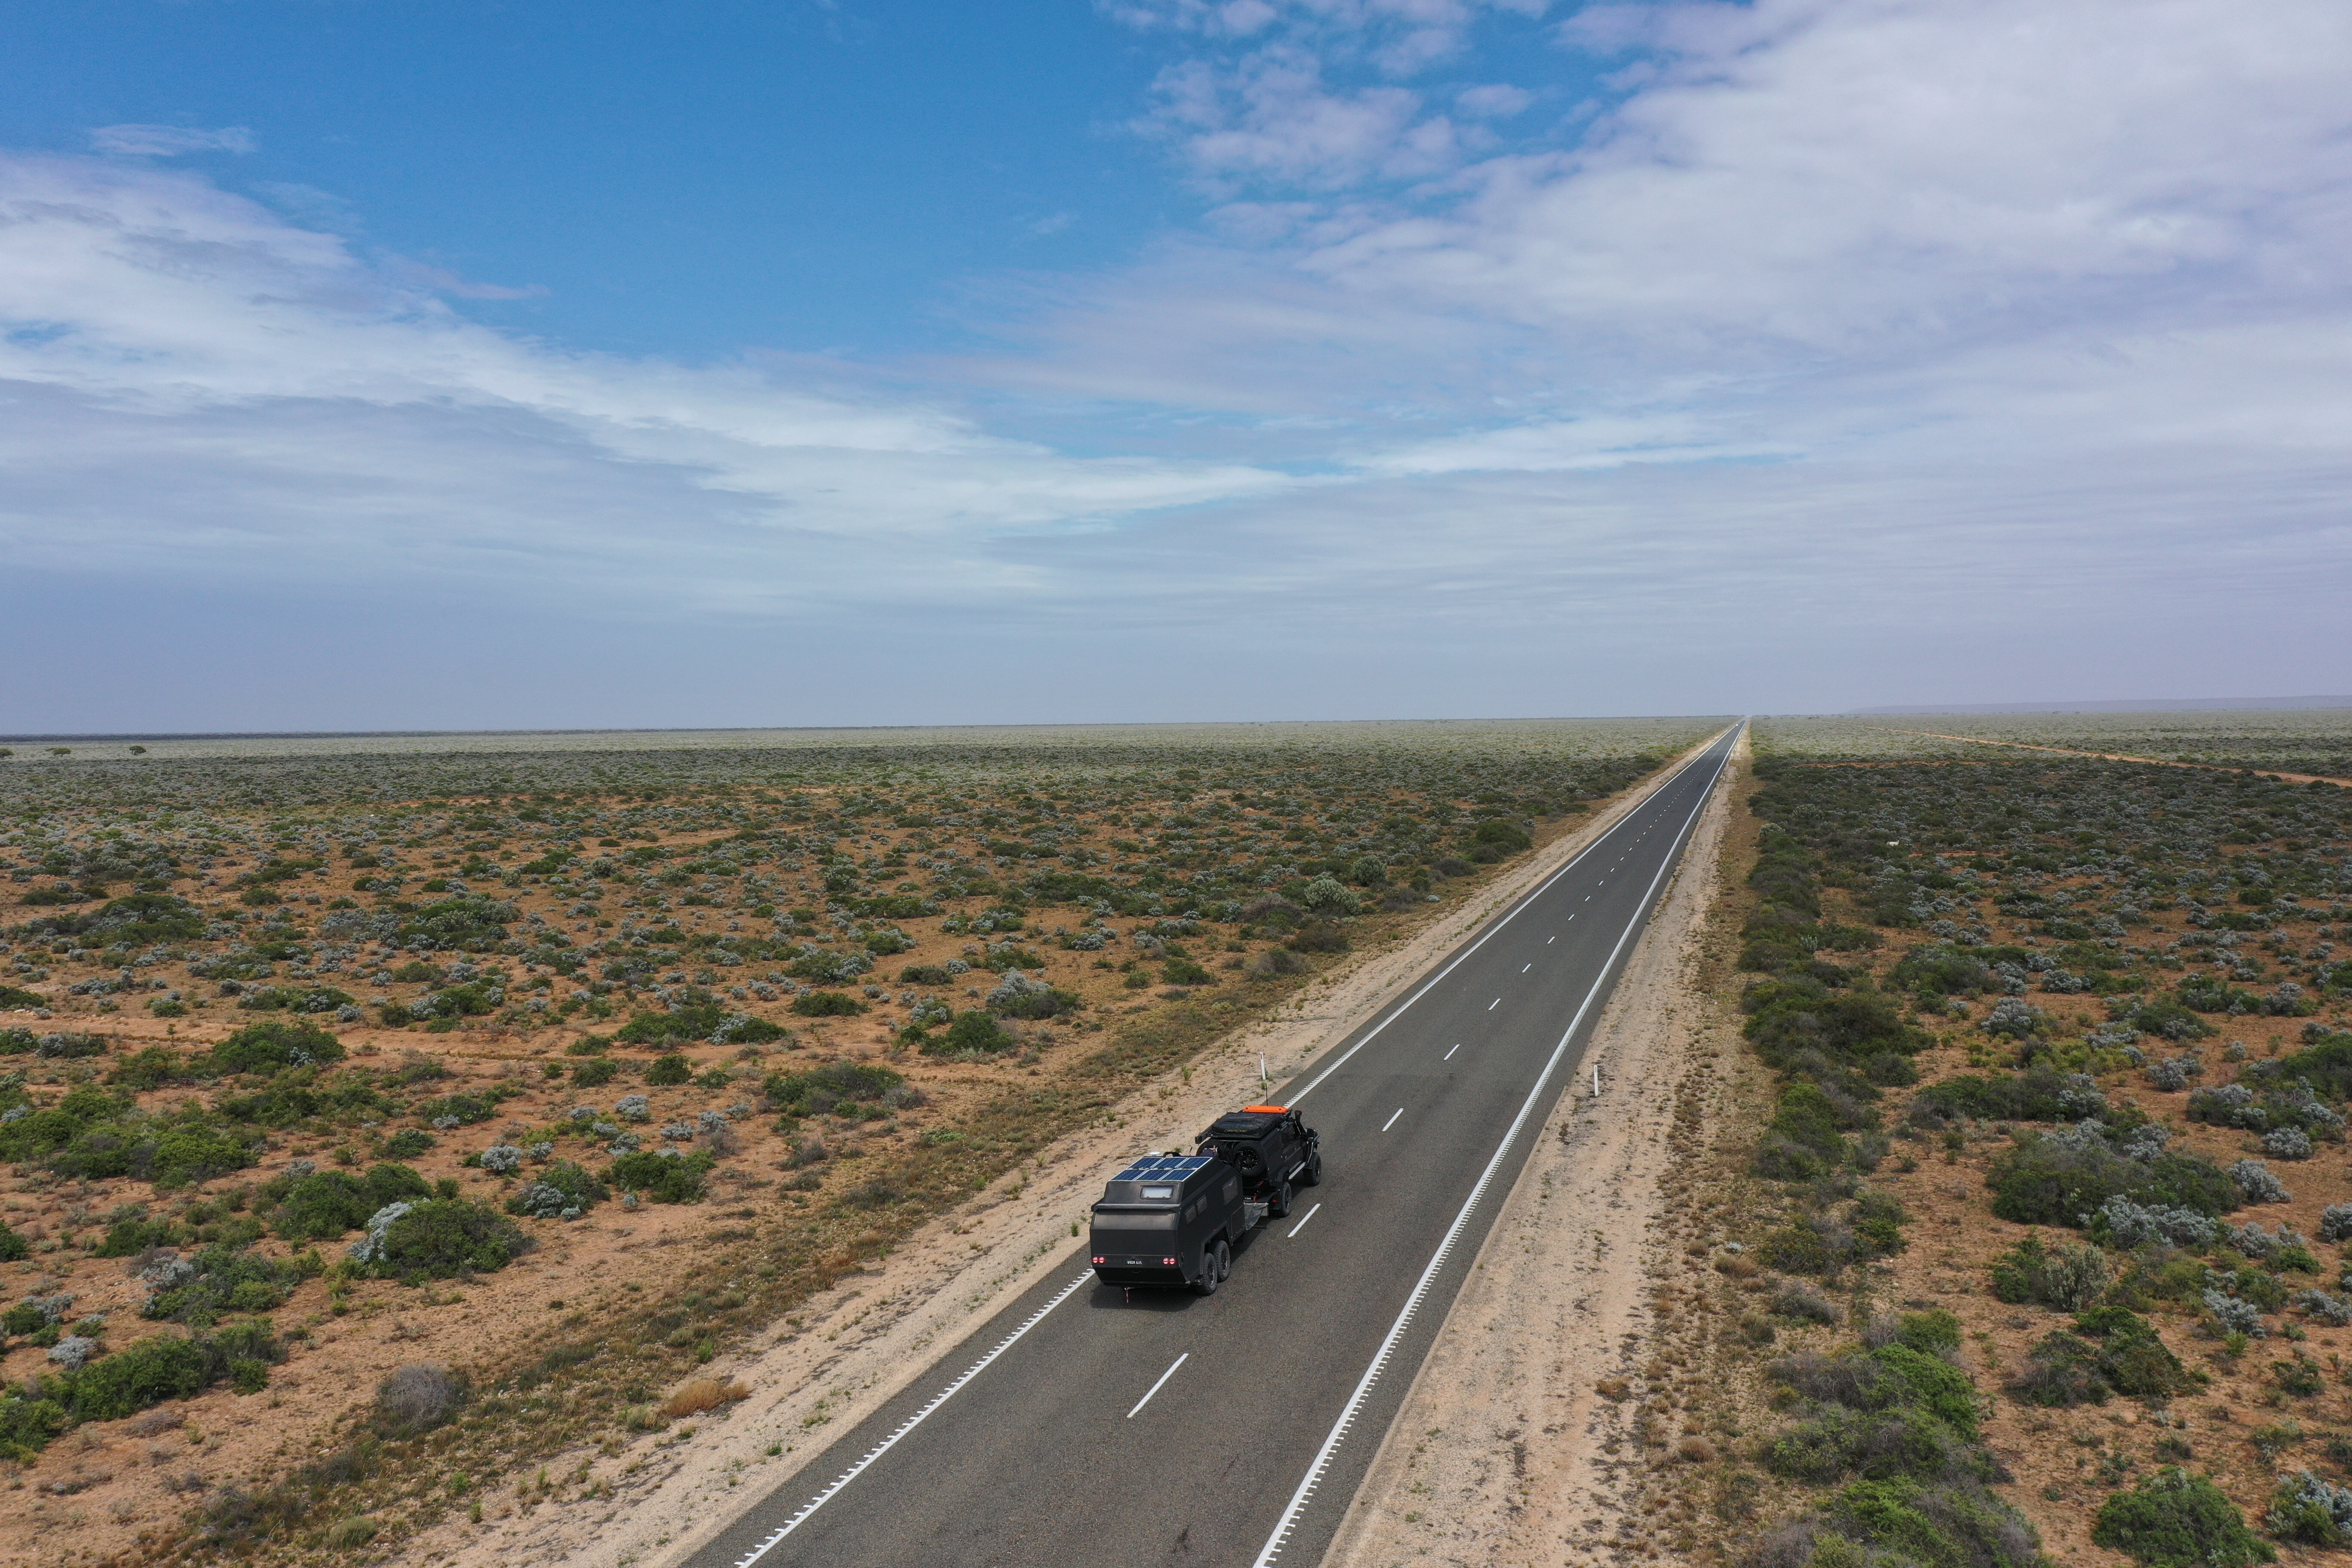
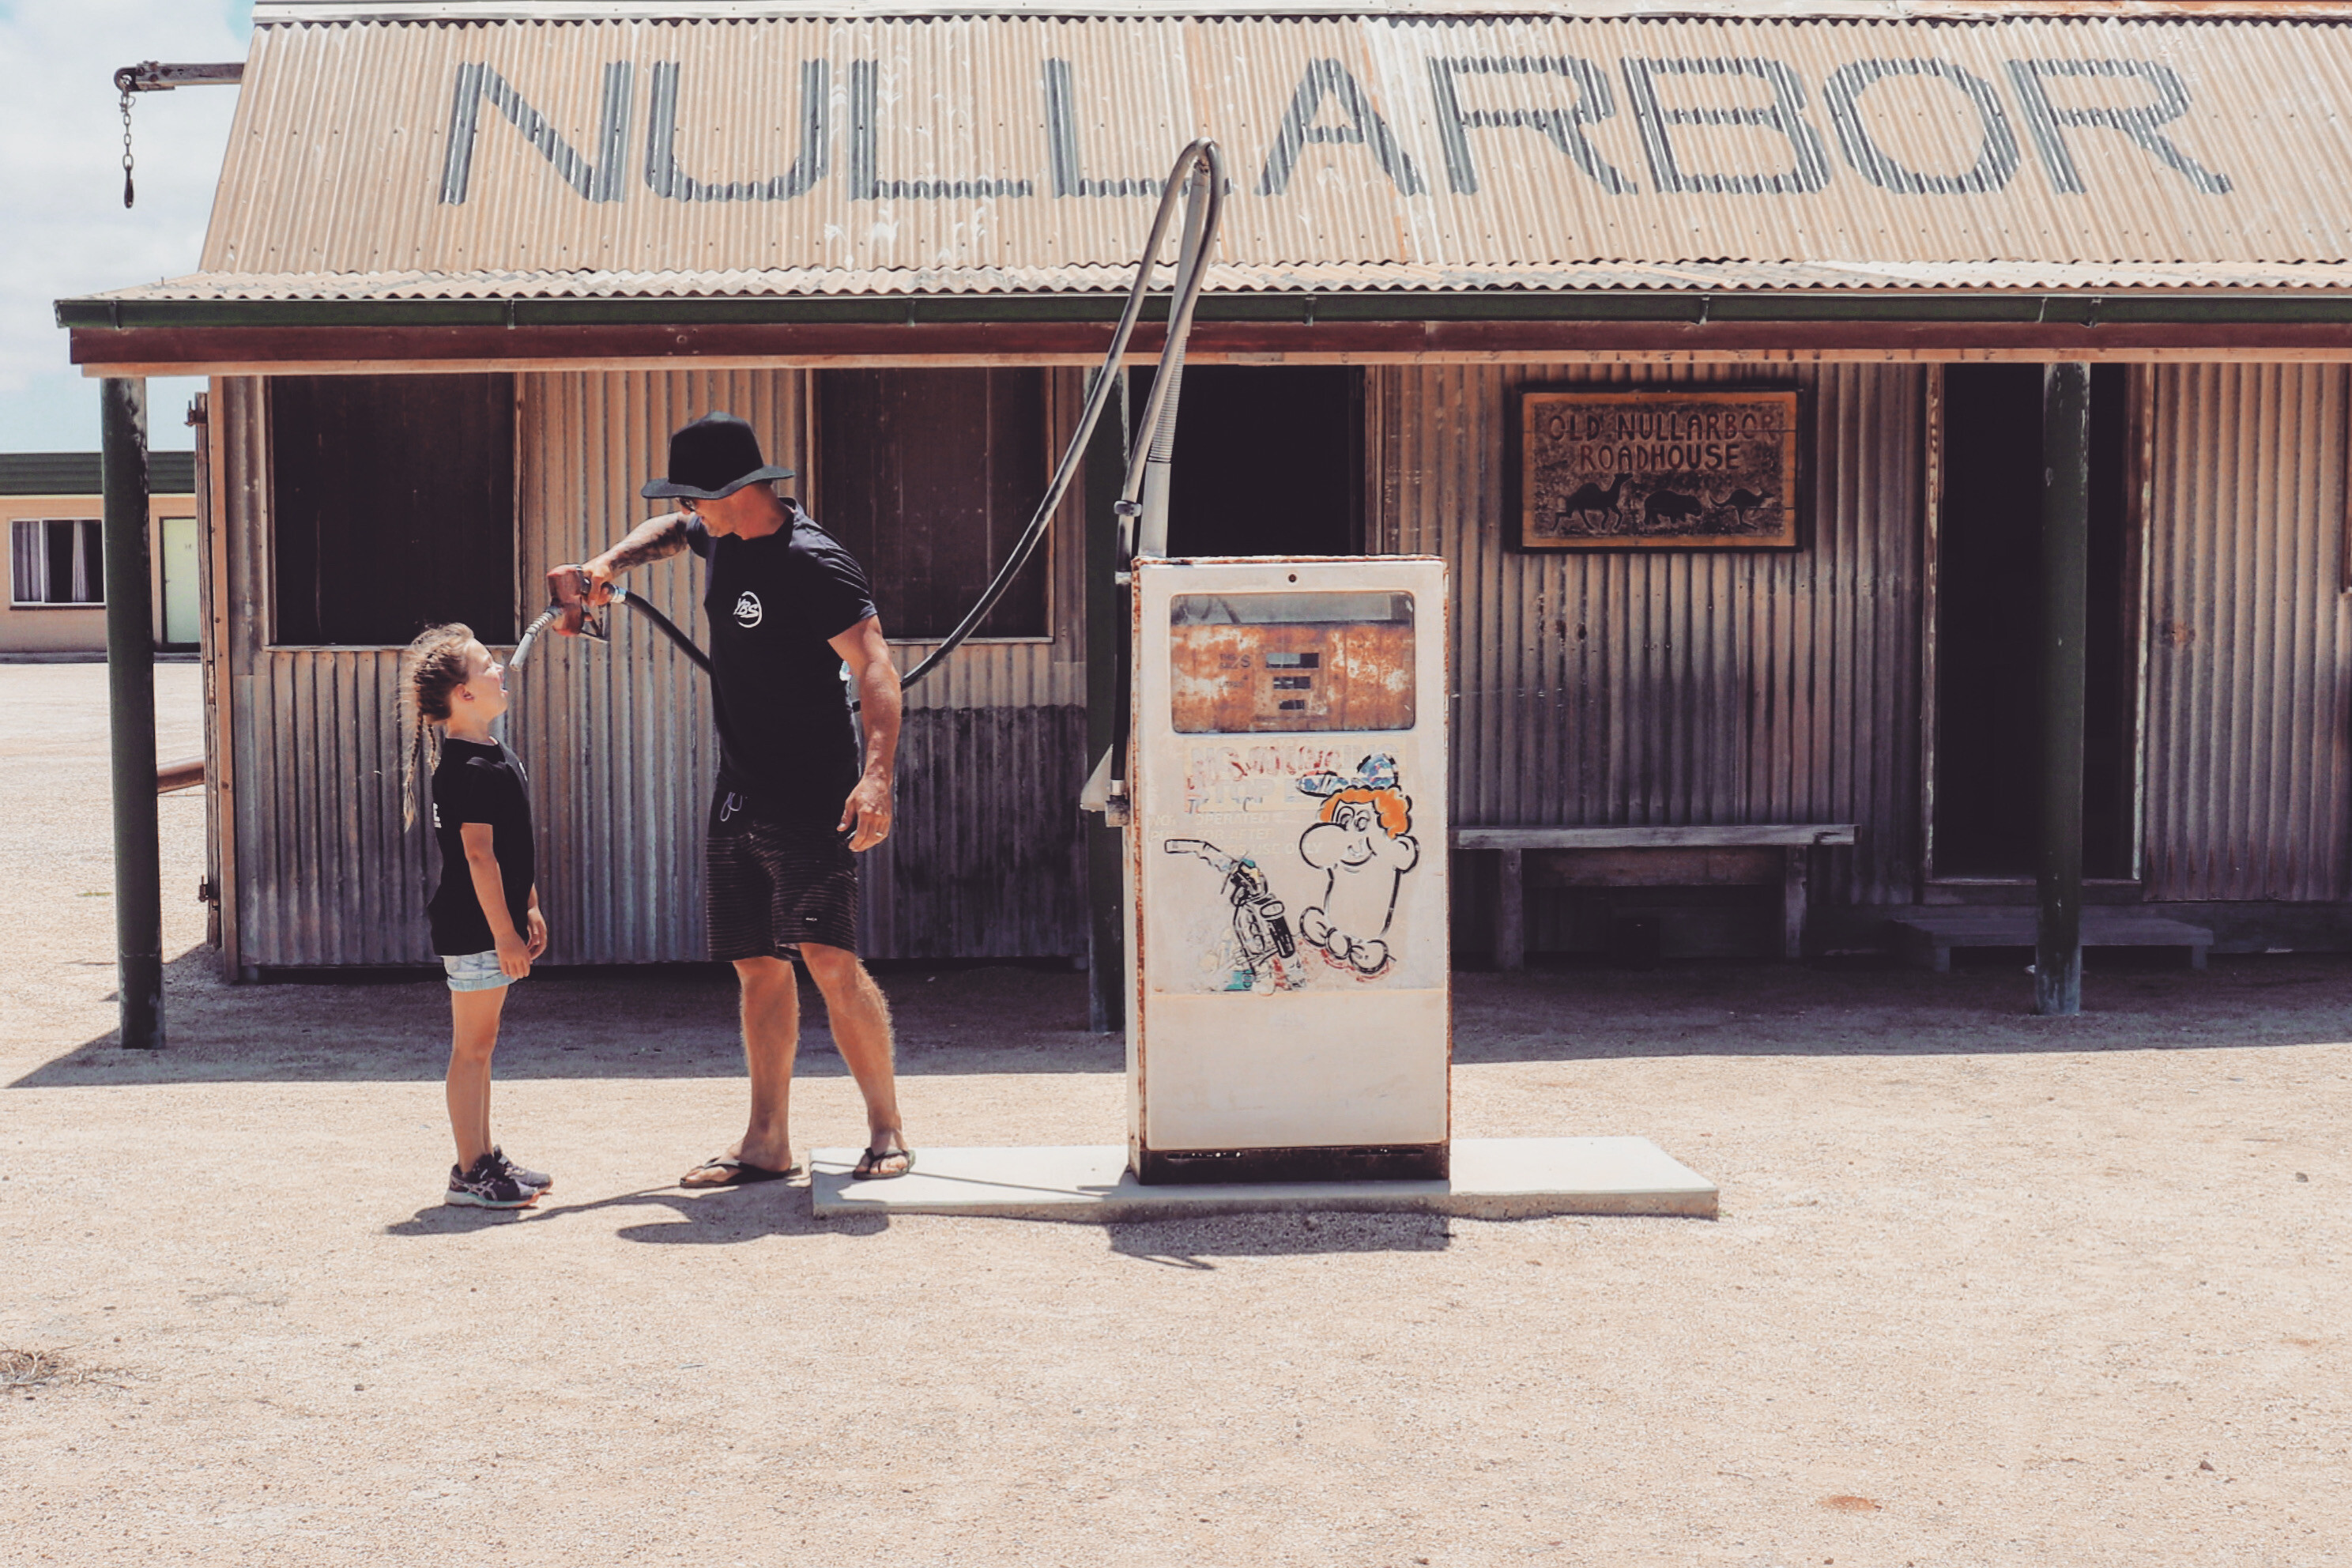
The police on the border were more impressed with our set-up than our border passes, and we were so excited to get through the tightest COVID border control in the country, we forgot to take a pic at the SA-WA border sign! The Nullarbor, to be honest, is not the most exciting drive and, despite there being multiple signs saying watch out for camels, roos and emus, we didn’t see a single one. We stopped for lunch at the Nullarbor Roadhouse and it’s a must-see, providing plenty of photo opportunities. It is another great roadhouse fully set up with accommodation, food and facilities.
After a full days driving including on the famous 90 Mile Straight, our first night in WA was spent at Balladonia Roadhouse. It was a great little set-up with caravan park, pool, restaurant and service station, as well as plenty of flies! We were thinking about doing the Balladonia Track down to Esperance, but after chatting to the locals we were advised it was closed and it was looking like it was going to rain, so we decided against it.
The Nullarbor comes to an end at the small town of Norseman, where it’s either bush or beach and you can head south to Esperance or north to Kalgoorlie.
1
Another great experience in Kalgoorlie is the ‘Super Pit’ working gold mine, where you can go on a tour (when they’re open and operating), go to the mine lookout and watch the mine in action, and witness a blast if they happen to be scheduled. The museum is also well-worth checking out and has plenty of activities for the kids.
In search of the ocean again, we headed four hours south to Esperance. We really loved Esperance and ended up spending well over two weeks there. You could write an entire article talking about the Esperance area, there is so much beach to explore and the 4WD tracks and camp spots around here are endless. In town, there is the port to visit, plus whale watching and Woody Island tours, fishing charters, Lucky Bay Brewing, and much more.
Out of town the most famous beach is Lucky Bay, and we know why it is famous – it is magical! With the most crystal-clear turquoise water and beautiful clean beaches, we lazed for hours on this beach and could even get a real coffee from the coffee cart.
1
Given the not-so-nice weather forecast, we decided to check out Kalgoorlie first. It’s a decent-size mining town rich in history and we spent a good week here exploring. The historic gold mine is a great morning out and both us adults and the kids learned so much about the boom days of the late 19th century. Spend hours exploring the historic settlement with all the essential elements of an olden-day mining town including miners’ shanties, hospital, post office, pub and a two-up shed.
However, Wharton Beach was our favourite, being even more stunning and less busy. We spent 11 days camping at Membinup which, like every other beach around here, was perfect. The only downside was the wind, which came up most afternoons.
From here we explored all the 4WD tracks around, went for a pub lunch at the old-school Condingup Tavern and visited Le Grande National Park. Esperance and the southwest have just so much to offer we can’t cover it all. Our journey across the southwest continued and we can tell you all about this next time. Until then, Go Wander …
Part 7: The Great South-West
We visited the southwest corner of Australia back in March, and what a beautiful part of the world this is, but we feel we didn’t spend enough time there and will definitely be back. The following two weeks, after leaving Esperance, we visited so many cool spots such as Albany, Cosy Corner, Denmark, Pemberton and Augusta, all of which we’ll have to tell you about later as there’s so much to see and do in this area.
This month, we want to talk more about the Margaret River region. This was our last stop before Perth and we soon realised it is such a small part of a much bigger wine region. There are so many little towns around Margaret River, each unique in character and most of them ending in ‘up’ meaning ‘place of’ in Aboriginal Noongar language.
2
We camped at the Big Valley Campsite farm stay and it was a great place to base ourselves for our five-day Margaret River visit. When visiting Margs, you have to get used to driving everywhere, which never goes well with multiple wineries and breweries – I guess that’s why they invented tours! Everything is about a 20- to 30-minute drive away and, we have to admit, it did feel like we were always on the go and driving here, there and everywhere.
However, the Margaret River region caters for so many different interests. We spent a day exploring the coastline, doing some mad four-wheel driving on beach tracks with some 4WD mates, and were lucky enough to find North Point at the northern end of Hamelin Bay beach. This is a gorgeous, secluded natural rock pool and we spent hours swimming, sunbaking and cruising around the rocks. It was much quieter than the touristy natural spa and Margaret River main beach.
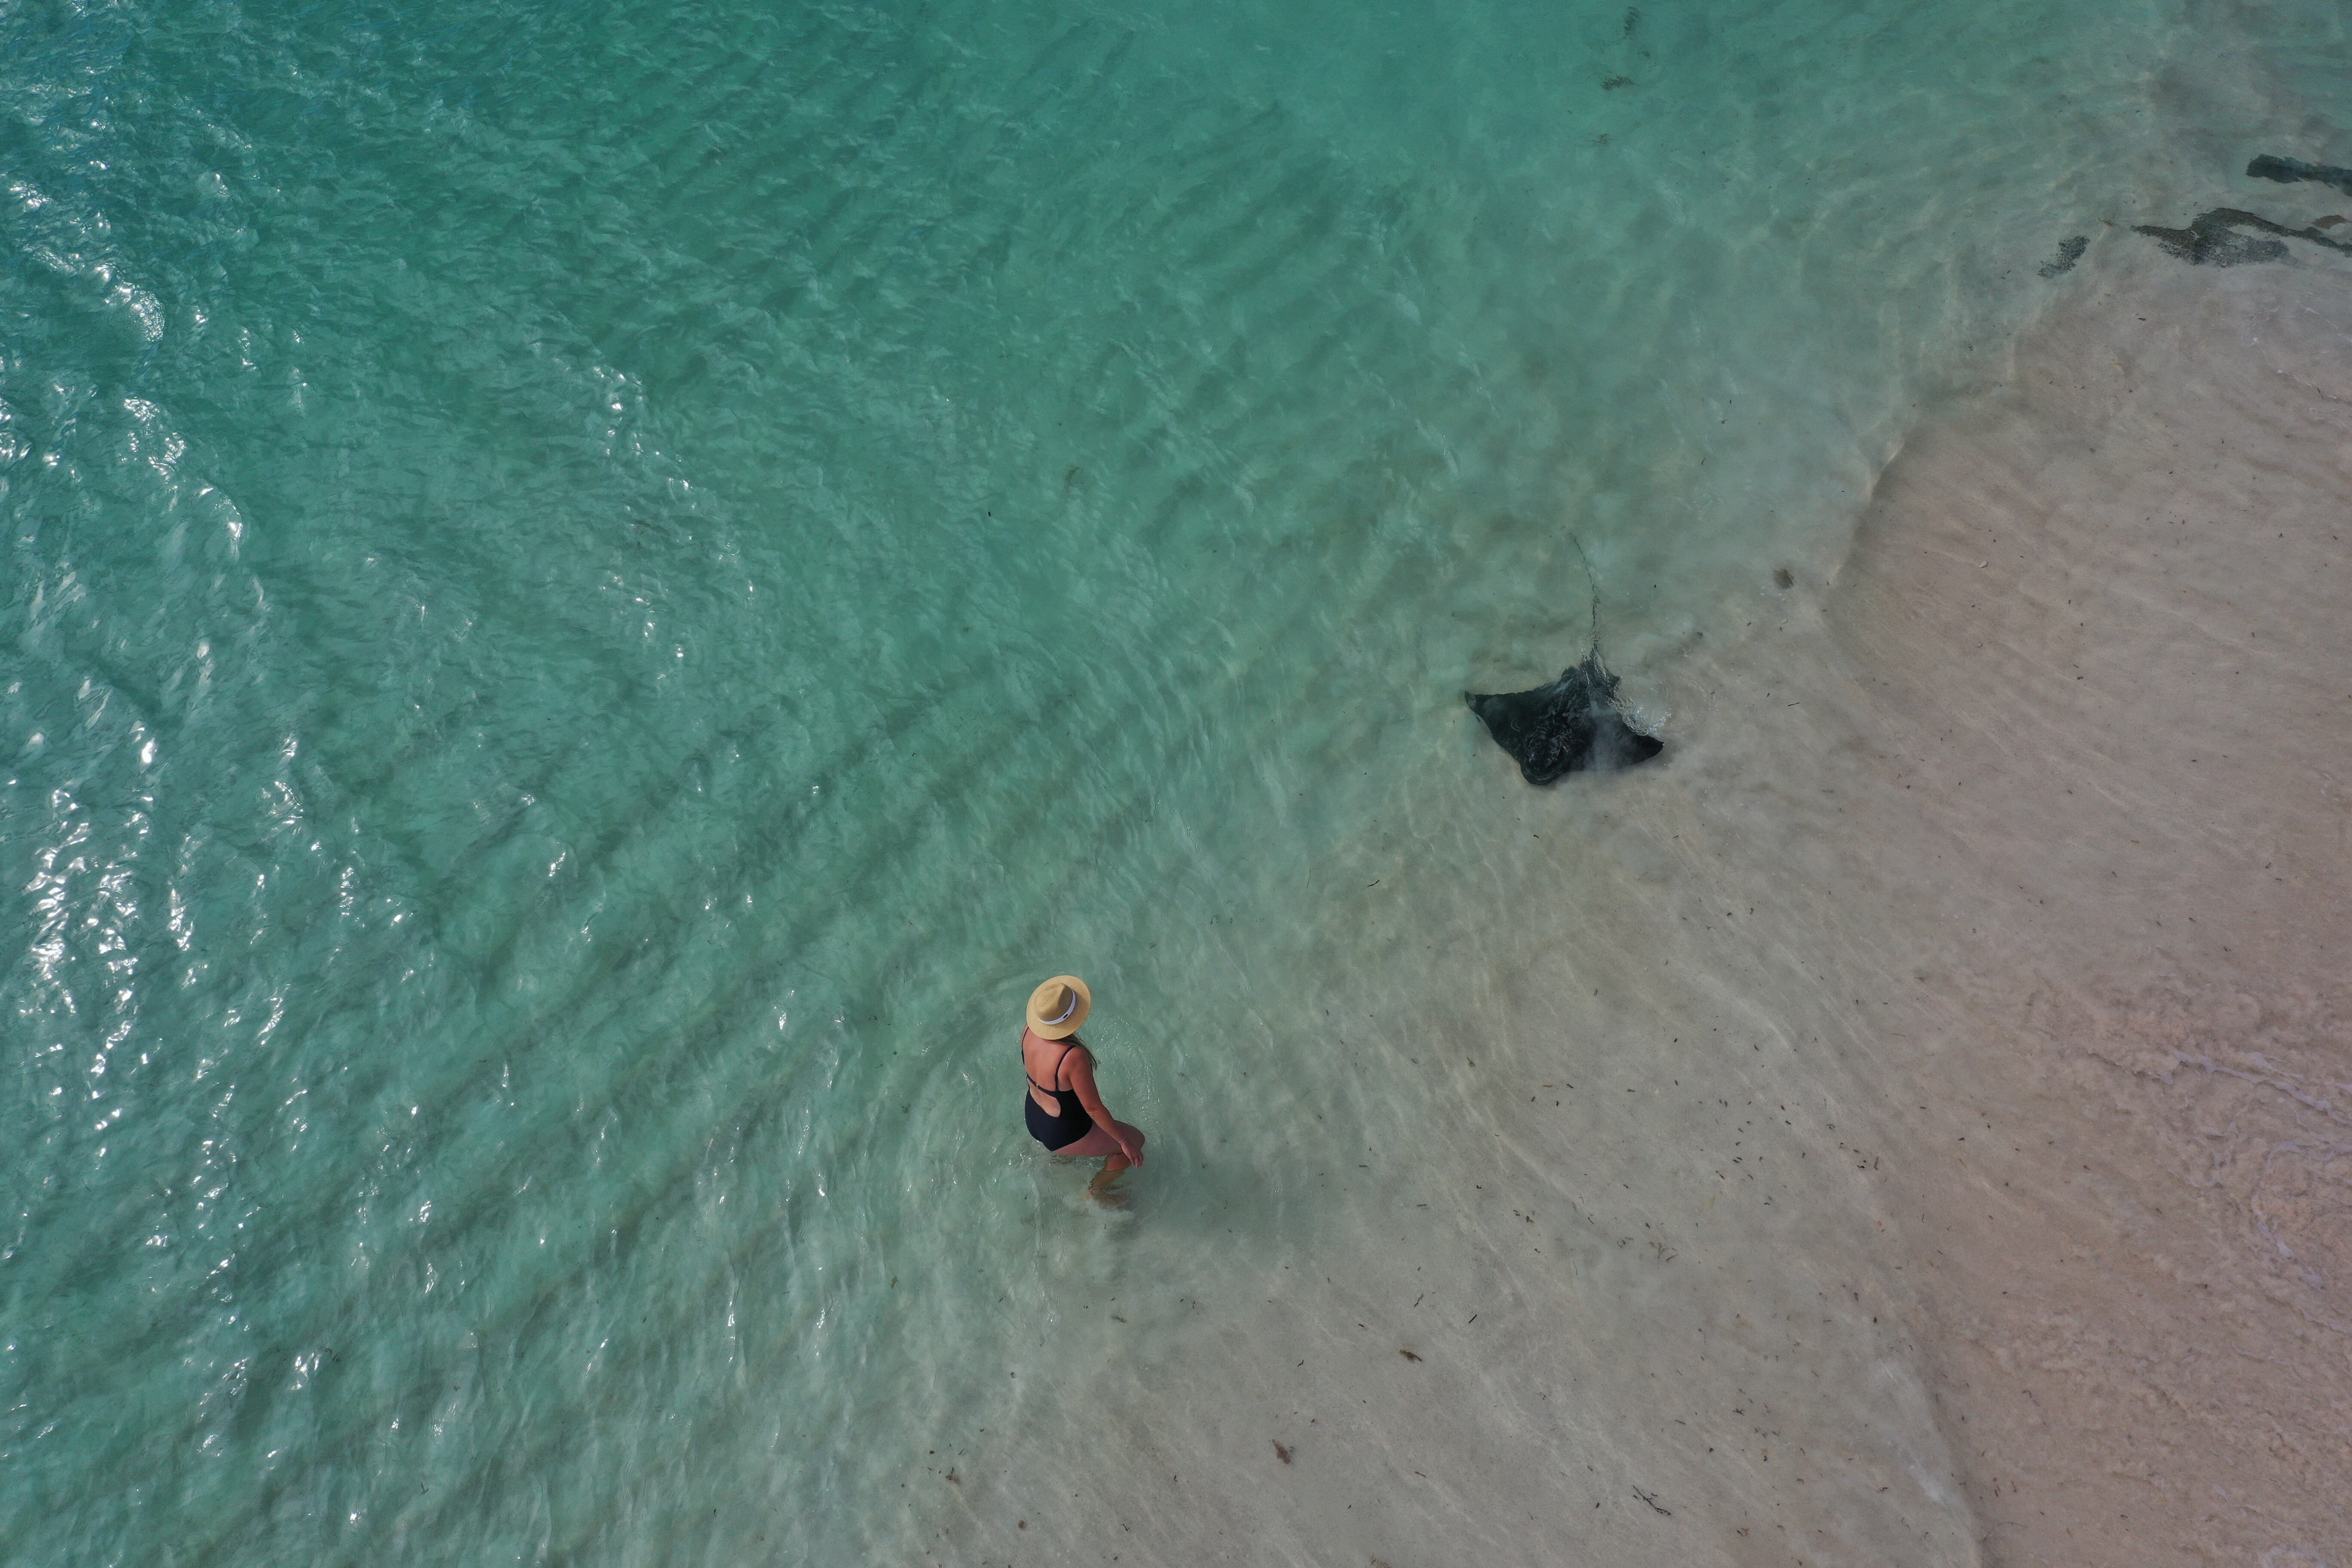
Hamelin Bay is another awesome beach spot, where there are resident stingrays that will cruise up and down the beach and seem to enjoy all the photography and attention.
Another natural wonder of the Margaret River region are the many caves, only a few of which are accessible. We visited Jewel Cave and it was such an awesome experience, with the girls learning so much about these ancient structures. When you visit, go on a tour with a knowledgeable guide who will tell you all the history and science about the cave. You can buy a cave pass to give you access to visit other caves, but we decided one cave was enough for us. From here, head into Margaret River along Caves Road, where most of the caves lie. Plus, there’s a pretty drive through the rainforest.
2
On to the wineries and breweries, which is why we were there, right? If you visit them all, your wallet would be the only thing dry, so we just picked a few, mostly the kid-friendly ones, and had a ball. We spent the good part of a Saturday at The Beer Farm for our daughter’s birthday, and it’s a must-see. It has a large selection of its own brews to sample, a great smokehouse restaurant and a huge area where the kids can run around. The day we were there, it had live music and a waterslide for the kids, hence why it was so easy to get to closing time and realise we’d been there all day!
Many of the breweries and some of the wineries have similar set-ups, with playgrounds for the kids and amazing food to accompany the amazing wines. Margaret River region is definitely a foodie’s paradise and we came away a couple kilos heavier and a few hundred dollars poorer.
Heading north, we arrived at Busselton, which was much bigger than expected and its foreshore precinct is a great place to spend the day. There are some great restaurants overlooking the ocean to have brekkie or lunch, or even take a picnic to let the kids go wild on the largest playground we have ever seen – our girls would have spent hours on the pirate ship playground if we had let them.
The main feature of the foreshore is the famous Busselton Jetty. It is the longest timber jetty in the Southern Hemisphere. You can walk to the end or take the lazy option on the gorgeous, little red electric train. Included in the train ride ticket is entry into the underwater observatory, which is a natural aquarium full of a huge variety of beautiful fish and coral.
As mentioned, there is just so much to see and do in the Margaret River region and there is so much variety – no matter your thing, you will be entertained. However, the two things we didn’t love about Margs was the amount of driving around and how expensive everything was. But that said, the pros definitely outweigh the cons and it is such a magical part of Western Australia.
Part 8: Dirk Hartog Island
Well, where do we begin? We absolutely loved our time on Dirk Hartog Island (DHI). It was a nice escape with back-to-basics camping and time well-spent as a family. We had five days on this western slice of paradise and enjoyed the laid-back island life and natural beauty of this place.
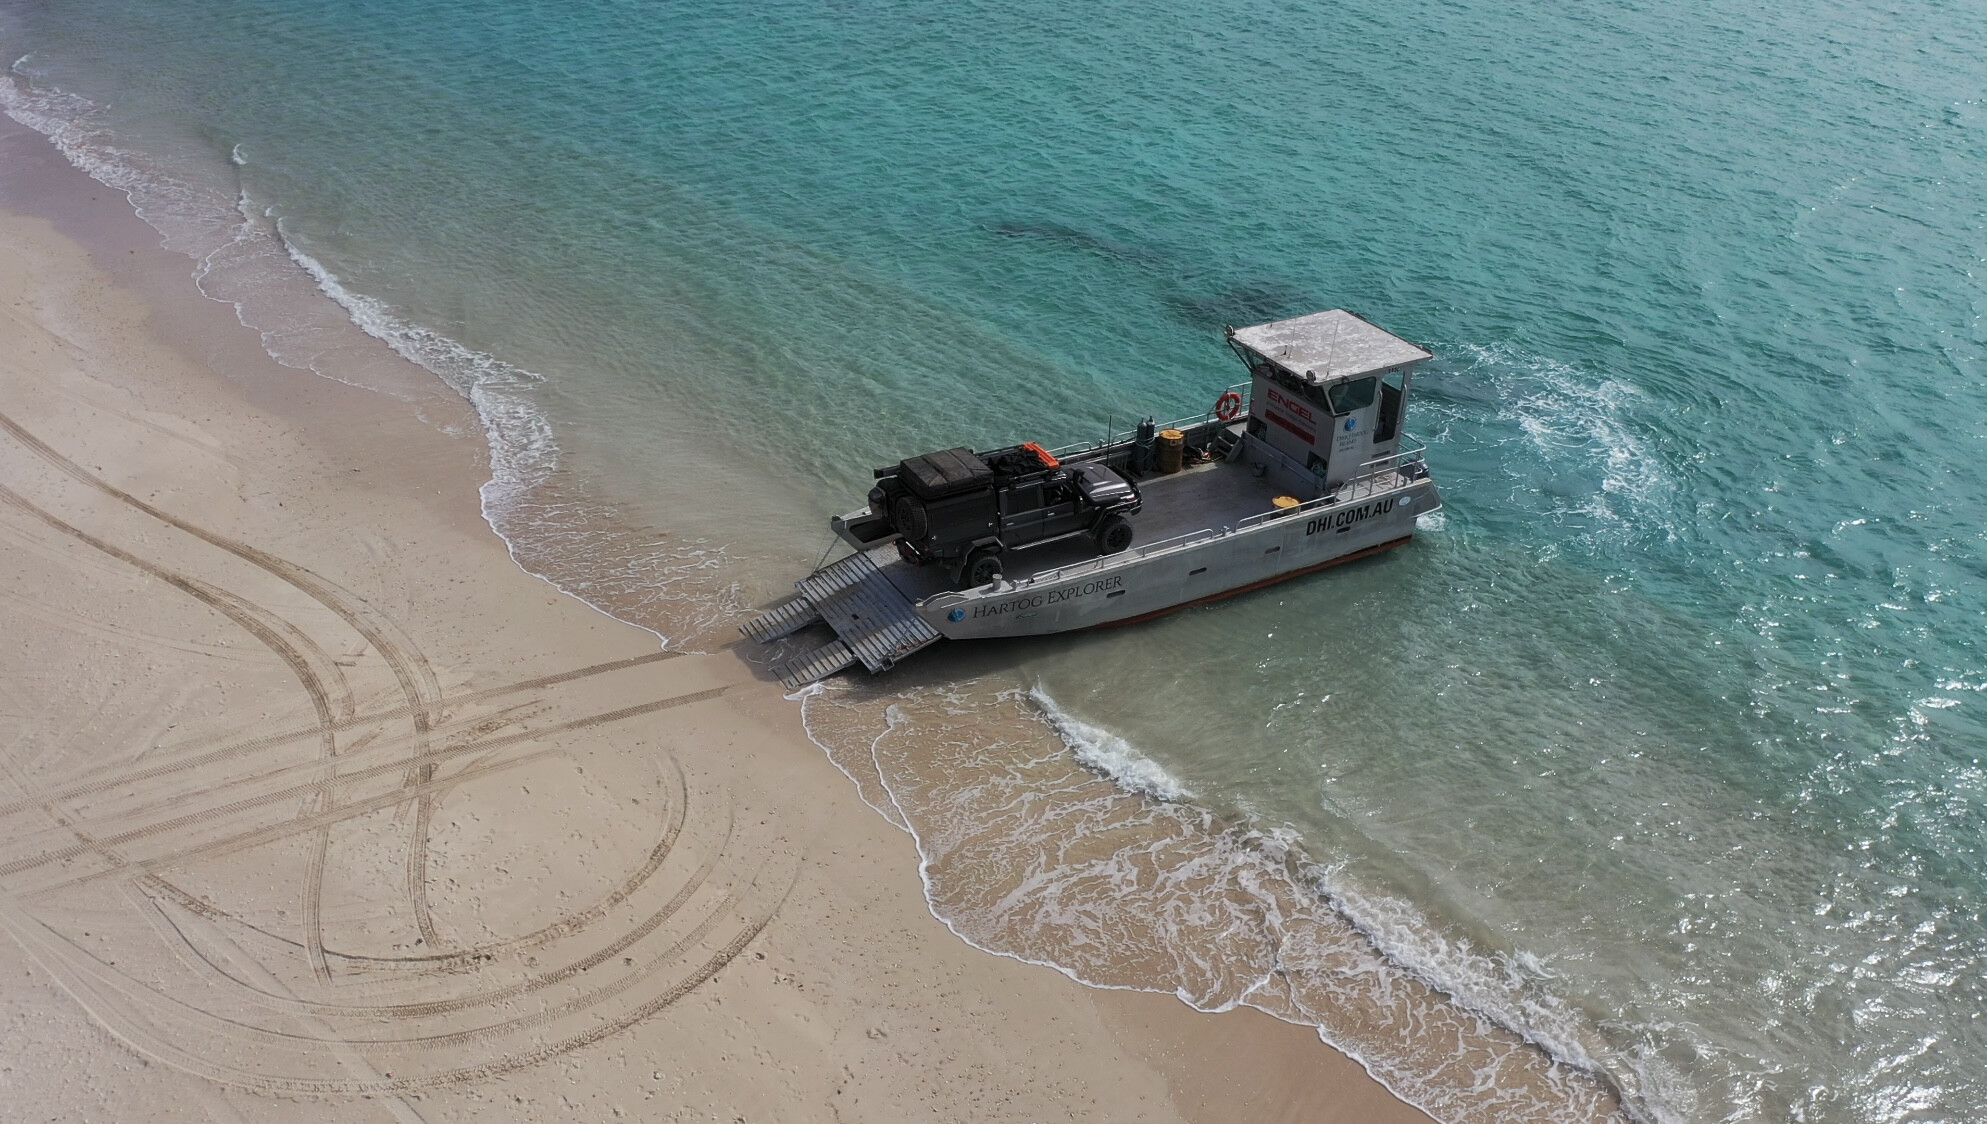
Dirk Hartog Island is a World Heritage site situated off Steep Point, the westernmost point of Australia, in the Gascoyne region of Western Australia. At 80km from end to end and 620km² in area, it’s WA’s largest island, and it’s only a short single-car barge ride from Steep Point. DHI is part national park and part privately owned by the Wardle family, who have owned the property since the early 1960s.
Let us take you on our mini-trip of DHI and, trust us, you’ll want to make the journey for yourself!
2
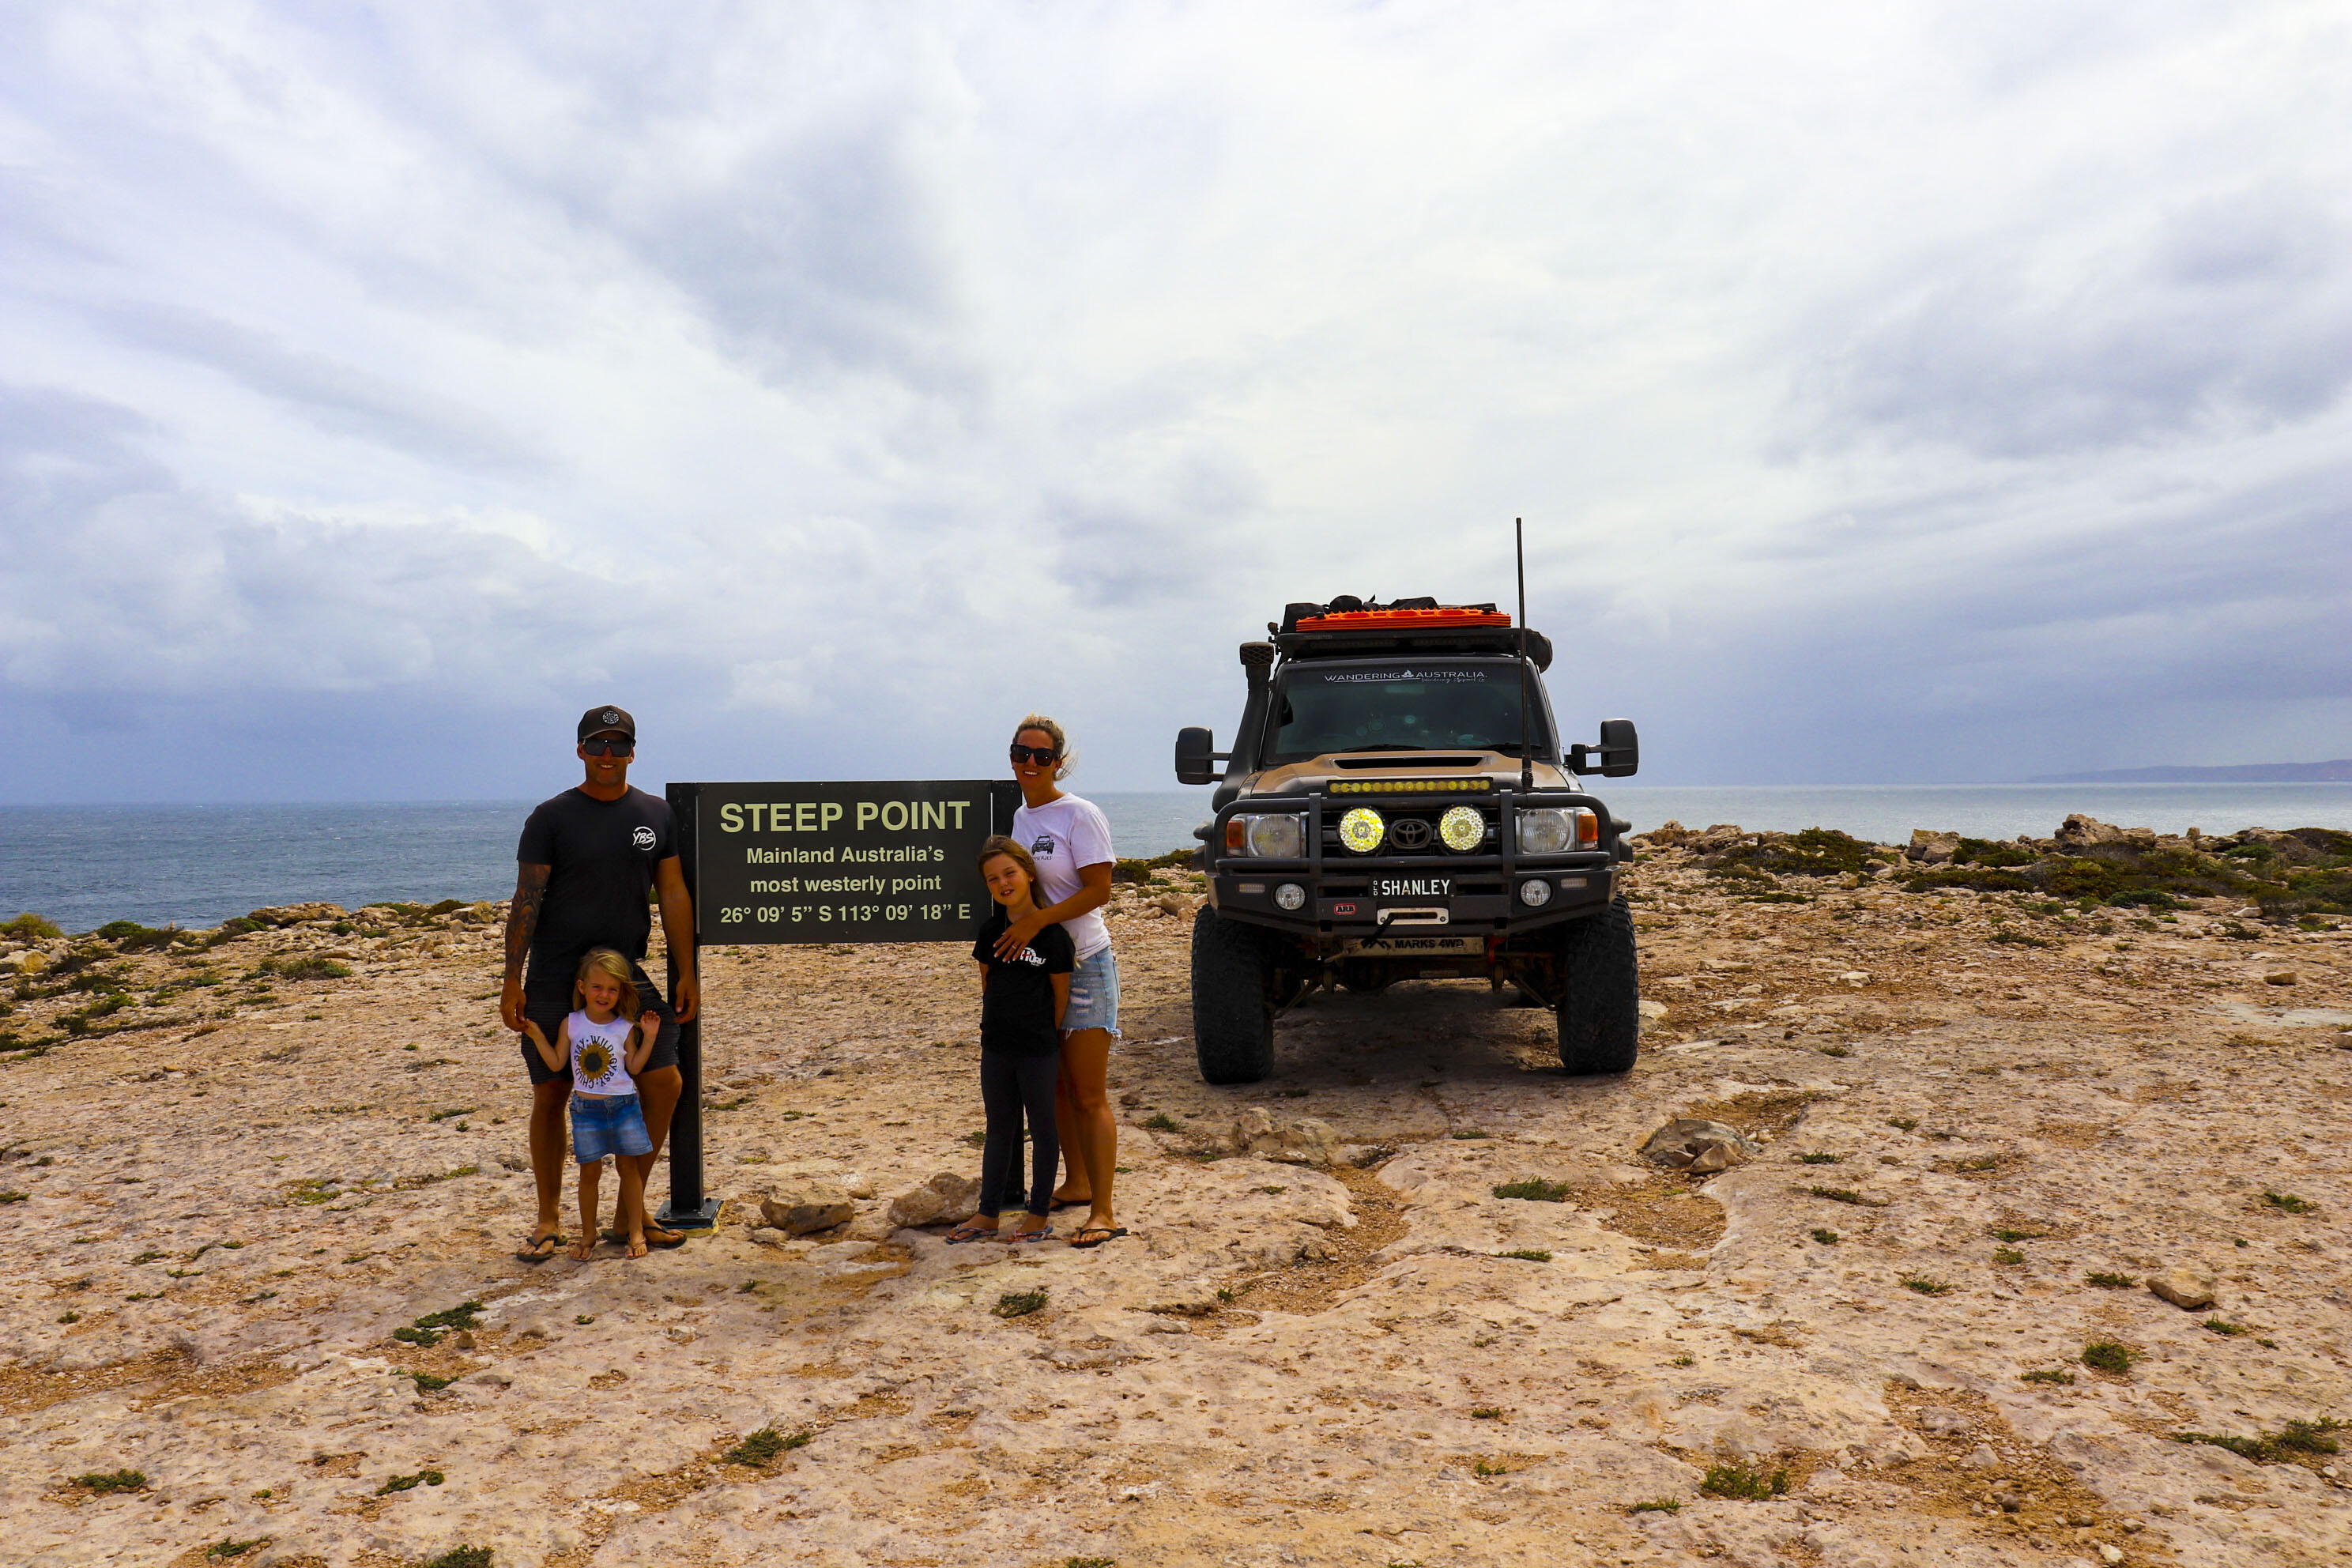
STEEP POINT – DAY 1
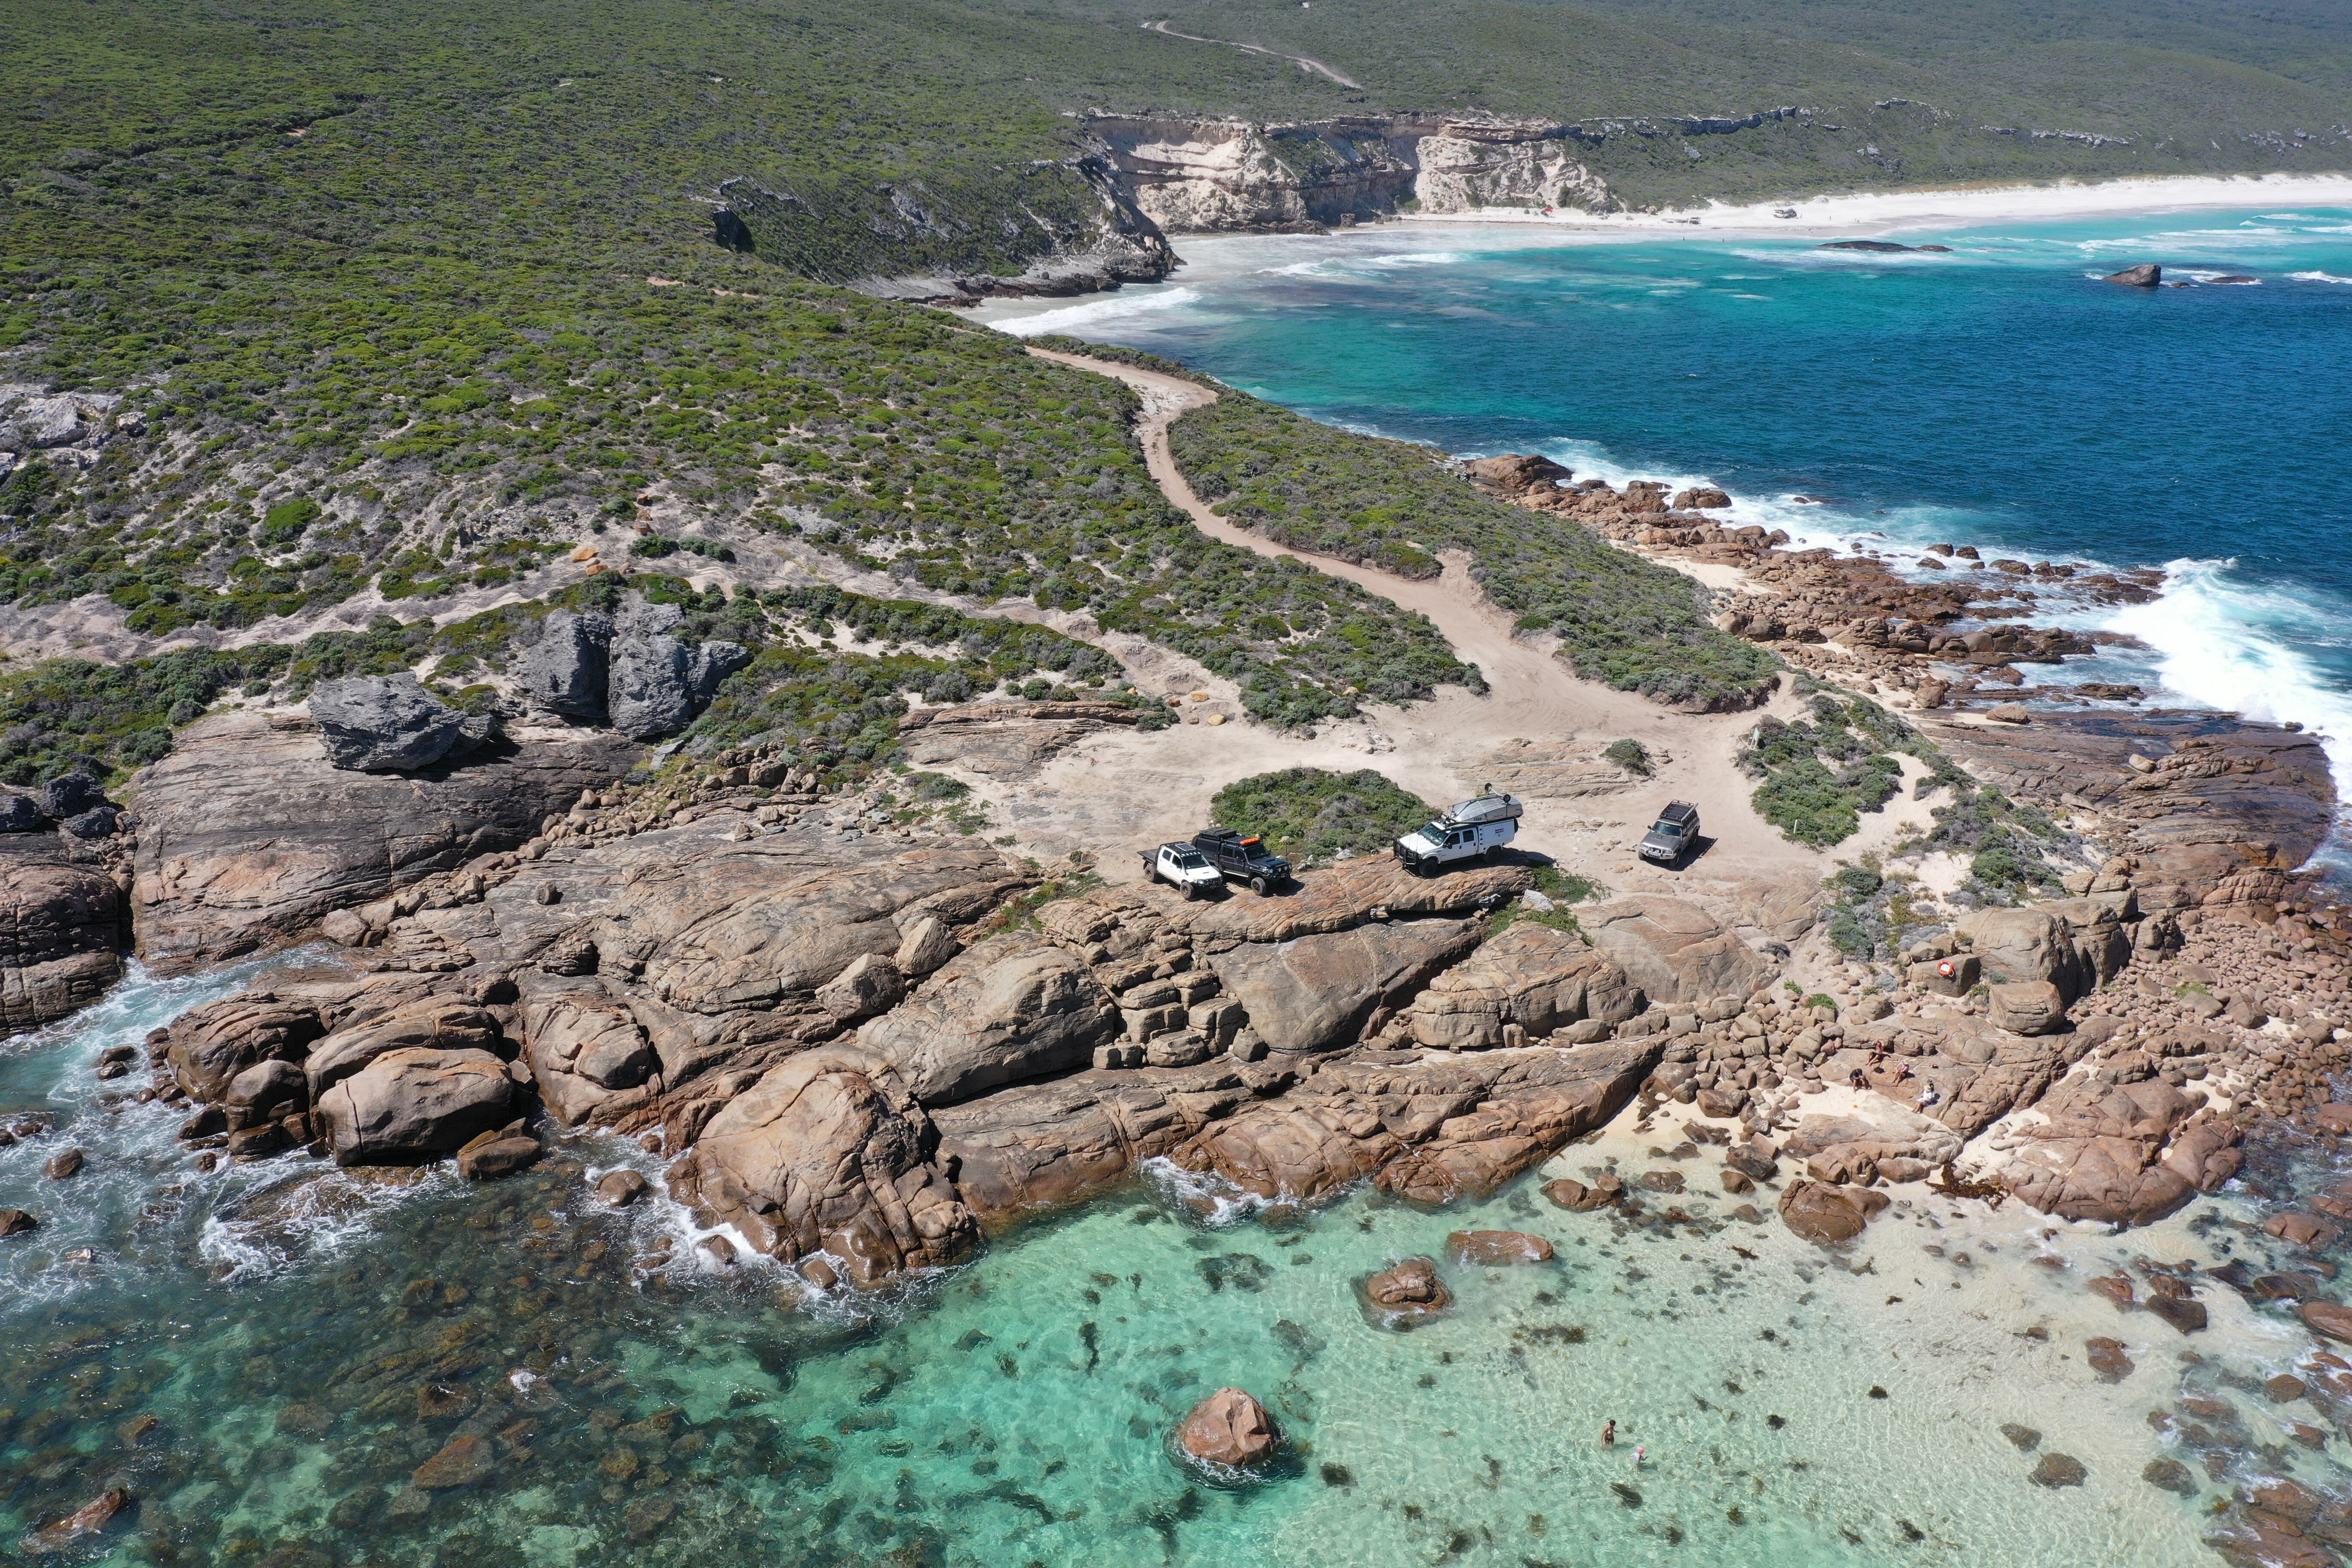
Getting to DHI is a small mission in itself, with the barge leaving from Steep Point, which is a three-hour four-wheel drive from the Shark Bay turnoff to get to. We left our ’van at Hamelin Station Stay as it was just a metre too long for the barge and headed towards Shark Bay, turning off towards Edel Land National Park. We didn’t think the road to Steep Point was too bad, but it is quite corrugated with a few short, soft spots. The road is unsealed and requires reduced tyre pressure, and be sure to check road conditions before heading off. It’s not a challenging drive, but it gets a bit arduous with three hours of jiggling.
Steep Point is well worth the effort though, with rugged cliffs on one side and beautiful beaches on the other, much the same as DHI. We visited the famous sign and explored the point, then settled in for our first sunset at Shelter Bay. Once you book a trip to Dirk Hartog Island you must then contact the ranger station at Steep Point, as they have campsites reserved for DHI guests at Shelter Bay – another stunning WA beach camp off the beaten track!
DIRK – DAY 2
We were so excited for the island we were up at sunrise ready for the barge ride. With only one car at a time fitting on the barge, it is a bit of a wait in line, but we got over there eventually and started exploring. Our first stop was Surf Point, which is such a cool little place full of baby wildlife including turtles, shovelnose sharks, many other sharks, and plenty of fish. We weren’t game enough to get in with them, but it was still amazing to watch from the shore.
We then explored the bottom part of the western side of the island. We were truly blown away (excuse the pun) at the blowholes, and these were the best blowholes we have seen so far. The sound of the waves and air shooting up through the rock was phenomenal. We ended the day at the homestead campground with basic facilities available, but best of all was the well-stocked bar where we enjoyed a few cold bevvies before hitting the RTT for the night.
1
SANDY POINT – DAY 3
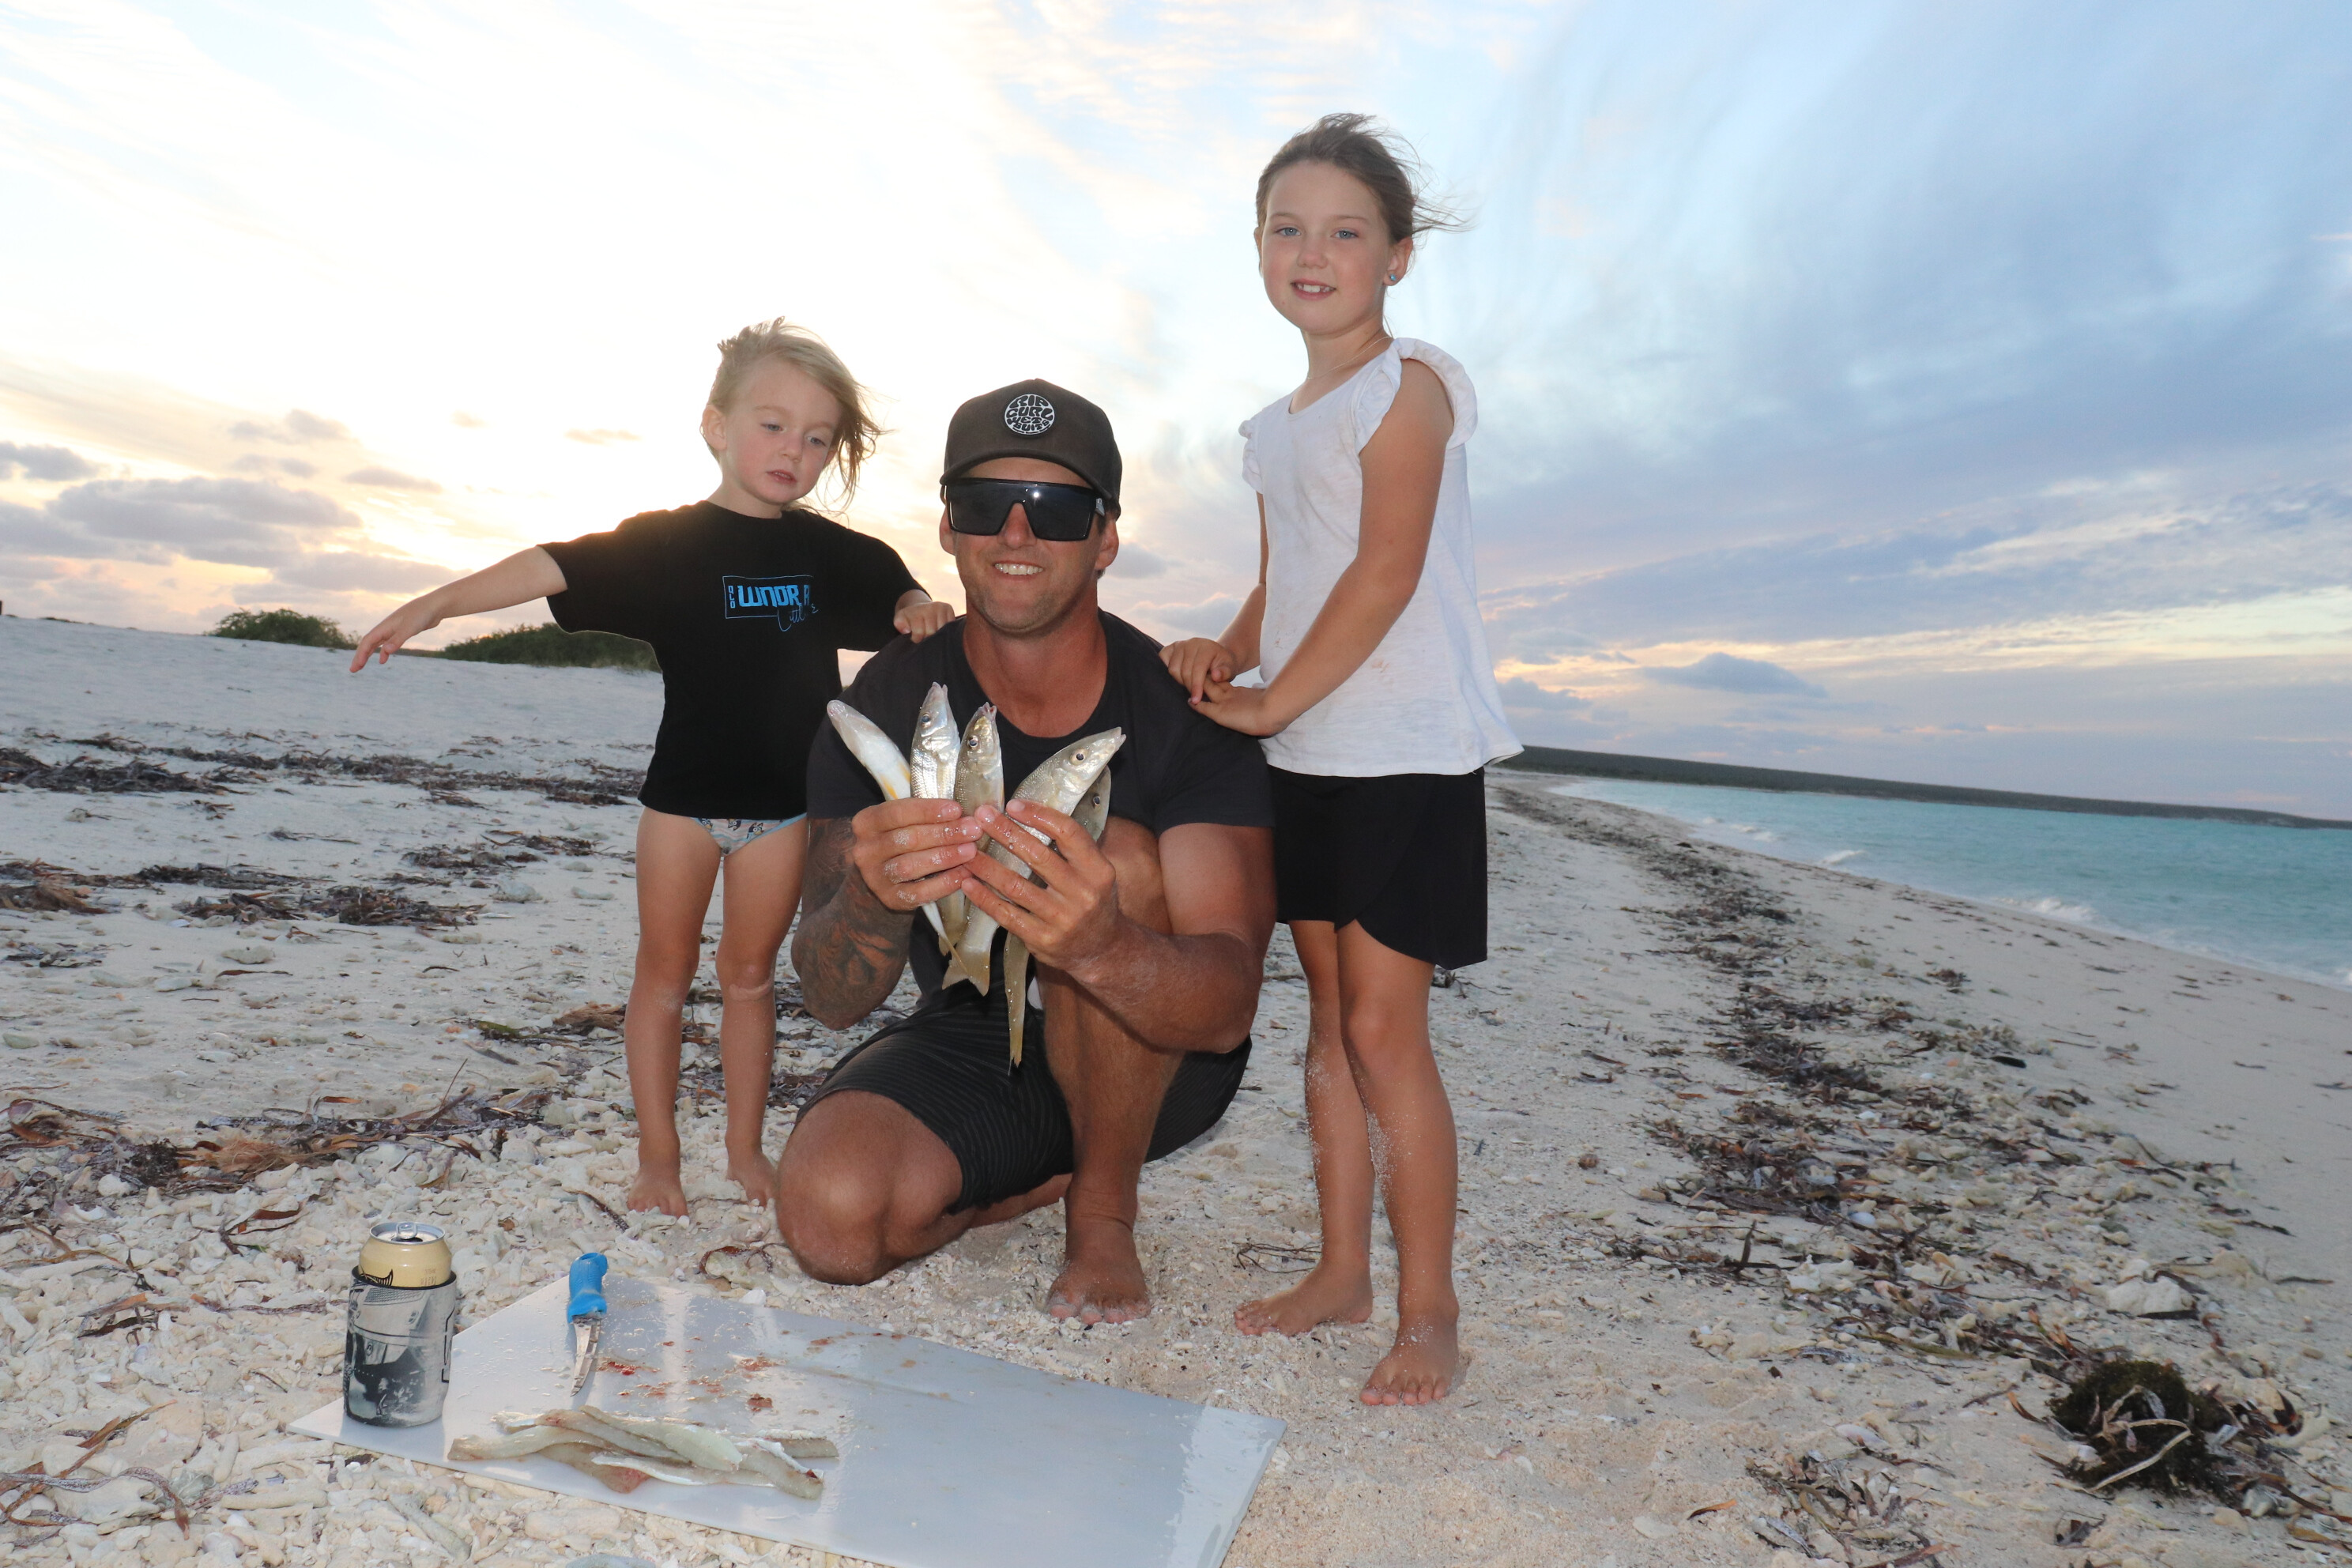
We headed north to explore the east side of the island which is dotted with pristine beaches, most of which you can camp at. While the island is only 80km long, it took us a good three hours (excluding stops) to get to the top. Notch Point was a magical little secluded spot where we didn’t see a soul and went for beach strolls and explored the little caves. We stopped for a late lunch at Louisa Bay, threw the lines in for a ‘quick fish’ and ended up catching a big feed of whiting for dinner. Yummo!
Hopping from beach to beach, we spent the afternoon and night at my favourite part of the island, Sandy Point, where we didn’t see anyone the whole time we were there. This was one of the best days of our trip as we just fished, played and chilled the day away as a family of four, spending quality time with each other.CAPE INSCRIPTION – DAY 4
We headed for the top, stopping in at Withnell Point for a quick look. You can camp right down on the beach at Withnell and it is a popular family camping spot. We also checked out Dampier’s Landing – the site where William Dampier landed in 1699 – which hosts yet another beautiful beach and single campsite behind the dunes.
We headed farther north to the tip at Cape Inscription, to explore the lighthouse and memorial to DHI’s discovery in 1616 by Dutchman Dirk Hartog. This was also the first recorded landing by Europeans on Australian soil. Most of our time at the tip was spent at Turtle Bay, where the outlook and landscape are just magical!
We enjoyed a spectacular sunset from our clifftop camp, then snuck down to the beach late at night looking for hatching or laying turtles, but unfortunately we lucked out and just found the shell remnants from hatchings. Turtle Bay is one of the best camps on the island, but beware the crazy number of mozzies.
1
MAKING OUR WAY BACK – DAY 5
We woke up at Turtle Bay on our last full day on DHI and unfortunately the weather decided to turn on us and the rain had set in. We checked out the northwest side of the island with its huge waves crashing against the cliffs. There are also a few camp spots, some with shelters and toilets, on this side of the island which would be ideal for adrenaline-junkie cliff fisherman. Through the rain, we headed back to the homestead, where we just chilled out in the RTT for the afternoon.
The following morning, we hit the barge early and headed for home back across the Steep Point Road that had just been graded and was a nice surprise. It was one of the best weeks of our trip and we highly recommend Dirk Hartog Island. This trip requires some planning, 4WD and camping knowledge, and a sense of adventure!
Part 9: Ningaloo Coastline
It’s up there with being our number one travel destination on our trip so far. Western Australia’s stunning Ningaloo Reef and Gascoyne Coast is breathtakingly beautiful. And with the Ningaloo Coastline stretching 300km, there is a little bit of something for everyone from spearfishing and boating to four-wheel driving to great dining and shopping. However, Ningaloo is very much seasonal and as busy as it is, we feel you really have to brave the crowds and visit in peak season to get the most out of the area.
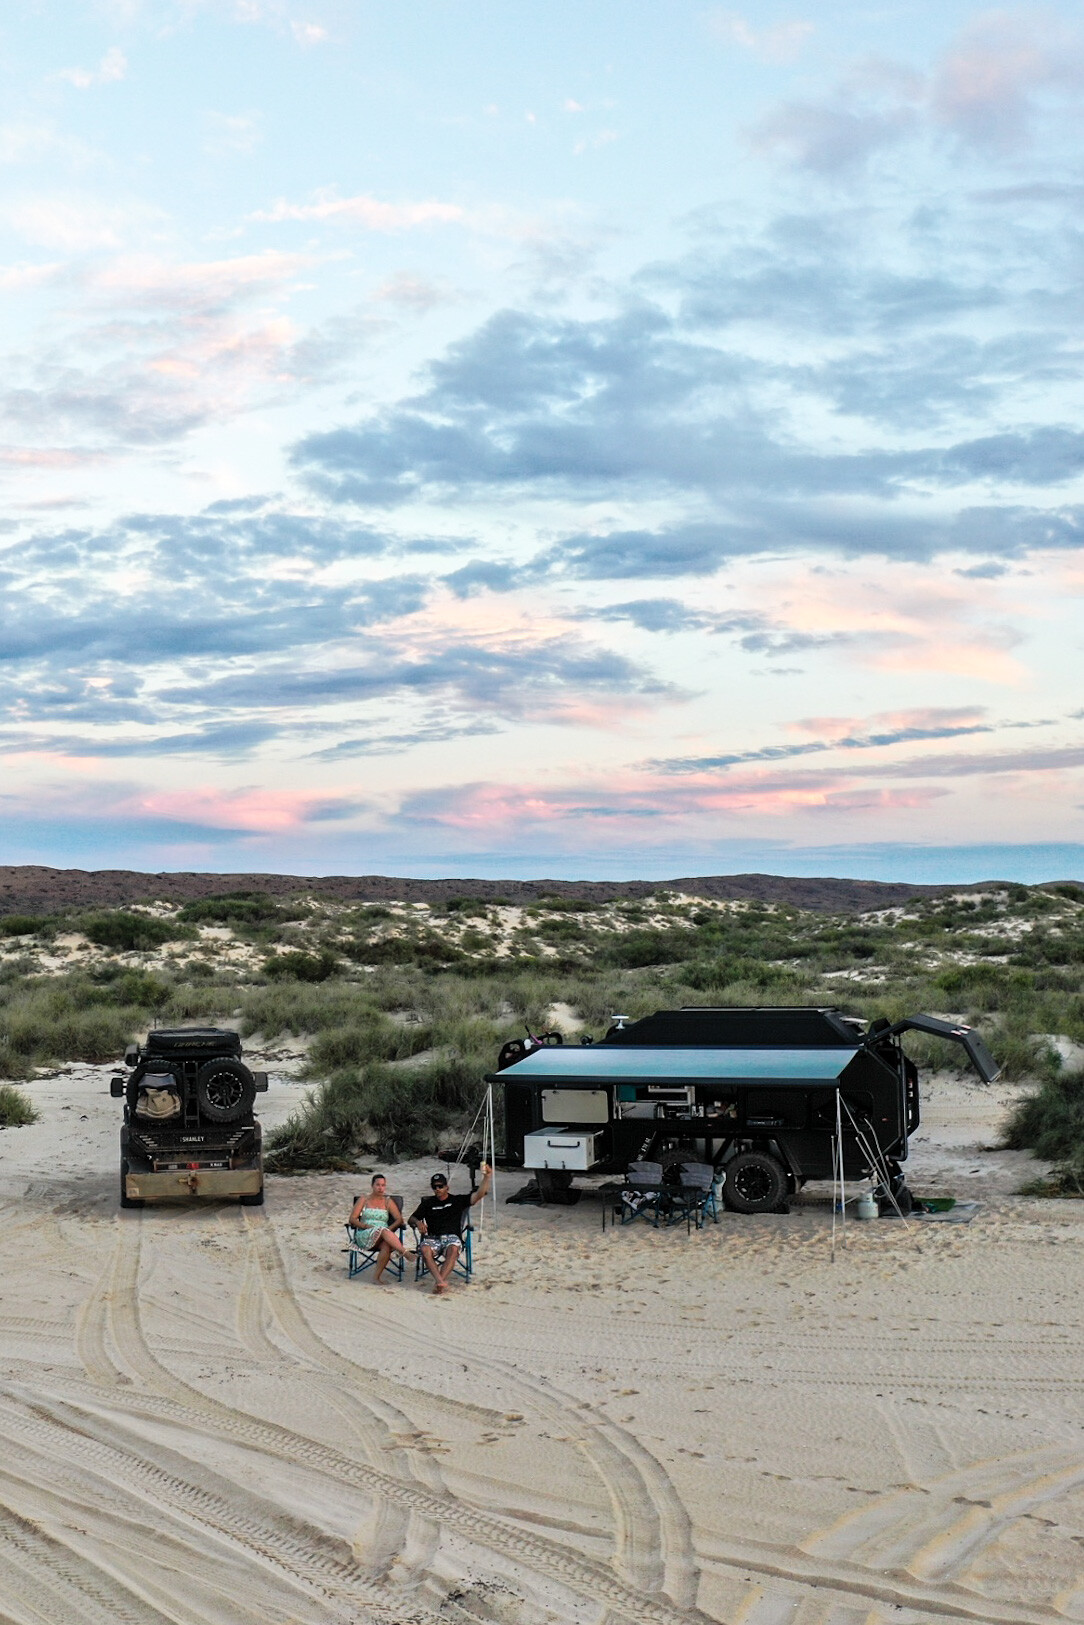
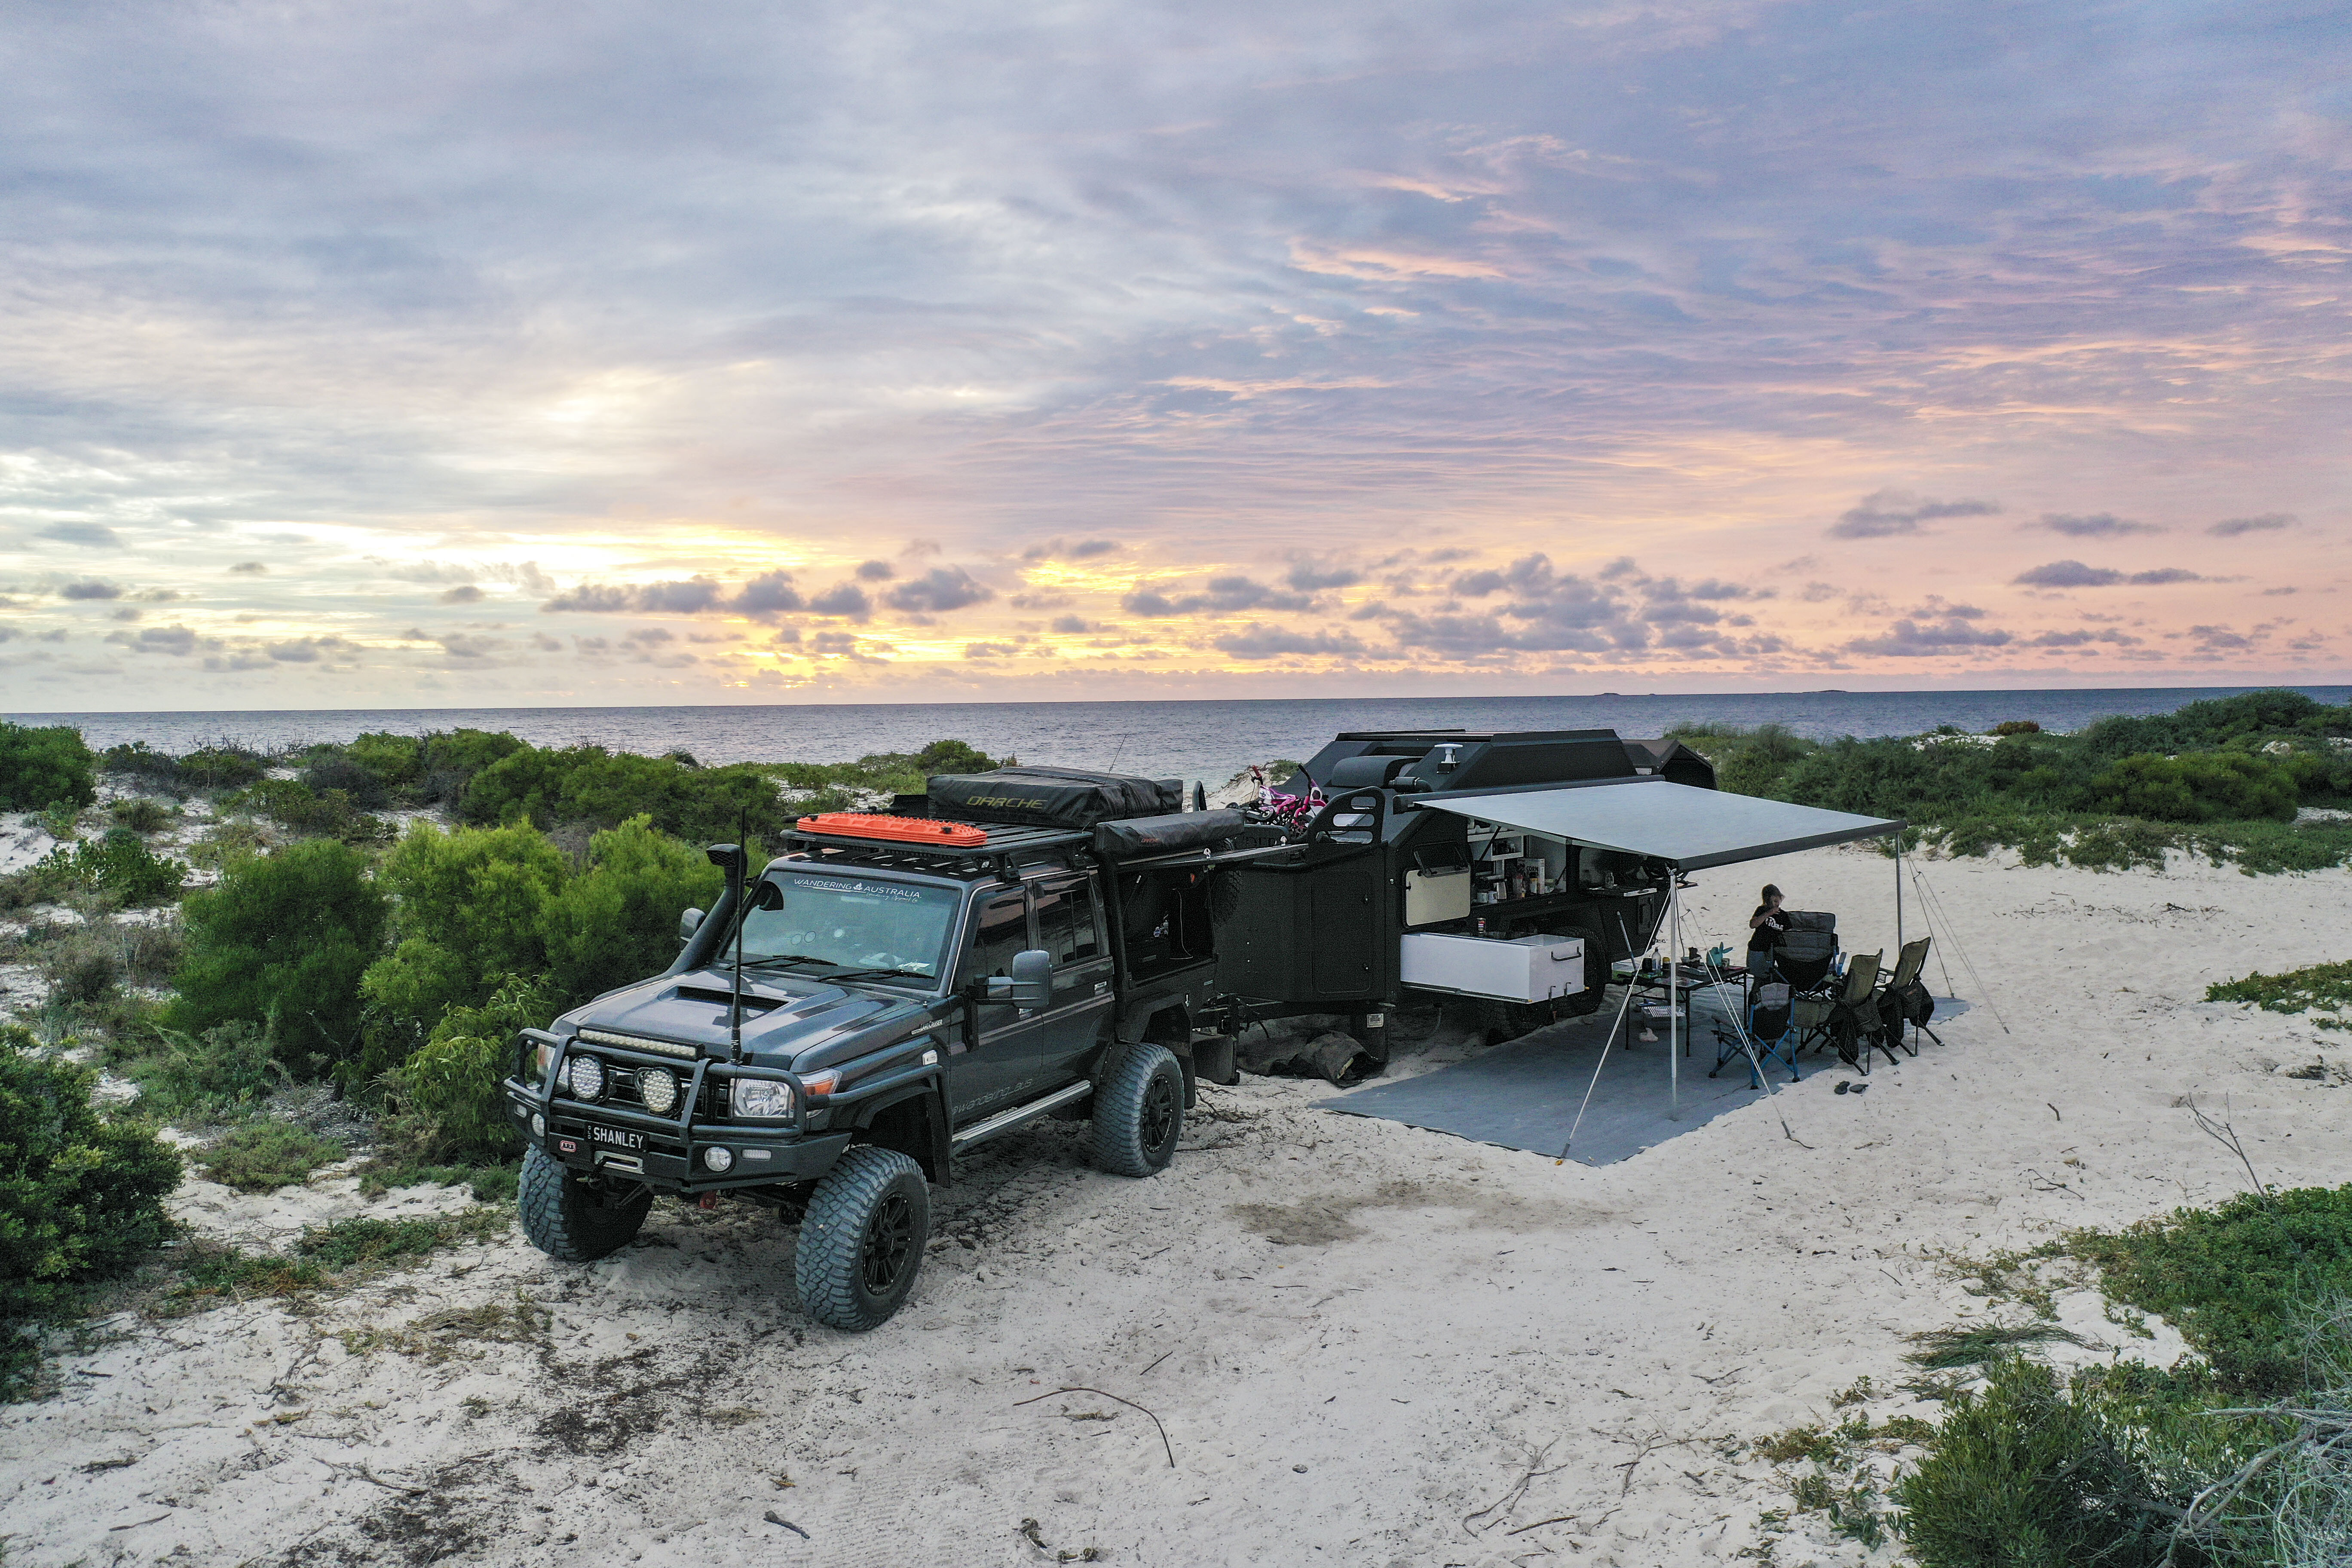
We spent around a month exploring the Ningaloo Marine Park, travelling north from Coral Bay, around Cape Range National Park and Exmouth, and inland towards the Pilbara. Ningaloo Station on the southern side of Exmouth is the ultimate in beach camping with beautifully clean white sand and that magic blue water it is famous for!
We based ourselves at Winderabandi Point for a week and explored from there. In all, there are five beach camping areas to choose from, with Winderabandi and South Lefroy the pick of those. There is fabulous snorkelling at South Lefroy, where Bella spent hours swimming with turtles, reef sharks and so many fish! We did all the things we love – snorkelling, swimming, exploring, fishing and beach lazing at Ningaloo Station.
A couple of pointers though – the road is very corrugated, rough sand tracks, there is no phone reception and there are no facilities, so you have to be fully self-sufficient.
2
Heading north, we tackled Yardie Creek water crossing on low tide, into Cape Range National Park where that gorgeous reef just gets better and better. The national park’s campgrounds are more marked out, offer facilities and are 2WD accessible from Exmouth making it very busy in peak season.
All the campgrounds in Cape Range are unique in their own way. Again, we did some amazing snorkelling at Osprey Bay, Turquoise Bay and Oyster Stacks where you can walk the beach and then let the current take you along the reef. Unfortunately, despite my best efforts, I missed out on swimming with a turtle but it was a magic experience all the same.
From Cape Range, we ticked another bucket-list item off when we swam with whale sharks. This is something we had wanted to do for some time and it was beyond all expectations. Swimming alongside these beautiful creatures literally took the breath away. We spent a full day out on the boat with 3 Islands Whale Shark Dive and highly recommend these guys. The team couldn’t do enough for us, loved what they did and were also great with the kids. We had six dives total and couldn’t get enough of these majestic animals. It was worth every dollar and would do it again in a heartbeat.
The town of Exmouth reminded us of a quieter Byron Bay and it is the one place we could see ourselves living in. Exmouth exudes a young eclectic vibe and has great boutique shopping and dining – I think we tried just about every dining venue in town.
1
There’s also heaps to explore around Exmouth with the Vlamingh Head Lighthouse precinct and SS Mildura shipwreck providing good history lessons, Charles Knife Gorge and Shothole Canyon for 4WDing and natural scenery, and the many beaches for fishing and swimming.
Also worth a visit is the Ningaloo Centre in town – again it has something for everyone with the history of Exmouth, particularly the American influence and occupancy, and the Ningaloo aquarium and reptile display which the girls loved. As we say with most places we visit, we could have spent so much more time in the Ningaloo region and really ‘felt at home’ there. But we just couldn’t be that far away from family and had so much more exploring to do, so we held off putting that house deposit down.
On our way to the Pilbara, we stopped at my favourite station stay so far – Bullara Station. This is a working sheep and cattle property and offers a great farm experience with all the luxuries of glamping. The best part was the scones they do daily and I was most impressed they had gluten-free scones – win all round! If you can’t already tell we absolutely loved exploring the Gascoyne Region, especially our ocean-lover Bella, we will definitely be back! From beach to bush, well sort of, our adventure on the Gibb River Road is next month.
Part 10: Embracing the Kimberley
From the minute you set a tyre on the dirt of the Gibb River Road, a sense of adventure and excitement fills your soul and doesn’t leave you – this is known by the locals as the Kimberley Spirit. There is just something about the Kimberley that sucks you in and makes you feel like you never want to leave!
We spent a month exploring the north, travelling from Broome to Kununurra, as well as popping down to the Bungle Bungles. With three weeks on the Gibb River Road, we divided our trip into thirds: Derby to Kalumburu Road, Mitchell Falls to Honeymoon Bay, and Gibb River to Wyndham. However, there are many different ways to explore the top of Western Australia, depending on your time frame, budget and set-up.
As most of you know, the Kimberley is famous for its towering gorges and refreshingly clear water that provides an oasis in this often-dry rugged landscape. During our month in the Kimberley we visited 14 of these natural beauties, and in the ‘first third’ of our trip we walked seven gorges in seven days. The gorges all have their own unique character, and a few of our favourites were El Questro, Manning and Bell.
2
We took most of the gorge walks at around 6 or 7am in order to beat the heat and the crowds. Most of them are around 3 to 4km return, tracking along the pebbly creek line to cool, deep waters for a swim at the end.
Bell Gorge is an easy 1km walk into Bell Falls, where you can relax by the upper pools or venture down to the lower pools beneath the falls. We spent a good few hours lying around in floaties on the water and baking on the rocks in the sun.
Manning Gorge is similar to Bell Gorge (with the swimming) but more spectacular, which makes it much more popular. The walk into Manning Gorge is a bit longer at around 2.5km and starts with a swim across the water, which certainly wakes you up at 6am. The walk after this, along the top of the gorge, is much more arid and doesn’t provide much shade, so best done in the morning or afternoon. It is easy to spend the whole day at Manning Gorge; swimming under the waterfall, jumping off the rocks and lazing in the sun.
Our favourite walk was El Questro Gorge, on the eastern end of the Gibb. This was the most challenging hike (especially with the kids) but definitely the most scenic. It truly is an oasis full of ferns and palms, and copious shade means you can do it any time of day. The walk follows the creek, with the Halfway Pool providing a great rest stop – you must get wet to pass this point. The second half of the hike involves boulder climbing, with a scale along the waterfall sure to get the heart racing. El Questro ends at MacMicking Pool, which is deceptively deep and has a gorgeous waterfall flowing into it. El Questro gorge is simply stunning and unmissable!
FREE CAMPING
When it comes to camping, the options on the Gibb are endless. There are so many free roadside camps for self-sufficient campers, many of which are beside a river or creek. If free camping is not your thing, there are also plenty of farm stays and a few campgrounds with basic facilities. Some highlights include the Gibb River Rest Area, Home Valley Station and the Pentecost River.
The Gibb River Rest Area is 3km north off the Gibb River Road at the Kalumburu Road river crossing. This free camp area doesn’t provide a huge amount of space, but it’s beautiful and peaceful and the kids had a good play (and wash off) in the river. Home Valley Station on the eastern end – complete with a bar, restaurant, swimming pool, playground and green grass – is certainly a treat after three weeks of dirt roads and basic camping. Pentecost River is another free camp with plenty of space, and we tried our hand at barra fishing and croc-spotting, and enjoyed a balmy night by the campfire.
3
Road conditions and 4WD suitability change on a daily basis in the Kimberley in the dry season, as hordes of people move through it. We saw a fair bit of carnage along the way with flat tyres, bent-up trailers and broken chassis. It is a very unforgiving road, but with the right equipment, knowledge, tyre pressures and time, it is not impossible.
The worst road we experienced was the Mitchell Falls Road, with around four hours return of bone-shaking corrugations. We were warned about the road but it was a bucket-list location for us and we had to check it out for ourselves. There is a lot of hype about the condition of the Gibb River Road, but we didn’t find it too bad and it is certainly worth the drive to see this amazing piece of our country.
The Kimberley’s landscape is harsh and unforgiving, but there is beauty to be found around every corner. We will definitely be back!
Part 11: What a year it has been!
As we wrap up 2021, I want to talk about what we’ve learned travelling around Australia this year, and boy have we learned plenty.
This year has been one of the most rewarding of my life – I made a promise to myself at the start of the year that I would get out of my comfort zone, and I have definitely ticked this box. Our trip around Australia has been everything we expected and much, much more! We have seen the most amazing sights and experienced life-changing moments. Travelling Australia gives you the opportunity to say “yes!” more often than “no!” and when you change to this mindset, the life you live is mind-blowing!
That was a big attitude change for me, and I found myself swimming with whale sharks in 60 metres of the deep blue, standing on mountain summits soaking in the clean air, and conquering rough 4WD tracks to say “we did it!”
1
Travel life is just one great moment to the next, but as many travelling families will tell you, it’s not all margaritas and sunshine. You go through this change after about a month, where it begins to feel like a lifestyle rather than just a holiday, and the real world starts to creep back in. While on the road, you still have to do all the everyday things you would at home – grocery shopping, cleaning the house AKA van, educating children and paying bills; and some people are still working on the road, so they have that as well.
On top of this, we are always planning our next adventure, managing bookings, as well as editing photos and videos to keep of our memories. Don’t get me wrong, I am not complaining, but it’s definitely a busier lifestyle than I thought.
We often get asked, “How do the kids go travelling?” And our answer every time is, “They love it.” We feel this experience is one of the biggest life lessons for children, and it has been so rewarding watching our children learn and grow. They have learned things I never could have imagined as a child, such as the many varied species of fish and animals, how to interact with both kids and adults from all walks of life, the beauty of nature, and so much history of both our First Nations and Colonial peoples.
Our kids have really come out of their shells and have become humble, versatile and adventurous little human beings. We educated Bella, our eldest, both in and out of the classroom; and when she was doing conventional schooling, she did it with Longreach School of Distance Education.
While it was a learning curve at the beginning, mainly getting Bella to listen to me and concentrate long enough, we got there in the end and I cannot thank LSODE enough for the wonderful support and teaching they provided us over the last couple of years. We wanted to do a structured school program as I felt I needed the direction and motivation. Formal education is something I highly value and felt it was important for Bella.
1
The families we met on the road all do it differently, from unschooling to workbook-based learning to home-schooling to distance education. No way is the right or wrong way, it’s about what is best for your family. It is quite a minefield out there once you start researching. As for Hannah, our youngest, she is our outdoor-loving tomboy and was happy to go exploring with Dad, while Bella and I did some schoolwork.
Another concern people often ask about, and I must admit it did cross my mind, is about our kids missing out on social interaction through school and other activities – and, wow, this is extremely the opposite. Both our kids and Brendan and I have met some amazing, kind and caring people on our travels who will be lifelong friends.
Travel life is very social and you just have to be willing to get out there and say, “G’day, how are you?” … and next thing you know, you’re still up at 1am, a few drinks deep, chatting around the campfire. We just continue to be astounded at how generous people are and how total strangers have welcomed us in to their lives, homes and boats, just because they are great people!
1
None of this travelling life would be possible without our workhorse, the 79 Series. I’m sure Brendan had some idea about maintenance and running costs involved in travelling Australia in the 79, as, to be honest, I have no idea about any of it. However, even Brendan admits he didn’t realise just how much time, effort and money we would have to put in to the big girl.
We have spent a small $16,000 this year in repairs with regular services, new gearbox, two new tyres, all-new brakes and rotors, new rear diff centre, rear portal axle repairs, rear leaf springs replaced and a few other bits and pieces sorted out. We absolutely love our beast and it’s now practically brand-new mechanically, but it leaves a bitter taste forking out money to fix it.
However, the places it has taken us make the memories priceless. We also want to take this opportunity to say that whether you tour in a $20,000 or $200,000 car, it’s about the experience and getting out there. Be warned, though, you will still need to account for maintenance and repairs in your budget, no matter the vehicle.
There are so many other things we have learned, and maybe I will touch on them in the New Year, but as you have probably gathered, travel life is incredible! If you are considering packing up your life and hitting the road, just do it! It’s the best thing you will ever do. We are looking forward to sharing more adventures with you in 2022. Have a wonderful Christmas and all the very best for the New Year.
Part 12: Karijini National Park
Karijini National Park is an experience like no other and was truly memorable. This spectacular collection of gorges nestled in the Hamersley Range in the Pilbara region of Western Australia provides breathtaking adventure around every corner.
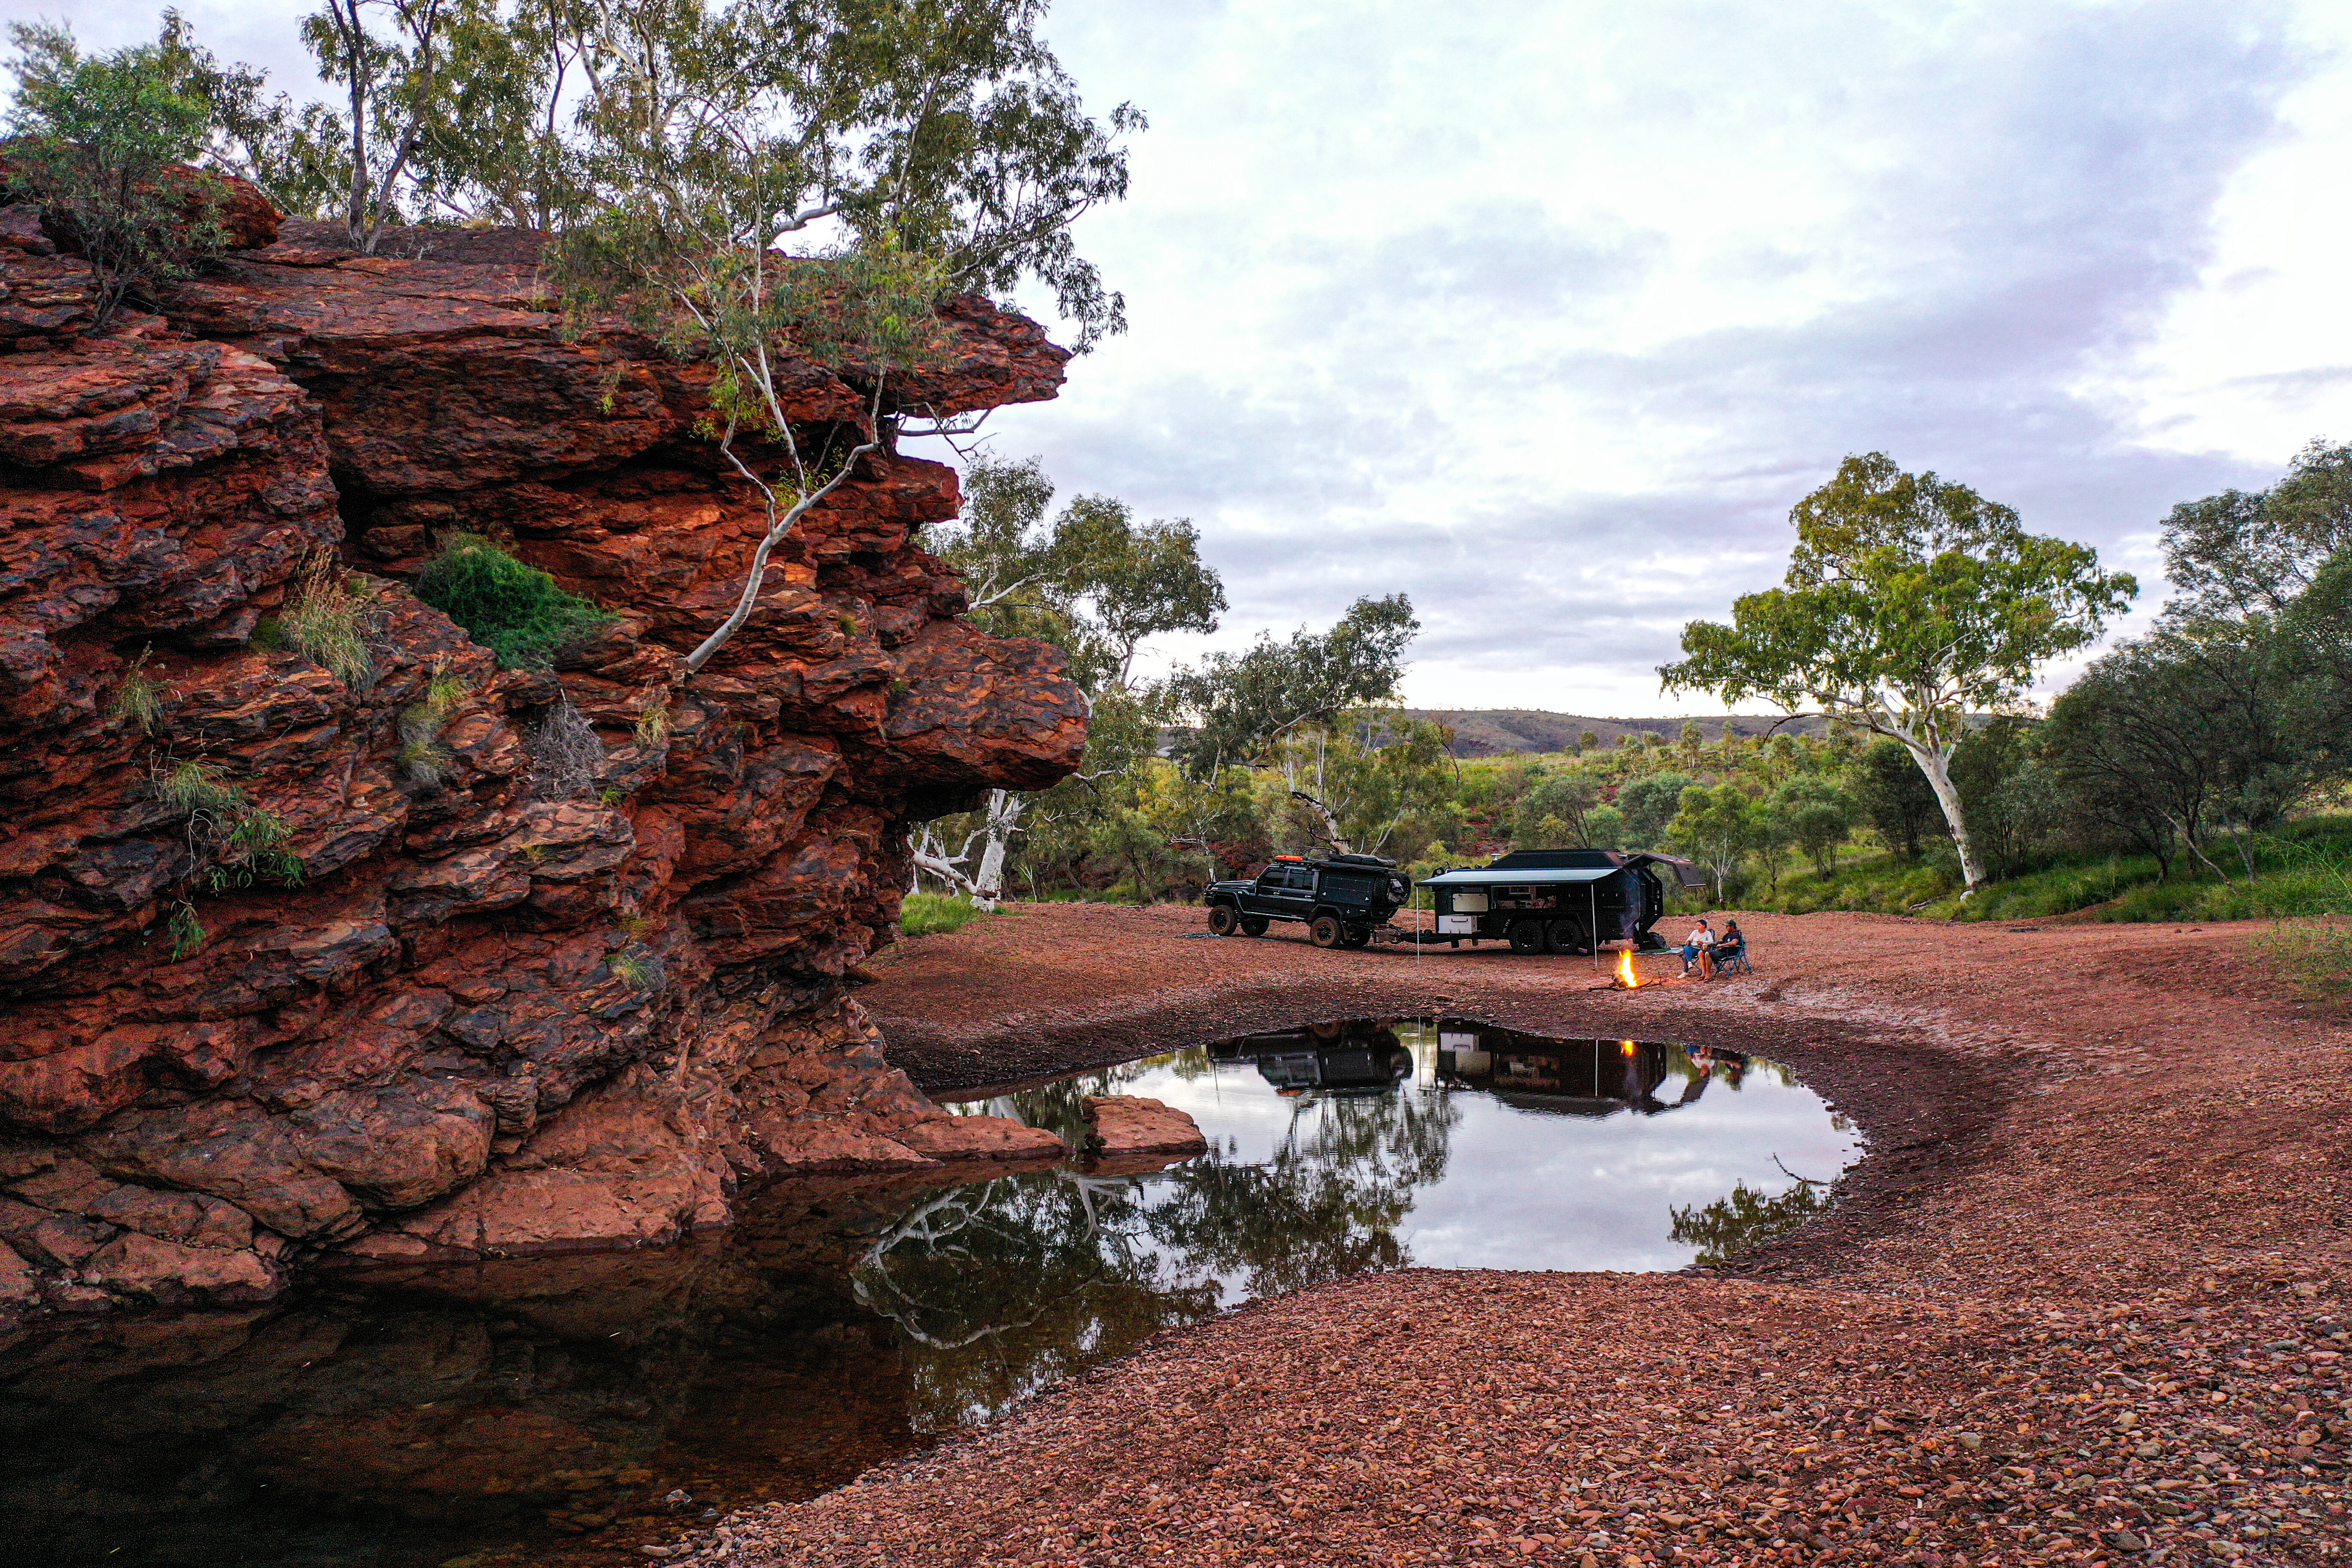
We spent five nights at Karijini but could certainly have spent longer. As we were moving north along the coast of WA, we travelled to Karijini from Exmouth along the North West Coastal Highway and headed in to Tom Price (Karijini’s nearest town) to stock up on supplies. We spent our first night at Tiger Eye Pool, a great little free camp around 20 kilometres west of Tom Price.
In terms of camping at Karijini, Dales campground and Karijini Eco Retreat are available, with online bookings essential for both. Dales campground is run by the Parks and Wildlife Service and is a basic campground with drop toilets only. This campsite is within walking distance of the most accessible gorge walk, the aptly named Dales Gorge, and Fortescue Falls and Fern Pool. Fortescue Falls is magical and you can’t visit Karijini without having a swim in the chilly Fern Pool, where you can sit beneath the waterfall and contemplate life.
1
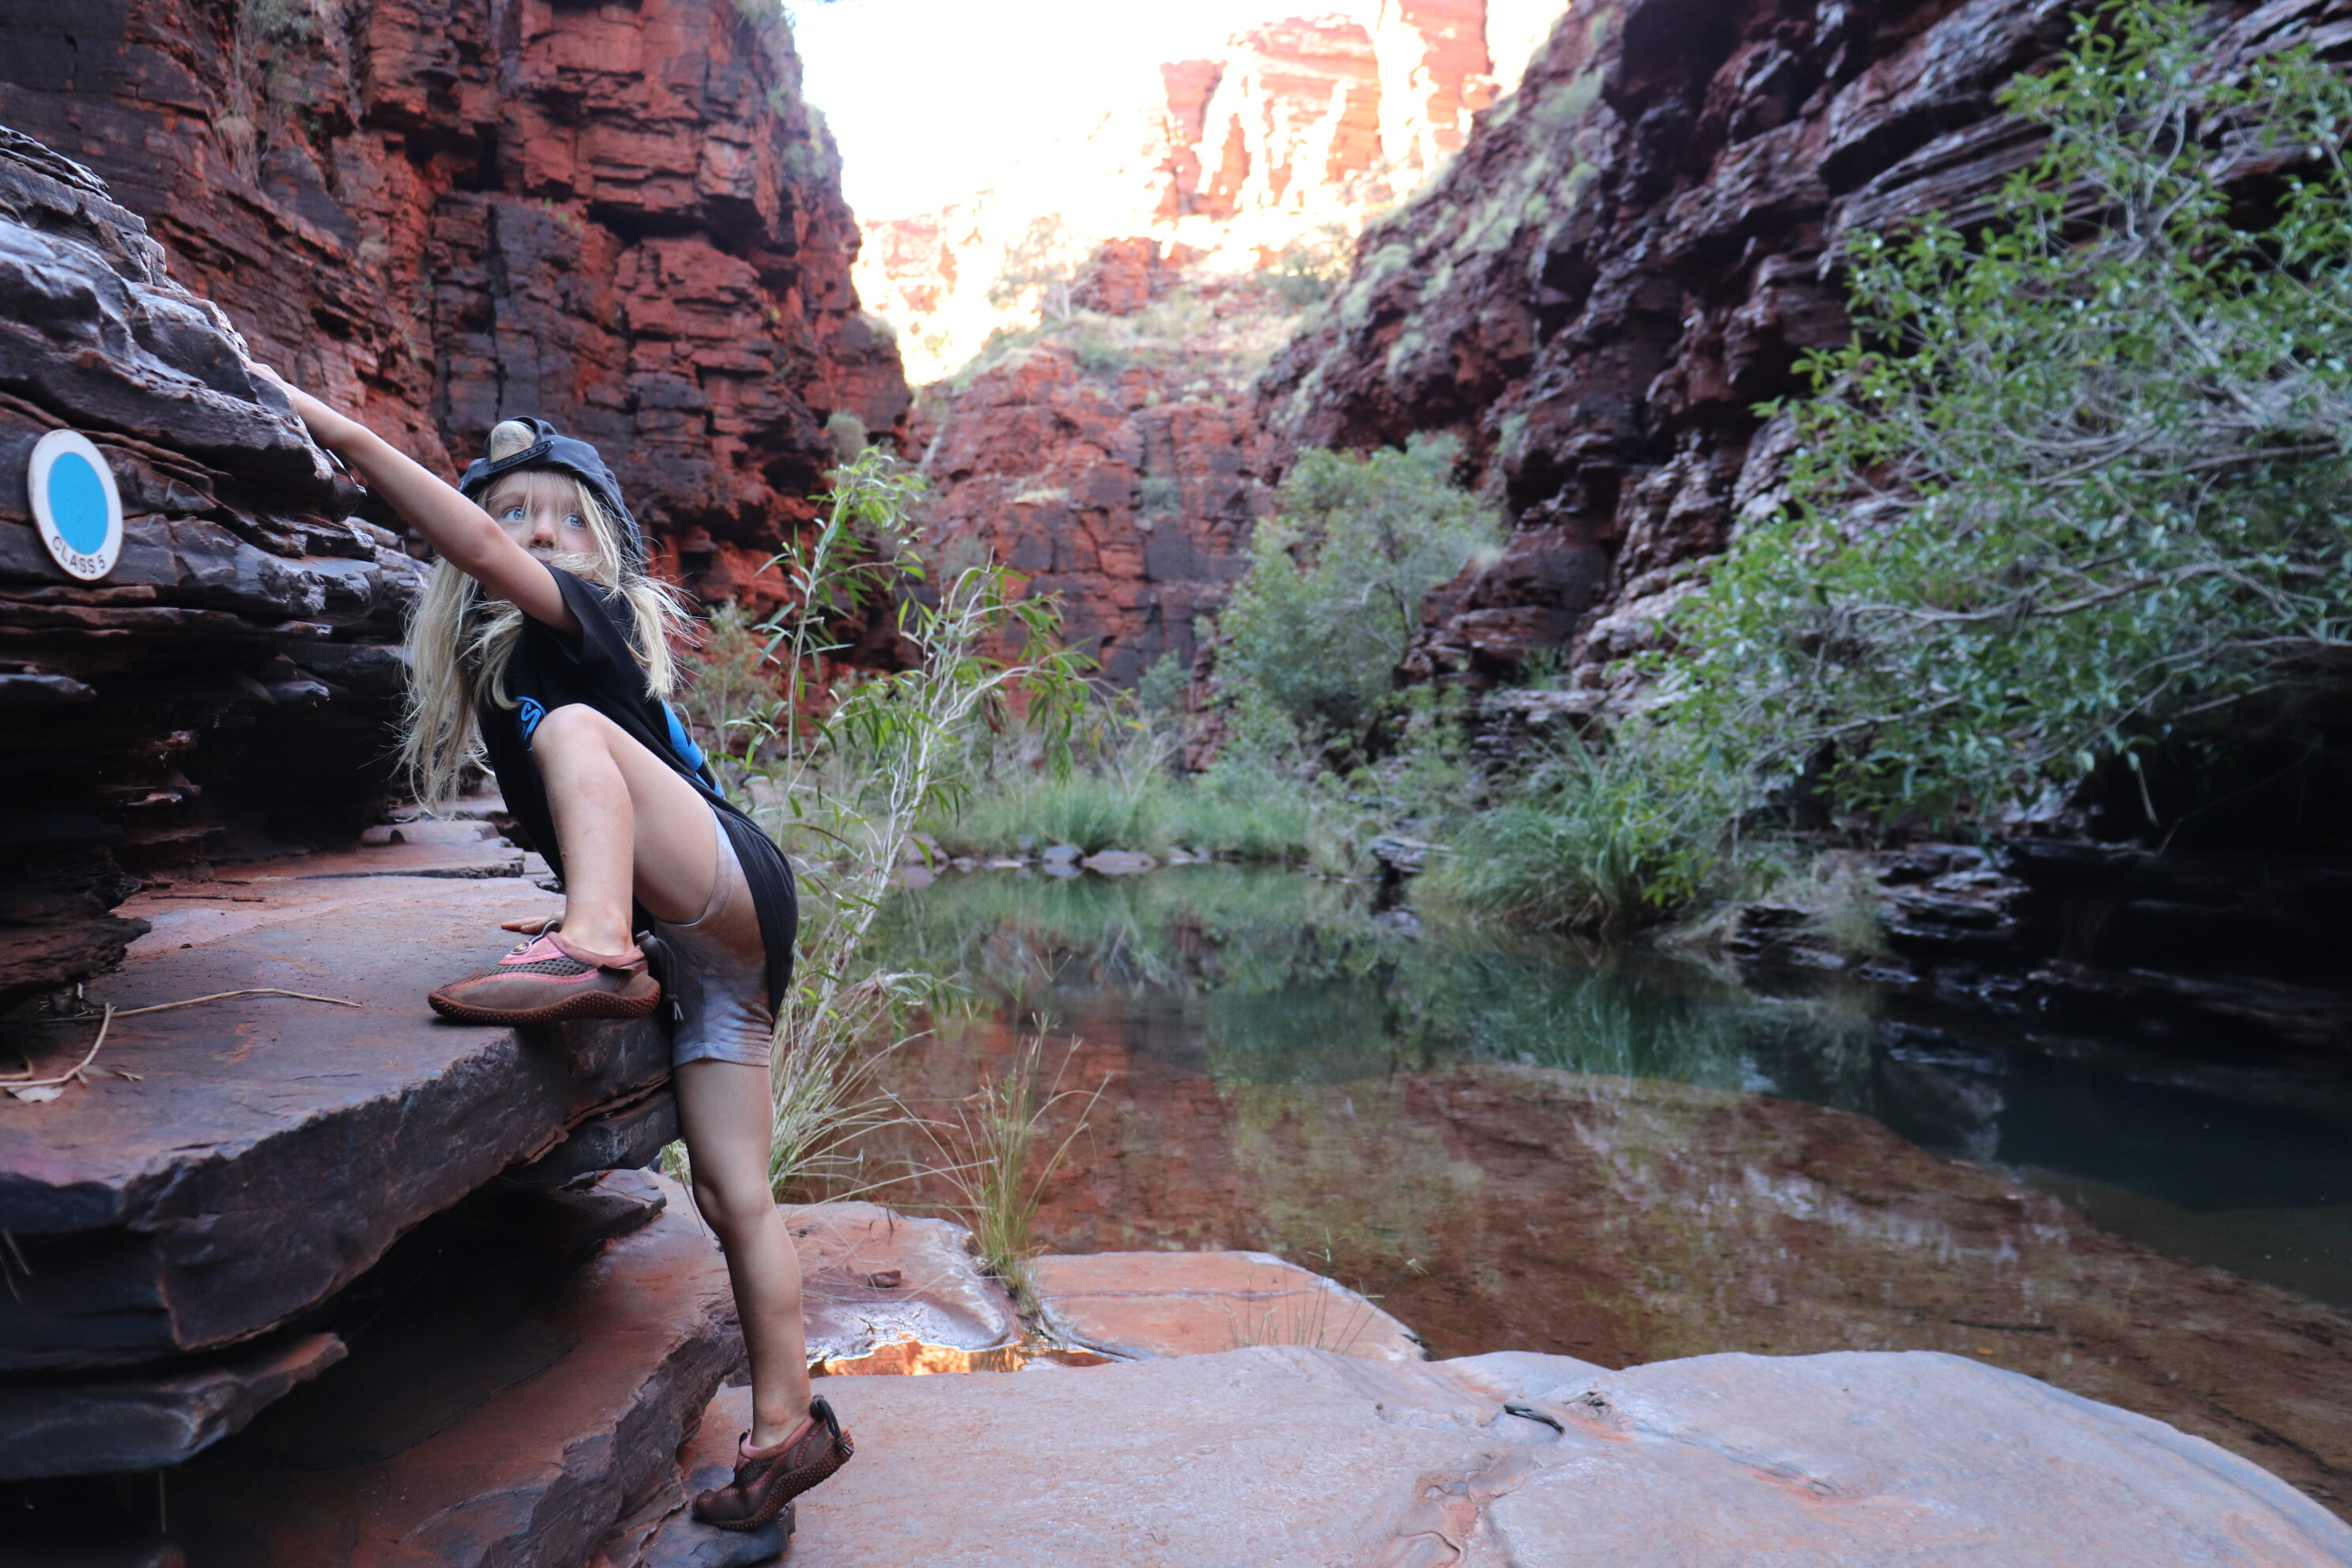
We spent our first full day at Karijini exploring Hancock, Weano and Knox Gorges. This was a big day with around 10 kilometres of walking all up, but it was such an adventure. Just like the Kimberley, each gorge has its own personality, and Hancock was probably our favourite.
This was challenging at times, with some steep ladders and a fair bit of rock-ledge hopping. The first section involves getting down a ladder to walk along the rock ledges at the bottom of the gorge, where you reach a natural amphitheatre around two-thirds of the way along. This is perfect for having a water-and-snack stop and warming up a bit after wading through the icy-cold water.
The end of Hancock Gorge is the slightly challenging bit with a spider walk between the rocks to reach Kermits Pool for another freezing-cold swim. This pool is beautifully fresh, crystal-clear water and you get a real sense of achievement when you make it to the end. Then to start the climb back, with the whole walk taking a few hours including resting and swimming time. We highly recommend reef shoes and a wet pack for this walk.
1
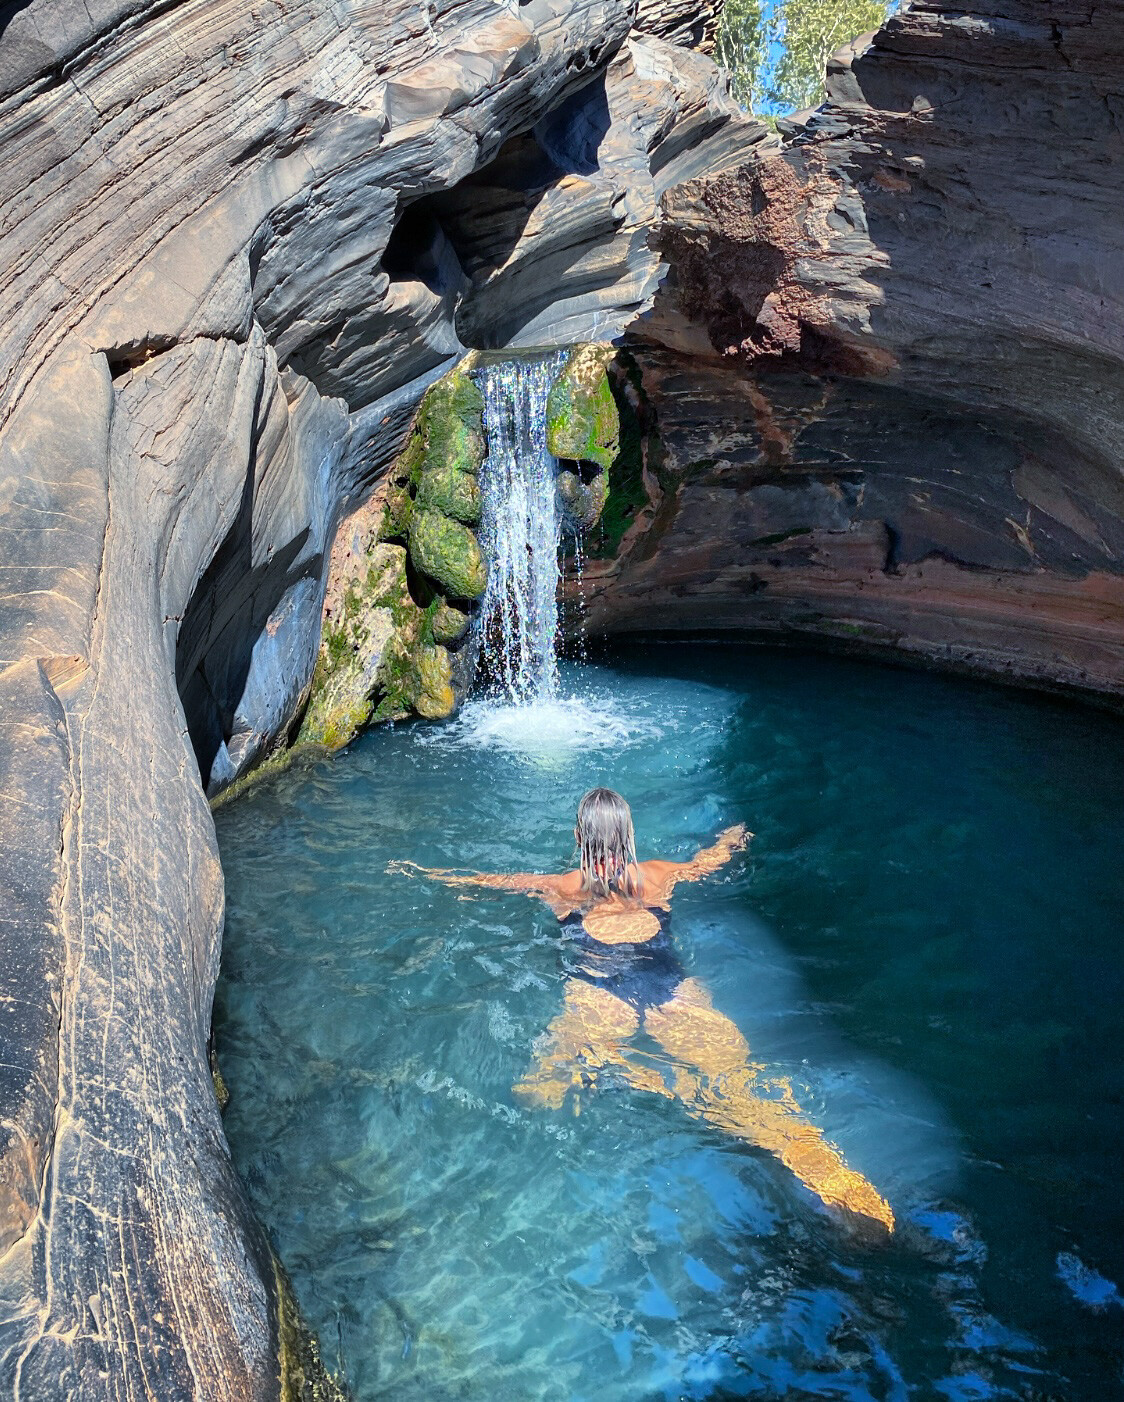
Another one of our favourite gorge walks at Karijini was Hamersley Gorge. This gorge has become a little ‘Instafamous’ for its natural-spa rock pool and we certainly know why. Hitting the road early definitely paid off as we had the place to ourselves for a good hour.
There is a short section of steps to get down to the gorge and, once inside, it is just a matter of scrambling over some rocks to enjoy the gorgeous fresh rock pools and waterfalls. Again, the water was freezing cold and we reckon in summer, it would be so refreshing on a warm day.
This a great gorge to pack a picnic and enjoy the day there, but with the roads the way they are, it takes a good hour to get from Dales campground to Hamersley Gorge − some people visit this gorge on their way in or out of the campground to avoid backtracking.
1
There are many other walks and gorges around Karijini and we didn’t get to see them all, but that’s a good reason to return.
The information centre with its small history museum is a wealth of local knowledge and well-worth a visit upon arriving at Karijini. There is no food, supplies or phone reception at Karijini, so good preparation is key. Another thing to keep in mind is that most of the roads are unsealed with some not wet-weather suitable – and the red dirt gets everywhere!
We left Karijini with stained feet, a red van and ruined clothes, but a great collection of memories. It is definitely a bucket-list item and well-worth the travel in.
Part 13: Bush versus beach
When it comes to travel and camping in Australia, there is that age-old debate: bush versus beach?On our travels, we have done our fair share of both, but the ocean is always calling us back and if we had to choose, it’s seaside hands down. Both hitting the sand and the great Aussie bush have their pros and cons, and the beauty of an island nation is you can enjoy both.Having grown up in the country, we spent most of our childhood and early adult life bush camping in Western and Central Queensland. It is the best feeling to leave behind the hustle and bustle of the cities and towns and get back to nature out in the bush, where you feel like the only people in the world and it is just blissfully quiet.
2
We have spent a few summers water skiing at Lake Boondooma, along the many western rivers and simply just getting out on nearby properties with nothing but a campfire and a blanket of stars.There are so many inland lakes and dams to enjoy without the worry of sea creatures defending their territory, and away from all the tourists and beachside hotspots. As well as this, there are many mountain ranges to explore inland from the Flinders Ranges, SA, to the MacDonnell Ranges, NT, to Mount Augustus in Western Australia providing outstanding bush-camping getaways. However, we do think camping in the bush is best done in the cooler months when you can enjoy a campfire and it’s not so hot during the day.We were so privileged to be camping literally in the middle of nowhere when we had a lunar eclipse in the middle of last year and it was one of the best nights of our trip. We had climbed Mount Augustus earlier that day and camped on the side of the road amongst huge cattle farms in the Gascoyne region in the mid-west of WA. I will never forget sitting around a campfire watching the lunar eclipse with no light or noise pollution and thinking how very lucky we are to live in this amazing place. It is memories like this that make bush camping so attractive.
1
As I said above, we hadn’t done a whole lot of beach camping until we moved to the East Coast of Queensland in our mid 20s, and it was then we fell in love with sleeping seaside. We have probably spent 80 per cent of our travels chasing the coastline.Another treasured memory of 2021 was our last beach camp in WA at Barred Creek just above Broome. This place is magical, with white sand and blue water and nothing but you and the sound of waves crashing. We had a great night with great mates dancing around the campfire and eating freshly caught Spanish mackerel.Beach camps around Australia are all so different, too. Perlubie Beach in South Australia was one of our first beach camps of 2021 and we had a blast! We vote Perlubie the most social beach in Australia. You can park your van straight on the sand and the bark huts provided give a great party vibe. We enjoyed happy hour(s) with fellow travelling families for a few nights here. Another great beach stay in WA is Red Bluff along the Quobba Coast, where the waves are some of the most powerful I have seen, and we were able to camp within metres of the shoreline. Drifting off to sleep to those waves crashing was divine.
2
Hands down, our favourite beach camp is Fraser Island (K’gari) in Queensland, and the fact that it is so accessible for us probably has a lot to do with it. However, who wouldn’t love a whole island full of beach camping and four-wheel driving. We love holidaying here every year and the island has so much to offer for all different interests. A 4WD and a bit of planning are essential when visiting K’gari, though.The best part of beach camping is stepping straight out of the van on to the sand and in to the water for a swim. In saying this, you have tyre pressures, tides and plenty of sand in your bed to contend with when beach camping. It is good to be prepared and know tidal times and the weather forecast, as this can be the difference between a good and bad camping trip.Whether you hit the dirt or the sand, it is all about exploring this great land and getting out there having fun. What will you choose for your next adventure: Bush or the beach?
Part 14: Catch-and-cook lifestyle
We often get asked by family and friends about day-to-day life on the road, particularly what we eat. After spending more than a year travelling, we have noticed how much we have changed with our eating habits, cooking practices and day-to-day lifestyle.
Travel life has taught us all about eating fresh local produce, simplifying our meals and to be much more relaxed in general.
Let’s face it, being from one of the biggest beef-producing areas of Australia, we have never really been in to seafood or catch and cook. However, travel changed this for us. Before our trip, our idea of seafood was a treat at a restaurant on holidays, but now the kids are requesting fish for dinner most nights of the week.
1
The best part about travelling to different areas is you get to experience the freshest local produce each part of Australia has to offer. In South Australia, the Barossa boasts magnificent food to accompany the wine, while the Eyre Peninsula is famous for its oysters, of course.
Another local delicacy we were introduced to at Perlubie Beach was razorfish, where we had a quick lesson from fellow travellers on how to shell them and prepare them for eating. Our culinary journey continued in Western Australia and again we were spoilt for choice in the Margaret River region, where there are great restaurants, wineries and breweries – as well as the Margaret River Chocolate Company to which we, of course, paid a visit.
While it’s nice to spoil yourself with restaurant food every now and then, our waistlines and hip pockets were feeling it and it was nice to escape all this and get back to natural living once north of Perth – there was plenty of squid and fish to be caught and enjoyed.
One afternoon on Dirk Hartog Island, we pulled up on the beach, threw in a line and caught 10 whiting for dinner. Heading north along the coast we were very spoilt with fresh crayfish and seafood, which, when grilled on the barbie with some garlic butter, makes for an awesome dinner watching the sunset over the water.
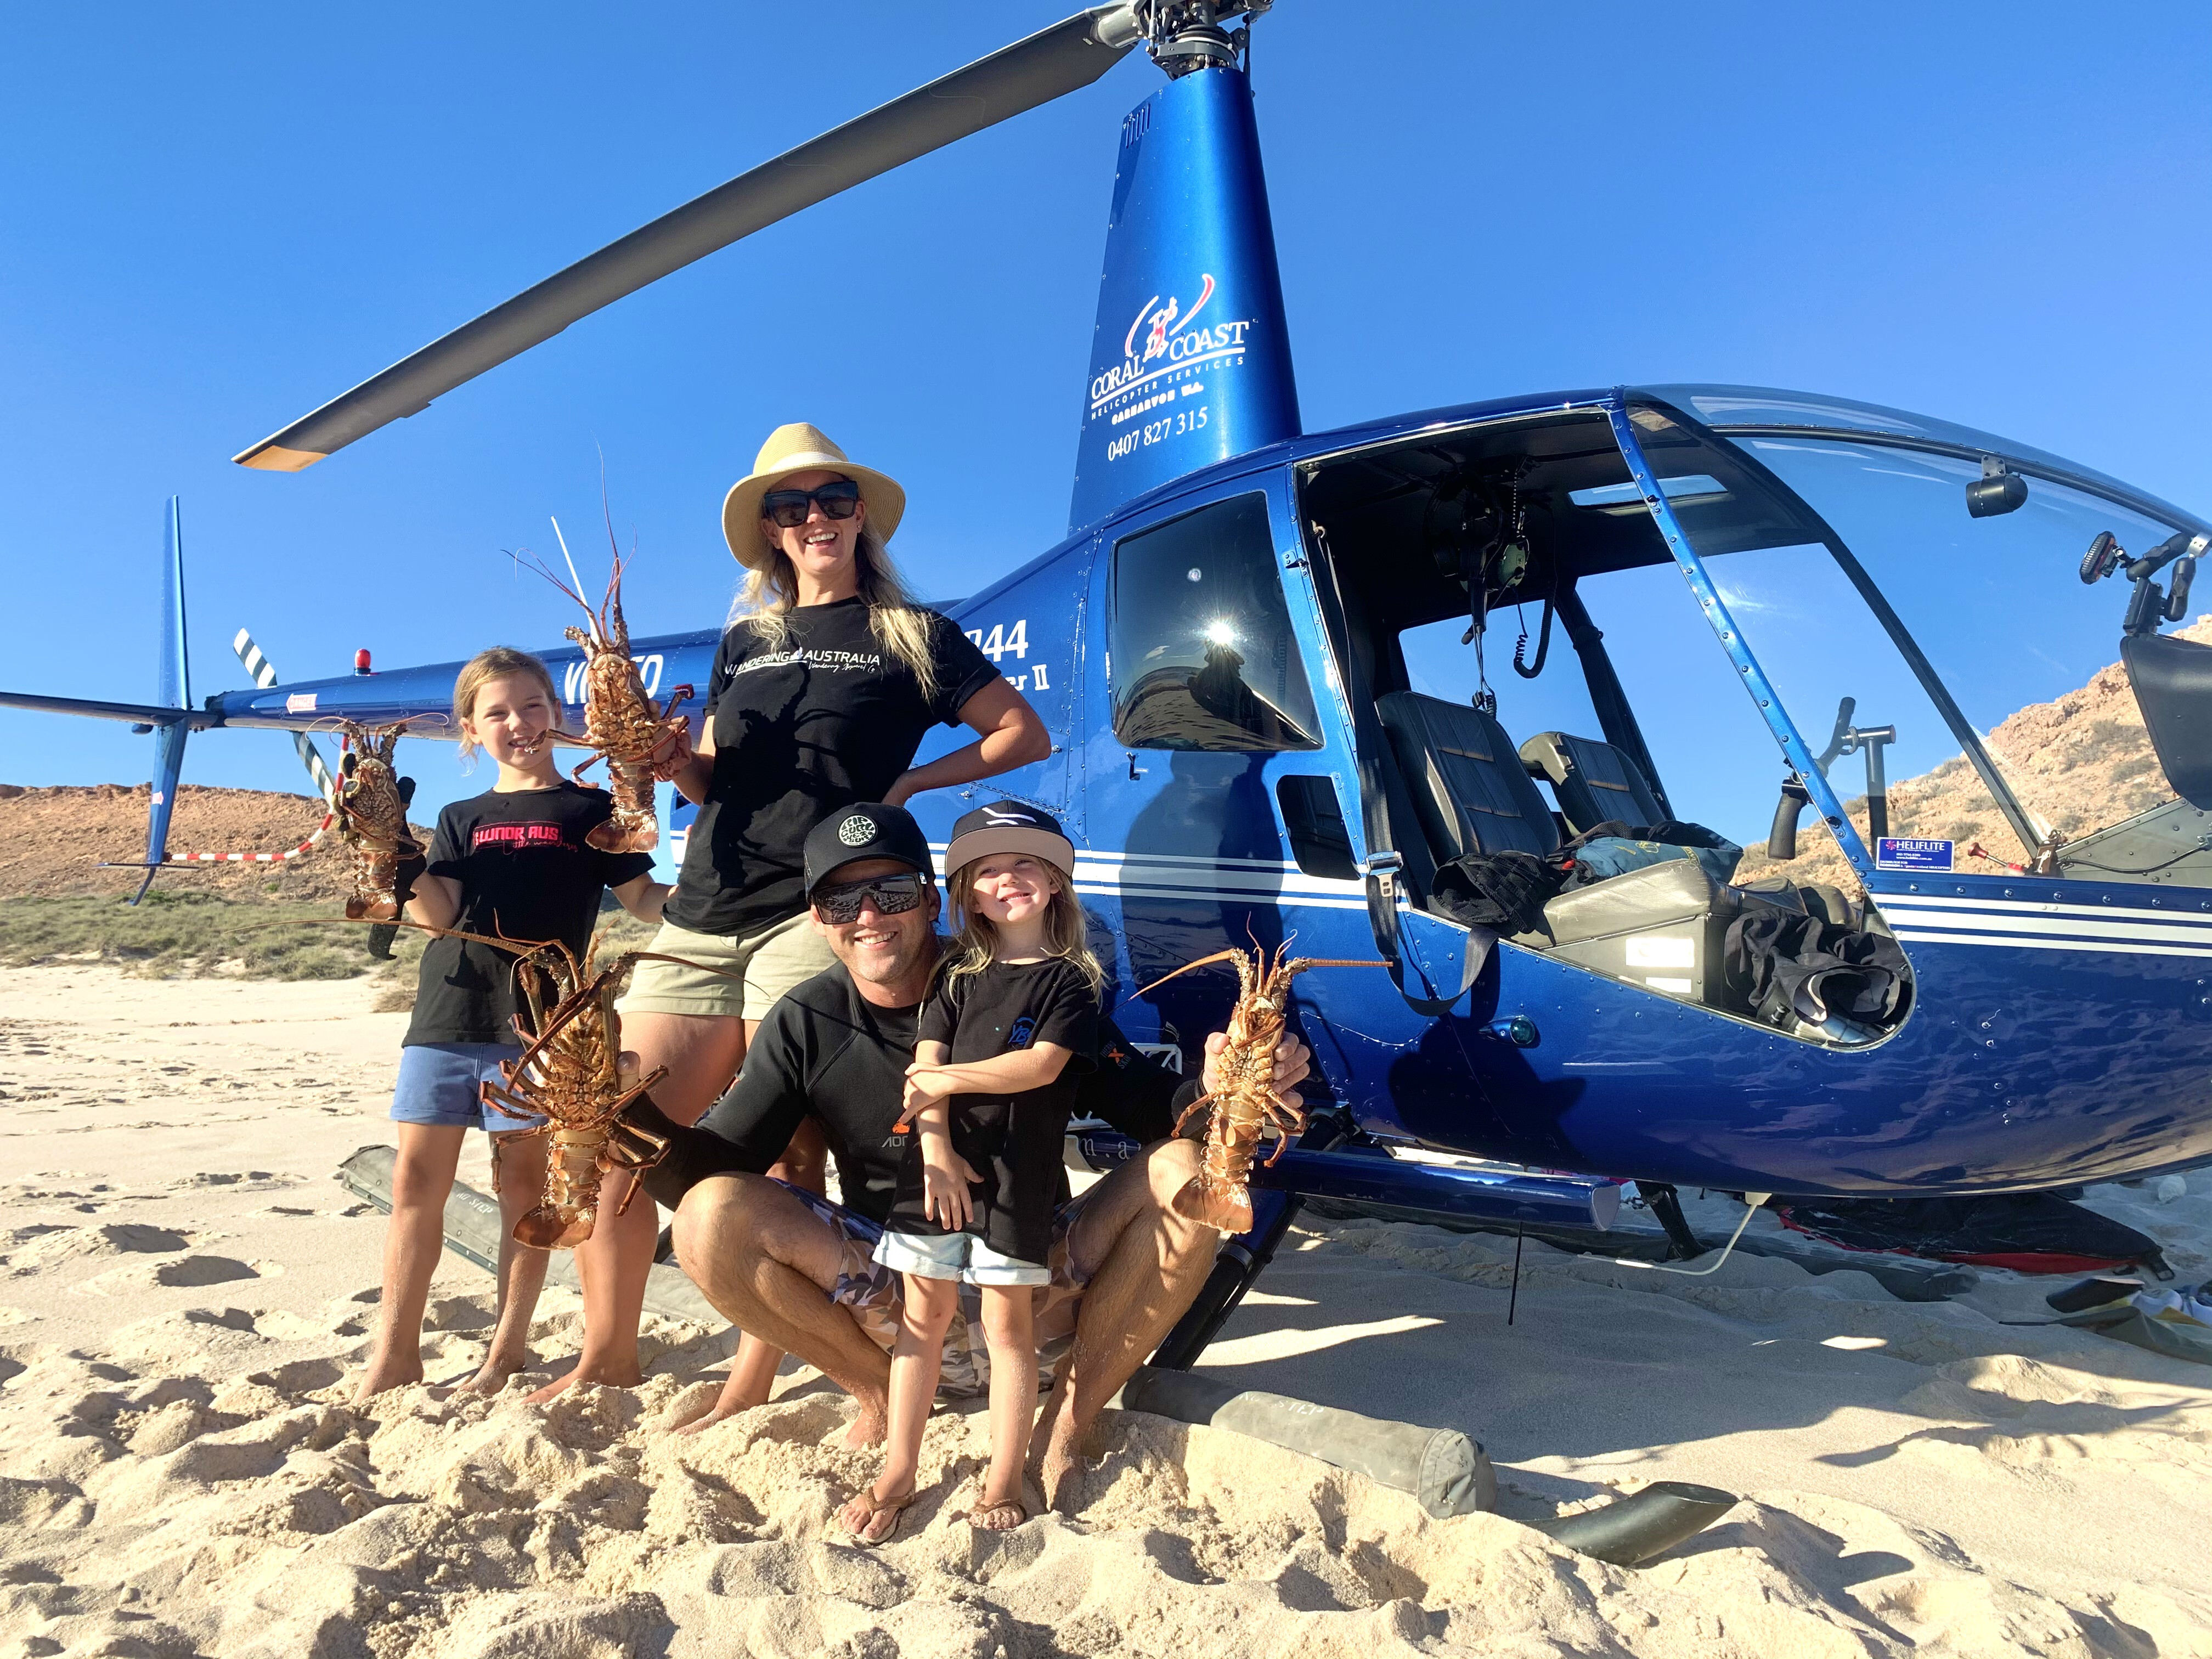
1
Carnarvon is famous for its fruit and fresh produce, and we enjoyed doing the ‘fruit loop’ and buying fresh fruit and veg straight from the farms. The Ningaloo Coast, while protected for the most part, is famous for prawns; although, we have to say we don’t think they are as good as Mooloolaba prawns in Queensland.
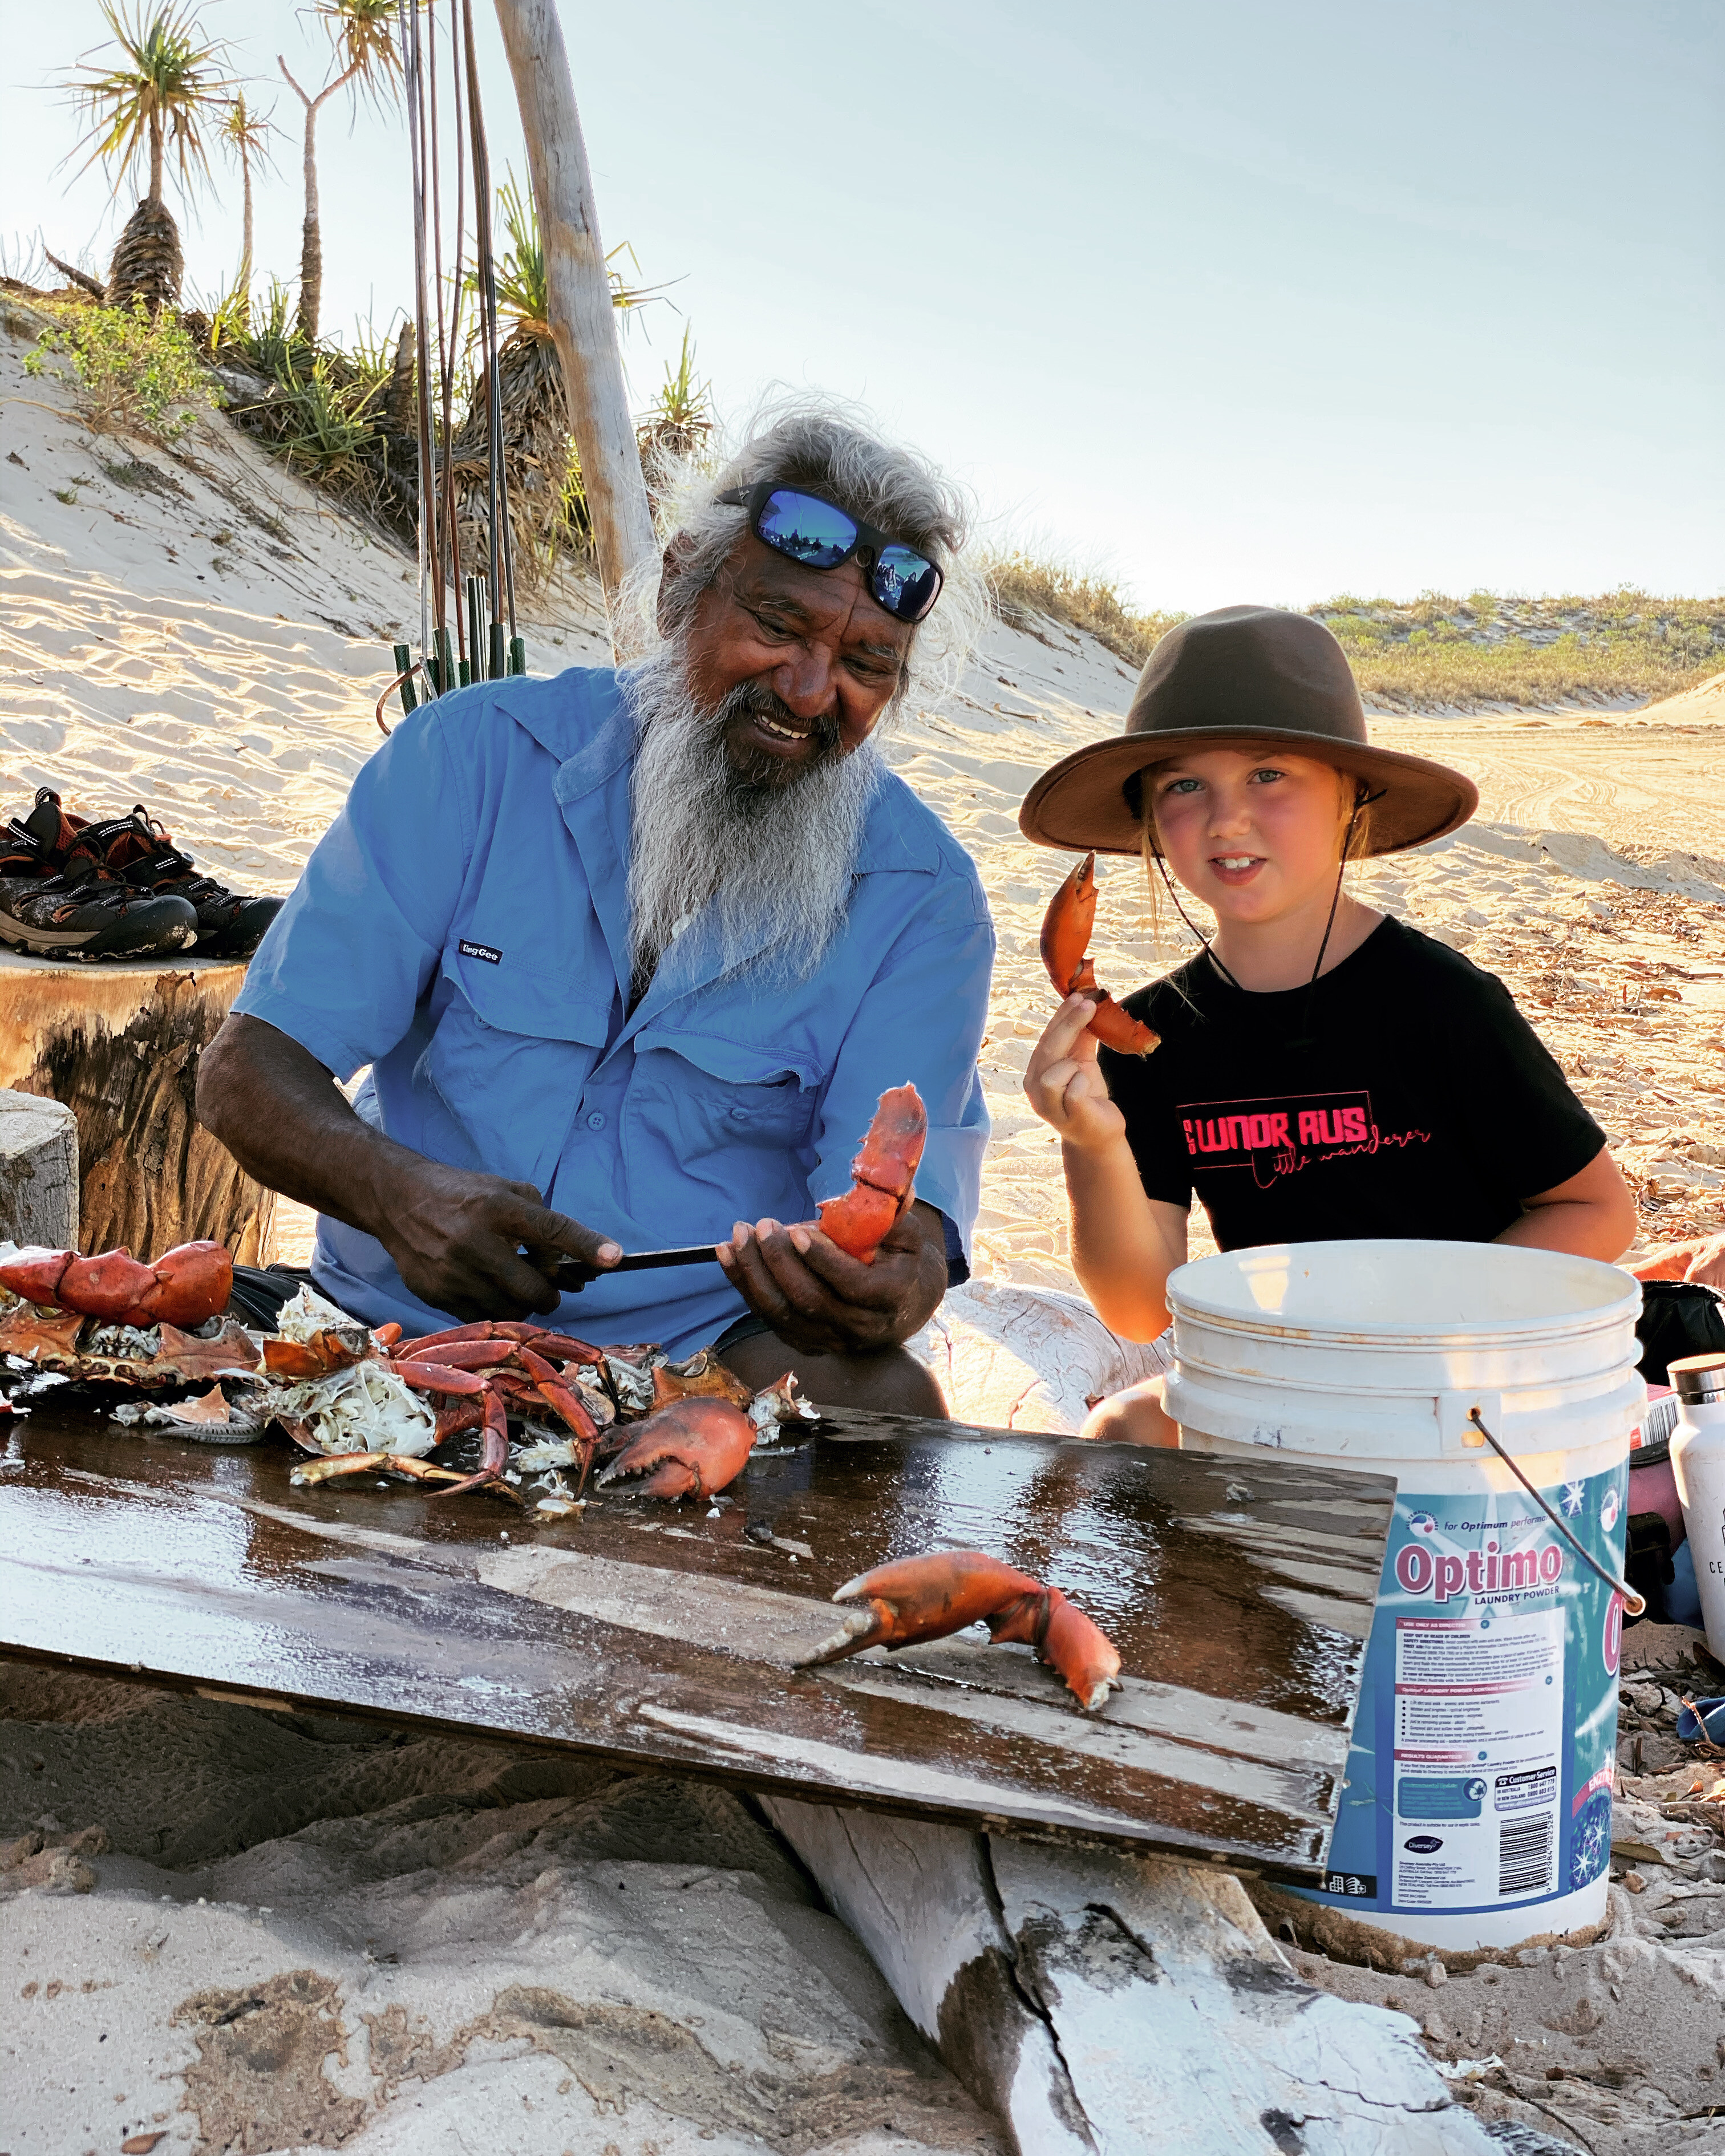
It was around Exmouth that Brendan made the most of spearing and restocked the freezer again. Farther north, around Broome, Brendan had a great time fishing offshore, bringing home a haul of red emperor, blue bone and cod. We also got the opportunity to try some crocodile up north and, while it is a bit like chicken, it has its own unique flavour where it absorbs whatever you put with it.
While at Cape Leveque, we went on a Brian Lee Tagalong Tour, which provides a very informative insight in to how the local Kimberley people live and have done so for thousands of years. Brian shows his guests the abundance of fresh produce to be found in the Kimberley if you just go looking, and he taught us that if we care for our land it will provide.
As for cooking on the road, we initially missed the oven and baking at home but soon learned to live without it – travel life for us is about eating fresh food cooked simply. With limited fridge and pantry space we couldn’t stockpile too much – and in certain climates, particularly up north, fresh food doesn’t stay fresh for very long in the heat – so we had to shop for fresh produce every few days.
“Travel opened our eyes to the wonderful produce this amazing country can provide”
In saying that, there were a few times we had to be organised and do a big grocery shop and plan for meals that didn’t require fresh food. For example, we spent a month in the Kimberley and our fruit and veg ran out after about a week. After this, we relied on frozen veg and ready-to-go pantry items such as packet pasta, two-minute noodles and frozen meat. We never felt like we missed out, but the steak and salad at El Questro tasted bloody good.
So, all in all, when we get asked, “What did you eat?” We reply, “Much the same as we do at home.” With a few differences, though.
Travel life taught us to simplify things with cooking, learn to live without an oven, eat more fresh food particularly seafood, and appreciate the produce available from the area that you are visiting. Again, travel opened our eyes to the wonderful produce this amazing country can provide and we really are spoilt for choice!
Part 15: Meet-up at Rainbow Beach
Earlier this year, we hosted a ‘meet-up’ with all our mates from around Queensland and beyond. This was a joint venture with our good friends Greg and Ellie from @Makntrx_4x4 and we thank them for their help and support.
We all congregated at Double Island Point lagoon at Rainbow Beach and had the best time meeting, greeting and doing what we love – 4WDing and camping. The weather was mostly kind to us with a passing shower every now and then, but that didn’t stop us having the best time in the sand, saltwater and in our rigs.
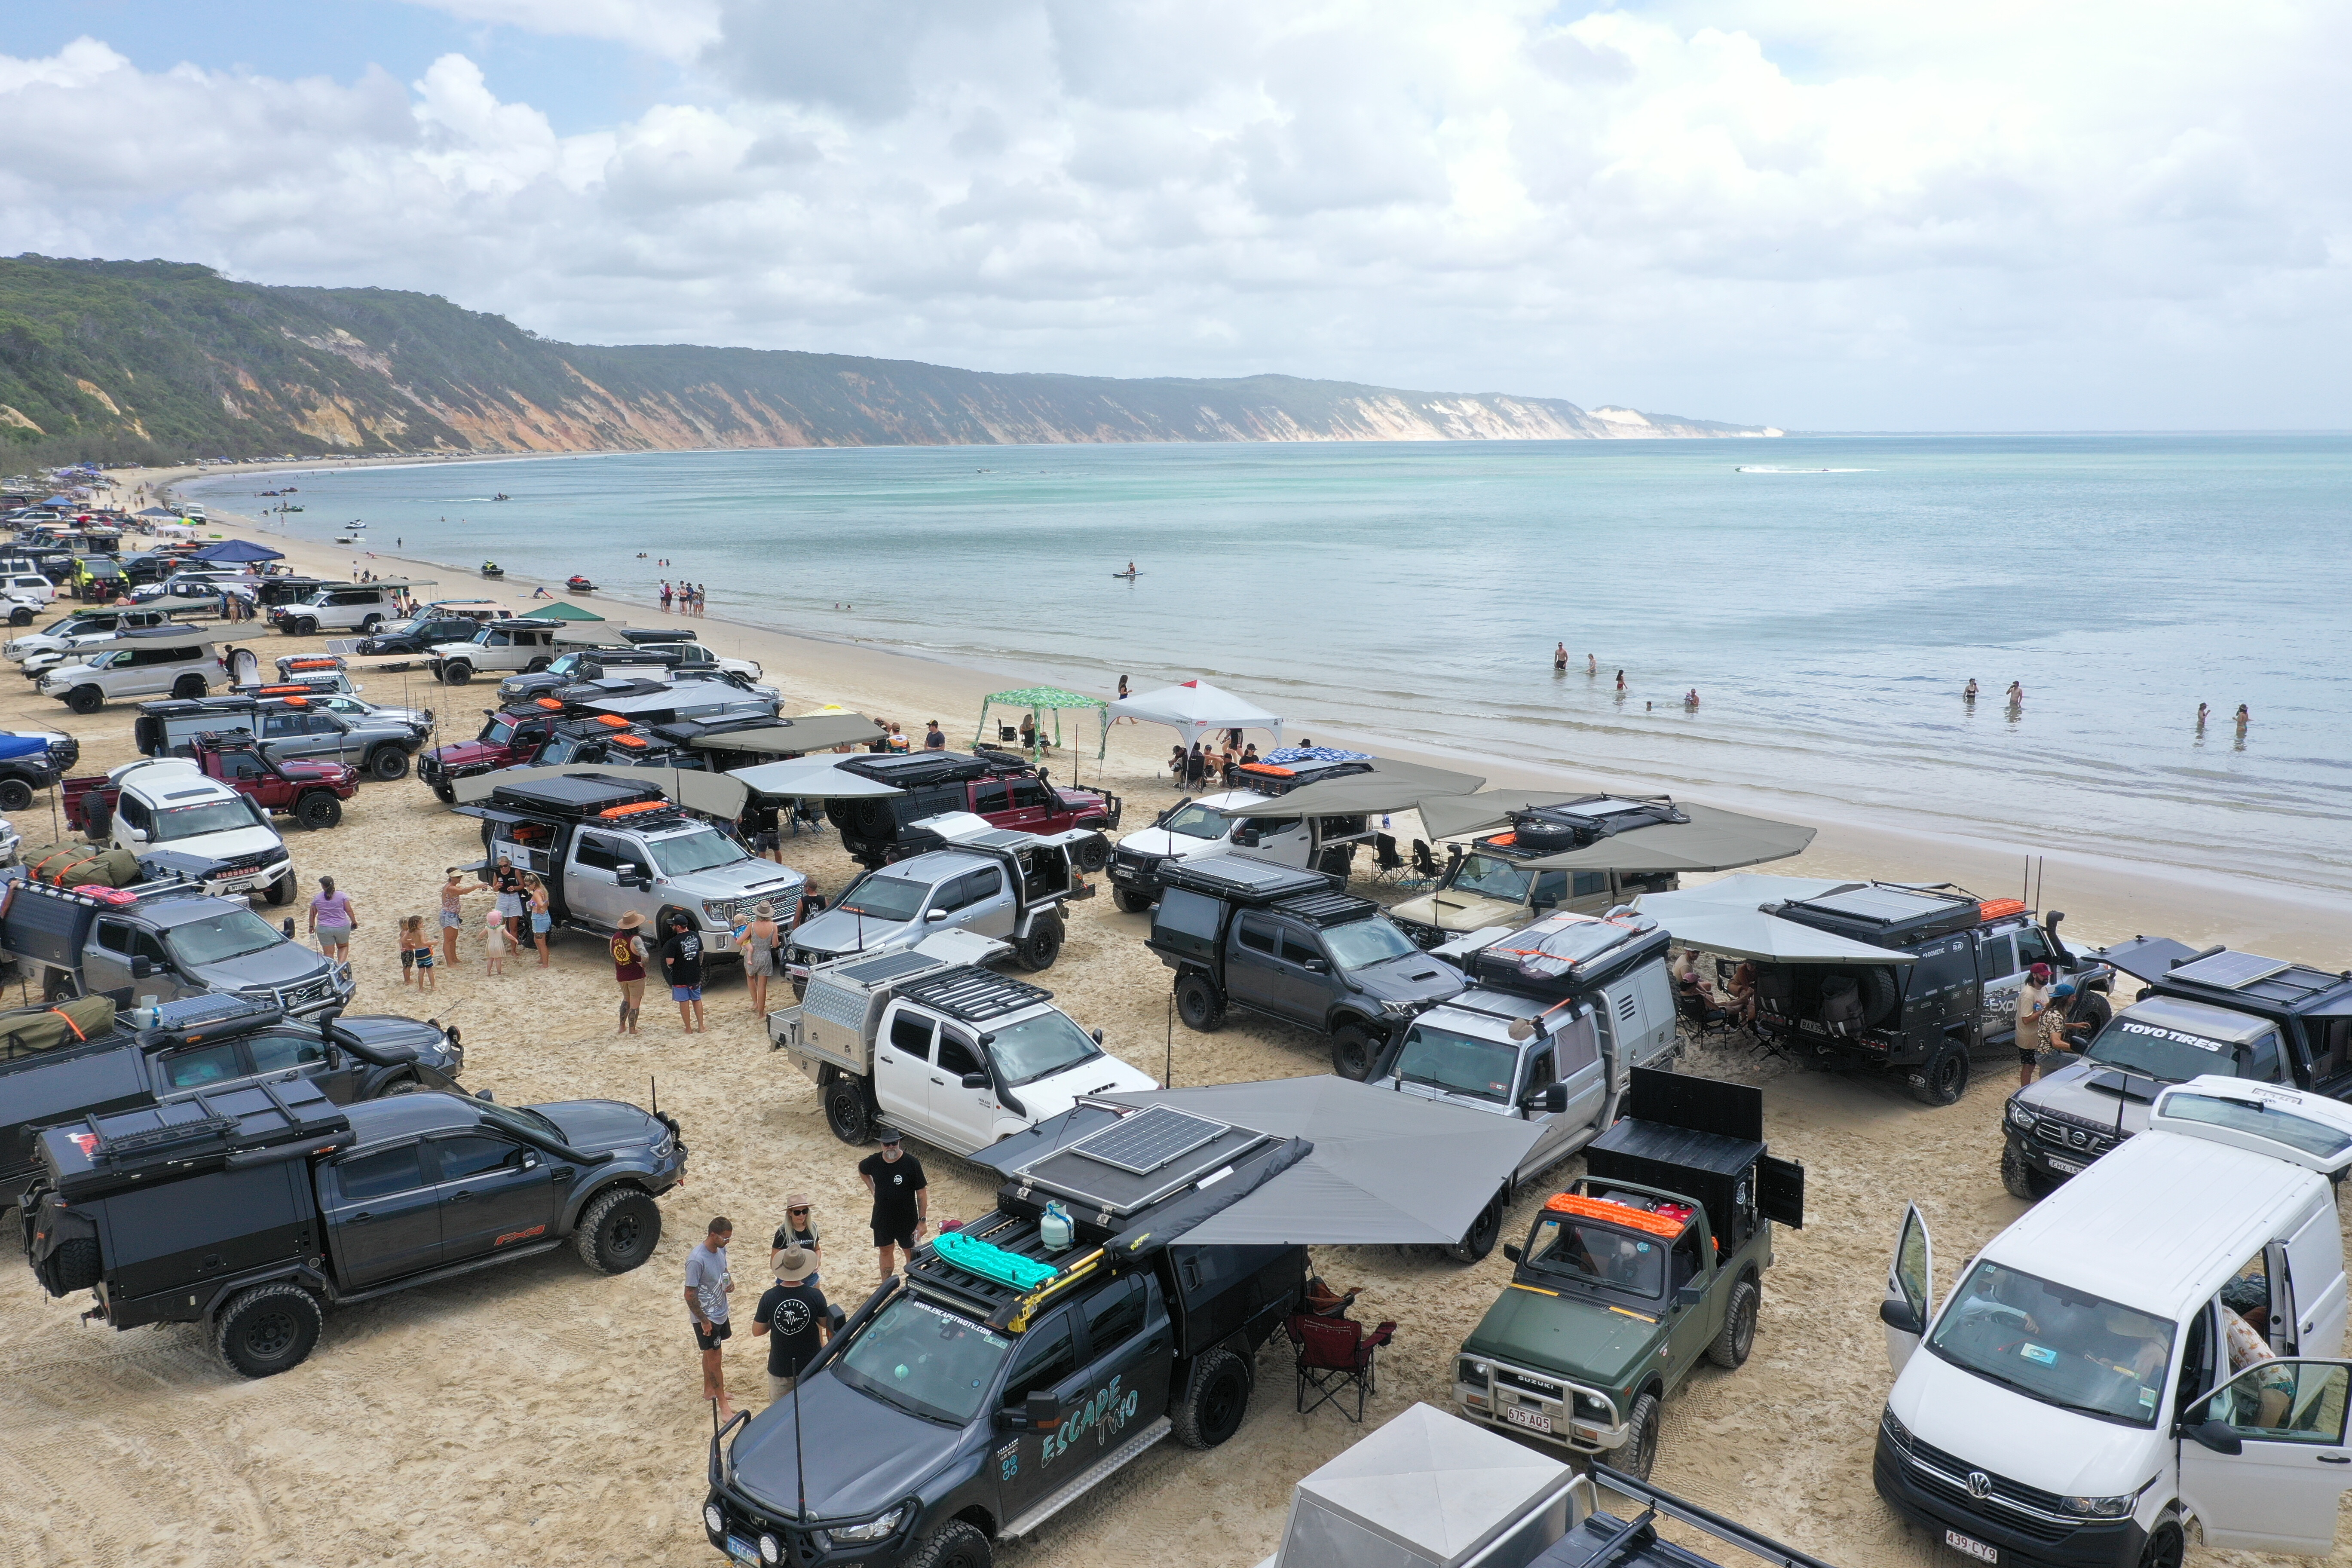
2
The weekend started off at Rainbow Beach, hitting the Freshwater track in a mega convoy of awesome rigs. We hit Teewah Beach to set up camp among the dunes, where you never get sick of waking up to the waves crashing on a beautiful beach. We had a great couple of nights with drinking, dancing and plenty of laughs. On Saturday, we parked the fleet along DI lagoon beach and spent the day chatting all things 4WD and travel.
The power of social media and how far it reaches blows our minds. We were overwhelmed by the love and support we have received through our social media pages and this was reflected with the number of people who made the effort to join us over the weekend. We wanted to organise a meet-up with likeminded people who love the outdoors, travel and 4WDing as much as we do and, well, we certainly achieved that.

1
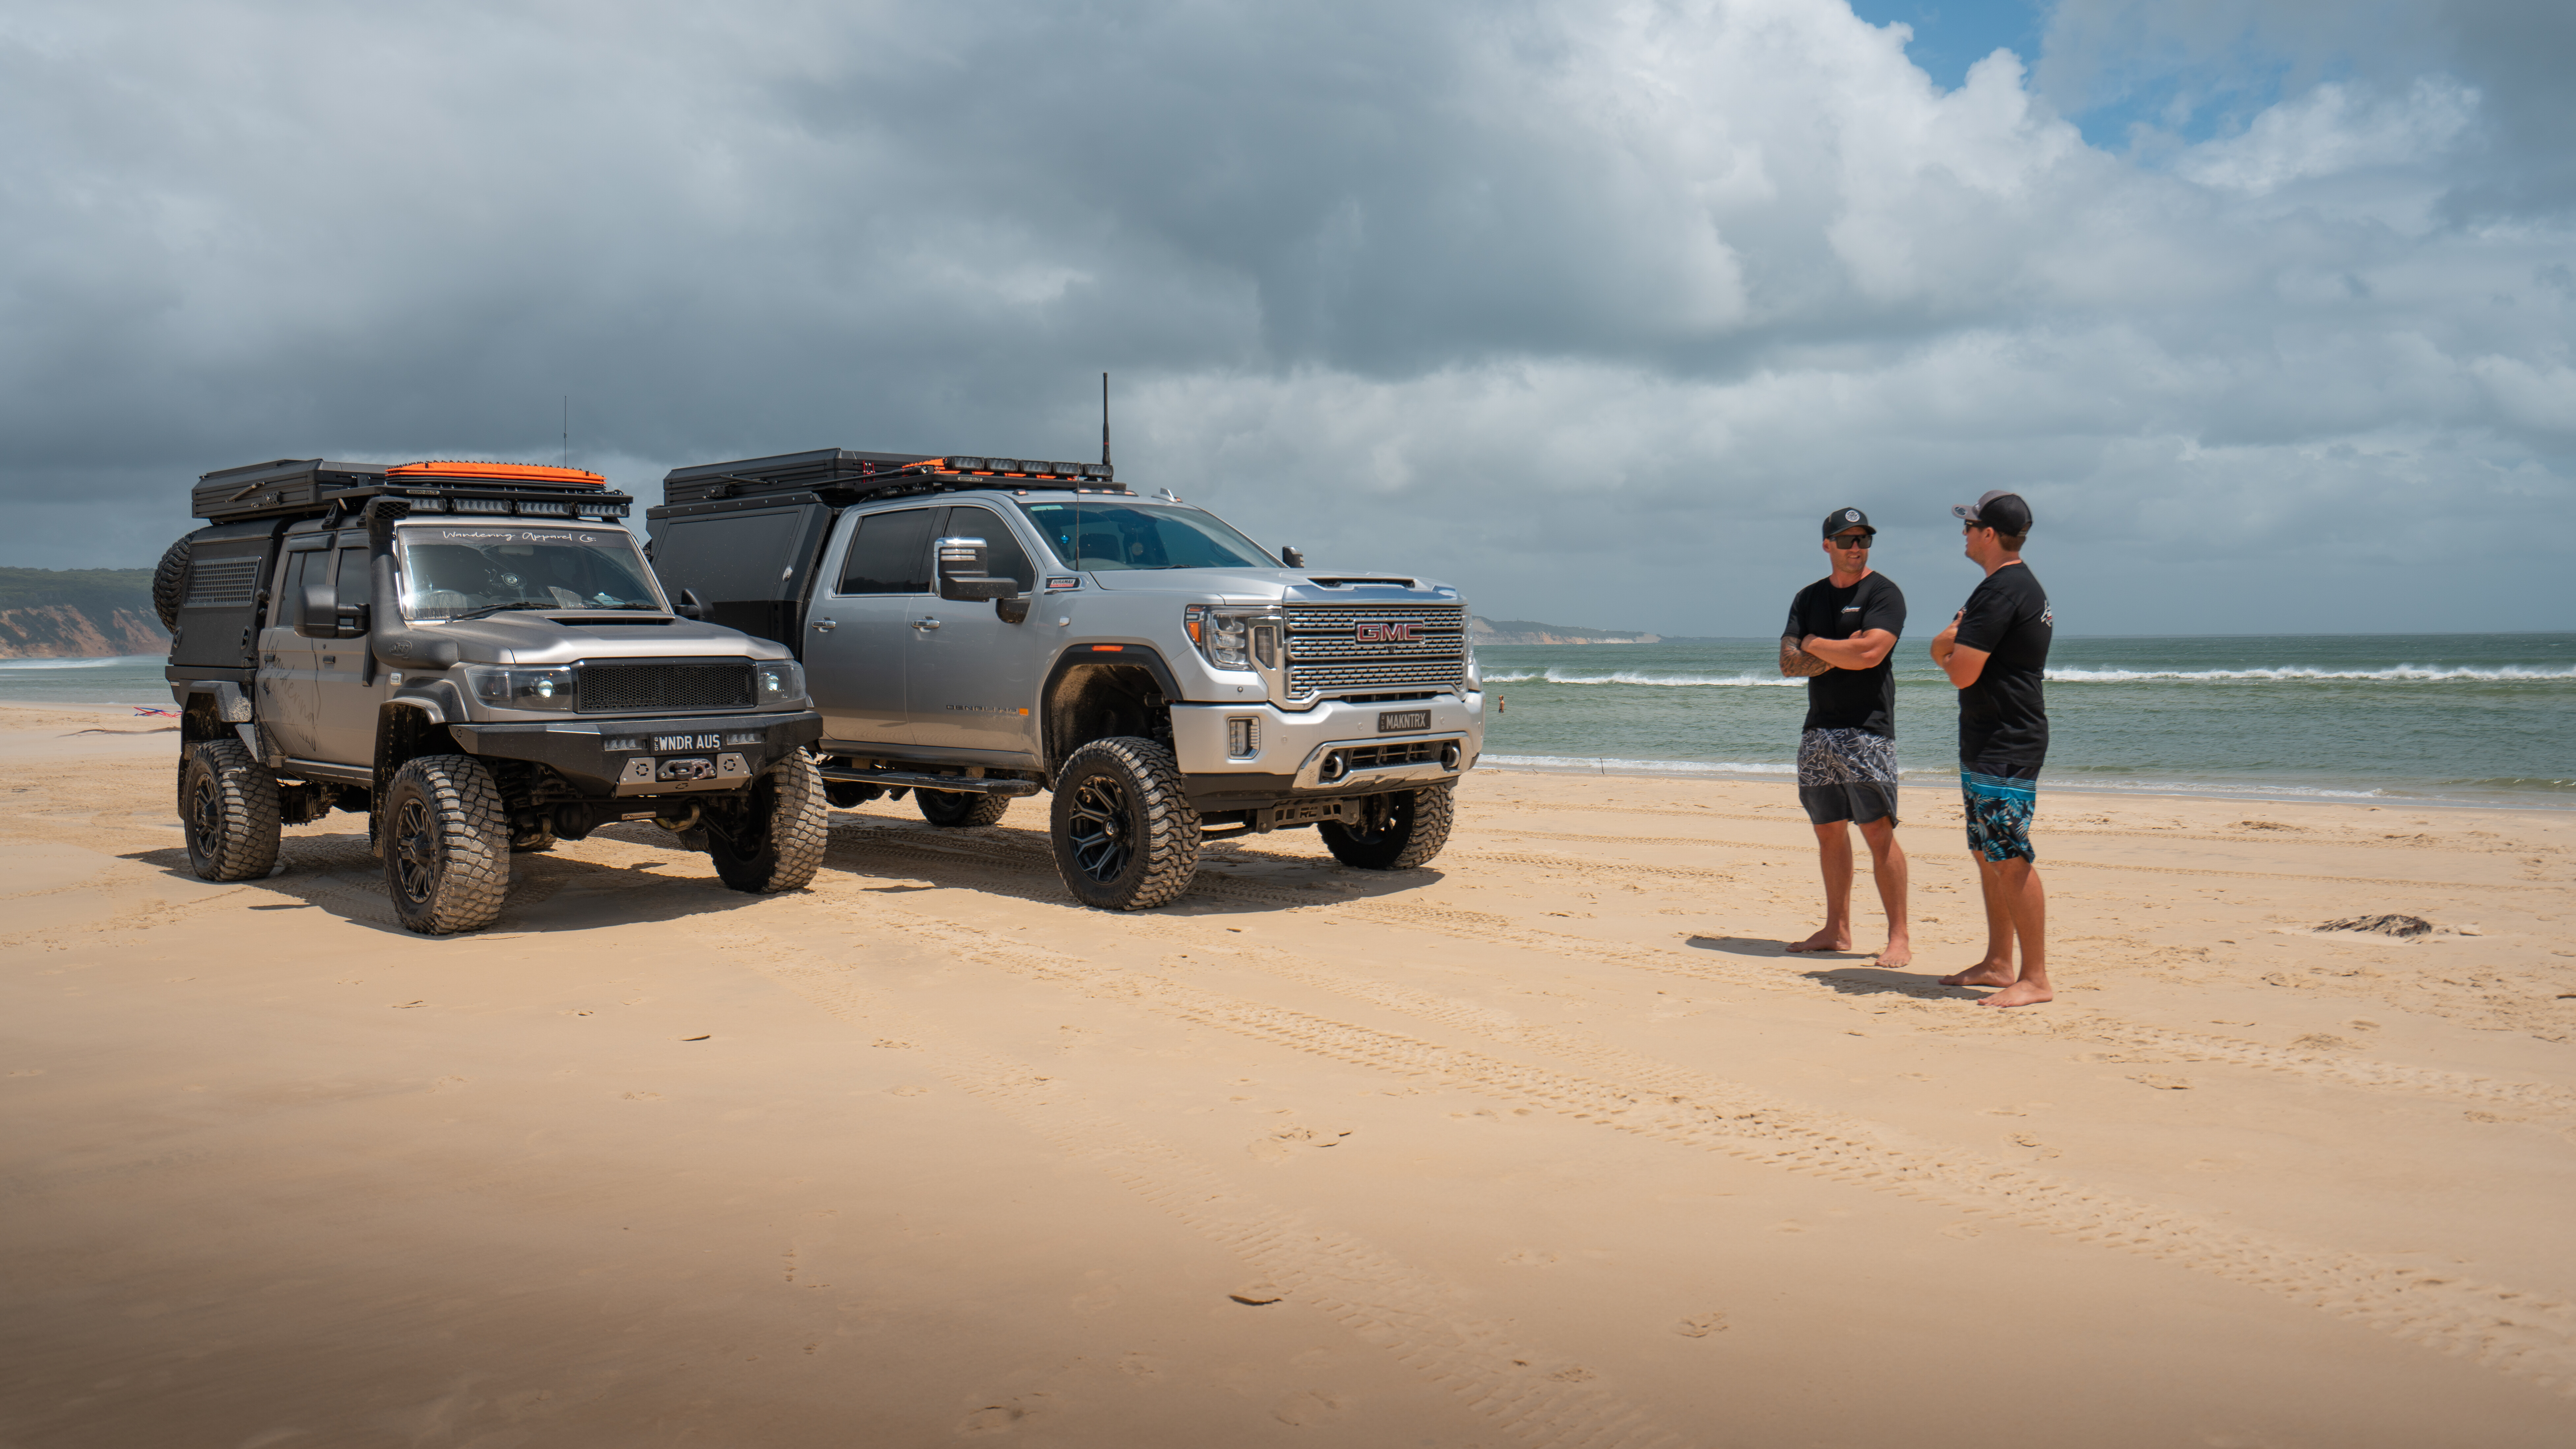
Over the afternoon we met weekend travellers, 4WD enthusiasts looking to set up their rigs, and other families keen to hit the road for a lap of the map. It was also a great opportunity to catch up with all the amazing people we met on the road through the 4WD community. We love spending time with the travel family that has formed through social media, and we’ve made lifelong friends along the way.
We also had a great time over the weekend showing off our new vehicle builds, with months of planning and preparation put in to our rig – as well as Greg’s new GMC Denali. We will reveal more on the rig in later issues, but let’s just say we are thrilled with the next-generation WNDR AUS machine! We were privileged to display and use some great products, and we feel our followers could see the products in action to consider using them for their next adventure.
1
It continues to amaze us how travel, camping and social media can bring so many great people together. Our weekend meet-up reiterated for us that it doesn’t matter who you are, how much money you have, or what you drive or camp in, it’s just about coming together to enjoy the great outdoors and having a good time.
Given the success of this meet-up, we are keen to organise more catch-ups in the future. If you are keen to get amongst it, we would love to see you at our next event. Keep an eye out for our future plans in the coming months. We have really enjoyed our travelling and social media journey so far and are looking forward to many more adventures and meet-ups. See you at the next one!
Part 16: Magical K’gari
One of our favourite places on this planet is its largest sand island, K’gari, or Fraser Island. Just a stone’s throw away in our home state, this island has an endless number of things to do and places to explore.
We have visited so many times and still haven’t seen it all. The landscape is ever-changing with seasons, fires, tides and the human impact, and we’ve been lucky enough to visit at these different stages. We usually do an annual trip to Fraser with a few other families and I feel every year we have a different holiday but always the best time.
While there are a couple of options for getting on to Fraser, we have only ever been via Inskip Point off Rainbow Beach. This is sometimes entertainment in itself; watching people psych themselves up for the run to the barge in soft sand and sometimes they come off second best.
1
Given Fraser is completely sand, it is important to air down before hitting the barge and there’s plenty of space to do this, along with toilets and camping facilities at Inskip.
We have so many favourites on this stunning island but we would have to say ‘West is Best’ – the west side of Fraser is just magical. We have lazed away many days over at Awinya Creek and other beautiful beaches along the Great Sandy Strait. The sand is so white and water so blue and clear you will often spot rays, dolphins and whales enjoying the west side also!
Camping is an option over on the west and it is simply the best; camping right on the beach, drifting off to sleep to the sound of the waves. It is unfenced camping and quite isolated with no phone reception so best to camp in a group and be prepared.
“K’gari is all about basing yourself somewhere and heading off each day to different spots around the island”
Back over on the east side are an endless number of spots to spend the day. Heading right up the top to Sandy Cape is a bit of a journey but totally worth it if you have the time. Be sure to time your trip with the tides, pack a lunch and do the short but steep hike up to the lighthouse to appreciate the vastness of the Pacific Ocean. On the way to the Cape, you’ll encounter Ngkala Rocks. The southern end is tight and rocky leading on to soft sand dunes with no run-up and can be challenging at times depending on the conditions.
K’gari is all about basing yourself somewhere and heading off each day to different spots around the island. Eli Creek is a popular place all year around, but particularly in summer where you can cool off floating down on the creek’s refreshing spring water. Be sure to get in early for a creek-side parking spot and have your floaties ready!
Another great day area on the island is Champagne Pools where the kids love the natural spa feel when the waves crash against the rocks and fill the pools with fresh bubbles. Again, it can be hard to find a parking spot in peak season, and there’s minimal shade and space, so it’s good to go earlier in the morning or later in the afternoon – tide dependent, of course.
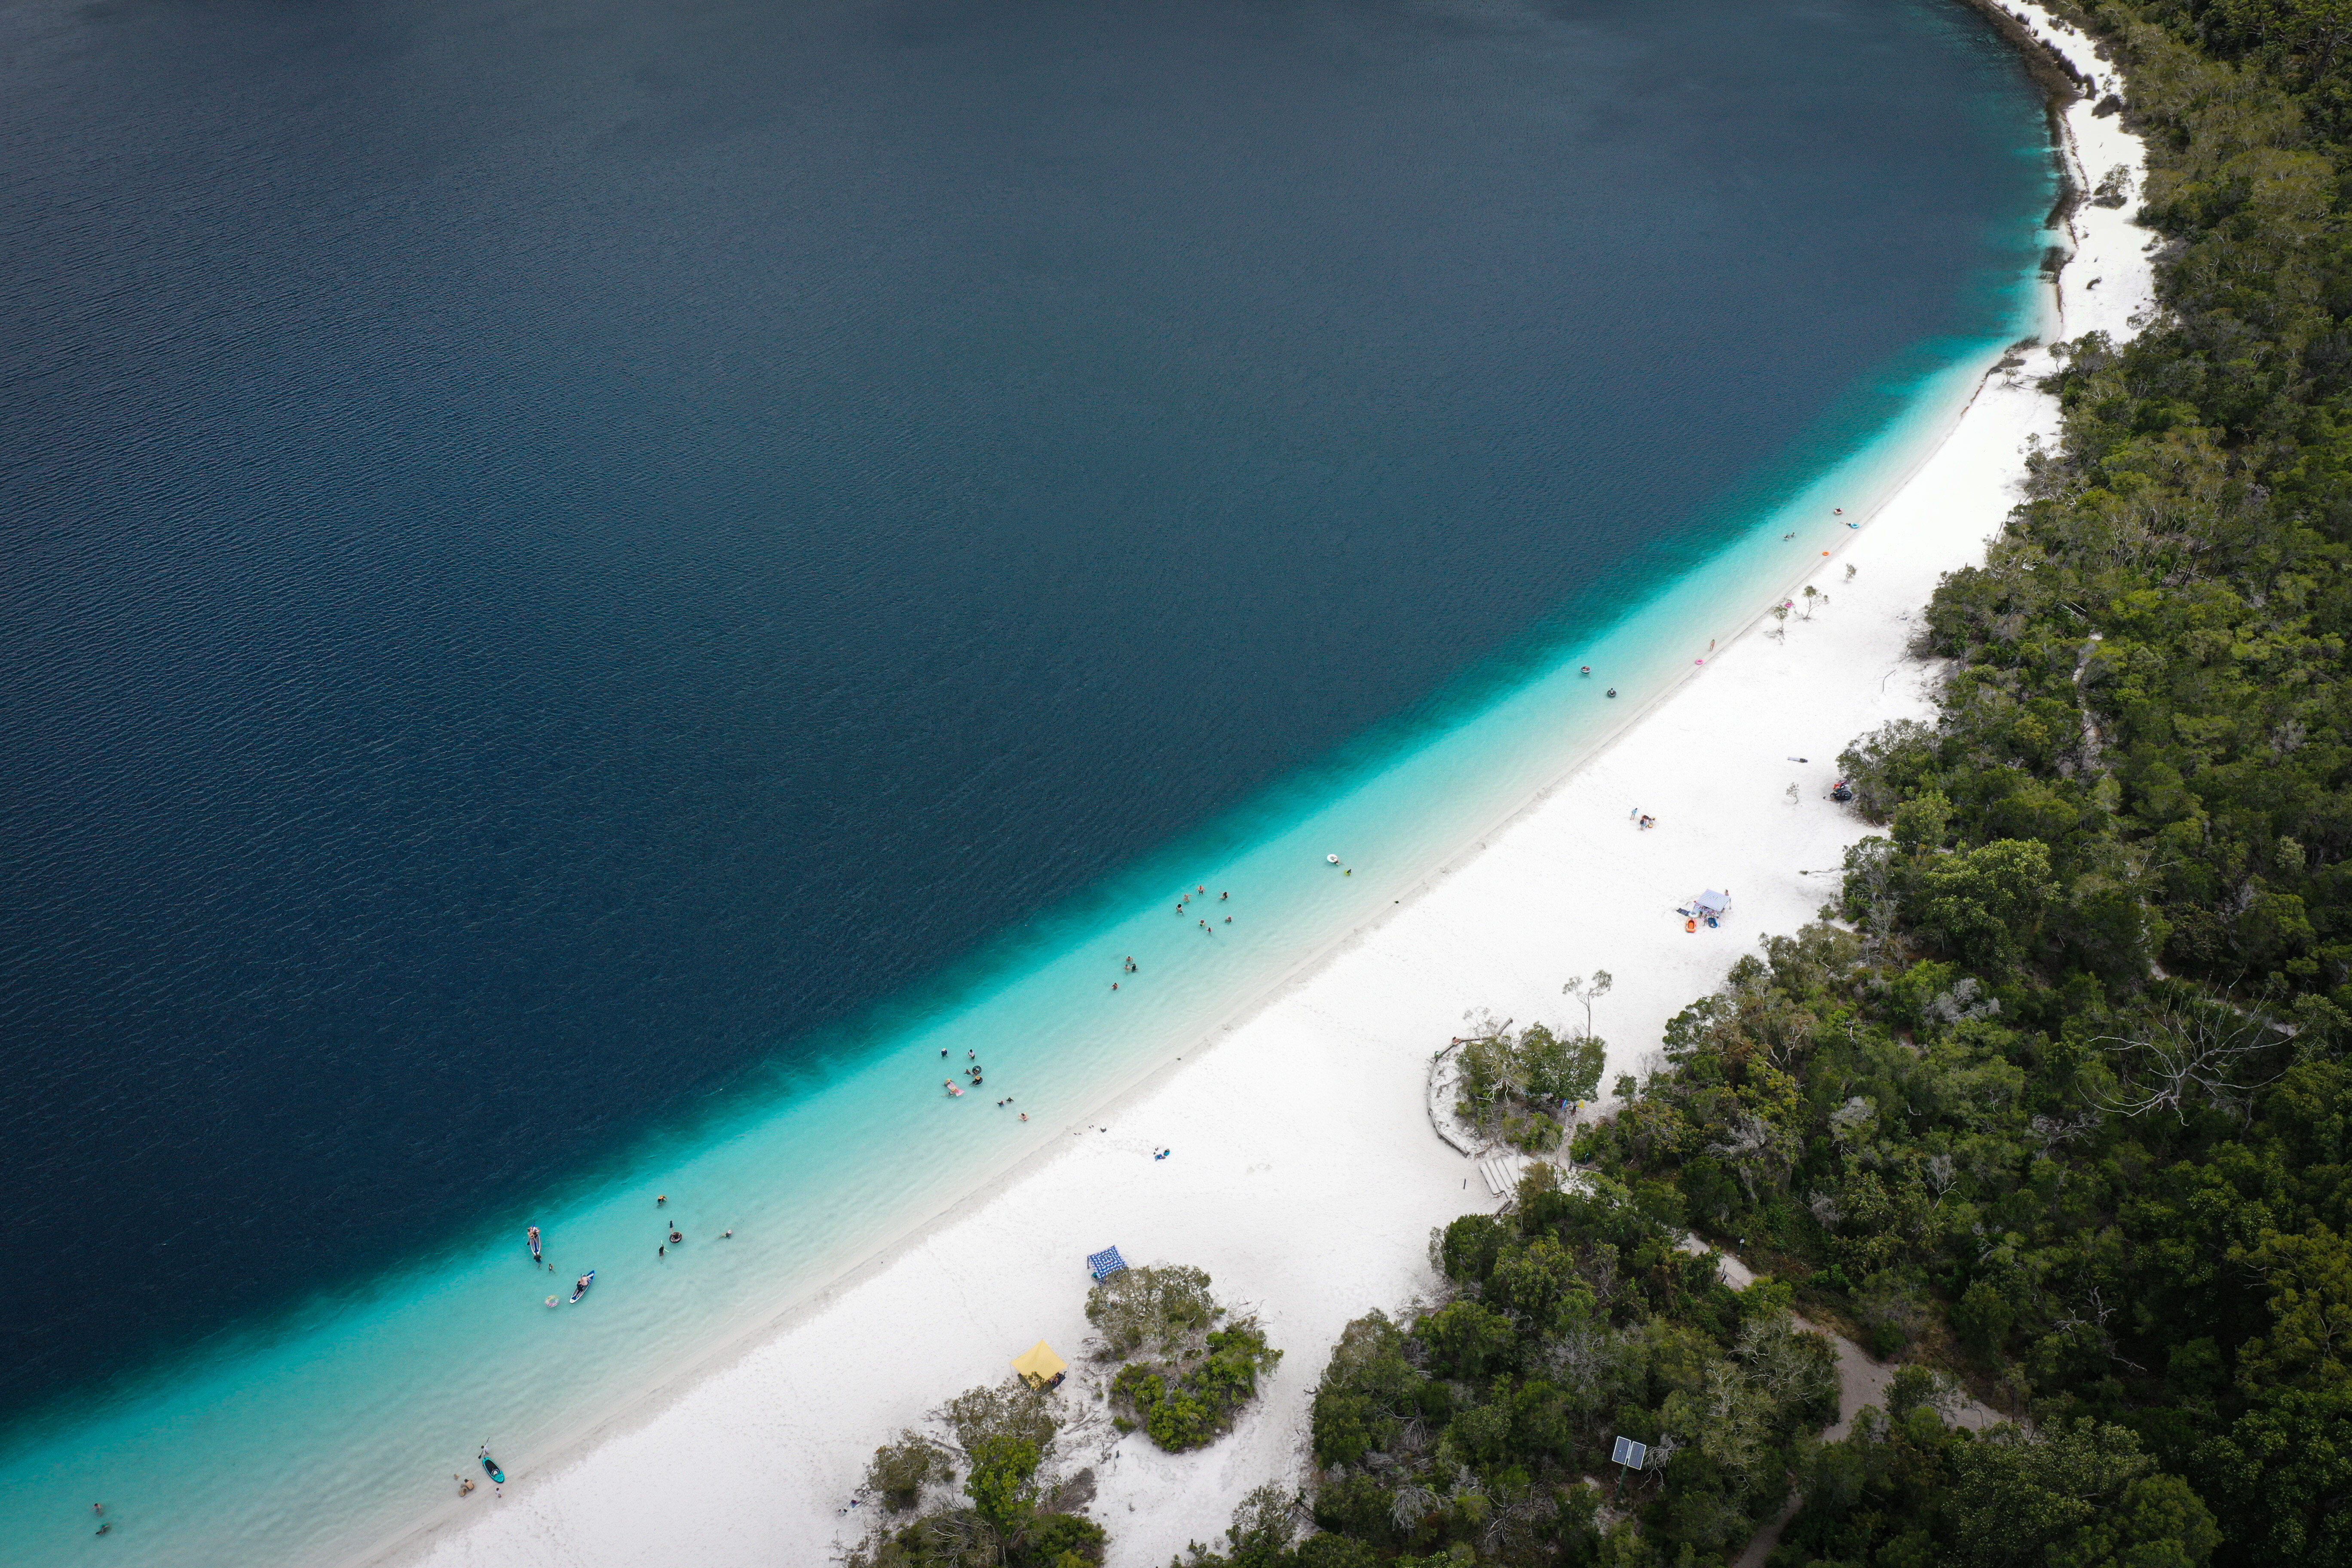
You can’t visit Fraser without spending the day at Lake Mckenzie. It is a bit of a drive inland, around an hour of 4WDing and you guessed it, the track can get busy in peak season. Lake McKenzie offers white sand, and the bluest of blue water where you can soak in the shallows, stand-up paddle board, and the kids can splash about for hours. Complete with toilets and fenced eating areas, Lake McKenzie is another favourite day trip for our family.
1
In terms of camping and accommodation, there are a few different options across Fraser. You can true blue camp almost on the beach and this is usually what we prefer. We have never had any trouble with the locals AKA the dingoes as long as you keep your food scraps packed away up high, watch the kids and don’t walk anywhere alone. There are also fenced camping areas around the island providing protection from dingoes, and toilets and showers.
Another good option for the camping experience without the set up and pack up is the pre-existing tents at Cathedrals campground complete with one or two bedrooms, front deck and furniture.
You can also hire linen and there is fuel, a bar and café in the campground. If you’re not the camping type, there are also a couple of resorts on the island and if you’re not sure about 4WDing there are plenty of tour operators and 4WD hire services based at Rainbow Beach.
K’gari will always hold a special place in our hearts and we love visiting every year, back to our old favourites but also discovering new spots. The memories we have made will last a lifetime and we just love watching our kids experience such a beautiful part of our country!
Part 17: Dollars and sense
Money. It’s the topic most people want to know about but don’t want to ask. However, it is one of the most fundamental aspects of travel life, and obviously travel is not possible without some amount of money.
We always maintain that no matter your budget, you can have the most amazing time. It is not about what you own or don’t own, it’s about getting out there and spending quality time exploring this incredible country.
On our first big trip in 2020, we were much more budget-conscious and established a dedicated bank account for travel. This way we could deposit a certain amount of money in the account and budget for that amount to last a certain period of time, as a way of controlling our spending. Using a single account was also a good way of keeping track of where our money was going.
However, in 2021, we got a bit lazy with budgeting and the budget blew out a fair bit with increased travel distances, more remote locations and doing a few more big-ticket tourist activities. For both 2020 and 2021, we just saved hard in the preceding years and Nikita took some paid leave from work.

1
People often say to us, “How can you afford all this?” and we proudly tell them we paid every cent for what we own, and we worked and saved hard for our travels. We also lived on the road, so our van and car were our home and our biggest assets, as is the case for many travelling families we have met along the way.
We have found fellow travellers all do it differently when it comes to their homes and vans. Some, like us, make their van their home and put furniture in storage; some people lock up their homes; while some rent out their homes or use house-sitters – no one way is the best way, as everyone’s circumstances are different in that regard.
One of the biggest killers of our savings is fuel. Especially driving a V8, we spent a majority of the budget on diesel. As well as this, the more remote you go, the more expensive it gets, with $3.30 a litre the most we have paid for fuel. However, in the current climate, this is almost a regular price at most bowsers! You can be thrifty and save money at the bowser with fuel apps on your phone, planning ahead for areas where fuel is more expensive and carrying fuel with you (weight permitting) if needed.
1
The second biggest cost on our trip is food! Nikita admitted to always over-shopping when it comes to groceries, and travelling did teach us how to curb this, as we simply did not have as much fridge and pantry space. As time went on, we got better at only buying what we needed and learning which meals and foods were better to cook when living out of a caravan. When travelling along the coast, catching our dinner and eating fresh produce also helped both the bank balance and our waistlines.
We also made a point of trying not to eat out or get takeaway more than once a week. Initially, it is tempting to live like you are on holidays and eat out at pubs and restaurants all the time, but this gets very draining financially; plus we often weren’t near a grocery store let alone a restaurant. Again, if you put a bit of time and effort in to budgeting and planning, you can spend less on food on your travels. It’s all about reaping nature’s rewards (legally, of course) and being a savvy and organised grocery shopper.
Another place our money goes is doing touristy things and activities and, as many of us know, the more children you have and the older they are, the more expensive it is. We may suffer from FOMO but we didn’t want to miss the big-ticket items such as diving with the whale sharks, Horizontal Falls and sailing the Whitsundays – and while none of these things or any of the tourist experiences are cheap, they are worth it.
1
I guess it’s all about prioritising which things are bucket-list items and which things you can leave for another day, and then getting the most out of those things you do pick. However, some of the best times we had on our travels were watching western sunsets at free beach camps with mates, and this is absolutely free and priceless.
Camping and caravan park fees are another consideration with budgeting, and many government bodies in each state have started charging fees for previously free campgrounds. Obviously, free camps are the cheapest and best option, and we reiterate that if you are using a free camp please respect the property and look after it – leave only footprints and take only memories.
Again, it’s all about planning ahead to book in low-cost camping, occasionally splurging on amenities and a swimming pool, and realising that you won’t stay in a five-star campground all the time. There will be nights on the side of the road and, as mentioned, some of the best camps we’ve been to are free or cheap.
Unfortunately, travellers also have to keep in mind that some weekly or monthly payments don’t stop, just because you are travelling. Things such as insurance premiums, rates for homeowners, healthcare costs, phone bills and registrations need to be budgeted.
1
Another thing, which we have talked about in a previous article, are vehicle repairs and potential breakdown costs for both your vehicle and your van. Accidents and breakdowns happen and are not always covered by insurance, so it’s good to have a kitty stashed away for emergencies.
You don’t need to be absolutely loaded to travel Australia, but it is good to consider money and finances and have a bit of plan. We always say, “Just like having children, there is no right time to travel. Just do it!”
It doesn’t matter how much you have in the bank or how you get around, it’s all about getting out there and living the dream. We need to make the most of this safe, free and naturally spectacular country we call home while we can. So, get out there and start spending – spend the kid’s inheritance, spend that rainy day fund and, most of all, spend precious time with your loved ones.
Part 18: Top tips for a family hike
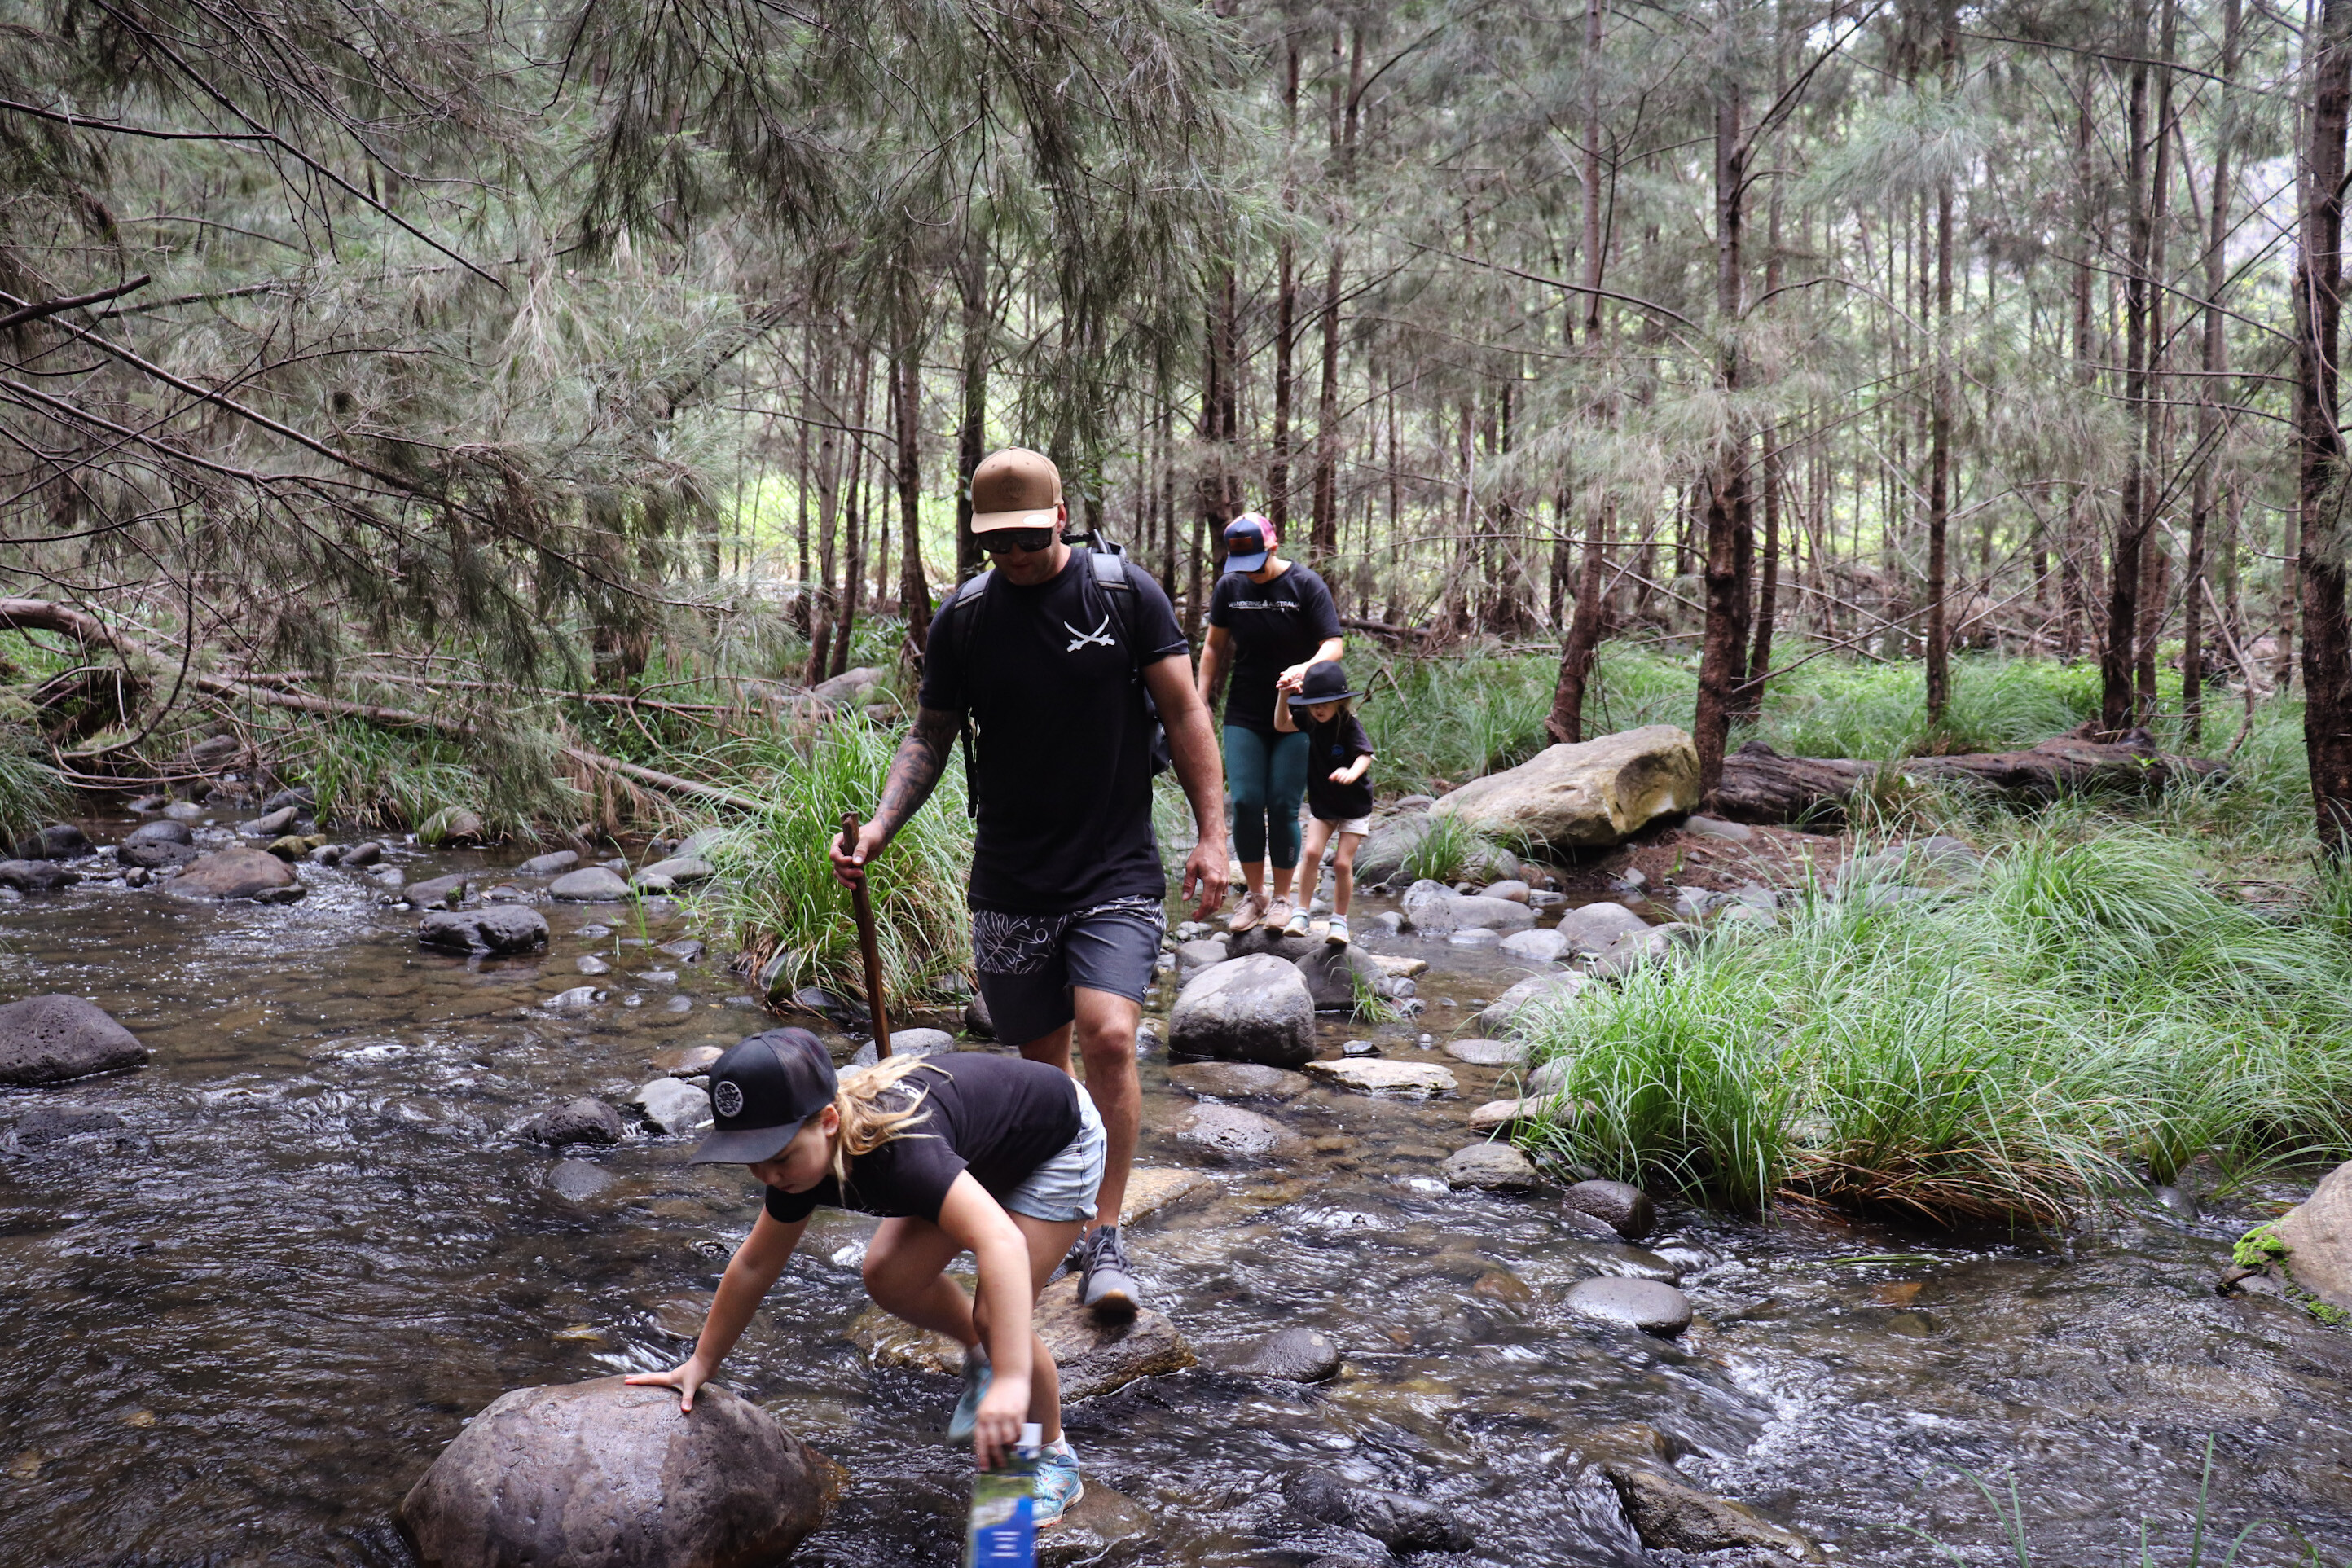
Our recent weekender to Carnarvon Gorge in Central Queensland prompted us to think about all the walks and hikes we have done as a family. Mind you, we still have many more out there waiting for us.
Brendan was often dragging us out of bed to hit the dirt nice and early, but we always thanked him later when we got to witness the best the Aussie bush has to offer. After doing a few hikes dotted across Australia, we decided to share with you some of our thoughts and tips for bushwalks.
GO EARLY
We found on our trips that if we got up right at sunrise or sometimes even before, we seized the best part of the day and were privileged to witness some of the most beautiful sunrises. By going early, we avoided the heat of the day and would be back at camp by lunch to do some schoolwork and have a rest.
1
When we climbed Mount Augustus in Western Australia, we were up at 5.30am to hit the track by 6am. We had to start early with this one as it is a 12km return to the top of the largest rock in the world, and it took us (four adults, a seven-year-old and a three-year-old) seven hours. In this case, we were so glad to be up early to appreciate the most amazing views over the Gascoyne Region, and it was well-worth the 1200km round driving trip and big hike up the rock.
We got in to a good pattern in the Kimberley, getting up early for gorge walks. Despite being there in August, it would still get pretty warm in the middle of the day and it was nice to do these walks in the cooler mornings.
BE PREPARED
In terms of what to take, we invested in a Pelagic waterproof pack. They’re not cheap but definitely worth it for hikes, especially through Karijini National Park. We could swim right through the gorges without getting any of our stuff wet, and this is super important when taking cameras and media gear.

1
Another good investment, especially again with Karijini and the Kimberley, are reef shoes. They are so good for gripping on to rock ledges when climbing waterfalls, and also when you get your feet wet, which you do in most of the gorges in Karijini.
When going on walks, we always made sure to pack snacks, plenty of water, sunscreen, sometimes insect repellent, media gear (we used the GoPro most often), a towel and sometimes a snake-bite kit. Remember to always make sure you have your phone charged and, if there’s no phone reception, it’s a good idea to let the ranger/caretaker know where and when you are going in case of emergency.
GIVE THE KIDS GOALS
We did struggle at times with the kids getting tired or bored, or just getting on our nerves! When Bella was younger, we visited the Grampians and discovered if we put headphones on her, she was distracted by the music and found her rhythm and just kept walking. I guess the downside to this was she wasn’t taking in all her surroundings and sometimes couldn’t hear us, but we found it useful to keep her going.
Another thing we find useful with our children is giving them something to work on. Recently in Carnarvon Gorge, I got them to count the number of water crossings (as there are quite a few here) and told them if they got the right number at the end of the hike, they would receive a prize.

1
This again distracts them from thinking about how tired their little legs are. We quite often do this with different things on hikes, such as count how many animals you can see, or get them to find the next marker if there are markers on the ground, as there are on Mount Augustus.
There have been times they have seen right through this trick and it doesn’t always work, but it’s a good one to give a try if the kids are getting over it. Our older girl Bella is now old enough to be interested in reading the maps (if there is a map) and giving directions. This is a great learning experience and can be incorporated in to remote learning/home schooling.
Our little one likes to sing “The Ants Go Marching” or “We’re Going on a Bear Hunt” and somehow never gets tired of this! Another good idea for bushwalks with children is to take lots of snacks – they seem to burn through energy and snacks keep them going and distracted.
GO WITH FRIENDSThe thing we found most useful for keeping kids entertained is going with other families. It is much more fun when you are in a small group, and there are so many benefits to hiking like this. If there are a group of kids together, they have the time of their lives and, before they know it, we’ve reached the end of the hike while they’ve been yarning and playing.
I find boys tend to make it a competition and see who can climb the best or run the fastest and girls usually skip along with their mouths moving faster than their legs the whole way.
Going with other families makes it so much more enjoyable for the adults as well. It is also much safer, where if anything was to happen there are other people around – safety in numbers as they say. We have done most of our hikes with mates and it is so much fun.
We have many more hikes to tick off our bucket list and are always looking forward to our next adventure. Where will your next adventure take you?
Part 19: Queensland’s stunning Central Coast
Towards the end of last year, we spent a couple of months exploring the Queensland Central Coast from Airlie Beach and the Whitsundays down to Yeppoon. There are plenty of great camping spots and places to explore along this beautiful section of the Queensland coastline.
It also hosts the southern end of the Great Barrier Reef, and we had plenty of opportunity to enjoy this natural wonder from both afar and plunging in to the deep blue.
Airlie Beach is a must-visit and quite often the gateway for travellers to the Whitsundays. It is such a bustling little town full of tourists, backpackers and the best party atmosphere.
While at Airlie we stayed at the Big4 Whitsundays, which is a great park for kids. Our girls had an awesome time on the 25 – yes, 25 – waterslides in the pool, playing minigolf and exploring the multiple playgrounds. It’s definitely a family park and a great place to set up and explore the Whitsundays.
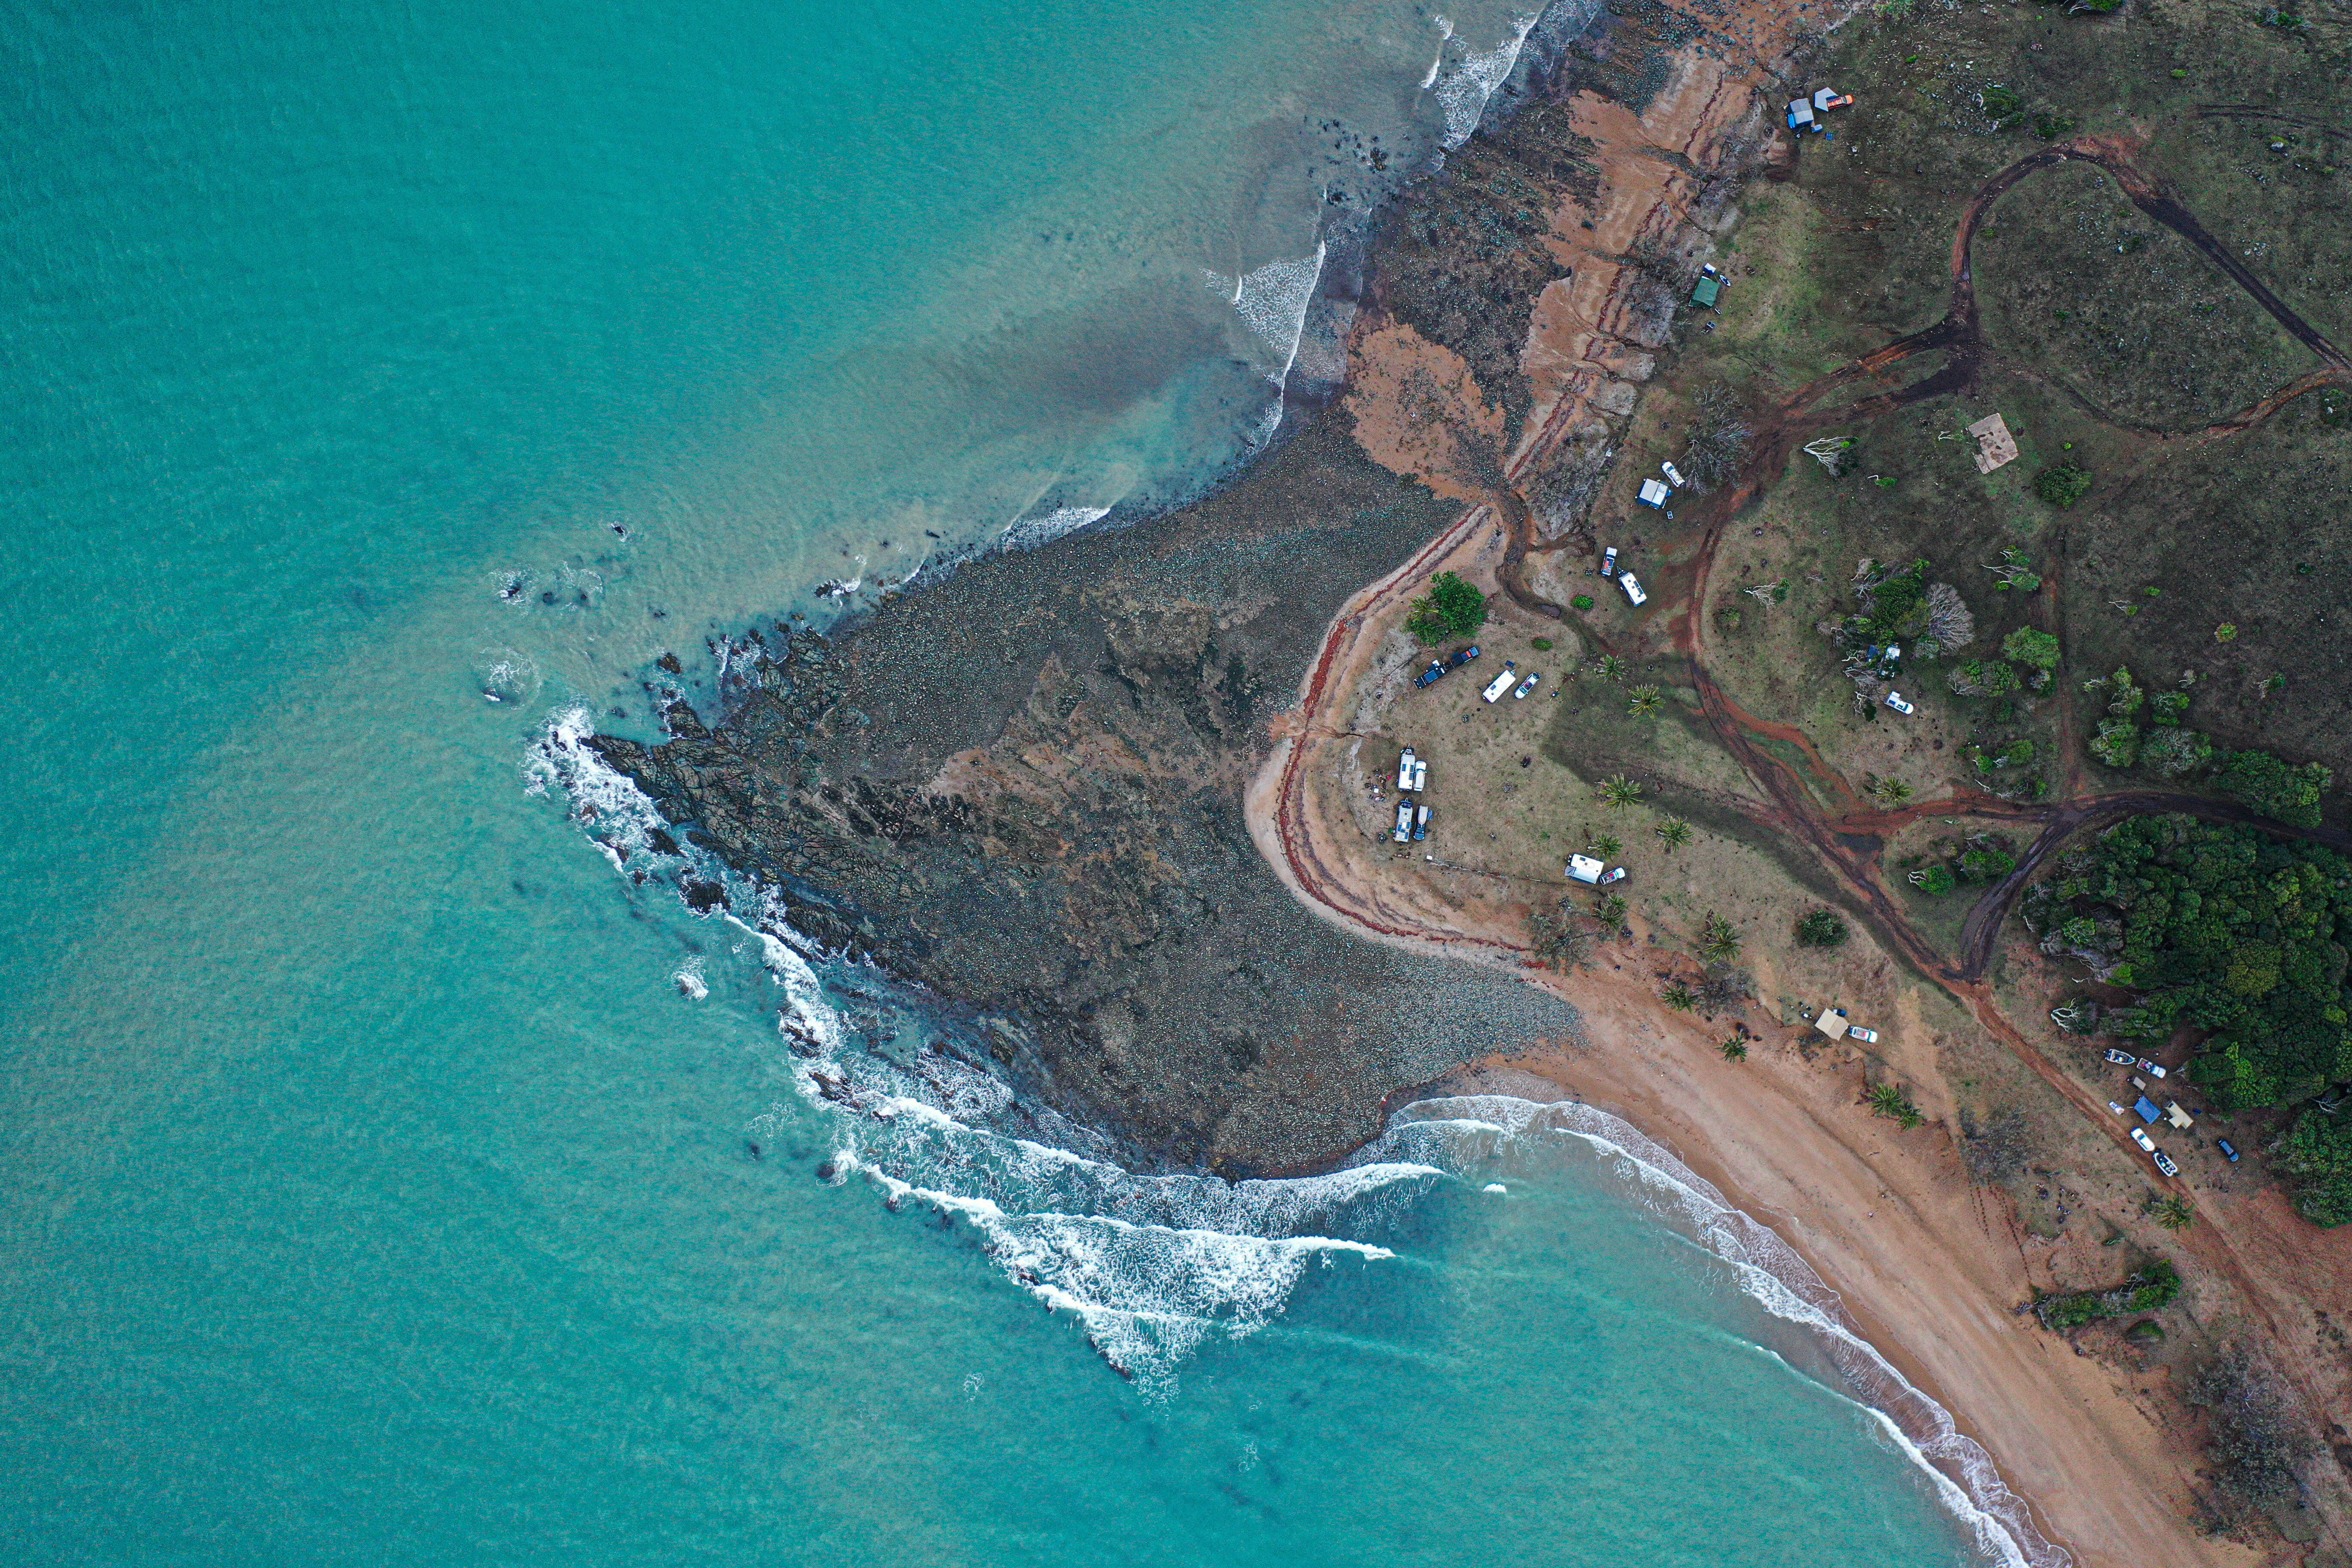
1
We went for a day trip to Whitehaven Beach, Hamilton and Daydream Islands for a great day out with just a little bit of everything the region has to offer. You could certainly spend weeks and plenty of money exploring these islands, but we opted to spend most of our time in Airlie.
After leaving Airlie Beach we headed not too far down the road to Cape Hillsborough. This is a bit of a hidden treasure with a small tourist park set in the Cape Hillsborough National Park. We parked here for a couple of nights and enjoyed the walk to the lookout early one morning, as well as the walk out along the cape at low tide.
The highlight of our stay here, though, was getting to see a mother turtle returning to the ocean after laying her eggs early one morning. These creatures are simply amazing. We spotted her while on the beach at sunrise feeding the kangaroos. Once again, enjoying everything nature has to offer.
There are also some great camping spots inland of Mackay and we spent a night at Kinchant Dam, a fantastic spot for boaties and skiers, before a couple of nights on a farm stay at Finch Hatton Gorge. We did the walk in to Finch Hatton Gorge and enjoyed a refreshing swim at the end. This is another great little national park well-worth a visit.
We also pushed the 79 up the range to Broken River, which is a perfect camping spot for tent campers in dense rainforest complete with awesome walking tracks, views and the most adorable wild platypus. I think it is one of the few times we have kept the girls quiet for a good 10 minutes, watching the platypus just doing its thing.
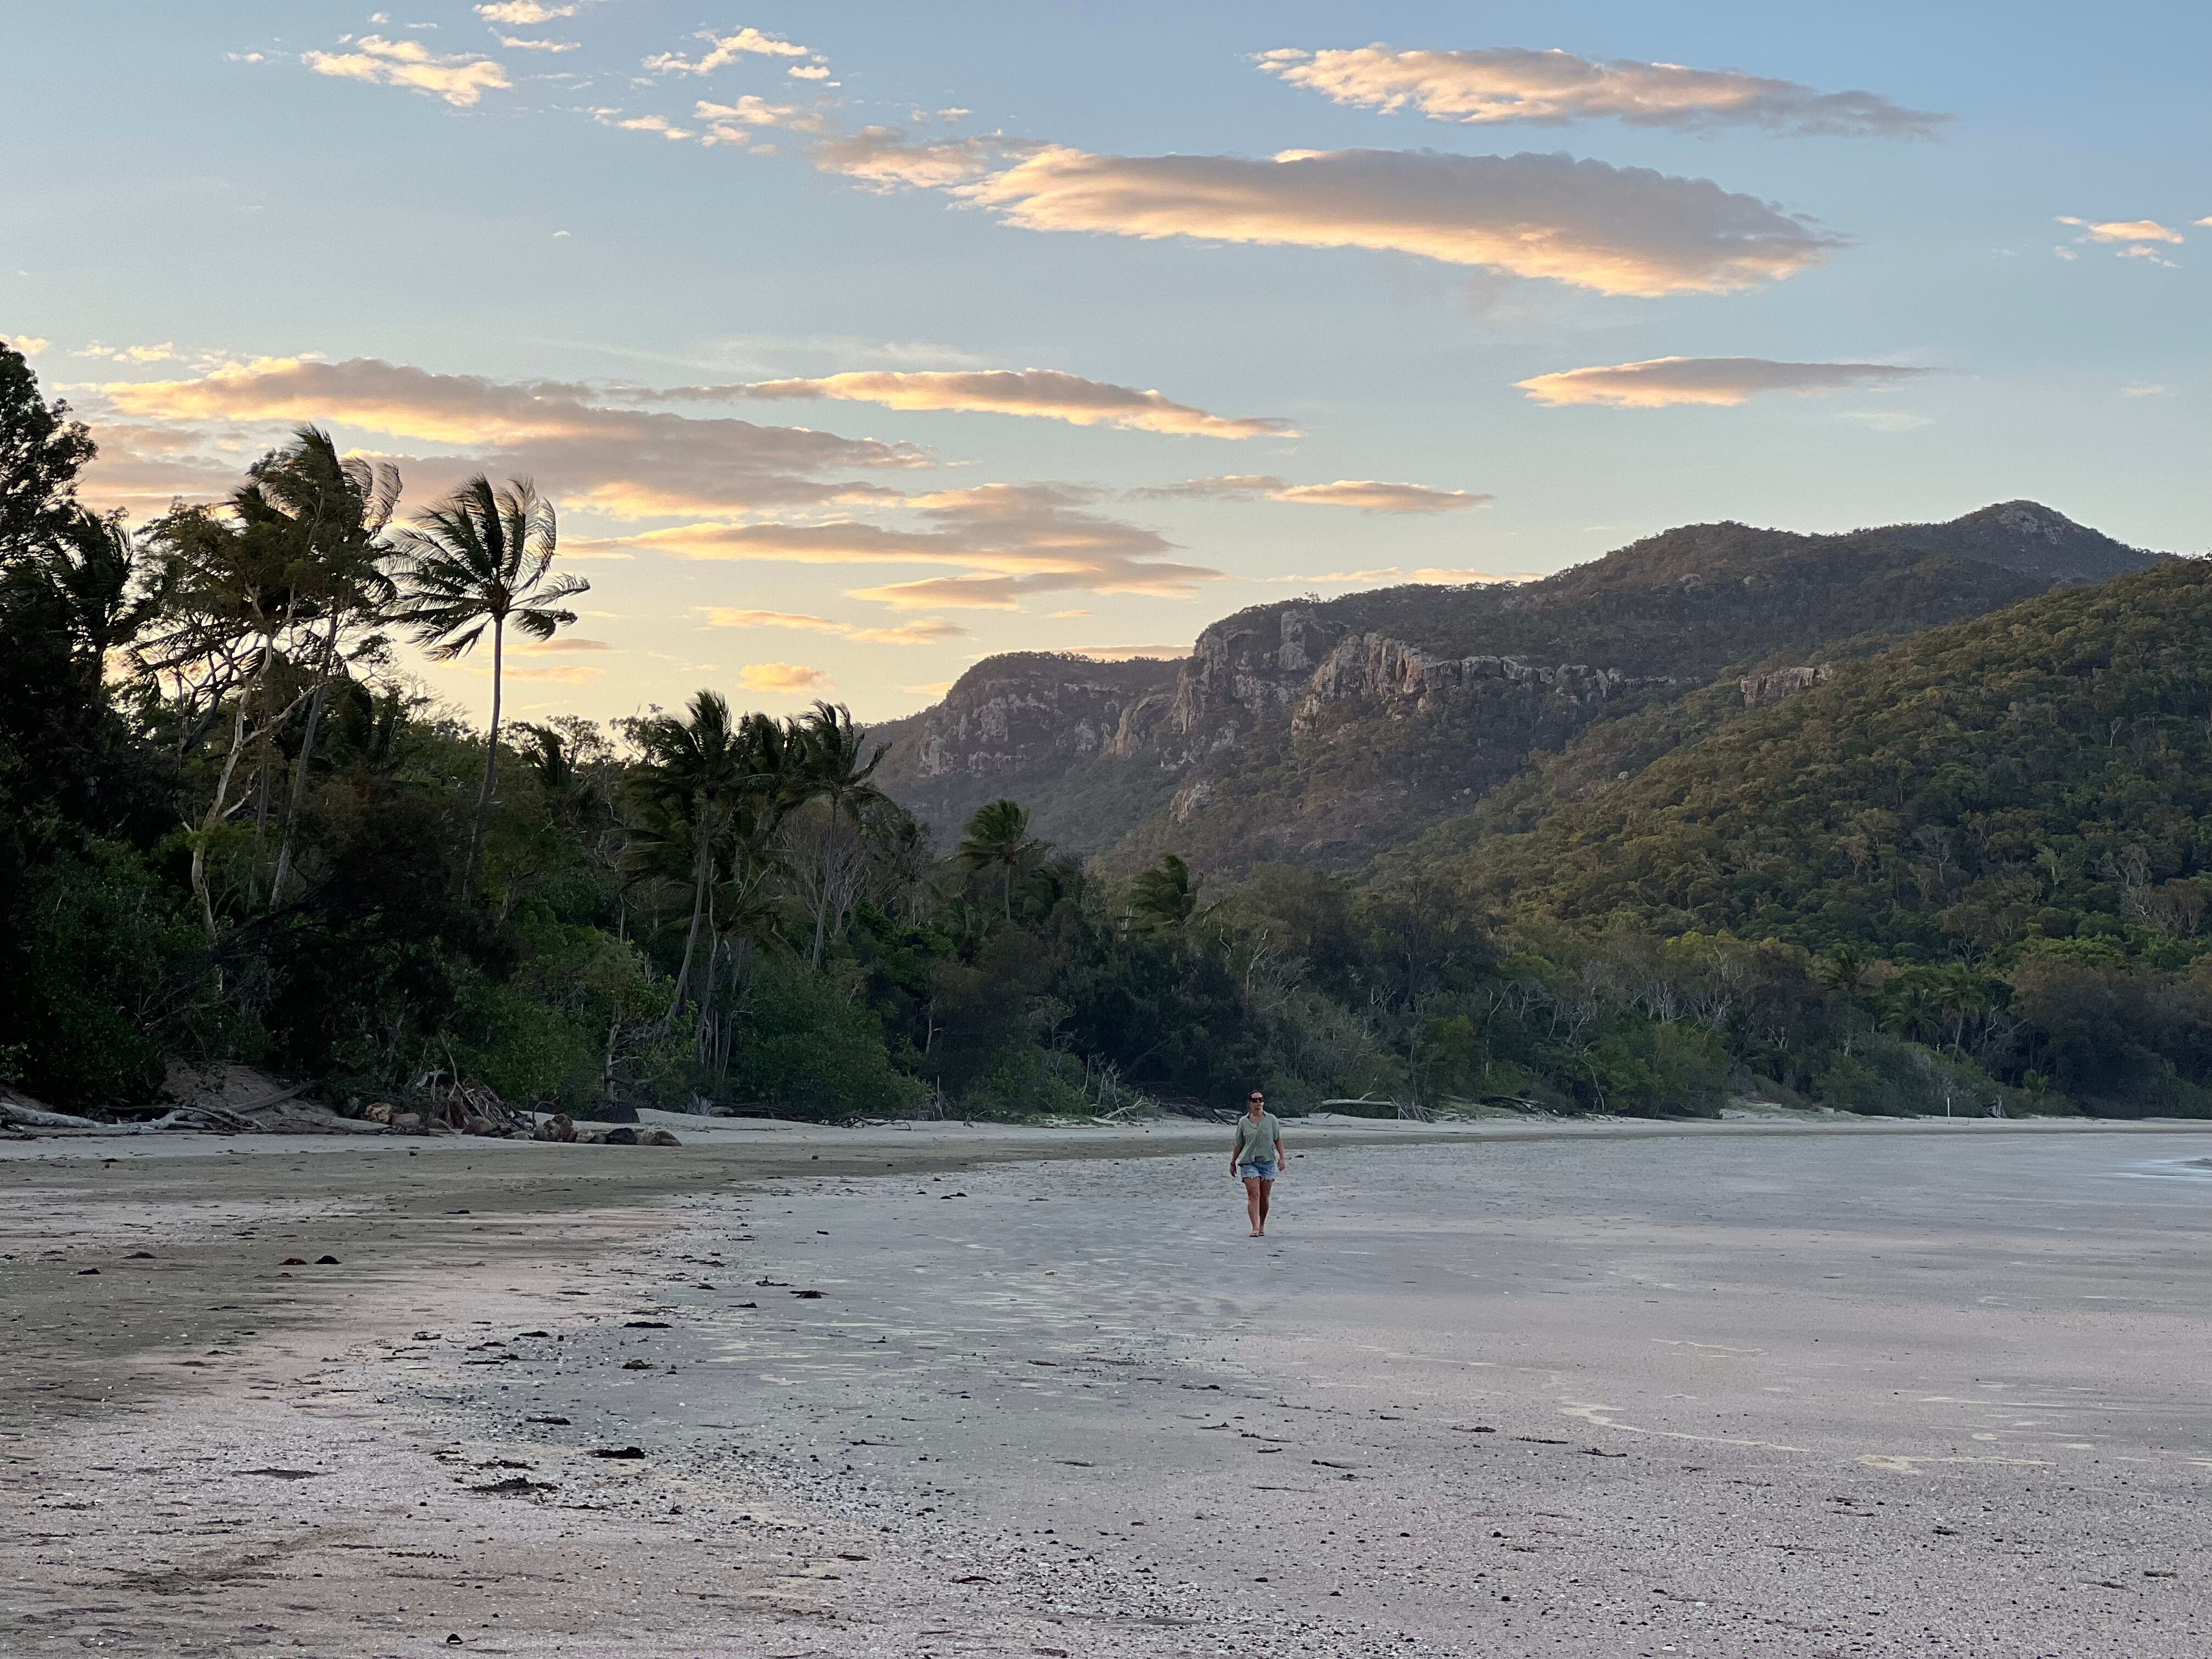
1
Our next stop down the Queensland coast was at the much-anticipated Notch Point. We had heard our travel mates talking about how this was a great free camp right on the water, and they weren’t wrong. Notch Point is set on private property an hour out of Mackay. You need to be fully self-sufficient and at least semi off road-capable to enjoy Notch Point. There is no power, water or facilities, but this didn’t worry us and the views and location definitely make up for it.
The trip in is mostly dirt road and requires a bit of negotiating around trees, cowpats and mud holes. We had a great time with some mates getting through the mud after 20mm of rain the night before. We tested out the Bruder Expedition’s tipping point when the 79 hit a mud pit and almost lay her on her side, making for a great shot and some fun in the mud!
As expected the 79 gracefully pulled her out and back up on dry ground. We camped right on the water and spent a few days just relaxing with no phone service or hustle and bustle, for a good recharge before hitting Yeppoon.
We absolutely loved Yeppoon and spent a week exploring the area including Byfield National Park and Great Keppel Island, but we’ll let you know all about this another month. You could spend weeks exploring the Queensland Central Coast as there is something for everyone; white sand beaches, beautiful nature hikes and attractions, and some great four-wheel driving adventures.
Part 20: Golden Outback
For our new Bruder’s maiden voyage, we decided to take a week of the school holidays and explore some of Queensland’s golden outback. We were blessed with good weather over the week, but we travelled just after a decent amount of unseasonal rainfall and everywhere we camped was boggy, muddy and ripped up from previous travellers. It was a fairly action-packed week, covering 3000km in eight days, but we had the best time discovering all that Western Queensland has to offer.
Day 1: Roma to Blackall
We hit the road fairly early and left a very chilly Roma heading west along the Warrego Highway through Amby, Mitchell, Morven and Mungallala. We had a quick smoko stop at Augathella and checked out the murals through the town and the artwork on the water tower.
Our next stop was Tambo, home of Tambo Teddies and Fannie Mae’s Café. We rounded out the day in Blackall at the showgrounds as the riverside camping was a very busy mud pit, and took the afternoon to wander down the main street. Blackall hosts the Jack Howe statue – one of our most famous shearers – some great artistic Blackall signs and the Big Ram at Ram Park. Another great little western town.

1
Day 2: Blackall to Longreach
Heading northwest, our first stop was Barcaldine, just an hour up the road which is a T-junction for the western highways. Barcy is home to the Tree of Knowledge and there is a great display explaining the famous tree, the historical Shearers’ Strike and formation of the Australian Labor Party. Being a Sunday and a very small town, there wasn’t much happening at Barcaldine, but there was plenty going on at the Wellshot Hotel at Ilfracombe.
Just 27km out of Longreach, this town is really just the pub and a few houses, but what it lacks in size it makes up for in personality, and we were warmly greeted with hot coffee and cold beer.
That afternoon we arrived in Longreach and checked out the QANTAS Founders Museum before heading to the river. We were a bit underwhelmed by the QANTAS Museum, but it was interesting to learn about Australian and Queensland aviation history and we feel aviation enthusiasts would love it. We camped the night at the Apex Riverside Park along the Thomson River and it was a great little spot, just a bit boggy.
Days 3&4: Longreach and Winton
We couldn’t visit Longreach without stopping by the Australian Stockman’s Hall of Fame, and it was just as informative and interesting as I remember. We had a great morning learning all about these hardworking men and women who have worked our land for the last couple of hundred years. The visit was complete with a live performance showcasing horsemanship, working dogs and even a big, beautiful Brahman bull. This was entertaining and the kids loved it.
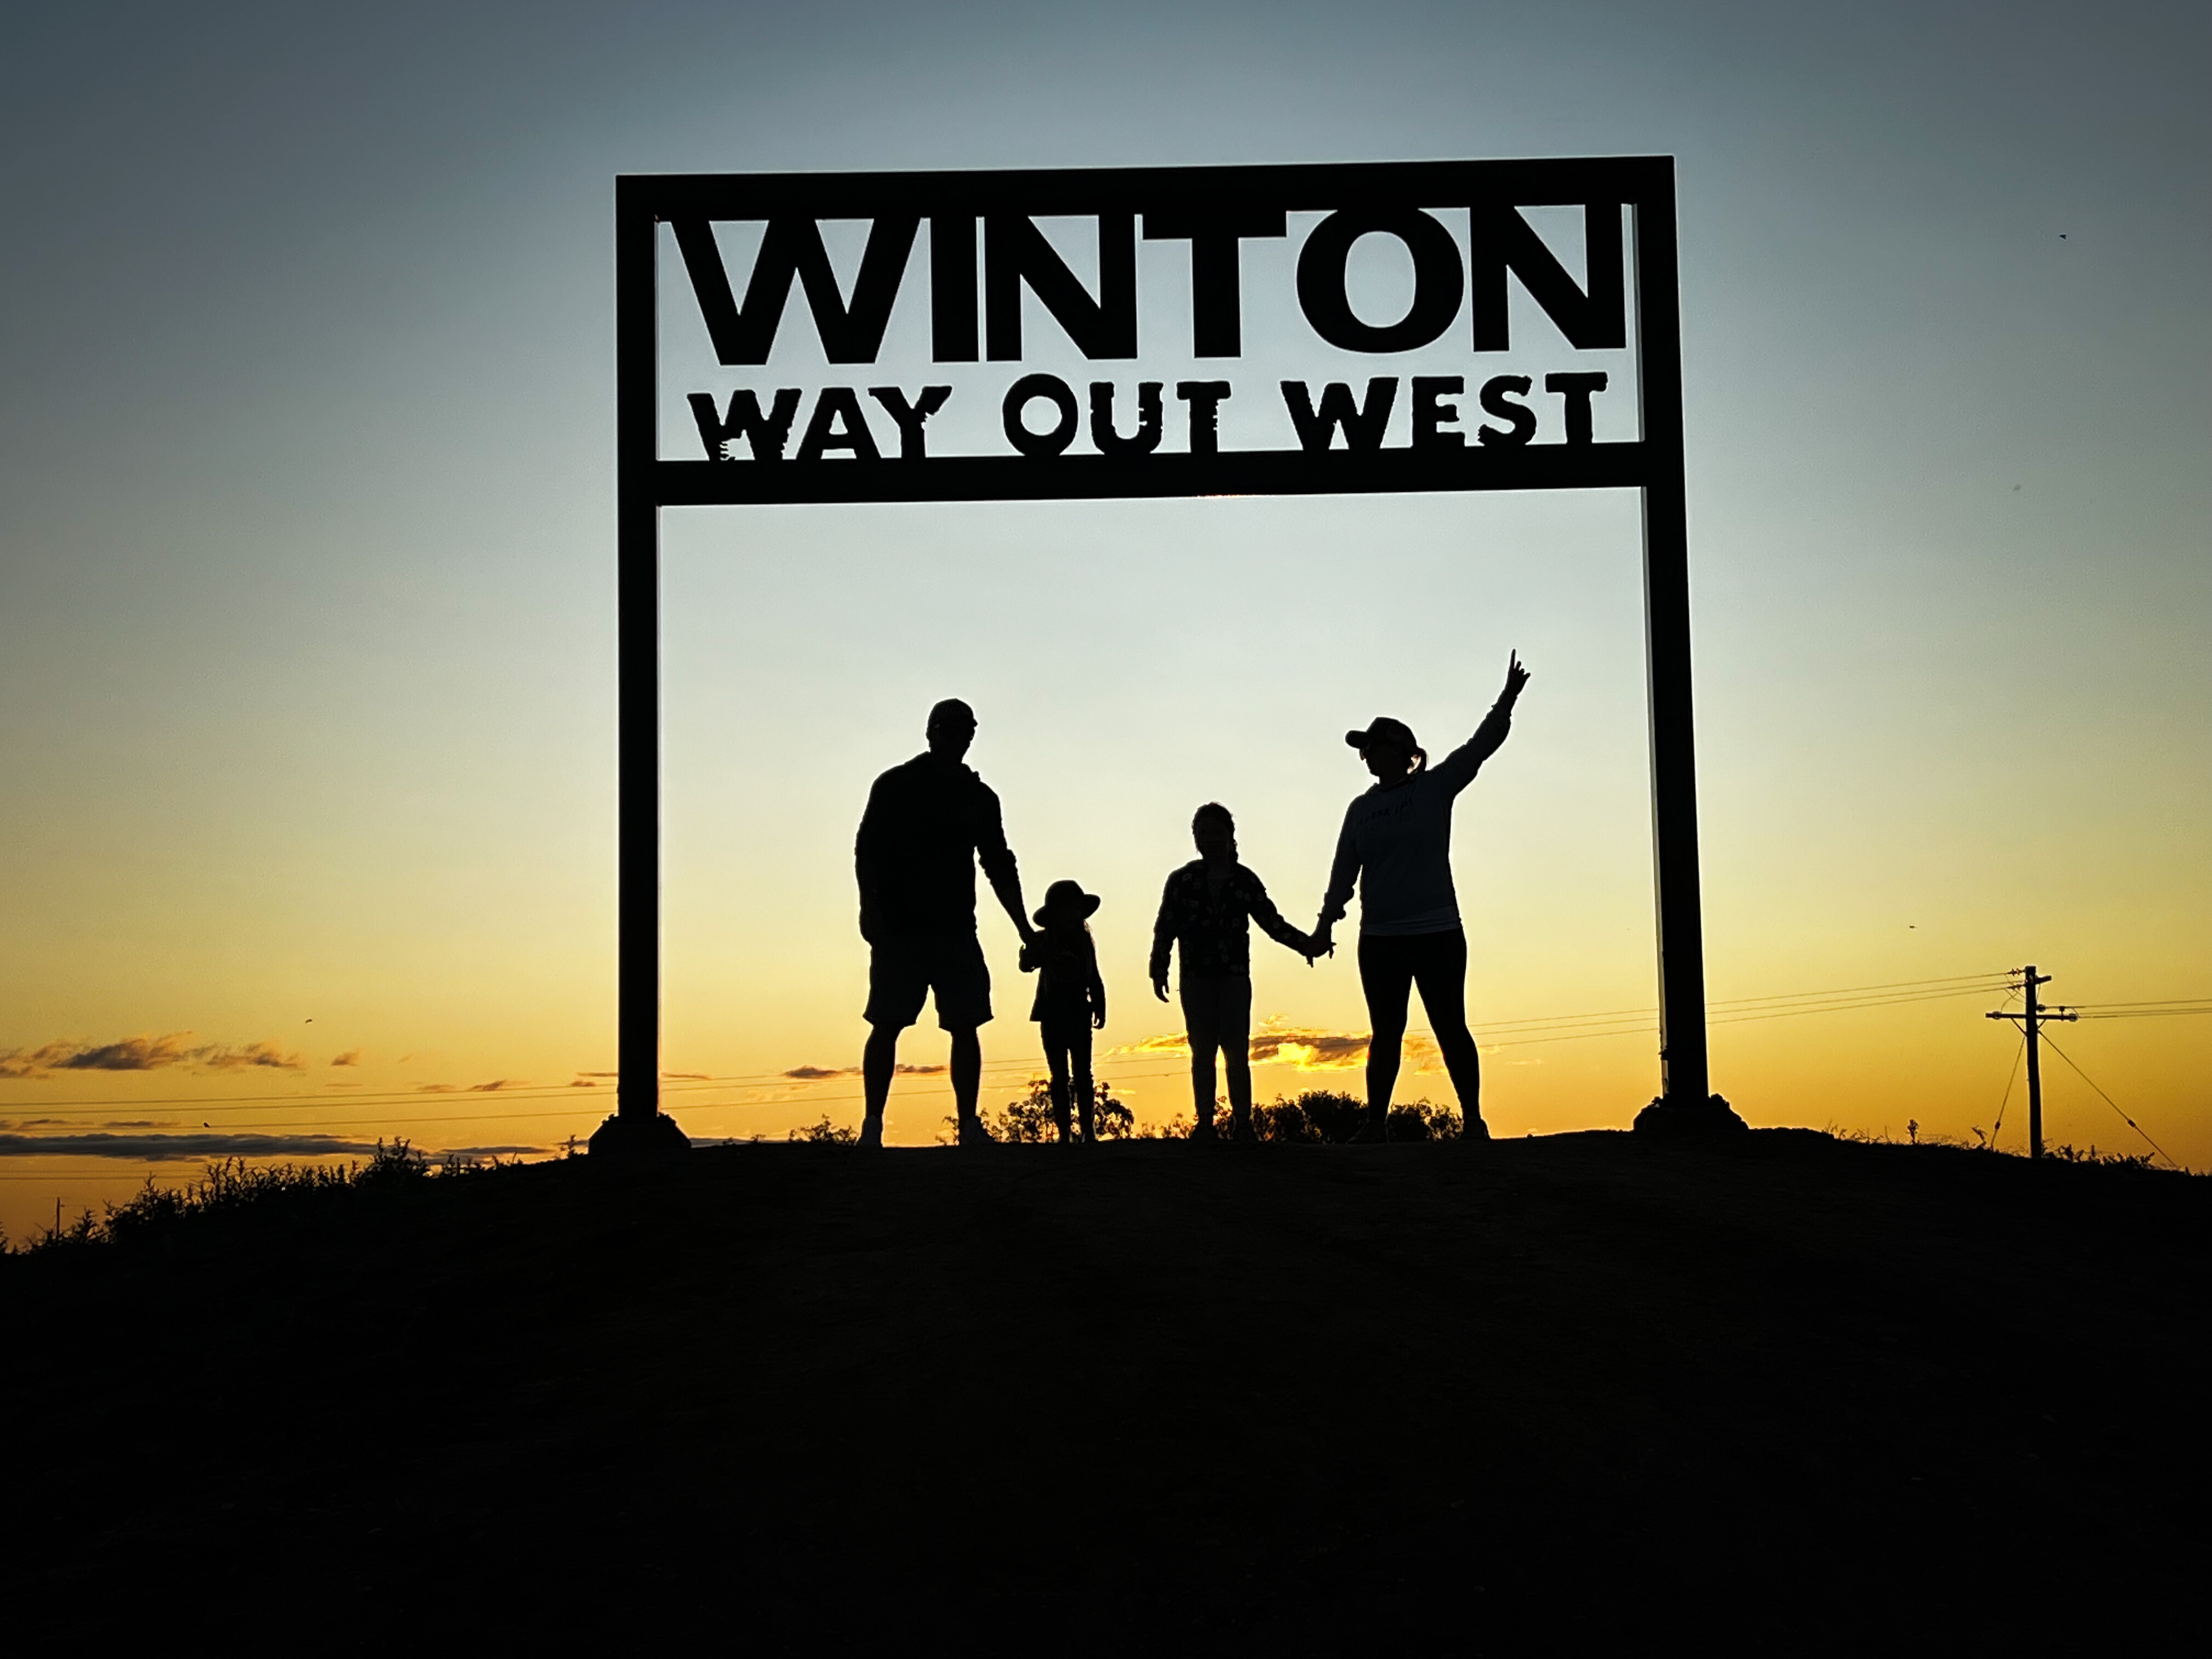
1
After having some lunch and a rest at the park, we headed an hour west down the road to Winton. This is another great little welcoming community, and we pulled up stumps at the showgrounds which had also seen plenty of rain.
After being on the highway so much, we had a chill day in Winton and headed out of town around 20km to visit Winton’s famous Age of Dinosaurs. This is a great tourist spot and they have done such a great job both discovering and displaying the incredible dinosaur fossils of the area. Set on private property, the museum has different exhibits and tours that keep you entertained for the better part of a day. Again, the kids were well-educated and entertained. We spent the afternoon exploring Winton and the Crackup Sisters house, and we finished off with dinner at the local.
Day 5: Winton to Julia Creek
The road from Winton to Julia Creek was a really nice drive as it was so green, and we stopped halfway at the Blue Heeler Hotel, Kynuna, for a coldie and to leave our mark on the wall. I was amazed how thick the flies were, even in winter.
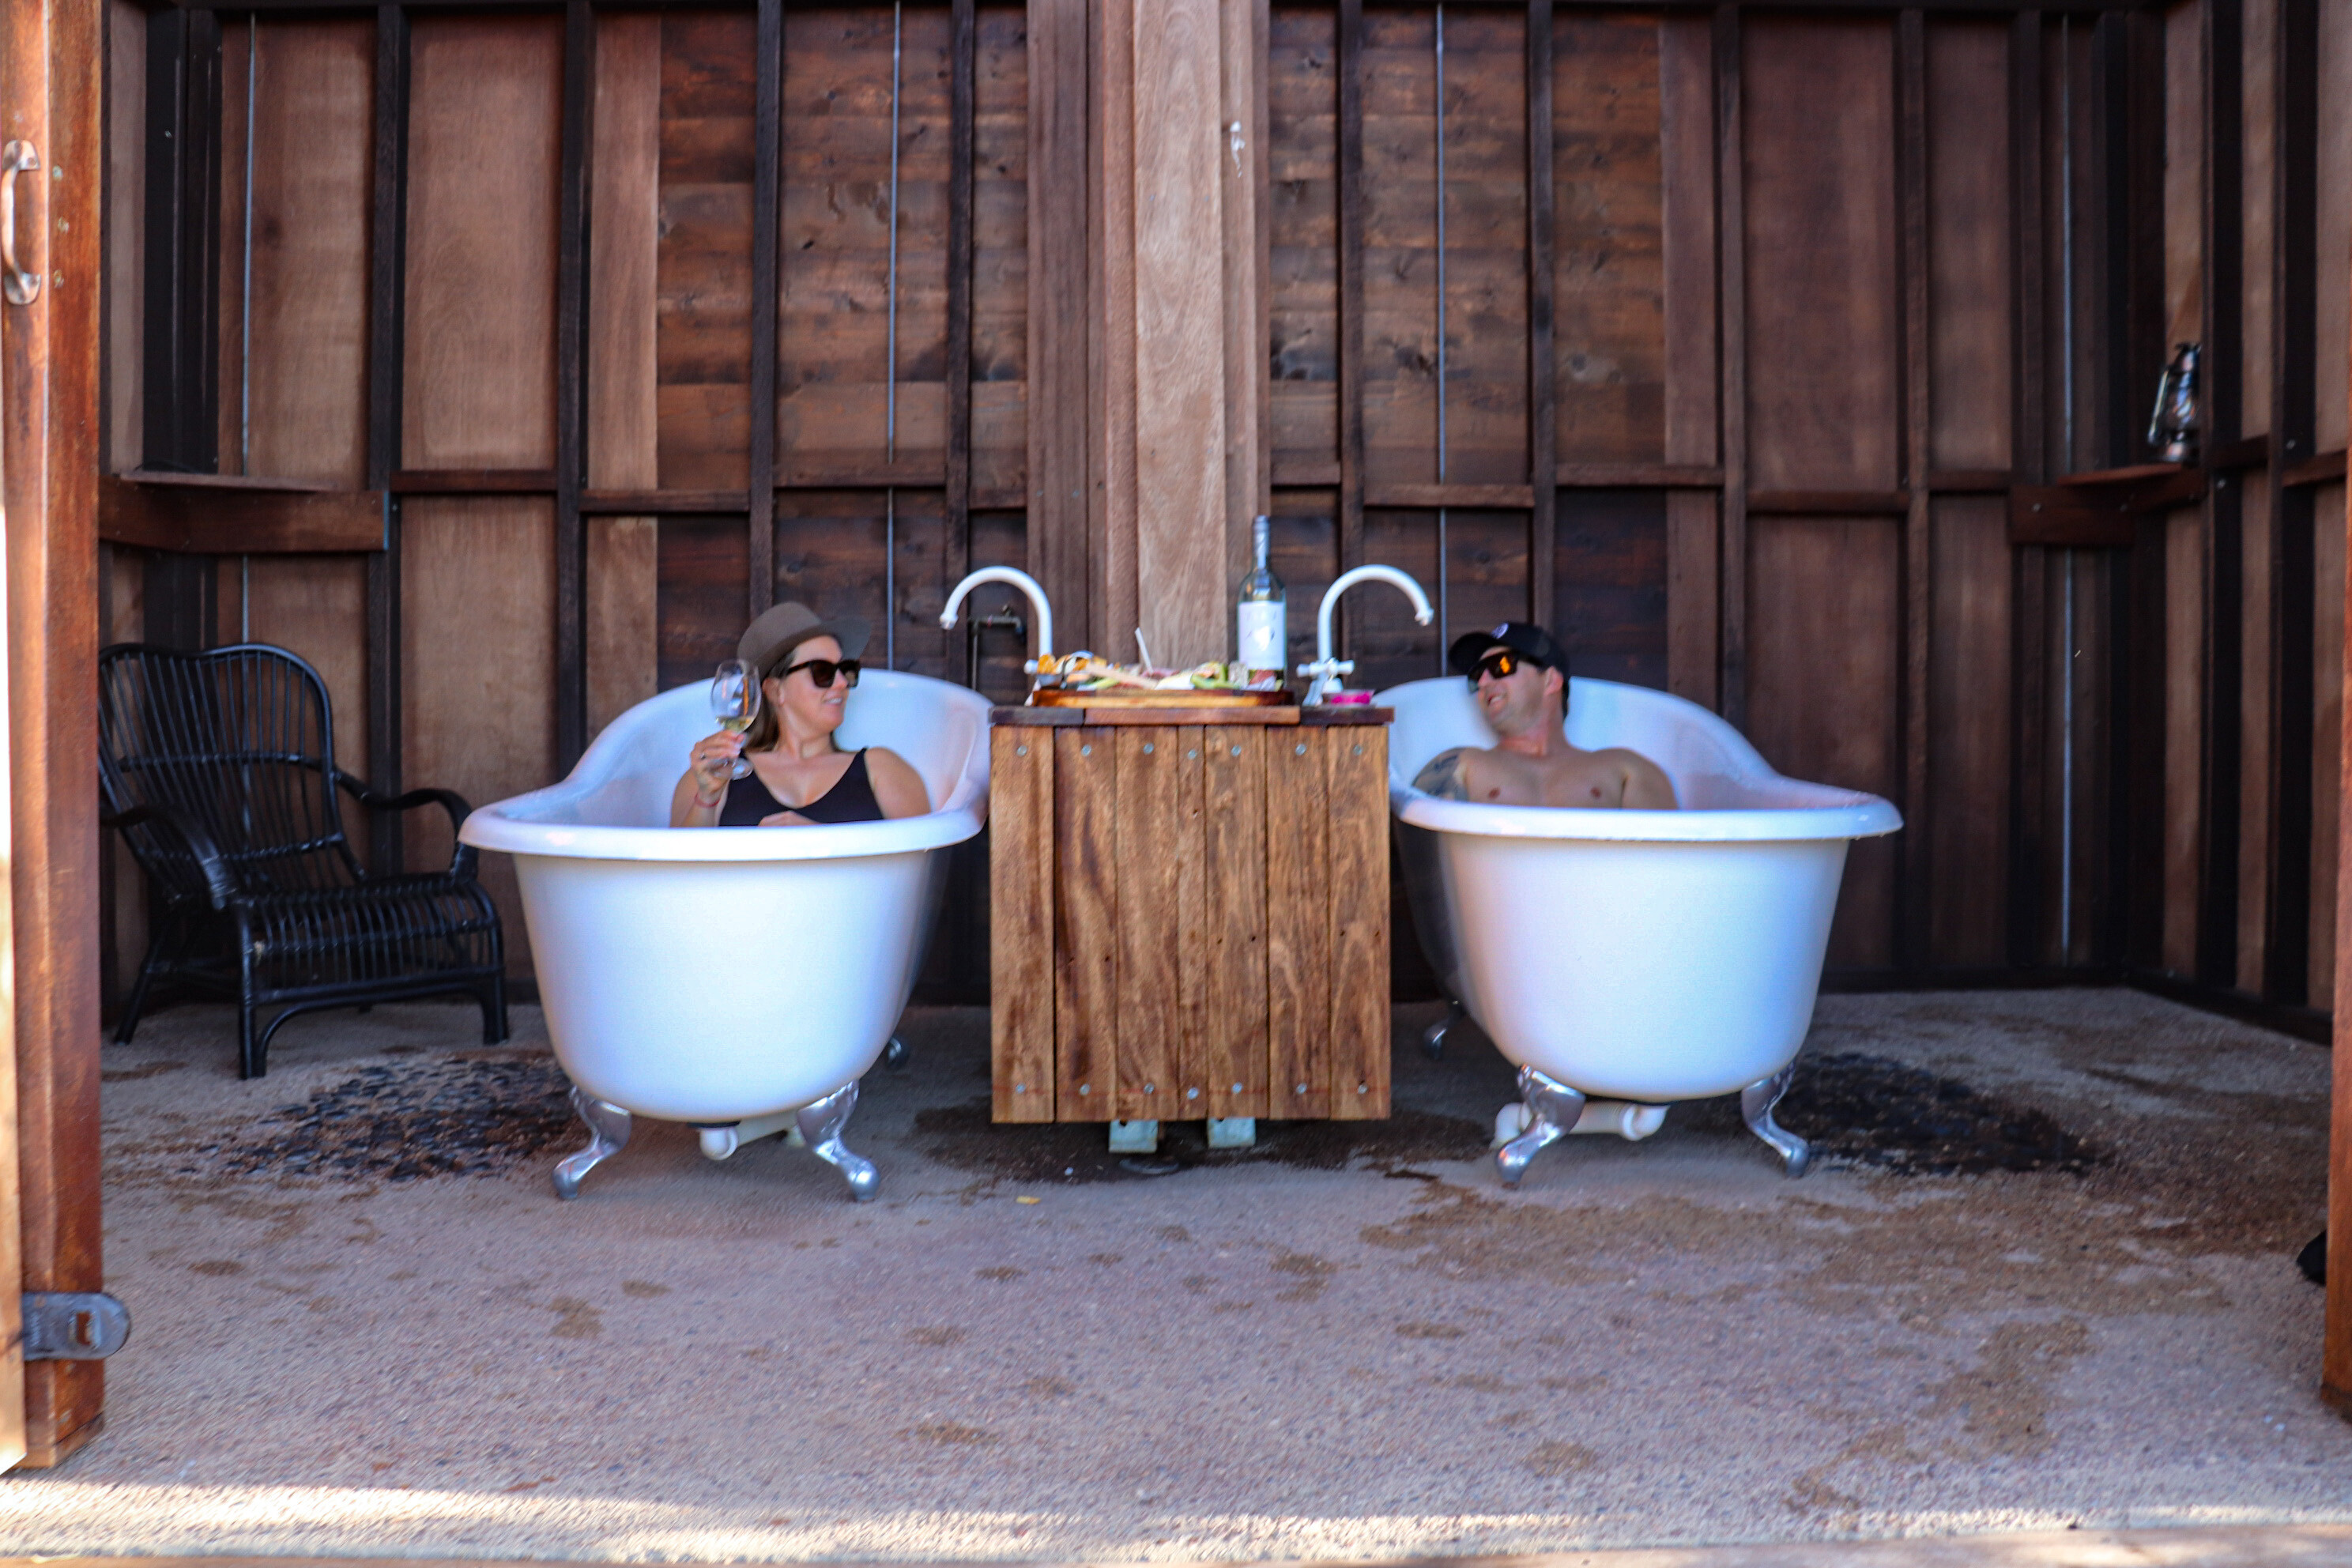
1
Julia Creek is another awesome country town and the Julia Creek Caravan Park, complete with artesian bathtubs, was on our to-do list for this trip. We had a great time relaxing in the baths (when we could, with two rat bags), enjoying the wine and the cheese platter you can order from reception. We then struck up conversation with some fellow travellers and had a great night chatting around the campfire.
Day 6: Julia Creek to Muttaburra
This day was our longest driving day by far, and due to the rain and road conditions we couldn’t take the shortcut, so we went through Richmond, Hughenden and Torrens Creek on our way to Muttaburra. We also took the time to check out the silo art at Hughenden; it’s such an awesome piece of art by Drapl and The Zookeeper. We finally hit some dirt and christened the new Bruder before camping beside the creek at Muttaburra, enjoying another beautiful outback sunset.
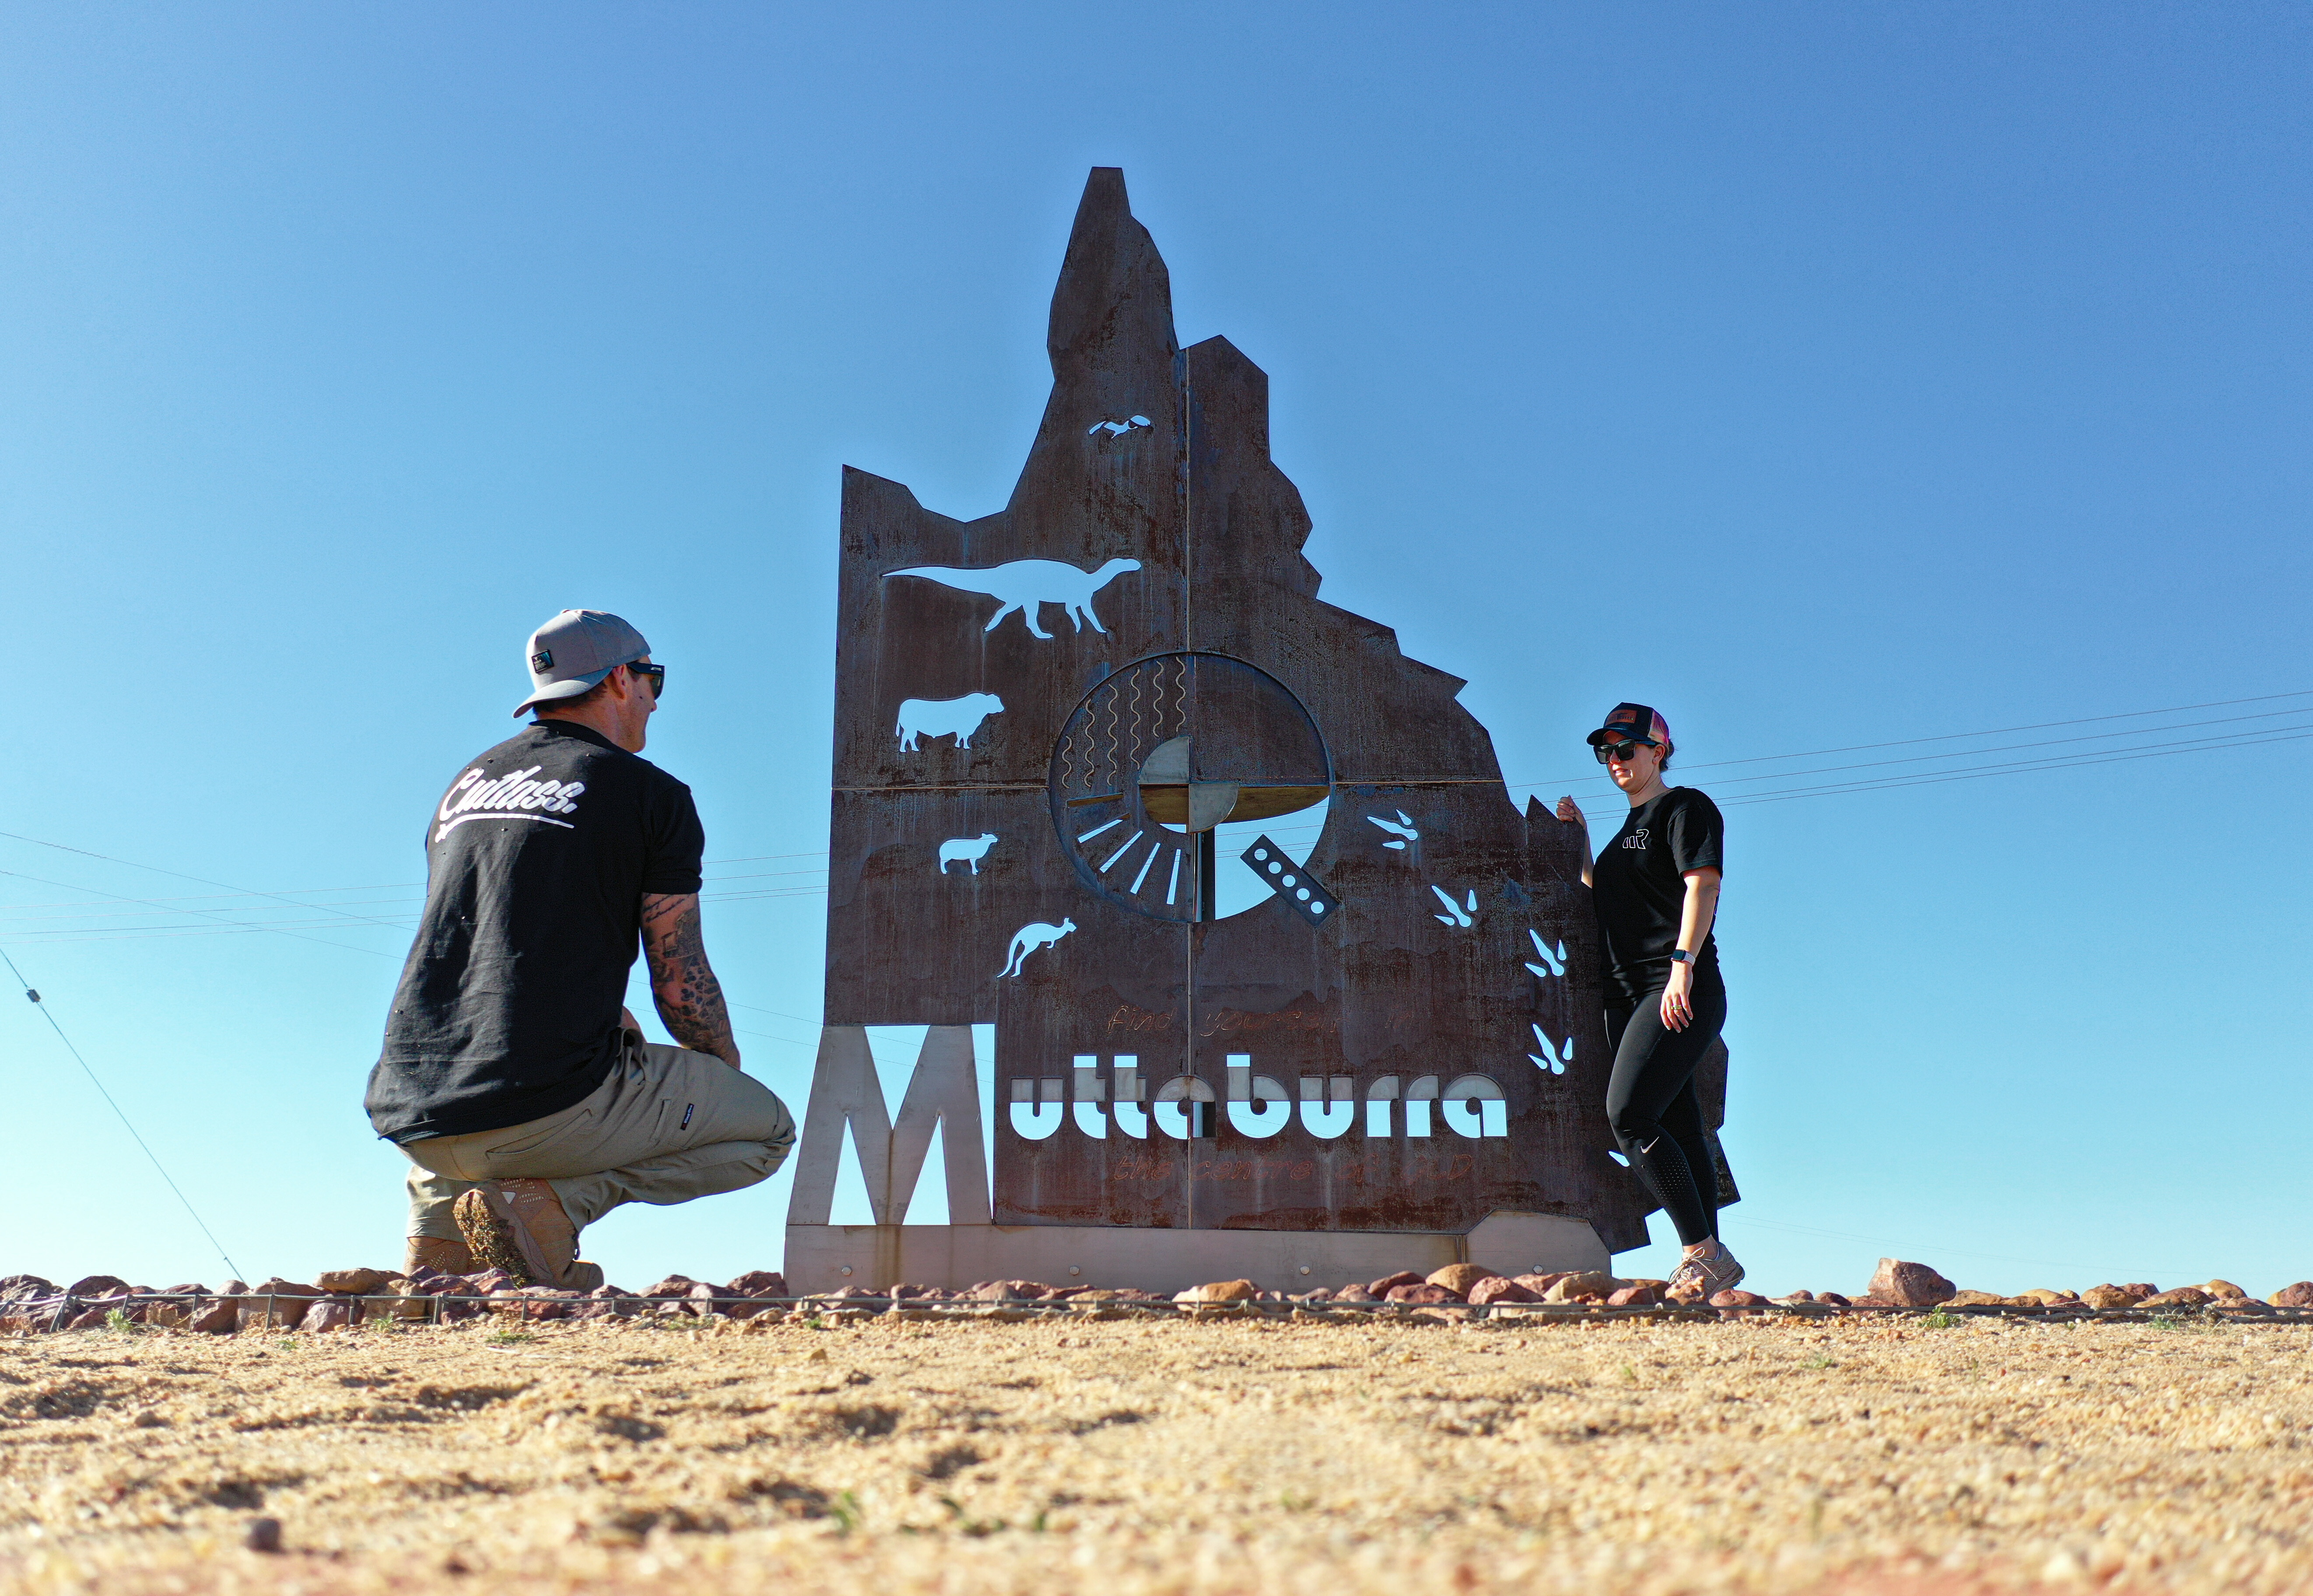
1
Day 7: Muttaburra to the Gemfields
Muttaburra surprised us; for such a small town it has a decent amount of tourist attractions and is the geographical centre of Queensland. We went on a tour of the old general store, storekeeper’s cottage and hospital, all of which have now become museums.
Barcaldine Regional Council bought these buildings and preserved them in their original state; and it was so good to see how it was in the “olden days”, as Bella would say. Muttaburra also has a Muttaburrasaurus display, tying in with the dinosaur story of the west, and a very cool sculpture trail that extends all the way past Aramac, showcasing amazing craftmanship by locals with scrap metal and welding.
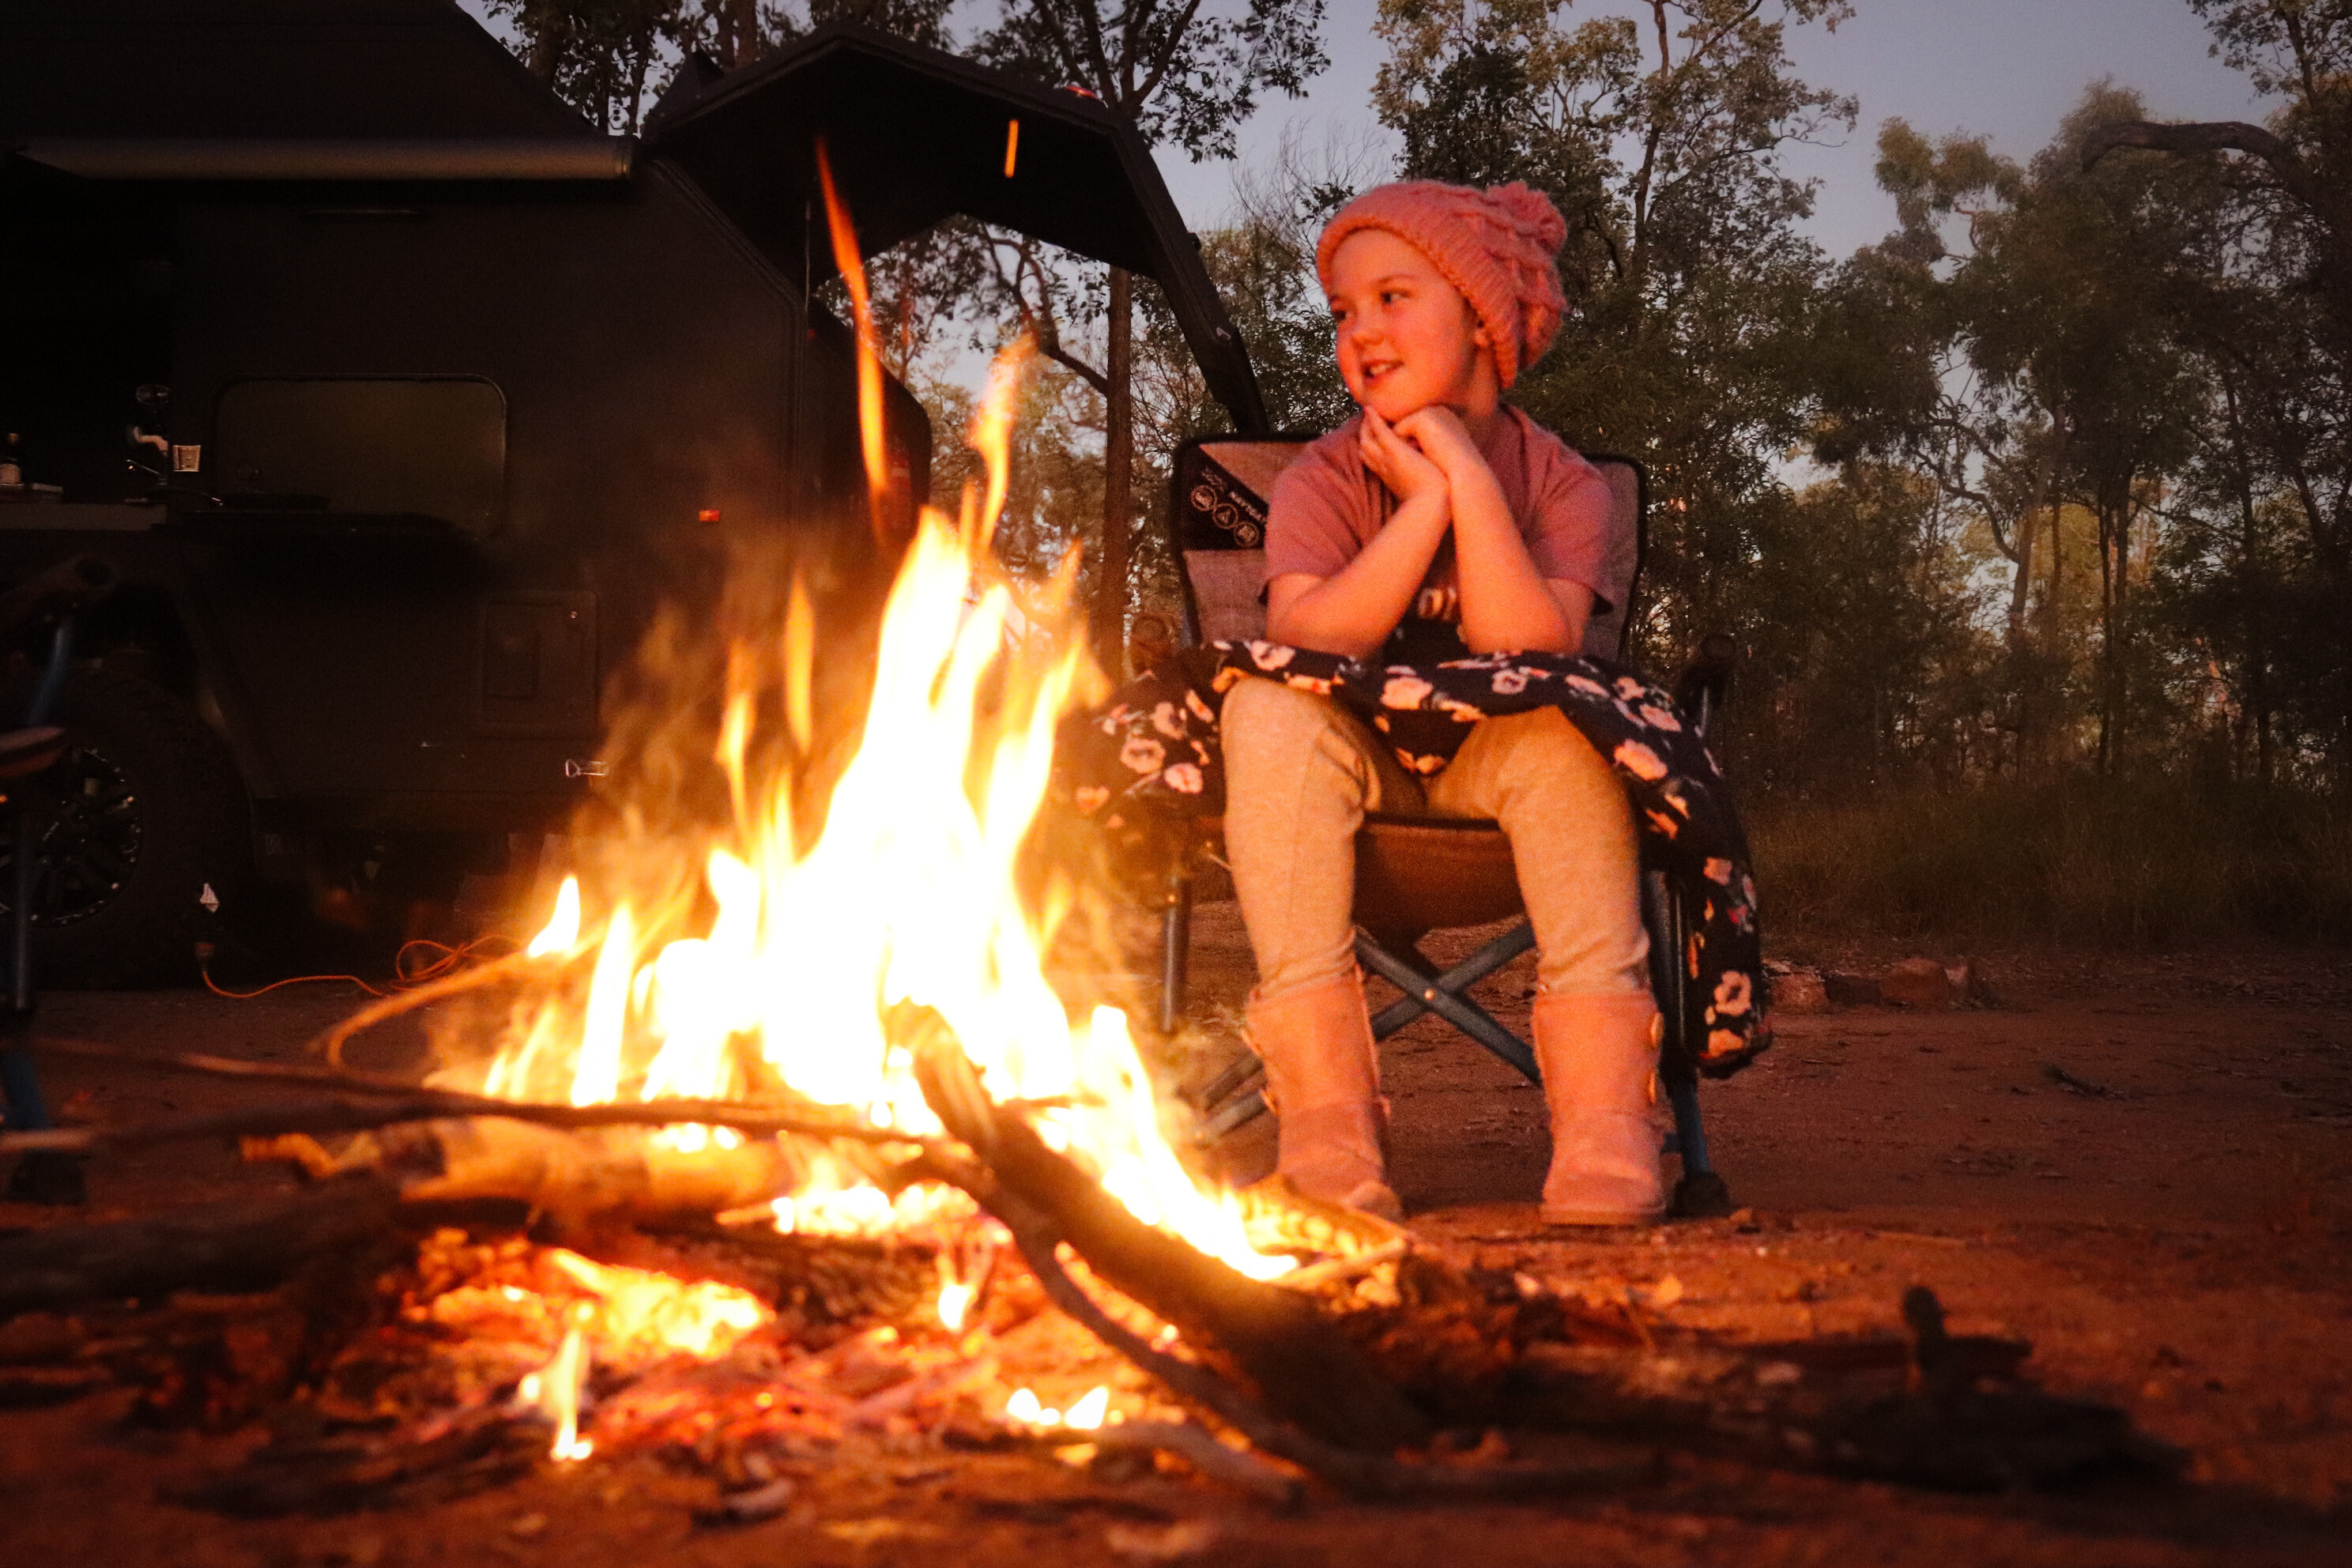
1
Day 8&9: The Gemfields
We spent our second weekend away exploring the collection of small communities that makes up the
Gemfields. These communities are full of colourful characters all looking to find their fortune with that one, big gem! You can try your hand at fossicking yourself, or just buy ready-made in the form of stunning jewellery, as your souvenir. This place is worth checking out and you can camp out in the bush, stay at the local ’van park or head out for a day trip from Emerald.
We had the best time on our mini-trip of Western Queensland. We all learnt so much about our history and the Western landscape and had so much fun doing it. We highly recommend you get out of the cities and explore and support our country communities.
Part 21: Building bonds
We are going to get a little bit deep and talk about relationships and travel. We are building relationships all the time right, and this certainly rings true when full-time on the road.
Before setting off on our trip, we’ll admit there was a bit of apprehension from both ourselves and other people about how travel life would impact on our marriage, relationship with our kids, family and also meeting fellow travellers. Well, we can now say that 99 per cent of the time we had the most amazing experience and it’s one of the best things we have done for ourselves and our kids.
Many people may think that living in a confined space with your partner 24/7 will be a challenge in itself and trust us, it’s not always unicorns and rainbows, but on the whole, it was such a positive experience for us as a couple. We have always gotten along most of the time, otherwise why would we put up with it right?
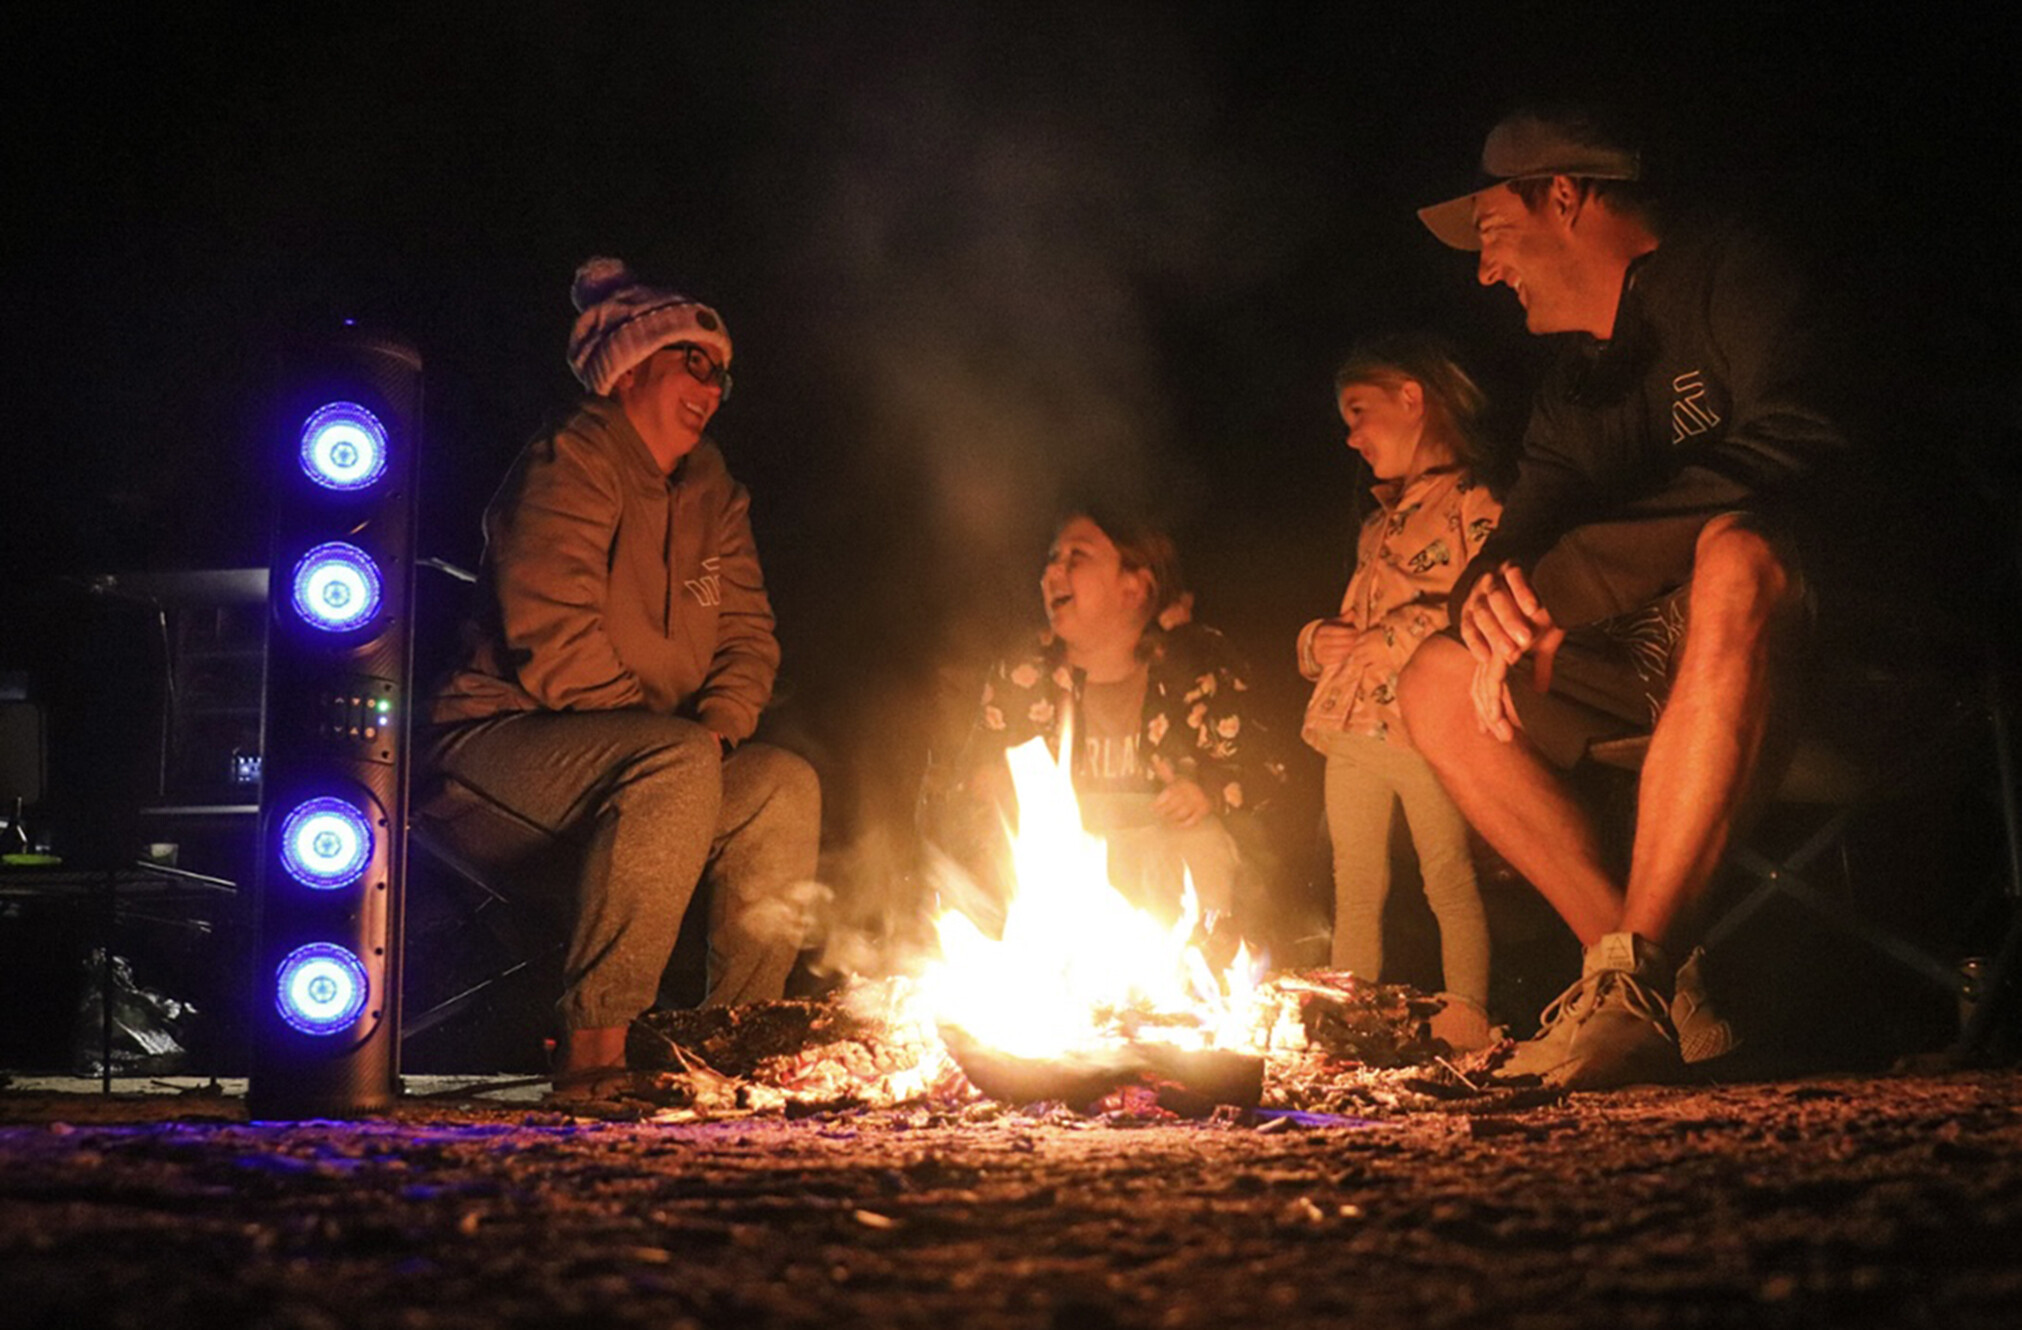
1
Both of us are relatively independent people, happy to do our own thing but also work well as a team. We found that just ‘stopping’ with the business of regular home life helped us to sit back and focus on our relationship and made our marriage stronger for it.
We both assumed our roles fairly early on in our travels with Brendan being chief operator/driver/handyman and me chief navigator/organiser/chef. I feel Brendan pushed me out of my comfort zone with many of the experiences and 4WD tracks and showed me living for which I am forever grateful.
Brendan says he learnt how to push me out of my comfort zone, without pushing me over the edge. He also feels I helped him open his mind to different cultural experiences, history lessons and cuisine that he may not have sought out naturally.
Don’t get me wrong, we had our fair share of arguments along the way as well which is completely normal in a healthy marriage and we realised quite early on the importance of ‘me time’. In Brendan’s words, “You need an out” and we made sure we took time out from each other and the kids to focus on self-care.
This often meant going for a run or a workout, Brendan going fishing with mates or on his own, me going to the shops/salon or even just going grocery shopping without the kids – I found this quite therapeutic, weird I know!
It’s really important in general, but particularly when travelling, to make that time for yourself. In terms of special adult time, you can imagine it is rather difficult to achieve this with the kids at your feet, however, you find a way.
Some friends of ours Macgyvered a privacy curtain in their van, others helped each other with babysitting for date nights and you can use your imagination – you learn to get creative in the great outdoors!
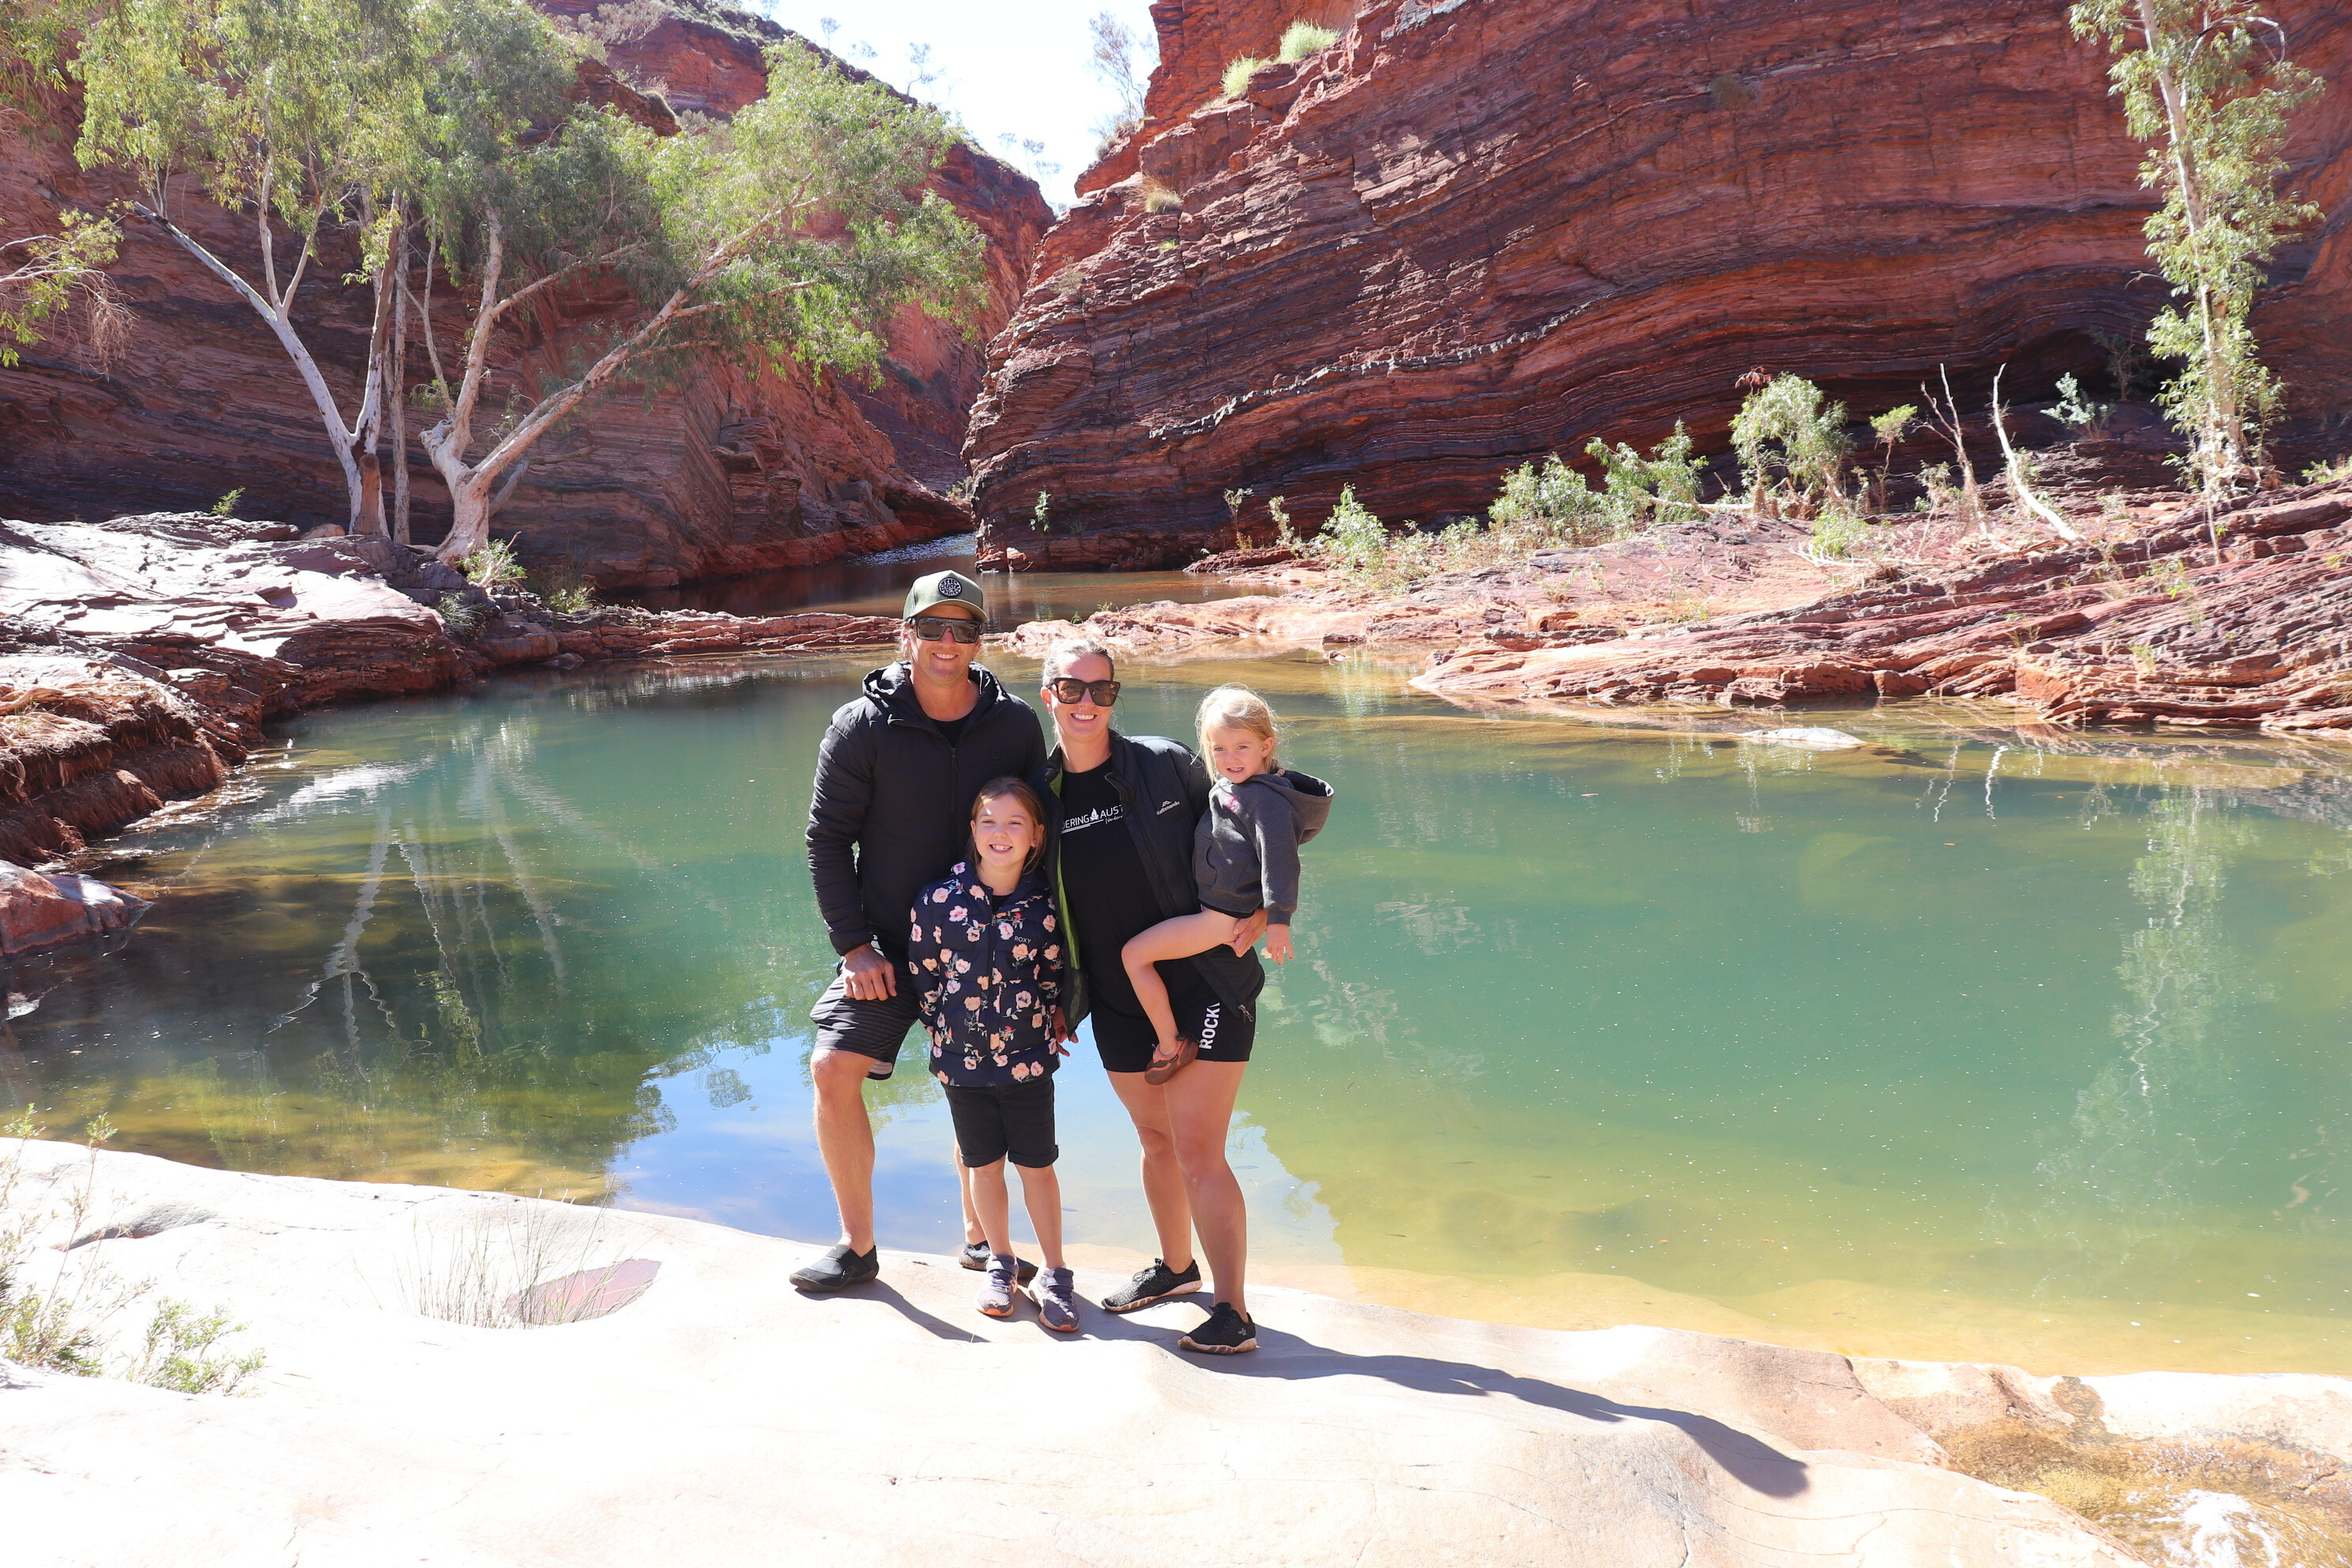
1
Speaking of our cherubs, one of the reasons we decided to set off travelling was for our children. We wanted to give them an amazing experience, lots of life lessons and spend precious time watching them grow and learn. I found with my occupation, I don’t get to spend a whole lot of time with the girls and this was an opportunity to learn from them and with them.
I was a bit worried about it to be honest, just in terms of “would it be too much, having them 24/7?” and “would they be okay being away from family, friends and formal education?” However, I didn’t need to worry as it was so much more than I expected. I got to watch them experiencing the most amazing things and places our country has to offer and learned so much more about my girls then I ever imagined.
Travelling full-time enriched our relationship with our children and made us better parents for it. Again, it wasn’t always rosy and we did look forward to date night with a babysitter when we were able.
Making new friendships was one of the best parts of travel life and we have talked about this in previous articles. Travelling is so social and you just need to be outgoing and say “hi” to your neighbours and fellow travellers and you will find you have made friends for life. We met people from all walks of life and it was so special to pay it forward with travel tips. What we gained from previous travellers we could then pass on to future travellers.

1
One of the best ways we saw our travel community shine was when a fellow travelling family unfortunately lost their home on wheels to fire. We all banded together with love and support and the family was able to purchase flights to travel home. It was so heart warming to see those relationships shine to support a fellow family.
We also feel travel has changed our relationships with our family and friends at home, mostly for the better. We definitely missed everyone at home, we missed milestones, new babies, significant events and this made us sad, however, it also made us value those we left behind.
We also had to make a mad dash home through the middle of last year when Brendan’s pop became terminally ill to spend his last days with him which we don’t regret in any way. This made us realise the downside to being so far from home, but he wouldn’t have had it any other way.
Relationships on the road have their ups and downs (pun intended) but overall travelling has enriched our lives in so many ways. We’ve learnt so much from each other, our beautiful kids, our loved ones holding the fort at home and the fabulous families we have met along the way. Just another benefit of travelling this amazing land, so get out there and just do it!
Part 22: Southern Cape York
Anyone who has travelled to Australia’s most northern point will agree, this journey is an adventure like no other.
After months of planning, discussing and packing, we set off with three other families on our adventure to the tip and we had an absolute ball! We highly recommend travelling Cape York with mates, especially with all the 4WDing along the Tele Track. However, we will talk all about the Tele Track next month, this month is all about the southern Cape York Peninsula from Cairns to Bramwell.
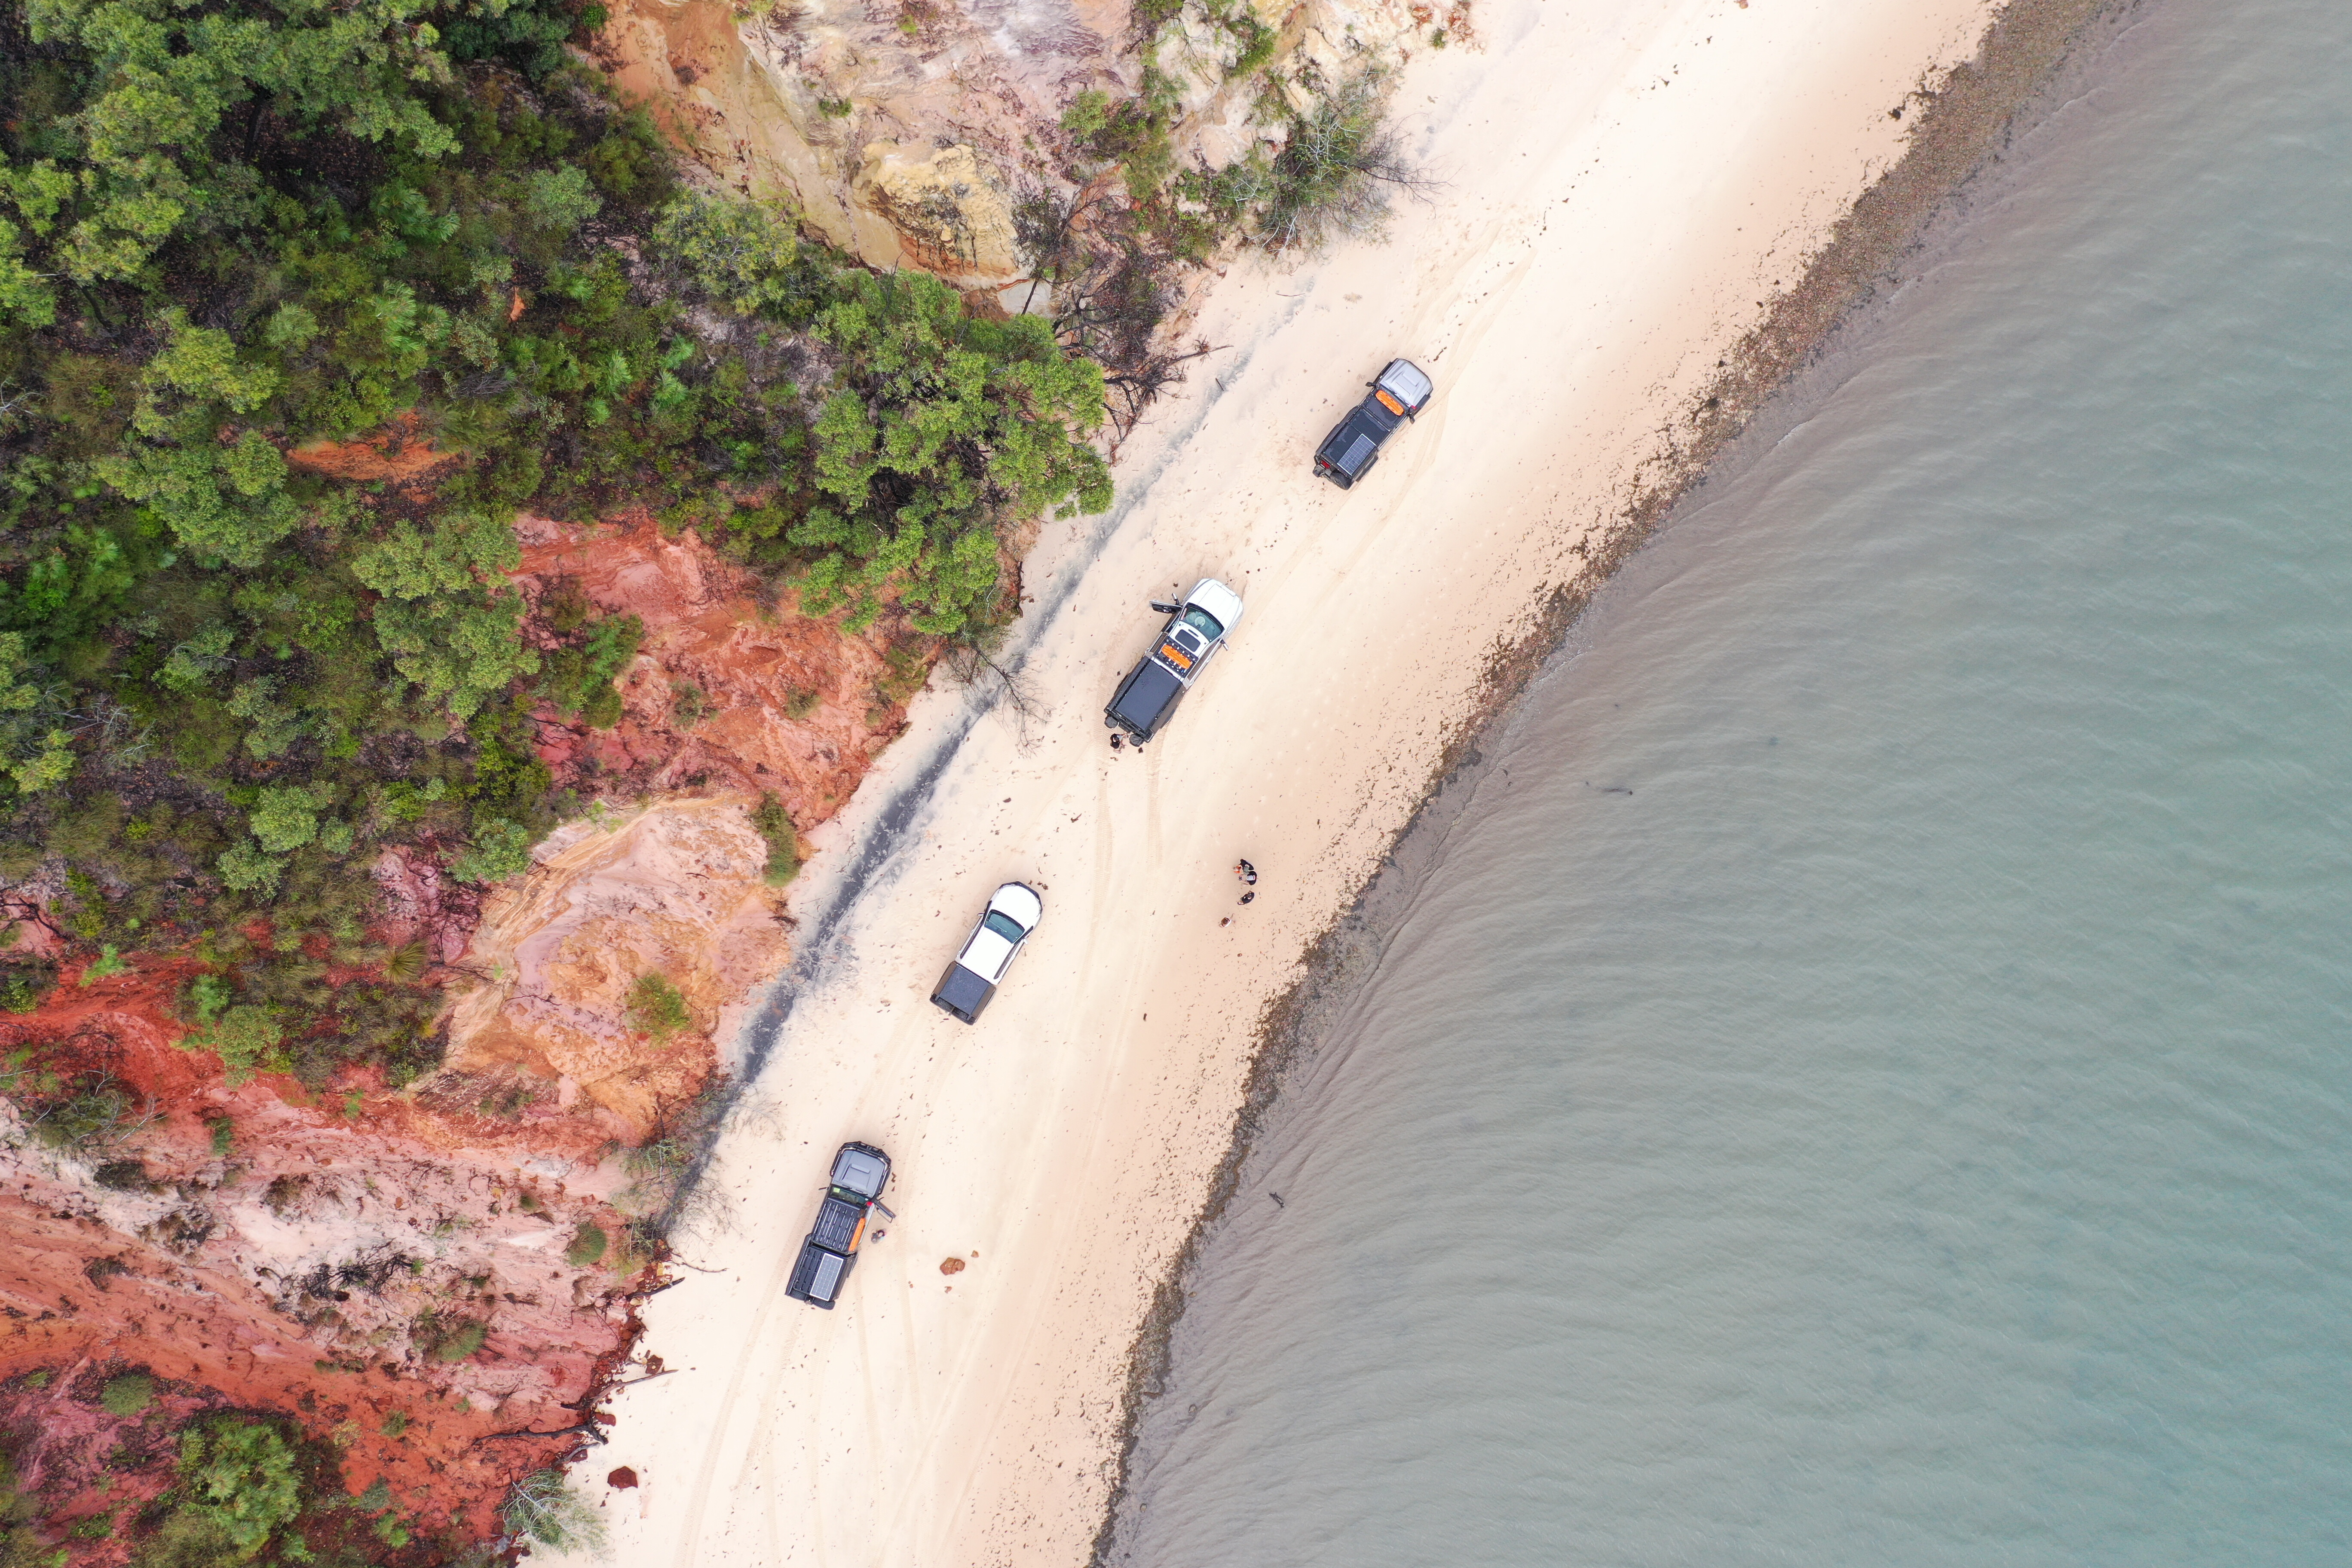
1
The weekend we had in Cairns was not the best weather and we didn’t really explore the area too much, just used the opportunity to stock up on groceries, spare parts and supplies. We had come from all over Australia to meet in Cairns and hit off the trip with awesome cocktails and parmys from the Cairns Coconut Bar.
Cairns and the Daintree can be a trip in itself, and we had a great time exploring the rainforest. The Mossman Gorge walk is an enjoyable and easy 7km hike through dense forest complete with a cool suspension bridge and refreshing swim at the end.
Another great tourist spot to visit is the Daintree Discovery Centre which is an informative insight of this amazing rainforest and the flora and fauna that inhabit it. A mandatory stop through the Daintree was the Daintree Ice Cream Company before checking out Cape Tribulation, a beautiful secluded beach that reminded us of a scene out of Cast Away.
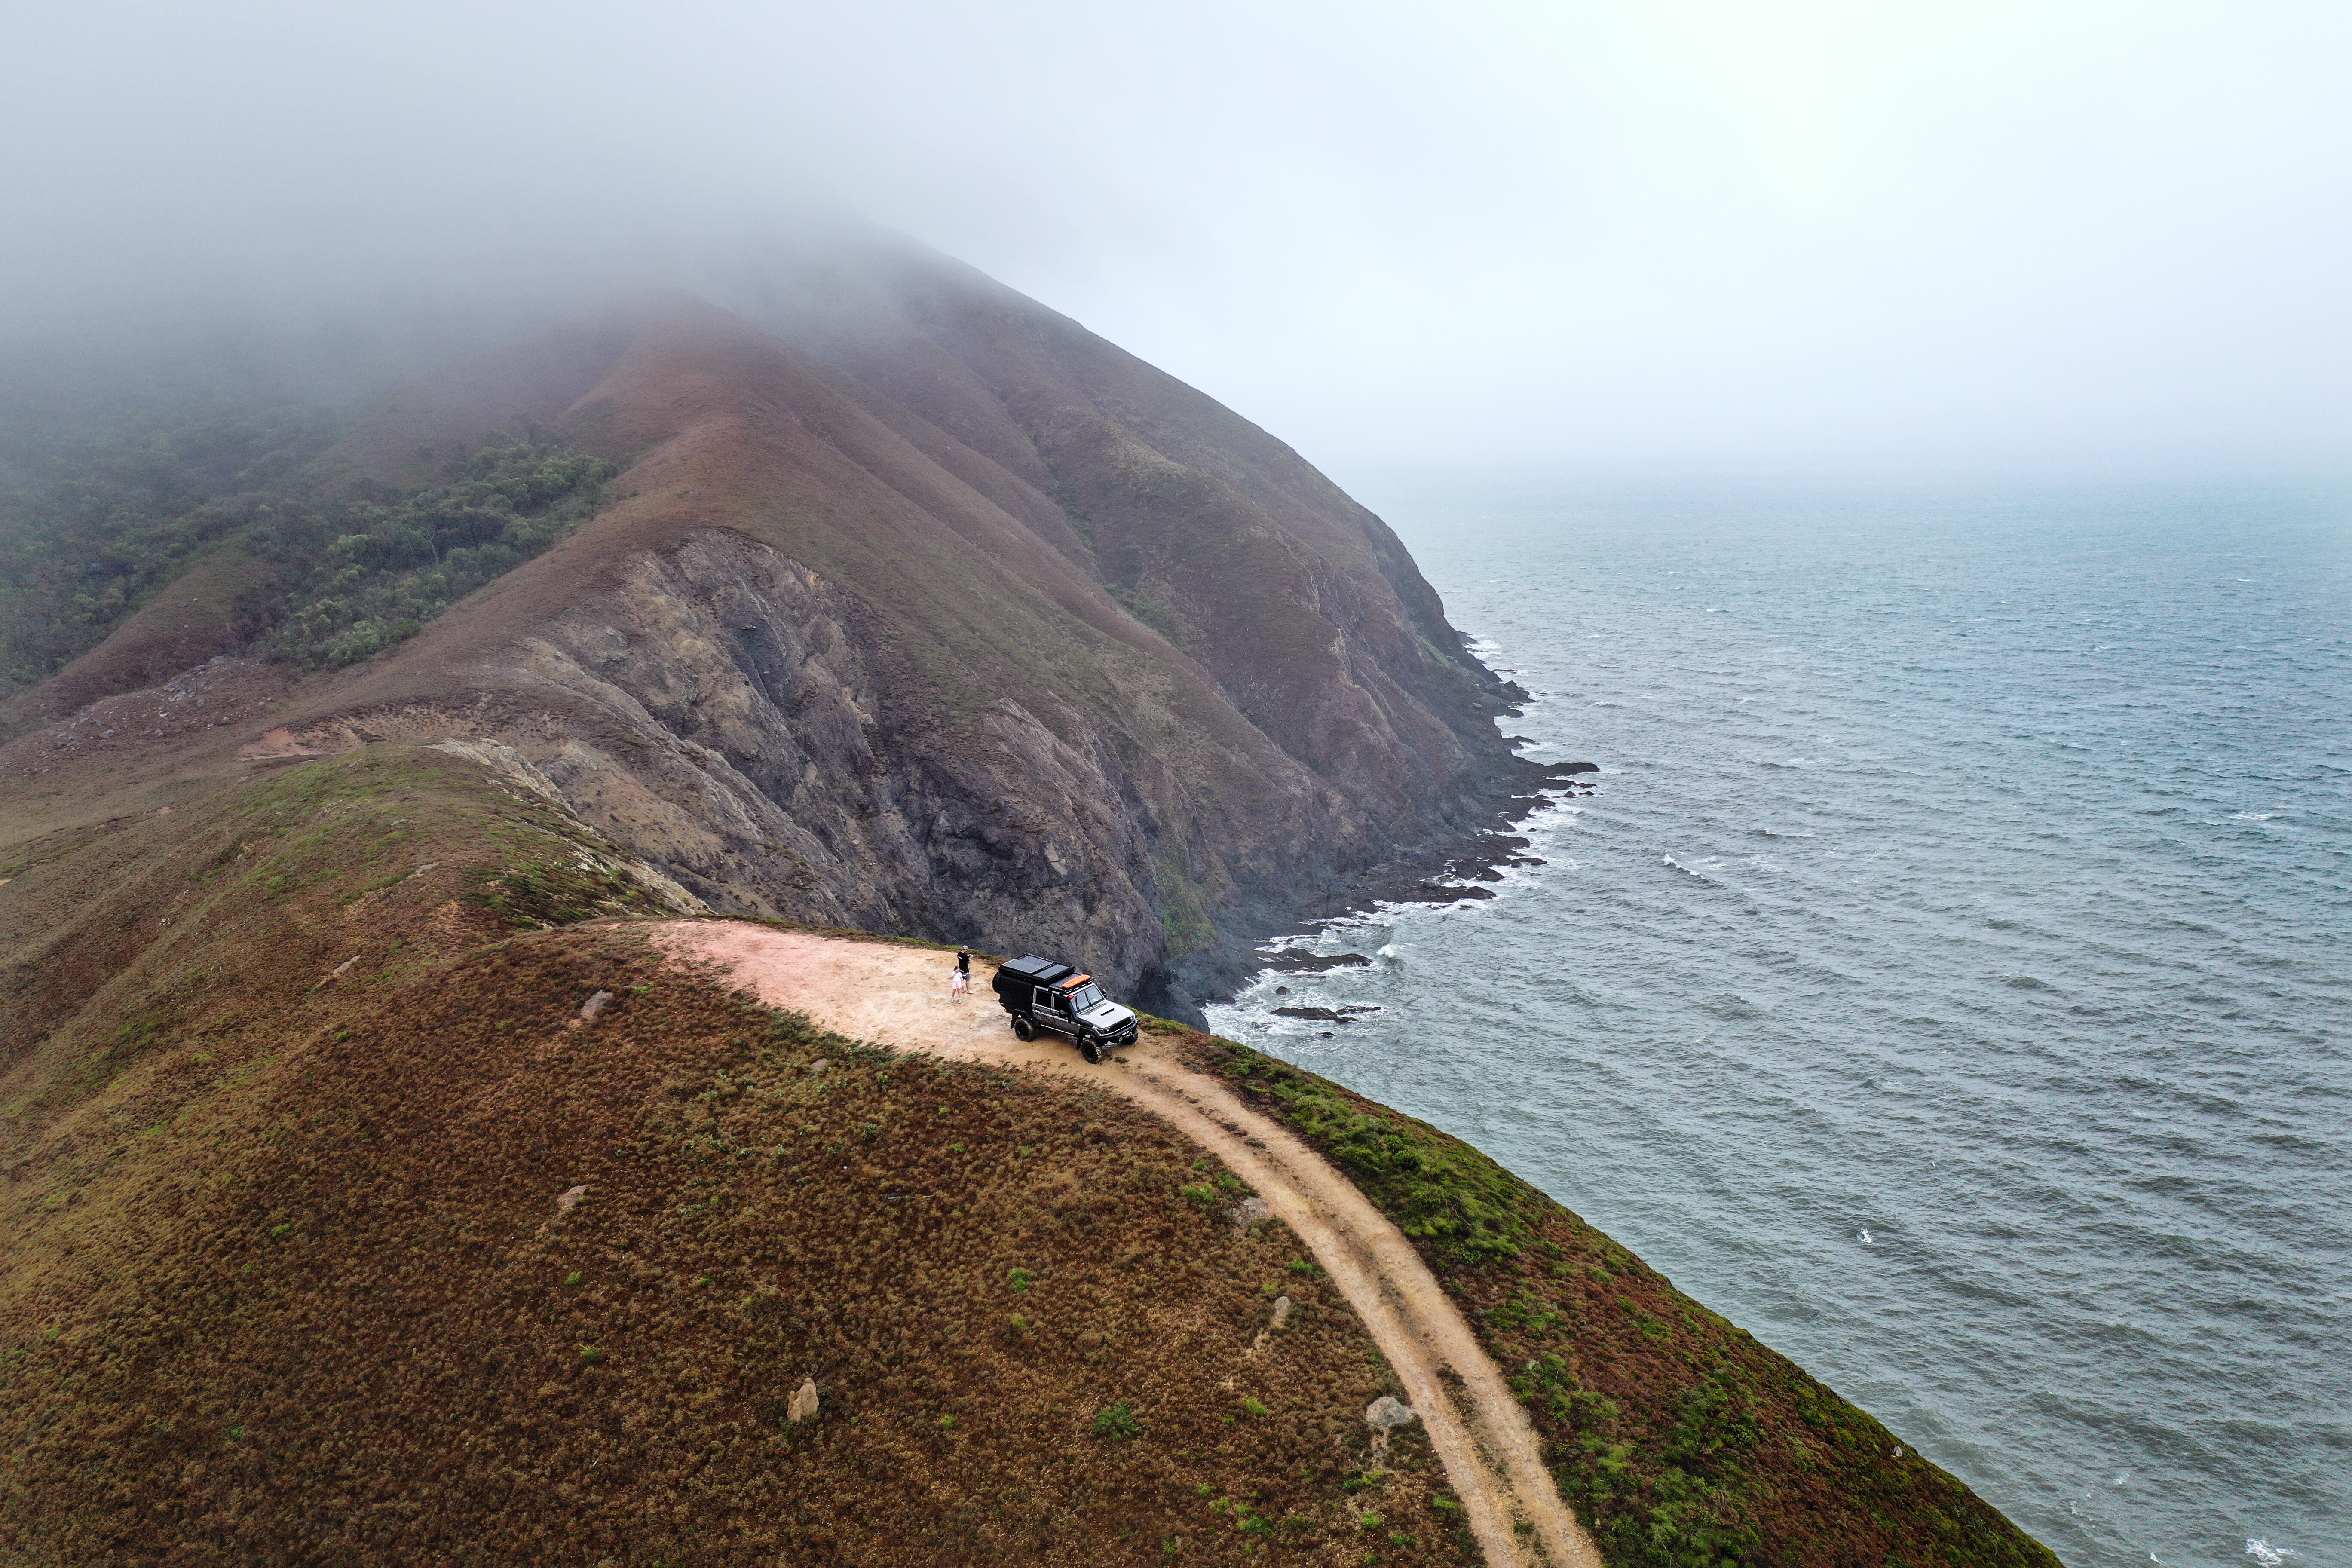
3
The road along the coastline from Port Douglas to the Bloomfield Track is a stunning drive and exceeds itself with the rainforest meeting the sea. The misty rain continued and we felt like it was following us, but that just added to the challenge of the Bloomfield Track.
The Bloomfield Track was a great start to the tracks we covered over the Cape and is a beautiful scenic rainforest drive with some serious hill climbs. While it wasn’t recommended to tow on the track, we successfully pulled our off-road ’vans and trailers through, showing that with care and good brakes, it can be done.
All the steep sections were concreted which helps, but it’s important to know that we undertook this at our own risk; this is no track for the average traveller and there is signage advising towing as not recommended. What a beautiful drive though, and a great start to the Cape.
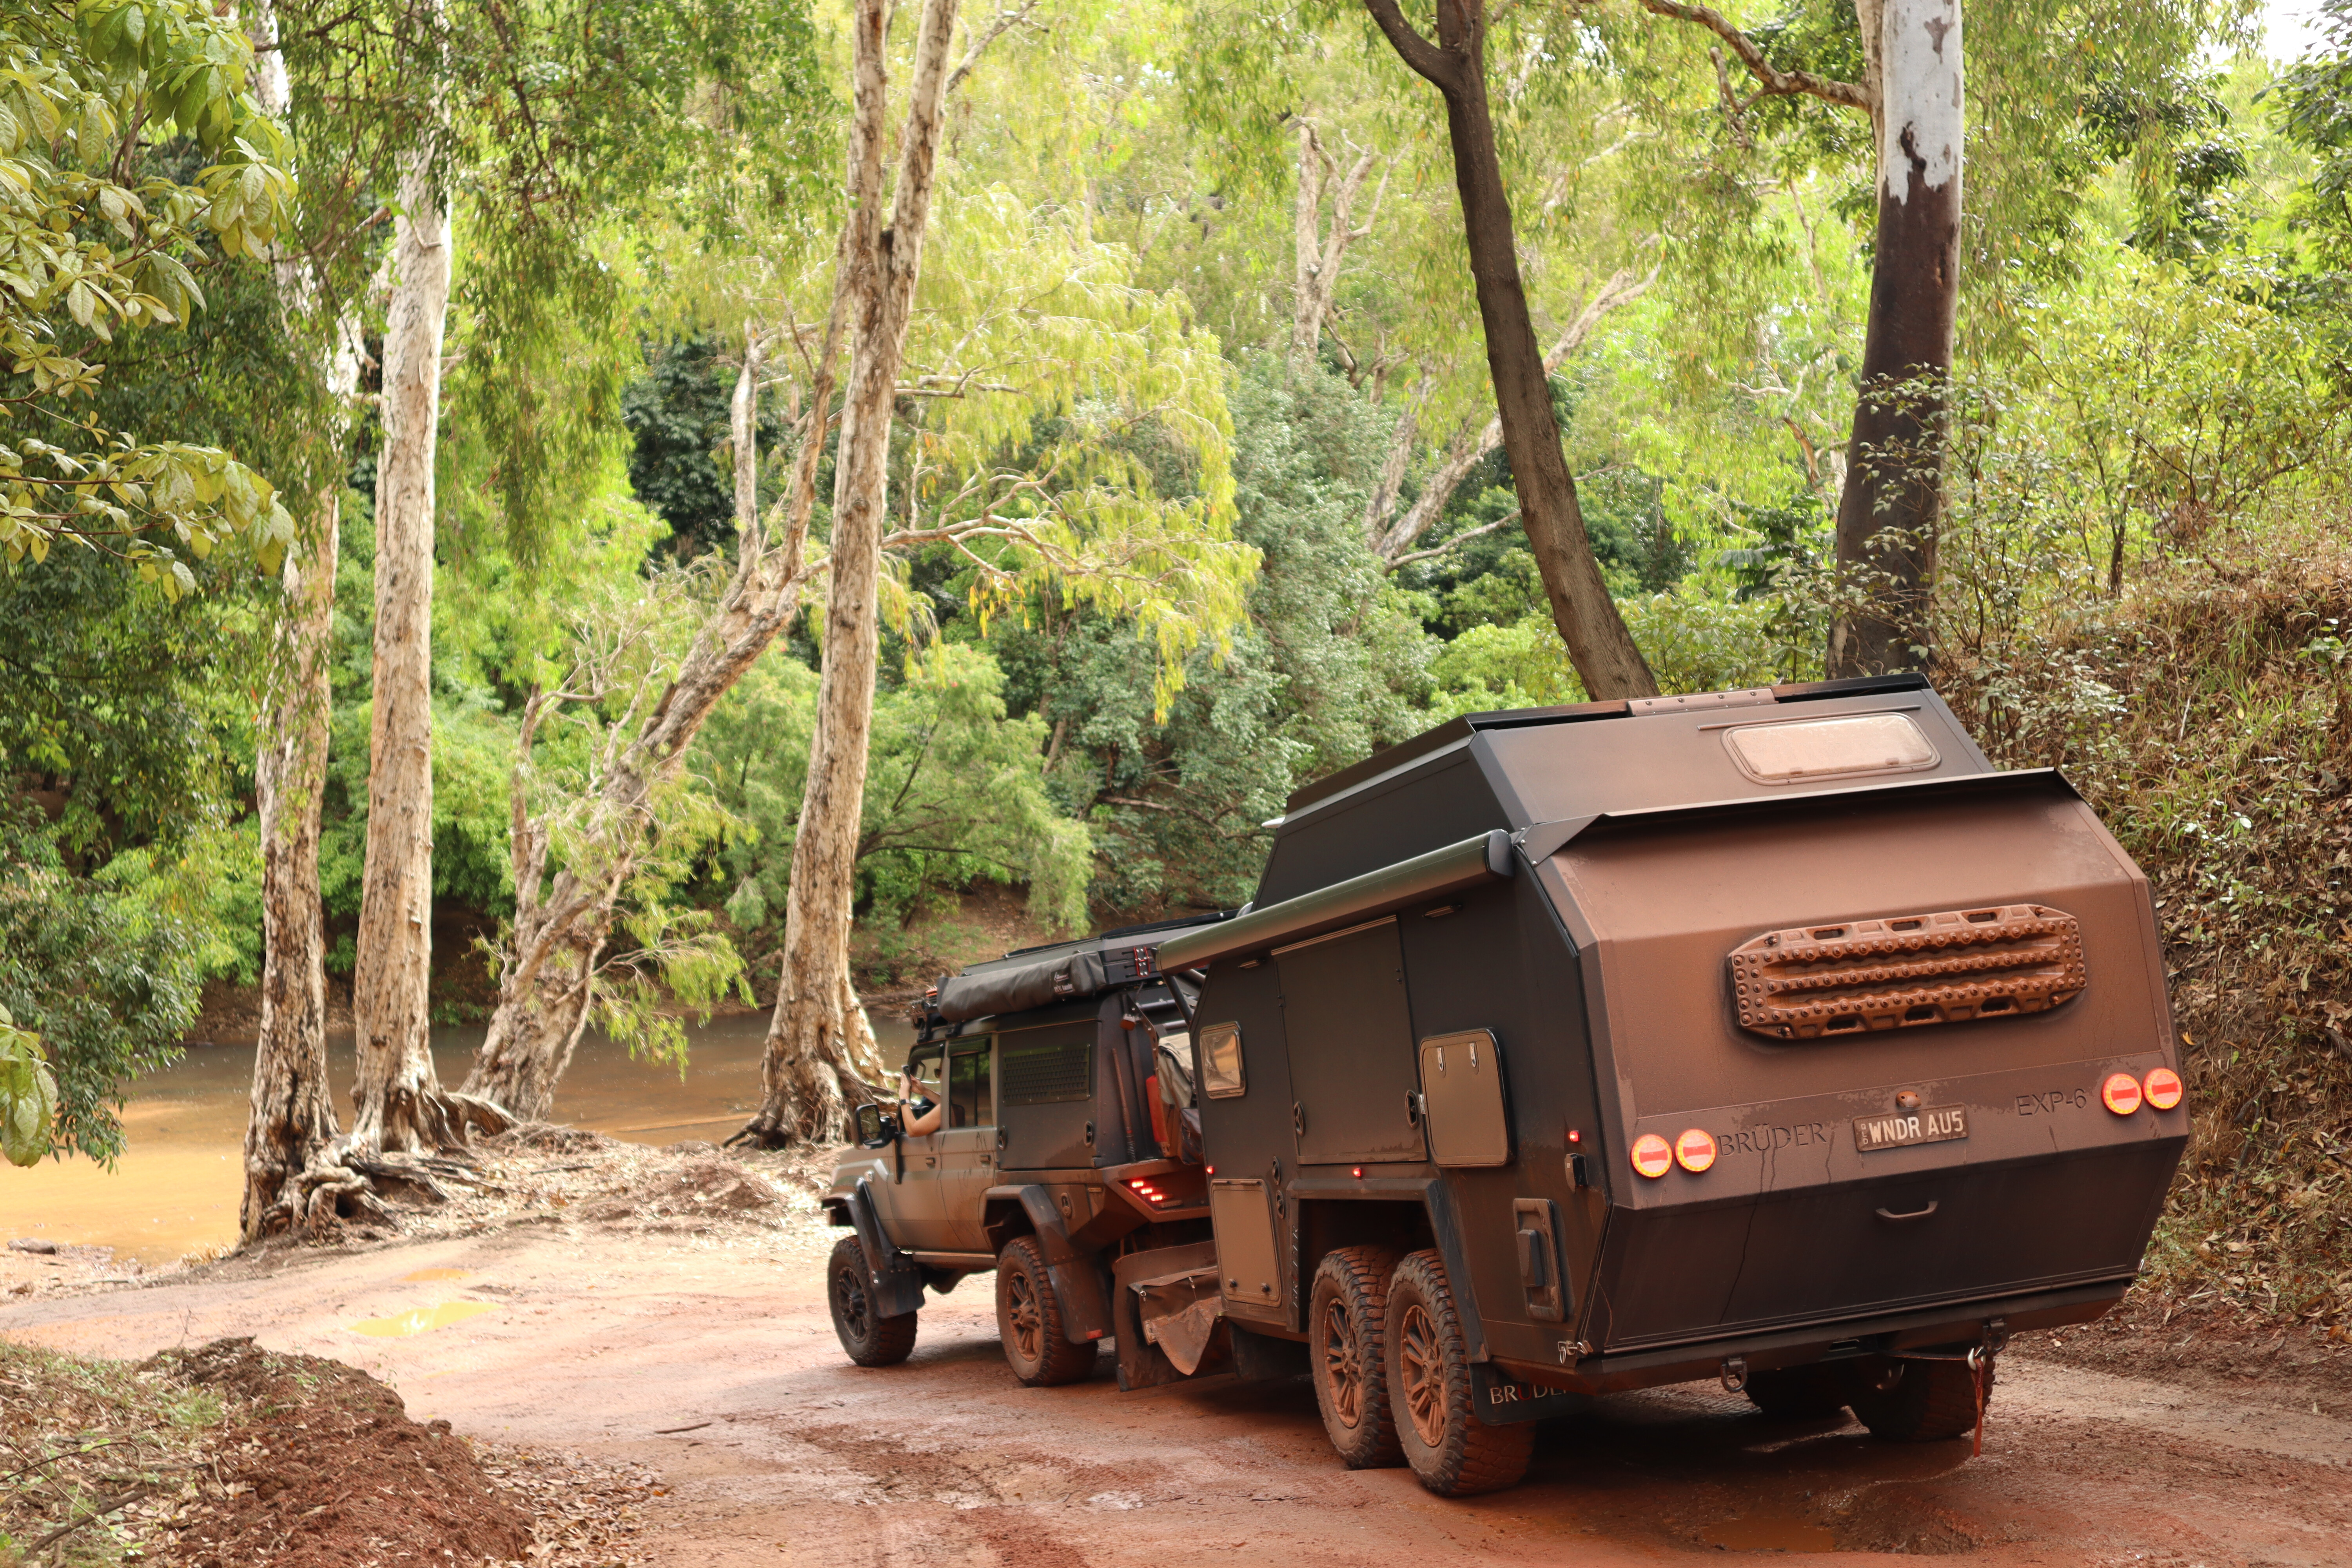
2
We rounded off the day with a drink, or 10 at the legendary Lions Den Hotel. It’s a great place, full of memorabilia, offering scrumptious pizzas, cold beer and live music. The best part is you can stagger back to camp just a few metres away.
Over on the east coast at the bottom of the Cape was our next stop and our first beach camp: Eddies Camp Ground at Elim Beach. We spent a few days exploring the surrounding 4WD tracks around Cape Flattery and Cape Bedford and was heaps of fun. These were not difficult drives and a good way to spend the day on the sand.
Our trip continued north-west through Rinyirru (Lakefield) National Park, stopping at Old Laura Homestead for a short history lesson and camping along the Laura River complete with a wild bull claiming his territory.
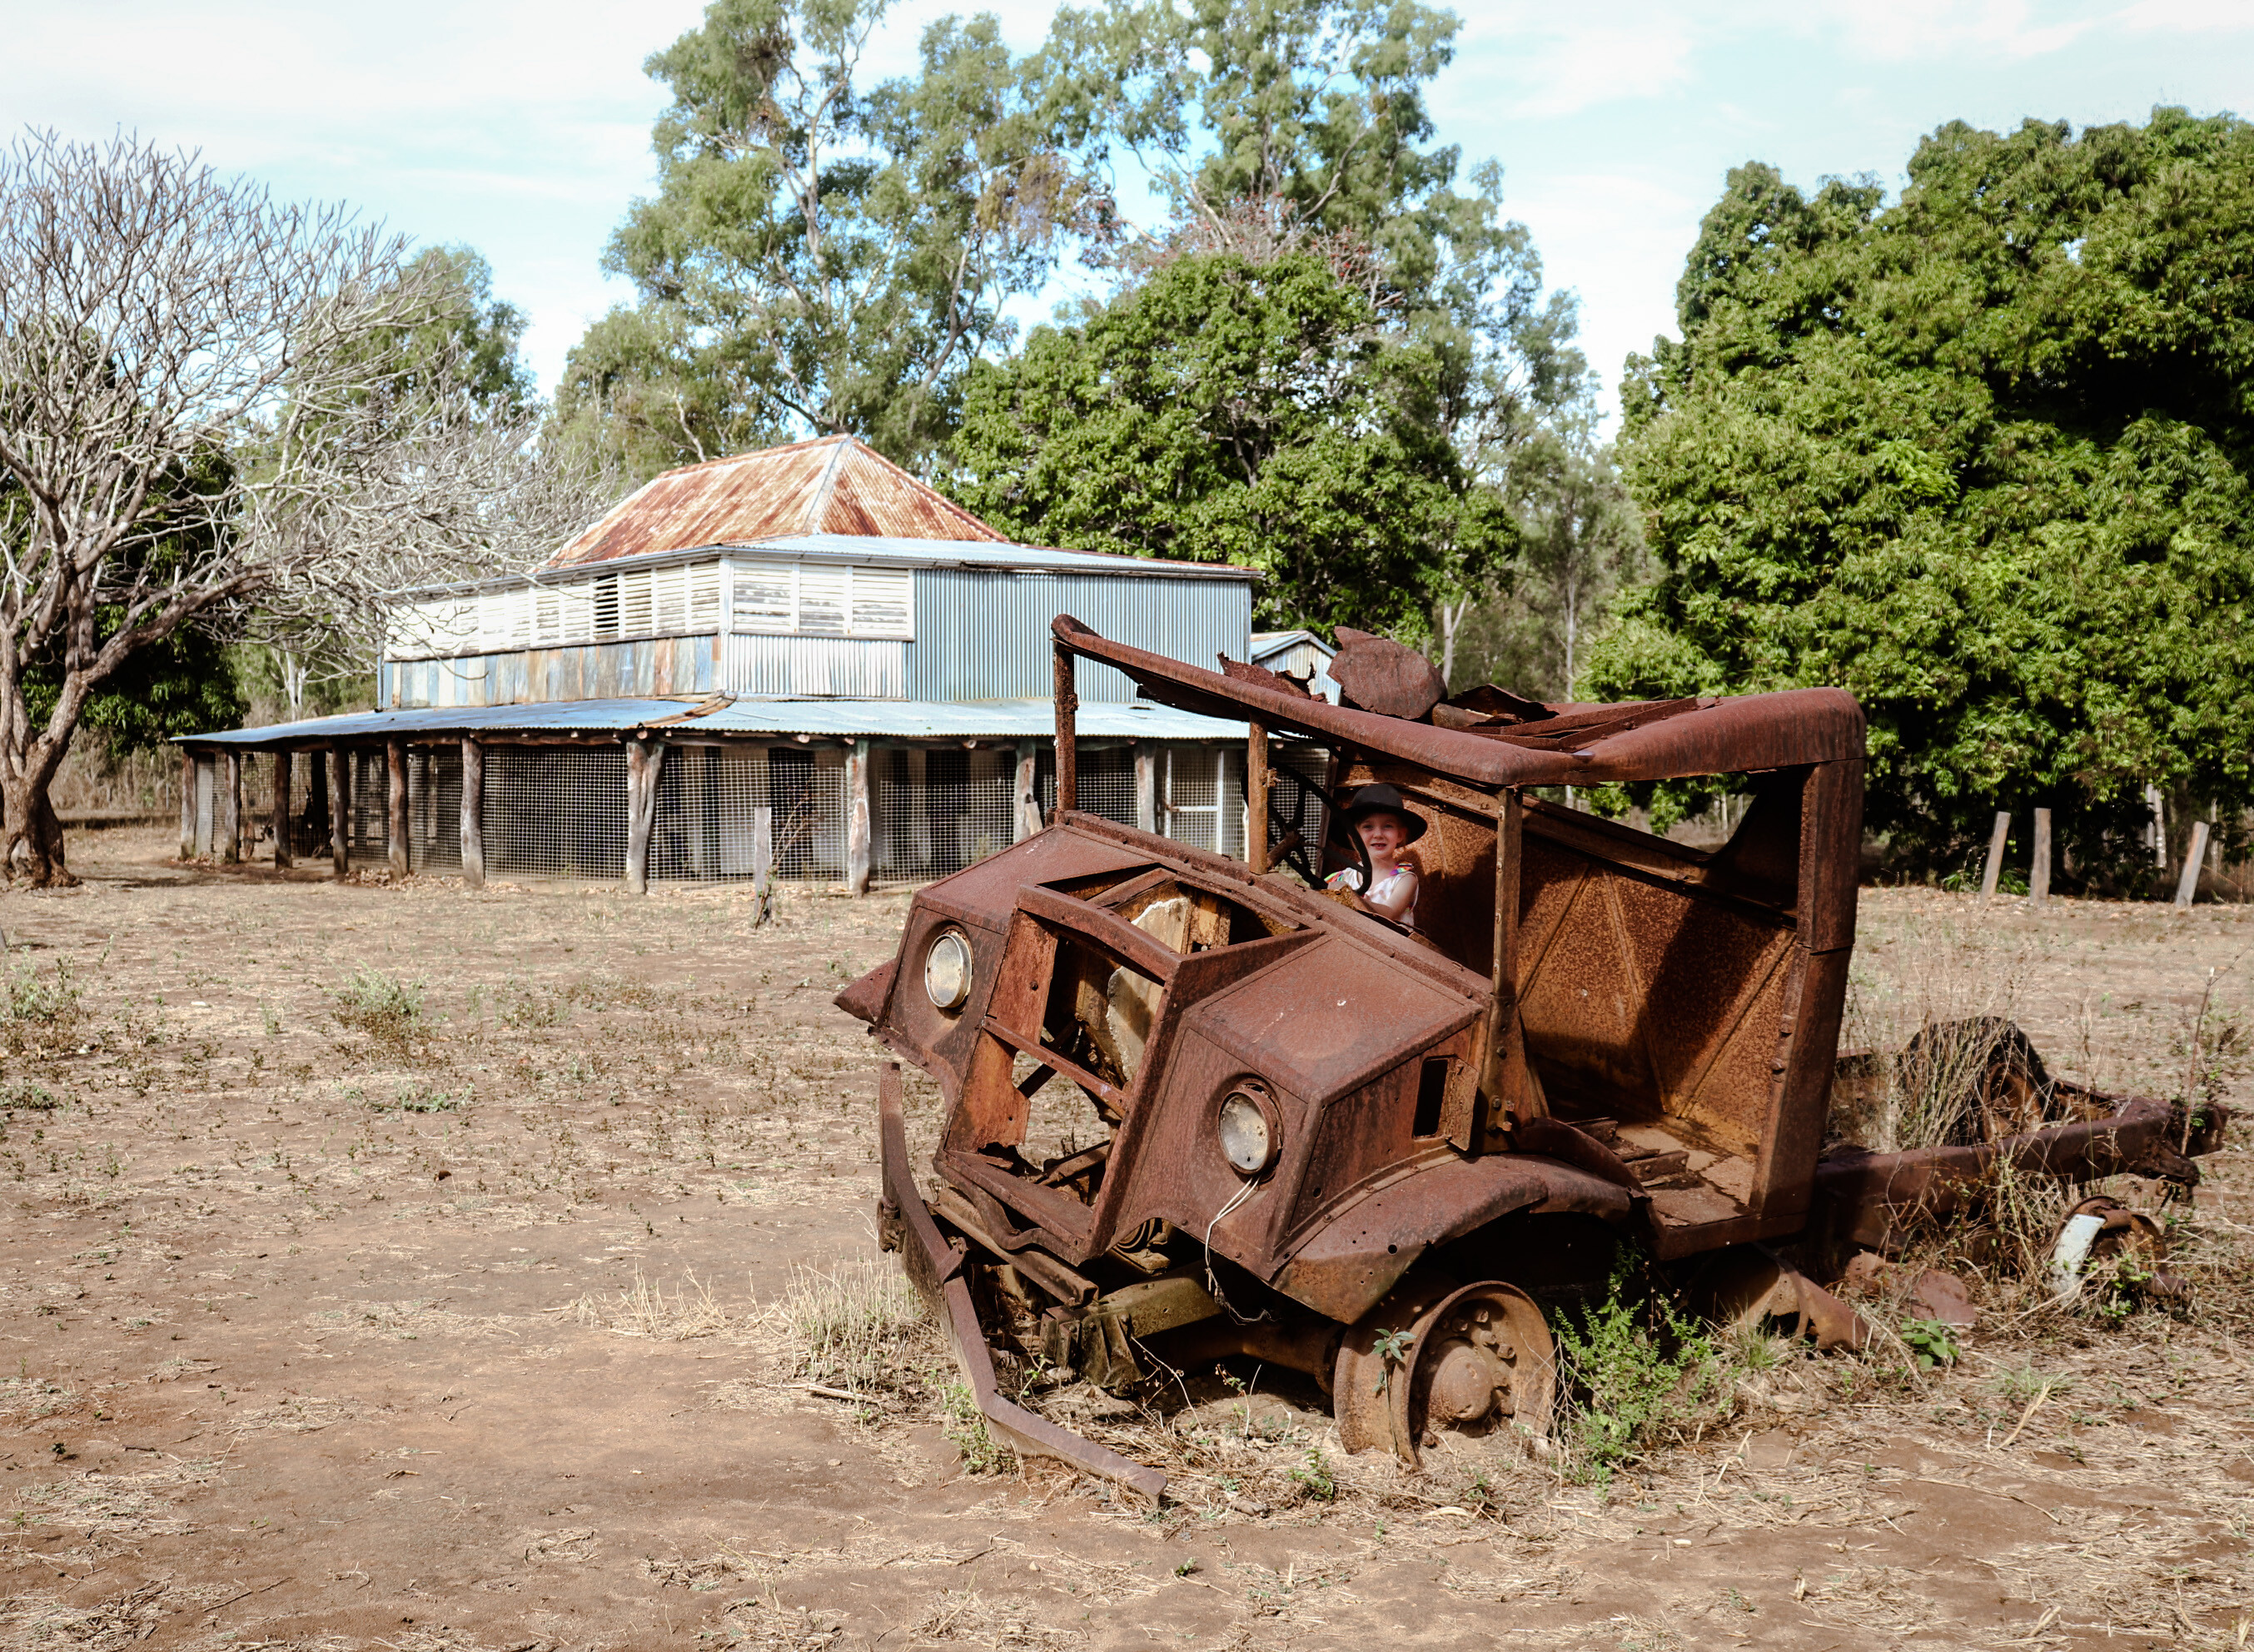
1
We toured up through Lakefield and met up with the PDR to spend a night at The Bend at Coen before heading on to Chilli Beach. To be honest, we felt like we didn’t give Chilli Beach a decent go due to bad weather, and the girls being ready for a shower and washing machine.
Chilli Beach could be a great little campsite to chill out for a few days and we also missed checking out Portland Road and The Temple WWII bunker accommodation nearby.
“The best part was crossing the Pascoe River, with a reasonably steep, rutted-out descent”
From here, we dropped the ’vans at Archer River Roadhouse and hit the Frenchmans Track. This was our favourite track of all the 4WDing we did in the Cape. It is around 50km and we did it in around five hours, however that was taking our time having a few swims and a well-deserved beer at the end of it. It wasn’t an overly challenging track but an enjoyable scenic drive.
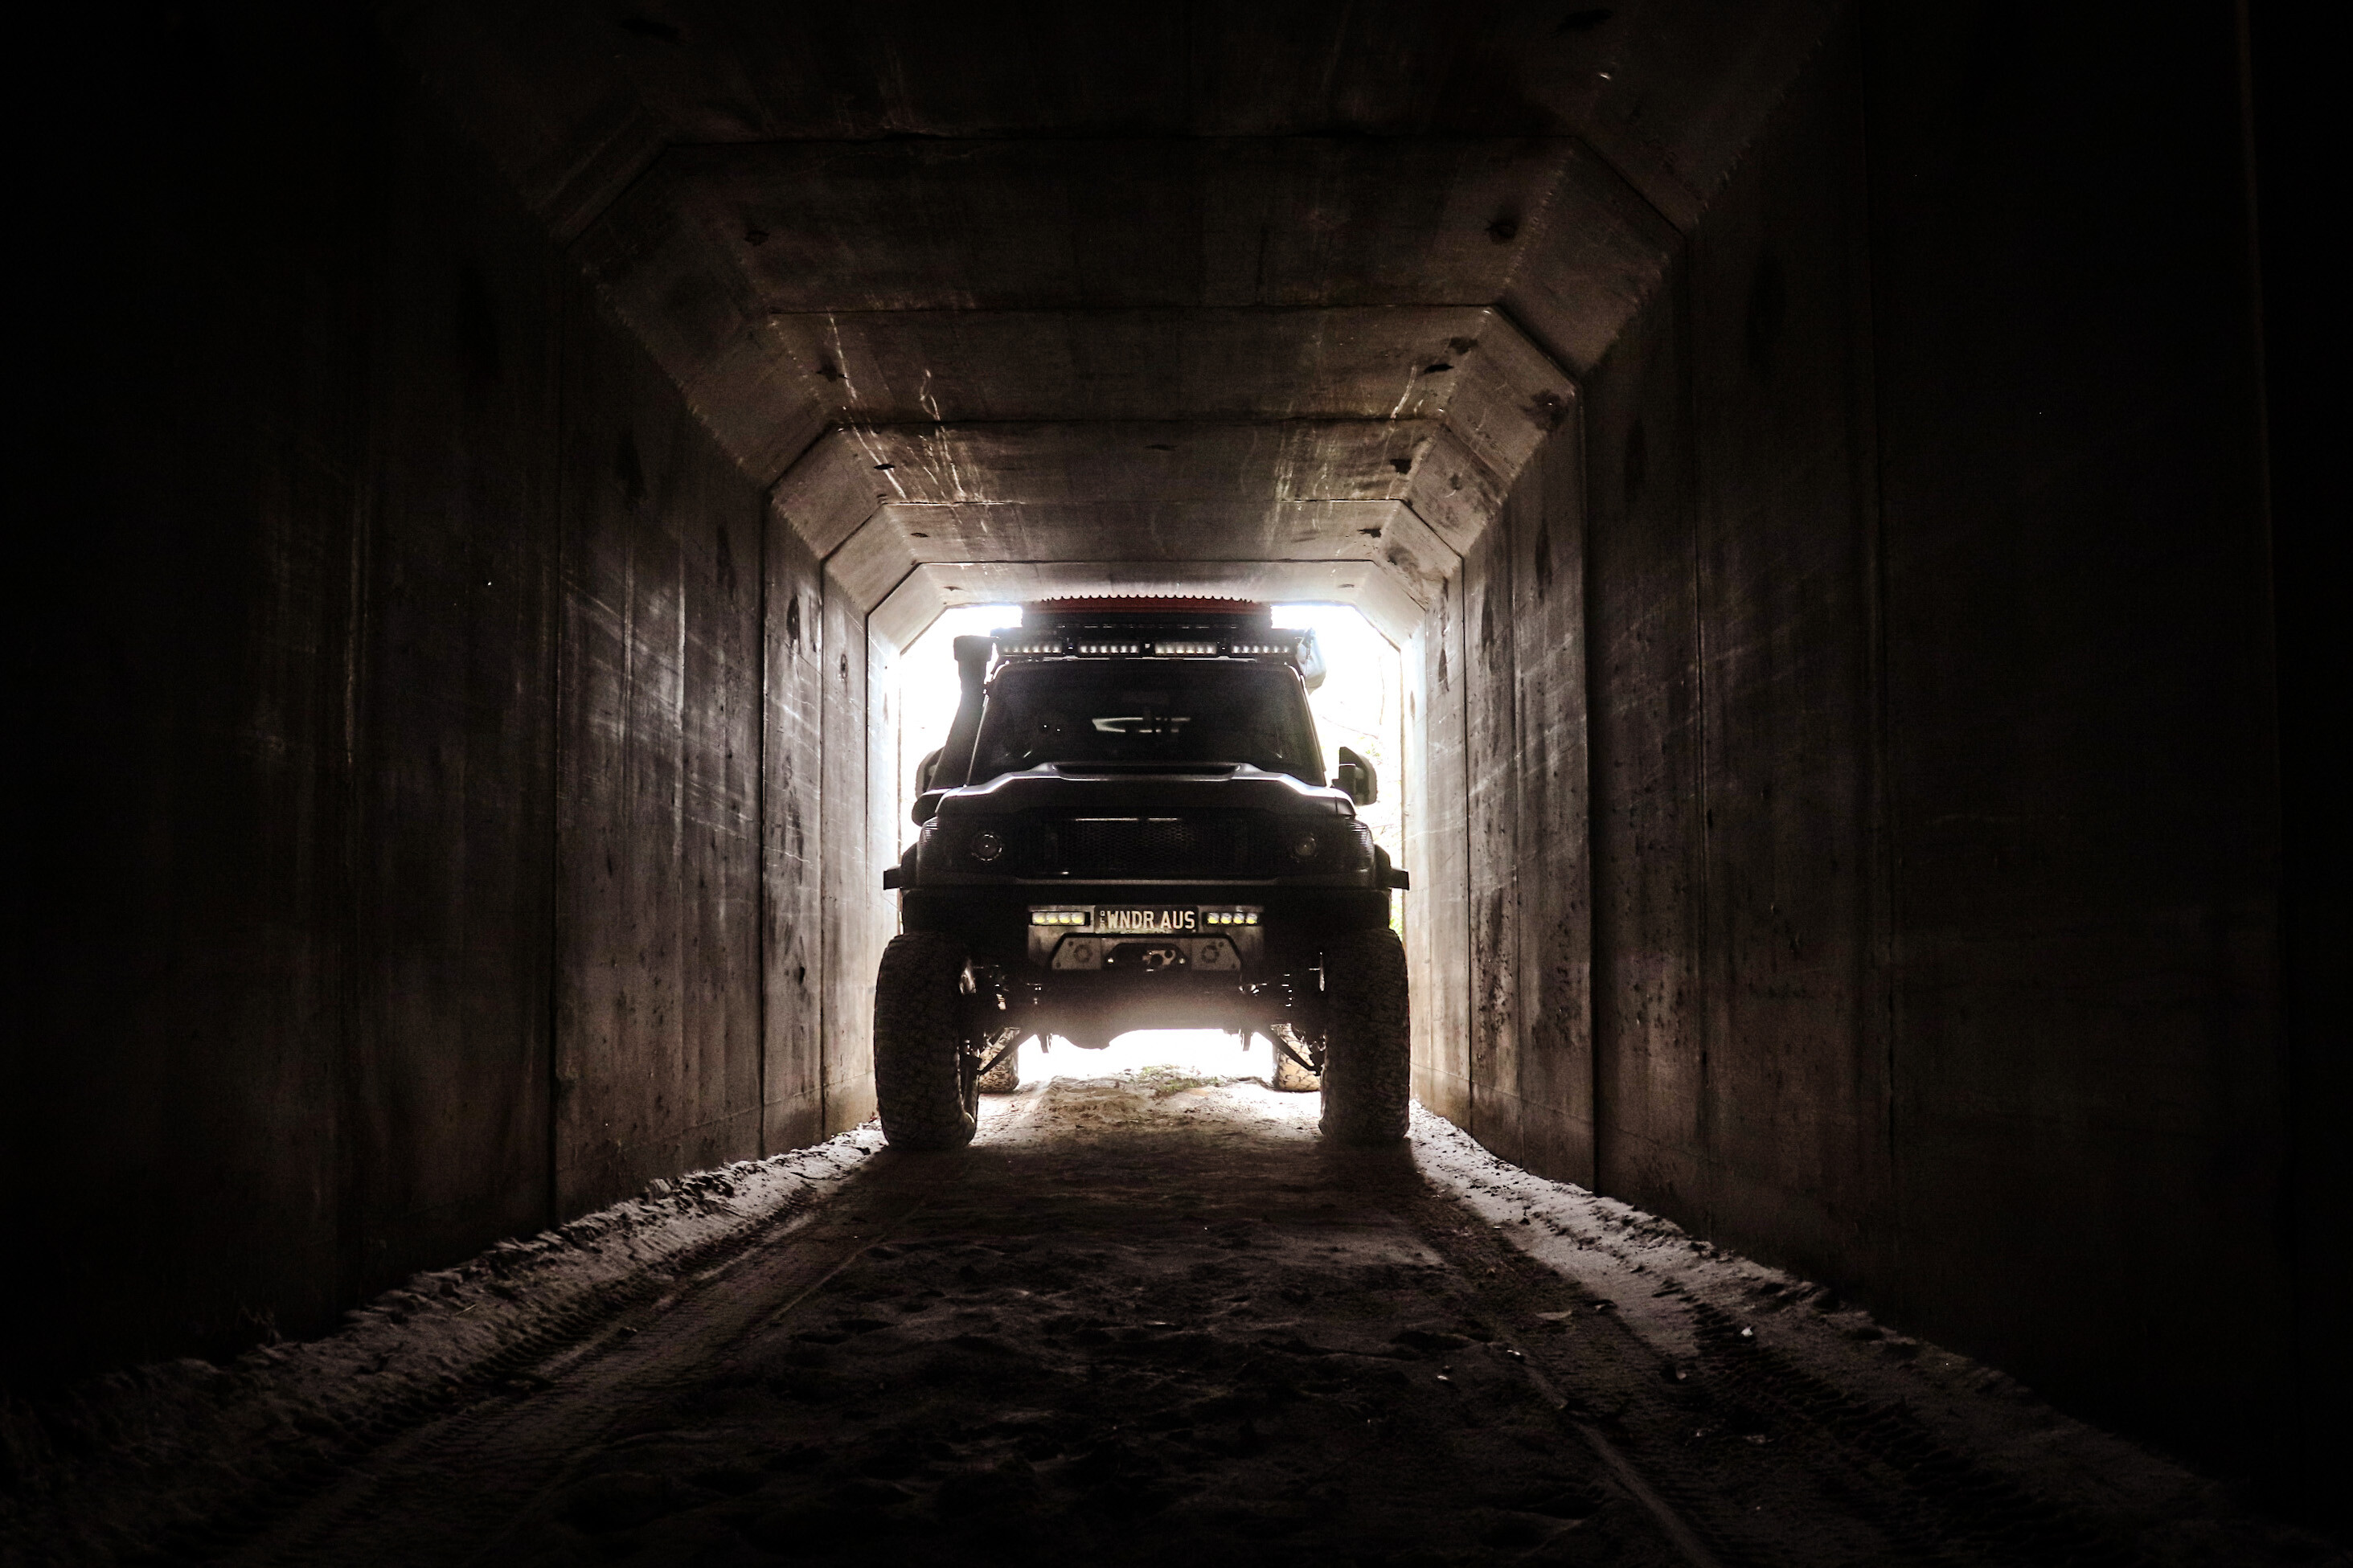
2
The best part was crossing the Pascoe River with a reasonably steep, rutted-out descent into around 50m of 1.2m deep water. It was easily managed by all the vehicles and the road after the Pascoe worked its way up on top of a sinkhole with some magic views for sunset.
We rounded out the first half of our Cape York trip with a few days in Weipa for a stock-up and refresh. Whilst here, we checked out the community of Mapoon and spent most of the day playing in the dunes at the beautiful Pennefather Beach. It’s torture seeing the stunning blue water and not being able to swim!
We finished our days at Weipa with fresh barra and chips at the campground and a few cold brews.
Next month, we’ll take you farther north on the famous Old Telegraph Track to the tip. Yes, we made it and yes, the 79 survived (we never had any doubts) and came out pretty much unscathed!
Part 23: Ol’ Tele adventures
Well, here we go! We finally get to talk about the Old Telegraph Track and our time on this iconic adventure. The Old Telegraph Track (OTT) in Far North Queensland is one of the most famous four-wheel drive hotspots in Australia, along with the likes of the Vic High Country and the Gibb River Road.
An achievement so many are dying to tick off their bucket list, and let me tell you it was a great feeling relaxing in the waters of Nolans Creek knowing we had got through multiple obstacles relatively unscathed.
There are a few different ways to tackle this terrain, but our plan was to take it slow heading up to the tip. We started at South Tele, completing it in two sections over two days with a small break in-between. Most people do the Tele south-to-north and then follow Bamaga Road down from the tip; however, if you’re up for the challenge, you can go against the grain, north-to-south.
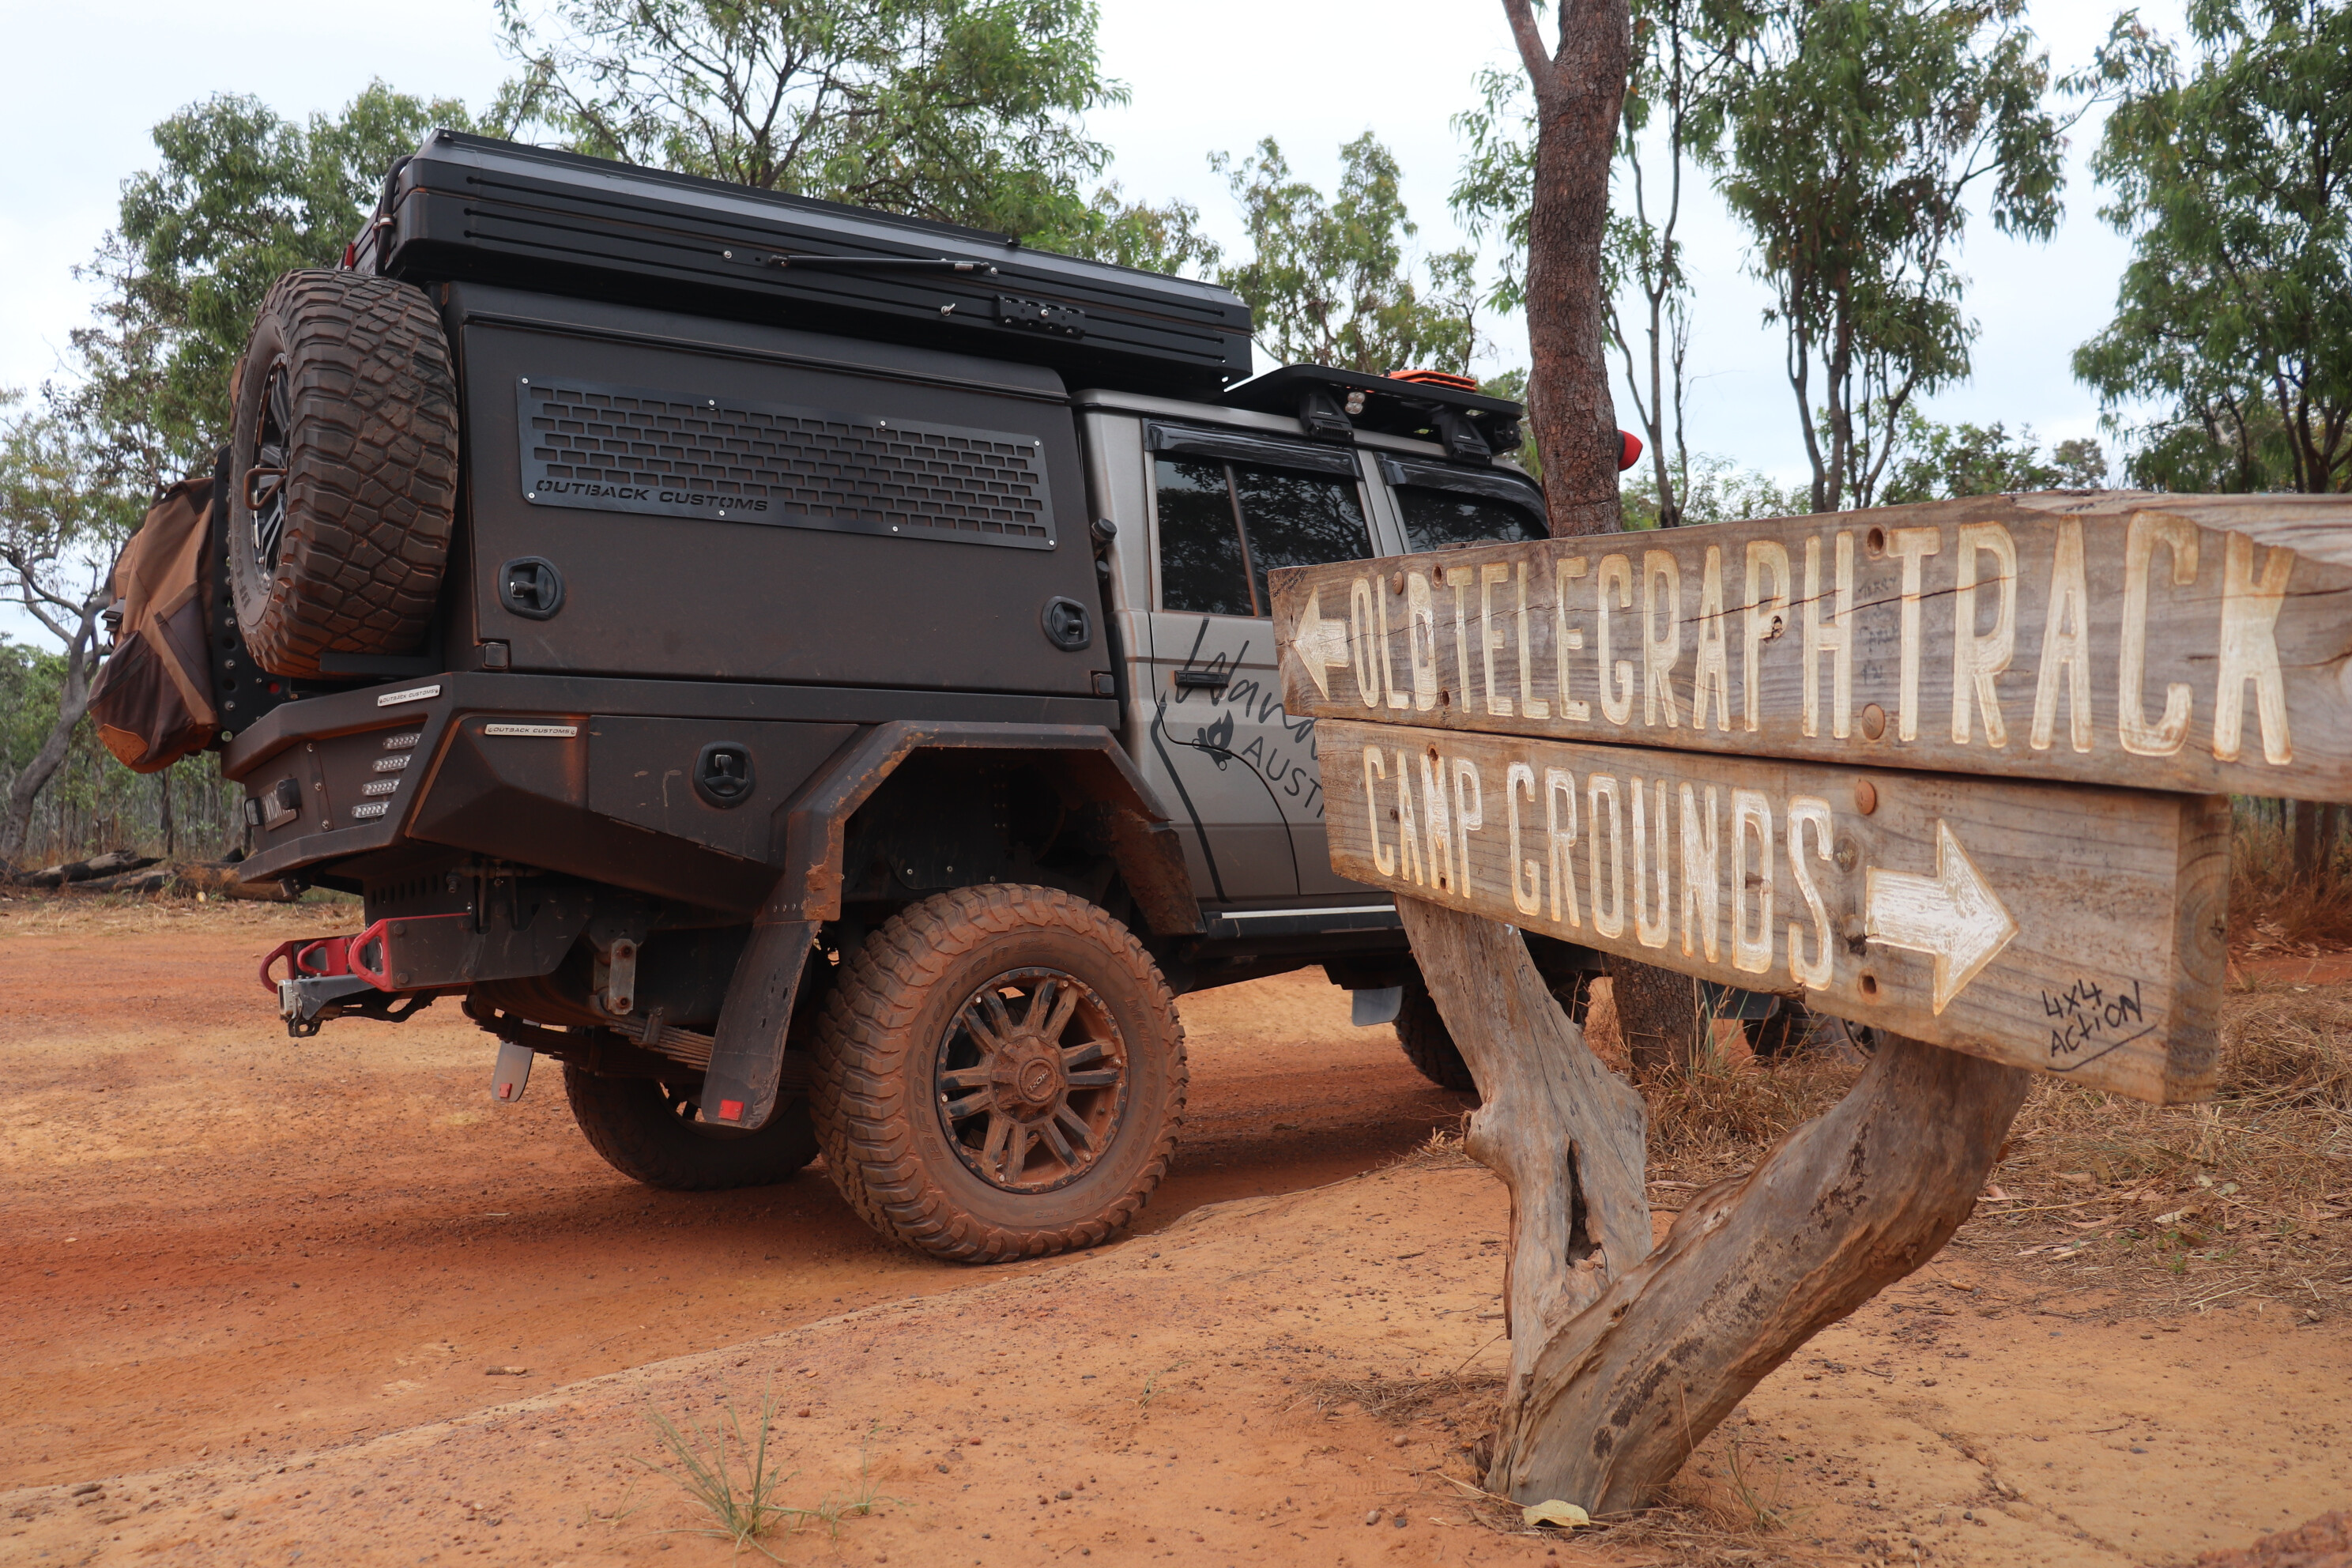
1
As well as being great 4WDing, the OTT is rich in history and we loved learning about how many people from different cultures survived this harsh terrain. Nikita spent most of her time in the passenger seat studying the Hema Cape York Atlas & Guide and can’t recommend it enough.
The OTT is what is left of the Cape York Overland Telegraph Line completed in 1887. It extended from Laura to Thursday Island, operating until 1962. This is a reasonably tough track in the 21st century, let alone back then, and we can’t count the number of times we said: “Gee, imagine what this was like on horseback.” After all, it took the initial surveyors three months just to get to Somerset Station.
You can still see all the telegraph poles along the way, and it is maddening to see that most of them have been vandalised. We just can’t understand why people have to damage history and ruin the experience for others. There is a rumour that there are one or two original timber poles left on the track, but we couldn’t spot them.
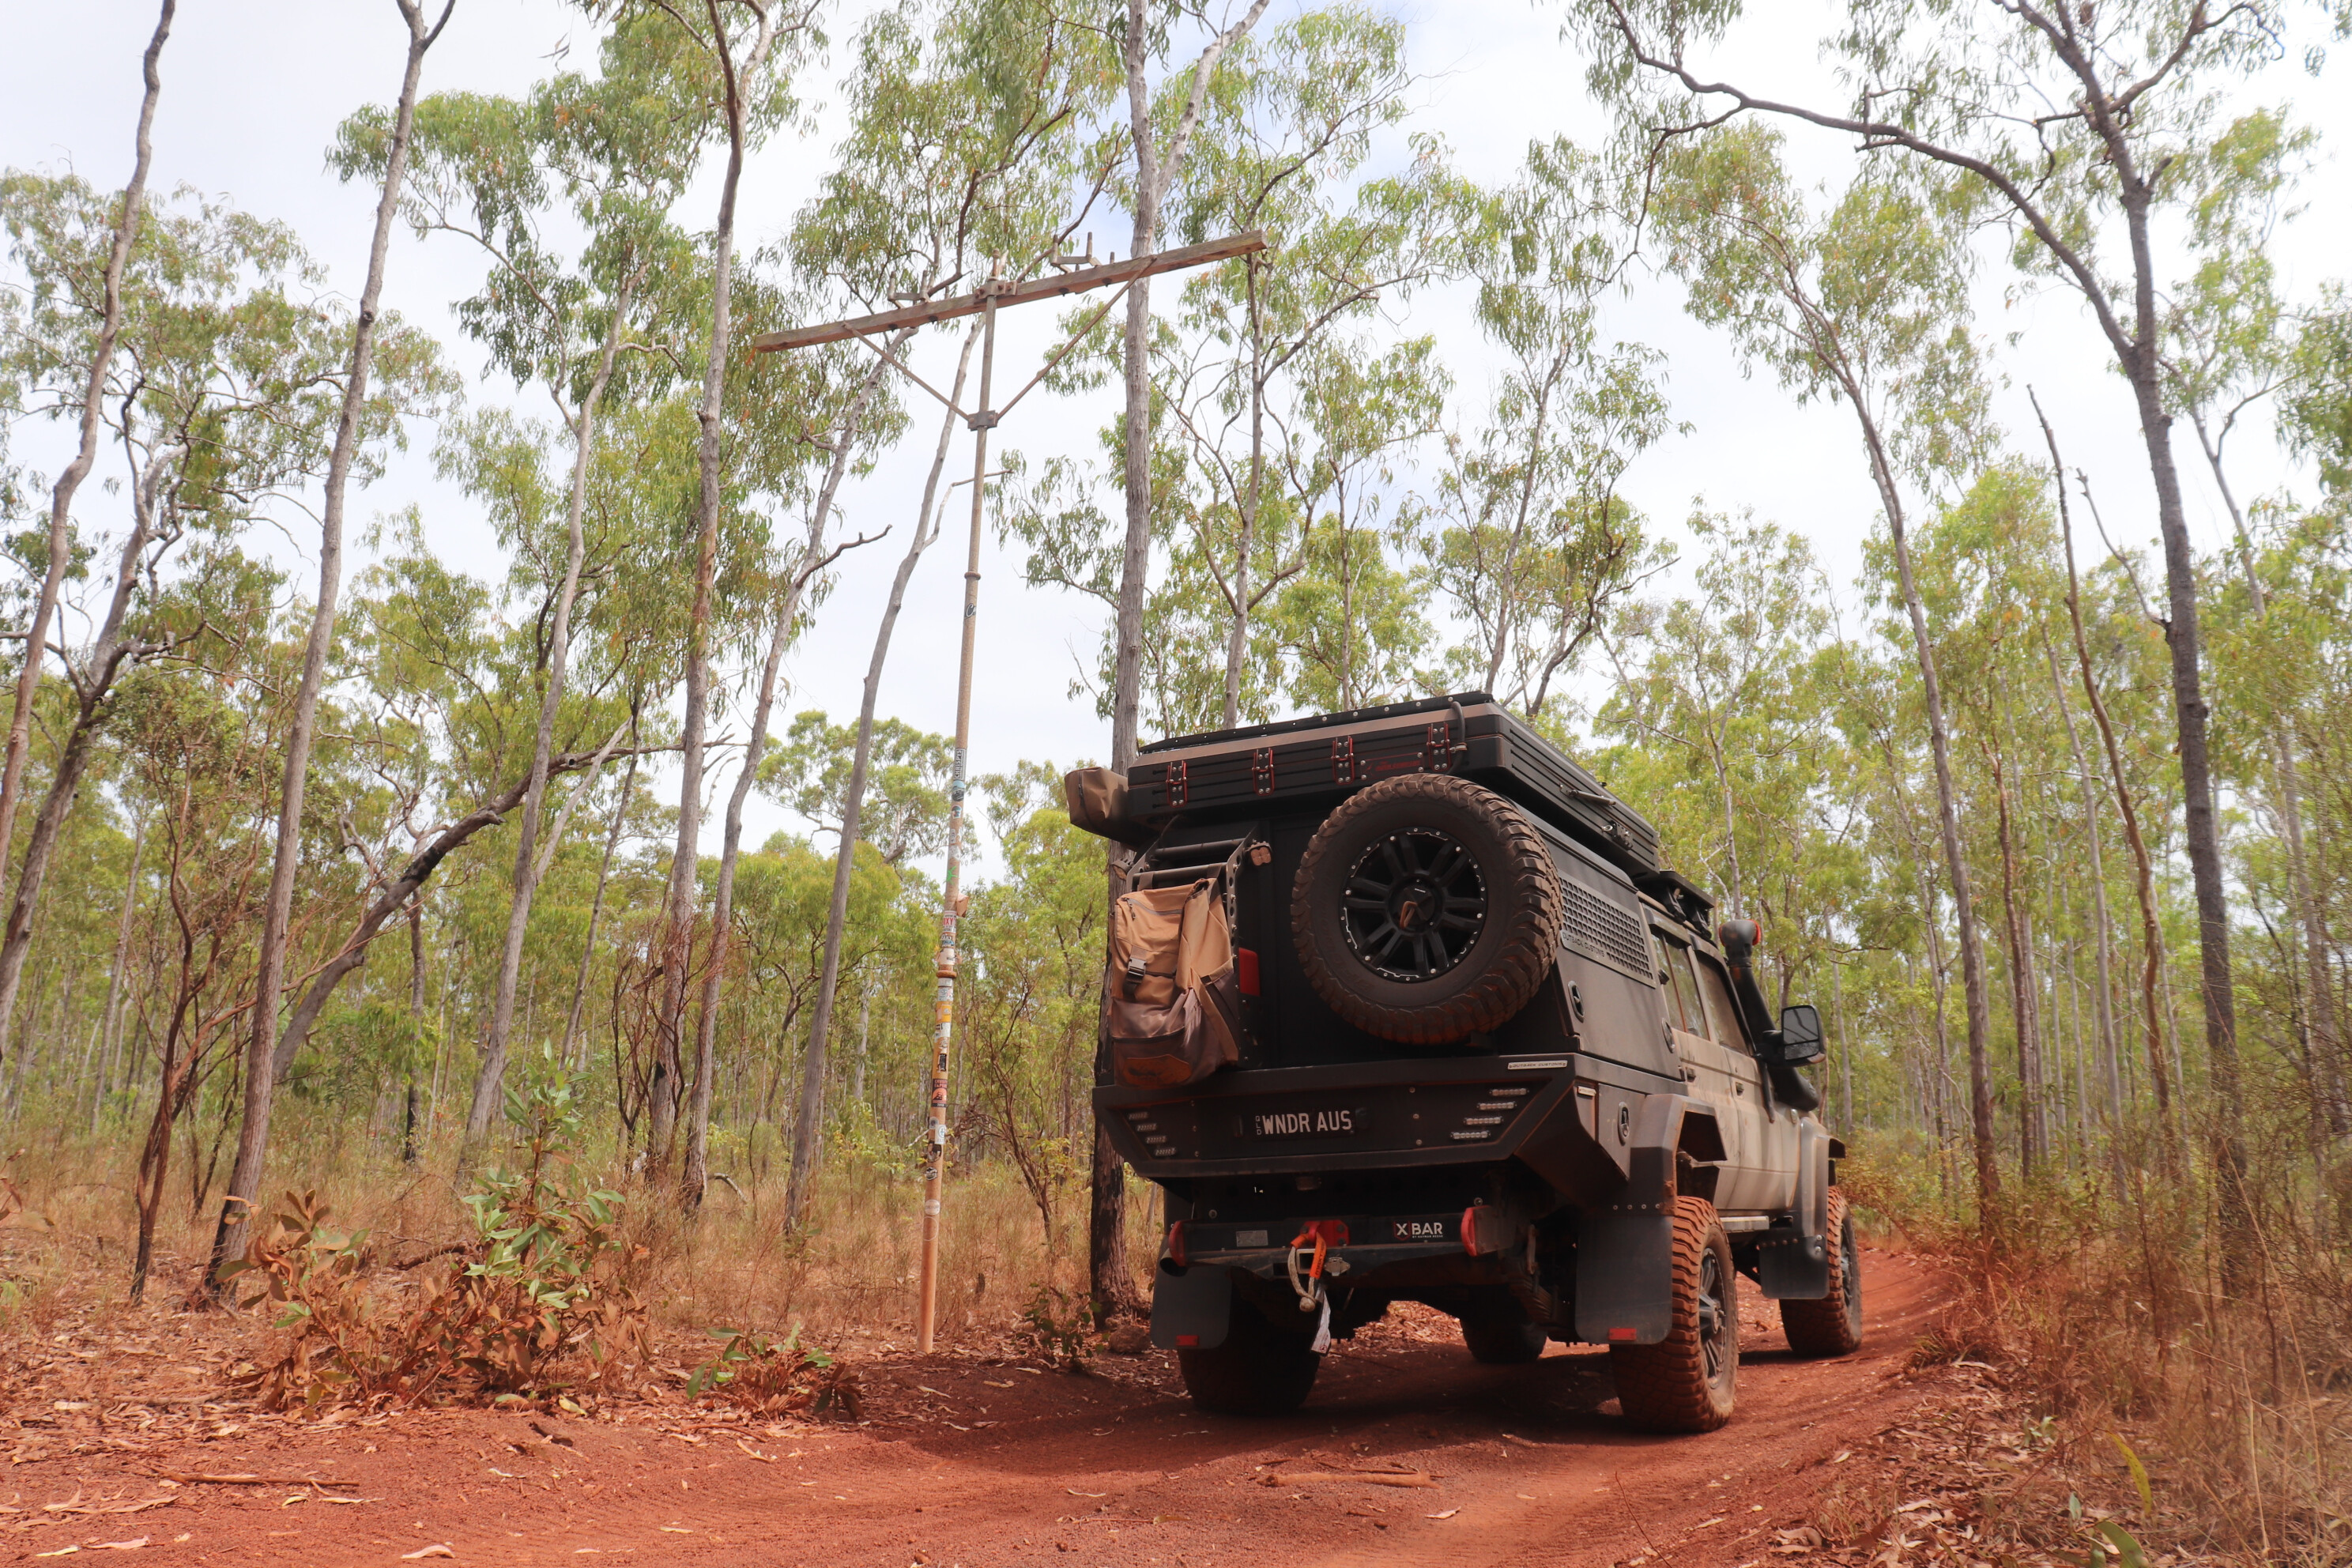
1
We had a couple of days at Bramwell Station to recuperate and prepare for a few big days in the car. The boys made sure tyres were checked, pressures were right, air filters cleaned and weights were reduced, while the wives refilled snacks, ensured iPads were charged and caught up on washing. How cliché!
The South Tele Track was a big day and, when we do it again, we will probably camp along it rather than travelling back to Bramwell. The two sections of the OTT are quite different; the southern section is longer, a lot of steep creek descents, obstacles and it’s quite dry, while the northern section has more water crossings but a shorter distance overall.
Starting at the famous sign at Bramwell Junction, the first obstacle is Palm Creek and it comes upon you quite early in the drive. You could spend most of a day hanging out here watching all different vehicles taking on this challenge. From all reports, this was by far the most challenging obstacle of the OTT for 2022.
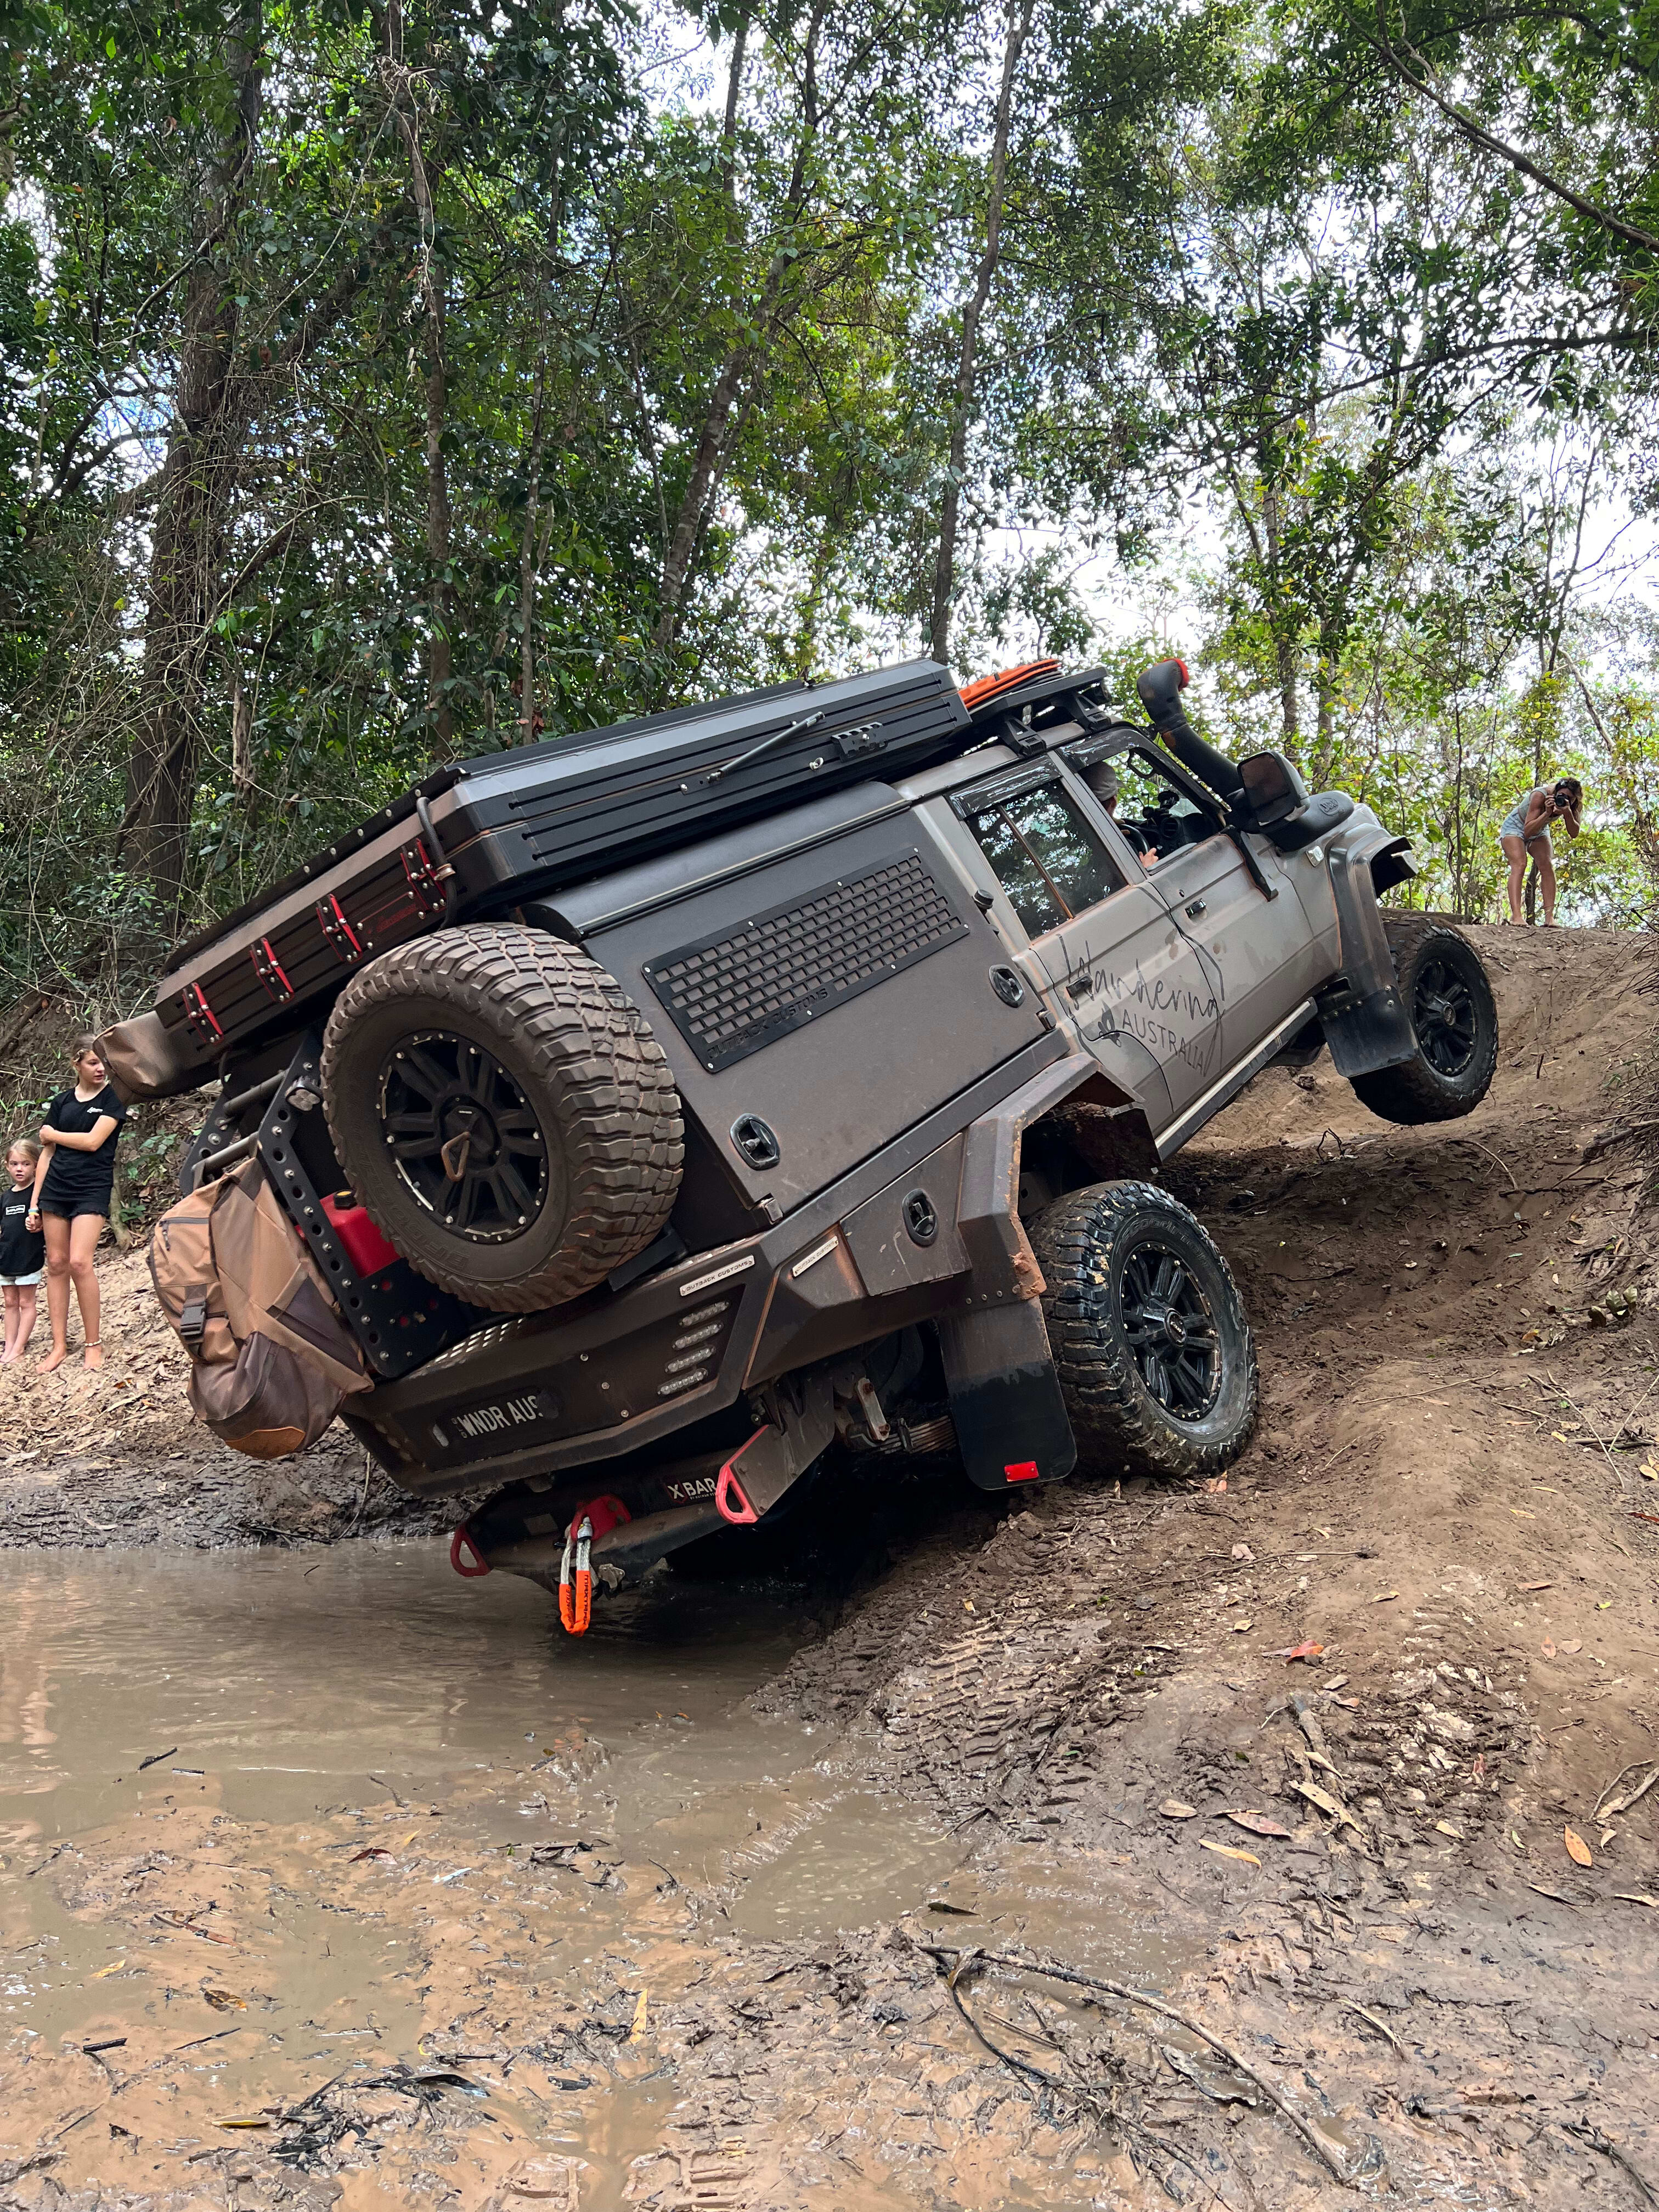
1
There are around five different entry/exit points and it is very much a choose-your-own-adventure scenario. Everyone, except the big girl GMC, tackled the main drop in at Palm and we all nailed it! It’s a steep 3.3-metre, 90-degree drop with 50mm clearance either side of our guards, so it’s ideal to have a spotter, a handheld two-way, some good brakes and be keen to drive standing up!
All things that go down must come up and there are a few different options to get out of Palm Creek. You just have to choose which is best suited to your vehicle, equipment and 4WDing capability.
Next along the way was Ducie Creek – an easy little creek crossing with a small drop-in, but we still managed to lift a couple of wheels. A few little creek crossings later and we had hit Gunshot by lunchtime. Gunshot Creek is part of what has made the OTT so famous, and it has clearly been well used. There are drop-ins everywhere and the original drop-in is no longer accessible. Again, the boys each chose their own adventure and got through with minimal damage.
The main drop in at Gunshot is truly insane. Due to our weights, we opted to go down some of the surrounding ‘chicken’ tracks, but these still got the old ticker going. The exit of Gunshot is quite an articulated section, but it’s nothing too crazy and easily achievable.
After Gunshot, there are three other small creek crossings, and that was the South Tele done. It took us around six hours to do the South Tele Track with plenty of stops along the way, before we followed Bamaga Road back to Bramwell Station. All up it was a 12-hour day, but heaps of fun.
Bamaga Road is not exactly a smooth ride and you get pretty used to rattling along on the corrugations. For this road, we dropped tyre pressures to 22psi to try and buffer against the car getting a hiding. We certainly noticed the three weeks difference on the way back along Bamaga Road than on the way up. It just gets so rough and the corros are as deep as Elon Musk’s pockets!
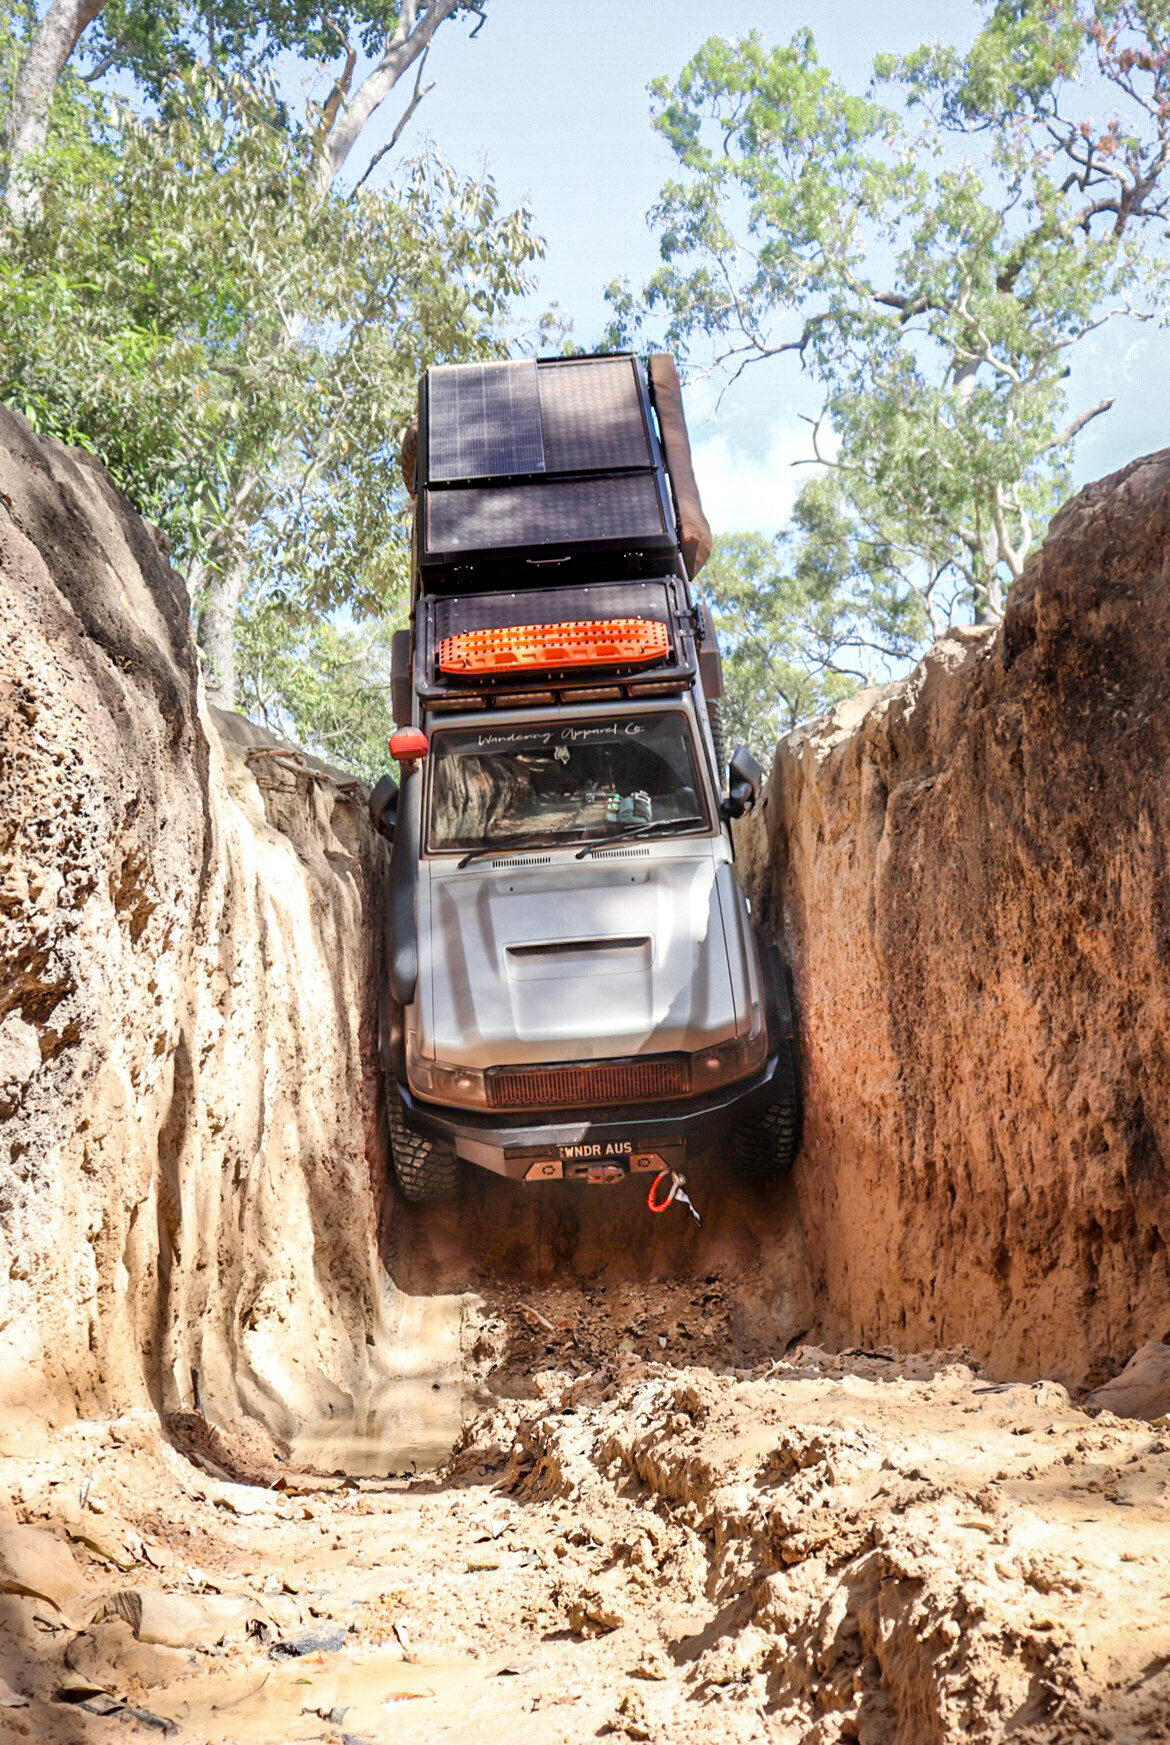
1
The following day, we headed up the same road once again to get to Elliot Falls for the second half of the OTT; so yes, we did a bit of backtracking, but that was what worked for us, our families and our set-ups. The South Tele was a challenging and super fun day and we all did so well overcoming the obstacles with skill and finesse.
Be sure to pack the following essentials for your car when tackling the OTT, and Cape York in general: a winch, recovery kit, a set of MaxTrax, a snorkel and have at least a two-inch lift.
We had planned to talk about the whole Tele this month, but there is so much to tell you all – so we will let you know about the northern section next time.
Part 24: North Tele
Welcome back to the Old Telegraph Track, Cape York!
We left you last month at Elliott Falls, just off Bamaga Road and the halfway point of the Tele Track. Elliott Falls campground was a great spot to base ourselves for four days and have a chance to chill, explore and soak up the sounds of nature.
It’s seven kilometres along the Tele Track off Bamaga Road and we easily towed our ’vans and trailer there. This road has some corrugations and washouts, as well as Scrubby Creek crossing – there’s a concrete causeway at this relatively straightforward crossing, or, if you’re up for it, a drop-in straight through the creek.
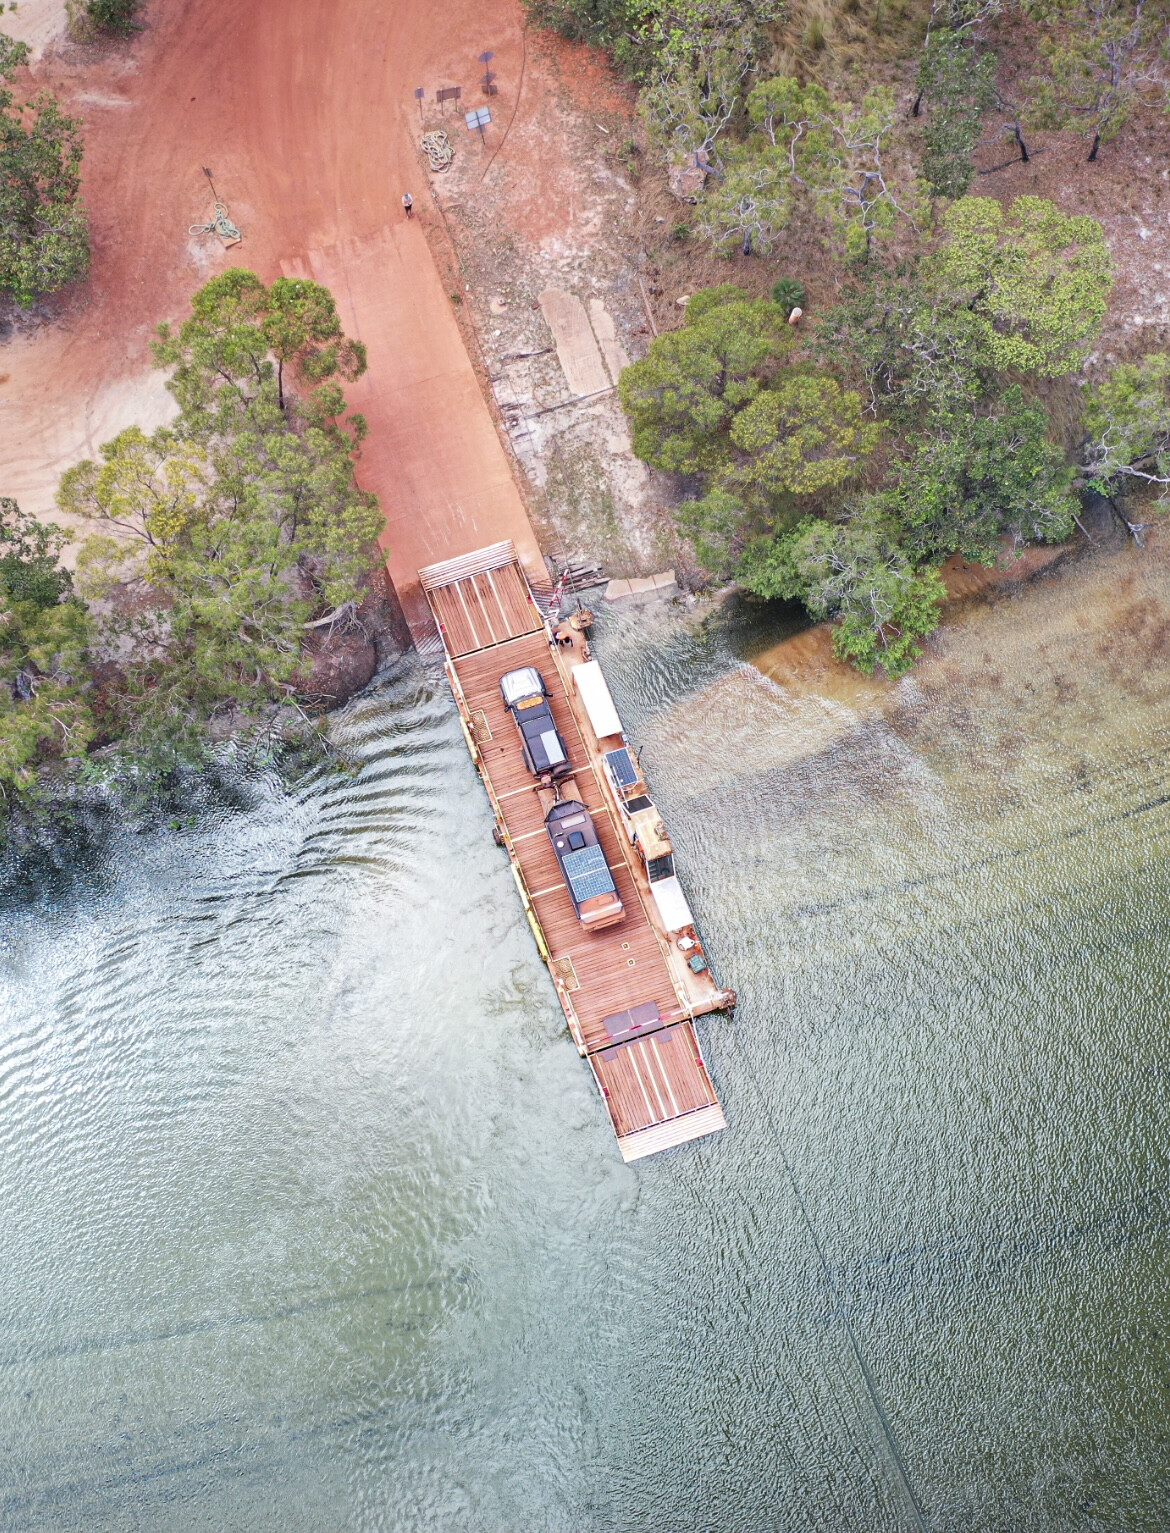
1
Elliott Falls is in the Jardine River National Park and it’s a well-set-up, back-to-basics campground with drop toilets only. It’s a short stroll along the forested boardwalk to Elliott Falls, Twin Falls and the Saucepan, all of which are unique and fabulous swimming holes. We spent a day floating around Fruit Bat Falls as well, and this place is just magical!
As we were there in September there was not as much water, but it was still refreshing to splash around in the beautiful clear falls. We recommend going early in the day before all the tourist buses roll up. Of all the falls in this area, Elliott Falls would have to be our favourite – it’s deeper and has a natural spa at the fall’s end. Twin Falls is the most kid-friendly, with a little rocky ‘beach’ area and a wading pool.
After lazing away days in the beautiful falls, we then hit up the North Tele to tick off the OTT. Four kilometres along is Sam Creek, another great creek crossing and camping spot. After a straightforward drop-in, water crossing and a small hill climb on the other side, we pulled over and scrambled down to the falls running off the crossing. Another beautiful, clear waterhole for a refreshing dip and play for the kids.
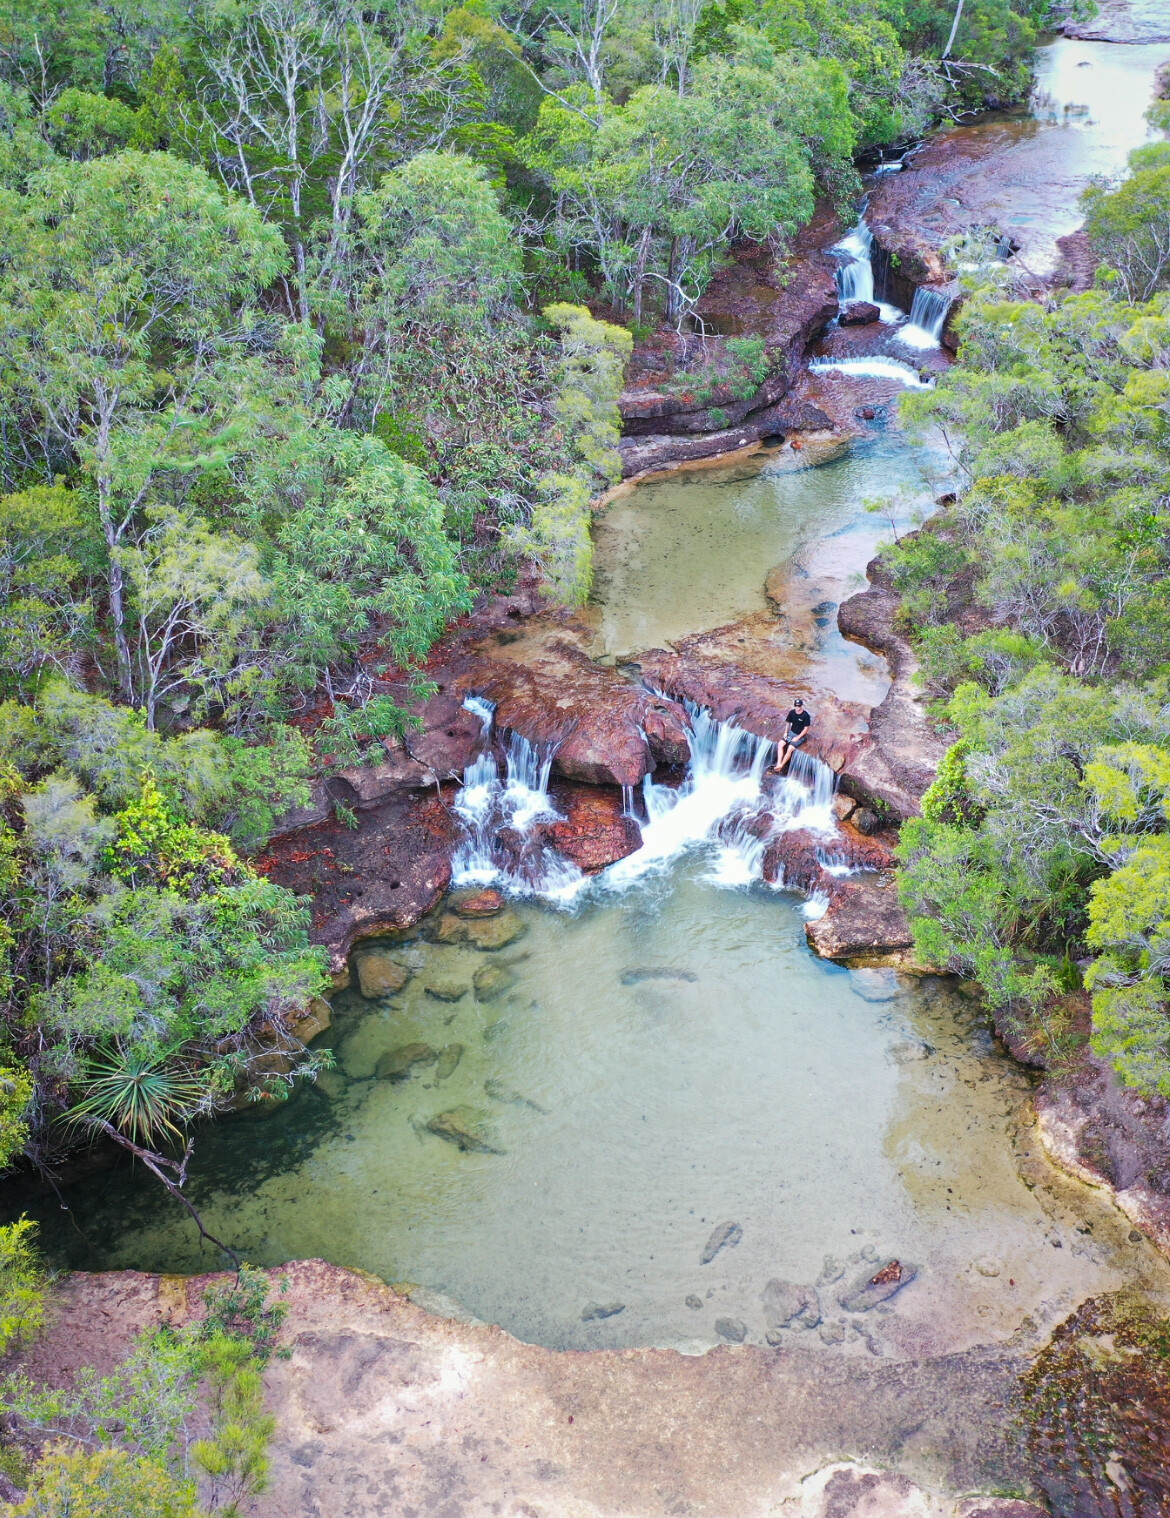
1
Next up was Mistake Creek and Cannibal Creek, which are both beautiful, clear creek crossings and a bit of fun. Cannibal Creek involves a U-turn in the water, so it takes a bit of driver skill, but the water is shallow so drowning your car is not a huge concern.
It was then on to one of the big-ticket items on the Old Tele Track: the Cypress Creek Log Bridge. Not for the faint-hearted, this is a bridge made of a few massive logs, with lots of smaller branches and bits and pieces all tied together with snatch straps! Sounds safe, I know.
This bridge sits atop a creek around three metres below and spans around seven metres across. We got the lighter, smaller guys over without any trouble, but when it came to our 79 and the big GMC, well, let’s just say the boys may have needed a change of undies by the end of it. In all seriousness though, it’s important to walk the bridge before crossing it to ensure it’s secure, and to take it really steady with good two-way communication with your spotter.
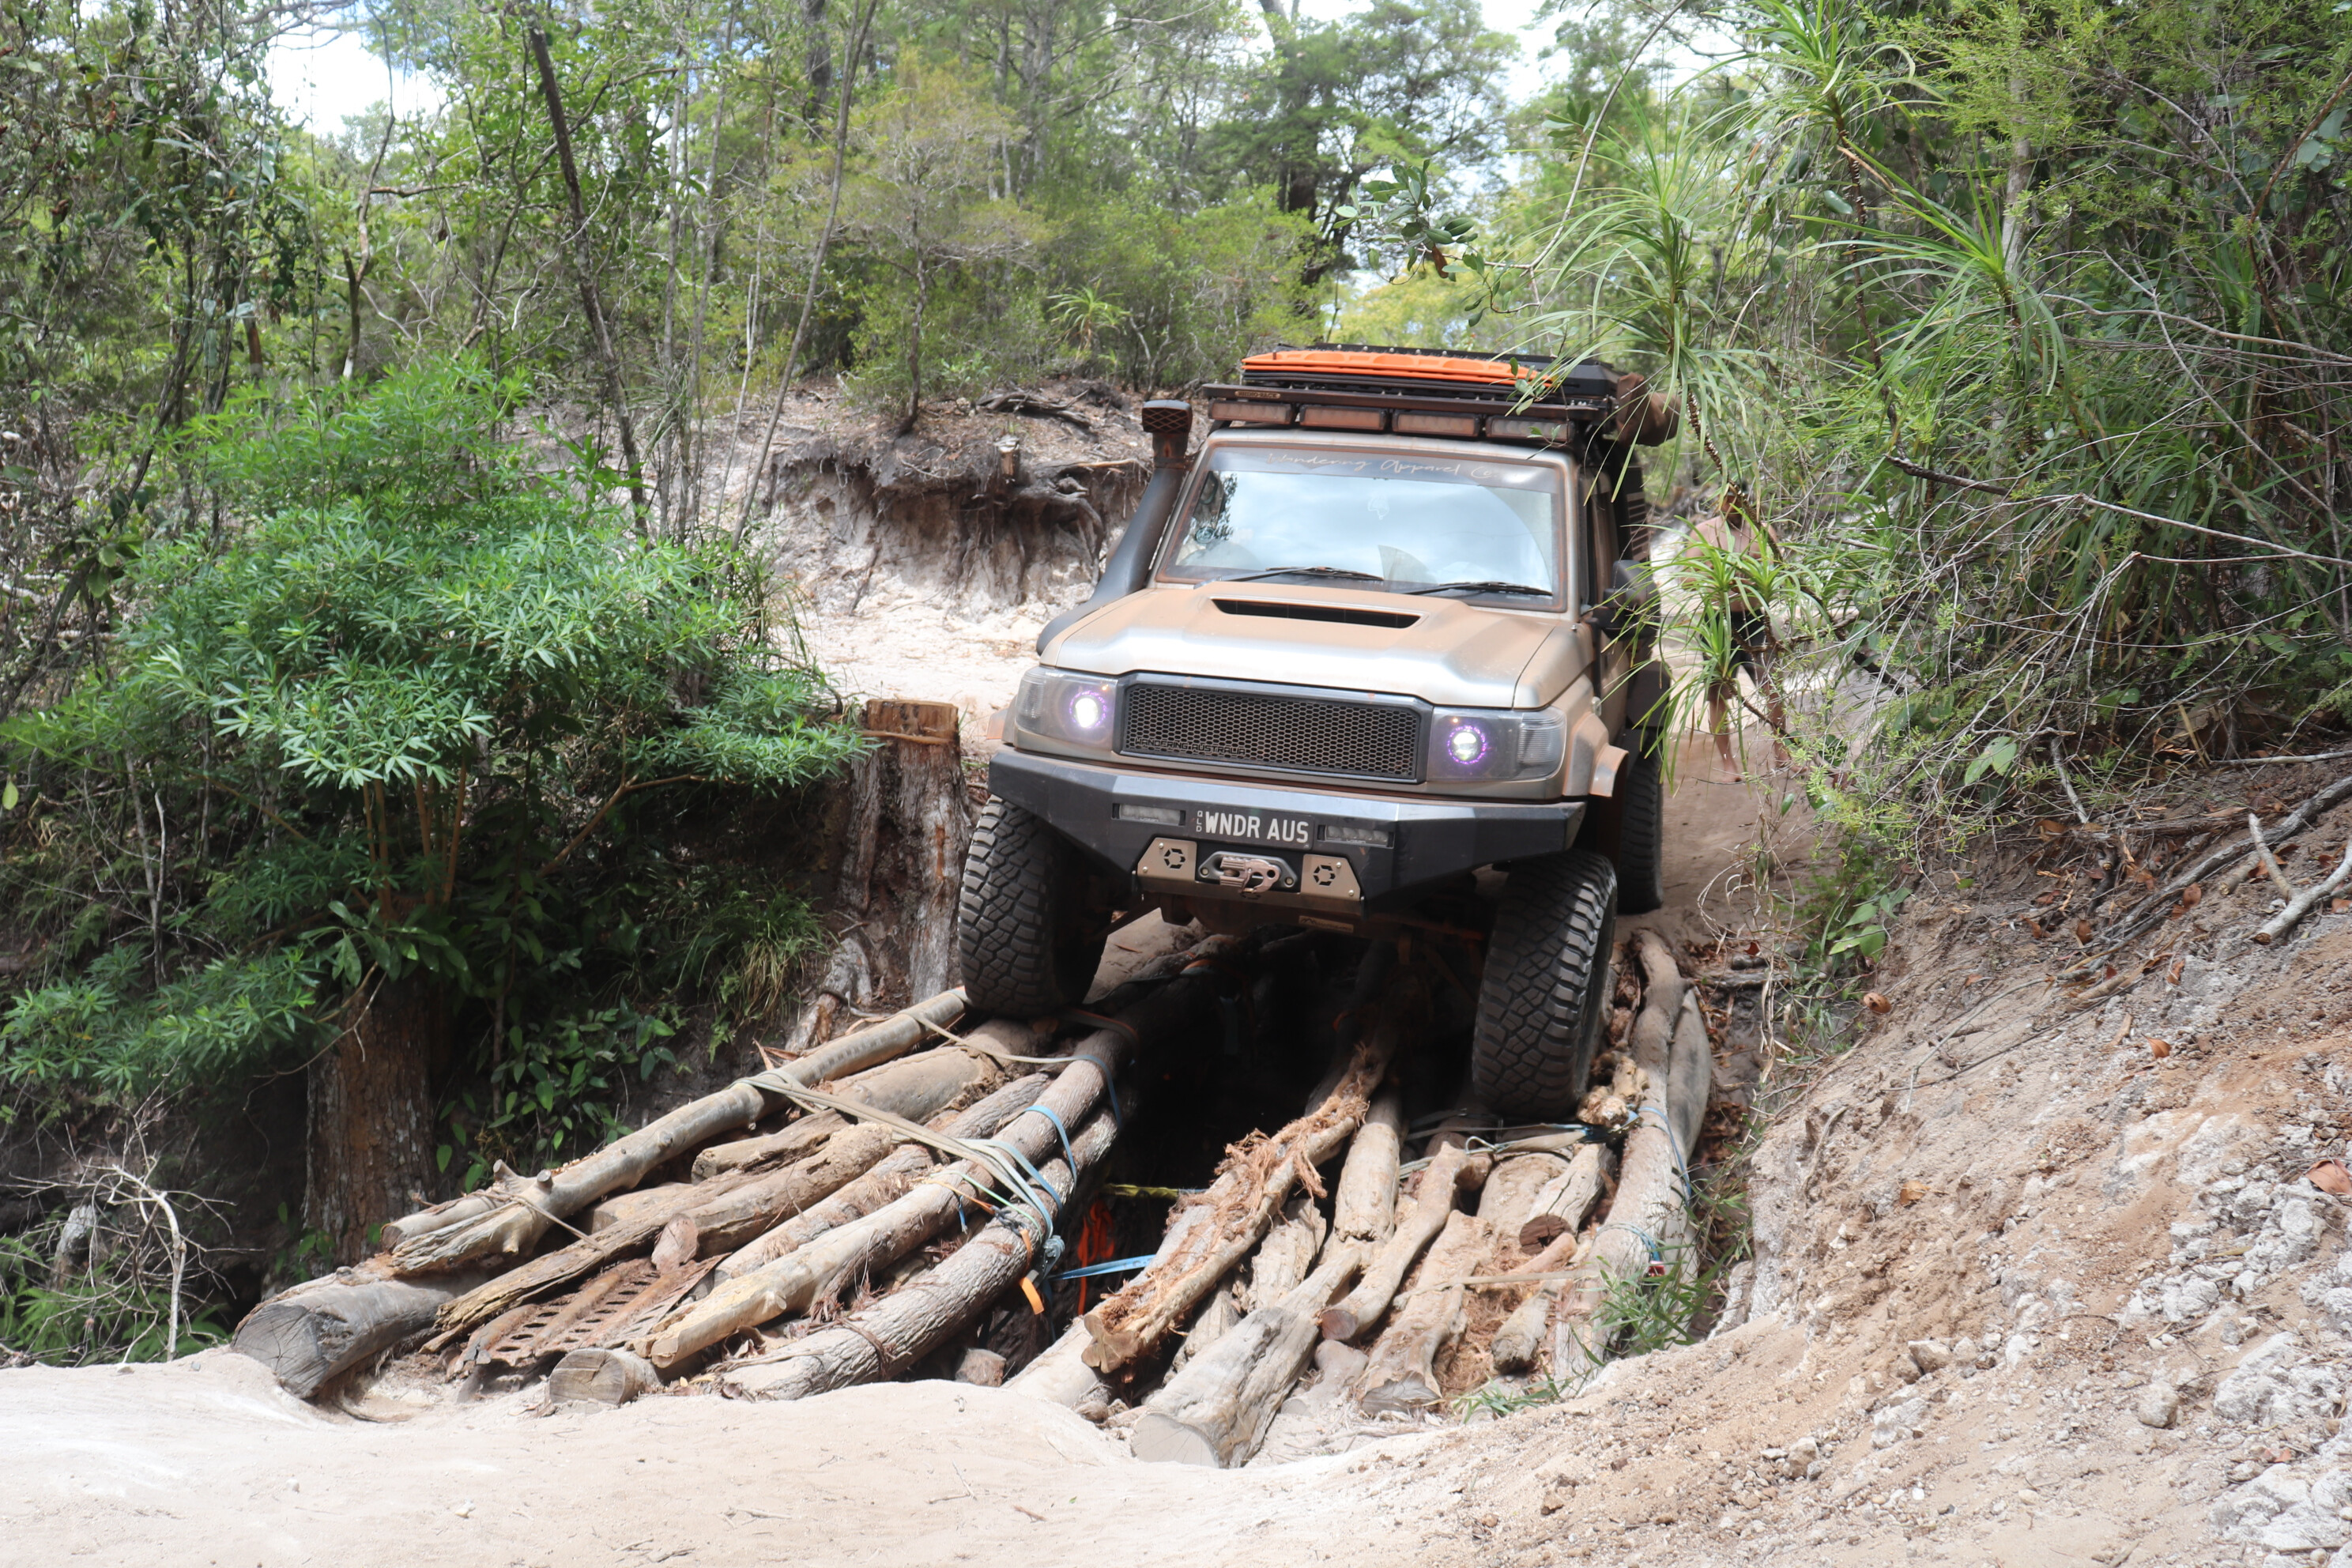
1
The last two obstacles on the North Tele are Logans Creek Crossing and Nolans Brook. Logans is the longest water crossing and the base is quite ‘whoopy’, so watch out for this. Brendan walked it to gauge the depth and we stopped for a bite to eat on the other side of the creek, where the kids had a bit of a paddle. It was only after getting home we found out a three-metre croc had recently been spotted at this crossing! Guardian angels with us that day.
Lucky last and one of the best crossings on the OTT is Nolans Brook. This was the one Brendan was most worried about, given the majority of car drownings occur here. With a soft base, you can get caught out quickly, so we all aired down to 14psi, had the snatch strap ready to go and, once down the drop-in, hit it to get through without getting stuck and flooded.
It was a great moment and feeling to know we had all safely passed through Nolans and the Old Tele Track without a huge amount of damage. We had a few celebratory drinks before hitting the Bamaga Road back to camp. It was another big day of around 10 hours all up and we slept well that night knowing we had done it – the revered Old Telegraph Track!
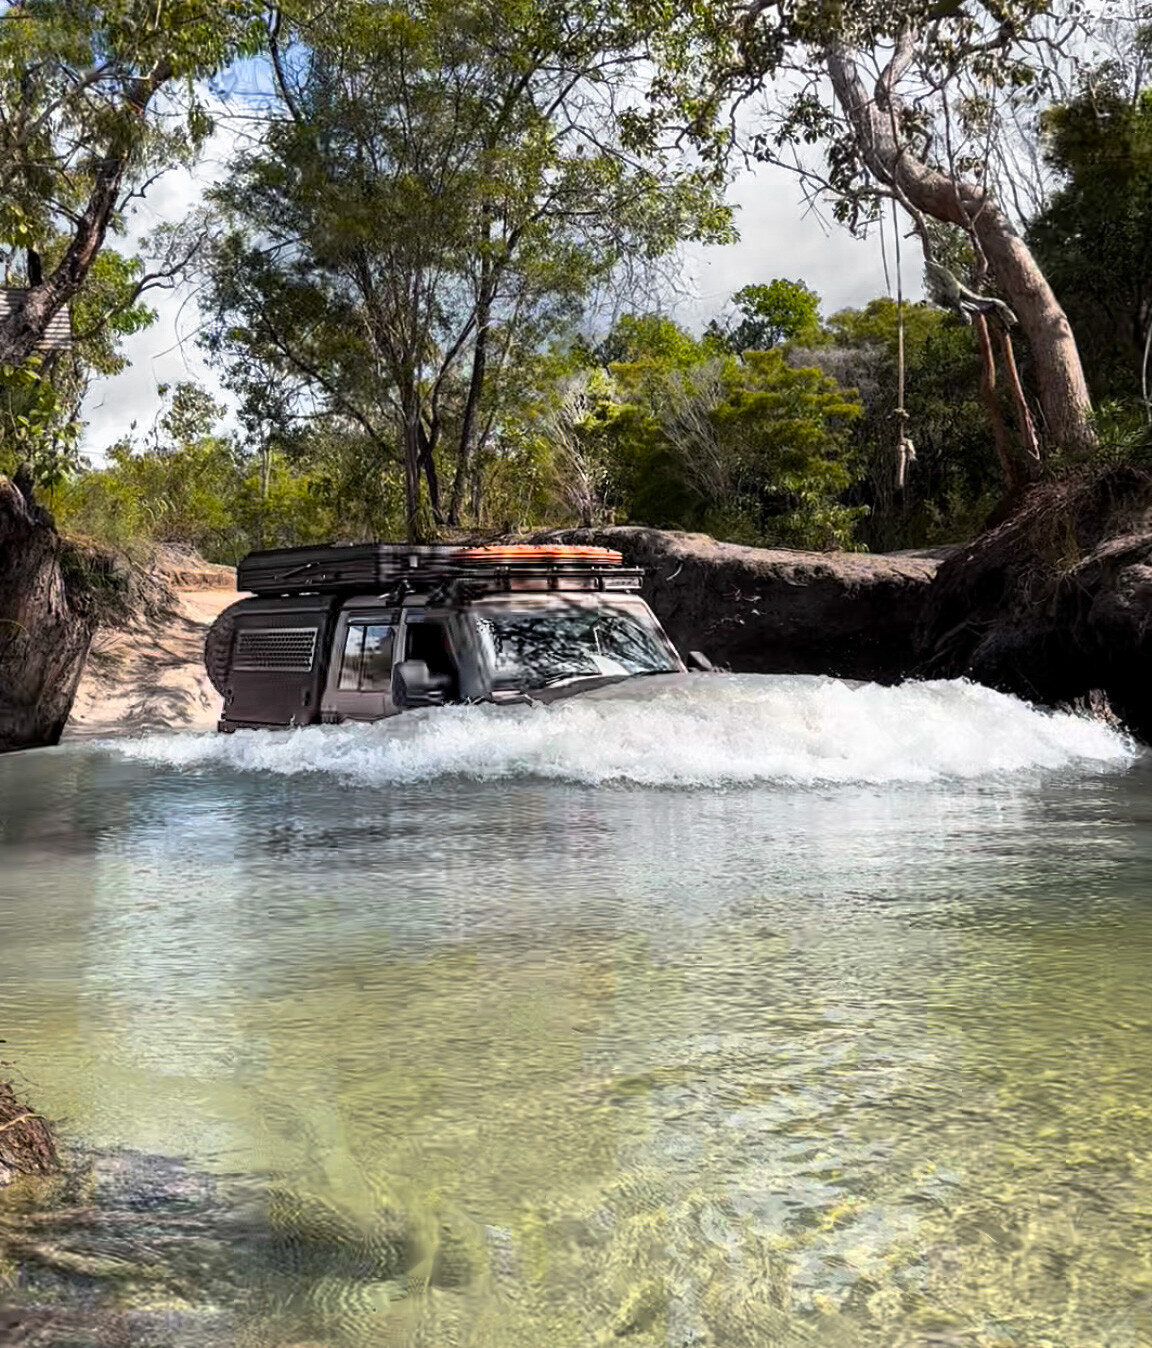
1
We had planned to go back and camp at Nolans on the way up, but we were all looking forward to a shower and us girls were keen to hit up the grocery store yet again, so we headed for the Jardine River Ferry towards Bamaga.
We had heard there was often a line-up with a wait time of up to four hours, and we were pleasantly surprised getting straight on. The locals who run it were really helpful and friendly, but this would have to be one of the most expensive barges we’ve been on, costing $175 for three minutes of travel.
The North Tele is different but equally as stunning as the South, and we had a ripper time completing each obstacle along the way. Next month, we finish off our journey at Cape York.
Part 25: Final chapter
The fourth and final part of our Cape York adventure – to the very top of Queensland and the northernmost point of mainland Australia! We spent the good part of a week at the Tip relaxing and exploring the great north before embarking on the journey back home.
Once crossing the Jardine, we hit up Bamaga for a restock of groceries and alcohol and may have ended up at Australia’s northernmost pub for the afternoon enjoying the air-con and cold beers.
One of the great things about the Northern Peninsula Area (NPA) is that everything is so close. While we took our time around the NPA, you could cover this area in just a few days if you were limited for time.
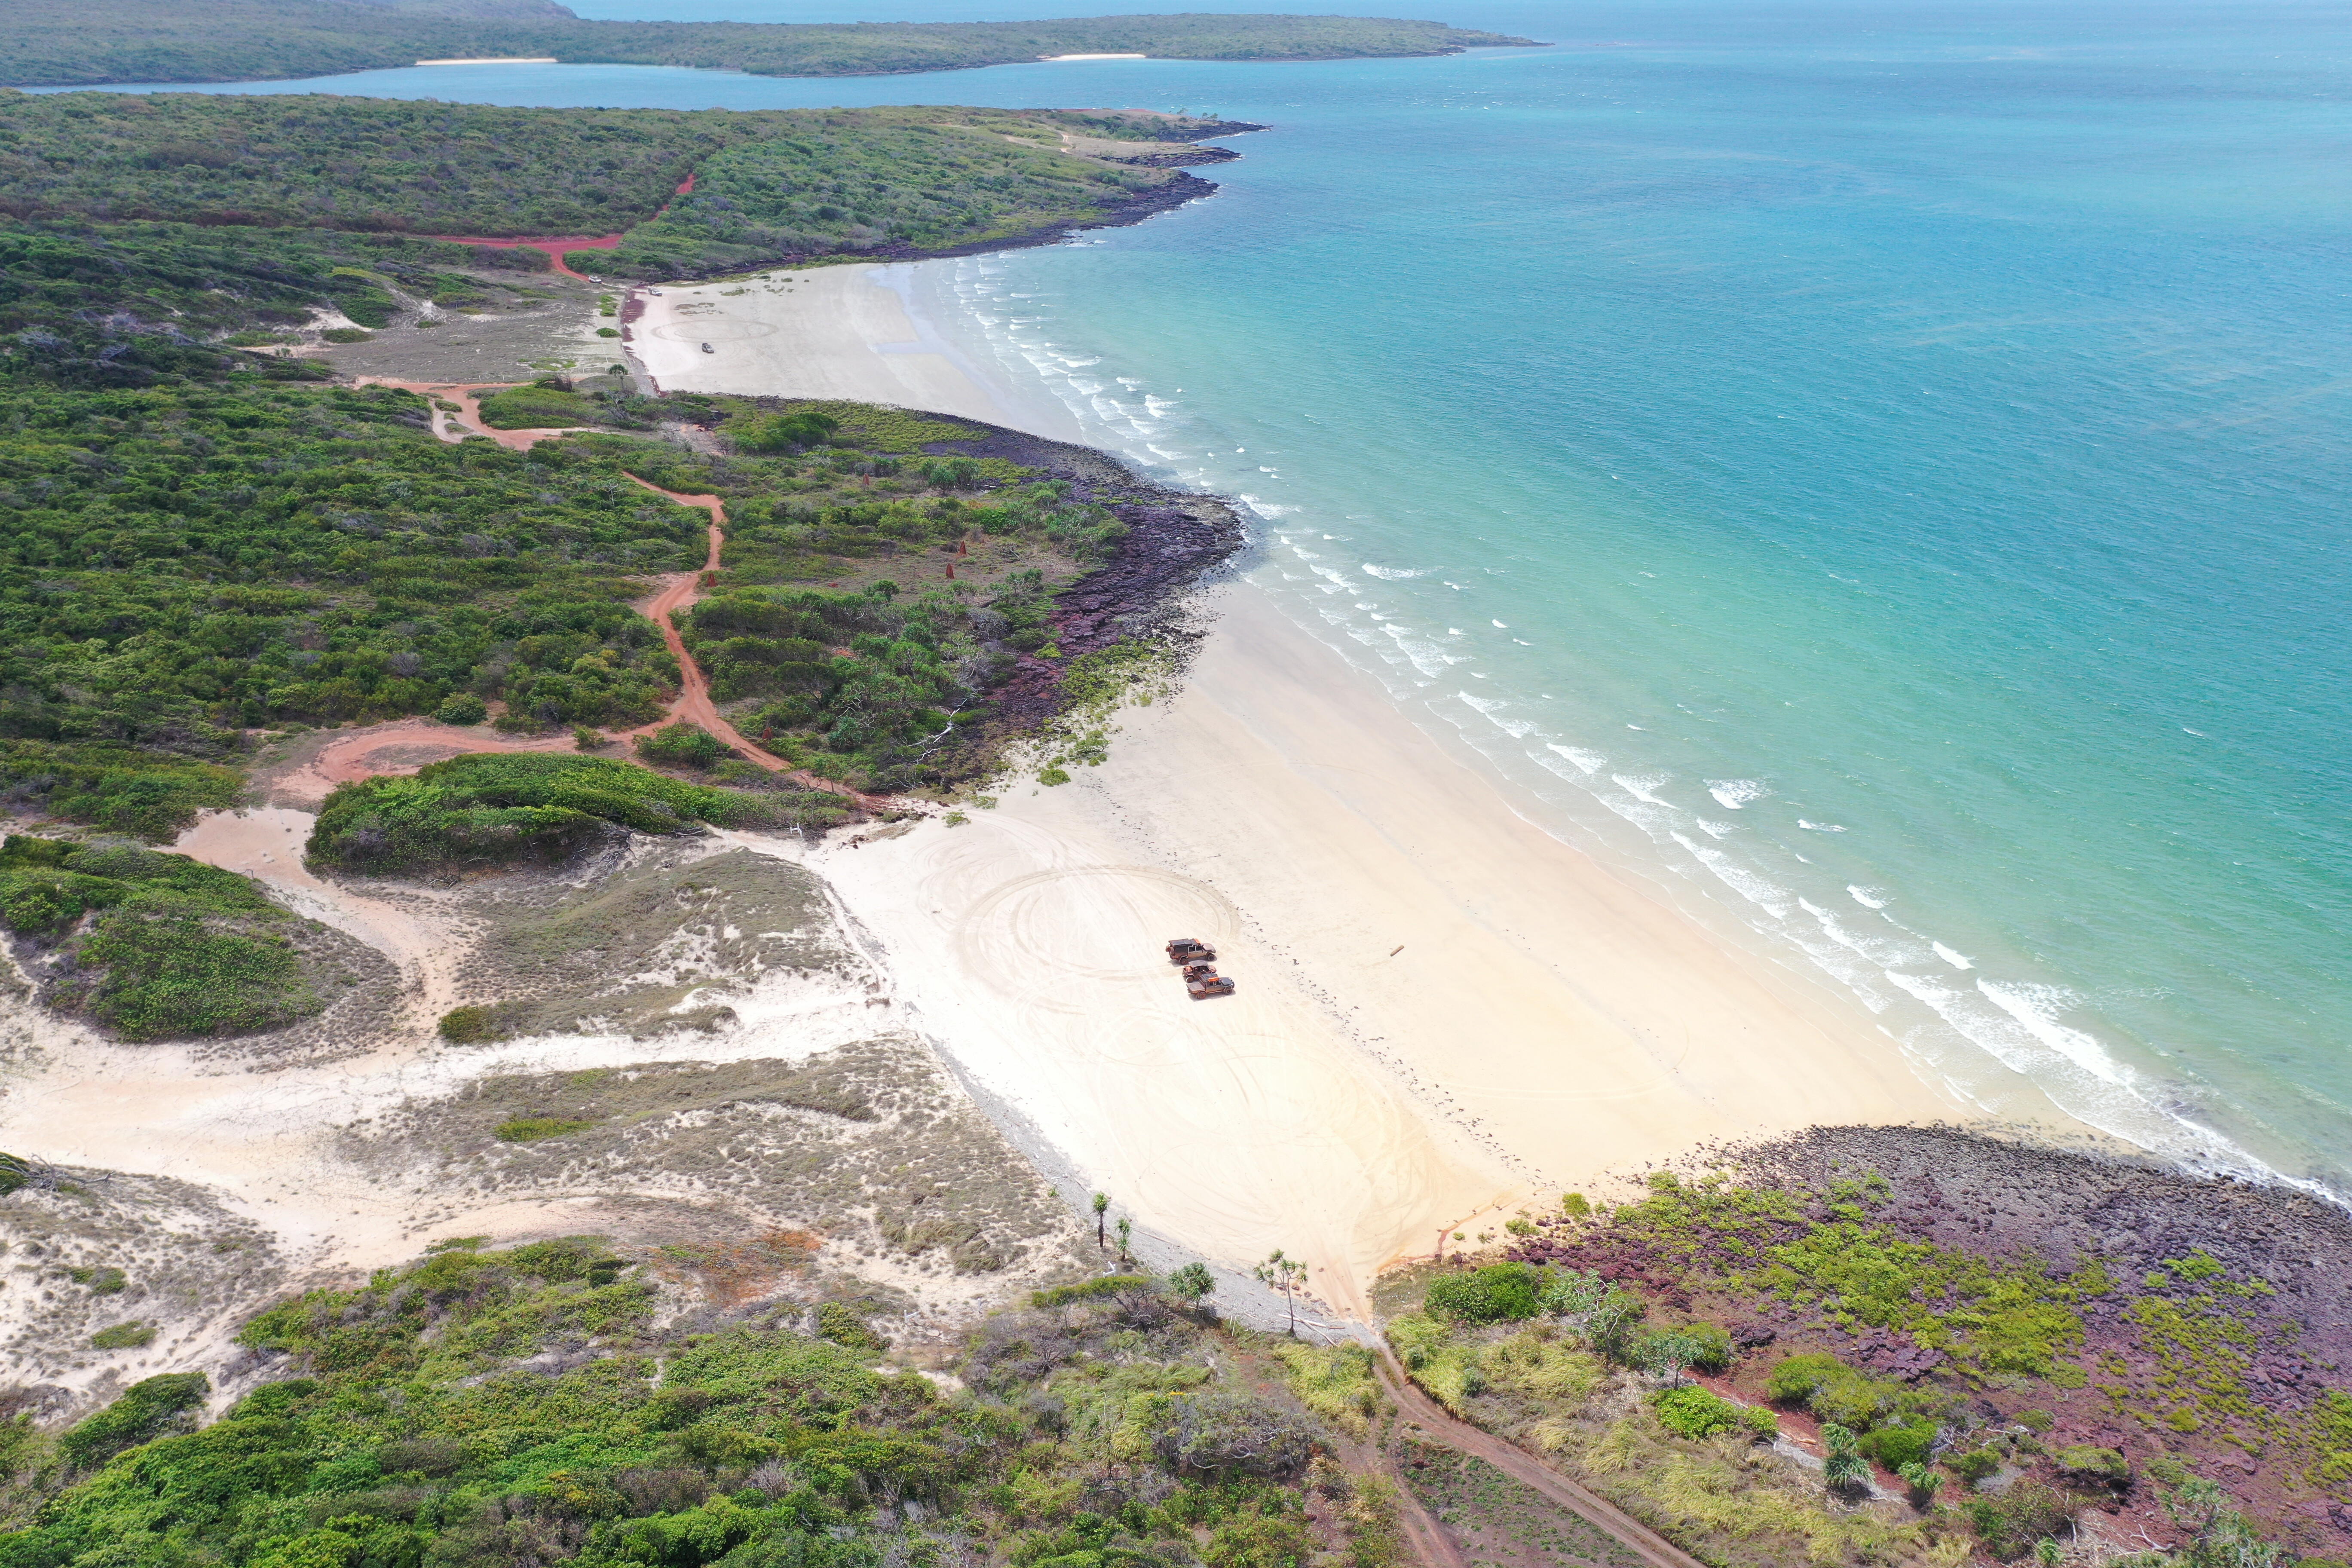
1
We decided to base ourselves at Loyalty Beach for the first four nights and wow what a spot. We were lucky enough to jag a campsite right on the beach with uninterrupted views of the Endeavour Strait and the surrounding islands.
We witnessed some cracker sunsets with great company and it made for a rewarding break after a couple of weeks of red dirt, dust and 4WDing. Beware though, of crocs taking your children and a few unlikely locals taking your gear!
From Loyalty we did a few day trips exploring, including a fishing charter for the boys and a visit to Thursday Island for the girls (and kids). The boys had a ball with Bully’s fishing charters out of Seisia catching longtail tuna, spangled emperor, coral trout, and plenty of sharks! It was hard going, as everywhere they went; they were sharked! Despite braving the crocs in a few estuaries, we still couldn’t get the elusive barra either.
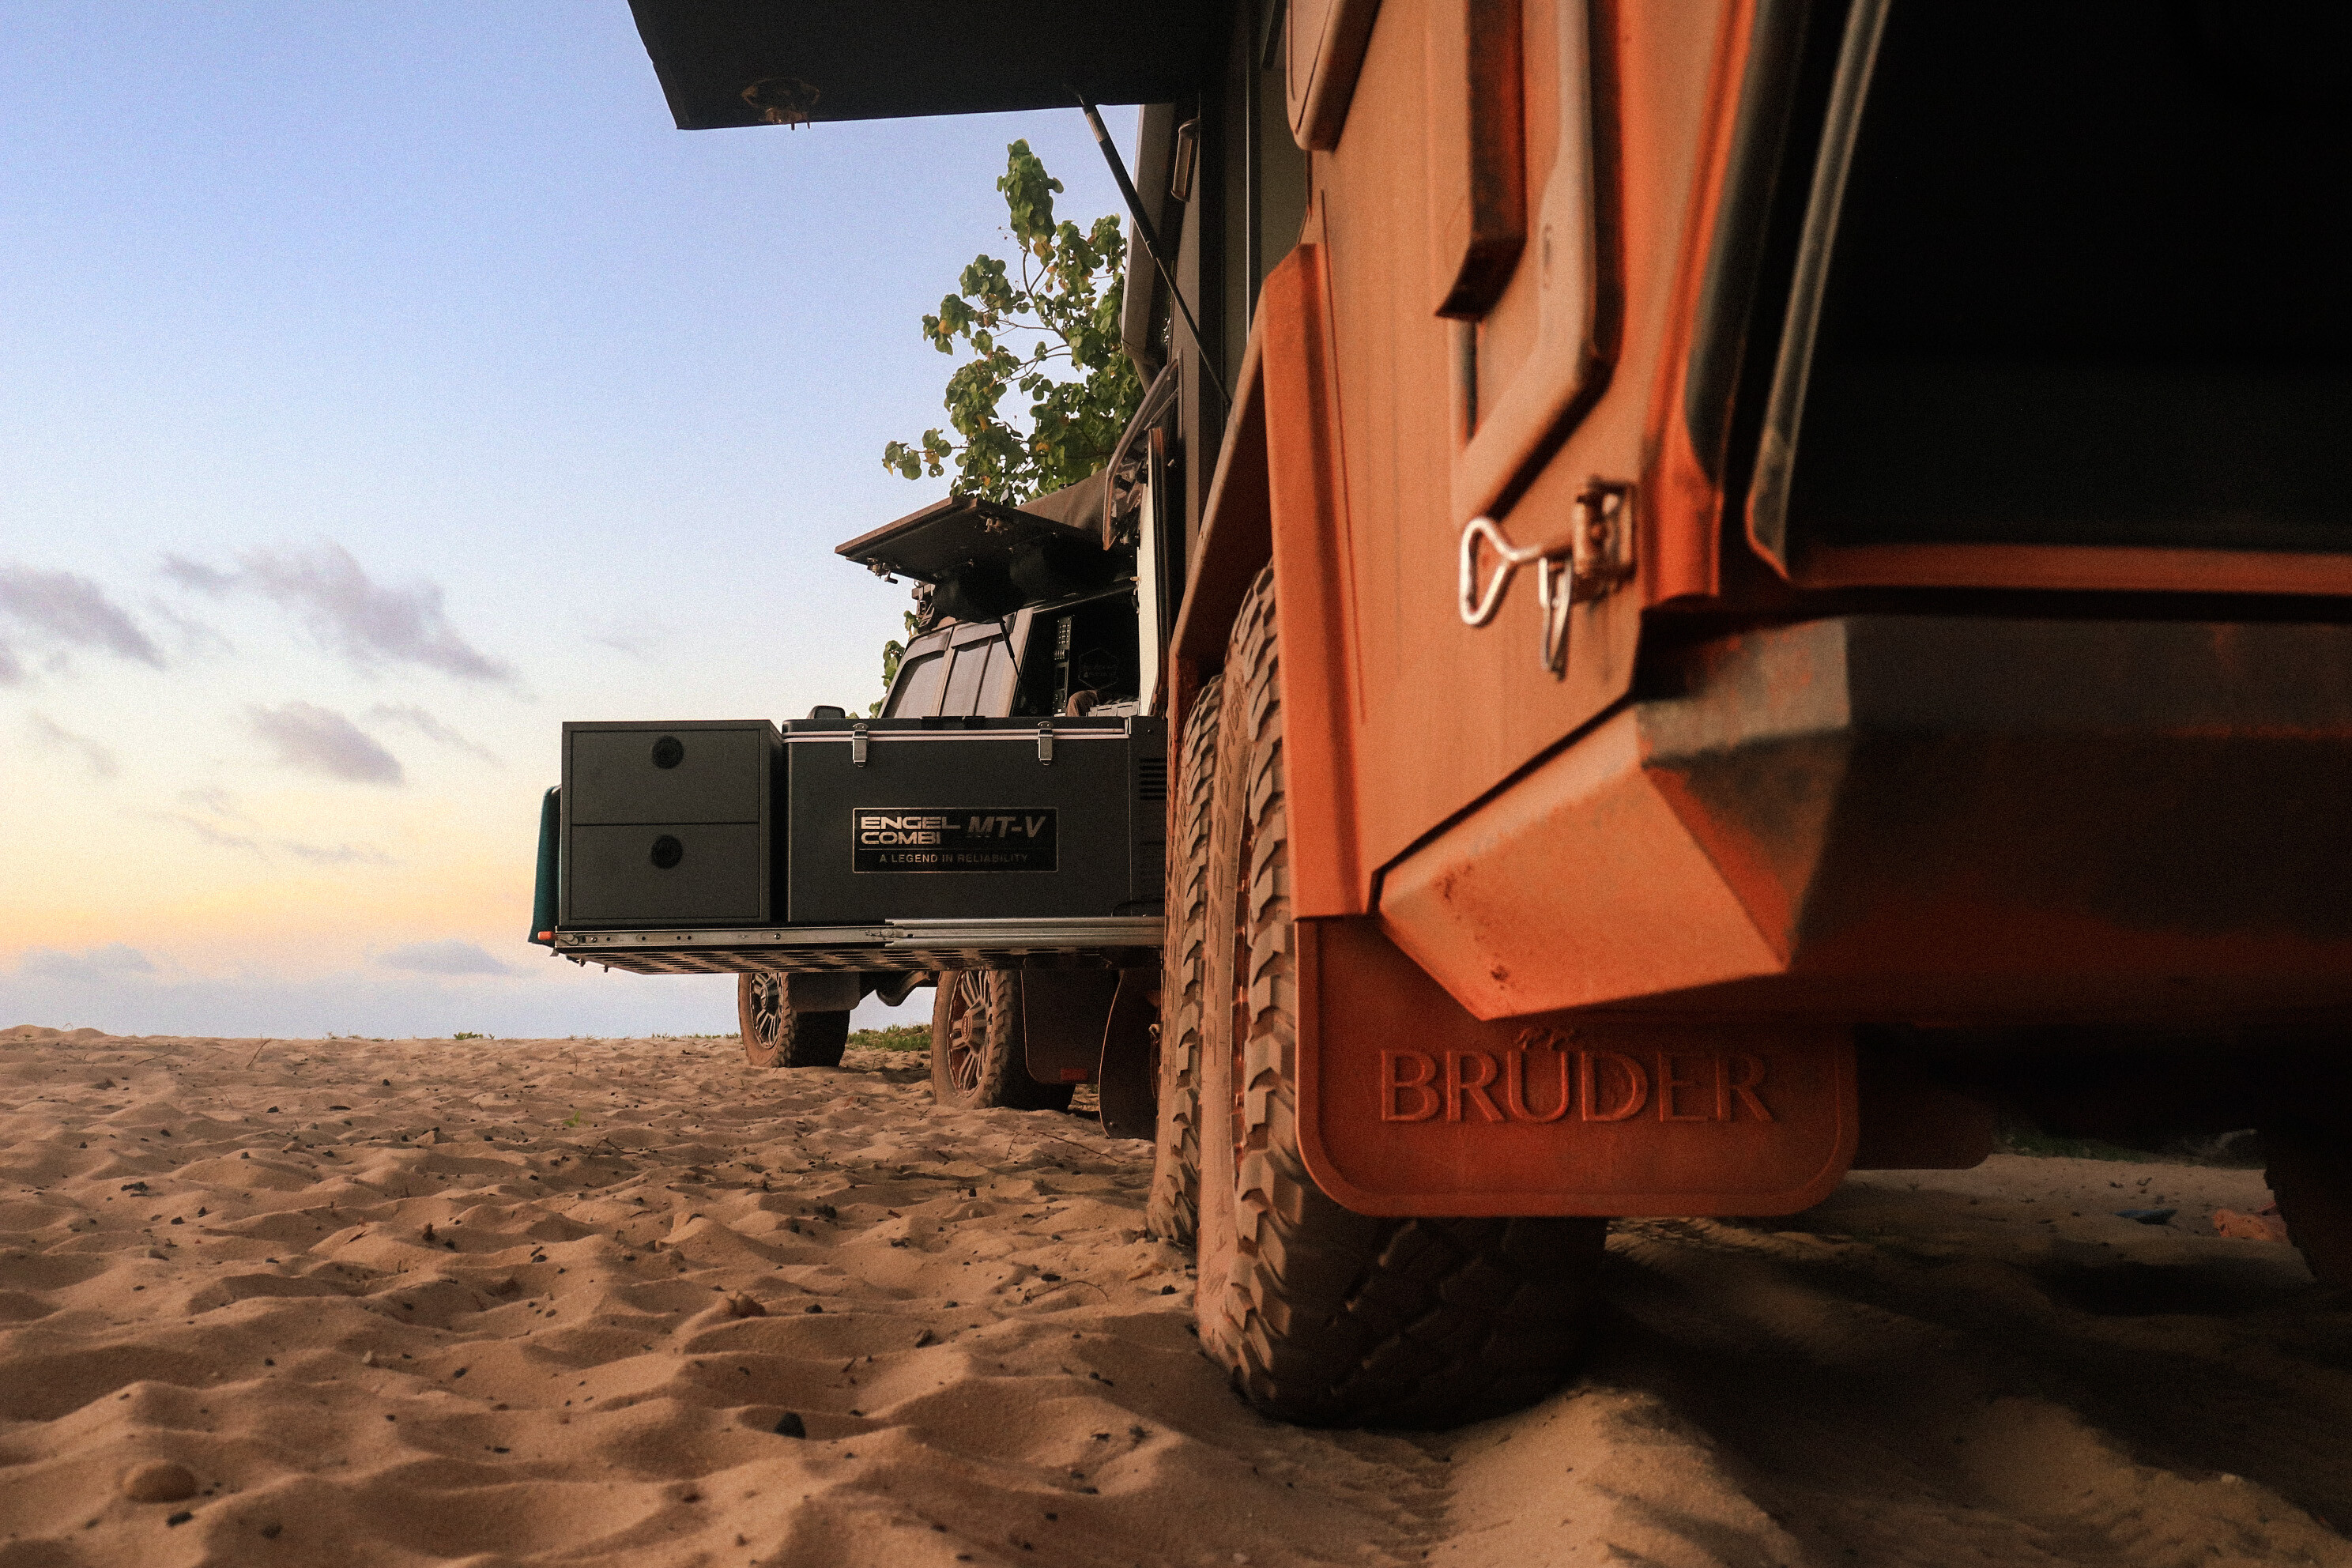
1
While the boys sorted out dinner, the girls explored Thursday Island. This is a gorgeous little island where everyone is so friendly and on island time. It was great to check out the Green Hill Fort, a now decommissioned military fort set up in preparation for a potential Russian invasion in the late 1800s. Over a hundred years later, it still stands strong and is an interesting history lesson.
You haven’t been to the Cape unless you have stocked up on merch at the Croc Tent. This is a souvenir shop like no other, set up by a young couple who absolutely fell in love with the Cape on their travels there and decided to call it home. They set up the Croc Tent tapping in to an undiscovered and lucrative business opportunity and will not only kit you out with memorabilia but also greet you with friendly local travel tips and advice.
Well, we still hadn’t been to that famous sign and so it was about time – we packed up from Loyalty and headed to Punsand Bay – our final destination on the journey north. This is the most popular campground at the top and it is essential to book ahead, especially if you are wanting to camp beachfront. Set along the beautiful (you guessed it) Punsand Bay, the campground has amenities, laundry, a swimming pool, a bar and restaurant, and some of the best pizzas we have tasted!
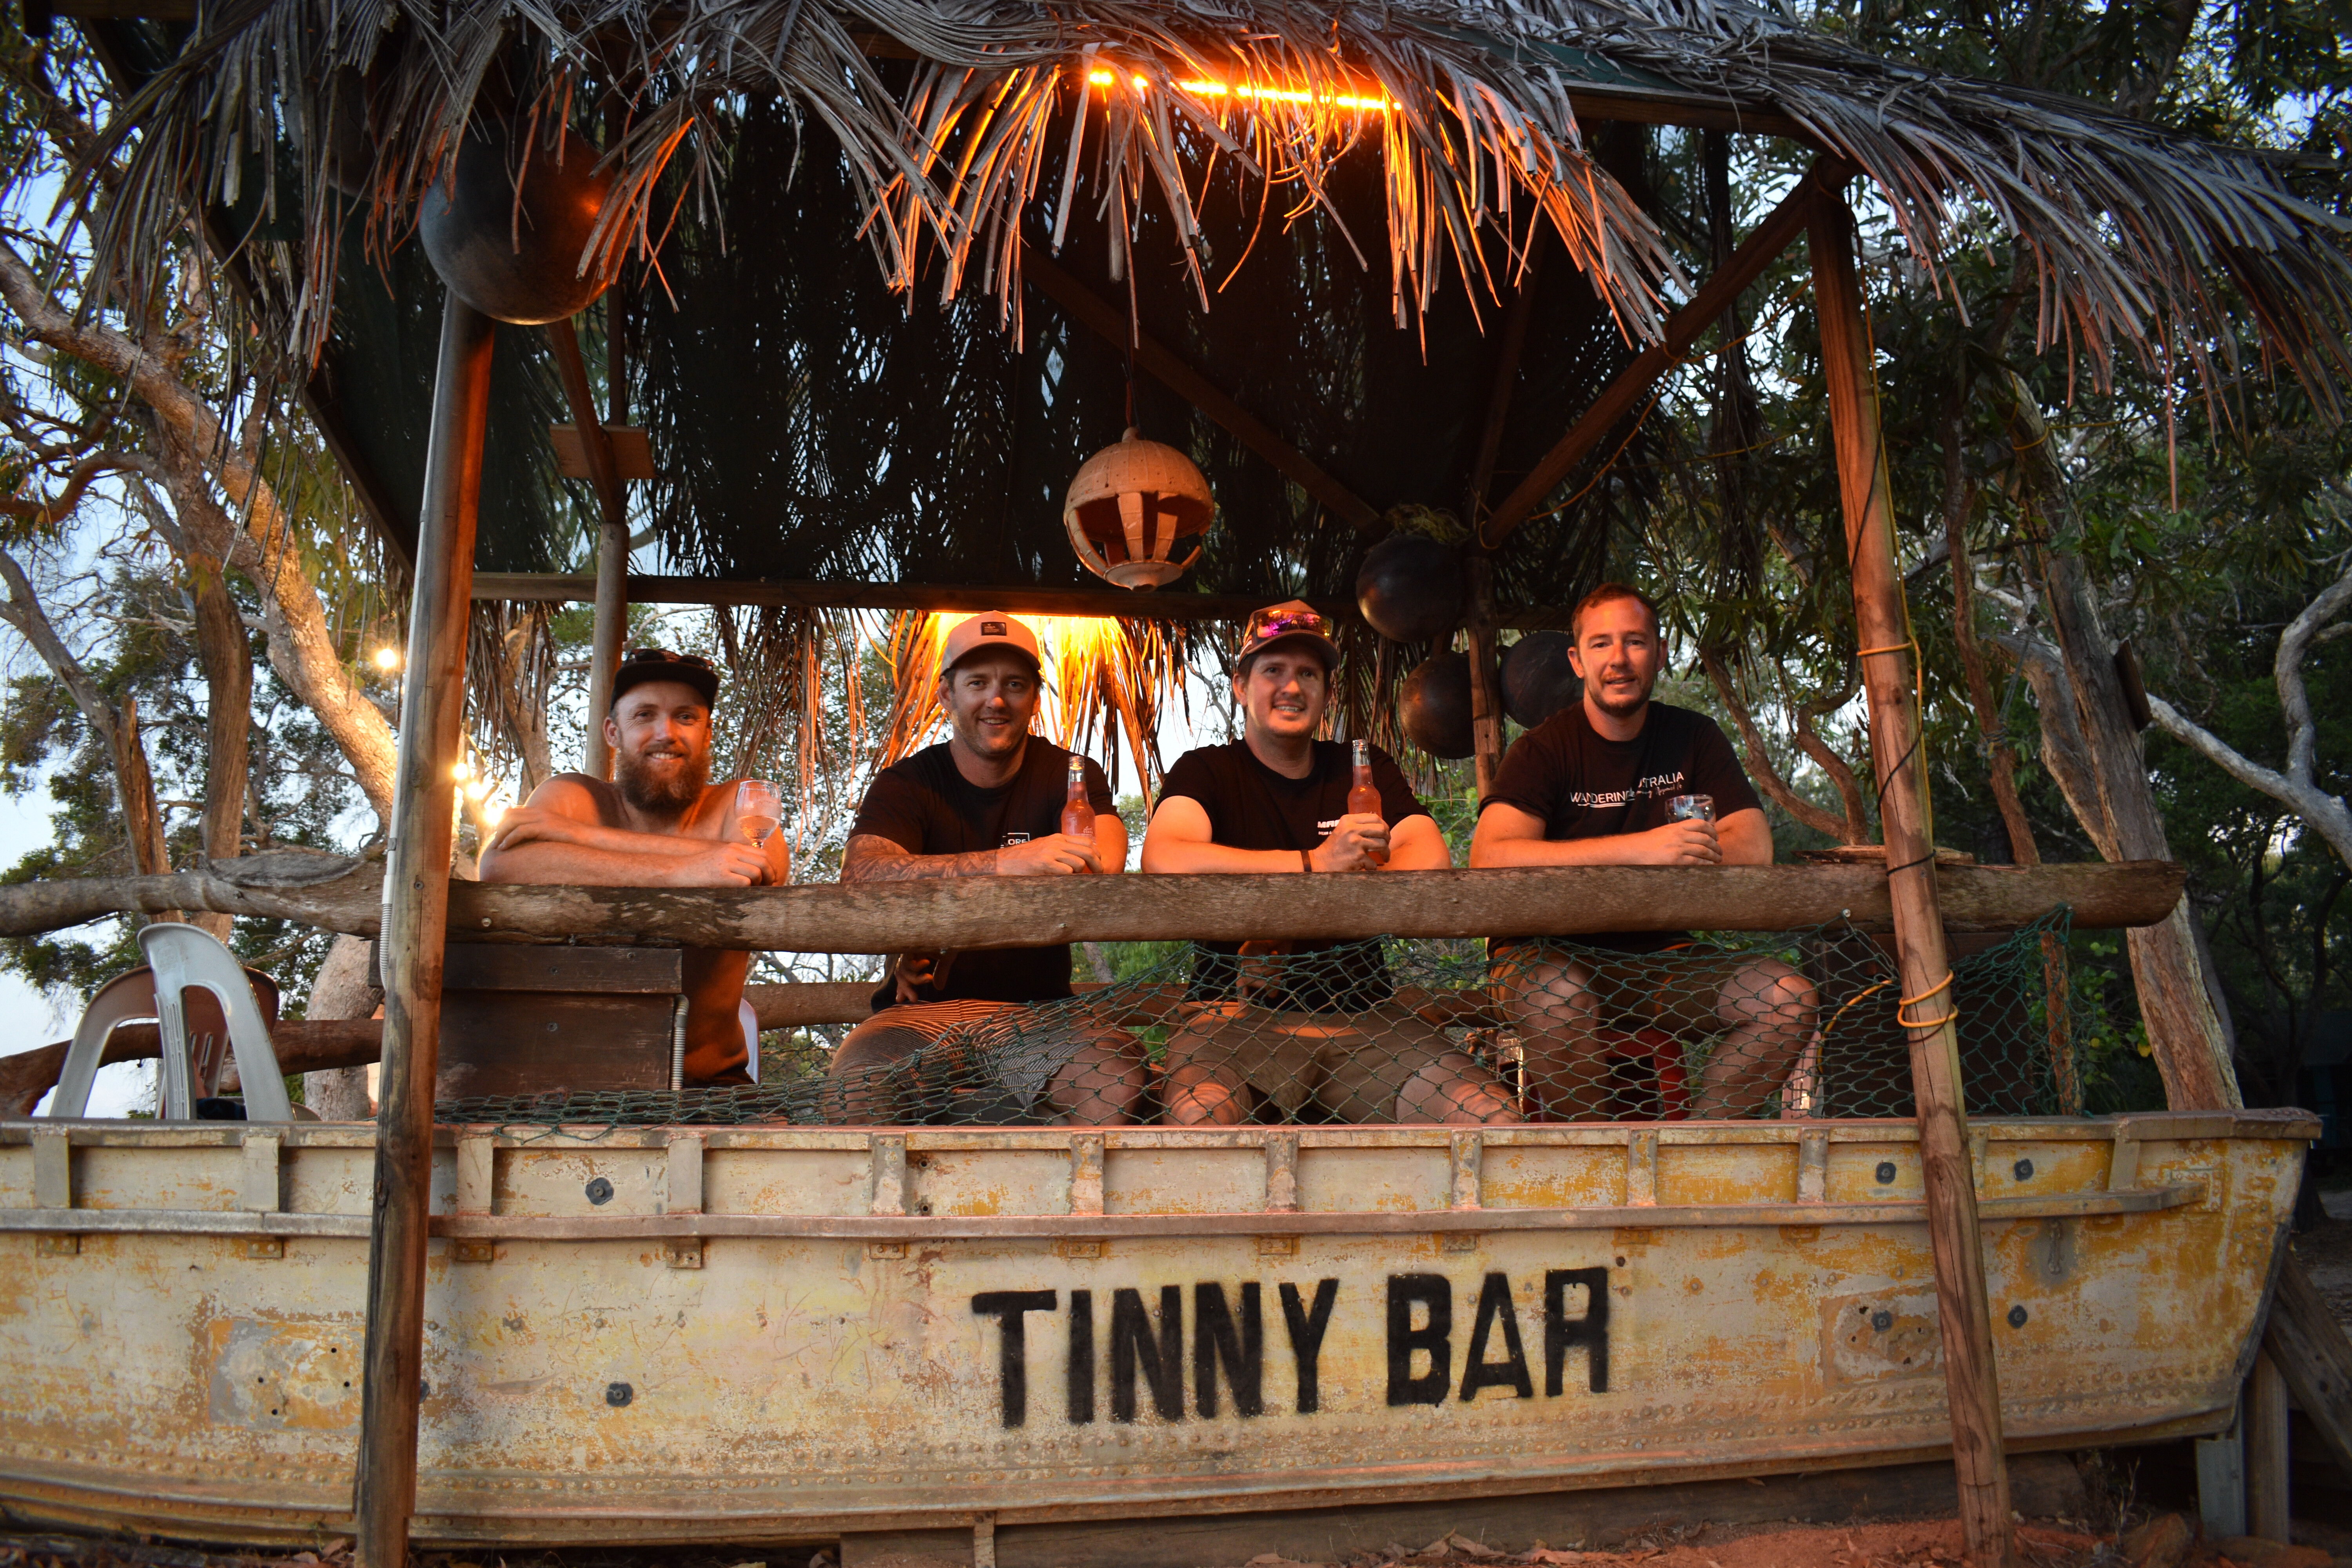
1
It was from Punsand we journeyed to that famous sign. For those that have done it, you will agree that the ‘Tip’ has a real spiritual sense when you visit there. We spent most of the day enjoying flicking a lure, getting the compulsory pic and knocking back a few tinnies. We were also lucky enough to get a visit from a few sea turtles and sharks. Still no barra though.
We also spent an afternoon exploring Somerset Station on the eastern side of the cape, where the Jardine family had lived and worked until WWII. It operated as the main port of the Torres Strait in the 1860s before moving to Thursday Island in 1877. We checked out the Jardine family graves and the wreckage sites of multiple bombers that came down through war times. Another great history lesson.
While on the eastern side, we also drove the Five Beaches Track, a nice scenic drive which isn’t challenging and is about a two-hour round trip from Punsand Bay. Each beach is separated by a small section of track and it made for a great morning out.
After three weeks on the road, it was time to start heading home and our intention was to do this faster than on the way up, however, we still had a couple of places to tick off that we didn’t get to. Moreton Telegraph Station was one of our stopovers and we were all so impressed by the luscious green grass and beautiful shady mango trees.
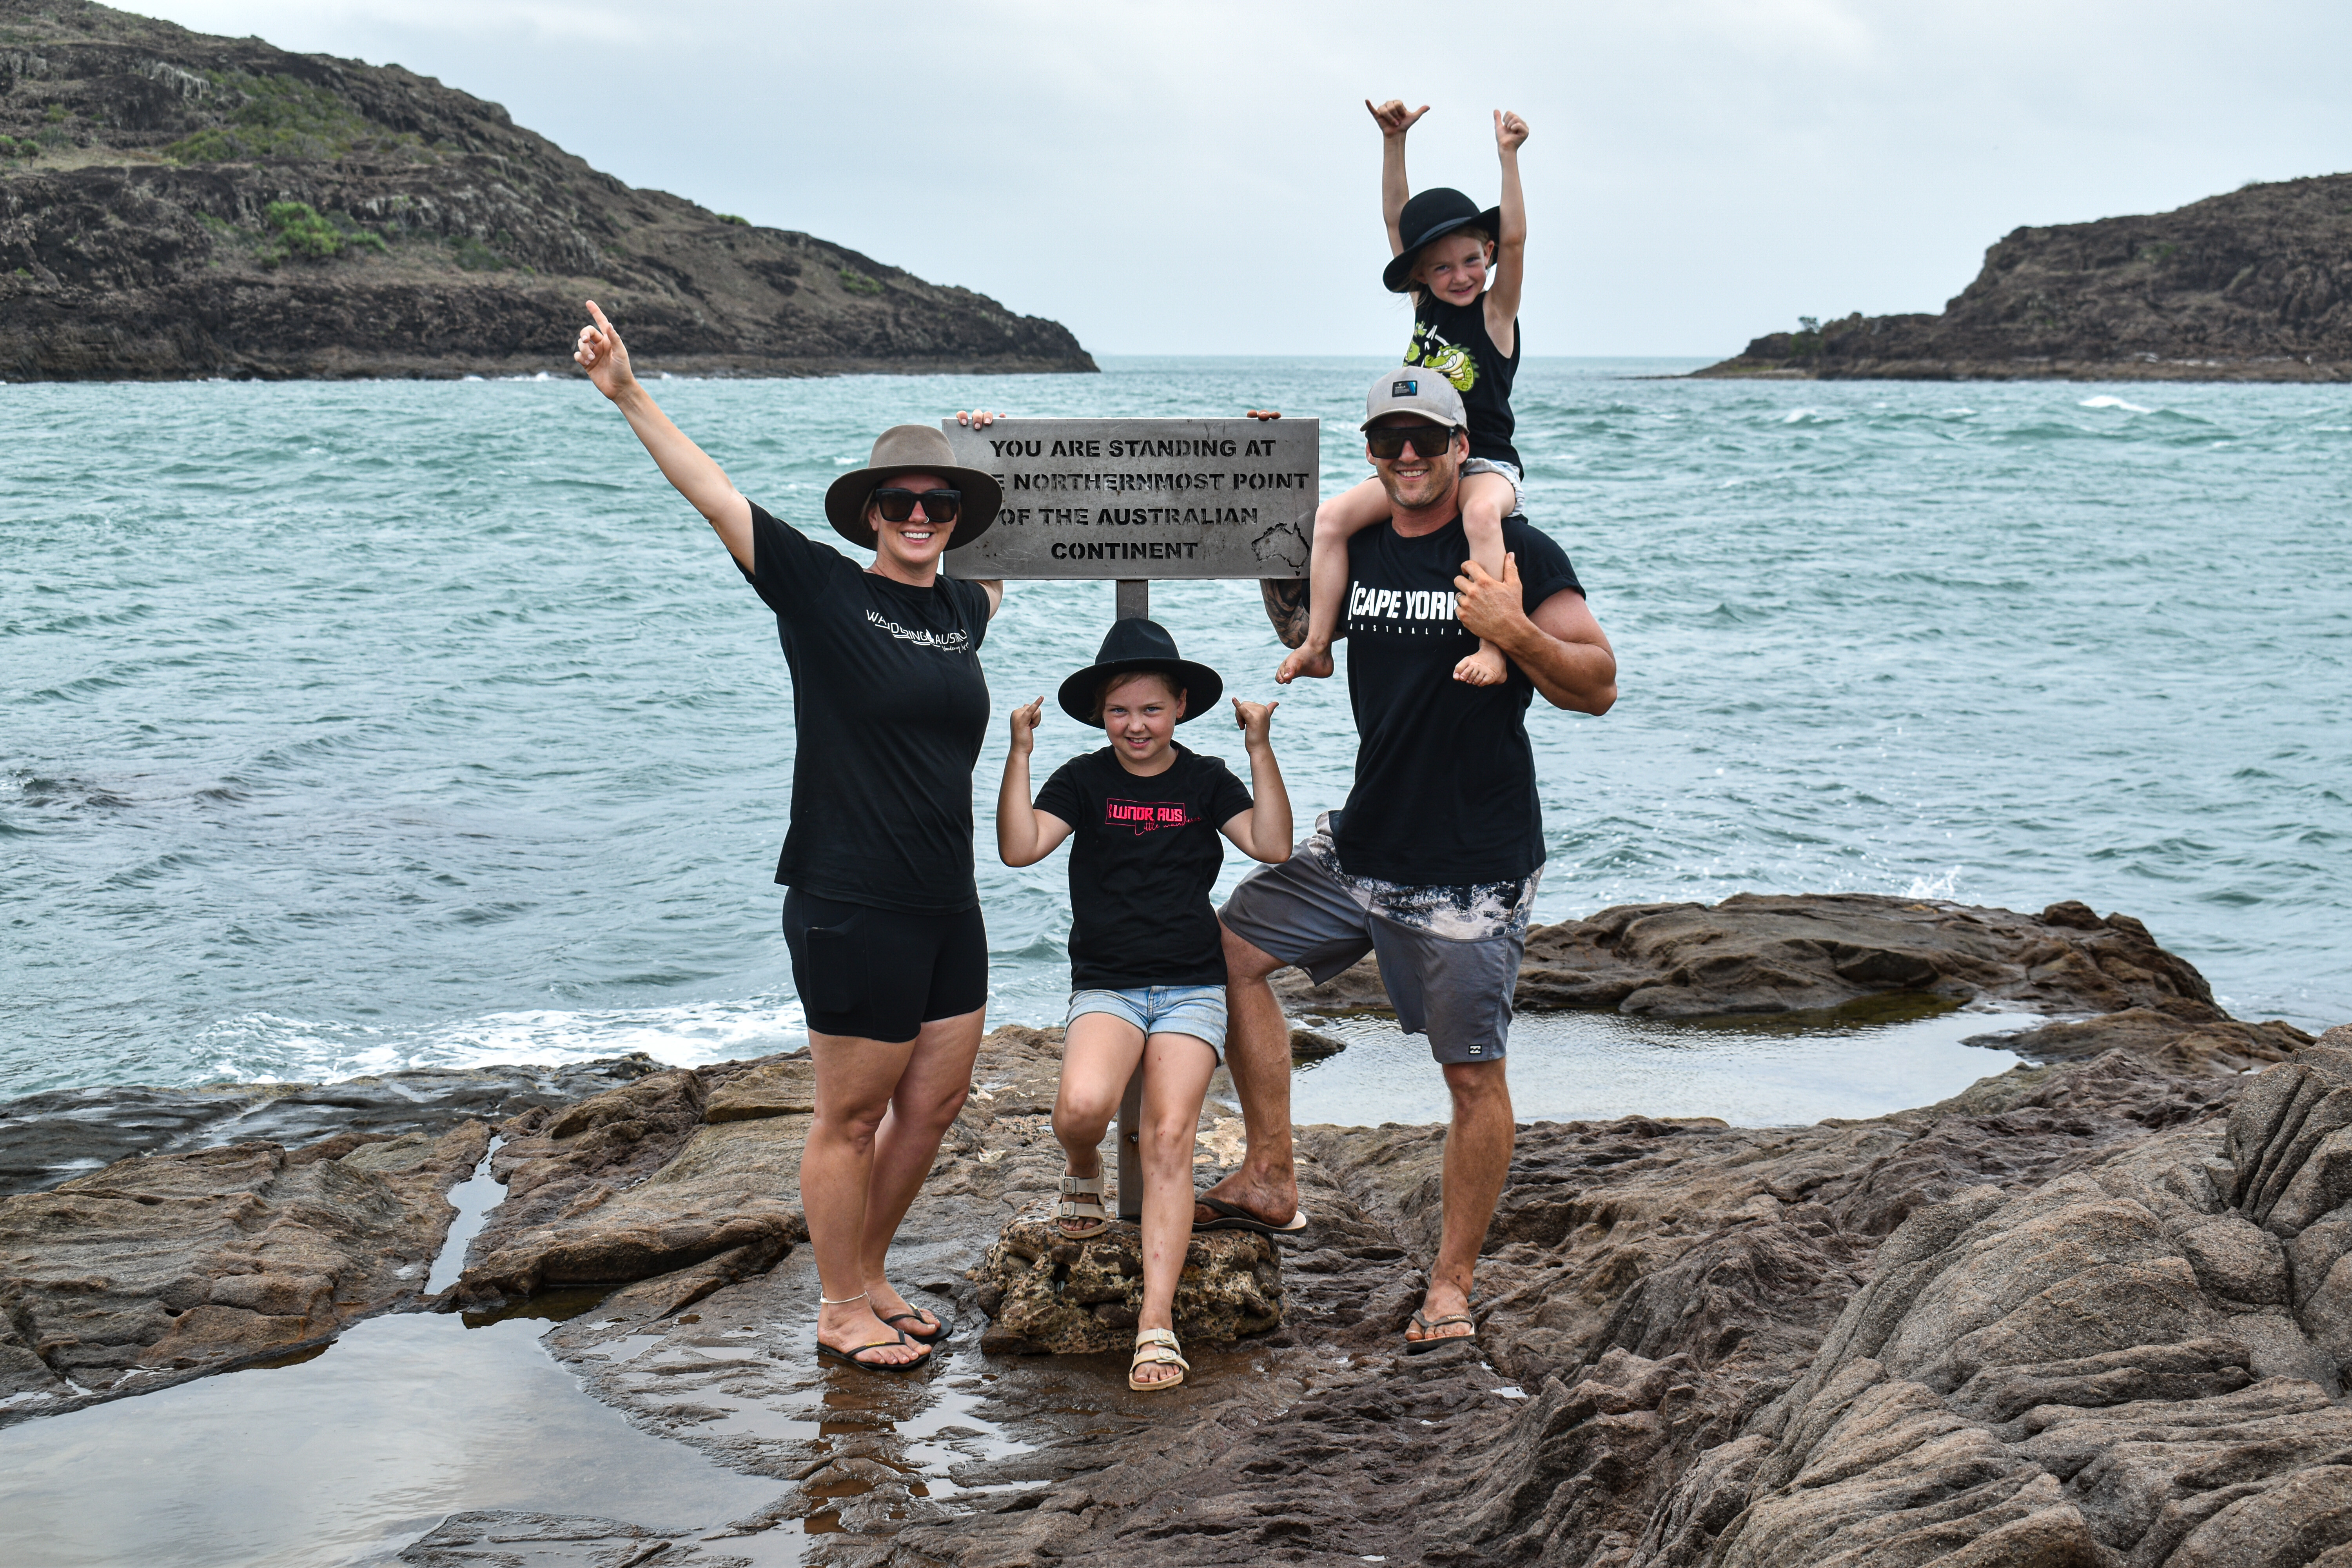
1
Farther south, we stopped for a couple of nights at Laura, camping behind the pub so the boys could go and explore Old Coach Road. Again, rich in history, this is the site of a gold mining community called Maytown that was hustling and bustling with a population of up to 20,000 back in the late 1800s.
You can still see where shops and services were on the main street and the remnants of the old track the coaches used to freight the gold to port. Very interesting and a great 4WD track to boot! It is definitely not a track for 2WDs, with a few shale hills and rock climbs. Some even say this is the hardest track of the Cape.
Safe to say we had a successful six-week trip to Cape York Peninsula. We had an absolute ball with a bunch of great mates and it definitely won’t be our last visit to the Tip.
There was lots of planning and preparation and I will just say that while it is important to book in some accommodation and make sure your vehicle is appropriate and prepared, it’s also not as remote as many people think and there is no need to take everything you could ever imagine you need. You do need to take the kitchen sink though!
If you’re thinking about visiting the Tip, our advice is always just do it! It’s a great family holiday full of dirt, dust and lots of fun!
Our lap of the map is finally complete. Thanks for joining us on our trip of a lifetime! Go Wander, Brendan and Nikita
At the start of 2022 we bought a brand new, bog stock Isuzu MU-X with the intention of transforming it from a suburban family wagon in to something with some off-road touring ability.
We chose the base model LS-M specification as it comes standard with 17-inch wheels and a manual tailgate, and it wasn’t going to stay in standard trim for long.
To achieve our goal with the MU-X, we spoke to some of the leading manufacturers of aftermarket 4×4 equipment to see what they had for the Isuzu. Interestingly, many companies didn’t produce gear for the MU-X as it’s not on their radar despite being the second best-selling vehicle in its class in 2021, behind the Toyota Prado. More products have come online since the start of the project, but it’s been a tough haul.
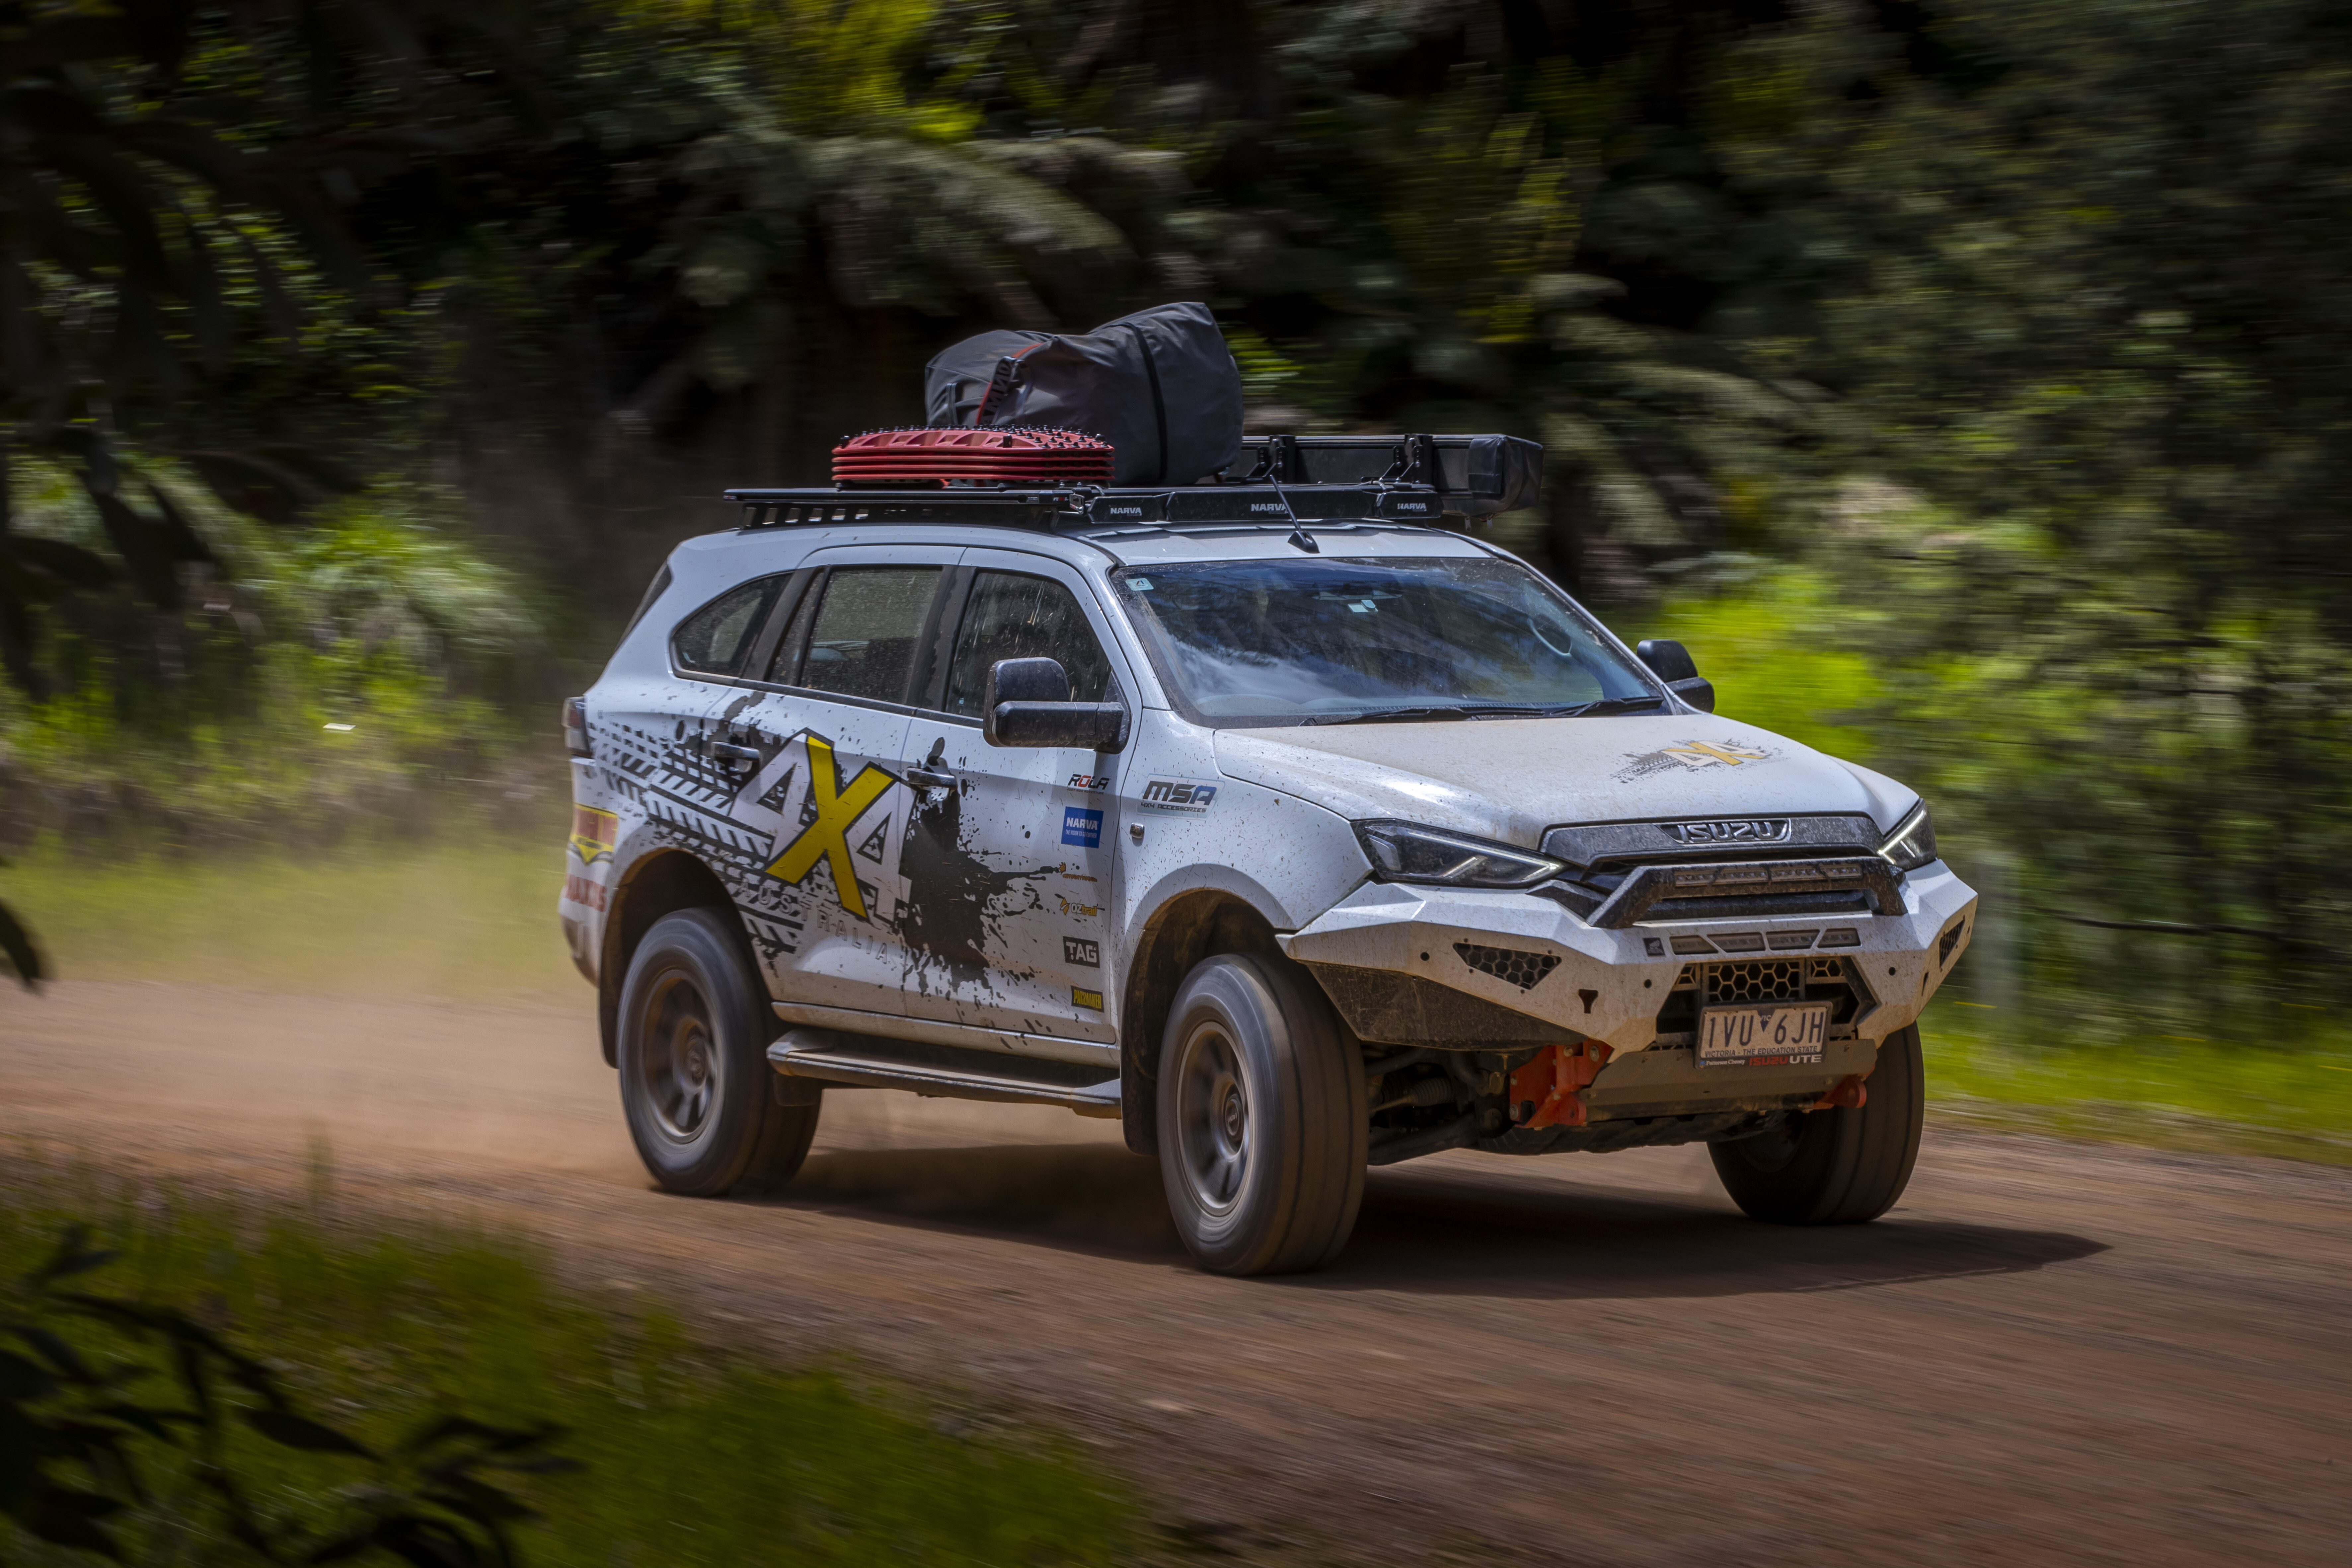
1
Over the following 12 months we were able to get the kit we needed to transition the MU-X in to what we had in mind for it. That is a 4×4 that you can take just about anywhere, be it the Central Australian deserts, Cape York or the Victorian High Country. This is now a car that will get you there and back.
Hopefully, potential wagon buyers will see what we’ve done with the MU-X and maybe give it another look when thinking about their next 4×4.
Stage 1
As some brands were still developing products for the 2022 MU-X, they wanted to get our car in their workshops to engineer the gear to be just right. This meant sending the car interstate from our Melbourne HQ, but there were a few products we could get fitted before it left town.
One of those interstate stops was to be Tough Dog Suspension’s headquarters in Sydney, but before we had the suspension fitted we wanted to get some of the extra weight we had planned for the car fitted. Specifically, this meant the front and rear bars and rear storage systems as they would be some of the heaviest aftermarket components.
All along we had to keep in mind the MU-X’s modest payload and GVM, so we did hold back on some of the products we might have liked to install on a touring 4×4.
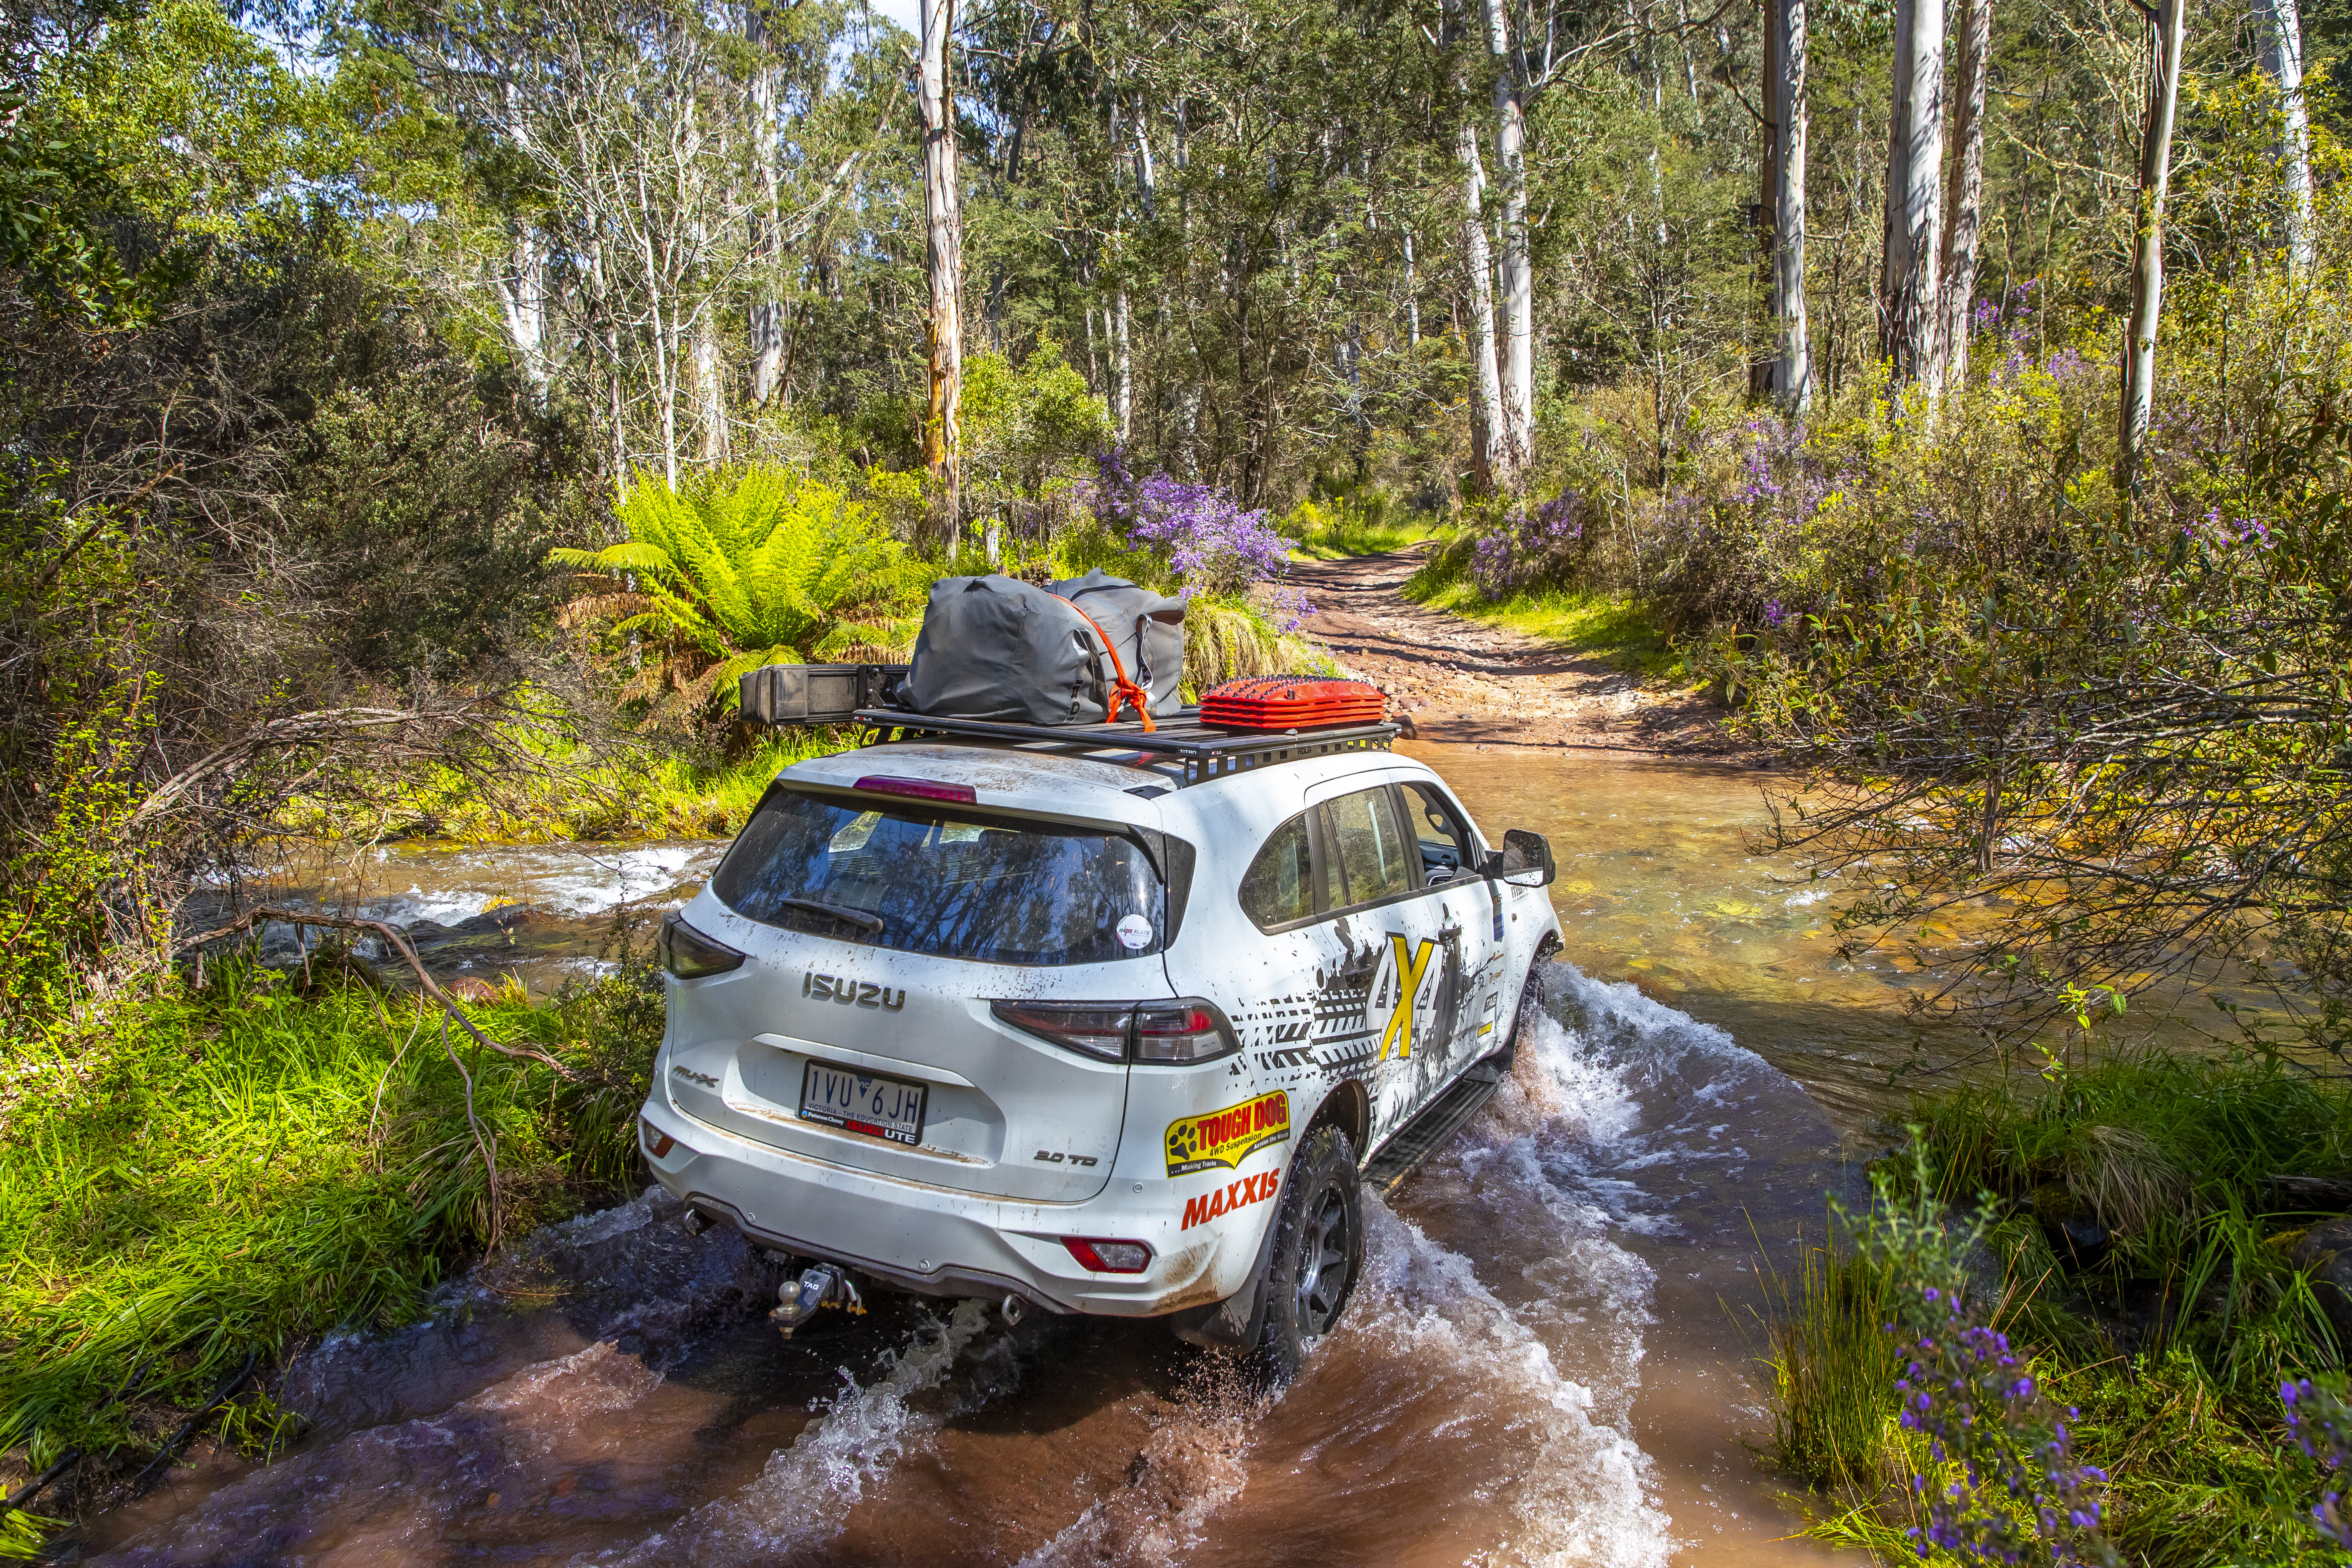
1
Working with a relatively small wagon like the MU-X did bring with it some limitations, and that 625kg payload certainly stopped us from including items like a long-range fuel tank, full bar work and a winch.
The first stop was to the workshop of Offroad Animal in Mornington to check out its Predator bar for the MU-X. We ordered the relatively light weight bar with the Stealth hoop, and colour-coded it to the car.
Dave at Offroad Animal told us that Narva’s LED light bars would fit in both the bar and the hoop and, as Narva was our lighting partner on the build, we grabbed a pair of Explora single-row bars to fit. Then we dropped the whole package off to our friends at OnTrack Automotive in Ferntree Gully for the installation.
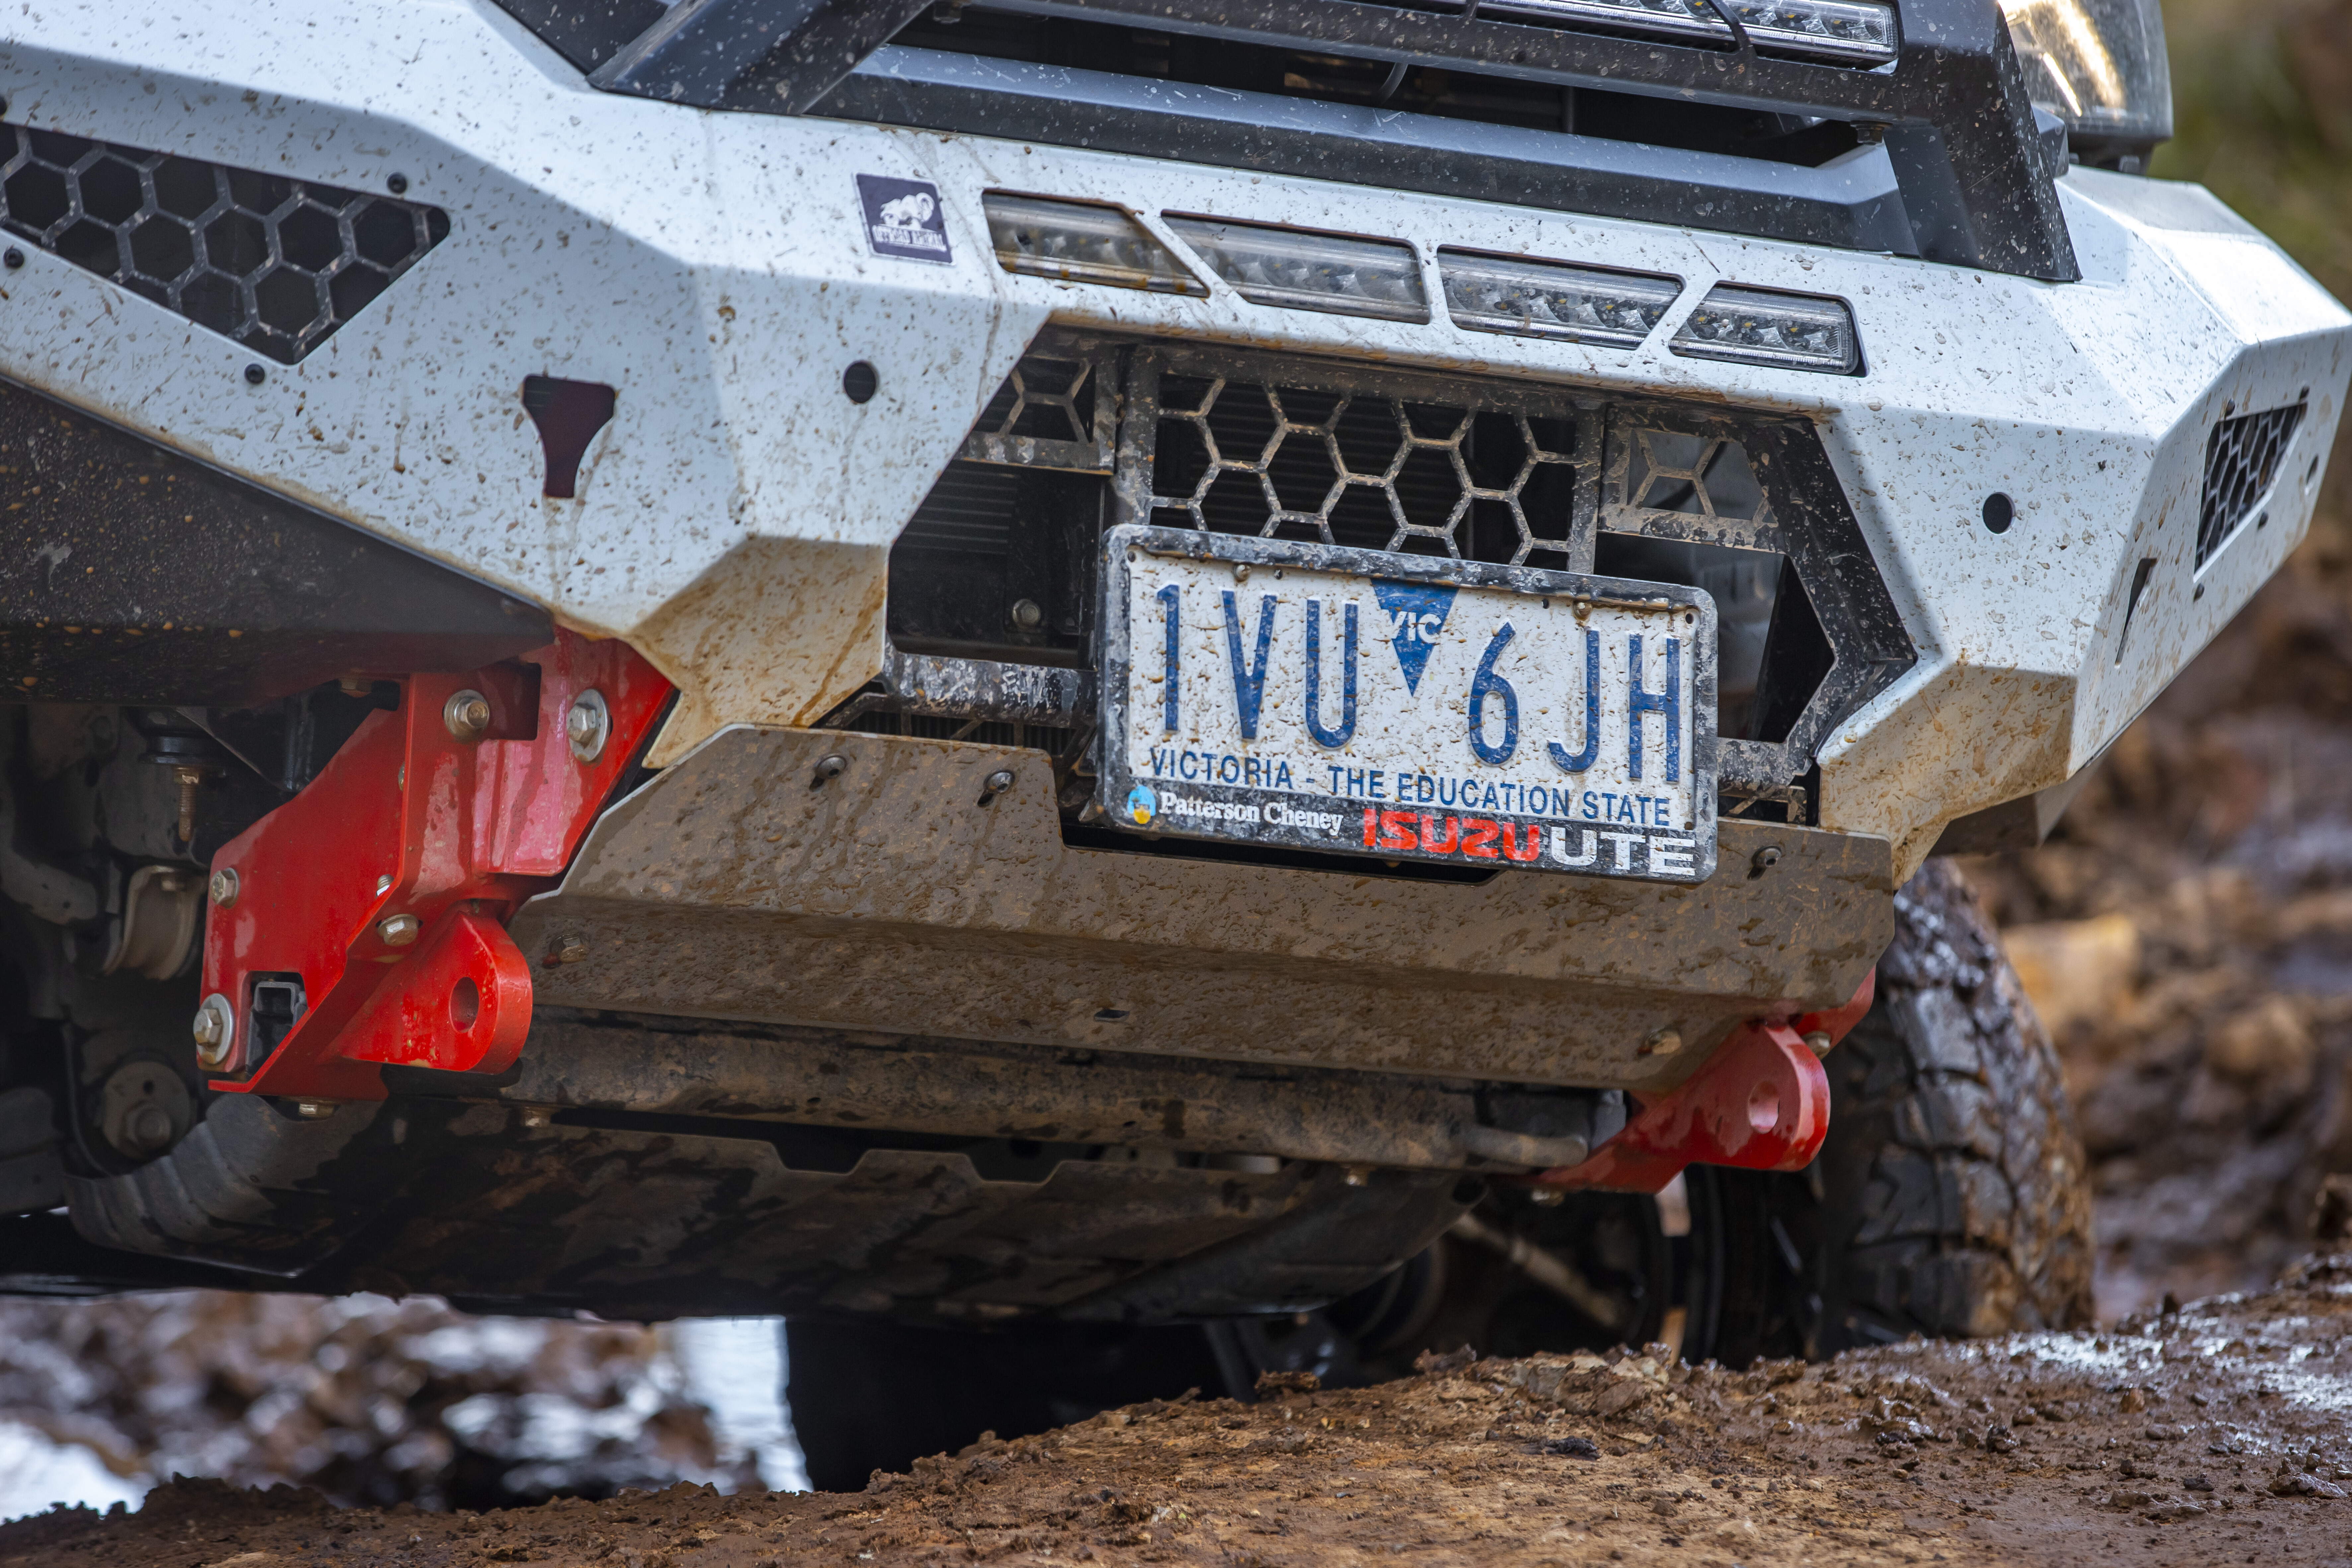
1
Phil and the team at OnTrack have helped us out with all our project cars and, as four-wheel drivers themselves, we trust them with all our cars. They said the lightweight Predator bar instal was reasonably easy with no dramas, and the product looks awesome.
The MU-X did look a bit odd with that striking bumper fitted and everything else stock, so before it went interstate we wanted to get the wheels and tyres on it. Maxxis is another brand that has supported us in all our projects and we’ve had fantastic results with its RAZR tyres in both the AT811 and MT772 patterns.
Going with the intended use of the MU-X, we chose the AT811s for this build and went up a size from the standard 255/65R17 highway tyres to 265/70R17 RAZRs. The bigger size gives us a little bit more ground clearance and better fills the wheel arches of the Isuzu.
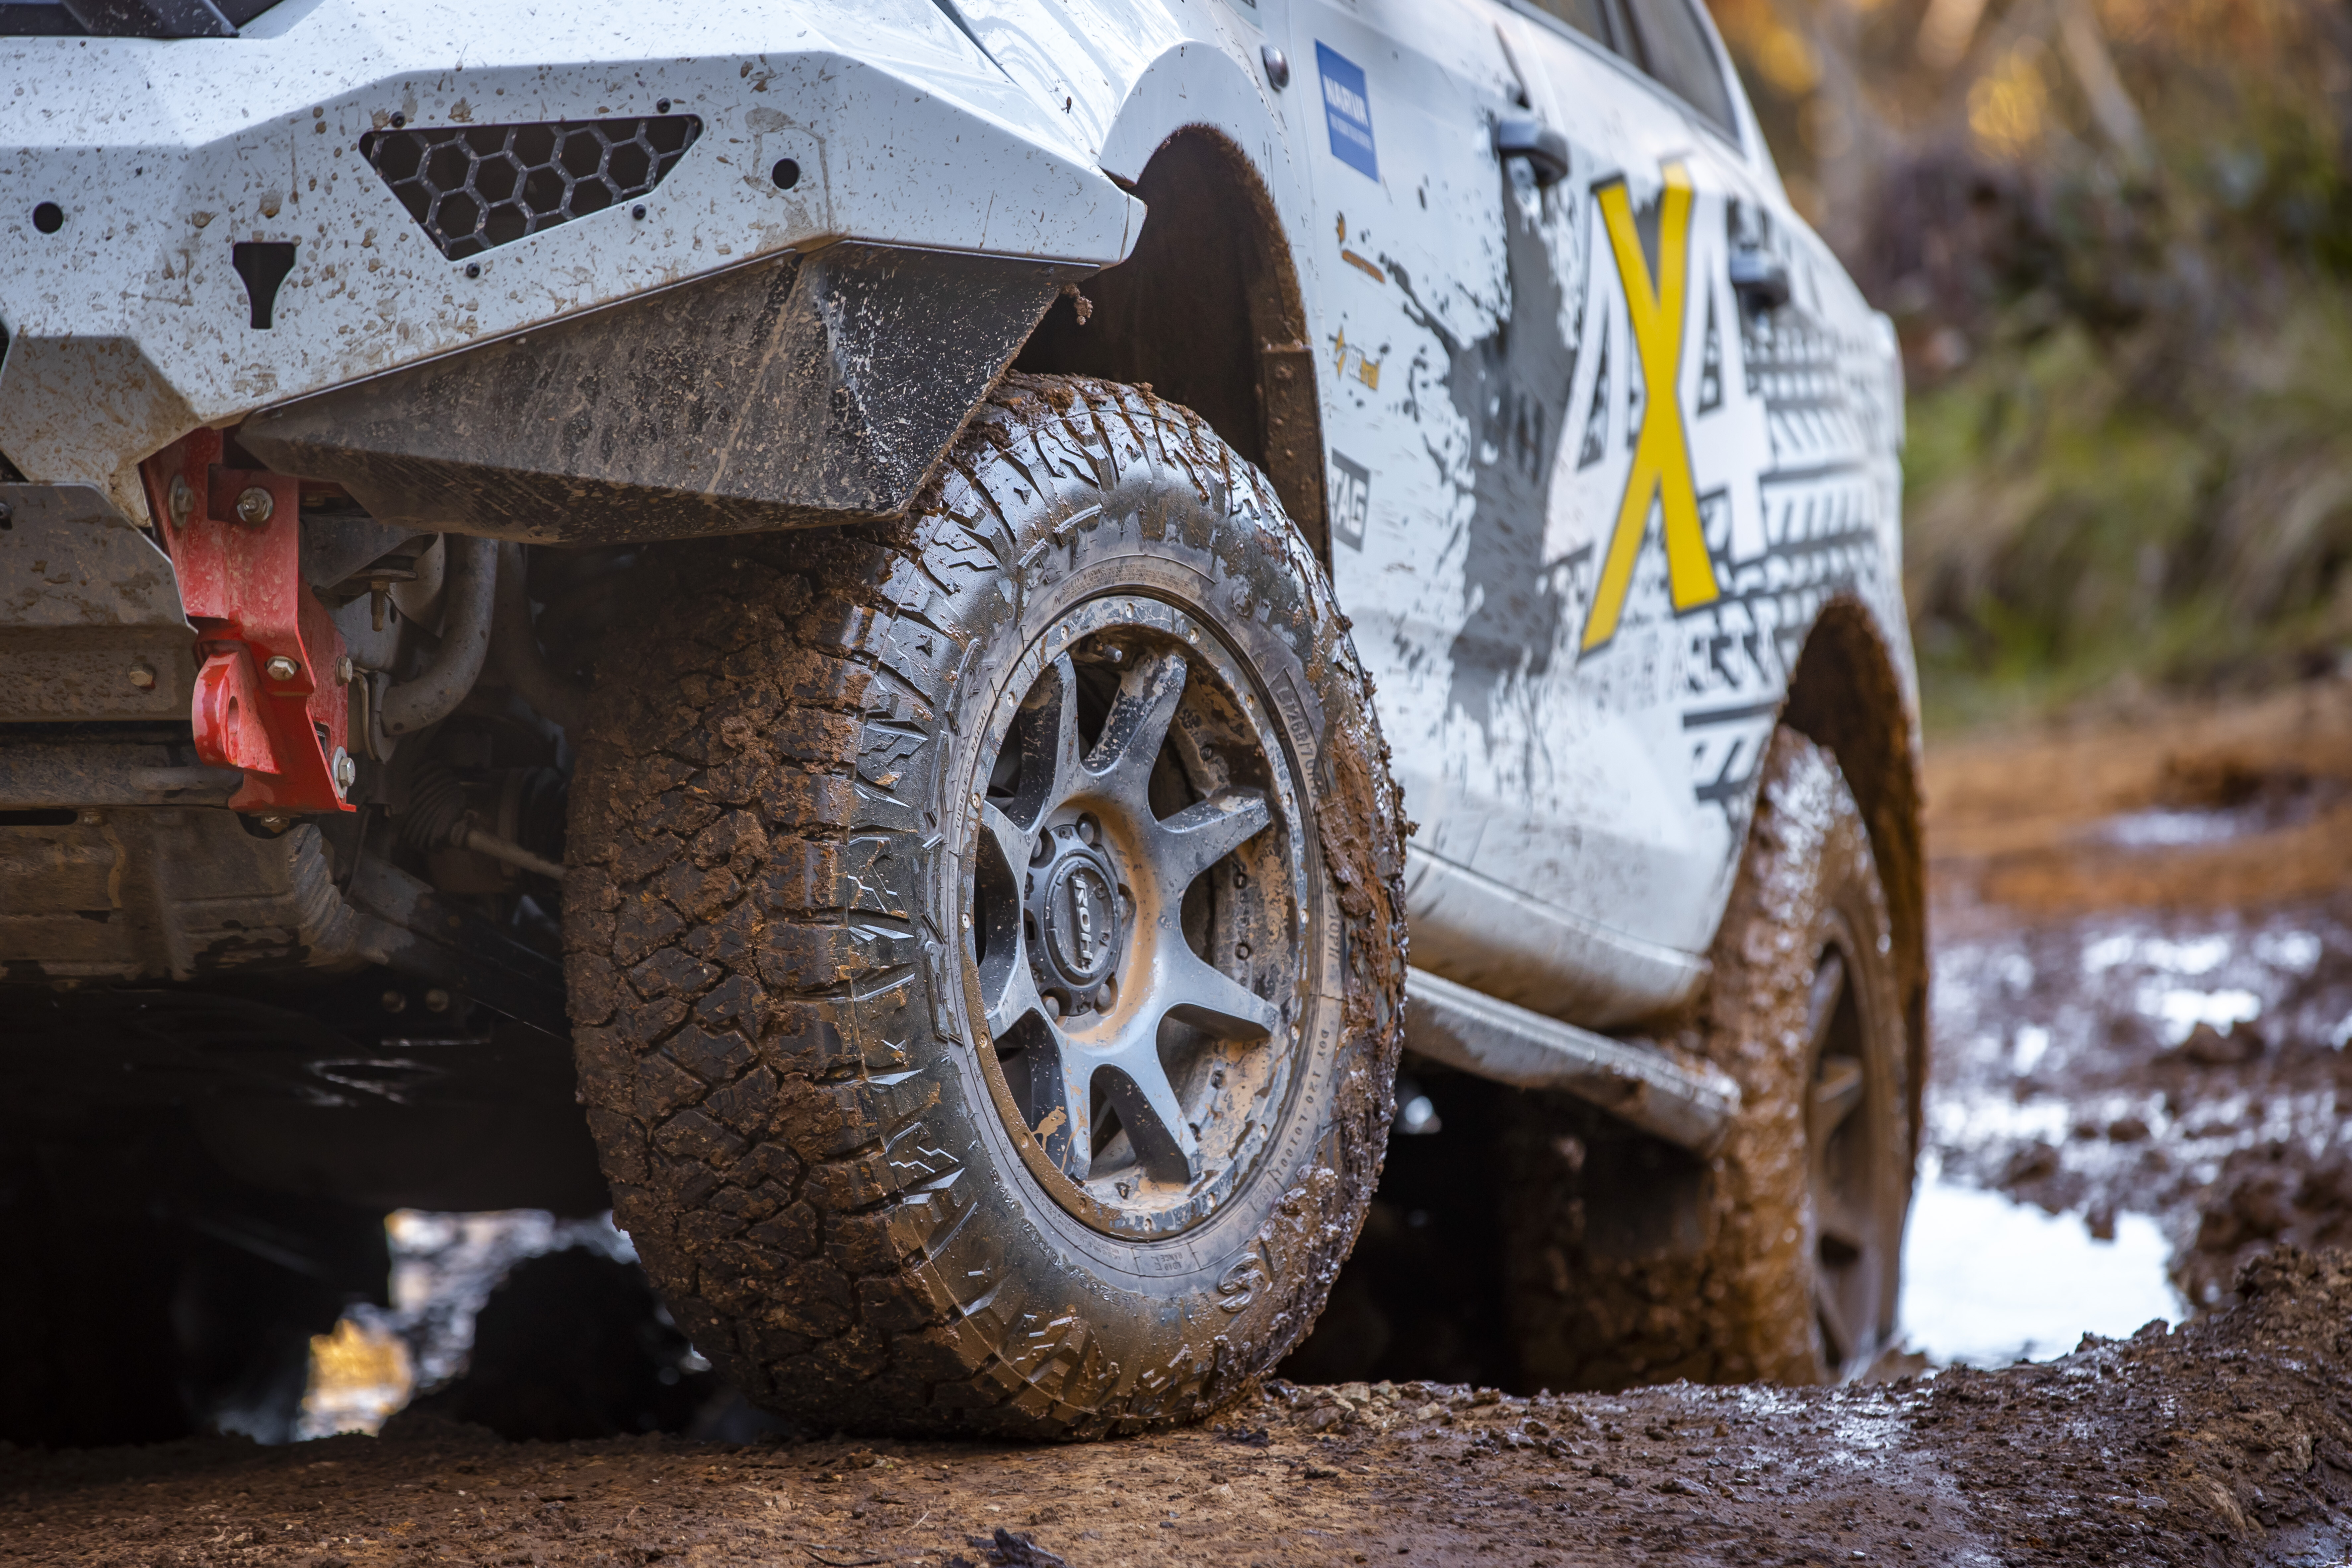
1
The Maxxis RAZRs were fitted to 17×9 ROH Trophy alloy wheels by the team at Competition Tyres & More in Murrumbeena, again long-term supporters of our builds and our go-to local tyre shop.
With the wheels and tyres fitted and wheels aligned, the MU-X was ready to hit the highway – next stop, Queensland. But before we set off we replaced the standard starter battery with a Century Batteries Dual Force hybrid starter/deep cycle battery.
The 750CCA output of the Century Dual Force gives us more powerful cranking for easy starting in all conditions, while the hybrid nature of the battery allows it to cope better with discharges from running accessories, making it excellent for life in a 4×4.
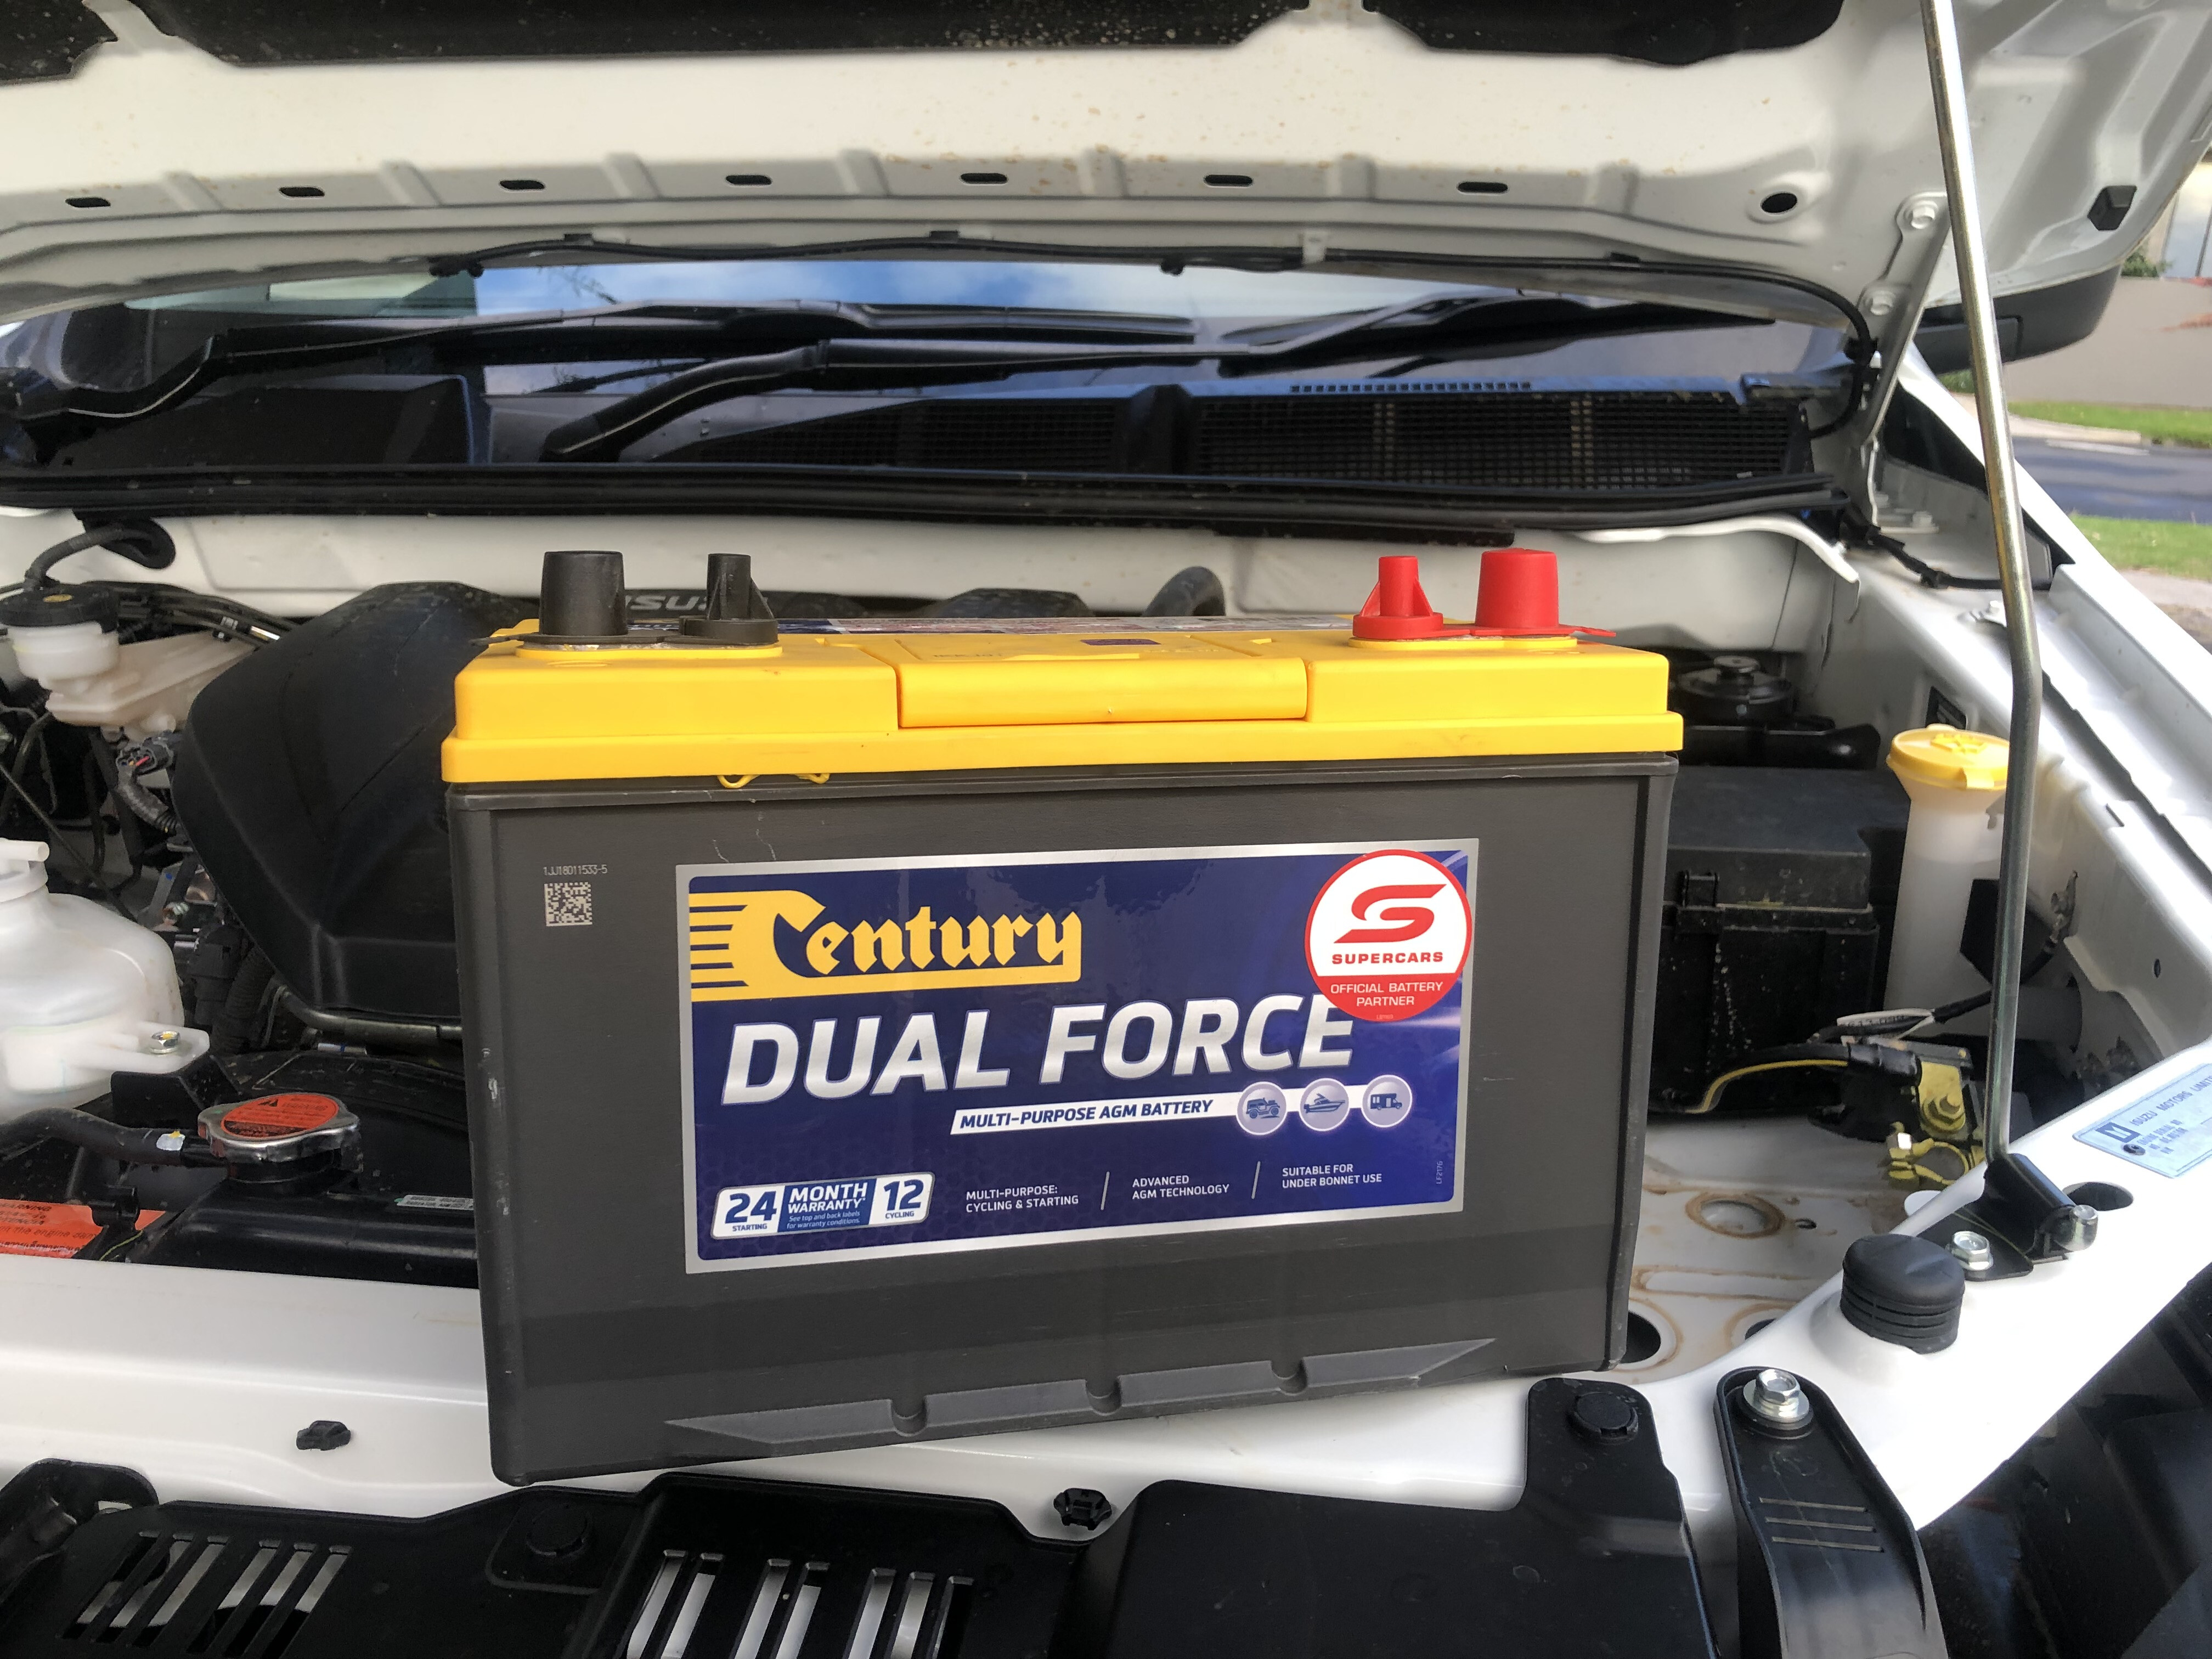
1
Stage 2
MSA 4×4 Accessories doesn’t have an off-the-shelf drawer system for the MU-X, so the team made one especially for us. Give them enough demand for MU-X product and they might put it into production.
Again, considering our 625kg payload, we elected to go with a single drawer and a straight pull (not a drop-slide) fridge slide in the cargo area.
After removing the third-row seats, a mounting frame was fabricated to secure a new floor on which the SL40 slide and single drawer were secured. We also fitted an MSA fridge barrier to keep our fridge clear of luggage and anything else that might sit against it, plus a table that clips on the front of the fridge slide providing a usable work/food-prep space.

1
Lastly, MSA fitted a set of its towing/touring mirrors, and these have become one of my favourite additions to the MU-X simply because of the fact I appreciate the improved rear-view vision they provide every time I drive the car, no matter whether we’re towing or not. I’d recommend these mirrors for any build.
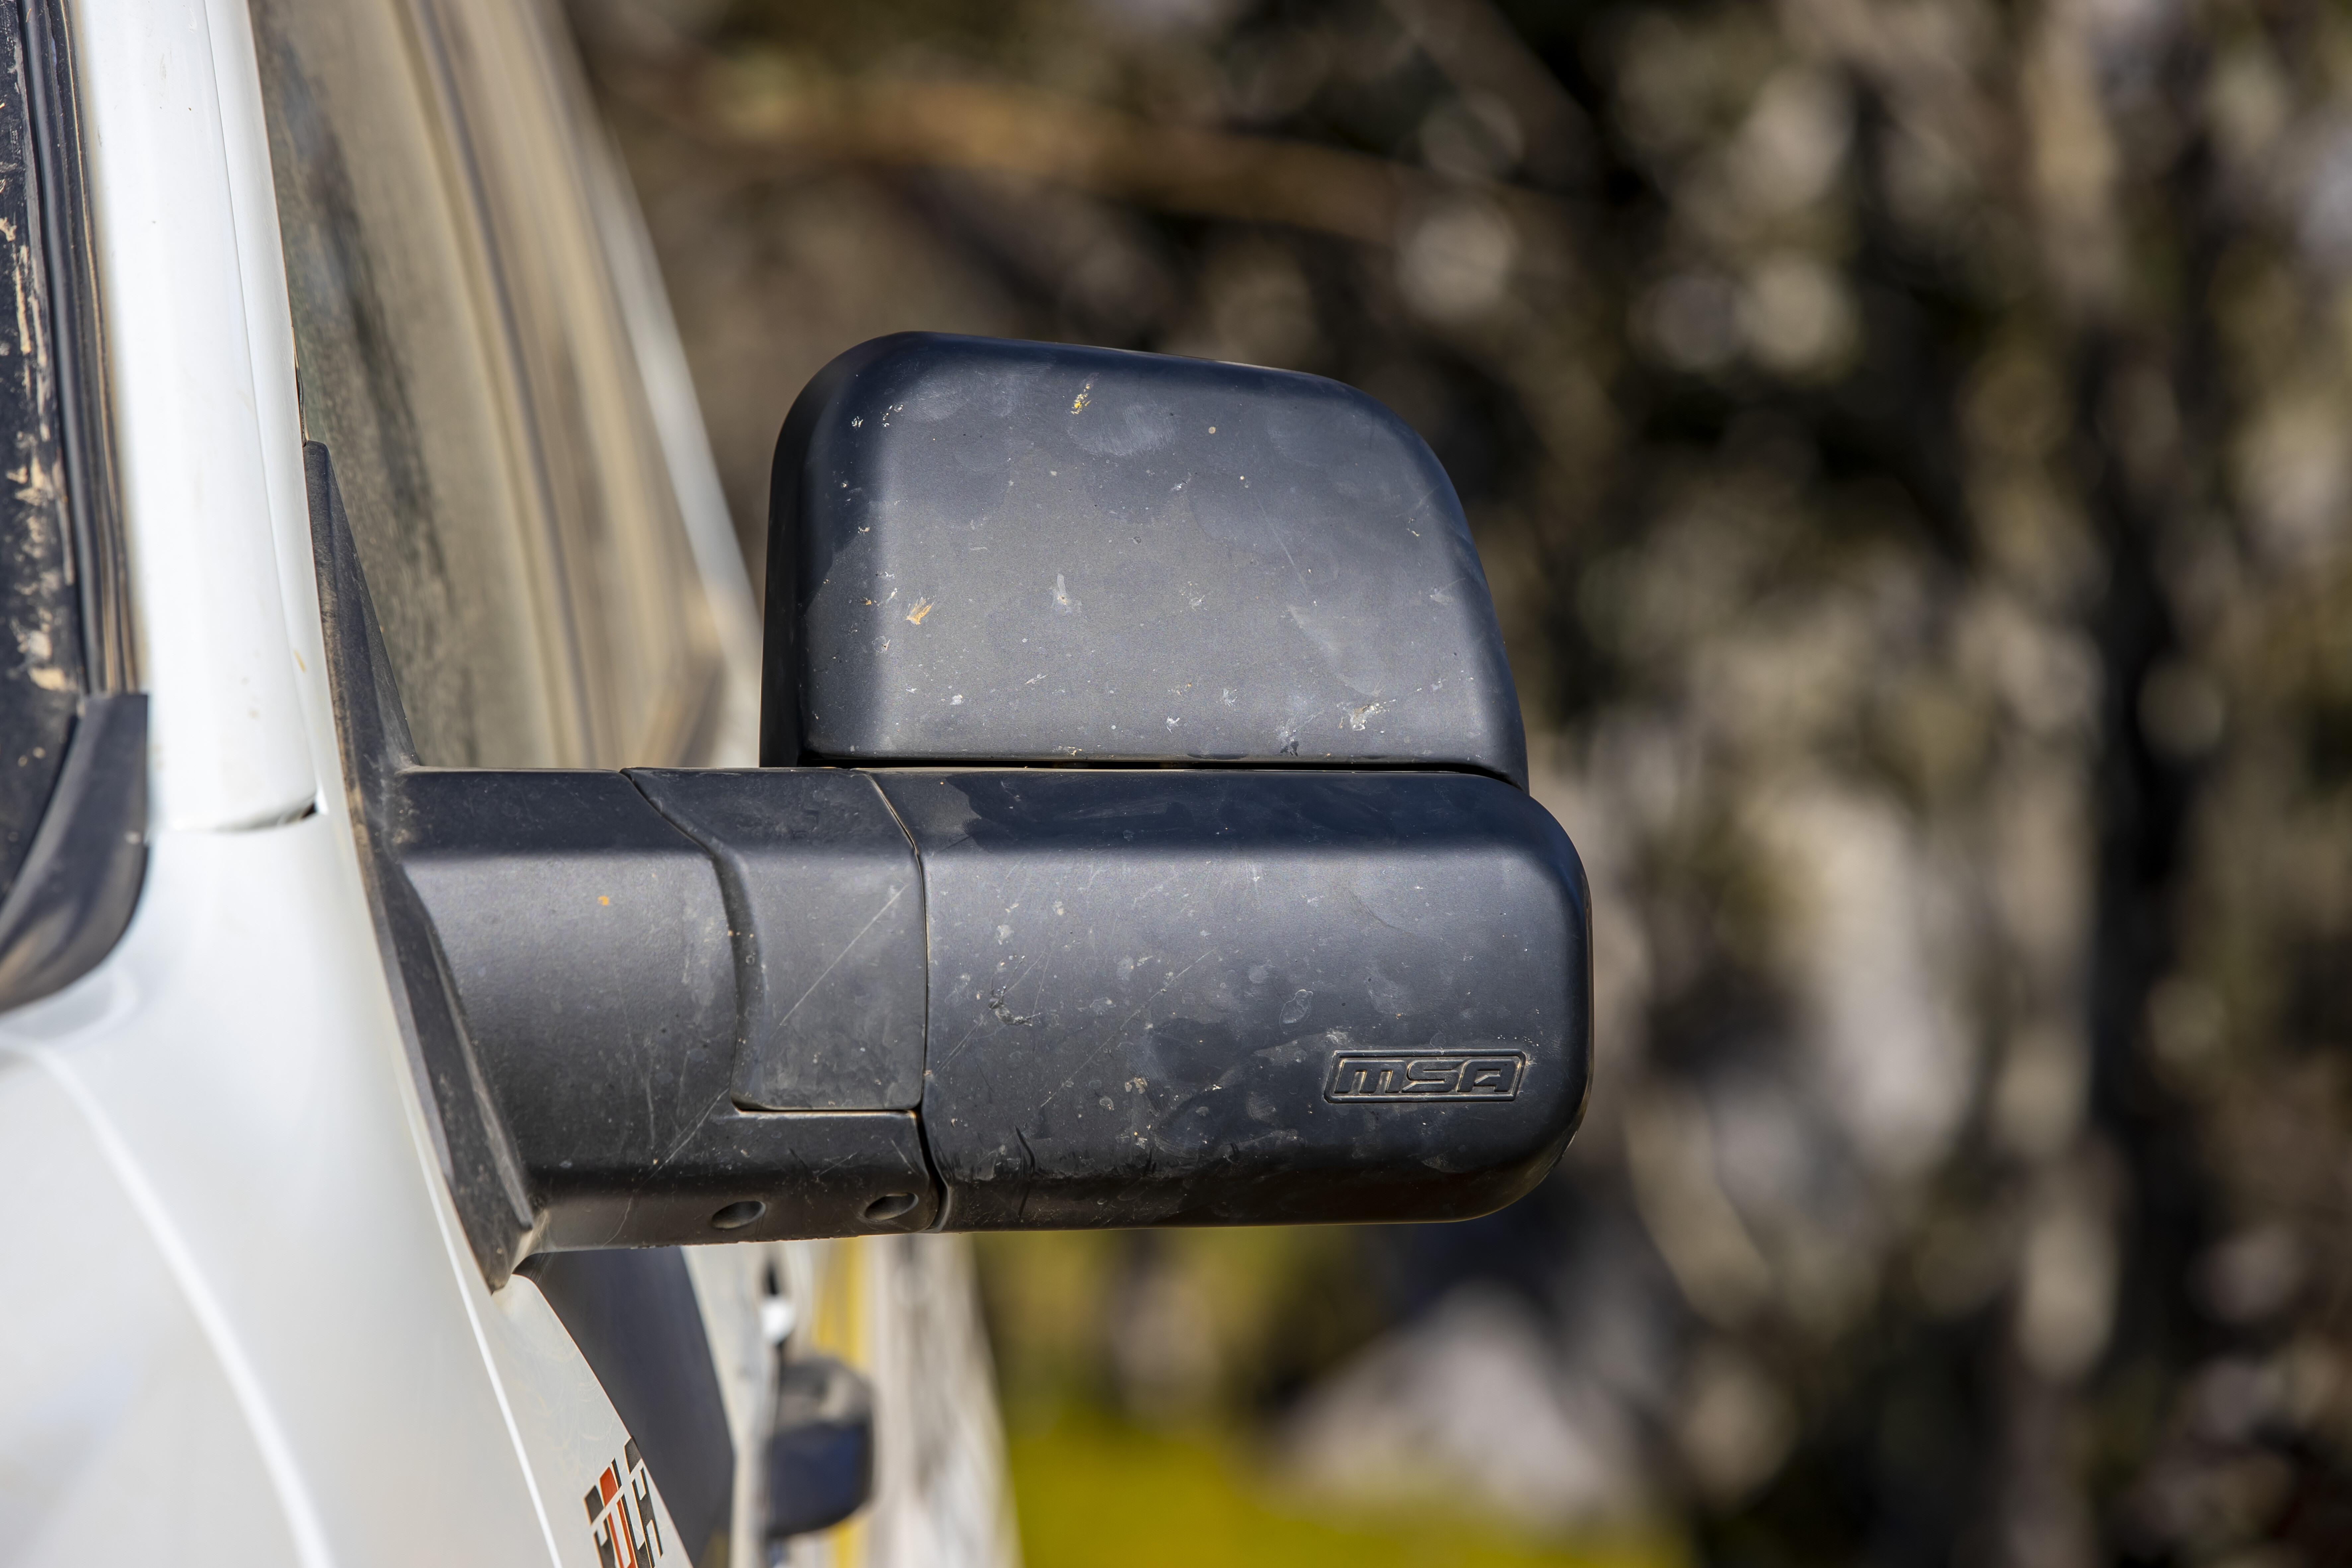
1
While in South East Queensland, we then took the MU-X to TAG Towbars where they had been working on a new product for 4×4 wagons. We’d seen TAG’s XR Recovery/towbars on utes we’ve featured in the magazine but never on a wagon, and the company had been busy looking at ways to make them possible.
The TAG XR bars incorporate 4000kg rated recovery points at each side of the bar as well as the central recovery point in the 50mm square hitch point. The MU-X’s 3500kg towing rating is also retained. The XR bar has a well-integrated look at the back of our MU-X and gives us the additional versatility of the extra recovery points when we’re pulling other 4x4s out of the bog.
Our MU-X was the first production application of the TAG XR bar and we had some trouble with the space for our bigger-than-standard spare tyre. The taller tyre was wedged hard in-between the bar and the Panhard rod on the rear suspension, so we had to swap back to the standard-size spare tyre.

1
We took this information back to the team at TAG and they held back the launch of the MU-X XR bar. TAG’s engineers were able to redesign the bar using different dimension steel and free up the extra space for a 265/70R17 spare – the new bar should be available by the time you’re reading this.
That’s the advantage of designing and manufacturing your products locally in Australia; TAG was able to take another look at the product and amend it to make it more suitable for what Aussie touring 4x4ers would be doing with their cars. Great work!
From TAG in Brisbane, we drove the MU-X to Tough Dog in western Sydney for our suspension instal. Fitting a Tough Dog suspension kit in a car like the MU-X is a relatively simple job, especially when Tough Dog can sell you complete assembled struts to suit, so you don’t have to risk life and limb messing around with spring compressors and the like.
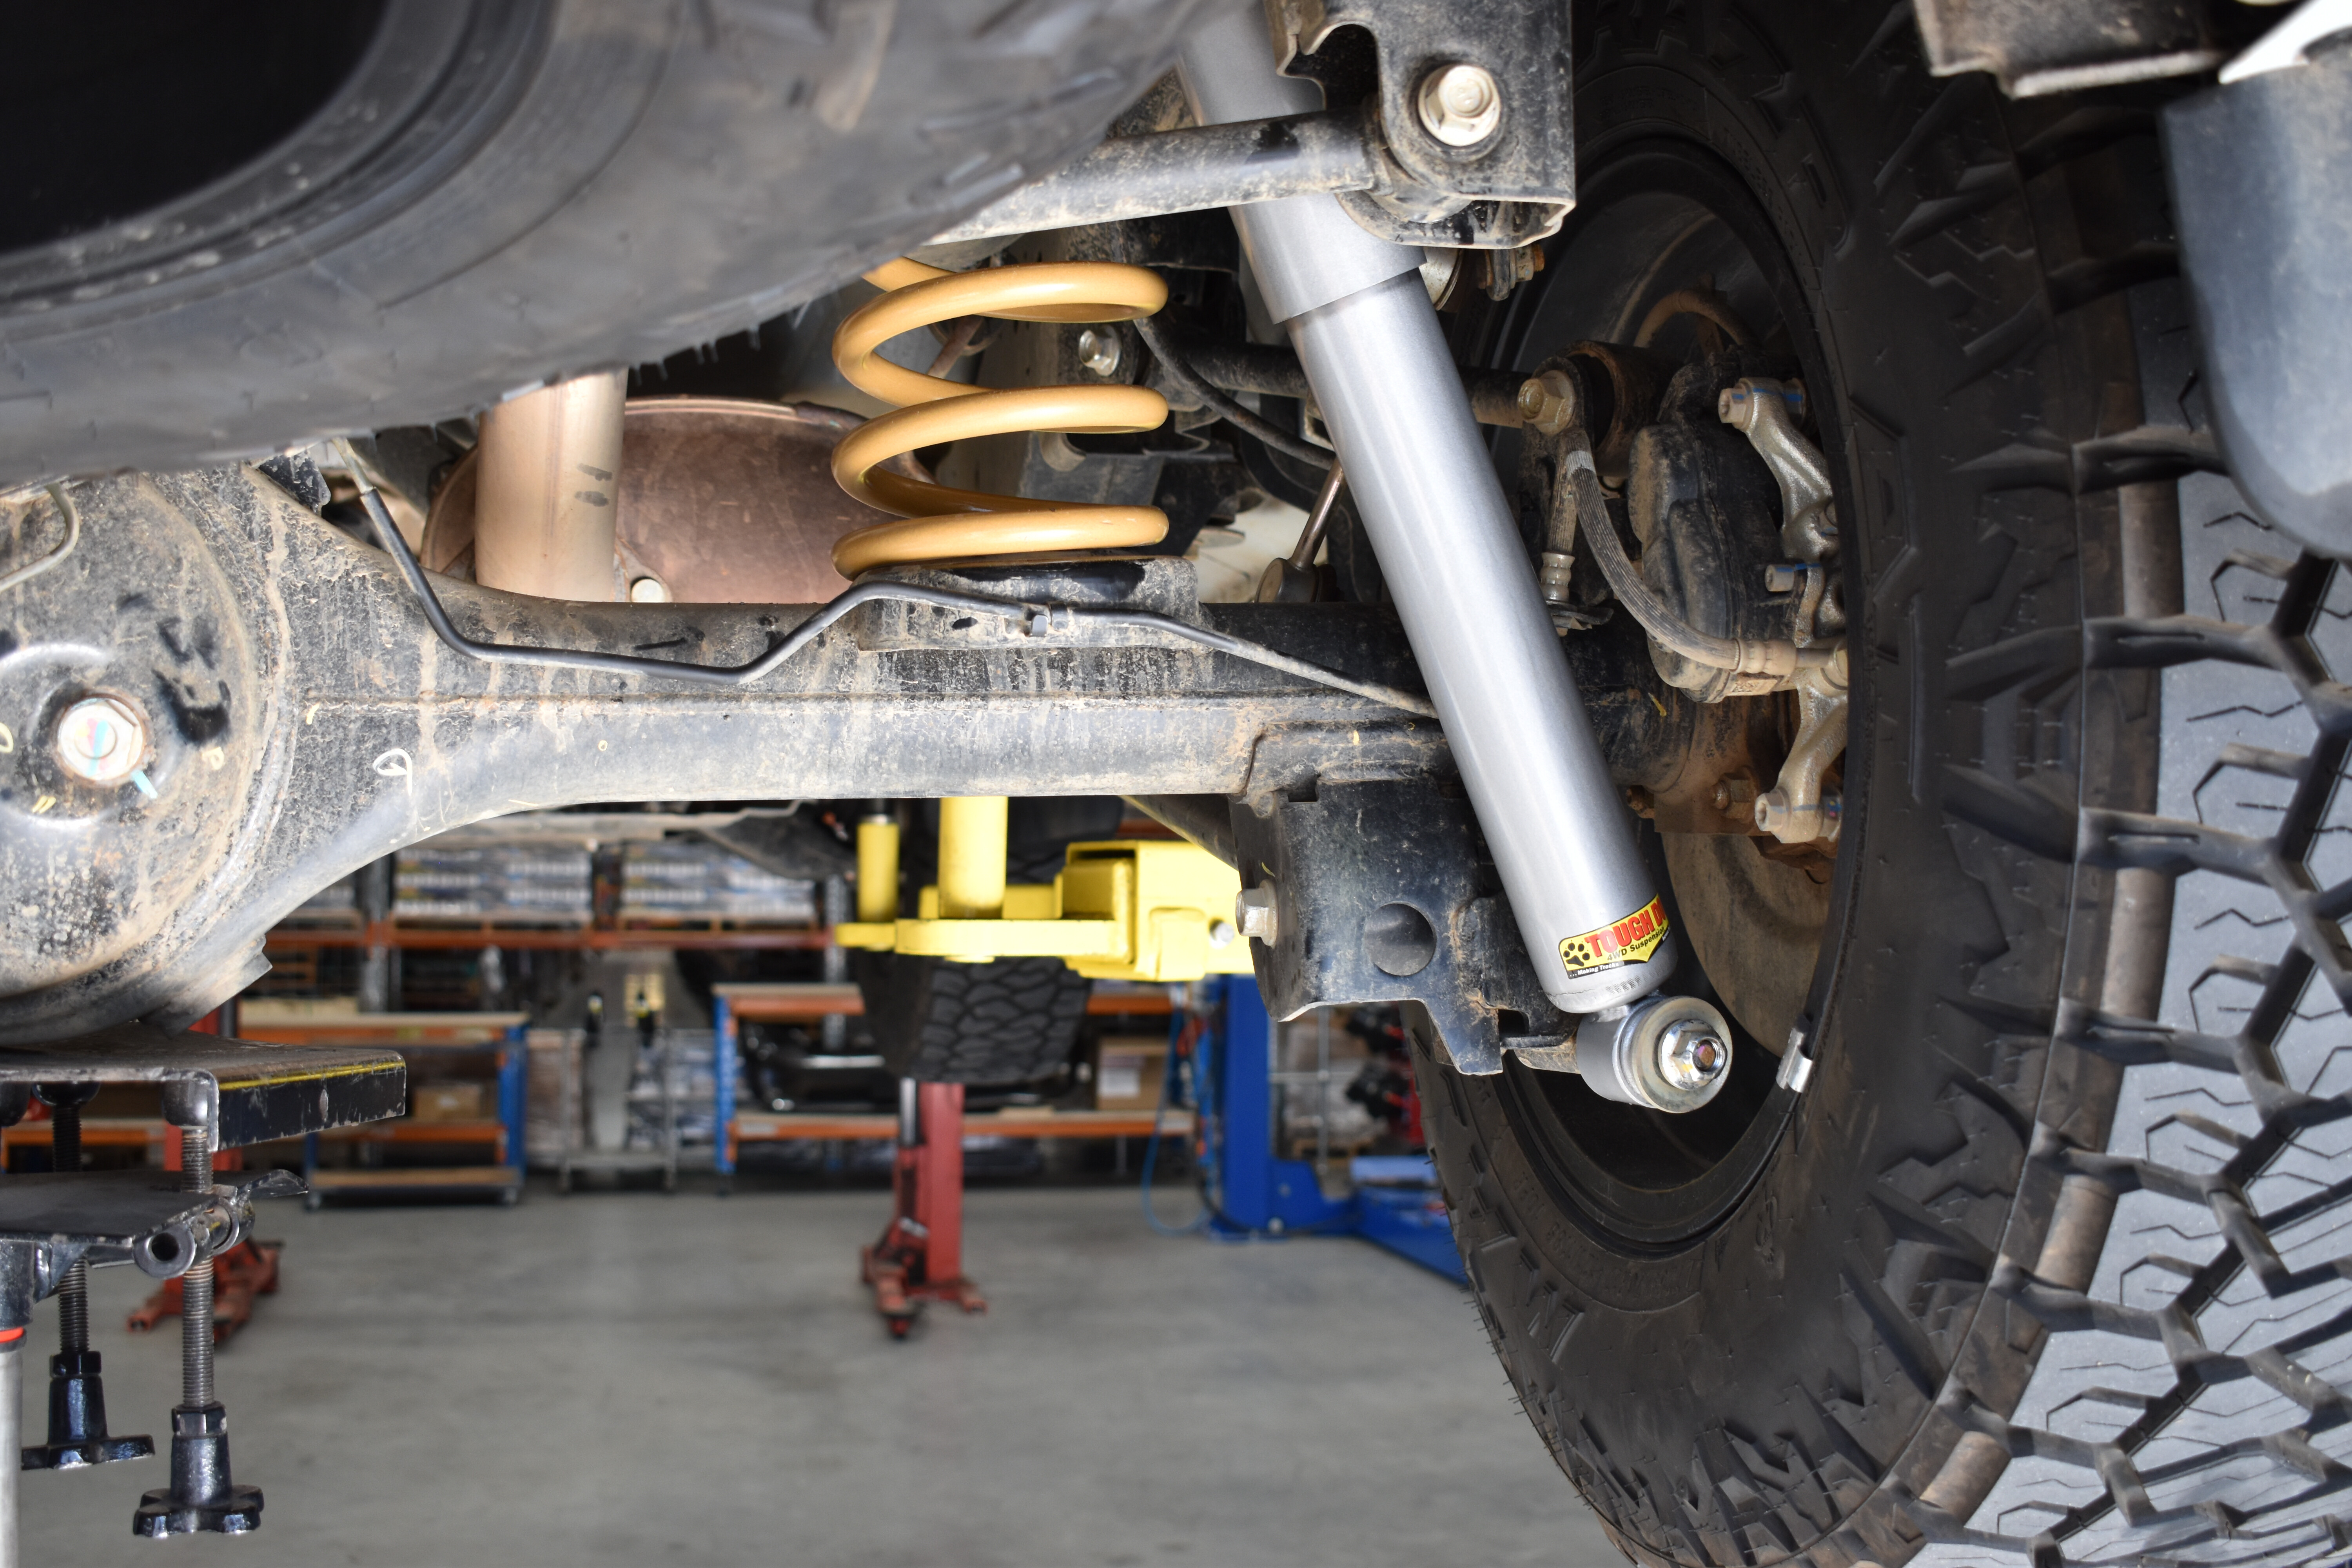
1
It’s simply a bolt-in affair and the rear coils are so much easier to deal with than the heavy leaf springs on most utes. After originally over-springing the rear of the car, we ended up with 300kg constant-load coils and the back and front struts to suit the weight of the no-hoop bumper without a winch.
After driving around on the suspension for a few months, it’s settled in to leave us with around 40mm of extra height over the standard suspension, and it’s a package that provides much more control both on the road and in the bush. In fact, the suspension really came into its own in the High Country where its low-speed performance was exceptional, allowing plenty of wheel movement to keep the Maxxis rubber on the tracks.
Stage 3
Since getting the Isuzu back to Melbourne, it’s been a constant tour of workshops as we get more and more kit fitted to it.
We threw a set of Maxtrac 3D carpet mats on the floors front and rear to protect the carpets before it got any dirtier. These are a great fit and perfect to keep carpet in good condition and the mud and grime out of them.
Then we slipped the MU-X into the workshop at Rola roof racks where again our Isuzu was the production mule for some new product. This time it was Rola’s new Ridge Mount system for the Titan Tray that provides a long and strong mount for the full length of the 1800 x 1200mm cargo tray chosen for this car. While ours was the first MU-X to get one of the Ridge Mounts, they are now available to suit most popular 4×4 models.
1
The Titan Tray’s slotted cross slats and edges allow you to mount all manner of load-carrying accessories for no matter what you want to carry on the roof. Which is important when you consider the MU-X roof is rated to carry 100kg up top, and the relatively limited space available inside the car.
The first products we had fitted to the Titan Tray were some yet-to-be-released LED light bars from Narva. The new Ultima light bars come in both a 24-inch unit and an eight-inch double-row configuration, and as we were looking for something around the 40-inch mark to spread across the front of the MU-X, a combination of both worked out perfectly.
Narva sells a joiner kit to link the bars together, and the eight-inch light bars come in a twin-pack; so again, perfect for our needs.
1
Aside from the incredible light output the new Ultima lights produce, the smart thing with them is they are compatible with Narva’s new Connect+ controller. Connect+ allows you to control the outputs of two different light sources so you can tailor the beam to what suits your needs.
For our application, we have the two eight-inch flood-beam bars set on one channel of the controller and the 24-inch bar on the other. You can then adjust the outputs of either channel to vary the beam ahead of you and, if you want more power, hit the Boost button to deliver 15 per cent more power for a 30-second burst of intense light.
These new Narva Ultima light bars and Connect+ controllers will be released to the public early in 2023, so keep your eyes out for them.
2
For when we hit the tracks in the MU-X, we have a full suite of recovery gear from MaxTrax on board. Of course, it starts with a set of MaxTrax recovery boards and we’ve gone with the Extreme in the new shade of red, just for something different. They’re mounted up on the Titan Tray using MaxTrax’s own flat-rack mounts to keep them secure and ready to access.
For more serious recoveries, we have a MaxTrax ‘Beach’ Recovery kit on board. The kit includes a 10m kinetic recovery rope, a three-metre static rope, two Fuse synthetic rope shackles, three Core rope shackles, and a rope dampener. It’s all kept tidy in a durable carry bag. It’s an extensive kit that suits our MU-X which doesn’t have a winch fitted.
Next up, we threw an OZtrail ‘Birdsville’ 1400 rooftop tent up on the Titan Tray and sent Tristan away to test it out. While Tristan reckoned the Birdsville tent was perfect for couples heading out for time on the road, it didn’t really fit in with what we wanted for the MU-X so it was taken off and replaced with an OZtrail Blockout 270° awning.
1
The awning is much better suited to our uses of the car, and having it on the roof and not the RTT frees up space for other gear up top. As well as keeping a lower profile. The Blockout 270° is the 2.5m version, so it gets an extra extension at the front which you can either peg to the ground to provide a wall against the weather, or support it outwards on tent poles for more open space.
A 270° awning is very handy for providing cover from the sun and rain, but they are not ideal for wagons with a lift-up tailgate that will interfere with the awning when open. Yes, the Isuzu’s tailgate can’t be opened all the way up with the awning in place, but it opens enough that we can still access the drawer and fridge in the back, and it’s an inconvenience we’re prepared to put up with when in the bush. Still, it’s something to consider if you’re choosing an awning for your 4×4 wagon.
We fitted the OZtrail awning using a set of mounts from RacksBrax. These clever brackets attach to both your awning and your roof rack and allow quick and easy removal of the awning for storage when not in use. They are lockable to secure the awning to the brackets, and the easy-pull pins to release them once unlocked make removal a cinch.
1
Century Batteries launched its range of Lithium Pro batteries for cars in the latter part of 2022, and these are perfect for 4x4s that run accessories such as fridges, lights and charging appliances. We don’t have an inverter in the MU-X so our auxiliary power needs are not huge, but available space was a consideration so we went with the 100Ah slimline Lithium Pro battery for our installation. Century Batteries also has a full N70-size 100amper and a bigger 200Ah unit in its Lithium Pro range.
Powering the Century Lithium Pro is a charging system from CTEK that was professionally installed by the team at Autobarn Bayswater. The CTEK system is relatively simple and could be installed by the home handyman in an afternoon.
Our set-up comprises both a CTEK D250SE and a CTEK Smartpass 120S unit, to give strong charge to the Lithium Pro battery while isolating the Century Dual Force starter battery from accessories current draw. The D250SE is a 20amp DC-DC charger, but by partnering it with the Smartpass, the charging output is boosted up to 140amp as required.
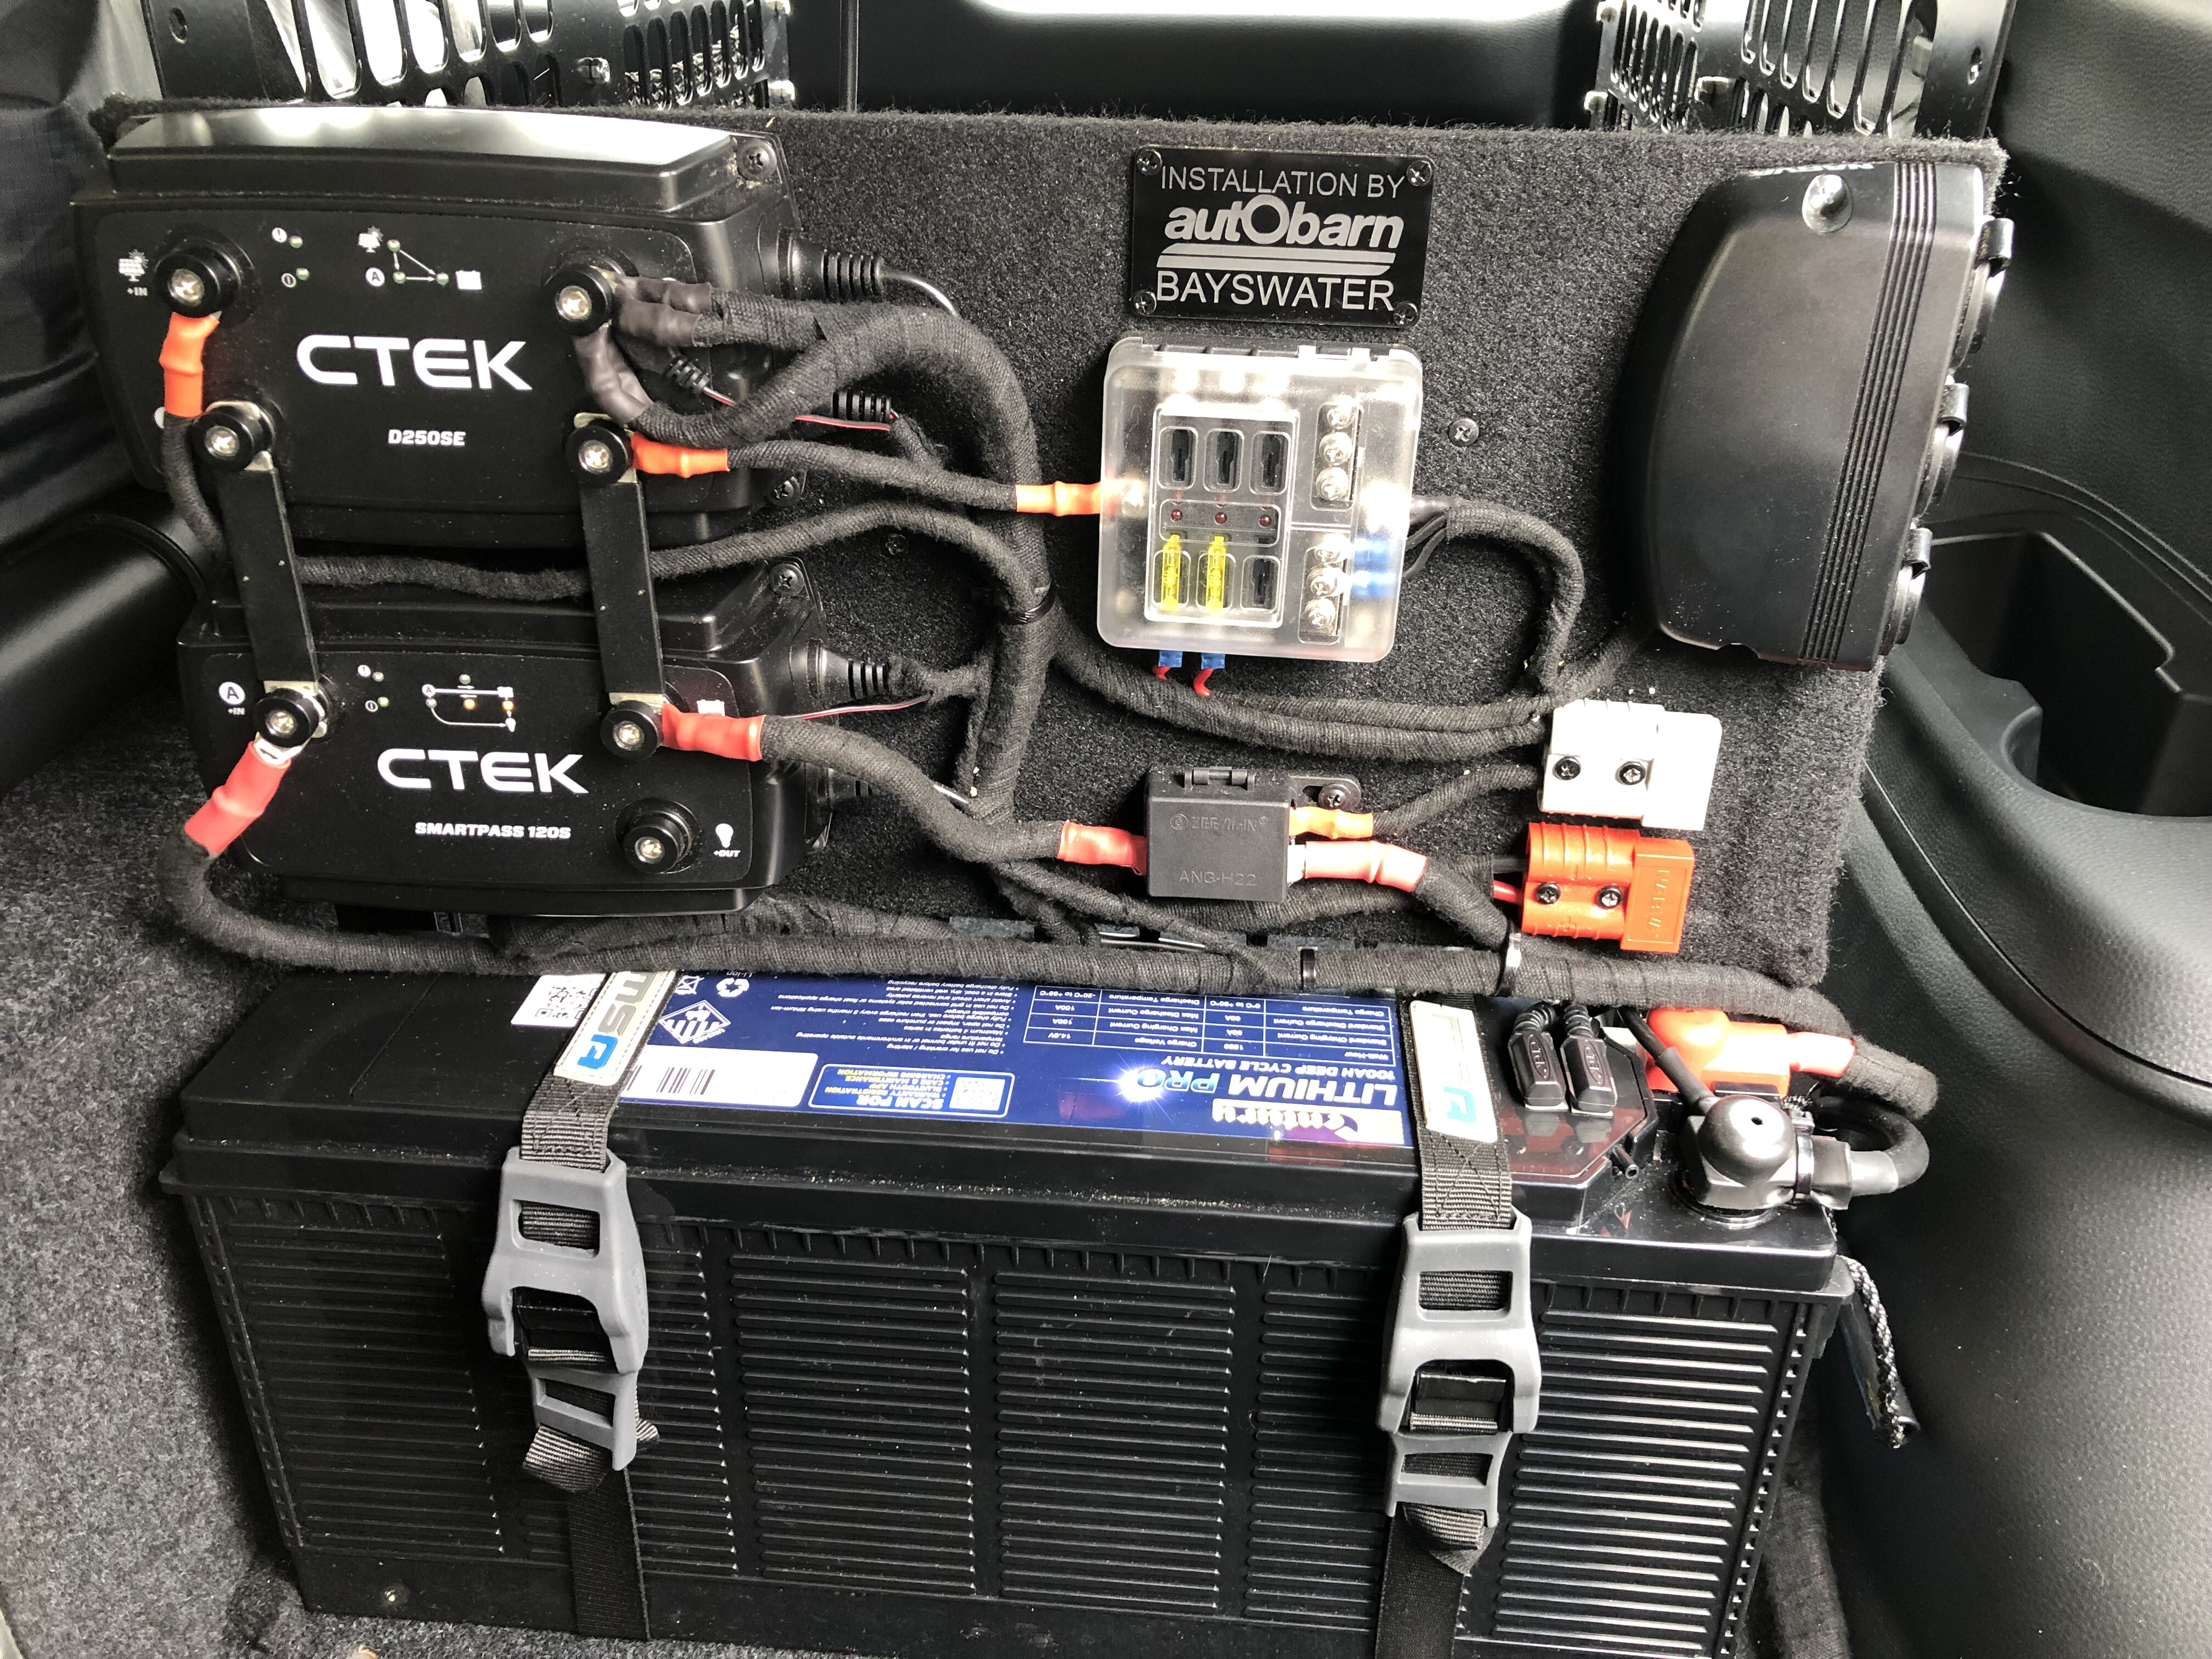
1
Autobarn completed the instal with all the required wiring and fuses, an extra fuse box for any future accessories to run off the auxiliary set-up, an Anderson plug for solar power charging input, and various different power outlets to keep our accessories running and charged.
Next stage
Even as 2022 rolls to an end, there’s still work to be done on the MU-X. We had planned to fit a Pacemaker King Brown exhaust system to the car, but Isuzu kindly changed the OE system just enough that when we put it up on the hoist to get it fitted, we found the existing Pacemaker system wouldn’t suit anymore.
Again, the benefit of working with a company that designs and manufactures its products in Australia means that the Pacemaker team can head back to the factory and redesign that front section of the system to allow it to be fitted to our car, and other MU-Xs in the New Year.
Then it’s time to get the MU-X out on more tracks for some more adventures, while we’re also getting stuck in to our 2023 build of a Ford Ranger V6.
Accessory price list
| Accessory | RRP |
|---|---|
| Tough Dog Suspension | $1542 supplied with unassembled front struts, or $1722 with pre-assembled struts (plus installation) |
| MSA Single Explorer Drawer | $1338 |
| MSA Straight Slide SL40 | $446 |
| MSA Clip-On Table 30009 | $145 |
| MSA Fridge Barrier FBSL40Nu00a0 | $419 |
| MSA Towing mirrors | $887 |
| OZtrail Birdsville 1400 rooftop tent | $2499.99 |
| OZtrail Blockout 270u00b0 awning | $1199.99 |
| MaxTrax Extreme Red recovery boards | $499 |
| MaxTrax flat mounts | $109 |
| MaxTrax Beach recovery kit | $699 |
| Maxxis RAZR AT811 tyres 265/70R17 | POA |
| ROH Trophy 17×9 wheels | $436 each (at Bob Jane) |
| Rola Titan Tray | $839 |
| Rola Ridge Mount for MU-Xu00a0 | $551.55 (plus fitting) |
| RacksBrax XD Hitch | $245 |
| CTEK D250SE | $469u00a0 |
| CTEK Smartpass 120S | $549 |
| Century Lithium Pro Slimline battery | $1399 |
| Century Dual Force battery | $440 |
| Century BM12V Bluetooth battery monitor | $59 |
| Offroad Animal Predator baru00a0 | $2950 (plus colour-matching, Stealth Hoop, and fitting) |
| Narva Explora 22-inch single-row light bar | $299 each |
| Narva LED light wiring harness | $79 |
| Narva Ultima 24-inch light bar | $990 |
| Narva Ultima 8-inch light bar twin pack | $880 |
| Narva 40-inch Joiner kit | $129 (needed to combine 24-inch and two 8-inch light bars) |
| Narva Connect+ controller | Approx $120 (TBC) |
| TAG XR tow bar | $964 |
| GRAND TOTAL* | $20,725.54 |
*sans tyres; and not including $2499.99 OZtrail Birdsville 1400 rooftop tent
A vehicle-mounted awning is an awesome bit of kit to have on your 4×4, but for some users they may not be something they want to keep fitted to the car full-time.
If you’re only using your car for one camping trip a year, it might be worth removing the accessories from the roof rack to reduce fuel consumption and preserve them from UV damage or thieving hands.
Unbolting an awning is not a difficult job, but it’s a task made even easier with these quick-release mounting brackets from Aussie manufacturer RacksBrax.
1
RacksBrax has developed a range of hitches to make mounting items like awnings, traction boards or fishing rod holders quick and easy, and by adding extra parts you can make swapping these rack-mounted accessories quick and easy.
Add another set of the mounts to your garage wall and you then have somewhere to store your gear when it’s not on the car.
RacksBrax come in HD and XD models to suit the different weights of selected accessories. For the Blockout 270° awning on the Rola Titan Tray on our MU-X, we went with a triple pack of the XD mounts that sells for $285 from the RacksBrax website. The site also has a handy guide to help you select the right hitches to suit your accessories.
1
The RacksBrax basically have two parts: one that attaches to your awning (or other accessory) and the other to your roof rack. The two parts then come together to give a secure and lockable connection to fit the accessory to your car. They are adjustable for height and can be spaced along the length of the awning to suit your roof rack.
For our set-up we used the optional long foot brackets for the section that bolts to the roof rack. These extend across the rack to fasten on two of the rack’s mounting slats and spread the load of the weight.
Each of the brackets is rated to carry 20kg, while the OZtrail 270 weighs 27.1kg. A pair of MaxTrax Xtremes, like the ones we carry elsewhere on the roof rack, weigh 9kg and could also be carried on the RacksBrax hitch using a suitable mount.
1
To remove the awning you simply unlock the mount using a key, pull the pins from the mounts, in our case all three of them, and lift the awning off the vehicle to put it away for storage.
RacksBrax also has neat covers that fit into the brackets to tidy the look up when there’s nothing attached to them.
I can unlock, disconnect, remove and refit the awning off the MU-X myself using the RacksBrax and there’s no messing about trying to hold it in place to line bolts up. I am 185cm tall, and it would probably be easier and safer with two people and a step for shorter folks.
1
As mentioned, the hitches are lockable with included keylocks. These lock the hitch pins to the mount so that your accessory can’t be removed.
The RacksBrax hitches are manufactured solidly and look and feel to be durable. They are made with ’glass-reinforced nylon that is UV-stabilised to protect the products against the harsh Aussie sun while up on the roof of your 4×4. Best of all, they are made in Australia!
Pricing
- XD triple pack: $285
- XD long foot brackets (triple): $430
As the hotly anticipated Nissan Patrol Warrior gets close to its big reveal, Evan Spence heads out for some beach touring in the high-spec 2022 Nissan Patrol Ti-L.
JUMP AHEAD
- How much is it, and what do you get?
- How do rivals compare on value?
- Interior comfort, space and storage
- What is it like to drive?
- How is it on fuel?
- How safe is it?
- Warranty and running costs
- VERDICT
- Specifications
How much is it, and what do you get?
Pricing for this top-spec Ti-L model Nissan Patrol comes in at $103,202 drive-away, which is certainly a fair chunk of change, while the only other model available is the Ti which costs $13,600 less.
The extra money you spend on the Ti-L scores an intelligent rear-view monitor, second-row seat entertainment screens and driver’s seat memory with two settings that also store your side mirror and steering column positions.
Inside, the Ti-L also gets a 13-speaker premium Bose sound system, perfect for listening to your old CDs, as yes, the Ti-L still has a CD player. There are also heated and cooled front seats and a sunroof. Lastly, the Ti-L has roof rails fitted where the base spec Ti misses out.
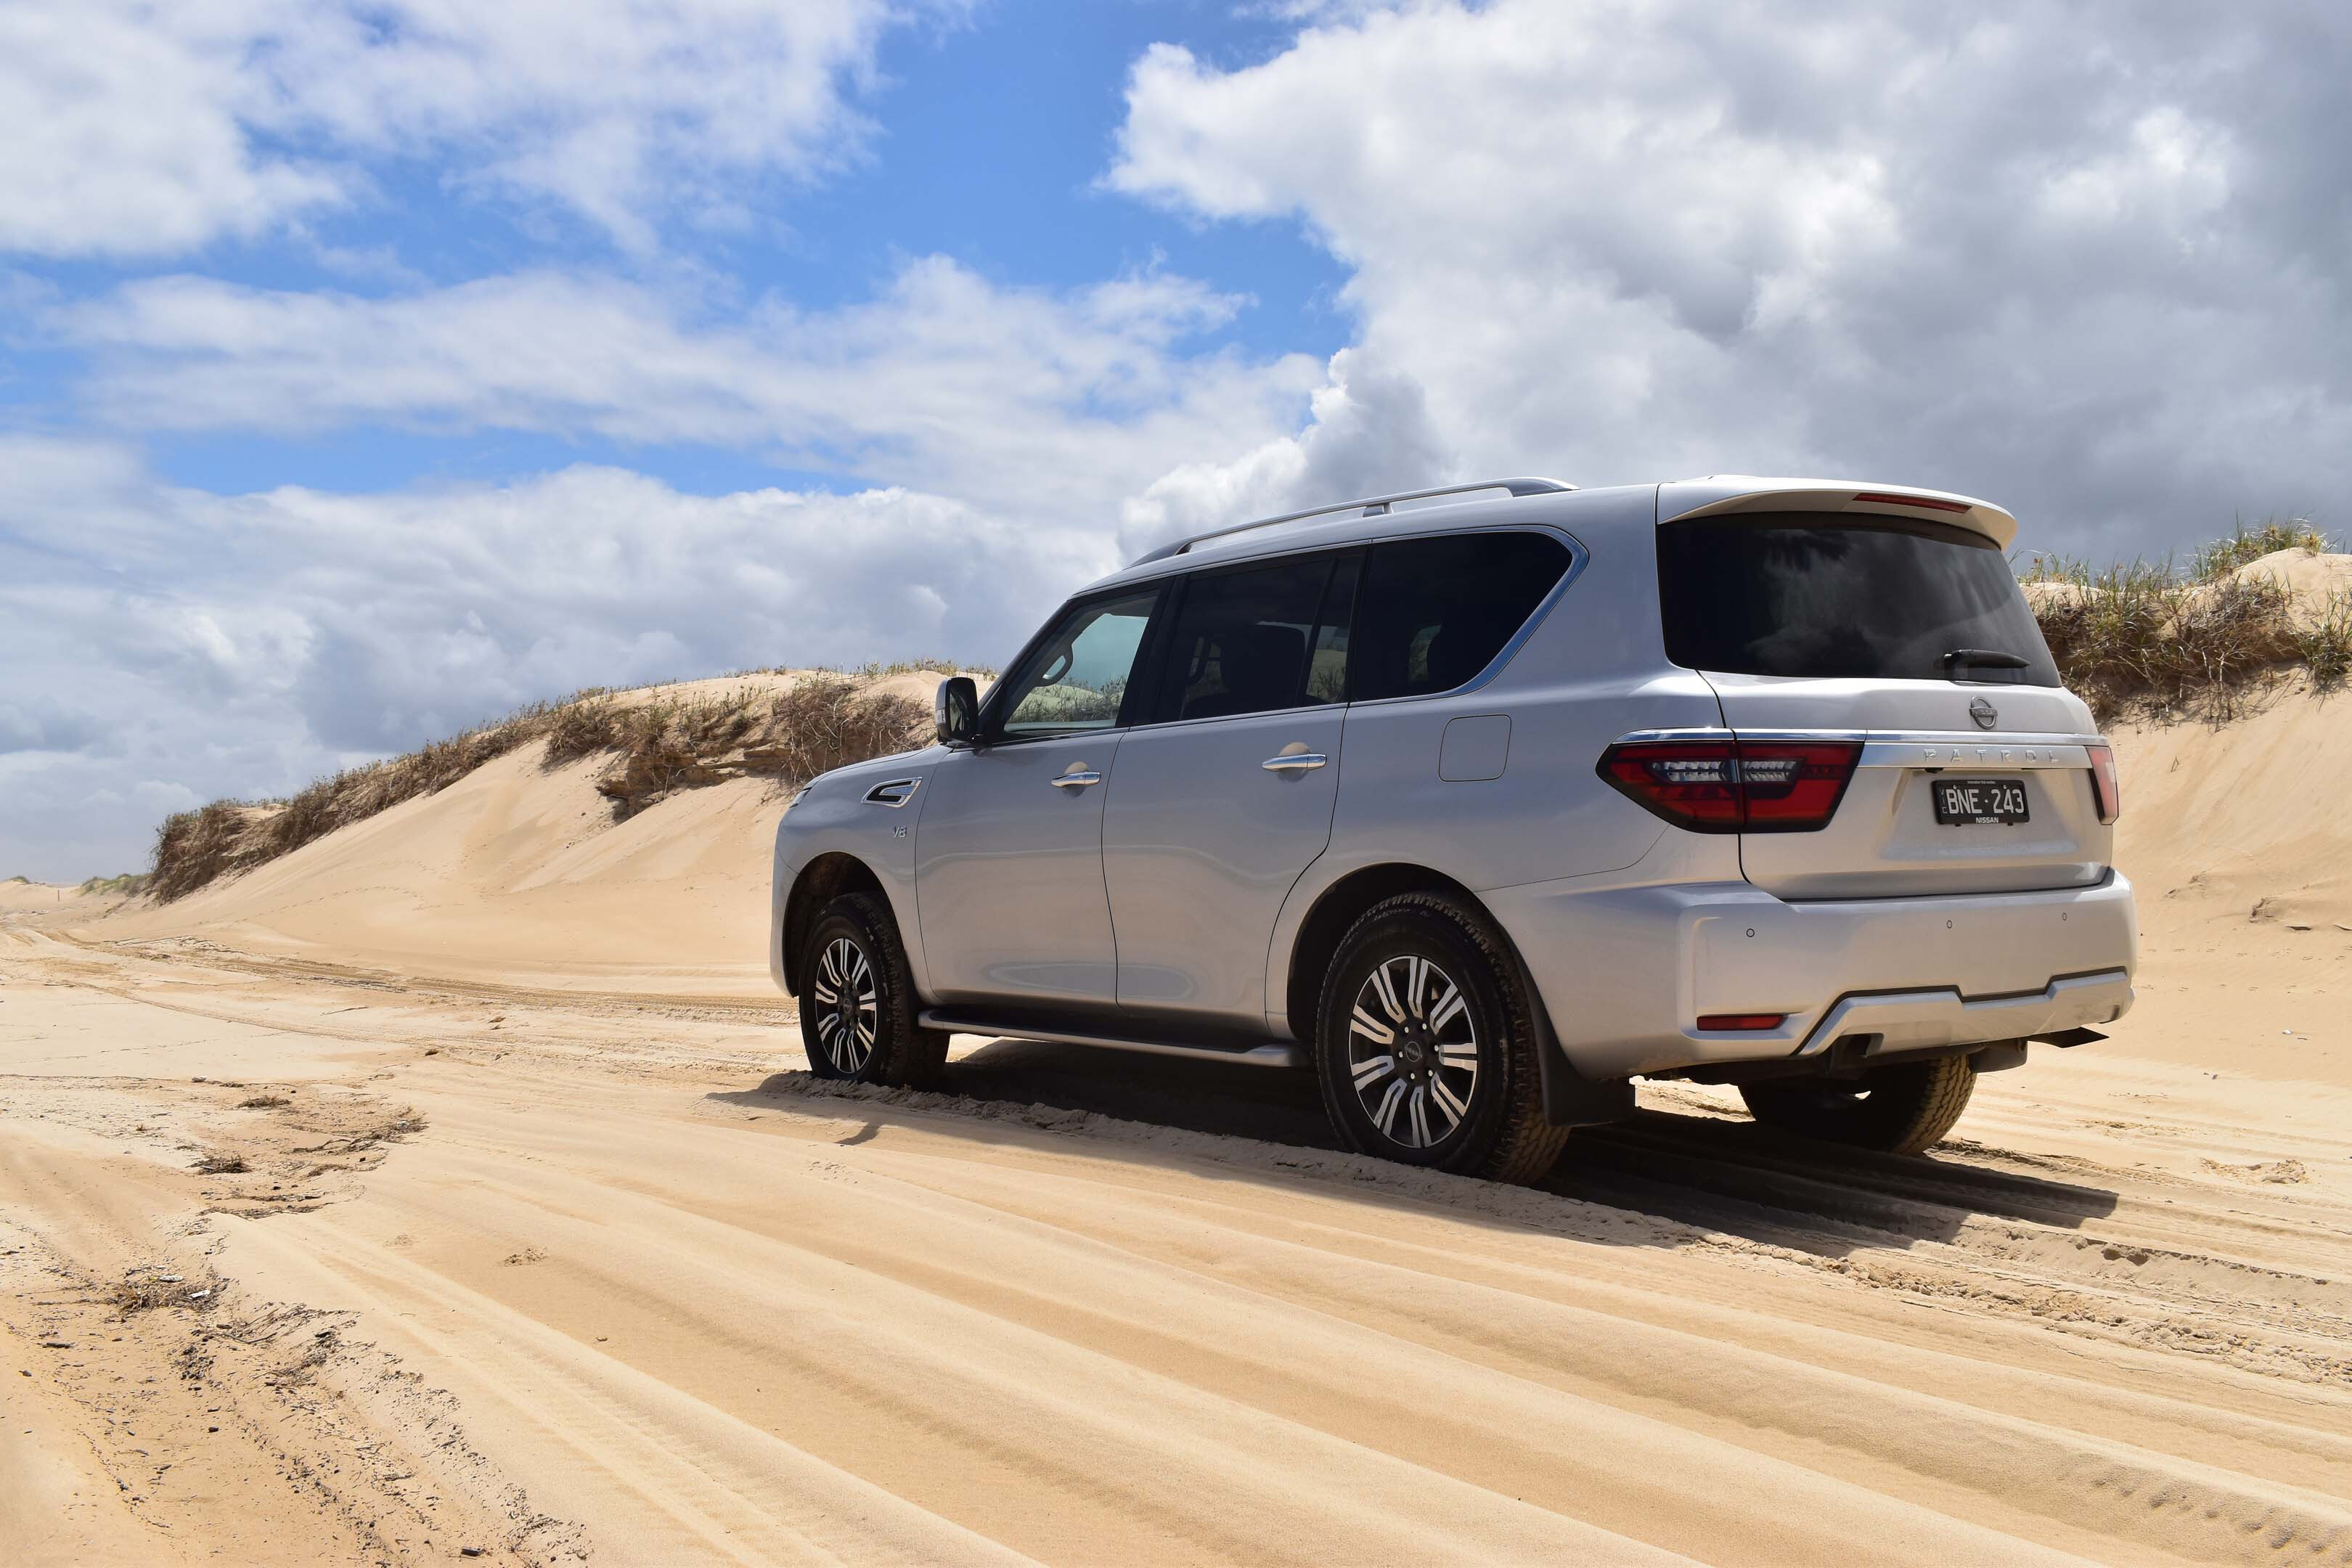
1
How do rivals compare on value?
If we were to compare the top-spec Patrol to the base model GX LandCruiser 300 Series, the GX retails for $96,262 drive-away.
Although it’s hard to call the GX a pov-pack model these days, it’s certainly not as nice as a Ti-L and it’s also not a seven-seater.
The next step up the ladder for the LandCruiser range is the GXL which is more expensive than the top-tier Patrol at $108,652 drive-away. The top LC300, the Sahara ZX sells for $147,704 drive-away. When you take that into account, the Ti-L Patrol is a bit of a bargain on paper.
Another option in the seven-seat full-size four-wheel drive wagon category is the newish Jeep Grand Cherokee L. The Jeep offers a plush interior and many more modern features compared to the Patrol, so could be worth a spin if you need the seats and off-road capability. In Night Eagle trim, the Grand Cherokee L is priced from $86,922 drive-away and goes all the way up to $121,782 drive-away for the top-spec Summit Reserve.
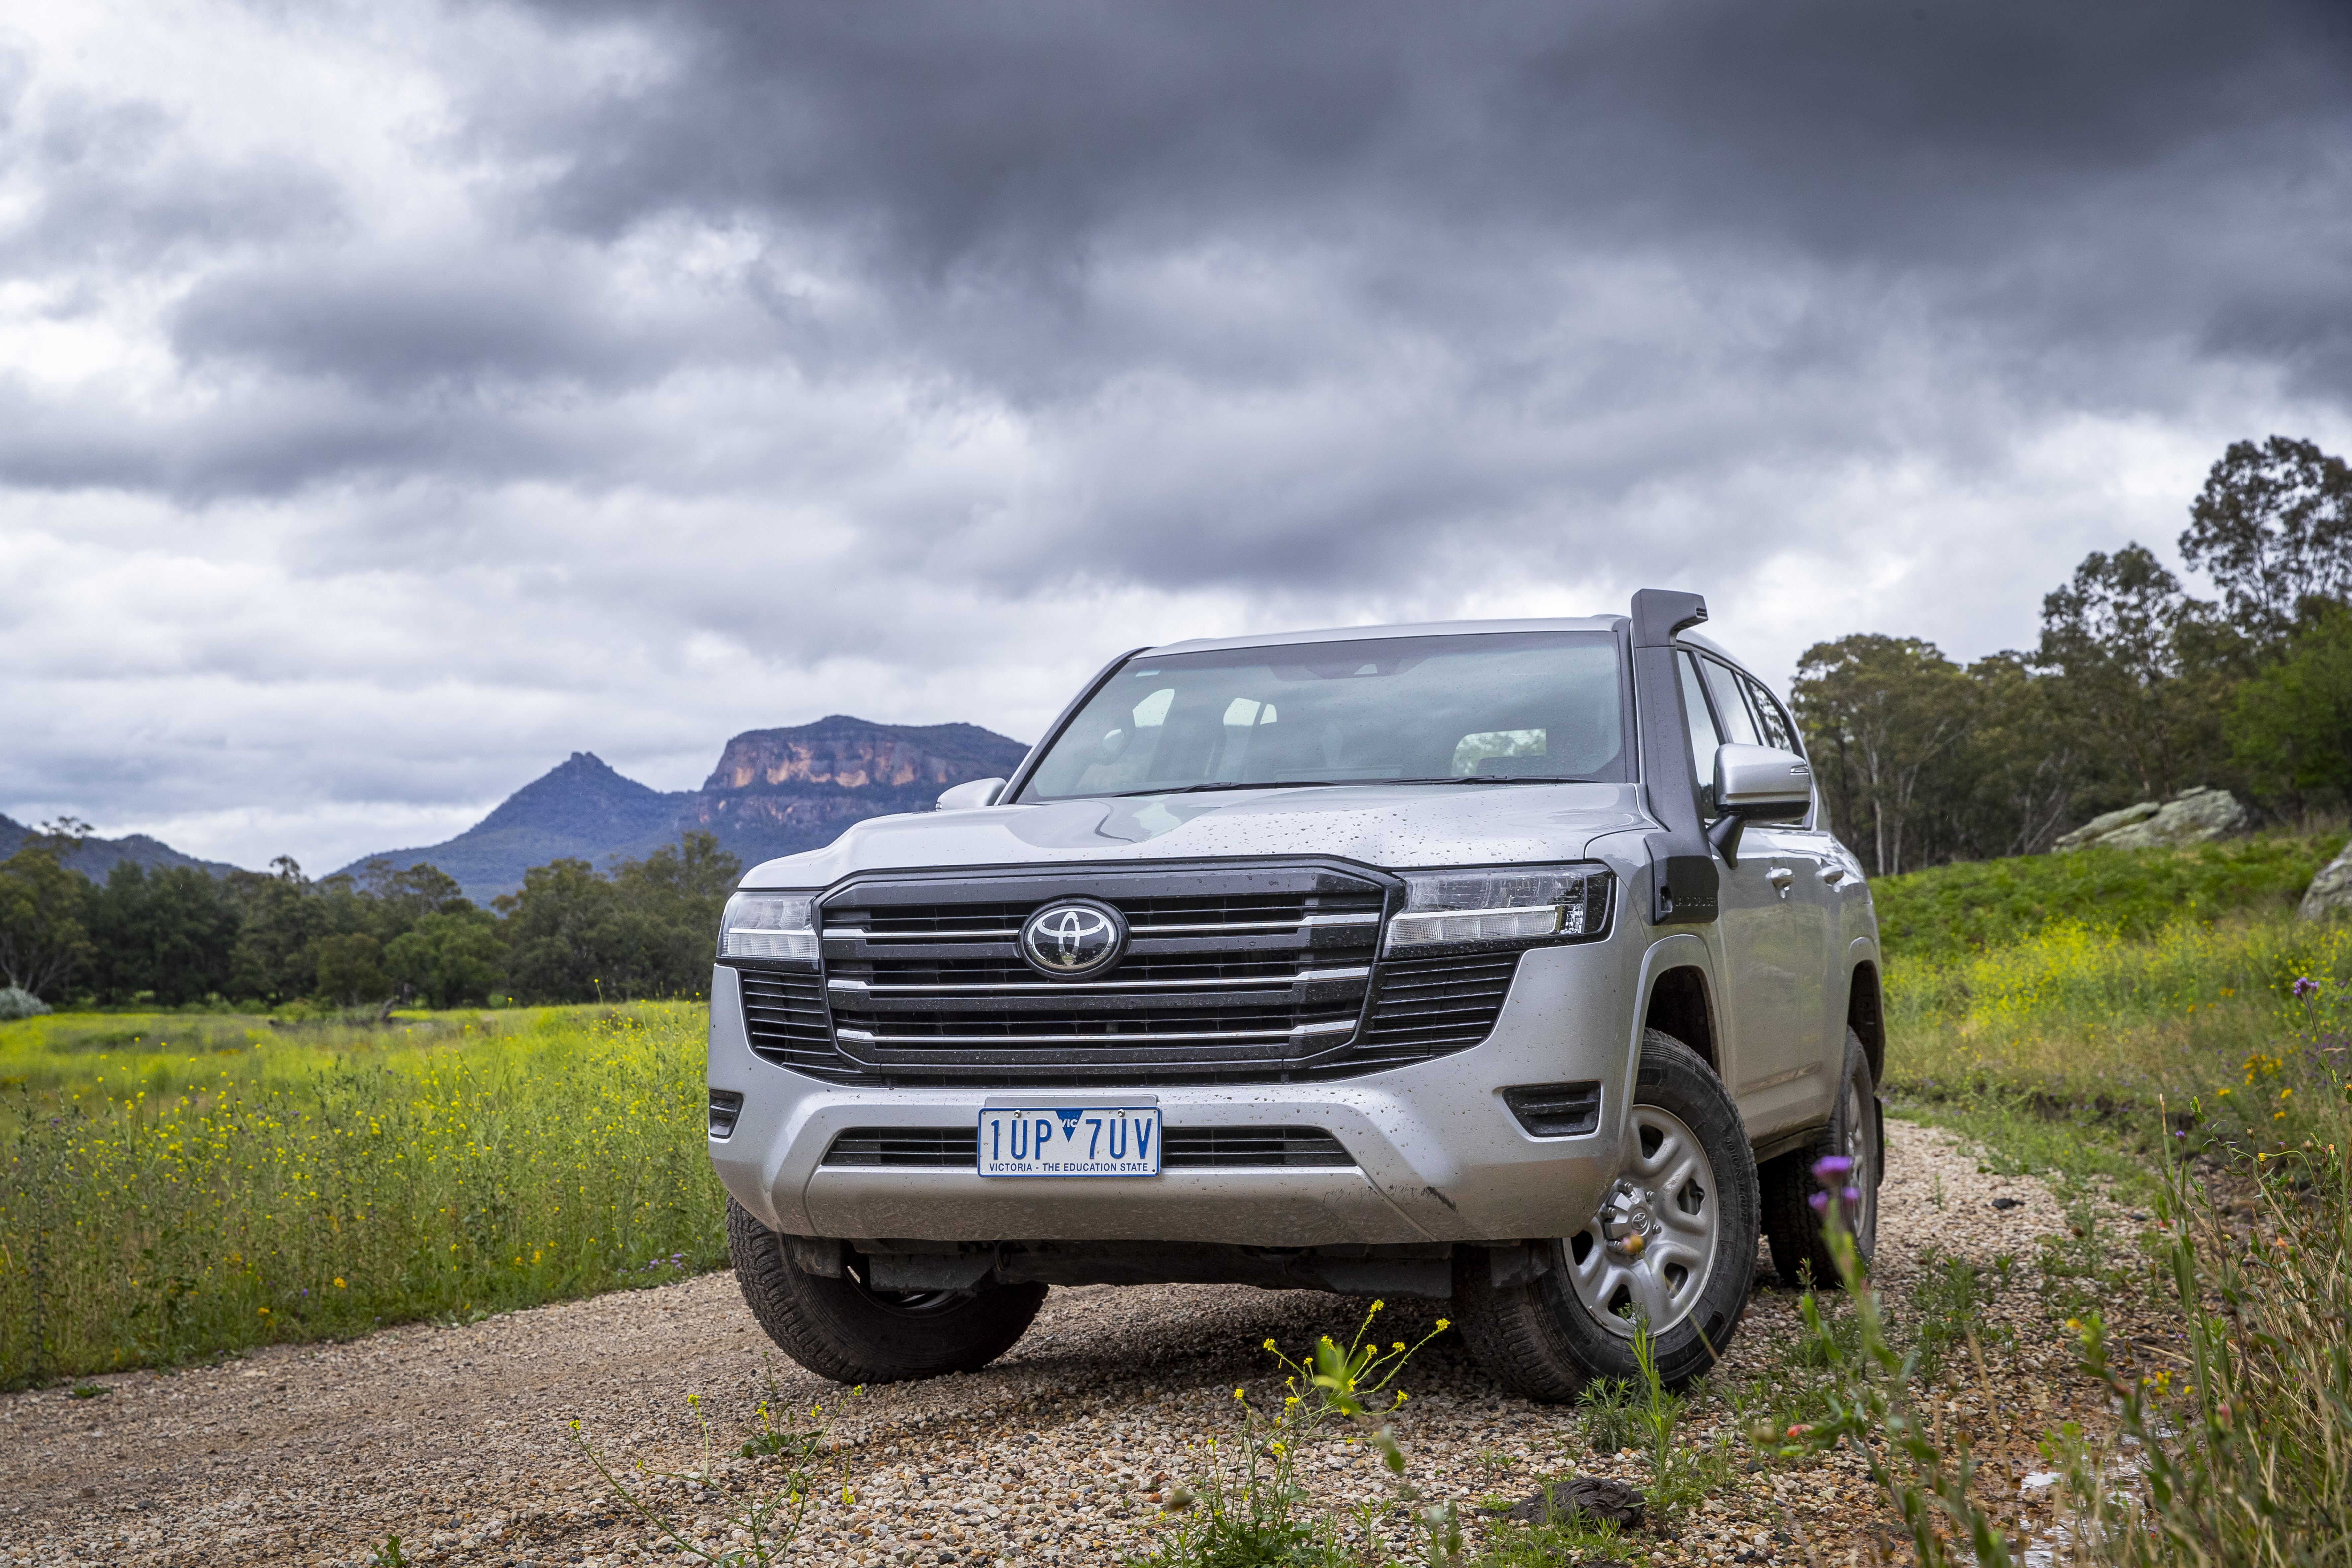
1
Interior comfort, space and storage
While the Patrol’s interior is visually and technologically dated, you have to give Nissan points for creating a comfortable environment.
Even after a four-hour stint behind the wheel, at no stage did I feel sore, fatigued or uncomfortable; quite the opposite.
This thing is built to cruise, be that on the highway or the beach. The leather seats are lounge-like, offering excellent comfort in the front or back, although I’m no fan of the faux woodgrain trim which, as I’ve said in the past, makes you feel like you are sitting at a roulette machine in a rural casino.
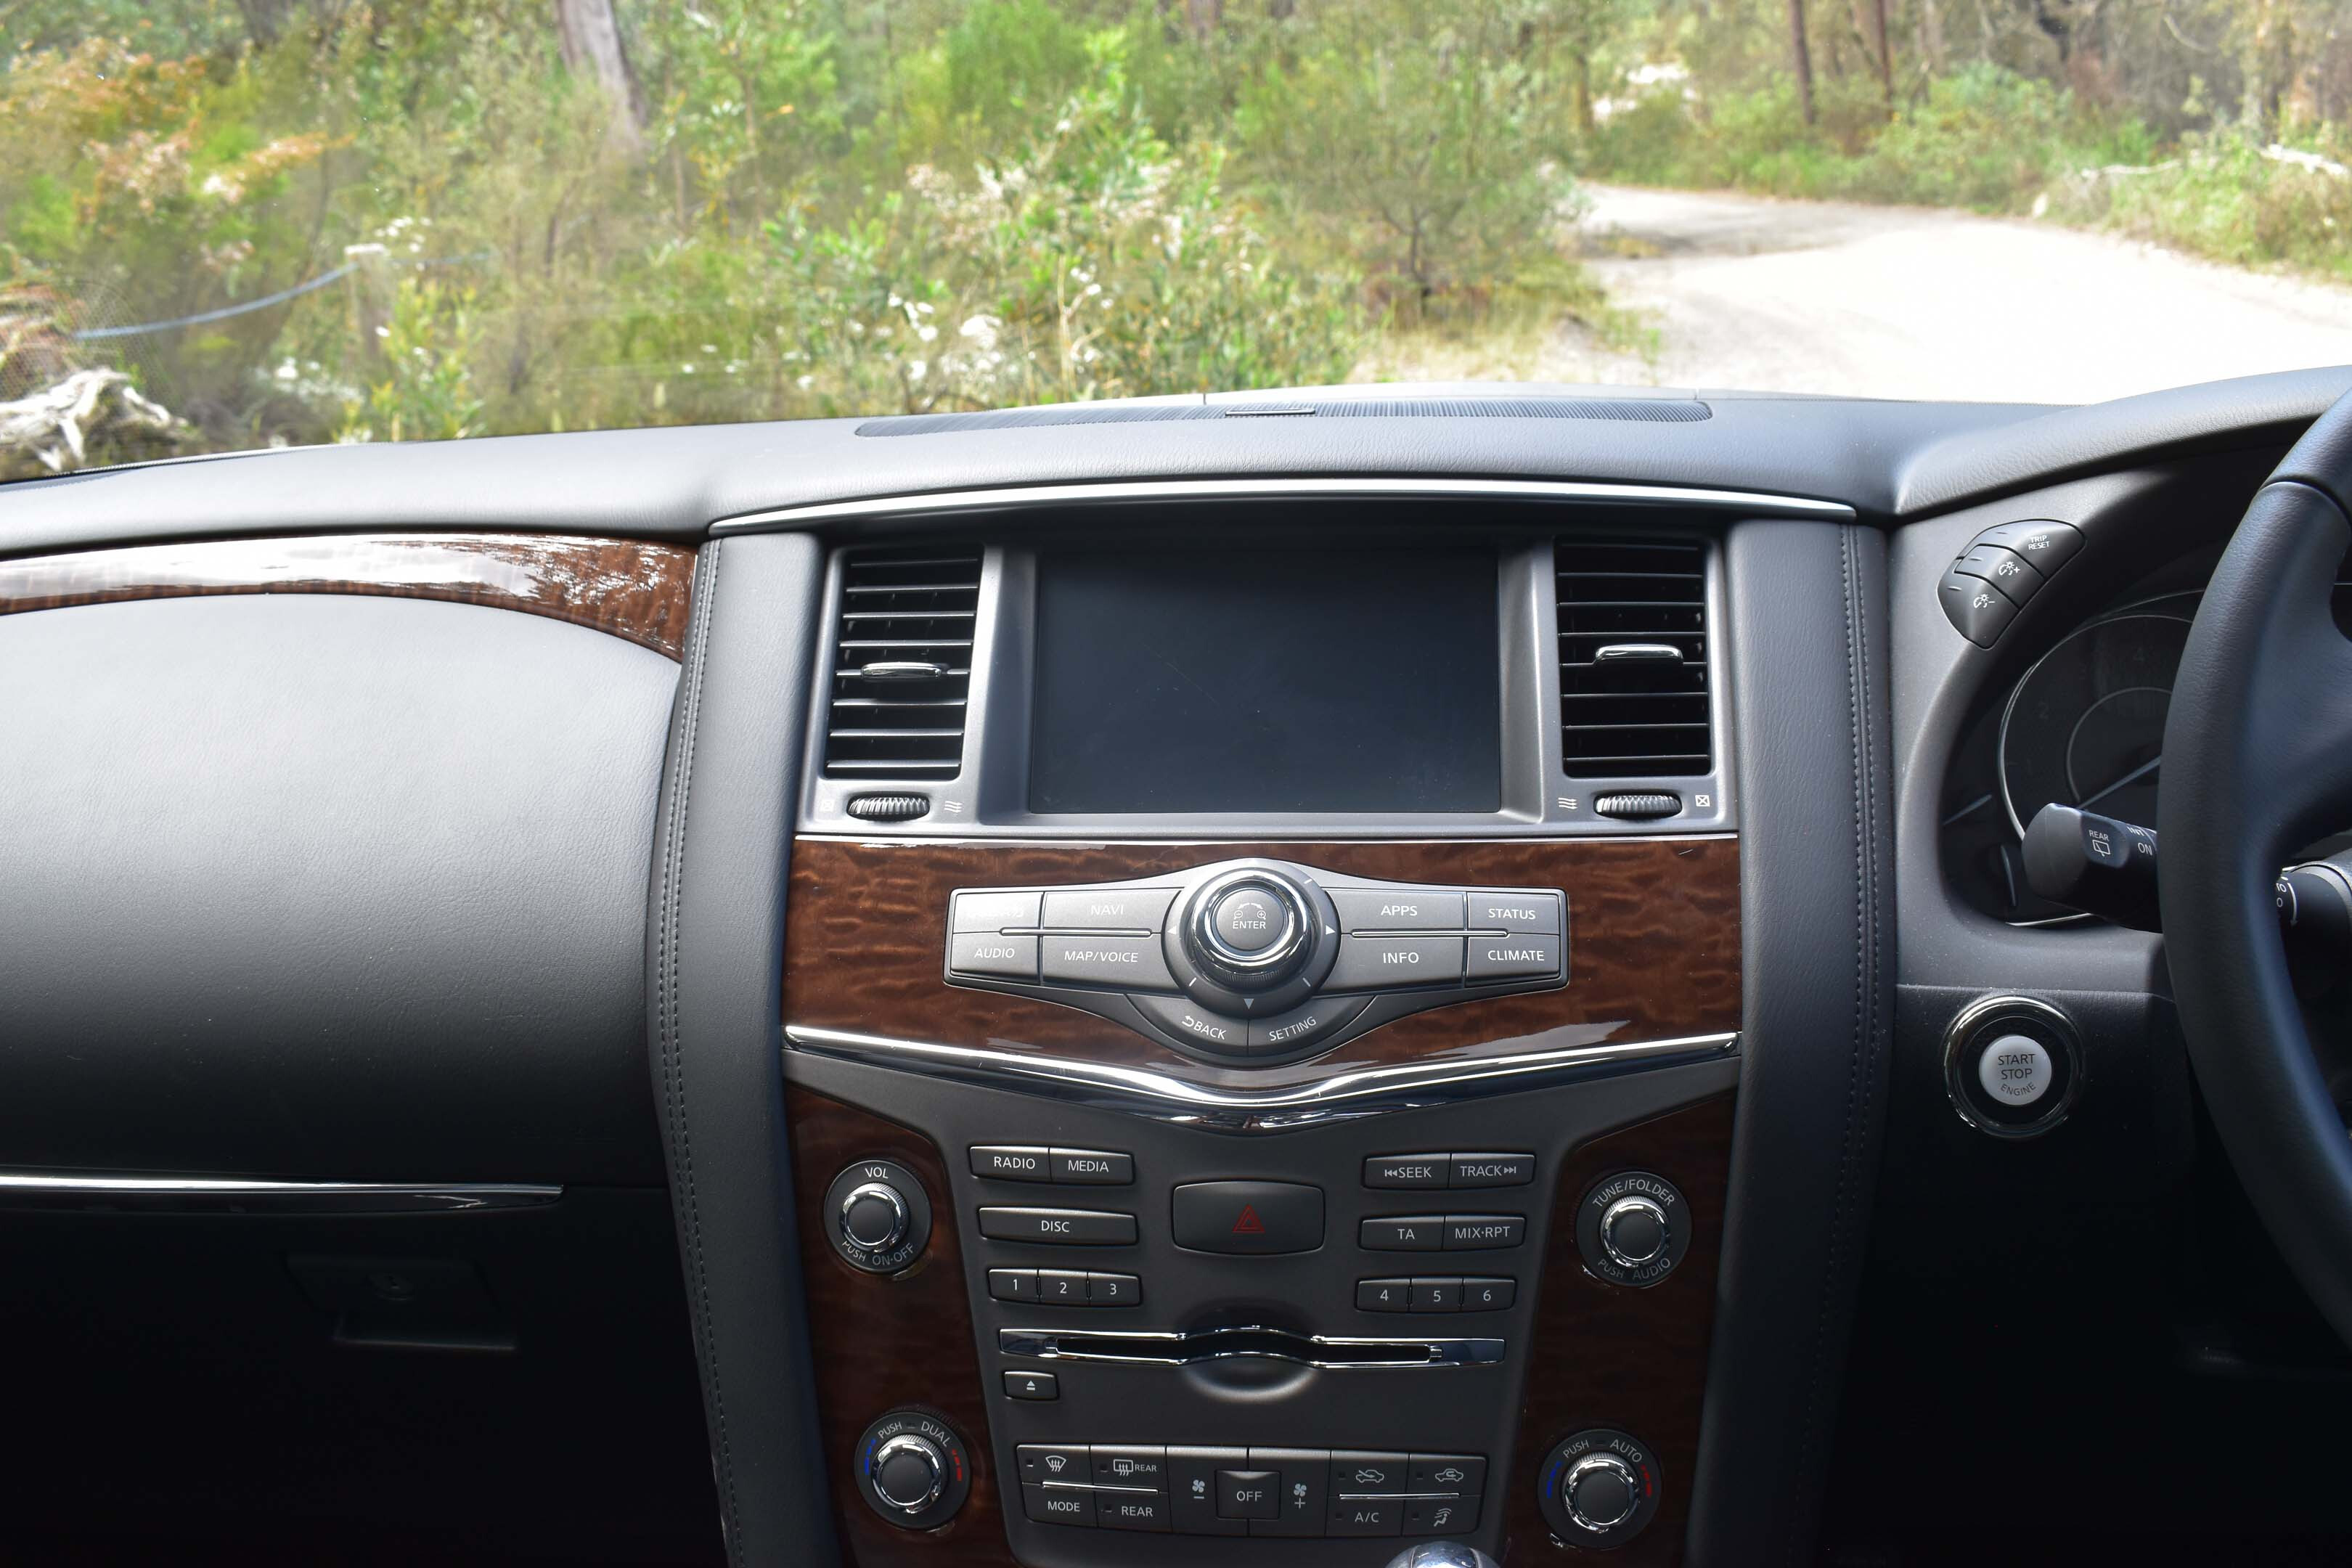
2
Make no mistake, this is a very large vehicle, which is perfect for both families who need space as well as long-distance tourers who want to accessorise their Patrol with storage drawers, bulky fridges and camping gear.
Technology-wise, the Ti-L Patrol is a bit sad, with the highest selling point of its frankly rubbish infotainment being a CD player. It is not Apple CarPlay compatible and the navigation system looks dated.
One saving grace is the Bose audio system, which sounds good and operates at a nice volume for my road-worn ears.
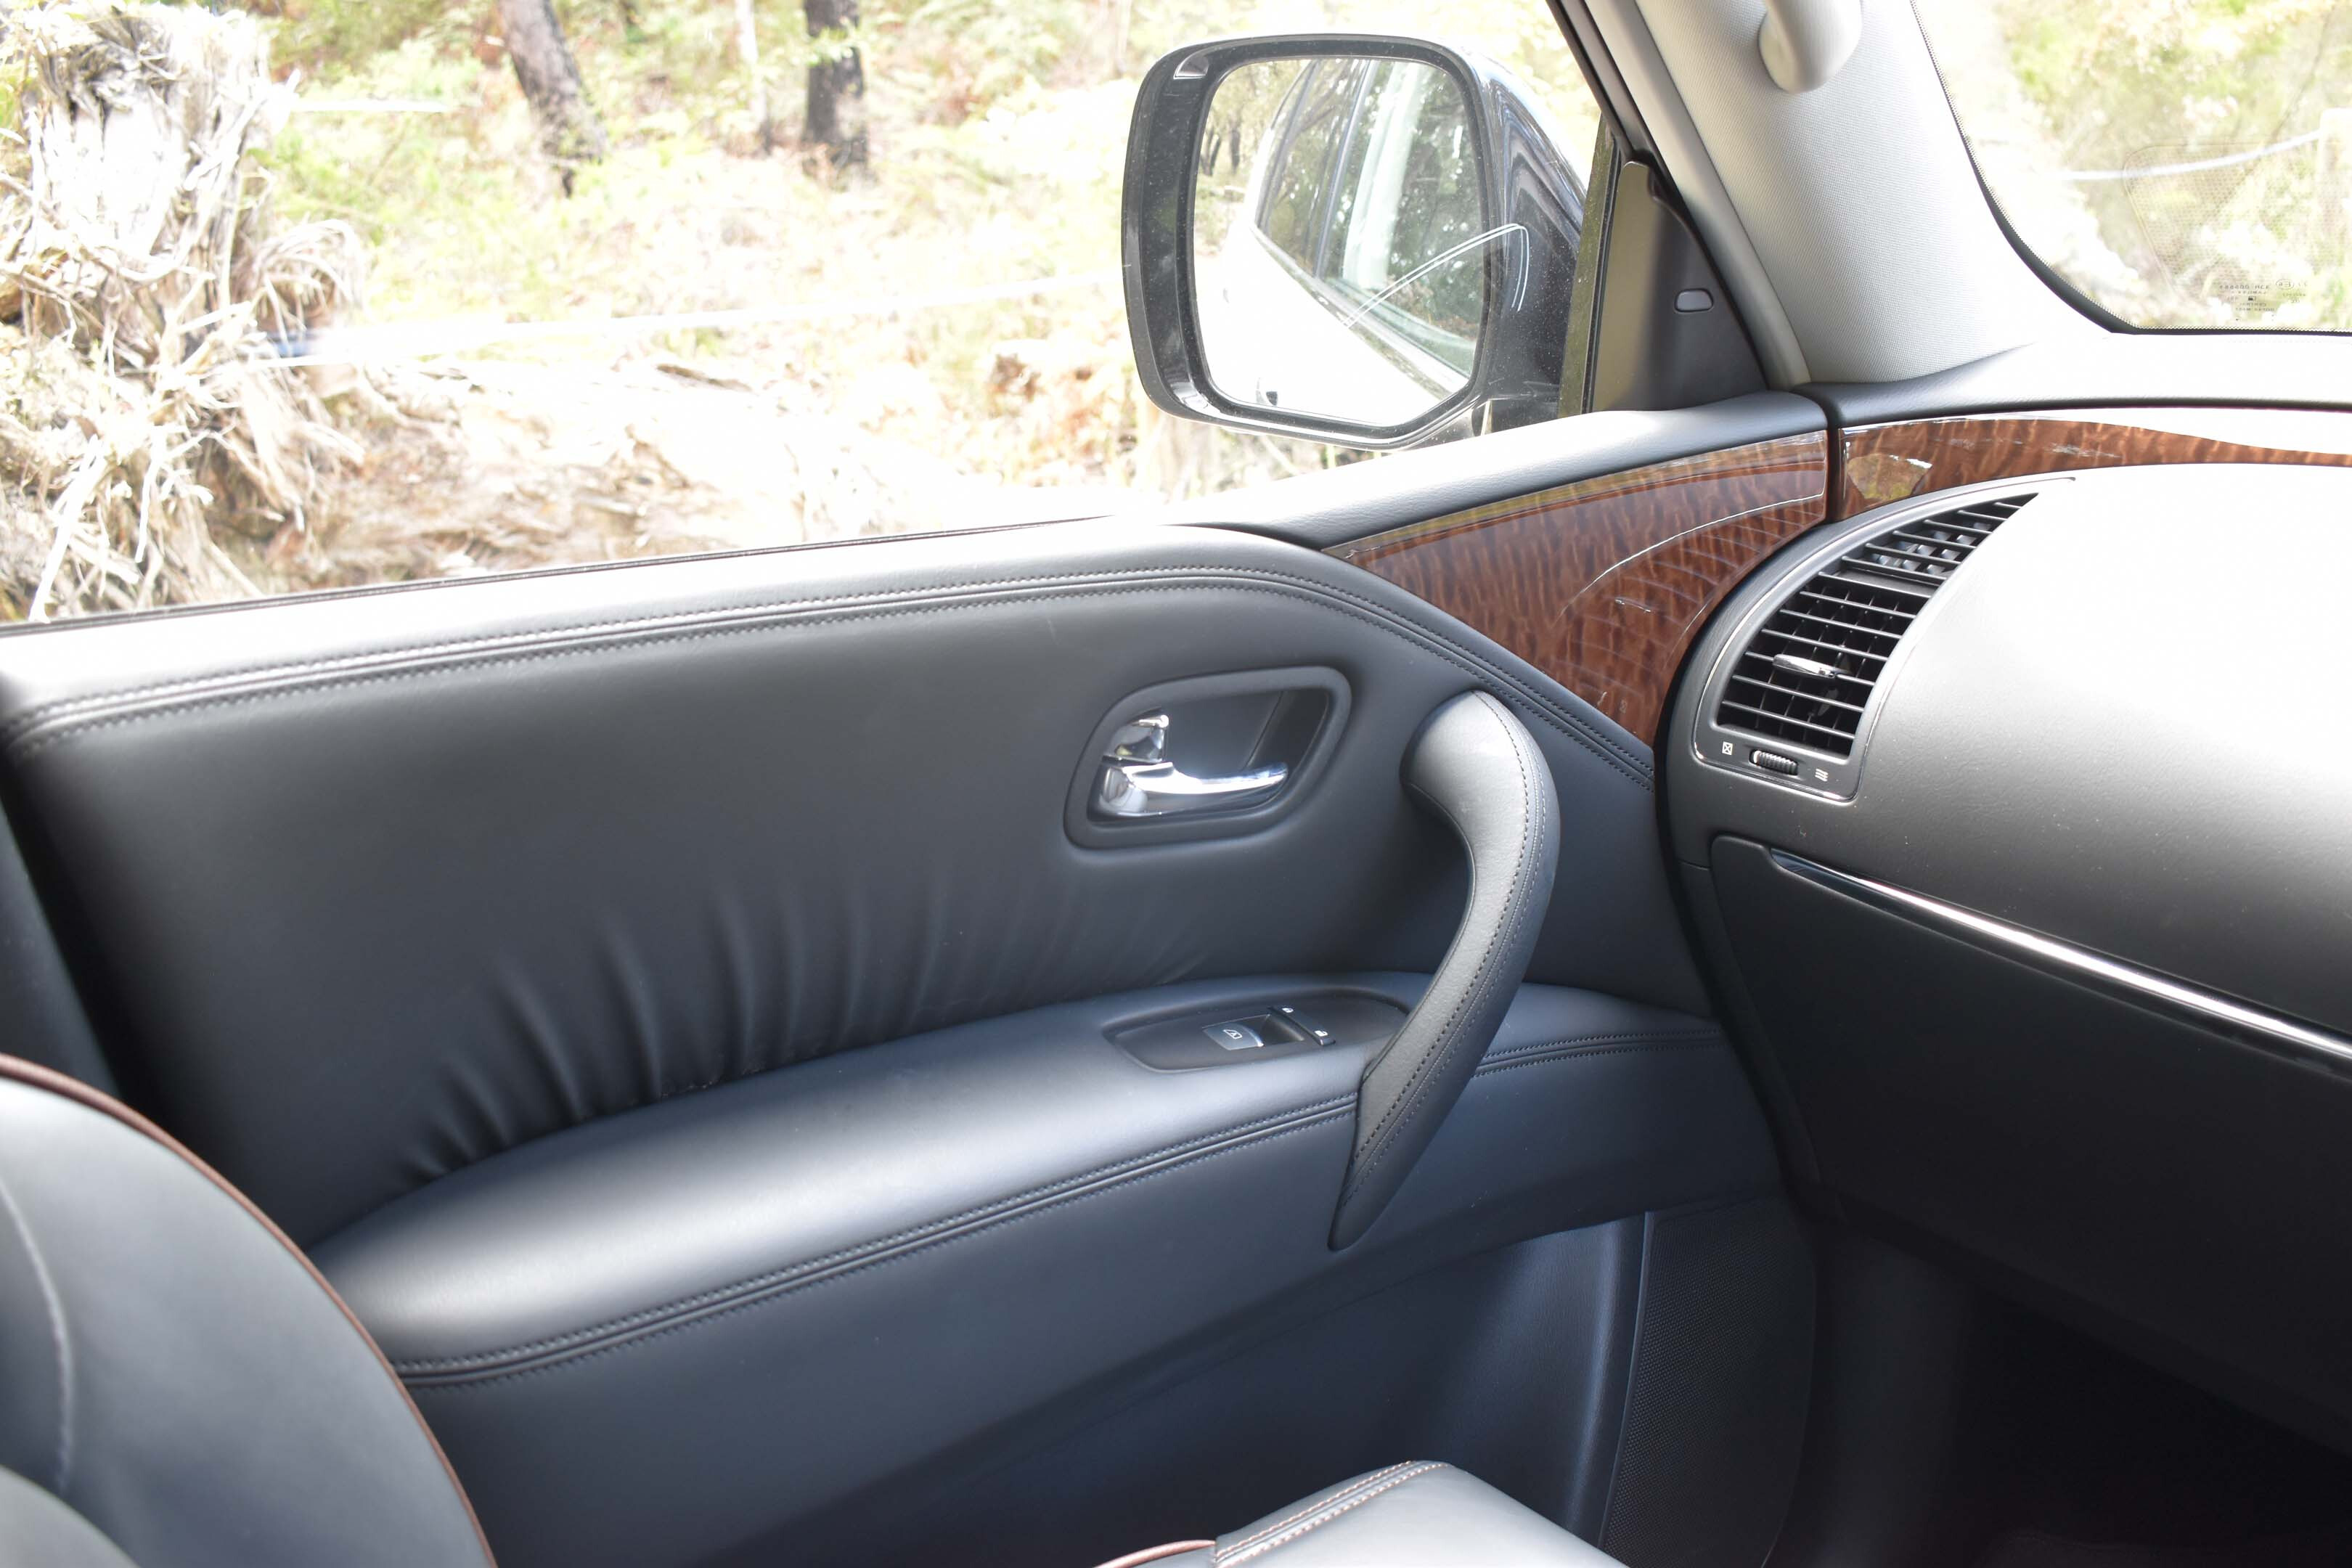
1
There’s a pair of USB points up front as well as two 12-volt outlets, which will get used as you charge your phone and opt to use its mapping instead of the vehicle’s navigation.
In the back seats, the Ti-L has two screens built into the headrests, which you can use to pop on your favourite DVD. See what I mean when I say this interior is dated?
With the third row of seating folded down, the cargo area is simply massive, providing 1413 litres of space. With the third row in operation, you get 467 litres.
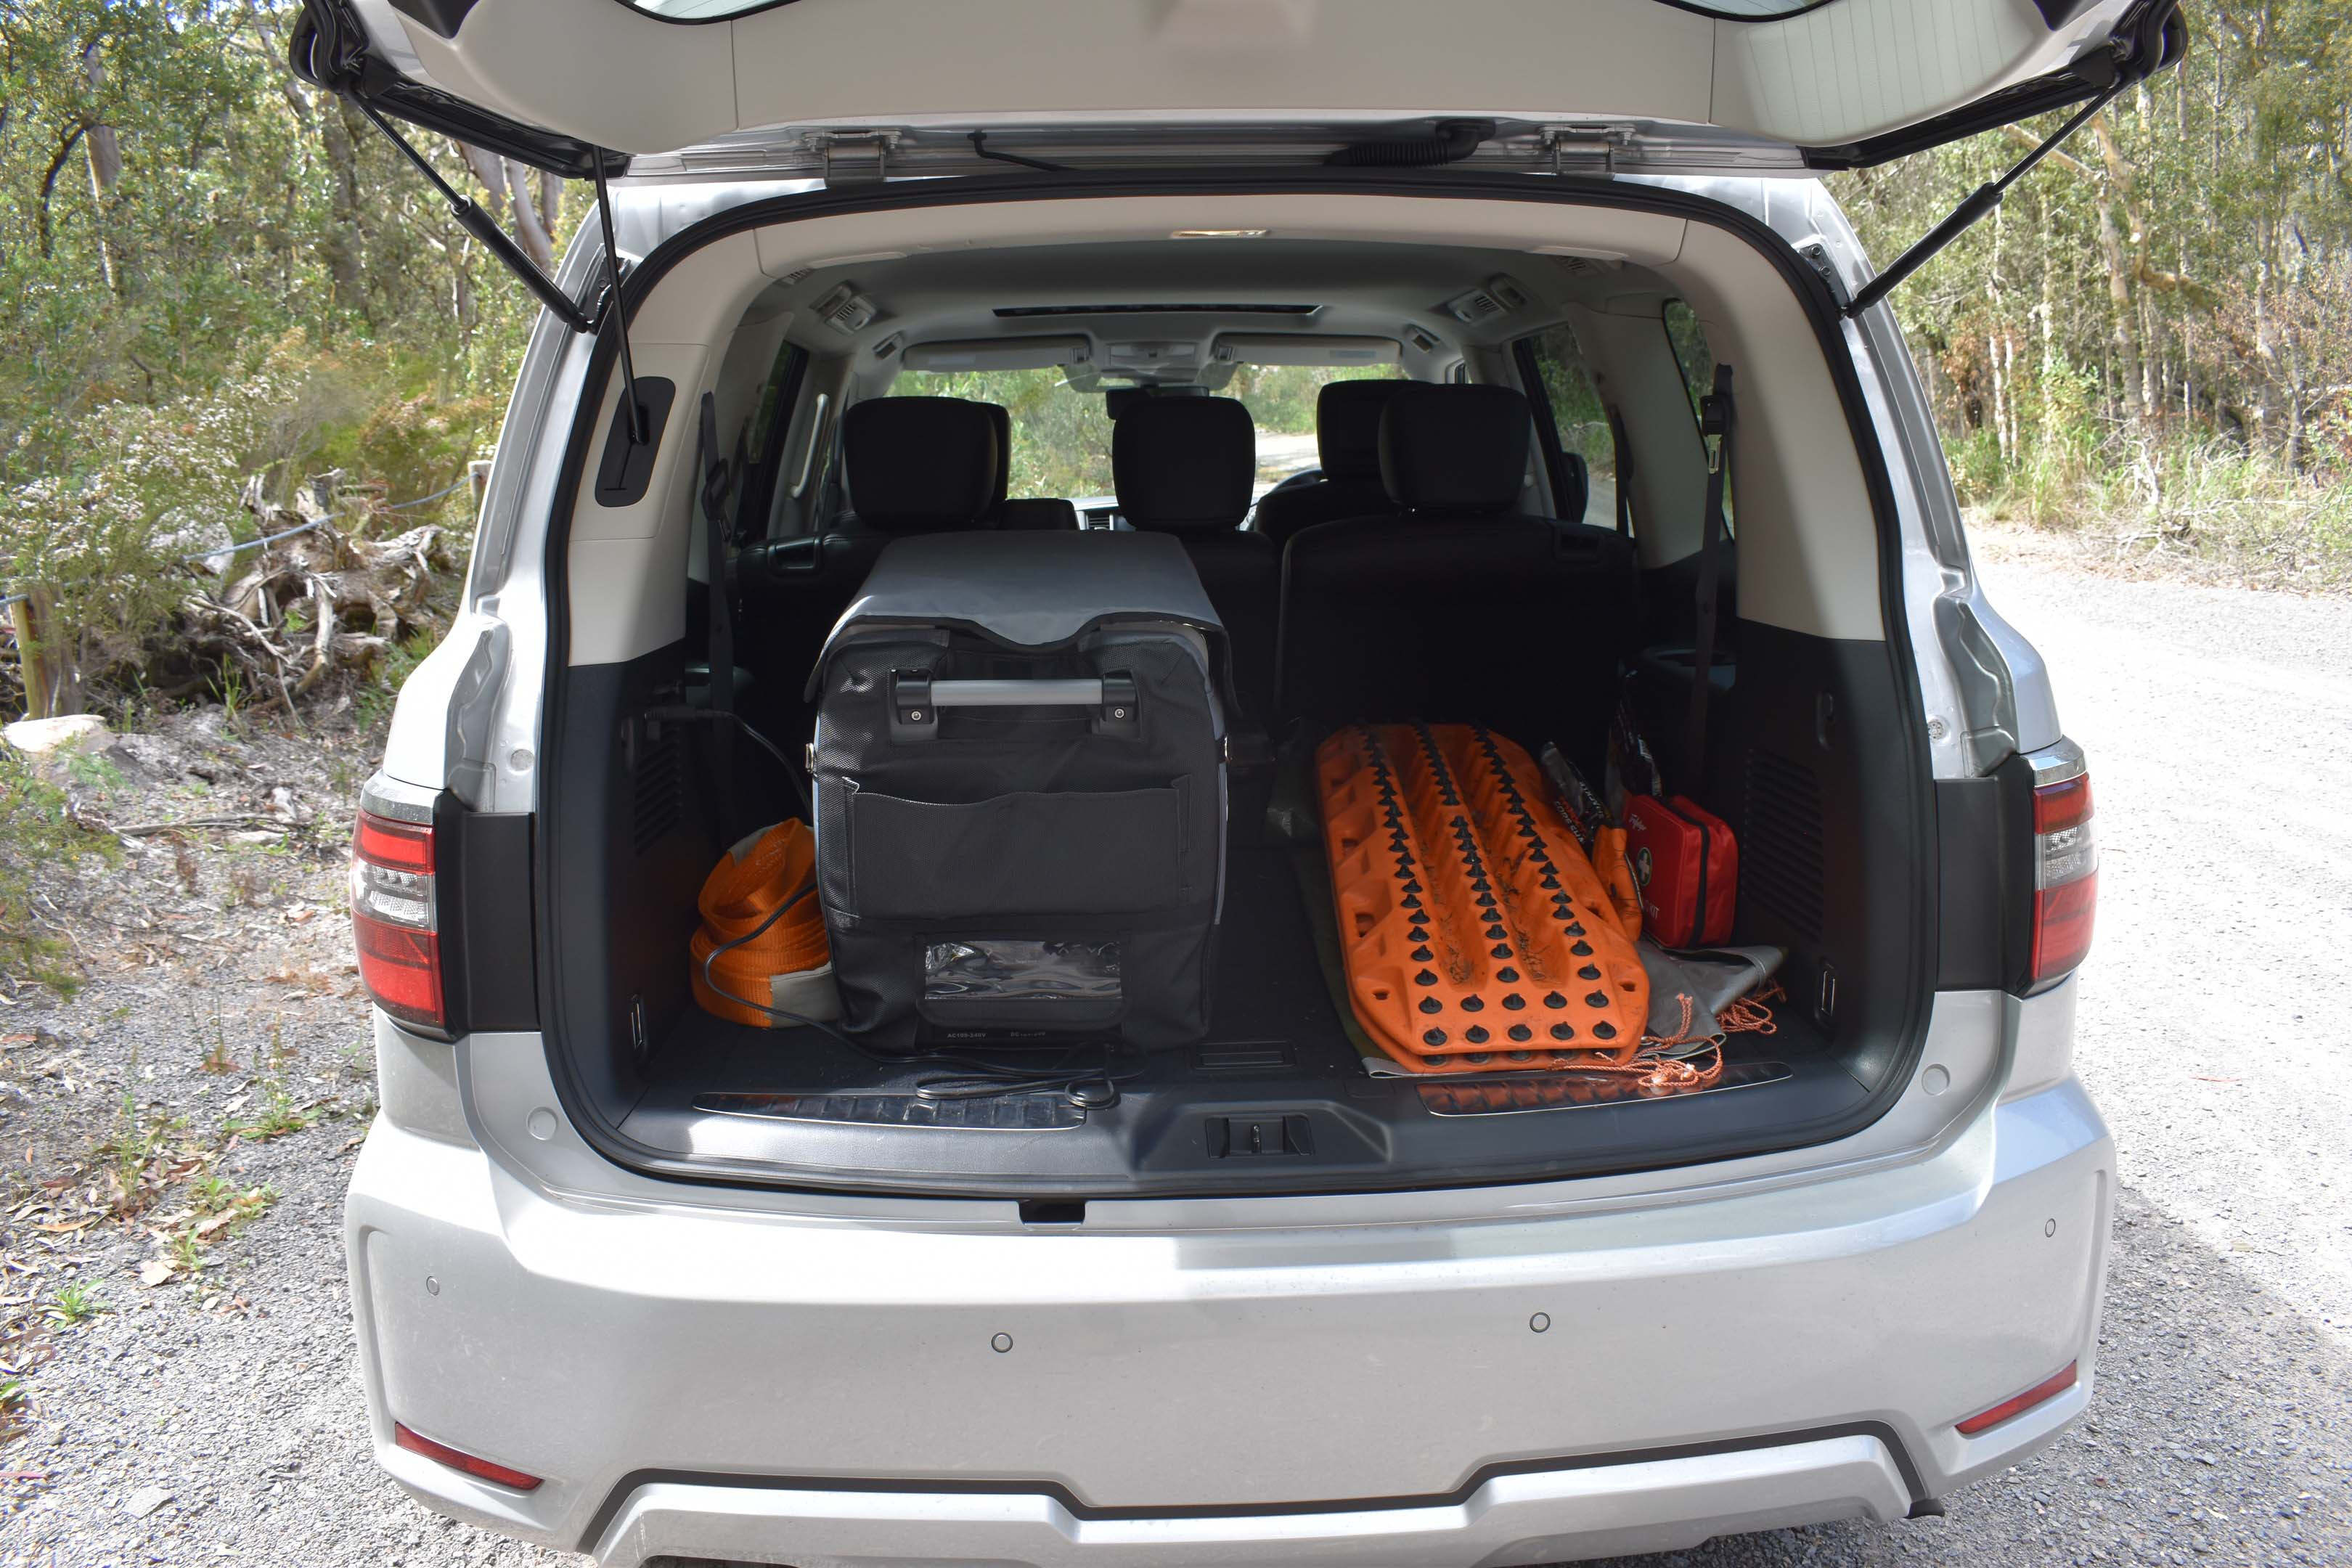
1
What is it like to drive?
With a claimed 298kW of power and 560Nm produced from the 5.6L naturally aspirated V8 petrol motor, as you can expect the Patrol has plenty of poke to move its hefty frame.
The listed 3500kg towing capacity suggests the Patrol will be a popular choice for those with a trailer and this is a task I feel it will handle well considering the power, handling and braking ability found on test.
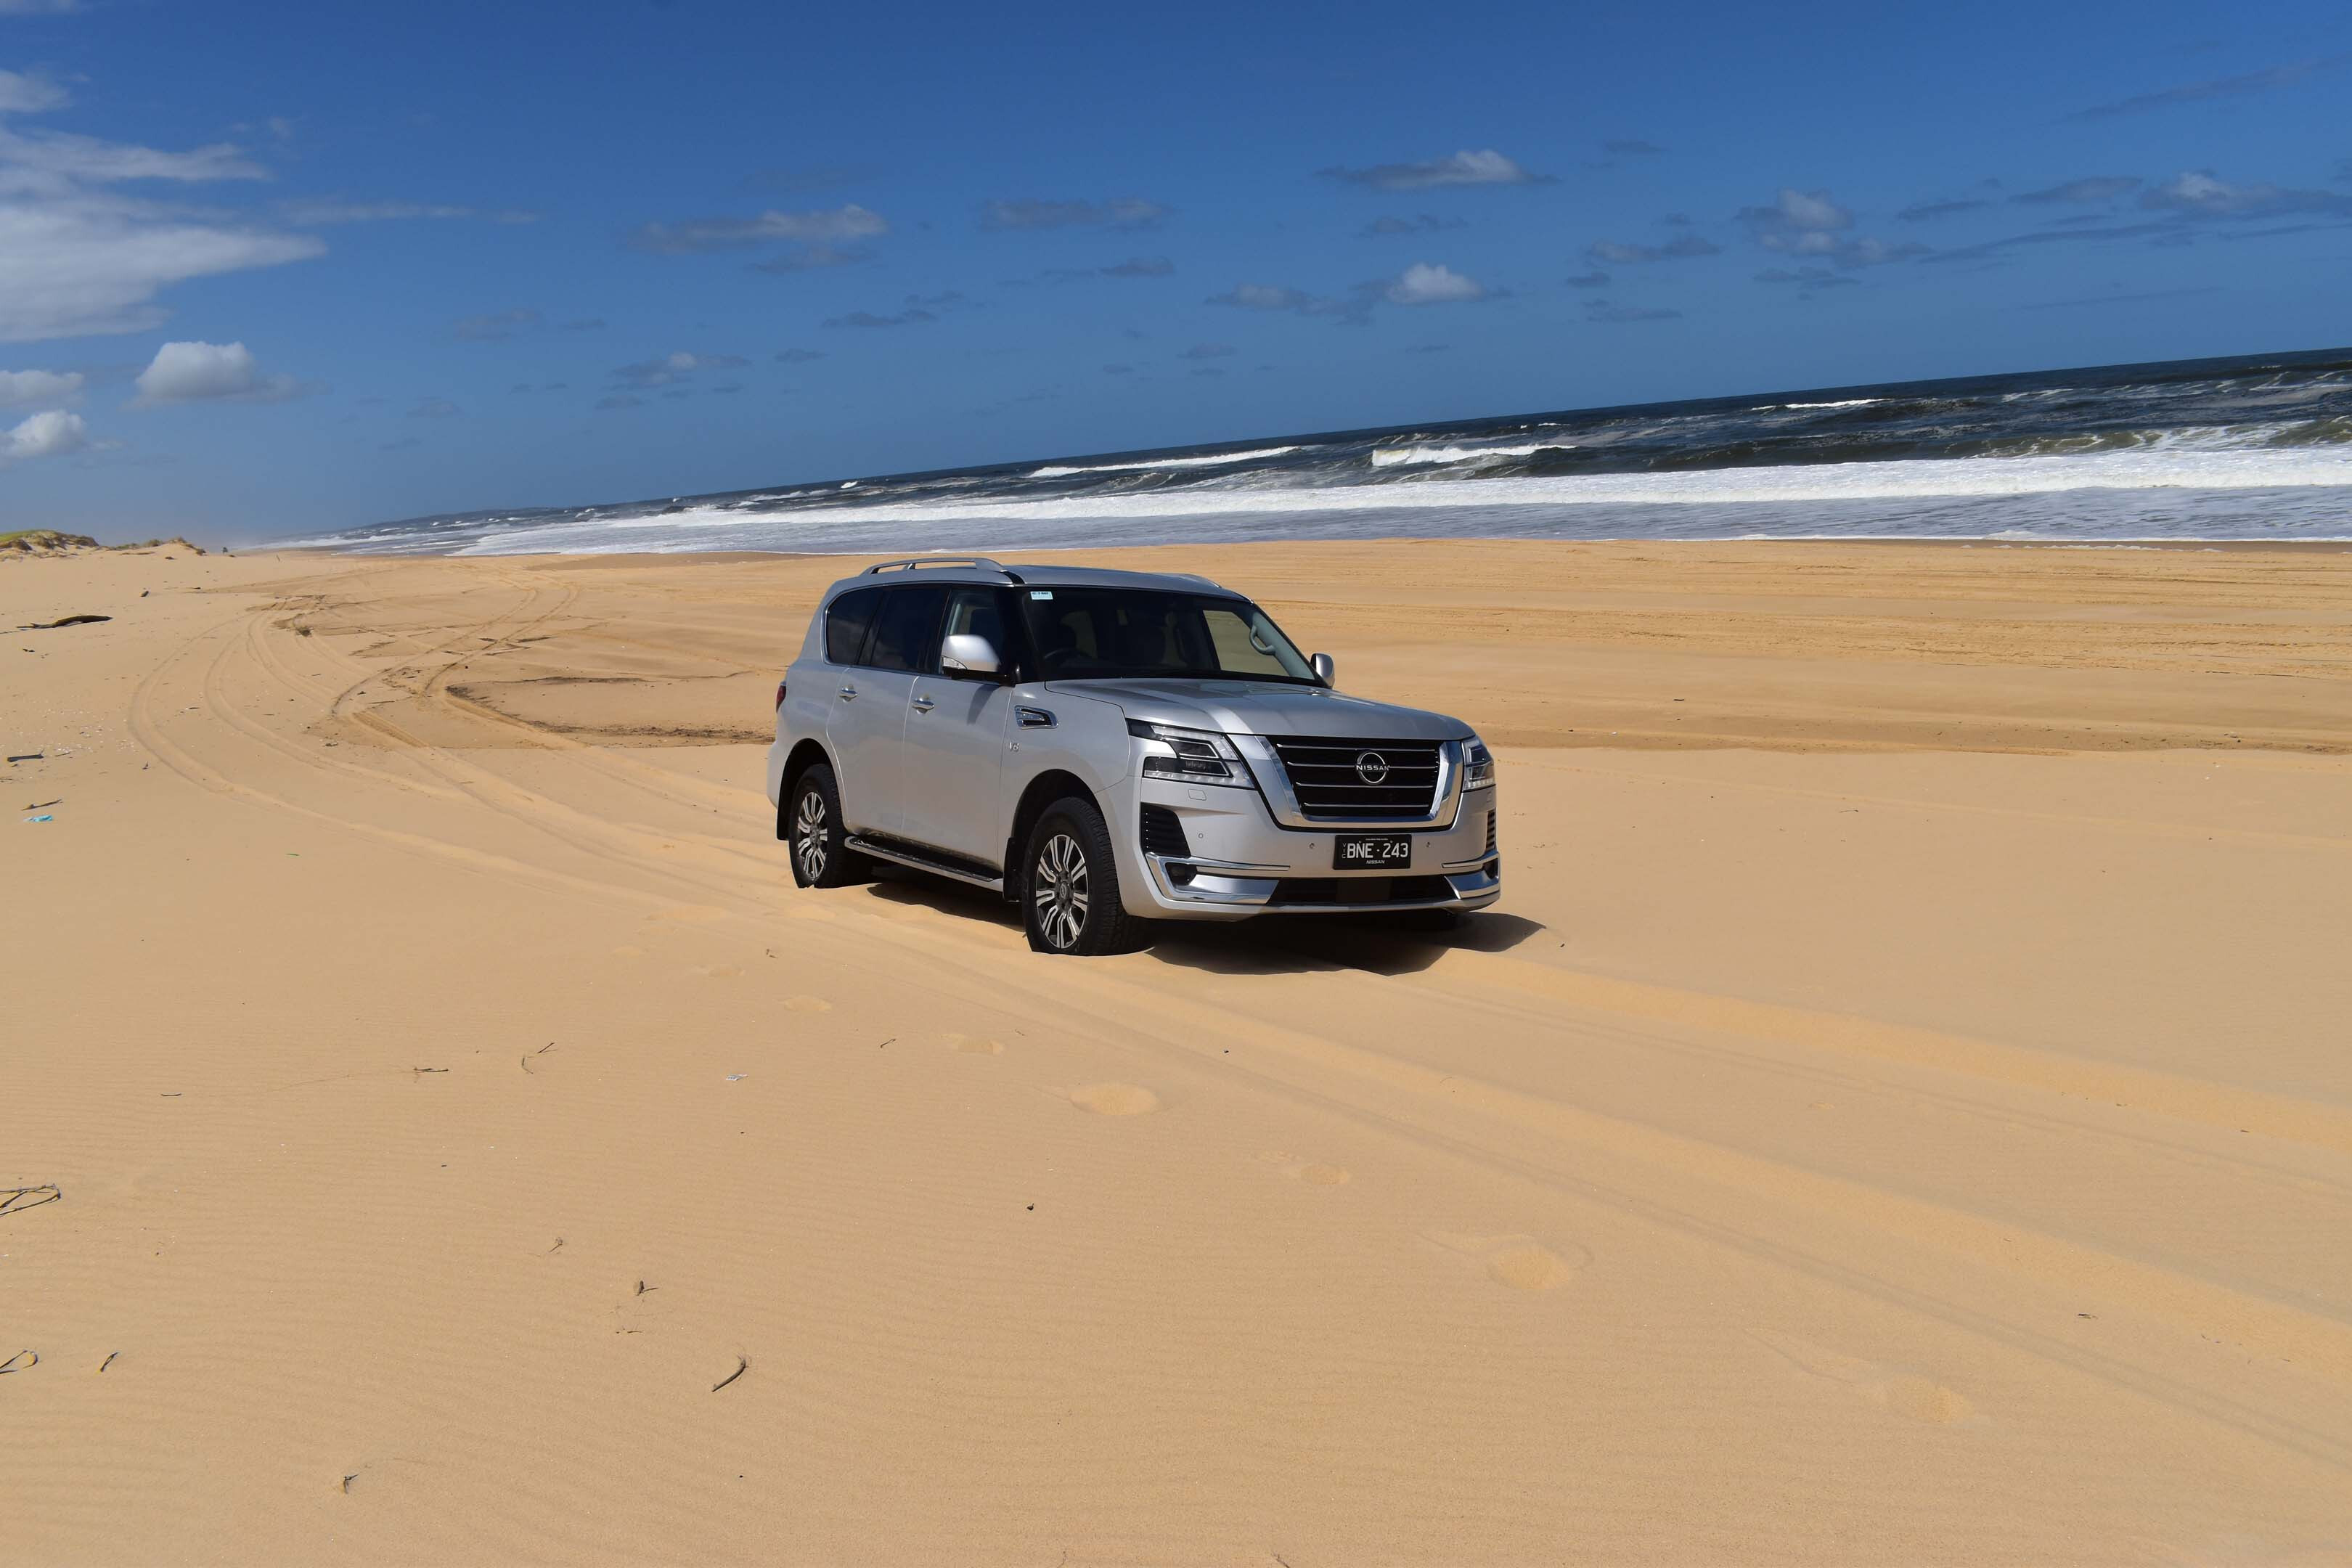
1
And let’s not forget the sound; this motor is as sweet as a nut when you put your foot down.
One of the first things I test is braking feel and performance, and the Patrol is excellent in this department, as is the engine and gearbox combo. When the going gets tough, it’s great to see various selectable terrain modes and a rear diff lock.
The foot-operated park brake is a bit weird but isn’t really an inconvenience once you get used to it.
It’s a big wide car, and you notice this pulling onto a cramped Parramatta Road for example. Once away from the city grind and on the sand of Stockton Beach, the Patrol really felt in its element.
The power, wider track and decent approach, departure and ramp-over angles give the Patrol genuinely capable off-road credentials.
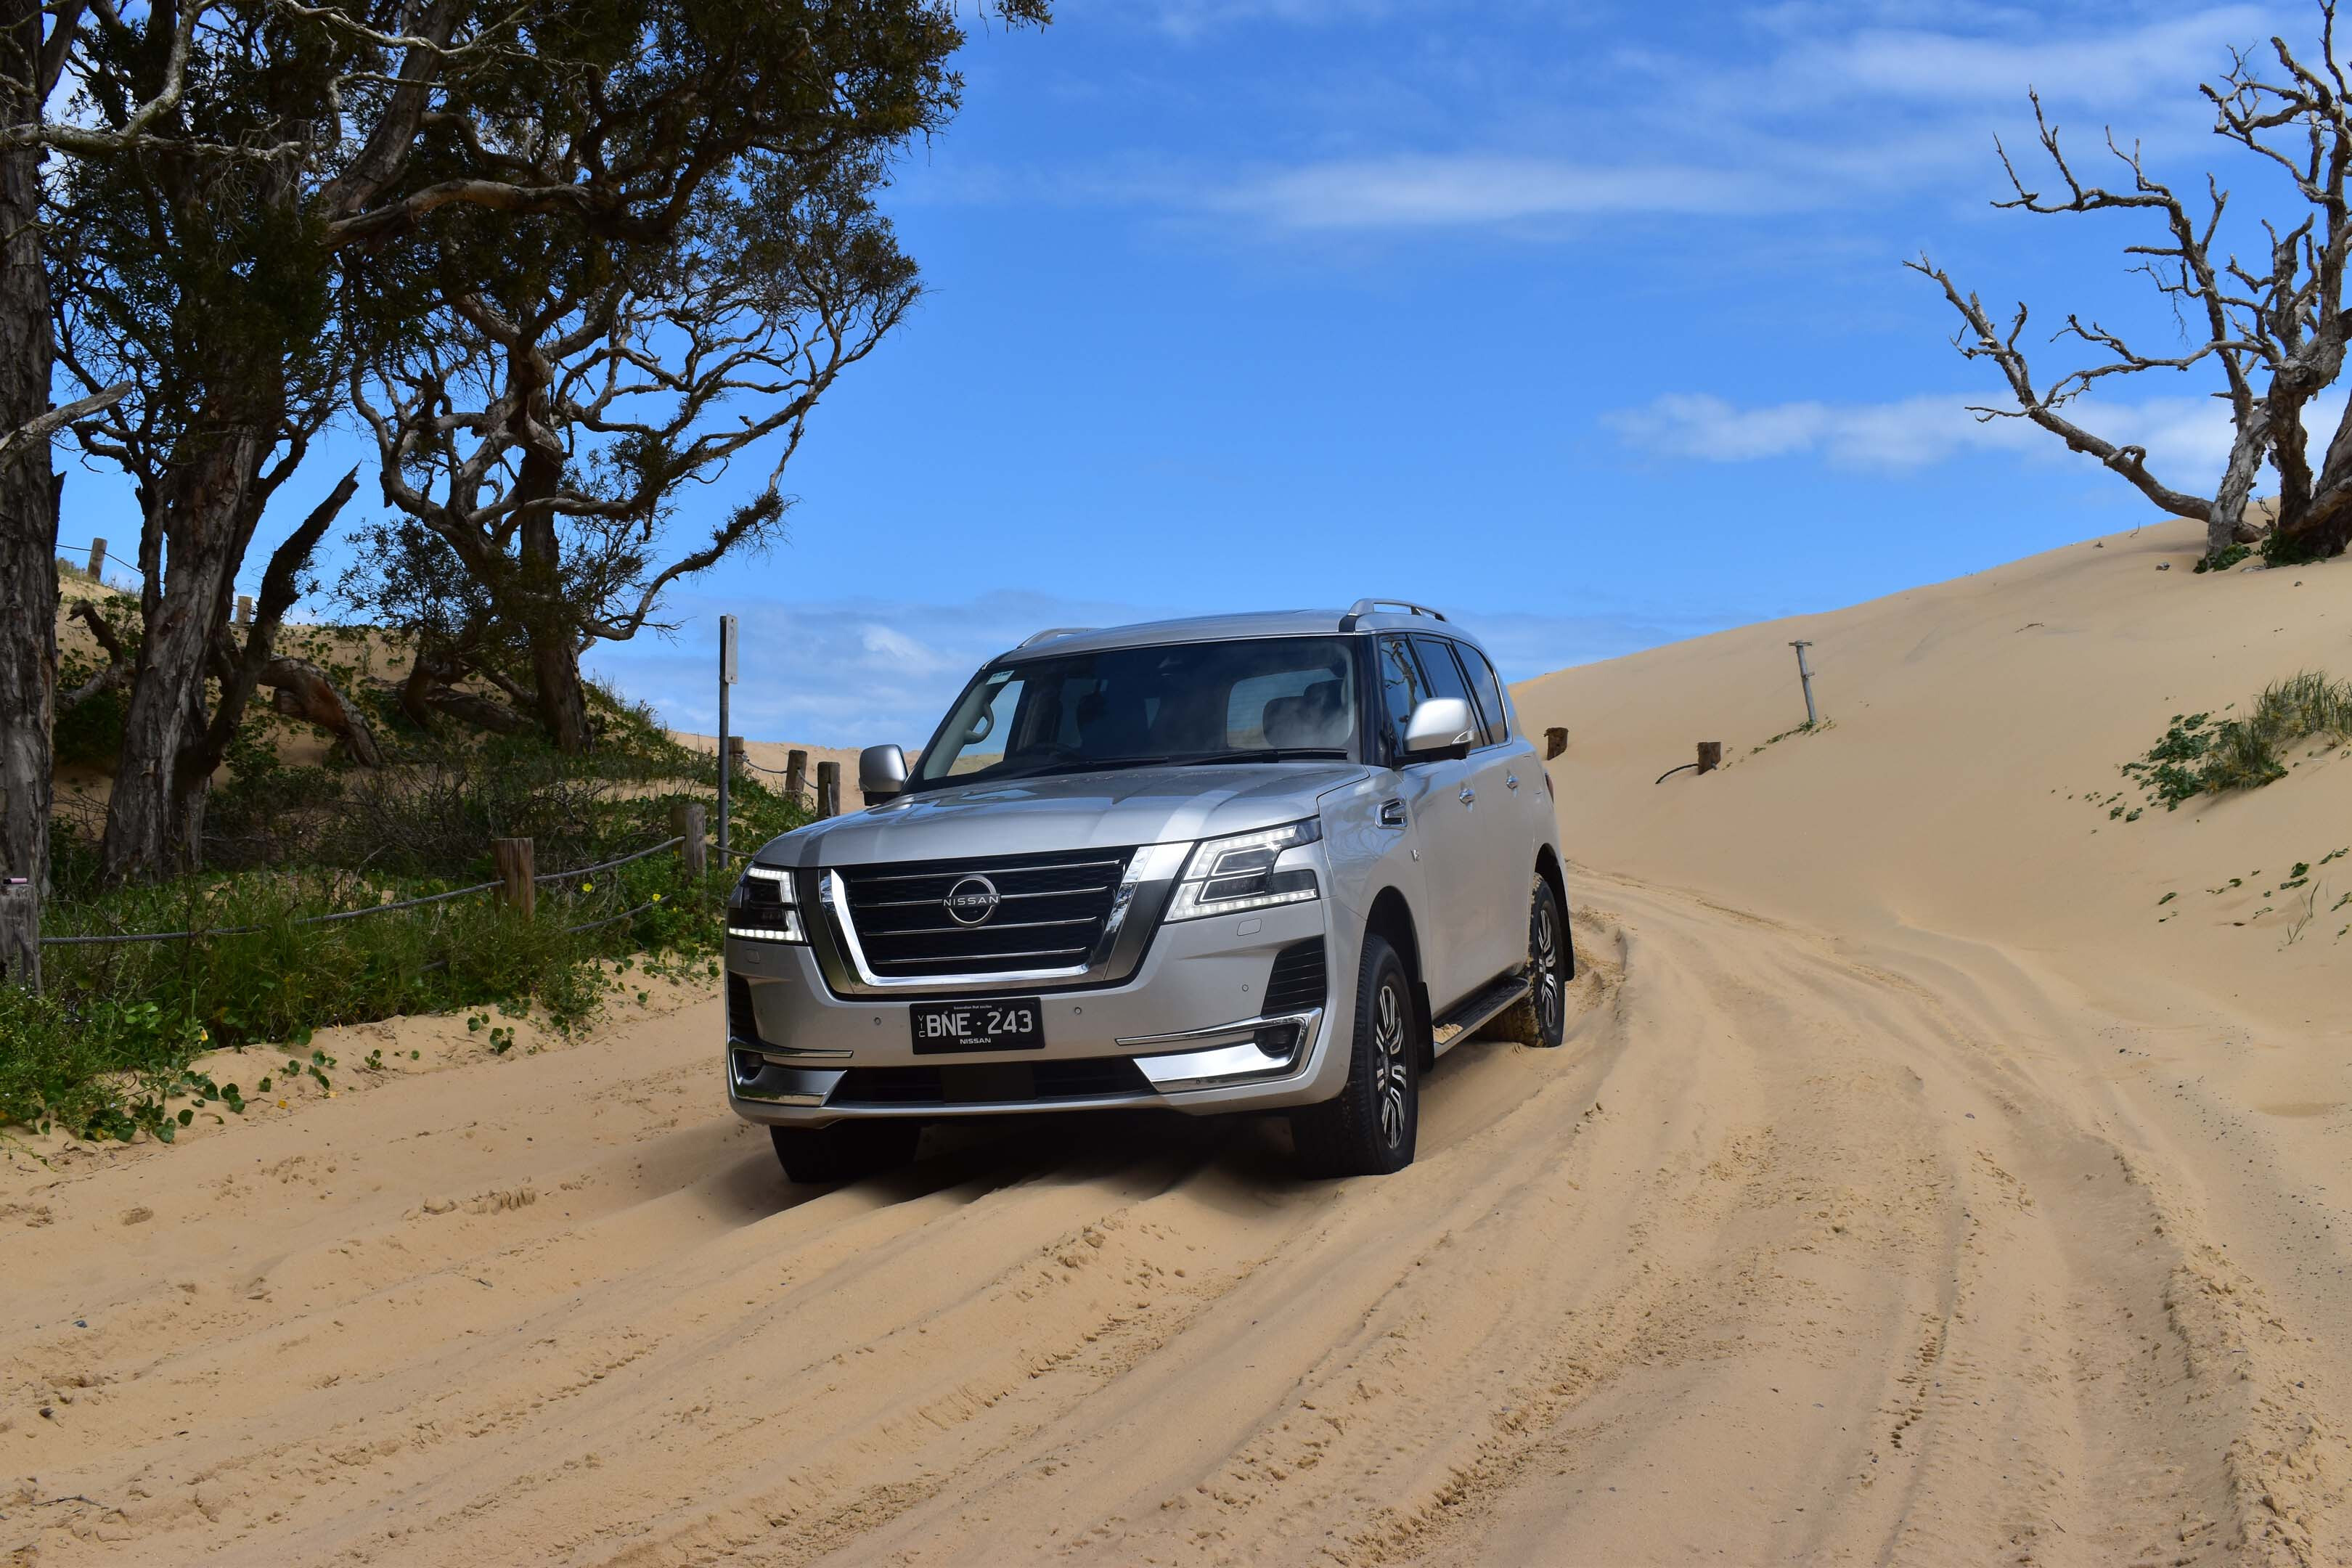
1
Not only is this thing capable in the sand, it’s a ball to drive – even though it’s not a petite vehicle.
There’s a reason why the Nissan Patrol is so popular in the UAE; it’s a terrific vehicle to drive on sand.
In terms of negatives, the front suspension bottomed out on a few occasions, so for me, some stiffer and taller springs would be beneficial for serious off-road work, to both provide a better ride and more ground clearance.
Oh, and from experience, you can fit a nearly 35-inch tyre to this generation Patrol on the stock suspension – neat!
So, for me, a small suspension lift with quality aftermarket gear, a set of 35-inch tyres and some frontal protection, you’ll have a solid base for a practical, comfortable and capable family off-roader.
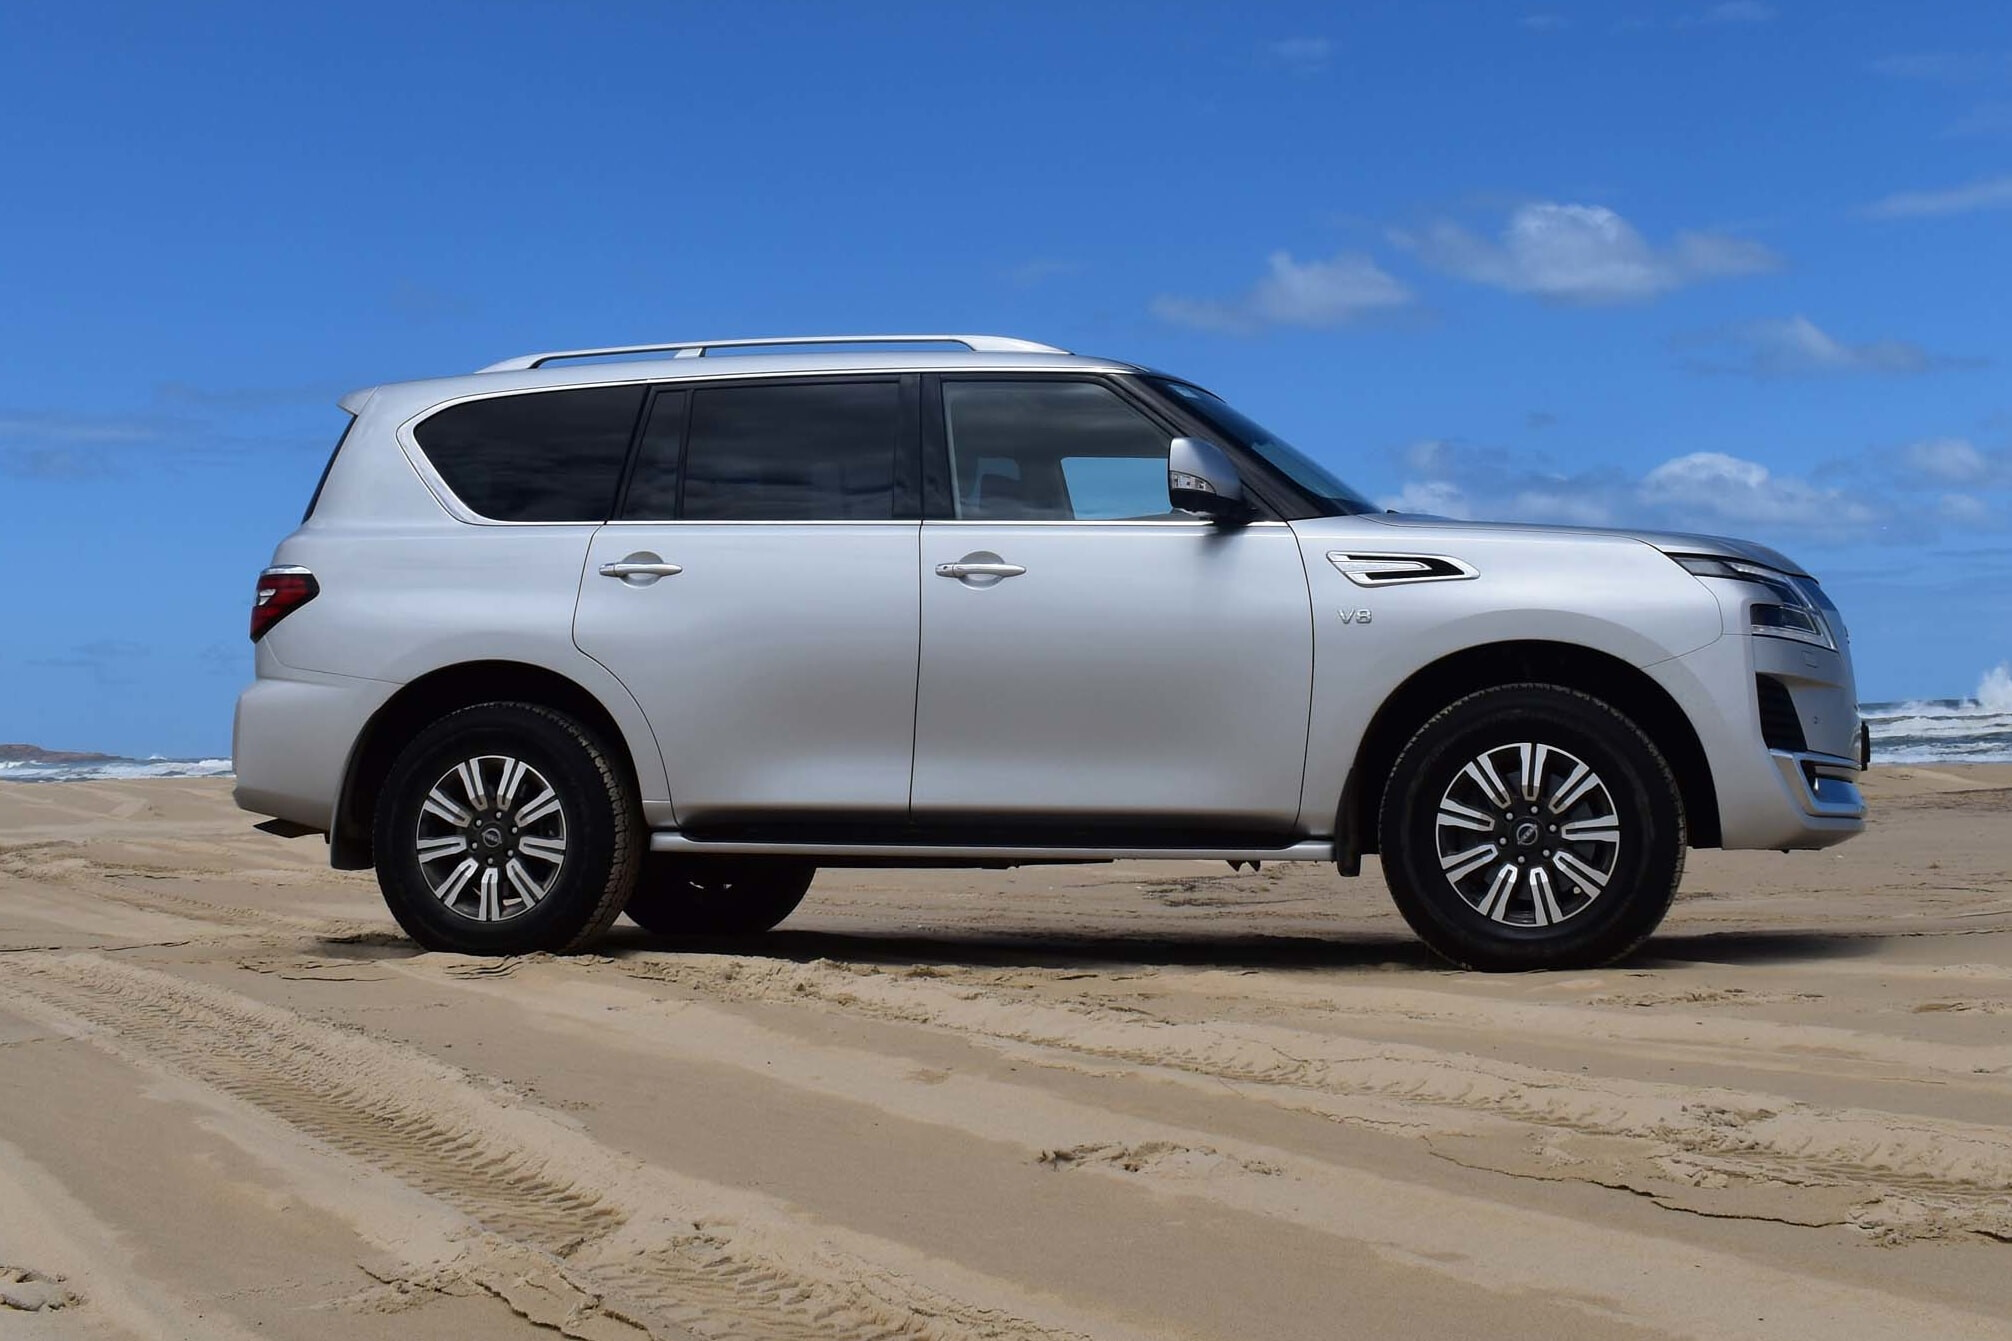
1
How is it on fuel?
After a week of highway, off-road and around-town driving, 15L/100km seemed to be the average. However, my official final recording was higher coming in at 16.1L/100km combined.
When you take into consideration this includes urban commuting, highway and off-road driving, that figure, while certainly high, isn’t crazy high.
For reference, my own petrol-powered Toyota FJ Cruiser with its 4.0L V6 at best uses 11L/100km, and while it has plenty of power – it’s not V8 power.
I expect if you were simply punting along at the posted speed limit of 110km/h on a long highway run, this figure would drop considerably as sand driving certainly puts more load on the vehicle, using more fuel in the process.
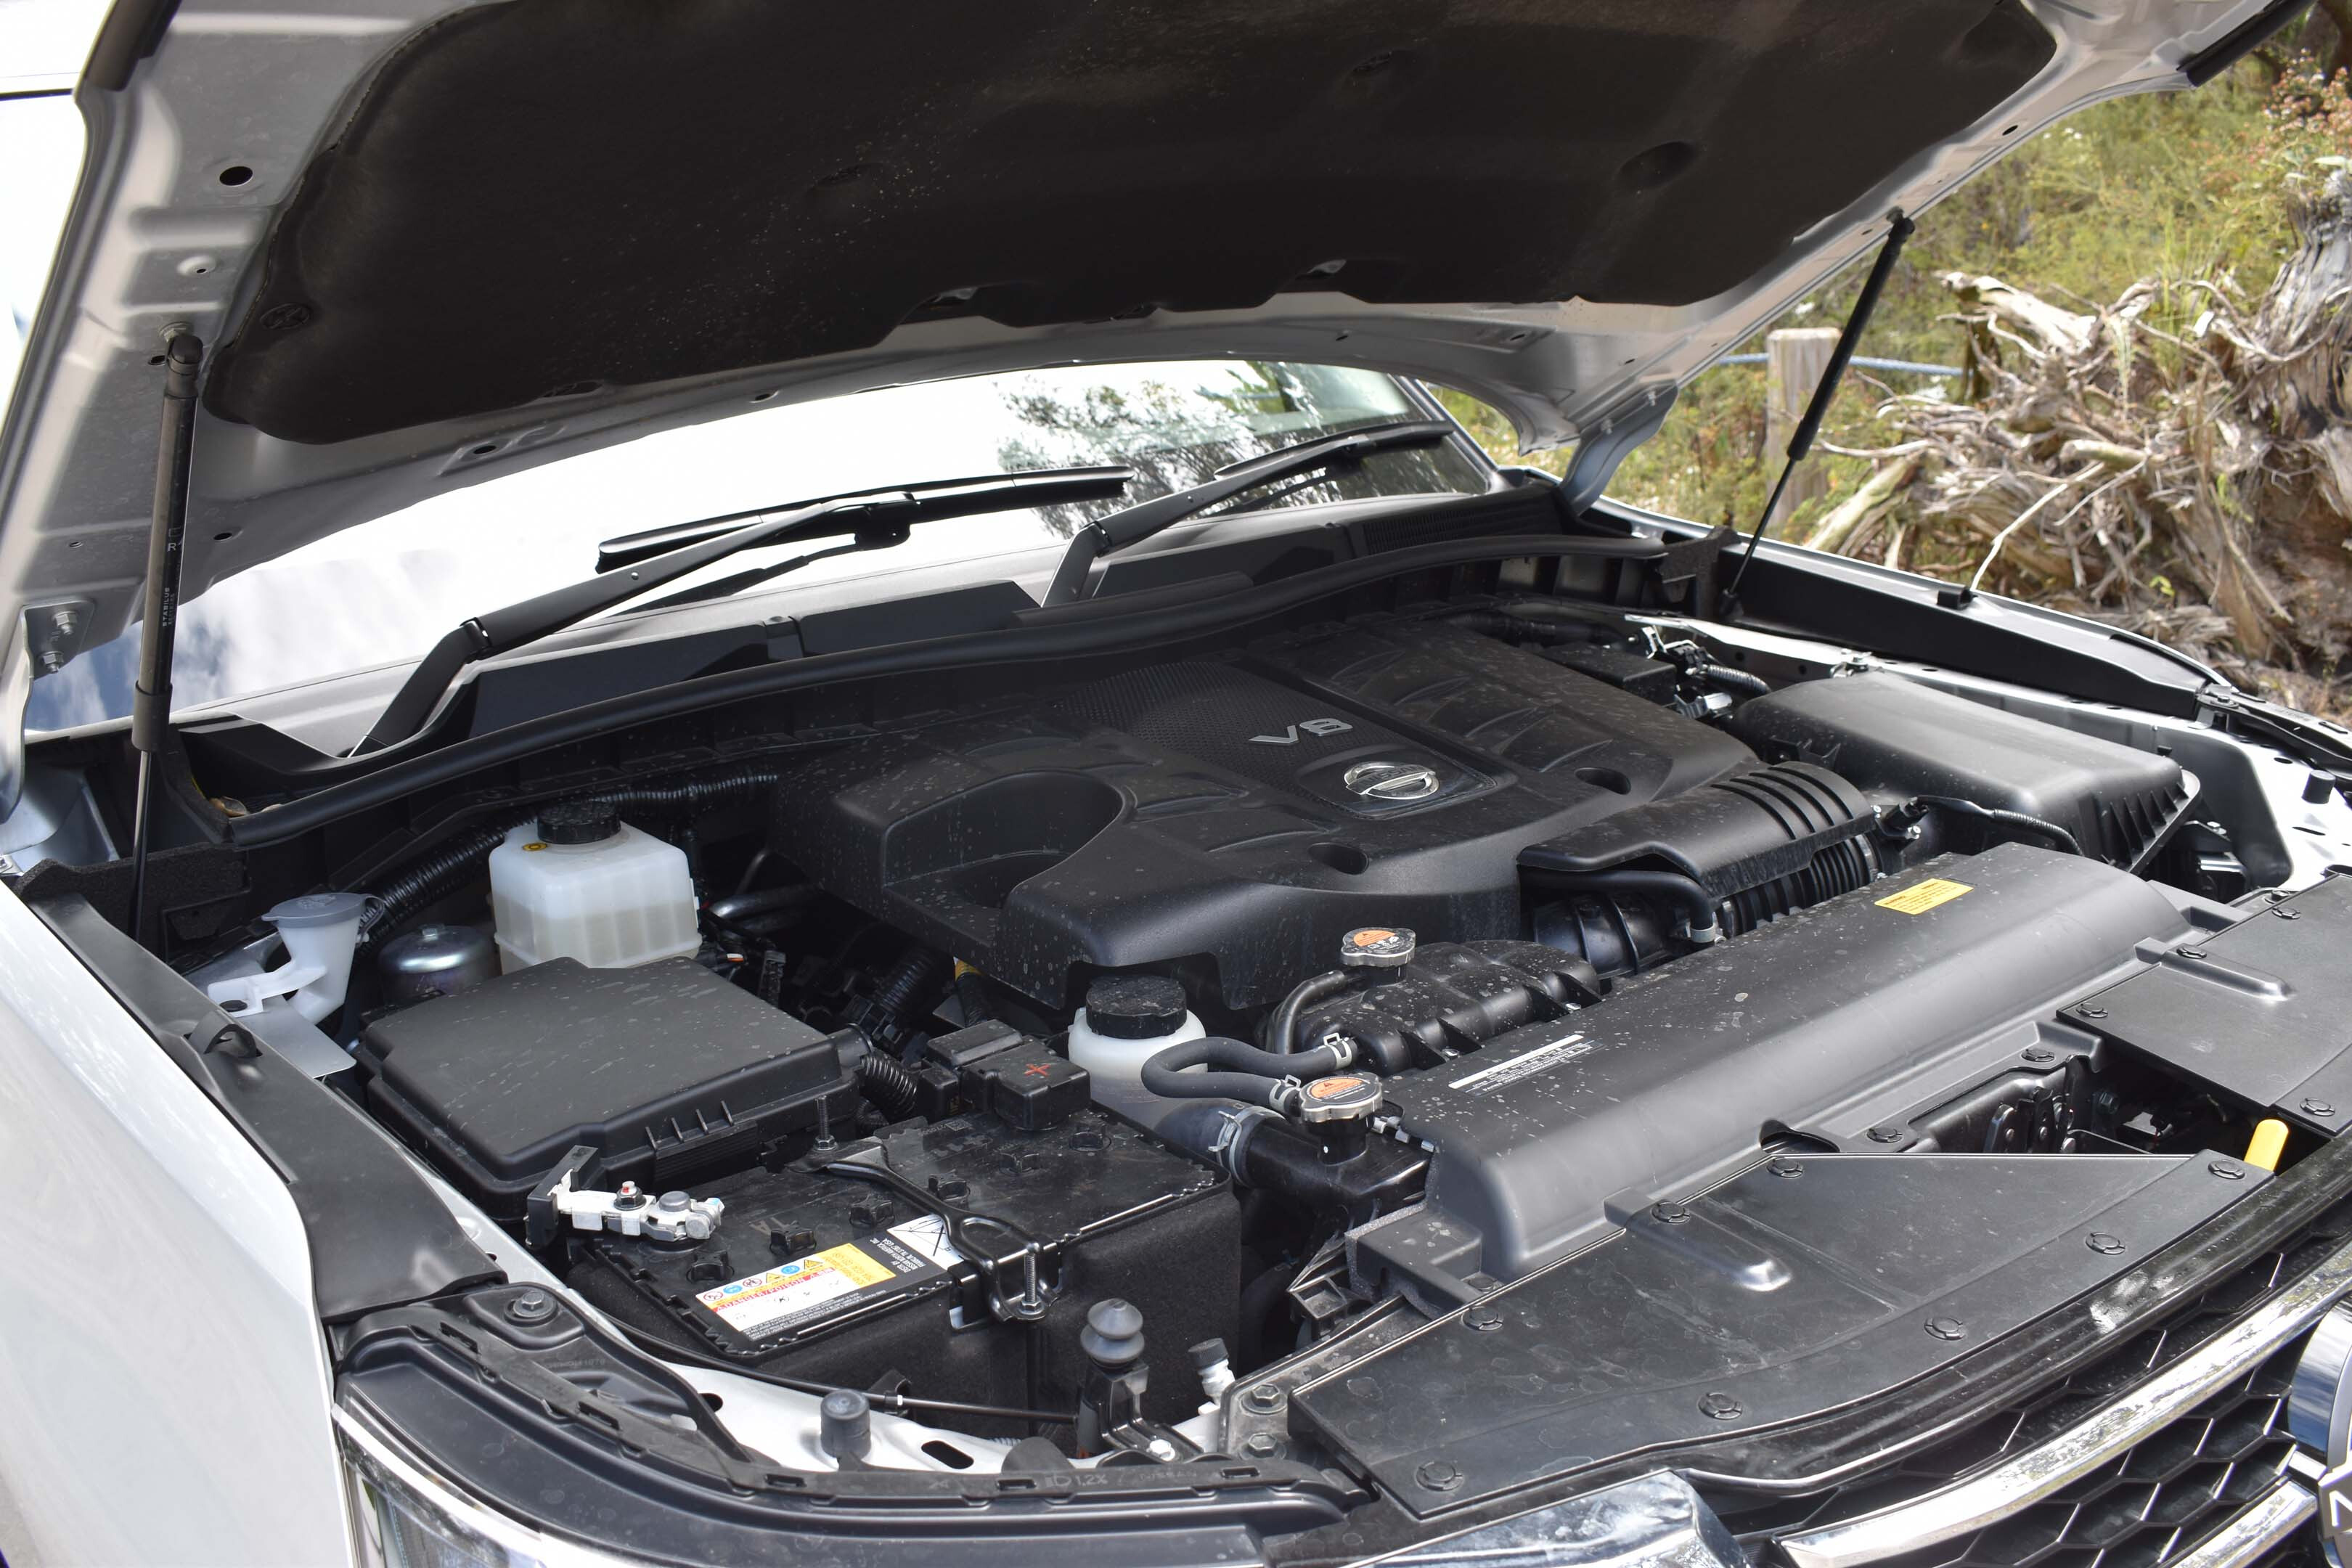
1
How safe is it?
Sadly, there is no ANCAP rating available for the Patrol. However, in terms of safety equipment inside the cabin you’ll find dual front and front side airbags, plus curtain airbags across all three rows of seating.
Blind-spot monitoring, parking sensors front and rear, autonomous emergency braking, rear cross-traffic alert and radar cruise control round out the safety suite for the 2022 Nissan Patrol Ti-L.
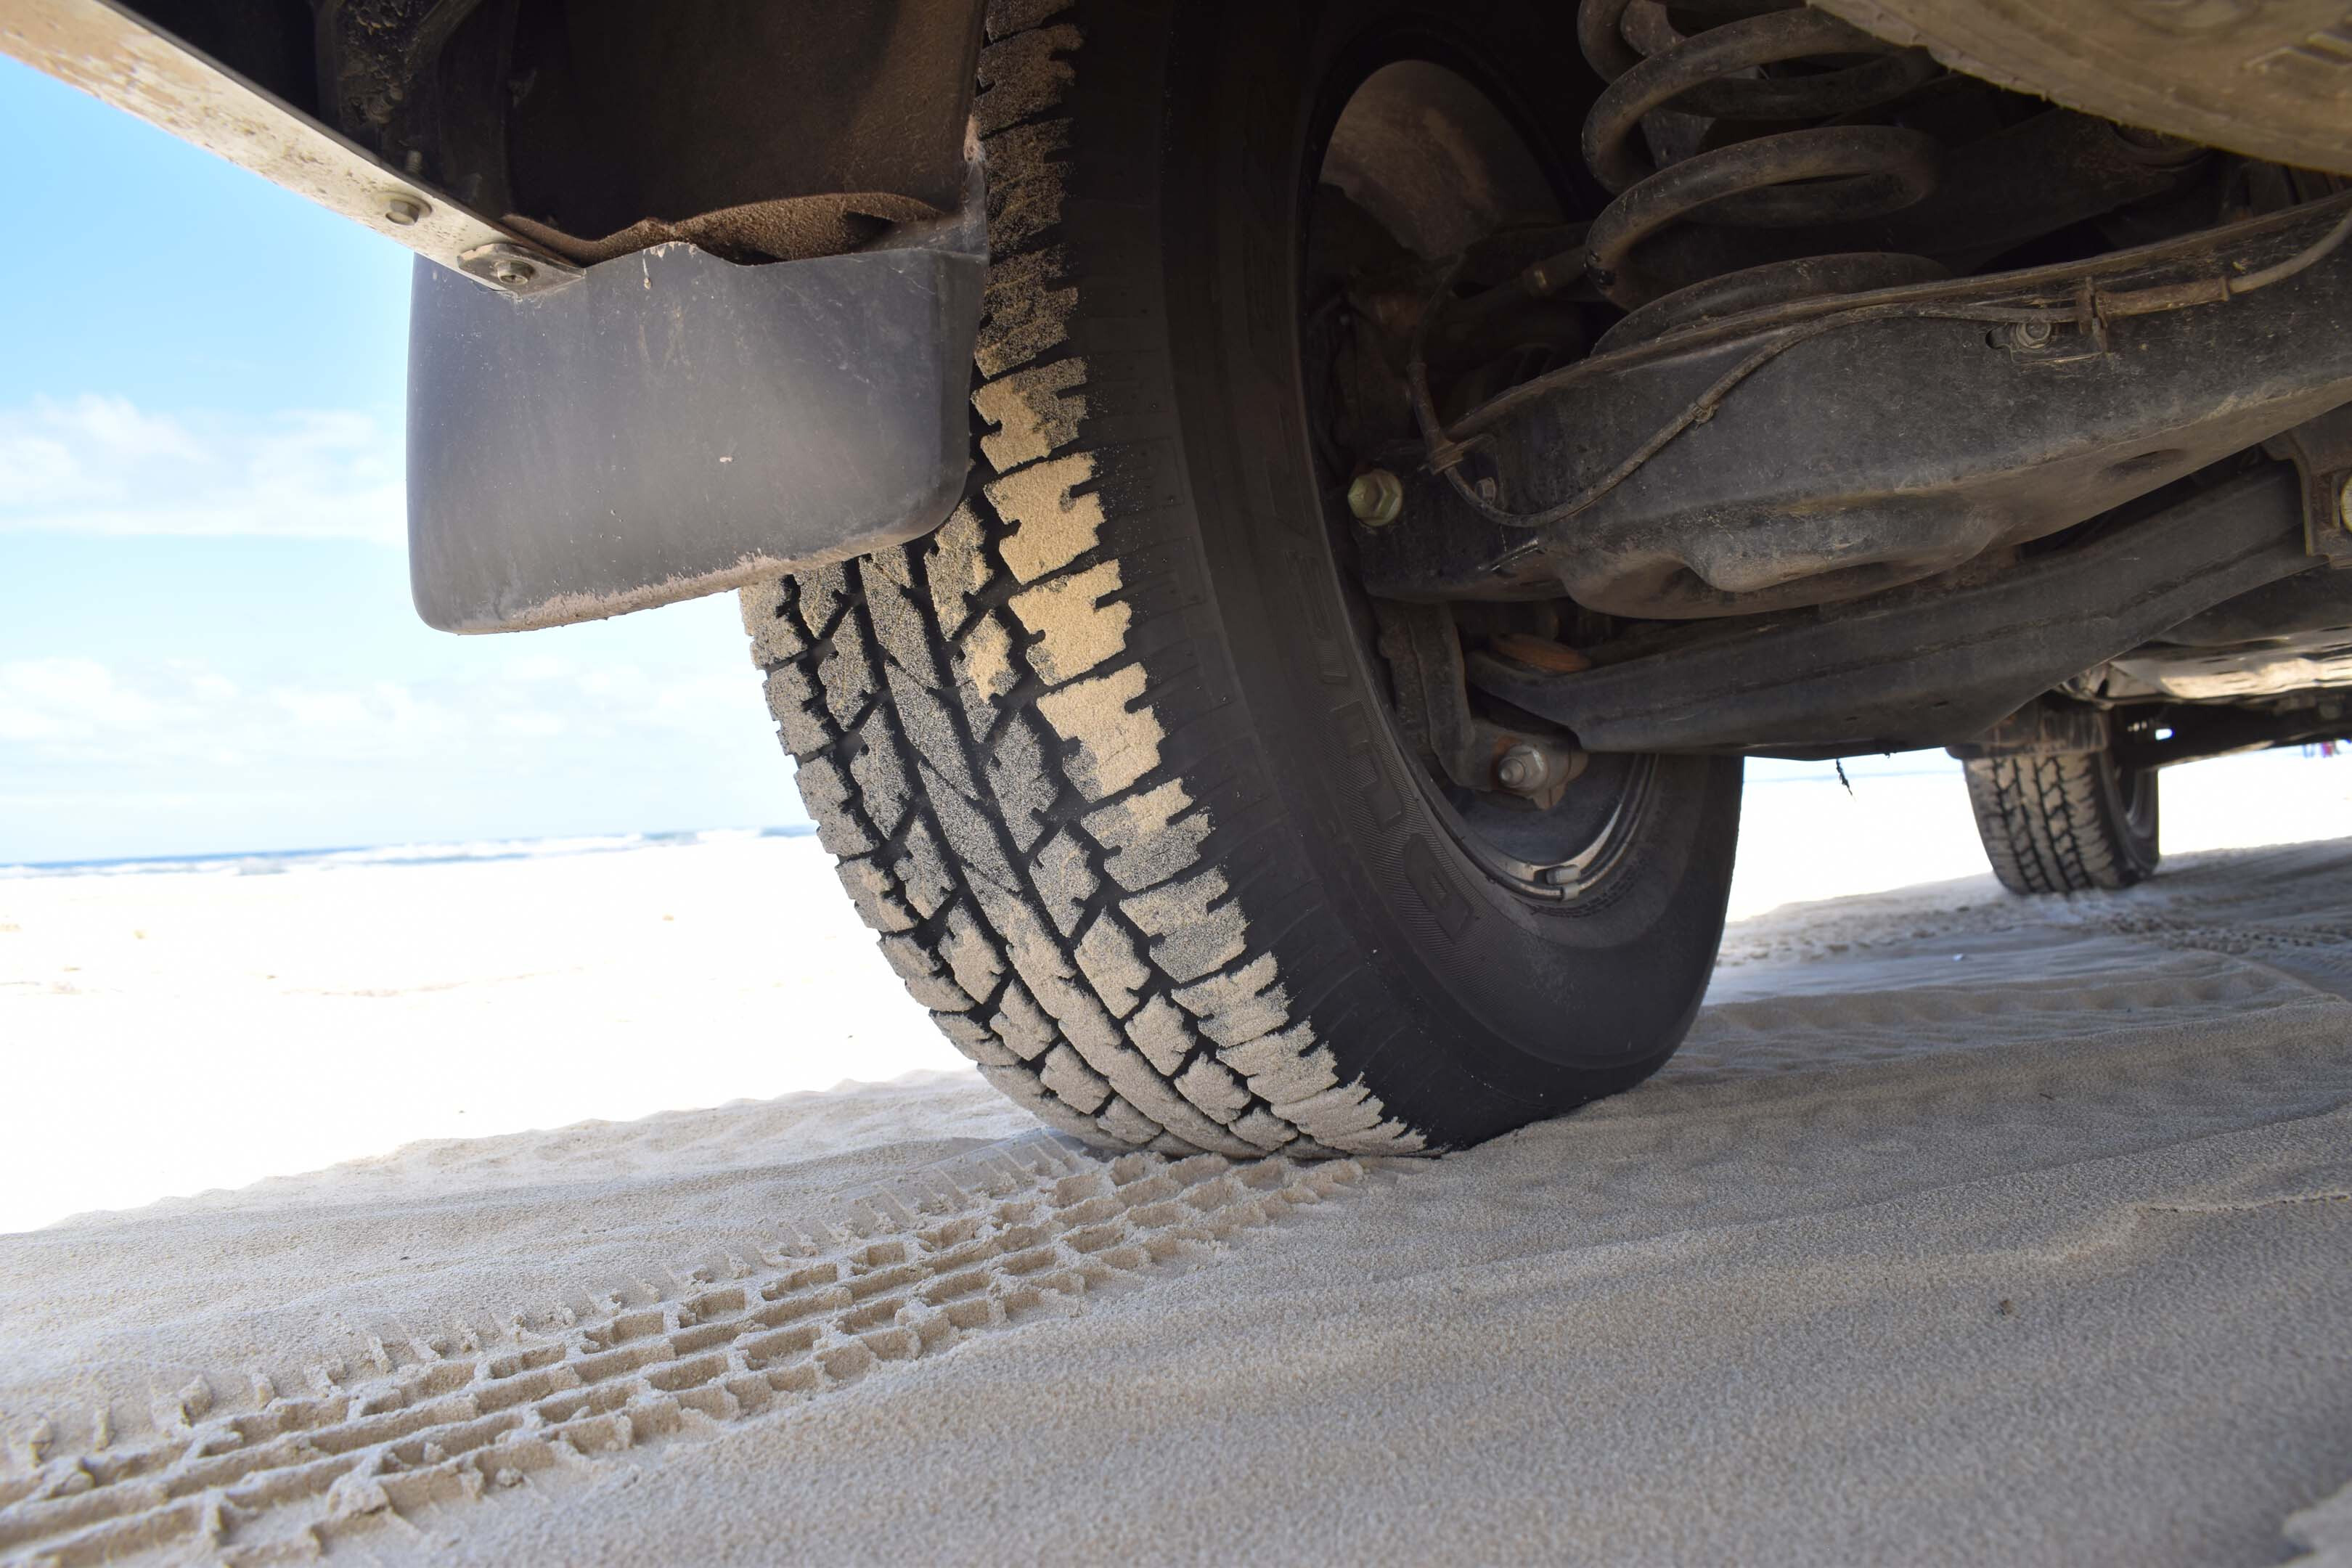
1
Warranty and running costs
The 2022 Nissan Patrol is covered by a five-year, unlimited-kilometre warranty with service intervals listed for every 12 months or 10,000km (whichever comes first).
Prices for servicing are capped for the first six services:
VERDICT
It might be getting a little long in the tooth, but the Nissan Patrol is a good thing if you are in the market for a seven-seater wagon with genuine off-road capability that is considerably cheaper than a similar specification of Toyota LandCruiser 300 Series.
You can’t call the Nissan Patrol a cheap vehicle though, and the interior is begging for a modern update both in terms of technology and aesthetics.
On the beach, the Patrol felt completely at home, with that grunty petrol V8 engine singing a sweet tune and offering more than enough instant acceleration to climb dunes or work through soft sand.
It felt planted and rode well, even though on occasion the front end did bottom out when hitting washouts at speed.
On the highway, the Patrol was effortless to drive and I could see it being a brilliant tow vehicle. However, it would be fairly thirsty on fuel if you hitched up a large van and did big kilometres regularly.
If you can live with a dated interior, and don’t mind spending a bit more on fuel (don’t forget that petrol is commonly cheaper than diesel at the moment), the 2022 Nissan Patrol is a rock-solid option for four-wheel drivers seeking a large wagon to use as it was intended.
1
MORE
Everything Nissan
2022 Nissan Patrol Ti-L specifications
| Engine | petrol V8 |
|---|---|
| Capacity | 5552cc |
| Max Power | 298kW at 5800rpm |
| Max Torque | 560Nm at 4000rpm |
| Gearbox | 7-speed automatic |
| Crawl Ratio | 44:1 |
| 4×4 System | permanent 4WD, dual range, rear diff lock |
| Construction | 5-door wagon on separate chassis |
| Front Suspension | independent double wishbones and HBMC |
| Rear Suspension | independent double wishbones and HBMC |
| Tyre | 265x70R18 |
| Kerb Weight | 2861kg |
| GVM | 3500kg |
| Payload | 639kg |
| Towing Capacity | 3500kg |
| Seating | 7 |
| Fuel Tank | 140L |
| Fuel Consumption (ADR) | 14.4L/100km |
| Fuel Consumption (tested) | 16.2L/100km |
| Departure Angle | 26.3u2070 |
| Approach Angle | 28u2070 |
| Wading Depth | 700mm |
| Ground Clearance | 273mm |
If you’re using your 4×4 vehicle for camping adventures, then a pull-out awning is one of the best pieces of kit you can add to it.
Mounted to the roof rack or trailer, these awnings provide quick and easy shelter from the sun and rain no matter where you are. They can be a godsend when it comes to beating the conditions.
Vehicle-mounted awnings come in a range of designs and styles, ranging from simple ones that pull straight out from the side of the car, to 180° and 270° units that fan out around the vehicle to give the most amount of coverage.
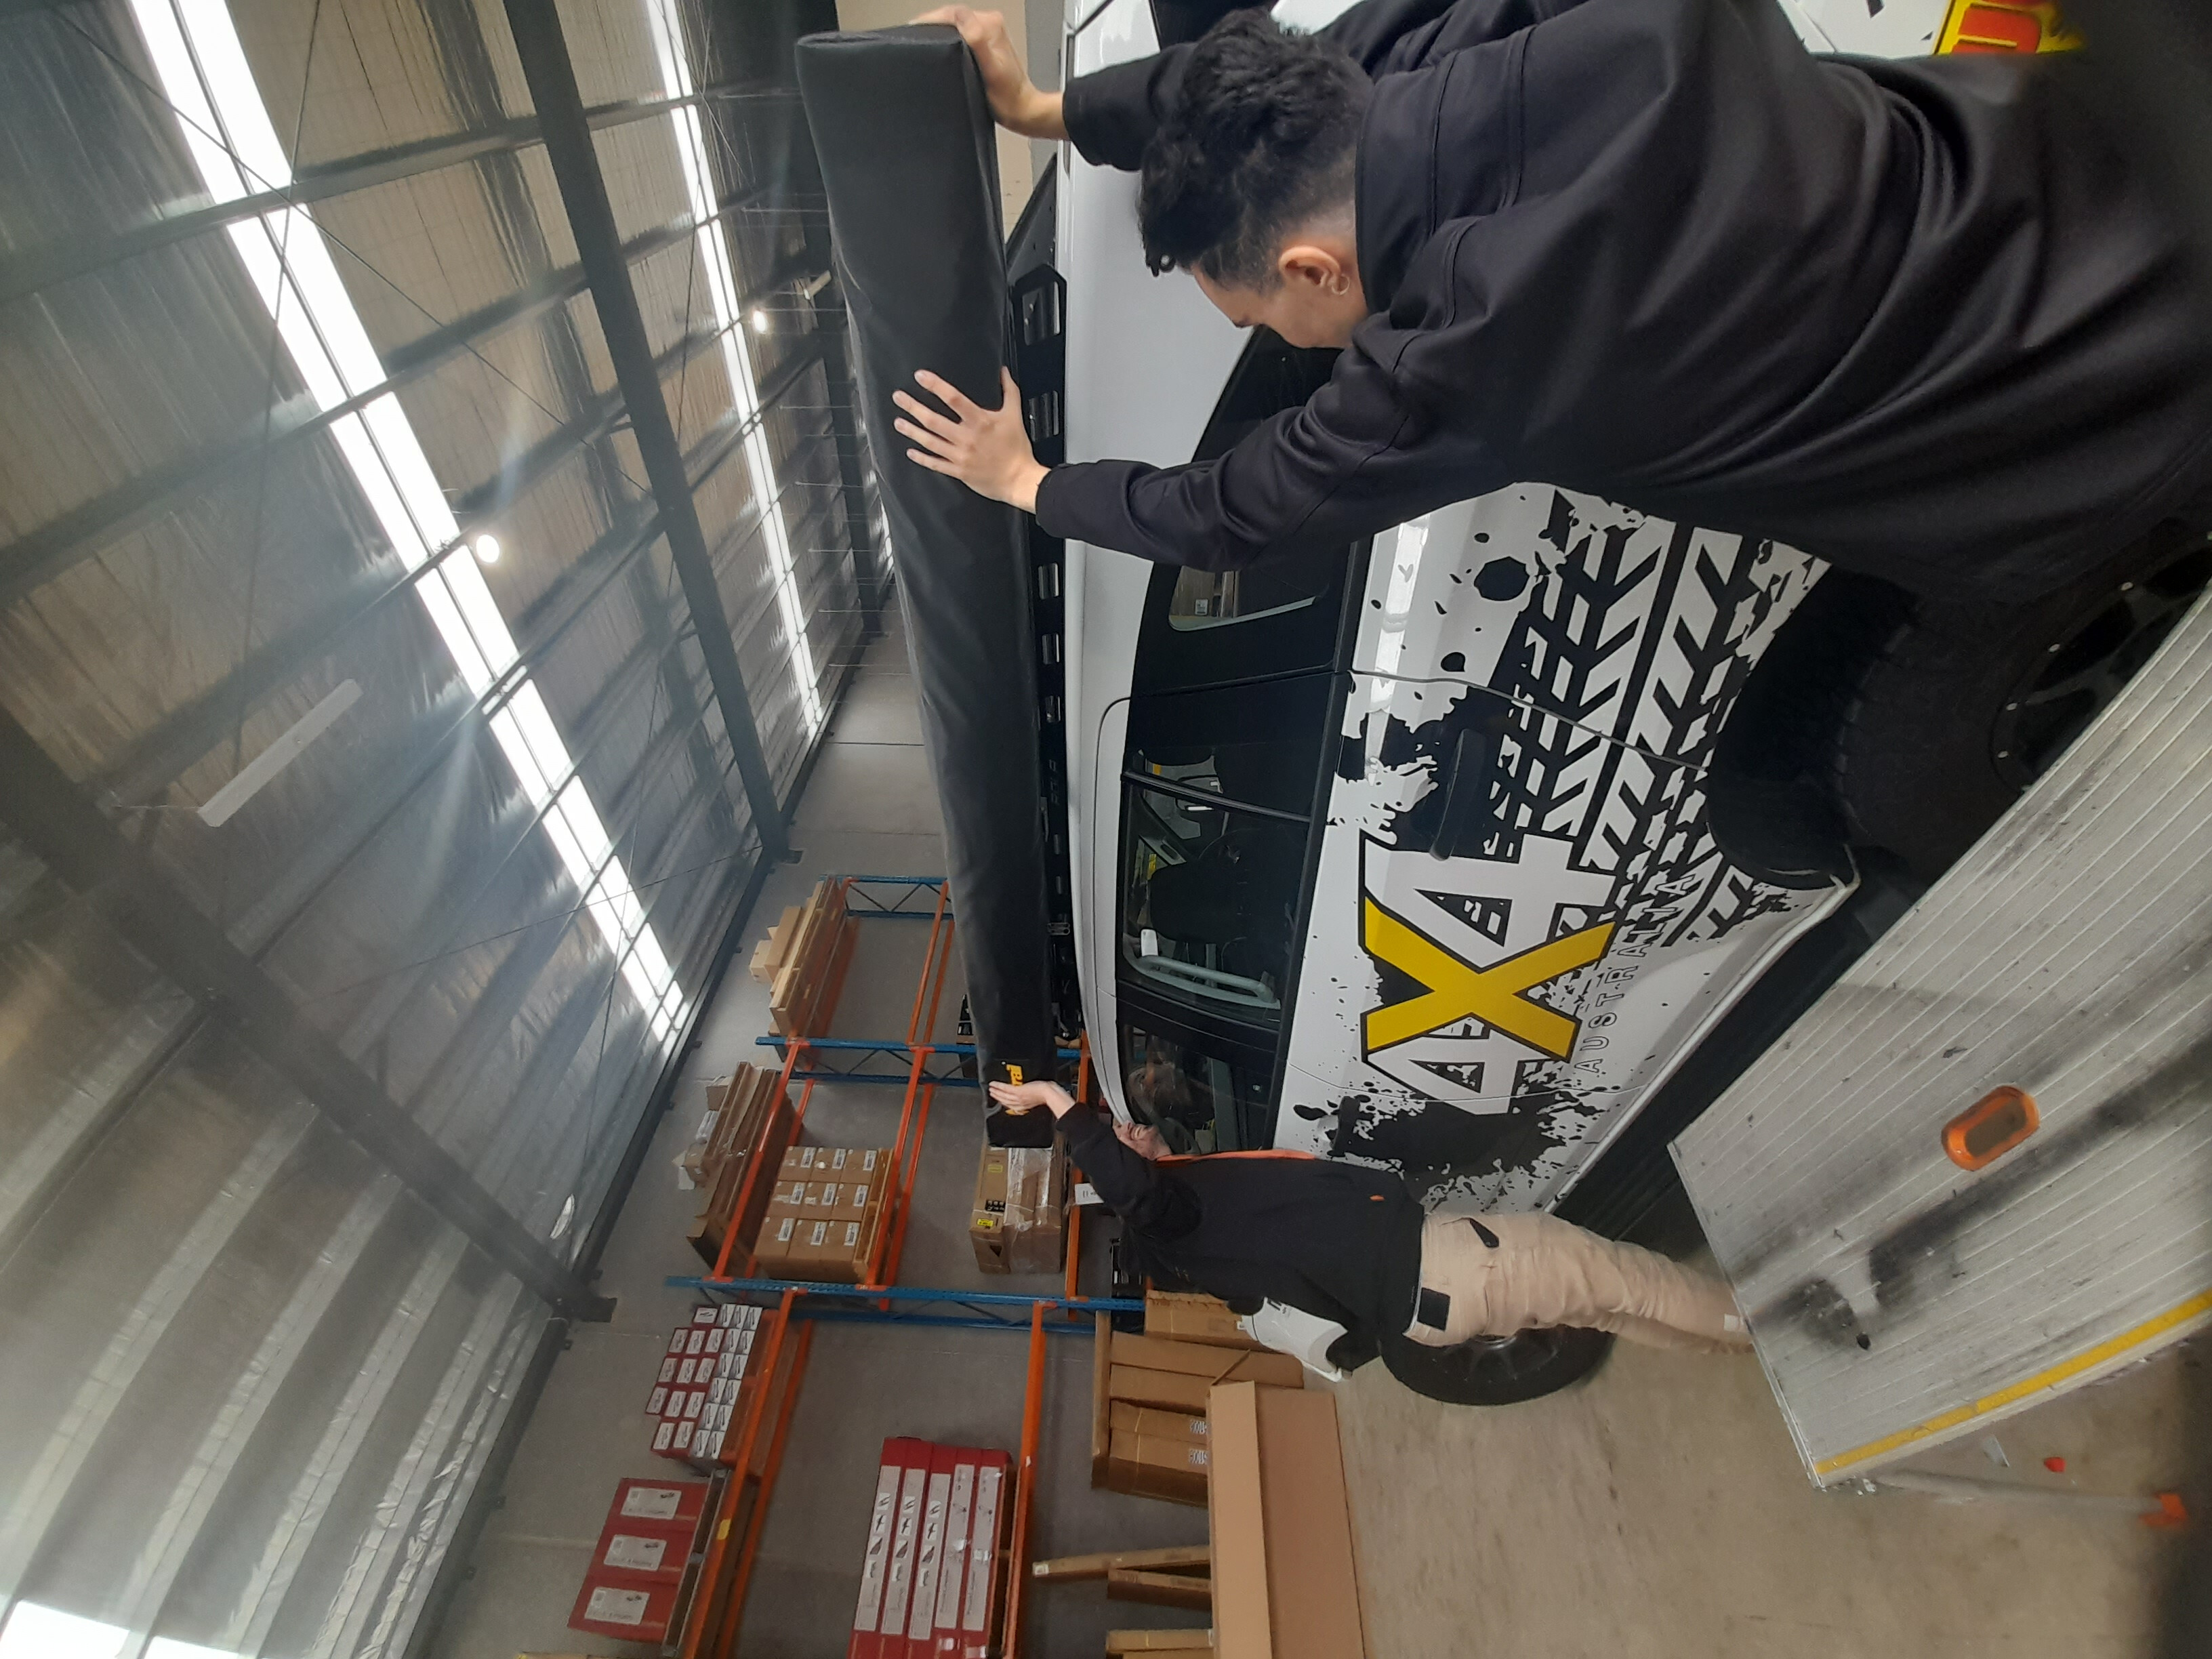
1
For the Isuzu MU-X we fitted a 270° BlockOut awning from OZtrail for maximum coverage. The 270° part of the name indicates that the awning fans out to extend not only down the side of the Isuzu but around the back to cover the area under your tailgate.
The BlockOut part of the product name refers to the dark material used that is claimed to block out 95 per cent of light passing through the top of it and reduce temperatures under the awning by up to 10 per cent. Clever stuff.
The black material used is a 280gsm ripstop poly-cotton canvas that is seam-sealed and has a 1500mm waterhead rating, so it’s pretty much waterproof – just as you want for camping on Australia’s East Coast in the current climate.
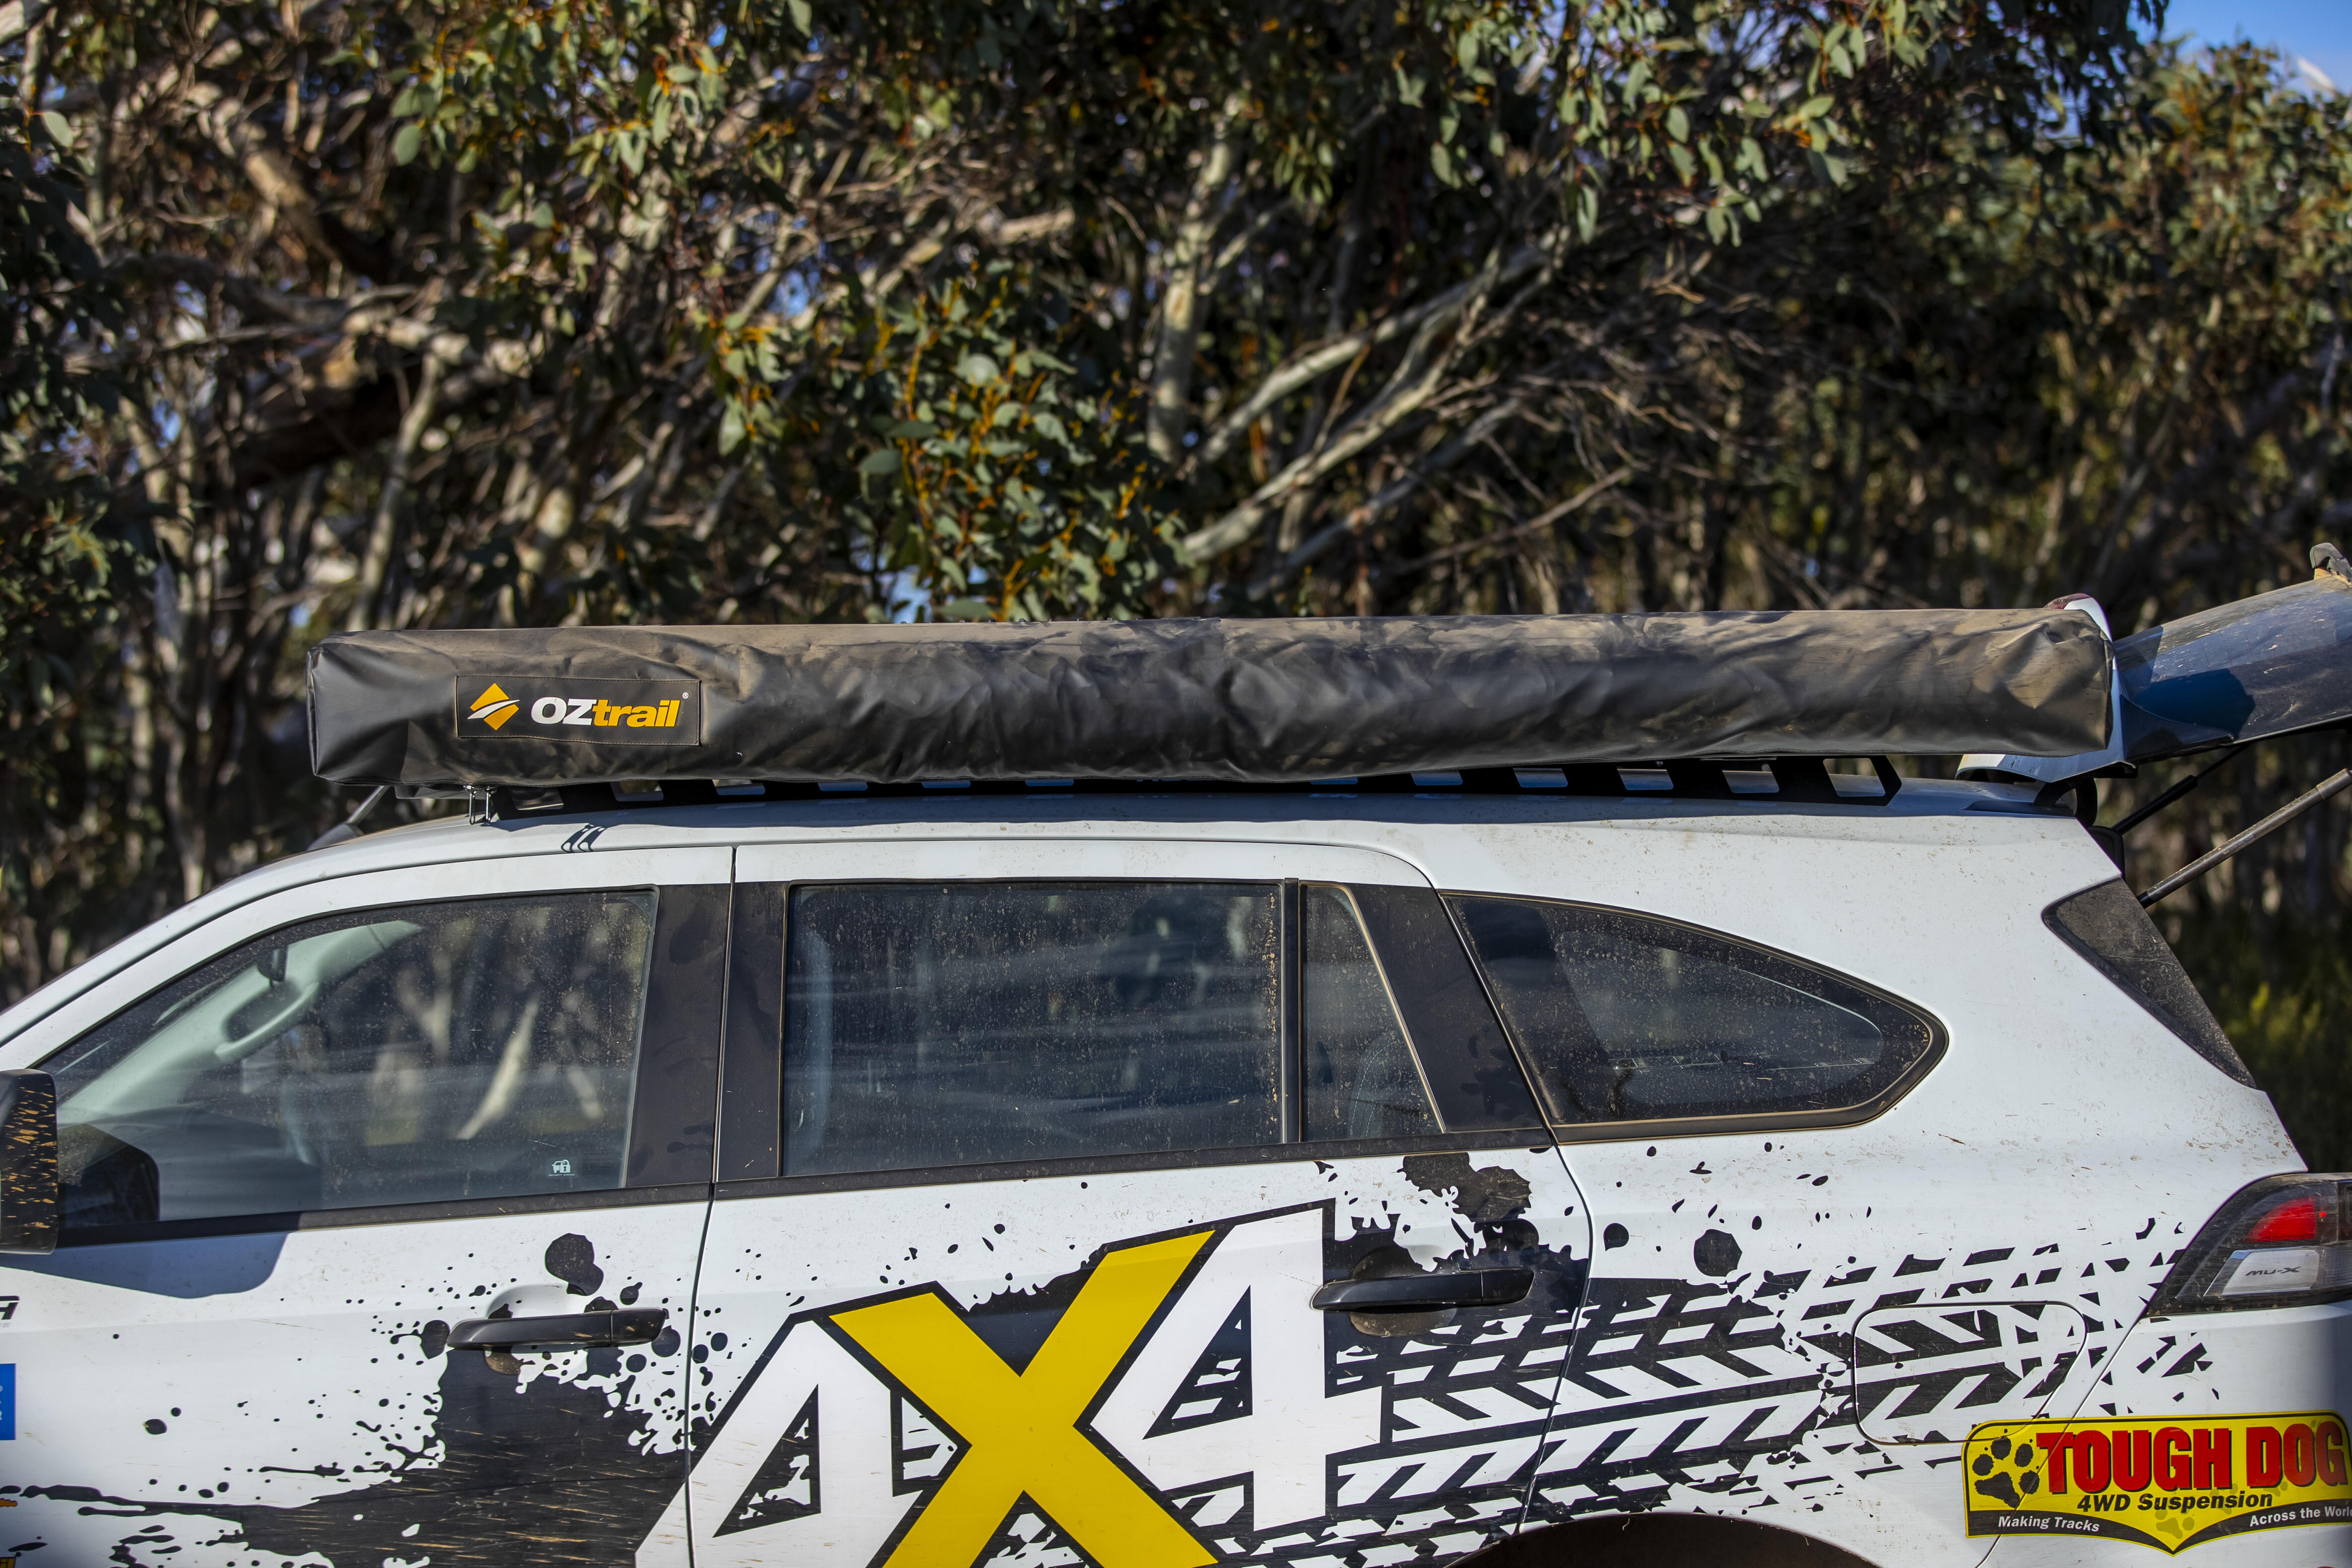
1
The awning fans out on four aluminium C-channel arms, each with fold-down telescopic poles for strong support. One of the arms swings forward toward the front of the vehicle, while the last three pivot around the rear of the car to give the 270° and up to 20.96m² of coverage.
Maximum coverage is achieved by unfurling the included wall sheet an extra 3.2m forward of the front support arm and propping it up with poles, or it can be pegged down to the ground to give protection from inclement weather.
OZtrail also offers optional zip-on walls that fit to the outsides of the awning panels, to provide even better protection by creating a full enclosure.
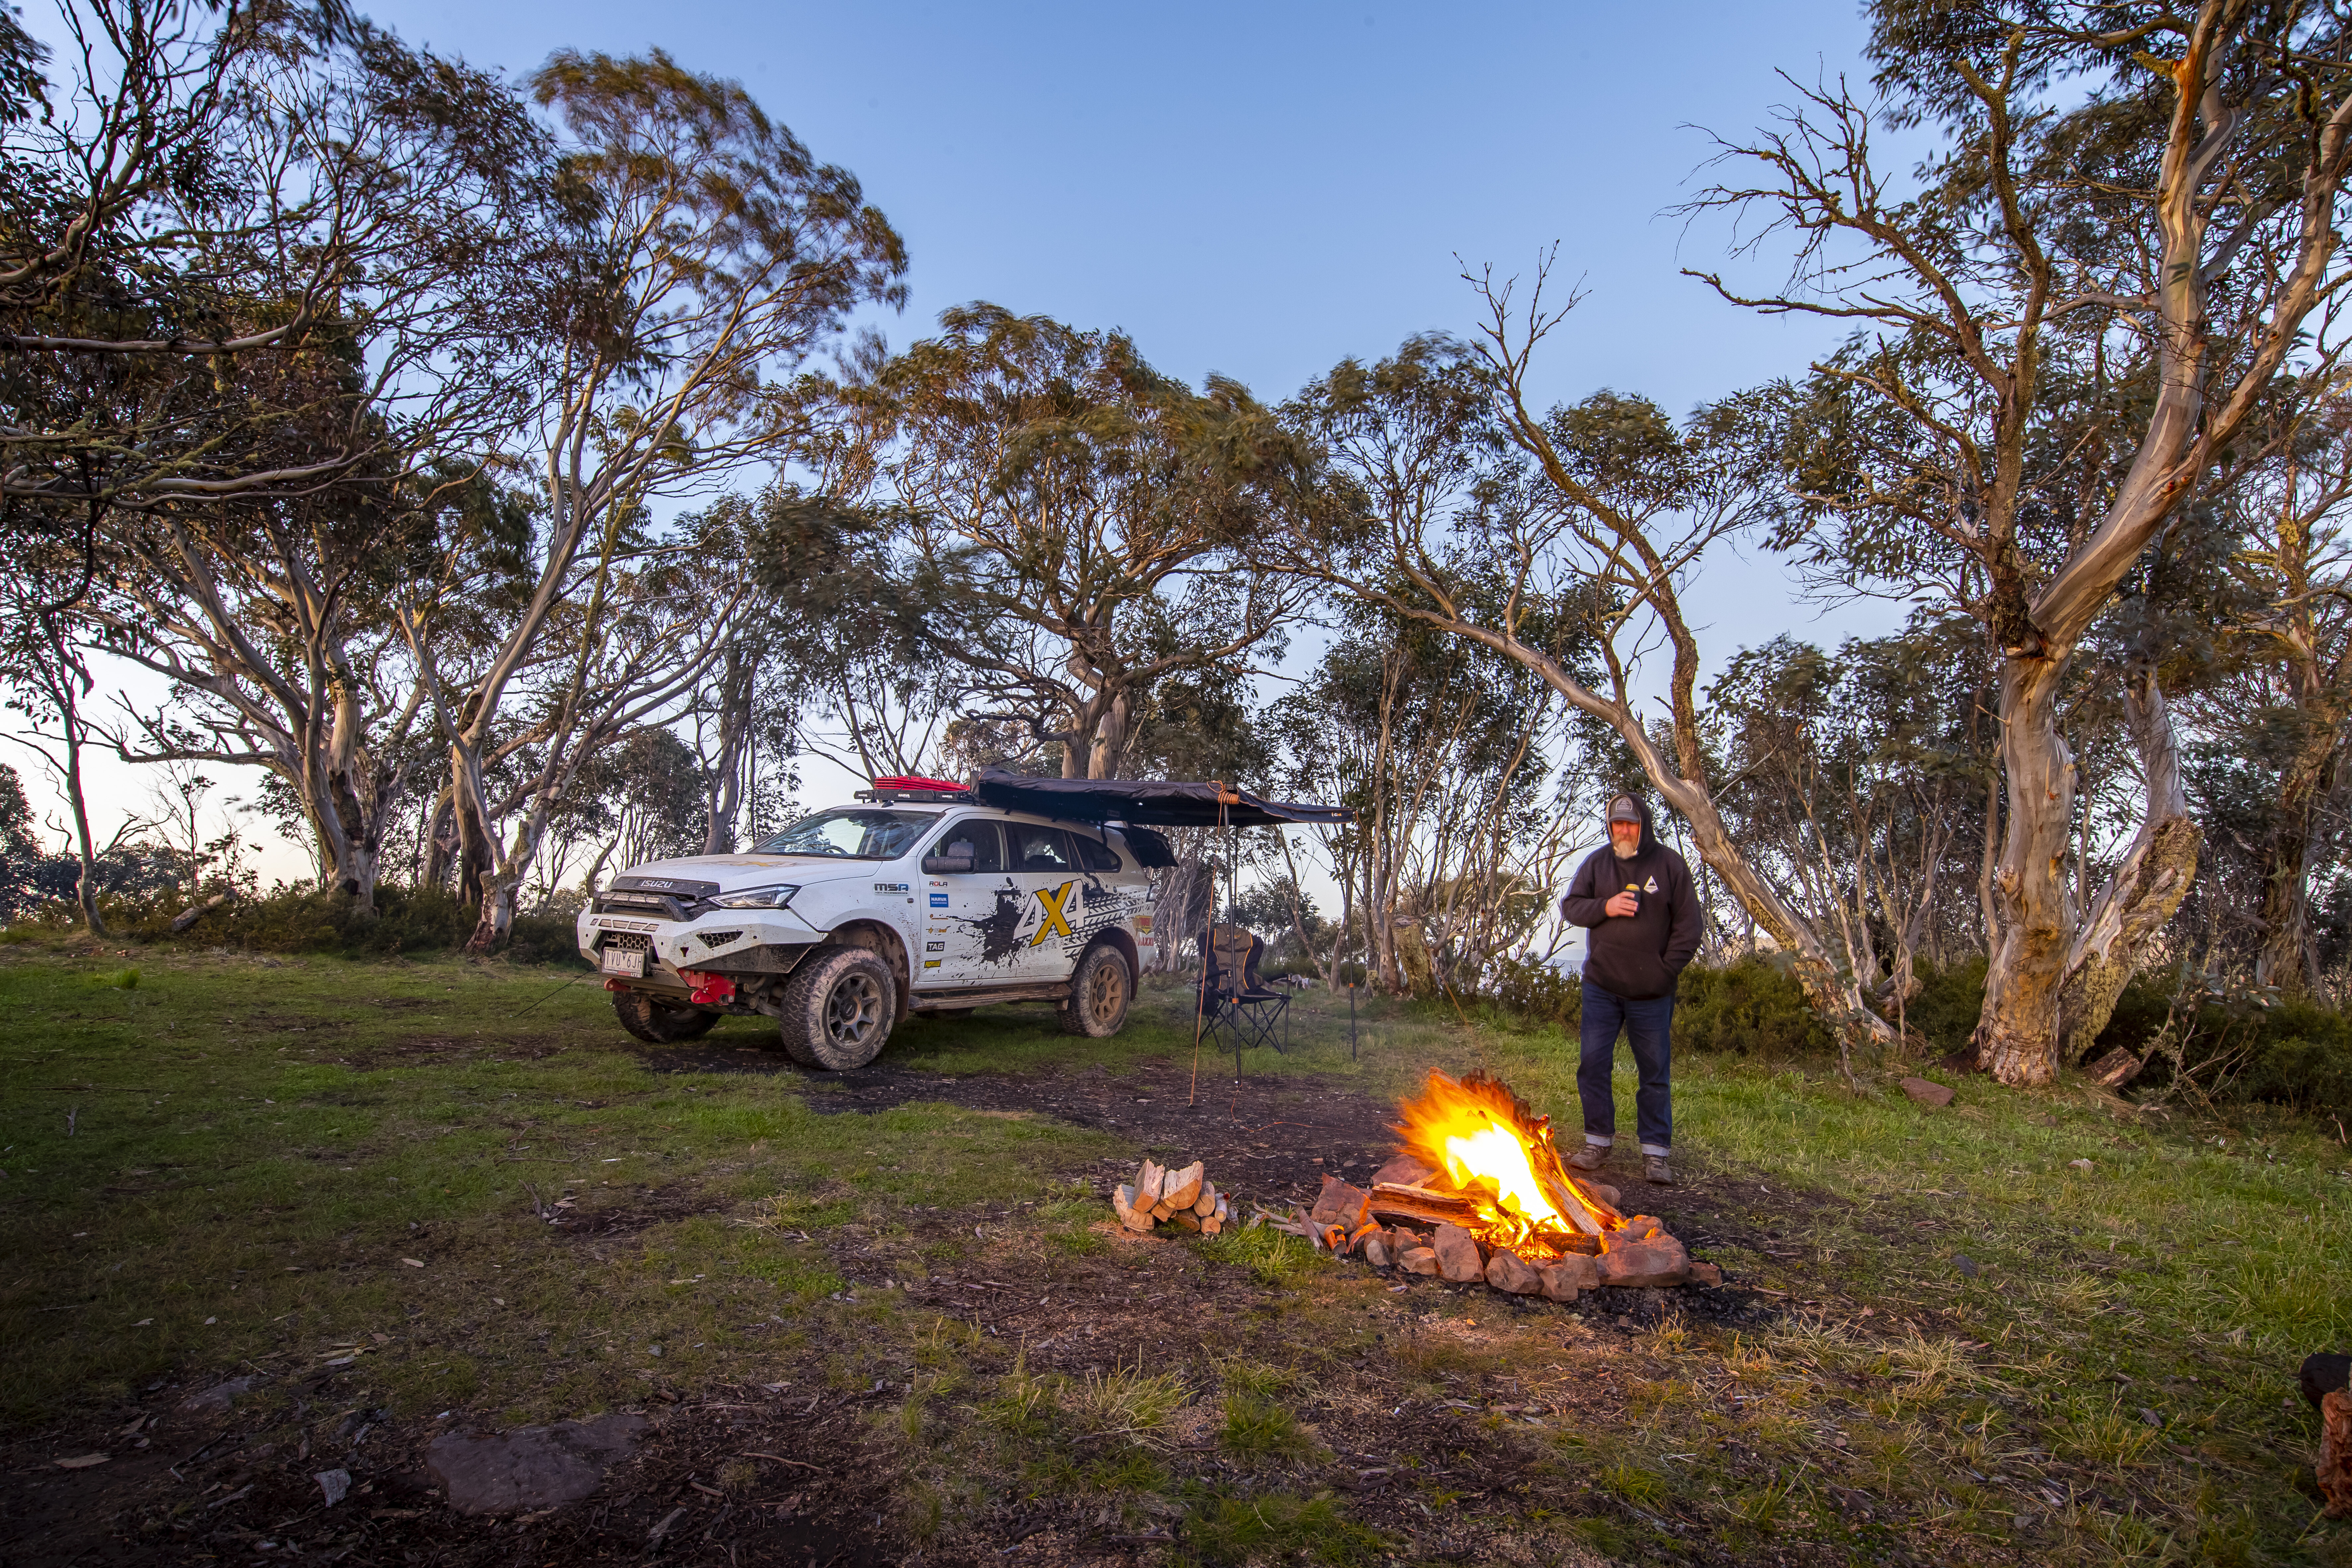
1
The BlockOut 270° awning includes all necessary poles, pegs and guy ropes to erect and secure the product for all conditions. It also includes brackets to mount the awning to most popular roof racks. We mounted ours to the Rola Titan Rack using quick-release brackets from RacksBrax, for fast and easy removal from the vehicle when it’s not needed.
The awning and its poles pack up neatly in the heavy-duty PVC zip-up bag on the side of your vehicle.
Put to the test
I have to admit I was slightly daunted by the prospect of setting up the big BlockOut 270° awning for the first time when I pulled up to solo camp in the Victorian High Country. I needn’t have worried as it was pretty simple after unzipping the storage bag and unfurling it in to position, dropping the telescopic poles and then tying them all down.
I did have some trouble with the MU-X’s rear door fouling on the awning arm when set-up and not being able to open the door to its fullest. I have since rectified this by loosening off the mounting brackets when the awning was packed away, and moving it forward on the roof rack around 50mm so that the rear door clears the awning when it is unfurled.
We reckon you could get away with unfurling it without tying it down for quick-stop shade on a still day, but it’s essential to tie it down securely for longer and overnight stops and/or with any hint of wind present. All that canvas easily catches the wind and can easily cause damage if it does.
1
You need to tie down the awning not just to secure it against any wind but also to pull the material taught to prevent the pooling of any water in between the awning arms. If and when it does rain, you can then lower the poles at one end of the awning to allow any water to drain away where you would prefer it to and not pool up above.
I’ve only used the awning in light rain so far and there was no problem with pooling. On that occasion I unfurled the front wall and pegged it to the ground and put my swag under the front section to keep it dry, allowing it to be packed away dry the next morning. With the swag under cover, there was still enough room under the awning for a couple of us to sit in shelter.
Pack-up for the first time was again daunting but proved to be relatively easy and has become more so with repeated use. Once you unpeg it from the ground and fold the poles up to where they clip to the C-section arms, you simply close it up, folding the material around the arms, and it all tucks back in place where it is secured with heavy-duty Velcro straps.
1
Try to keep the material spread across the arms rather than bunched up and it will be easier to do the zipper up on the storage pouch as this can get tricky. I would like to see a heavier duty zipper used here with a bigger pull-tag on it, to make it easier to close up.
All in all the OZtrail BlockOut 270° awning has done what it says it will do in the brochure. It has provided us with cover from the sun and rain, and it’s self-contained and relatively easy to unfurl and put away, even single-handed. Shorter users will want to have a step handy to make things easier, especially if their car has a high roof – but this isn’t an issue for my 185cm height.
The BlockOut 270° can be mounted on your vehicle rack, along with other accessories and even a rooftop tent if they are your thing. The awning weighs 27.17kg, so adding it with an RTT and the weight of the roof rack itself could be pushing your vehicle’s roof capacity to its limits.
1
We know it would certainly exceed the MU-X’s 100kg rating. The other alternative is to mount the awning on your camper trailer, which would allow you to drive your car away while leaving your camp set up.
At $1199.99 the BlockOut 270° is at the more affordable end of awnings of this design, so you could potentially buy one for both your 4×4 and your trailer for the same price as one of the more expensive examples.
Pricing
RRP: $1199.99 Available from: www.oztrail.com.au
Water crossings are about the only off-road driving scenario where you actually want to be left high and dry, and in this instalment of 4X4 Australia’s How To Off-Road Driving series we’re going to take you through the steps to ensure you and your rig make it safely across to the other side.
MORE
How To: 4WD in mud
Tackling your first deep water crossing can be one of the most intimidating off-road driving experiences you will ever face. After all, how many failed water crossings have you seen on social media, or even on the TV news, where vehicles have become stuck halfway across a flooded causeway or, even worse, are washed downstream.
The first things you need to know about water crossings is when it’s okay to drive across them and when it is not, and that will depend on several factors including the depth of the water, the speed at which the water is flowing, the state of the terrain beneath the water’s surface, the type and capability of vehicle you’re driving, and what equipment your vehicle is armed with.
1
But first, a confession: over three decades of testing a huge number of four-wheel drives in differing terrain all over the world, I have performed countless successful water crossings; but a couple of years ago I managed to bugger one up big time.
By not heeding my own advice, I found myself stranded in the middle of a creek with a stalled engine that would not fire and nothing but a Tirfor to get me out of the drink. I made several mistakes that day, but the good news is we can all learn from them, so here goes …
Types of water crossings
It doesn’t matter where you drive your 4WD, sooner or later you are going to be faced with the prospect of having to tackle a water crossing, whether it be a crystal-clear high-country stream, a brackish waterflow on a coastal beach, or a murky brown river in desert country.
Depending on the water crossing, there are slightly different techniques to safely get across to the other side, which we’ll get to later, but regardless of the type of crossing, the first thing you should ask yourself: “Is driving through this water really necessary?” If there’s an alternative route that isn’t too far out of the way, then a bit of added time to the trip and some minor inconvenience is better than getting stuck up the proverbial creek.
Of course, there will likely be times that you have no alternative other than to drive through a water crossing, in which case you will need to know what you are up against before you dive in.
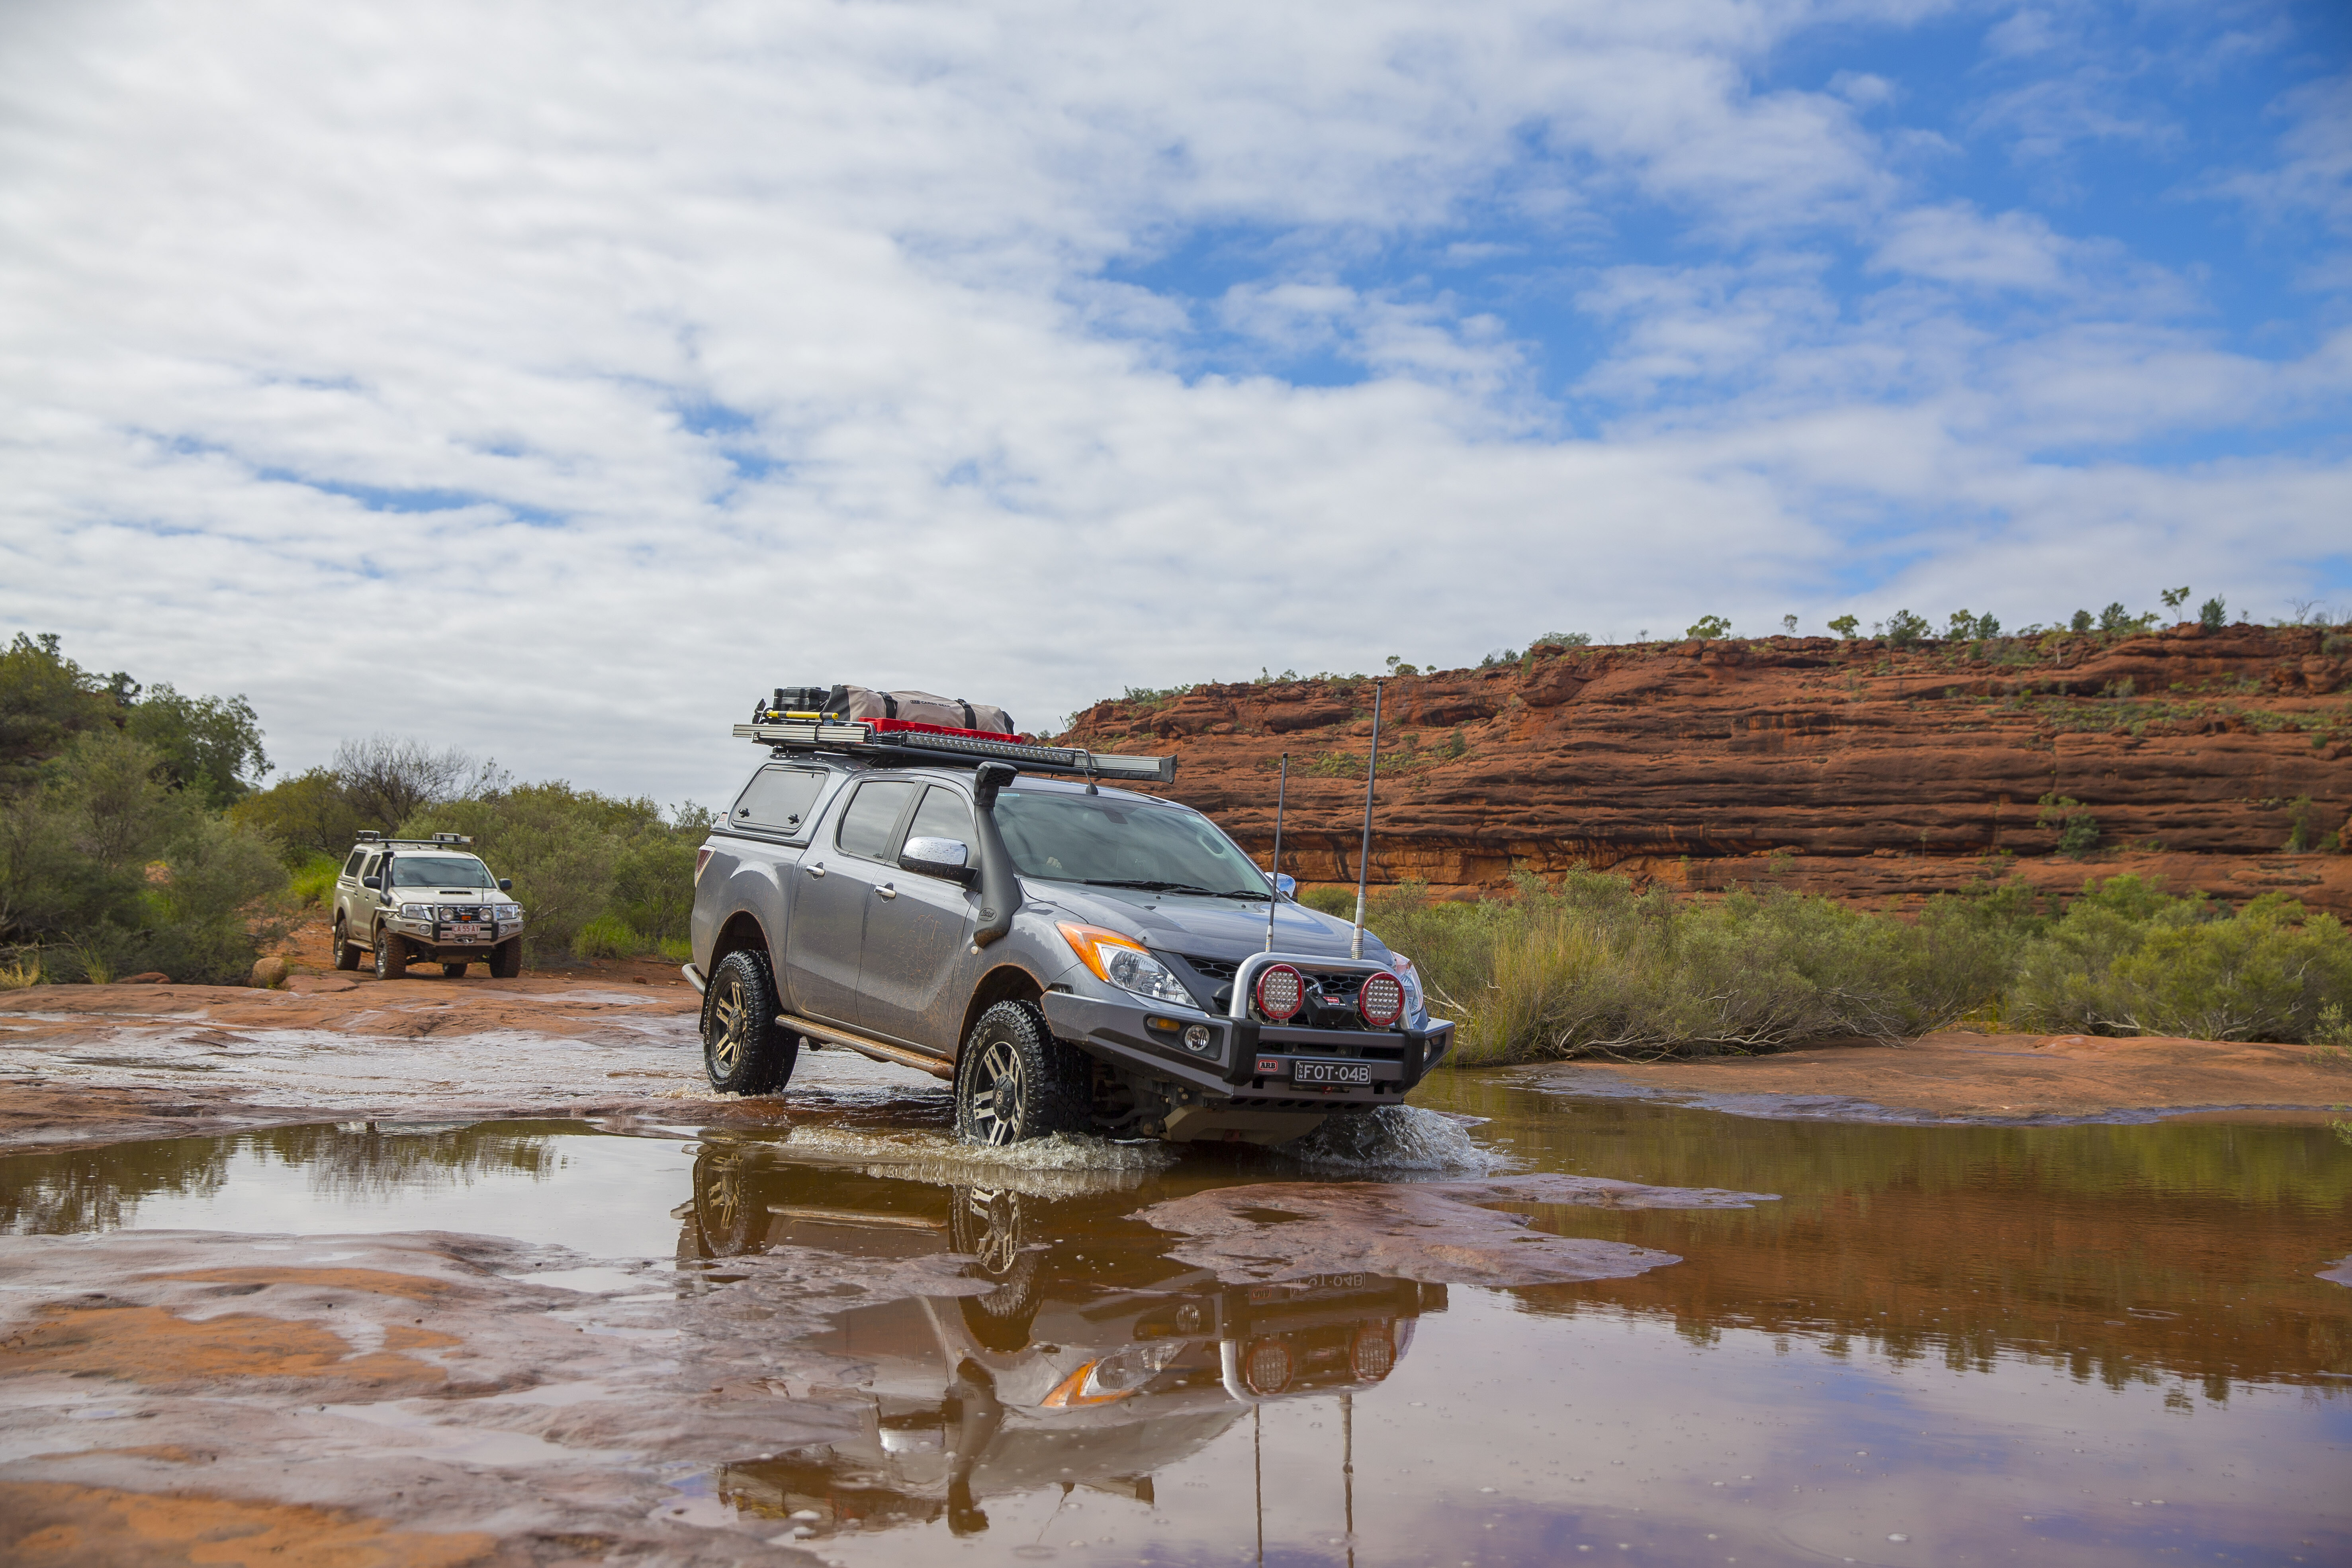
1
High Country creeks and streams can be deep and fast-flowing, and the terrain beneath the surface will usually consist of river stones and boulders, with potential obstacles including tree trunks, branches and deep holes. All of these can cause your vehicle to become stuck, and they can all cause damage.
Water crossings on coastal beaches are usually caused by water flowing from beyond the dunes and into the sea, but close to the waterline the direction of flow will depend on whether the tide is coming in or going out. As a result, the water will be brackish, a combination of fresh inland water mixing with sea water. The edges of these crossings can be like vertical steps, so take care when entering and exiting.
Murky brown rivers in desert country will have a sandy or muddy base, and in the case of the latter can suck your vehicle in and not want to let go, so you’ll need to use all the traction aids at your disposal and keep momentum up to get to the other side.
Essential gear for water crossings
| Snorkel |
| Diff breather extensionsu00a0 |
| Radiator blind (car bra) |
| Rated recovery points |
| Shackles and recovery straps |
| Winch |
| WD-40 (or similar) |
| UHF radios |
Stop and study
The first thing to do when confronted with any unfamiliar water crossing is to stop and take a good look. Secure your vehicle, get out and examine the water crossing ahead of you.
If the water is clear and you can gauge that it’s not too deep, that the water isn’t flowing too fast, and you can see a clear route that will avoid any potential obstacles such as rocks, logs or deep holes, you might be able to get back in your vehicle and drive across.
Before you do this, however, take a good look at the entry and exit points to make sure there are no steep drop-offs that you could get hooked up on, or deep and muddy ruts that could see you scrabbling for traction when trying to drive out.

1
If you can’t judge the depth of the water from the bank, and you really need to get across to the other side, it’s always best to walk the crossing first, but make sure it is safe to do this before stepping in, because you don’t want to be washed downstream if you lose your footing in fast-moving water, or get gobbled up by a saltie if you’re driving through croc country.
When walking the crossing you will be able to gather a lot more information than just the depth and rate of the water flow. You will be able to feel around with your feet to determine if the crossing has a rocky or muddy base, and you will be able to feel if there are any unseen obstacles and where any deep sections might be.
Having footwear that can get wet is a good idea, because going barefoot can be painful and potentially dangerous. And wearing polarised sunnies can help you to see what lurks beneath the surface, so if you don’t normally wear them, it’s a good idea to store a pair of these in your vehicle.
If you can easily walk across to the other side, and you know where the obstacles are, you will have a good chance of driving across without a problem; but if you’re finding it hard to keep your footing because the water is too deep or flowing too fast, chances are your vehicle will struggle too, and an alternative route should be found.
Under pressure
Stopping to examine the water crossing before driving across provides your vehicle with a chance to cool down, which is a good thing. Your vehicle’s mechanical components (engine, gearbox, transfer case and diffs) get hot when driving, and when these hot components are dunked in icy-cold water, the pressure inside them decreases rapidly, creating negative pressure.
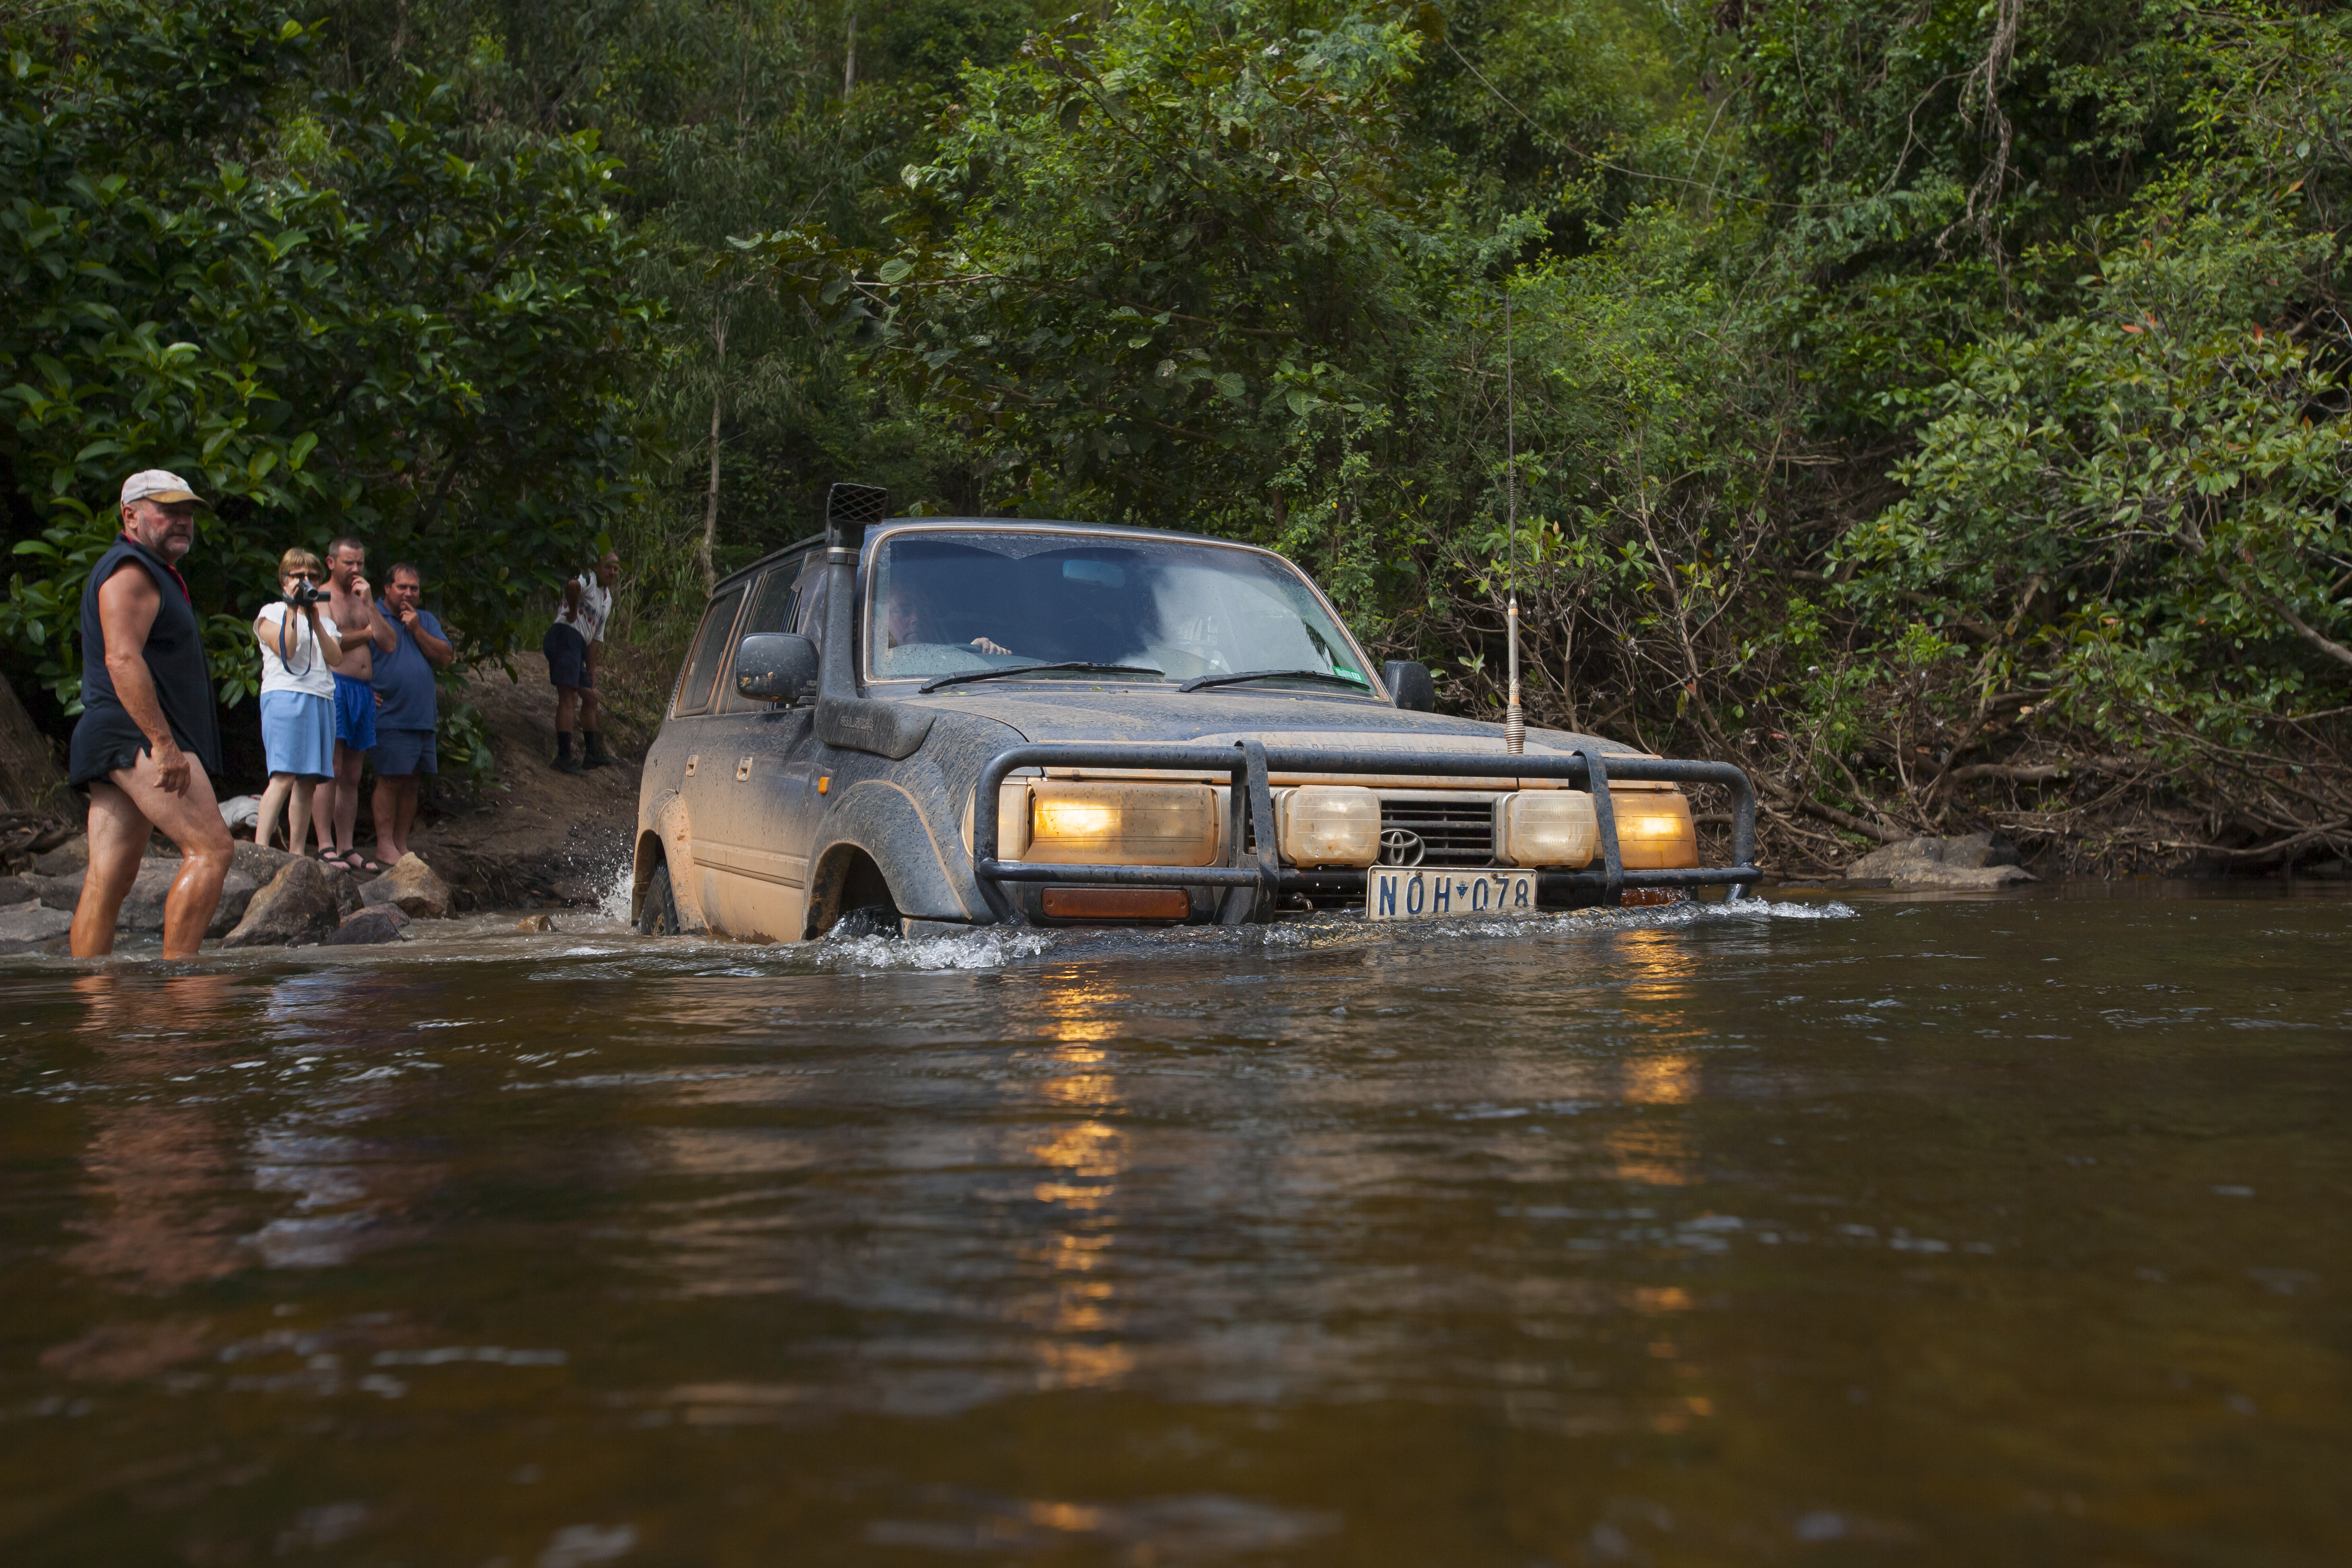
1
As a result they will want to suck in the surrounding water, which will contaminate the oil inside. These components are fitted with breathers, usually with one-way valves, to prevent water ingress, but if the pressure difference is great enough, water can still get into diffs through axle seals, for example, and find its way into other mechanical components.
Another way to equalise the pressure inside and outside of the differentials is to replace the OE one-way valves on the diff breathers with diff-breather extension tubes that are plumbed up high in the engine bay, where water is unlikely to reach. These will usually be fitted with filters that let air in and out but not water. You can also get extension tubes for the gearbox and transfer case.
Breathing easy
It’s imperative that you know what your vehicle’s maximum wading depth is, and that you don’t exceed it. Some 4WDs have a very limited wading depth of around 500mm, which is essentially knee height, while others will claim a wading depth of almost a metre.
Things that have a bearing on wading depth include where the engine air-intake is positioned and its orientation, the height of the alternator in the engine bay and the location of fuse boxes. Regardless of your vehicle’s maximum wading depth, this can be increased by fitting aftermarket equipment including a quality snorkel.
A snorkel raises the vehicle’s engine air-intake to prevent the engine from ingesting water. This is of vital importance because if water gets past the air filter and into the engine, it can at best cause the fire to go out (stall the engine) leaving you stranded in the middle of the water crossing.
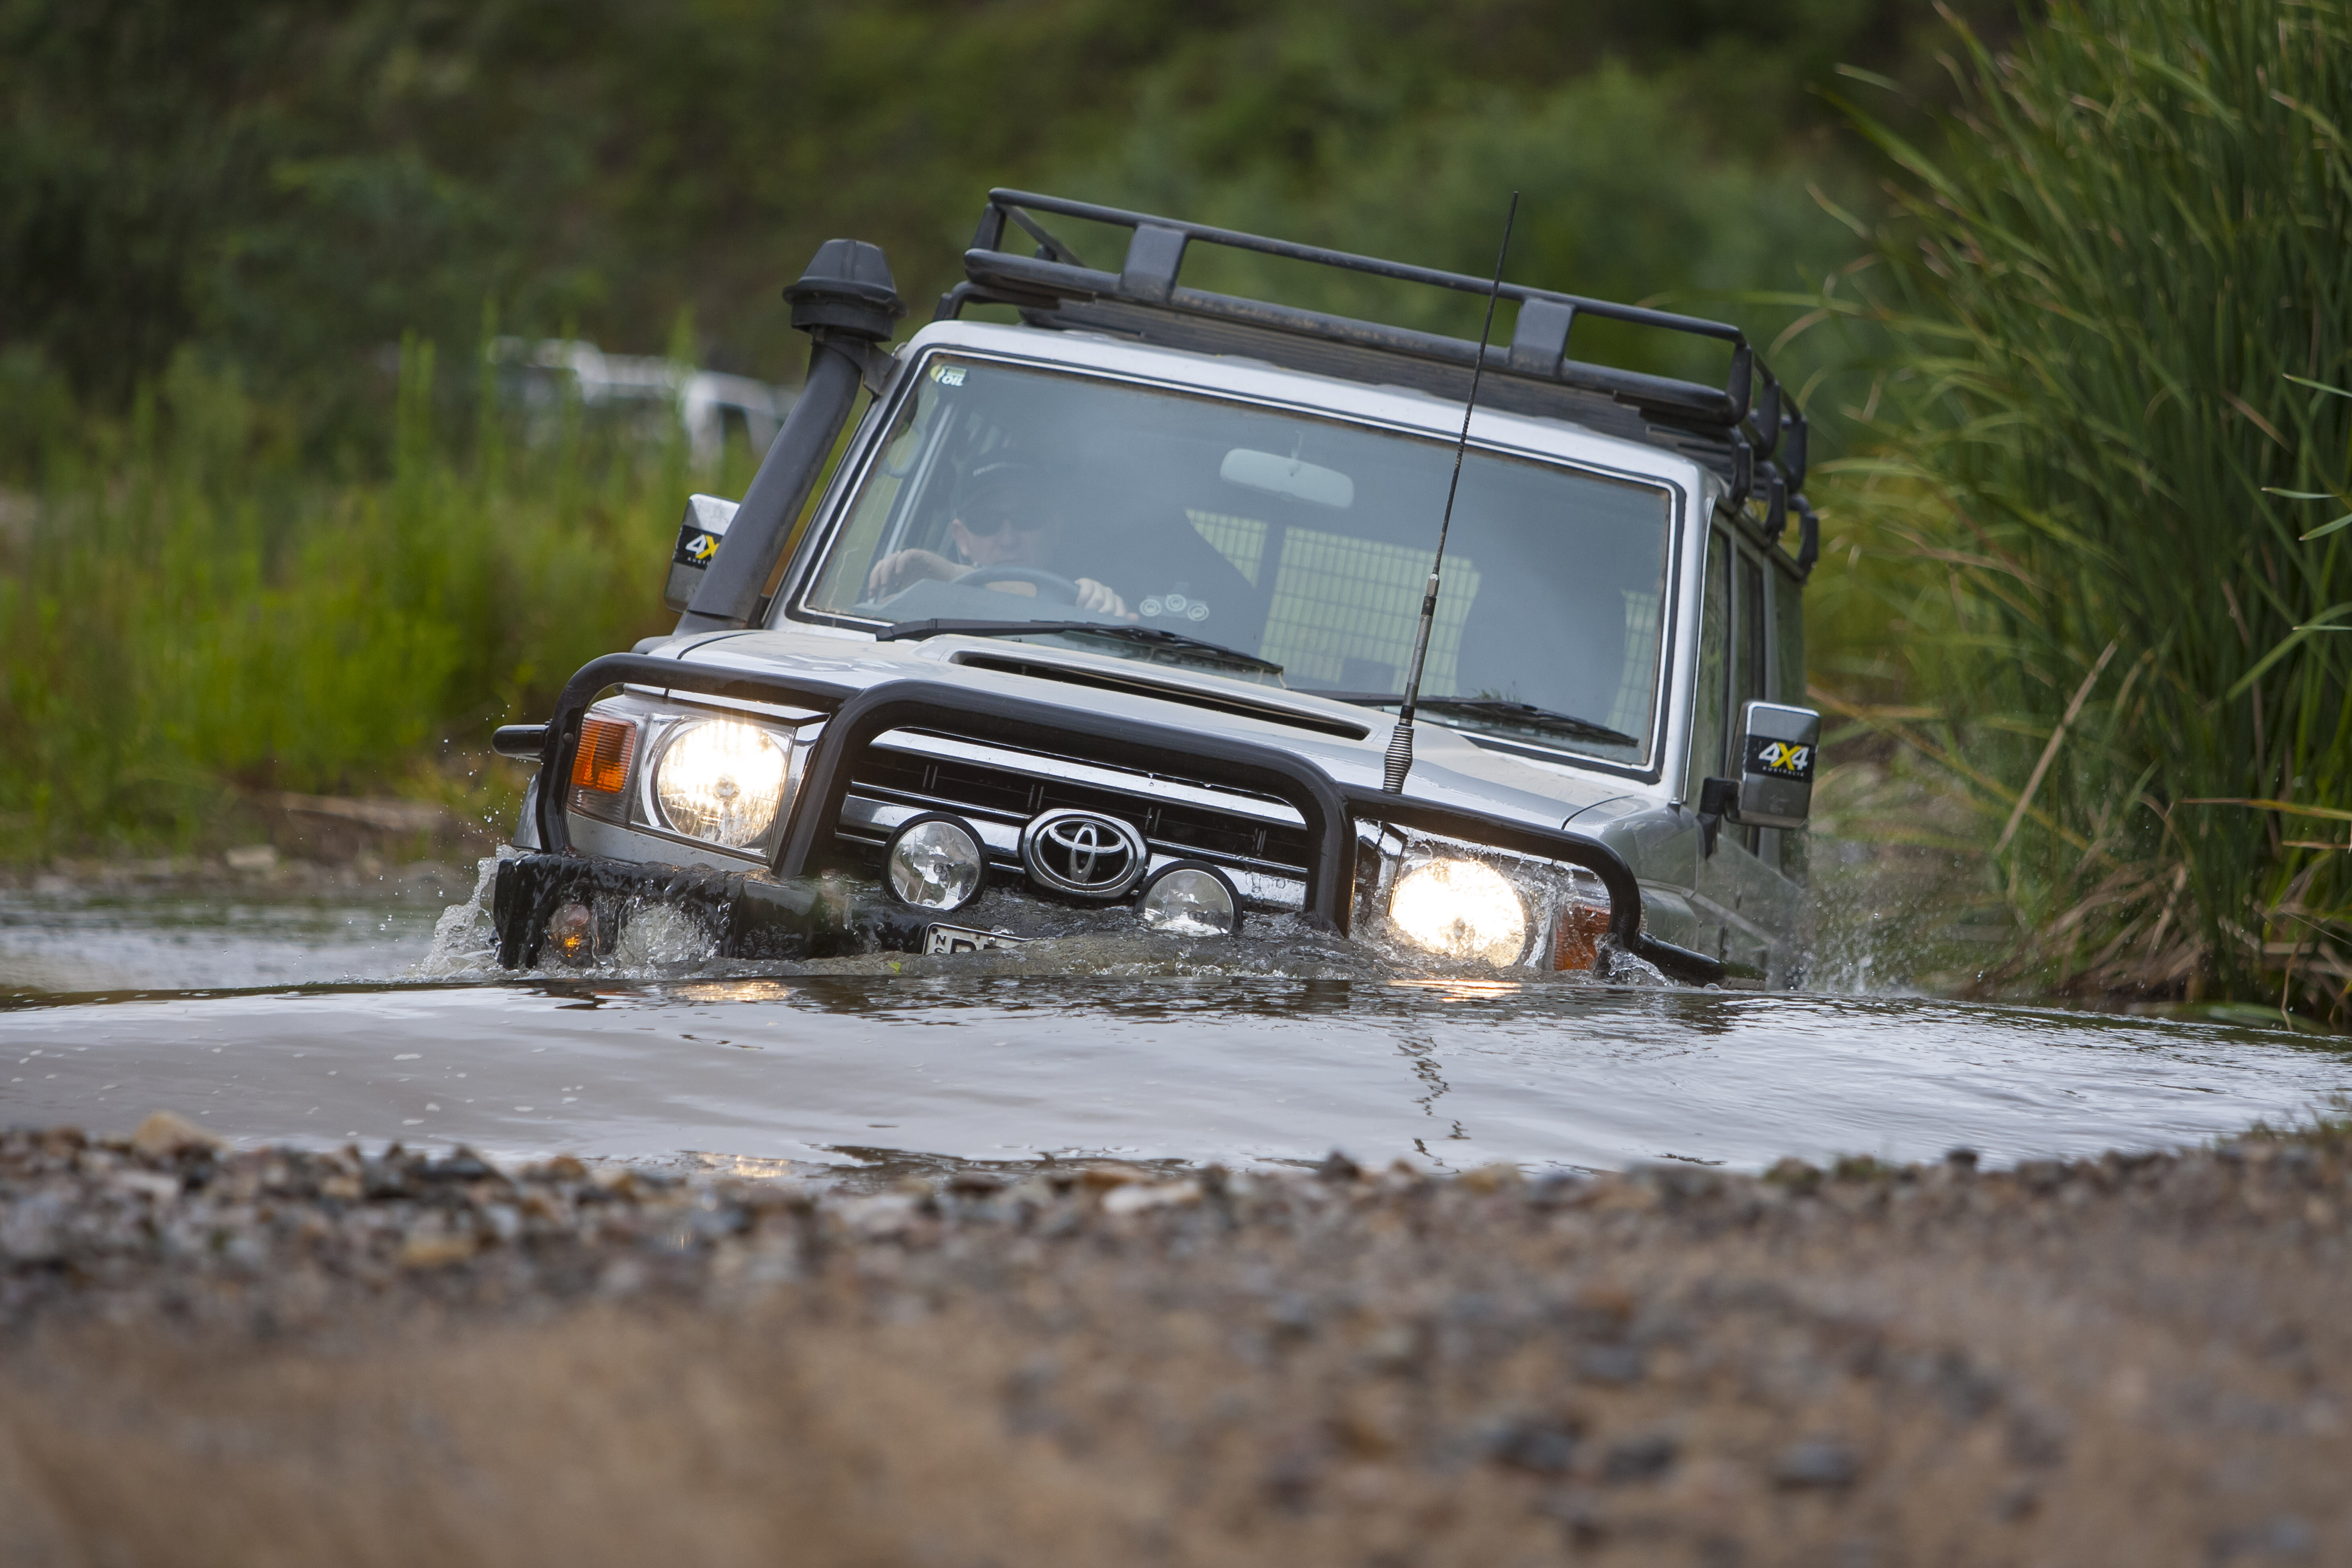
1
Even worse, it can cause the engine to suffer from hydraulic lock, which is when water gets into the cylinders, and as the pistons go up and down they try to compress that non-compressible water, usually resulting in bent conrods and terminal engine failure.
Bear in mind that some snorkels are better than others. What looks like a standard OE snorkel on a 70 Series LandCruiser, for example, is actually described by Toyota as a raised air-intake, and it has many joins with gaps where water can get in. A good-quality snorkel, on the other hand, has airtight fittings so water can’t be sucked into the engine, and it will also be designed so that it won’t restrict airflow that could impact engine performance and fuel economy.
Another handy piece of equipment when tackling water crossings is a radiator blind that can be fitted to the front of your vehicle, and this can either be a well-secured tarpaulin or a tailor-made aftermarket design. A radiator blind, as its name suggests, is designed to direct water flow around the engine rather than through the radiator and into the engine bay.
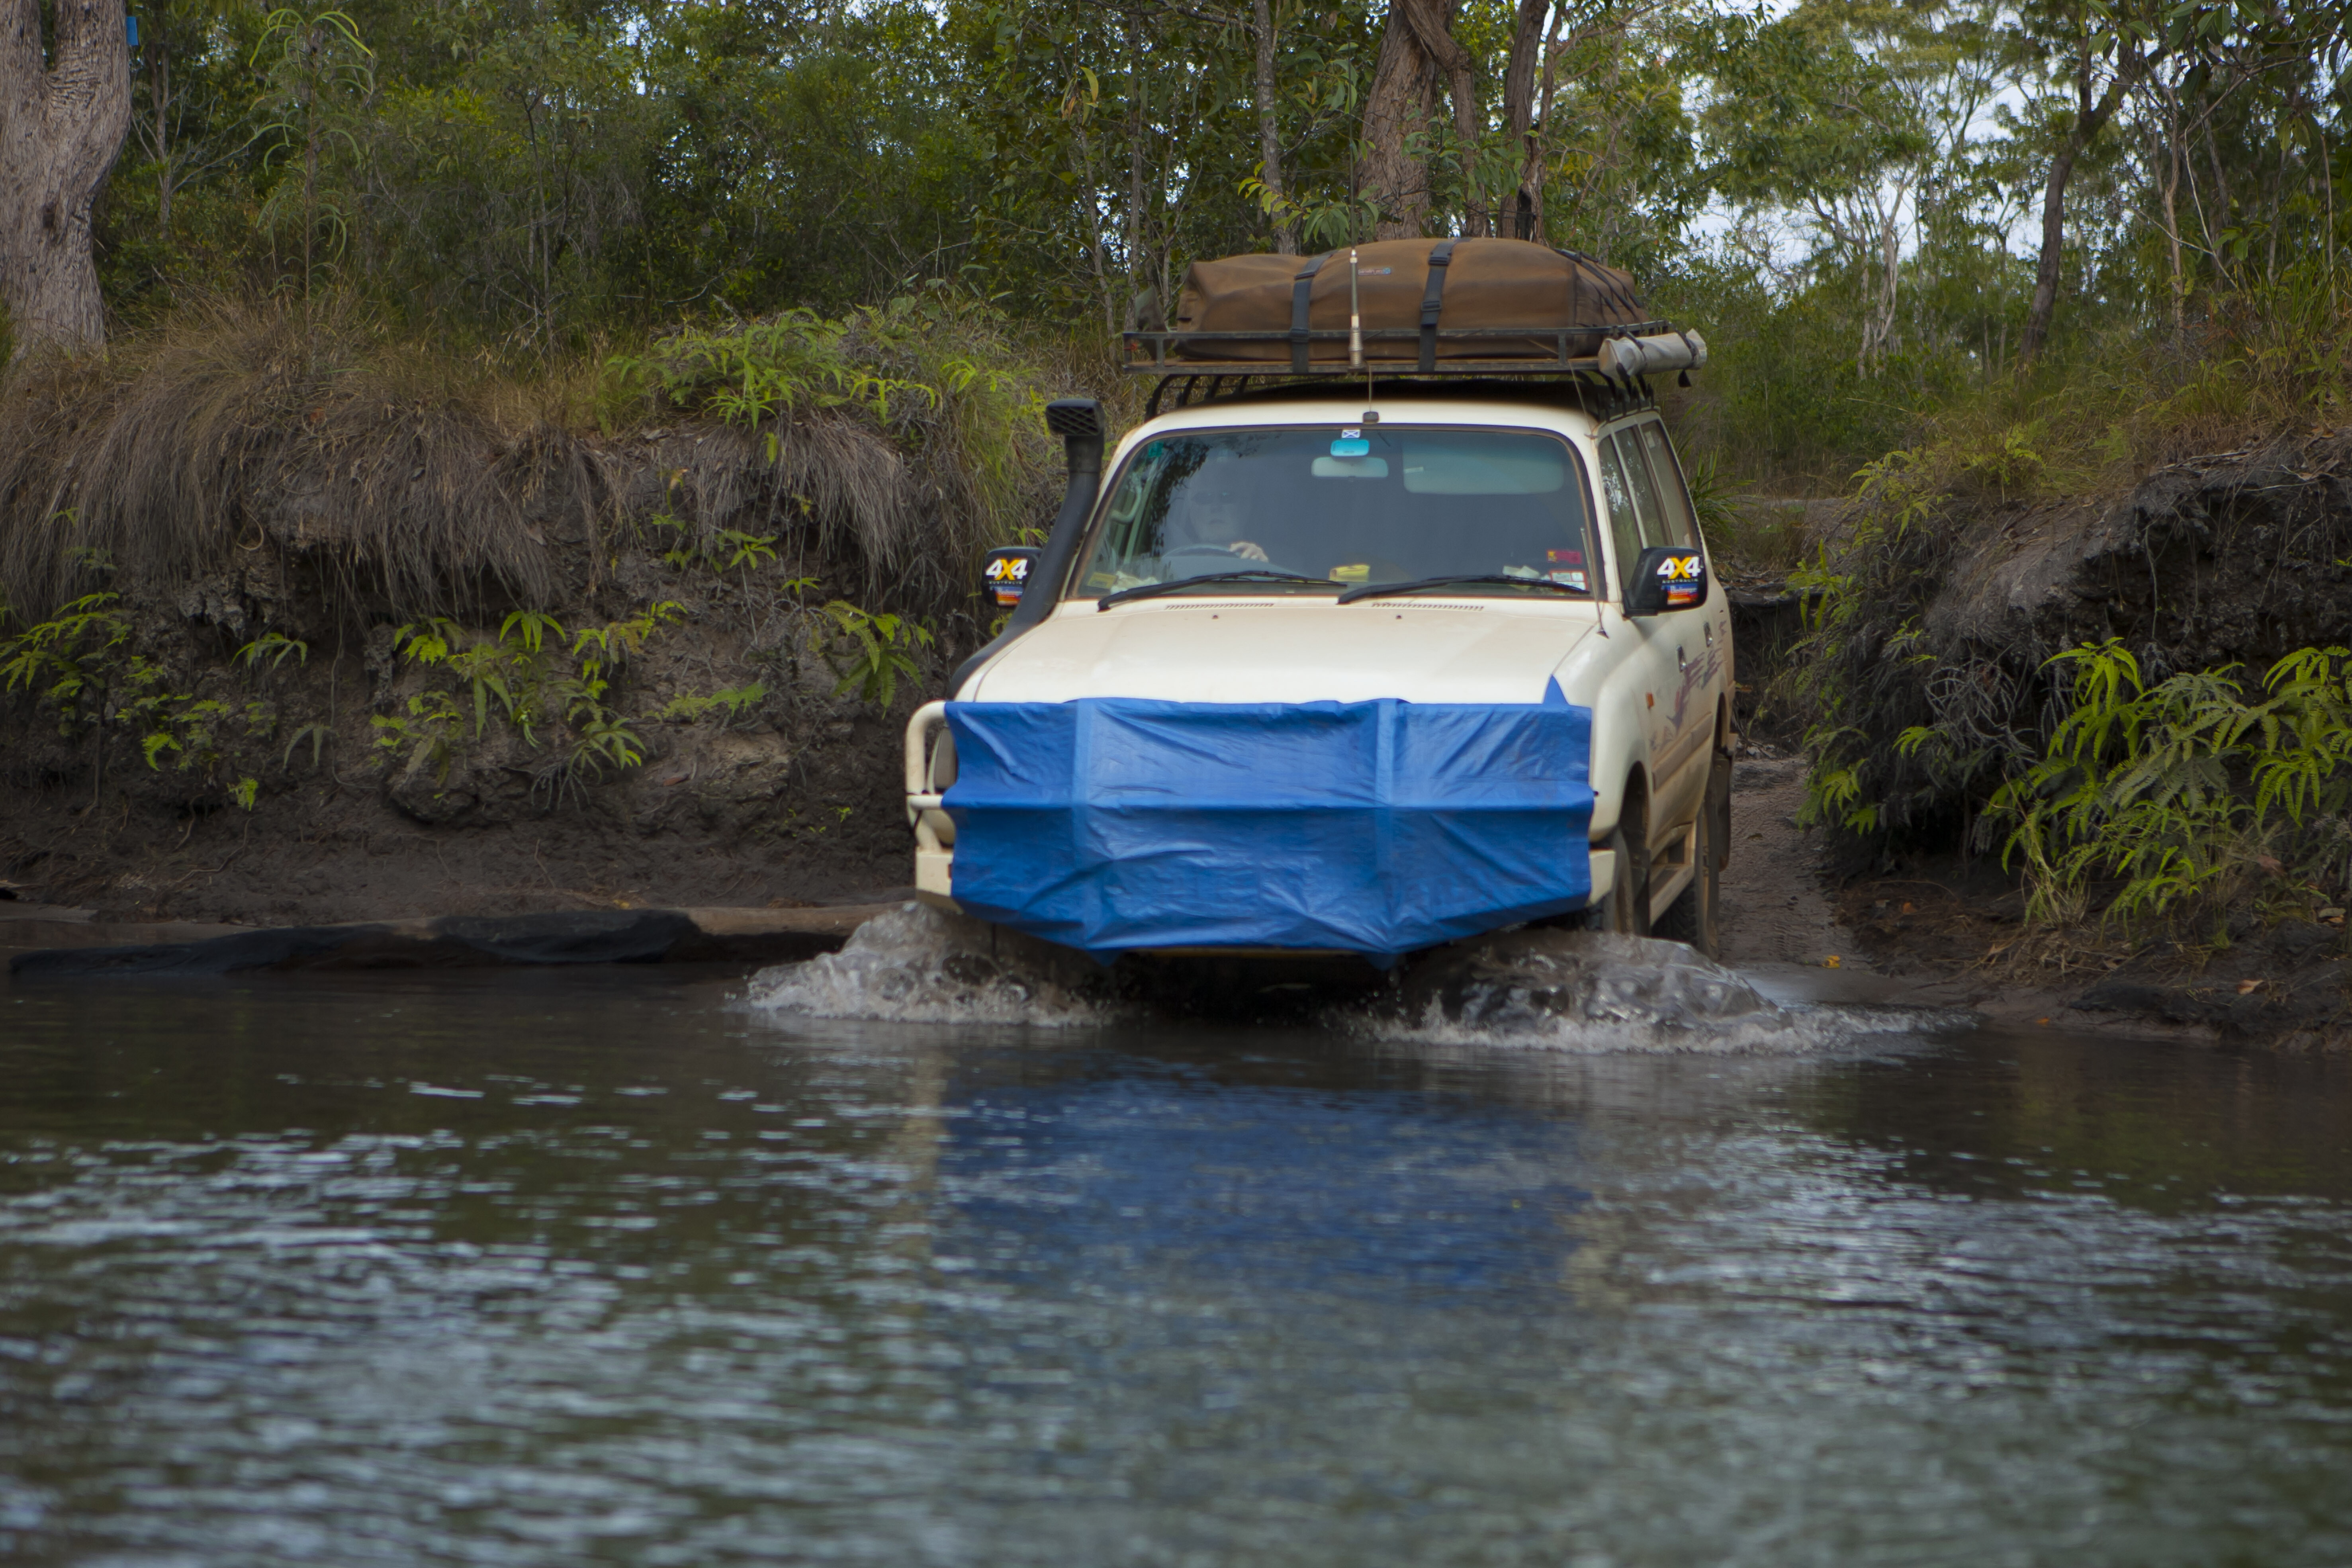
1
If water passes through the radiator, it can cause the nylon blades on an engine’s spinning cooling fan to bend forward and cut through the radiator’s cooling fins, potentially resulting in a loss of coolant. Water that passes through the radiator and into the engine bay can also get into electrical components, resulting in the engine stalling.
If your engine stalls in the middle of a water crossing, it’s best to attempt to recover the vehicle rather than trying to get the engine going again in case water has made its way through the induction system and into the cylinders. If it has, you will need to remove the sparkplugs (petrol engines) or injectors (diesel engines) before cranking the engine over to pump the water out.
No matter whether you use a tarp or a dedicated radiator blind, always make sure it is properly secured to your vehicle and that you remember to remove it after you’ve driven out of the water on the other side.
Vehicle set-up
So, you’ve checked the water depth and the flow rate, you know where the obstacles are, and the entry and exit points are all okay, but before you drive into the water make sure your vehicle settings are appropriate to give you the best chance of getting across.
Firstly, make sure the driver’s window is down. If you get stuck in the middle of the crossing and your vehicle’s electrical system fails, you might need to climb out the window. Secondly, a liberal spray of a water dispersant (such as WD-40) on electrical connections, both under the bonnet and on your winch, is a helpful defence against water ingress.
Selecting the right ratio in the gearbox is imperative; second gear in low-range is ideal for most water crossings, as this will allow you to drive fast enough to create a bow wave at the front of the vehicle to stop water from flooding the engine bay, but slow enough that you don’t end up with water washing over the bonnet and halfway up the windscreen.
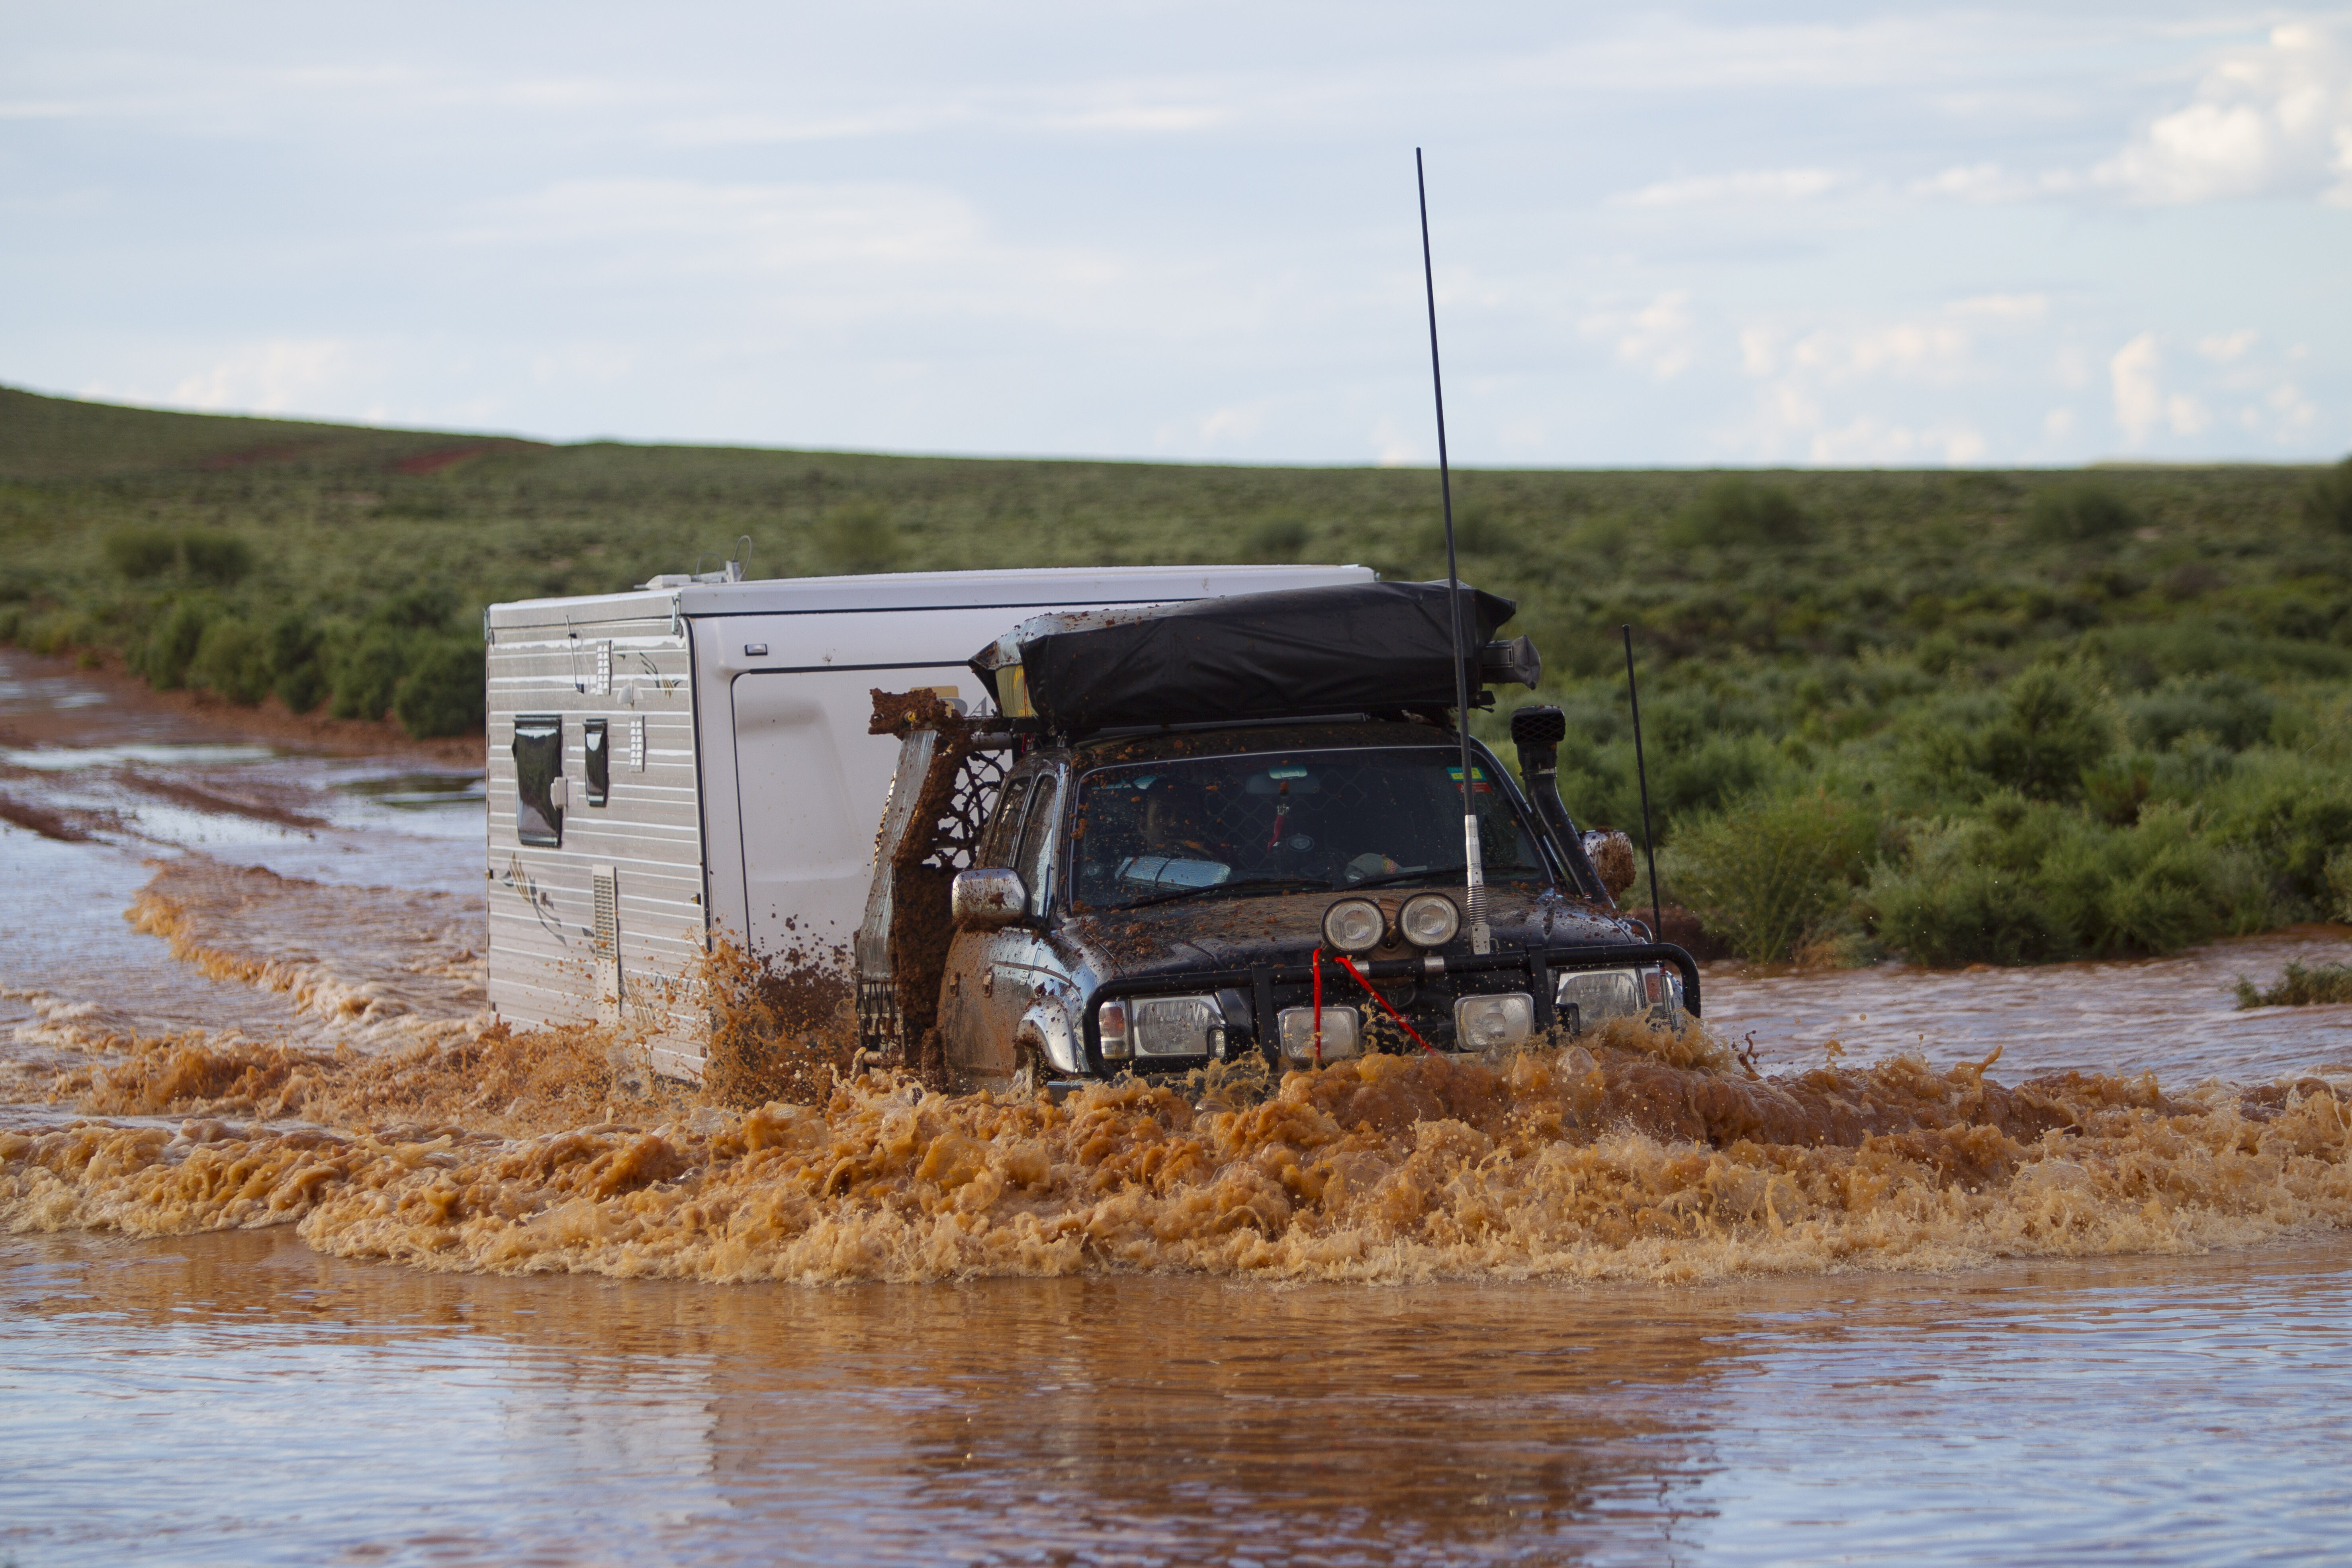
1
If your vehicle is equipped with locking differentials, engage them before entering the water so you have the maximum available traction. If your vehicle is equipped with different drive modes for different terrain types, select the one that best suits the conditions. If the water crossing has a rocky base, select ‘Rock’ mode for example, or if it has a muddy base select ‘Mud & Ruts’. Some vehicles will have a ‘Water Fording’ mode, and if that applies to your rig, use it.
Finally, have a look around for anchor points that you can use to recover your vehicle if something goes wrong, such as sturdy trees. Your vehicle should be fitted with rated recovery points front and rear, and you should have your recovery gear ready to go and in an easy-to-access spot.
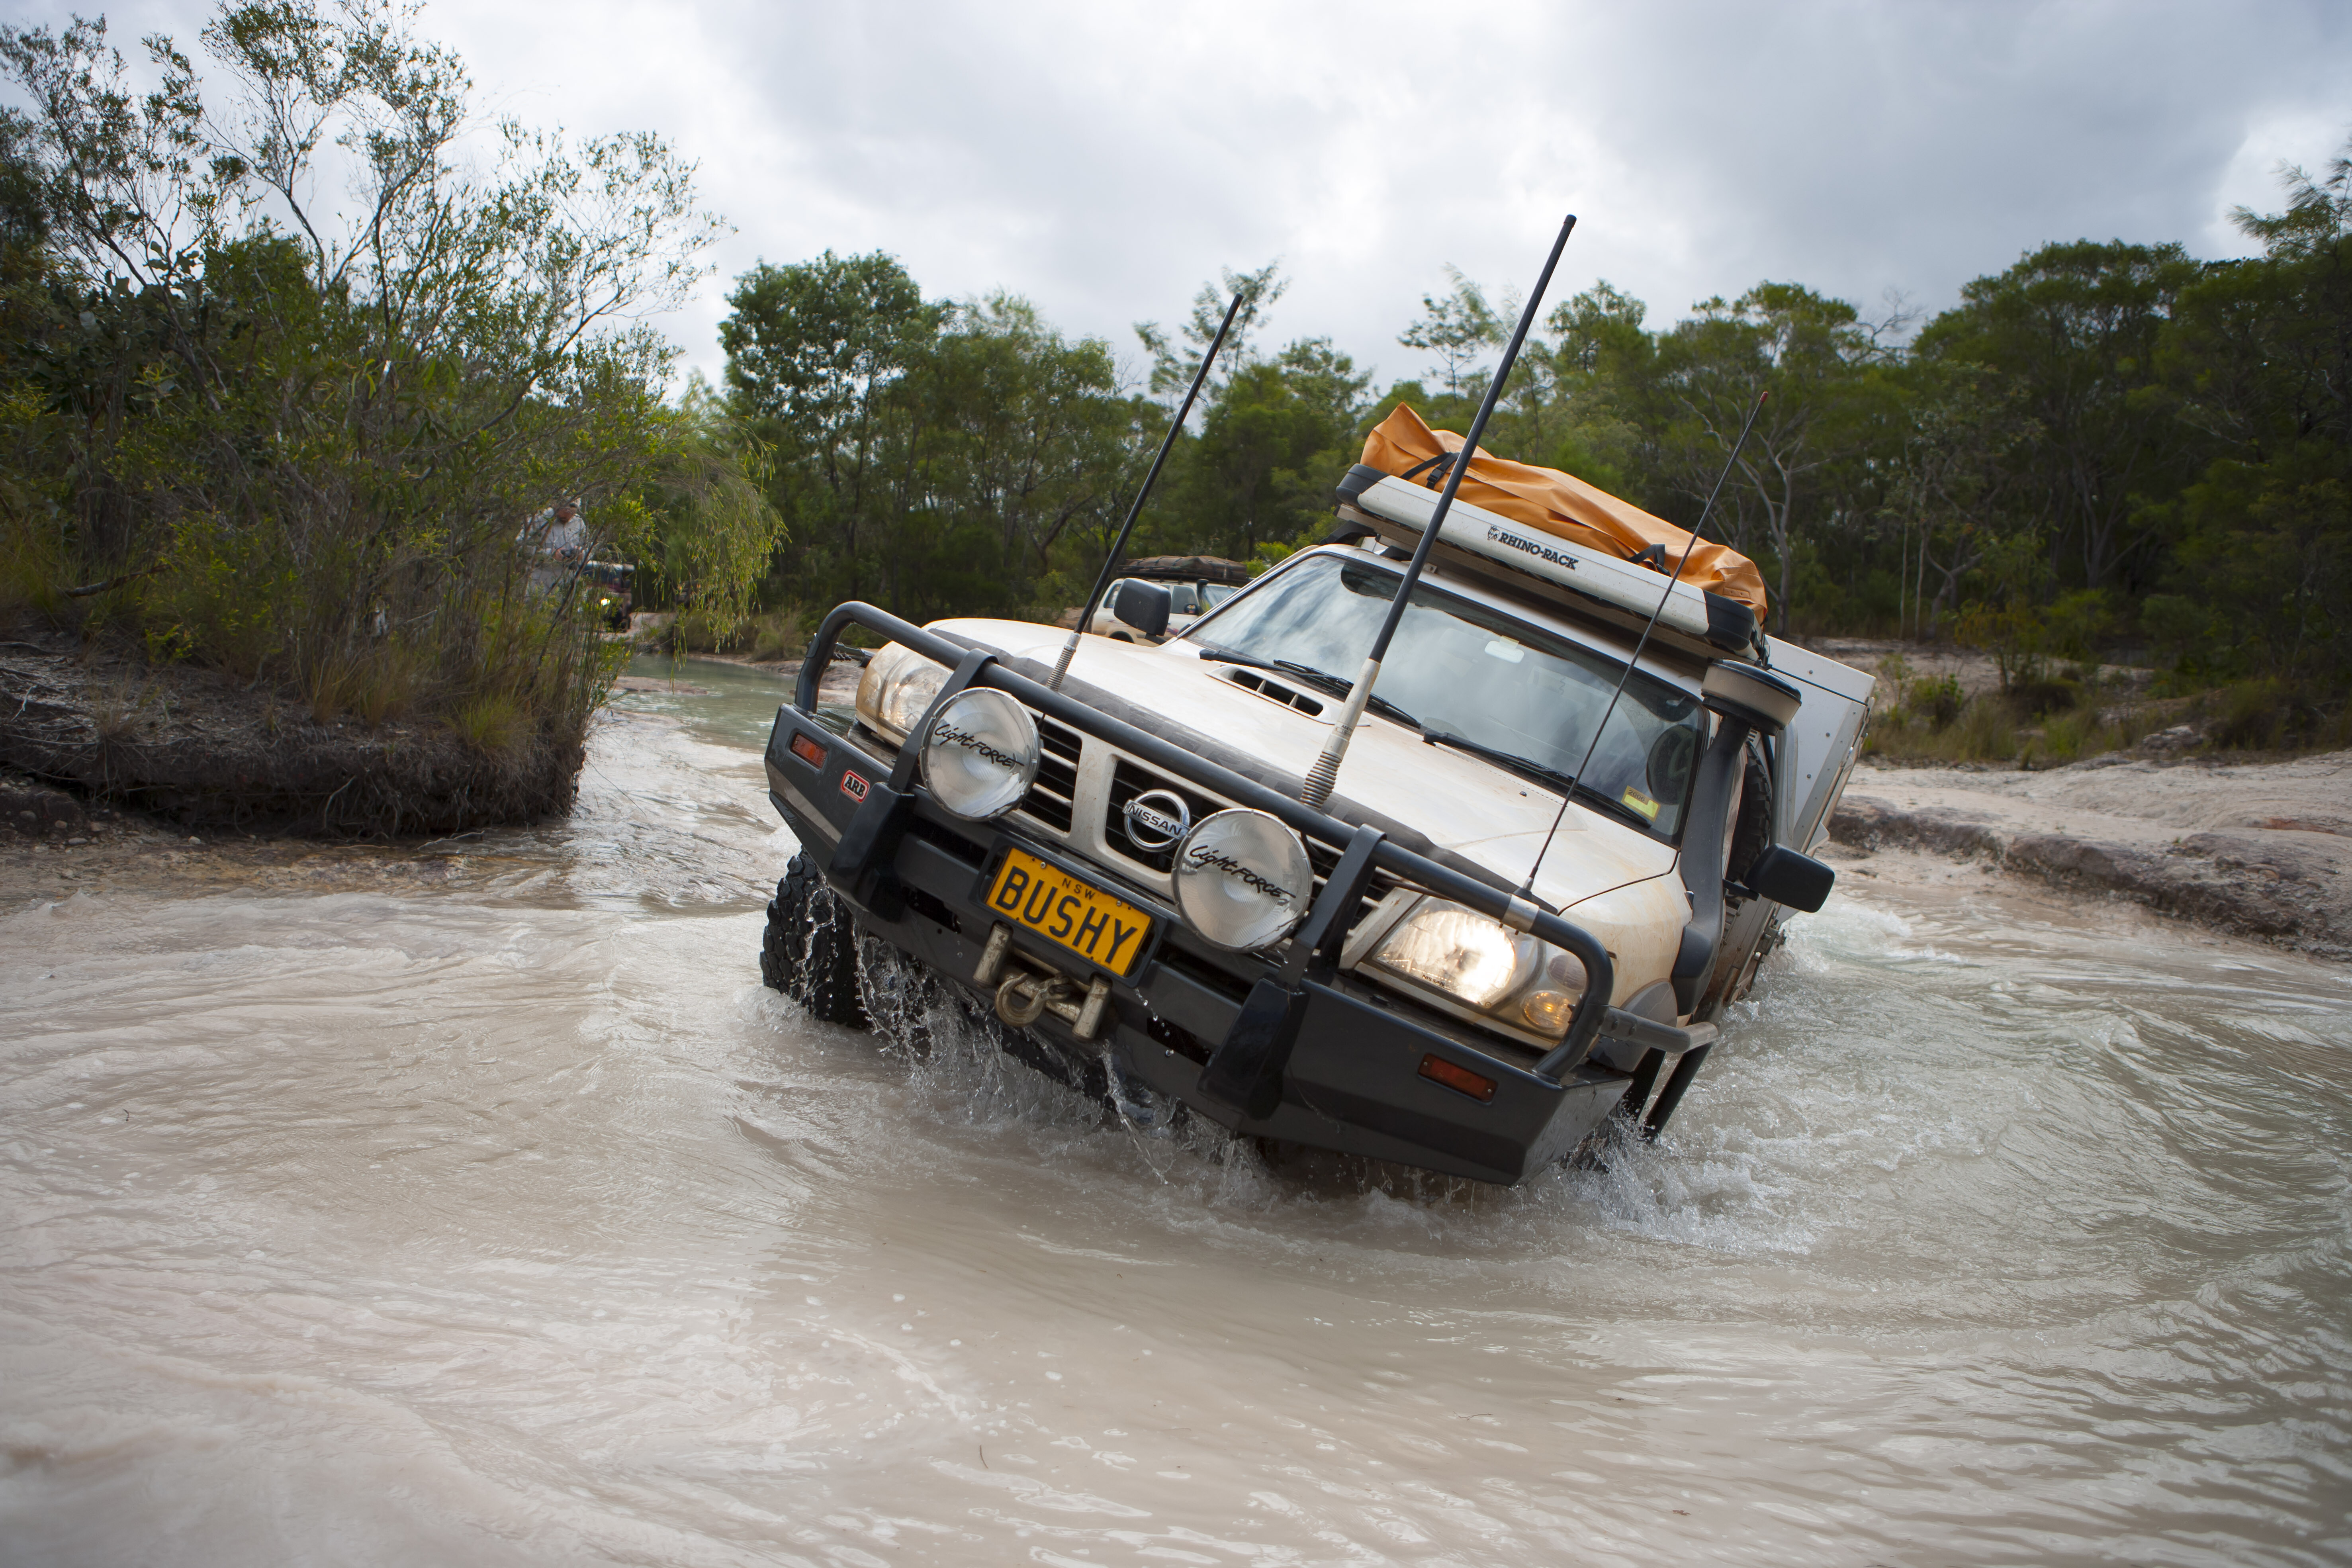
1
If you are travelling with other vehicles, make sure there is only one vehicle in the water at any one time, and have other vehicles suitably positioned to help in a recovery situation if required.
If you’re travelling solo, a winch is an invaluable piece of equipment if you become stuck, but bear in mind that electric winches can sometimes fail when submerged, so you need to be prepared for all eventualities. A Tirfor (hand winch) is a good back-up.
Steady as she goes
Drive into the water with caution, particularly if there is a steep entry point, but with enough momentum to prevent you from becoming stuck from the get-go.
As you drive through the water make sure you stick to your planned route so that you avoid any obstacles and deep holes that you spotted when examining the water crossing. You may need to make some steering adjustments as you go, particularly if the water is flowing fast enough to change the attitude of the vehicle. If there are other people with you, and they have a UHF radio, they can direct you from the bank to help you avoid obstacles that you might not be able to spot from behind the wheel.
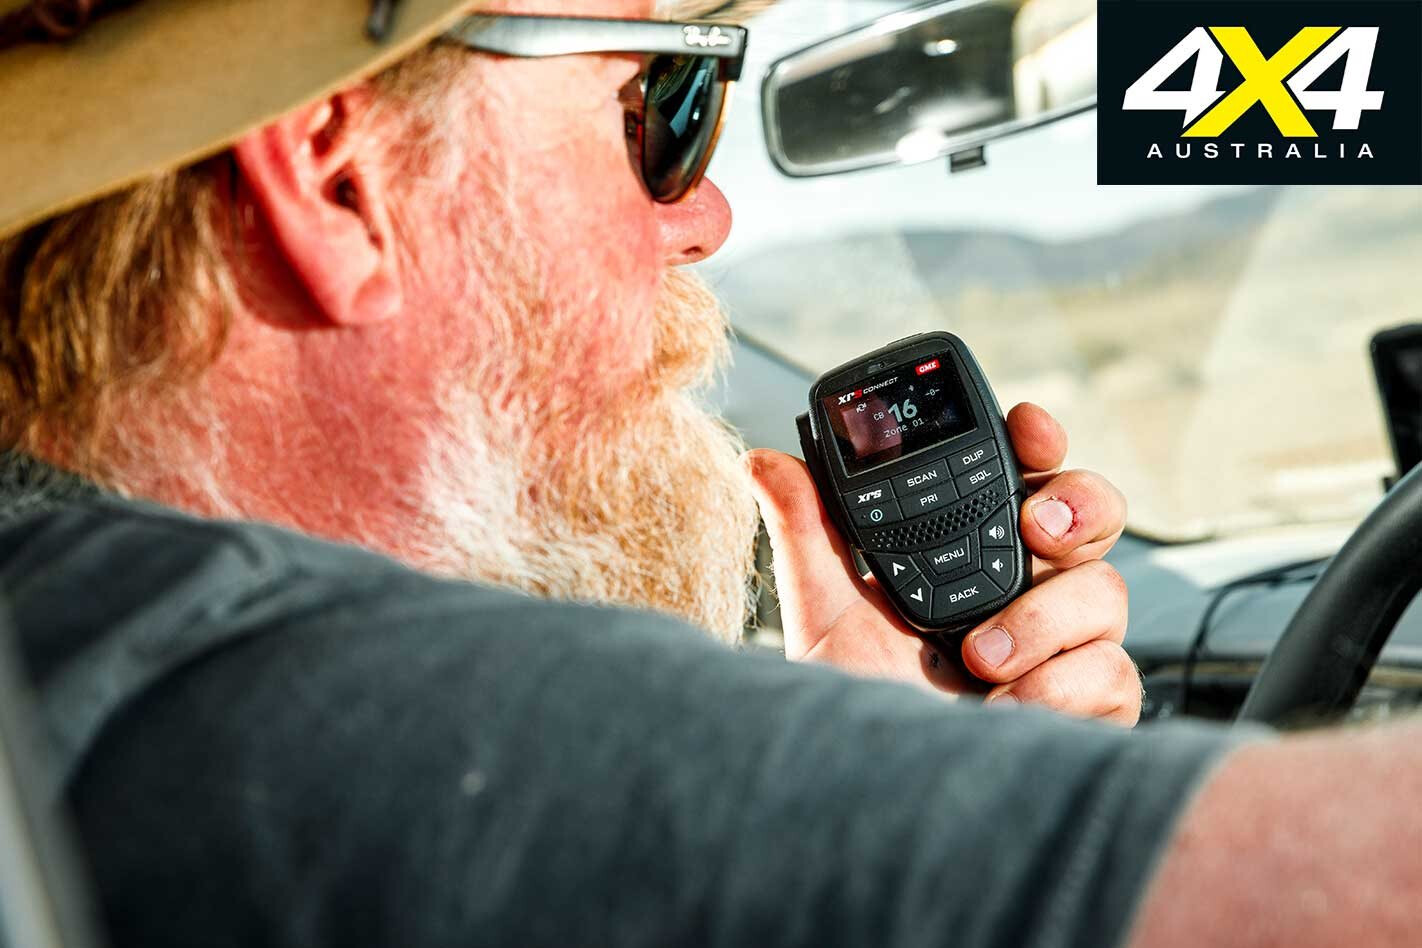
1
Keep your speed as steady as possible; you want to be going fast enough to create a bow wave at the front of the vehicle but not so fast that water is splashing up over the bonnet. Whatever you do, don’t stop in the middle of the crossing; keep driving forwards until you are safely at the bank on the other side. If possible, try to avoid gear changes in vehicles with a manual transmission, as this can result in the vehicle losing momentum.
If the exit of the water crossing is slippery due to dirt, grass or mud, stop if it is safe to do so before driving up the track to let water drain from your vehicle. This will limit track degradation, making it easier for following vehicles to exit the water crossing. Bear in mind that this won’t always be possible, as you might need to maintain momentum on some steep exit points.
You’ve made it
Once you are safely across to the other side, disengage diff locks and set the transfer case and drive mode to suit the upcoming track conditions. While you are removing the radiator blind, have a good look around and under your vehicle to check for any damage and to ensure there are no foreign objects stuck anywhere. Also check the lights all around your vehicle, to make sure they don’t have water in them.
If your vehicle is running okay, you can continue on your way, but give the brake pedal a couple of pumps to ensure the brakes have dried out and are working fine. If the engine is running rough, check to see if the air filter is dry and, if not, dry it out before continuing.
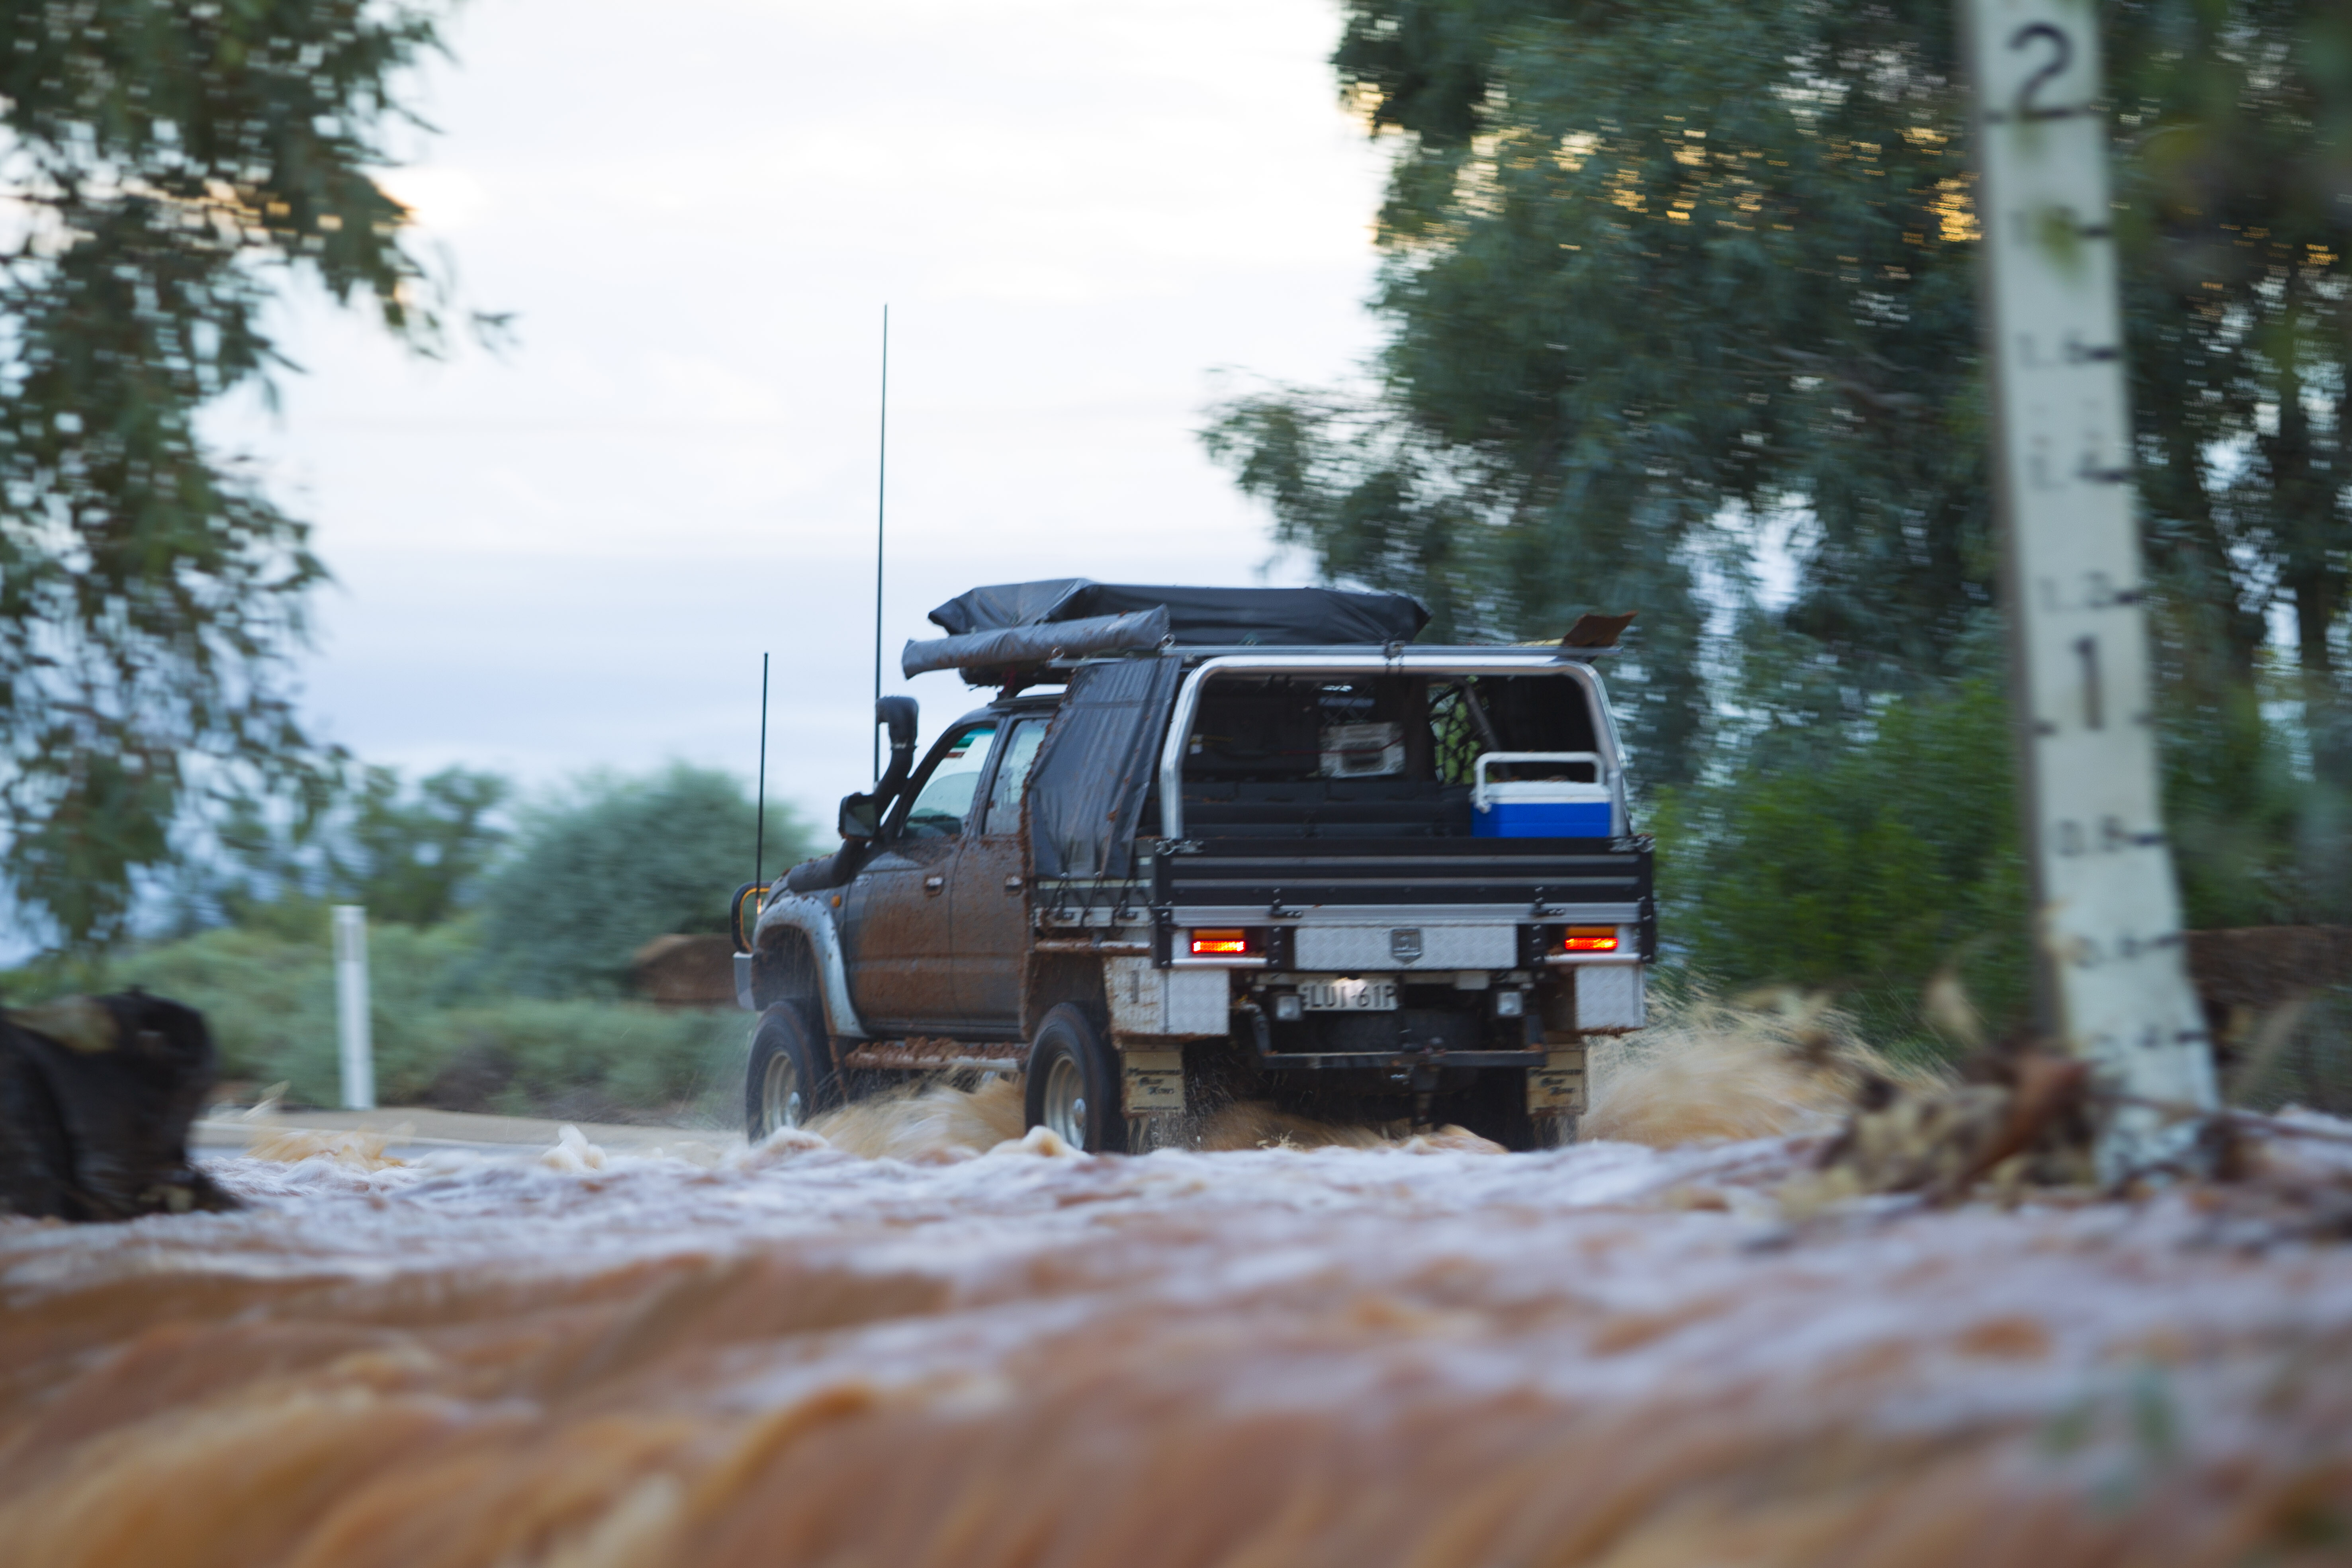
1
If water has made its way past the air filter, it may have reached the mass-airflow sensor (MAF), which can result in a modern vehicle engine entering limp-home mode; you can sometimes dry the MAF by blowing it with compressed air, but be careful not to damage it.
Have a look at the radiator to make sure there is no obvious damage or leaks, and take a peek in fuse boxes to make sure they are dry. Check the engine and transmission oil, too, to make sure it hasn’t been contaminated with water. Diff oil should also be checked once you’re back home. Also, have a feel around the footwell area to make sure the carpet is dry, and air it out if necessary.
Finally, don’t take water crossings for granted, no matter how familiar you think you are with them. They are not static obstacles and by their very nature are always changing, so err on the side of caution.
Water ingress
I would always have to remove my boots when tackling water crossings in my old Land Rover Defender because the door seals were so bad that water would be sloshing around in the footwell.
While most modern vehicles have watertight door seals, a lot of utes don’t have any seal at all around the tailgate, and if the crossing is deep enough your gear in the tub will soon get awfully wet.
Luckily, there are dust and water seal kits on the market specifically designed to suit most makes and models of ute, and they are easy to fit.
What to do
- Check crossing before diving in.
- Fit a snorkel, diff breathers, and radiator blind.
- Let the vehicle cool down.
- Have recovery gear ready to go.
- Correct gear, drive mode and steady pace.
What not to do
- Dive in without checking the crossing.
- Drive too fast.
- Change gears halfway across.
- Drive away without checking over the vehicle.
- Forget to remove the radiator blind.
Ford New Zealand has unveiled a more rugged version of the Everest large SUV – and it wears a familiar name.
The 2023 Ford Everest Wildtrak will launch across the ditch mid-year, but there’s no word for Australia at this stage.
“Everest Wildtrak is an exciting new addition to the global Ford Everest line-up, but we have no news to share about an Australian introduction,” said a Ford Australia spokesperson.
Inspired by the popular Ranger variant, the Everest Wildtrak echoes the forthcoming Ranger Platinum’s relation to the flagship Everest grade, with its front bumper taken directly from the Ranger Wildtrak, including the dark grey ‘H-bar’ and unique LED fog lamps.
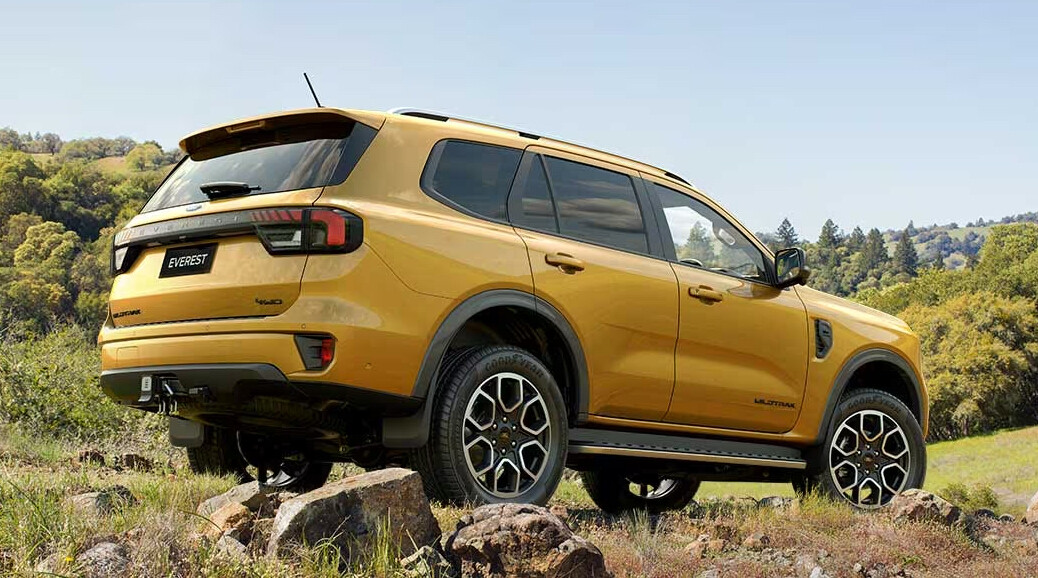
1
There’s also the luxe yellow paintwork, orange stitching with ‘Wildtrak’ embroidered into the front seats, a bonnet insignia, and a set of 20-inch alloy wheels borrowed from the recently-updated MY23.5 Ranger Wildtrak – but as standard, not optional.
It slots between the Sport and Platinum in the Everest line-up, which retail for $69,590 and $77,530 before on-road costs respectively in Australia.
It follows a minor update for the 2023 Ford Everest, with changes including a more-affordable two-wheel-drive Sport 2.0-litre variant, a black roof and steel underbody protection for the Platinum, and black roof rails in the optional Touring Pack for the Trend and Sport.
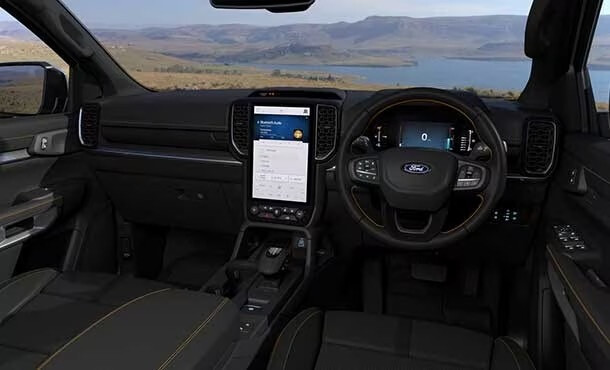
6
2023 Ford Everest pricing
Prices exclude on-road costs.
MORE
Everything Ford
The Ford Ranger is quite the remarkable success story in Australia, its popularity more than compensating for this country’s strange apathy towards the Blue Oval’s passenger cars and SUVs.
And the most popular variant is the Ranger XLT that we’re testing here in latest-generation form.
It has plenty to live up to considering we rated the previous XLT as our favourite dual-cab ute of 2021.
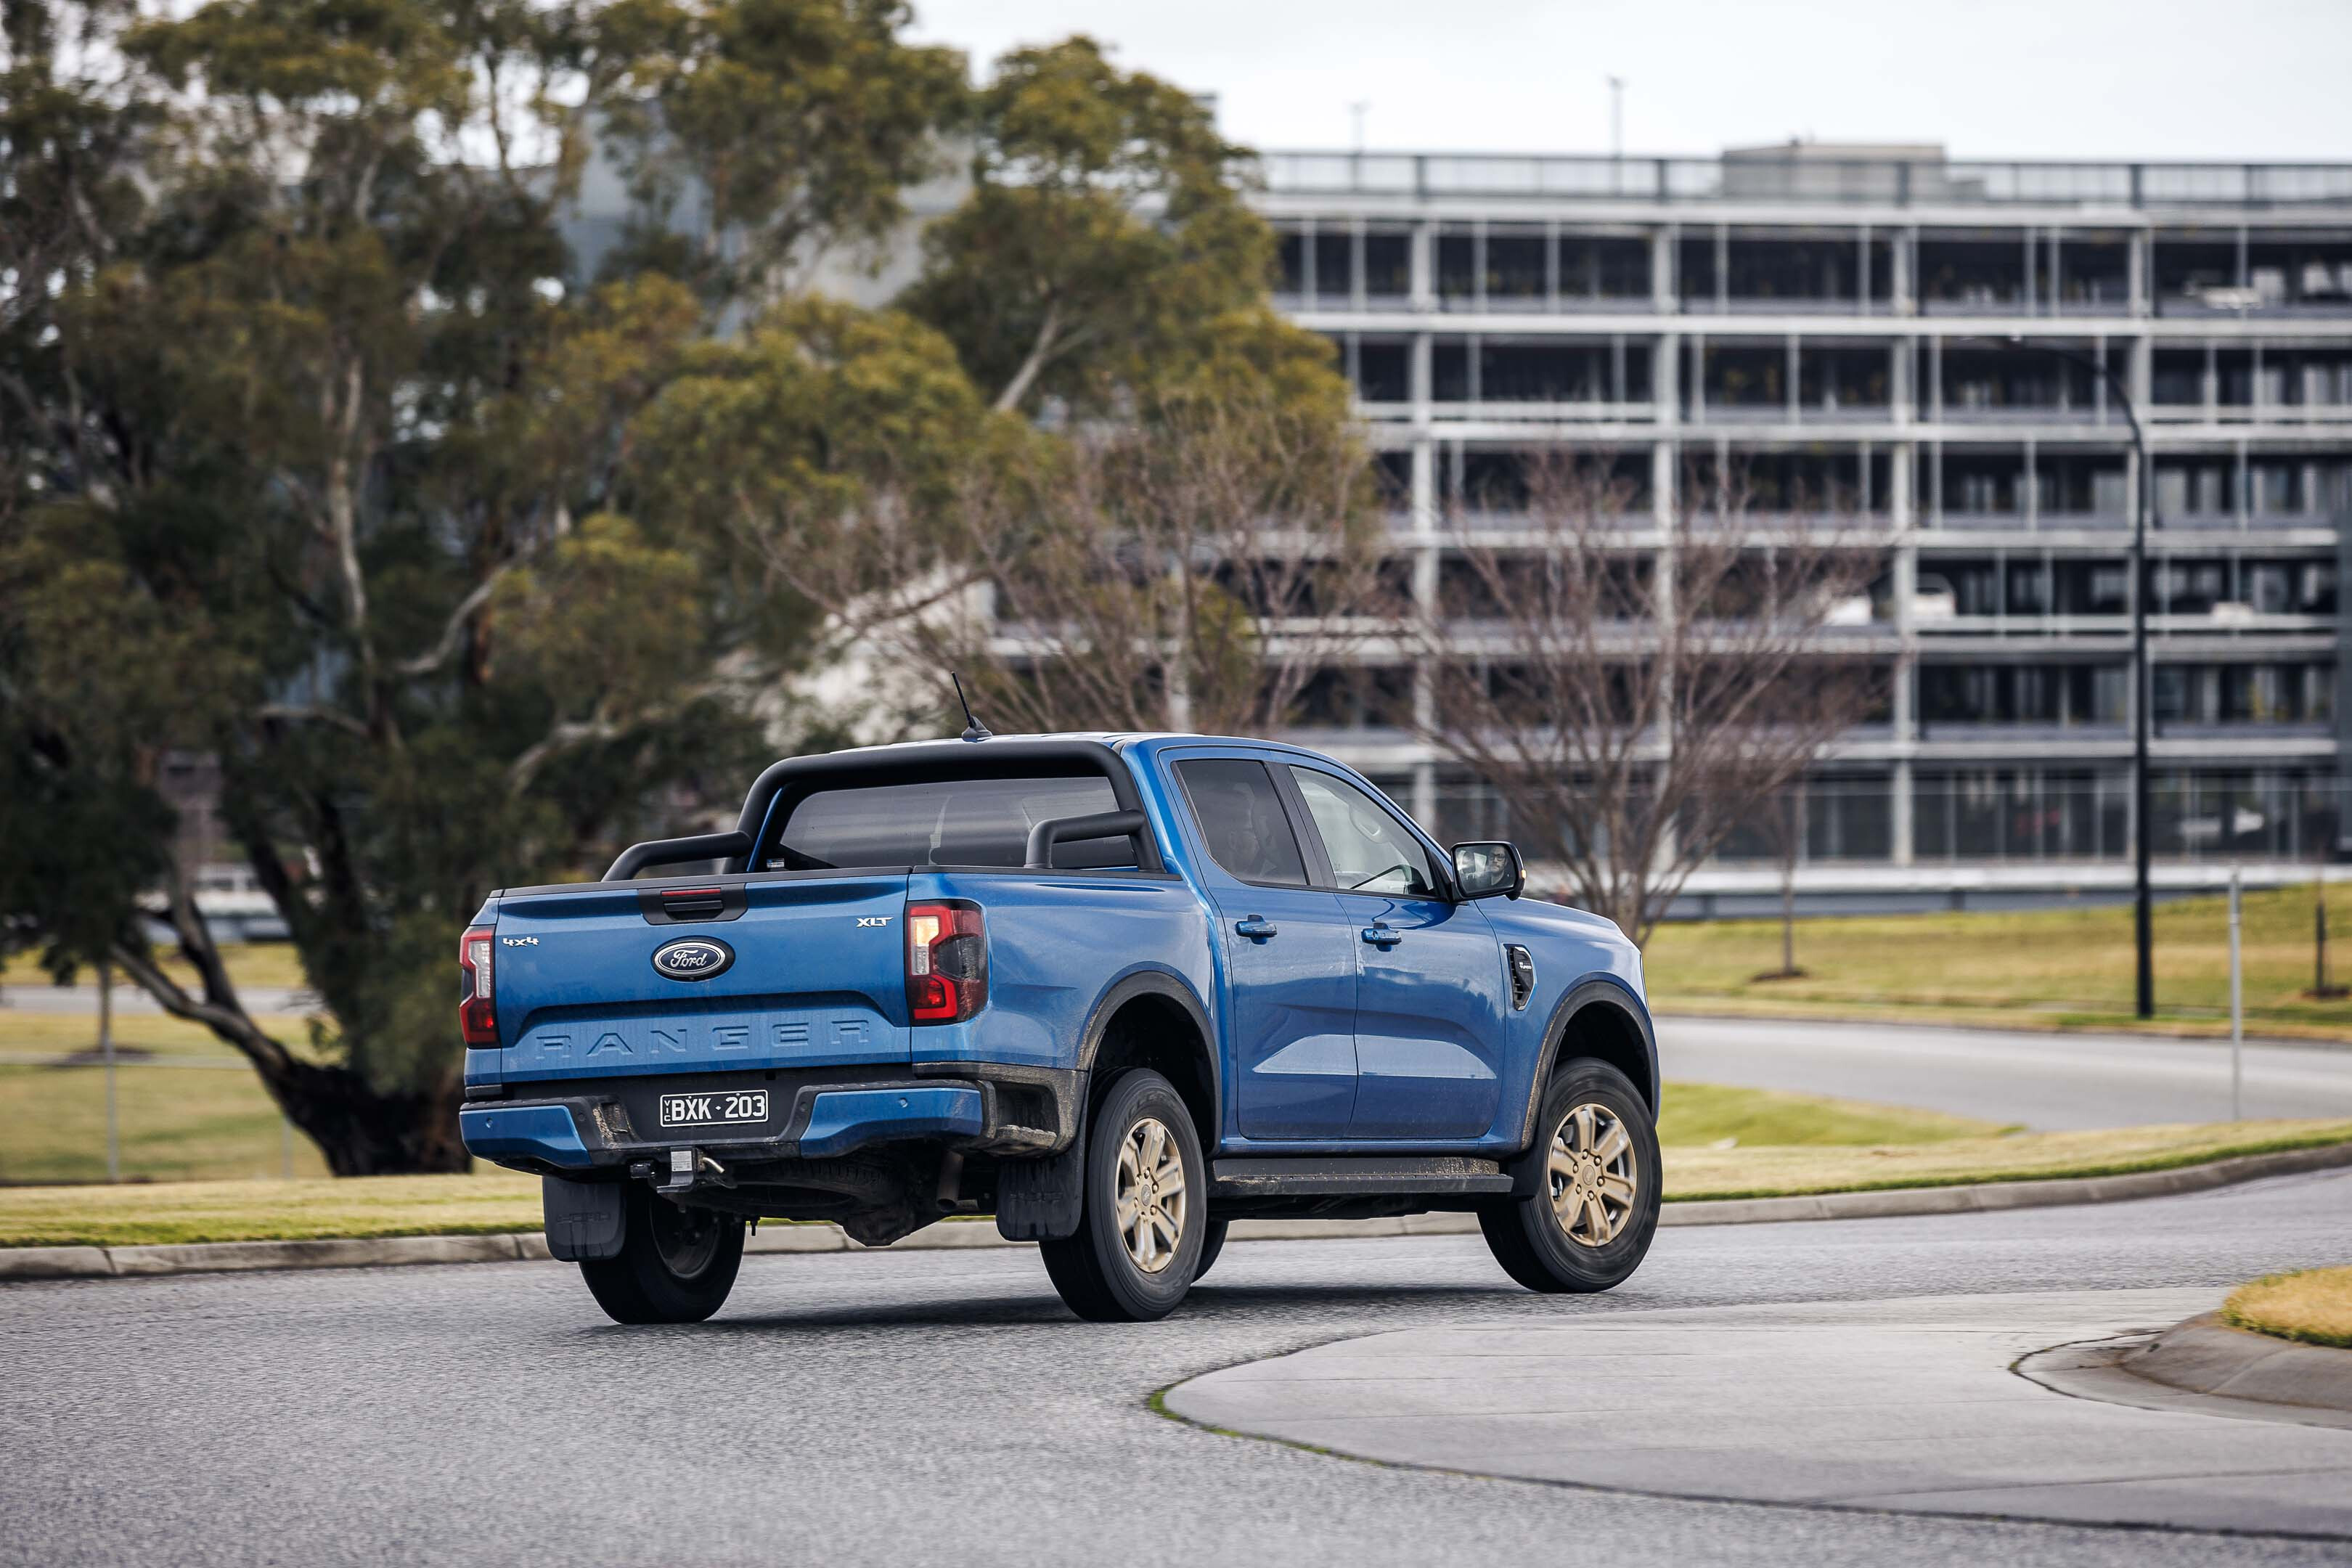
1
JUMP AHEAD
- How much is it, and what do you get?
- How do rivals compare on value?
- Interior, comfort, space and storage
- What’s the payload and is the tray practical?
- What is it like to drive?
- How is it on fuel?
- Is it good for towing?
- How safe is it?
- Warranty and running costs
- VERDICT
- Specifications
How much is it, and what do you get?
The XLT sits in the middle of a big Ford Ranger pack, positioned above XL and XLS variants and below Sport, Wildtrak and Raptor models.
Buyers can opt for a 4×2 Hi-Rider Double Cab Pick-Up that kicks off the XLT line-up from $54,790 before on-road costs
All other XLTs are four-wheel drive, including the four-cylinder-only Super Cab Pick-Up variant. Two other Double Cab Pick-Up XLT variants offer a choice of four-cylinder (our test vehicle) or V6 power while the Double Cab Chassis is V6-only.
The 4×4 XLT Double Cab Pick-Up with four-cylinder engine costs from $61,990 before on-road costs. Driveaway pricing is currently about $68,000, varying slightly by state.
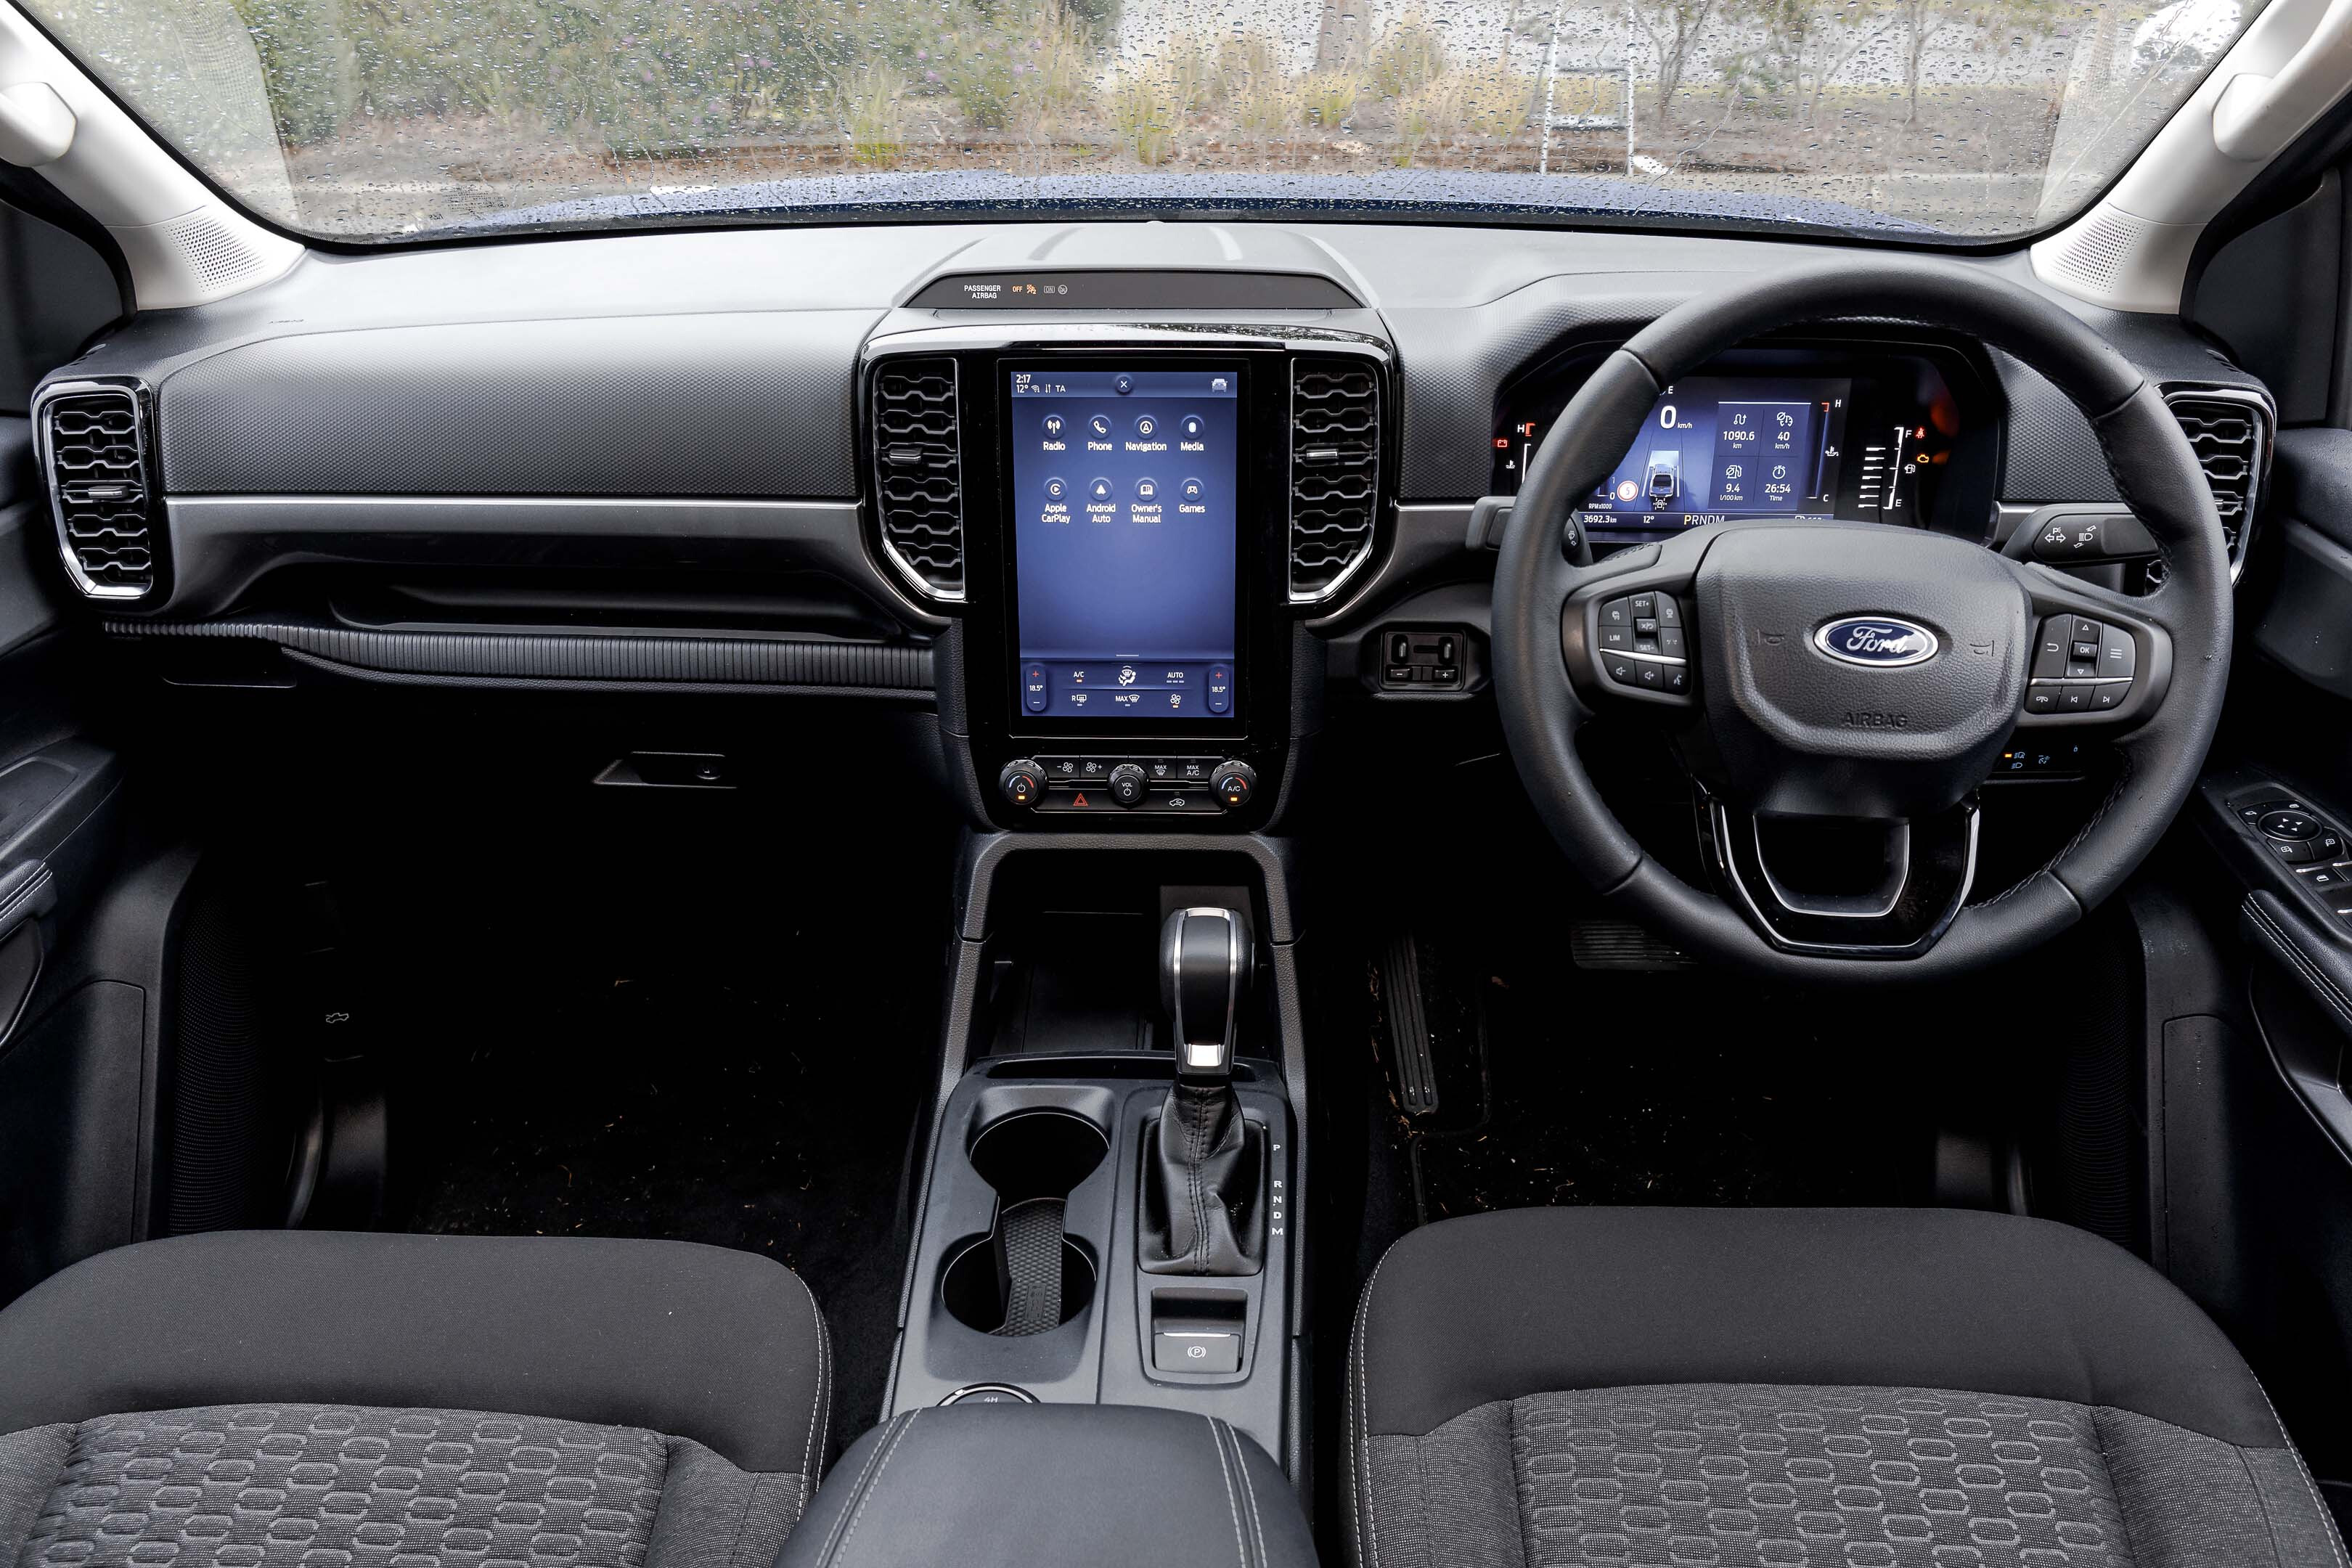
1
A $3000 premium is charged for the V6, which seems good value considering you not only get more power and torque but also full-time four-wheel drive rather than a selectable part-time 4×4 system.
Only a few options – including all exterior colours except white and a $900 Touring pack that adds a handy integrated trailing brake controller for towing – are included in Ford’s online Build & Price configurator.
However, Ford has teamed up with renowned accessories company ARB to create a vast range of official factory-backed add-ons for the Ranger.
The Ranger XLT’s standard equipment brings a whole host of extras over the XLS. Key features for the cabin include dual-zone climate control, keyless entry, auto-dimming rearview mirror, leather steering wheel, and integrated navigation plus DAB+ digital radio.
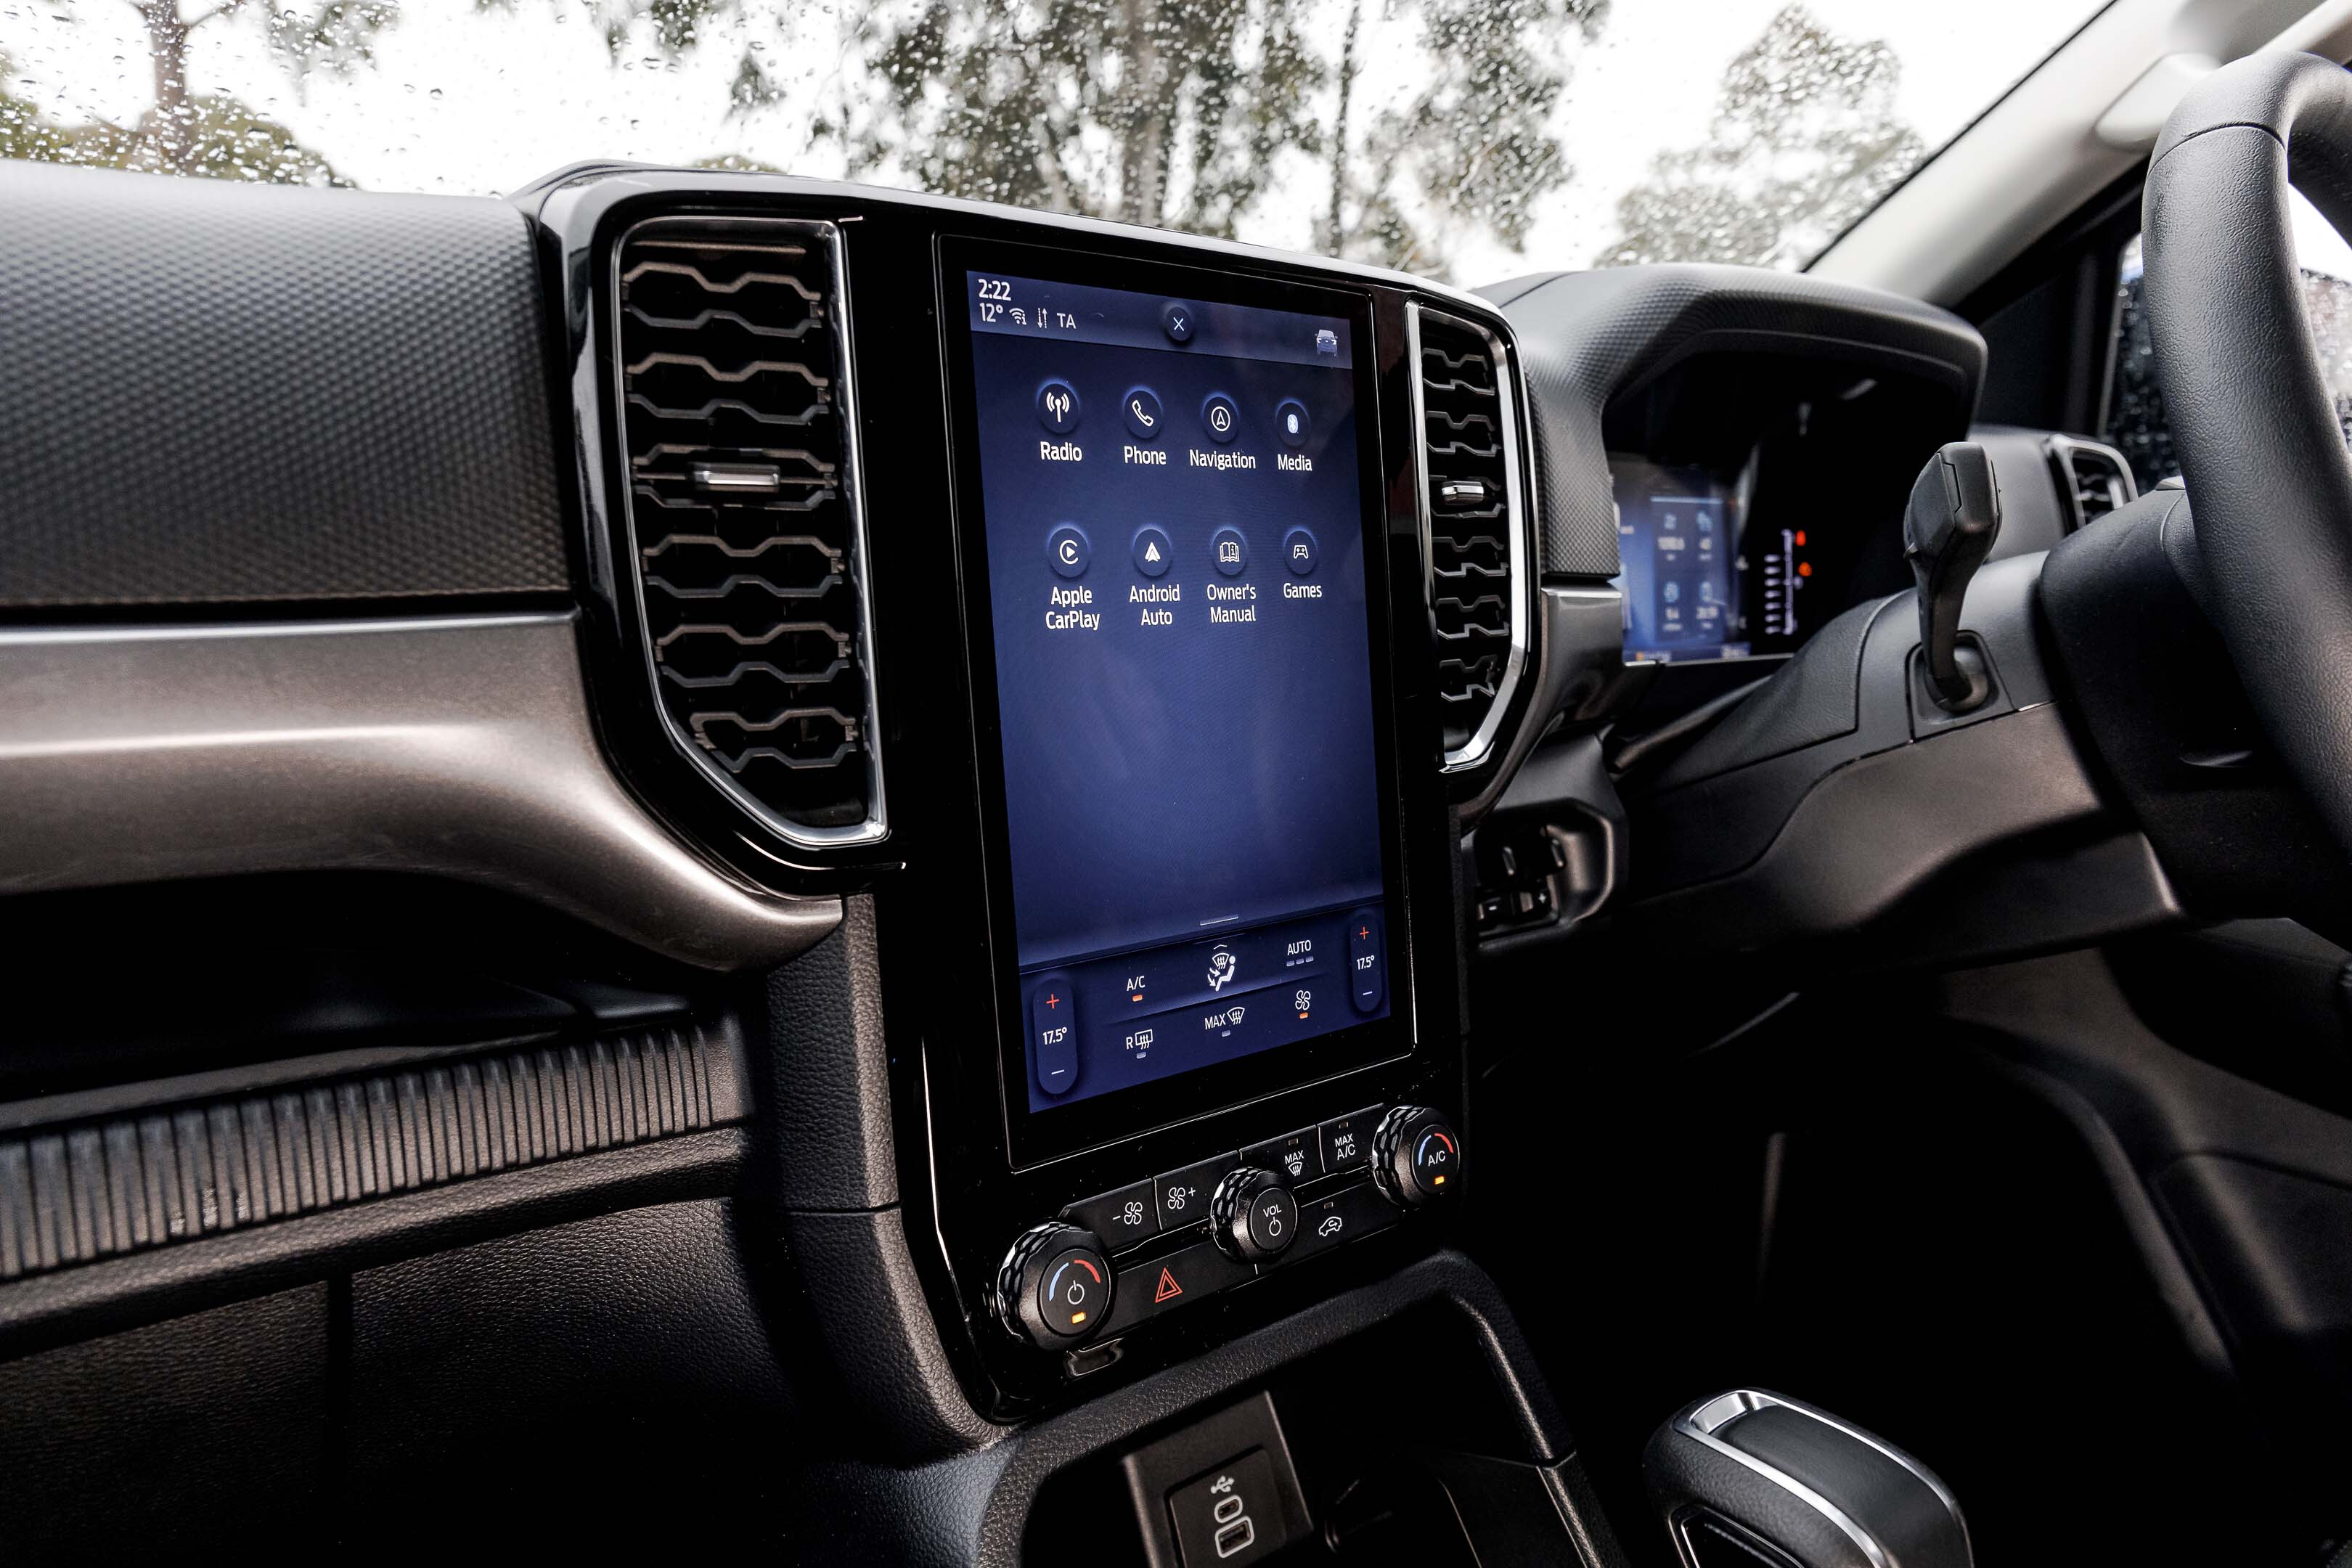
1
Exterior additions include a tow bar, LED headlights, 17-inch alloy wheels (up from the XLS’s 16s), a black sports bar and a tray featuring bedliner, 12V socket, and illumination.
If you can stretch an extra $2500 – and are interested in more features rather than more power (from the optional V6) – the Ranger Sport (four-cylinder) throws in LED foglights, skidplate, 18-inch alloy wheels, off-road screen (for the infotainment display), wireless phone charging and electric driver’s seat adjustment.
Upgrade your Ranger
How do rivals compare on value?
The Ford Ranger certainly doesn’t achieve popularity from cheap pricing; quite the opposite. The XLT, for example, is the most expensive dual-cab ute in its competitor set.
You’ll find similar variants of the Isuzu D-Max, Mazda BT-50, Mitsubishi Triton, Nissan Navara, and Toyota HiLux priced between $55,000 and $60,000. However, the Ranger can’t be described as poor value considering its extensive list of standard features.
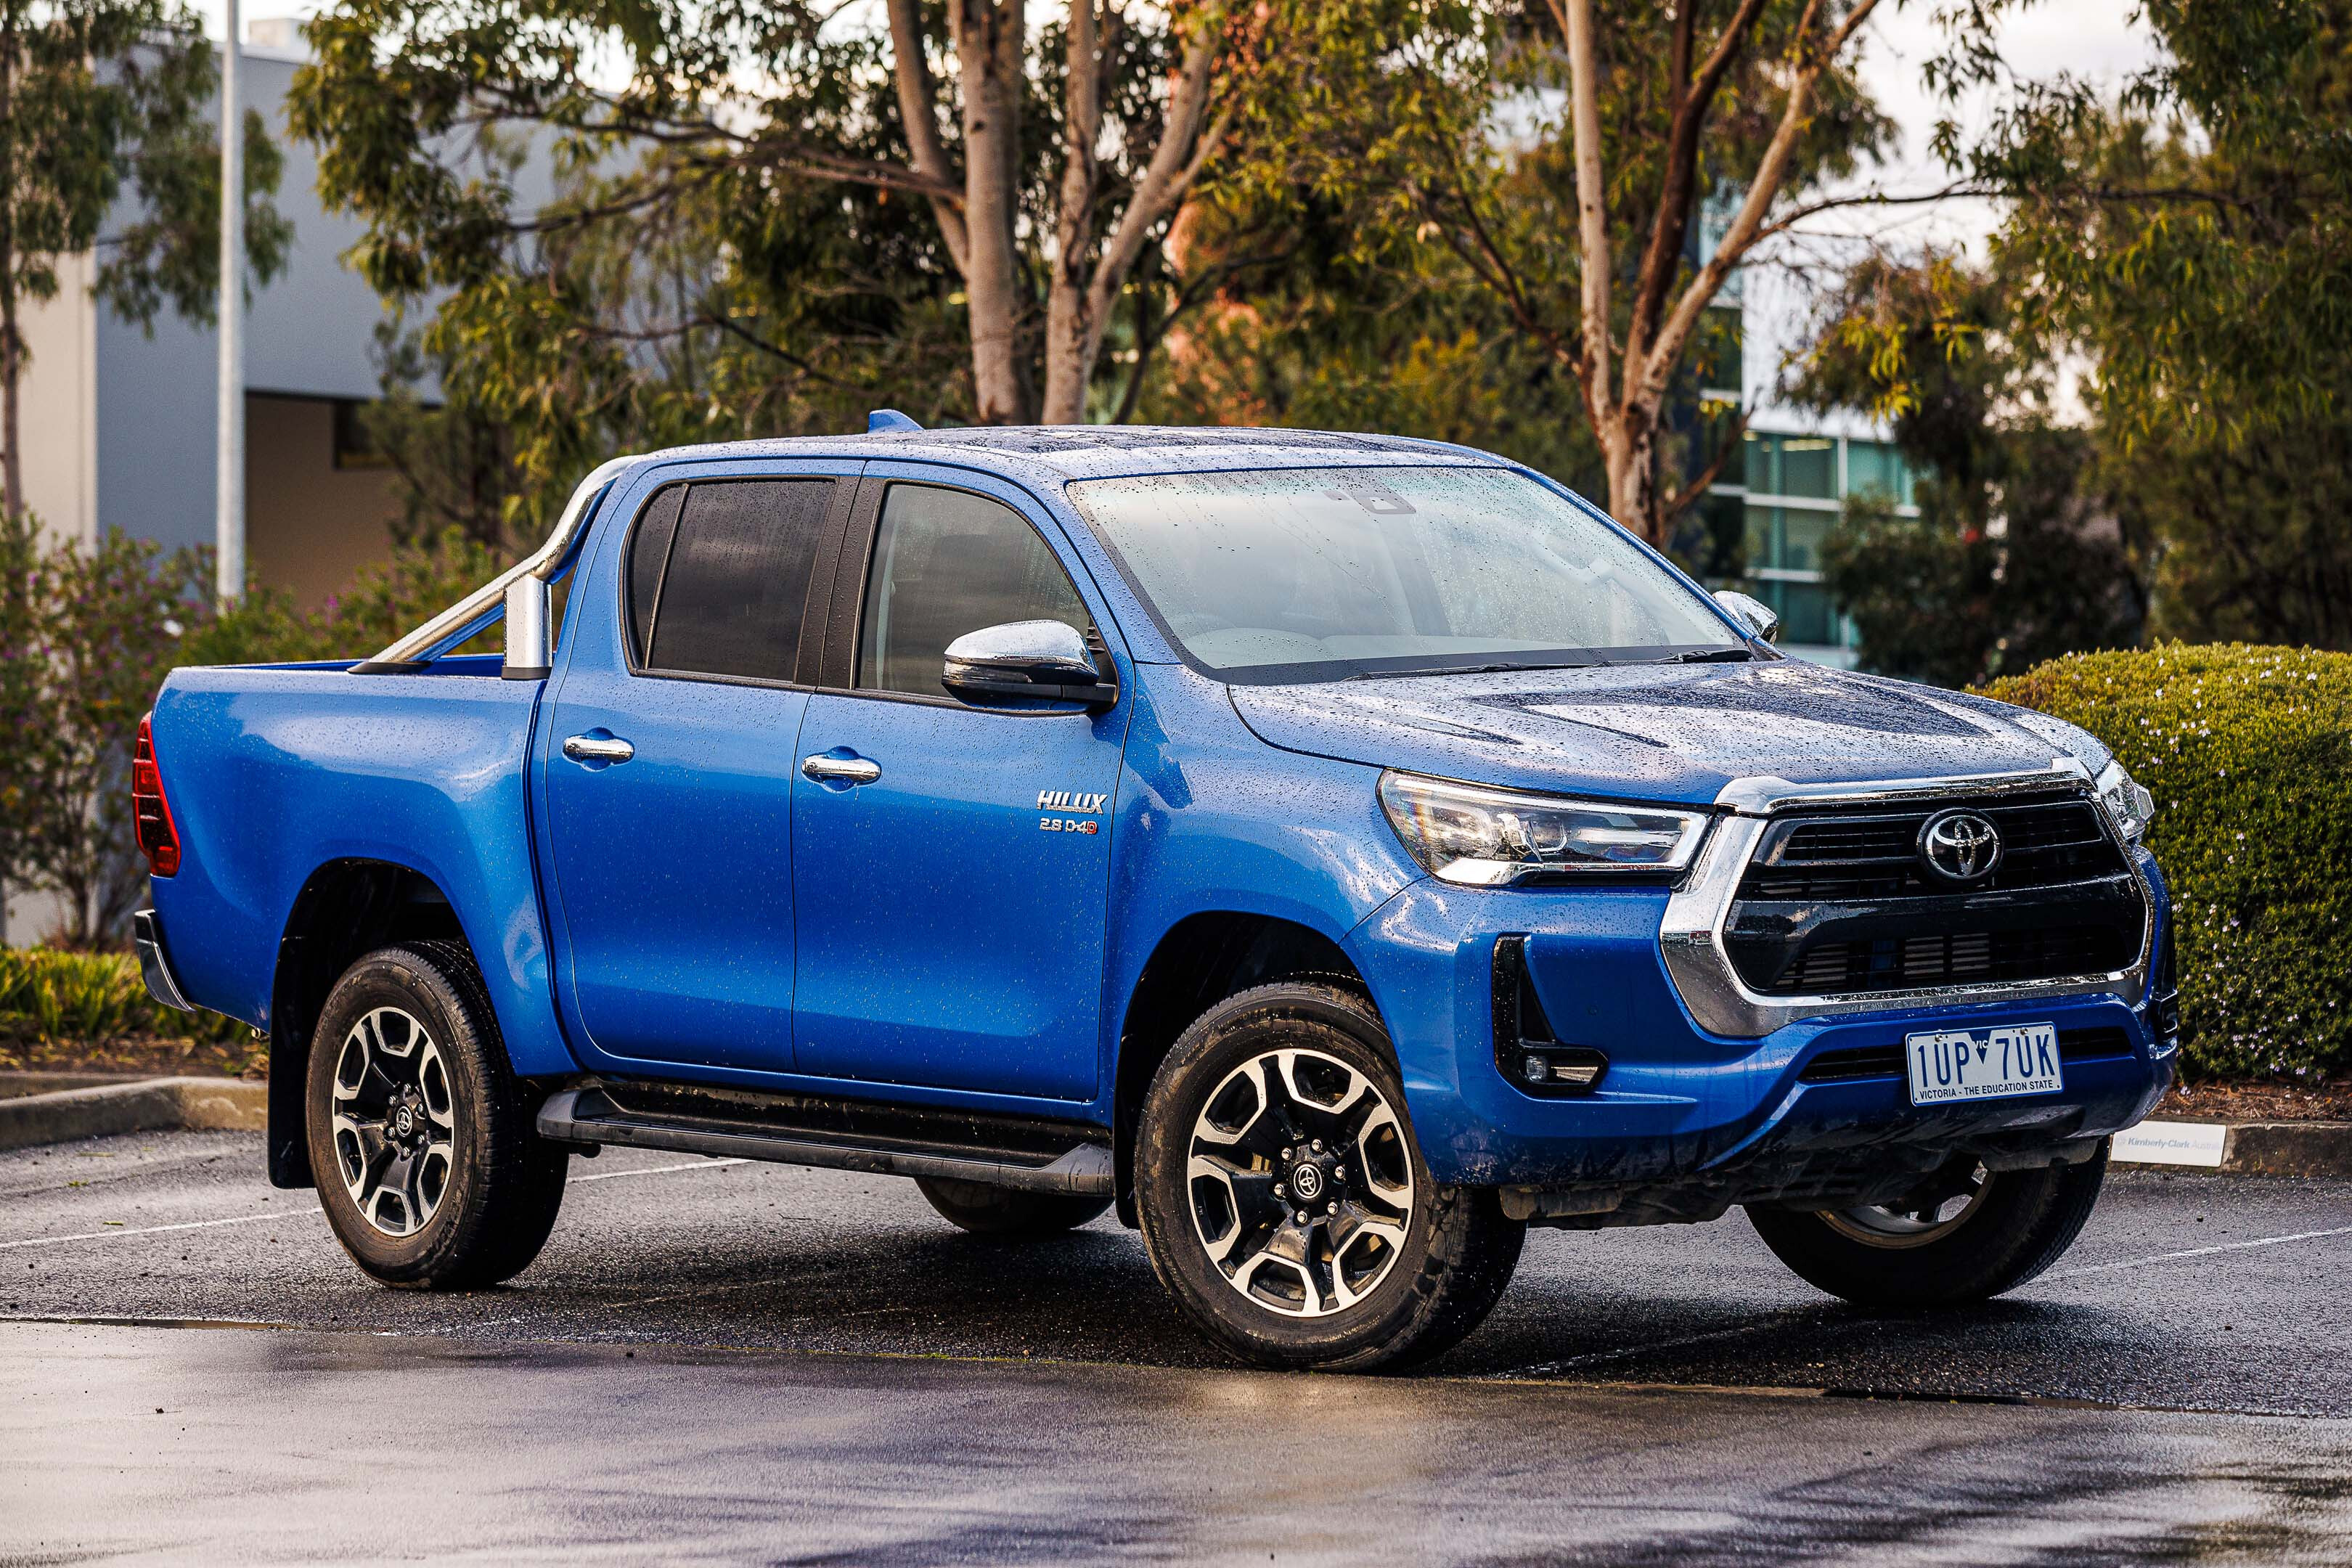
1
Interior comfort, space and storage
The Ford Ranger is the first one-tonne ute to introduce a large central touchscreen in portrait orientation (following the likes of Tesla and Volvo). Its 10.1-inch screen size is also class-leading.
Ford’s new Sync4A operating system is slick, intuitive, and needs just four seconds to boot up to fully functional after the vehicle is switched on.
While navigating the system isn’t exactly the same as a smartphone, there are some similar pinch and swipe controls, and the various features and applications are easy to find and use, including a sketching ‘game’.
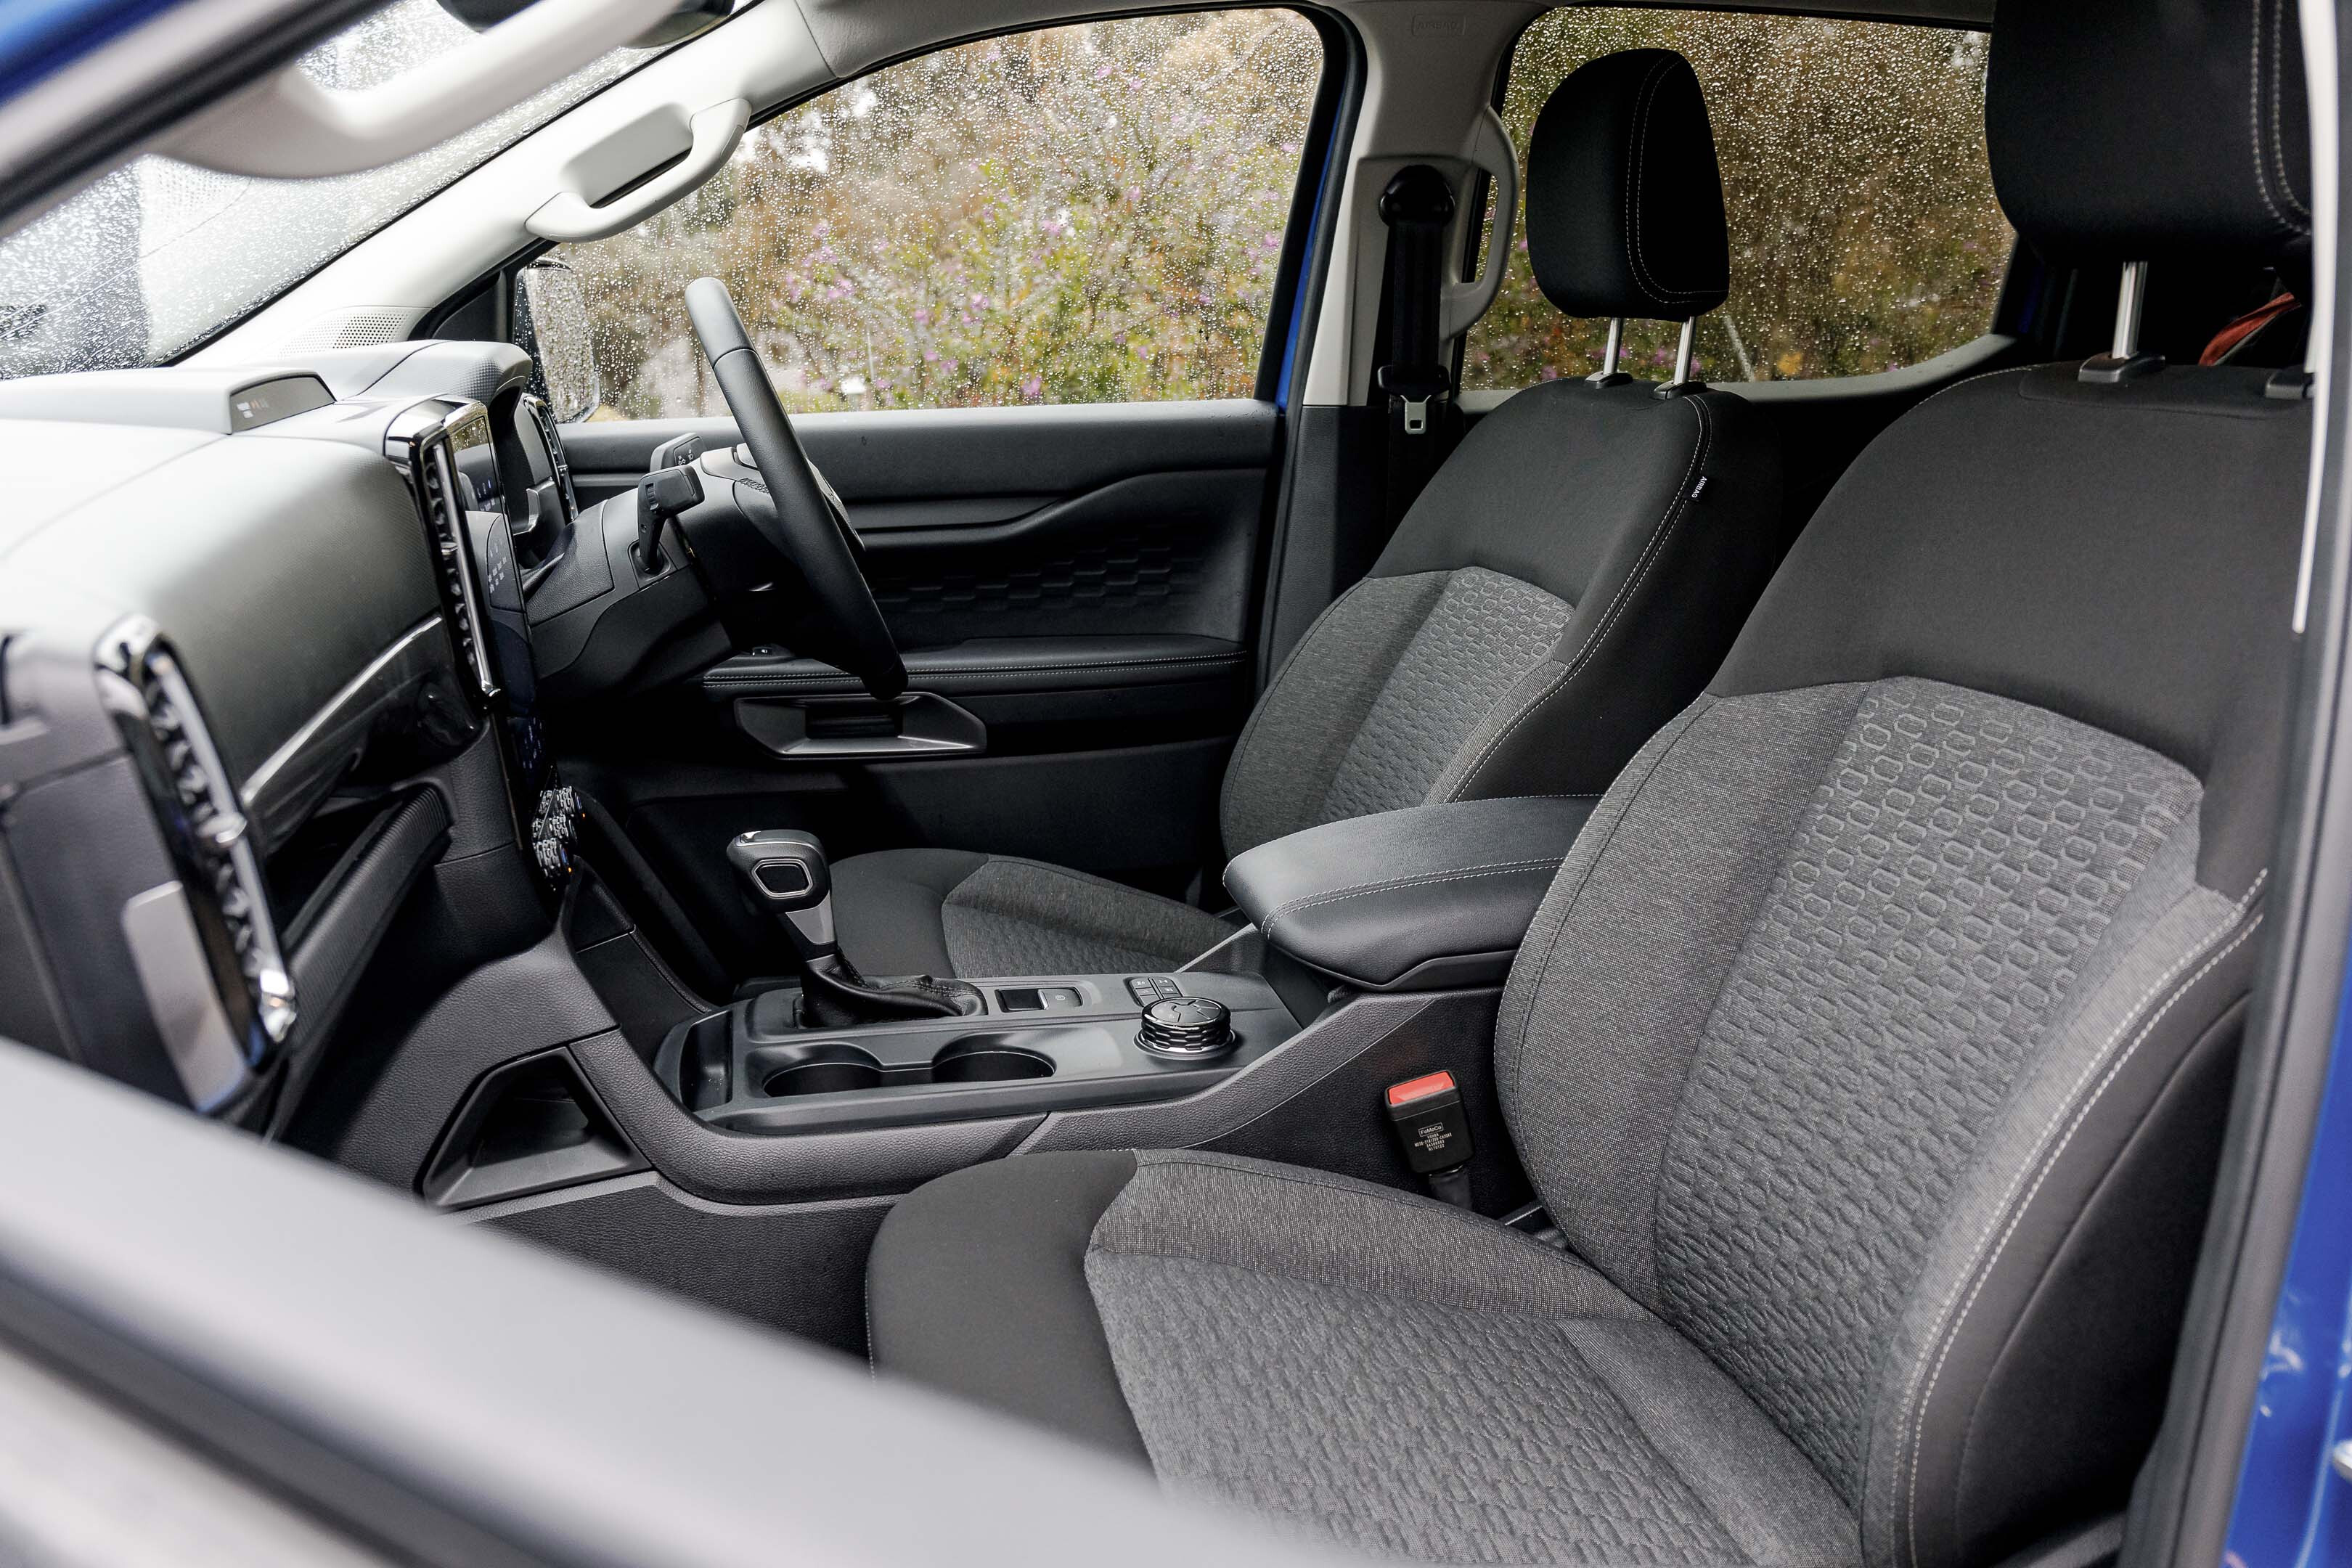
1
A digital driver’s display completes a sophisticated dash that stands out in the segment.
Hard/durable cabin plastics are still common, though there are softer parts for key touchpoints such as the door armrest and centre armrest, and there’s an array of interesting textures and patterns.
The XLT’s cloth seats are manually adjusted (whereas some cheaper utes come with electrically adjustable front seats) and could do with extra lateral support, but they are comfortable, with good contouring for the back.
Lots of storage options are provided throughout the well-thought-out cabin, including a dash shelf for the front passenger, generous door pockets with big bottle holders and lots of central storage cubbies thanks to an electric park brake which occupies less space than a conventional lever.

1
If you’re wondering what each compartment is for, Ford has even provided little cartoon images inside each as a suggestion (including one for a packet of French fries).
The front row isn’t the most spacious in the class but still offers 70mm of headroom above a 188cm driver despite a strange bulge intruding into the roof space. The two-way steering wheel adjustment also has lots of range.
It’s not such a good story in the second row, where space is more limited. The transmission tunnel intrudes into useable floor space, there’s no room for a passenger’s toes under the front seat and knee room is a relatively short 30mm.
The second row has a folding armrest and room for three people. As a final indication of the modernity of the Ranger, it includes a USB-C charging socket for the front occupants alongside a more traditional USB-A port and there’s a 12-volt socket for the rear seat area as well as a second in the central storage bin.
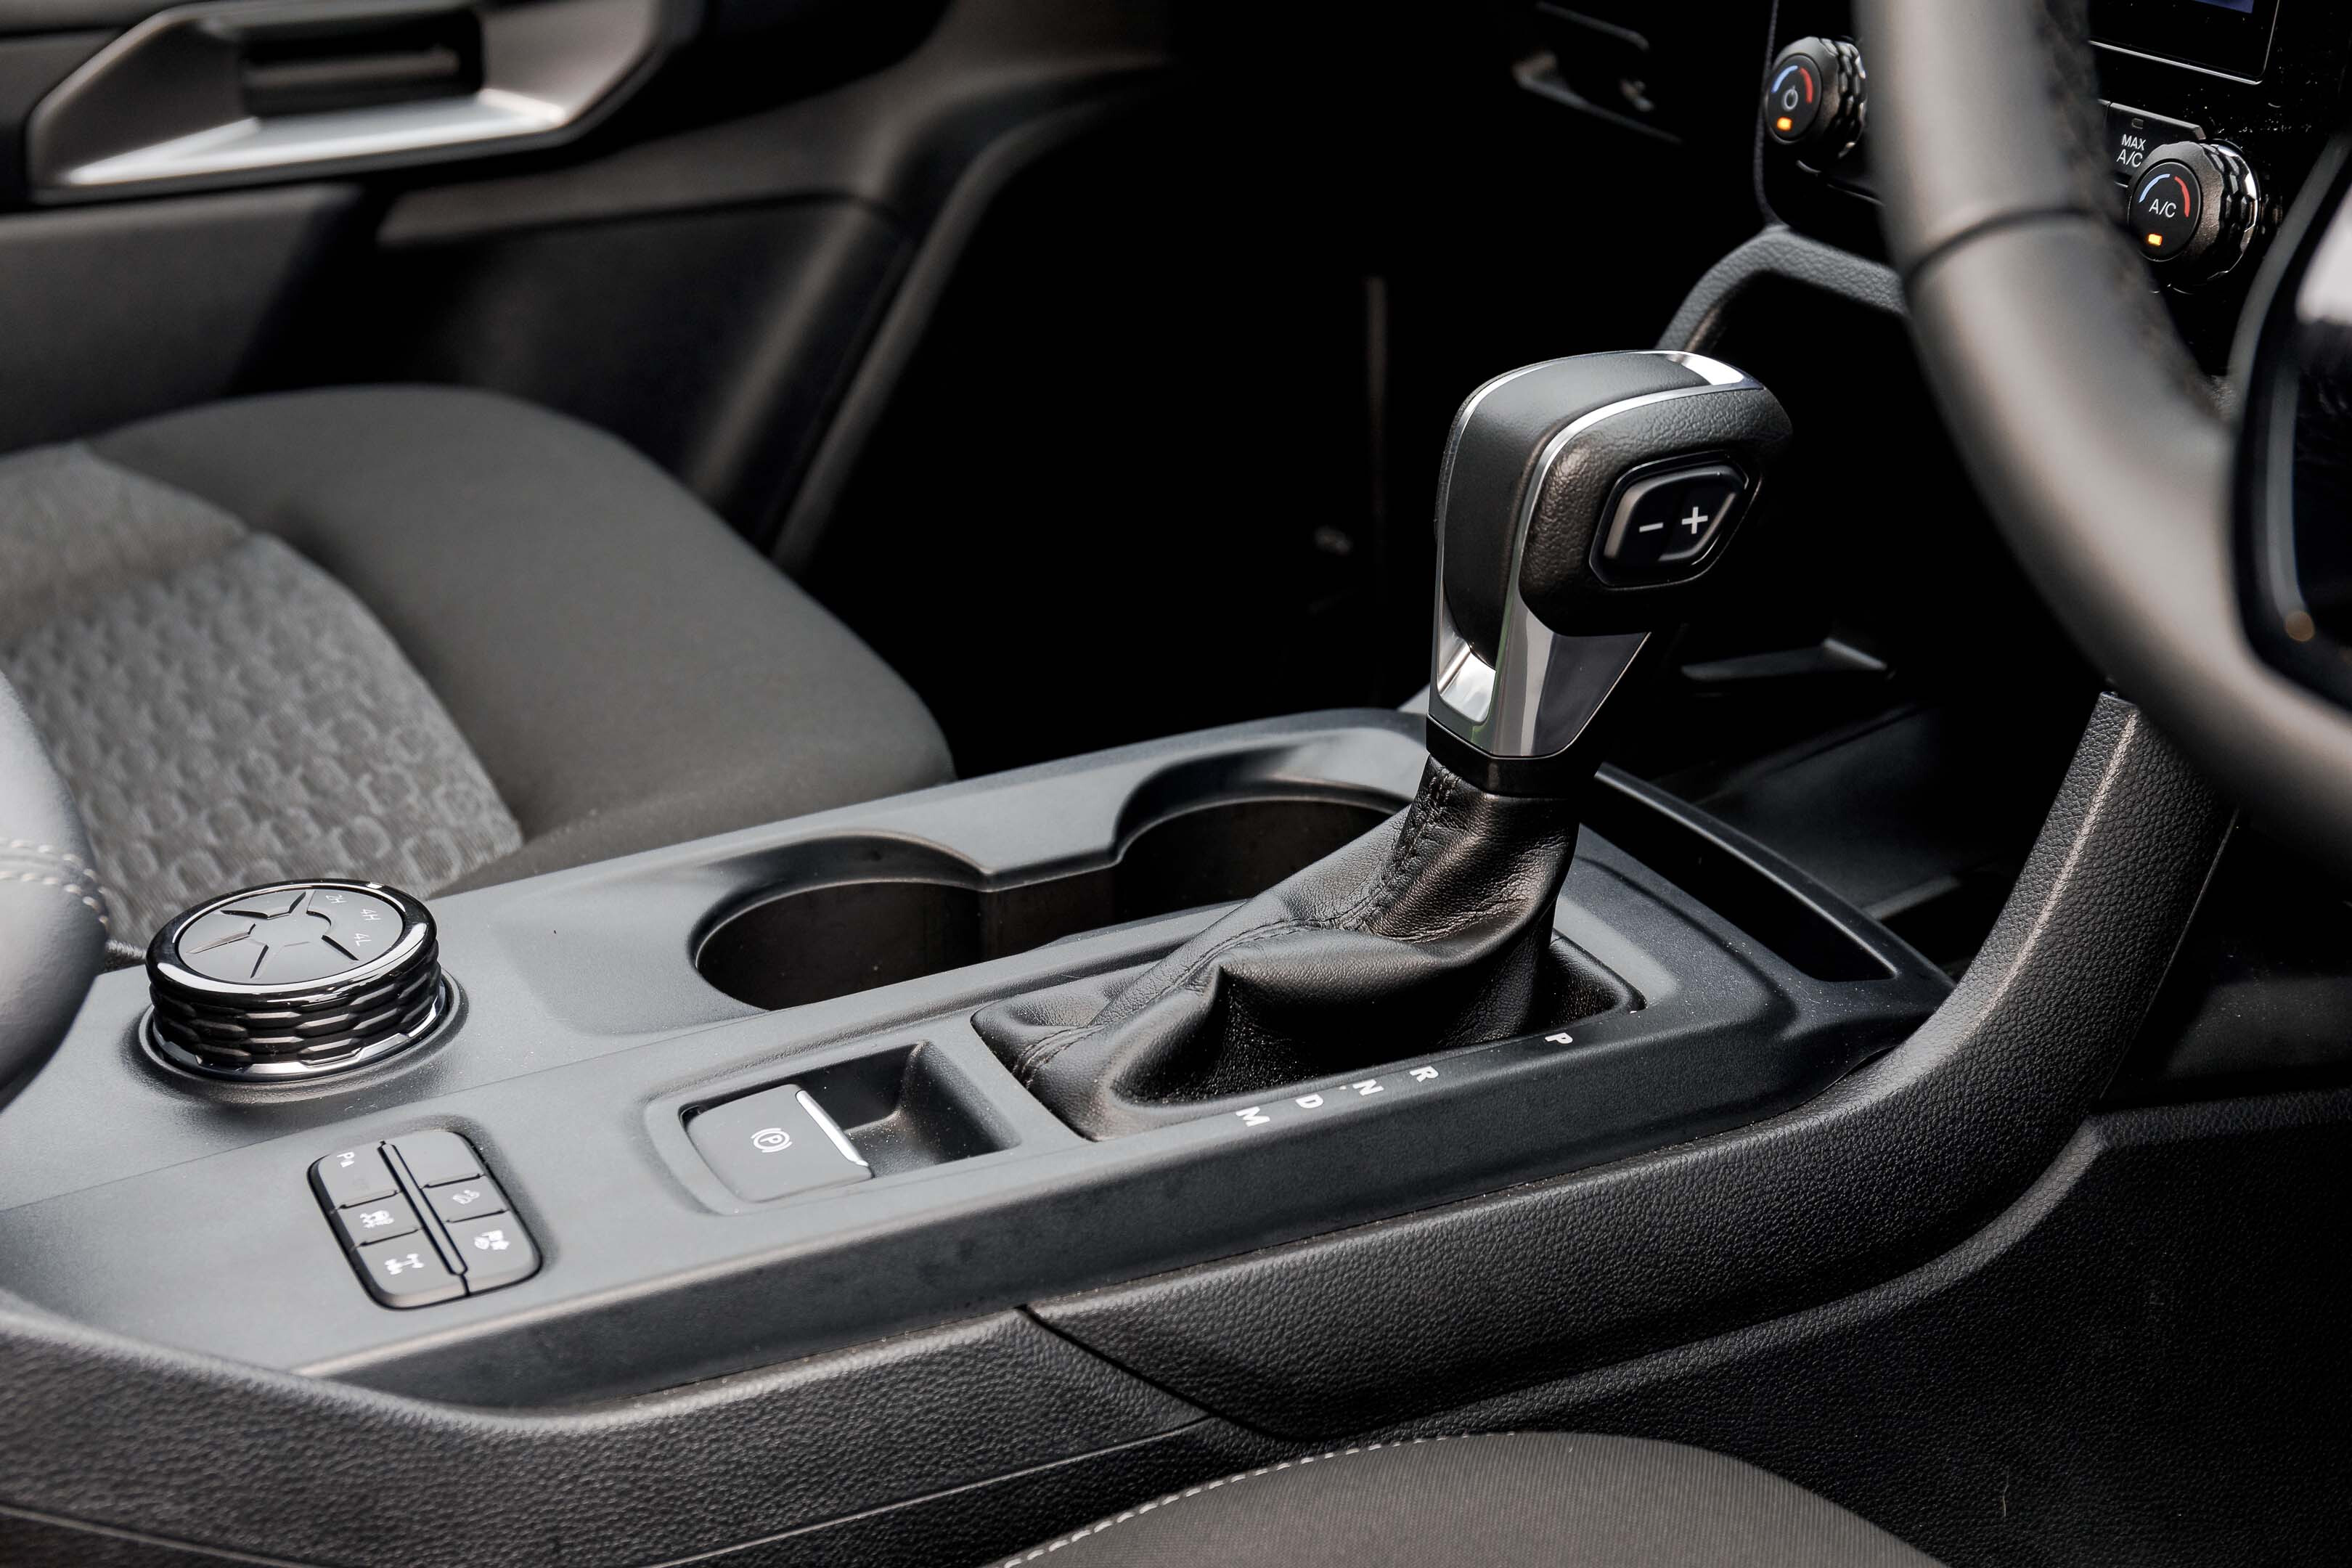
1
What’s the payload and is the tray practical?
The Ranger can now swallow a Euro pallet (1200mm) between the rear wheelarches, while external tie-down rails and six tie-down points (the most available among its key rivals) will prevent gear from rattling around on corrugated tracks (the high-spec Wildtrak model features an internal rail with adjustable cleats to modulate tie-down locations, similar to the Navara’s Utili-Track).
Another clever and useful inclusion is steps built into either side of the tray, complementing the rear step. The spray-in bedliner is also kind on your knees.
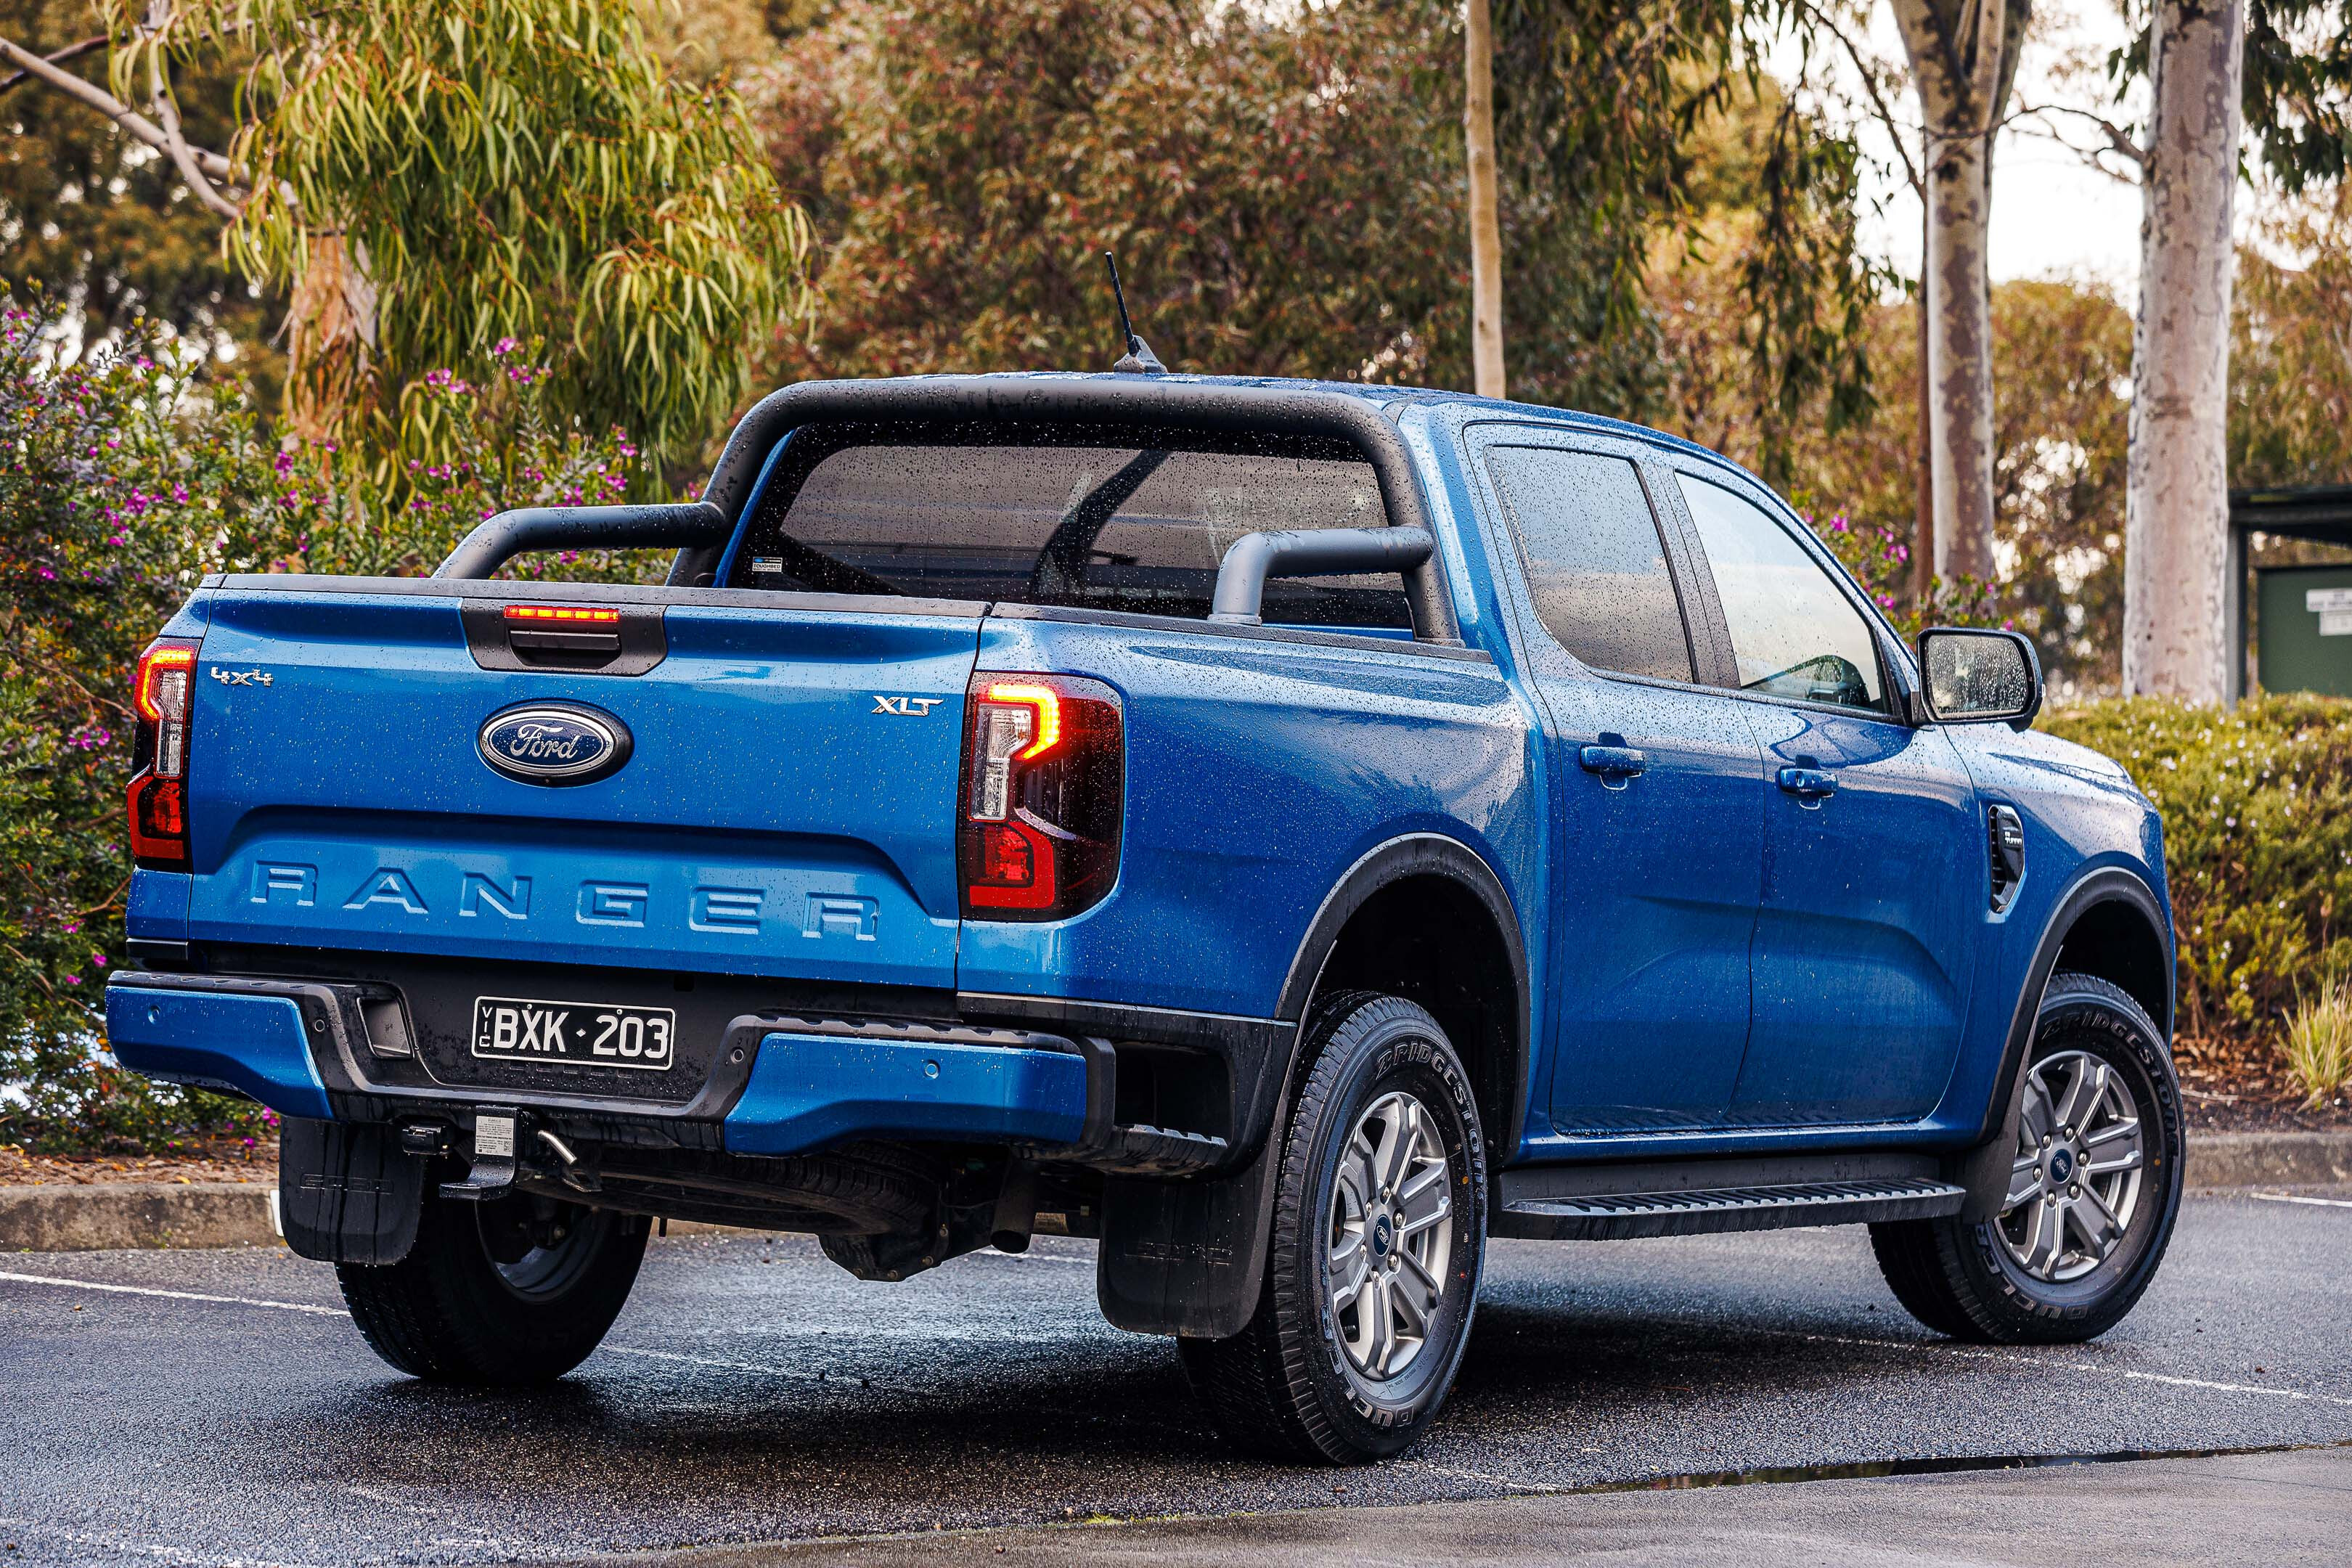
1
The spring-loaded and damped tailgate is the easiest to use in the segment –although others are catching up – enabling it to be opened and closed with one hand. There are also novel features such as the clamping pockets and a ruler with 10mm increments that can transform the tailgate into a workbench.
Another rare feature in the Ranger’s tray is a 240-volt power outlet and LED lighting.
Tray capacity is 1233 litres and the four-cylinder XLT’s payload capacity is 959kg.
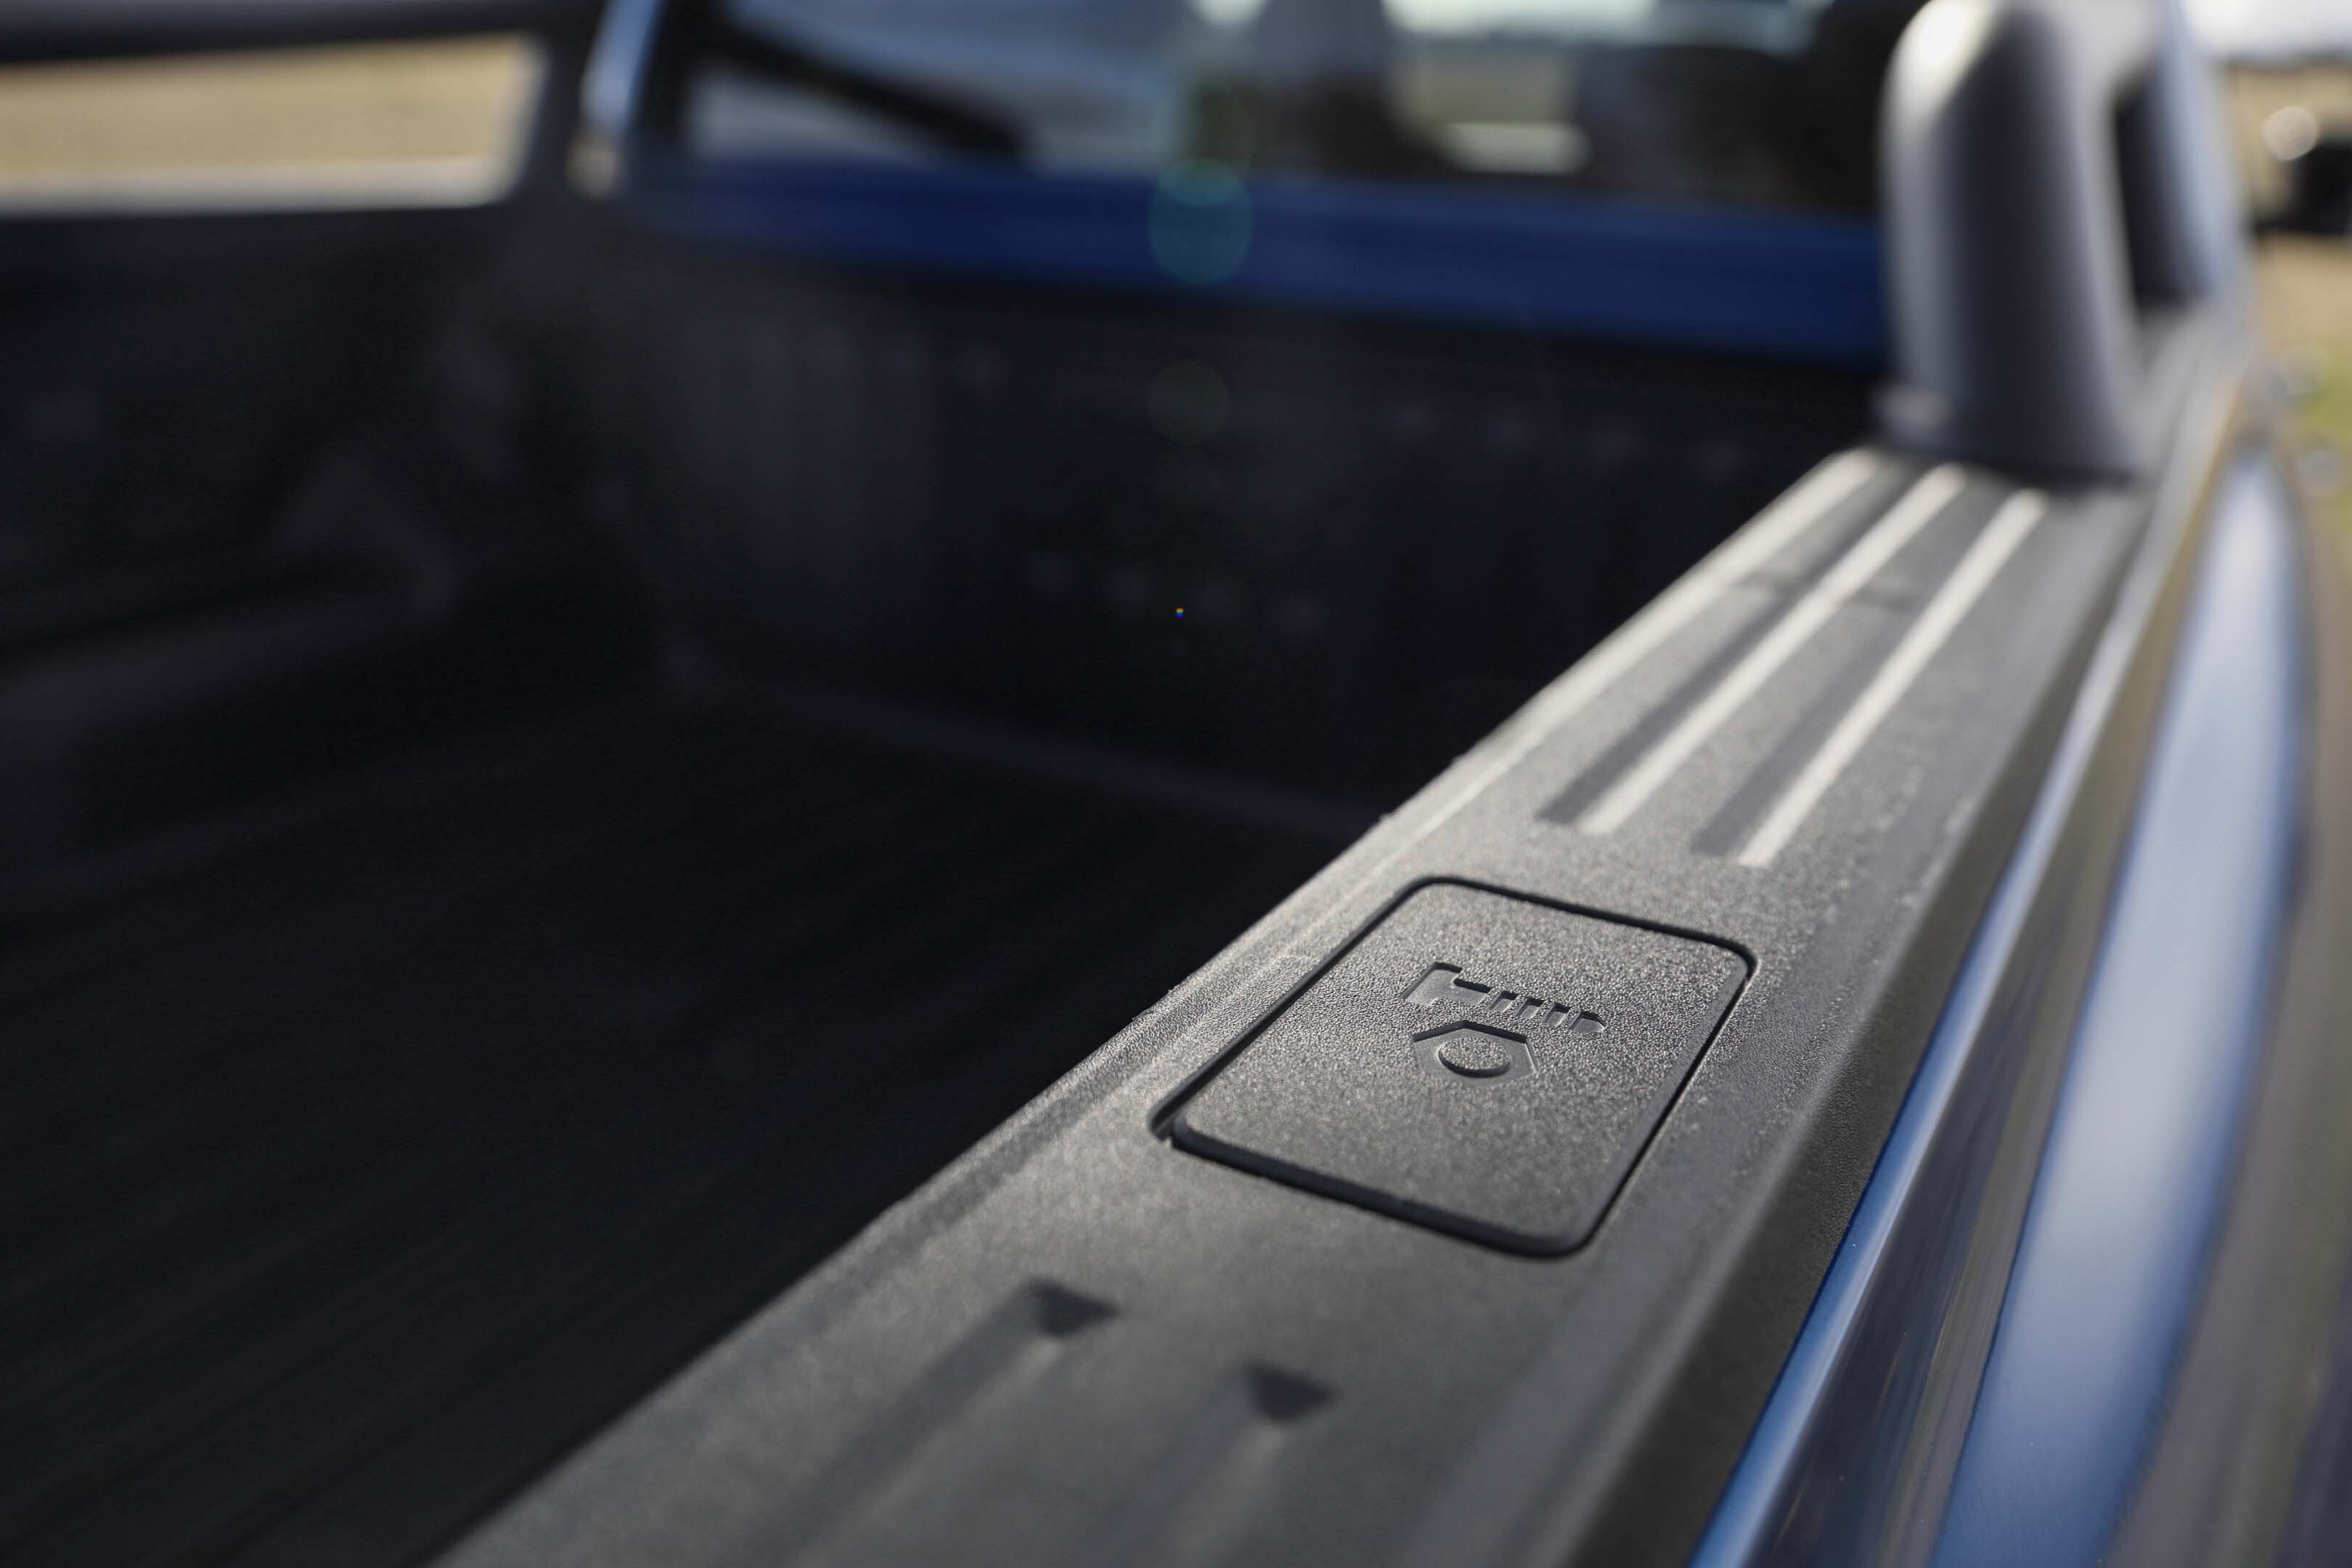
2
What is it like to drive?
The previous Ford Ranger was a benchmark on the road, and the local engineers thankfully didn’t drop the ball for the latest-generation model.
Ford’s Australian engineering team, in fact, has evolved the Ranger’s ride and handling to a point where the ute is better to drive on the road than many SUVs we could mention.
Steering remains a Ranger stand-out. Although there are about 3.2 turns lock to lock, the steering is relatively direct – with less arm twirling required for tighter turns compared with most of its peers. There’s also a precision and just-right heft that isn’t matched by any current rival.
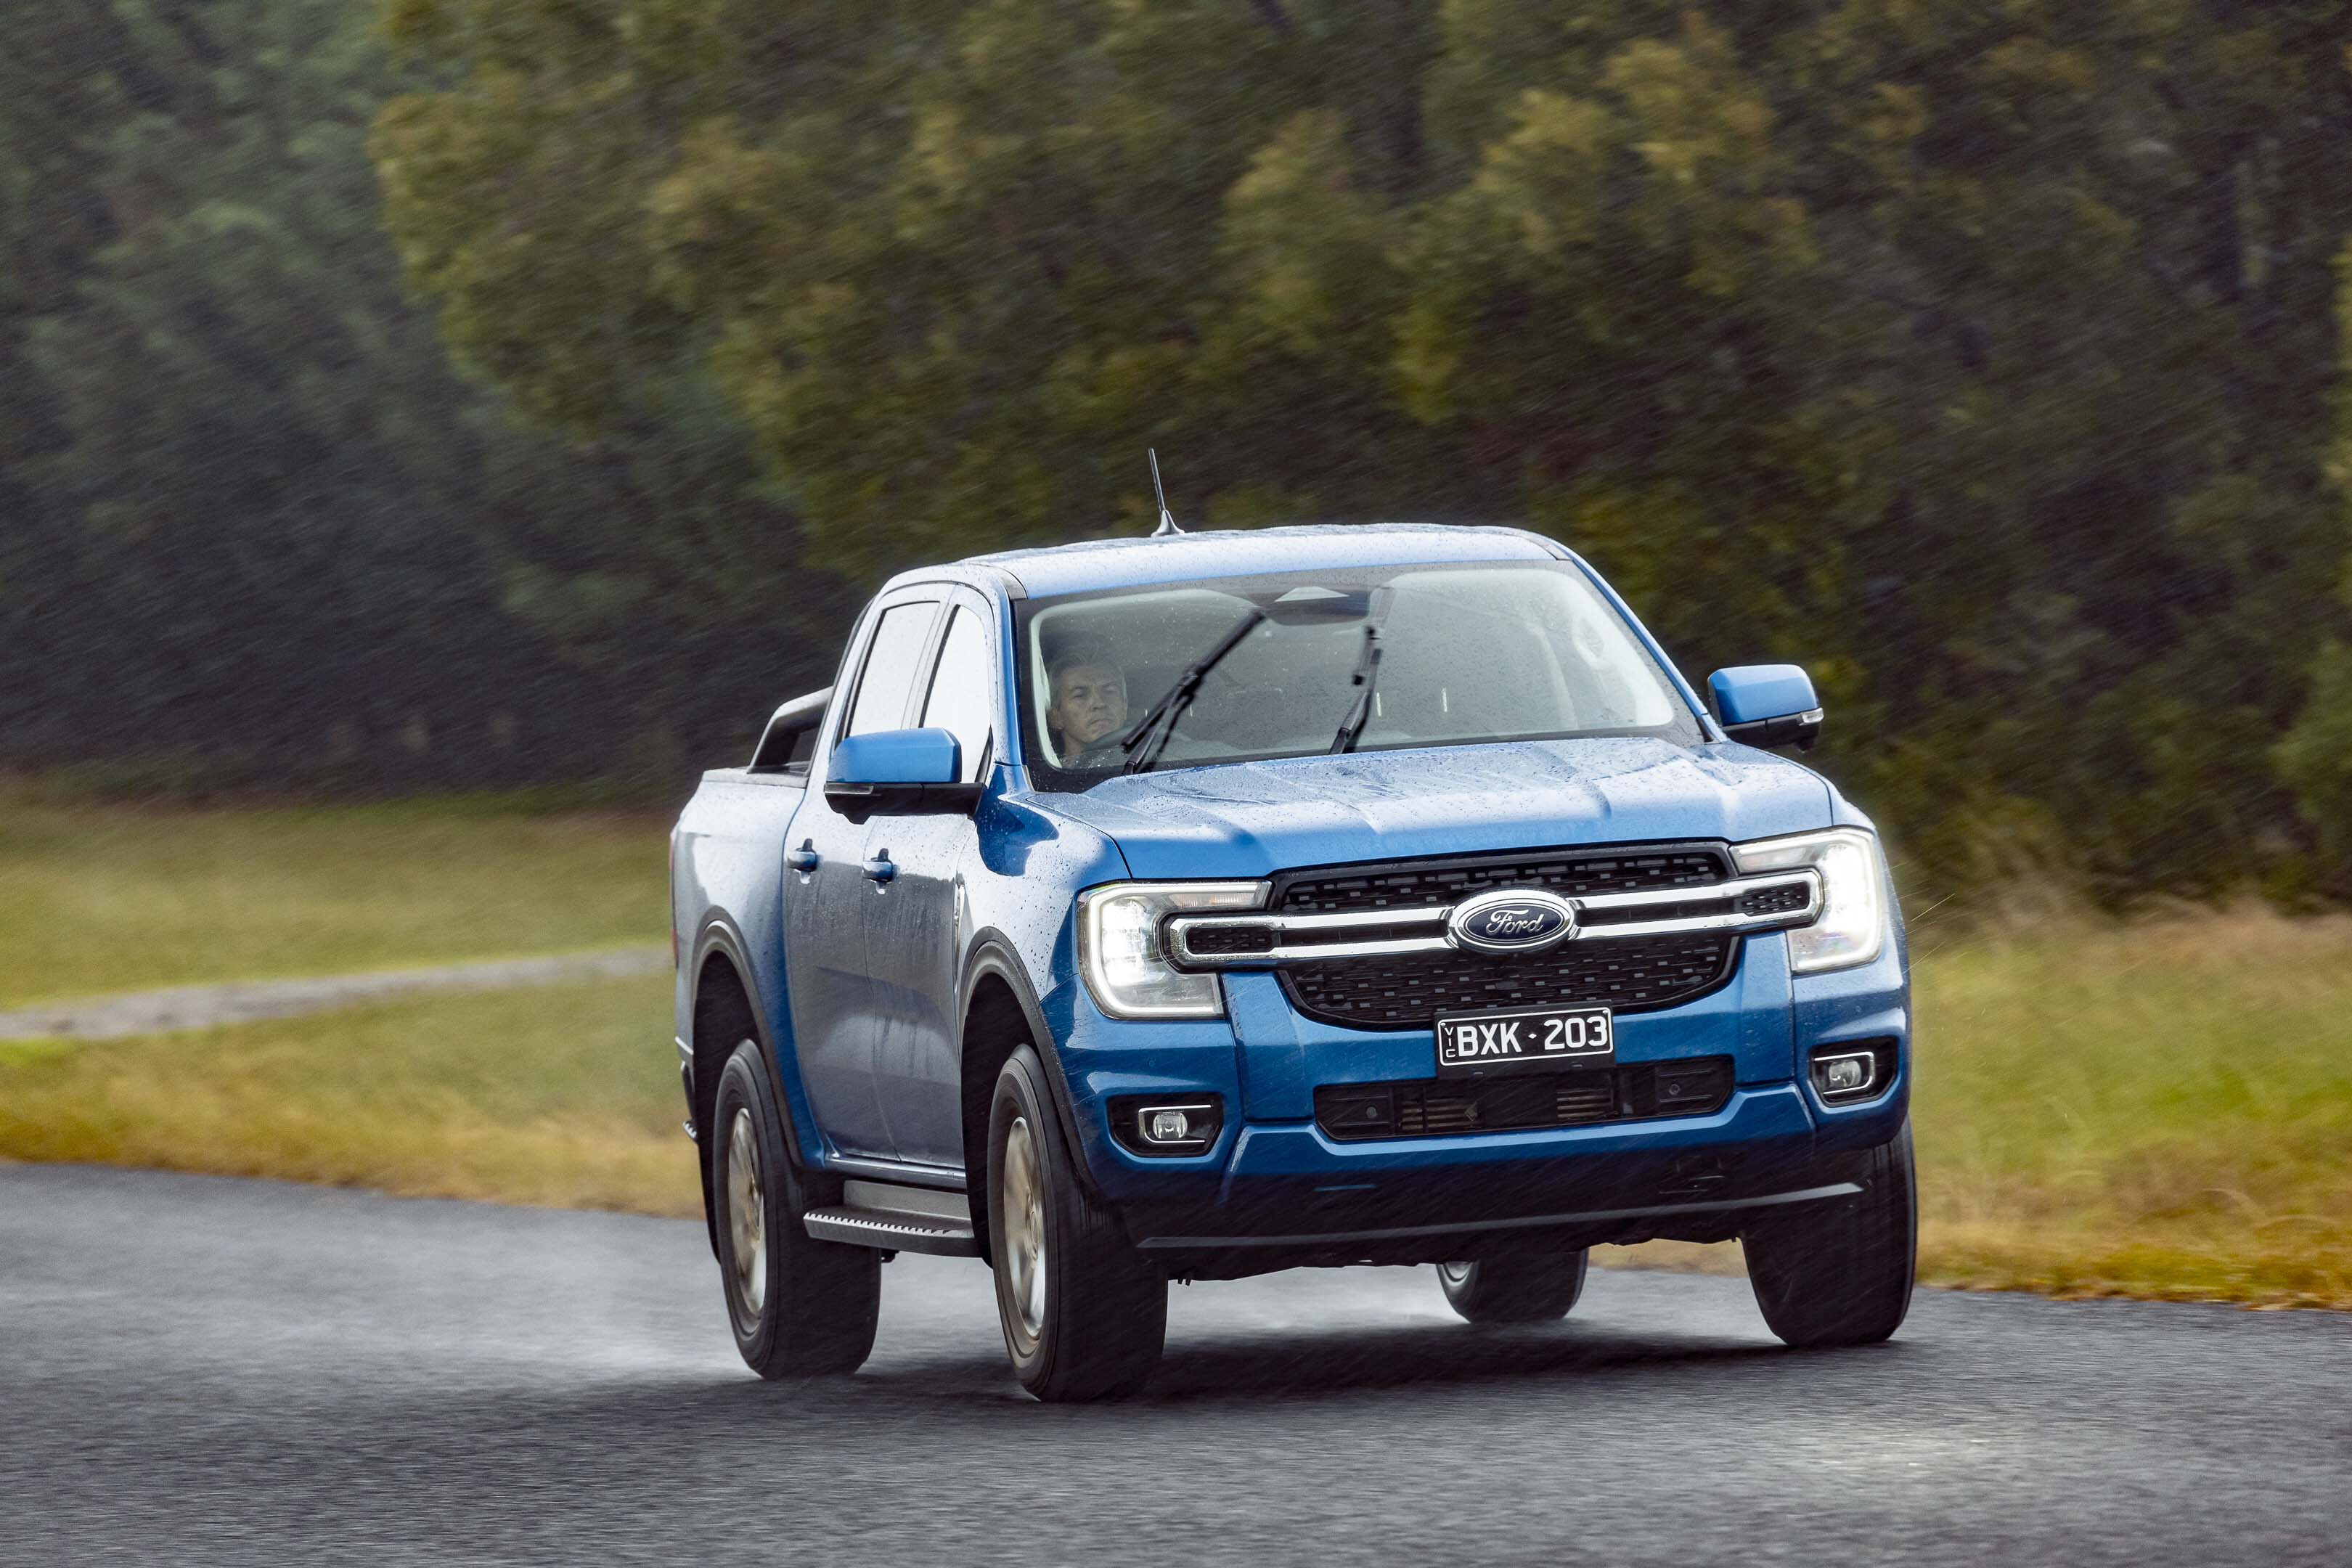
1
The Ranger can’t quite compensate those who still lament the passing of sporty Falcon utes, but it is impressively composed through corners – offering something for both keen drivers and those who simply want reassuring roadholding from their dual-cab.
A superb electronic stability control system helps keep the Ranger in check on slippery roads.
There’s a firmness to the XLT’s unladen ride, which is particularly noticeable at lower speeds, though crucially the Ranger’s suspension avoids the jiggly characteristics so common to the segment.
Cabin calm is further boosted by low levels of tyre, wind and engine noise.
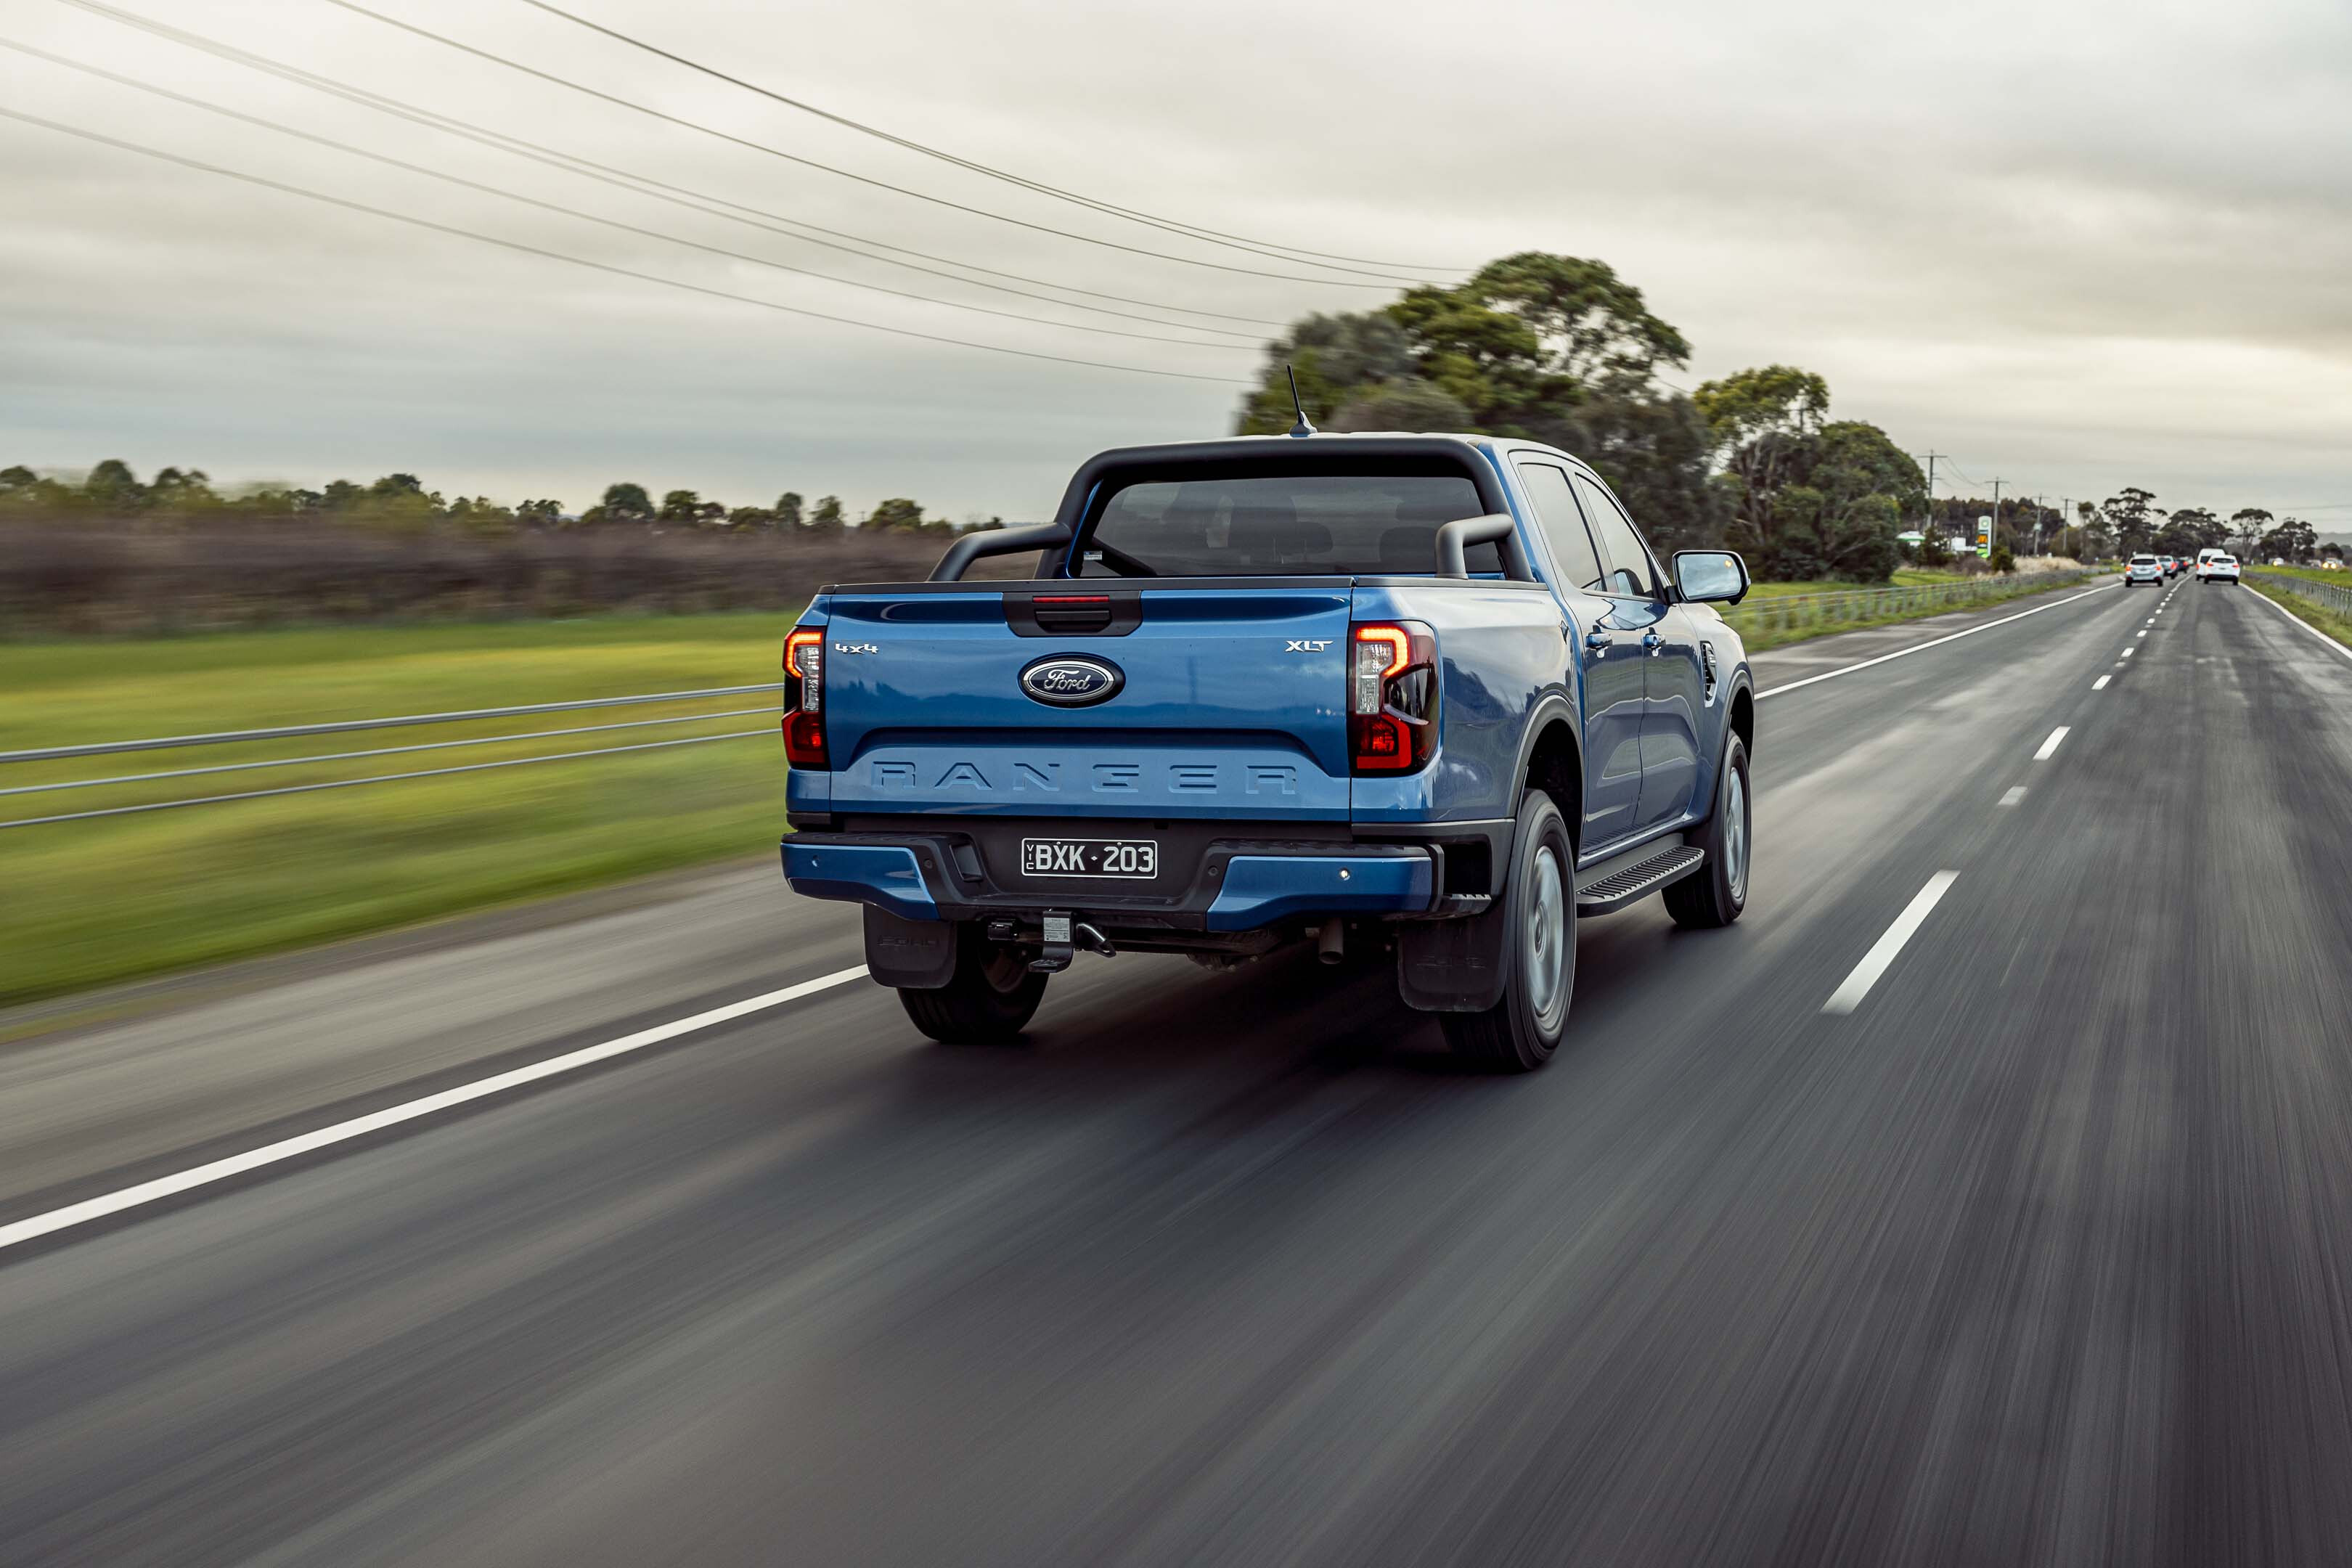
1
The four-cylinder may be relatively quiet but it’s also plenty muscular, producing maximum torque of 500Nm between 1750 and 2000rpm. The 10-speed auto has been revised (with a new torque converter) to reduce its previous tendency to hunt for gears; if still not perfect, the transmission is less busy in the new Ranger.
Performance is relatively brisk, too. We achieved 9.2 seconds in a 0-100km/h test, making the 154kW four-cylinder Ranger one of the fastest-accelerating vehicles in the class.
Wipe a whole second off that sprint time if you choose the V6, which in addition to developing an extra 30kW, has 600Nm cranking in a slightly wider band – 1750-2250rpm.
The six-cylinder gels even more sweetly with the 10-speed auto, and powers all four wheels variably and permanently whereas four-cylinder Rangers make do with a more conventional part-time four-wheel-drive system. This requires manual shuffling between rear-wheel drive (for on-road driving) and High/Low 4WD (for lower-grip surfaces), though this can be performed on the fly.
1
How is it on fuel?
Official, lab-derived consumption figures for the Ford Ranger are 7.2 litres per 100km for the four-cylinder and 8.4L/100km for the V6.
Expect higher figures in the real world. In our 2022 Dual Cab Megatest, Ford’s ute was the thirstiest of all vehicles in the segment.
The four-cylinder XLT returned an average of 11.3L/100km over a 215km drive. The V6 used some extra fuel, though its 11.8L/100km result was a smaller margin than the 1.2L/100km suggested by ADR81 figures.

1
Is it good for towing?
The Ranger’s braked towing capacity is 3500kg regardless of whether you choose the bi-turbo four-cylinder or V6.
However, a V6 Ranger offers the benefits of stronger performance and better refinement, as well as permanent four-wheel-drive capability, which delivers benefits on wet and varied roads when towing.
You also miss some of the driving modes, though the Tow-Haul setting is still there.
The electronic towing aids and on-screen guides are also there when you have the optional Touring Pack fitted, as our Ranger XLT did.
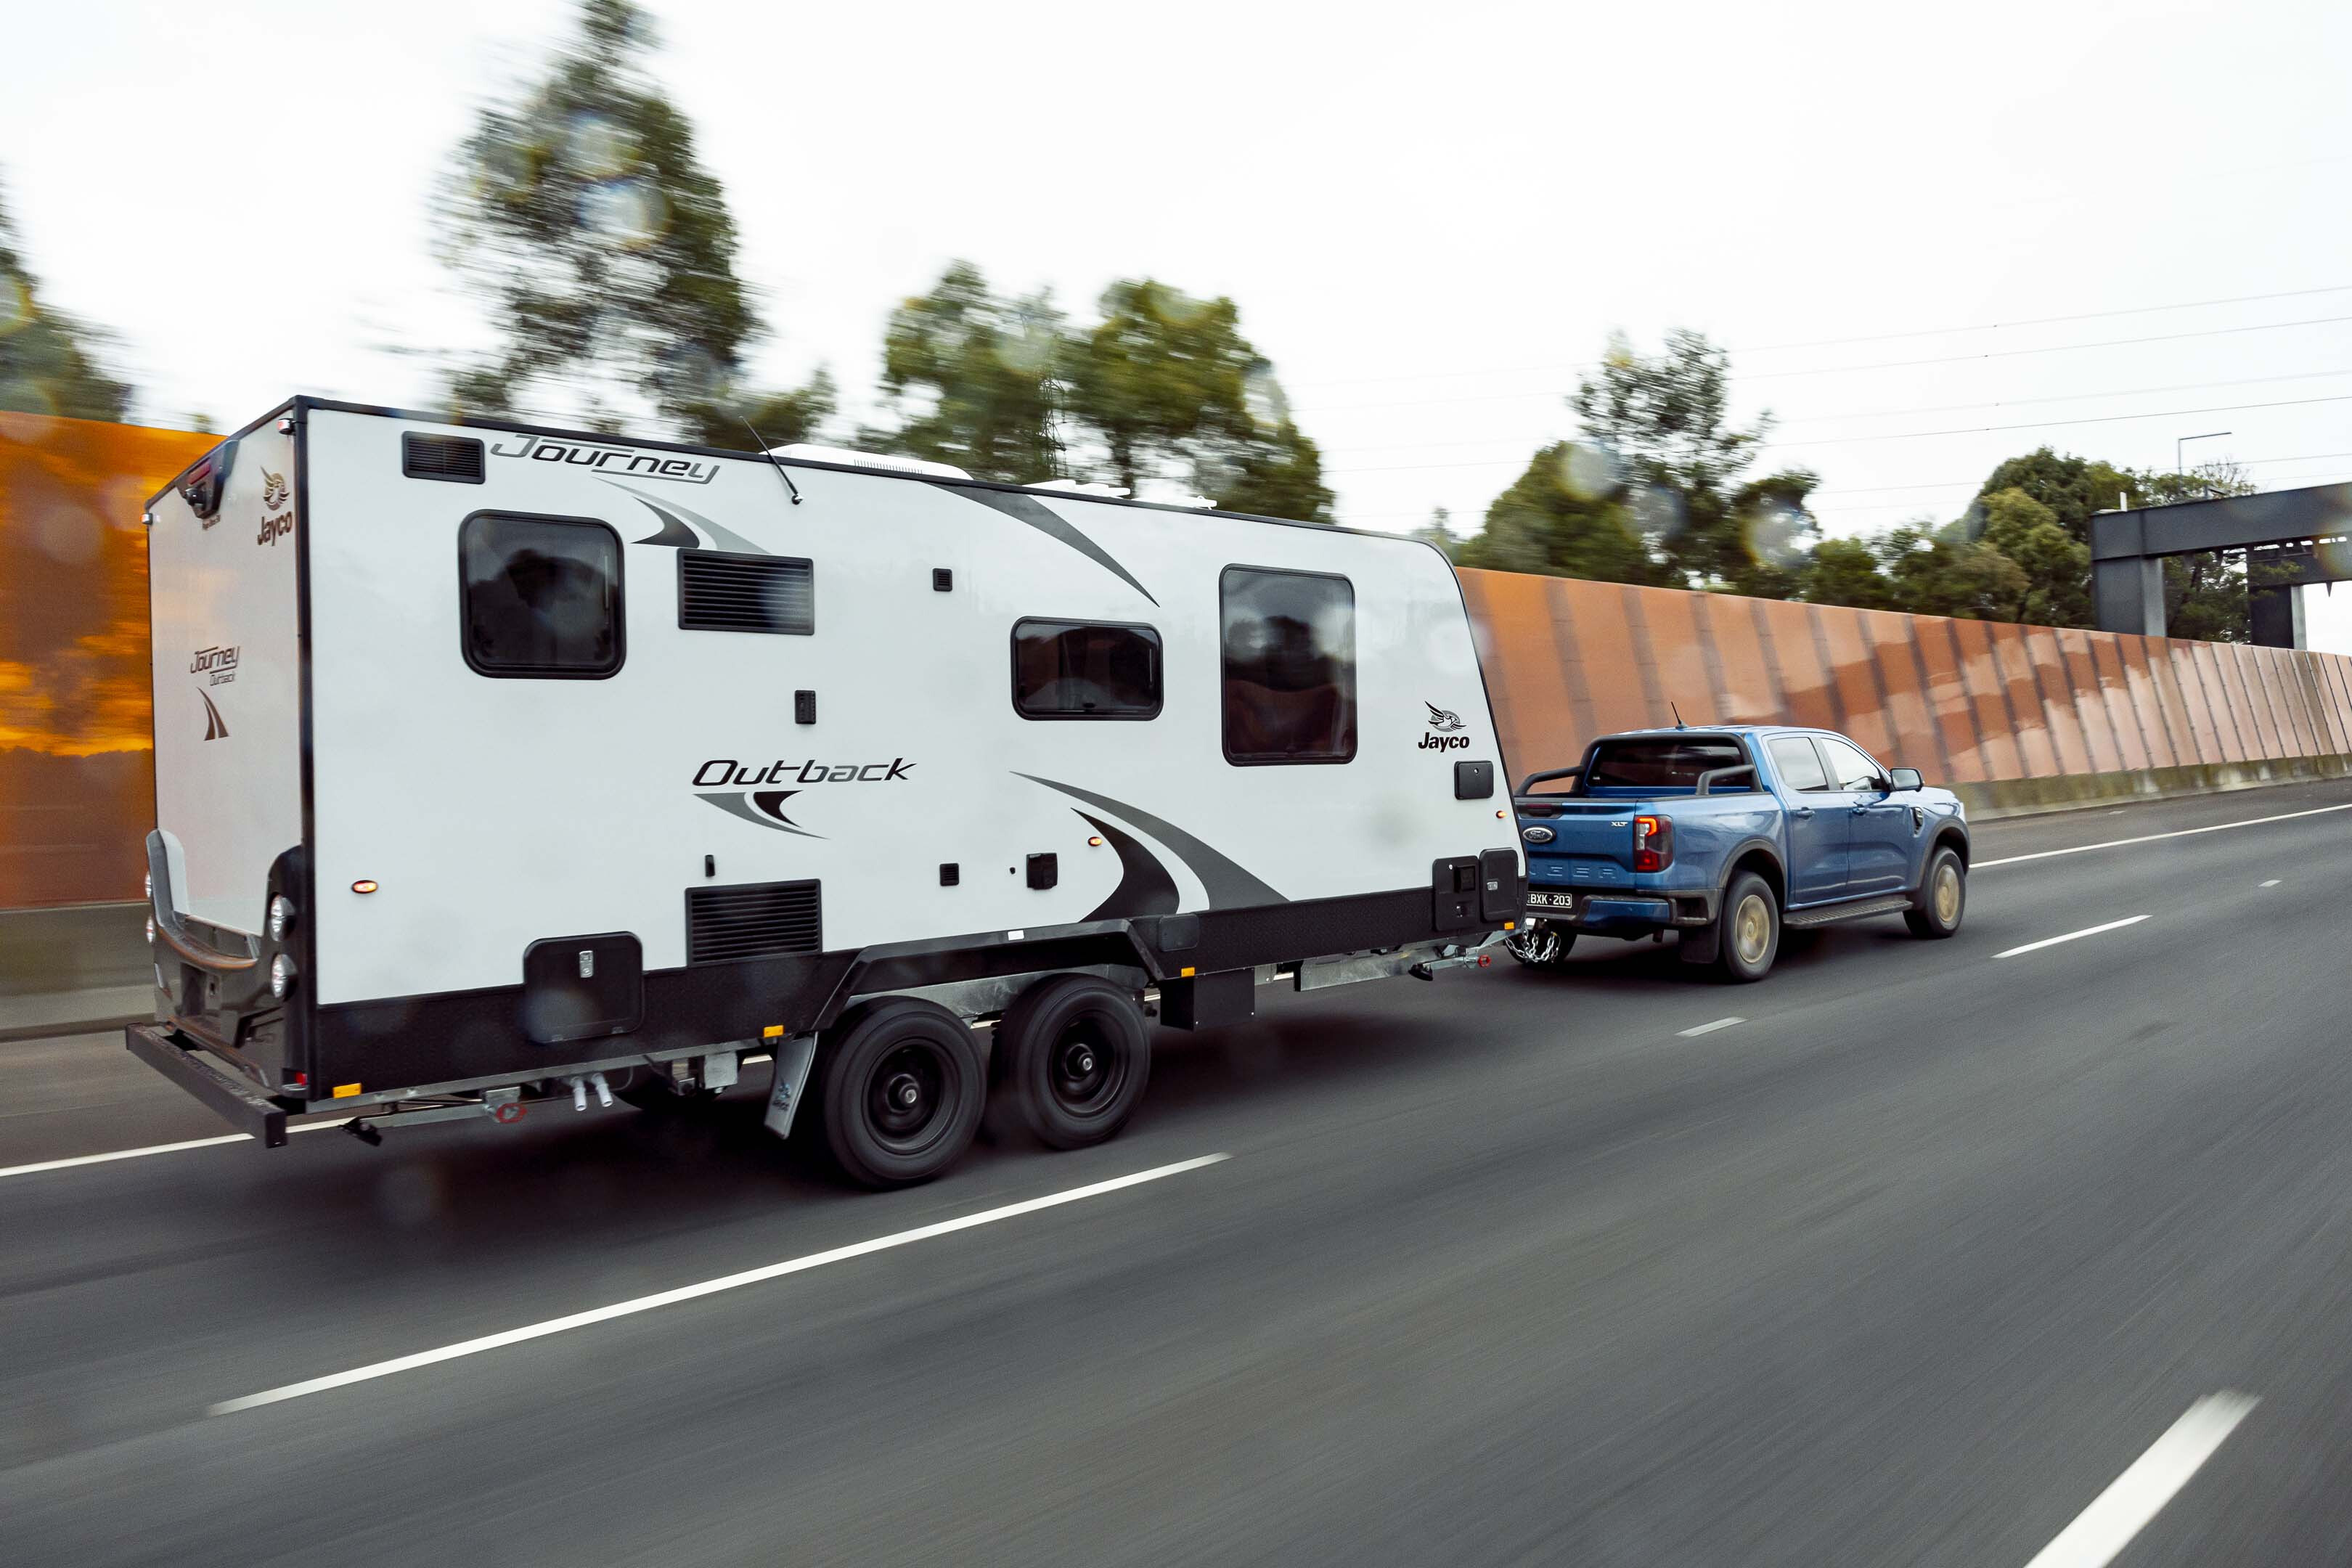
1
We tested with a Jayco caravan on the back of both our XLT four-cylinder and a Ranger Sport V6 and found a similar experience from the chassis. It’s stable and controlled and gives the driver confidence in the ute’s abilities.
The four-cylinder can be heard working hard on longer hill climbs and you generally need to work the accelerator pedal a touch harder to get the most out of the smaller engine.
It’s inevitably thirstier than the V6 as a result, though our results of 17.3L/100km and 16.7L/100km are unlikely to sway a buyer one way or the other.
The new Rangers prove not only to be competent and relaxed towing vehicles but, with the new technologies and features included, they make towing easier and safer.
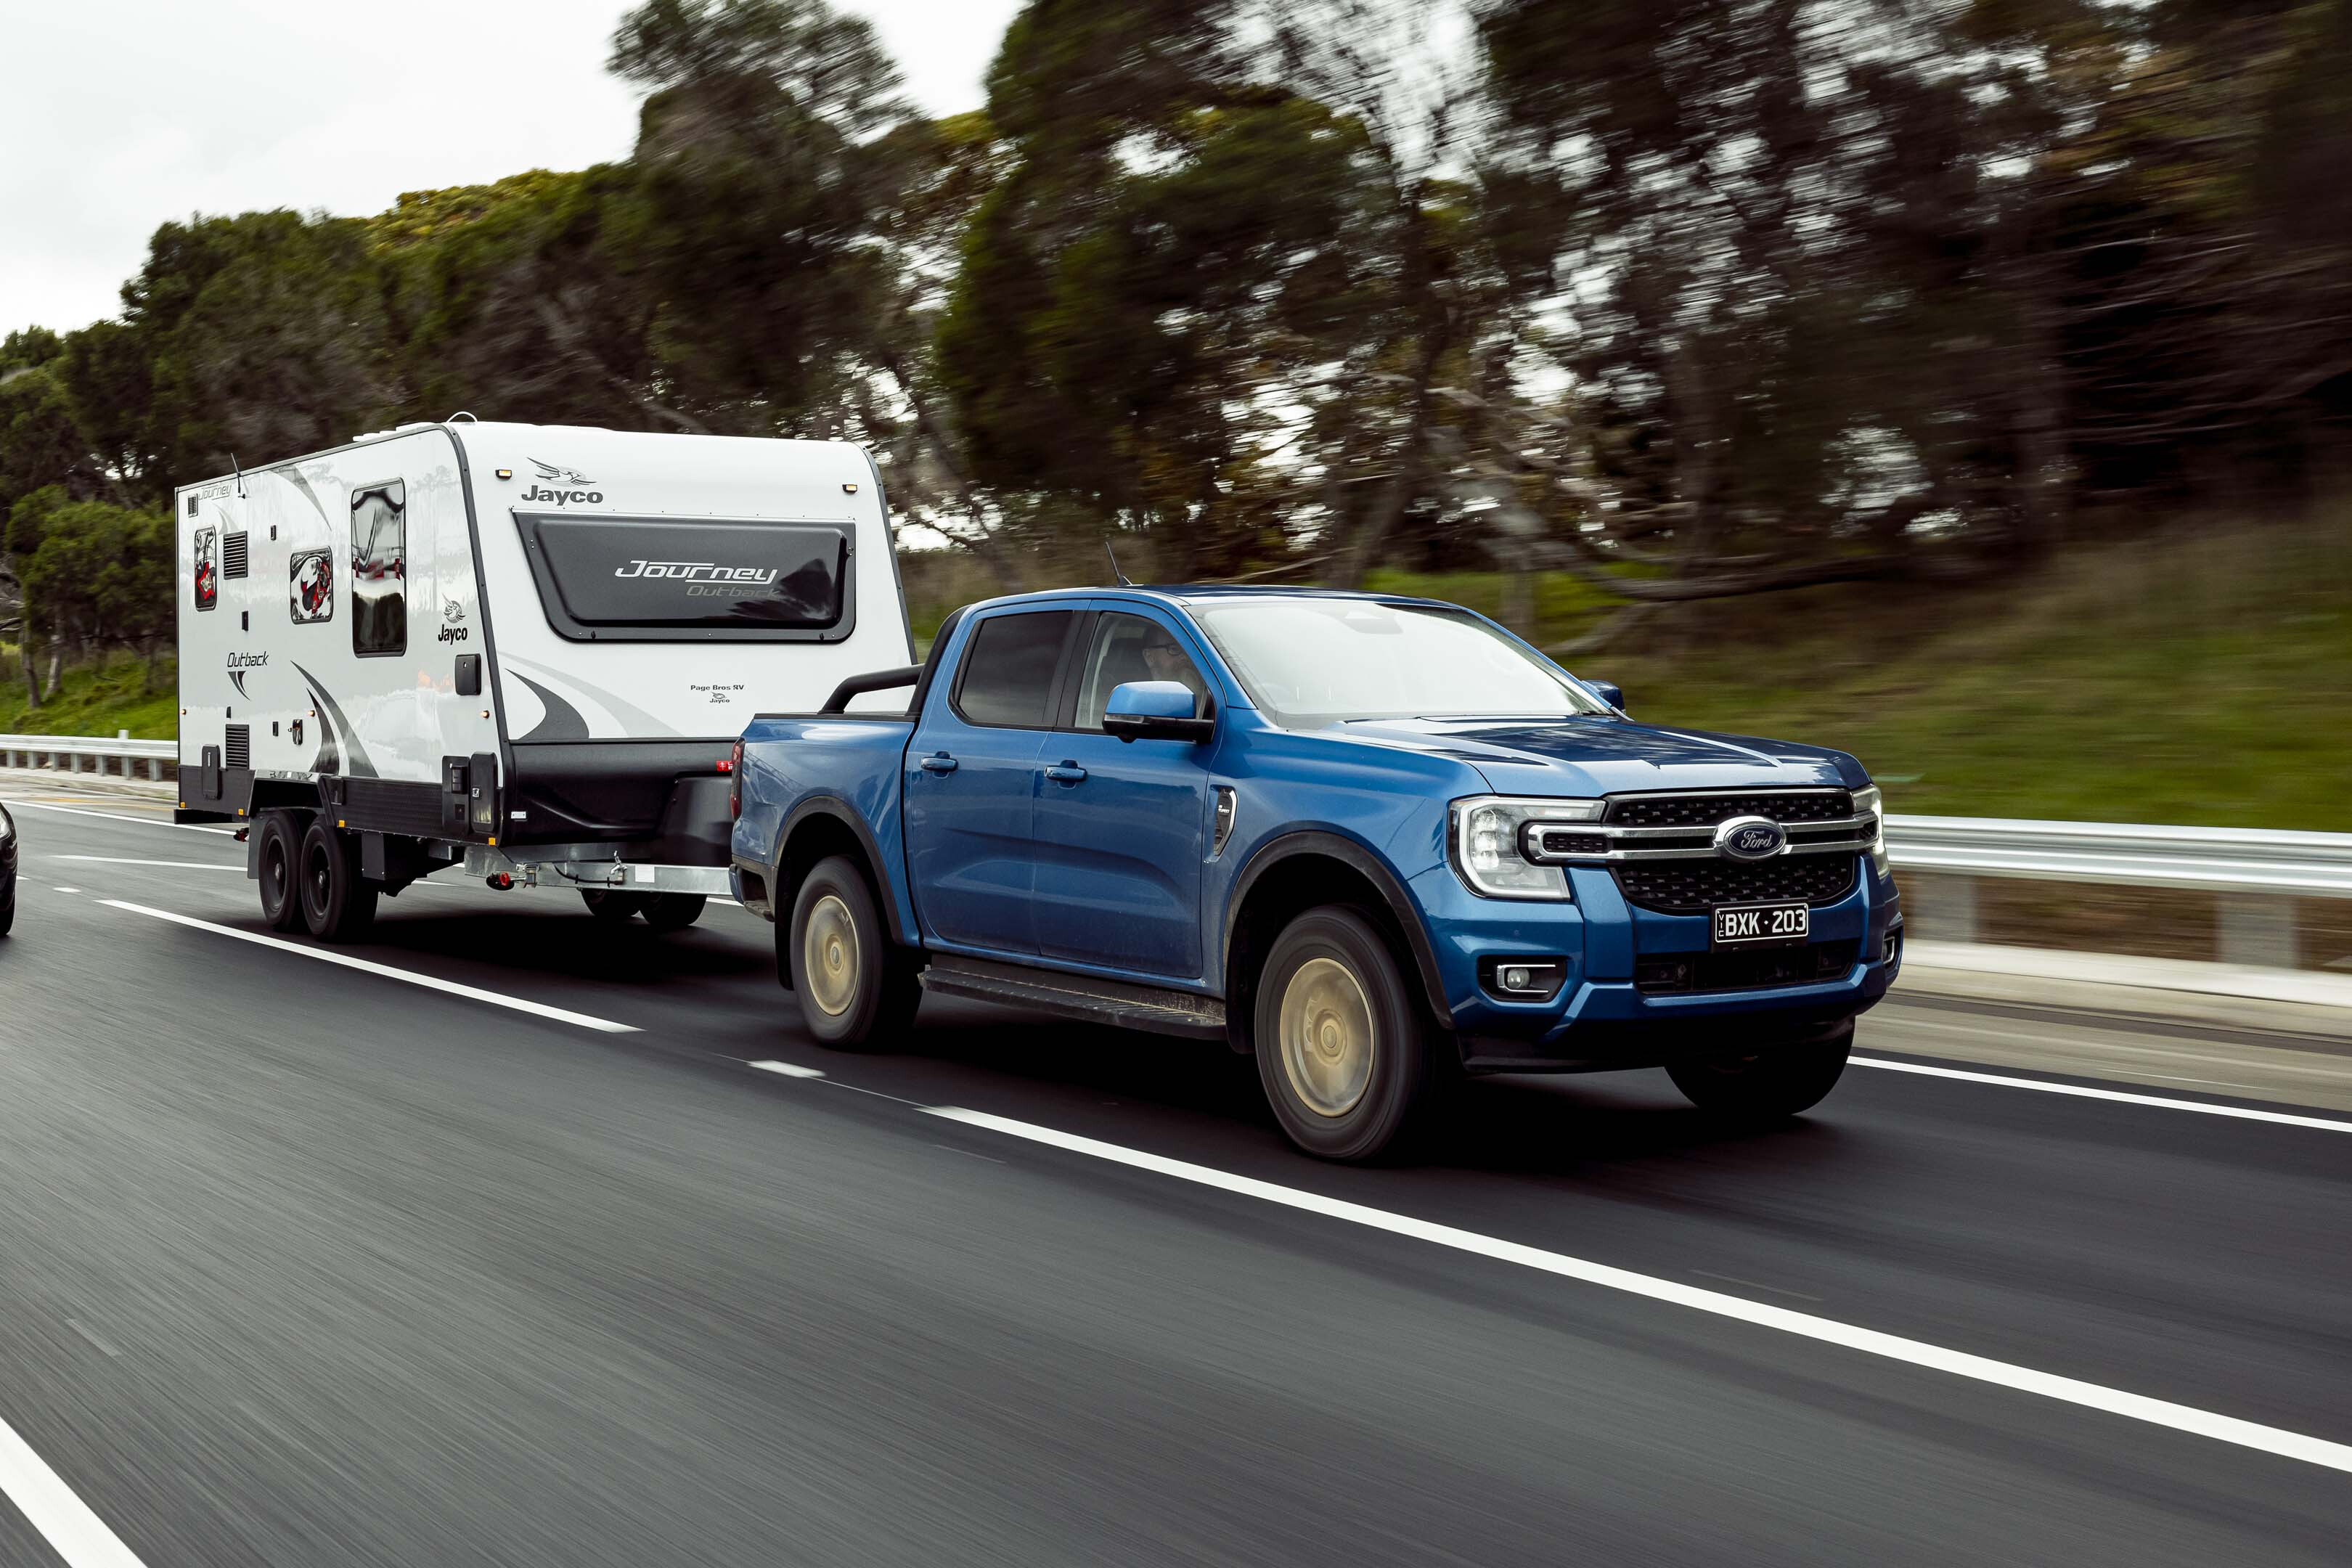
1
How safe is it?
Independent crash-test body ANCAP awarded the Ranger its maximum five-star rating.
While it shares that result with almost all dual-cab utes, the Ford scored particularly well for child occupant protection and safety assist technology.
The Ranger has more airbags than any other ute for protecting its occupants, and there are three-point seatbelts in all seating positions and childproof door locks.
Driver aids include intelligent adaptive cruise control, blind-spot monitoring with cross-traffic alert and trailer coverage, speed limit notification, lane-keep assist with road edge detection and driver alert, and pre-collision assist with autonomous emergency braking (AEB).
The XLT has parking sensors front and rear, an integrated digital rear-view camera, and a 360-degree camera.
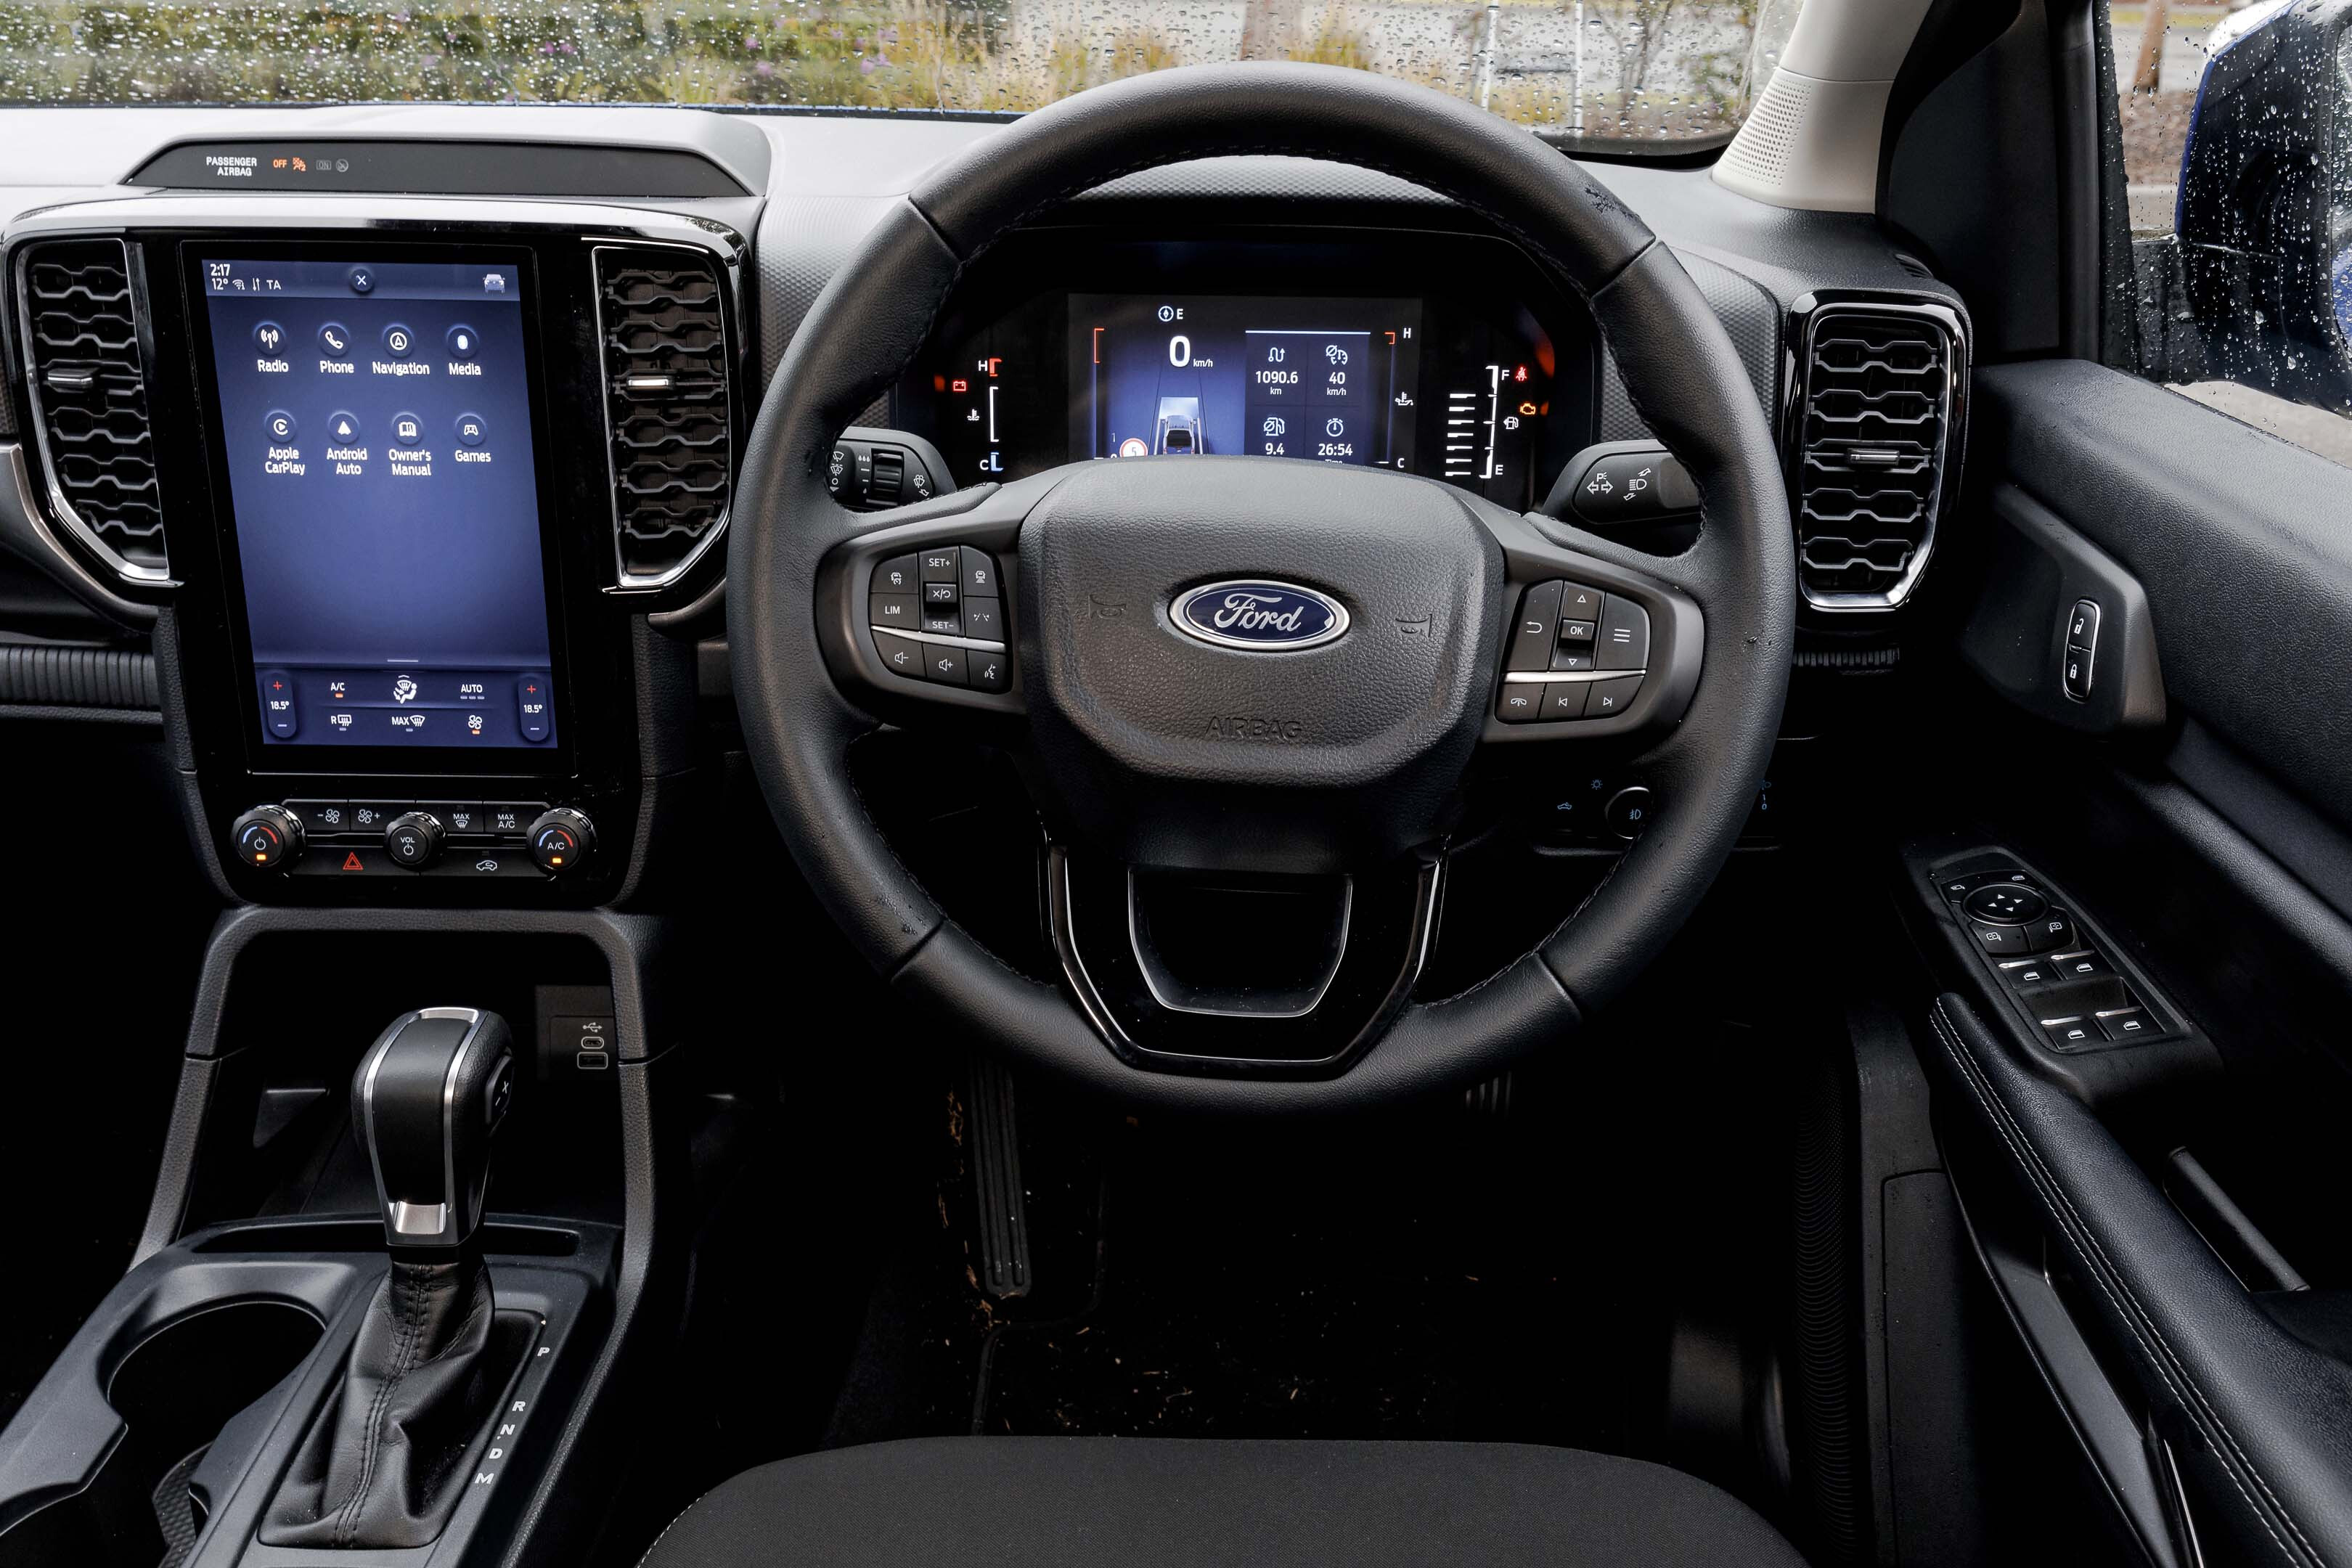
1
Warranty and running costs
Ford lists service intervals for its new Ranger at every 12 months or 15,000km, whichever comes first.
Capped-price servicing of just $329 is eligible for the first four general services, covering up to four years (or 60,000km), for MY22 Ford Rangers.
The Ranger is backed by a five-year, unlimited-kilometre warranty.
VERDICT
The Ford Ranger is a stand-out vehicle in the dual-cab-ute segment, with fuel efficiency one of the rare areas where it’s inferior to rivals.
Volkswagen’s second-generation Amarok, due in April and related to the Ranger, might alter the picture but the German ute is also likely to be dearer.
The XLT trim grade remains easy to recommend, too. We’d also suggest opting for the V6 over the four-cylinder engine as it delivers plenty for a relatively small premium.
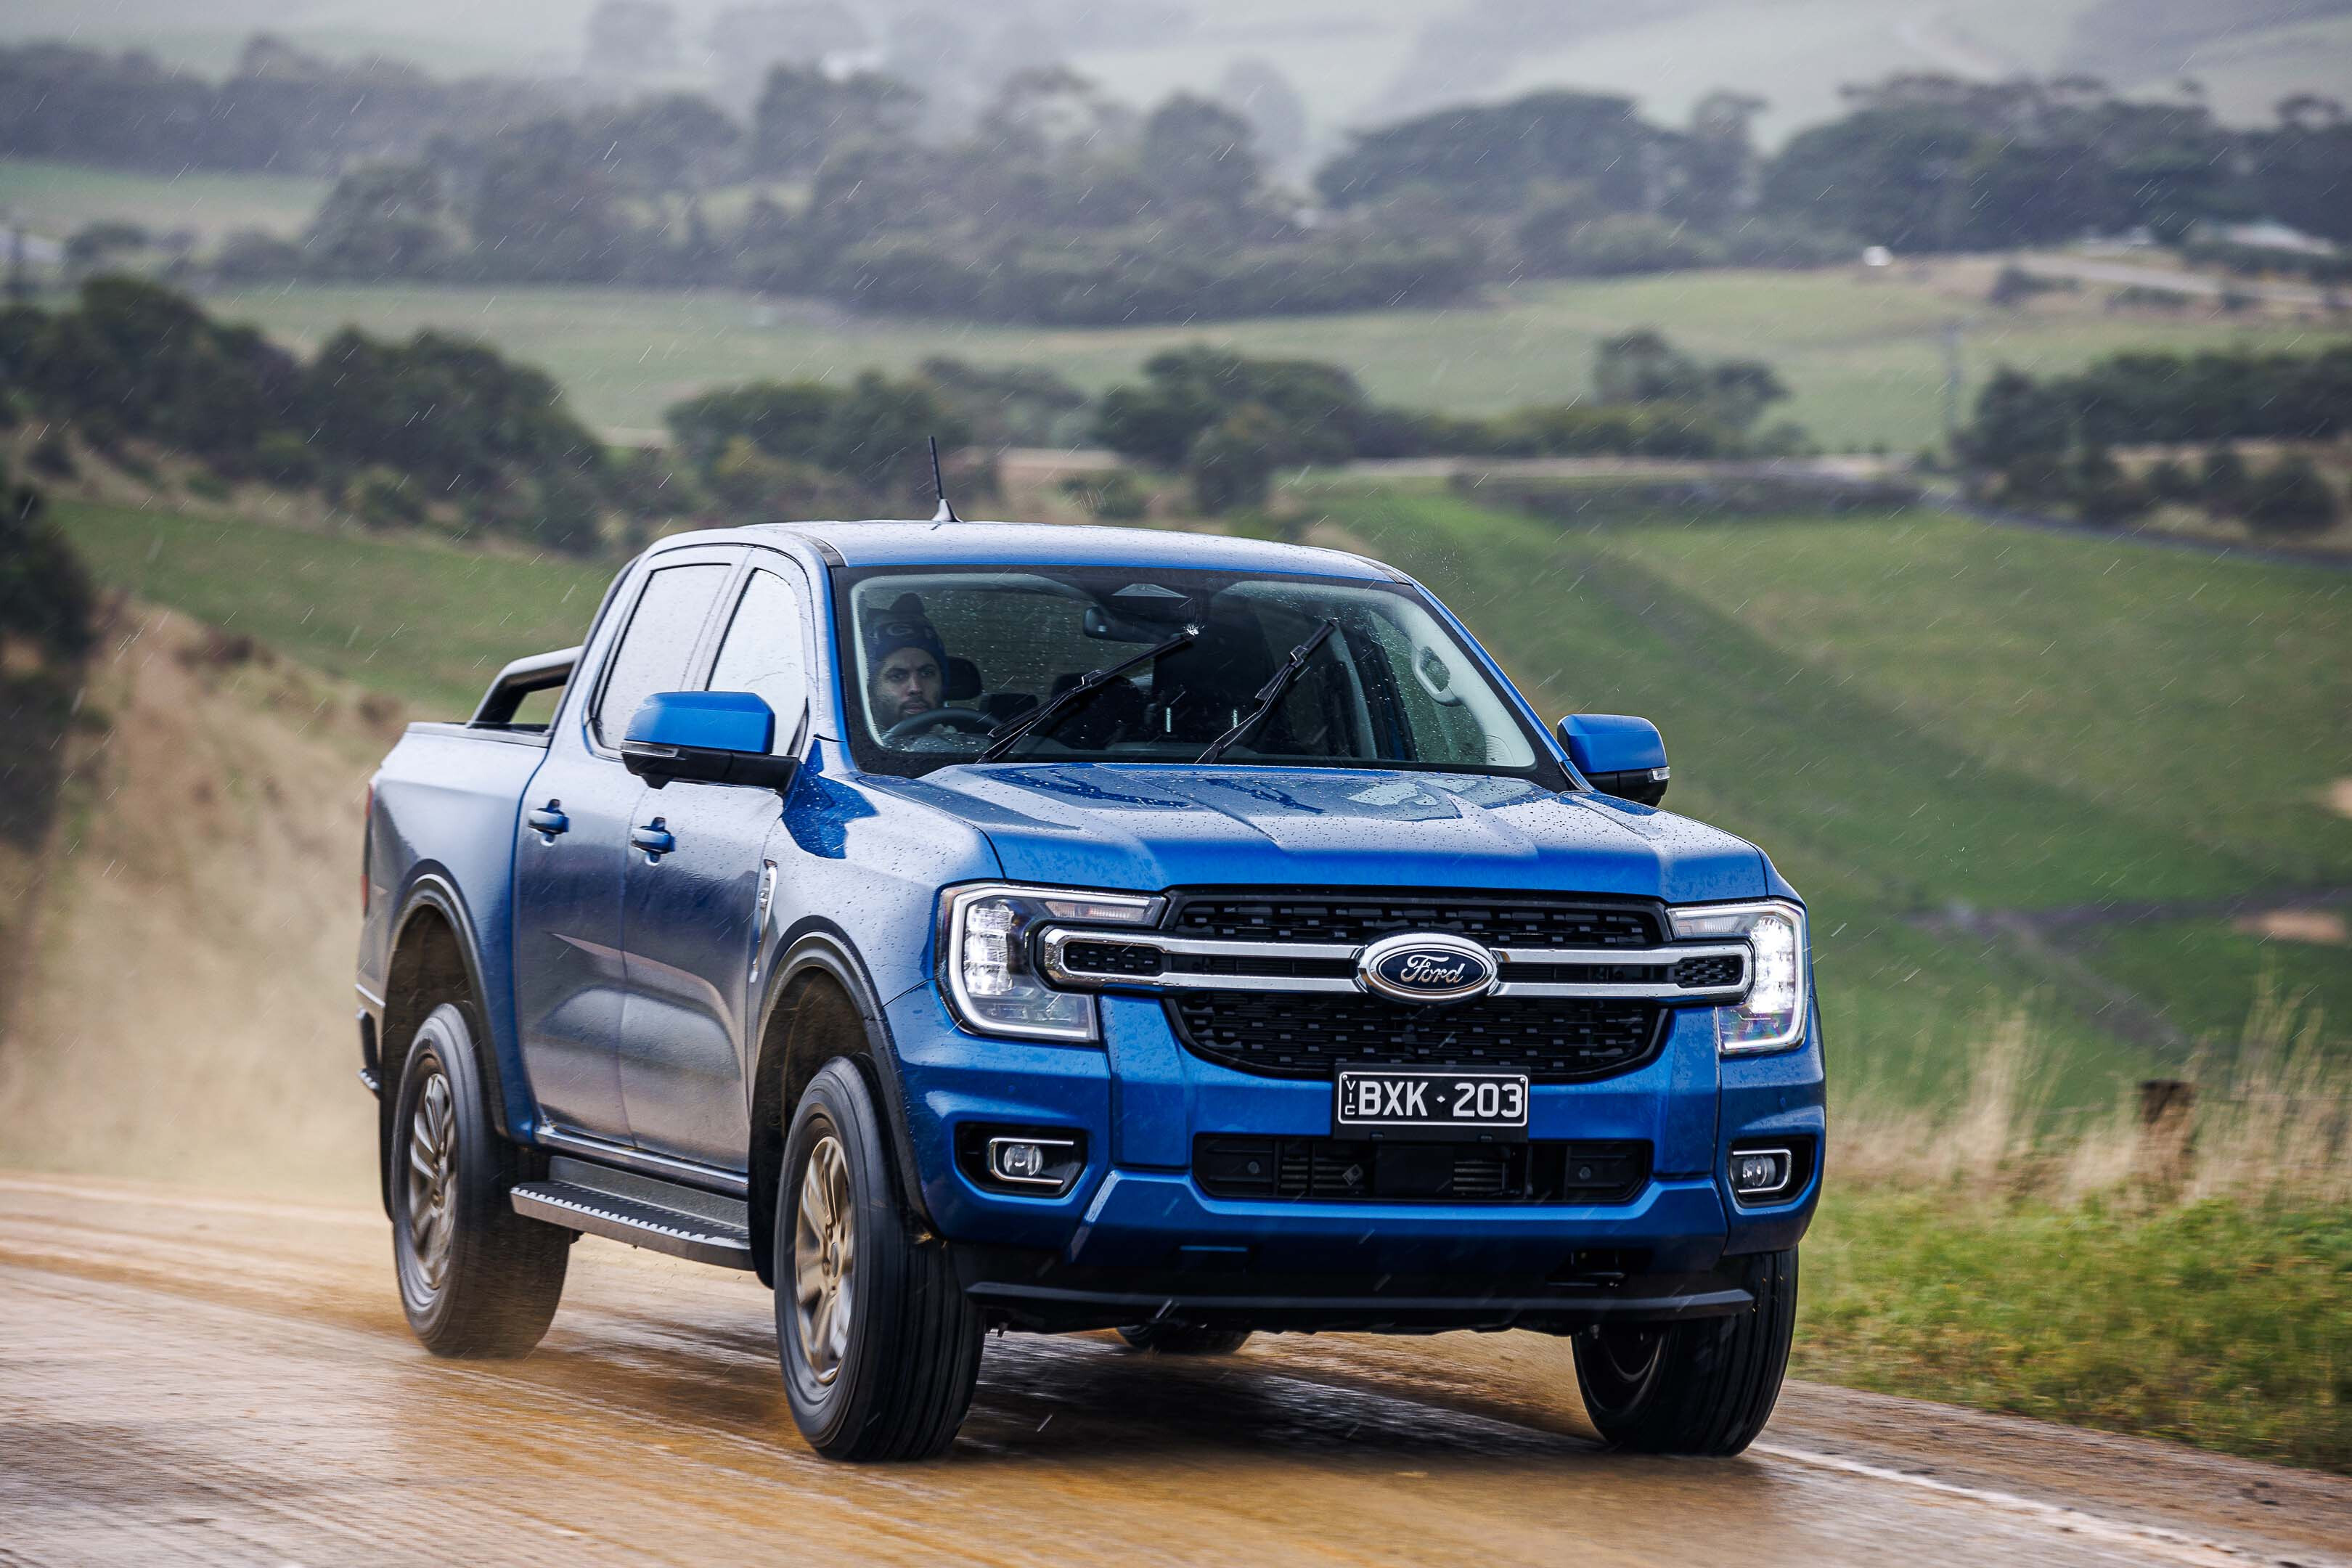
1
MORE
Everything Ford
After more than two centuries since nutty professors started producing light using electricity, you might be excused for thinking there couldn’t be anything more to extract from the humble light bulb.
Nothing could be further from the fact, as electric-light technology continues to develop at great pace with new products that produce better and more efficient illumination for multiple uses.
Nowhere is this more evident than in the automotive sector, where the introduction of light emitting diode (LED) technology has seen significant improvements in lighting in both the OE and aftermarket segments.
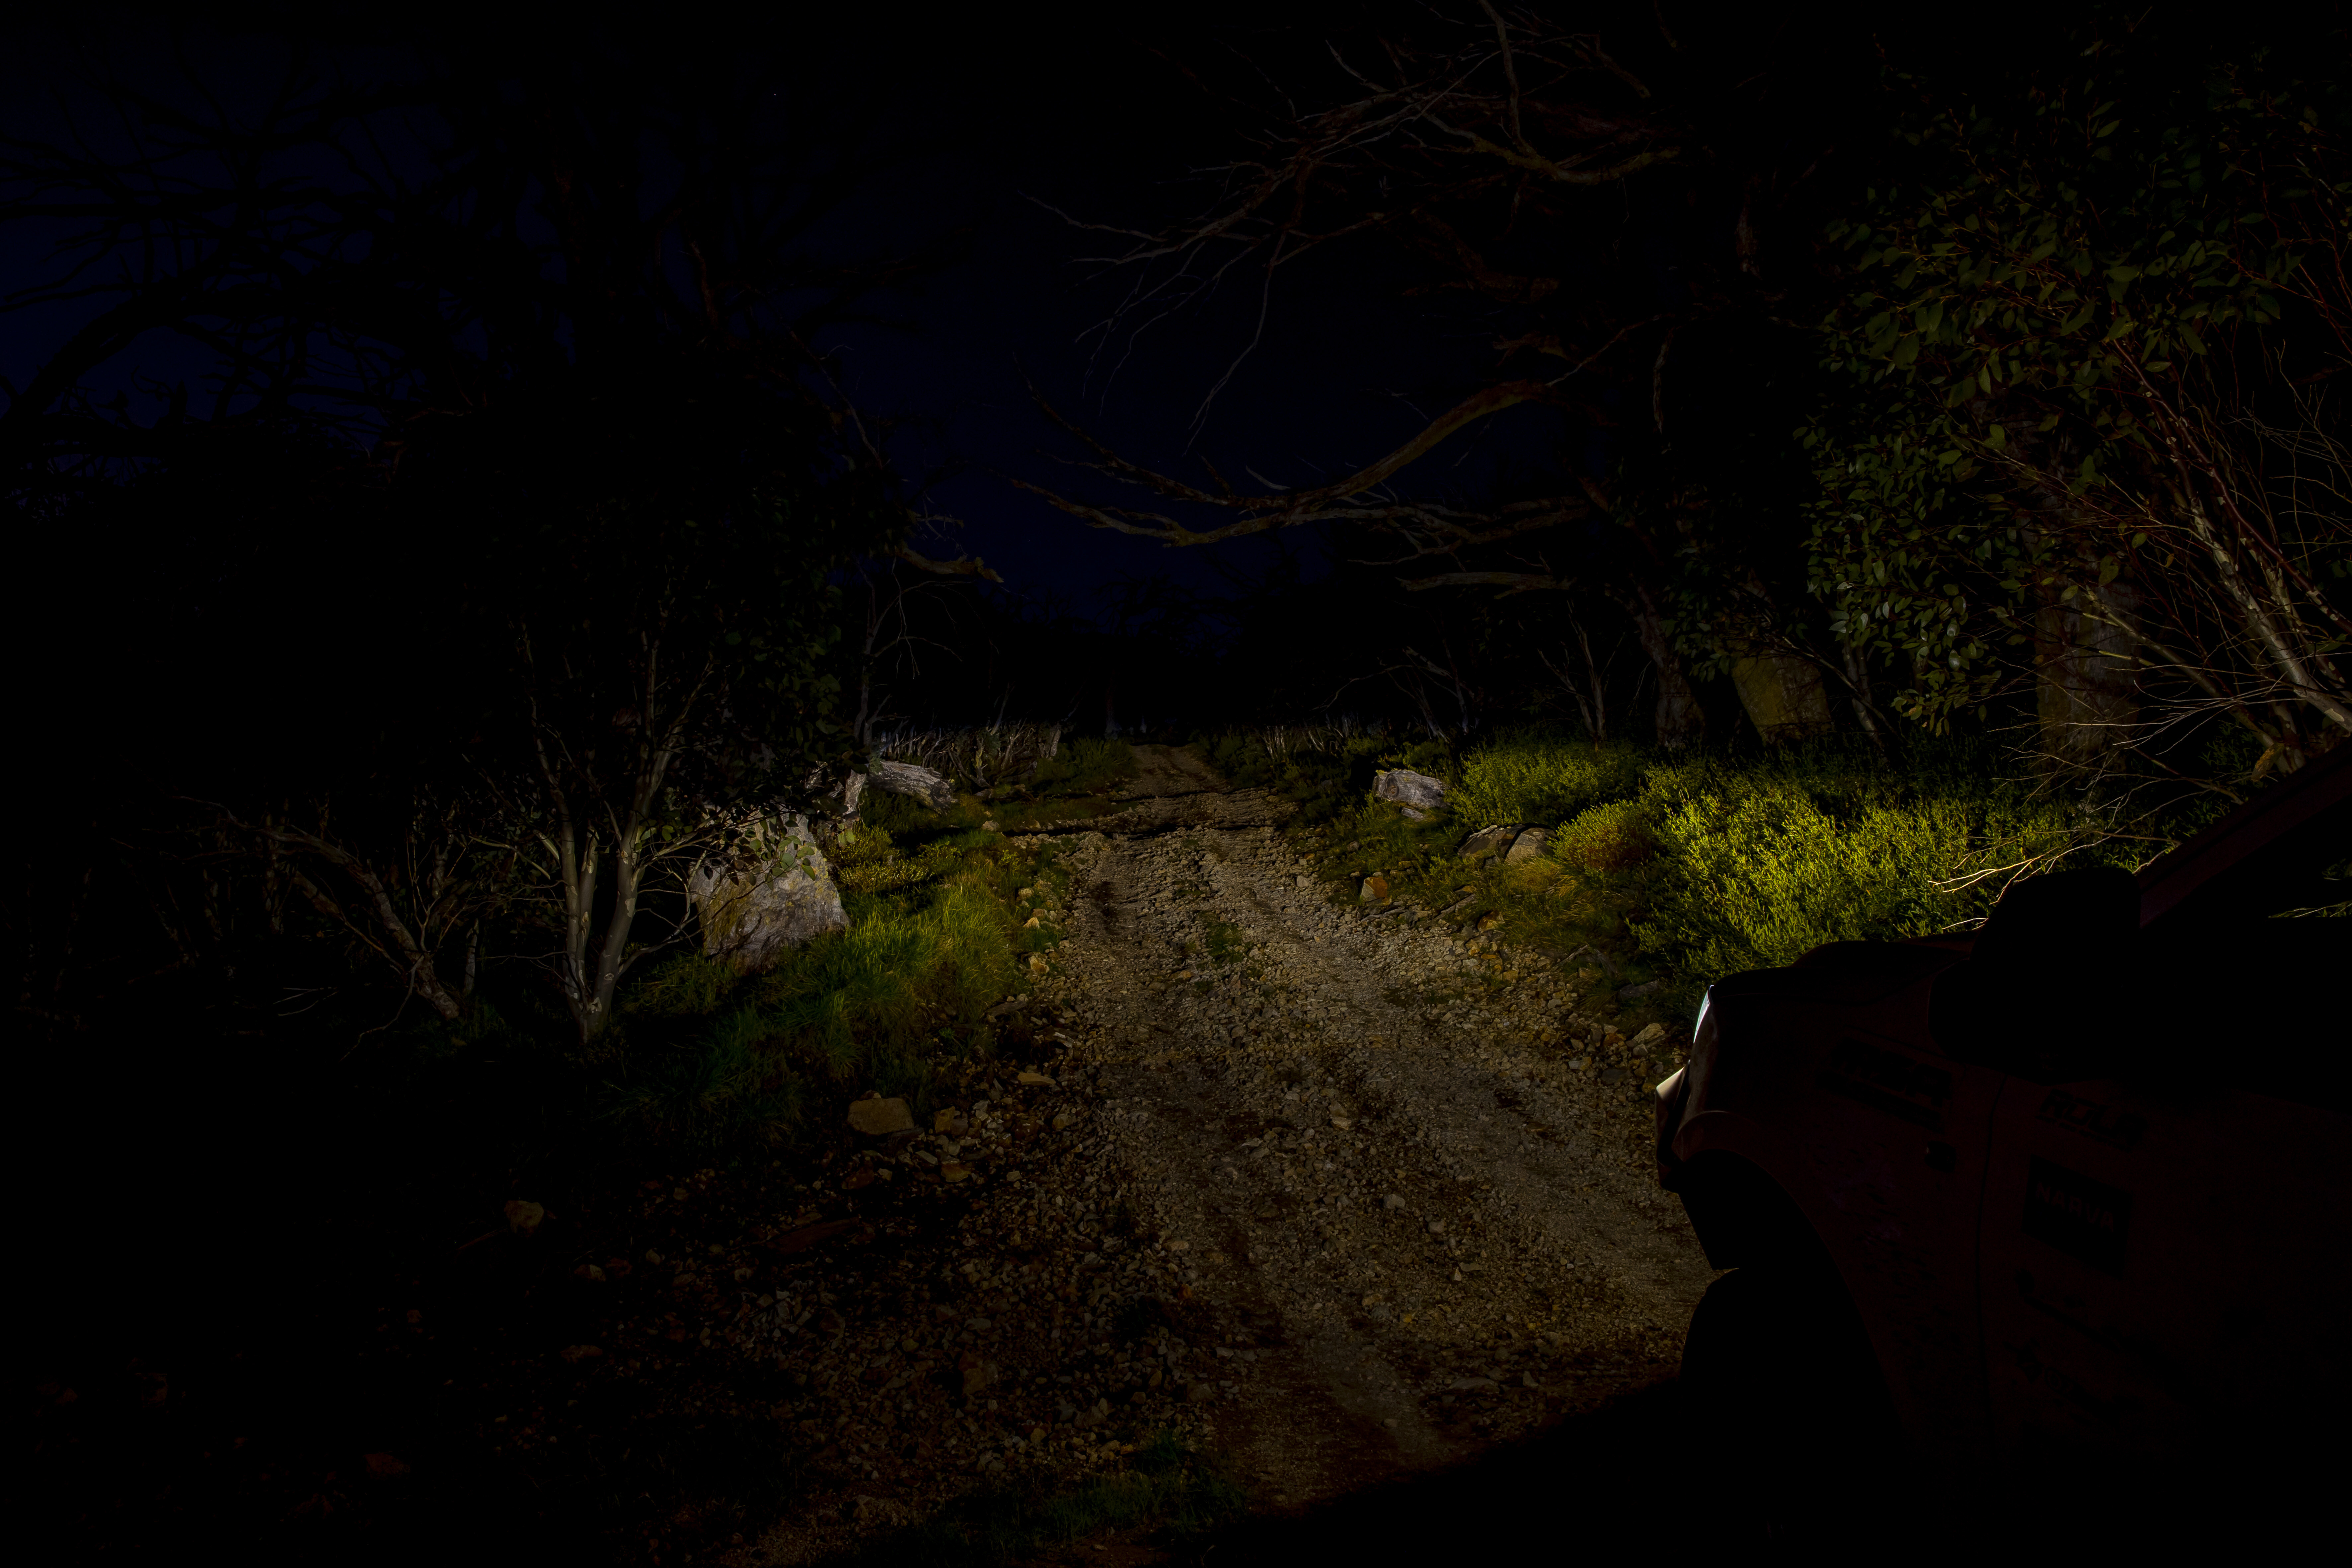
1
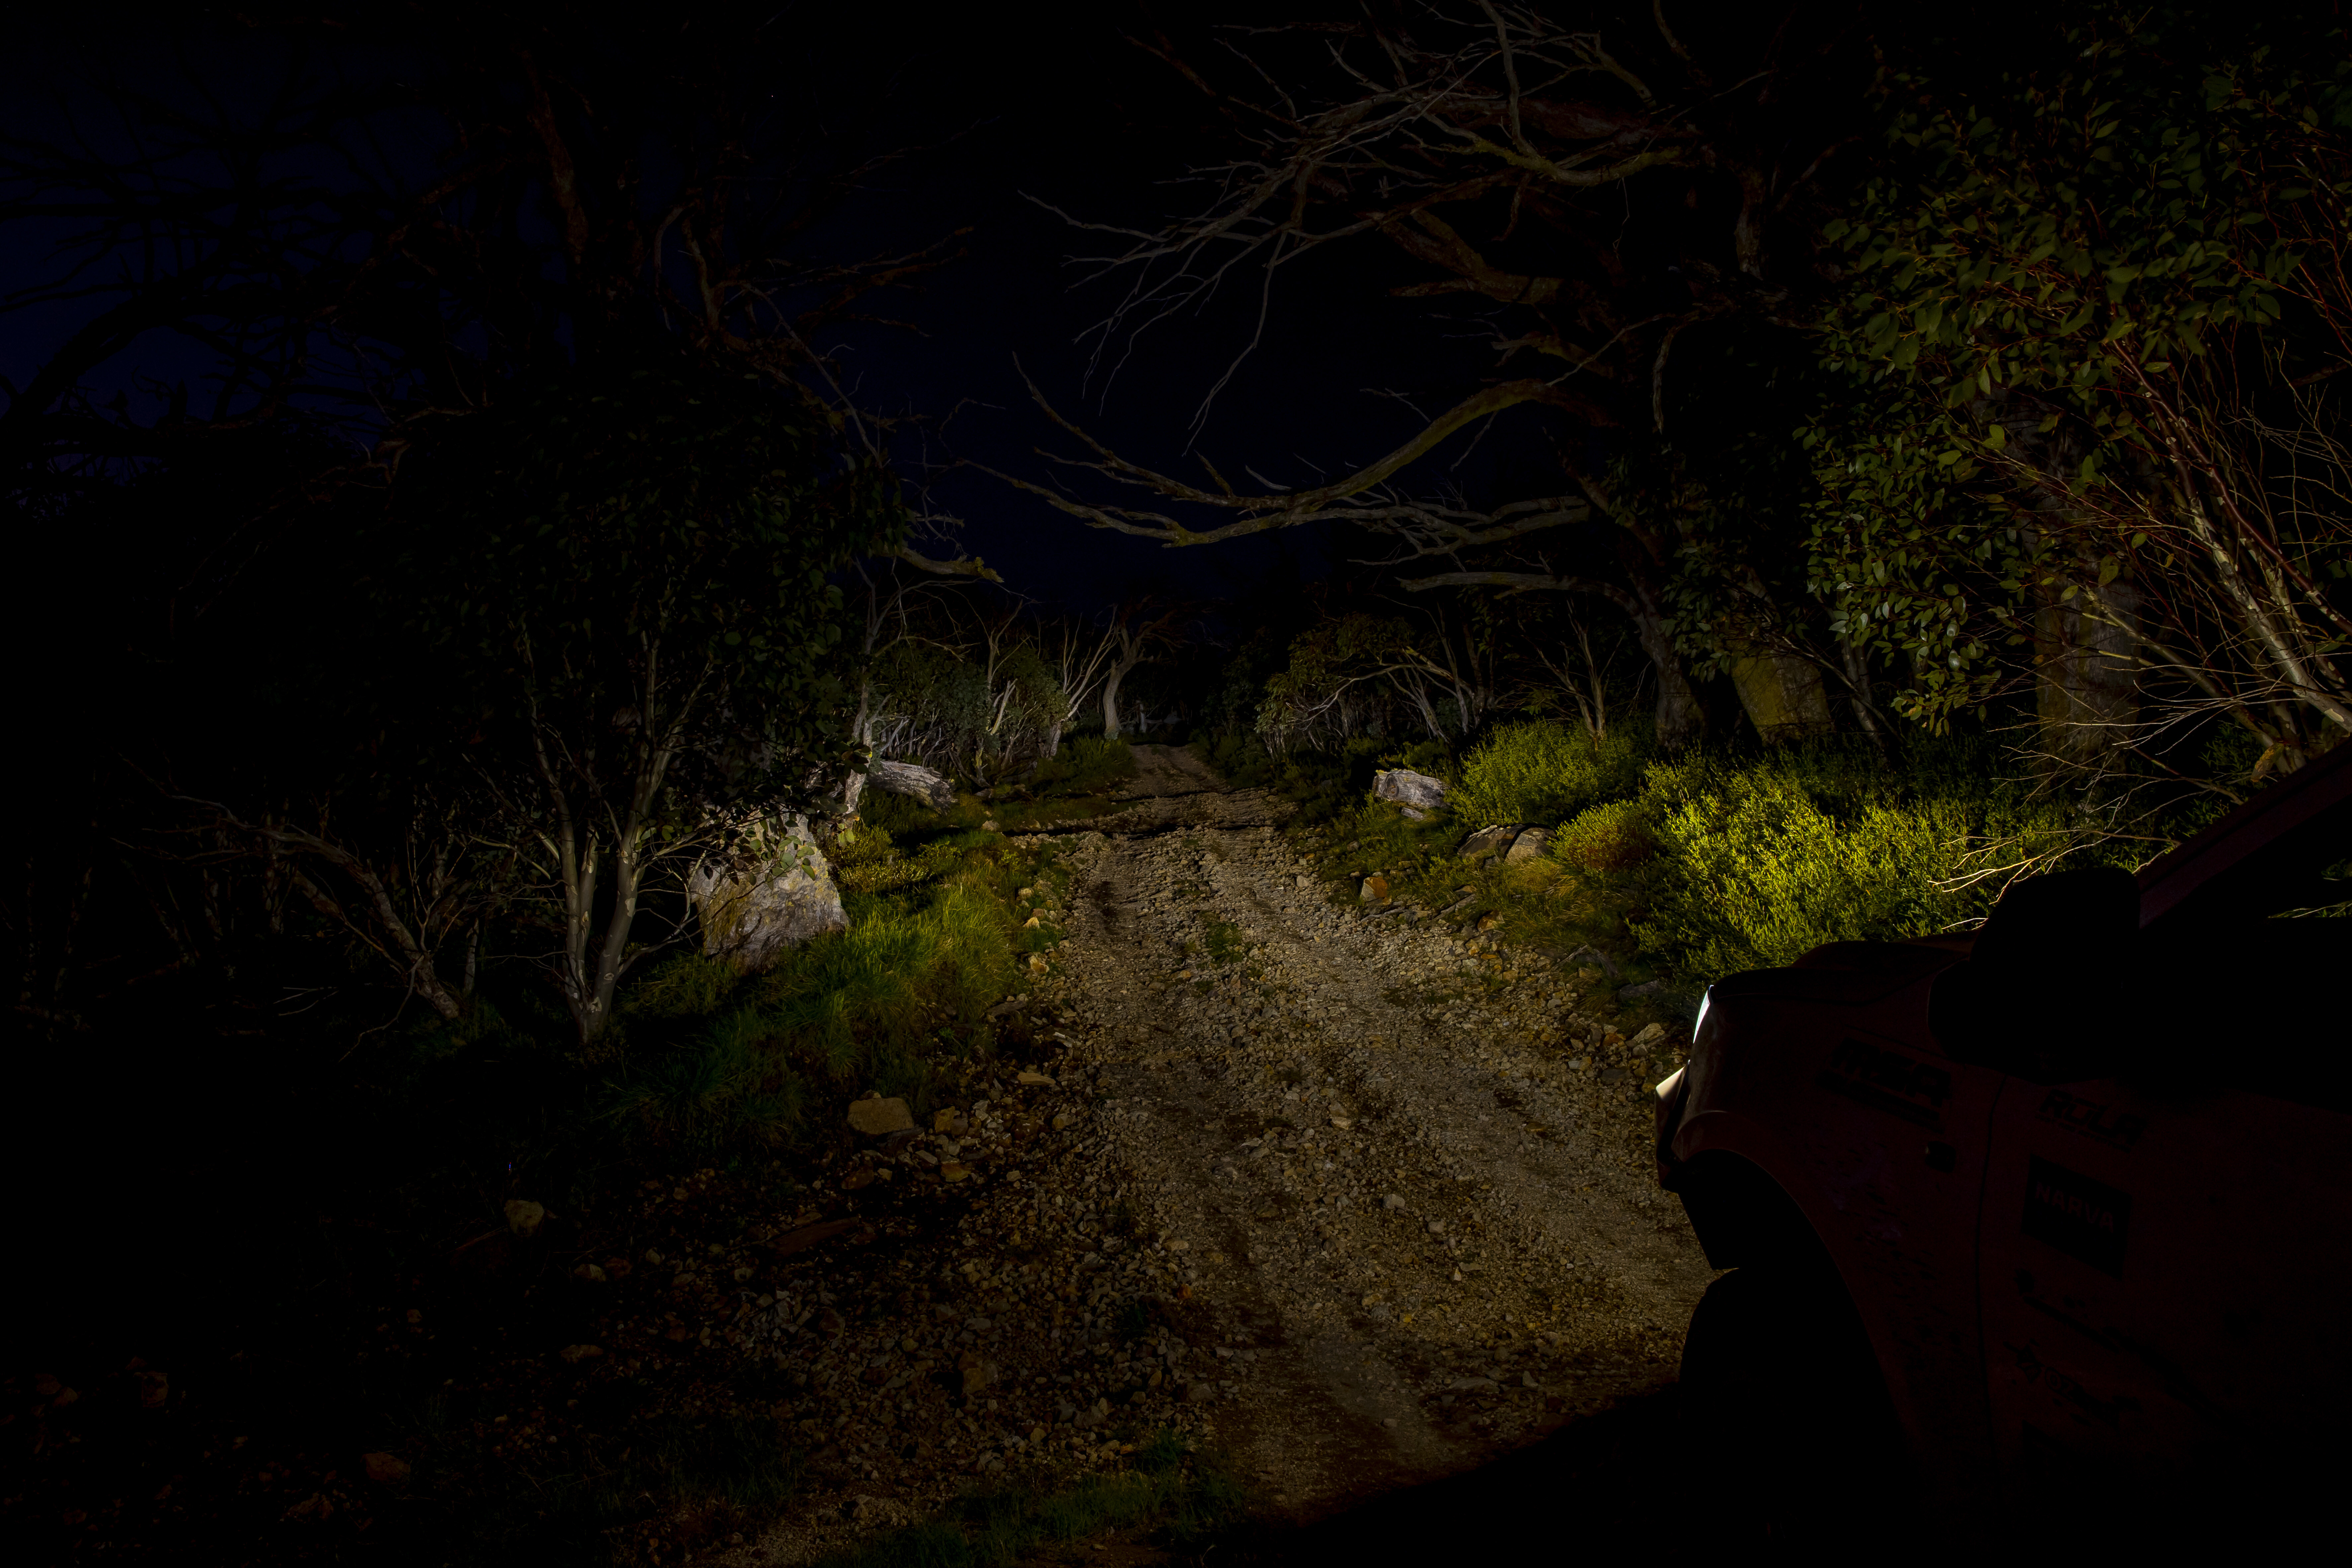
1
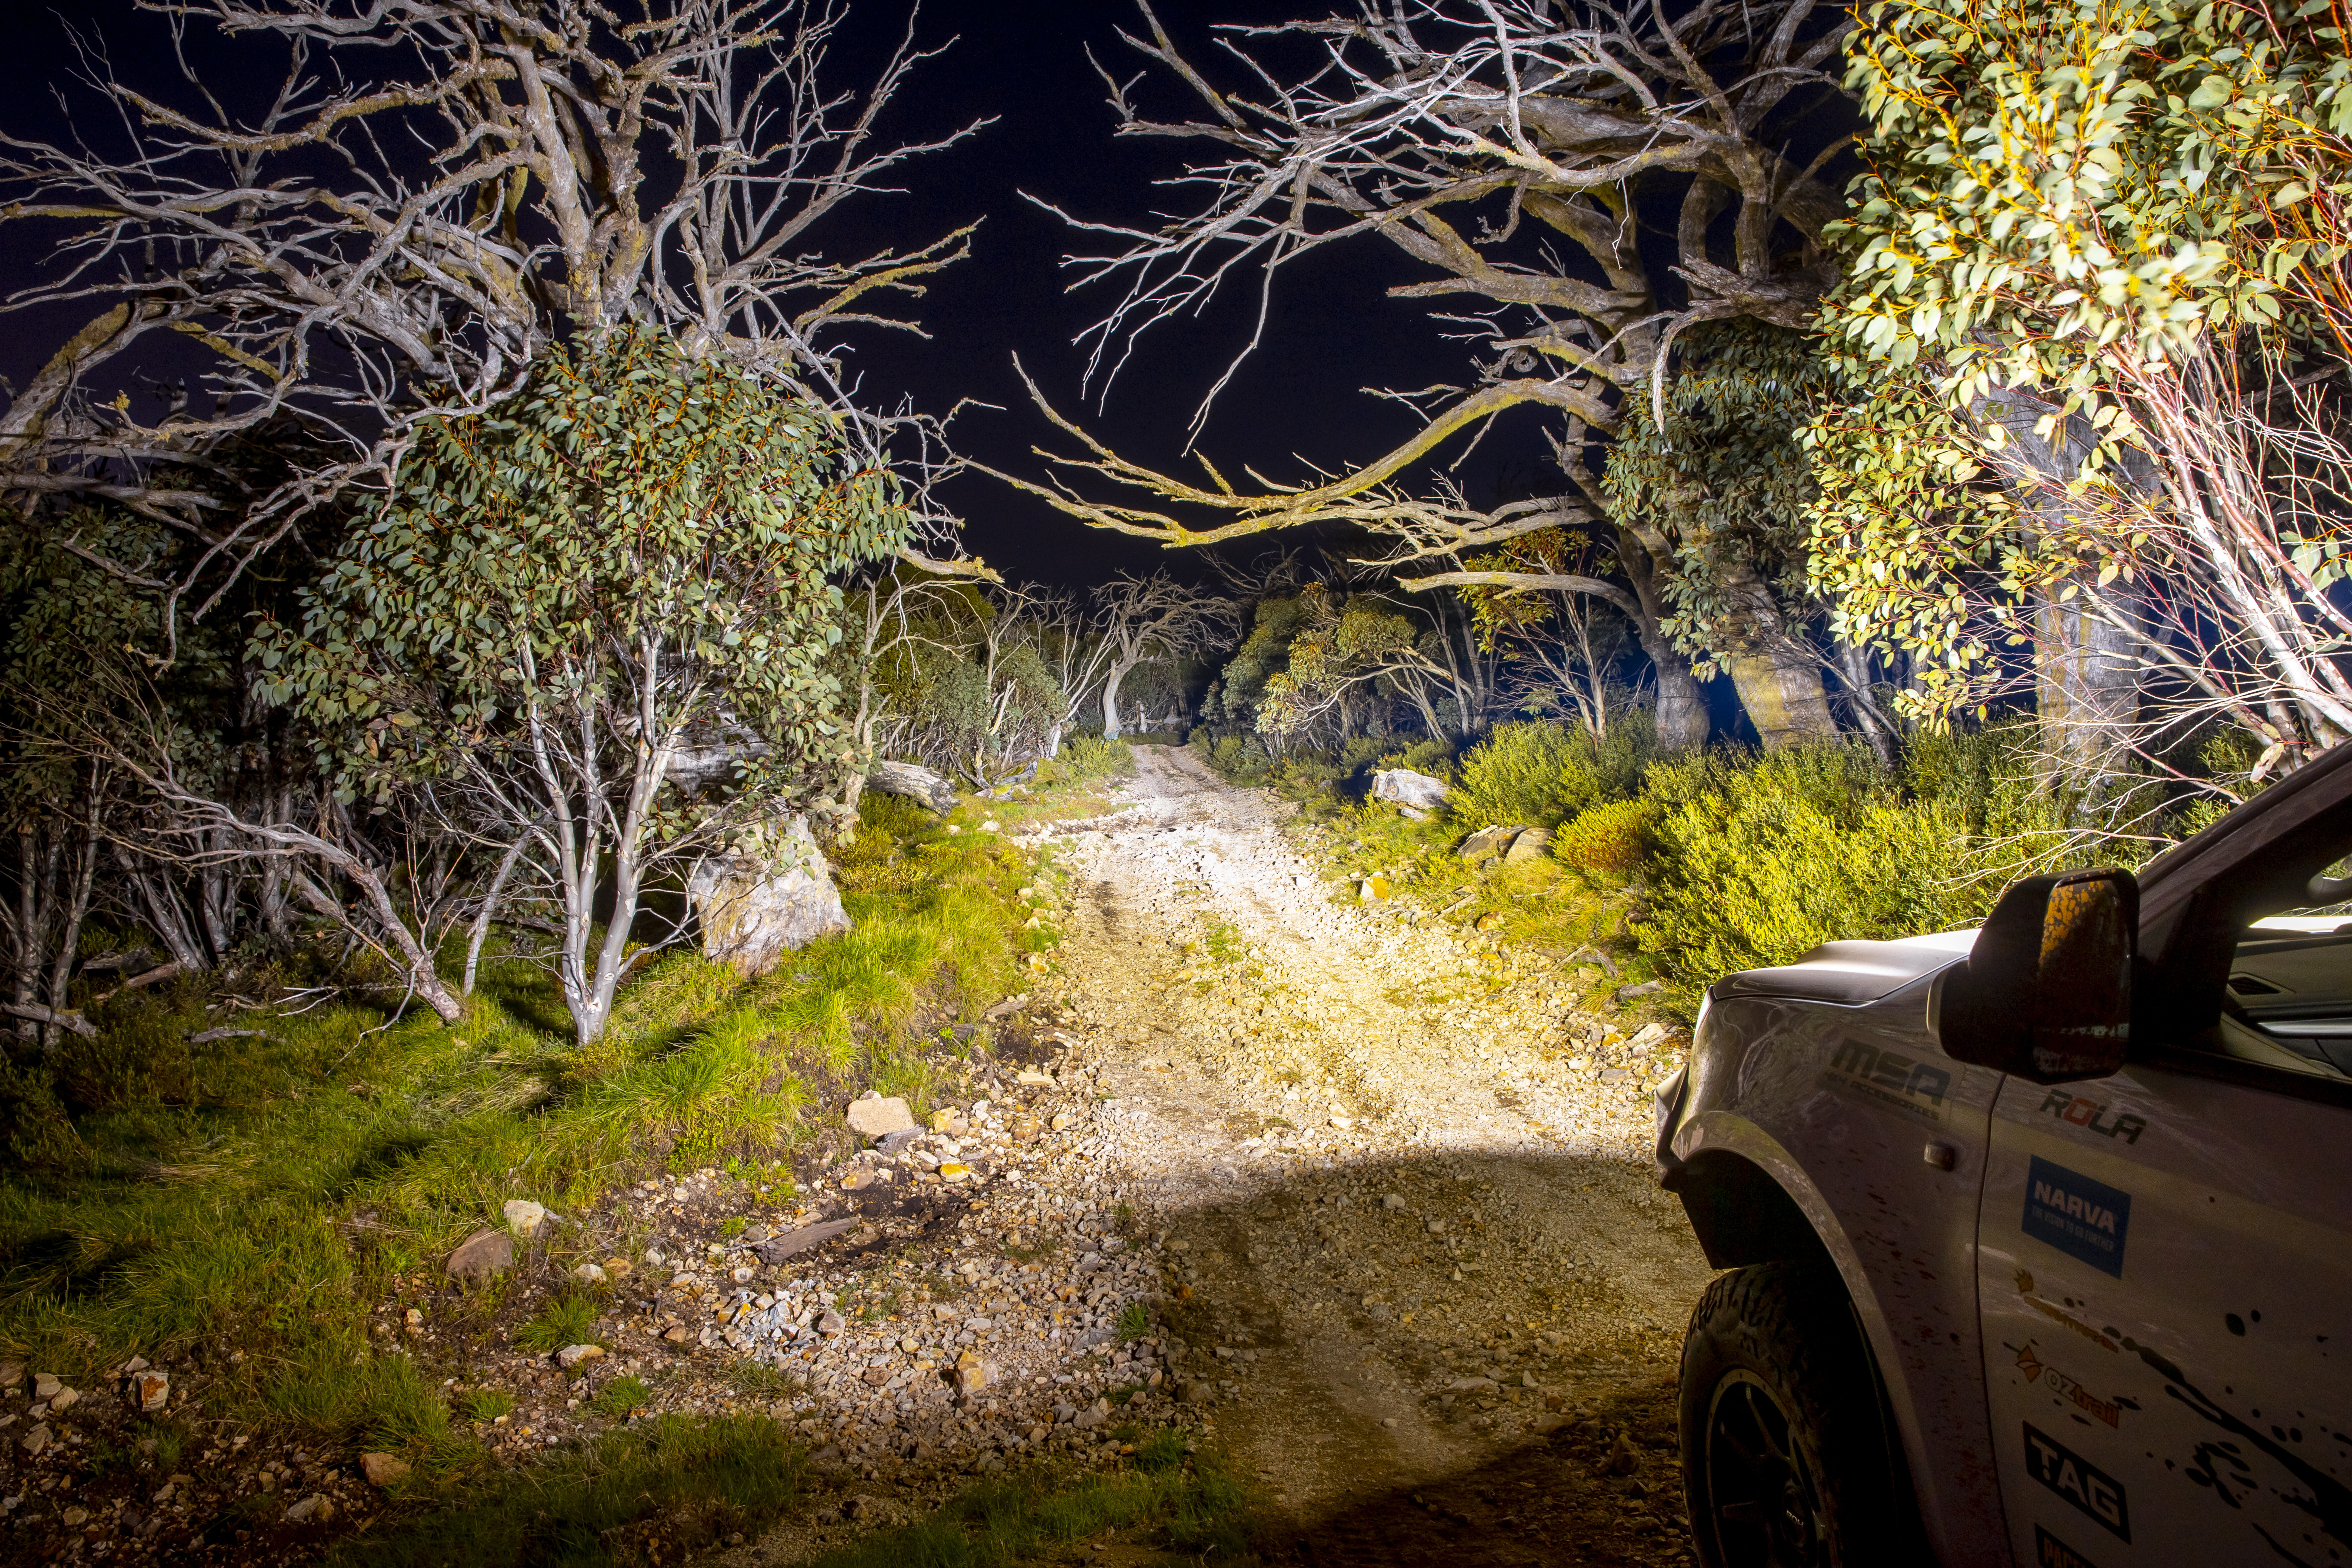
1
One could be forgiven for thinking four-wheel drivers are scared of the dark, as we’ve been quick to adapt and mount the latest and greatest in lighting tech to the front of our vehicles. But in a place like Australia, where you are covering long distances at speed, and big, hoppy things have a tendency to jump out in front of you, it seems that too much light is never enough and we’re always looking for more.
Narva is one of Australia’s leading brands in aftermarket lighting, and the team there is always looking for new technologies and methods of improving its lighting products.
Narva’s latest product is a range of Ultima LED light bars that not only use the best performing LED chips and construction, but also come with clever technology to allow the user to vary the intensity and beam of the light bars for varying driving conditions.

1
For instance, when you’re barrelling along a lonely outback road with no other traffic on it, you want the most forward vision your lights can produce with beams extending a long way ahead up the road as well as out to the sides from where those hopping critters like to surprise you from.
Yet when you’re driving along a winding bush track at night, long-distance illumination won’t be such a priority, but the wide beams are still important. It’s a similar tale when you’re on a country road where light reflection off road signs can be a real nuisance when you’re pumping out high-power illumination.
Having the ability to change the balance between your wide-beam lights and main light bar is very useful for these situations, and even more so when you can adjust the intensity of the lights themselves. While other light companies also offer adjustable intensity or power, the way the Narva Ultimas allows you to adjust them individually across the light bars is amazing.

1
The new Ultima light bars come in either a 24-inch bar or a twin pack of eight-inch bars, with the eight-inch versions offering the choice of wide or ultra-wide flood beams.
For our Isuzu MU-X, we were looking for a light bar of around 40 inches to run across the front of the Rola Titan tray on the roof. Combining the 24-inch bar with a pair of eight-inch wide-beam bars at each end, gave us the perfect length with the adjustability to set them as best suits the driving conditions.
Connecting the light bars together is done with a joining kit from Narva, while we mounted them using the Rola light bar mounts. Narva also offers a joiner kit to combine two of the 24-inch bars, for a 48-inch combo.
The adjustability comes from Narva’s new Connect+ controller. This unit which mounts inside the cabin where the driver can reach it, allows you to adjust the output of two different light sources through two separate channels. In our case, they are the centre 24-inch bar and the outer eight-inch bars, and we can adjust the output of each to best suit the road we’re on and driving conditions such as traffic, road signs and vehicle speed.
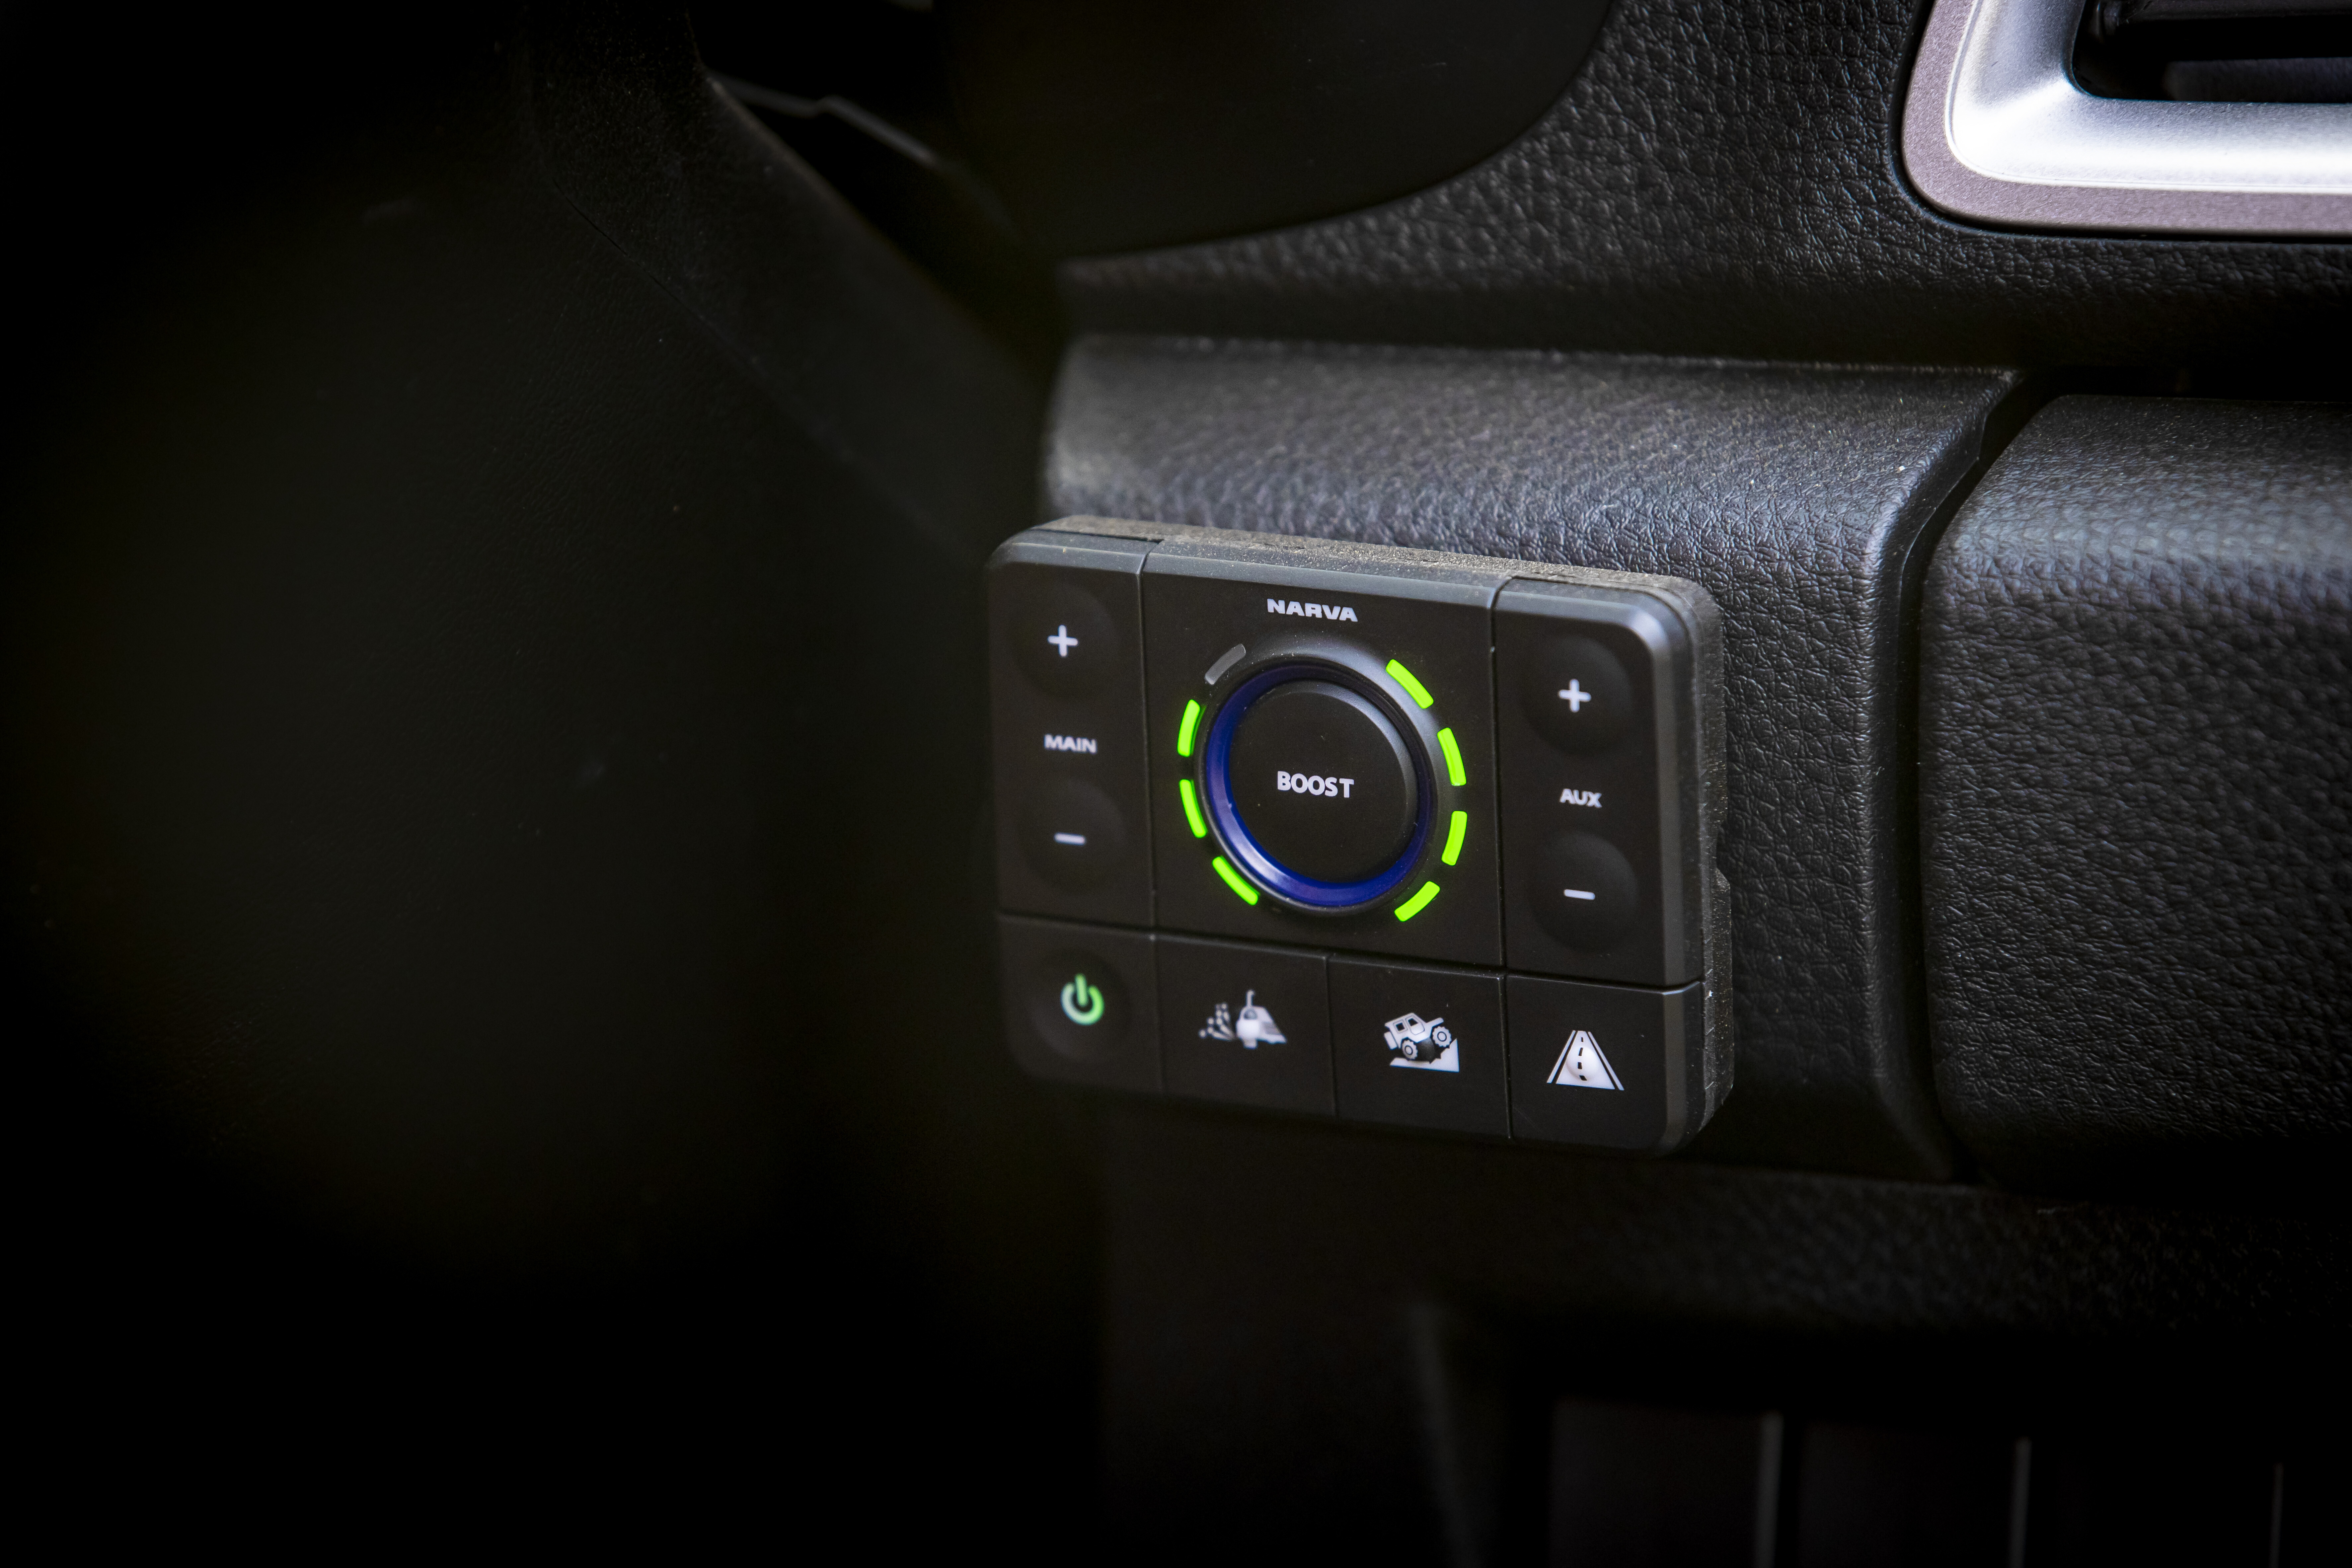
1
Each channel is adjustable individually through five levels of intensity, while there are three presets you can set-up for highway, outback, bush, or your own custom settings.
Say you want to limit the intensity of the 24-inch bar because of traffic or road-sign reflections but keep the power up to the wide-beam eight-inch bars, you could dial the 24 back the position to two or three and keep the intensity of the eight-inch bars up to five.
You can have a setting with both channels cranked up to five for those lonely outback highways, and if you think you’ve spotted something up ahead and want even more light, there’s a Boost button in the centre of the controller which, when pressed, blasts both channels up to full power plus 15 per cent for a 30-second burst. After the 30 seconds are up, you do have to let the lights cool back down before you can use the Boost function again.
Connect+ will also be compatible with future lighting products from Narva, as well as the new Ultima bars.

1
The light bars themselves feature a diecast aluminium housing with a breather and a hard-coated polycarbonate lens. They use 5W Osram LEDs, 38 of them in the 24-inch and nine in the eight-inch.
At full power, the 40-inch combination we have on the MU-X is claimed to produce a beam that is 90 metres wide and extends out to 1000 metres at 1 Lux, and we have no reason to question that claim.
We were very impressed with the outputs of the lights and the warmth of the light colour when testing them in the bush and on open roads. Having the ability to adjust the balance of the side and centre beams was handy, and we reckon the three presets are just enough to cover most conditions you might encounter. The presets are also customisable, so you can program them to a set-up that works for you.
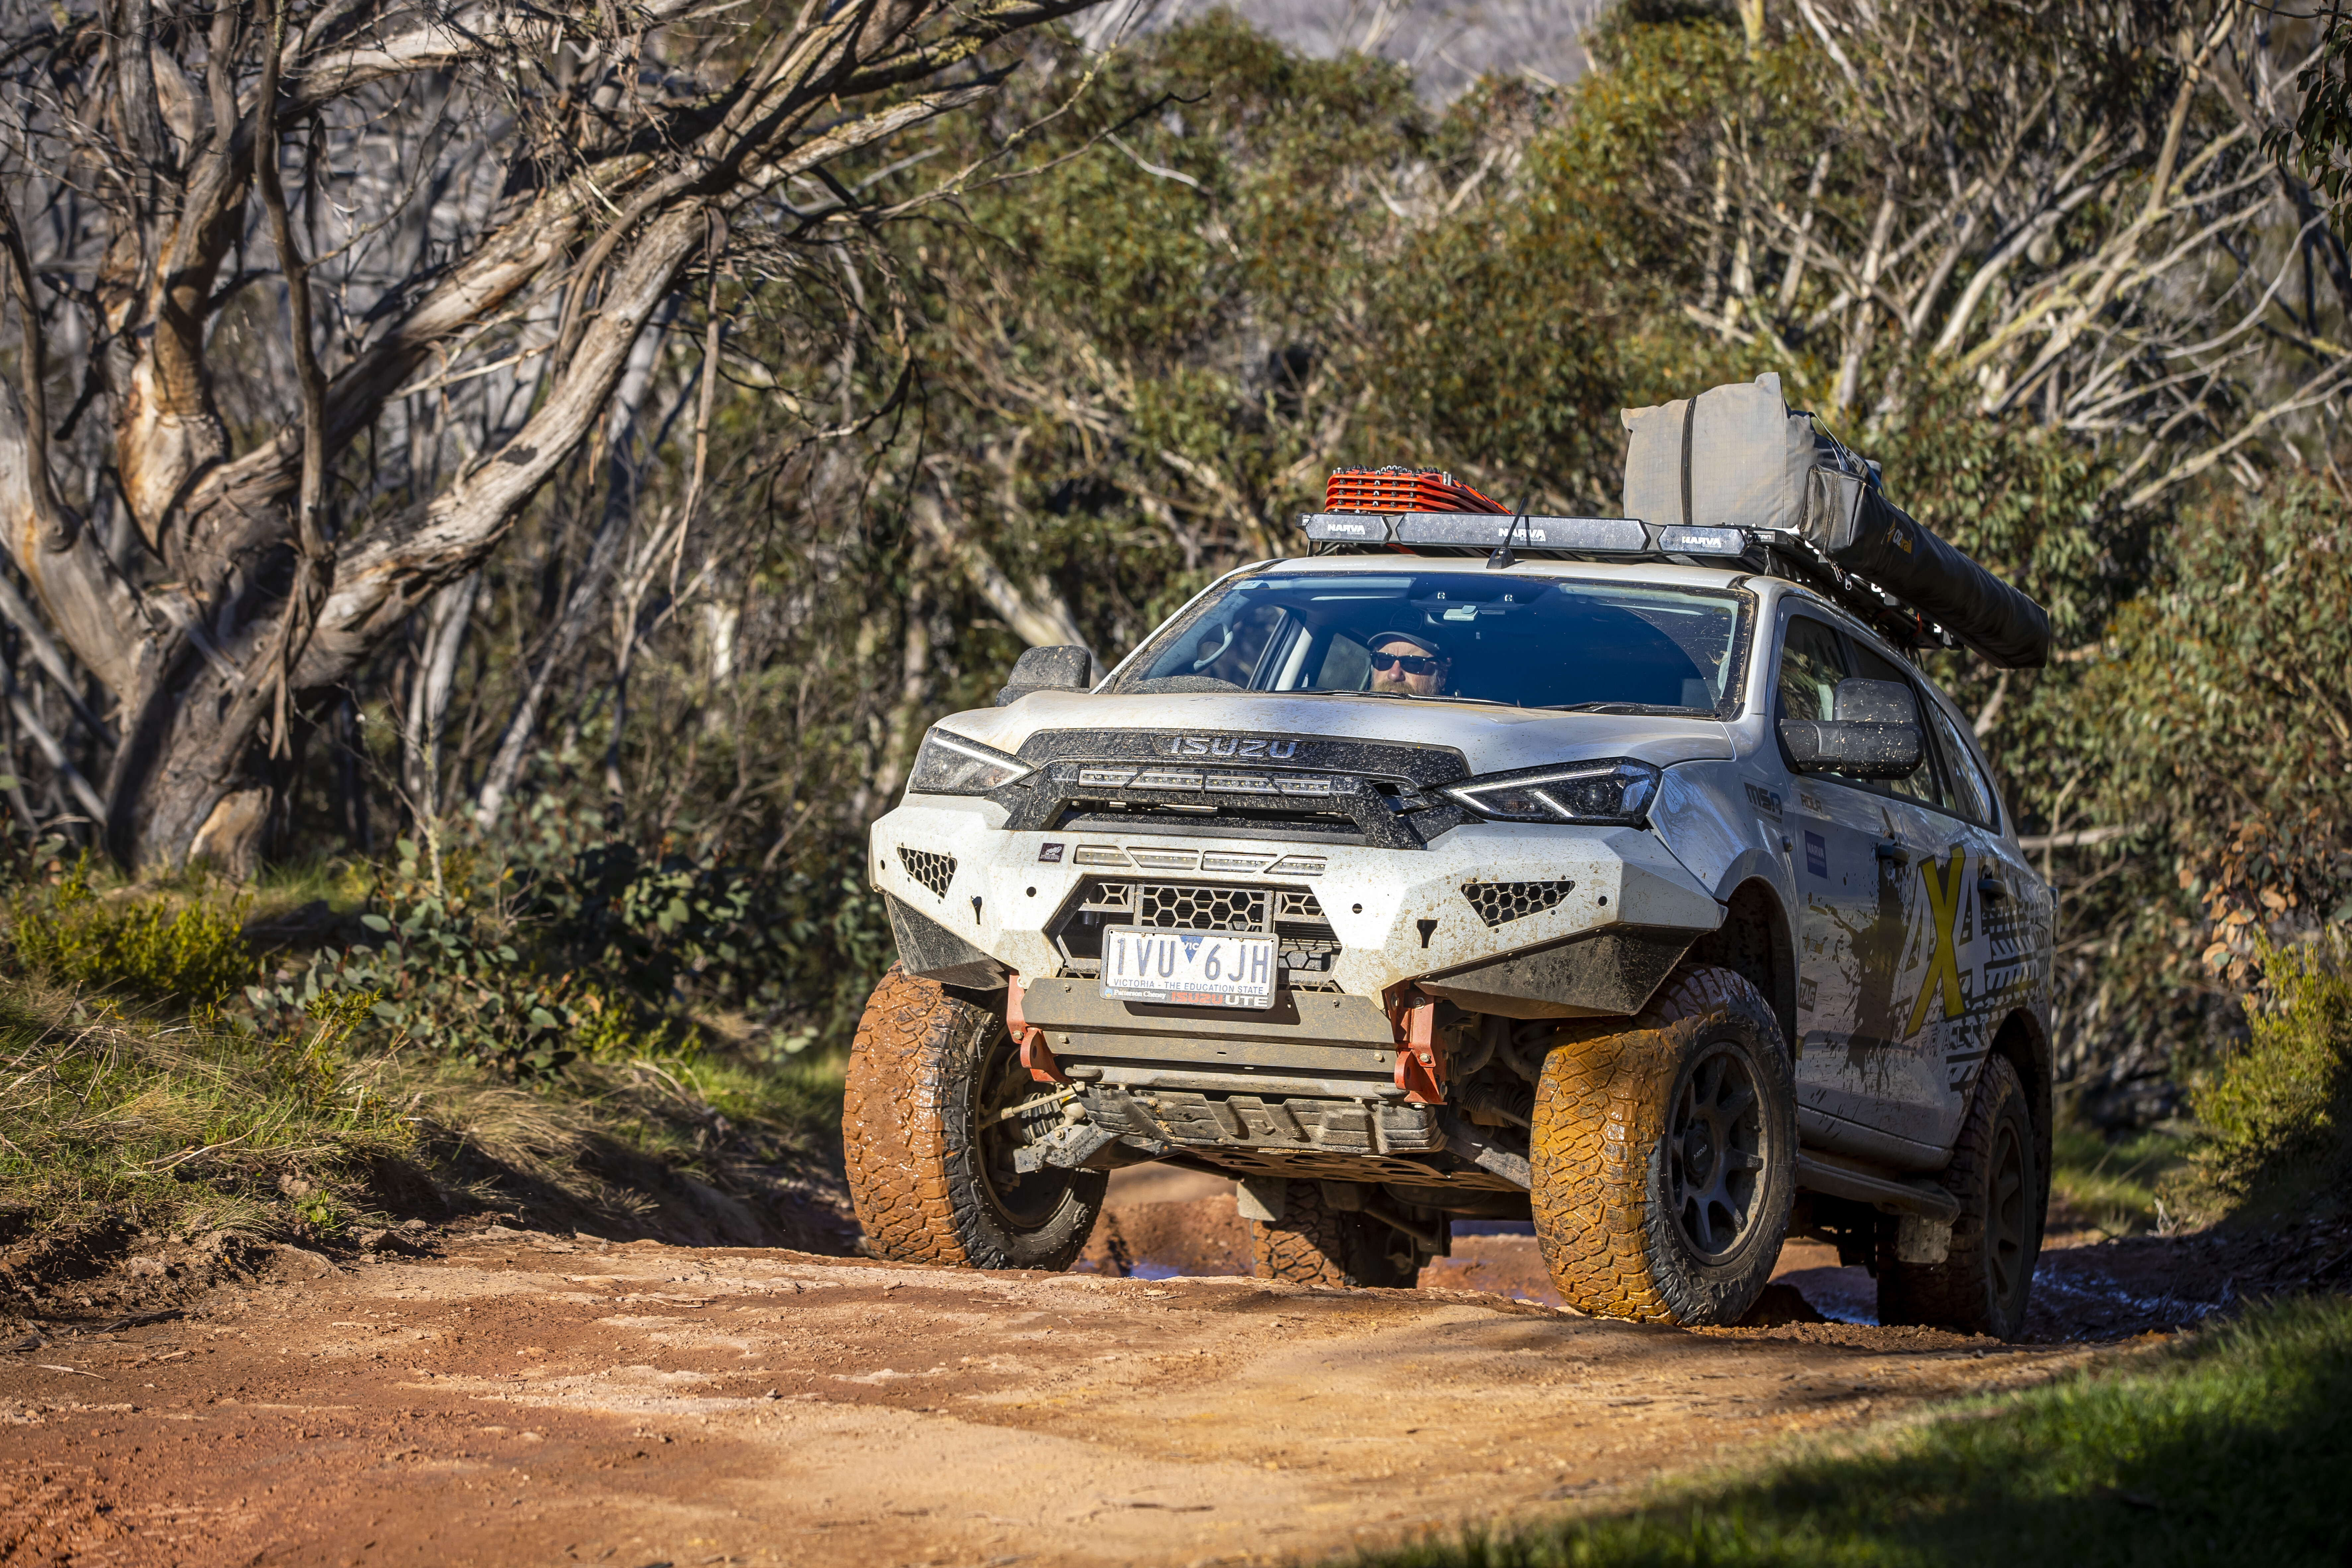
1
The light put out is at an easy-on-the-eyes 5700°K temperature; also reducing that bounce-back from road signs.
Further customisation of the light bars is possible with different colour bezels included in the kit, while the black ‘Stealth’ lens covers which we have on our Ultimas are an optional extra. Clear protection covers are also available.
Pricing
- Narva Ultima 24-inch light bar: $990
- Narva Ultima 8-inch light bar twin pack: $880
- Narva 40-inch Joiner kit: $129
- Narva Connect+ controller: $199 (approx.)
Available from: www.narva.com.au
Suzuki dealers have been taking orders on the Jimny five-door for 18 months, despite the model only having just been confirmed for Australia, Wheels understands.
Key Points
- 3-door sales paused due to overwhelming demand
- Dealers have been taking 5-door orders for more than a year
- So, if you haven’t ordered already… good luck getting any new Jimny!
The ‘JB74’ Suzuki Jimny off-roader continues to drive demand for the brand in Australia thanks to cute looks and compact size that belie the off-road capability of this ladder-framed, 75kW beast.
The current three-door is already experiencing extended wait lists, and has done for some time – and, indeed, sales of the three-door model have now been paused.
Likewise, many have been waiting for the arrival of the five-door.
The 505mm-longer Jimny will be built in India, rather than Japan where the three-door is built for our market. Pricing, specifications, level of equipment and arrival time are still not confirmed for the Australian market.
And yet, dealers have known it’s coming for a long time, with one source telling 4X4 Australia they’ve been taking orders for the last 18 months.
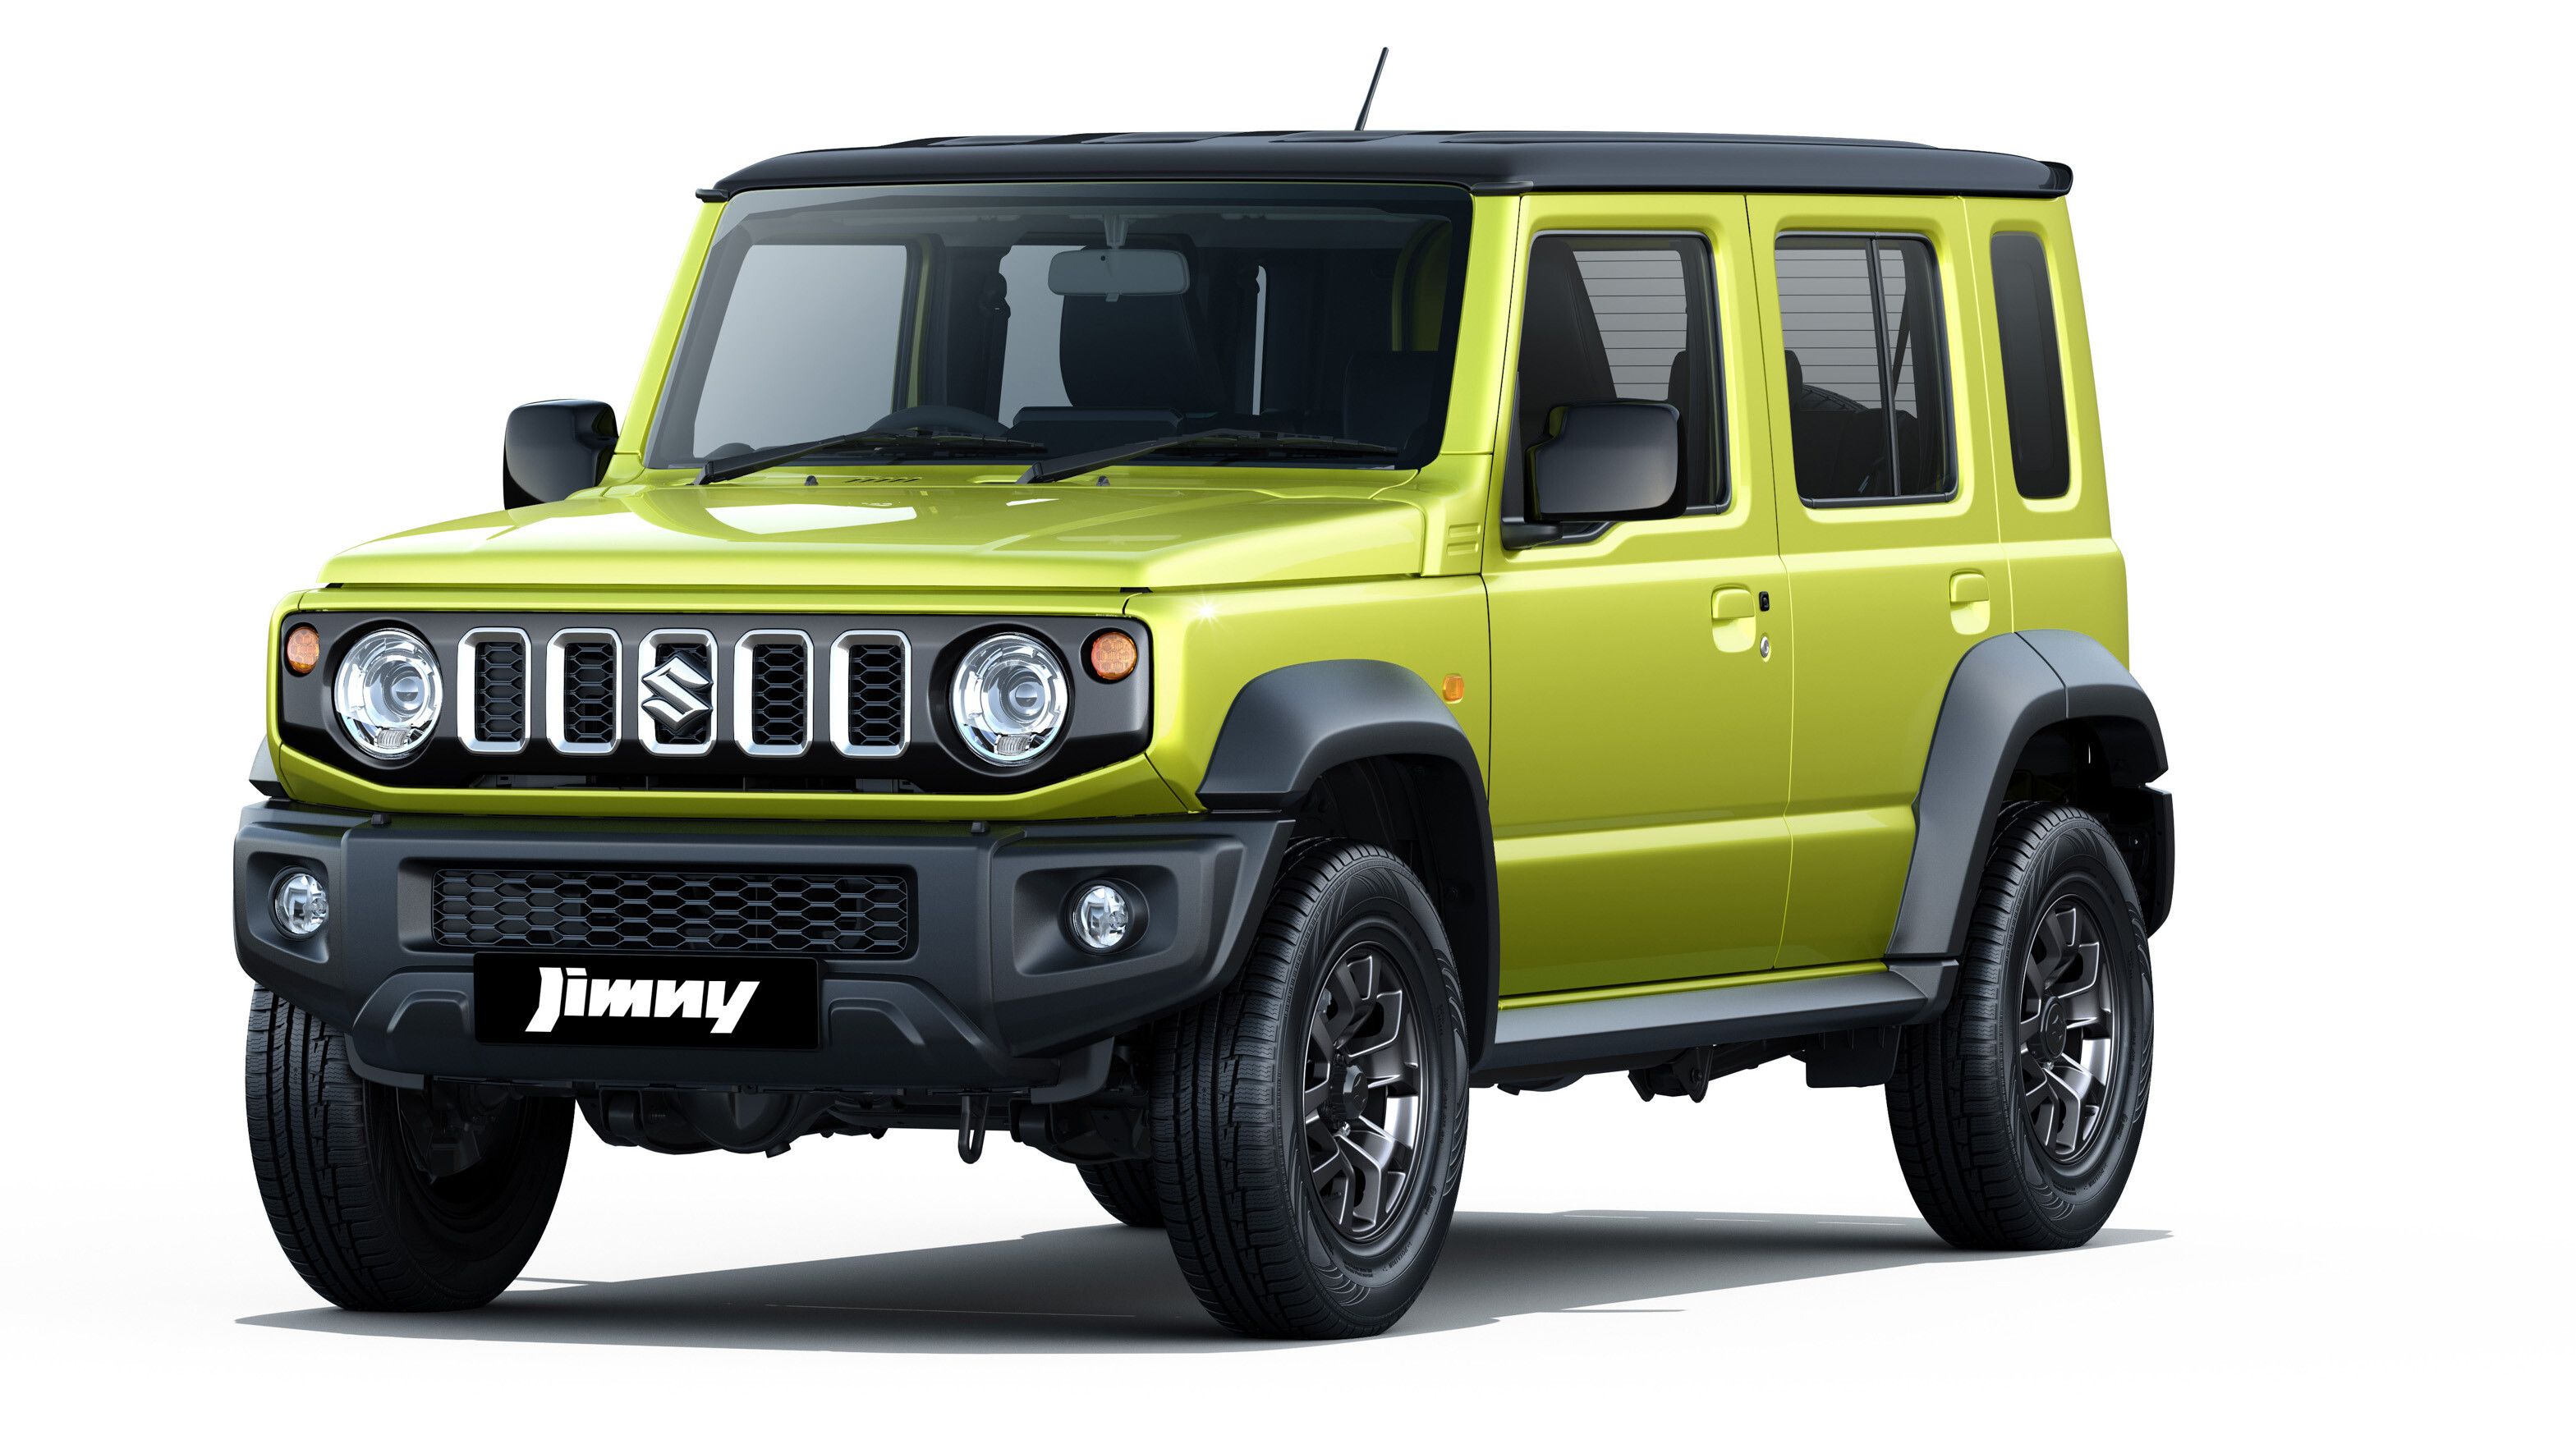
1
The same source noted that some customers who were waiting in the queue for a three-door Jimny have now swapped to the more practical five-door.
While dealers may have been taking names on wait lists previously, these expressions of interest are now being passed up to Suzuki Australia as orders, so you’ll need to get in quick to secure one.
“Now that we’ve confirmed it for Australia, we’re taking orders. First in, best dressed”, is what Suzuki Australia General Manager, Michael Pachota told 4X4 Australia.
The long Jimny will also be built exclusively in India. Reports suggest that there will be capacity to manufacture between 5000-6000 five-door Jimnys monthly at Maruti/Suzuki’s Gurugram facility. How that measures up to likely strong Indian market demand will become clear soon.
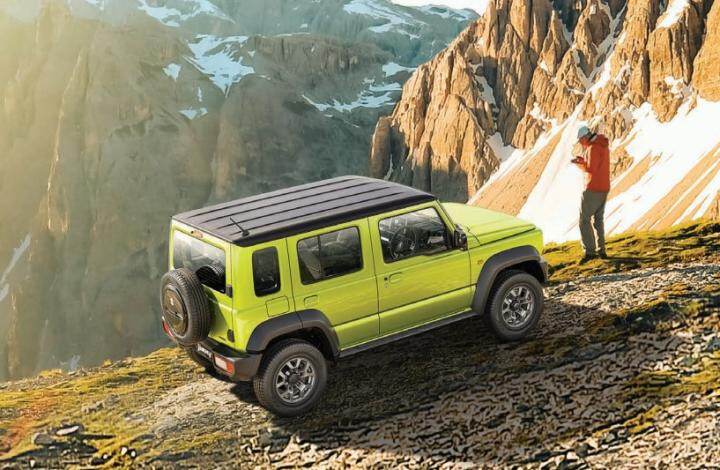
1
How much will the Suzuki Jimny five-door cost?
Measuring 505mm longer overall and riding on a 340mm longer wheelbase, the five-door Jimny is significantly larger than its relative.
Yet being produced in India, where wage costs are lower than Japan, may mean the stretched off-roader is priced at parity with the current models, or only a whisker more expensive.

1
The Jimny Lite starts at $28,490 before on-road costs, while the regular Jimny commands a little more, at $29,990 for the five-speed manual with a $1500 up-charge to get a four-speed automatic.
Suzuki Australia and dealers alike are yet to discuss how much the five-door will cost. It seems unlikely that an affordable Jimny Lite will kick off the five-door range, so we anticipate a starting price $30,000-35,000 before on-road costs.
MORE
Everything Suzuki