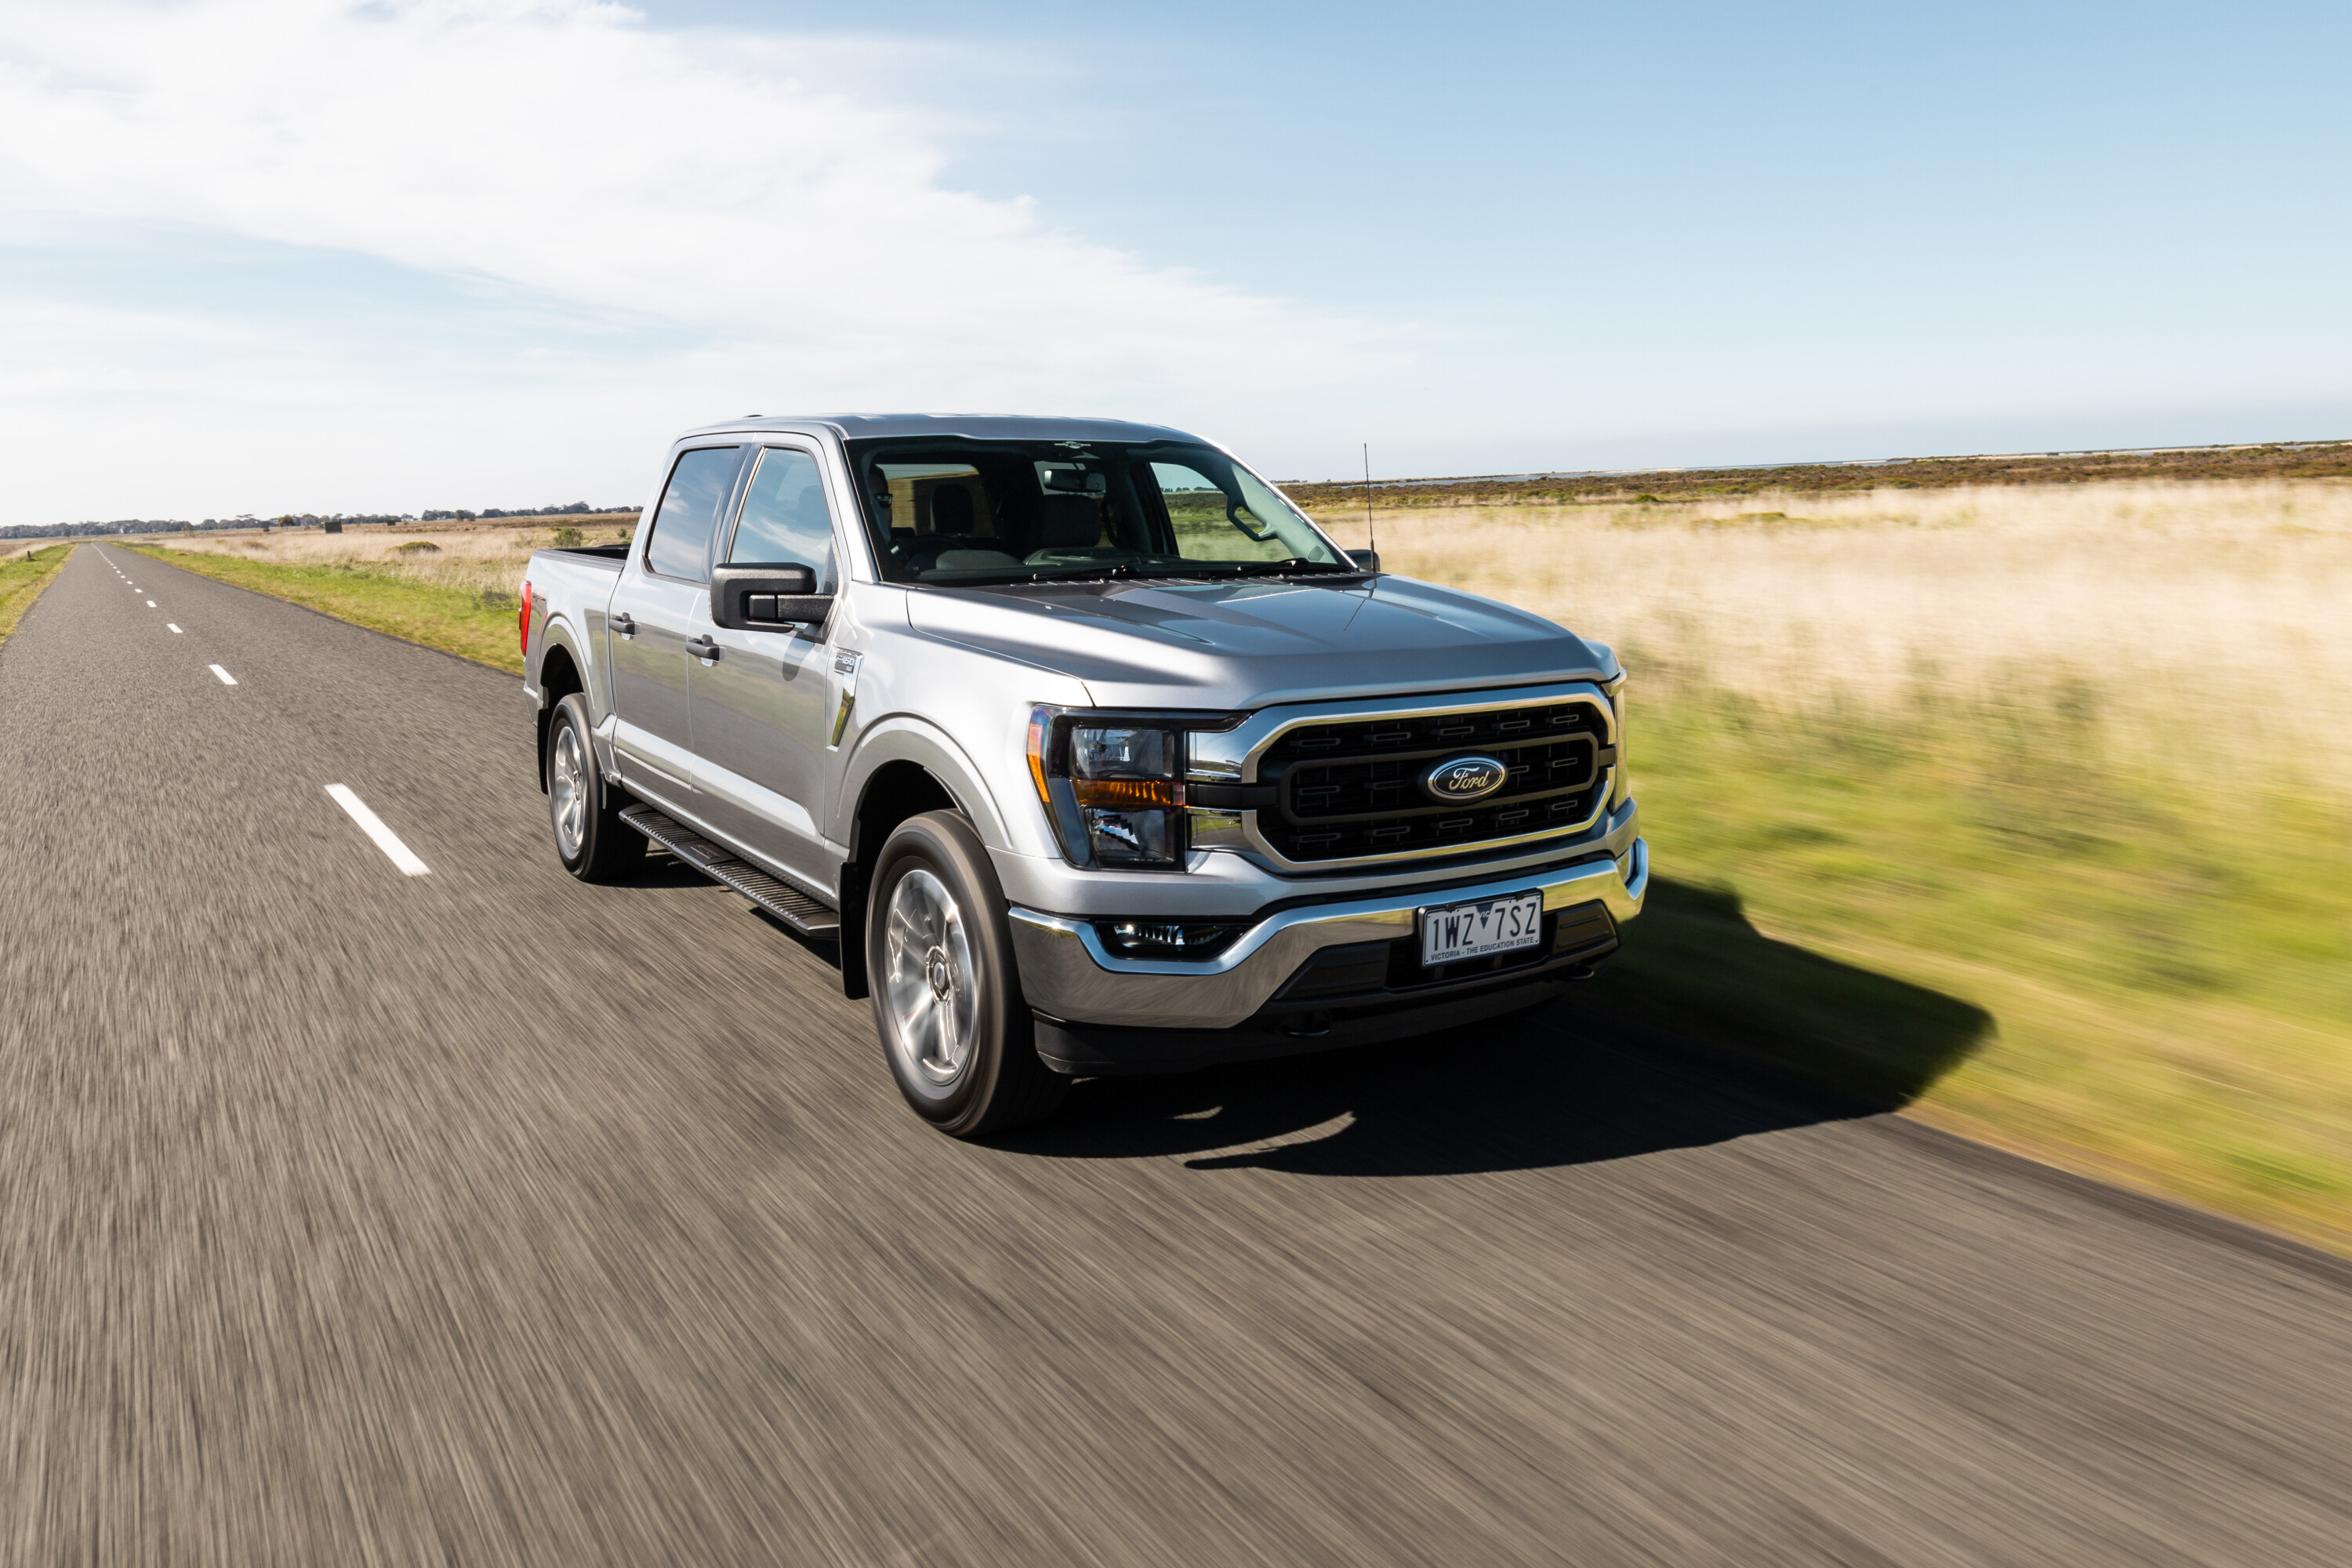
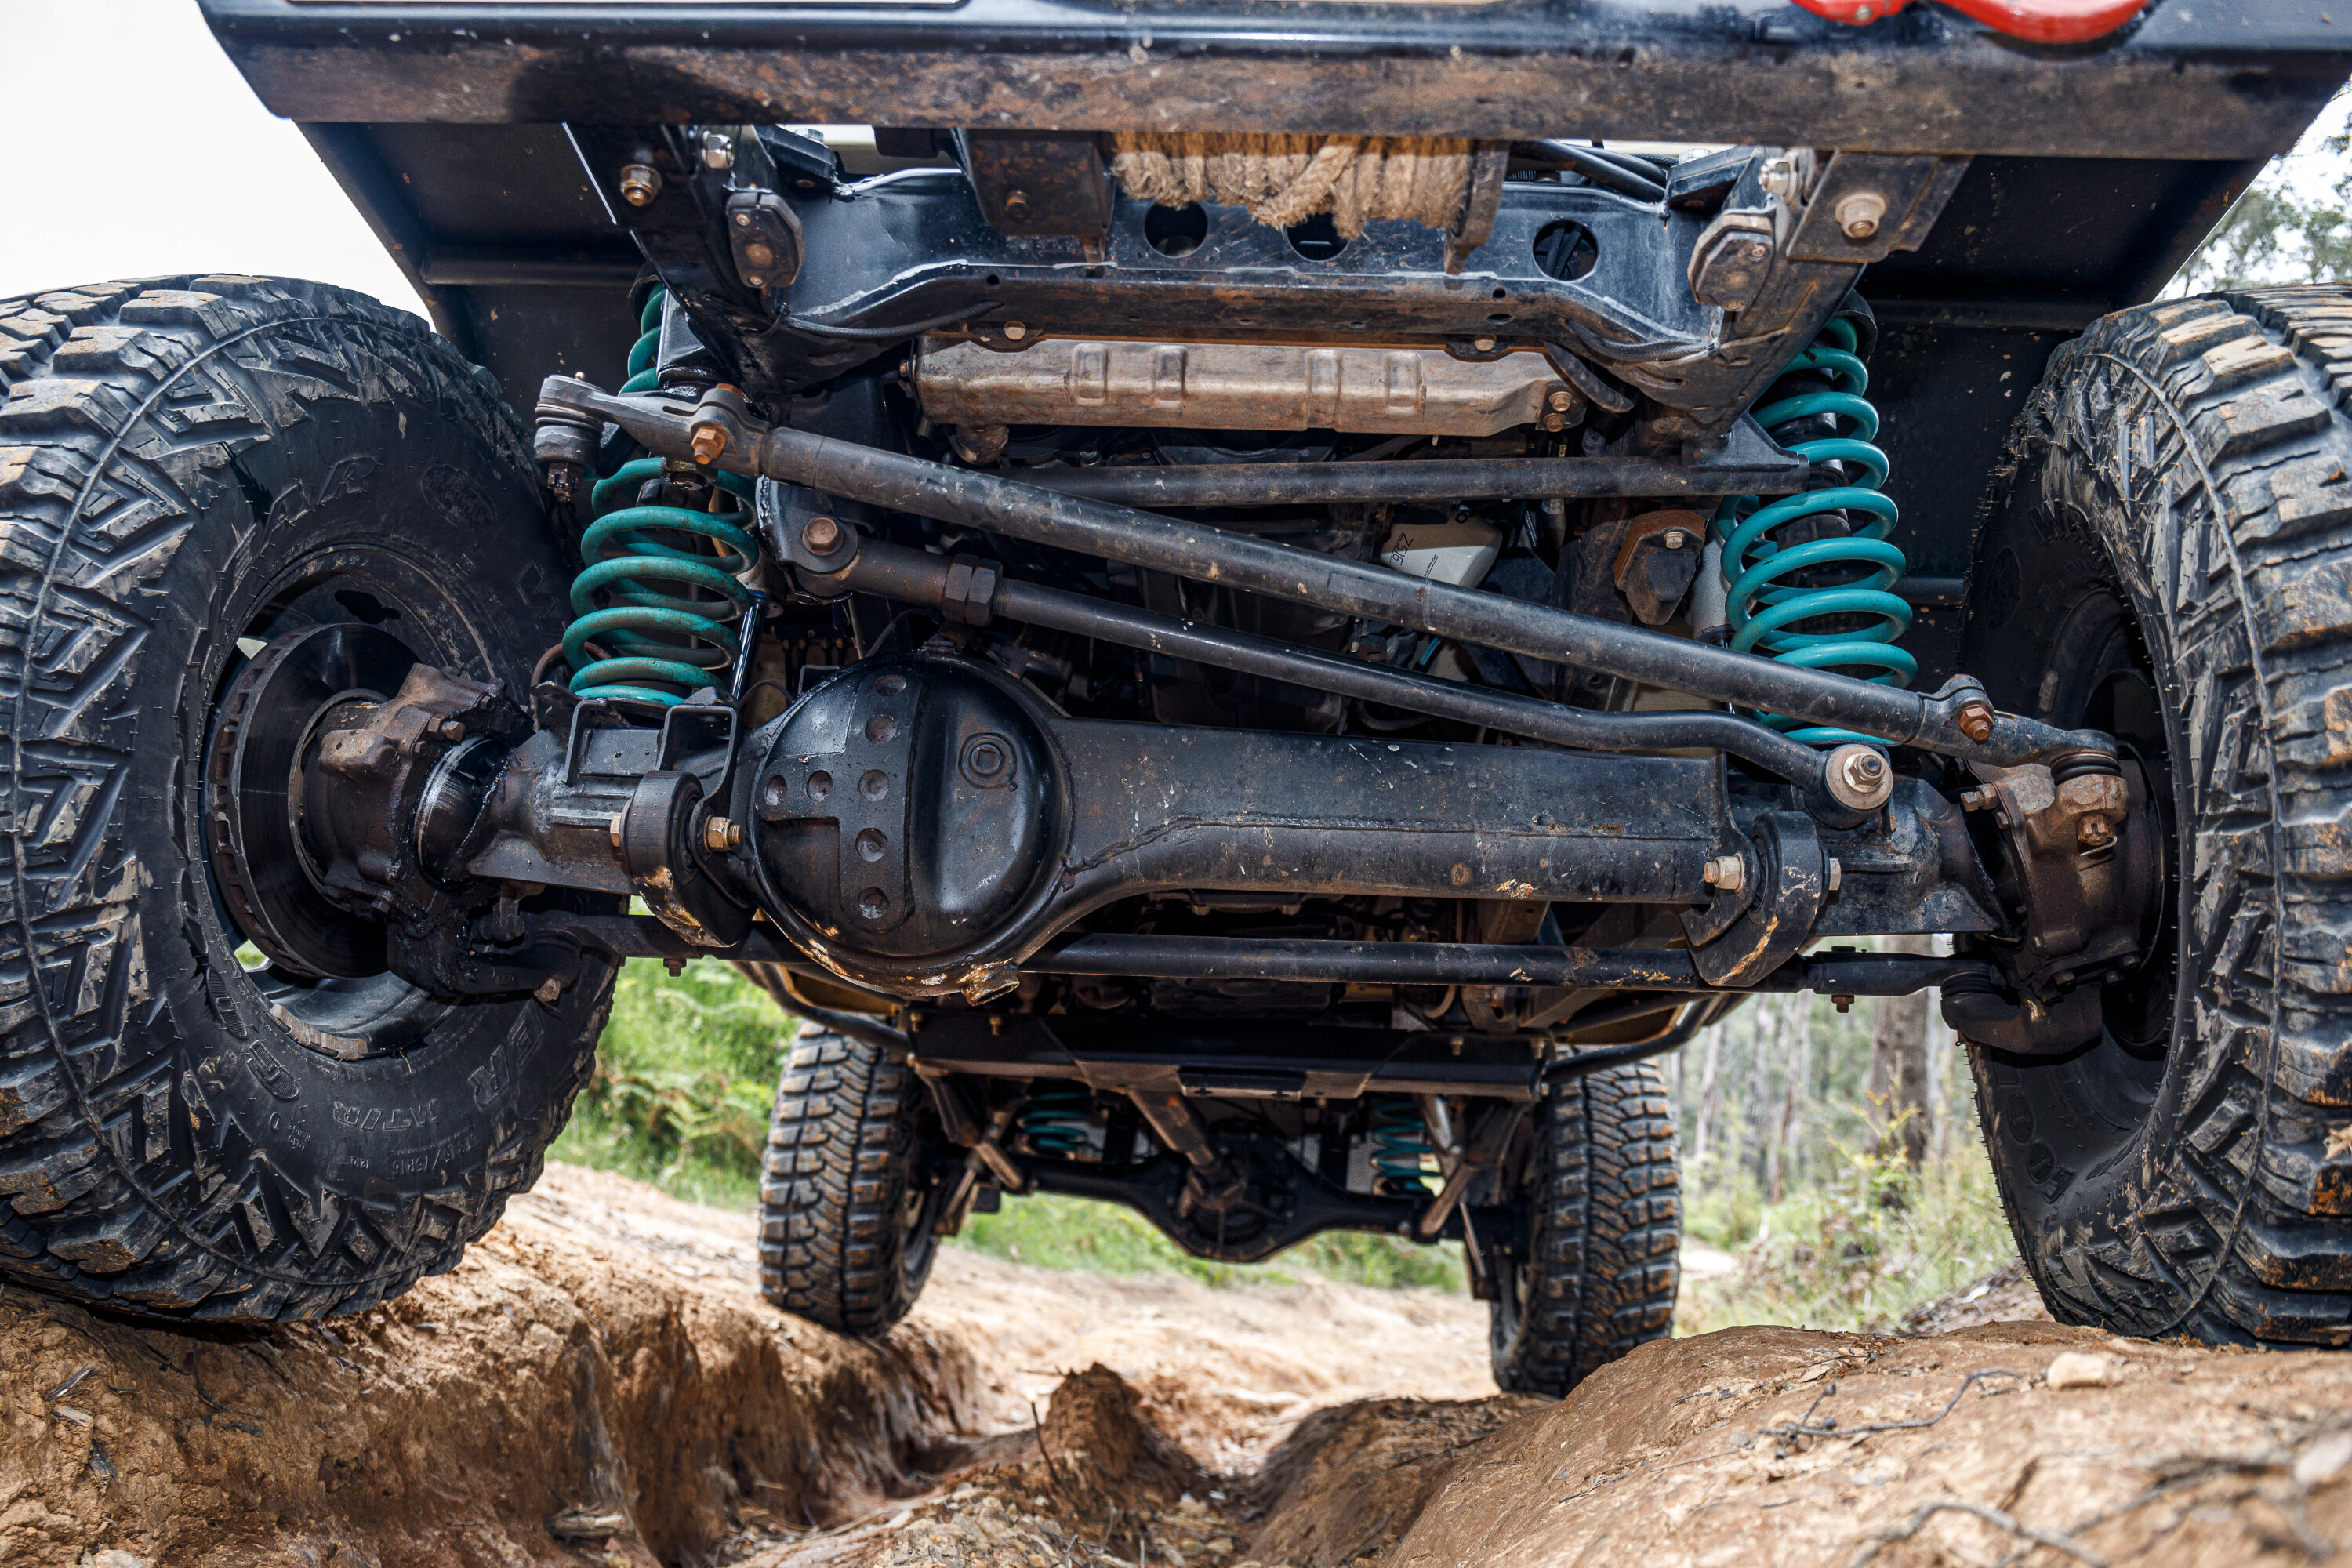
The further you go off the beaten track, the harder fuel is to come by.
This is why it’s important rely on additional fuel-carrying capacity to get there and back, and where a high-quality replacement or auxiliary fuel tank comes into play. These provide additional capacity to travel in areas where fuel stops are few and far between.
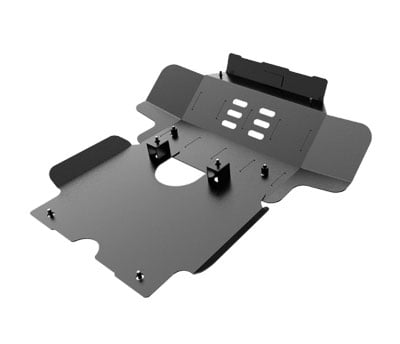
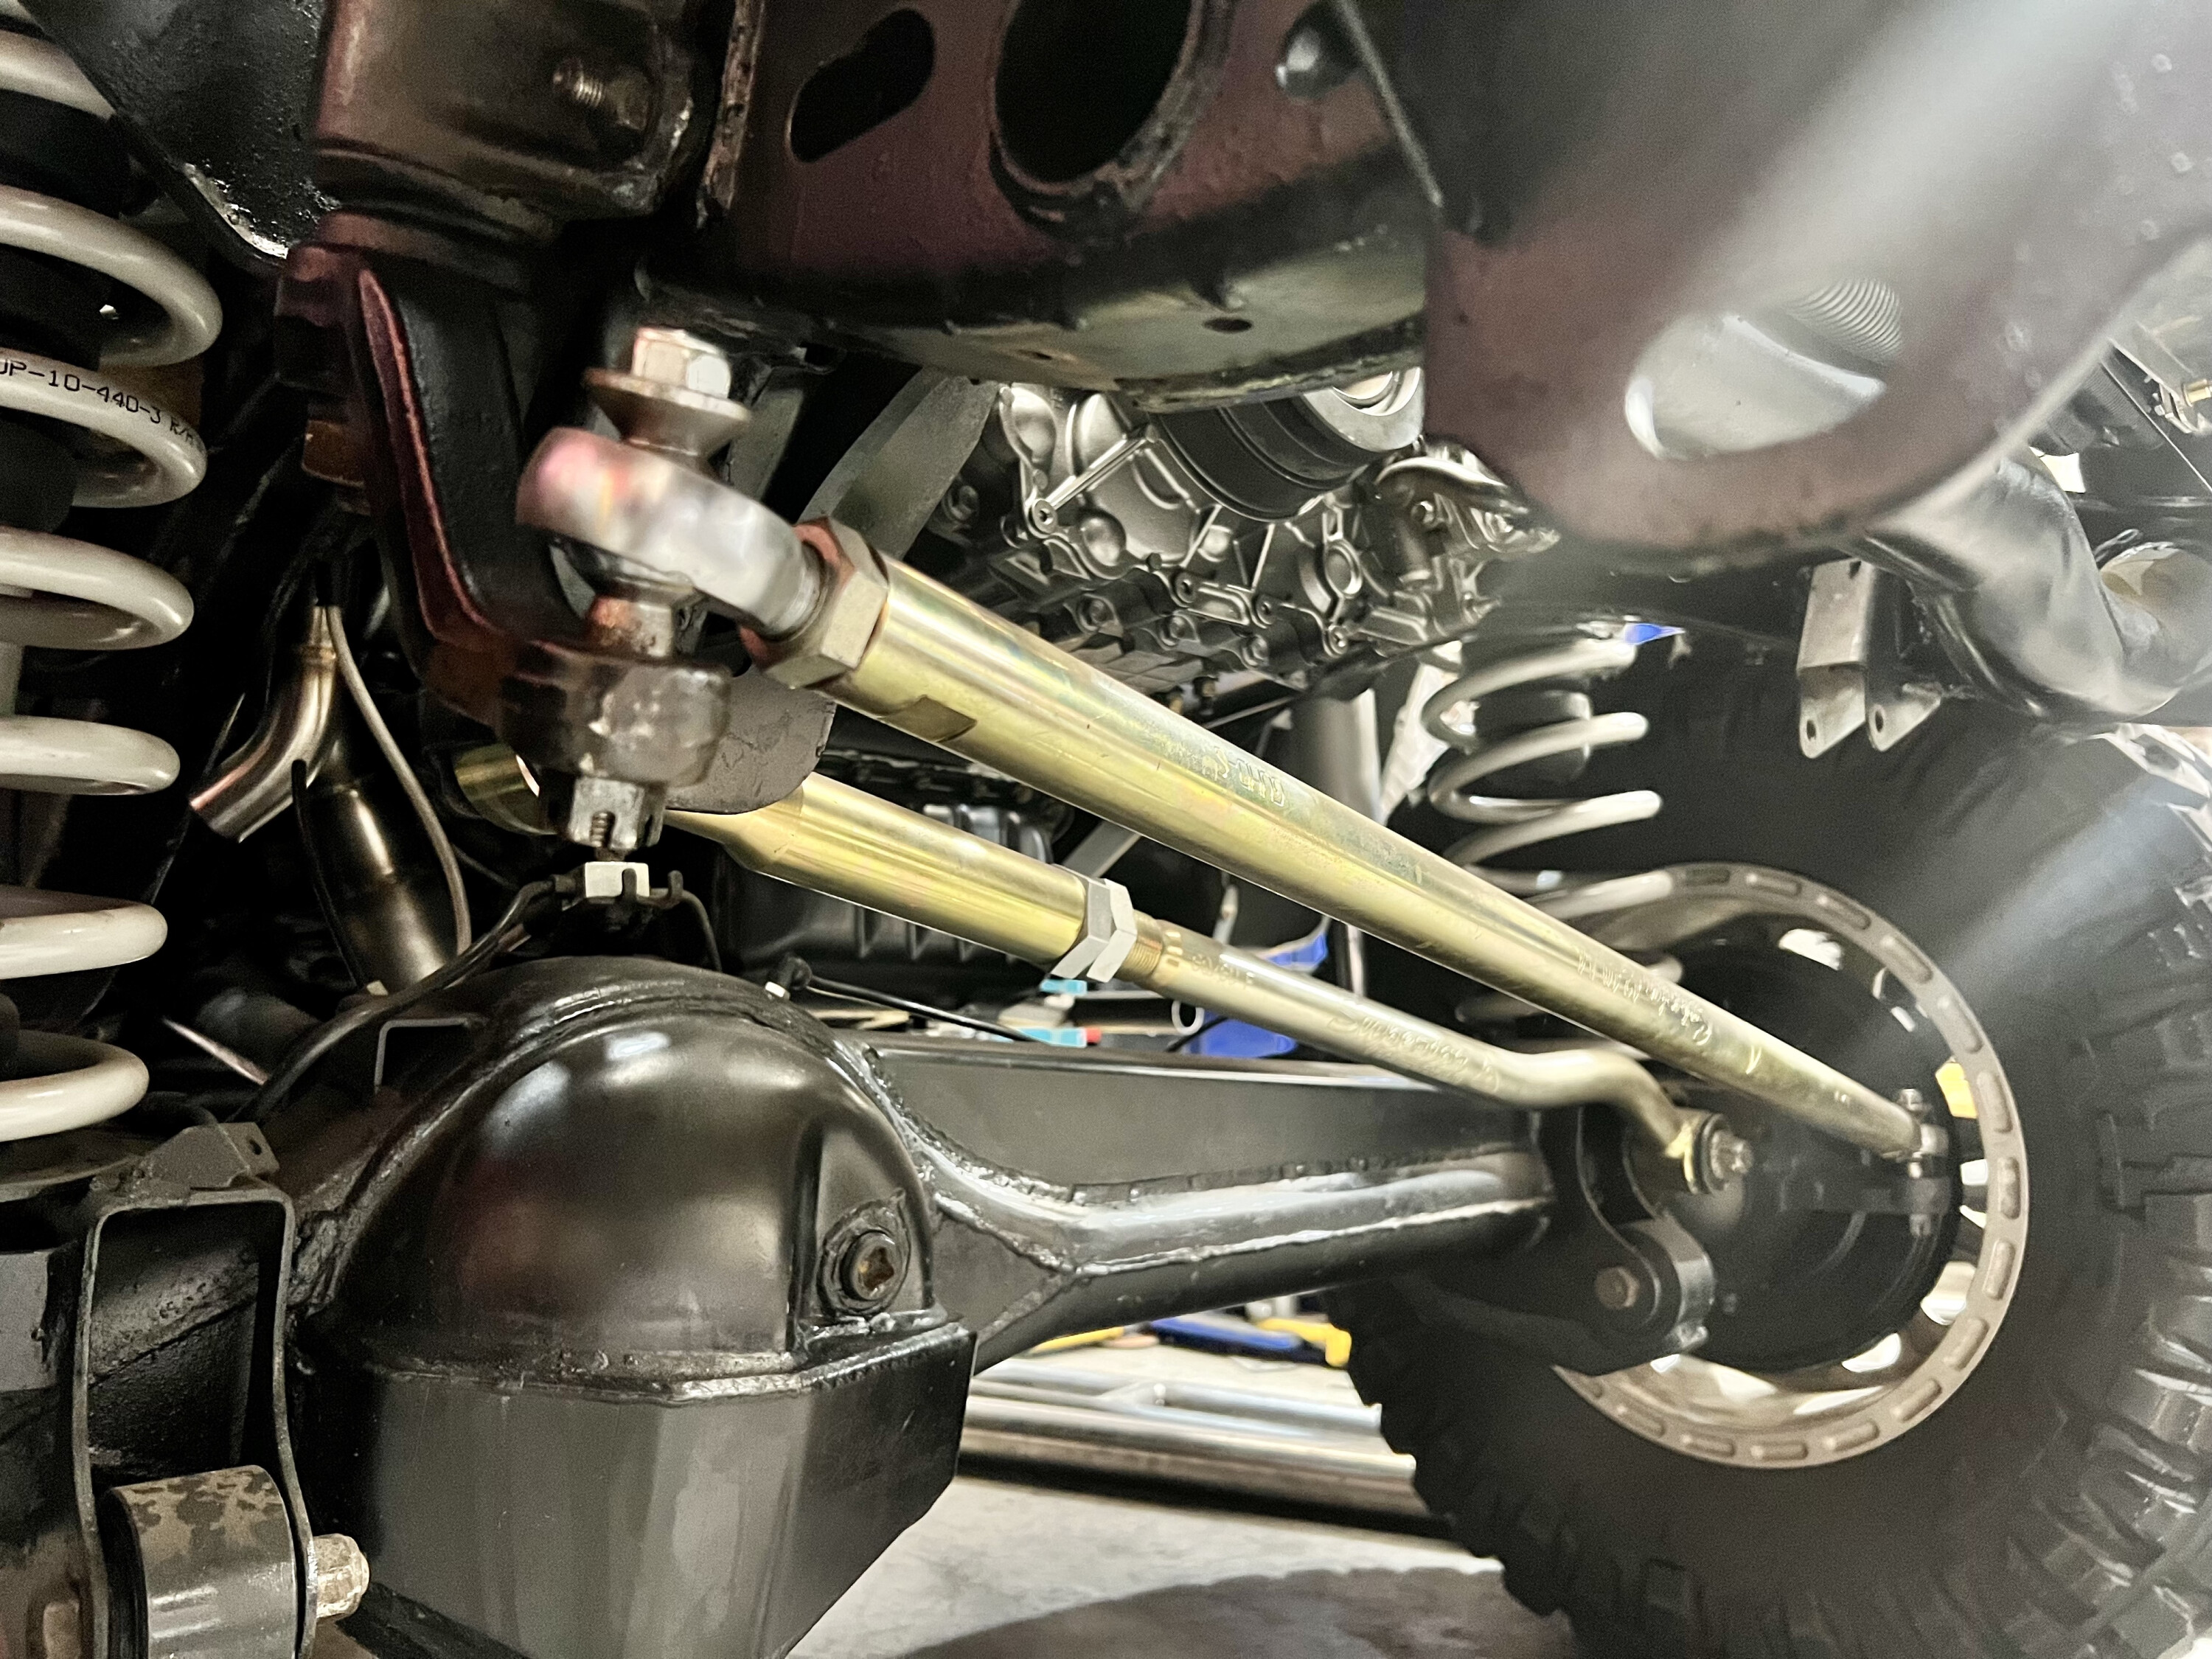
- What it is: A replacement or auxiliary fuel tank to increase your fuel-carrying capacity. At present, the majority of legitimate options are replacement tanks, but auxiliary options do exist overseas so expect them to arrive in Australia in the future.
- Why you need it: When you start planning remote trips in your Hilux, you will quickly realise that fuel servos may be few and far between. Add that you’re probably driving on rough dirt roads or sandy tracks and the fact that you’re driving a modified vehicle that’s heavily loaded or towing a heavy trailer, and your fuel consumption will shoot up. This obviously brings your range from the factory fuel tank down even further. A replacement or auxiliary long-range tank is a simpler and easier option than carrying extra fuel in jerry cans.
- Buying tips: Ensure the fuel tank doesn’t hang lower than the chassis rails or reduce ramp-over angles, and that other components such as aftermarket exhausts and underbody protection and compatible with the tank. You may also need to recalibrate the fuel tank gauge.
JUMP AHEAD
| Material | Capacity | Mounting | |
|---|---|---|---|
| ARB Frontier Long Range | Cross-linked polymer | 140L | Factory points |
| Brown Davis | Steel | 150L | Factory points |
| Long Ranger | Steelu00a0 | 153L | Factory and aftermarket |
ARB Frontier replacement tank
Utilising a cross-linked polymer, this is a replacement tank that will never rust and increases your fuel capacity by 60 litres over the factory fuel tank. With a wall thickness of 7-9mm, every Frontier long range tank is individually pressure-tested and backed by an industry leading three-year warranty.
Specifications
- Material: Cross-linked polymer
- Capacity: 140L
- Mounting: Factory points
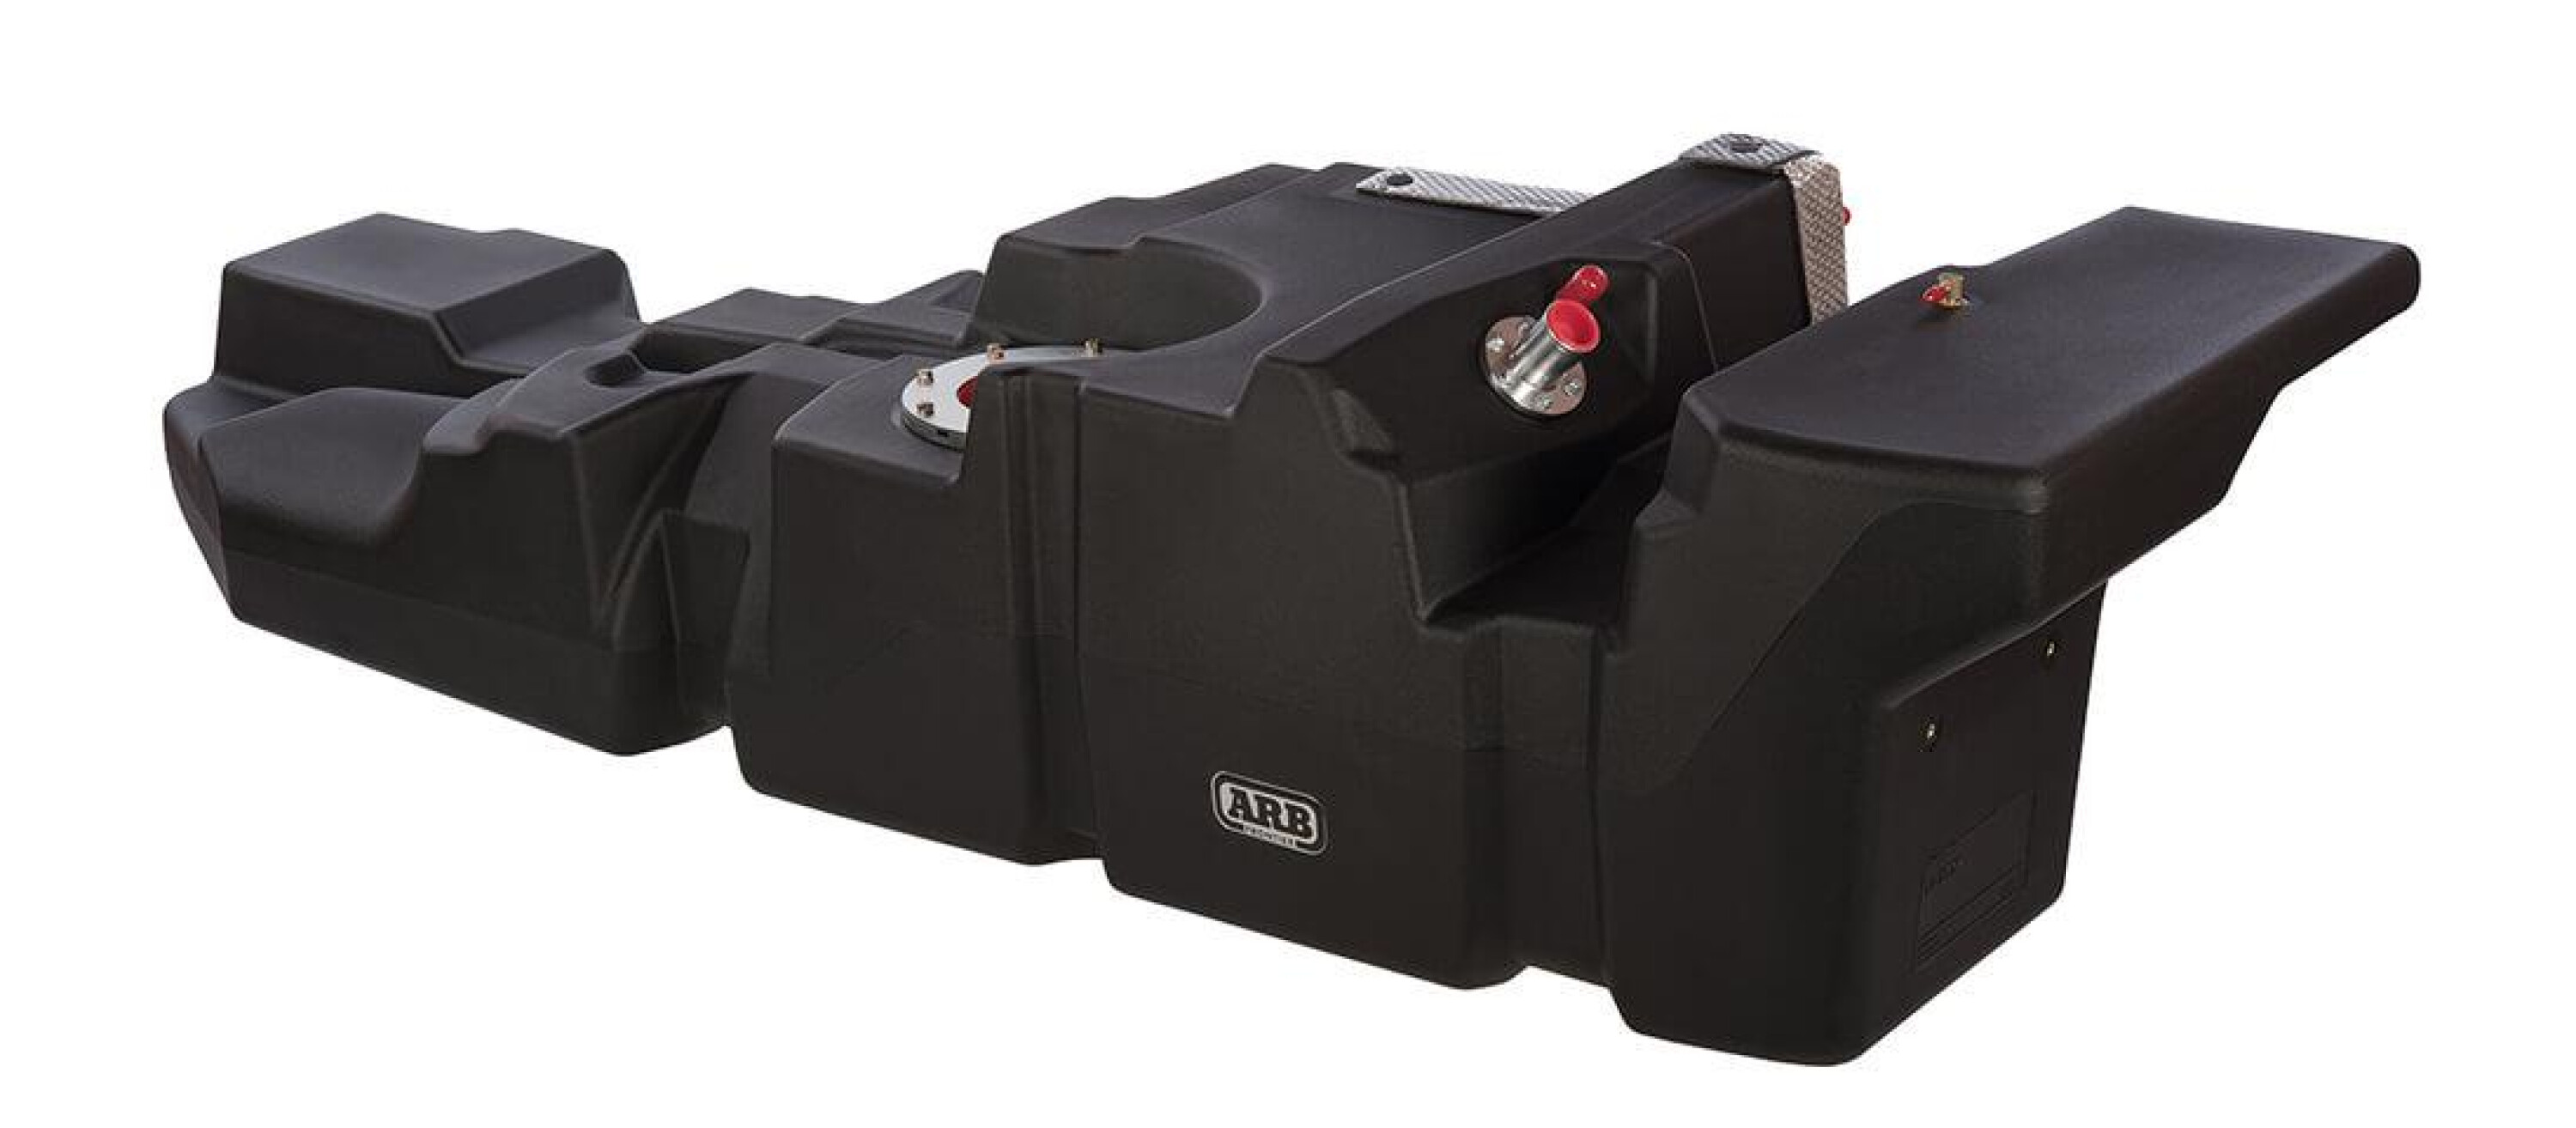
Pros
- Lightweight
- 7-9mm wall thickness
- Potentially less condensation versus steel tank
Cons
- Fuel gauge will be inaccurate when near full
- No drain plug means full removal is required if wrong or contaminated fuel is used
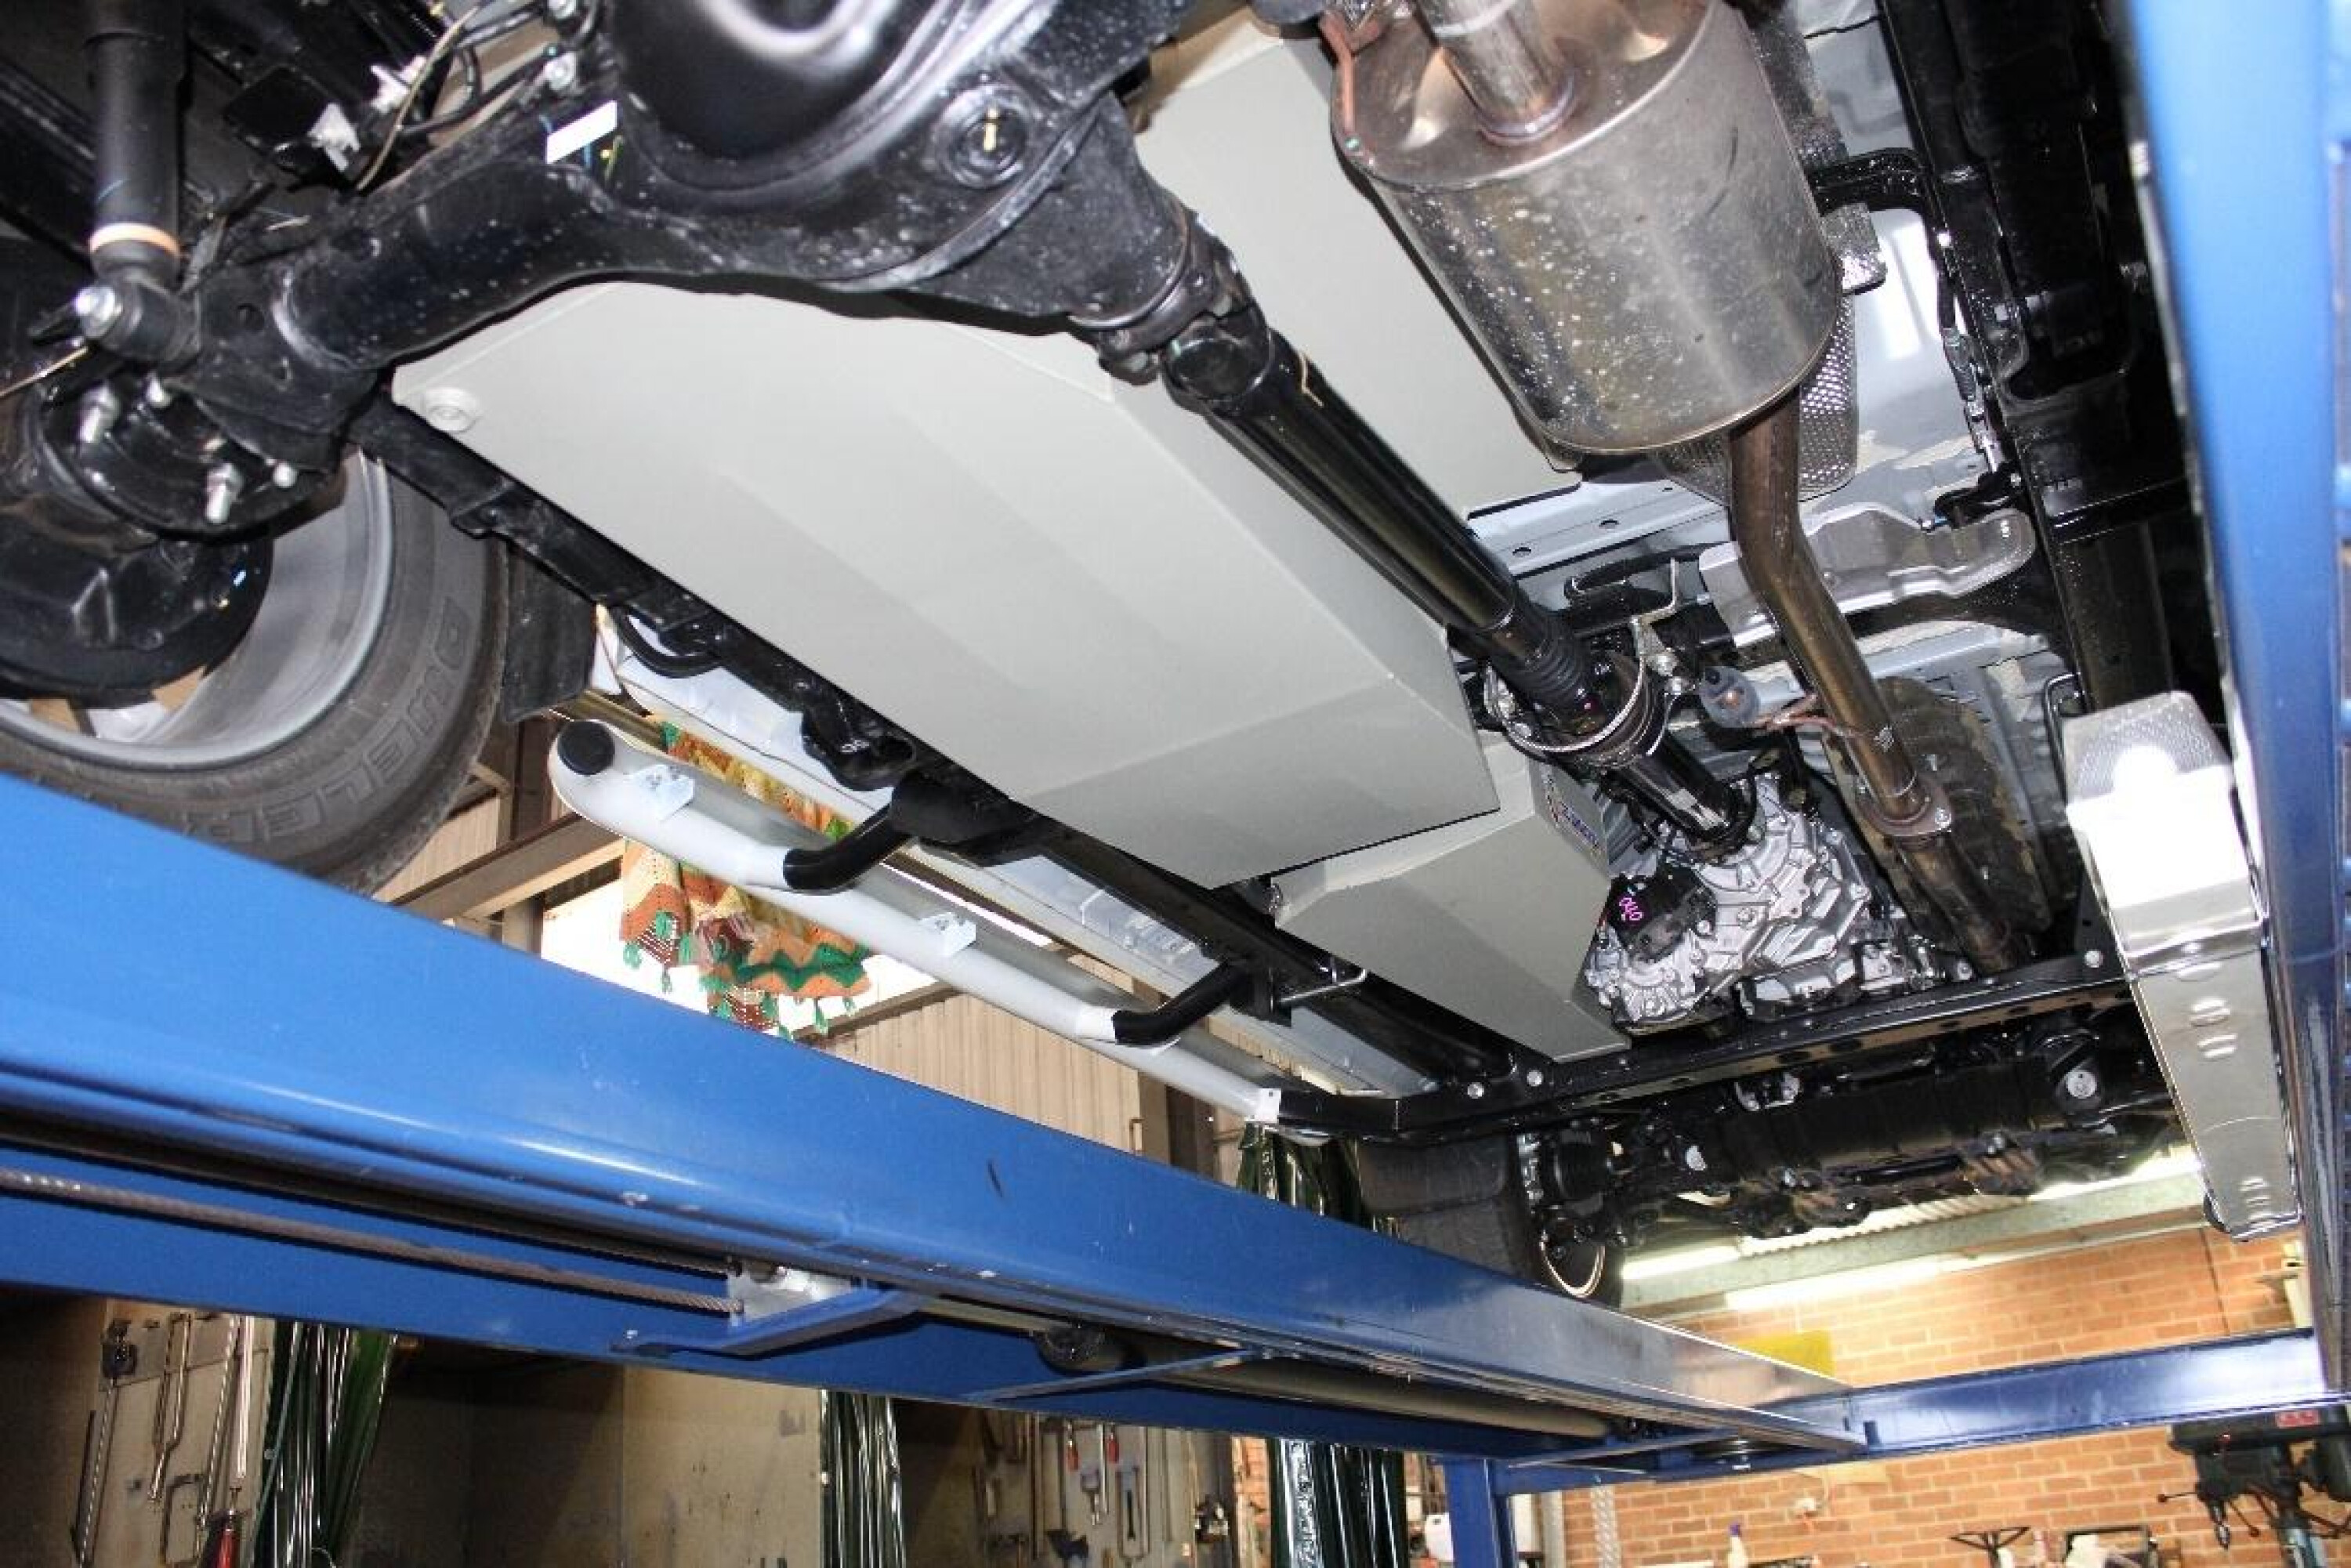
Brown Davis replacement tank
A massive 150-litre capacity means this Brown Davis replacement tank offers almost double the capacity of the factory fuel tank. This tank is mounted using factory points and includes a design that won’t impact the factory spare wheel location. A three-year warranty offers peace of mind.
Specifications
- Material: Steel
- Capacity: 150L
- Mounting: Factory points
Pros
- Two-hour fitting time
- Doesnu2019t compromise factory spare wheel location
- Confirmed fitment with most aftermarket three-inch exhausts and suspension upgrades
Cons
- Fuel gauge will be inaccurate when near full
- Heavy steel and increased fuel load may require GVM upgrade
Long Ranger replacement tank
Another massive-capacity replacement tank that almost doubles the factory capacity at 153 litres. The tank utilises a twin-tank design and claims to actually increase rampover compared to the factory tank. The three-year warranty offered is competitive with other manufacturers.
Specifications
- Material: Steel (2mm aluminised)
- Capacity: 153L
- Mounting: Factory and aftermarket points
Pros
- Fully baffled to prevent cavitation
- Drain plug included
- Longer two-piece design allows better ground clearance
Cons
- Fuel gauge will be inaccurate when near full
- More complicated to install compared to some alternatives
How we review products
4X4 Australia has been reviewing four-wheel drive vehicles and aftermarket products for more than 40 years.
When looking for the best accessories for your make and model of 4WD, there are some things essential to making sure you have the best off-roading experience.
When we compare products, here are some of the things we consider:
- Warranty
- Build quality
- Value for money
- Time and ease to set-up/install
- Weight
- Fit and finish
- How well it gets the job done
- What materials they’re made from
- Corrosion/UV resistance
- Coatings
- Compatibility with other accessories
- Compliance with ADRs and vehicle safety systems
- Country of manufacture
- Load ratings, to determine what’s the best product across each price point.
Disclosure: When you buy through our links, we may earn a commission. We also include products that we do not earn a commission from.
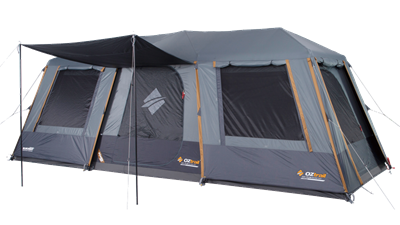
I’ve been sleeping in a wide variety of swags for so long it’s hard to remember when I first caught my slumber in a bed roll protected by canvas.
Since then swags have been improved and been upgraded, and I’ve long-since graduated to a dome shaped tent-like swag, and when my previous Aussie-made swag required replacement, I borrowed my son’s ARB swag to check it out.

Impressed, I went out and picked ARB’s latest Skydome Series II Single Swag, grabbing a Swag Bag at the same time and throwing both into the Hilux before heading out into the desert for five weeks.
Now let’s get the elephant out of the room quickly. Yep, these swags and bags are made in China, but if China can launch rockets to the moon it can certainly make a good quality swag and bag, and there’s no doubt both the ARB swag and bag are up at the top end of the quality stakes, no matter how you measure it.
JUMP AHEAD
The swag bag
The bag itself is available in two sizes, small and large, with the small one being suitable for the swag I wanted to protect.
The outer shell of the Swag Bag is made from tough Oxford weave PU-coated fabric while all seams are heat sealed and taped to ensure protection from rain and dust.
The large top opening features a roll-up closure with straps and buckles to create a good seal from dust and water ingress, as long as you don’t try and stuff too much into the bag – there are no zips or velcro to help seal this top opening so you need to ensure that the roll-up is secure.
There are grab handles at each end and a removable shoulder strap which I quickly gave the heave-ho. All in all, the bag is extremely durable, ensuring its contents remain clean and dry.
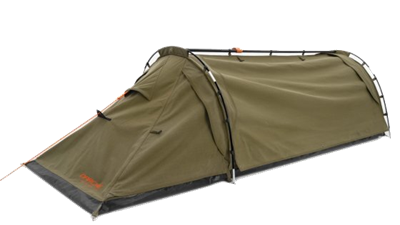
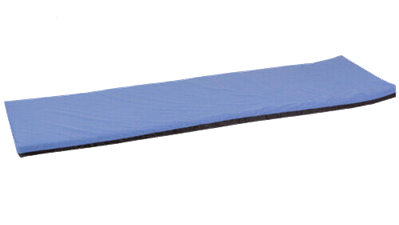
The swag
The ARB SkyDome Swag comes in single and double configurations but with Viv insisting she has already spent way too much time in a swag, I opted for a single swag for my solitary travels.
When fully erected the swag is very roomy, measuring 2150mm long by 1400mm wide, and having a height at the head and shoulder end of 800mm, meaning most people would be able to sit up without any issues. Foot height is 450mm, and there are plenty of storage options inside with four internal storage pockets, as well as two hanging hooks and a torch holder.
For sleeping comfort there is a 75mm thick high-density foam mattress featuring anti-microbial treatment with a machine washable cover.
The all-important material for the top of the swag is heavy duty 500gsm water and rot-proofed canvas, fully tested to meet Australian standards. The 970gsm PVC base with its 75mm high-tub design offers excellent protection against water ingress, just in case your swag ends up in a big puddle of water – not unknown when camping in our outback. As a second defence, corners are welded and sealed and PVC anchor tabs are used to prevent water wicking through the seams.
All doors and windows feature excellent YKK zips, while a rain gutter is integrated into the main entry door to inhibit water ingress. The sewing on all seams is first class ensuring the best possible wear and tear characteristics. The swag also features additional canvas flaps and insect-proof mesh in the roof zone and at each end, helping enhance airflow for increased comfort on those warmer nights.
Durable, elasticised 11mm aluminium bows (way better than fibreglass bows) keep the swag upright and taught. However, having three bows and two lengthwise support struts means the swag is a little slower (say a minute or so) to erect and pull down than others with just two bows and one lengthwise pole.
But the room inside the swag and its ability to withstand the elements when in the wild makes the extra support and time to erect well worthwhile. All up weight of the swag (without sleeping gear) is 10.5kg.
Like any canvas product you are strongly advised to wet the swag down before you use it, so I duly erected it and then hosed it down thoroughly before leaving on my trip. This ensures all sewing and seams have the thread swell to fill each and every sewing hole.
Throughout our ensuing five week trip, even though it was cold and wet on a few nights, I had no issue with water ingress.
On this latest trip I set the swag up on my old camp stretcher (ARB has its own) and while there are flaps at each end you can open to allow more airflow, it was so cold on our trip (below freezing on a few nights) opening any flap was not an option. Still, they can be fully opened or partly opened with guy ropes to hold them in place if need be – I didn’t!
I’m impressed with this swag and I reckon it’s one of the best available on the Aussie market. It’s roomy and comfortable and proved to be wind and waterproof.
Its top quality materials – canvas, tub, zips and mesh – point to a long and durable life and I look forward to many years of travelling and sleeping in it.
Specs
- Weight: 10.5kg
- Length: 2150mm
- Width: 1400mm
- Height (head and shoulder): 800mm
- Height (feet): 450mm
- Mattress: 75mm thick high-density foam
Pricing
- Single swag: $549
- Double swag: $699
- Single bag: $159
- Double bag: $189
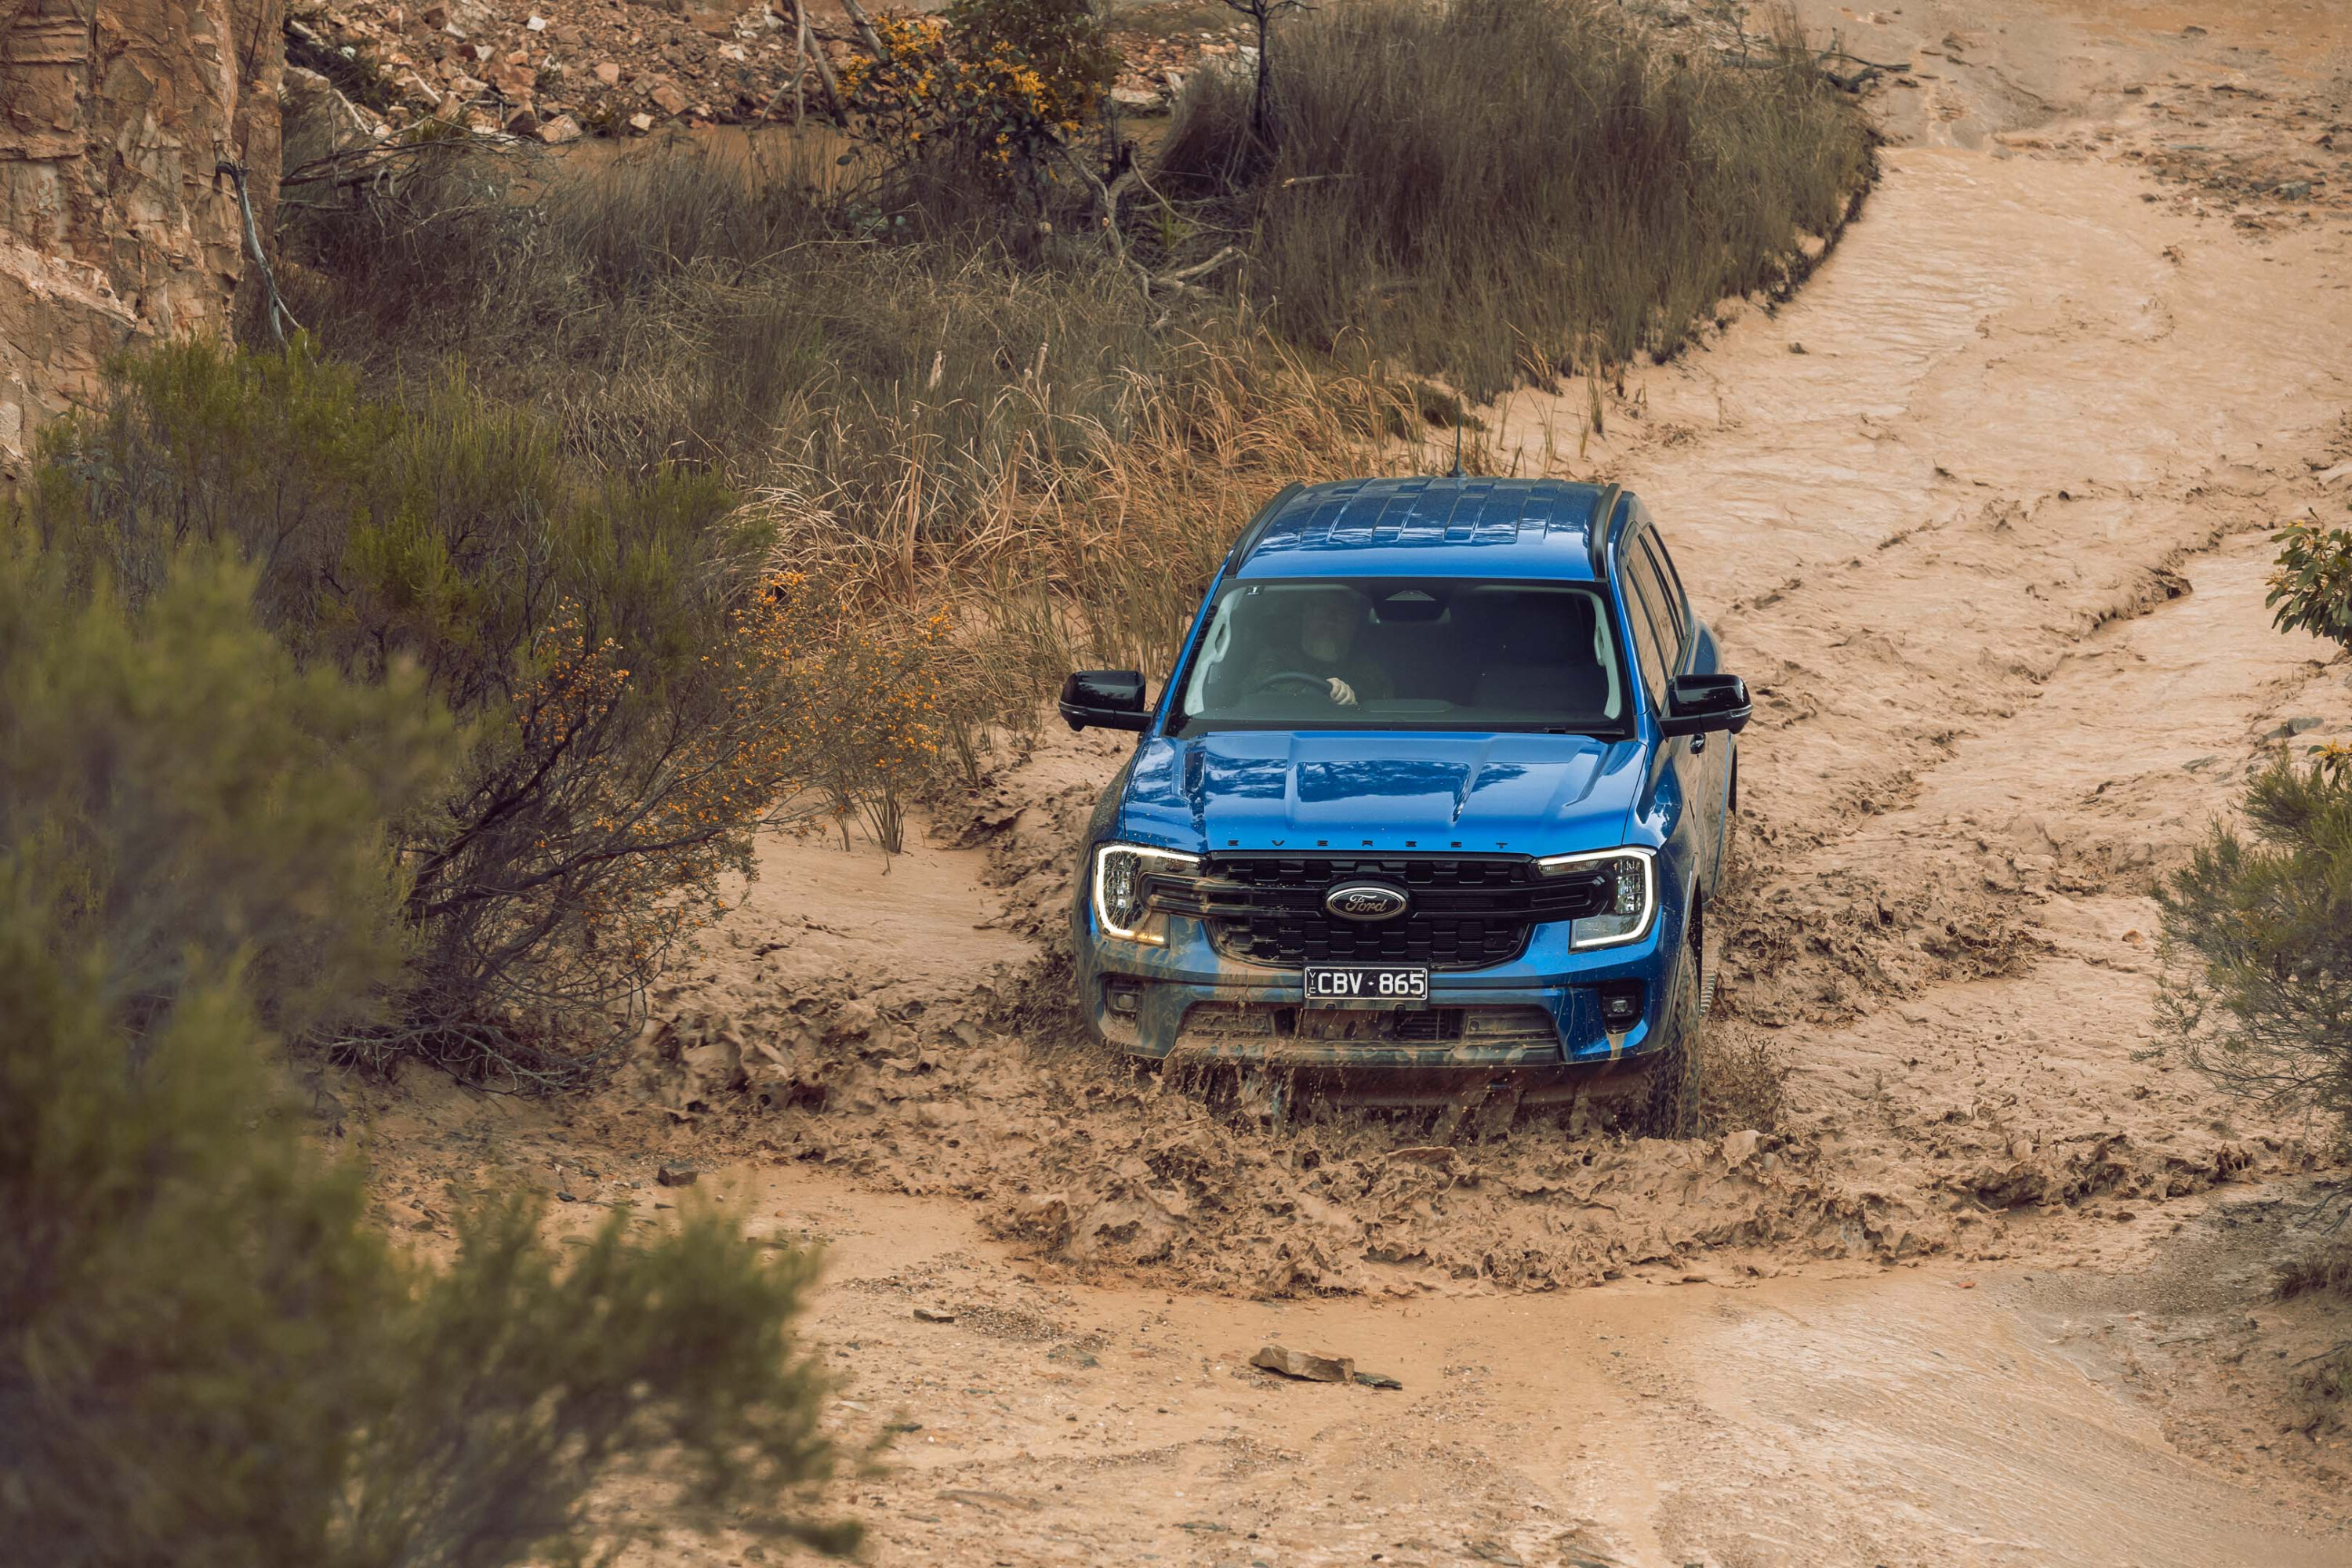
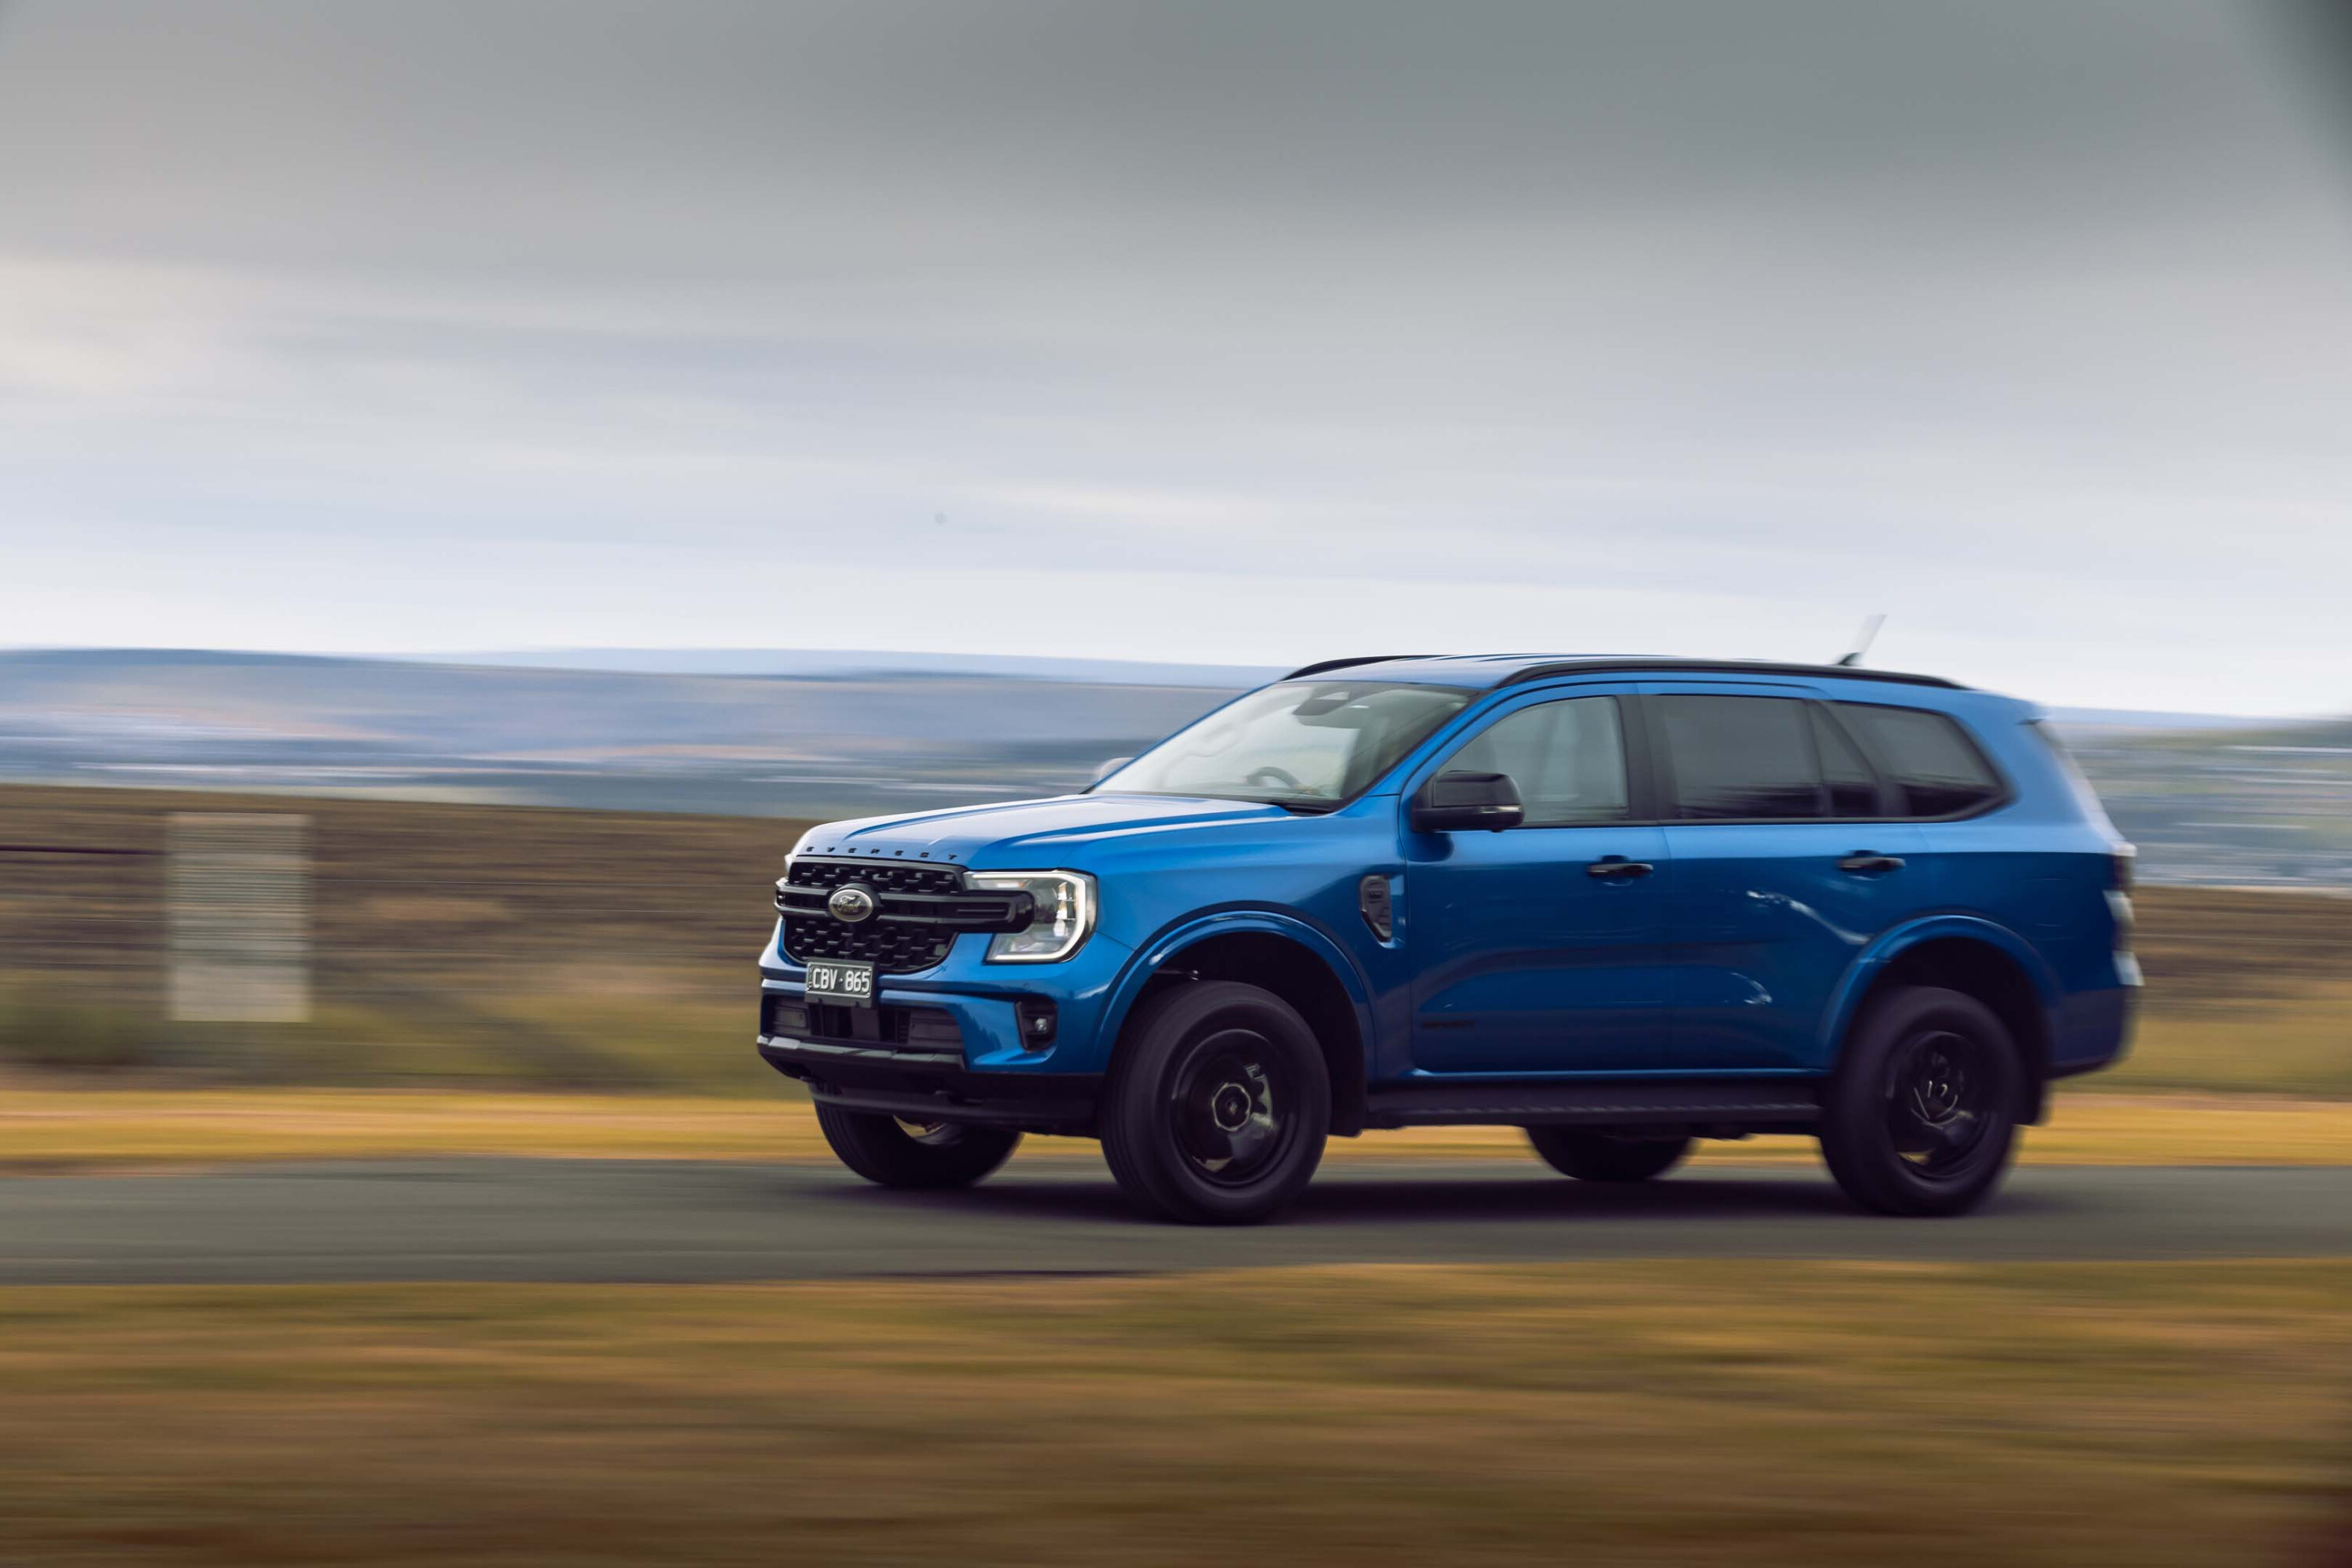
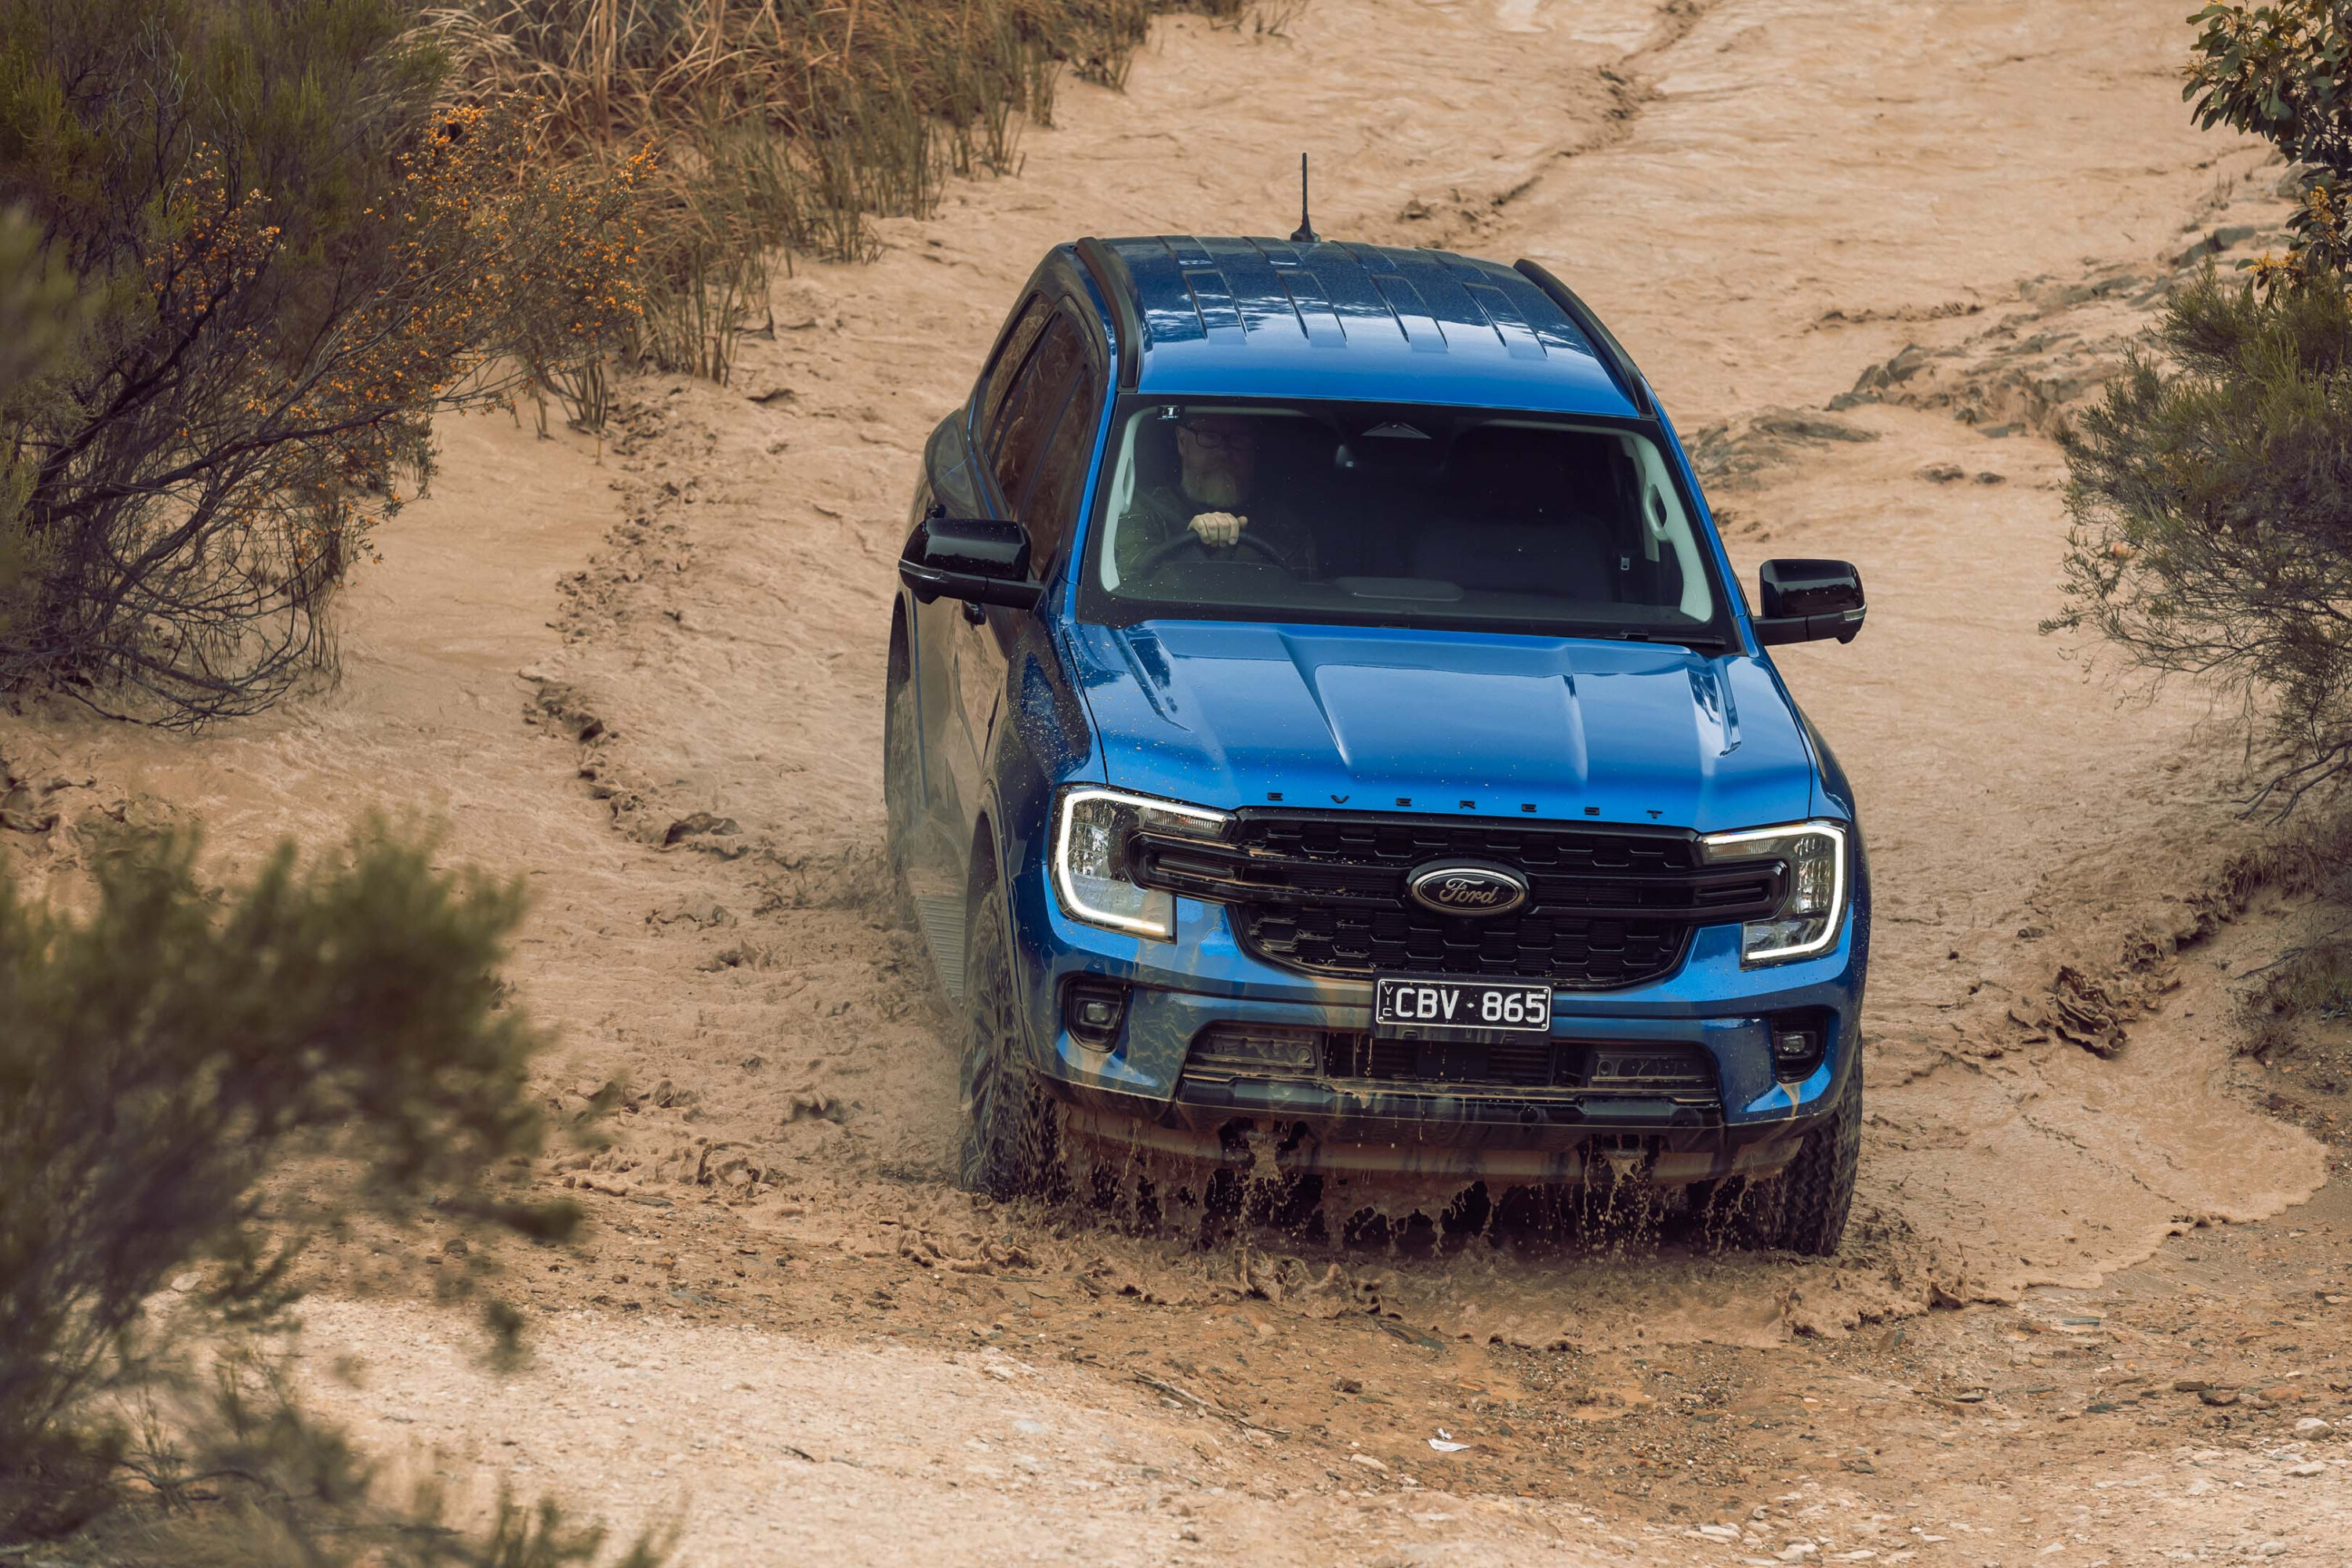
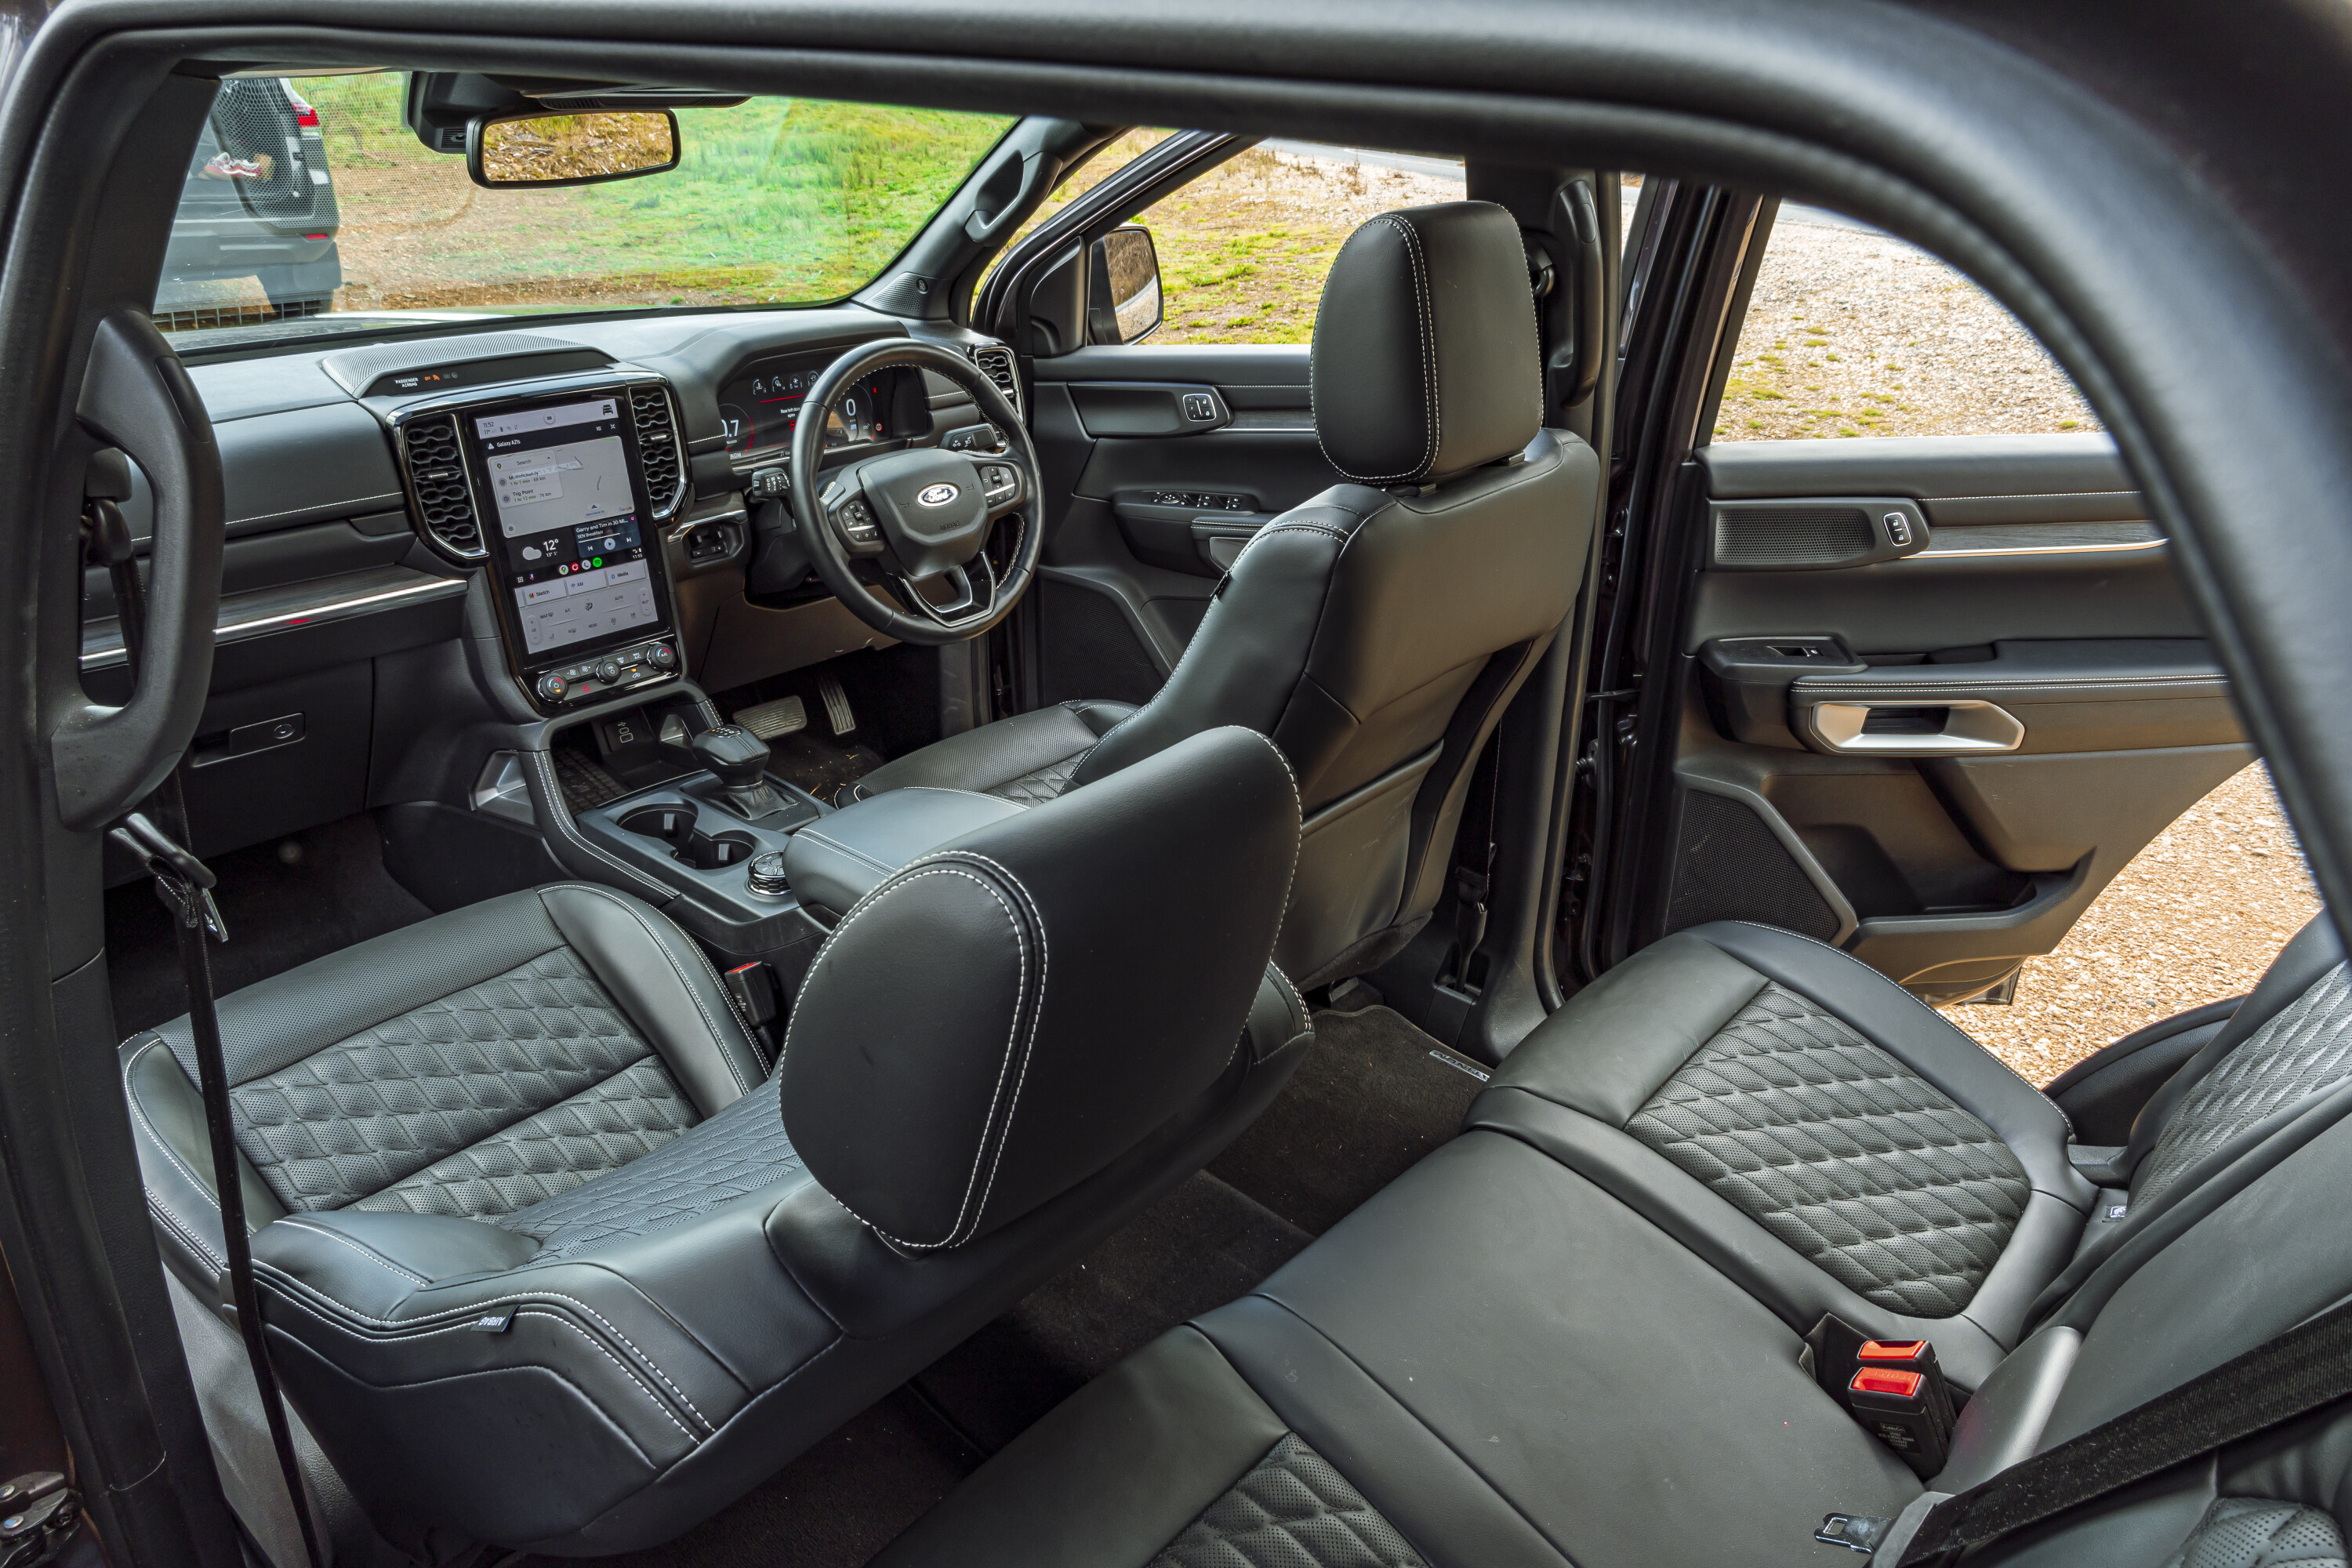
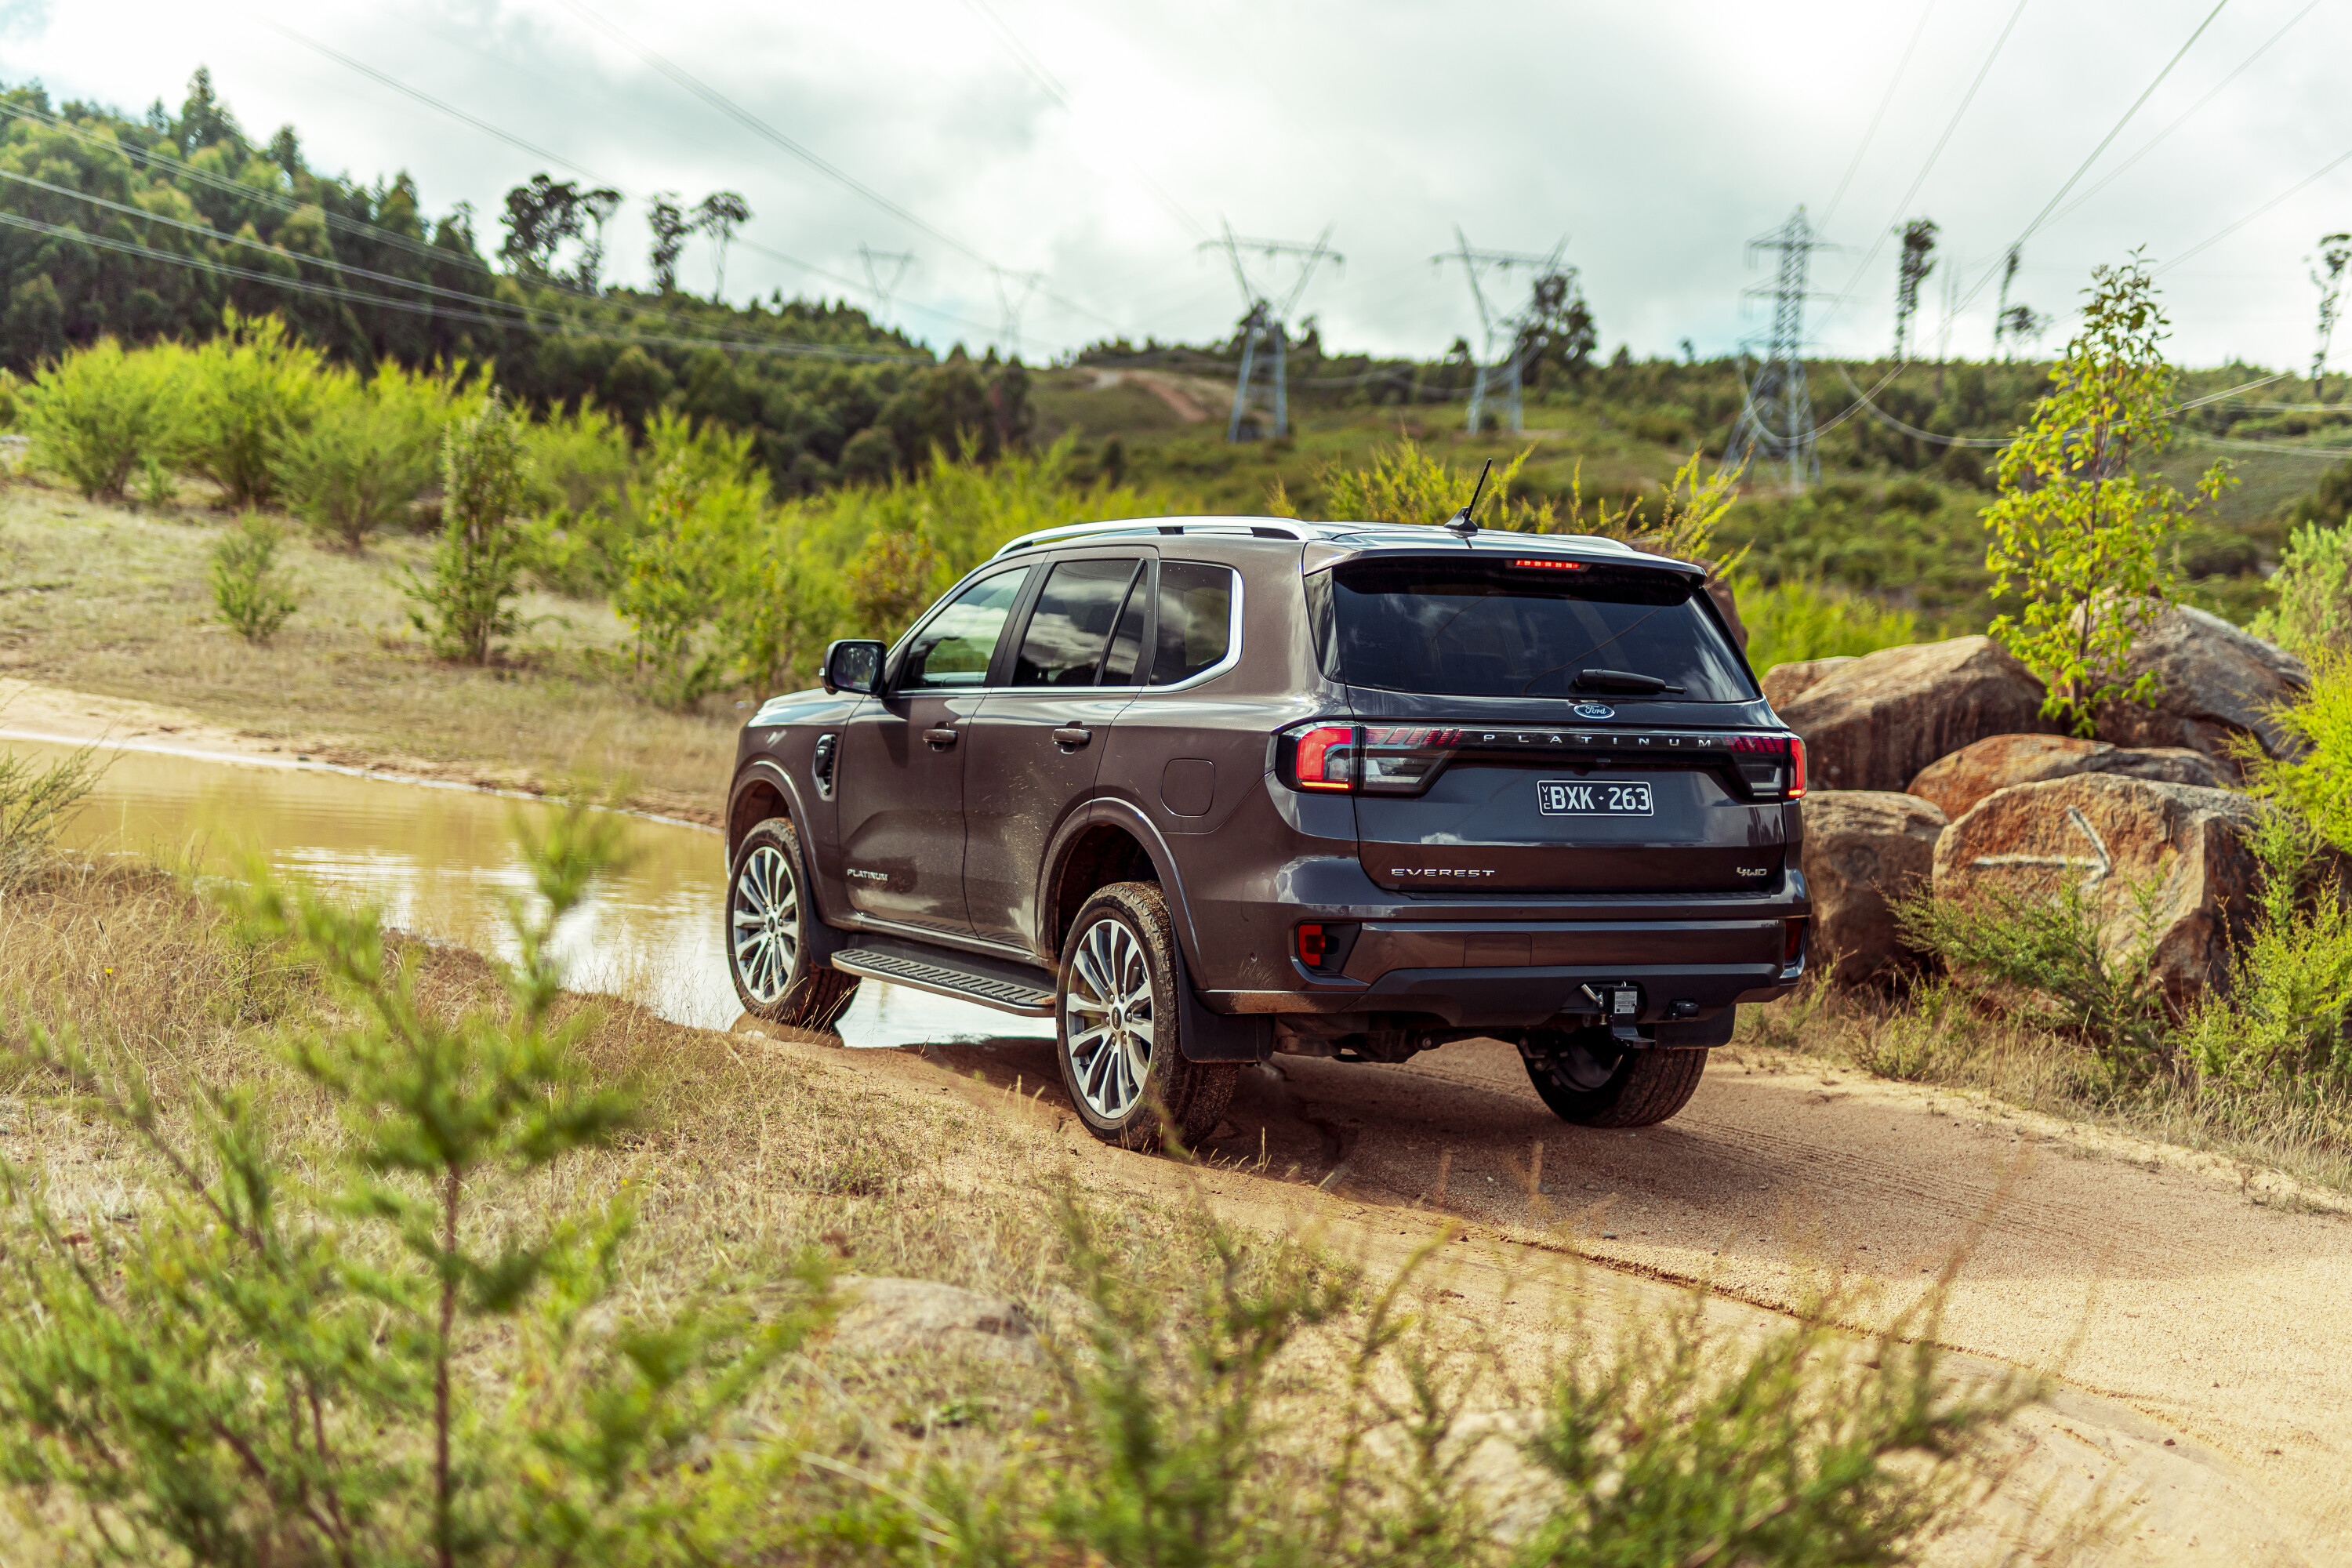
Living with the 2023 Ford Everest
JUMP AHEAD
- Introduction: Built to scale
- Update 1: Head for heights
- Update 2: It’s peaked
- Update 3 & conclusion: Post script
Built to scale
- Price as tested: $69,090
- This month: 4001km @ 9.5L/100km
- Overall: 4001km @ 9.5L/100km
As our 2023 COTY winner, the Ford Everest has been a popular addition to the Wheels fleet.
So much so, that it took nearly three weeks before I managed to get hold of it – and it’s had a huge first month.
First, Street Machine editor Simon Telford used it to tow some overboosted confection off to a fly-blown bush dragstrip, and then photographer Ellen Dewar snaffled the keys in order to disappear off on a week-long assignment at Winton and the high country. When it returned, the previously box-fresh Everest definitely had that slightly funky road-trip tang to it.
I can see why it’s in demand. Everyone in the Wheels office loves the new Ranger, and a more versatile and family-friendly SUV version built loosely on those bones was always going to be popular. Factor in a tow bar, 600Nm of torque on tap and a towing capacity of 3500kg and it has me wondering about the profit margins on a hot donut trailer.
Of course, it’s more than just a fenestrated pick-up. The rear end is coil-sprung rather than featuring leafs to soak up road bumps and there’s a Watt’s linkage back there too.
At the other end is a punchy 184kW V6 turbodiesel that can trace its roots all the way back to 2004 and the Gemini joint venture between Ford and PSA Peugeot Citroen, variants of the engine appearing in the likes of the Land Rover Discovery 3, the Jaguar S-Type, the Citroen C5 and the Peugeot 407.
Still, Bizzarrini’s V12 lasted in Lamborghinis from the 1963 350 GTV to the 2010 Murcielago SuperVeloce with a few tweaks along the way, so we won’t hold a lengthy lineage against the Everest’s lump.
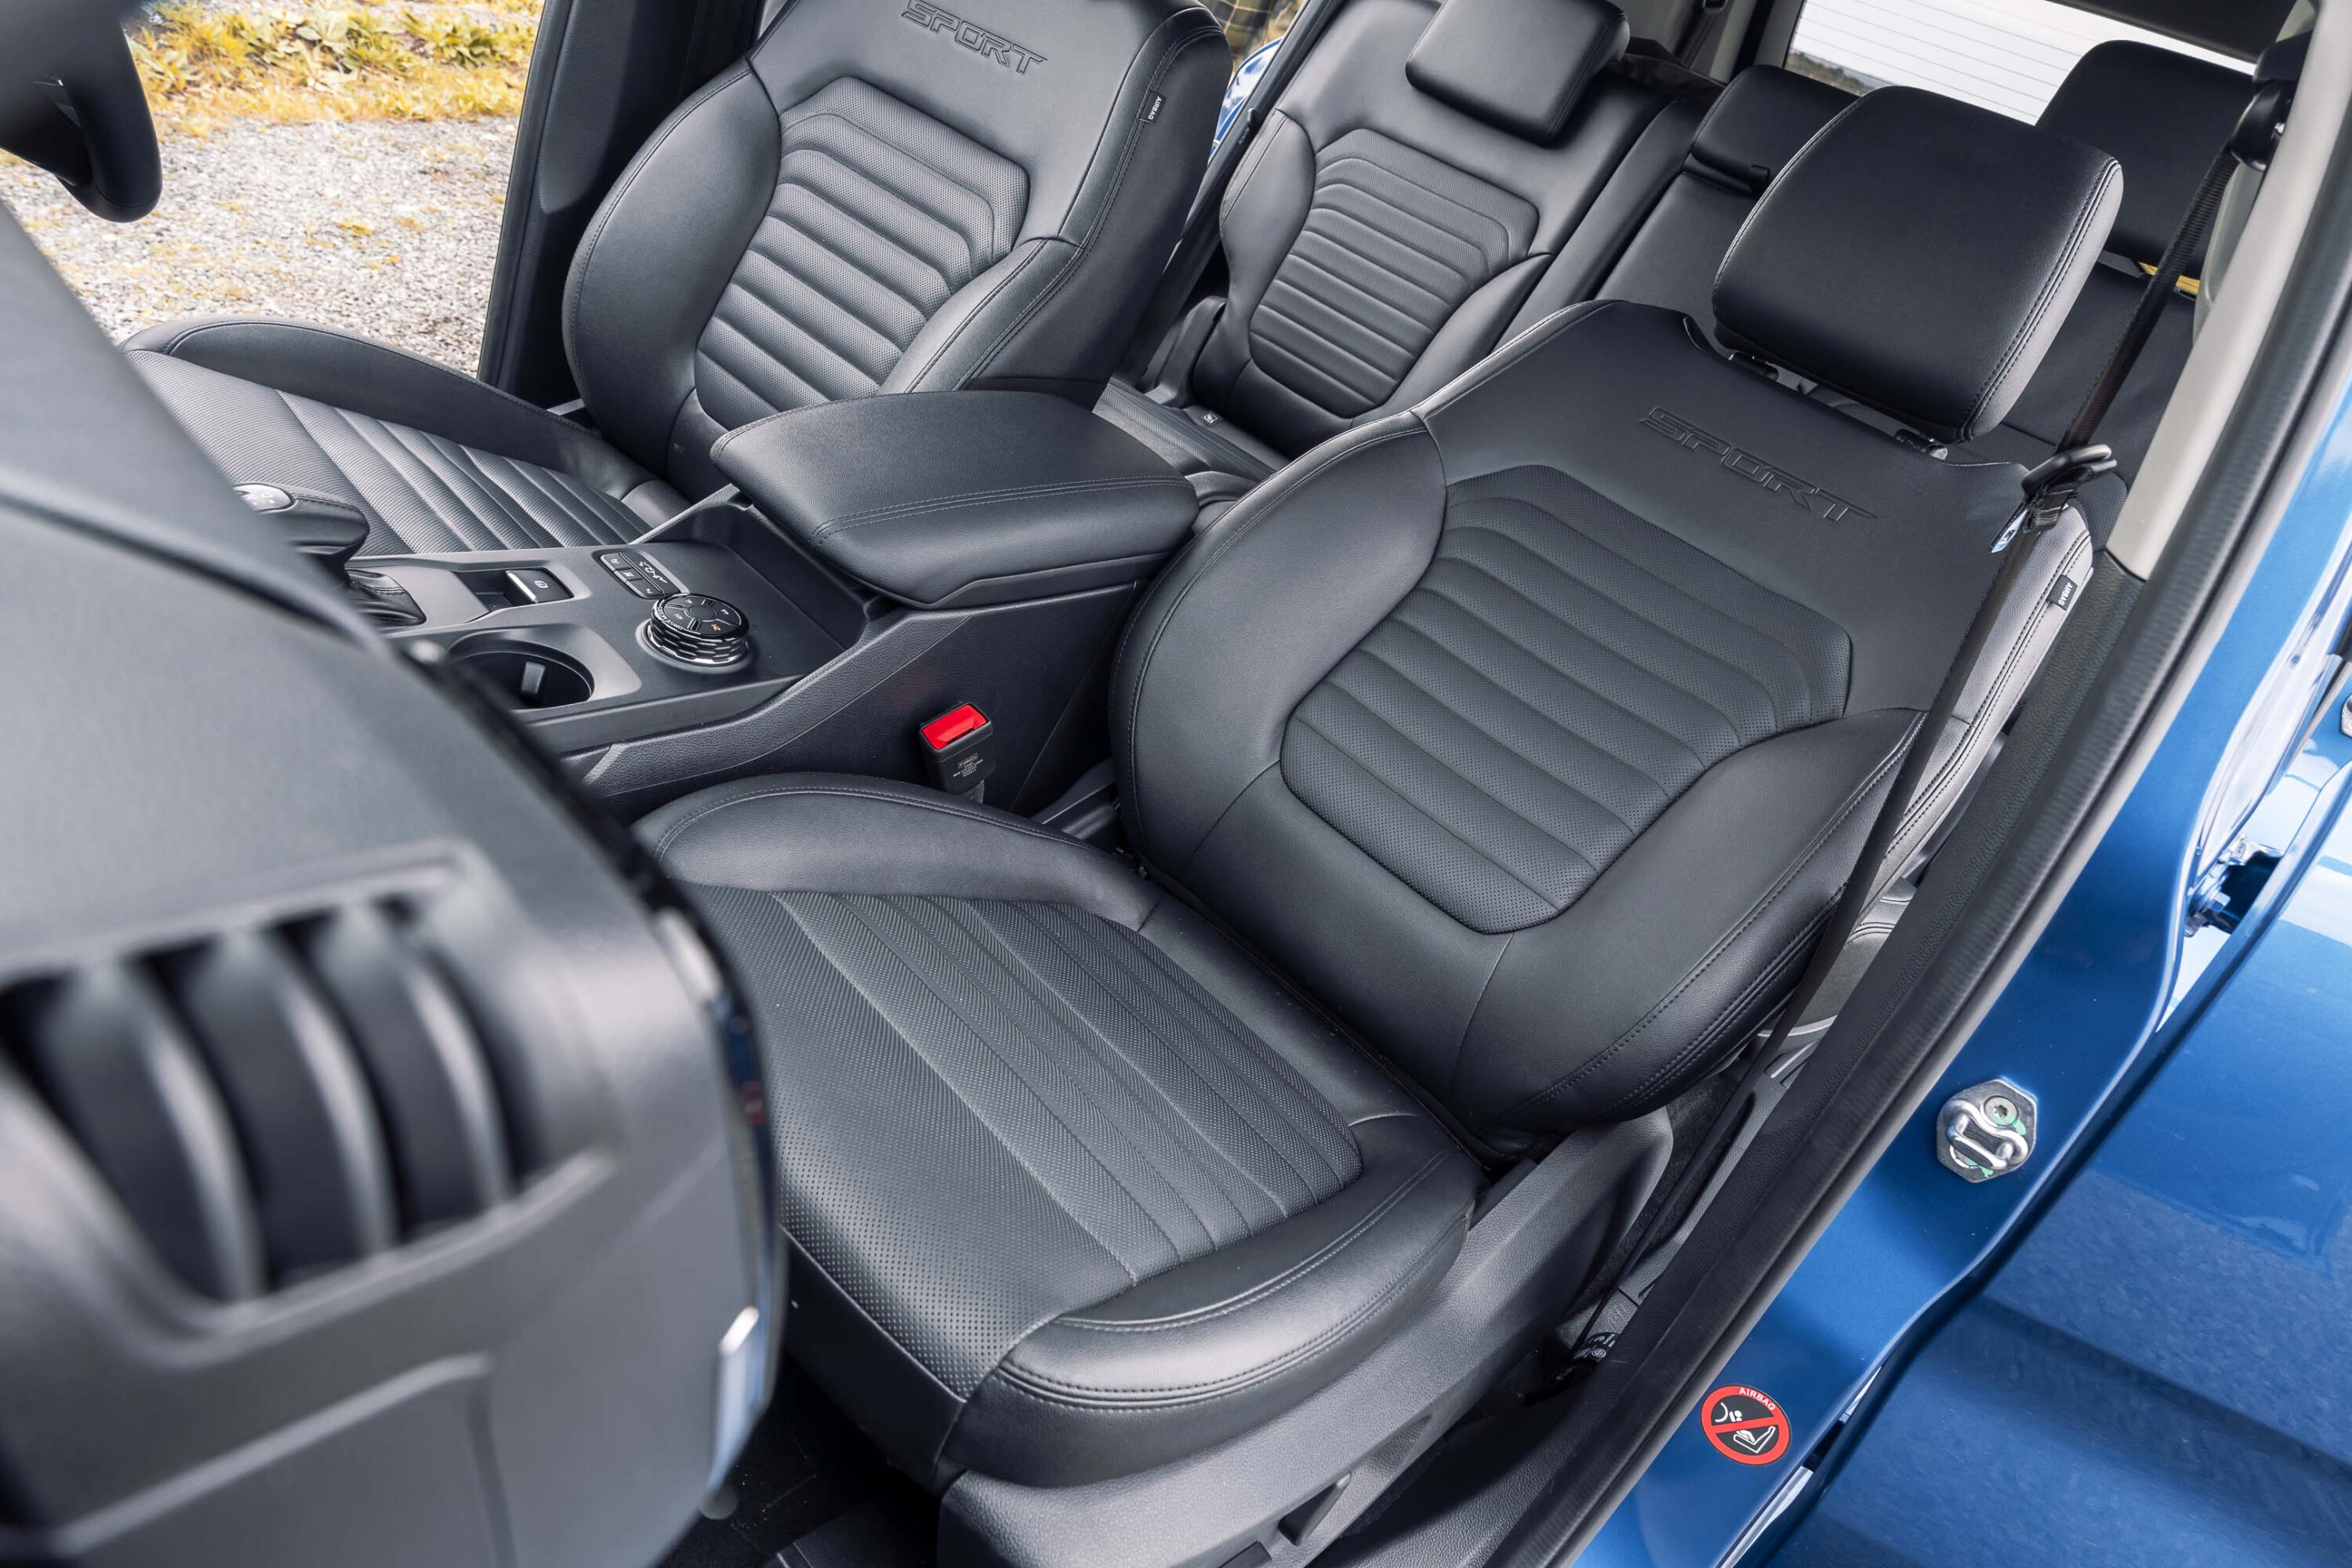
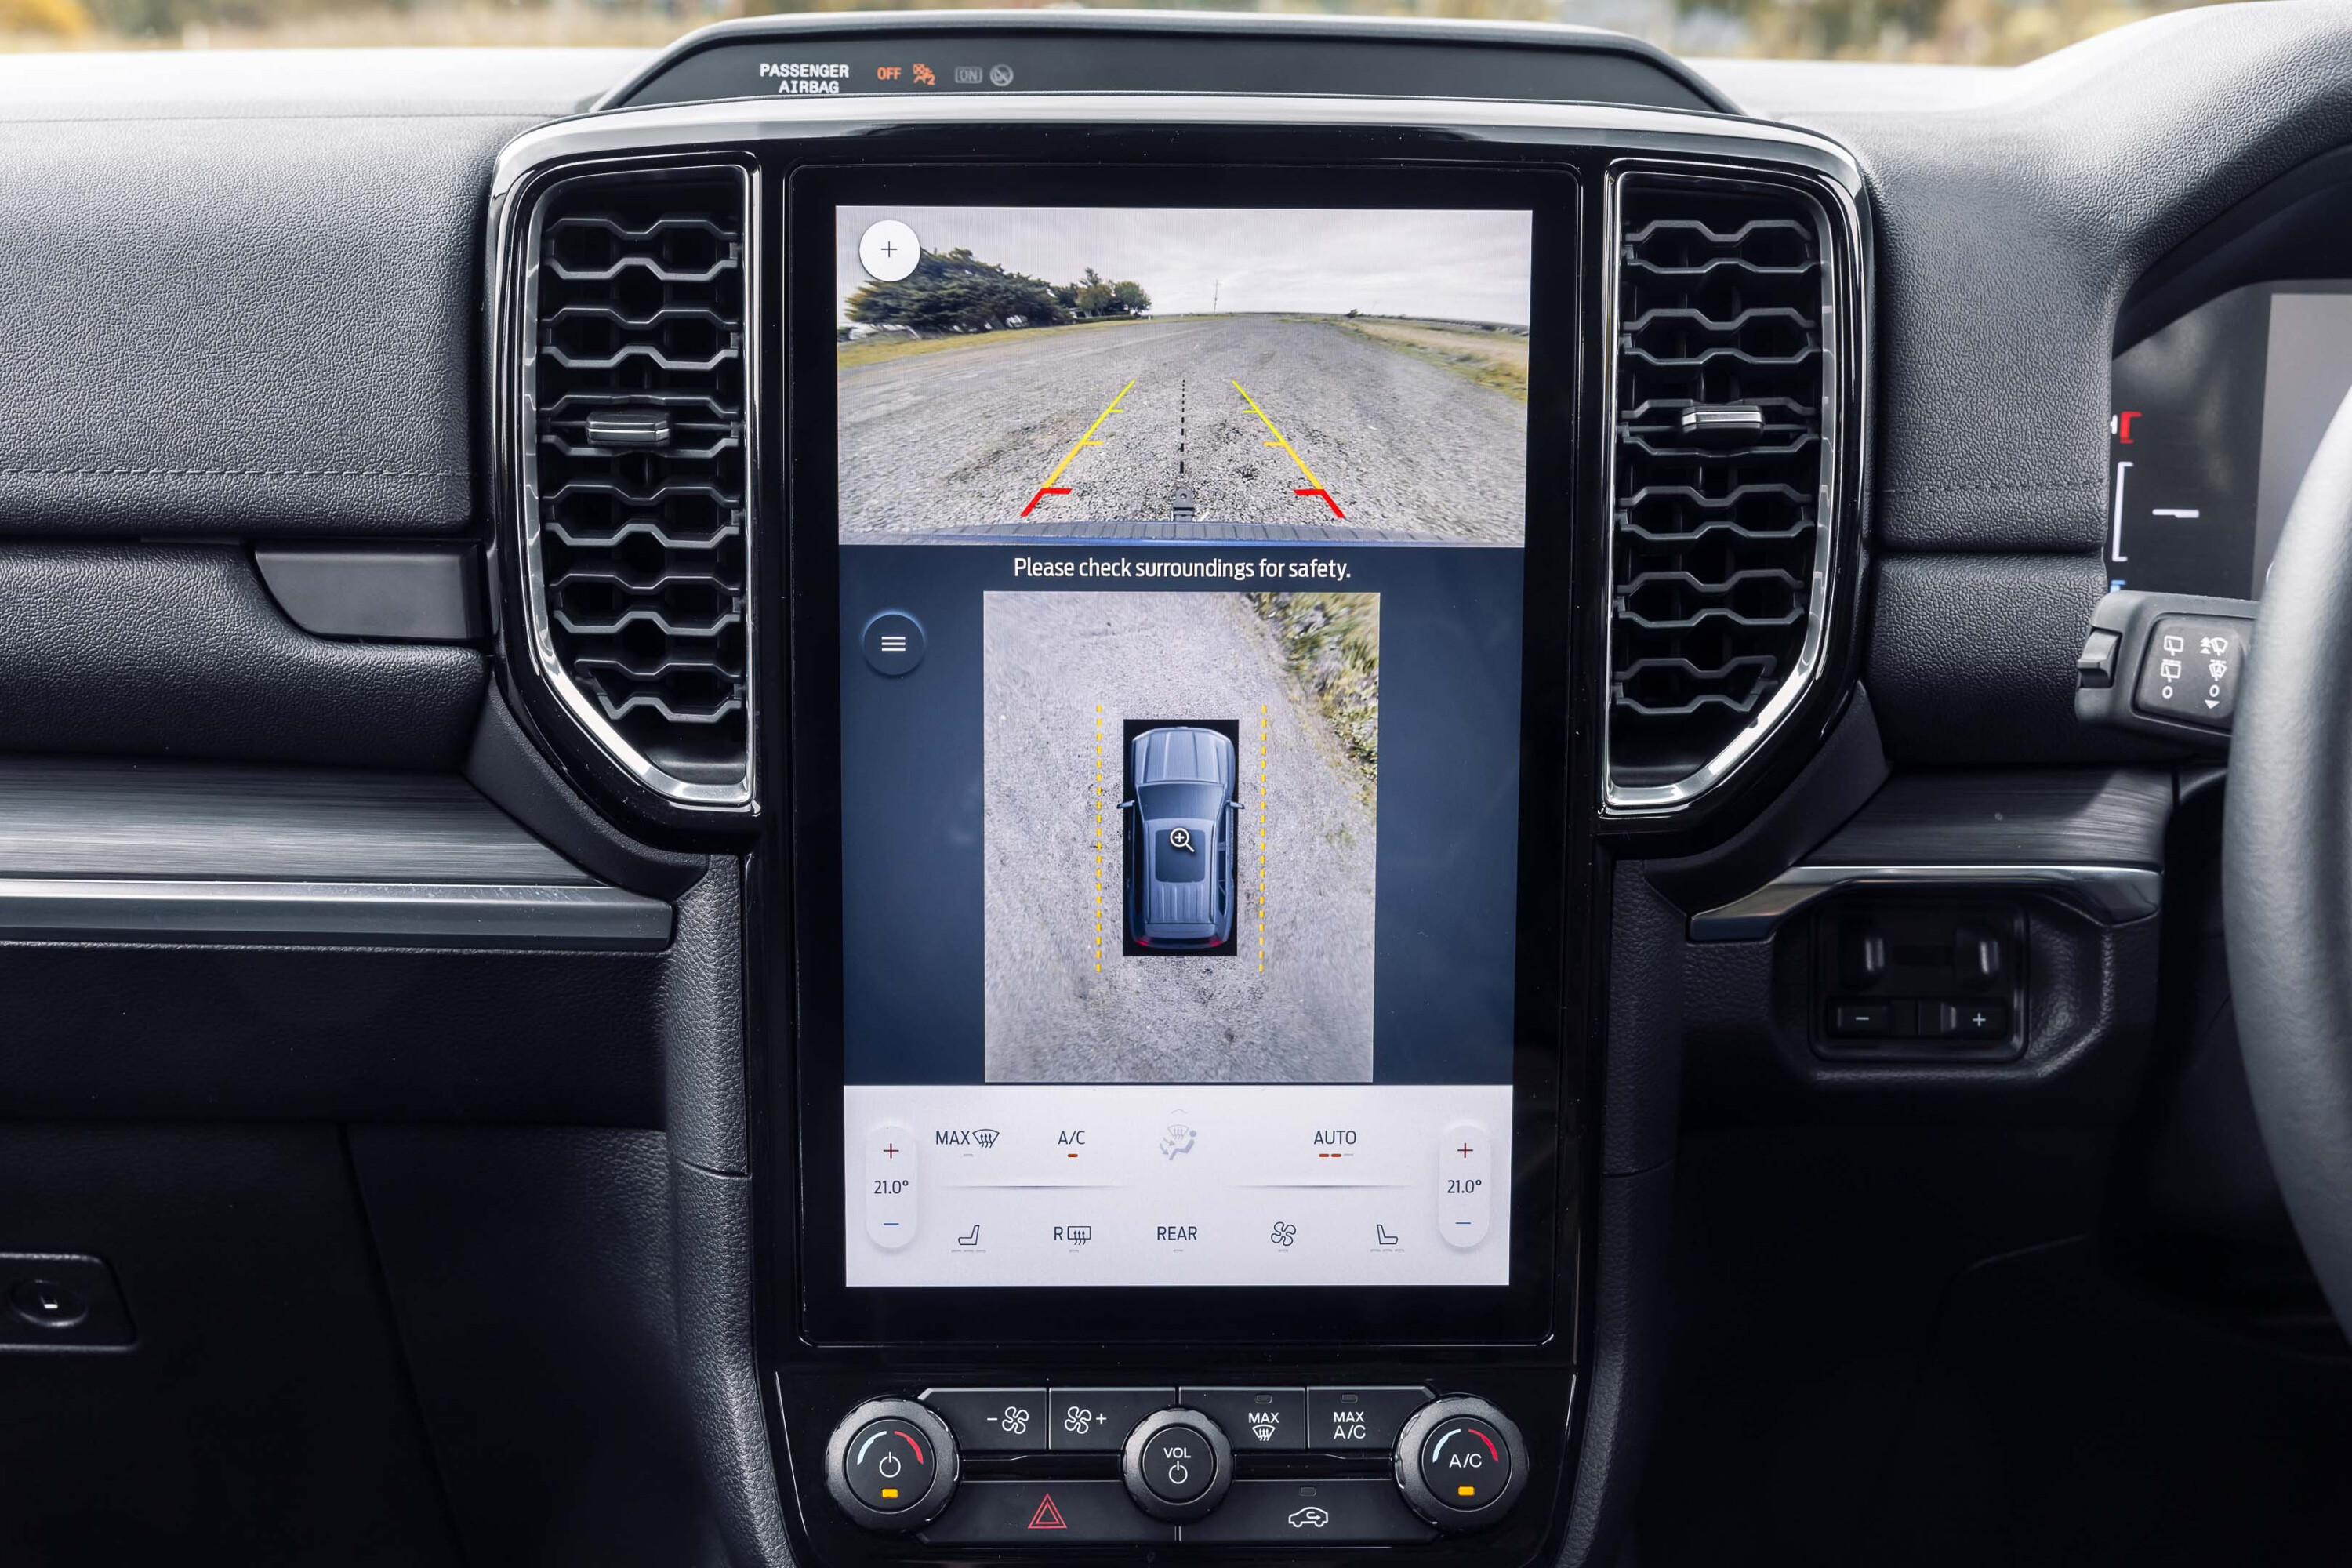
We opted for the Sport trim, which is one down from the Platinum range-topper, missing out on kit like a Bang & Olufsen 10-speaker stereo and 21-inch alloy wheels. One feature that, strangely, also goes amiss on anything other than the flagship is tyre-pressure monitoring.
The reason I noticed was that the Everest seemed to have a bit of a pull to the right. After checking pressures at a servo and everything seeming good, I found that it was Ford’s lane-keep system, which positions the vehicle a little further right in the lane than I would naturally, so I’d been driving for about an hour down a freeway tensing the wrists against the motor of the electrically assisted steering. Fail.
Given Telf and Ellen’s road trips, by the time I took delivery of the Everest, a notice had flashed up in the dash signalling that it needed replenishing with AdBlue within a couple of hundred kilometres or it’d throw a hissy and refuse to start.
I realised, to my embarrassment, that this was something I’d never actually done before, having never owned a diesel vehicle which needed it. The process was no more involved than topping up your washer bottle but I deliberately bought a smaller bottle in order to monitor its consumption of the foul-smelling brew.

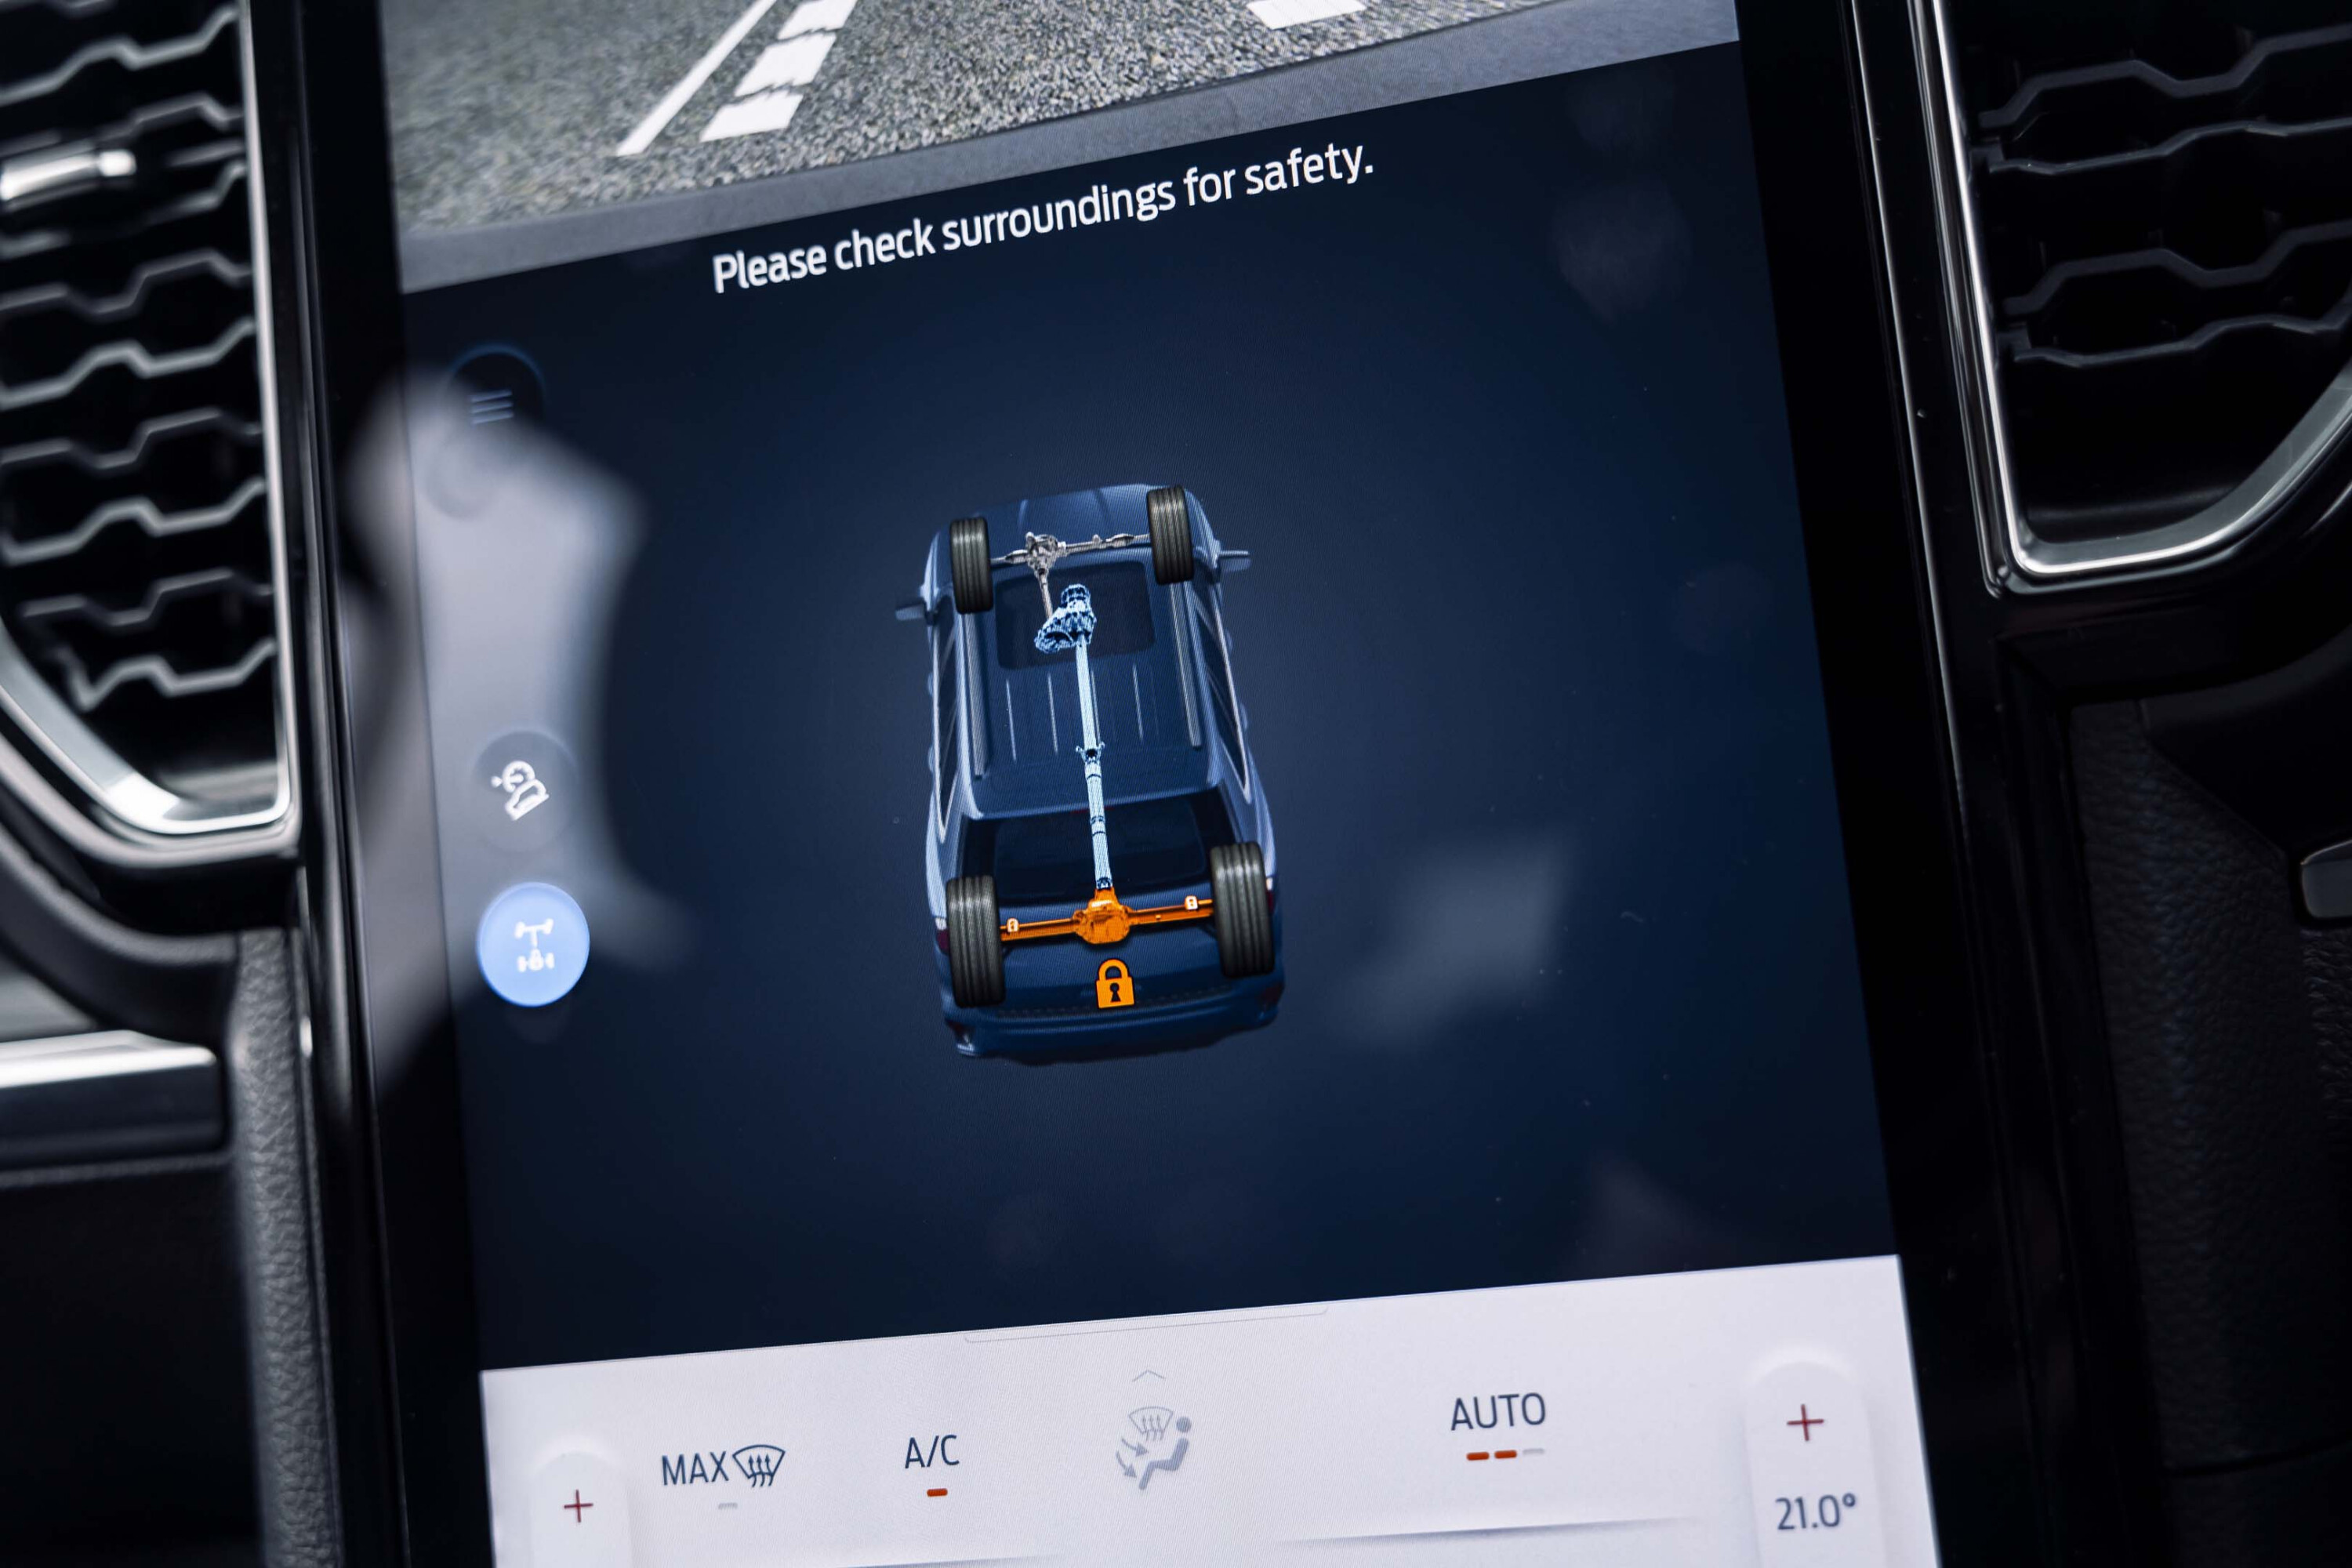
I still think the Sport is easily the best choice in the Everest line up. For me, all-wheel drive is a no-brainer on a vehicle with this sort of rough track potential and if you want drive going to each corner, you’ll also love the clever fire-and-forget automatic 4WD system, which is night and day smarter than the manual setup that you used to get on Everest.
If you want the extra poke of the V6 (and you should), that narrows your choice down to Sport or Platinum and given that the Sport is $8000 cheaper and, to these eyes at least, a better looking vehicle with its black rather than chrome exterior dress-up, the decision almost makes itself. At only $2500 more than the equivalent Ranger Sport V6, the seven-seat Everest looks strong value for money at $69,090 plus on-roads.
We’ve got some big assignments planned for the Everest to really establish its bona fides. Keeping the keys in my possession will be a good start.
Head for heights
Price as tested: $69,090
This month: 3536km @ 9.6L/100km
Overall: 7537km @ 9.5L/100km
Our Car of the Year tests its mettle on an epic high country drive
You’d like Eddy. He’s a lovely bloke who’s been at Ford for years and is in charge of the press garage. Right now, all I can think of is how Eddy is going to react when I tell him his Everest has fallen off a mountain. Earlier in the day I was wondering how Eddy would react when I told him that I’d lost his car to a lake.
Or had sunk into a quagmire never to be seen again on the Dargo High Plains road.
You see, I’d managed to find myself in one of those positions where I couldn’t go back down the mountain (too steep and narrow) but going further up to the summit on the far horizon was edging a little out of my comfort zone. This is like the morning commute for the blokes who work here on 4×4 Australia.
Me? I’m chewing such a sheaf of seat upholstery that poor Eddy’s going to wonder what happened to it.
I have everything working to help me. Diff lock, low range, A/T tyres, the forward camera system, everything. If I had training wheels to support me, I’d bolt those on too. I have no shame. I can’t even grow a decent beard, so I’d never be accepted by 4×4 Australia.
Somehow, against all the odds, the Everest summits at the trig point on the top of the Blue Rag Range track, a showroom-spec SUV sitting proudly amongst all the raised and snorkeled LandCruisers and Patrols. Cue a reader letter showing somebody driving up in a Mazda MX-5.
From there, I drove back down and over to Mount Hotham, clocking the snow still hiding in the south-facing chutes. Then it was 175km of unrelenting twisties down through Dinner Plain, Omeo and Bairnsdale before arriving at the shores of the Macleod Morass for a stretch, a bag of chips and the tedious schlep back to south-east Melbourne.
What else could have polished that off so adroitly? As you start casting for options, add in the rider ‘for $70K’ and I’ll save you a bunch of trouble. Nothing. Nada. Zip.
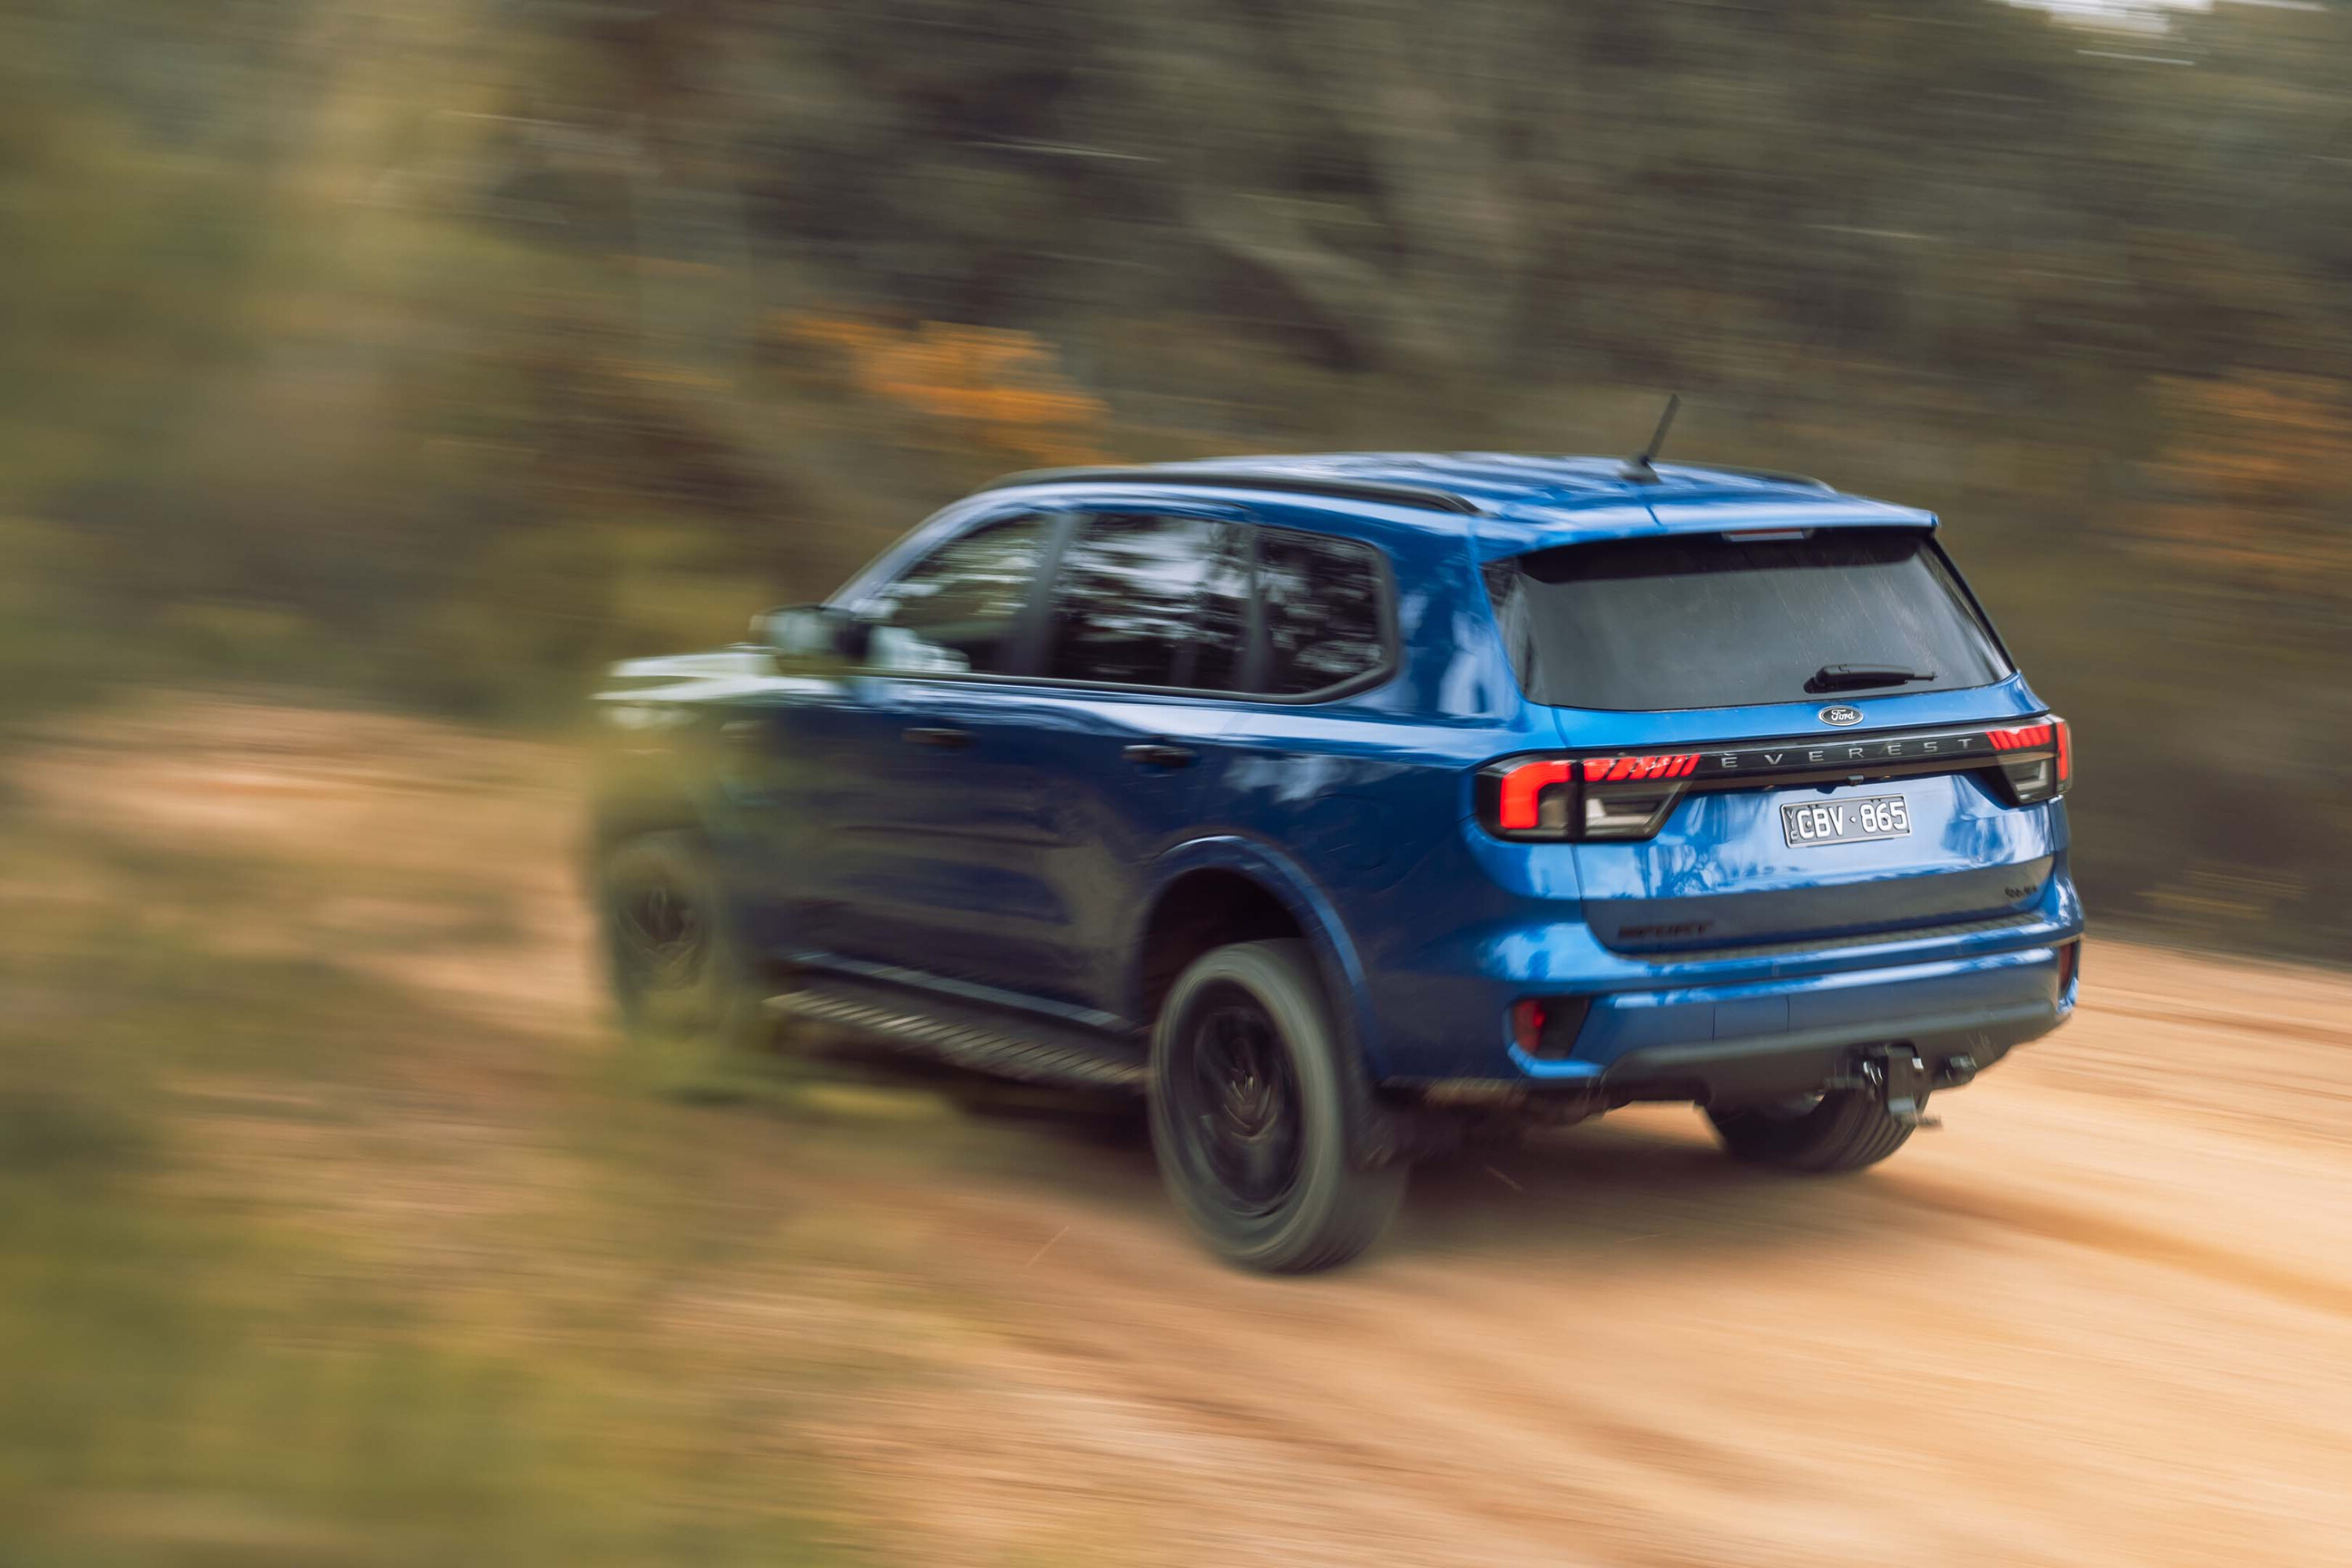
It probably won’t surprise you to hear that the Everest was good off-road, but it was on the drive back down from Australia’s highest stretch of bitumen that really impressed. Yes, you make allowances for the fact that this V6 Sport is riding on the 18-inch A/T tyres rather than the 20-inch street tyres that are a no-cost option, but the knobby tyres buy you a bunch of extra capability.
Had I ventured on this route with the 20s fitted, I’d still be in that bog on the Dargo road, out of cellphone coverage, wondering how long a man could sustain himself on half a bag of Haribo Goldbears.
Once you’d keyed into the limitsof the A/T rubber, it was then a case of seeing how far you could prod them, smearing the big Ford into tight corners, marvelling at its predictability and sheer grunt and, I’ll confess, wondering how much better it’d be with paddle shifters (note for the facelift, Ford).
After an 11-hour round trip, I arrive back home beyond certain that we absolutely nailed the verdict for Car of the Year 2023. The phone rings. Eddy wants the Everest back. Our time is nearly up. Stay tuned for the wrap next month when I’ll give the full report card.
It’s peaked
- Price as tested: $69,090
- This month: 2610km @ 9.7L/100km
- Overall: 10,147km @ 9.6L/100km
After three months, our COTY winner is left standing tall
As I write this, a genial chap called Chris is pulling out of the Wheels Media car park in ‘my’ Everest Sport.
It’s on its way back to Ford having covered just over 10,00kms in a little over three months here. If you judge a long termer by its popularity, then the Everest Sport V6 might have been the most in-demand vehicle we’ve had through the garage in ages.
Everybody had a use for it, whether that was towing a race car, family days out, a trip to IKEA or an off-road jaunt that they’d long had their eye on. I was pestered for the keys way more often than when McLaren saw fit to let us run a supercar with billionaire doors.
Whenever it was returned, it drew praise. “I can’t believe you get all of that for less than $70 grand,” reckoned Ben, our tech guru. “We towed the MX-5 all the way to Heathcote and by the time we were out of Melbourne, we’d forgotten we had a trailer on the back,” said Telf from Street Machine.
“Near perfect,” reckoned chief snapper Ellen after a photographic assignment in the high country. “I could have taken twice as much gear.”
I normally pride myself on getting decent fuel figures out of my long termers, so after so many loans, especially ones where the Everest would clearly be subjected to some demand, I was worried that the running total might lift a bit higher than I expected.
Nevertheless, getting single-figure fuel economy from a 2.4-tonne SUV over 10,000km isn’t at all bad. I look back at old copies of Wheels and note long termers like the 2.0-litre Focus hatch that Robbo ran a decade ago which returned 10.2L/100km.
I know. Diesel and petrol. Apples and oranges, but it’s worth considering before you pigeonhole the Everest as some kind of vast and profligate lump. I did get through around $110 of AdBlue during my time with the Sport V6. I also discovered, rather belatedly, that AdBlue prices vary wildly.
I paid (for shame) $85 for a 10-litre tub at a servo, but if you’re prepared to shop around you ought to be able to nab it for $40 or $50. An expensive lesson learnt. The identical 3.0-litre V6 in the Ranger doesn’t require AdBlue due to different emissions regulations for commercial vehicles.
The new Ranger Wildtrak X 2.0-litre, being a car that’s sold into European markets, however, does require it. Go figure.
To conclude, the Everest’s been an classy long-term addition to the Wheels garage but it’s not perfect. For the facelift there are a few things I’d alter. I’d up-spec the rear dampers, I’d change the plasticky drive mode selector so that you didn’t have to slowly cycle through each setting in turn, I’d give it wheel-mounted paddle shifters, I’d create a little more contour in the rear bench seats and add standard tyre-pressure monitoring across the range. And that would honestly be about it.
Now the obvious first-world problem is how to replace the big Ford. Trying to sort a nearish like-for-like is probably lining myself up for disappointment so I may have to think a little laterally about this one.
In the meantime, I feel I have banked a lot of favours from those who have enjoyed the Everest whilst I’ve nominally been its custodian. Time to call a few in.
Post script
- Price as tested: $79,967
- This month: 610km @ 10.2L/100km
- Overall: 610km @ 10.2L/100km
After our spell with the Everest V6 Sport we finish with a month in the flagship Platinum model
Product managers for car manufacturers spend a lot of time poring over specifications. For the most part, they tend to be very good at their jobs. Once in a while, they’ll get things a bit wrong and create models that are either not attractive enough and which wither on the vine, or which everybody gravitates to, creating supply issues and a neglected range structure.
I’d always thought the Everest V6 Sport with the 18-inch all-terrain tyres was the sweet spot in the range in terms of equipment and pricing. It did, however, lack a tyre-pressure monitoring system, a fitment you could only get on the range-topping Platinum version.
So, to round out our long-term stint with the Everest, the V6 Sport has gone back and we have a month in the Platinum.
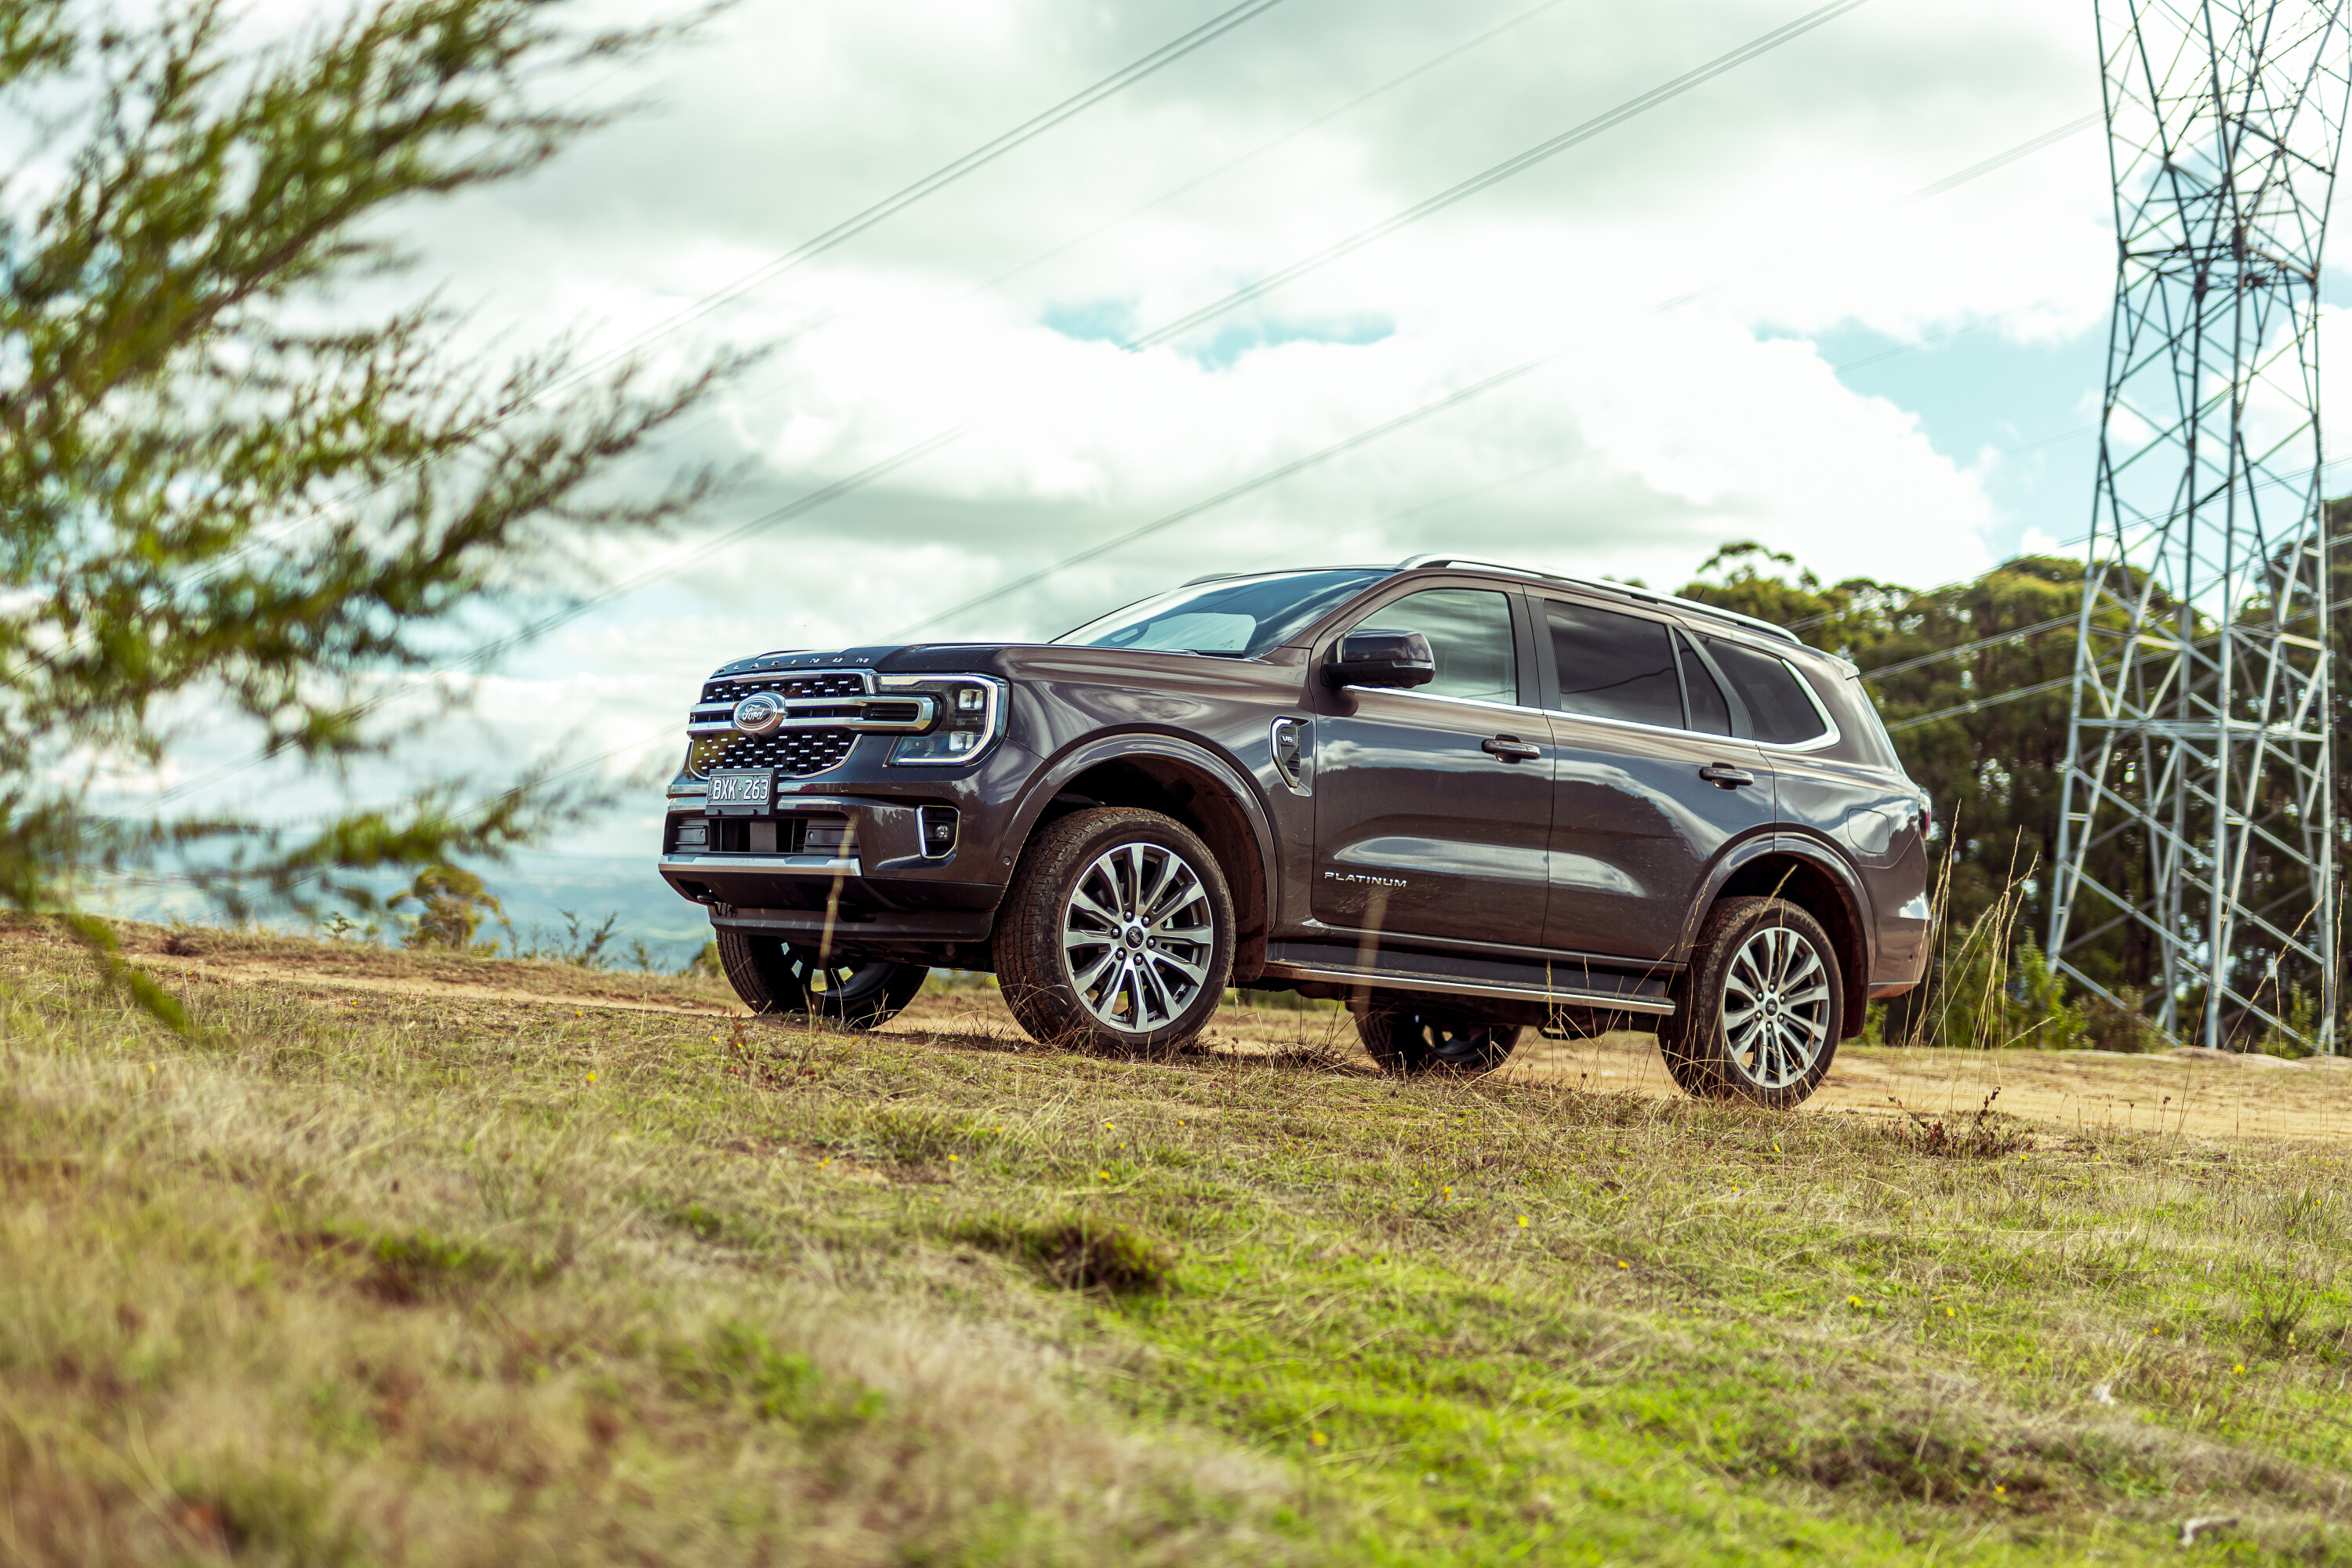
For another $8K, you get the aforementioned TPMS plus quilted leather seats, a 12-speaker Bang and Olufsen stereo, satin chrome exterior accents, matrix LED headlights, a dual panel panoramic roof, a heated steering wheel, seat heating for the second row, zone lighting, and active park assist among the trim highlights.
The 21-inch alloy wheels make the Platinum’s ride notably more nervous than the Sport on 18-inch AT rubber, and poorly surfaced bitumen can introduce some body shudder and, consequently, head toss for cabin occupants. It also means that because you have less sidewall to protect the wheels, you’ll need to be far more careful when heading off road.
Fitting 18-inch AT tyres therefore seems a win-win-win; better off-road ability, a more accommodating ride on-road and far less chance of damaging your rims.
I suppose it was an instance of Murphy’s Law that dictated that as soon as I received the only variant with a tyre-pressure monitoring system that I’d pick up a slow puncture, but there we have it. After a few days away on break, I returned to Tullamarine’s long-term car park to find the offside rear showing a meagre nine out of a desired 37psi.
Rather than scrabble about the vehicle in the rain and fit the spare, I limped it to the adjacent servo and topped up the pressures which would then leach away by about 5psi per day.
I’m now wishing I’d bitten that particular bullet and fitted the spare, as it would have saved me far more time and trouble than stopping every day to give it a minute at the compressor.
Would I pay the extra for the Platinum? I might, you know. It’d need the 18-inch rubber on it, obviously, but I can’t deny the TPMS has been a godsend. Perhaps I wouldn’t have needed it with more durable boots on.
I love the punch of the stereo but I’m so-so on the brightwork on the exterior. The heated steering wheel earns a tick, as does the excellent matrix lighting.
While I still think the V6 Sport is more right for more people than any other model in the Everest line-up, for me, a well-specced Platinum would certainly have me tempted. Catch me at the air pump.
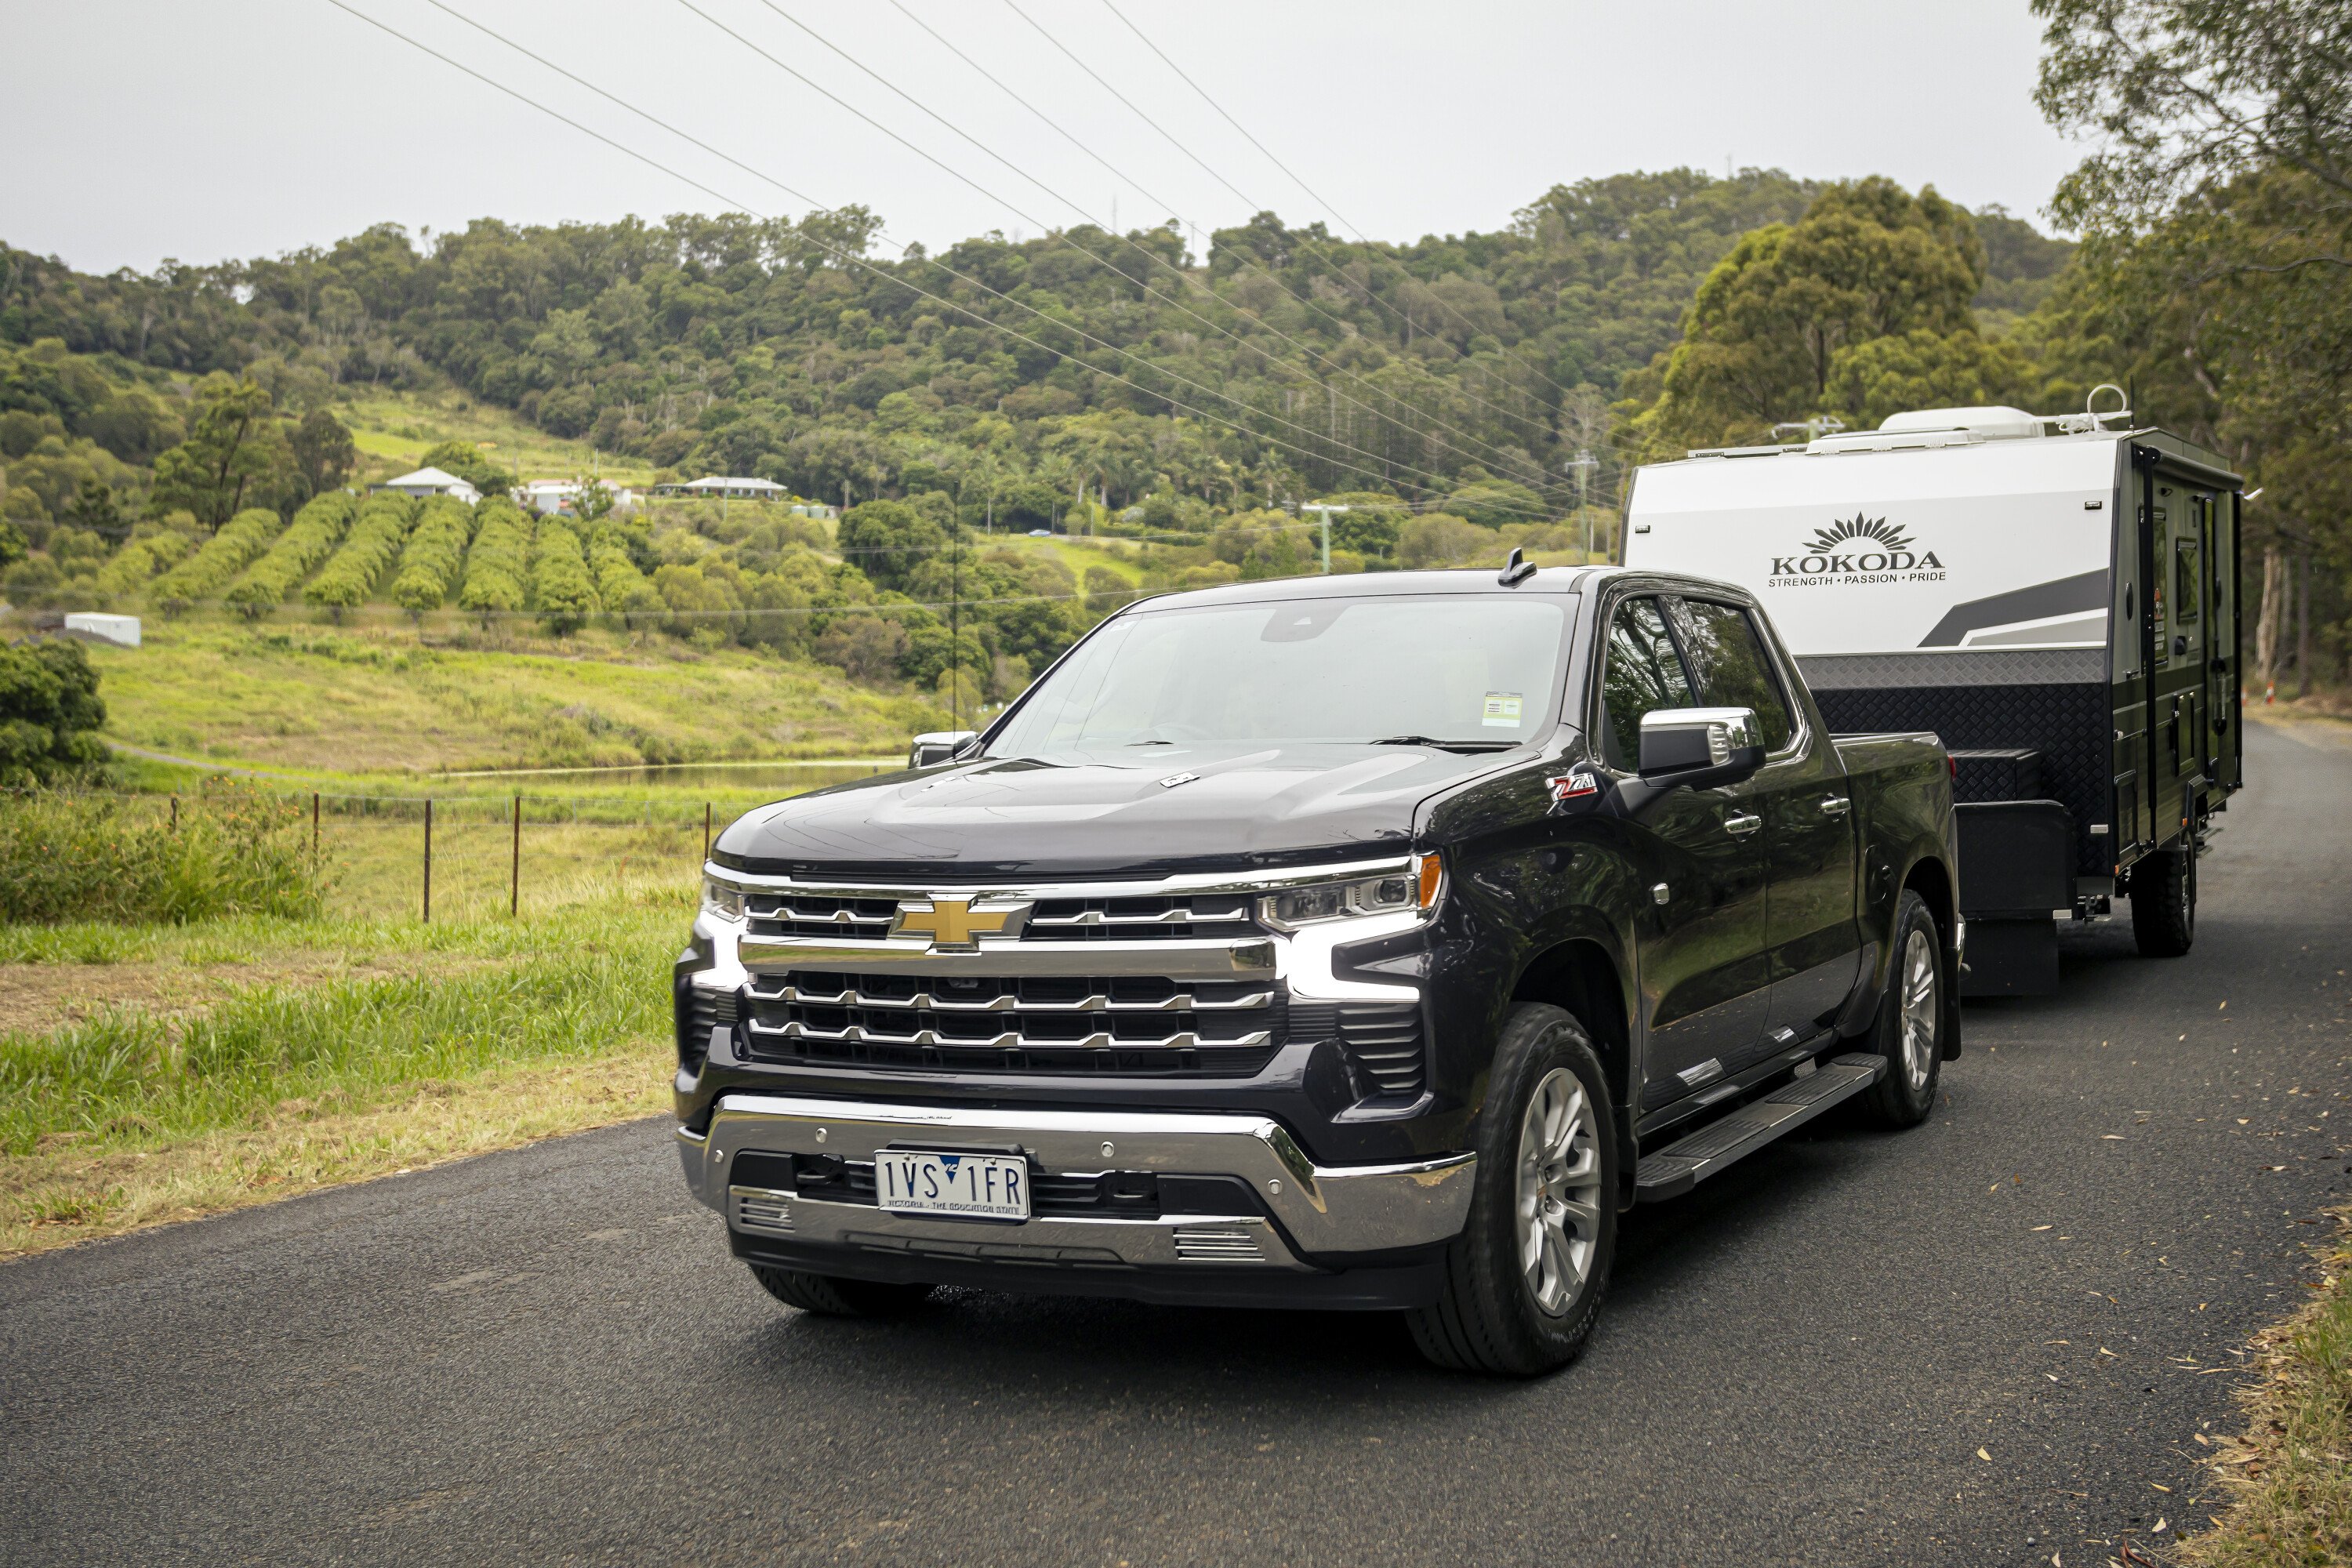
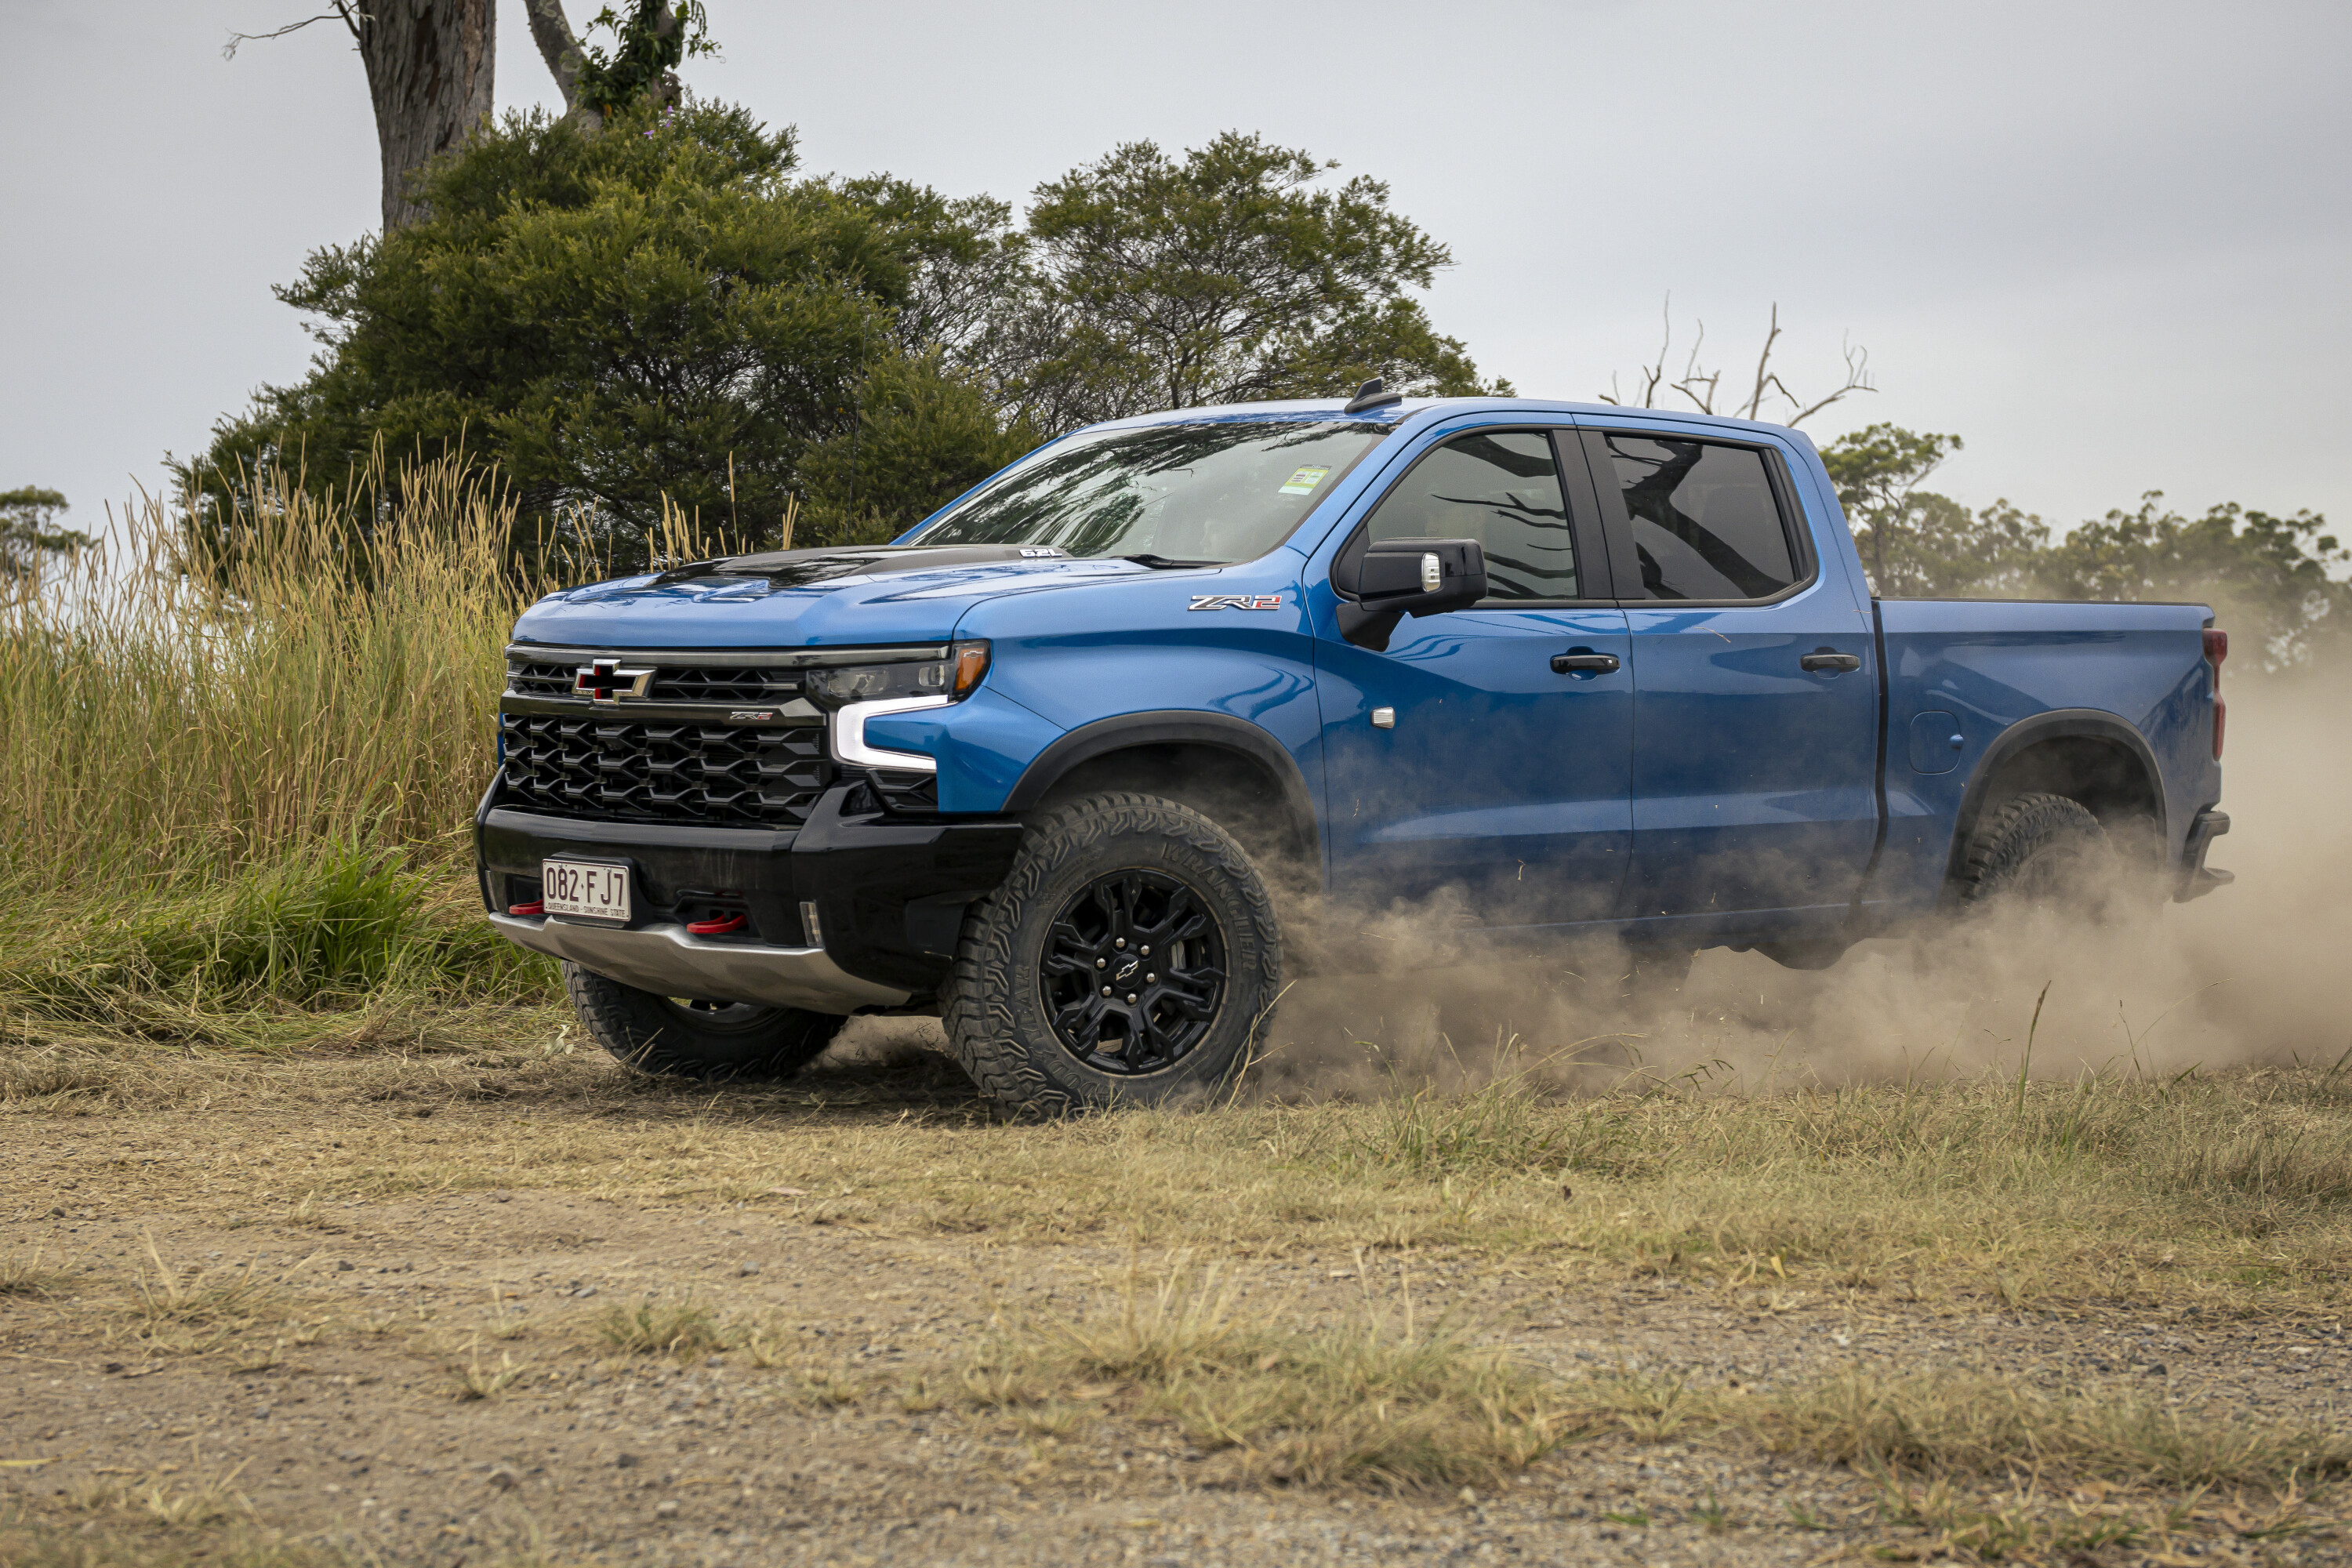
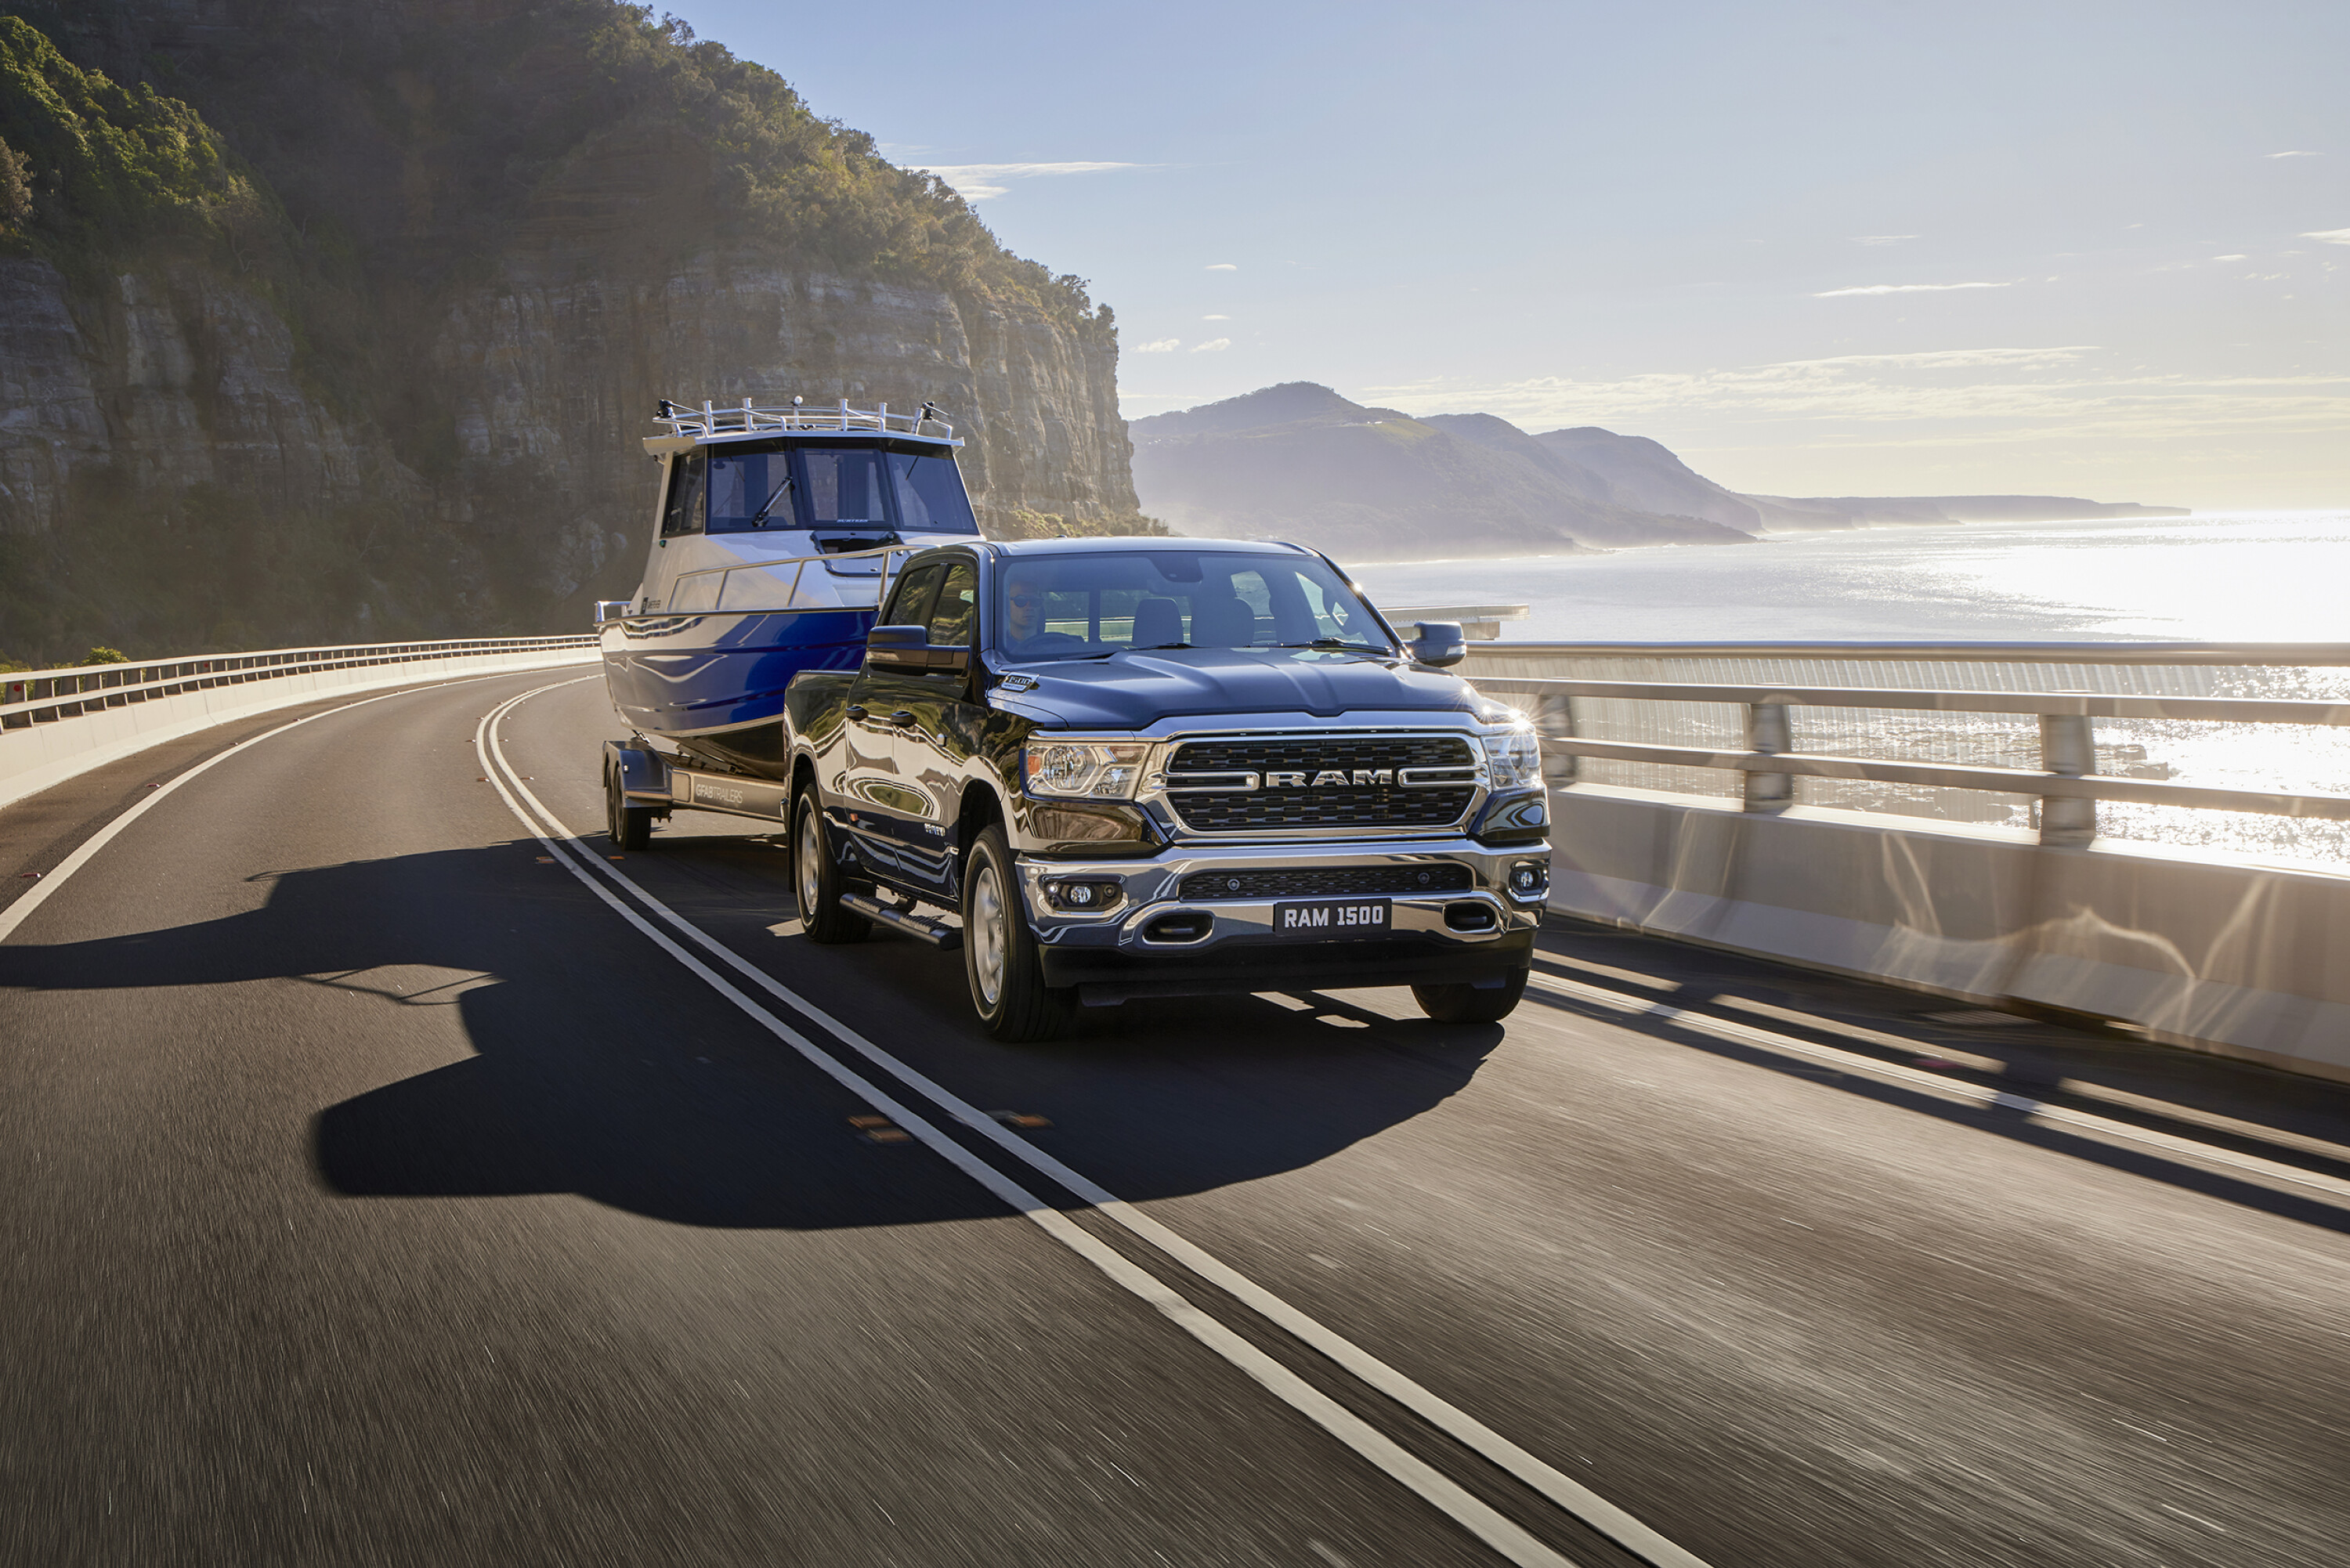
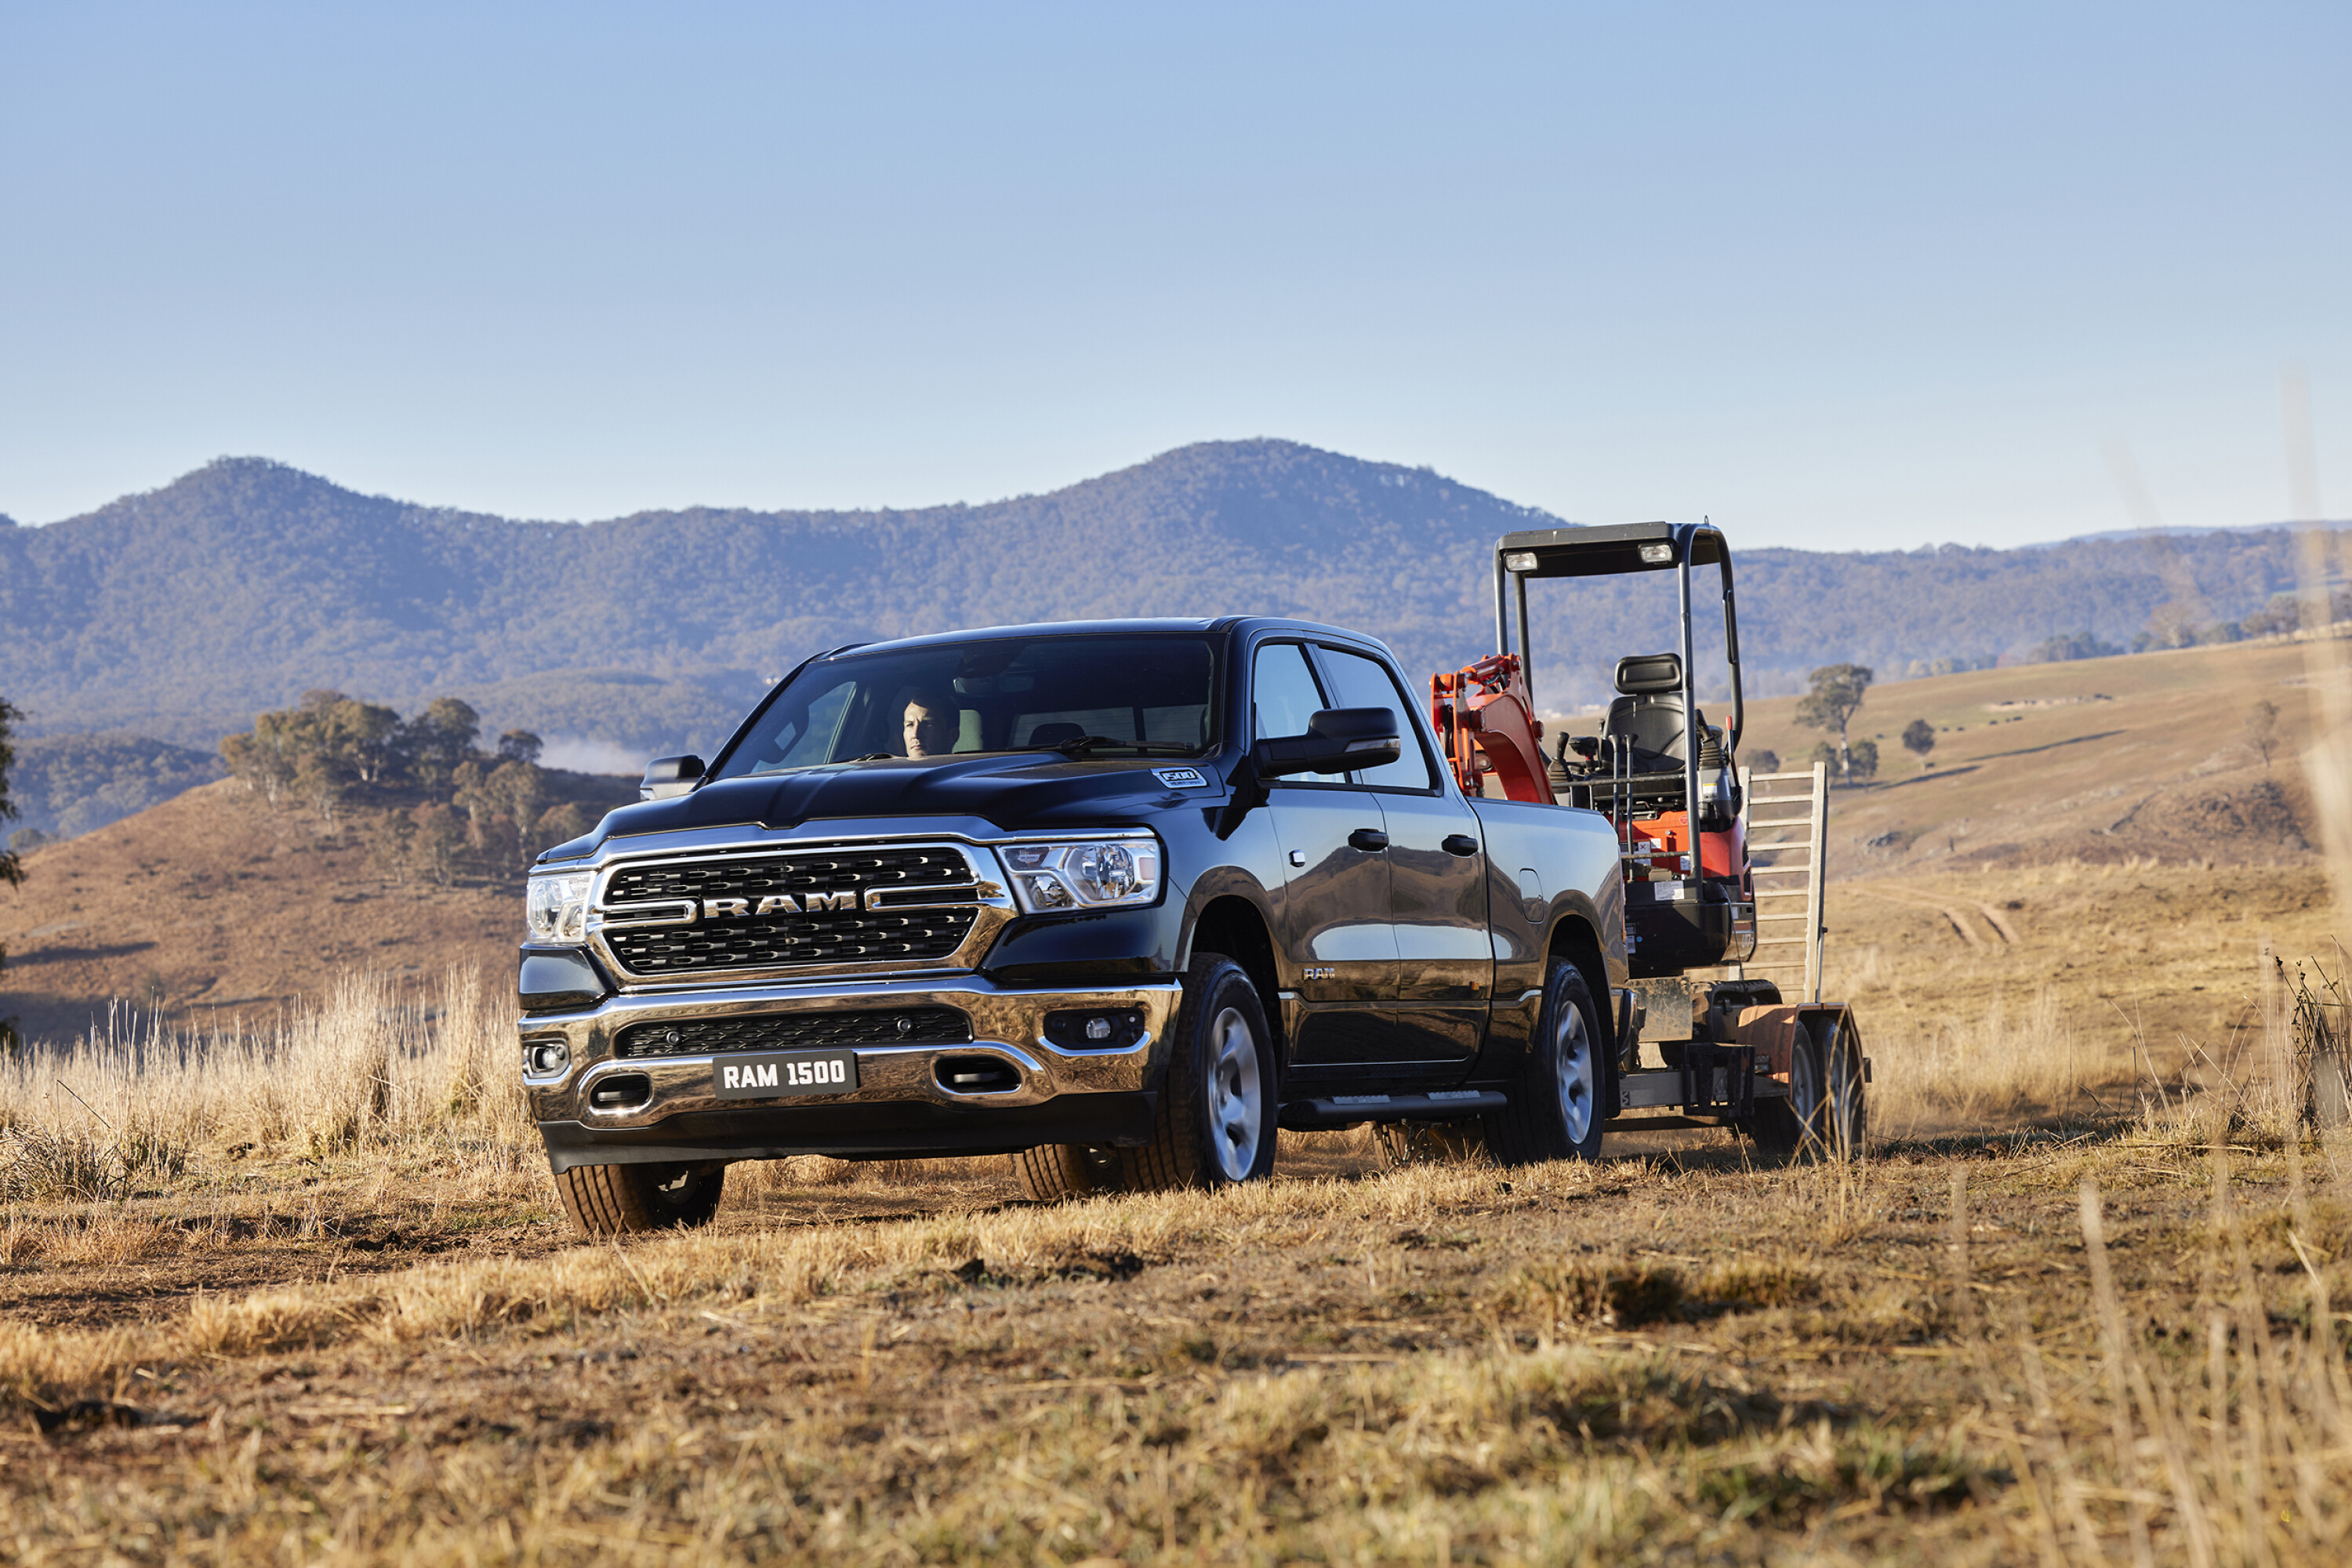
Big utes are becoming big business in Australia and if you’re currently in the market for one, chances are you’re planning to use it for towing.
Being able to tow massive loads is a huge part of the appeal of buying a full-size US pickup and the Ram 1500, Chevrolet Silverado and newly arrived Ford F-150 all boast braked towing capacities of 4500kg.
That’s a full tonne more than popular 4×4 dual-cabs like the Ford Ranger and Toyota HiLux and it’s just the tip of the iceberg.

If you need to haul even bigger loads, the larger ‘heavy duty’ versions of US pickups like the Ram 2500 and 3500 carry braked towing capacities of 8000kg if fitted with a gooseneck hitch and air brakes.
But buyer beware: not every tow rating is created equal.
While two utes might have the same maximum braked figure, there are other crucial figures to consider like payload, gross vehicle mass (GVM) and tow ball mass (TBM) that can make a huge difference when it comes time to load up your tow rig.
And once you take these into account, US pickups might have more towing limitations than you think.
In fact, when it comes to payload – how much stuff you can chuck in your ute – they actually struggle to better smaller dual-cabs like the Ranger and HiLux.
Check out the table below to see how they stack up while towing 4500kg and 3000kg.
For this comparison, we’ve focused on the Ford F-150, Ram 1500 and Chevrolet Silverado as they’re easily the most popular versions of full-size US pickups.
The 1500 class can also be driven on a regular car licence and doesn’t require a light truck licence like some larger utes do.
So which of this trio is best for towing? As you’ll discover, it pays to crunch the numbers. Let’s dive in.
Tow ratings, payload and other crucial weights
WINNER: Ram 1500 Big Horn
WEAKEST: Chevrolet Silverado ZR2
It’s easy to fixate on a ute’s braked towing capacity – it’s the big number championed in TV ads and in the brochure – but payload is just as important.
For a detailed explainer of everything you need to know about towing weights, read our story below.
Payload refers to the amount your ute can legally carry and it’s one of the most critical figures to be aware of when towing.
You see, while all three of these utes can tow 4500kg, their maximum payloads while towing vary wildly. In a Ford F-150 XLT short wheelbase, for example, you can only throw 319kg worth of people/stuff/accessories into your ute while towing 4500kg before you’re overweight and driving illegally.
But in the Ram 1500 Big Horn, that usable payload figure jumps to 428kg. It means the Ram can take an extra passenger and more bags, or around 12 more cases of beer.
And shockingly, the usable payload in a Silverado ZR2 is just 68kg when you’re towing at its max capacity. That means that even with just the driver onboard, you’ll likely be overweight. However, the Silverado 1500 LTZ Premium has a much more usable 335kg, demonstrating the importance of paying attention to the difference a trim level choice can make.
You calculate payload by subtracting your vehicle’s kerb weight from its gross vehicle mass (GVM). GVM is the vehicle’s maximum operating weight according to the manufacturer, without a trailer, and it includes fluids, passengers, cargo and accessories like a bull bar or canopy.
This is how the maximum payload for a Ford F-150 XLT short wheelbase is calculated: 3220kg (GVM) – 2451kg (kerb weight) = 769kg (unladen payload).
But payload also includes the weight of any accessories like a bull bar, winch or roof rack and, crucially, you also have to factor in your trailer’s tow ball mass (TBM) when towing.
TBM is how much weight the trailer exerts on the tow bar and is usually around 10 per cent of the trailer’s total weight. So if you’re towing 4500kg, you’ll need to subtract 450kg from the payload figure.
In the Ford F-150’s case, that means the sum suddenly looks like this: 3220kg (GVM) – 2451kg (Kerb) – 450kg (TBM) = 319kg (remaining payload).
Another way to calculate your ute’s towing payload is to subtract the kerb and trailer weights from the gross combined mass (GCM), which is the legal limit for your vehicle and trailer together.
An F-150 XLT’s GCM is 7720kg. So 7720kg (GCM) – 2451kg (kerb) – 4500kg (trailer weight) = 769kg.
Your maximum towing payload is the smaller number produced by these two calculations. So in the F-150 XLT’s case, the remaining payload when towing 4500kg is 319kg.
Of course, these calculations don’t take into account any accessories you may have fitted to your vehicle or trailer/van, so be sure to take your setup over a weighbridge. It’s also a good idea to use a scale to determine exactly what weight your trailer exerts on the tow ball so you can distribute loads accordingly.
The trim level of your ute will also have different GCM/GVM and payload figures to other variants in the same model range. In the table below we’ve included the variants with the lowest and highest usable payload for each of our three contenders, our logic being that other versions of the same ute will sit in the middle somewhere.
So what does all of this mean in the real world? Well as the below table shows there’s a big difference between our contenders.
The winner is the Ram 1500 Big Horn which has a usable payload of 428kg when towing 4500kg. That’s 200kg more than the Ford F-150 Lariat SWB (that’s a LOT of gear and beer) and a whopping 360kg more than the Chevrolet Silverado ZR2 which is left with a barely worthwhile 68kg usable payload.
The figures also highlight that when you’re towing 3000kg, every full-size US pick-up is trounced by a Ford Ranger XLT which costs half as much.
| Ford F-150 Lariat SWB | Ford F-150 XLT LWB | Ram 1500 Limited MY22 | Ram 1500 Big Horn | Chevrolet Silverado 1500 LTZ Premium | Chevrolet Silverado ZR2 | Ford Ranger XLT dual-cab | |
|---|---|---|---|---|---|---|---|
| Price | $139,950 | $107,945 | $156,950 | $120,950 | $121,000 | $124,000 | $65,190 |
| Braked tow rating | 4500kg | 4500kg | 4500kg | 4500kg | 4500kg | 4200kg | 3500kg |
| GVM | 3220kg | 3265kg | 3450kg | 3450kg | 3300kg | 3300kg | 3280kg |
| GCM | 7720kg | 7765kg | 7713kg | 7713kg | 7160kg | 6851kg | 6400kg |
| Kerb weight | 2535kg | 2471kg | 2749kg | 2572kg | 2543kg | 2583kg | 2233kg |
| Downball weight | 450kg | 450kg | 450kg | 450kg | 422kg | 400kg | 350kg |
| Unladen payload | 685kg | 794kg | 701kg | 878kg | 757kg | 717kg | 1047kg |
| Payload at max tow capacity | 235kg | 344kg | 251kg | 428kg | 335kg | 68kg | 667kg |
| Payload at 3000kg | 385kg | 494kg | 401kg | 578kg | 457kg | 417kg | 747kg |

Cruising range
WINNER: Ford F-150
Covering large distances is another part of a big ute’s appeal and when it comes to cruising range the Ford F-150 is the clear winner.
That’s down to its large 136-litre fuel tank which easily gazumps the capacity available in the Ram 1500 (98L) and Chevrolet Silverado (91L). The MY23 Ram 1500 Express does have a 121L tank, however, which puts it close to the Ford.
Of this pack, only the Ford uses a twin-turbo V6 engine, its 3.5L EcoBoost unit consuming 12.5L/100km on the official combined cycle. That gives the F-150 a theoretical driving range of more than 1000km. Keep in mind that’s without a trailer or van hitched, however.
| Ford F-150 | Chevrolet Silverado LTZ | Ram 1500 Limited | Ram 1500 Express | |
|---|---|---|---|---|
| Engine | 3.5L V6TT | 6.2L V8 | 5.7L V8 | 5.7L V8 |
| Combined consumption | 12.5L/100km | 12.2L/100km | 12.2L/100km | 12.2L/100km |
| Tank size | 136L | 91L | 98L | 121L |
| Range | 1088km | 746km | 803km | 992km |
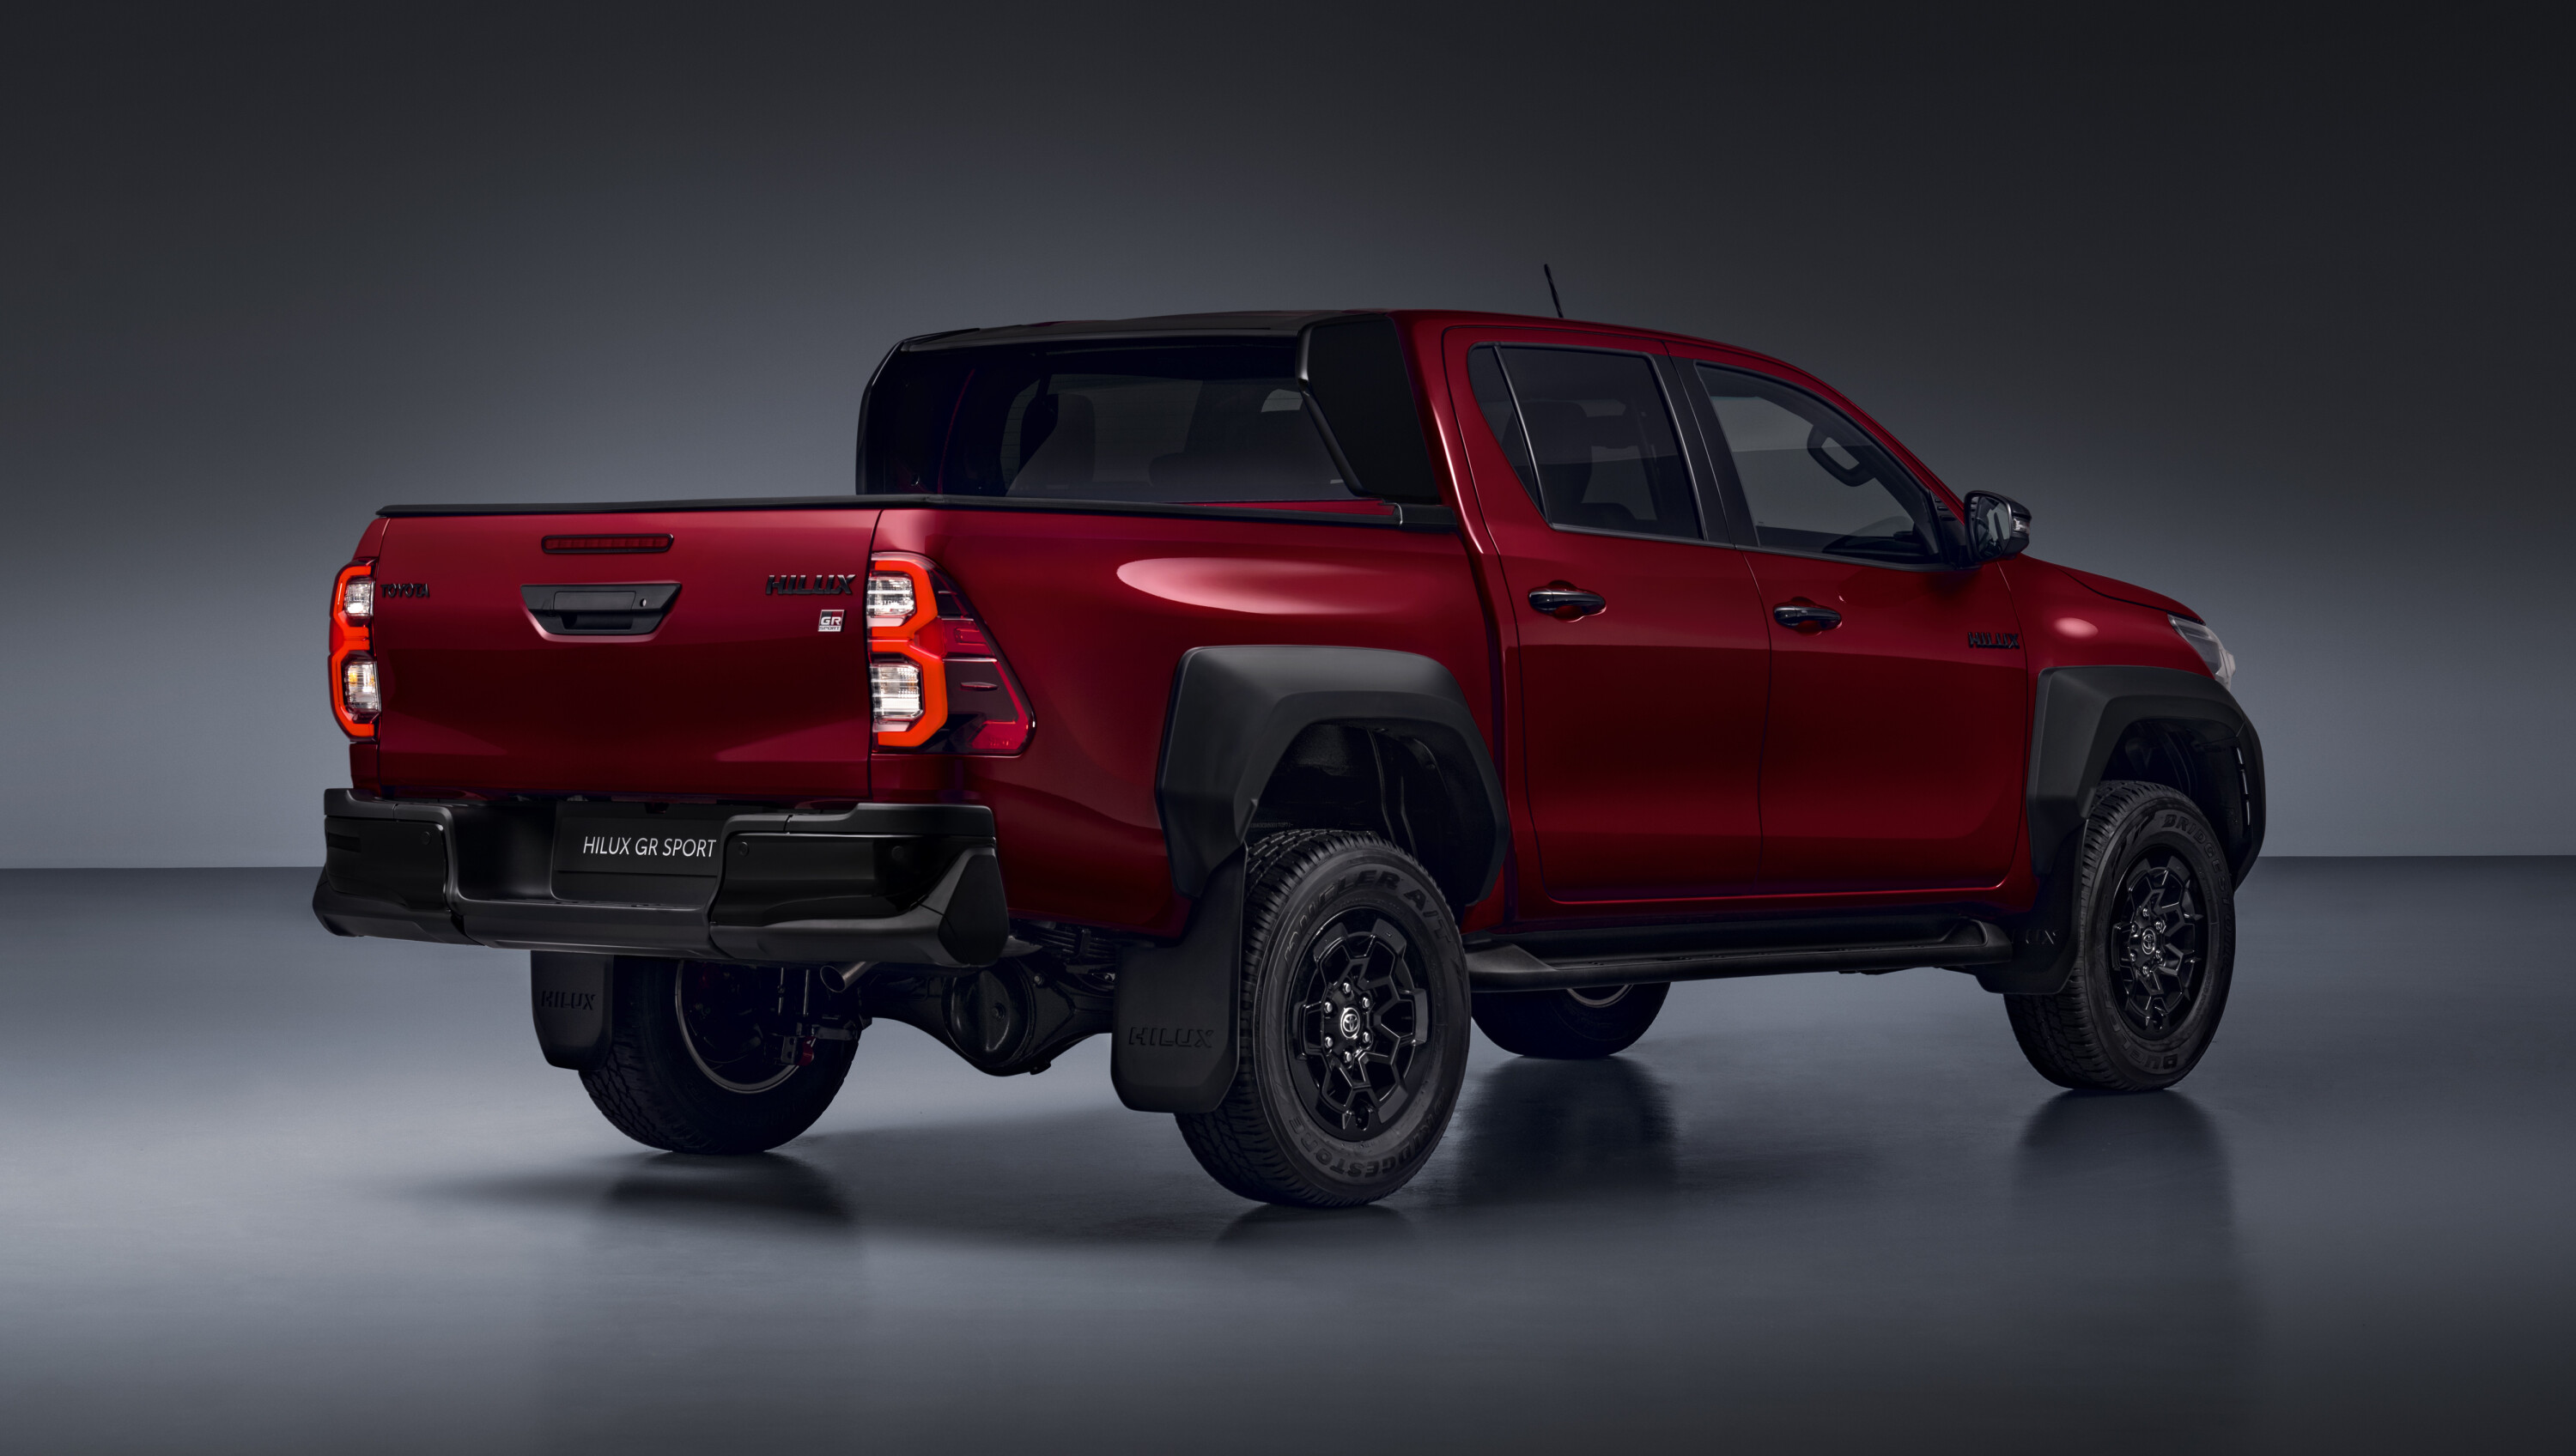
The 2024 Toyota HiLux ute with a new infotainment system has been detailed for Europe.
In a media release confirming the 2024 arrival of the ‘GR Sport II’ – launched in Australia last month – the brand’s European division announced the HiLux will be fitted with its latest multimedia system with an 8-inch touchscreen.
The new-look system debuted in Australia in the Corolla Cross last year and supports wireless Apple CarPlay, connected satellite navigation, natural voice control, and separate driver profiles.
Over-the-air software updates are also available in certain overseas markets.
“Toyota recently launched the HiLux GR Sport with a premium audio system featuring wired Apple CarPlay and Android Auto compatibility,” said a Toyota Australia spokesperson.
“Toyota is always aiming to provide the latest technologies for our customers but we have no announcements to make today.”
The current Toyota HiLux sold in Australia features an older-generation infotainment system with wired Apple CarPlay and Android Auto.
In 2021, Toyota Connected Services was added to the HiLux, allowing owners to remotely control certain vehicle functions via a smartphone application, with a complimentary three-year trial period.
Toyota vehicles in Australia with the latest infotainment system support additional Connected Services features, but have a 12-month trial period.
Last month, Toyota hinted at a “surprise” reveal for the HiLux in 2024. It is unclear if this will be a minor update, a new variant, or a first look at the all-new HiLux expected in 2025.
Toyota Australia promises regular updates for the HiLux – launched in 2015 – as it faces strong competition from the fresher Ford Ranger/Volkswagen Amarok and Isuzu D-Max/Mazda BT-50 twins.
“This regular updating of HiLux shows just how committed we are to meeting the requirements of our local customers. We’re no longer locked into these product cycles of yesteryear. We’re nimble. We’re quick,” said Toyota Australia vice president for sales and marketing Sean Hanley.
You’re damned if you do, damned if you don’t these days. There’s no winning. No matter what type of 4×4 you buy there’ll be someone telling you it’s a dud.
Buy a wagon for practicality, and then lose all storage space with camping kit. Buy a ute, and before you know it you’ve turned it into a wagon, just a whole lot heavier and longer.
Build yourself the ultimate tourer, complete with coffee machine and lithium, and before you know it you’ve spent $100k building something too heavy to take to the places you built it for.
So, bugger it. Everyone is going to be mad, and it’s not going to be as practical as you hoped anyway, so why not build something that’s epically cool and then let the rest sort itself out?
Latest Gear Guides

Resto-modded 4x4s are an area exploding in popularity and it’s a trend that’s starting to filter down to Australia.
It makes sense, instead of spending $60k on a budget dual-cab only to then have to go and spend another $60k building some epic tourer, why not spend $10k on a neat old classic rig, and then $50k turning it into something that’ll turn heads everywhere you go, including your own.
Just think, for less than the price of a base model vinyl floored ute you could have your own Marty McFly-inspired HiLux. The short wheelbase GQ Patrol of your dreams. An epic FJ40 with Fox shocks and an 80 frame underneath, or any other endless combination of cool and capable. Talked you into it yet? Well, here’s how to do it.
JUMP AHEAD
1: Lighting
We’ve bumped this one right up to the top of the list because, quite frankly, it’s one of the easiest to do. Even balls-to-the-wall expensive options are still cheaper than a basic lithium battery setup.
When it comes to improving the light out of an old rig, it’s not hard. The old incandescent bulbs threw about as much light on the track as a Dolphin torch poked out the window. Of course, it didn’t really matter when you were flat-out doing 80km/h and travelled far fewer kays than the modern four-wheel driver.
On a budget
COST: $0-$100
If you’re on a budget (let’s face it, who isn’t these days?) you do have a few options to gain some light output from your rig without spending a fortune.
No matter what type of headlight you’re running, if it’s dirty, or the lens is dull, you’re losing output. If the outside of your lens is smooth, it means the damage is on the inside and you’ll need to replace the housing itself.
New OEM style housings can be picked up for around $80 a pair. If the outside feels rough then you may be in luck and a quick polish will get the globes you’ve got punching through. Sounds odd, but toothpaste makes a suitable abrasive with a rag and some elbow grease.
From here, a pair of quality aftermarket halogen globes will give you a serious boost in lighting performance while remaining 100 per cent legal, all for less than $100. Cool doesn’t have to cost a fortune.
Flash a little cash
COST: $400-$800
If you’re keen to flash a little cash then complete LED headlight units are one of the most popular modifications on old rigs and new. Sure, the legalities are cloudy at best, especially with the differences between “ADR compliant” and “ADR approved”, but it’s hard to argue with the safety benefits of actually being able to see where you’re driving.
They’re available in a range of popular sizes like 7-inch round, and 6 x 4-inch rectangle, so will suit most old rigs. If you want to keep the budget under $800 there are a few options to throw Lumens down the road. Pretty much all of them look like something out of a bad science fiction movie, but their performance in terms of light pattern and light output vary greatly.
Don’t get caught up with flash features like halo rings, dancing disco lights, or Bluetooth apps that let you change the colour of the daytime running lights; none of that relates to light down the road. If you’re paying less than $200 per individual light, chances are you’re buying junk.
The best of the best
COST: $1000-$2000
We mention any one specific brand but we will say that over stateside there are a lot of people with a lot of money wanting a lot of lightingperformance, and the lighting industry has responded.
While you are looking at three to four times the price with US brands, back-to-back comparisons show two to three times the light output. Think 4200 RAW Lumens per headlight vs less than 2000 RAW Lumens. It’ll not only give you more bulk light output, it’ll also allow you to give your classic rig a classic look without needing to hide that chrome grille behind a string of driving lights.
High-end lights will typically come with bang-on beam patterns so you’re not blasting other road users, and neat tech like built-in heaters to keep your headlights snow free if you’re heading to the alps. We’re yet to come across a light with auto-levelling tech, unfortunately, so while you can get ADR-complaint versions, we’re yet to find an ADR-approved offering.
2: Ride quality
Let’s be honest, aside from a few aesthetics here and there, the ride quality is unarguably one of the defining features that separates an old rig from a resto-mod.
You can throw all the LED headlights you want at an old FJ40, if it’s rocking a 2H diesel and leaf springs it’d be more than a stretch to call it a resto-mod. The good news is, depending on your budget, making your ride handle a million times better is a straightforward affair.
The bad news is, even if you are on a budget, a large chunk of your cash is going to be chewed up here.
On a budget
COST: $2500-$4000
If you’re aiming to make your rig taller there are $50 spacers you can get that’ll jack it up, but if you want to have the suspension perform better on road and off in terms of ride quality and articulation, then even on a budget you’ll need to spend a little cash.
“By replacing the factory springs the vehicle is able to carry itself and extra load better,” Nick Finch from suspension experts Solve Offroad says. “Do this in conjunction with the correct shocks that suit the springs and you add extra ability to control the vehicle through cornering and over uneven surfaces.”
The actual price you need to pay will largely depend on what the stock suspension is to begin with, and how much you want to change it. The sheer volume of material in leaf springs means they’ll inherently cost more than coil springs, but around the $2500 to $4000 mark should get you a half decent comprehensive suspension kit with matching springs, shocks, bushes and any other ancillary kit like shackles and pins to tie it all together.
You won’t be winning Finke for $4k, but it’ll be the best your LN106 HiLux has handled in years.
Flash a little cash
COST: $5000-$10,000
Say what you will about dual cab utes, there’s a near endless expanse between the performance of a base model Ranger and a Ranger Raptor. Looks aside, the difference almost entirely comes down to suspension geometry and shock absorbers. Both of those things can be changed on your rig if you’re willing to dig a little deeper.
Geometry is reasonably straightforward. If you’re running something common like an old ’Cruiser, Patrol or Land Rover, a halfway decent suspension shop can set you up with all the links and arms you need. For everything else, there are grinders and welders with an appropriate price tag.
You’ll also find yourself stepping up from the lower budget shock absorbers into more high-end gear. These will bring features like bigger piston diameter, adjustable valving, and remote reservoirs for additional cooling capacity in high-temperature environments.
“The off-road handling and control that these shocks deliver can be impressive,” Nick says. “If serviced, they’ll generally last longer, and perform better.”
The best of the best
COST: $14,000-$20,000
If you’re an all-stops-out kinda person then there aren’t really two ways about it: your old rig should have a newer chassis underneath it, and for a few more reasons than you’d think. Billy McKinnon is responsible for more old rigs on new frames than just about any other four-wheel driver in the country, and he offers drive-in drive-out chassis swaps through his business McKinnons Cruisers.
“The old school leaf springs chassis structurally aren’t the best; they flex so bad they can actually tear bonnet catches out of the bonnets in a 40” he says.
Swapping in a frame from a later model rig like an 80 Series not only gives you 20-30 year better designed suspension, brakes and steering, but also gives you physically stiffer chassis rails, meaning less body twist, and a more stable platform for the suspension to work off.
No matter what brand you’re looking at, a newer platform will provide huge benefits in driveability and in aftermarket support.
3: Tech upgrades
When it comes to tech, there is some cool aftermarket stuff out there, but it’s still leaps and bounds behind what the OEM has to offer. Without spending the price of a new F150 on something custom, you’re not going to get the seamless integration of tech such as stability control like you’re get in a modern rig, but it doesn’t mean you can’t spruce up that old GQ to something that’d seem space age back in ’93.
On a budget
COST: $500-$1000
Forget the old six-stacker CD player or Bluetooth head unit, stereos with phone integration either through Apple CarPlay or Android Auto are worth their weight in gold.
Depending on your dash style, a simple touchscreen stereo install could give you off-road mapping, digital music streaming, hands-free phone calls, weather updates, or even a heads-up for defect stations if you haven’t quite gotten around to engineering your coil-converted 60.
If your dash doesn’t suit a honking big screen, slimline options are available, as are screen-mounted dash cams that’ll wirelessly connect your phone to your stereo. Systems like these can also be tied in with reversing cameras, something that’ll boost safety around town, and can be handy off-road too.
Flash a little cash
COST: $1000-$2000
If you’re after a bit more in the way of modern convenience, and you don’t mind a little extra complexity, there are a few extra odds and ends you can throw behind those beautiful steel interior panels without getting too over the top.
For less than a grand or two these days you can even wire up a Model T to have remote start, internal temperature monitoring, power windows, keyless entry and even slot in a few parking sensors. Sure, it all adds complexity, which might be the exact opposite of what you’re chasing, but if you want those mod cons they’re not hard to add.
The best of the best
COST: $2000-$5000
We’re not here to tell you how to spend your money, just to tell you what your options are. If those classic gauges nestled deep inside a vintage steel bezel is one of the things you love about your old rig then polish them up and send them for another 40 years. But if you’re after a little more bling on the inside of your rig there are options too.
If you’re after that vintage styling from a distance but modern performance then companies like Dakota Digital make offerings that are nigh indistinguishable in aesthetics, but with modern accuracy and customisability.Paired with a high-end steering wheel you’ll have a seriously classic ride.
Or if you’re after the latest and greatest there’s a variety of digital dash clusters available with generic mounts that can be modified to suit. Going down this path can allow you to completely customise what your dash looks like, from digital gauges to inbuilt mapping software. Paired with a later-model steering wheel you’ll have a modern experience in an old rig, but may start losing some of that old charm.
4: NVH
Without a doubt the flashier your suspension and chassis setup, the nicer your rig is going to be for the daily commute or a cheeky run up the Gibb River Road. But the nicest shocks in the world won’t help if it’s deafeningly loud inside the cab and your back hurts. In modern rigs, NVH (noise, vibration and harshness) is the metric they use to measure how nice a place it is inside.
It should come as no surprise then that focusing on those three key areas will give you a huge headstart to making an older rig a nicer place to be.
On a budget
COST: $0-$800
The best things in life are free, and lucky for you that’s the exact price of running out the vacuum cleaner and pinching nan’s old toothbrush for an interior detail (she hasn’t needed it in years anyway).
Before you worry about ponying up the cash for a single purchase, spend at least a full day detailing the inside of your rig. You’ll be amazed just how much nicer it is after the seats have been shampooed, the maccas chips vacuumed up, and the glass given a quick clean.
Once that’s done and you’ve got a good starting base; have a look at what’s actually shagged. A couple of hundred bucks going on OEM gear replacing things like broken door handles, interior lights that no longer work and perished window channel rubbers will get things feeling much more refined.
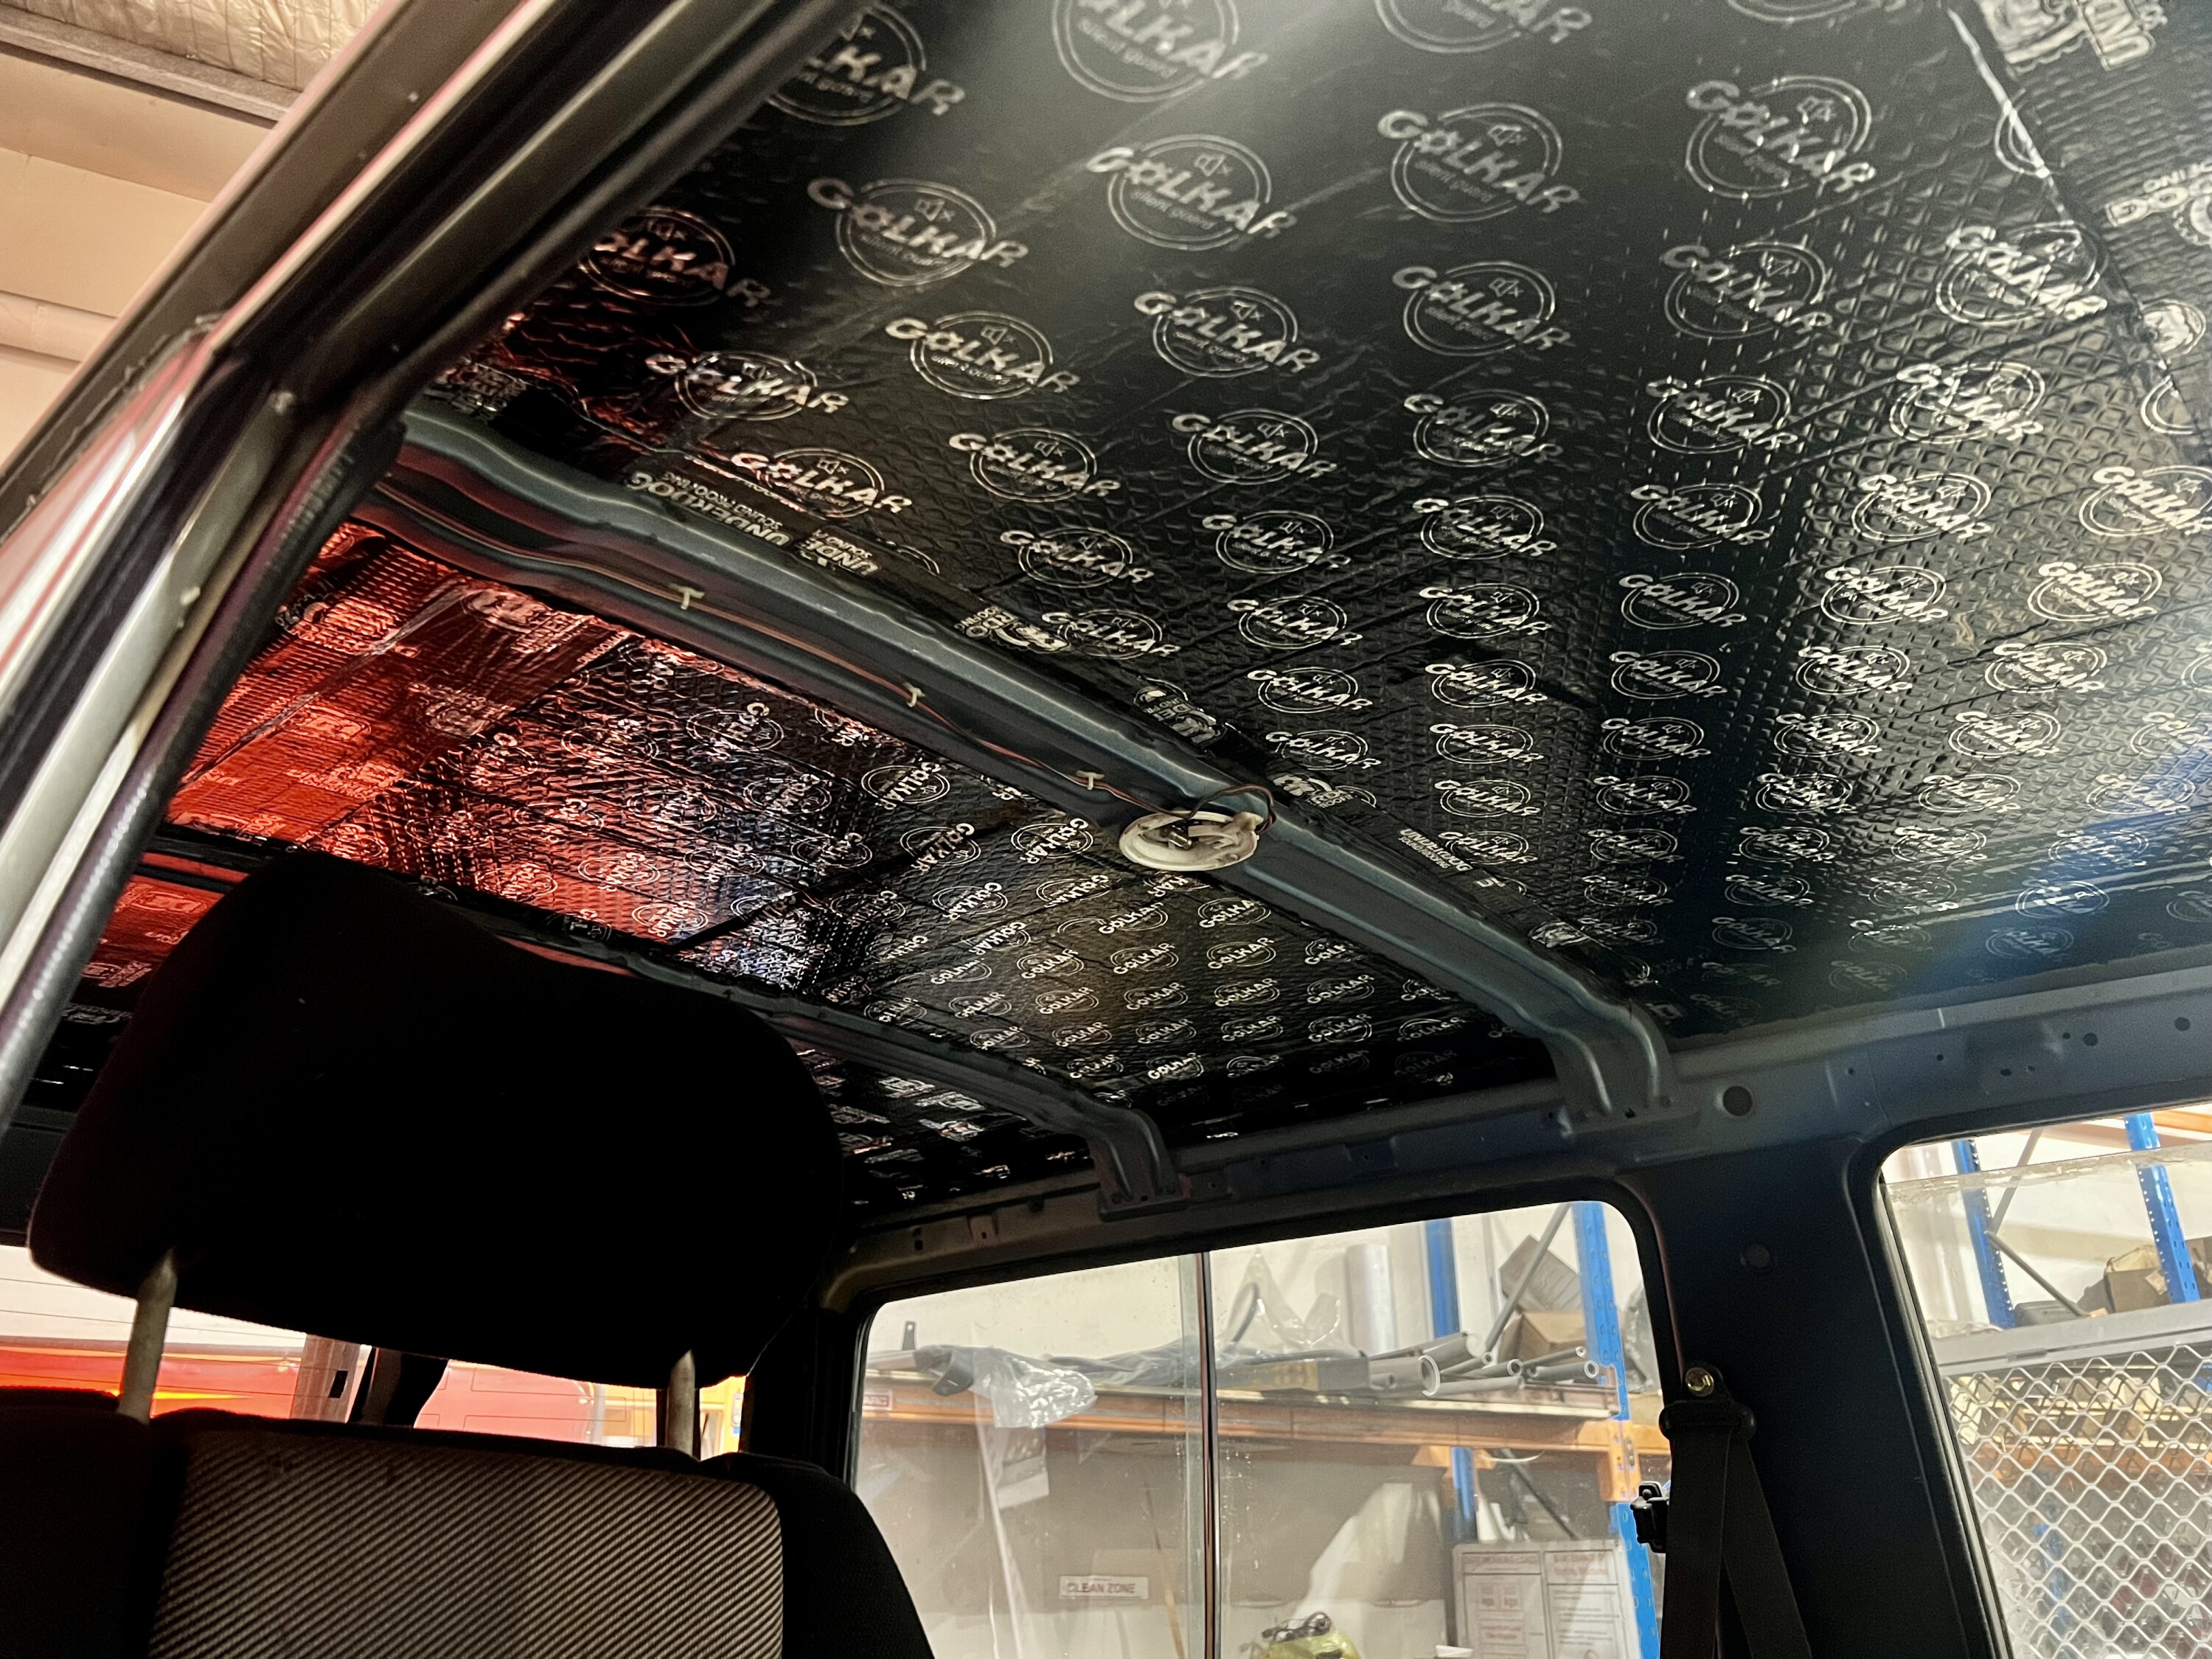
If you’re feeling fancy, a few sheets of sound-deadening material on the floor pan will help cut down road noise significantly.
Flash a little cash
COST: $1000-$3000
If you’ve got a little extra cash to spend it’s time to start ordering up new OEM kit by the wheel barrow load. Gut the interior down to its bones and buy a complete sound-deadening kit to line the floor, doors and roof.
It’ll not only drastically reduce noise inside, it’ll also insulate your rig, making it warmer in winter and cooler in summer, and give the doors a nice solid thud as they latch shut. Don’t go throwing old carpet back on either; a full set of new carpet can be had for just a few hundred bucks.
From here, your next port of call is fixing up the last few tired-looking items around the cabin. A trip to a motor trimmer for a headliner steam clean, some new door trims in the stock pattern, and any damage to the seats repaired, will bump this whole exercise up into the $3k+ range, but will literally make your interior as good as new.
The best of the best
COST: $4000-$5000
The neatest stock interior may be the dream come true for some, but what if you’ve got slightly deeper pockets and flashier taste? First things first; the stock seats aren’t going to cut it.
Sure, you can throw a set of Falcon seats in but most of them are nearly as old as the rig they’re going into these days.
“We find the classic styling and tech heavy features of our seats make them a popular choice for older 4x4s,” says Benjy Davenport, the main man behind Scheel-Man Australia seats. “Being able to have a near-factory look while adding things like heated bases and back rests, arm rests, and fully adjustable lumbar support seriously improves any interior.”
If you’re feeling really boujee, option up some fancy plaid fabric on the seats then get a motor trimmer to match the rear seats, door trims and even a centre console fridge to suit.
5: More power
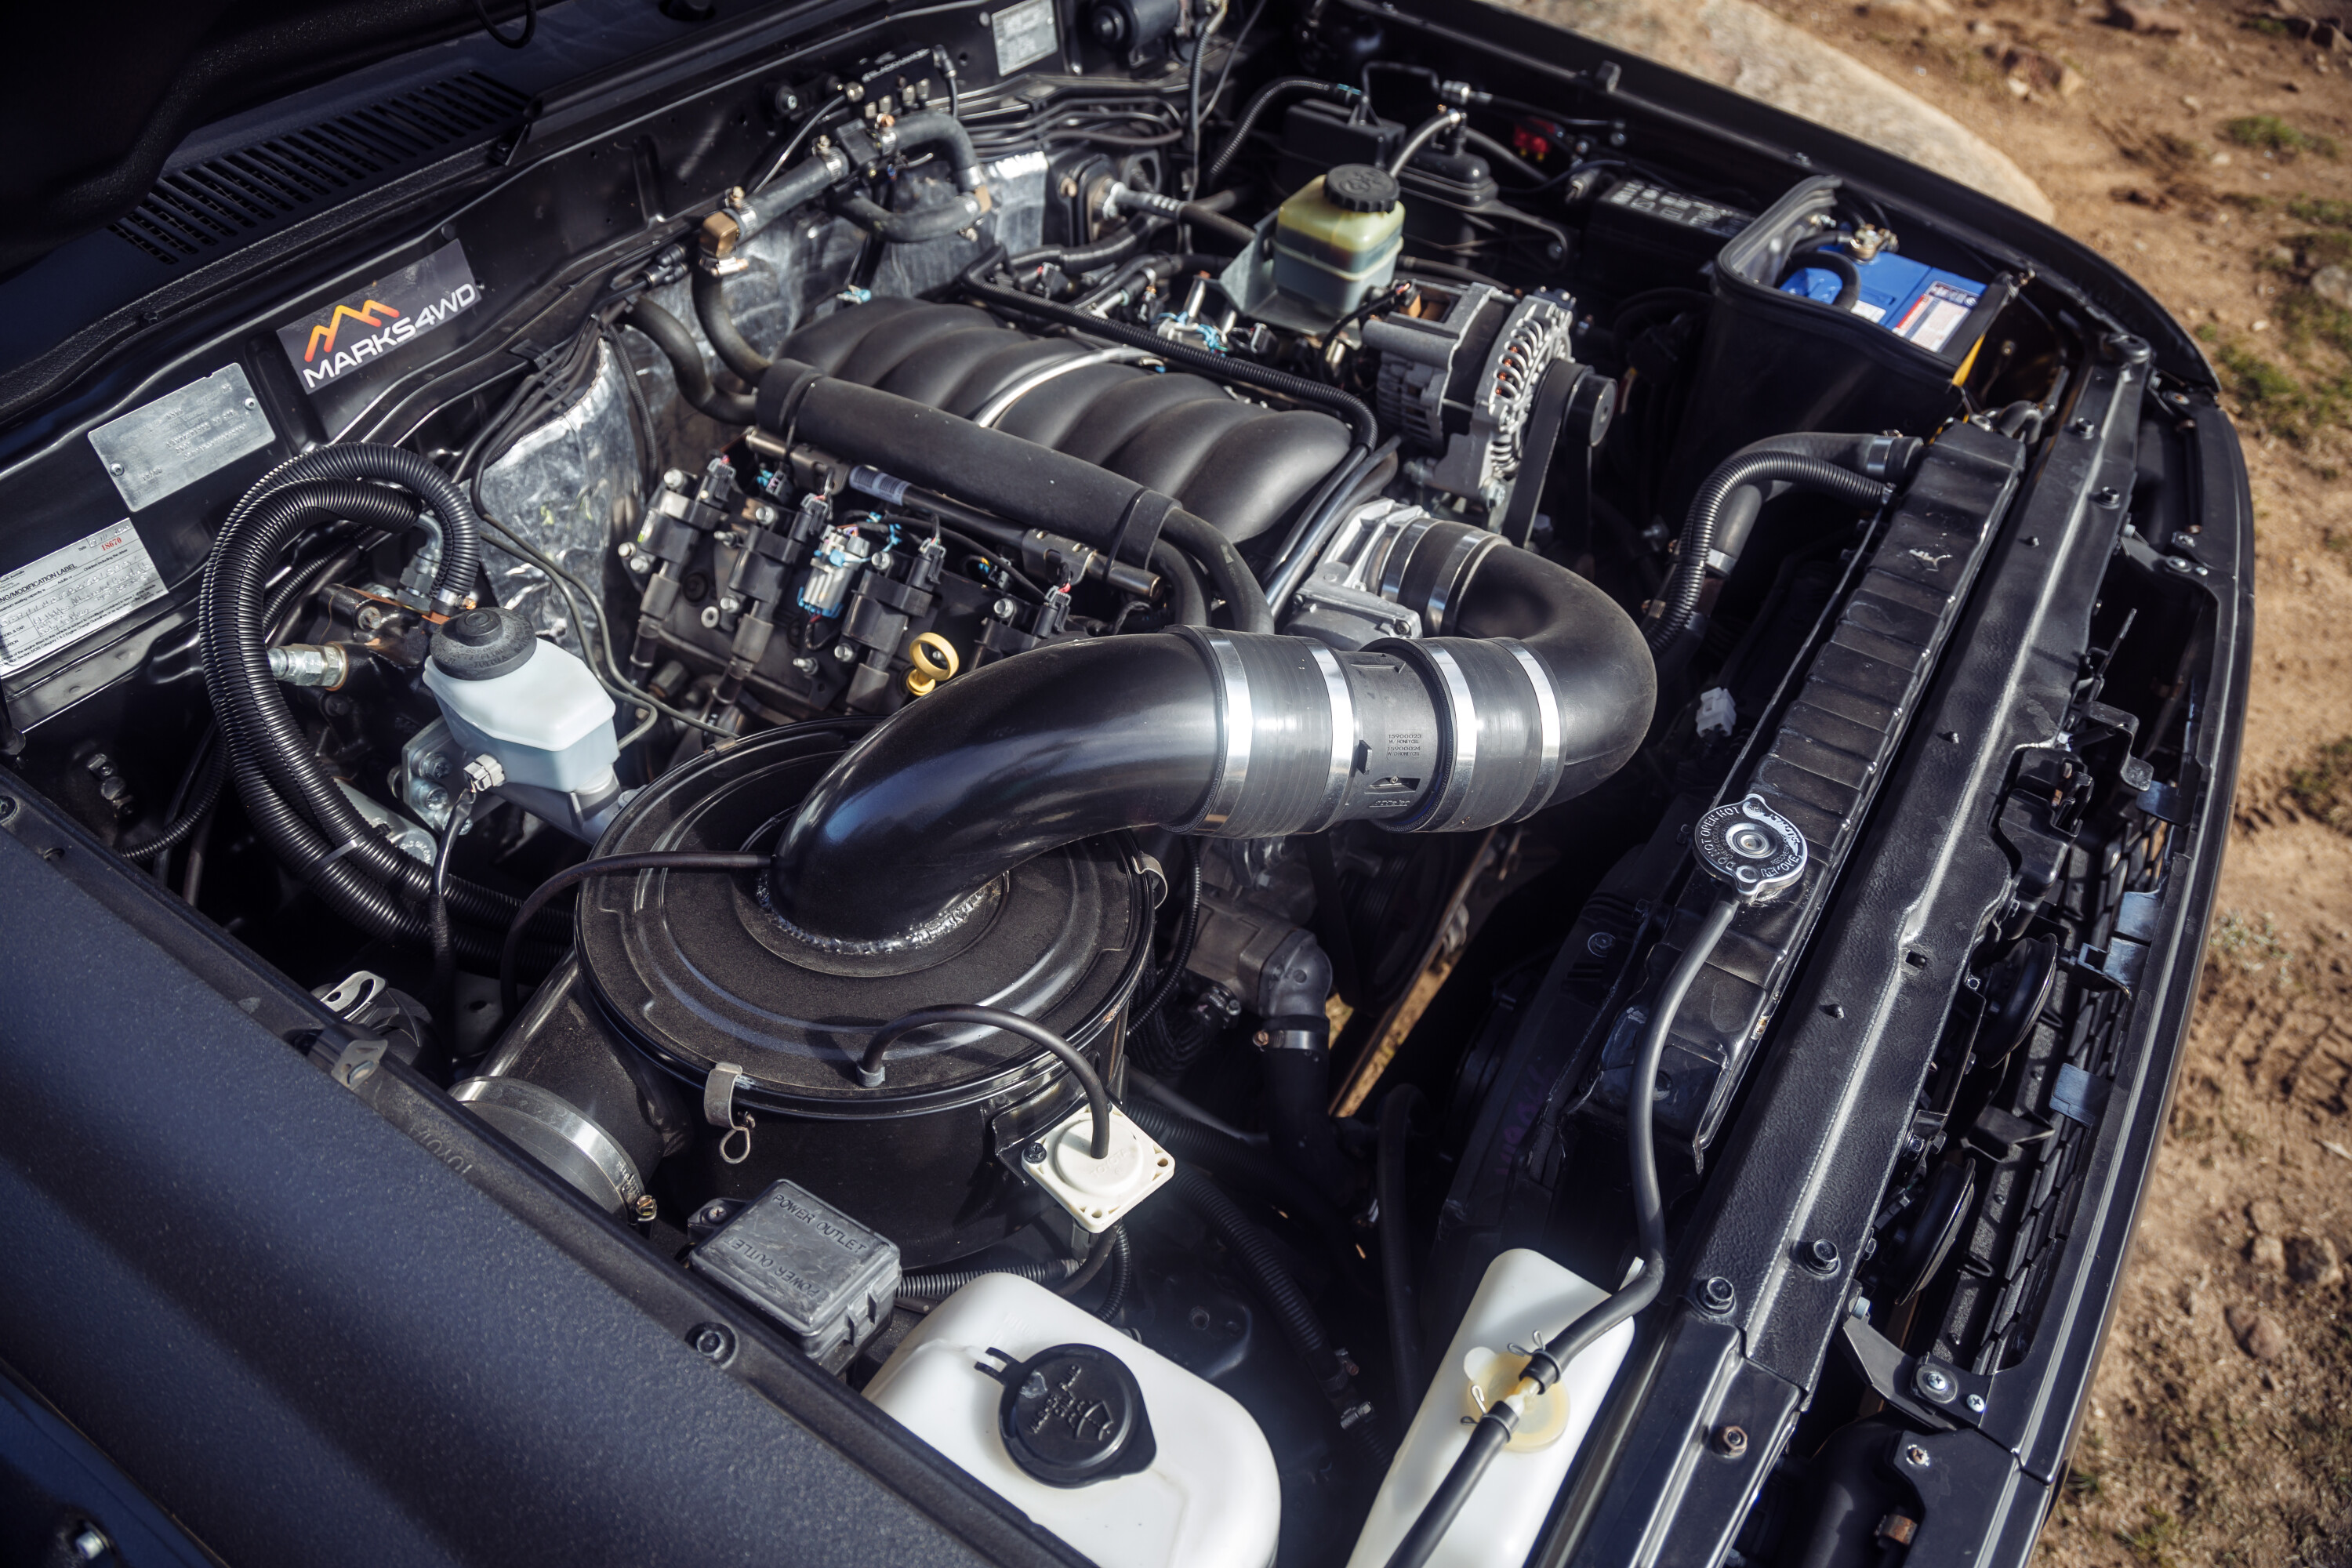
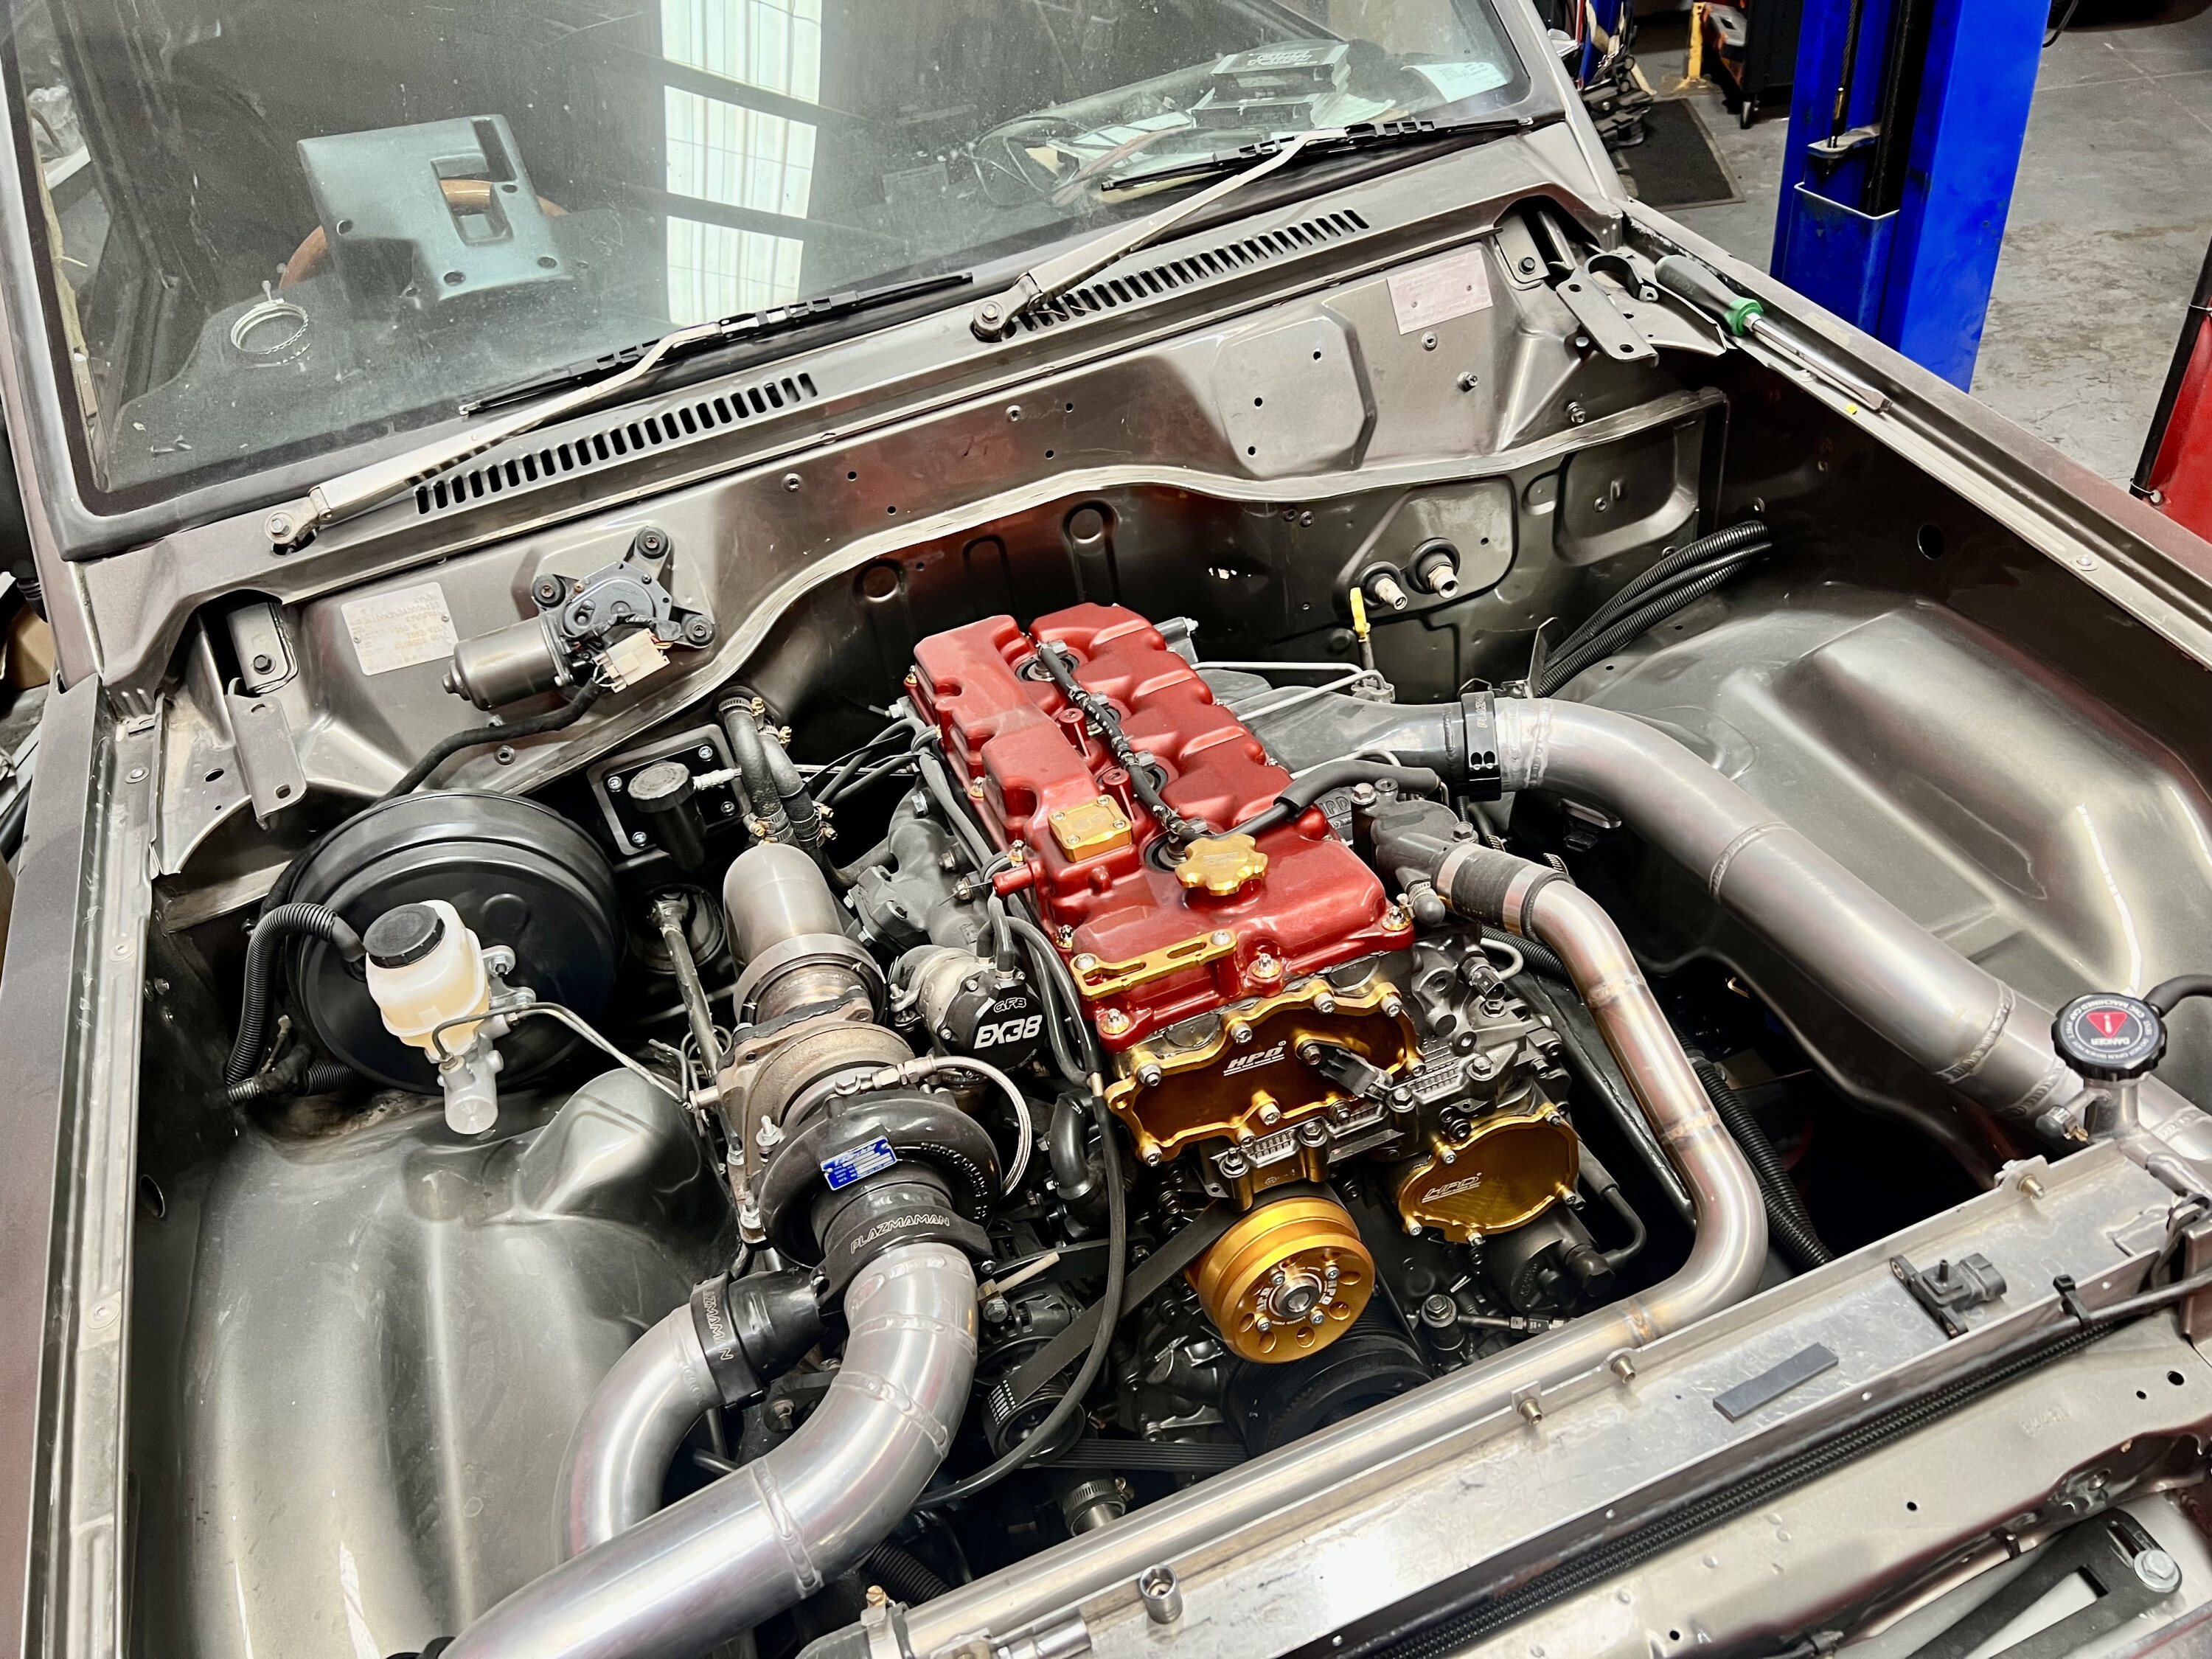
The original upgrade, people have been shoe-horning late model engines into old rigs since the Ford Model T days. Heck, businesses like Marks 4WD have thrived on making it easy to put a hot-rodded powerplant into a 4×4, but today there’s more choice than ever before when it comes to making your rig boogie when the right pedal gets squeezed.
Below we look at three very different pathways, each with their own pros and cons. Sure, they’re still broken up into budget ranges, but the three end up with very different results depending on your goals rather than your budget.
On a budget
COST: $3000-$10,000
Your path forward depends on the base vehicle you’re starting with but in general, older simple rigs are straightforward to hot-rod, whether they are a Range Rover or a Lada Niva. Get more air and fuel in, get more spent gasses out. Petrol or diesel doesn’t make a huge difference, a simple turbo setup with an exhaust, intercooler and some fuel modifications should see you home free.
In most cases mods like these will not only make your older rig more driveable on the road and off it, but will also see a reduction in fuel consumption as well.
Older diesels are definitely the most straightforward for modification, with off-the-shelf gear to suit popular makes and models, but petrols such as the 4.5L 1FZ LandCruiser are gaining in popularity and therefore are becoming easier to modify.
The power results will typically be far less than an all out engine conversion, but improving the original donk is often far simpler to get up and running… and legal.
Flash a little cash
COST: $10,000-$50,000
If you’ve decided even with a spicy tickle the stock powertrain isn’t going to get you the results you want then you’re going to have to start shopping for engine cranes, but there are two very different paths you can take. Diesel or petrol. Let us explain.
Jump on the Marks 4WD website and you’ll find a near endless combination of adaptors and bell housings all designed to get a range of late-model engines into older rigs.
Engines like the GM range of LS V8s, or Ford’s Barra turbo-sixes will typically use a little more fuel than the old donk you’re pulling out, but frequently offer more than double the power with very simple upgrades to the new engine. If you’re after a weekend play thing, love the sound of an angry exhaust, or just flat-out prioritise power over economy, then these are the drivetrains you need to be looking at.
Alternatively, late model diesel conversions into older rigs are also becoming more common. Isuzu’s near iconic 4JJ1 engine has developed a massive following in the aftermarket making conversion kits and upgrades a straightforward process.
Sure, you’re not going to get the grunt or exhaust note of a bent-eight, but with sub 12L/100km fuel consumption and the practical power of a new DMAX it’s an enticing proposition.
The best of the best
COST: $80,000-$100,000
We’re the first to admit that electric vehicles just flat out aren’t there yet for serious remote-area travel. There’s simply nowhere to plug in that fast charger on the Tele Track and no reliable way to carry extra juice with you.
But for some old rigs an EV conversion can be the difference between a garage relic and a killer daily driver capable of camping trips here and there. Dave Budge from Jaunt Motors down in Victoria reckons the electric powerplants they specialise on slotting into old rigs are so powerful these days they’re artificially limiting grunt to make them driveable.
“You can’t equate kW to kW with a petrol engine,” he tells us. “It feels like 20-30 per cent more power, you move your right foot and there’s an instant response, not noise and then speed, it’s just speed. The torque is always there.”
While the price tag is eye watering, the results often mean the very definition of turnkey. You can have a 50 year old 4×4 that’s simpler than it originally was, and starts every time. With a decent size battery bank range can be up around 500km, but actually improves off-road rather than decreases like an internal combustion engine.
They come with the rather unique benefit of being able to hear exactly what your tyres are doing at any given time. Imagine trundling up a rock edge knowing your back right is struggling for traction and needs steering input before the 4×4 shows a single sign of slowing. They’re certainly not for everyone, but if you have the means it’s hard to argue with the results.
6: Transmission
Let’s get one thing straight right from the get-go: for almost every situation in almost every vehicle, automatics from 30 years ago are mostly downright garbage.
They were heavy, clunky to change gears, constantly in the wrong gear, and rarely held up to the power the stock engines made back in the day, so they’re sure as hell not up to the task of any modern drivetrain. If you’re going to the hassle of making more exciting things happen when you put your right foot down it makes sense to get a transmission that’ll do it well.
On a budget
COST: $300-$500
Look, if you’re spending five grand on a set of shocks at least make sure the old clunky auto gets some of the power from the engine to the transfer case. You don’t have to go buck wild here but assume at a bare minimum you’re going to need to run a few fluid changes through it to fully replace the old stuff.
Check for any fibres in the old fluid as a sign of worn clutch packs. While you’re in there it’s worth fitting up a new filter and gasket as well as running your eyes over the condition of any external soft lines. If you’re planning on any soft sand work then an external cooler is an absolute must have as well.
All up, between a few fluid changes and a new pan and filter, you should only be out a few hundred bucks. The ’box will shift a little tighter, and last a little longer, so it’s worth the effort and money.
Flash a little cash
COST: $3000-$5000
We’ve slotted this one in the middle for purely budgetary reasons but the reality is this is well and truly an “in addition to” kinda thing rather than an “instead of” pathway.
If the 4×4 you’re resto-modding is 35 years old max, then chances are the transmission has a few different accessories available that won’t necessarily modernise it, but will make it shift better, tow better, and handle power upgrades better.
There are hard parts for the internals such as heavy duty valve bodies and torque convertors, external cooler kits that’ll bypass the factory cooler in the radiator preventing a serious failure point, and then hot-rod kits like aftermarket transmission controllers that’ll allow you to not only dial up line pressure for firmer shifts, but control when the transmission will kick up or down a gear, what it’ll do if you put the boot in, and even set multiple separate patterns for eco/sport or normal/tow modes.
The best of the best
COST: $5000-$10,000
A transmission from 2023 is going to be worlds apart from one from 2003, let alone one from 1983 – it’s as simple as that.
“There’s been a substantial change with our engine conversion customers going away from running the original manual or automatic transmissions,” Elliot Booth from Marks 4WD says. “Late model six-speed and now even eight- or 10-speed automatic transmissions give a low first gear and a good spread right through to top gear for highway cruising. Tiptronic manual gear selection even allows the driver to hold the vehicle in the gear they choose.” This is something invaluable for steep high-country work.
Marks 4WD reckons even a simple transmission like the GM 4L60 or 4L80 will make a massive difference in driveability and fuel consumption for older rigs thanks to the addition of an overdrive gear bringing those revs right down.
7: Better brakes
You can’t add ‘go’ without adding ‘woah’. Not only do the two words perfectly complement each other, it just makes sense. Having an old rig physically capable of going faster thanks to more power under the bonnet, or physically weighing more due to a bunch of camping kit, means that even a mild brake upgrade is needed to keep things at the same standard.
If you want it to actually stop better than it did from the factory you’re going to have to dig a little deeper to make it happen. Like everything here, if you’re under a tight budget and spinning spanners in your driveway you can get an old rig performing well without spending a fortune, and if you want the best of the best there are plenty of options for that too.
On a budget
COST: $800-$1000
Ian Campbell, Product Manager over at Bendix Brakes, reckons the solution can be quite simple.
“Many of these older vehicles are starting from a lower base when it comes to braking capabilities,” he says. “The most cost-effective starting point is to select upgraded brake pads such as Bendix’s Ultimate 4WD disc brake pads.”
At a glance they may have the same dimensions as the old $20 special fitted before but high-tech compounds mean they’ll not only last longer, but bite harder.
Pads alone won’t get the job done so while the spanners are out, fit a pair of new rotors up front, fresh shoes and drums in the back, braided brake lines and fresh fluid all round. It’ll get your old rig stopping better than ever for under $1000.
Flash a little cash
COST: $1000-$2000
If you’re after better than stock, but not keen to go all out, then you start finding yourself in a no-mans land between budget and boujee, so you’re going to have to get creative. If you’ve gone through and either rebuilt or replaced the basic components you’ll need to look a little left of field to find more braking improvements.
“Another popular upgrade is a brake booster upgrade,” Ian Campbell says. “This will not only greatly improve braking performance, but also require less pedal effort making for a more comfortable drive.”
From here you may need to look at later-model gear off a newer version of your rig. It’s not uncommon for a visually identical vehicle to get larger brakes from one year to the next, and all of that can typically be easily retrofitted if you get creative.
The best of the best
COST: $3000-$10,000
Stuff it, you want the best for your rig and no one is stopping you – pun intended – the good news is, there are plenty of options for big spenders with big demands. In this price category you’re not upgrading, you’re replacing with a new system.
One of the first ports of call is a Marks 4WD hydraulic brake booster. These physically replace the old vacuum-assisted booster with a hydraulic unit and have been shown to reduce stopping distances by up to 40 per cent.
You can also tick boxes for physically larger rotors giving your brakes increased leverage, calipers with more pistons for increased clamping power, and rear drum-to-disc conversions. It’s worth mentioning though that some of these modifications can require the fitment of larger diameter wheels.
Be creative
Reading through the last few pages might make you think that turning an old rig into a cool reliable daily driver is an insurmountable task, but it’s actually the exact opposite.
Realistically, each one of the seven sections listed only needs one approach depending on your budget and needs. Sure, if you want the ultimate resto-modded rig to impress everyone, you can spend $200k building it, but you could just as easily pick out the budget options for every category, throw them into an old LN106 HiLux and have something truly special that’s not only comfortable and capable, but turns heads everywhere it goes. All for less than the price of a 10-year-old HiLux.
That’s the beauty of resto-mods; there are no guidelines or ‘keeping up with the Joneses’ required. An old first-generation Pajero with some trick alloy wheels, a mint interior and a cheeky turbo under the bonnet is every part as cool as a 600hp EV-converted Defender. The only limiting factor to what you can build is your creativity… and budget.
Contacts
Snapshot
- BYD Ute due in second half of 2024
- Petrol-electric coming first, EV to follow later
- BYD Australia: u201cBest in class when it comes outu201d
The BYD Ute – due in Australia in late 2024 – will be “best in class”, according to the Chinese brand’s local arm.
At the media launch of the electric Seal sedan, Luke Todd, the CEO of BYD distributor EVDirect, said “the vehicle is going to be… so well suited for the Australian market, and that’s why we’re making the claim that it will be the best in class when it comes out”.
Todd confirmed the brand “will sell and deliver BYD Ute next year”, with a local launch in the second half of the year.
However, unlike BYD’s current vehicles – the Dolphin, Atto 3 and Seal – the as-yet-unnamed Ute will feature a dual-motor ‘DM-i’ hybrid arrangement with a 1.5-litre turbo-petrol engine at launch.
Unlike current plug-in hybrid vehicles such as the new Ford Ranger PHEV, which add electric components to an existing ICE-based platform, the BYD Ute has been designed as a “ground-up EV” with internal combustion added later.
“At the moment, plug-in or traditional hybrid is a petrol vehicle that’s had a battery introduced. This is the complete reverse around, so much so that we’re actually working with government authorities to get our own category because this is technology that nobody’s ever seen. It’s an ultra-low electric vehicle with the best of both worlds… there’s no range anxiety,” said Todd.
“What we’re about is bringing the best technology to Australia. Now, this is new technology that nobody’s ever seen before and we’re talking ultra-low emissions.
“So, yes, it’s not full electric… but it’s an electric platform vehicle and we will educate Australians on the benefits… There will be cynics… but when they see the emissions ratings and the highly efficient vehicle and that they’ve got the best of both worlds, people will understand why we’ve chosen it.”
BYD is said to be targeting a 1000-kilometre-plus driving range for the petrol-electric Ute.
As announced, an all-electric version of the Ute will follow around 12 months later in 2025 or 2026.
“We want vehicles that Australians can actually afford. We don’t ever want to be pushing $100,000. The reality is a full EV ute at the moment would be over $100,000 just for the battery size, to power, to get enough range.”
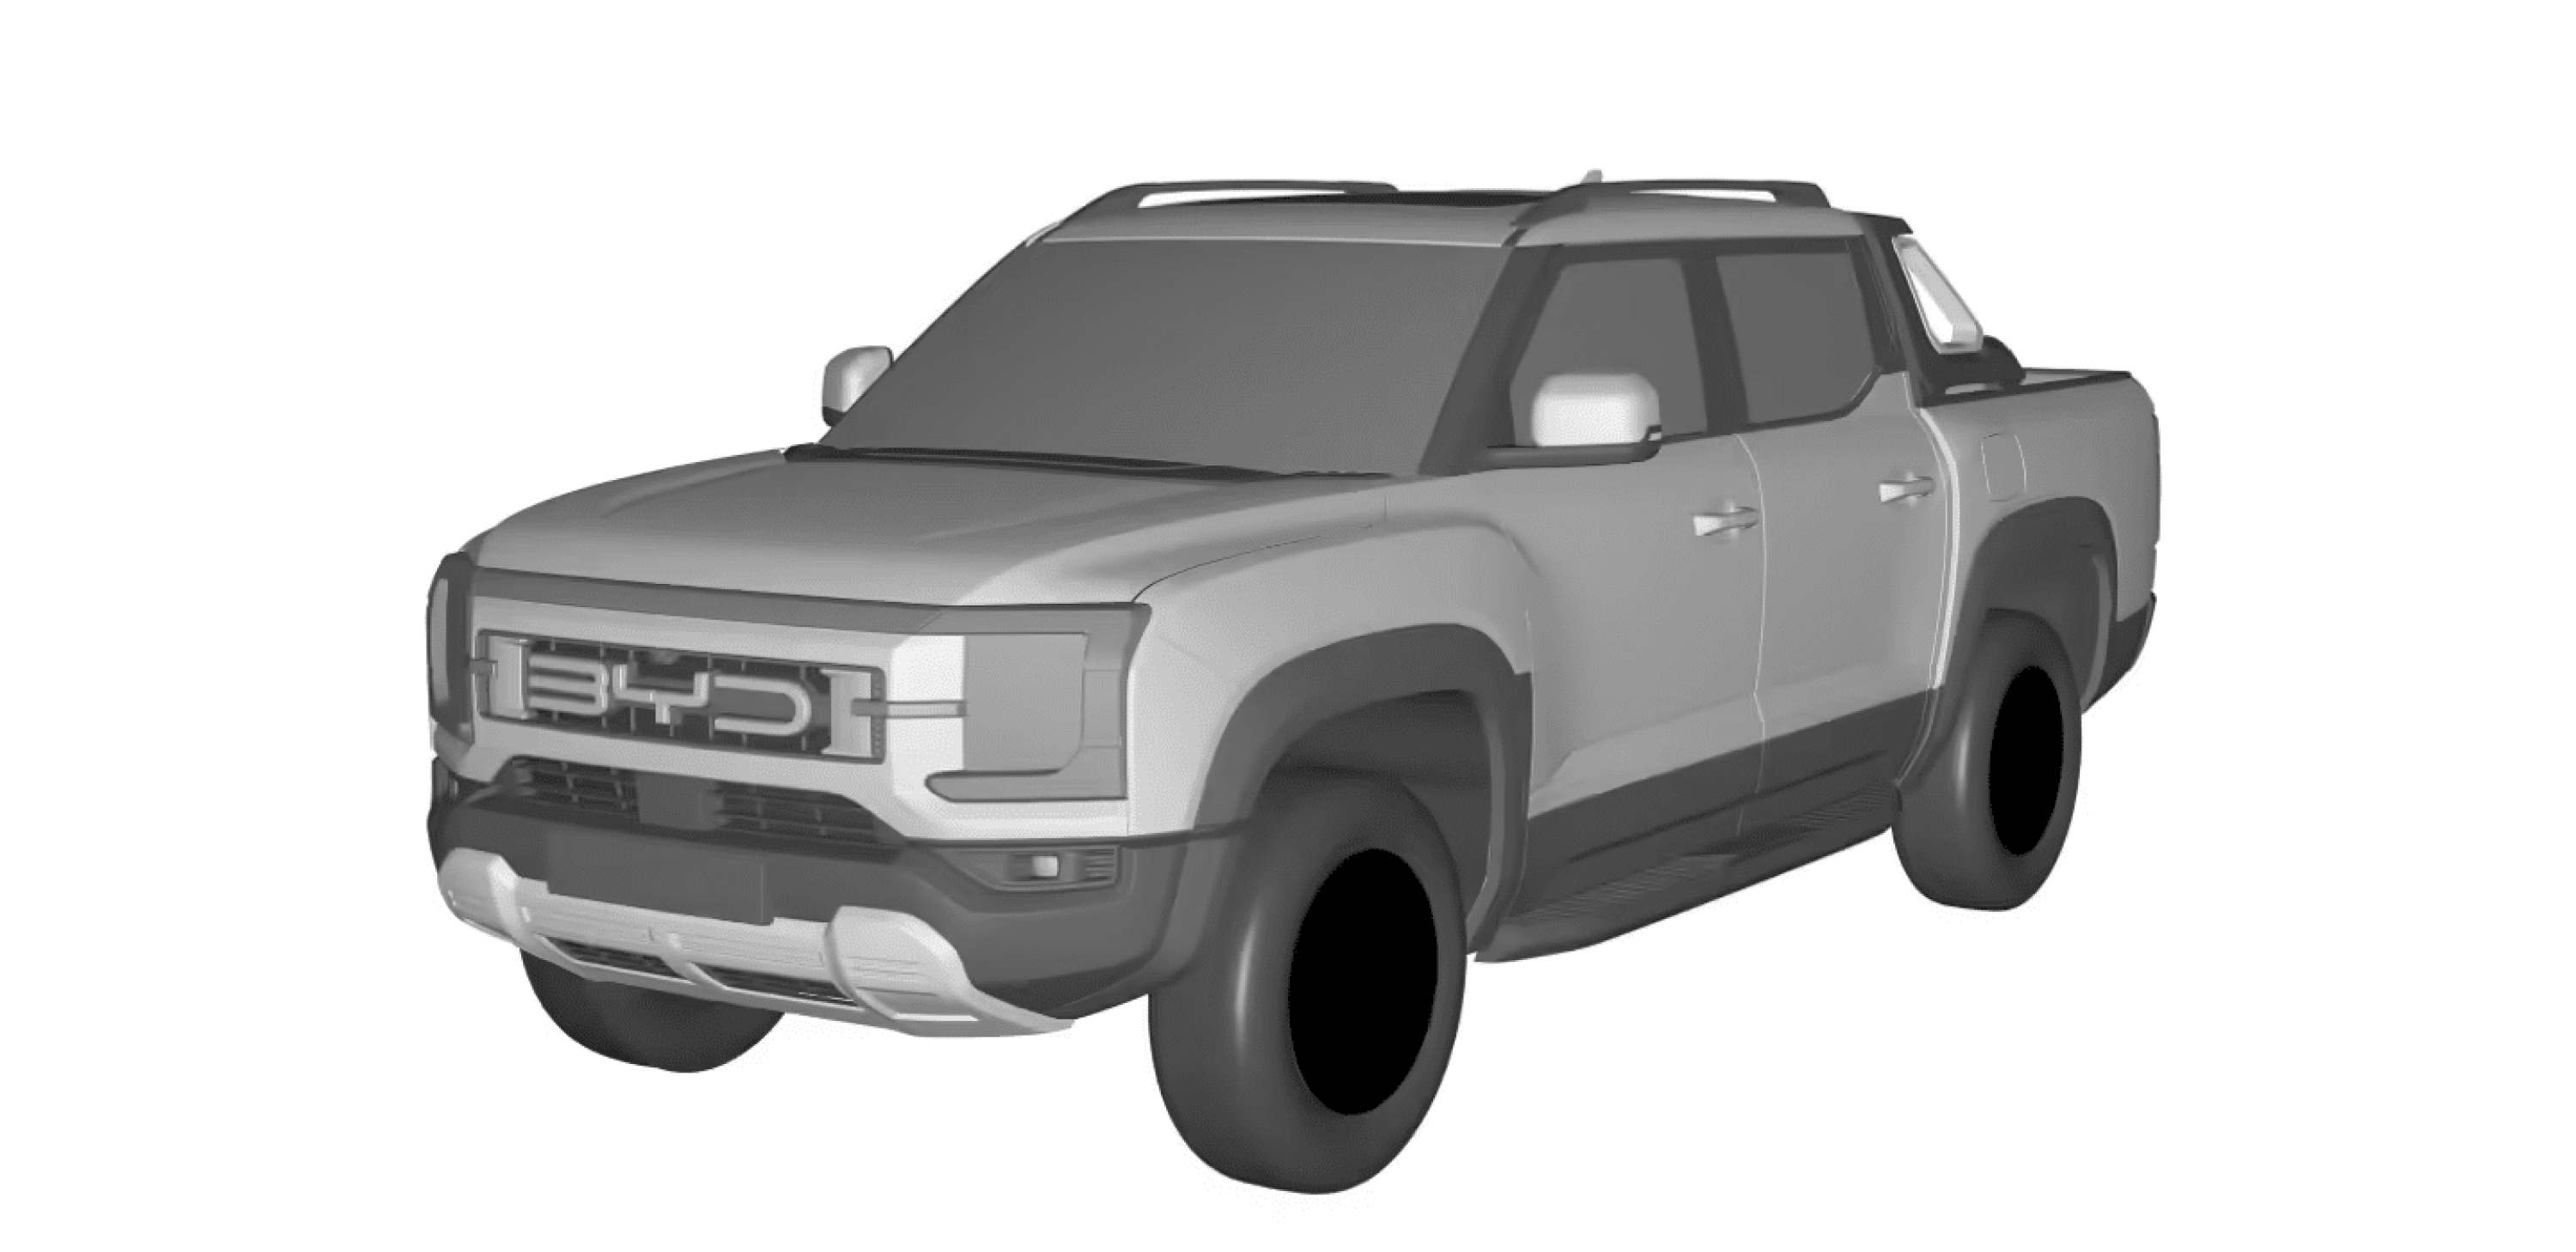
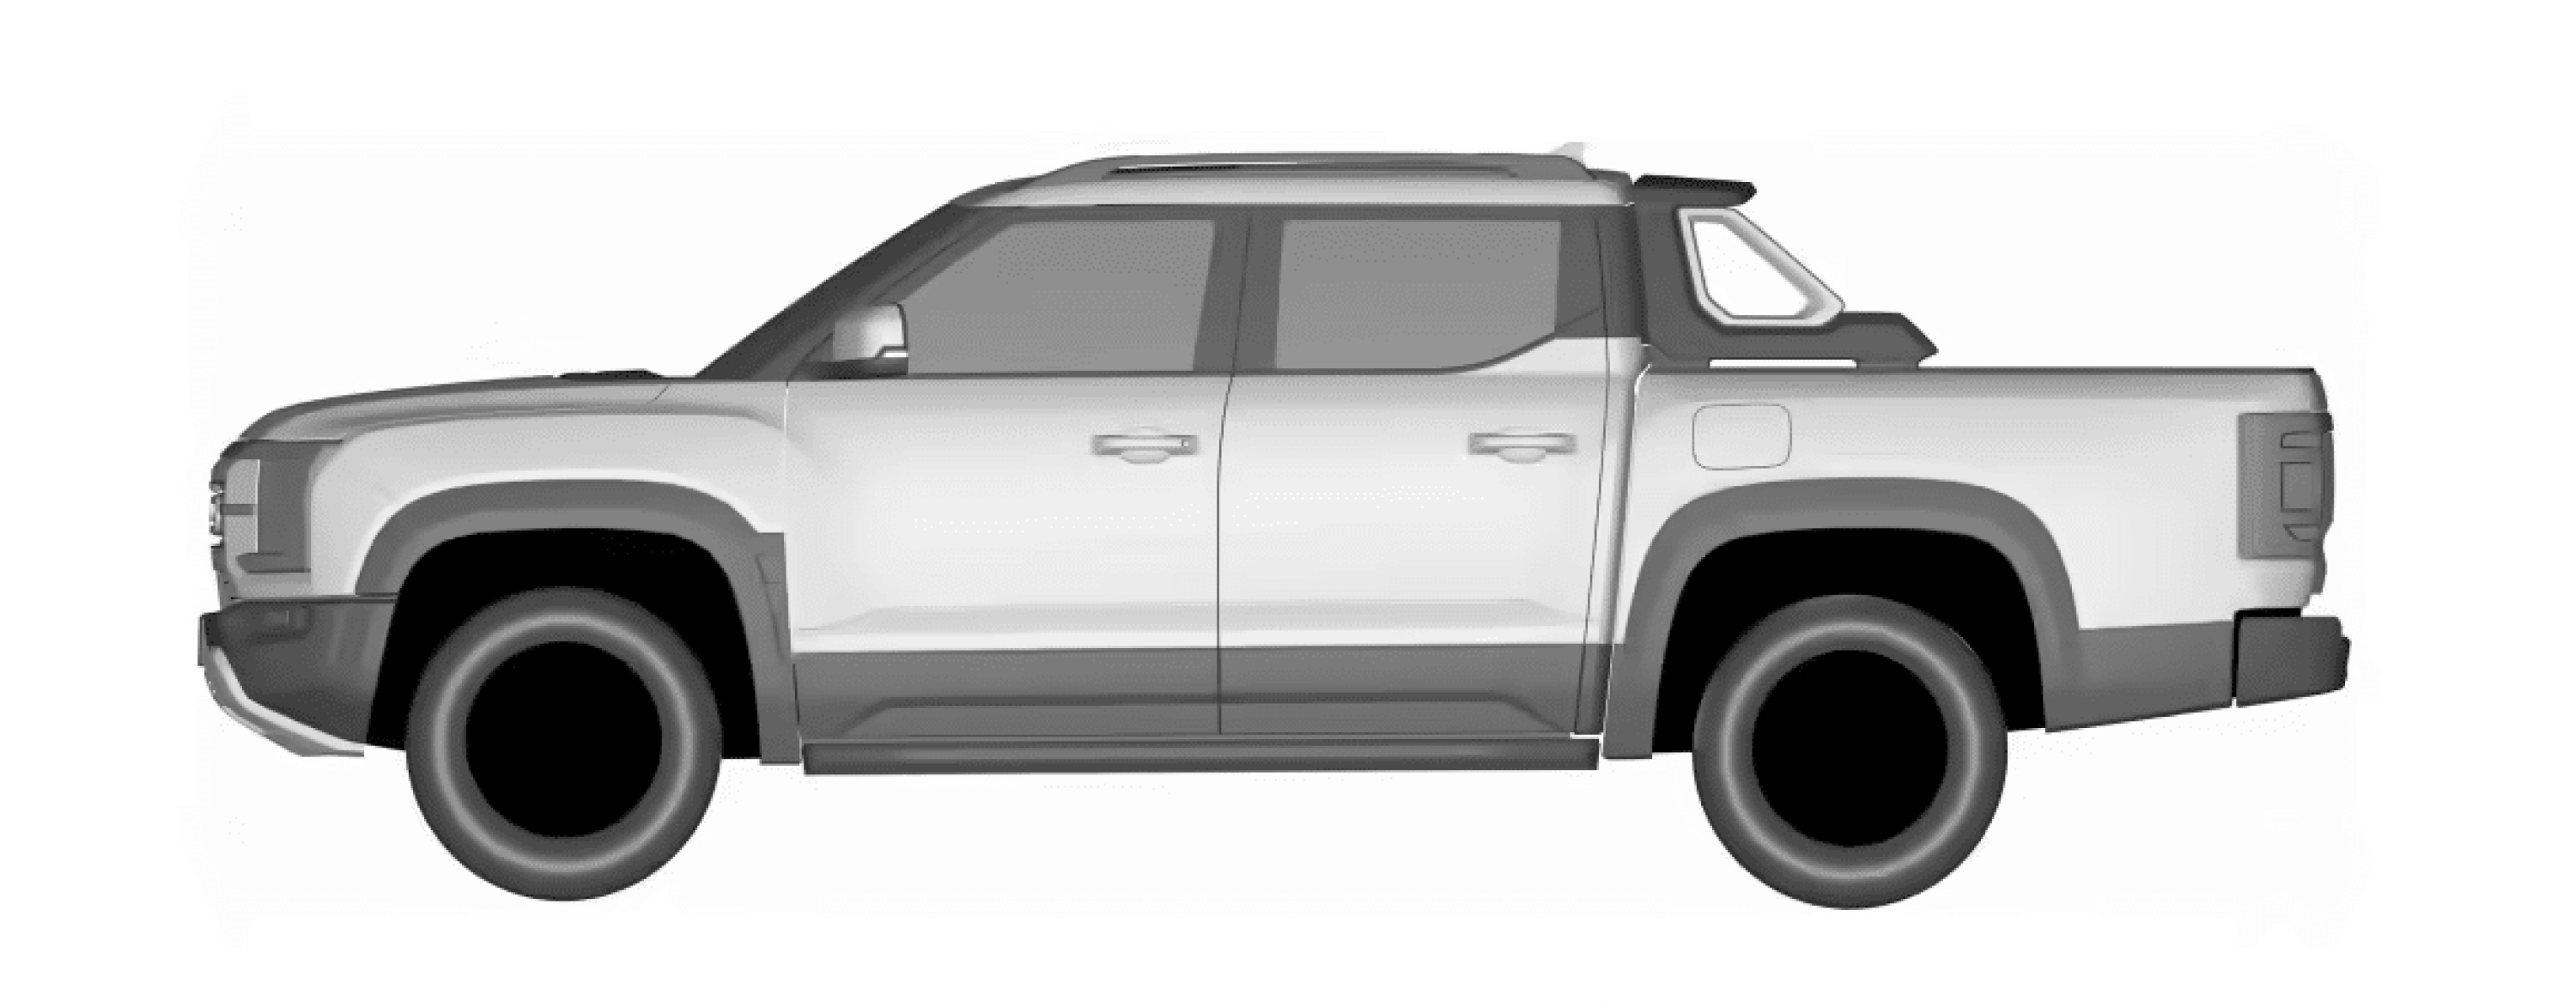
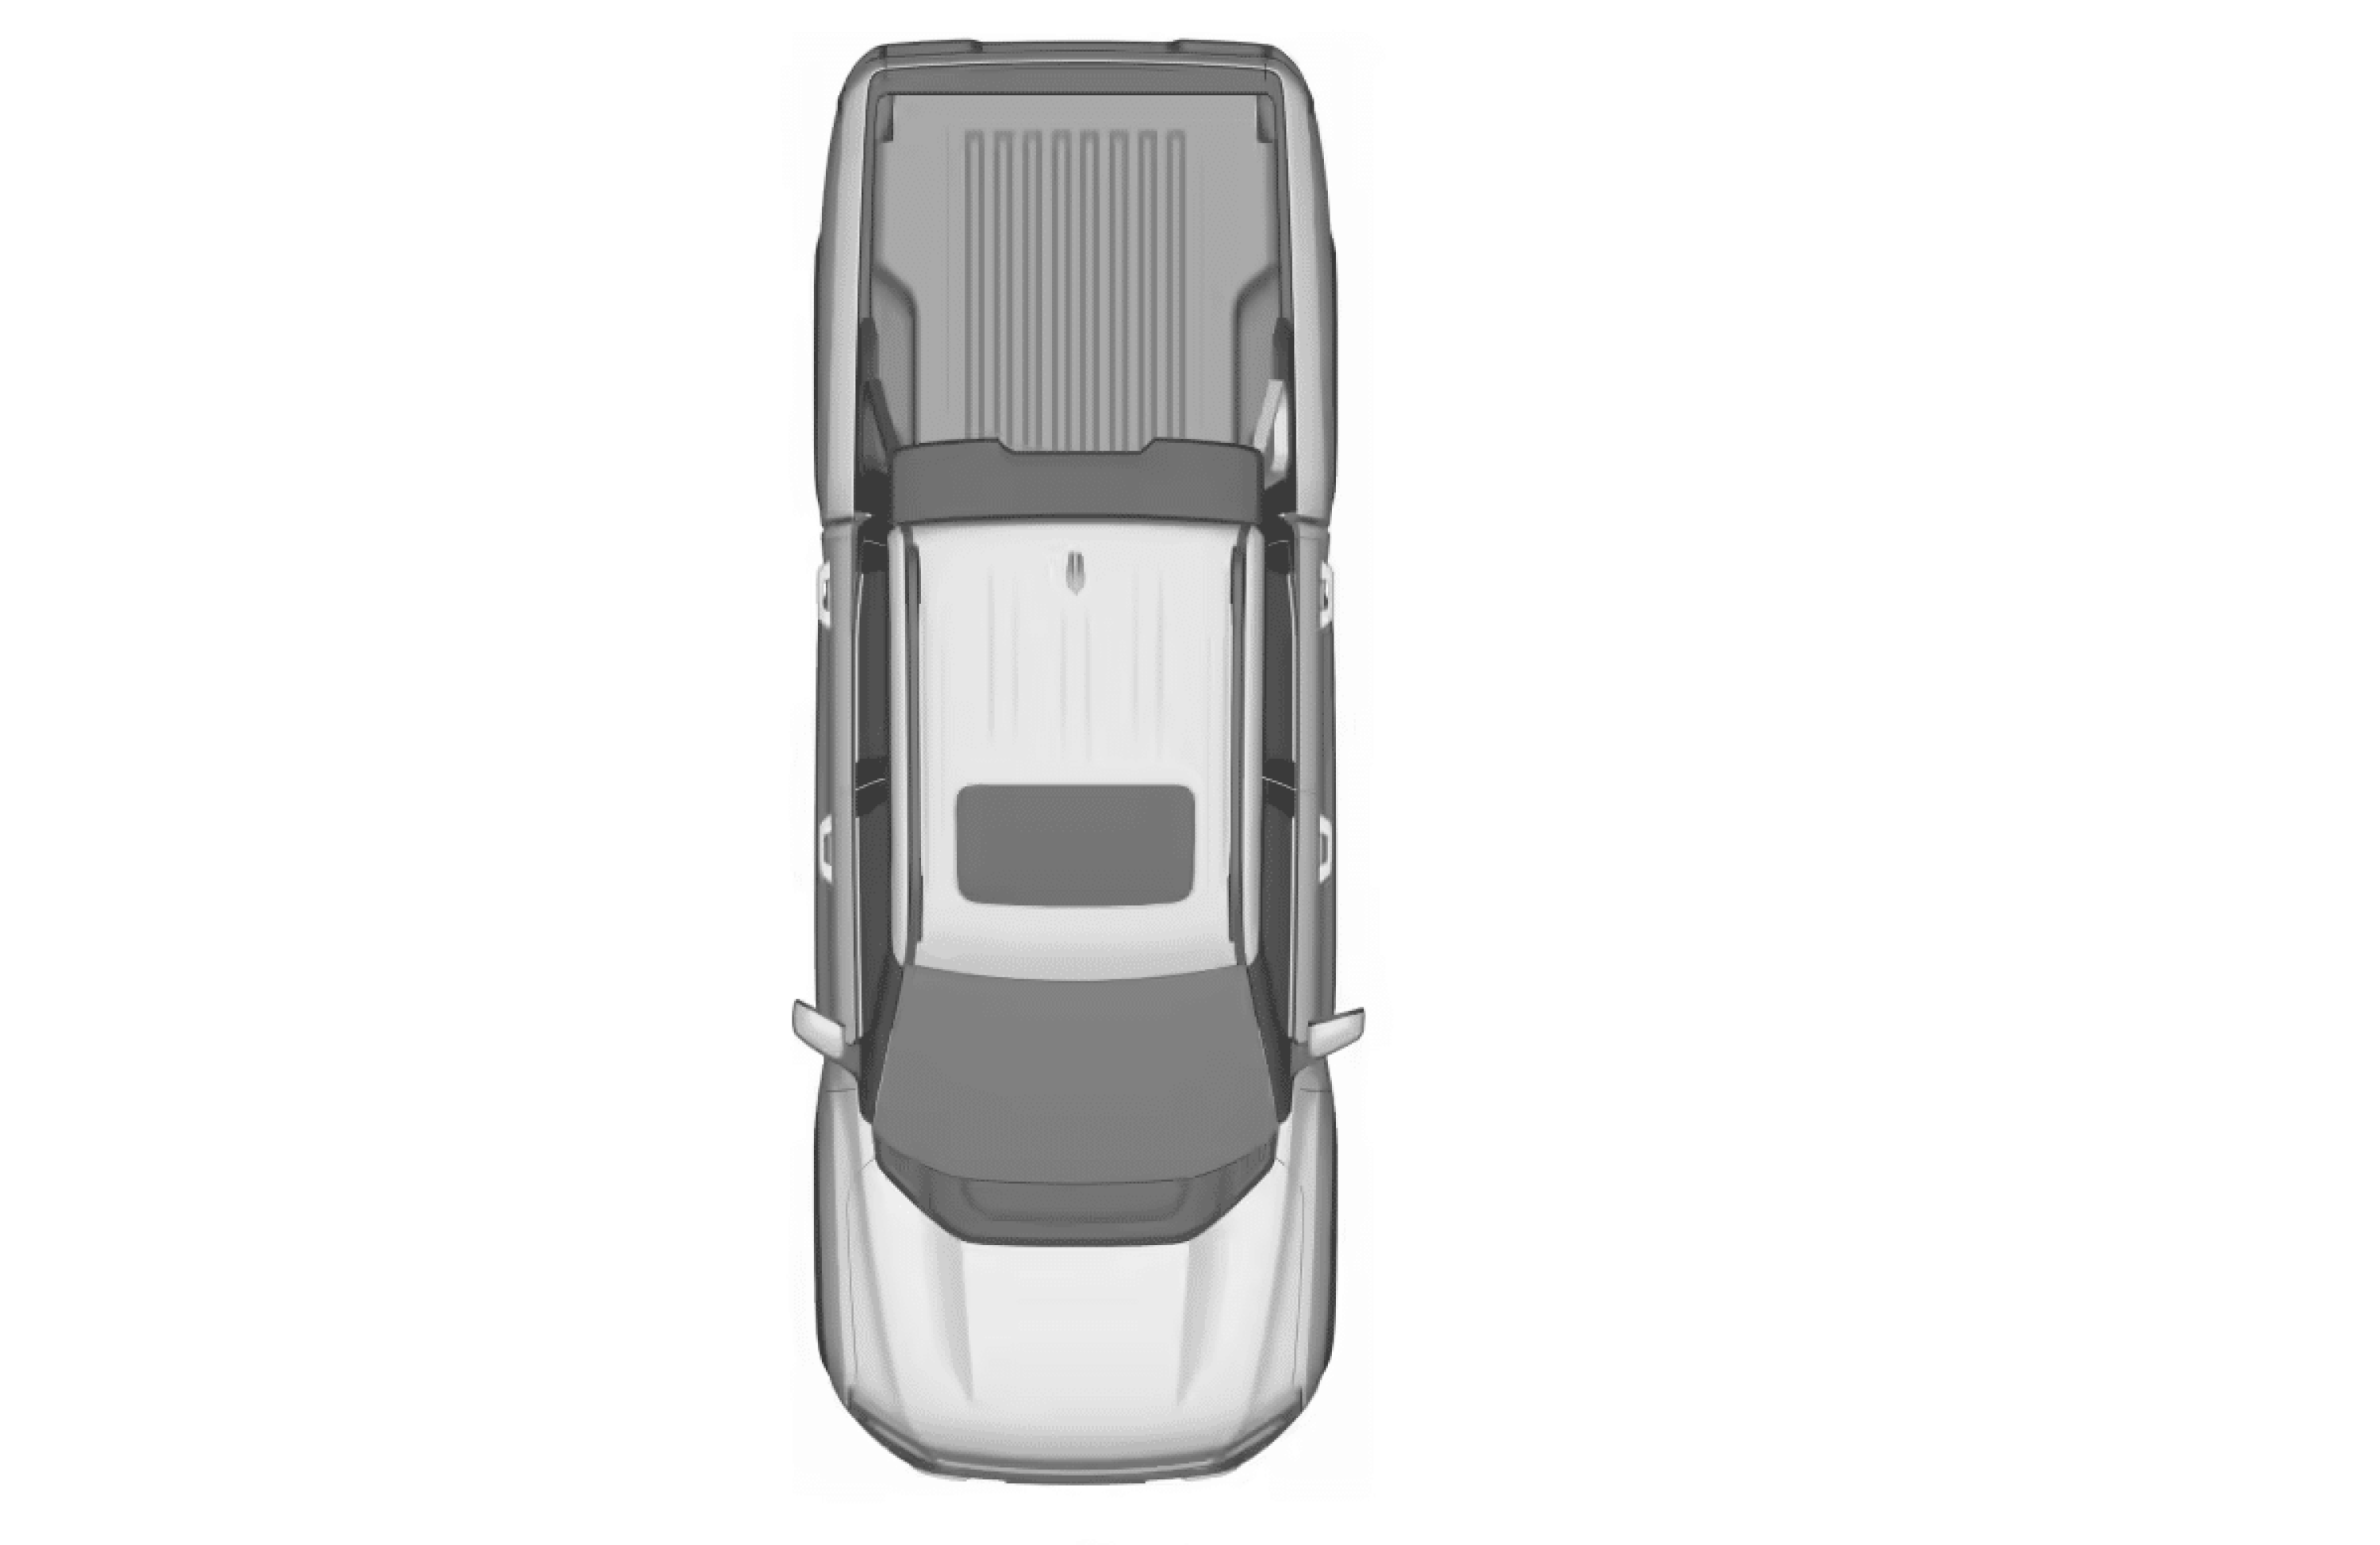
Patent images of the BYD Ute surfaced earlier this week, confirming it’ll follow a similar design to the GWM Ute and Ford Ranger.
Last month, Luke Todd told 4X4 Australia BYD will use feedback from Australia in the development of the Ute.
“I can confirm the feedback from the partnership and communication of what Australian consumers are looking for was extremely detailed. We’re talking an immense amount of data sharing of what consumers want for Australia and a lot of those inputs are being implemented into the ute… It is very much a co-designed vehicle for the Australian market,” he said.
The 4×4 recovery powerhouse has just released a new recovery board dubbed the MAXTRAX LITE, which is almost 50 per cent lighter than the premium MKII boards.
The Australian-made MAXTRAX LITE is priced at $179 per unit (a pair), which is considerably cheaper than the $319 MAXTRAX asks for its MKII. Despite the $140 price difference, MAXTRAX says its new LITE version shares the same DNA as the original units but in “a new lightweight construction”.
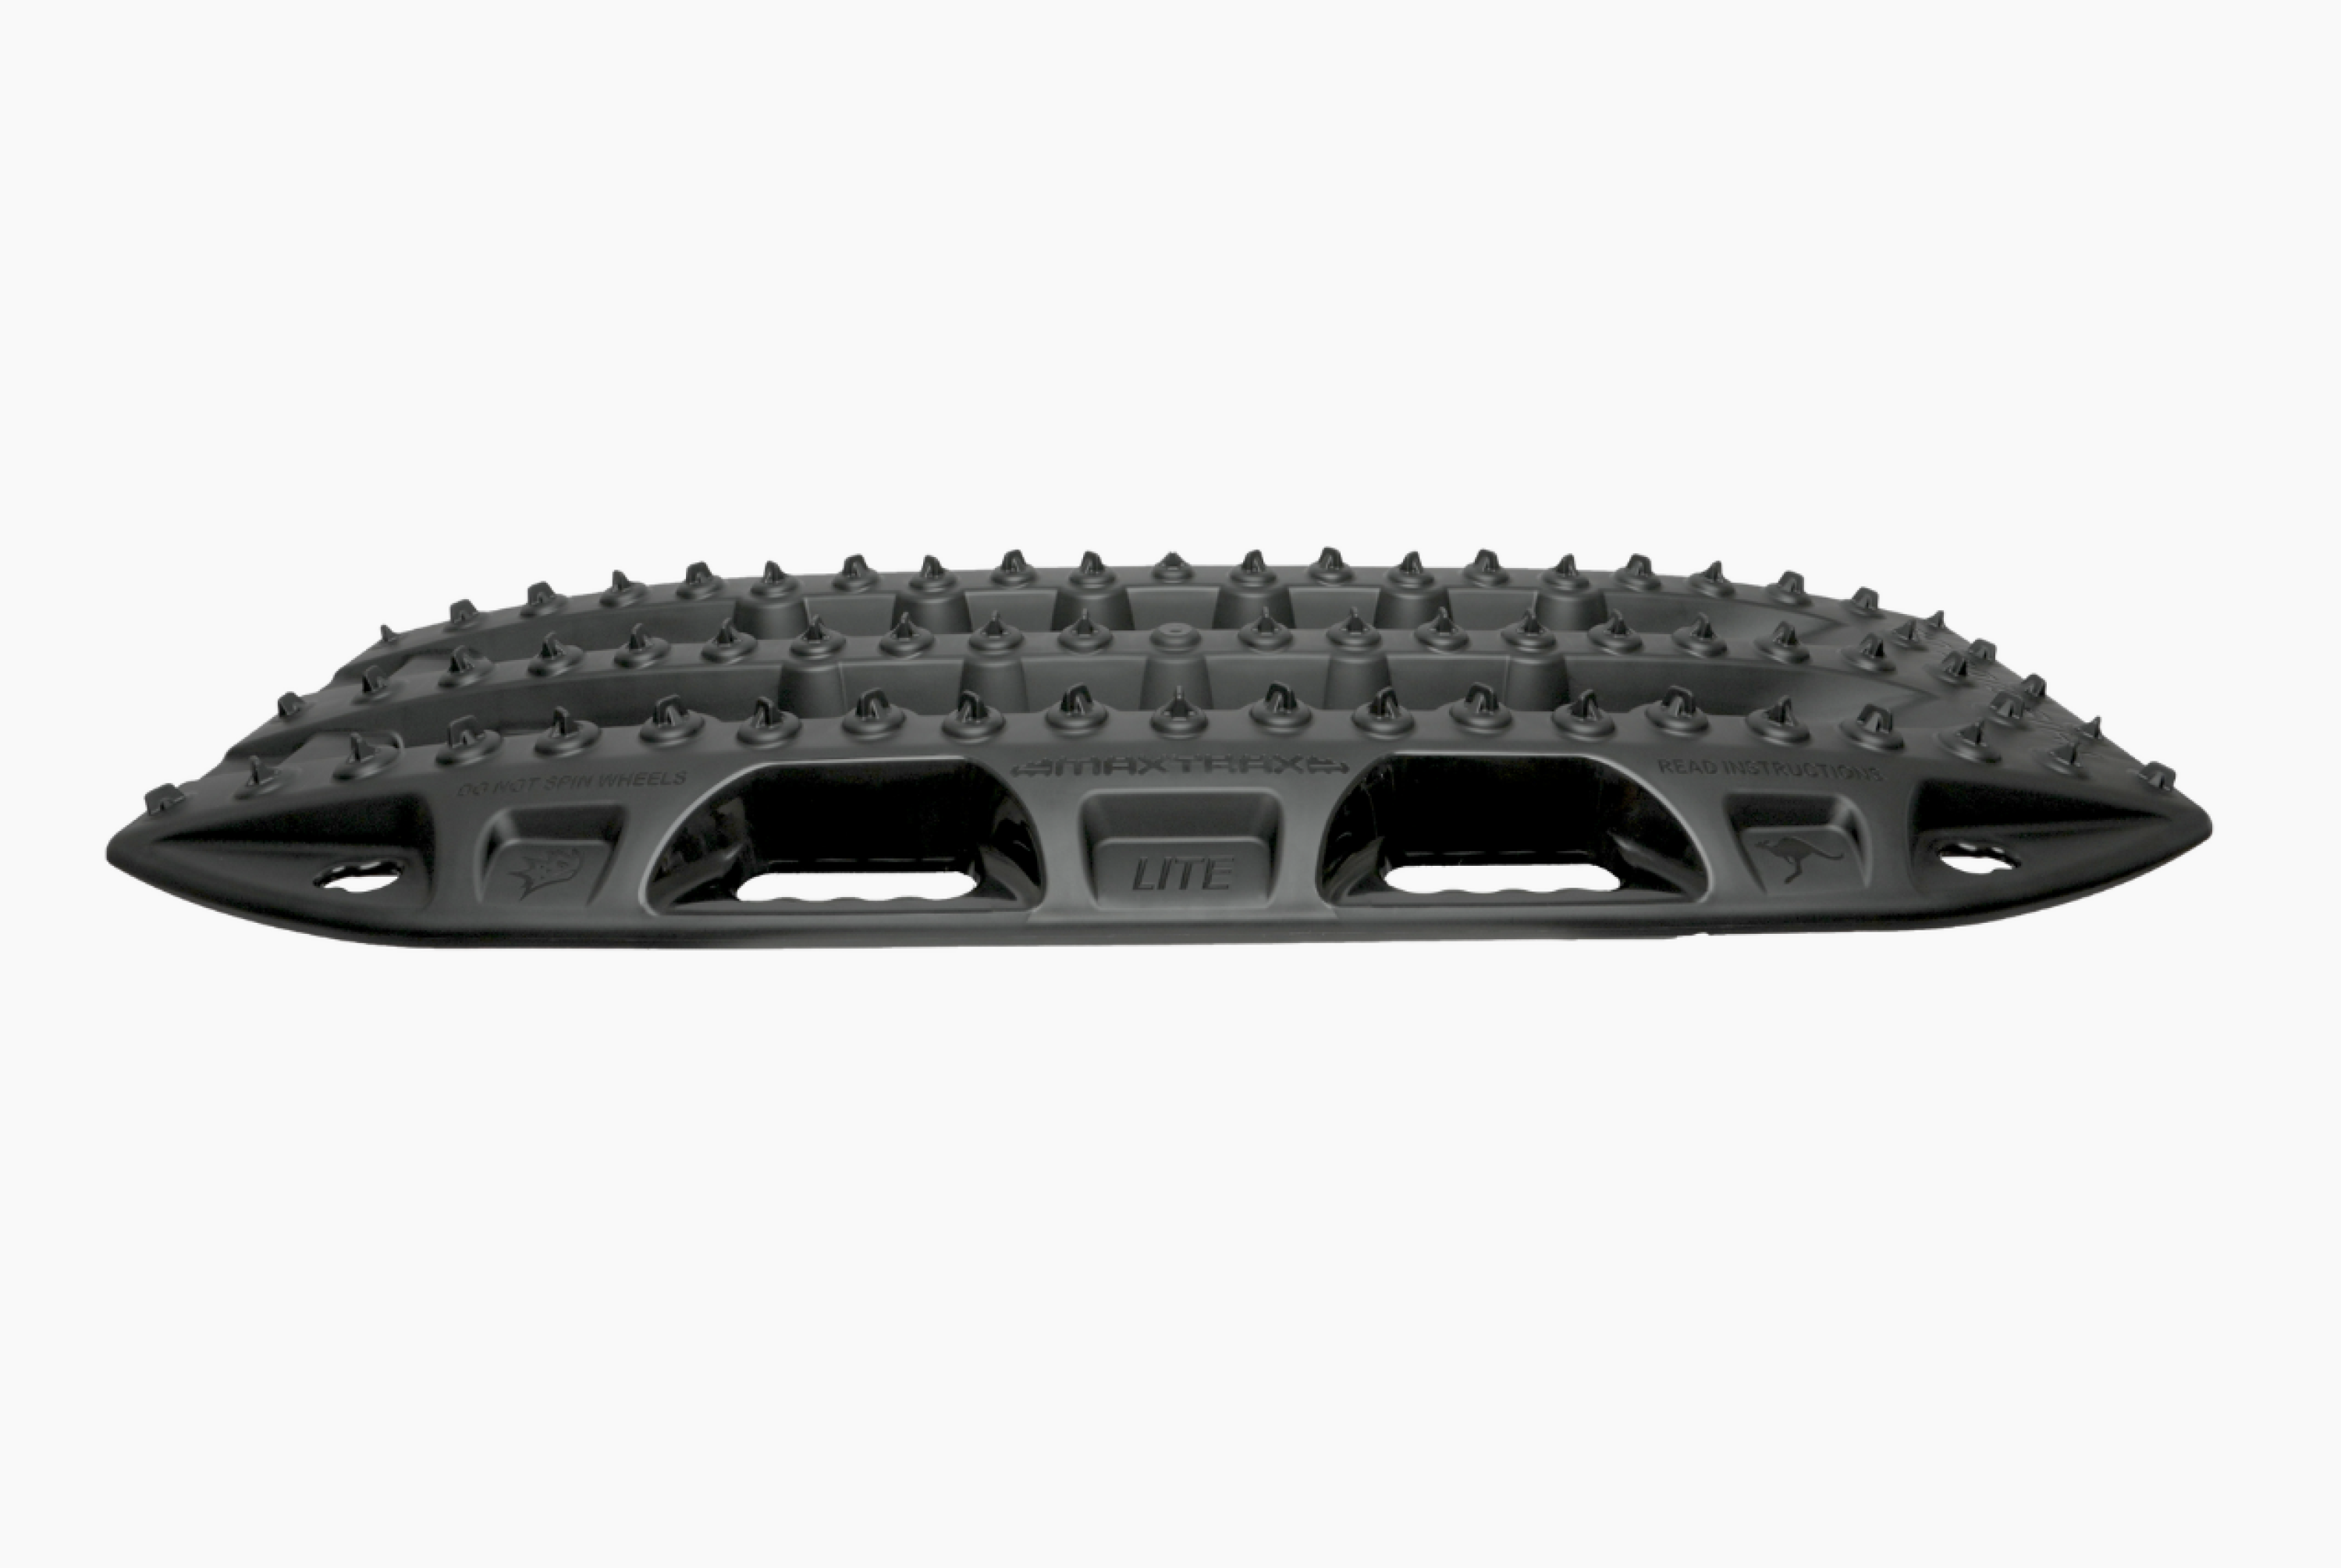
Giving the boards its tough yet light construction is the use of impact-resistant thermoplastic, in lieu of the MKII’s reinforced nylon blend. The LITE measures 895mm long and weighs just 1.8kg each, which makes them 22 per cent shorter and 48 per cent lighter than the MKIIs – an ideal weight and size for storing on roof racks.
With years of experience perfecting the ideal recovery board, MAXTRAX has ensured the boards are equipped with all of the clever and useful design features of the MKII.
Key features include a double ramp design, to easily fit beneath tyres; a shovel at both ends; four handles; mounting pin holes to link together with other boards in the MAXTRAX family, for easy storage; and a low-profile design.
Latest Gear Guides
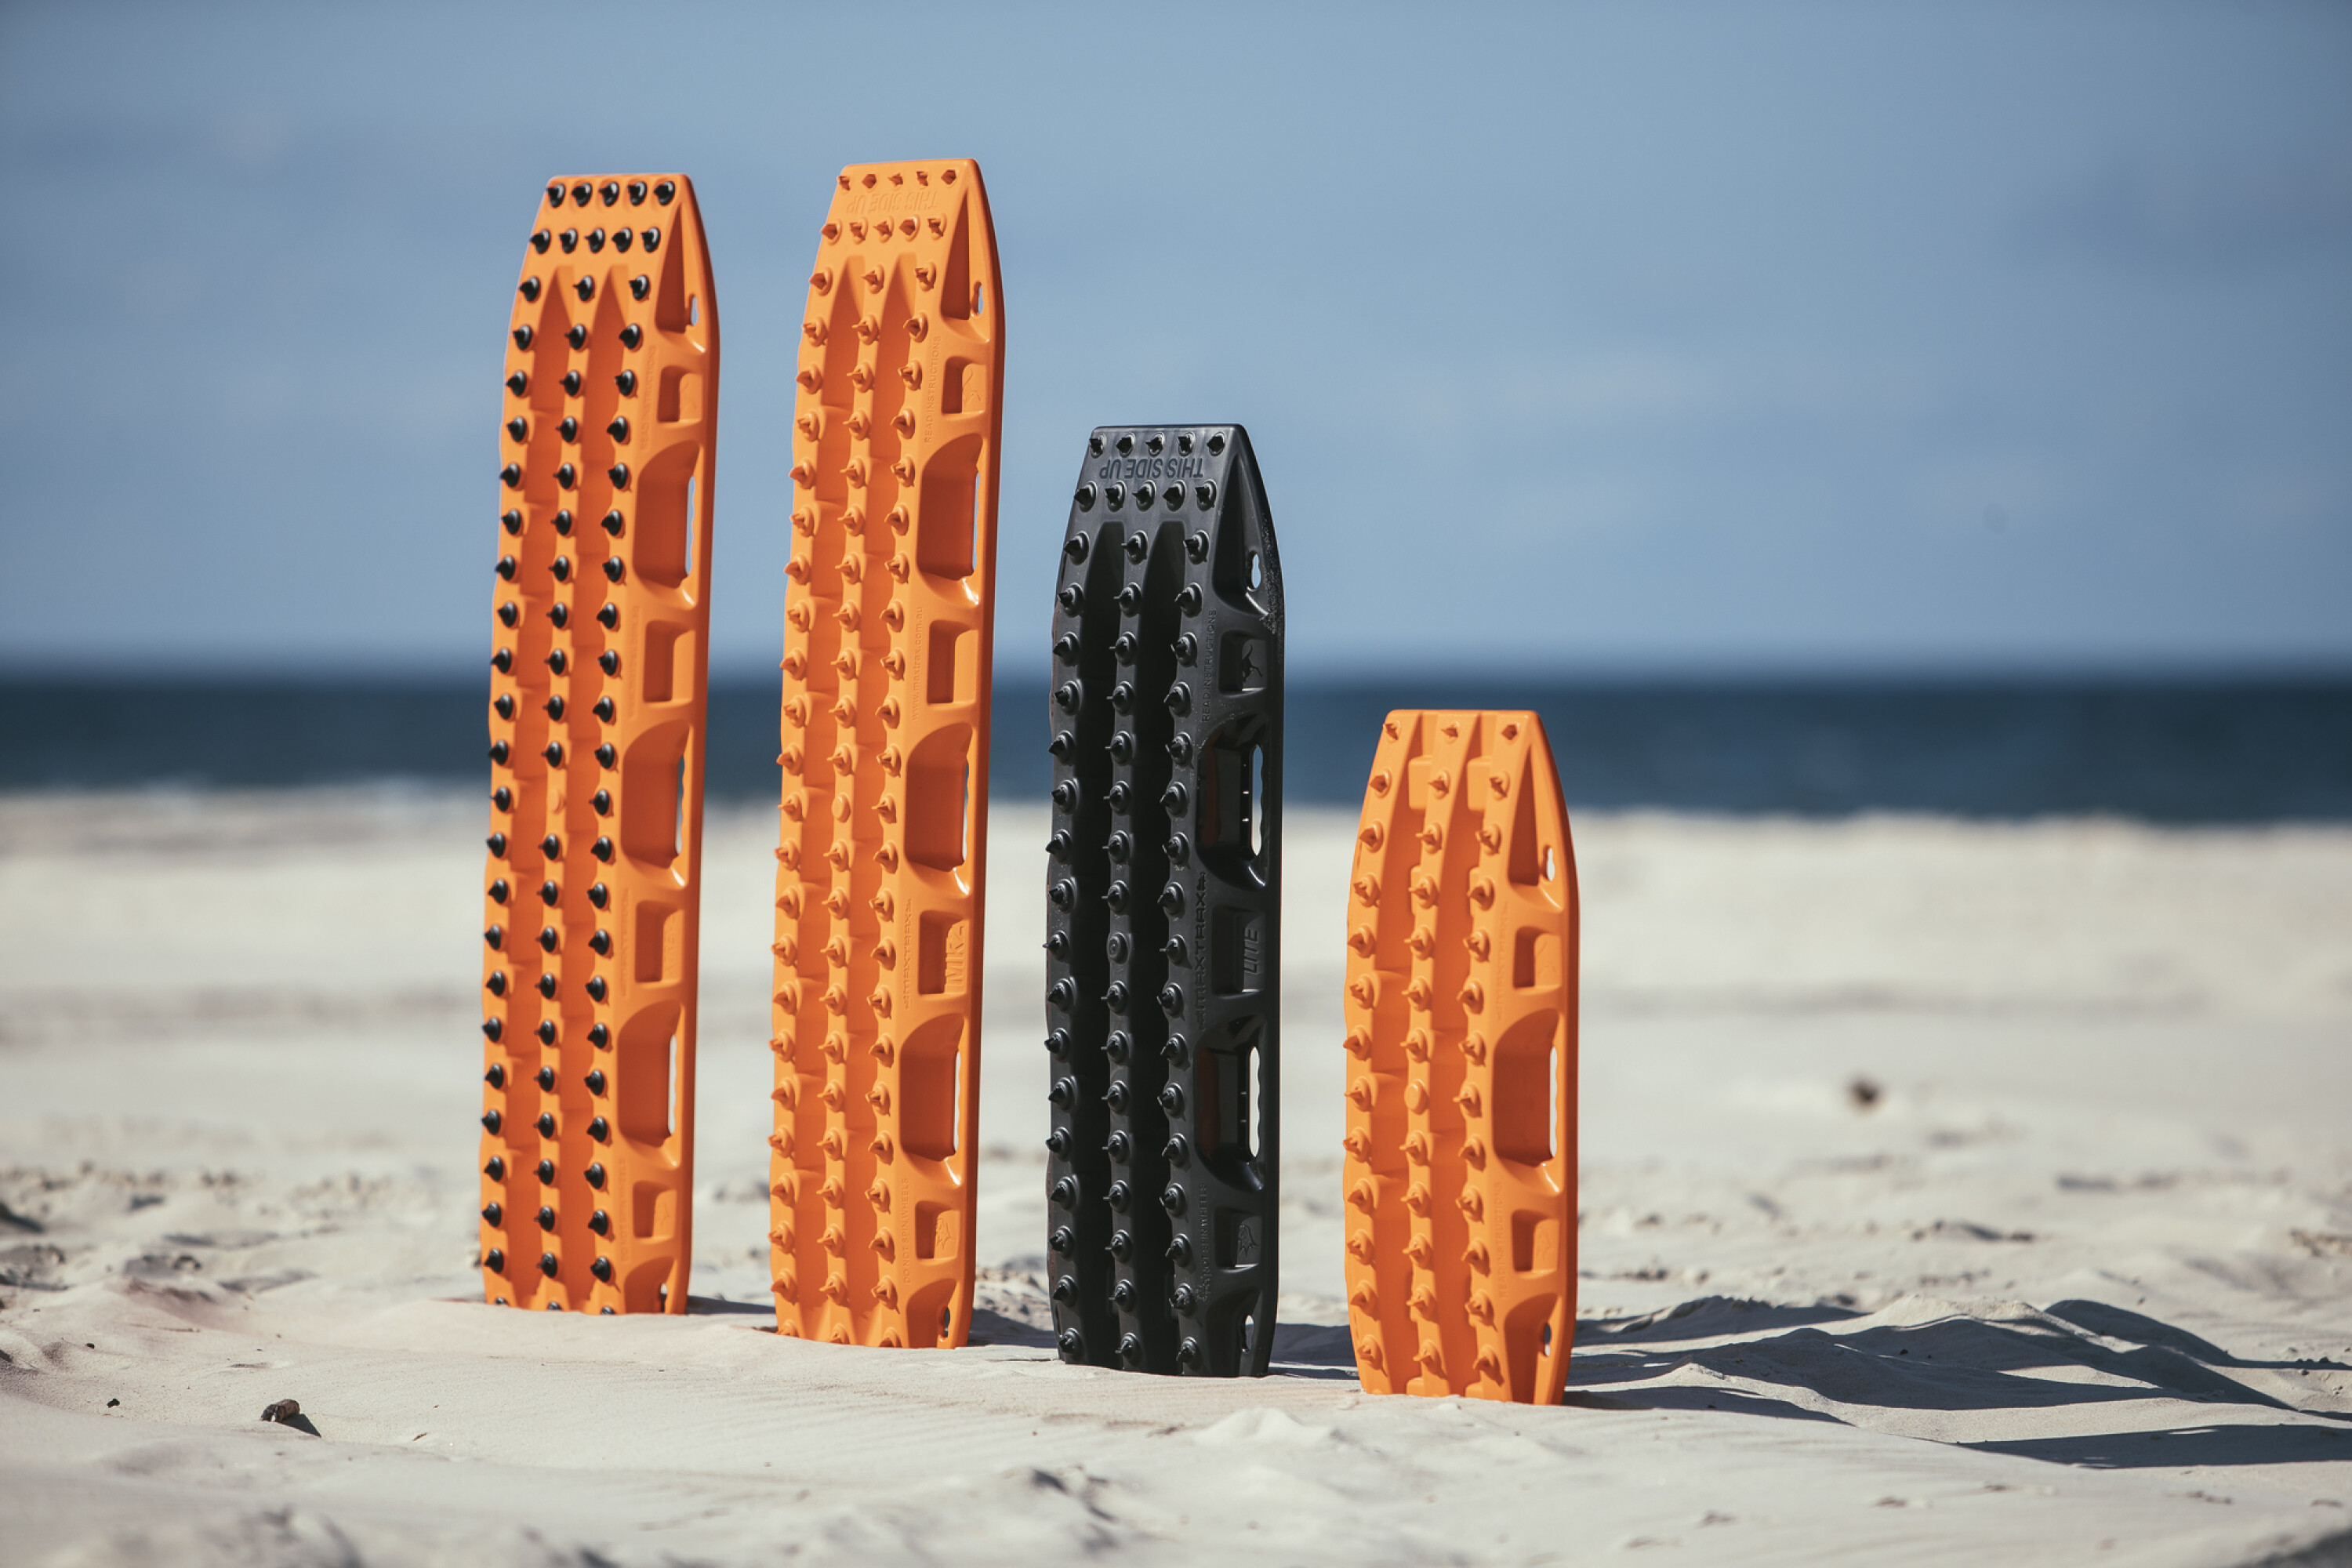
The LITE also shares the same aggressive teeth pattern as the bigger MKII, with the 66 teeth effective at gripping on to rubber in a recovery.
As the LITE is manufactured with a similar design as the original premium boards, they come with the MAXTRAX lifetime warranty.
Unlike the MKII, the LITE is only available in black.
When you add all the power-hungry accessories we take on trips these days, a starter battery simply can’t cope.
The result will be a dead starter battery when you need it most. The solution is a dual or secondary battery system. Without the need to perform starting duties on your HiLux, this second battery can be a designated deep-cycle with the sole purpose of running those accessories.
- What it is: A second battery system. These systems typically include a second deep-cycle battery; an isolator and/or charger between the starter battery and second battery; and associated wiring and hardware such as battery mounting trays. For this guide we have focused on battery trays as they are vehicle-specific, and chargers/isolators as they are the beating heart of any dual battery system.
- Why you need it: Fridges, lights, 12-volt ovens, radios, laptops, cameras and other accessories can significantly drain a battery, leaving insufficient power to start the car. A starter battery isn’t designed for the deep discharge required to power appliances long-term – it’s designed to deliver a surge of power for the short period of time required to start the car. To avoid destroying your starter battery, a second battery will be required to run these accessories.
- Buying tips: Dual-battery systems are not particularly vehicle-specific and similar setups will work across multiple vehicles. The HiLux is no exception, so any auto electrician should be able to create a dual-battery system. We have listed below some of the HiLux-specific kits, especially trays, as that’s the part which tends to be unique to a given vehicle.
Lithium batteries are the pinnacle of 12V systems as they are lighter and have more capacity than comparable AGM or lead acid batteries, but lithium does require specialised charging systems. They are also much more expensive.
Here are four products we recommend. They’re intended as a starting point, to give you an idea of what’s available.
JUMP AHEAD
| Battery Size | Battery Location | Charger | Lithium-compatibleu00a0 | |
|---|---|---|---|---|
| Piranha Offroad | Up to 265mm, 21kg | Under bonnet | 30Amp DC-DC | Yes |
| Redarc | Up to 200Ah | Tray or cabin | 40Amp DC-DC | Yes |
| Projecta | Up to 300mm x W174mm x H220mm, 17kg | Under bonnet | 25Amp DC-DC | No |
| Enerdrive Esystem | Up to 200Ah | Tray or cabin | 40Amp DC-DC | Yes |
Piranha Offroad
Pairing an Australian-made battery tray designed for under-bonnet mounting with the 30Amp DC-DC charger from Piranha Offroad provides a reliable and effective solution to your power requirements.
Featuring selectable output voltages for lithium, sealed lead acid, vented lead acid, AGM or lead crystal batteries and solar input, the charger will take just about any input and convert it to usable power to charge your auxiliary battery.
Specifications
- Battery size: Up to 265mm, 21kg (limited by the tray size)
- Battery location: Under bonnet
- Charger: 30Amp DC-DC
- Lithium compatible: Yes
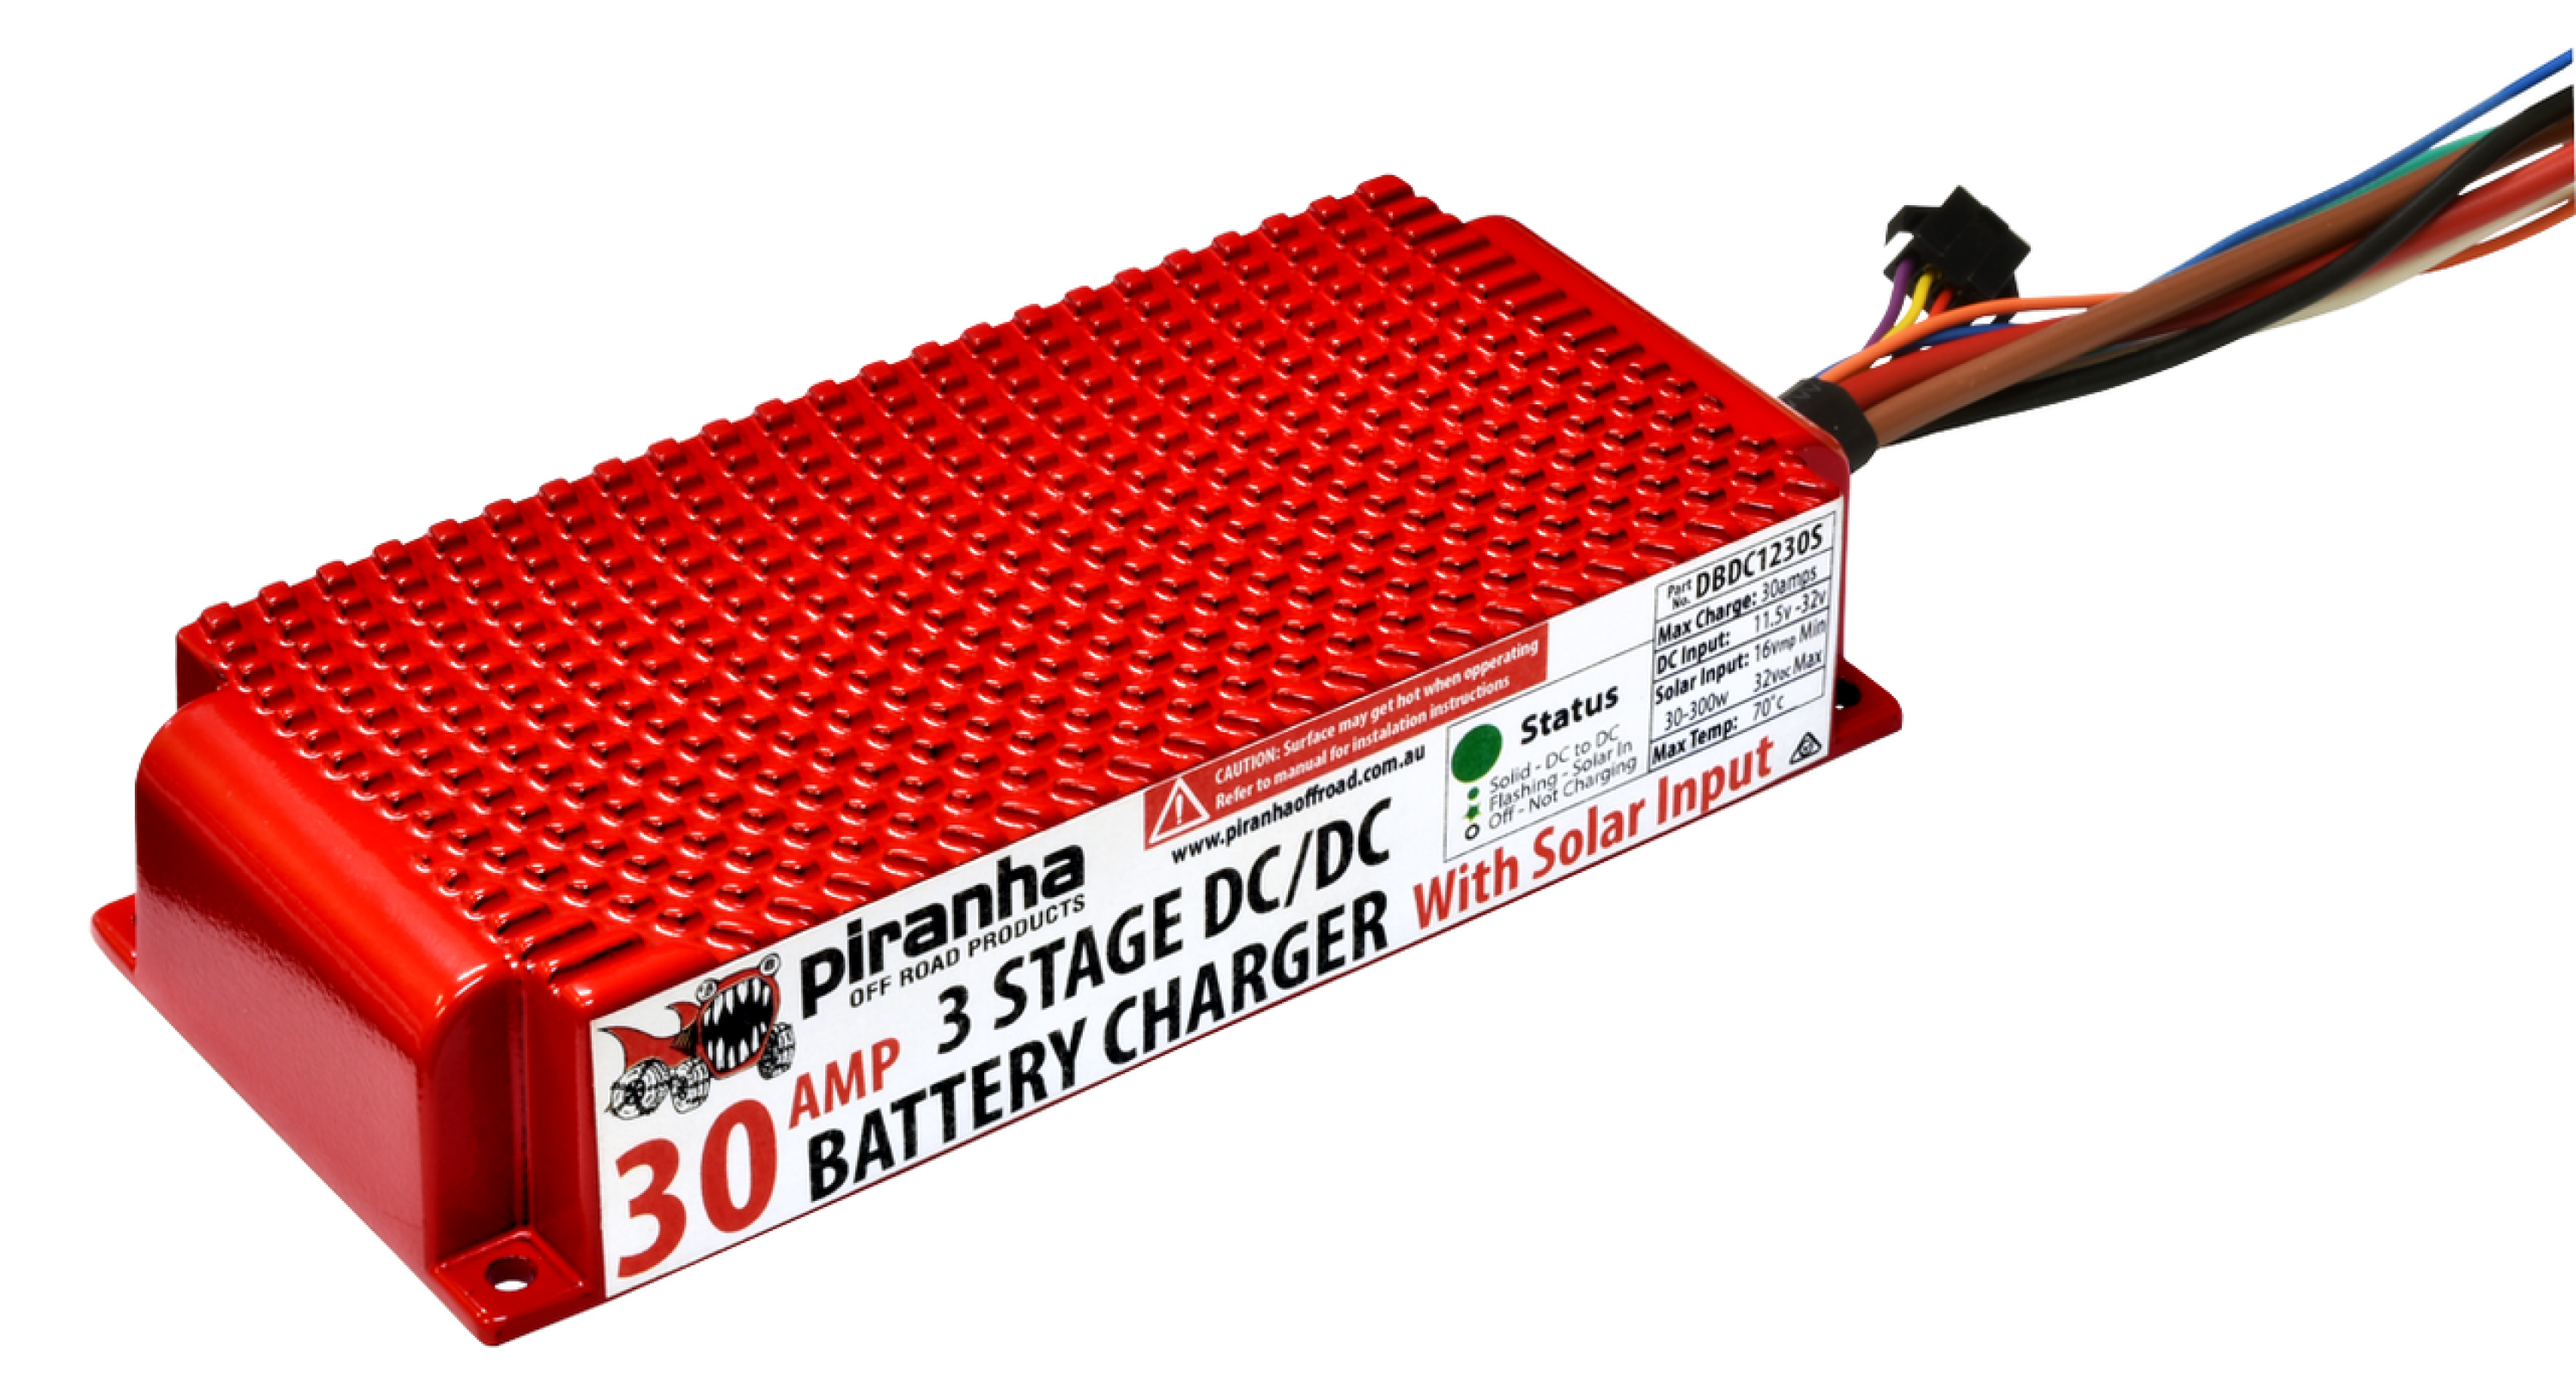
Pros
- Solar input available
- Australian-made tray
- Charger suitable for all battery types
Cons
- Under-bonnet mounting limits lithium options
- 21kg rating is insufficient for a 100AH AGM battery
Redarc
With 40 amps of output, this DC-DC charger from Redarc is suitable for batteries up to 200AH, including lithium. The kit comes with required wiring, fuses and a dual-battery voltage gauge. Pick up a battery and find somewhere in your cabin or tray to mount it and you’re ready to go.
Specifications
- Battery size: Up to 200Ah
- Battery location: Tray or cabin
- Charger: 40Amp DC-DC
- Lithium compatible: Yes
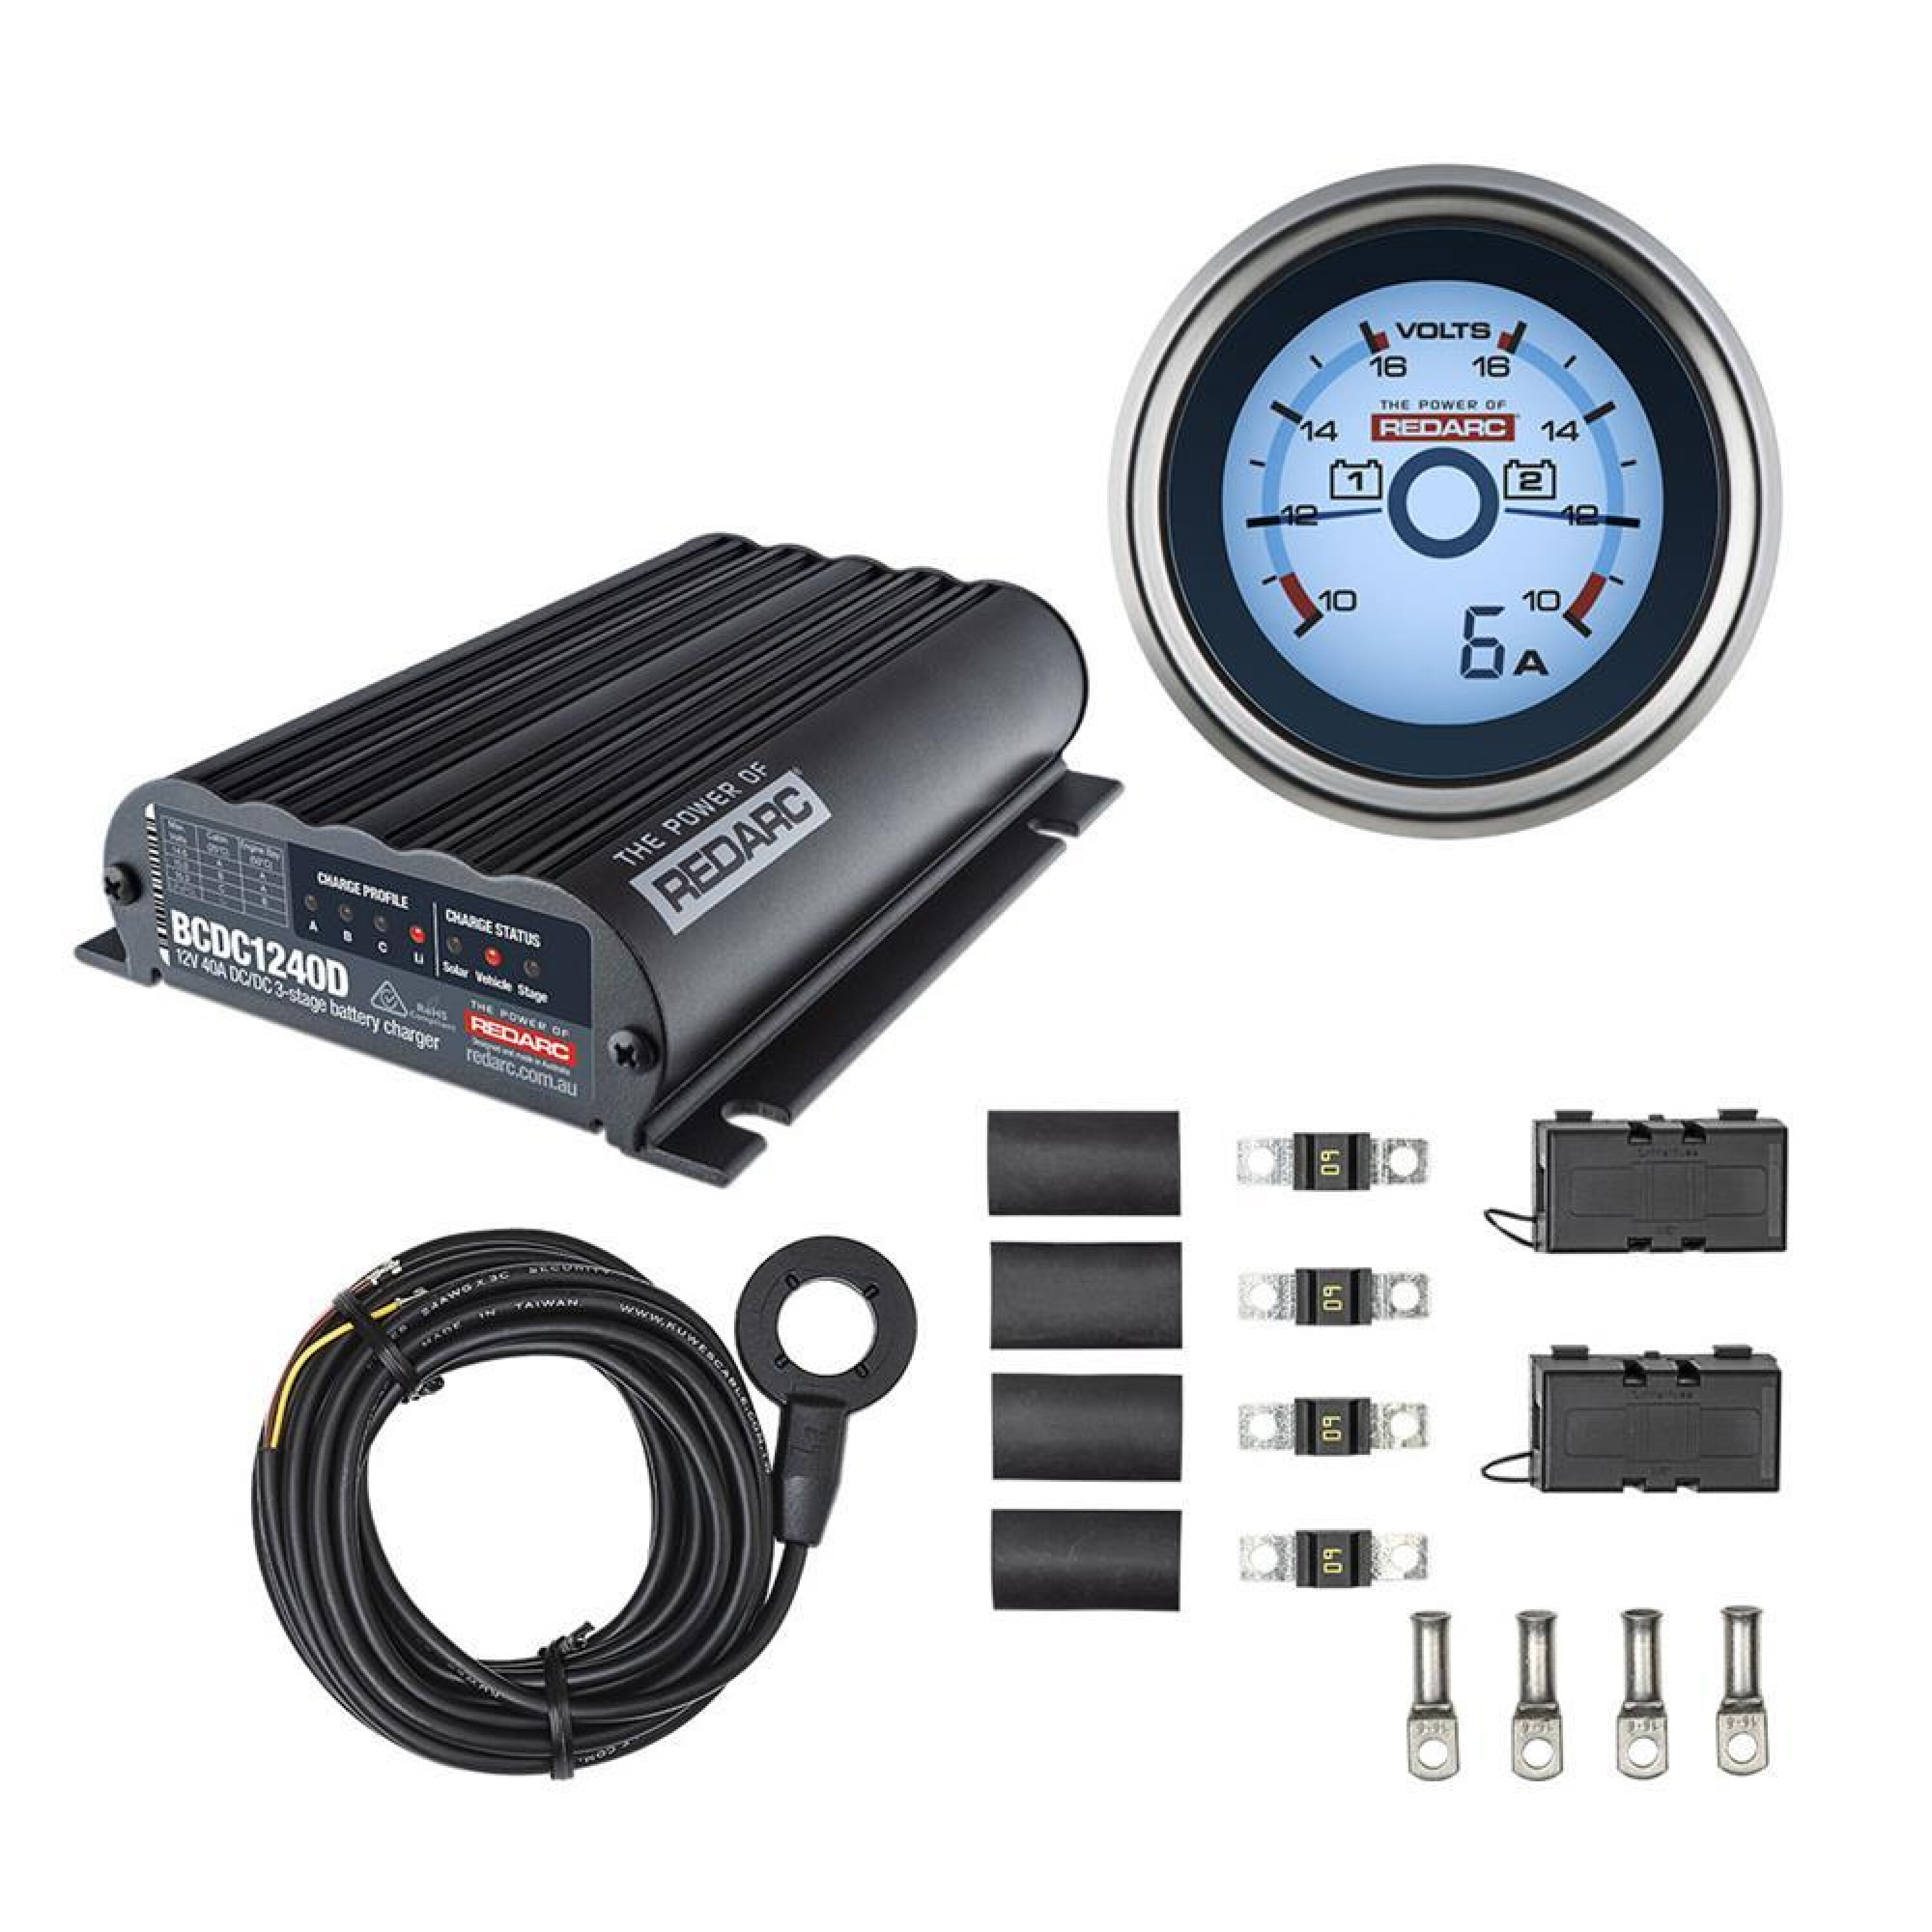
Pros
- The kit gives a nice headstart for those installing themselves
- Redarc quality
- Charger suitable for all battery types and can charge a whopping 200Ah lithium
Cons
- Redarc quality does cost
- The dual voltage gauge is great for an AGM but no good for lithium
Projecta
This combo from Projecta includes a heavy duty-battery tray designed for under-bonnet mounting, made with 2mm steel. It’s combined with a 45Amp DC-DC charger that is equally at home under the bonnet. The charger is rated up to 80°C, meaning this combo is a simple under-bonnet solution for those not interested in jumping on the lithium bandwagon.
Specifications
- Battery size: Up to L300mm x W174mm x H220mm, 17kg
- Battery location: Under bonnet
- Charger: 25Amp DC-DC
- Lithium compatible: No
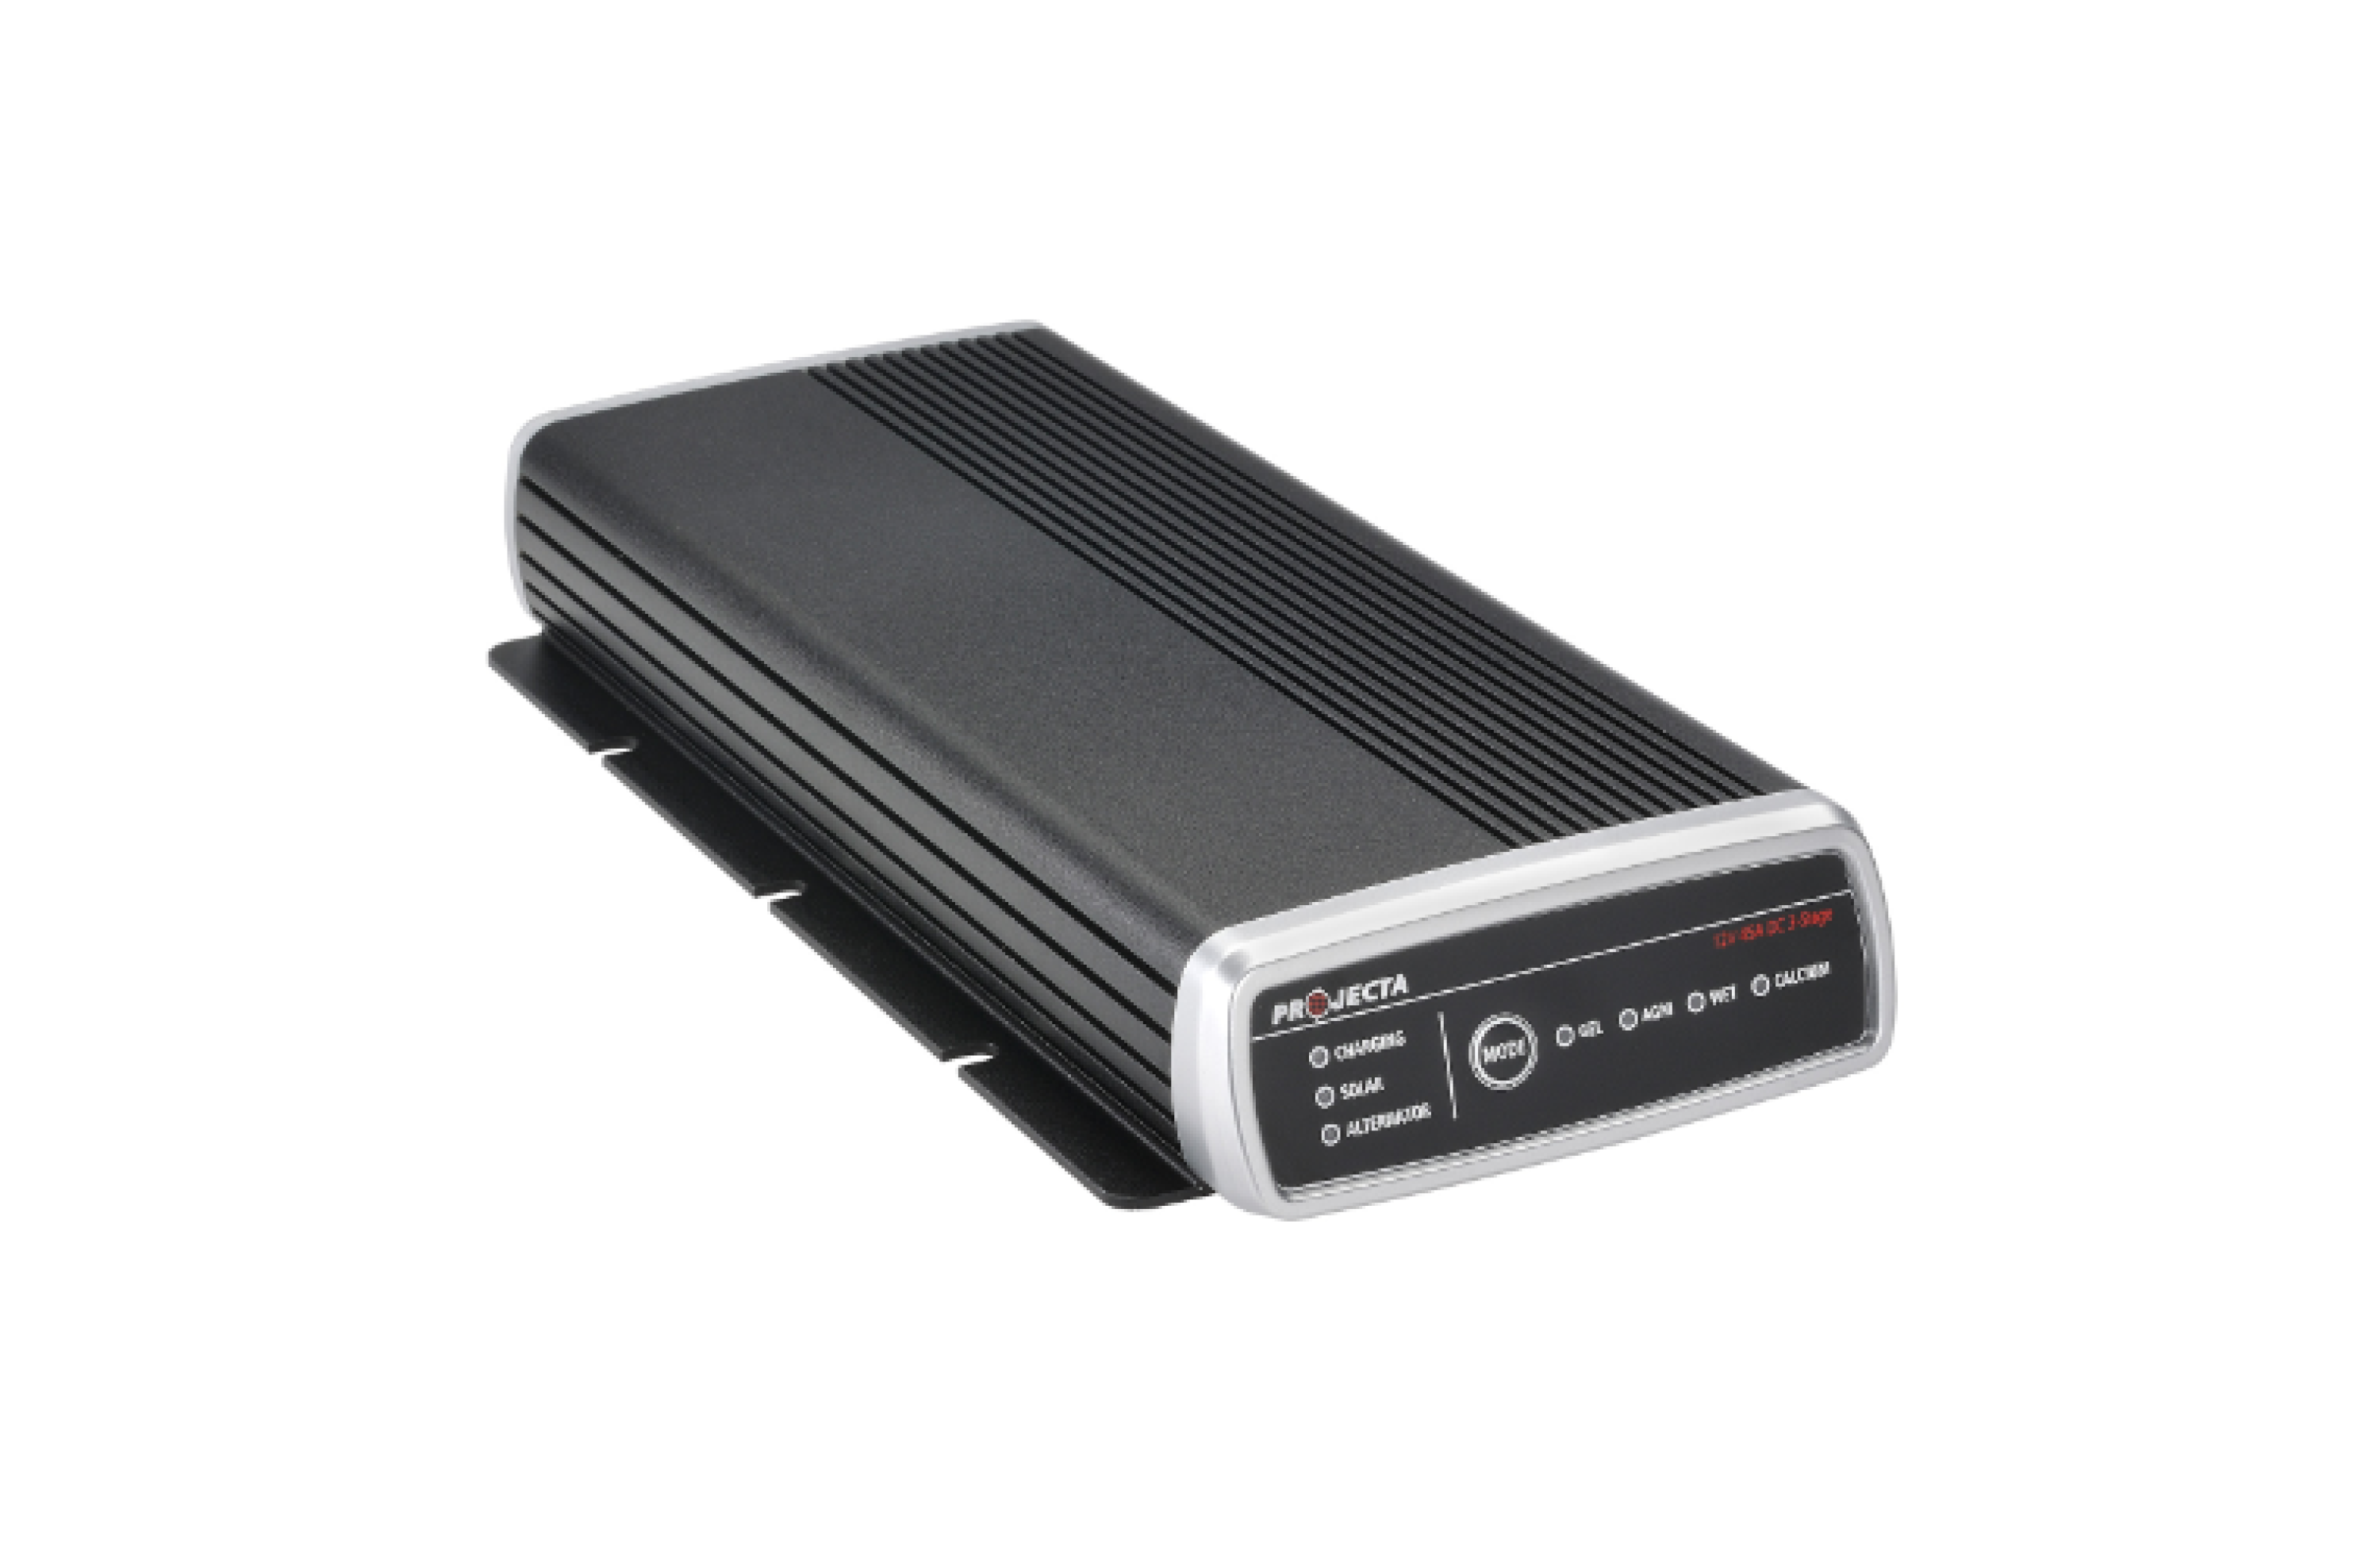
Pros
- Simple under-bonnet solution
- Solar input
- Auto detect battery types
Cons
- No potential for lithium upgrade in the future
- 17kg rating is a little light
Enerdrive Esystem
For those who want an off-the-shelf full system solution to bolt into that fancy service body or canopy, the complete Enderdrive Esystem is for you. The system includes a 40Amp DC-DC charger, fuse block and 2000W inverter for those 240v appliances.
Specifications
- Battery size: Up to 200Ah
- Battery location: Tray or cabin
- Charger: 40Amp DC-DC
- Lithium compatible: Yes
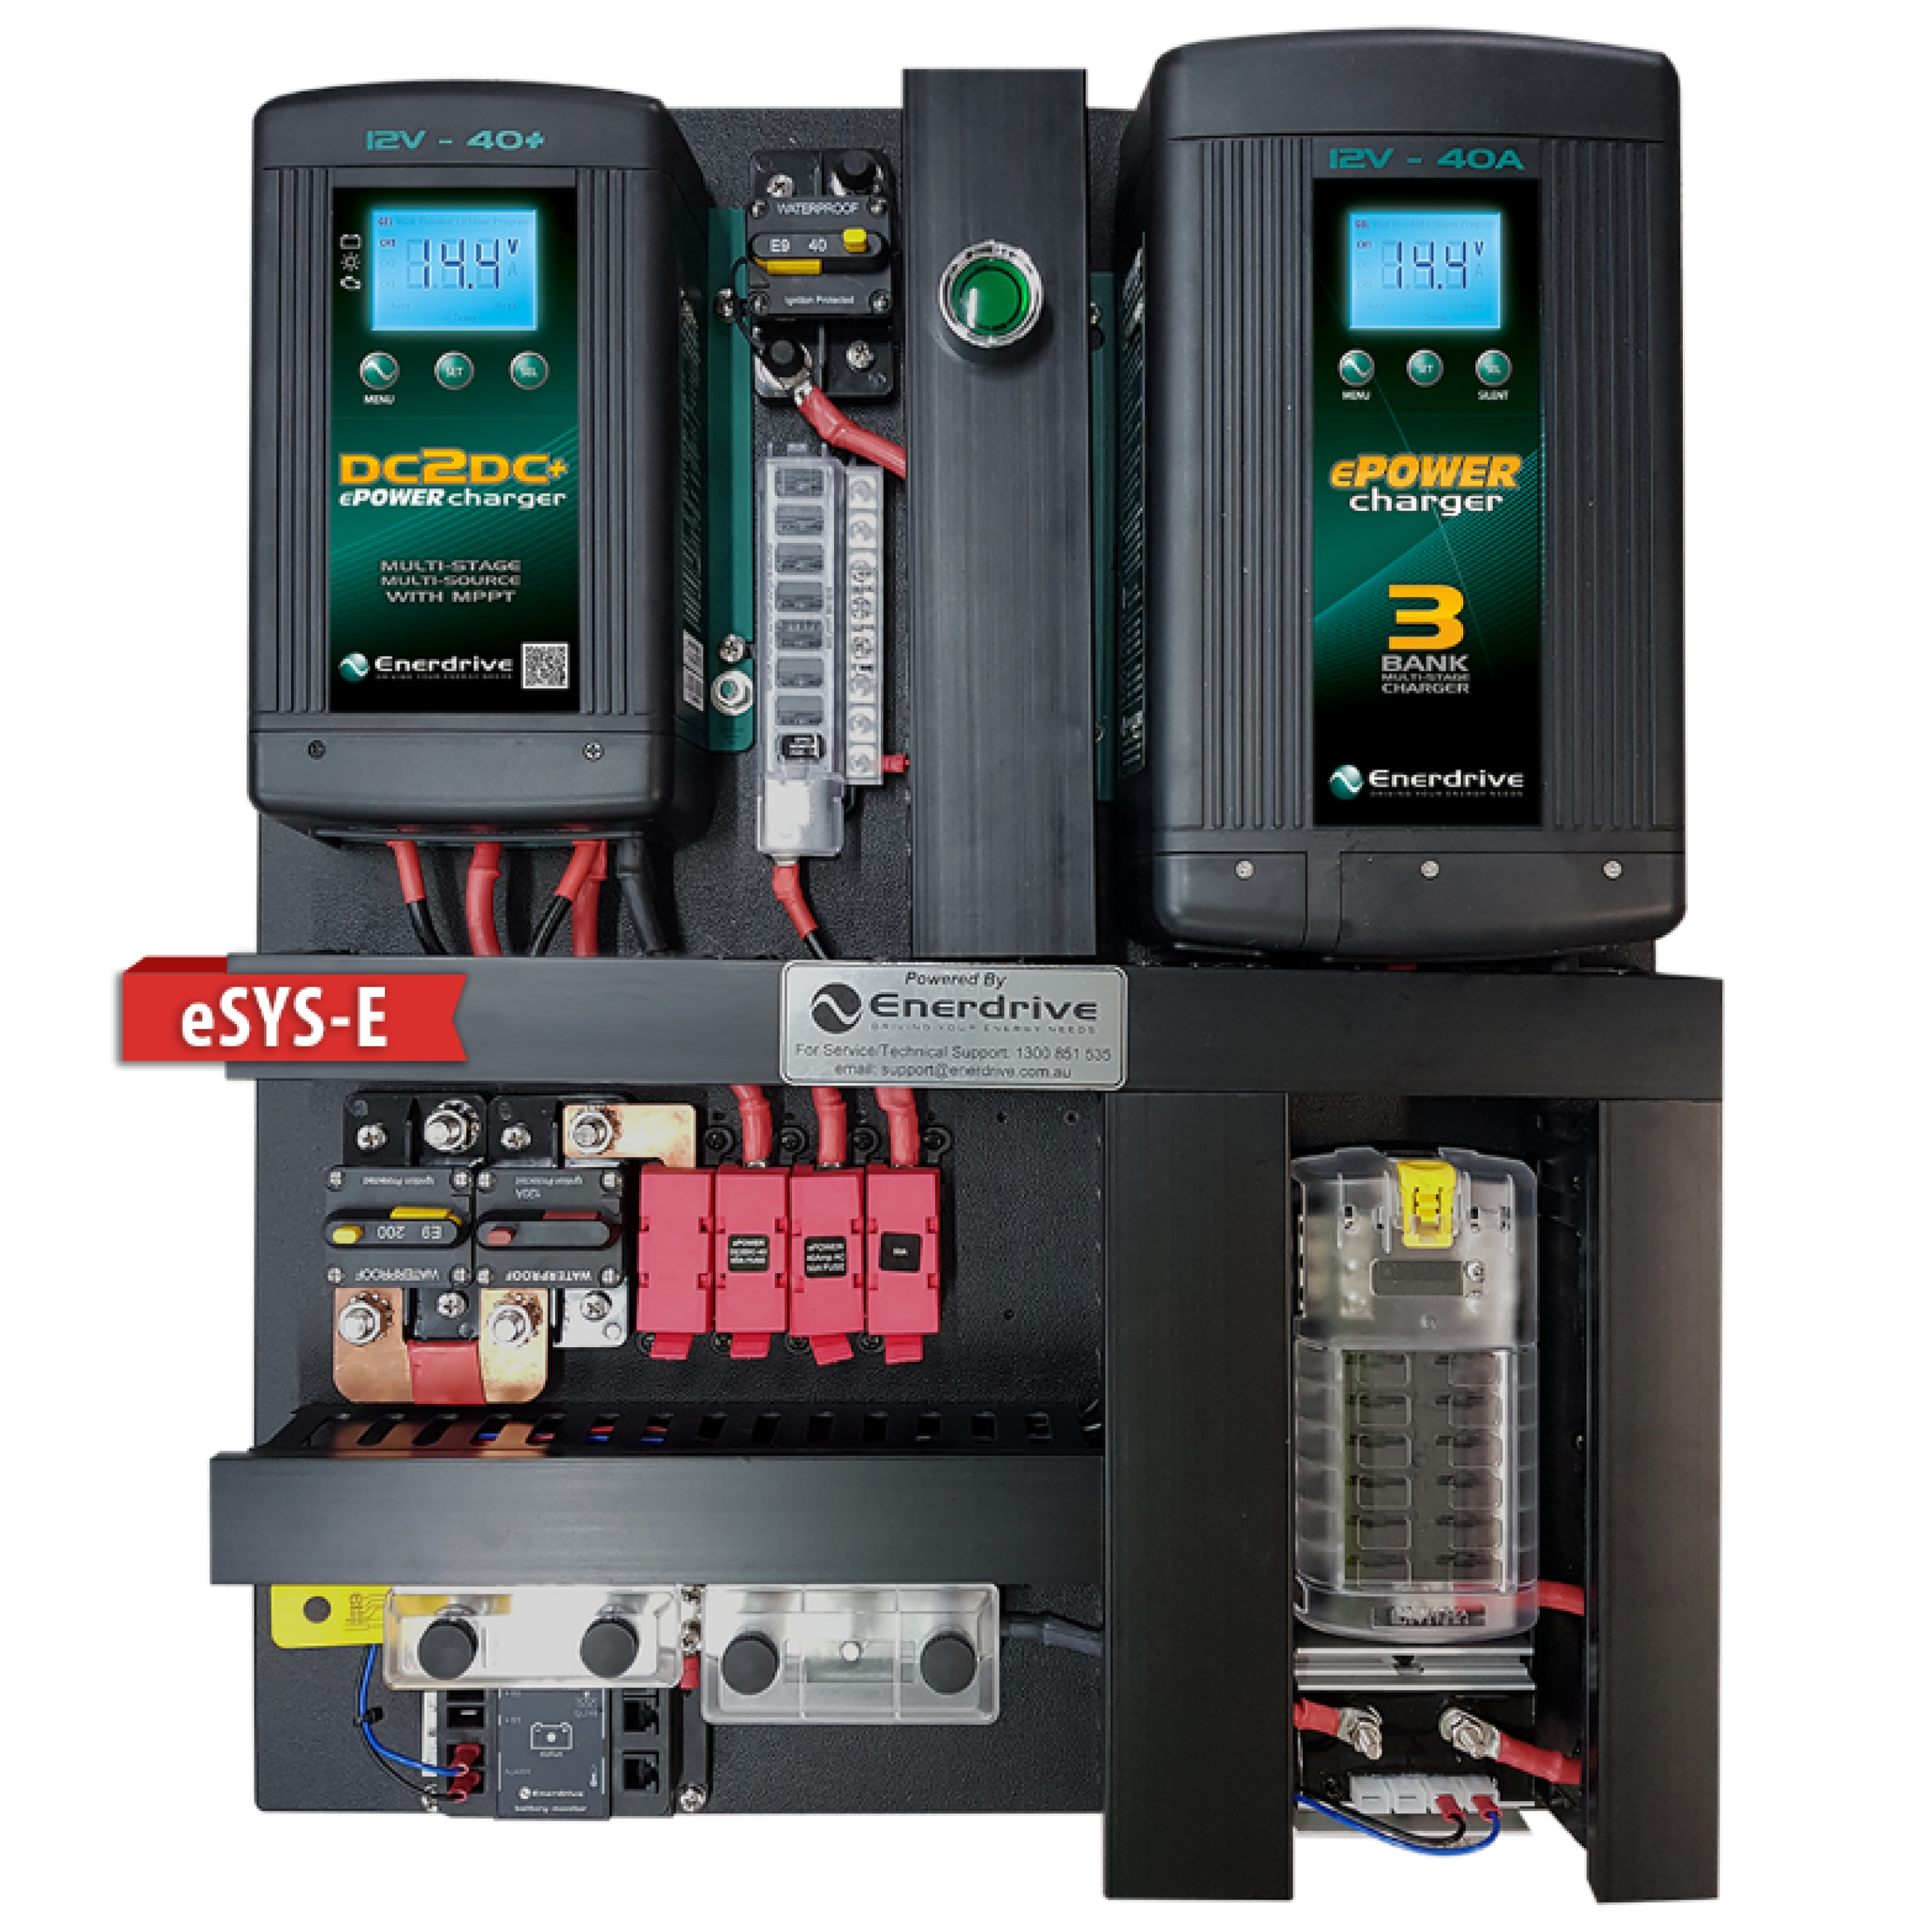
Pros
- Neat and tidy system easy to be installed by the home mechanic
- Made-to-order configurations
- Convenient
Cons
- Pricey overall but actually good value considering the inclusions
How we review products
4X4 Australia has been reviewing four-wheel drive vehicles and aftermarket products for more than 40 years.
When looking for the best accessories for your make and model of 4WD, there are some things essential to making sure you have the best off-roading experience.
When we compare products, here are some of the things we consider:
- Warranty
- Build quality
- Value for money
- Time and ease to set-up/install
- Weight
- Fit and finish
- How well it gets the job done
- What materials they’re made from
- Corrosion/UV resistance
- Coatings
- Compatibility with other accessories
- Compliance with ADRs and vehicle safety systems
- Country of manufacture
- Load ratings, to determine what’s the best product across each price point.
Disclosure: When you buy through our links, we may earn a commission. We also include products that we do not earn a commission from.
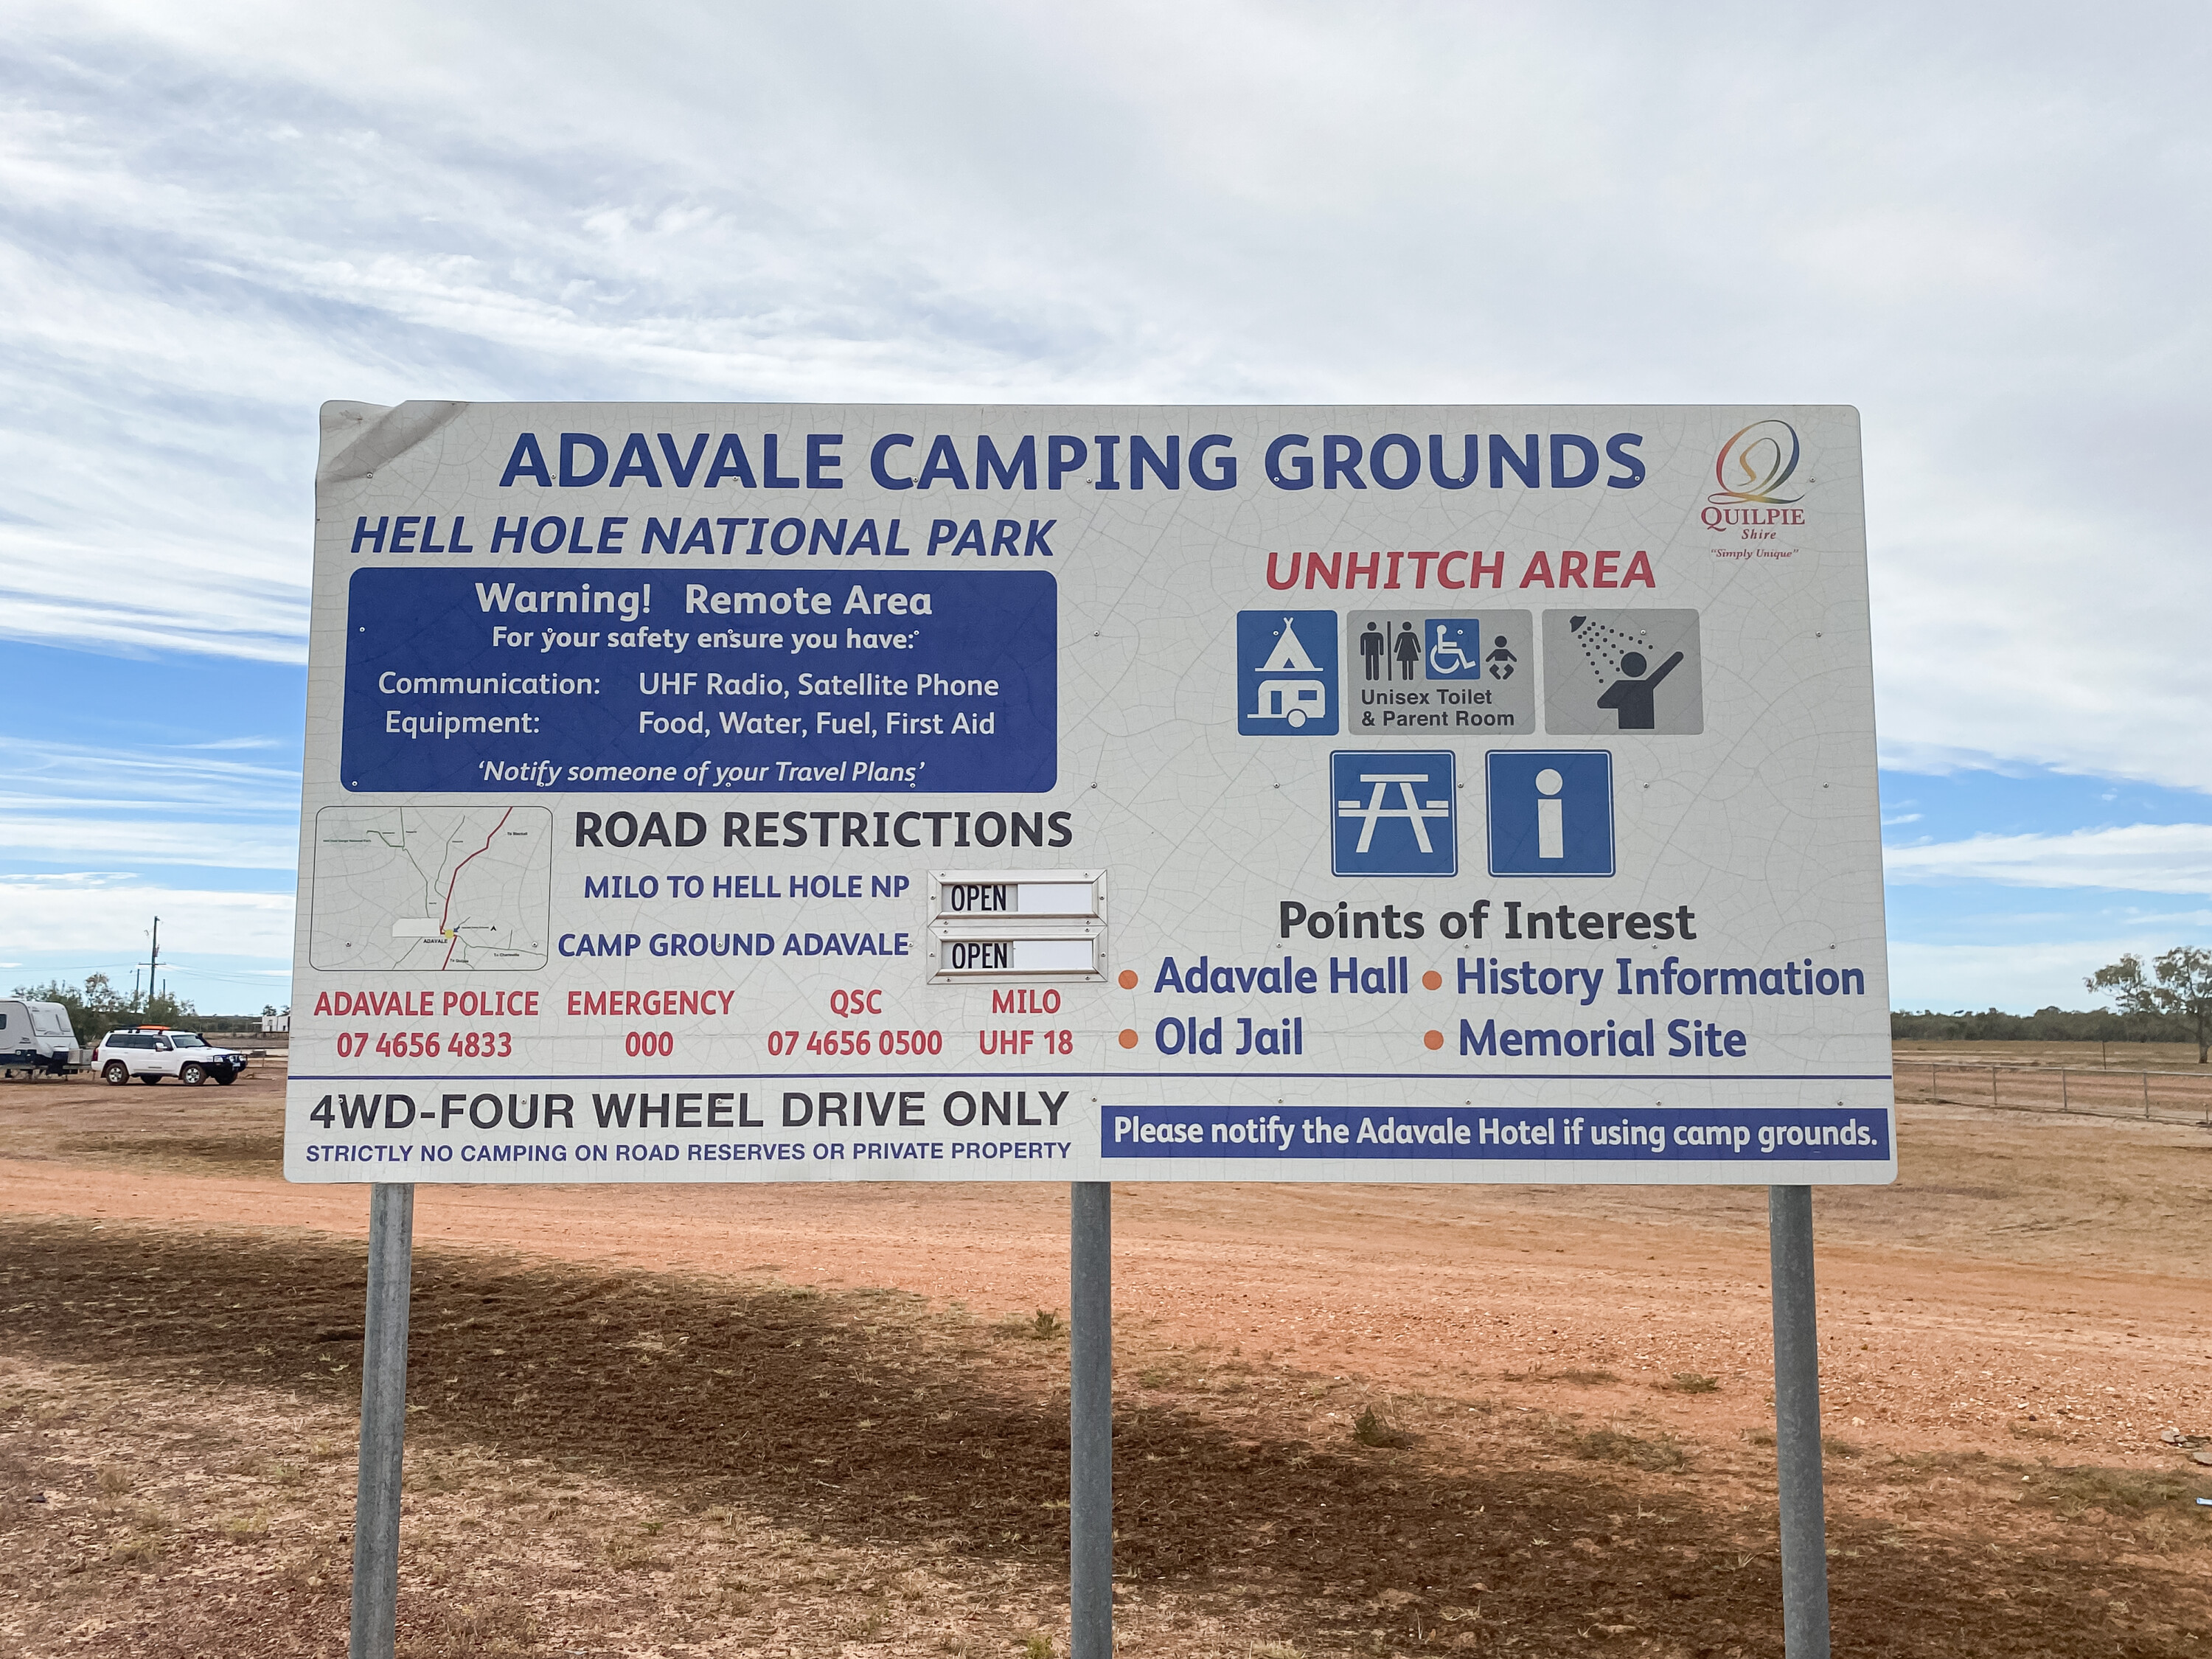
Adavale is located in a remote section of outback Queensland around 96km north of Quilpie (with only 23km of that unsealed) and 187km west of Charleville, along a gravel road that is well-maintained.
Be warned – while there are ice cold beers to be found in Adavale, there is no fuel available here, with Quilpie the nearest if you need to top up your rig.
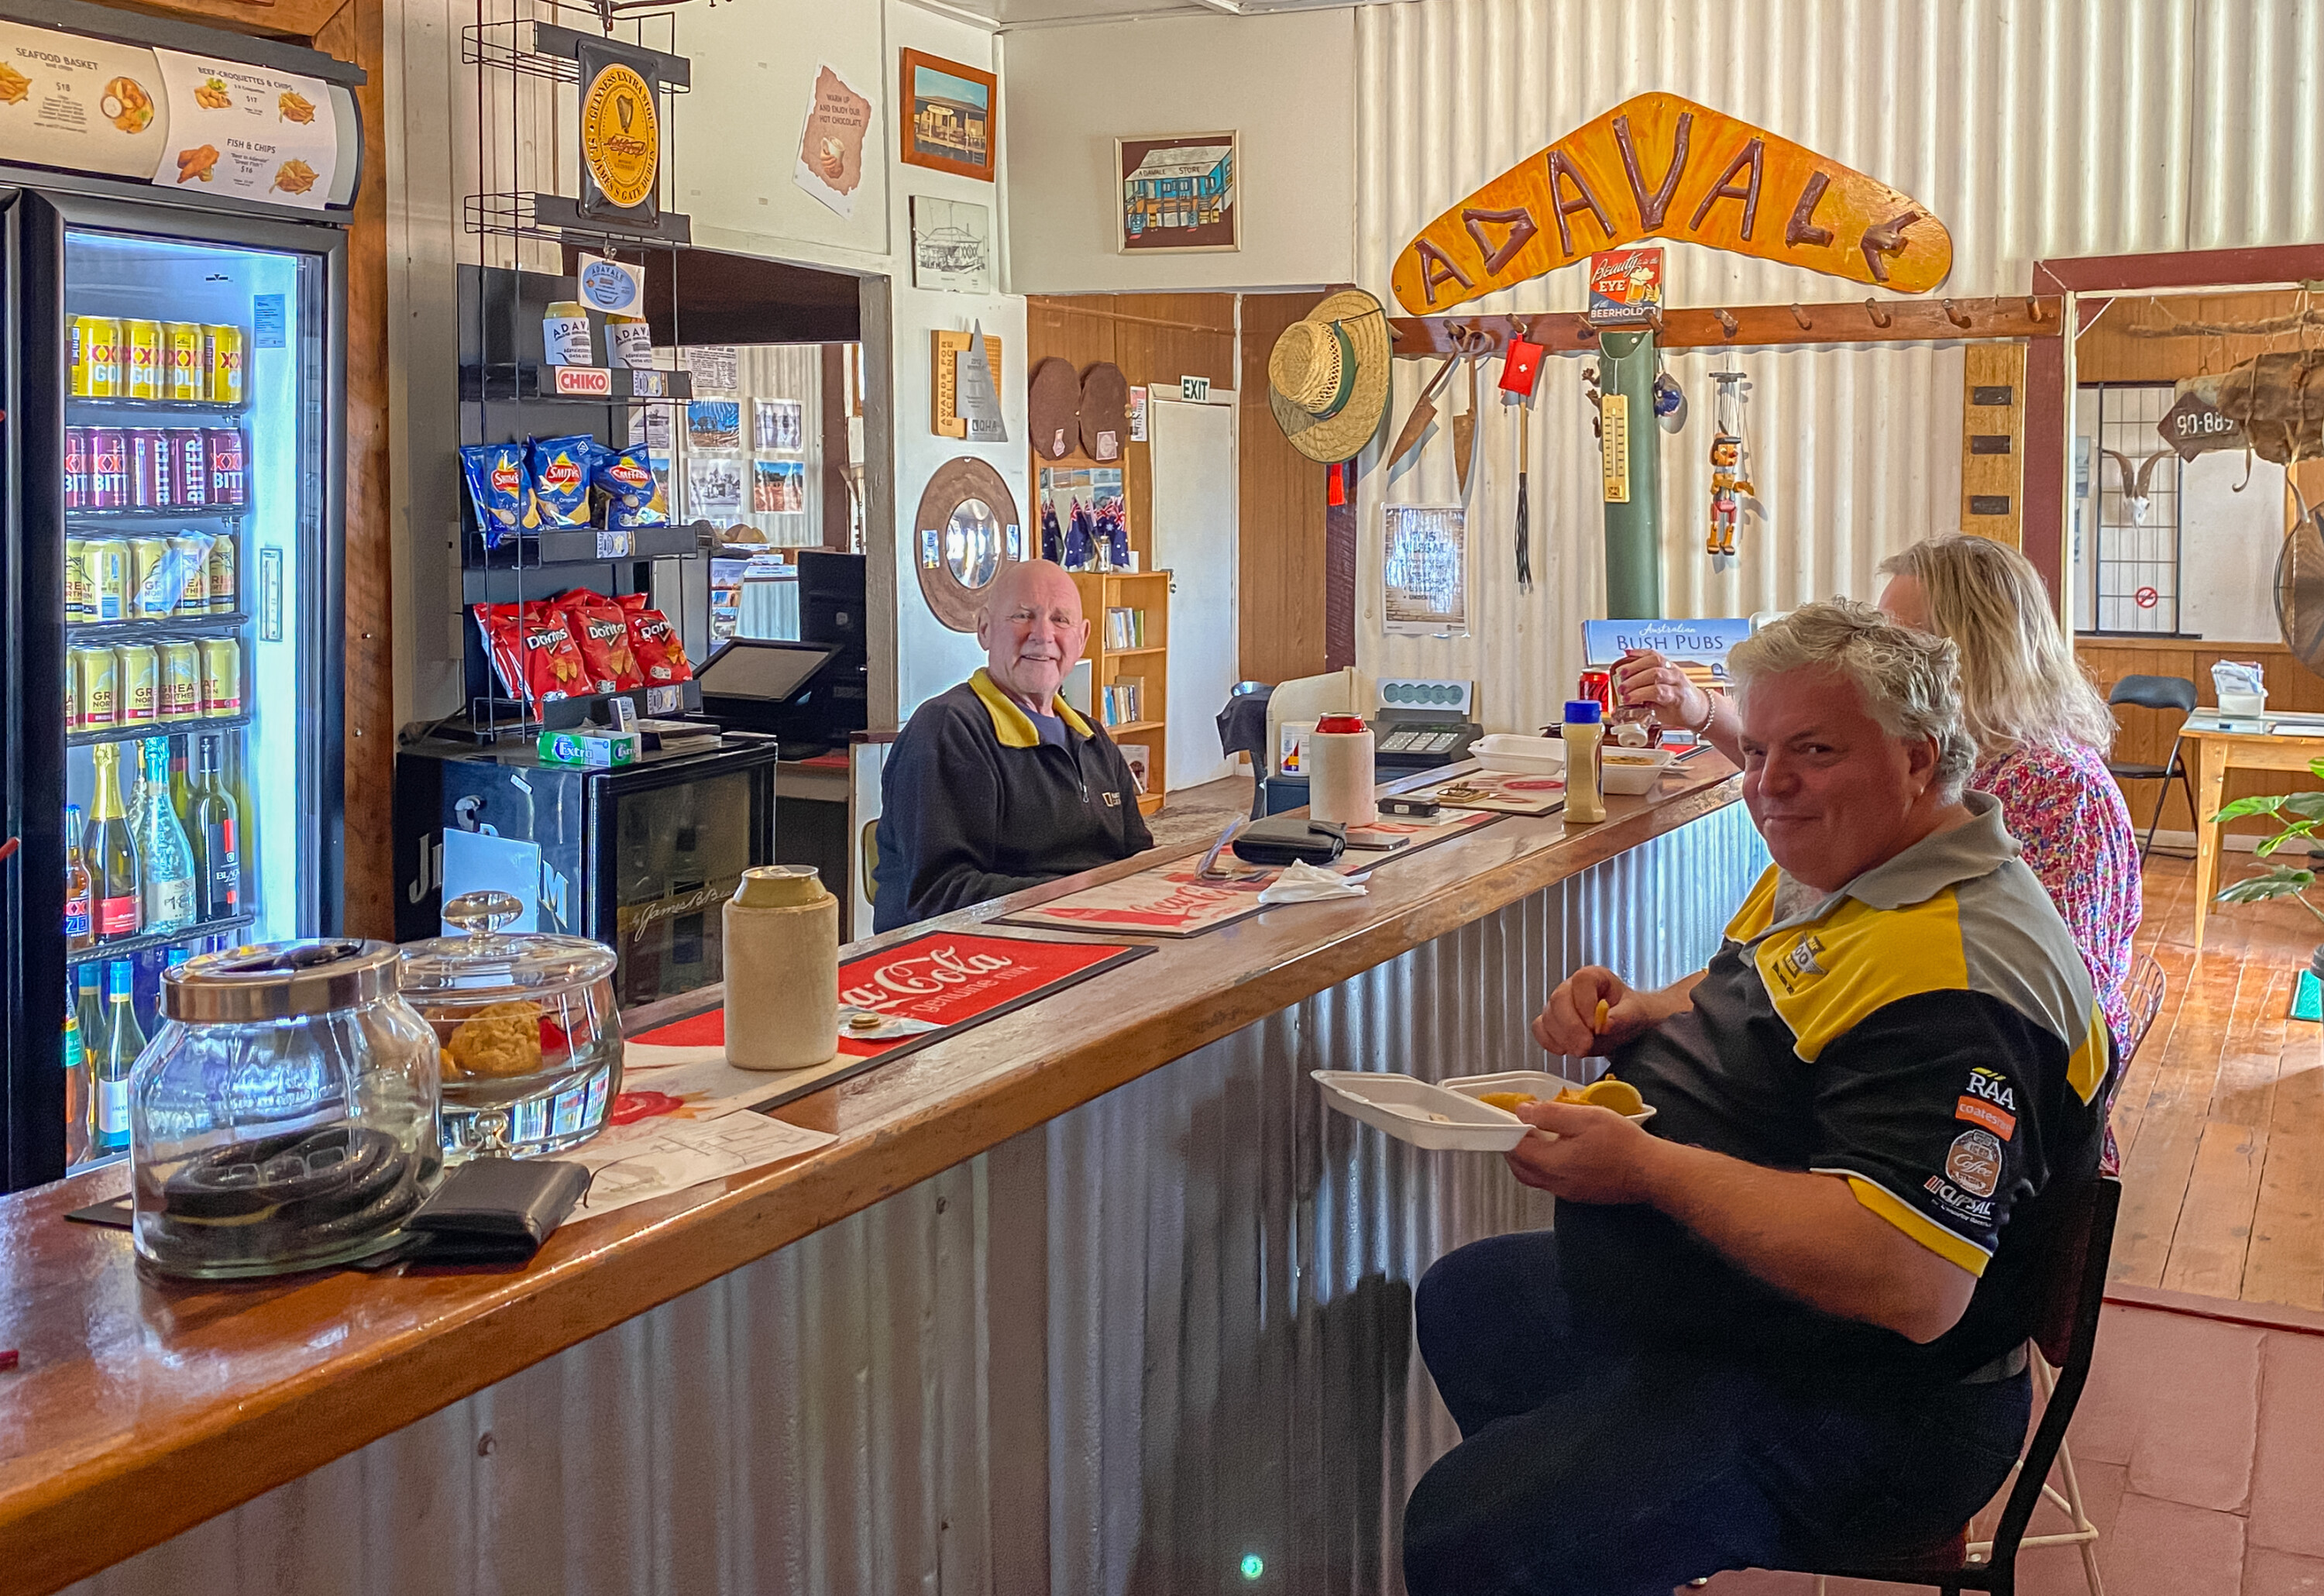
The current Adavale Hotel was developed by chance, only morphing into a pub when the Green Gates Hotel burnt down while the townsfolk were attending a funeral. That was back in 1974 and it made sense that the General Store would take over the off-premise licence immediately after that event, and eventually the on-premise licence sometime later.


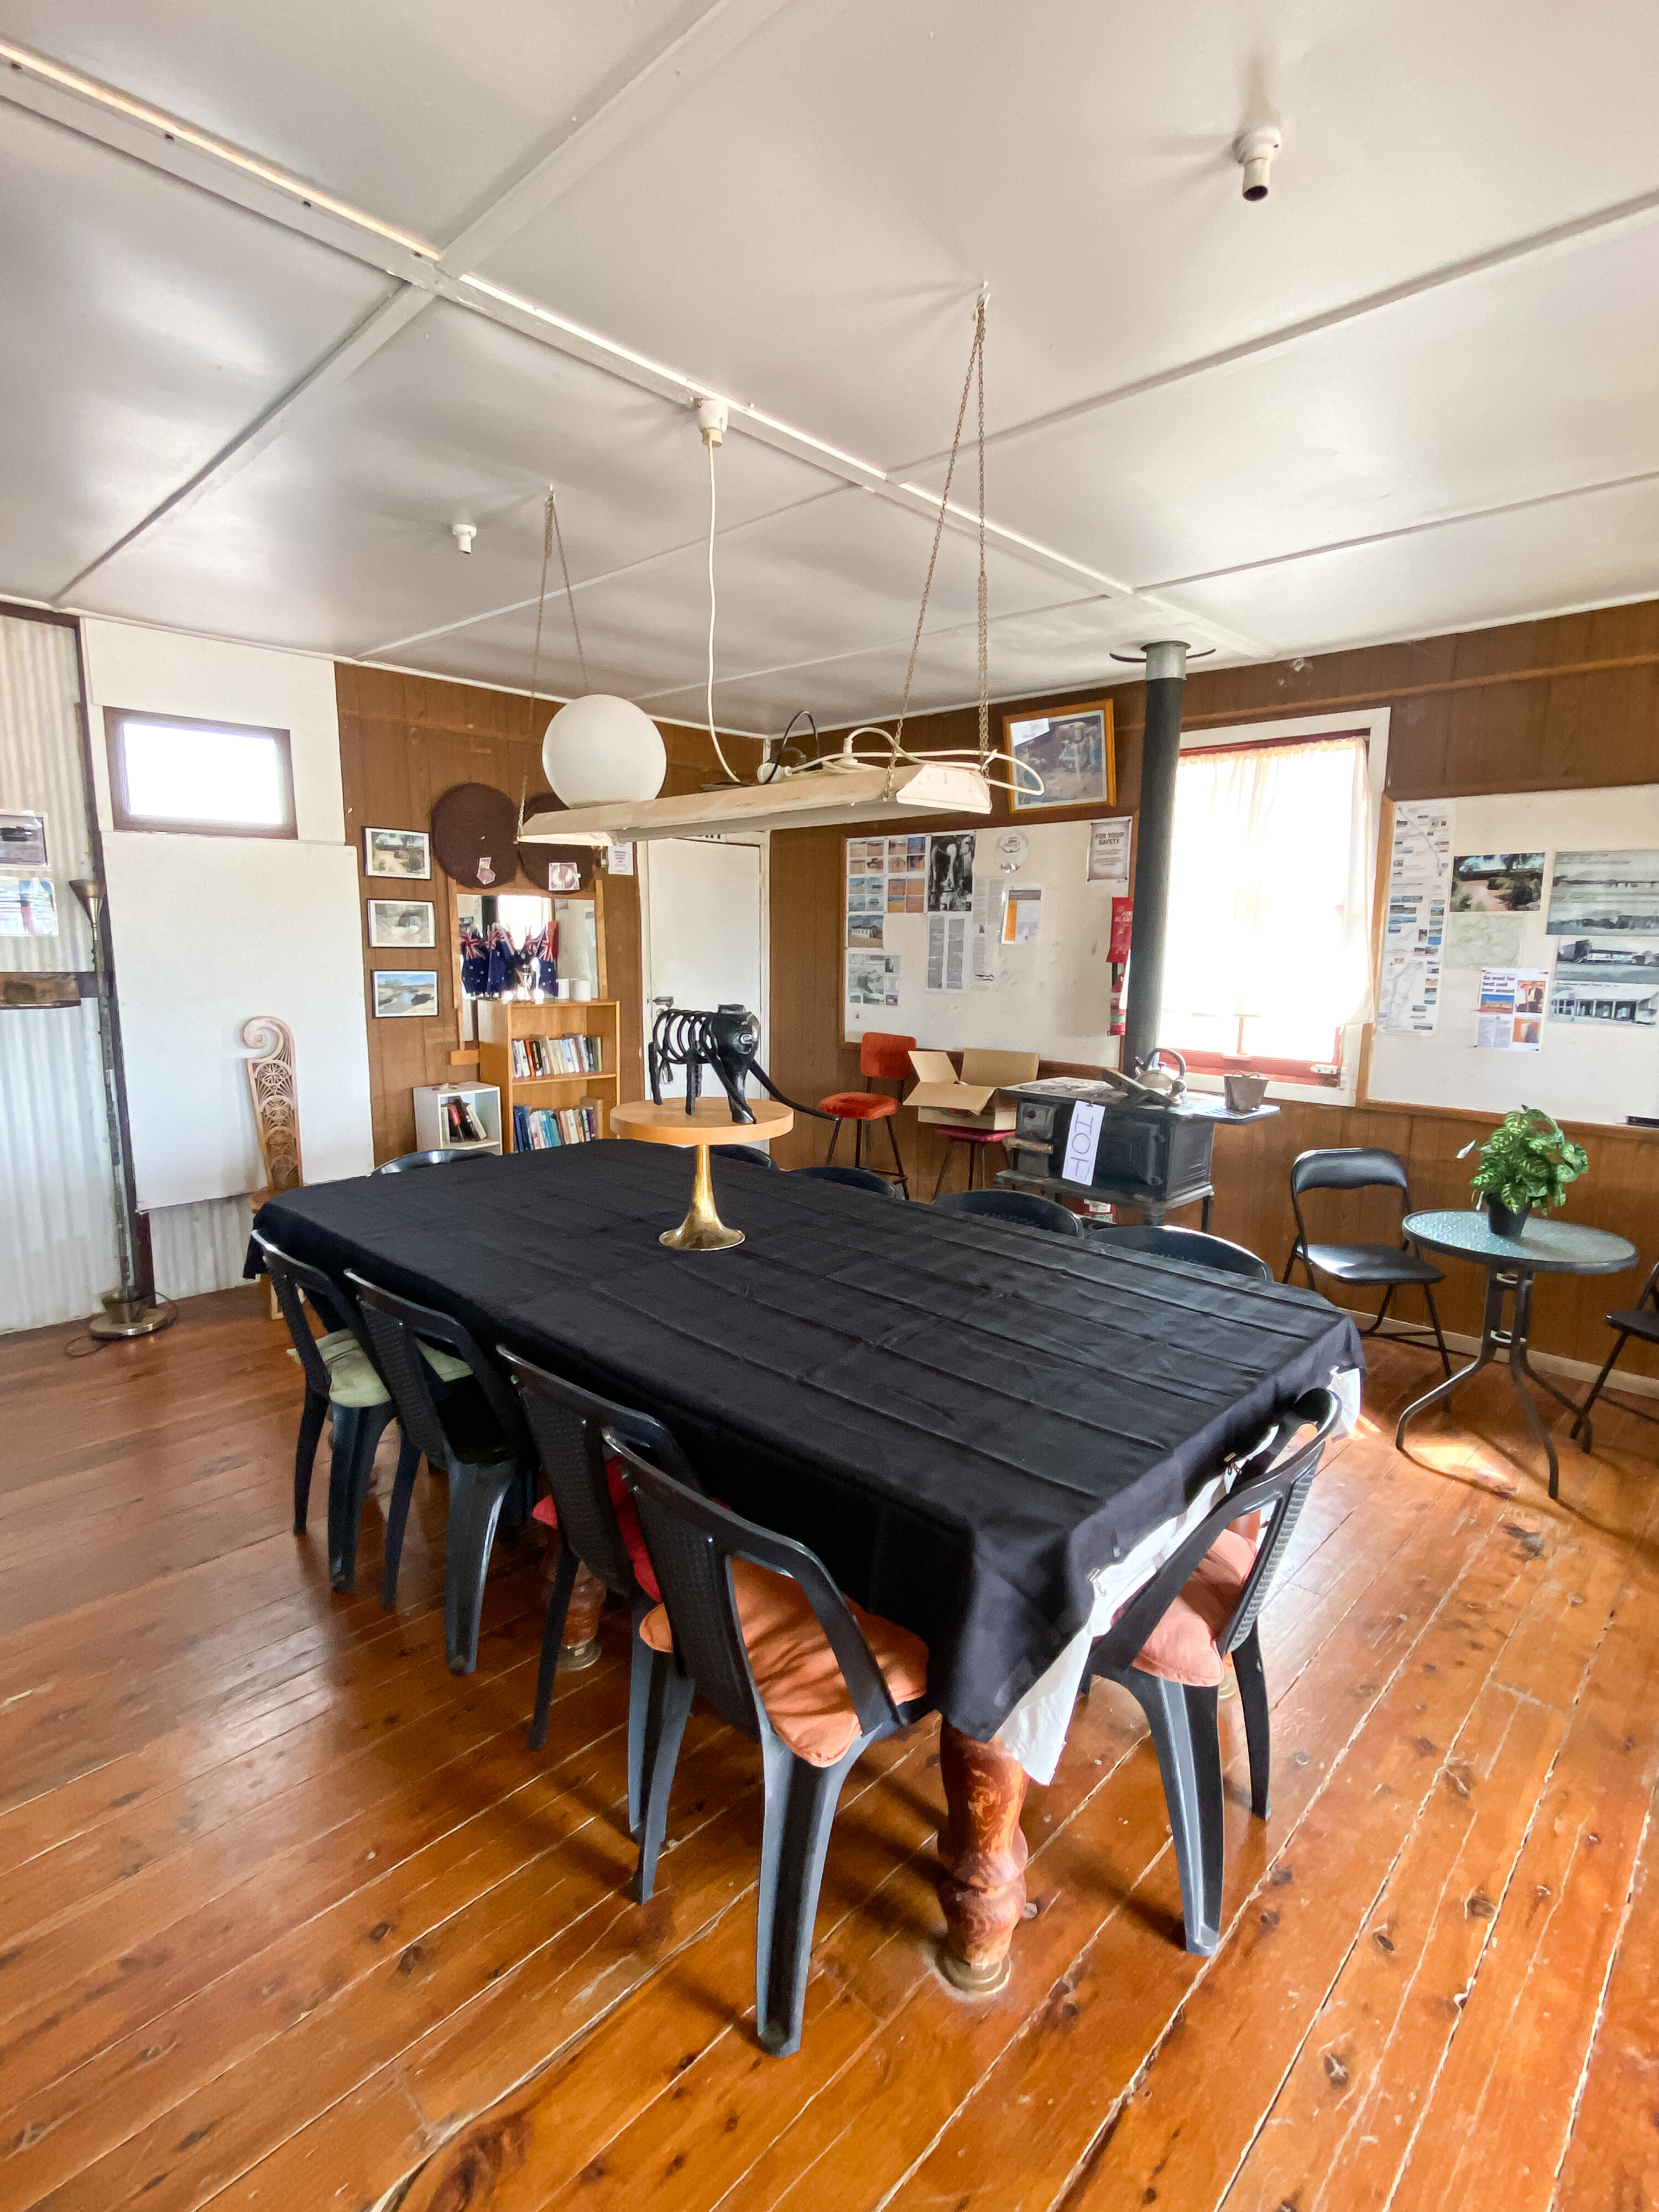
As well as a pub, the Adavale Hotel is the tourist information centre and post office all in one. The pub is owned by Koss Siwers, a former music teacher from Brisbane for the past 11 years, and he bought the place after driving through town and noticing a small cardboard ‘For Sale’ sign nailed to a tree.
Koss is a happy fella and keen historian who has explored this region extensively during his time here. If there is anything you want to know about Adavale’s story, Hell Hole Gorge or anything else, he is more than happy to help out.
Settled around 1865, Adavale was gazetted in 1878 and at one time had a population of 300 residents. Back then they would have enjoyed six pubs, a police station, Chinese market gardens, a bakery, a general store, a school, a hospital and a post office. These days you could transport the residents in one minibus, with the township home to just 15 souls.
There is an interpretive town walk that offers some insight into what the Adavale was like when it was booming. The locals have developed a quirky Outdoor Mini Museum in an old meat house, and nearby is the Police Museum, along with an outstanding photographic display on the external walls of the Shire Hall.
Free camping is encouraged beside the Shire Hall and offers a coin-operated gas barbecue, toilet and shower, all just a short walk from the Adavale Hotel. Make sure you drop some money into the box for donations that go to the Royal Flying Doctor Service. There’s also free bush camping and fishing holes along Brigalow Creek; just ask Koss for directions.
One thing you’d least expect to find in a place like Adavale is the Elegant Emu, where Christina Zito offers a small selection of handmade and home-baked patisseries, along with a fabulous High Tea Experience. You can also purchase ‘Christina For Fair Trade’ handbags here.
The locals don’t visit the Adavale Hotel very often but not because of Koss; the story goes that the constabulary used to wait for the locals to finish enjoying some liquid refreshments and then pull them over and breathalyse them. There was also something about a former owner of the pub mucking things up with the locals. This means that these days it’s mostly tourism that keeps the pub going.
In the old days, Adavale was the end of the line for Cobb & Co, and Koss can draw you a mud map so you can drive out to the hidden mail exchange out on the floodplain amongst a copse of gidgee. There are also remnants of the old coach road that can be seen in Adavale.
Grog for the pub comes via Australia Post, purchased through First Choice, as well as supplies from Quilpie or Charleville. Alcohol for the locals also comes via the post and because the pub is also the post office, Koss knows exactly what they are buying.
While the food menu is limited and made up of items that can be deep fried or microwaved, this is a one-man show and Koss has to disappear into the small kitchen to watch the frier as he doesn’t want this pub to burn down like the previous ones in Adavale. You can enjoy a meal and icy beverage at the bar, in the lounge or on the verandah.
The pub is open every day from 8am to midnight, from April to November, after which Koss returns to his wife in Brisbane and the pub closes. There is someone who looks after the post office while he is away from town.
There are other times that Koss returns to Brisbane, so it is always best to ring the pub to make sure the beers are cold and that the pub is open before dropping in.
Beer
- Cans of Guinness
- XXXX Gold
- XXXX Bitter
- Great Northern Super Crisp
- Great Northern Original
Meals
- Beef Croquettes & Chips: $17
- Fish & Chips: $16
- Seafood Basket: $18
- Outback Pie: $7.50
- Sausage Roll: $7
- Hot Chips: $8
- Coffee or tea
Contact info
- Phone: 0408 692 555
- Email: [email protected]
- Website: www.adavalestore.com.au
- Manager/owner: Koss Siwers
- Address: Shepherd Street, Adavale, Qld, 4474