Electronics & Gadgets
Gallery 1
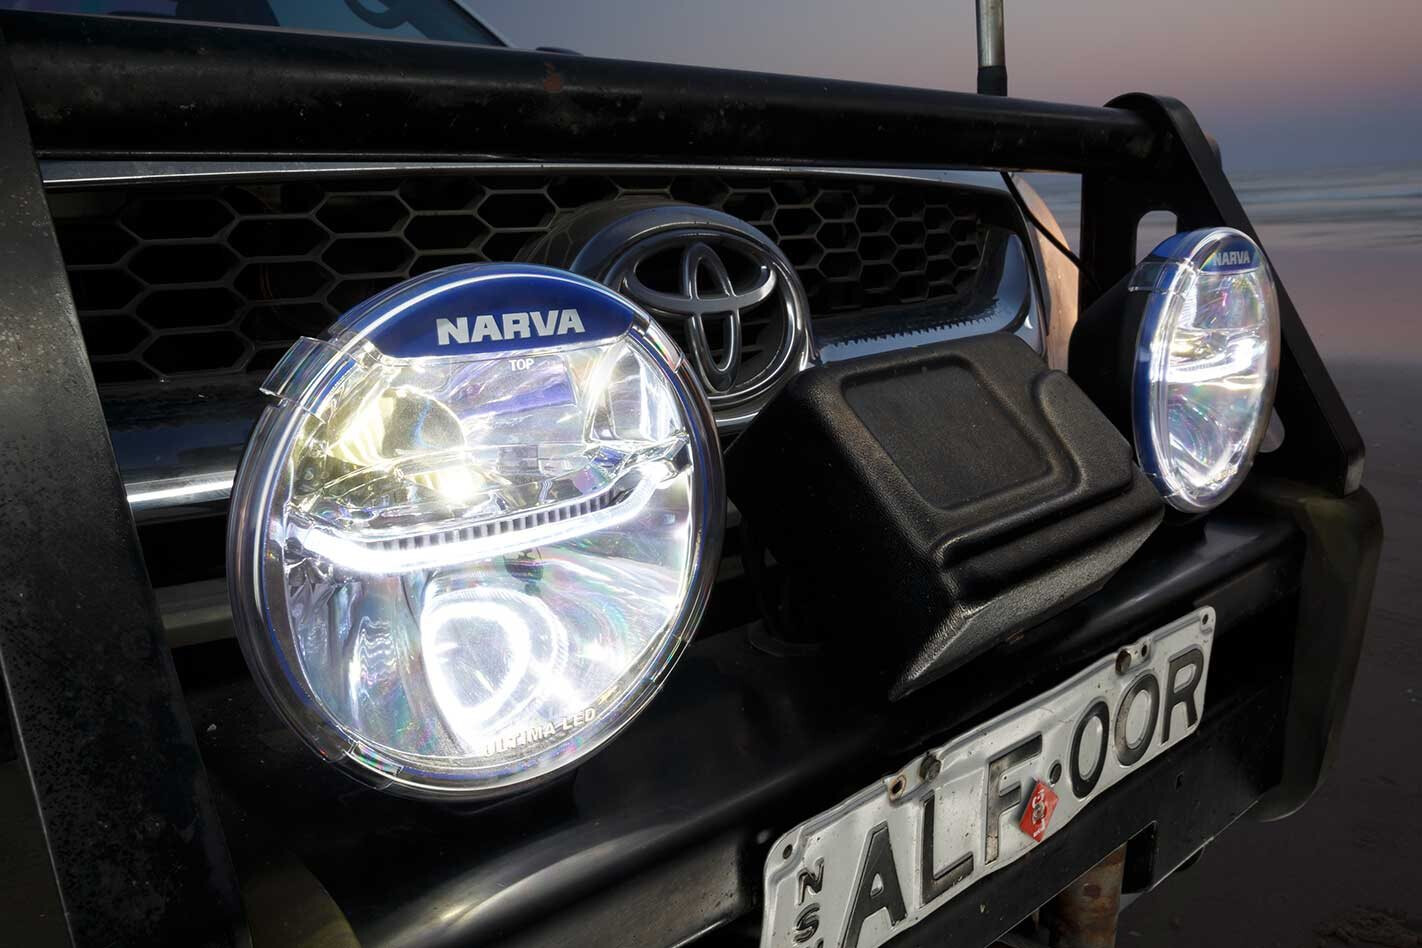
FOR MOST 4×4 owners, adding extra lighting to improve night vision is a huge benefit for comfort, confidence and safety. There have been significant advancements in headlights and driving lights recently, especially with HID (high intensity discharge) and LED (light emitting diode) technology. These two tech types have taken the helm from QH (quartz-halogen) bulbs we’ve had since the 1970s.

1
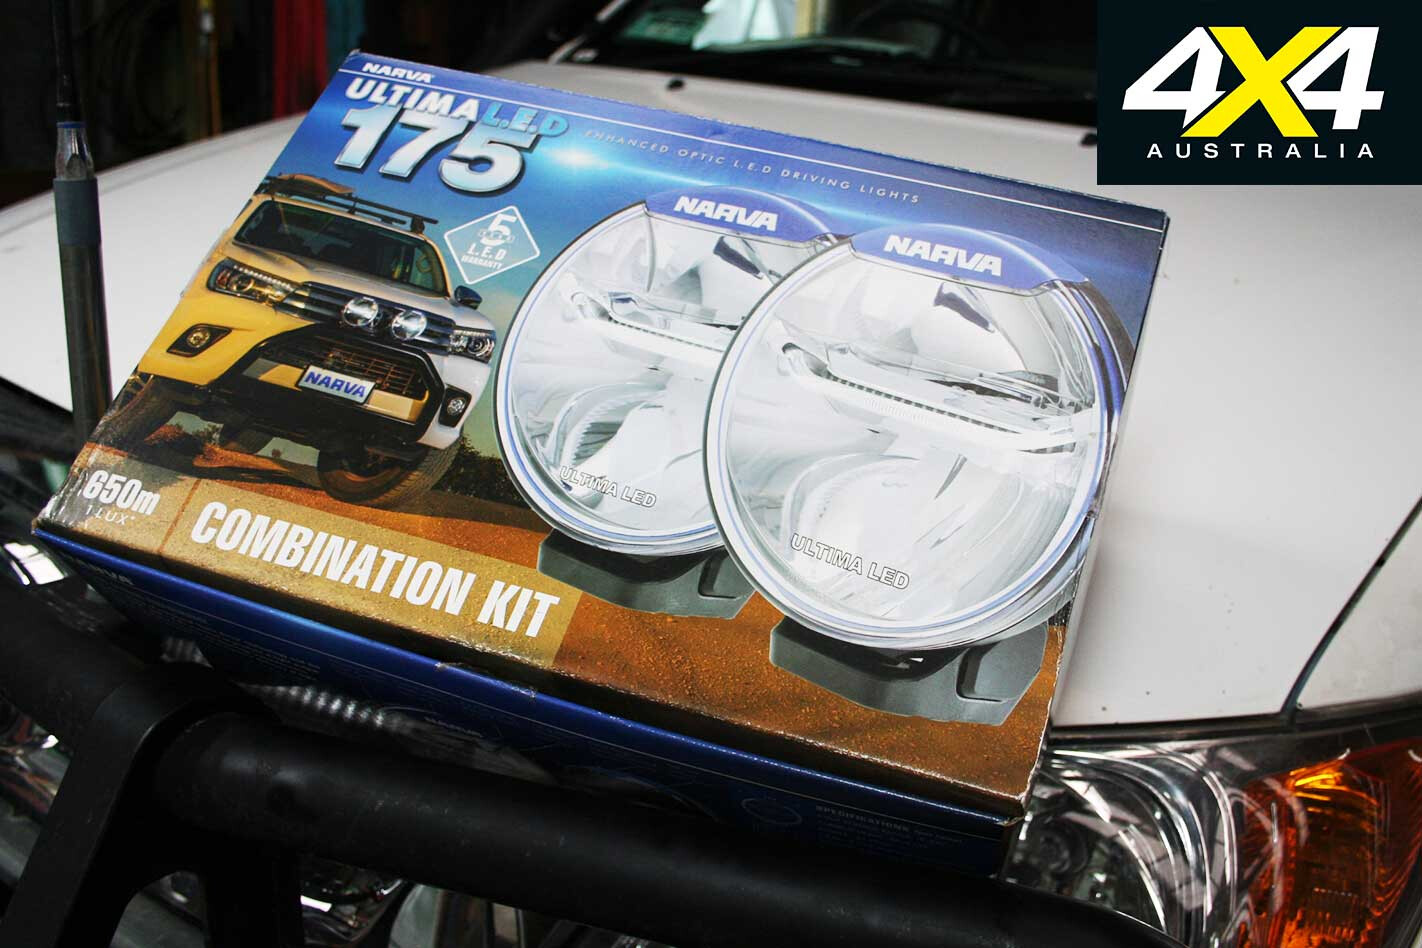
Designed with glass-reinforced bodies, polycarbonate lenses (and covers) and a stable mounting system, Narva’s range of Ultima LED driving lights are ideal for touring use. Here, we’re looking at a combination pack of Ultima LED 175s that – as the name implies – are approximately 175mm diameter and include one pencil and one broad-beam lamp. They’re a perfect fit for many touring wagons and dual cabs, with 225s available to fit larger vehicles.
DIY set-up is pretty simple, especially with the matching Ultima LED wiring harness (included in the Narva kit) providing foolproof plug-and-play installation for the varying voltages and circuit types of today’s cars, 4x4s and trucks.
If DIY isn’t your thing professional installation will take around two hours and cost a few hundred bucks, in addition to the price of the lights and wiring. Many people leave it to the pros, especially if a frontal protection bar is being installed to a new or just-bought vehicle.
Here’s what’s involved in installing a set of Narva Ultimas to a typical touring 4×4 – in this case, a 2005 Toyota Hilux.
The package
1
Narva’s Ultima LED driving lights are available in singles or, in this combination, two lamps and a matching wiring harness. The light’s variable voltage (9-33V), as well as the plug-and-play harness which detects various vehicles’ switching systems, makes installation simple.
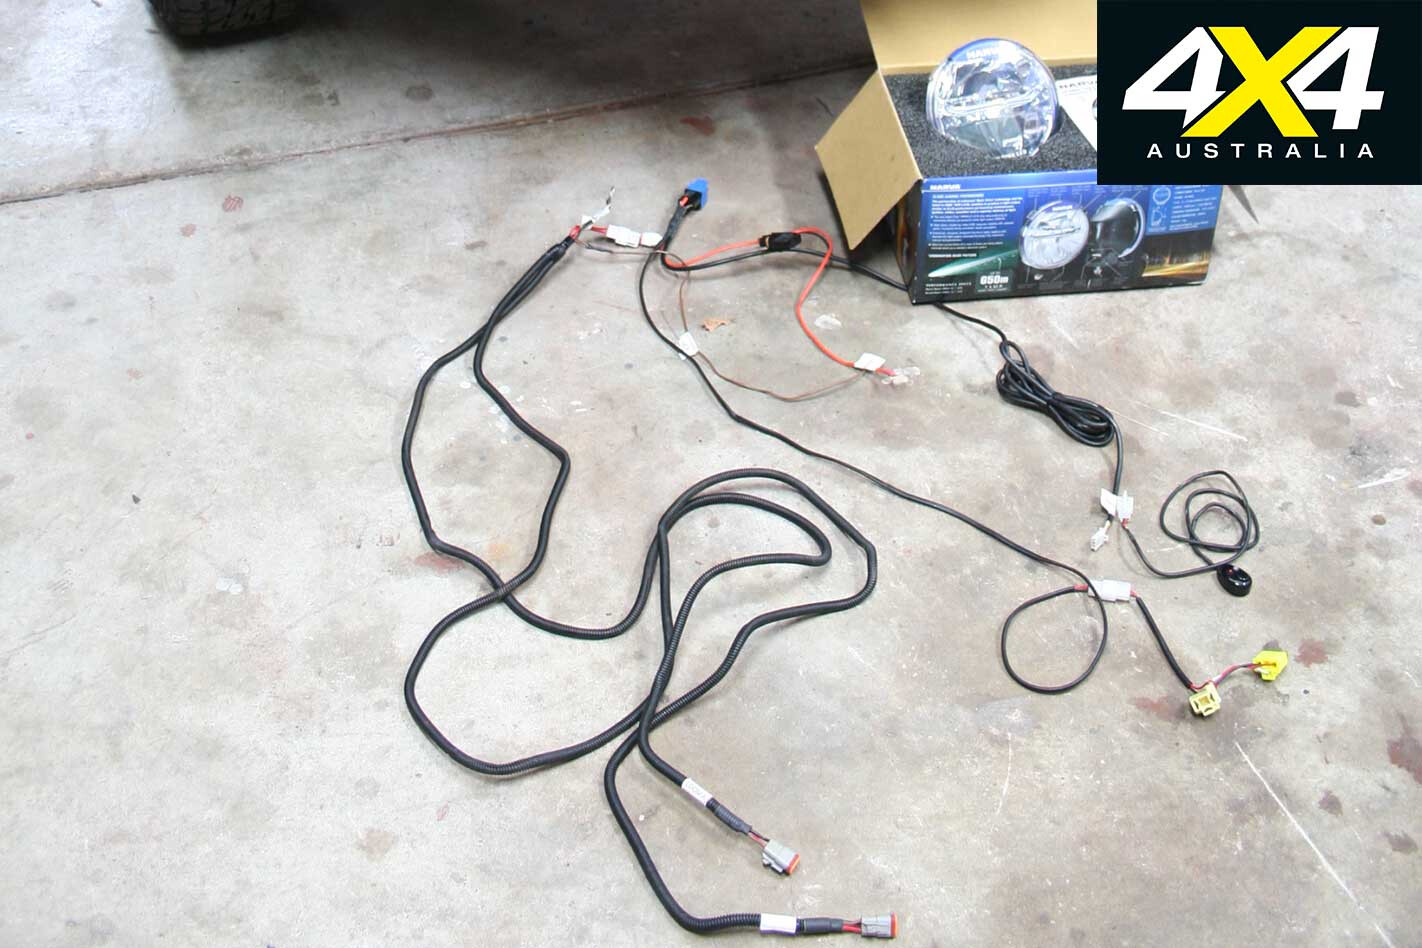
Step 1: Wiring Harness
1
Begin by laying the wiring harness on a floor or bench, to plan routing and installation in the engine bay. Removing the grille will often make access for routing the wiring harness from the lights back into the engine bay much easier.
Step 2: Placement
1
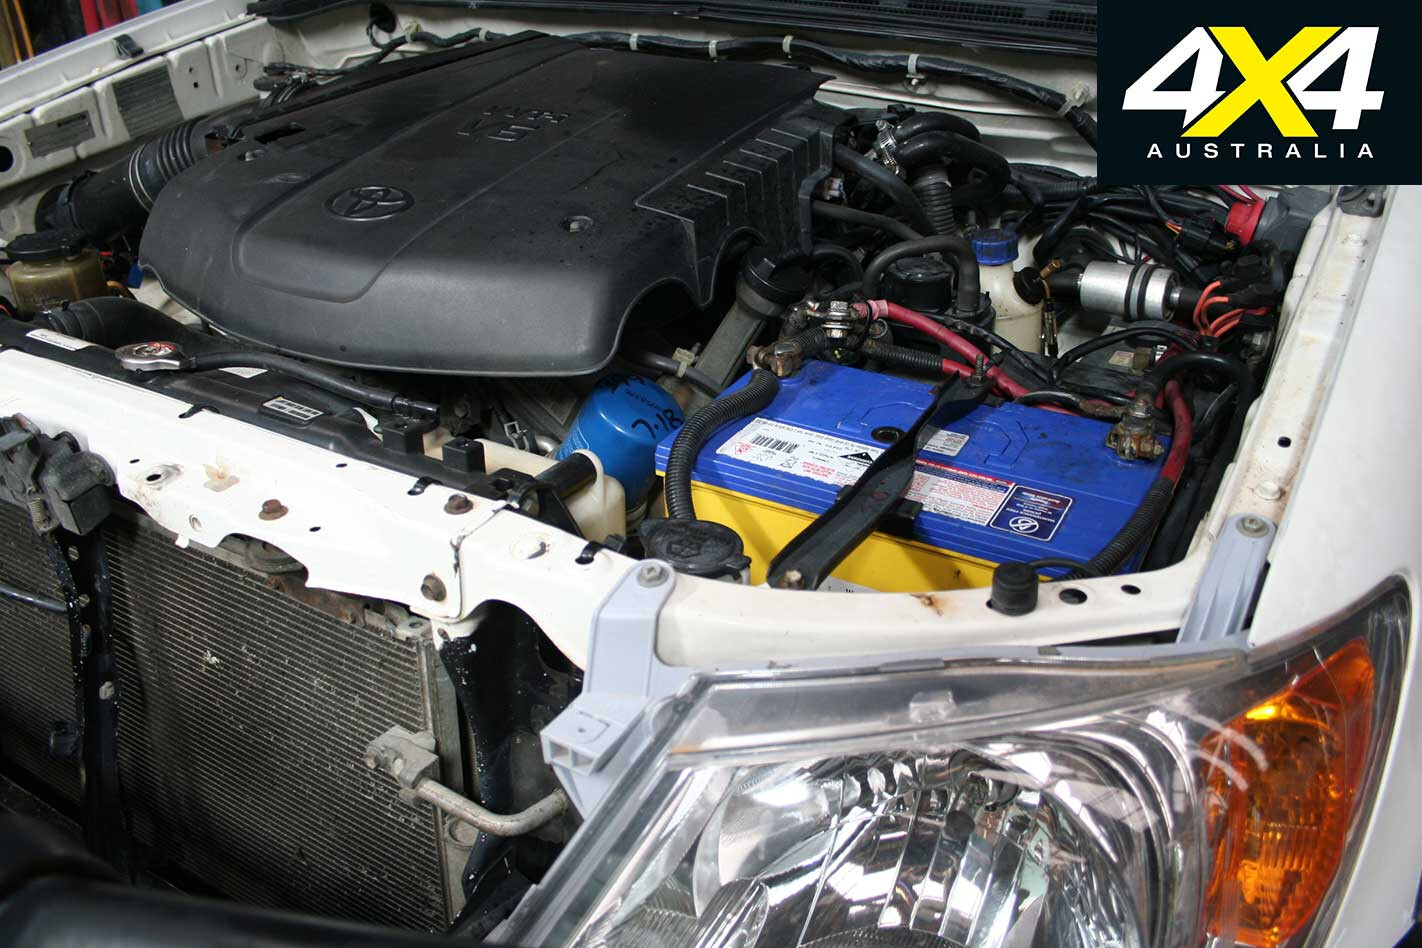
My 4.0-litre V6 petrol Hilux has an EFI LPG and dual-battery system hardware installed on the passenger/battery side of the engine bay. As such, it’s busy with wiring and relays, so I decided to install the Narva harness on the other side of the engine bay.
Step 3: Holed up
1
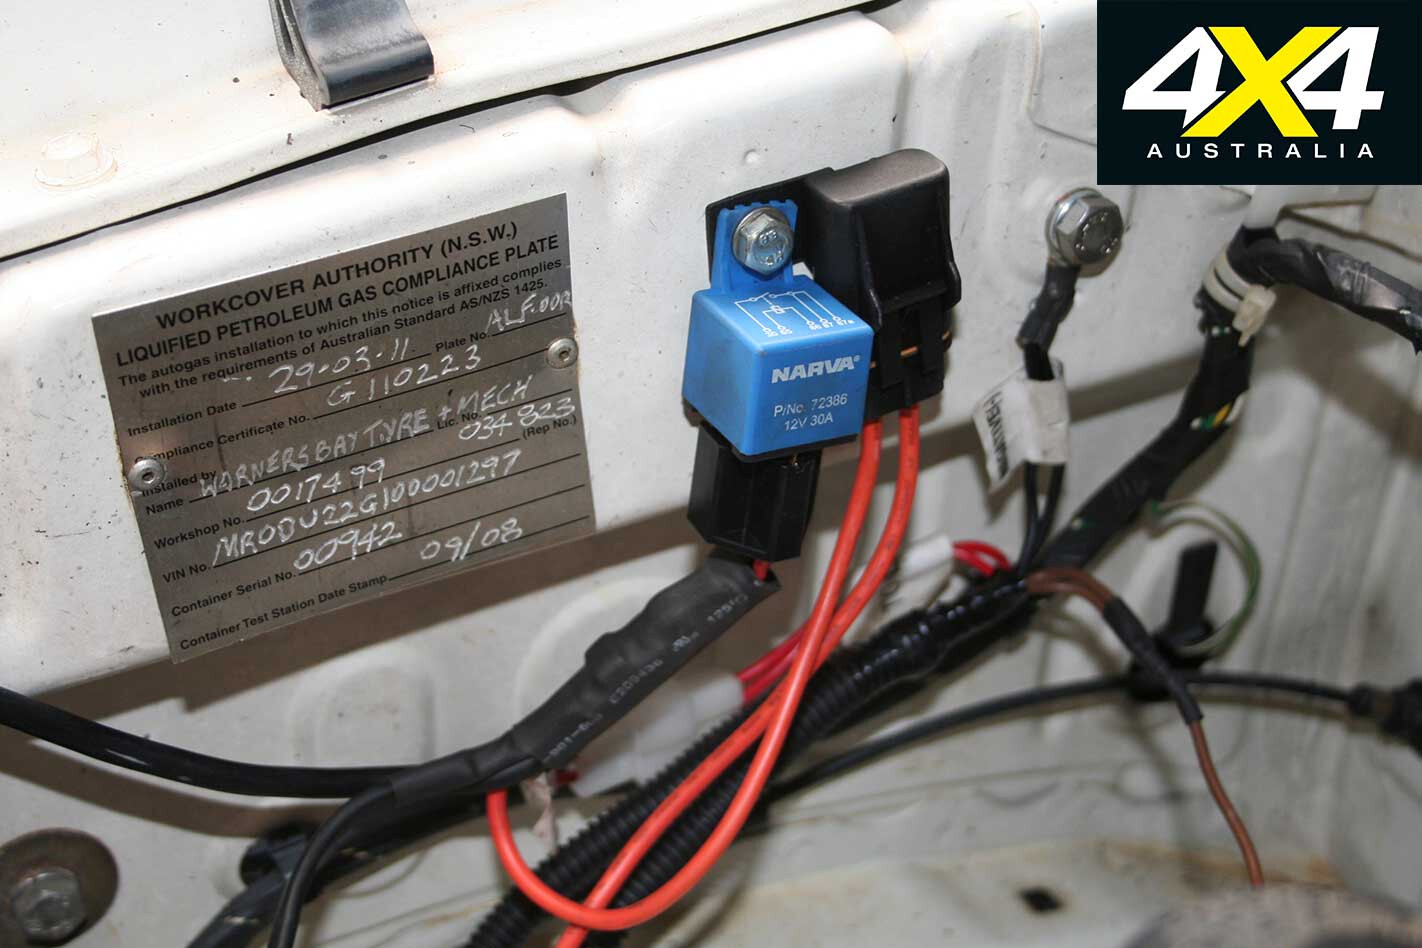
To make installation super-easy, some redundant mounting holes in the Toyota engine bay were used to install the relay and fuse. Always choose a location high, dry and away from any moving parts, and one that allows hassle-free future servicing and parts replacement.
Step 4: Looms
1
To feed the lights, the Narva harness has two well-shielded loom sections that were routed to the front protection bar. It’s good practice to follow the vehicle’s standard wiring routes where possible and to ensure the loom doesn’t run over sharp edges or close to hot exhausts.
Step 5: Wiring Grommet
1
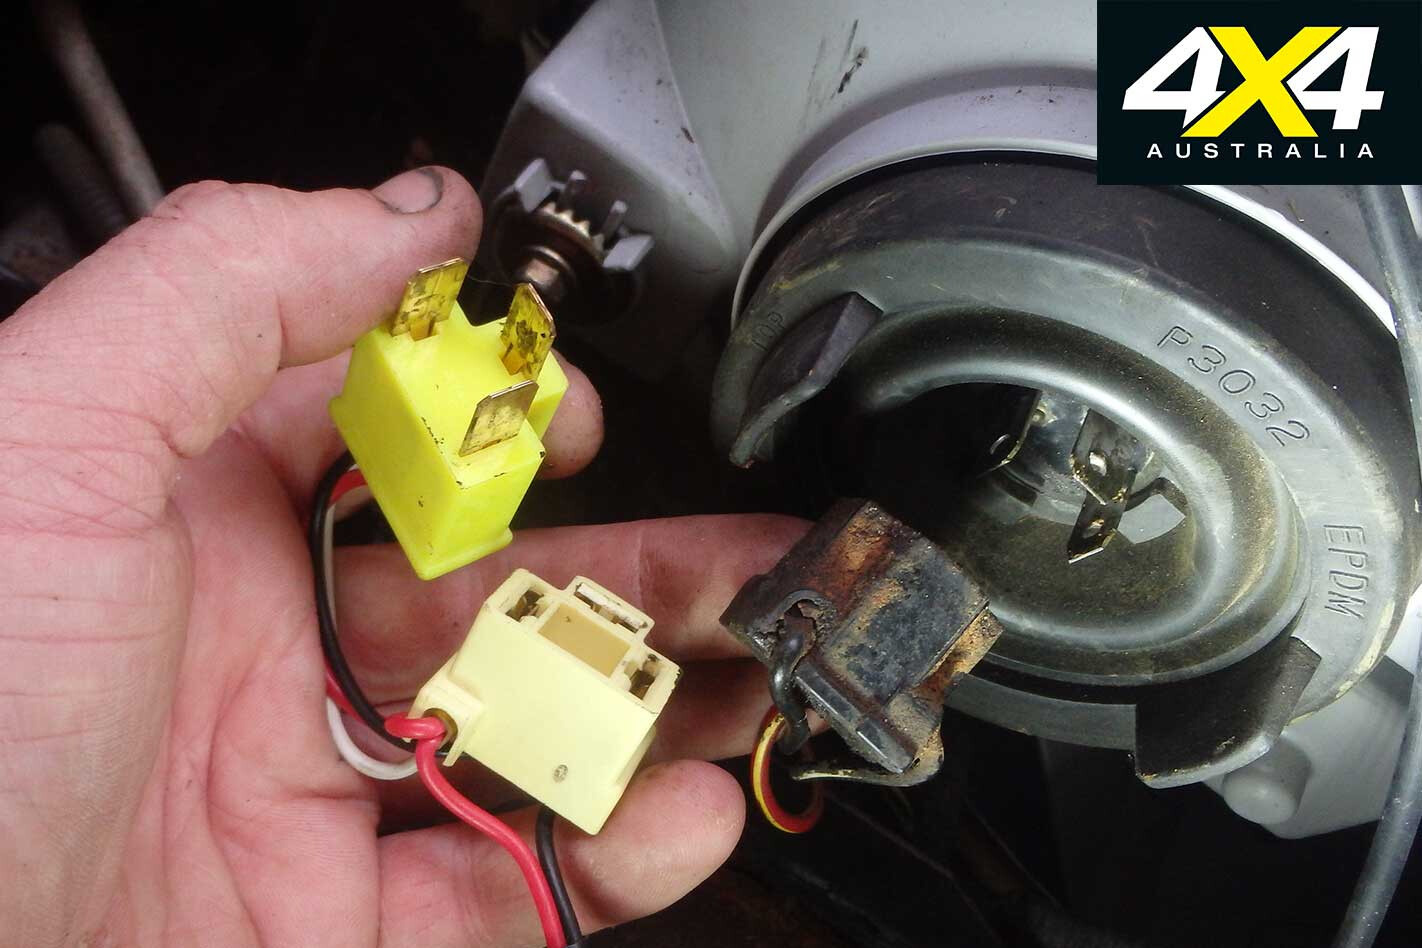
The switch must be in the cabin, so the switch supply loom must pass through the firewall. This Hilux has spare ports in the vehicle’s main harness grommet. Some vehicles require a hole to be drilled and a grommet to be installed.
Step 6: Switch Plug
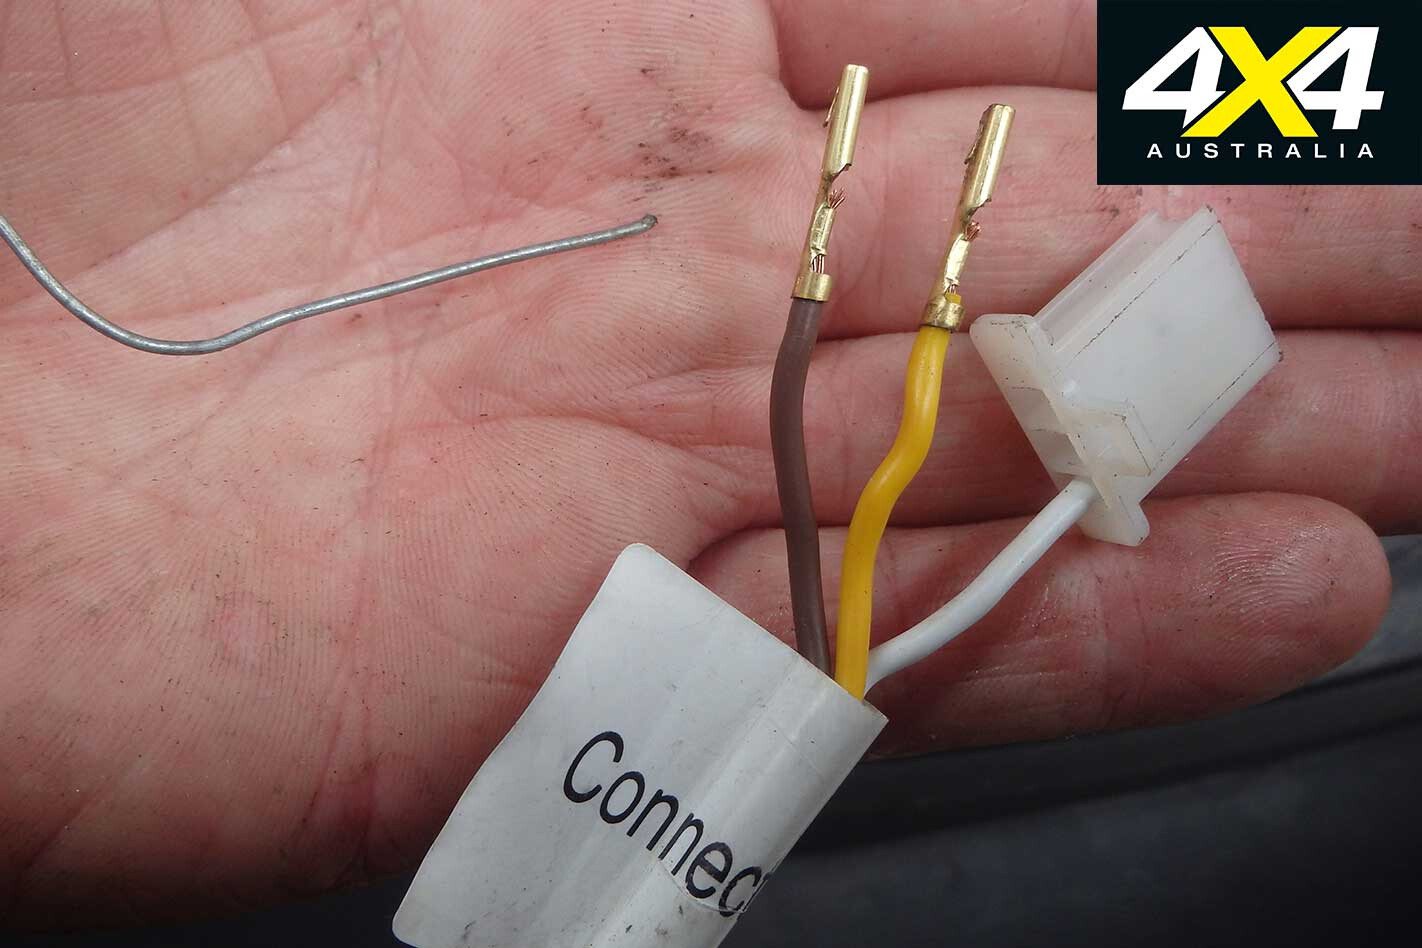
1
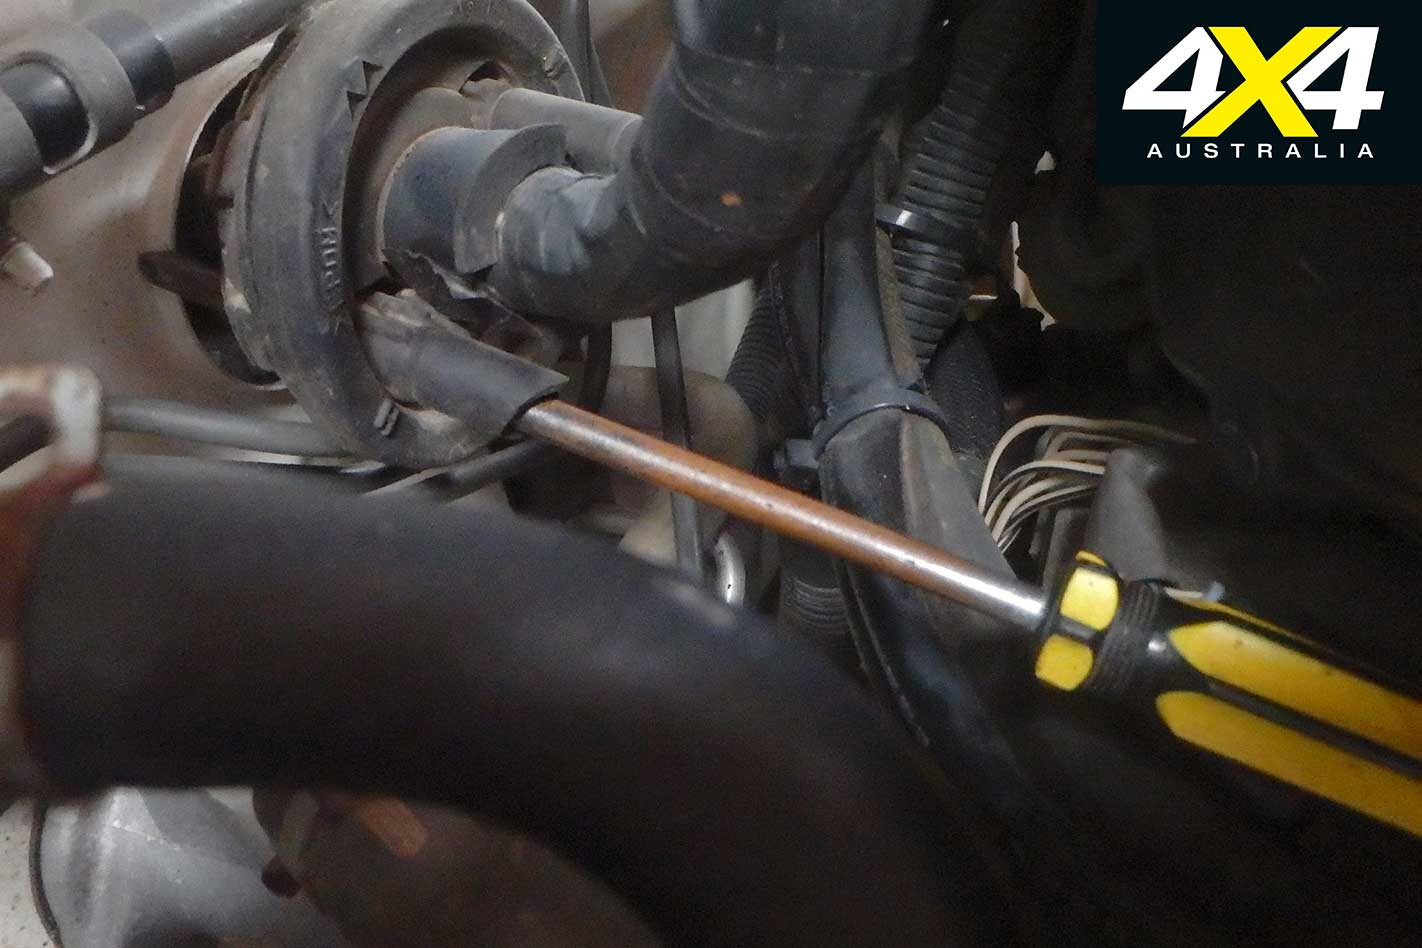
To allow the loom to be fed through the Toyota’s existing loom grommet, the switch plug was temporarily disassembled (florist’s wire can help with the removal of the plug’s brass pins). The individual wires were taped together and poked through the grommet to behind the dash.
Step 7: Be-Switched
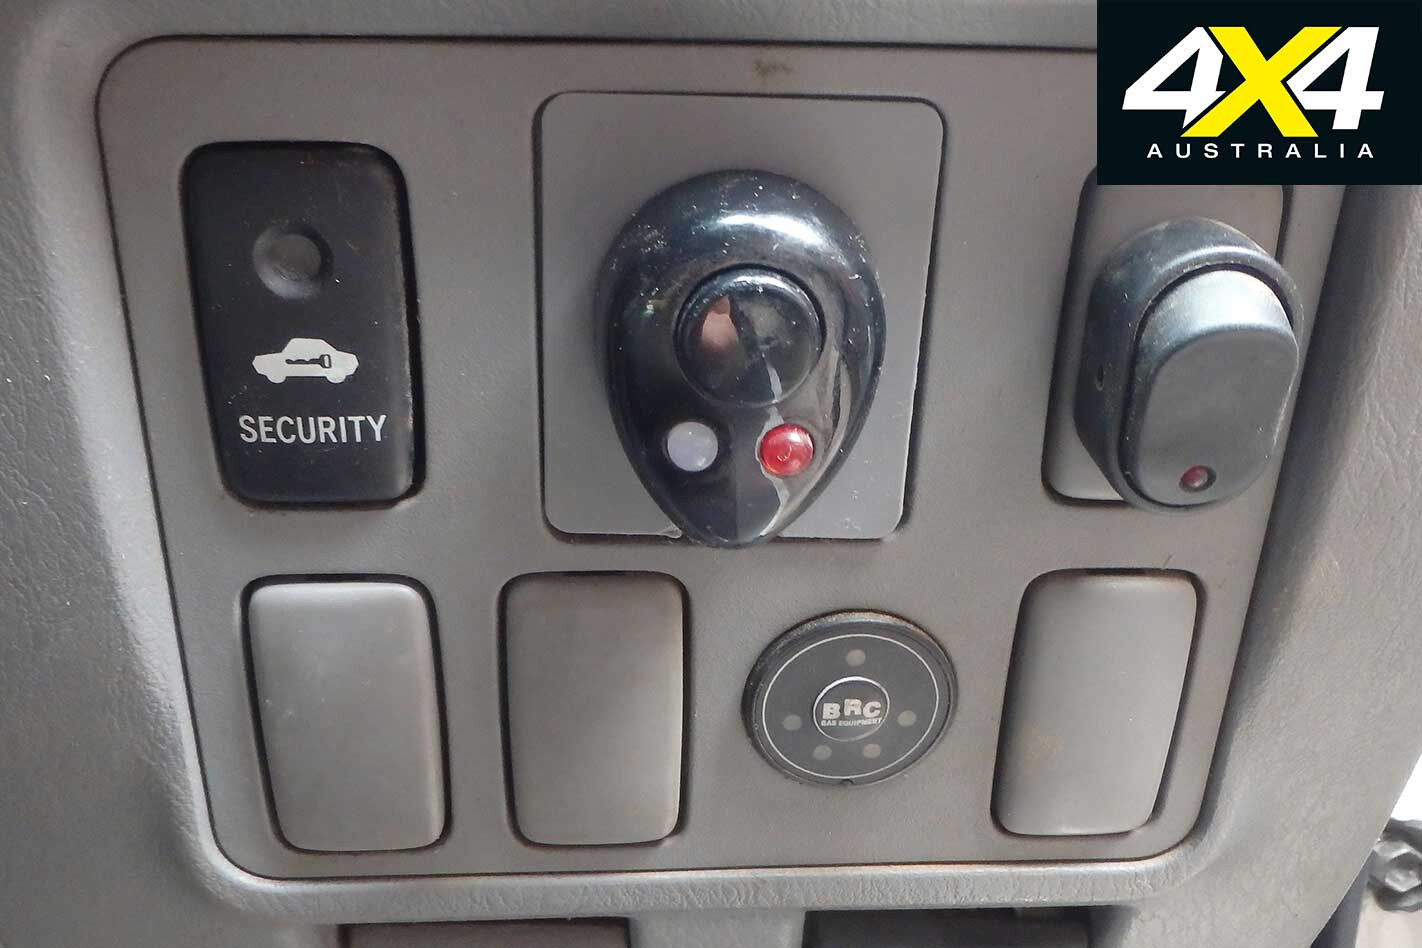
1
Most vehicles have a few spare dash-blanking plugs ideal for installing accessory switches. The glue-backed Narva switch was easily installed after clearing the bottom edge of a blanking plate for the loom; behind the dash, the loom was routed and tied high above the stop-and-go pedals.
Follow 4X4 Australia on Google
Get more 4x4 news, reviews and gear stories from 4X4 Australia in your Google feeds.