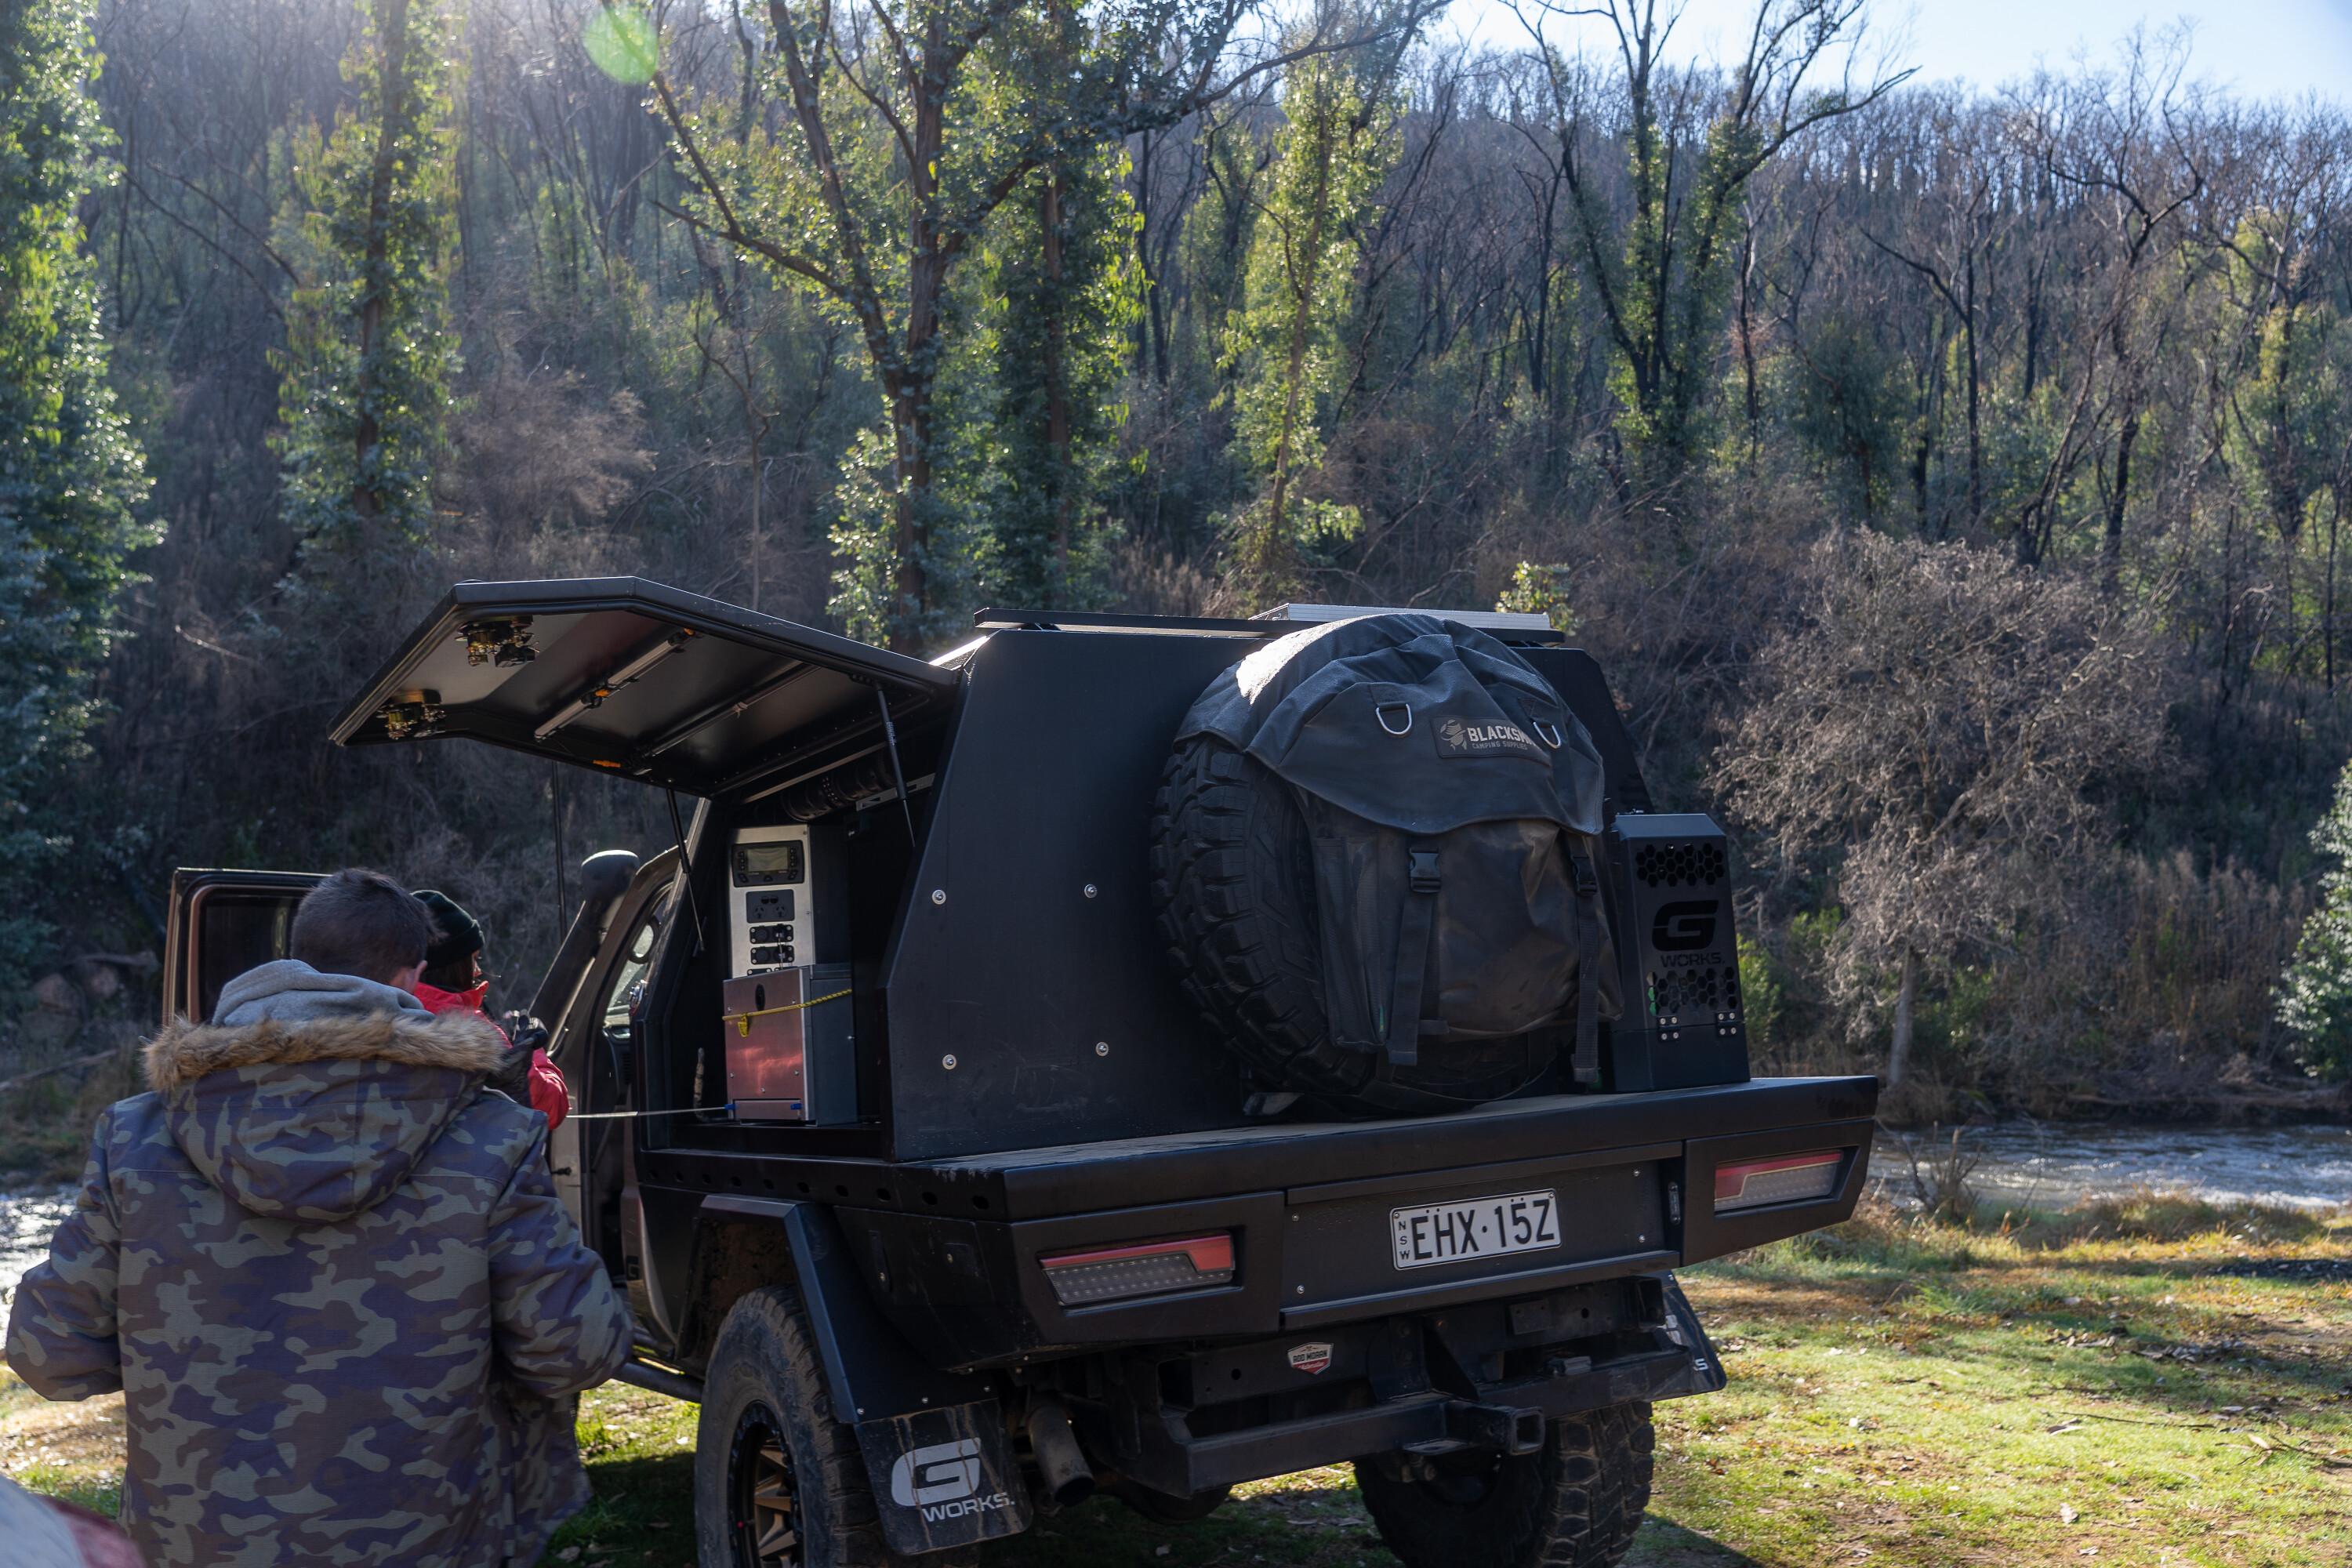
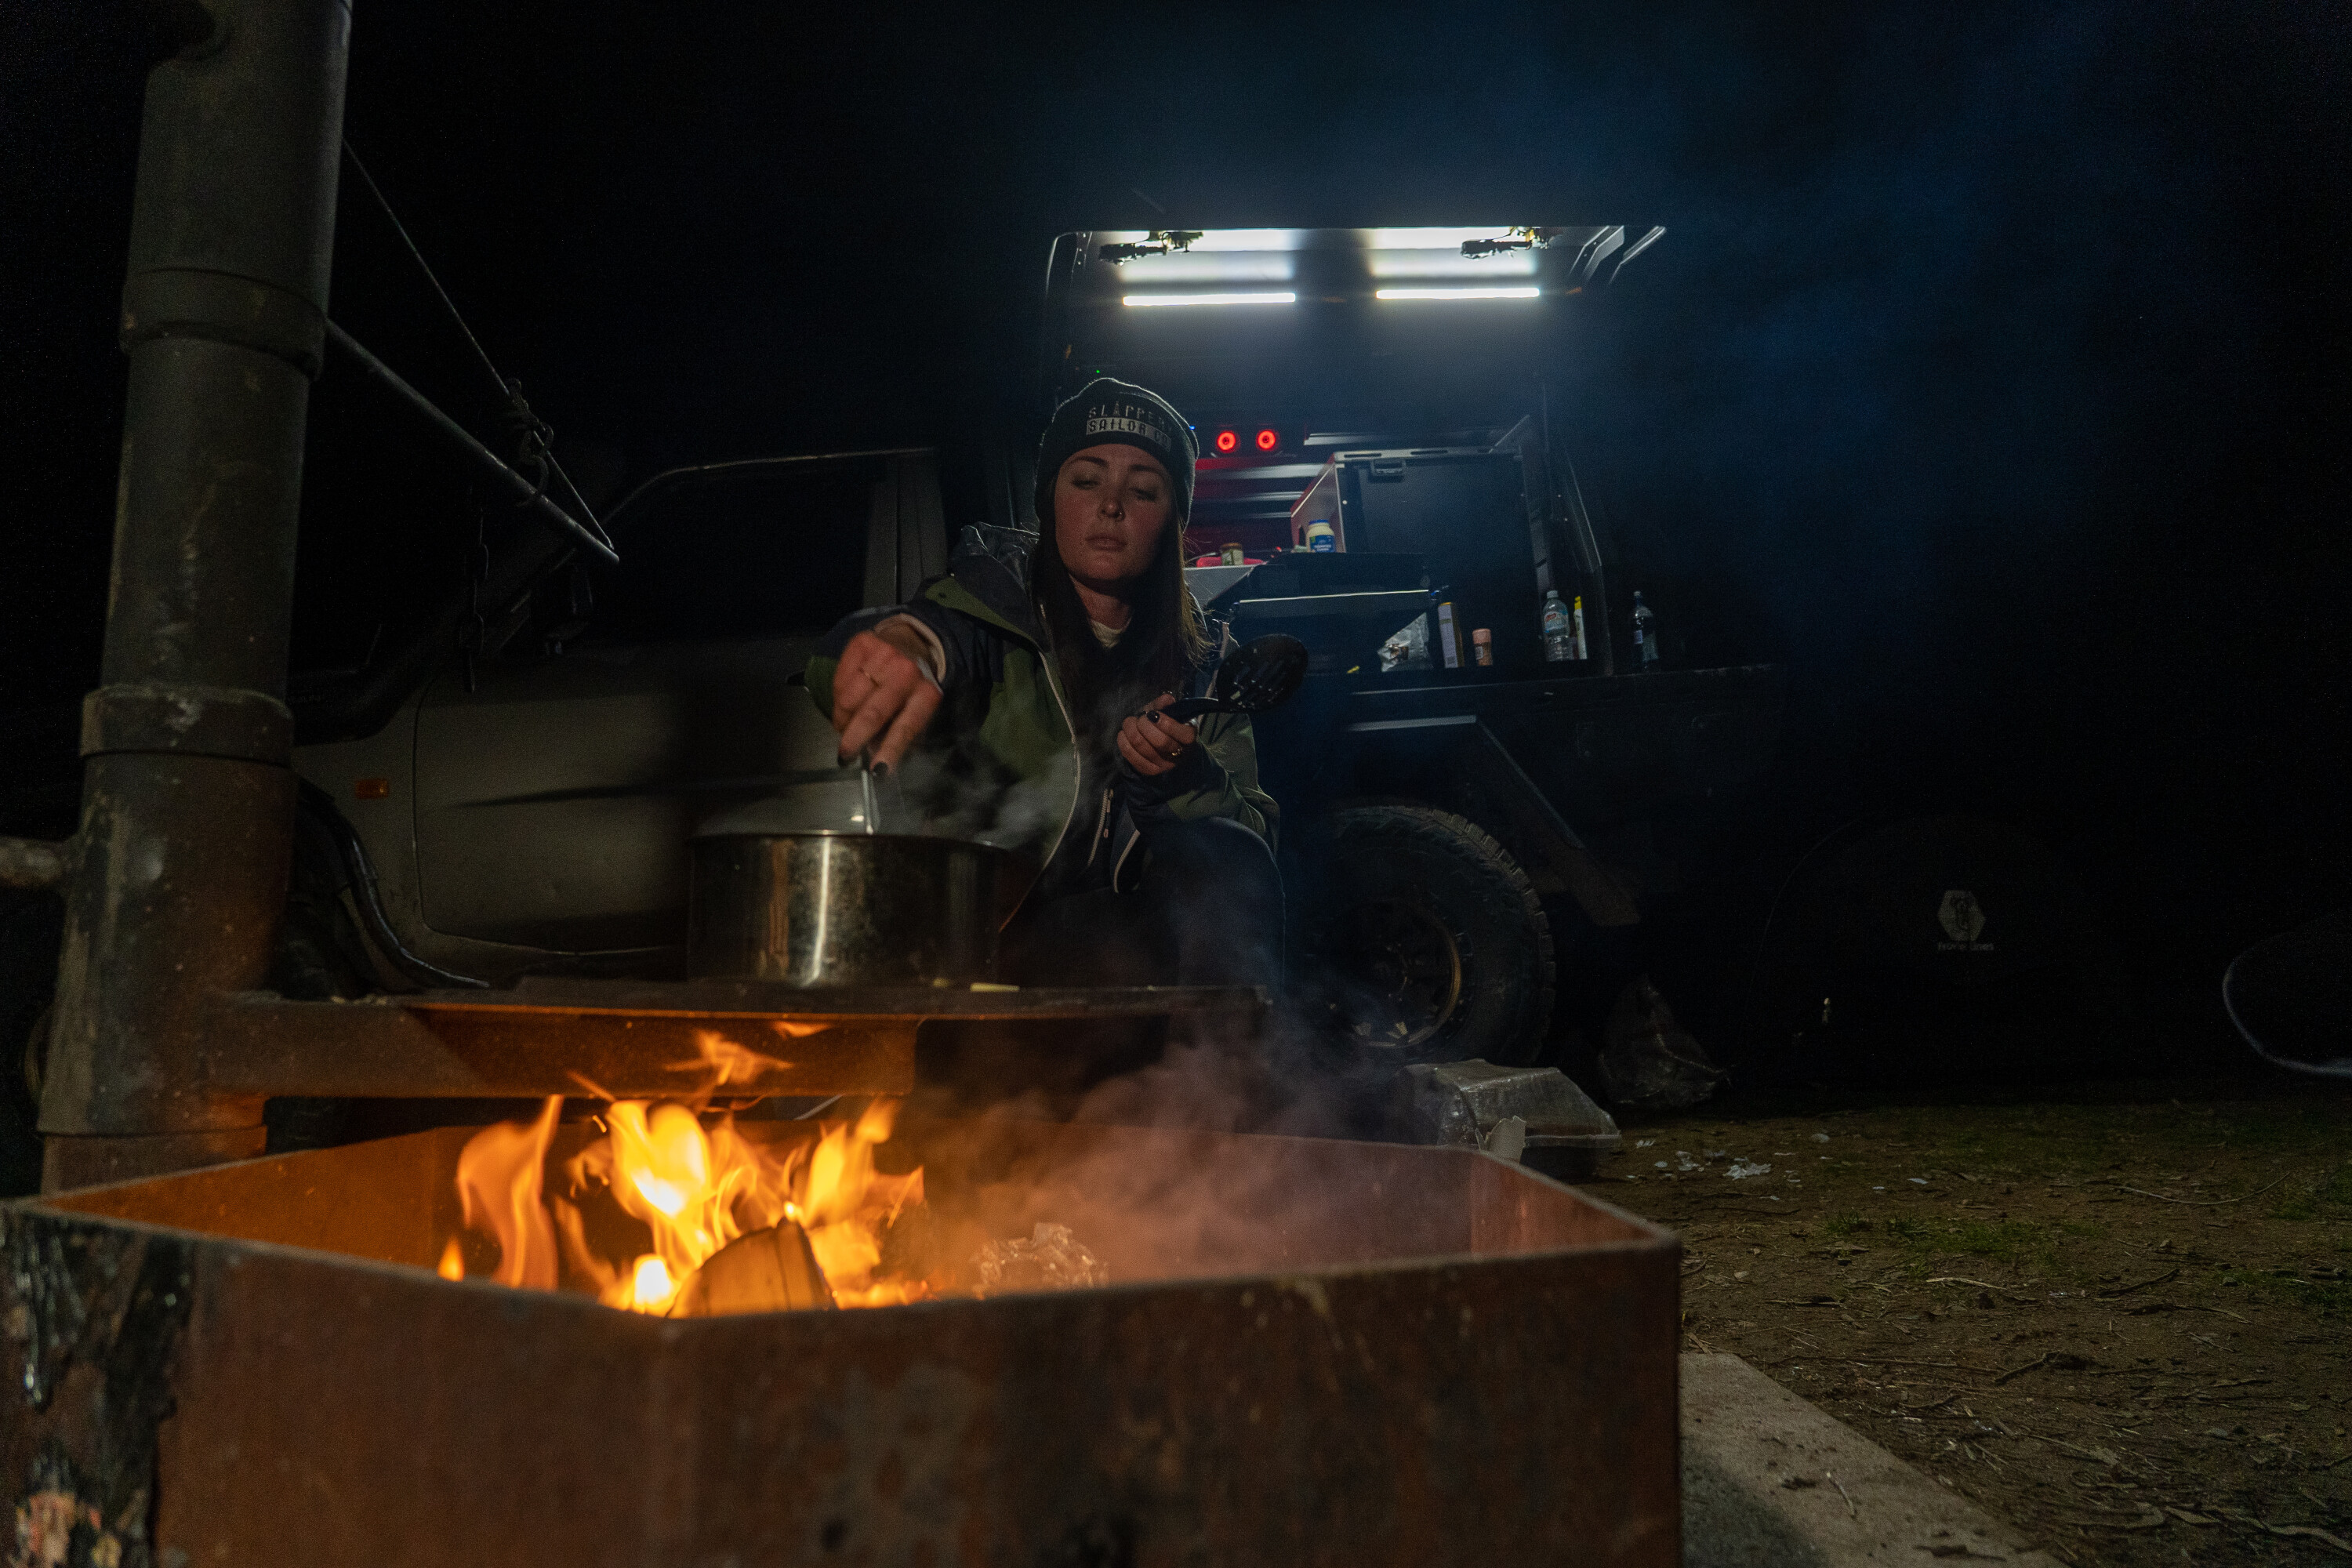
There’s a thread that binds all four-wheel drivers together. It weaves its way through all of us regardless of age, sex, or interests.
Whether you’re a grey nomad pining for that perfect campsite by a flowing stream, or you’ve spent months dialling in your suspension for maximum articulation to conquer the toughest tracks, or maybe you’ve just finally got the weekend off work and you’re looking for wide open spaces for the kids to explore while you sit by the fire with a cheeky red, that call to the wilderness is something all of us share.
Forget being beyond the city lights, we want to be beyond the crowds, where a busy night means counting stars, and the only sounds filling the camp are the roar of the fire and the laughter of good friends.
1
With four-wheel driving becoming ever more popular, it’s becoming harder and harder to find that little slice of wilderness.
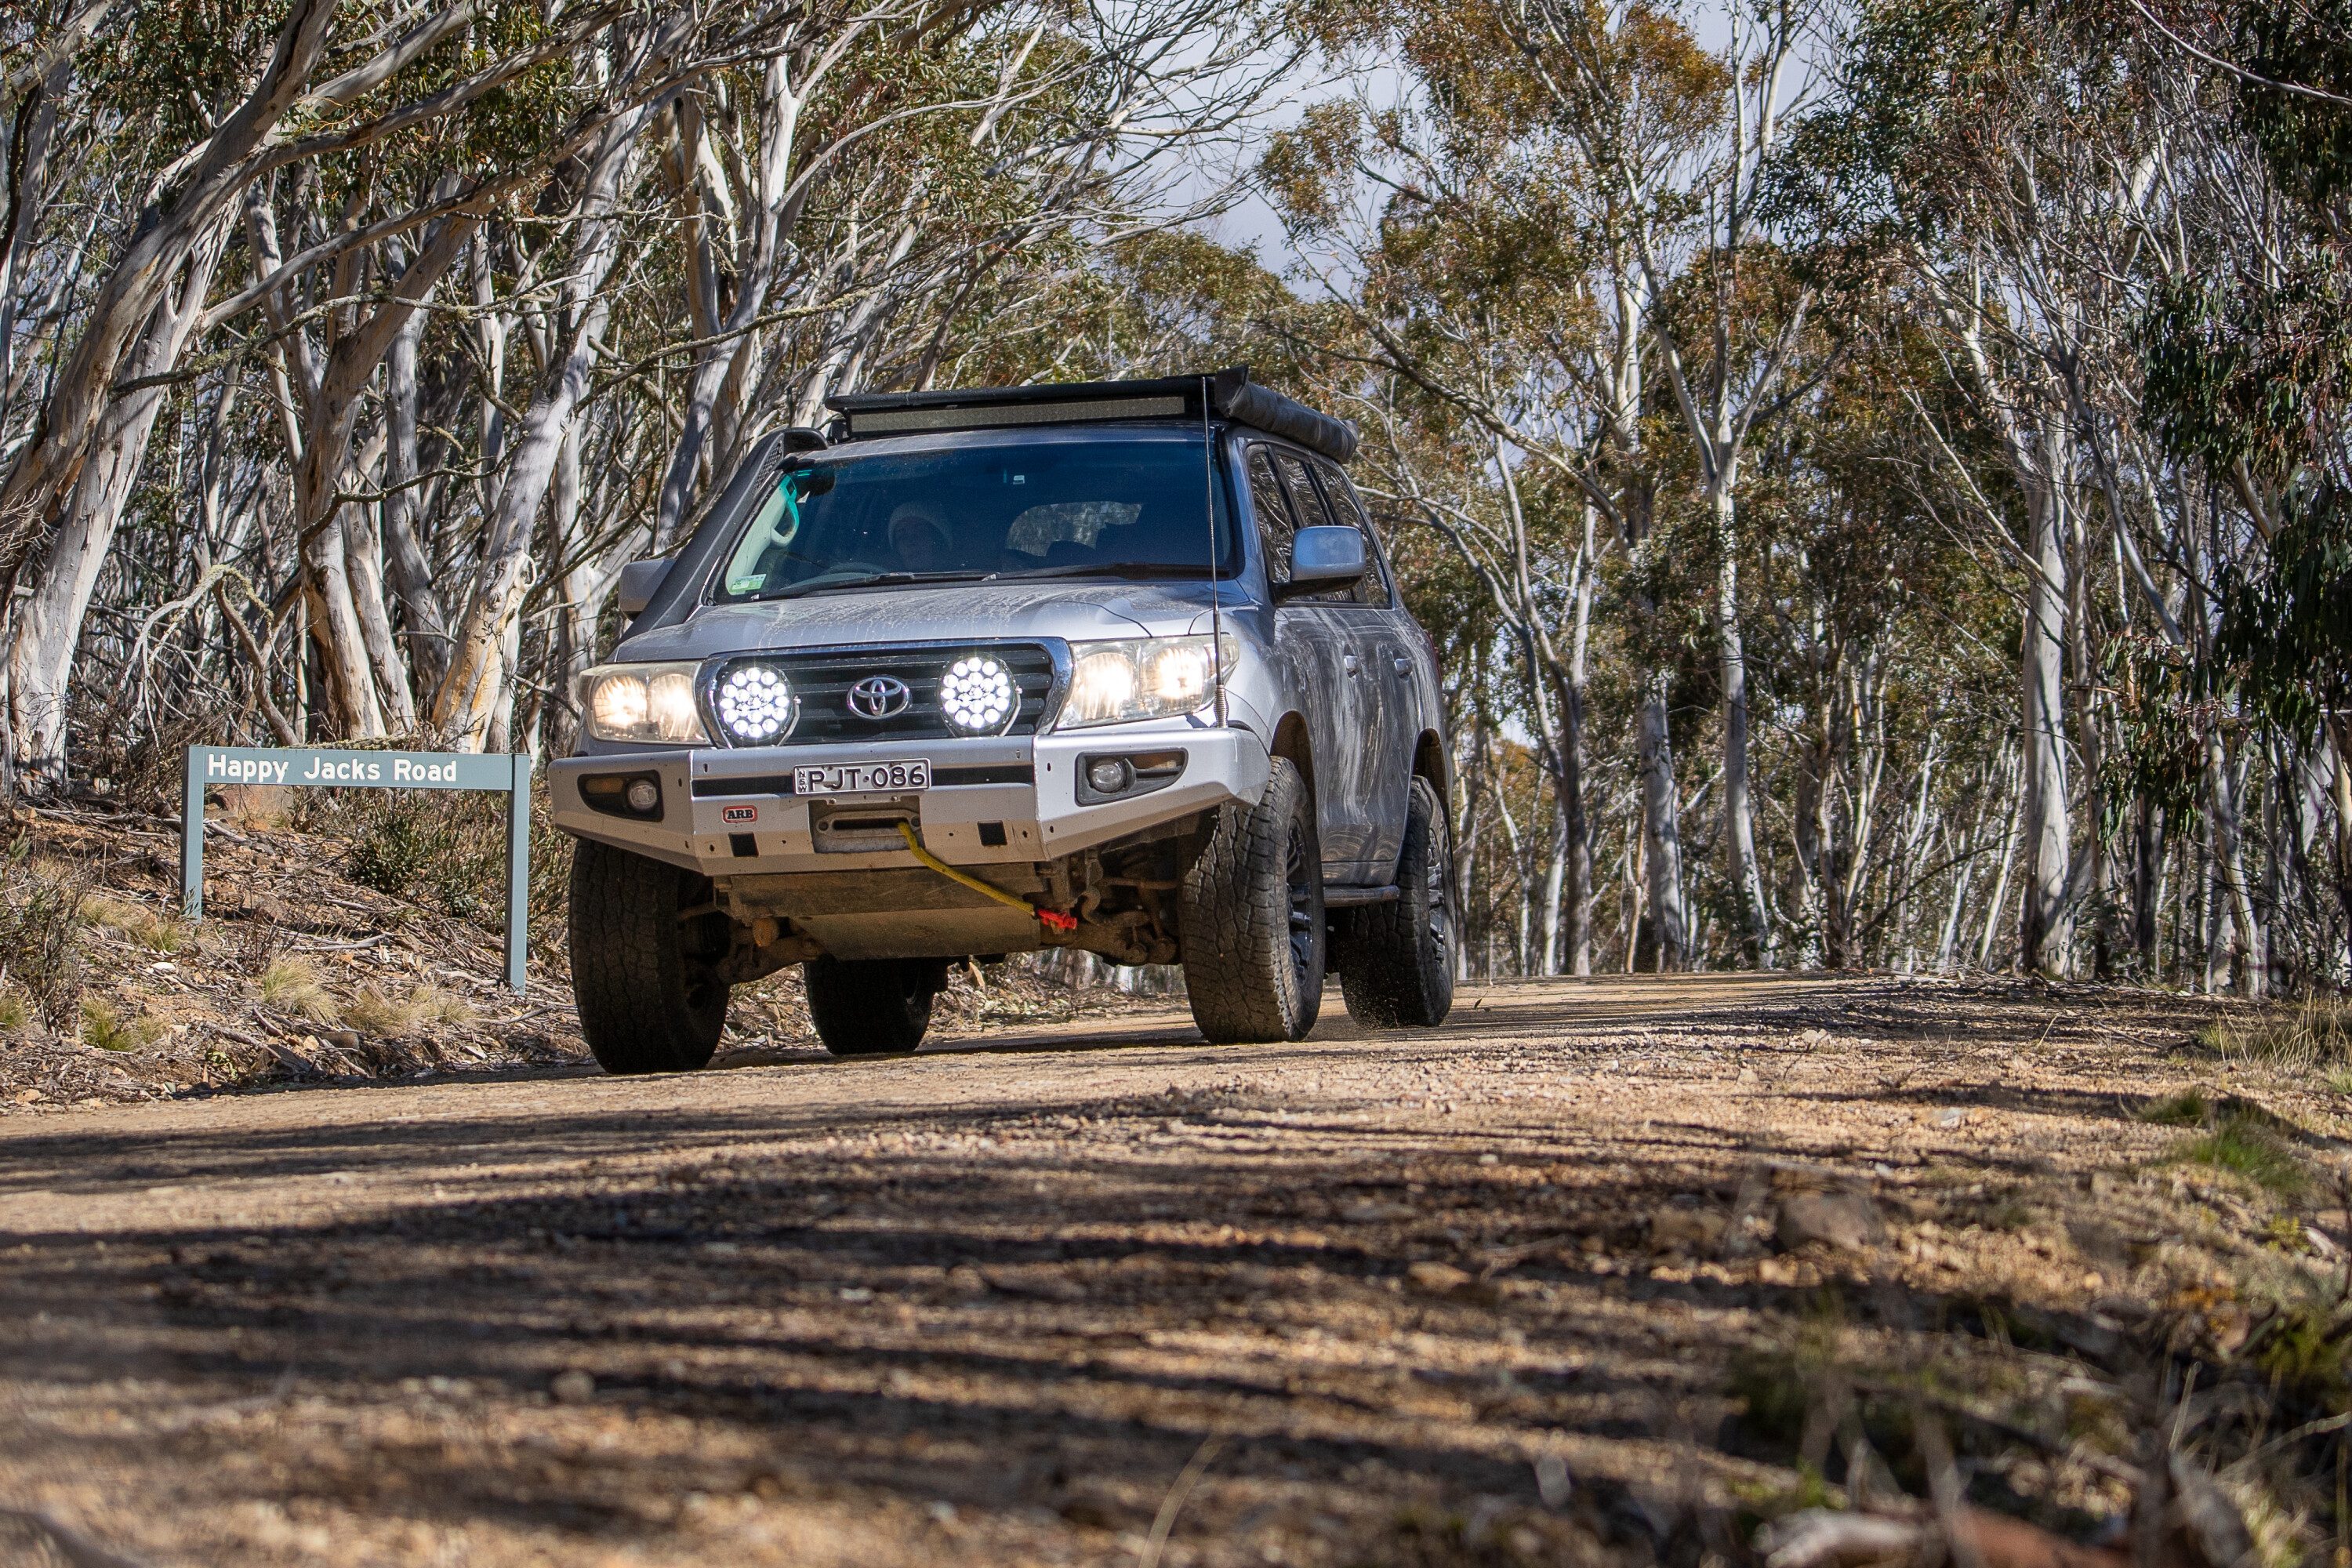
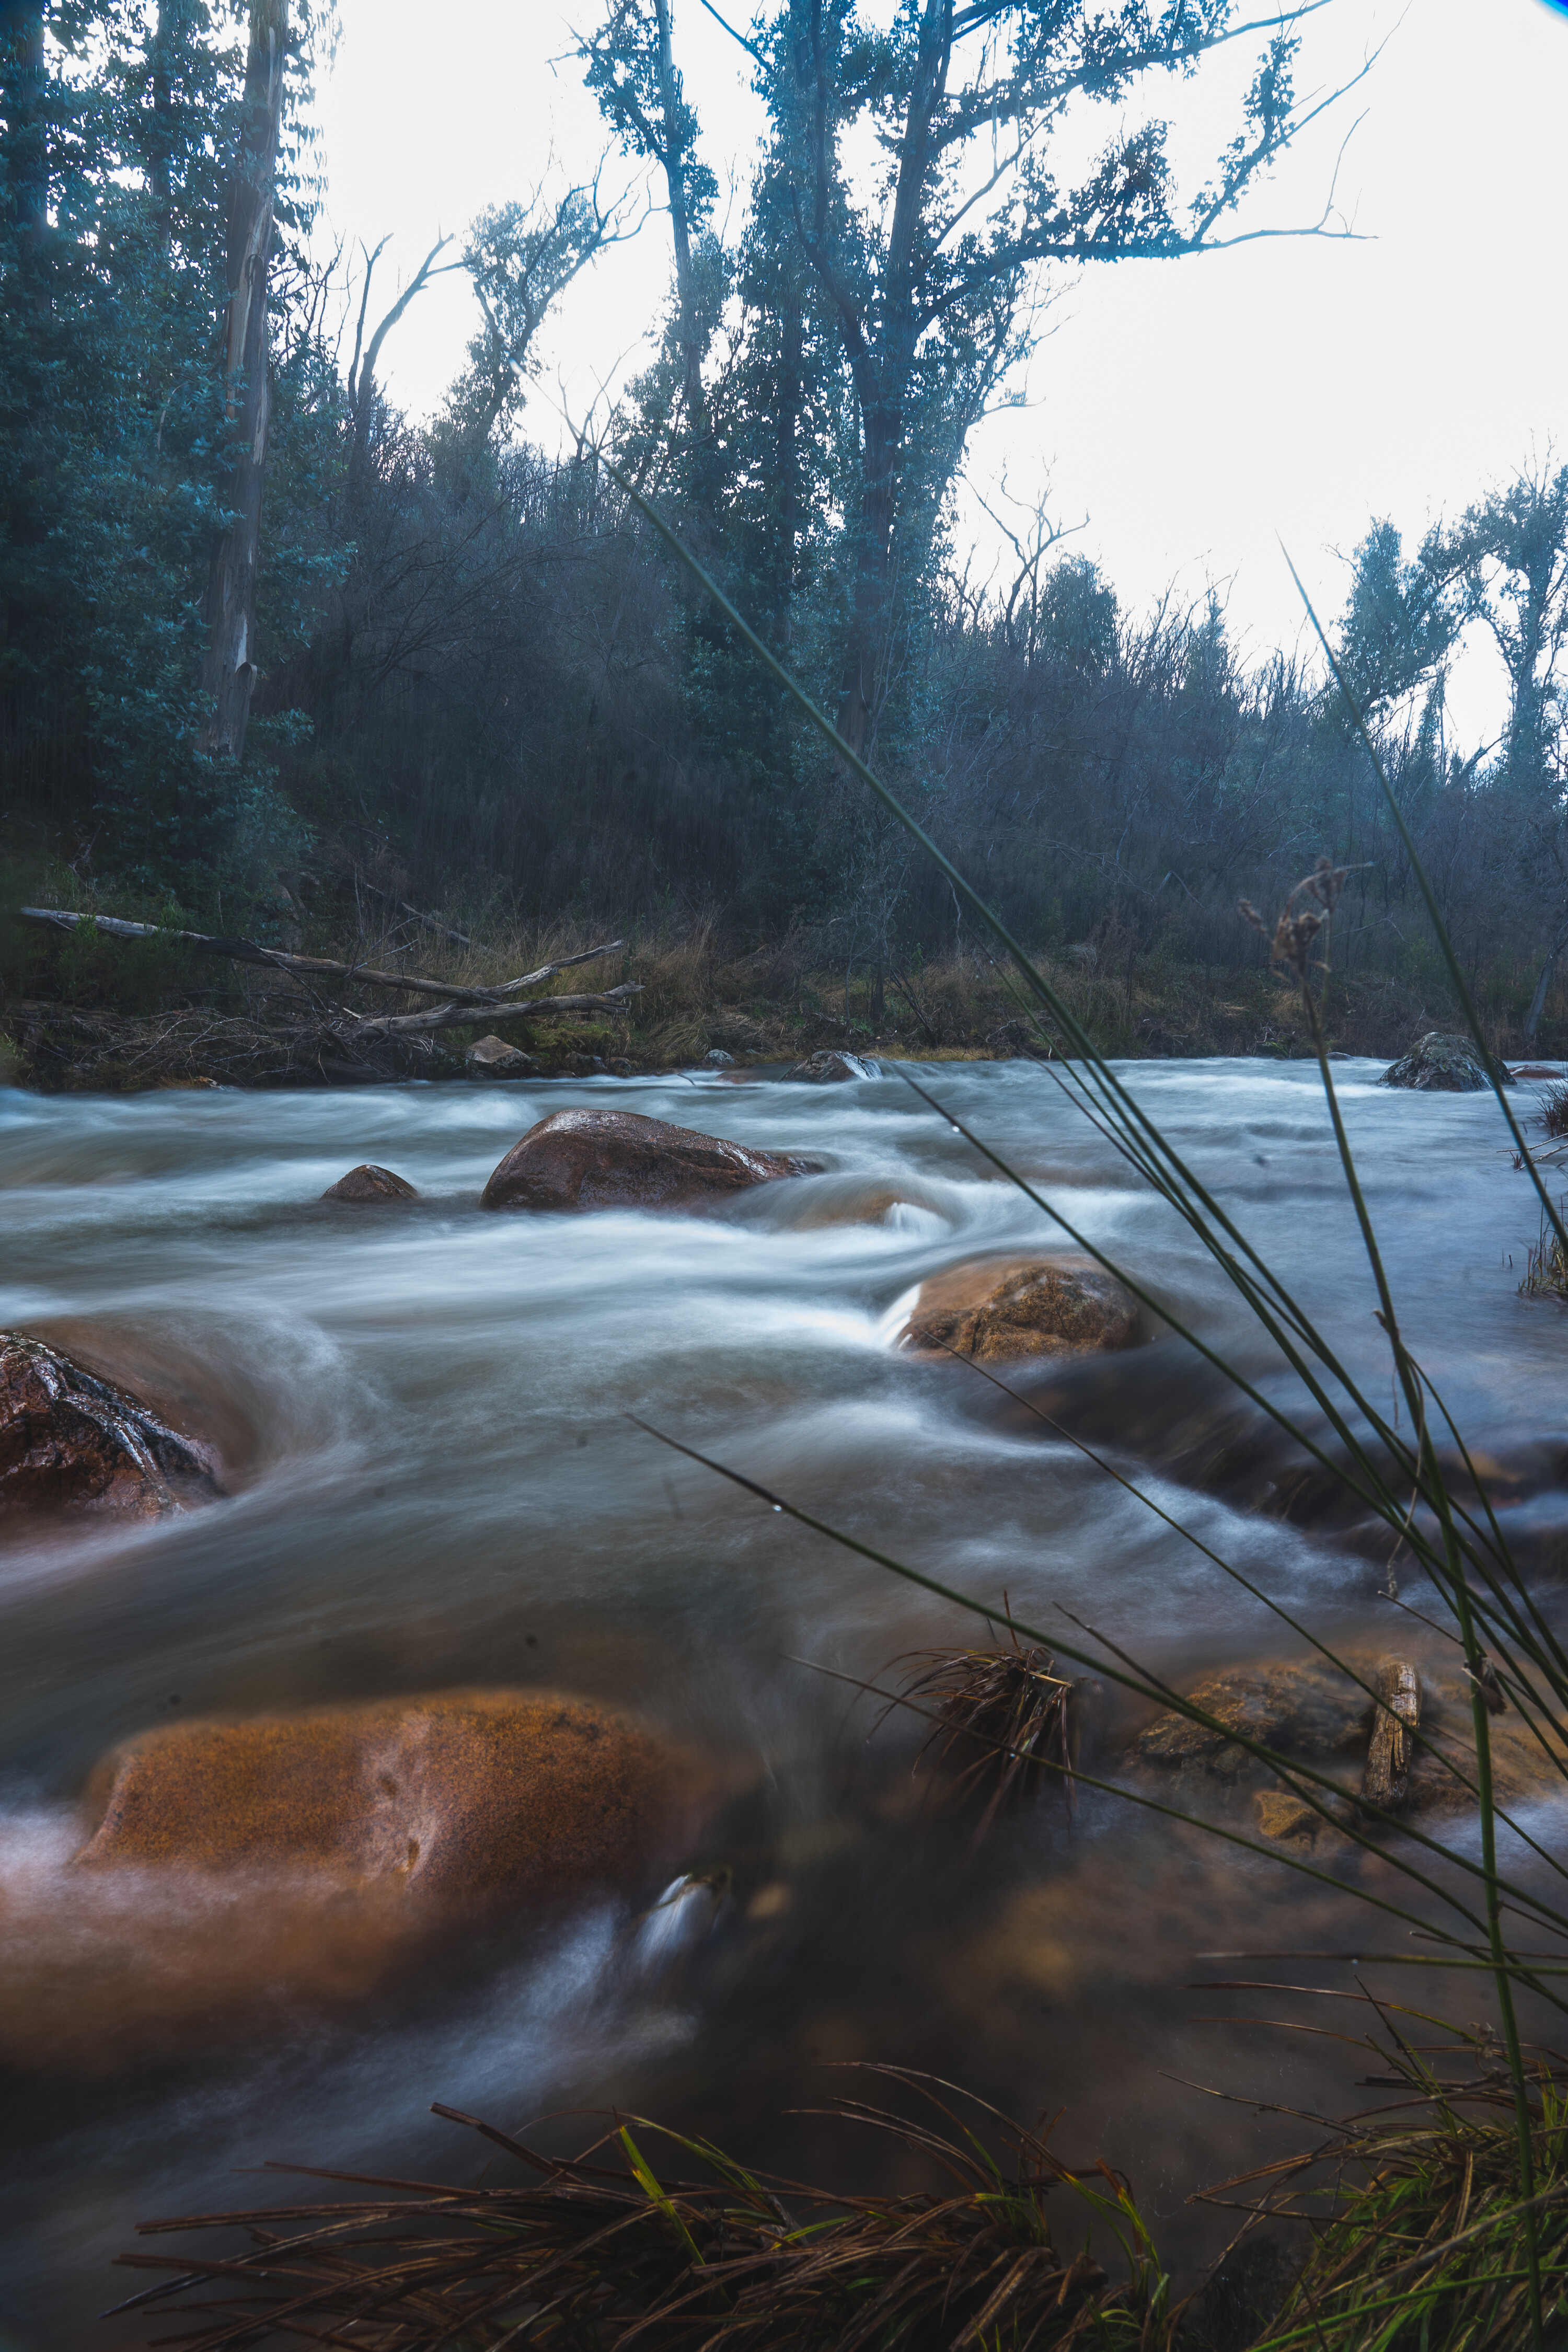
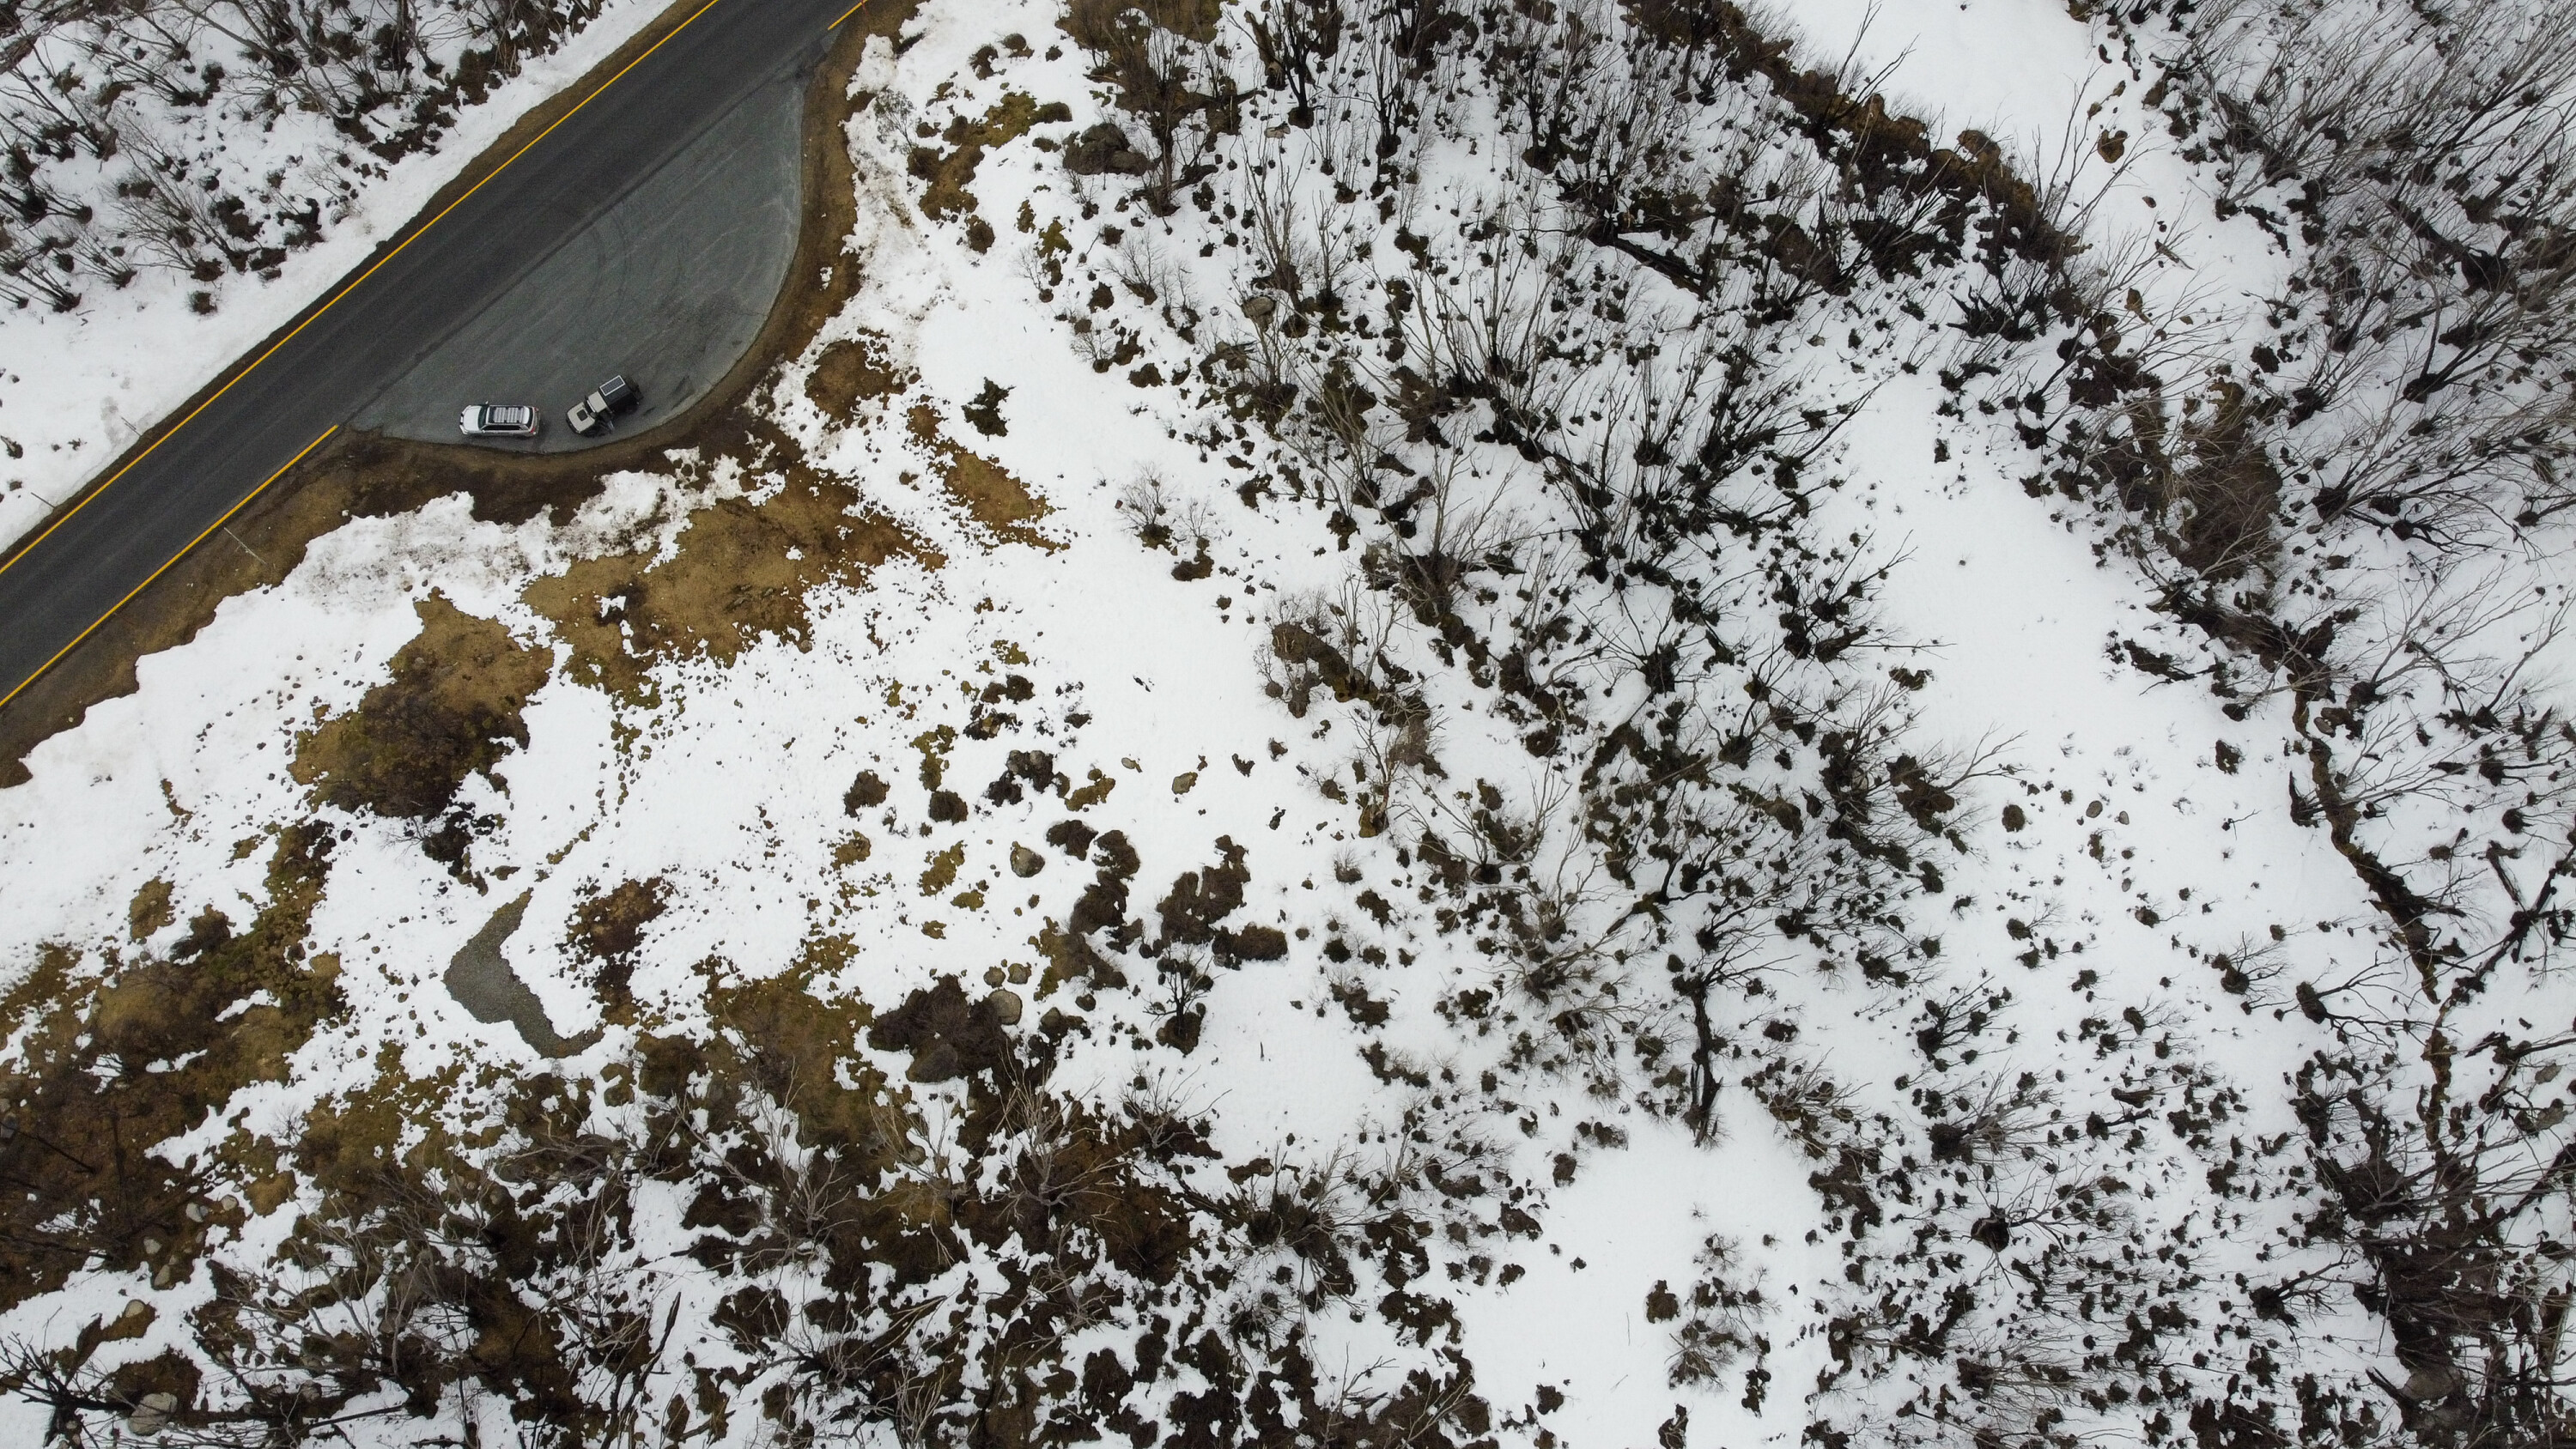
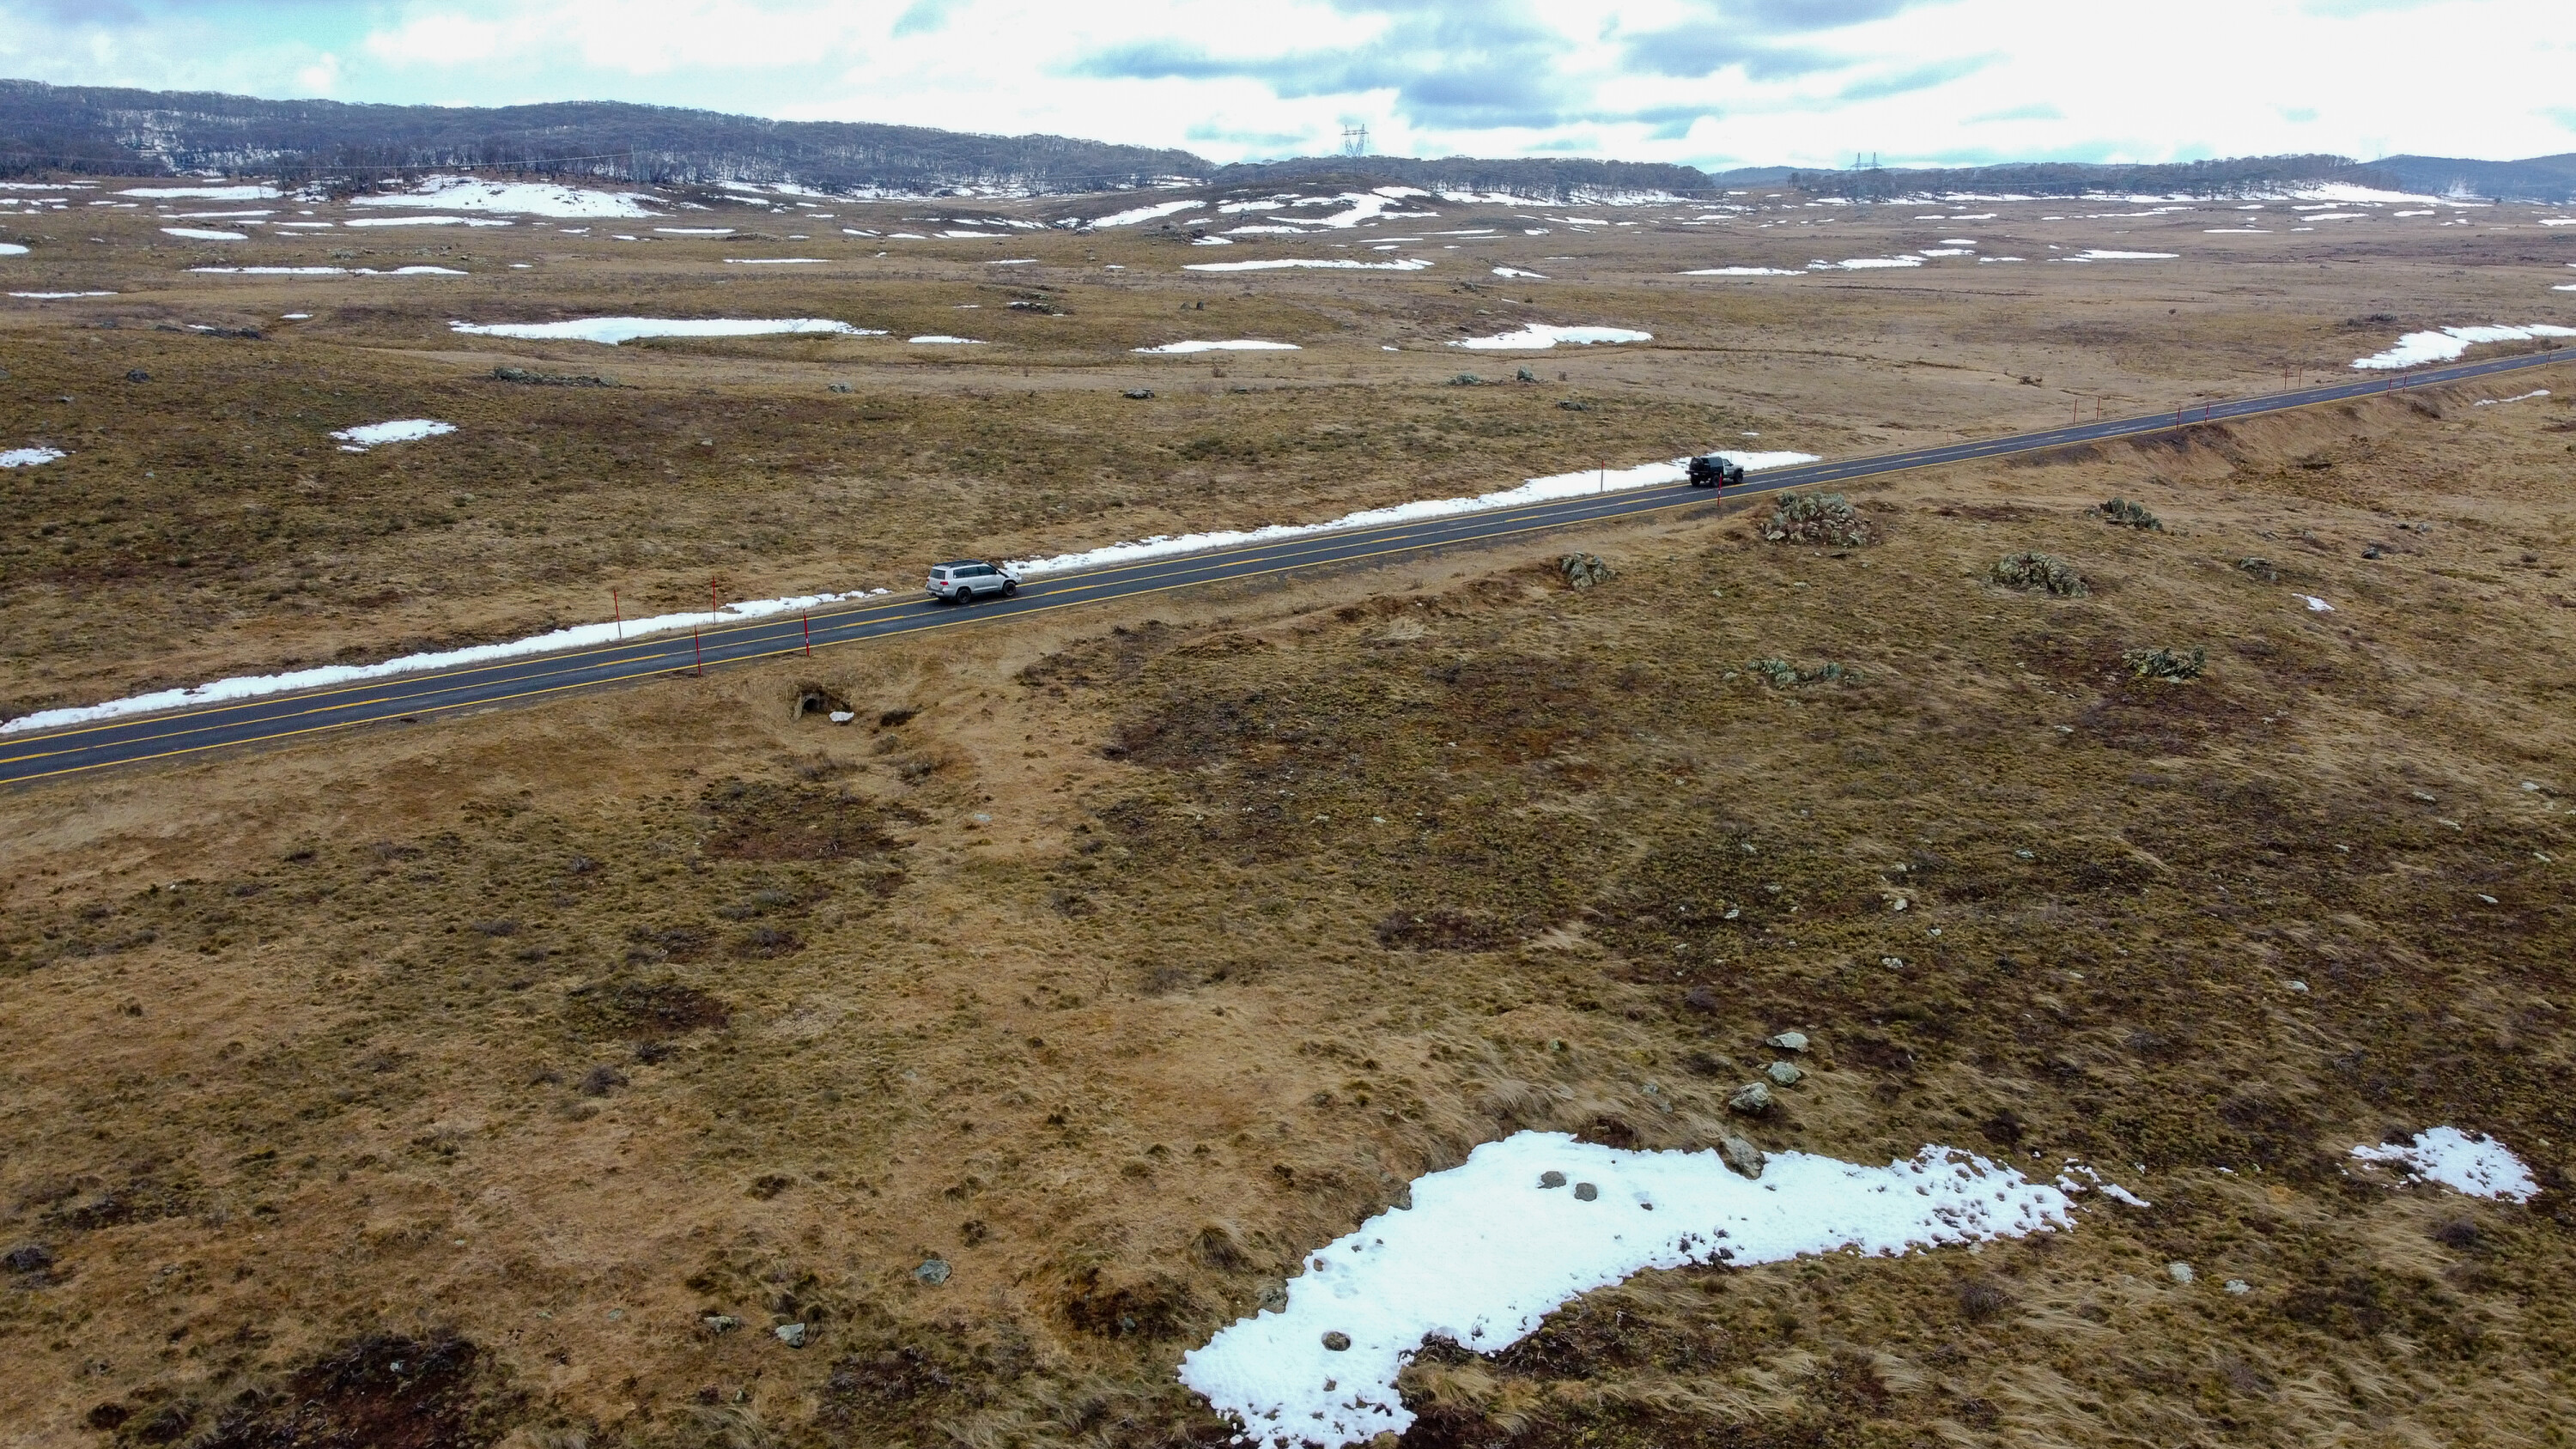
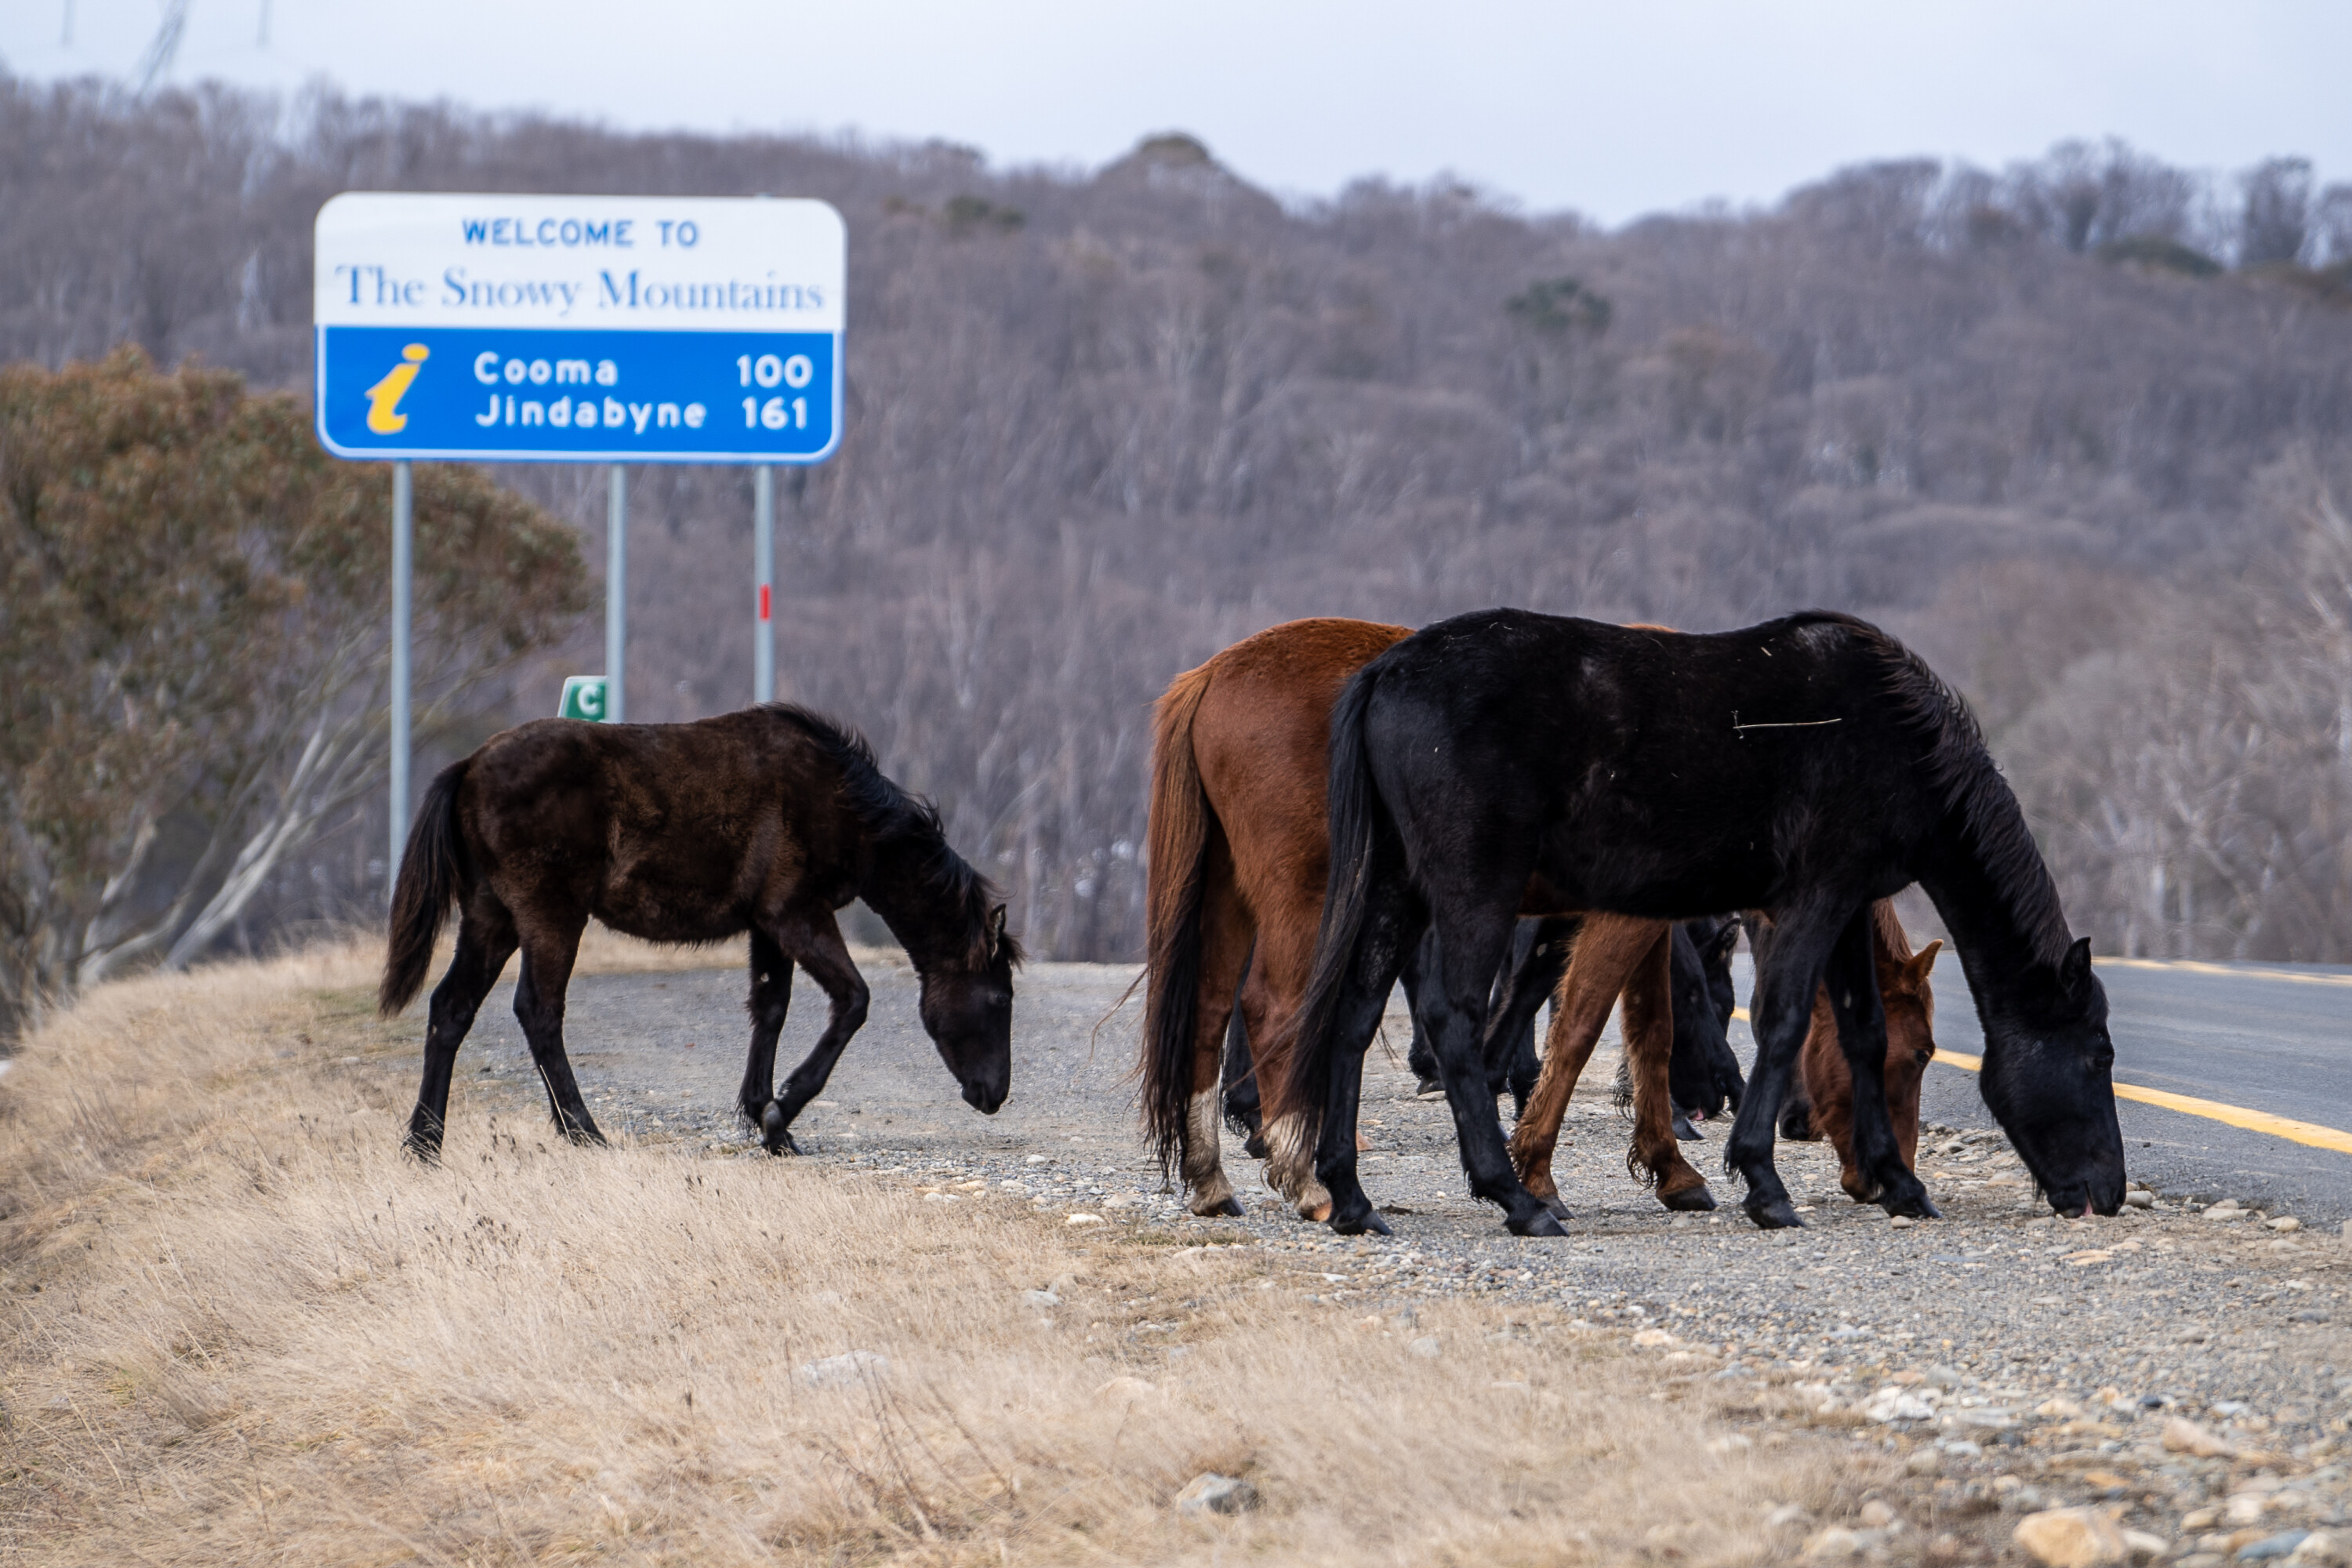
You won’t find it at your local campgrounds, and it’s even less likely to find it at those big bucket-list destinations. But the NSW Snowy Mountain region might just be what you’re looking for.
Soaring high above the surrounding terrain, ‘The Snowies’ as they’re affectionately called, play host to some of the most stunning terrain in Australia and remain almost entirely off the radar of most four-wheelers and campers alike.
1
Five of Australia’s highest peaks, ancient glacial lakes, and 20,000 years of history
Stretching from Canberra in the north to the Victorian border in the south, the region covers endless sweeping plains, five of Australia’s highest peaks, ancient glacial lakes, and 20,000 years of history from ancient feasts to the hardened High Country stockmen of Banjo Paterson’s The Man From Snowy River.
Over the course coming paragraphs we’ve put together a hitlist of how to see the Snowy Mountains, from the places to camp and the places to see, to the tracks that link them all together.
Here’s our guide to help you start planning your trip to one of Australia’s most known, but best kept secrets.
1
Places to camp
Long Plain Hut Campground
If there was ever a campsite to perfectly encompass the Snowy Mountains, it’d have to be the famous Long Plain Hut Campground.
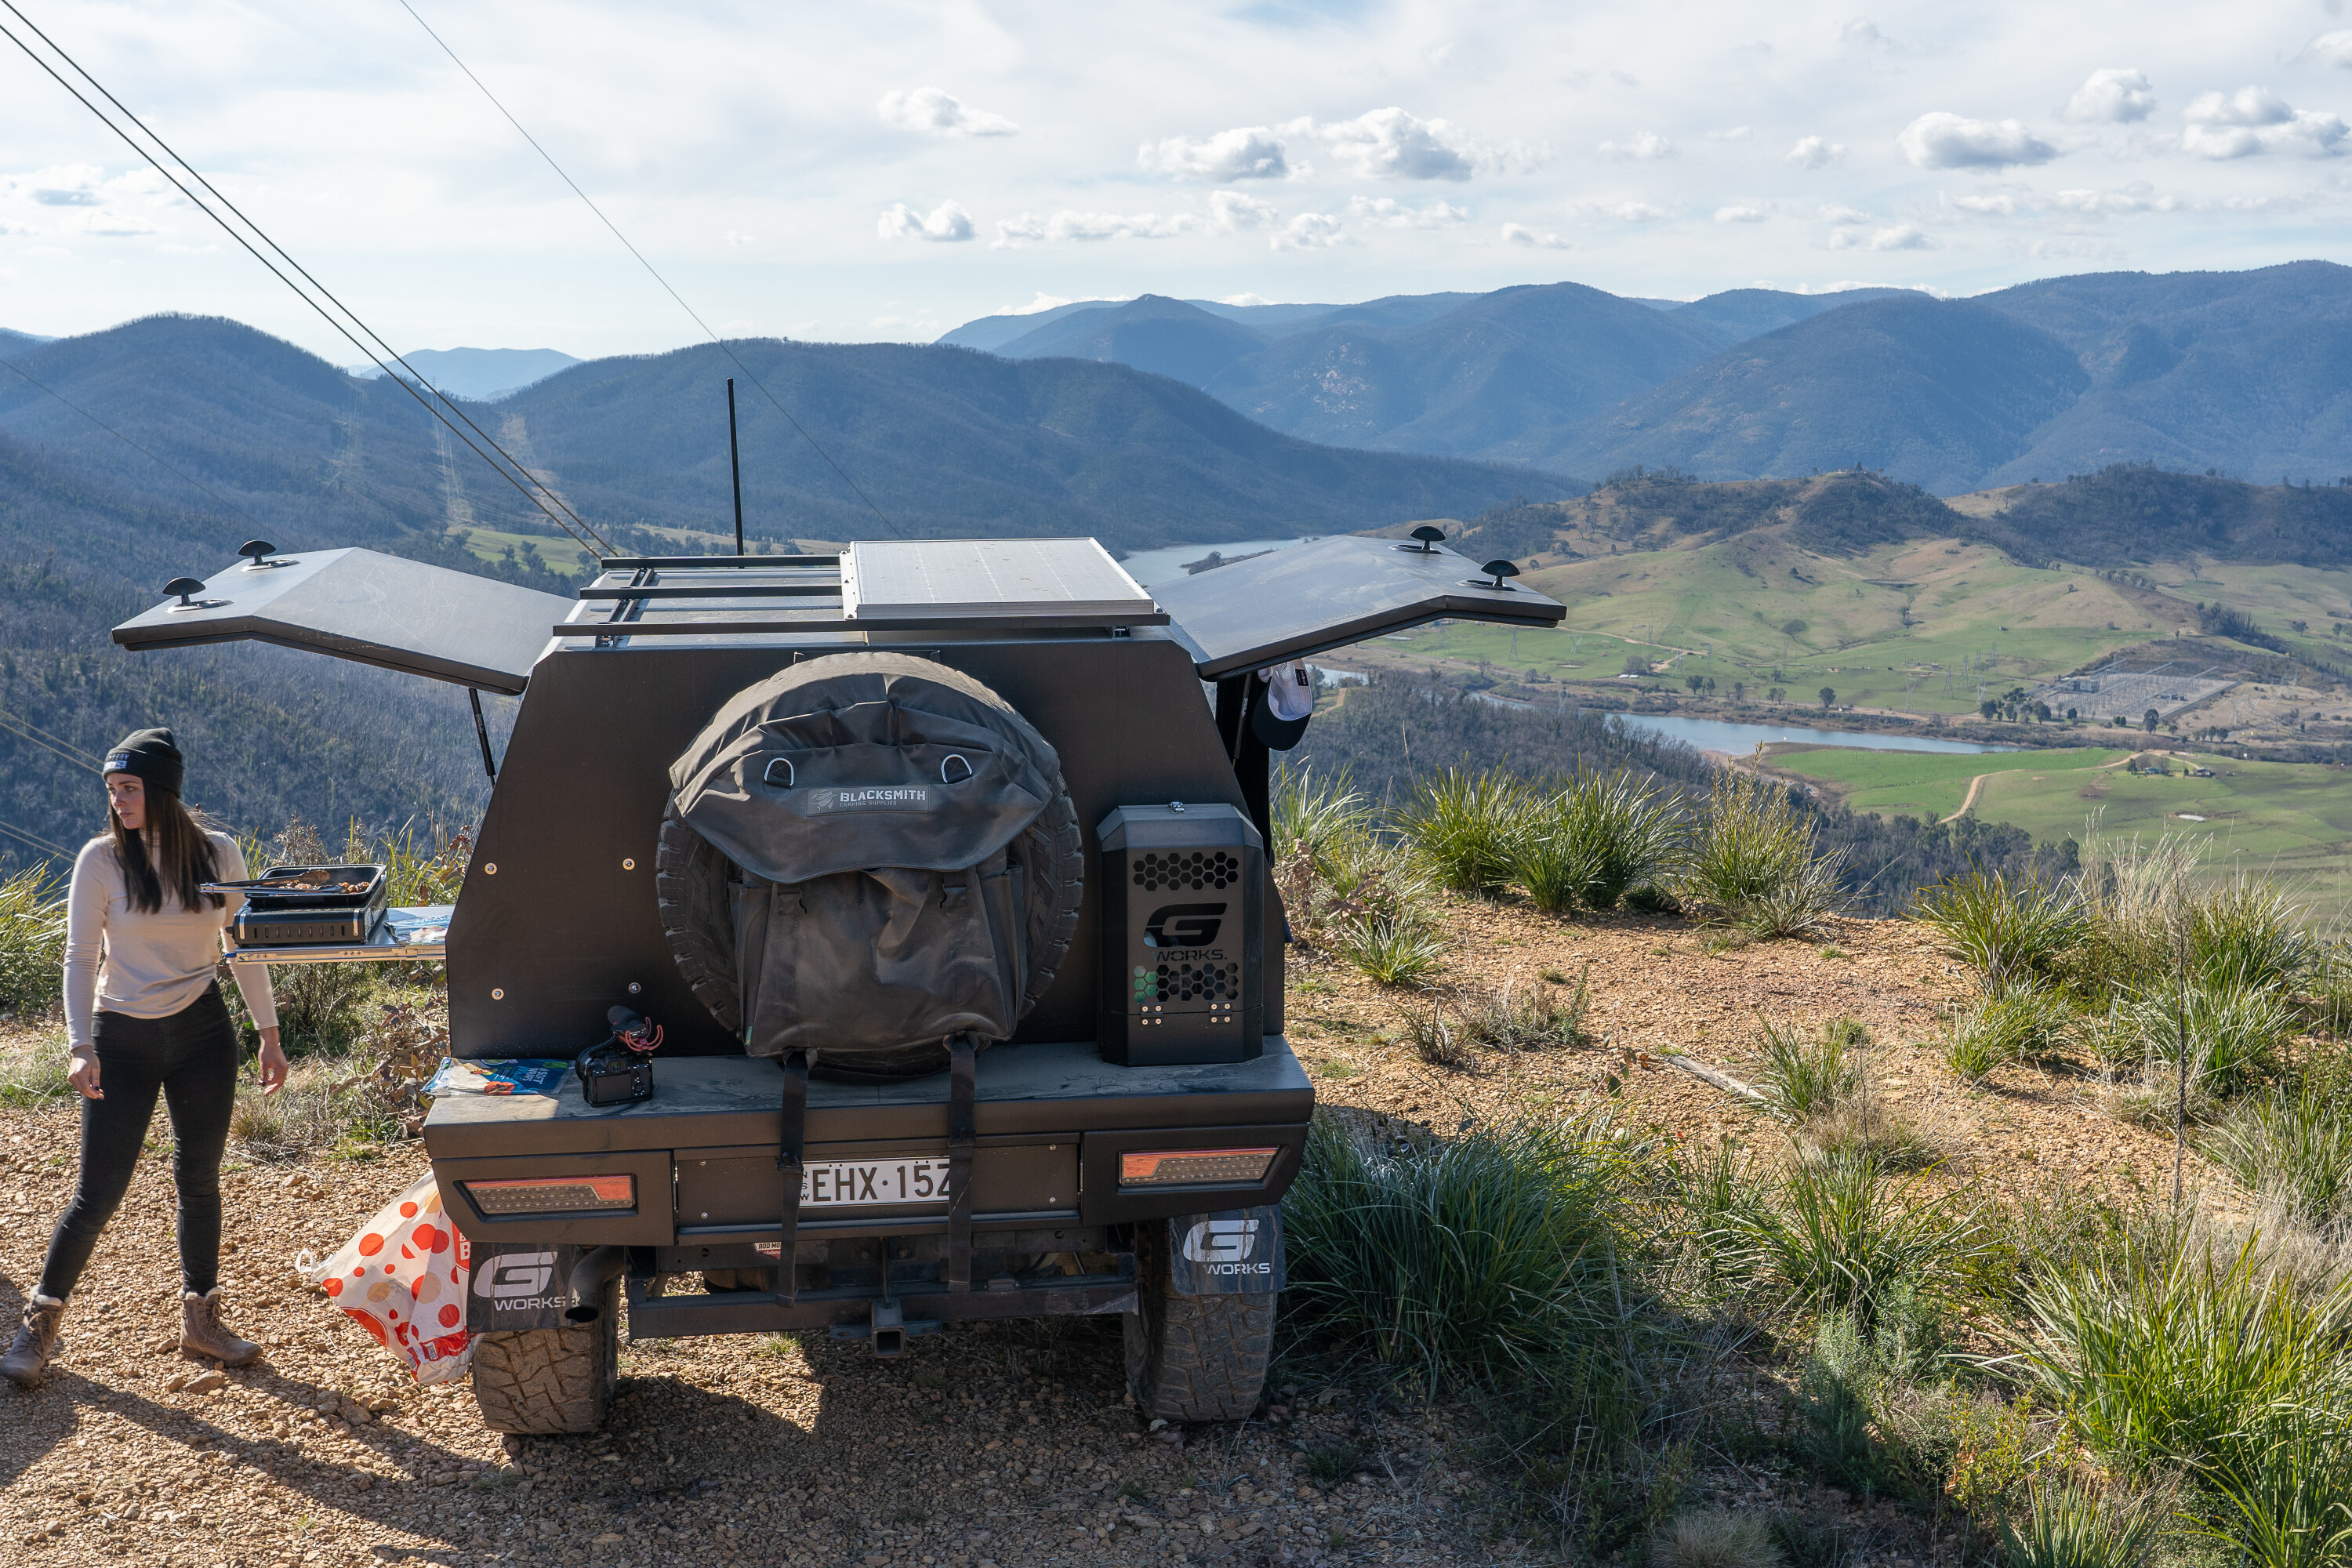
Nestled high in the hills above Long Plain itself, the campground boasts sweeping views of the plains below while offering plenty of protection from the elements amongst the snow gums. While booking is essential (and a $6 fee to do it) the campsites themselves are spacious with minimal infrastructure.
Whether you’re perched up high in a rooftop tent, rolling in with a caravan, or kicking out your swag by the fire, you’ll find a space to suit. Don’t expect any power, but there is a long-drop toilet in an old tin shed for people who like the fancier things in life.
1
The campgrounds themselves are in the old yards of Long Plain Homestead, a remnant of the early pioneer days of the region.
Draped in history, the homestead played host to everything from graziers to gold miners over its 200-year history. You can still visit the hut today; like most alpine huts, it can be used in an emergency, but use your commonsense.
Located just a half hour’s drive from Talbingo and the Blowering Dam to the north, it’s the perfect spot to camp the night as you work your way down through the region.
1
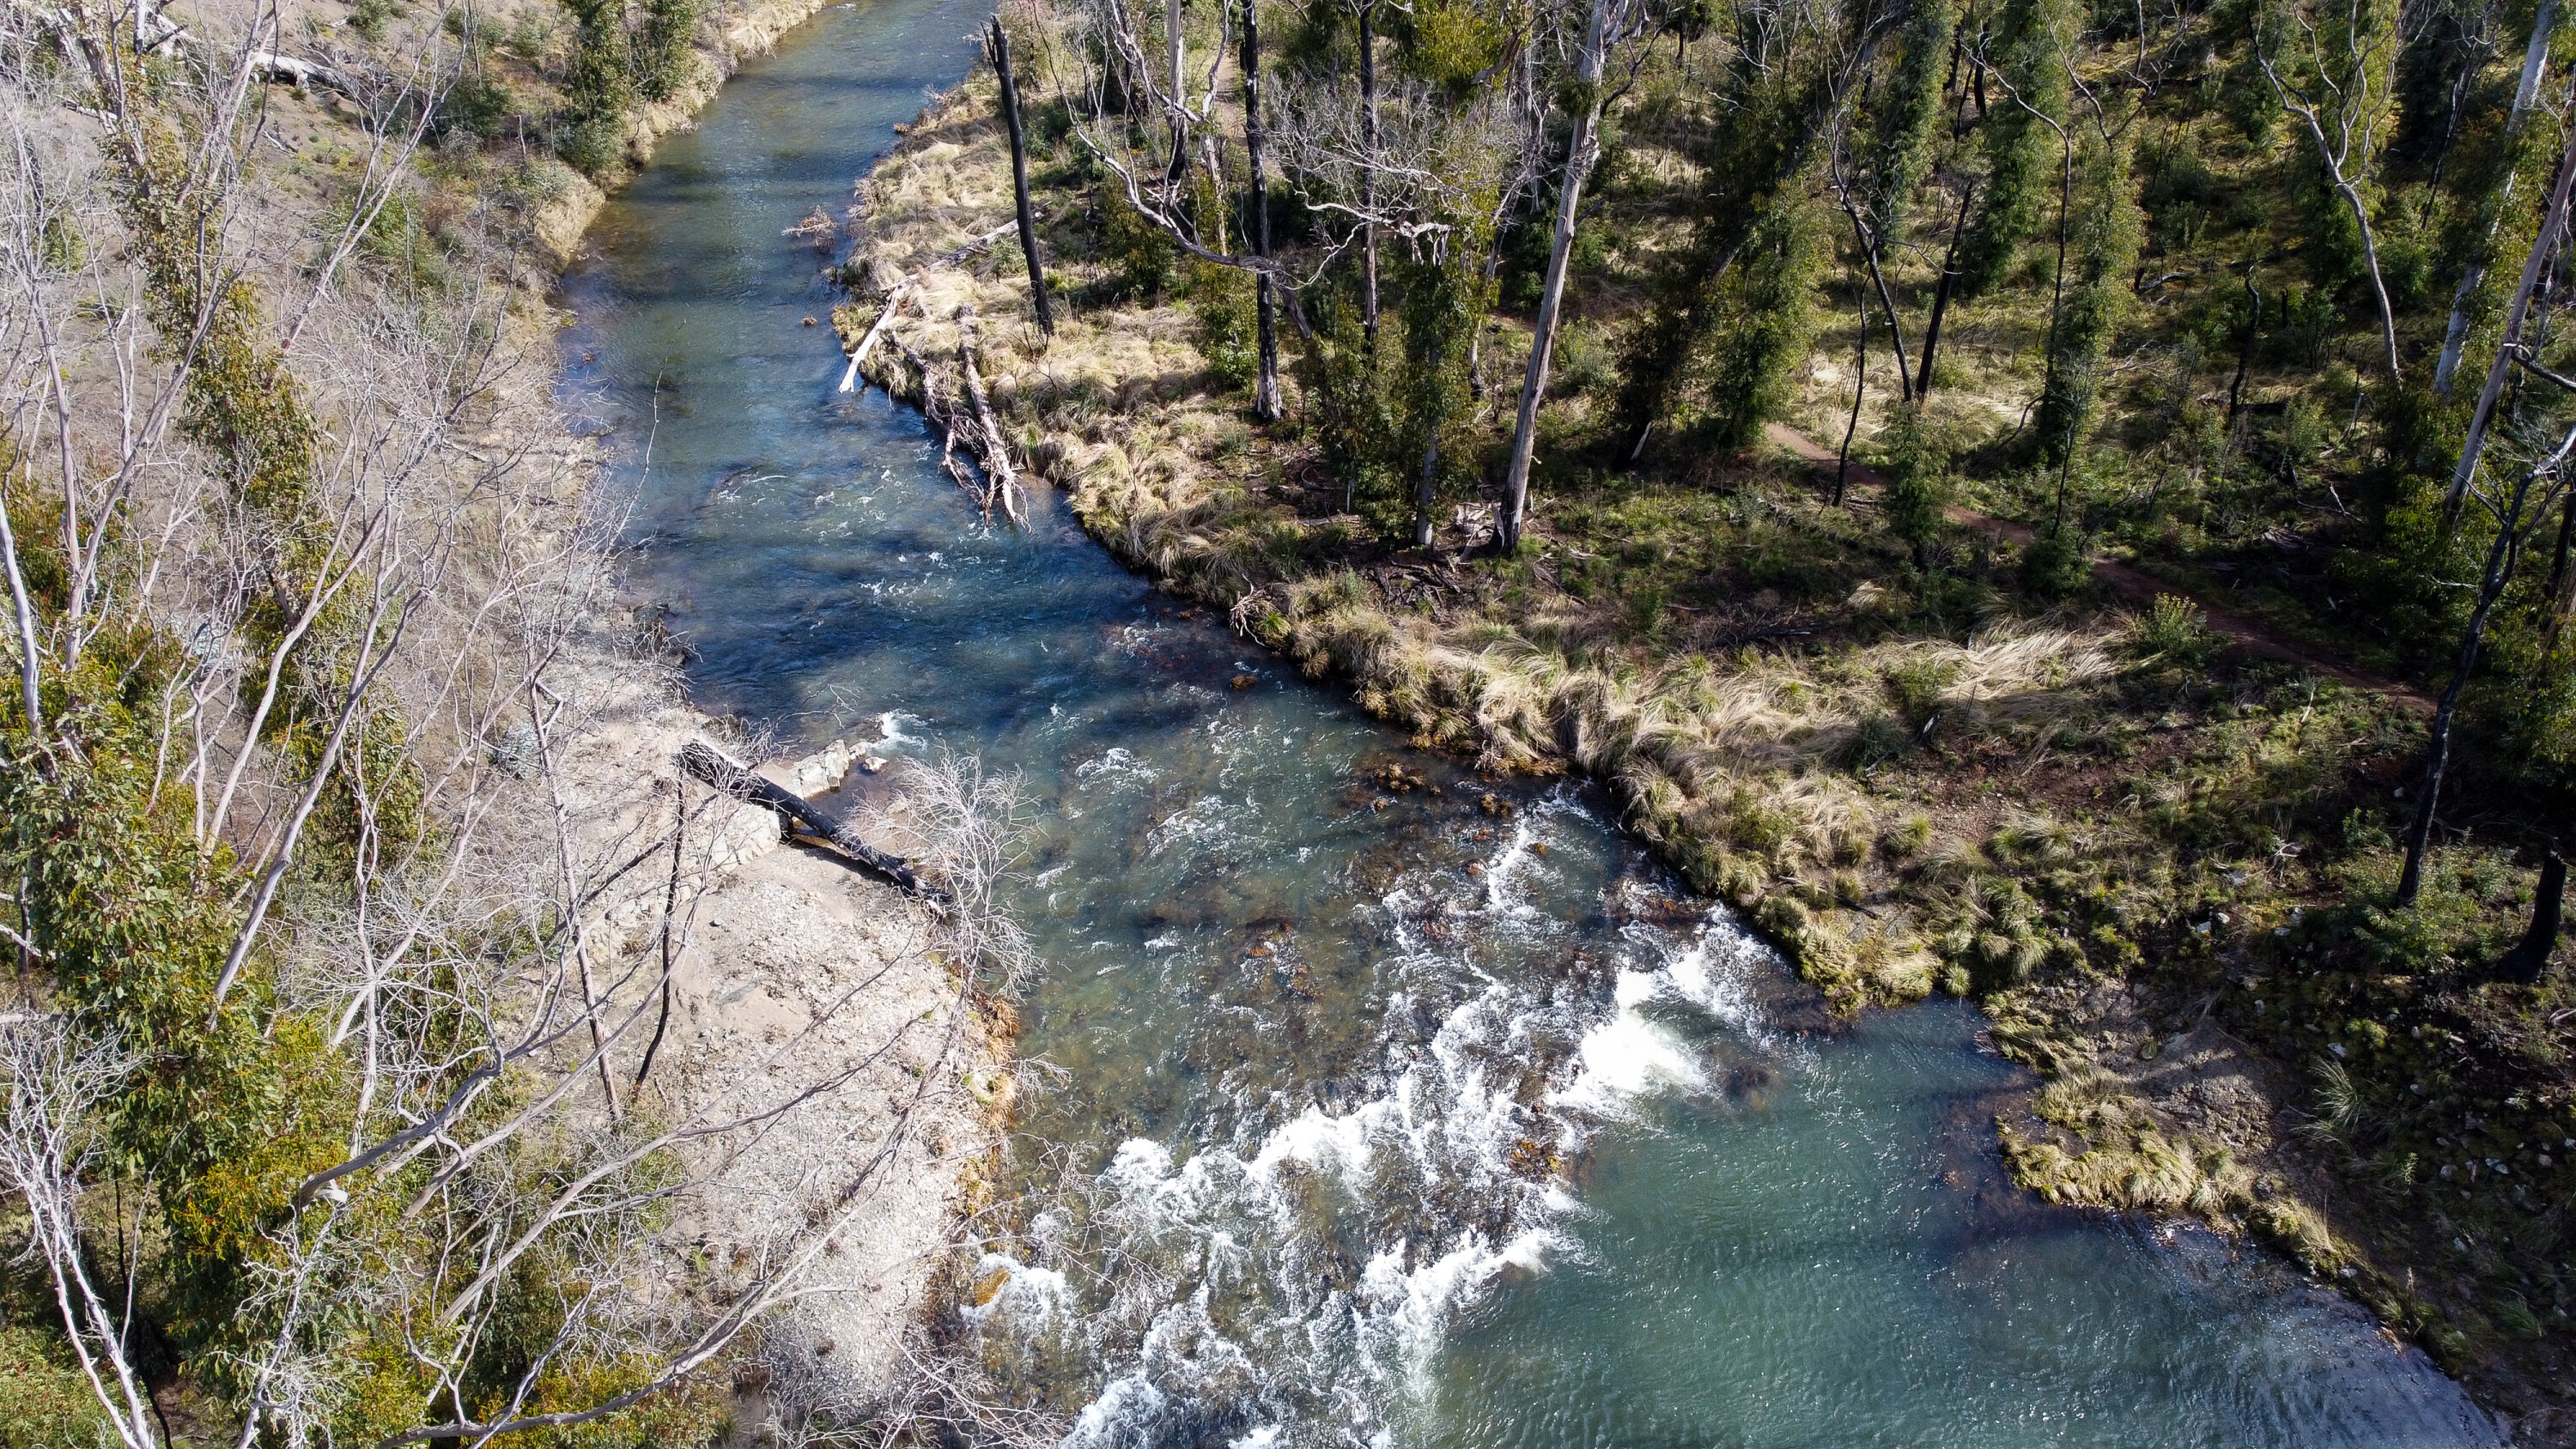
Pinch River-Moyangul Campground
Right at the southern end of the Snowy Mountains, Pinch River-Moyangul Campground is the perfect place to get away from it all, including away from all the other people getting away from it all.
Around 60 kays south of Jindabyne, Pinch River campground will take you a good hour of dirt road winding switchbacks along Barry Way near the Victorian border before you can pull up for the night.
In autumn and spring the camp makes a fantastic spot for people looking to swim or lilo in the mighty Snowy River running alongside the camp, or for people looking to dodge the crowds in winter.
1
If you’re keen on a little deadly-treadly action, the 53km Pilot Wilderness mountain bike ride kicks off nearby, or alternatively just use it as one of the many campsites you can park up your rig for a night around the campfire.
Like most camps in this area, there are long-drop toilets, wood barbecues and fire rings, but you’ll need to bring in your own wood so load up the roof rack before you arrive.
The road in is steep and winding, so is best left for rooftop tents or swags; a caravan is a recipe for disaster and camper trailers won’t be much better.
1
Tom Groggin Campground
Situated literally metres from the very southern edge of the Snowy Mountains region, Tom Groggin is a campsite starting to gain in popularity, but large enough that you can find yourself all alone if you avoid long weekends and public holidays.
Perched up on the northern banks of the mighty Murray River, it can be found 60km to the west of Jindabyne along Alpine Way.
The campsite features rolling alpine plains hidden amongst the gums, so there’s ample opportunity for camper trailers and caravans alike to spread out for a night or a few days.
1
Head down mid-week and you’re guaranteed to find a quiet place to yourself with nothing more than a campfire to keep you company.
While temperatures can get low enough to make you rethink your life choices, you’ll have plenty of eastern grey ’roos and echidnas to distract you.
There are also plenty of mountain biking and hiking trails in the area, but the real attraction is Mt Pinnibar just across the Murray. Just don’t tell Victorians we’re roping it in as part of the Snowies.
1
Gungarlin River Campground
If you absolutely don’t want to see anyone else at camp then Gungarlin River Campground needs to be on your hitlist.
Perched up high in the hills to the northwest of Lake Jindabyne, Gungarlin River Campground is 4×4 access only and has the low visitor numbers to prove it. At 1300m above sea level you’re well above the snowline so expect cold nights and colder mornings.
The area is closed over winter but time it right and you’ll score yourself an epic alpine adventure before the rangers lock the gates.
1
Fording the river is worth the experience so leave the old rickety bridge to its own devices and find a little remote wilderness on the banks of the Gungarlin.
You’ll get a camper trailer in, but caravans are best left on the blacktop. There are basic amenities like tables and barbecue pits, but there are no powerpoints or bollards within cooee so don your Akubra and live a little High Country Men lifestyle for the night.
1
Tracks to drive
Lower Snowy Drive (Barry Way)
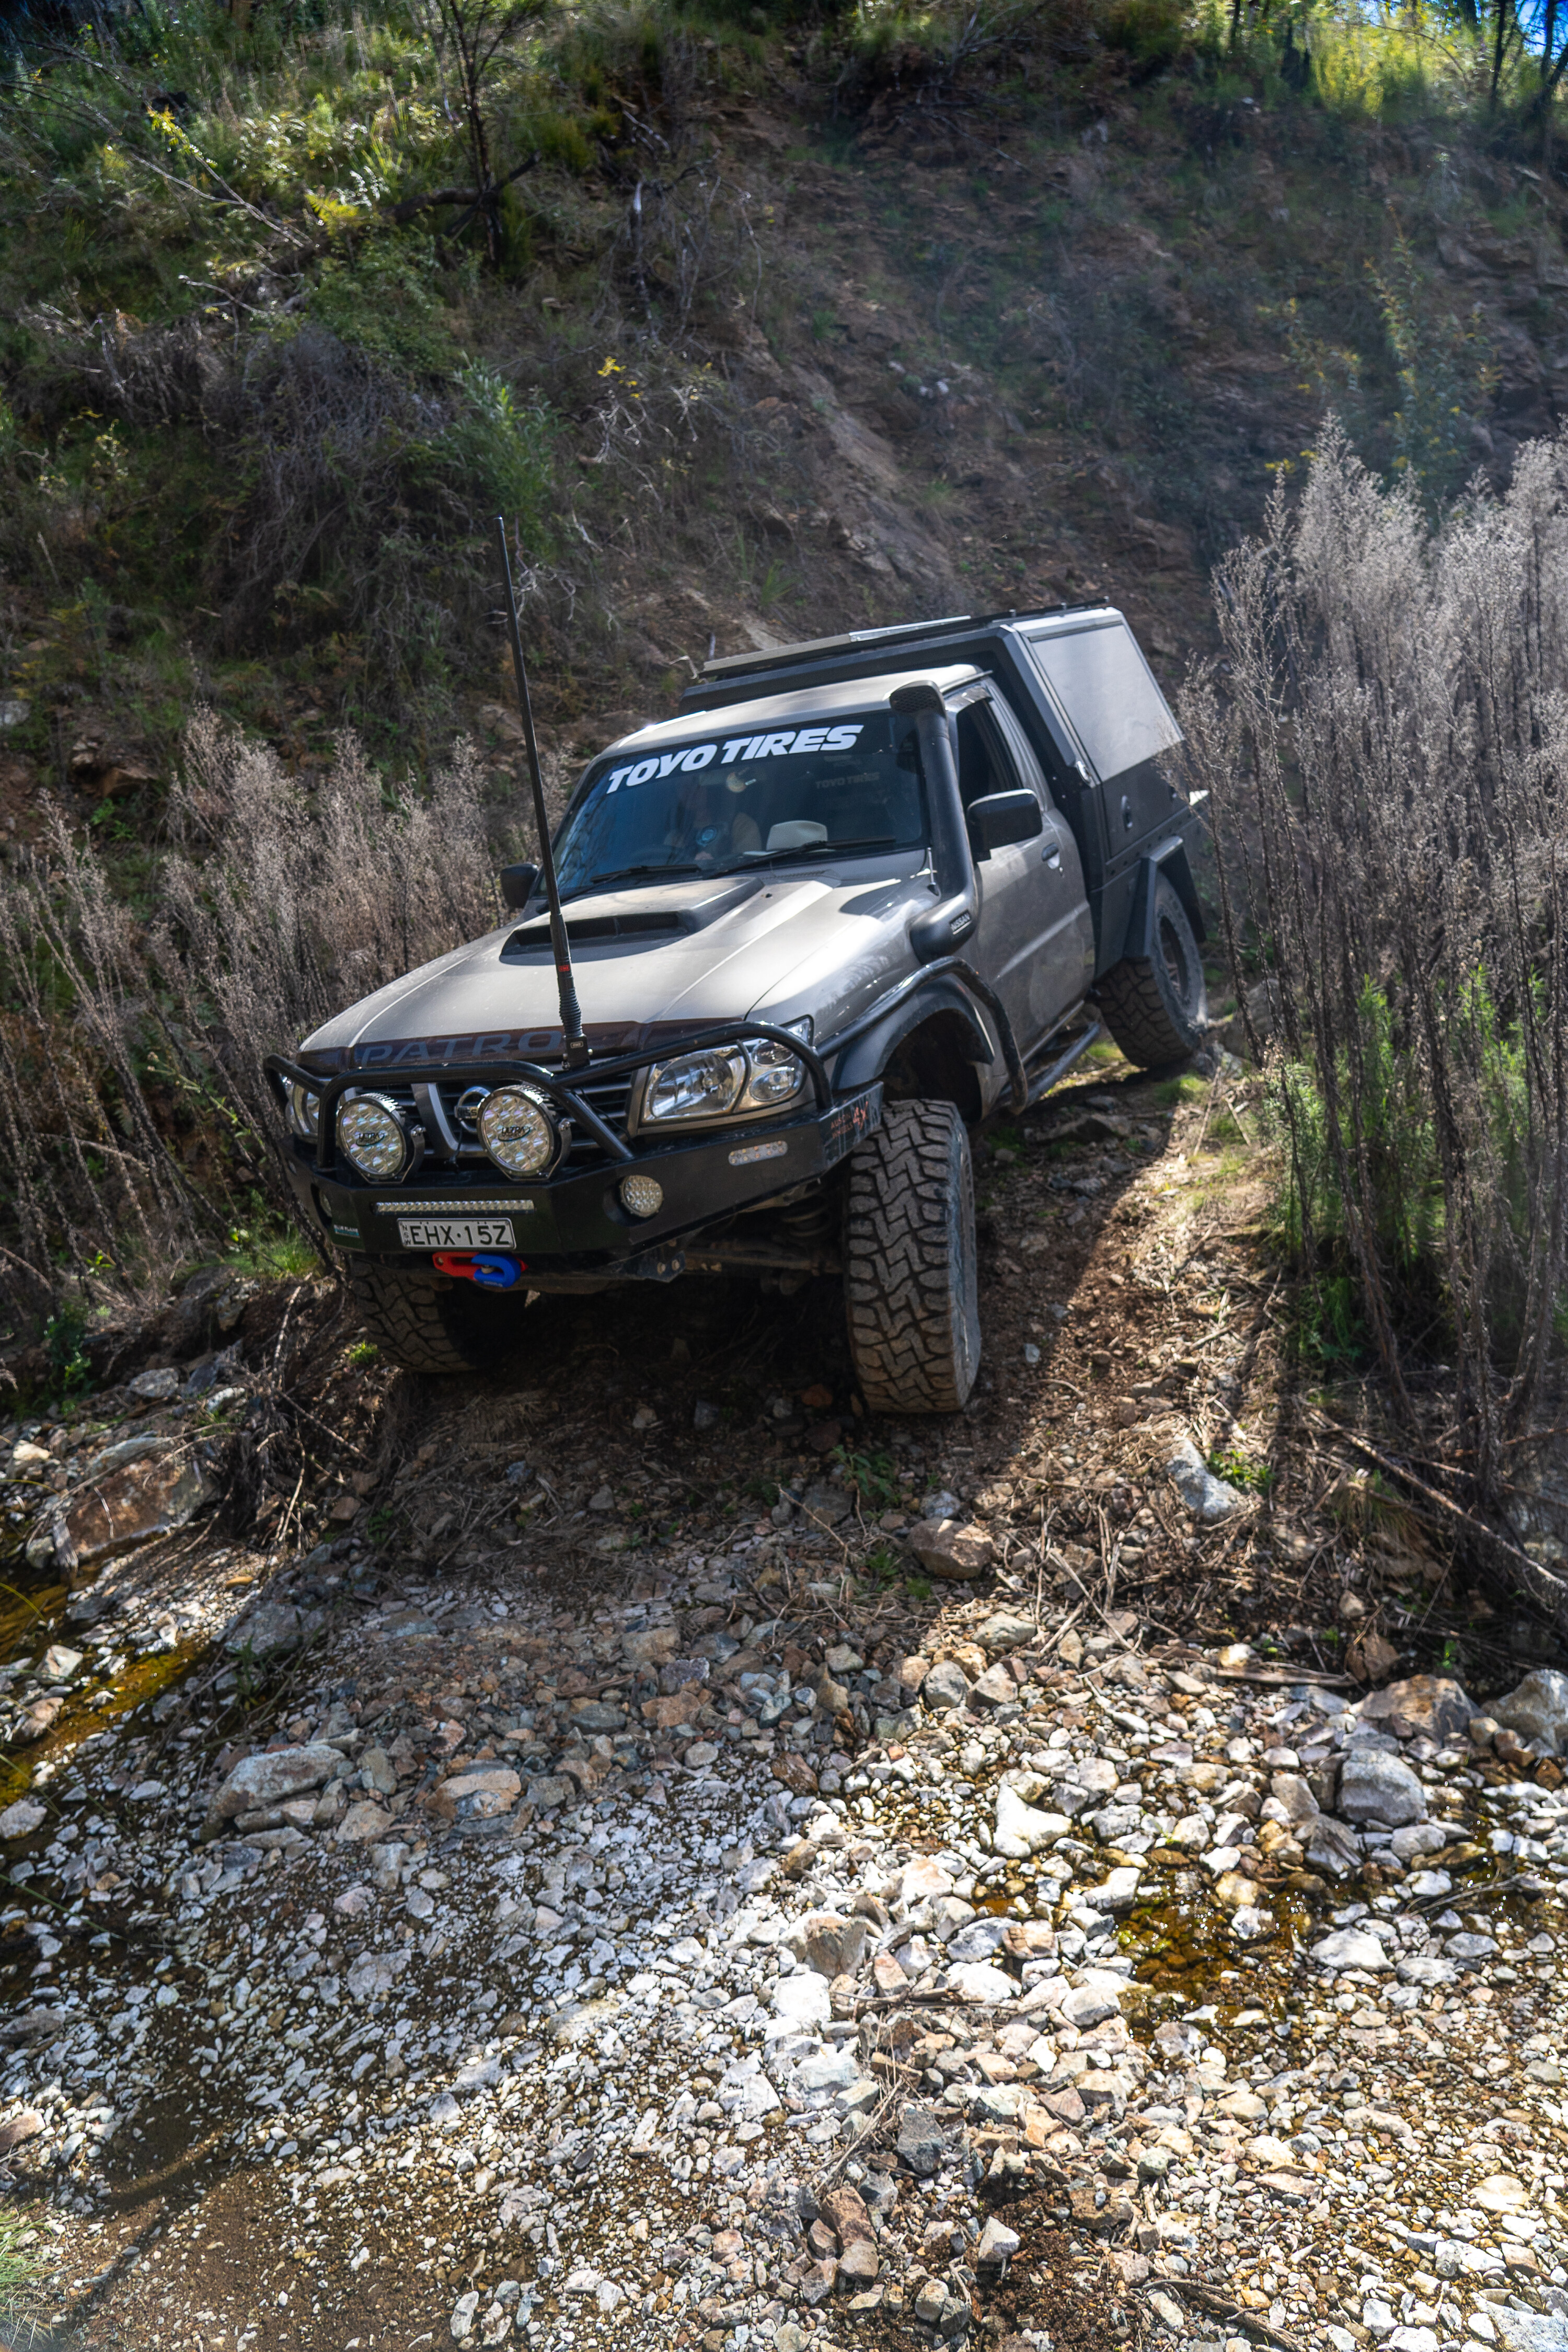
We’re going to level with you here: if you’re after wheels in the air while your 37-inch tyres scrabble for traction you’re going to have to settle for a few side tracks because the main attractions in the Snowy Mountains are epic touring and stunning views, not hardcore low-range action.
The Lower Snowy Drive might just be one of the best too. Showing as Barry Way on some maps, it looks little more than a route from point A to point B, but on the ground it’s a near endless single-lane trail winding its way up and down mountains, through tight switchbacks with perilous drop-offs on either side, and often framed with the mighty Snowy River on one side and sheer cliffs on the other.
Kicking off from Jindabyne in the north, the track meanders through the Lower Snowy River wilderness for nigh on 100km, passing by countless lookouts and campsites along the way.
1
If you fancy flicking a line, the river is teaming with life, or stop in at Jack’s lookout for a bird’s eye view of the river.
Somewhere along the way you’ll tick past a sign marking the Victorian border, and while the terrain won’t look any different, you’ll have access to some epic tracks if you’re looking to throw a little hardcore in with your touring.
When you cross the border you can hook west through a labyrinth of trails to end up near Tom Groggin and Mt Pinnibar, or push east to take on the mighty Deddick Trail.
1
Broken Cart Trail
While there are plenty of quaint towns and stunning scenery if you follow the blacktop south to the Snowies, save the pie shops and breweries for the return trip.
Instead, on the way down, pick up a track called the Broken Cart Trail. Starting in the back of the Brindabella Ranges in the ACT, the Broken Cart Trail is a sure-fire way to experience the Snowies in good and proper isolation.
The track will see you zig-zagging through pristine alpine wilderness for over 100 kays as you make your way deeper south into the Snowies. Follow through enough river crossings and bog holes and you’ll eventually link up to the northern end of Long Plain Road and all the touring and scenery it has to offer.
1
If you’re on the hunt for mud, ruts, and wheel lifts, allow yourself an extra day or two as you travel along the trail to explore the side tracks.
Skirted by the Bimberi Nature Reserve to the east and Blowering Dam to the west you’d be hard pressed to find any signs of civilisation out here.
Like most regions in the mountains, it can be wildly affected by weather so pack warm, expect closures over winter, and don’t head in without a chainsaw. You should be right towing a camper along its length, but your off-road van may be a gamble.
1
Geehi Walls
If you’re a history buff, a fiend for a good side track, or just want to explore more of the iconic high country huts, then the Geehi Walls and Major Clews Trail loop should be right up on your list.
If you’re heading up in a Jeep on 40s, don’t expect too much of a challenge, but for everyone else it’s a great day out exploring with the hubs locked in.
Kicking off around 30 clicks south of Khancoban along the Alpine Way, you’ll hook a right at the Geehi Picnic Area where you’ll find basic amenities and ample camping at Geehi Flats, as well as the Geehi Hut to poke your head into.
2
You’ll head deeper into the campground along the Behrs Flat Trail before facing a couple of classic Snowy Mountain river crossings on the Swampy Plain River.
In warmer months, the path is well trodden but with river rock bases you’ll need to take things slow. As the snow melts above, the water levels can rise, so don’t assume it’ll be an easy crossing and barrel in blindly.
Deeper along the track you’ll hook right at the Old Geehi Campground and start the long climb back up into the hills. The track gets steep, rocky and narrow in parts but the views are well worth it and the old cattleman huts along the way provide plenty of opportunity to stretch the legs.
1
Mt Pinnibar
We’ve left the best to last because quite frankly it’s a little morally ambiguous.
Not in the end-up-in-the-newspaper kind of way, more like eating an apple when your neighbour’s apple tree hangs over your fence line. Mt Pinnibar is just a stone’s throw across the Victorian border, but it’s best accessed from none other than the previously mentioned Tom Groggin campsite you’ve already punched into your must-see Snowies itinerary.
You might as well air down your tyres at camp because you’ll cross the mighty Murray River right from Tom Groggin over on to the Tom Groggin track in Victoria.
1
You’ll be reaching for 4-low as your spotlights point to the sky and your tyres will be scrabbling for traction as you navigate the various ruts and steps along the way.
You’ll throw it in 4-high as you snake your way through the dense bush before finally starting the climb up Mt Pinnibar itself; with the summit a massive 1772m above sea level it’s one of the highest roads in the country. At the summit, you’ll have endless views out over snow-capped mountains in every direction, but the climb up is just as good.
You’ll be reaching for 4-low as your spotlights point to the sky and your tyres will be scrabbling for traction as you navigate the various ruts and steps along the way.
It copped a flogging over the 2019/2020 bushfire season, and receives plenty of snowfall, so is subject to a variety of closures. If you can align the stars to get up there when there’s snow on the ground it’s one of the most magical tracks in Australia. Just don’t let the Victorians see you sneaking over the border.
1
Sights to see
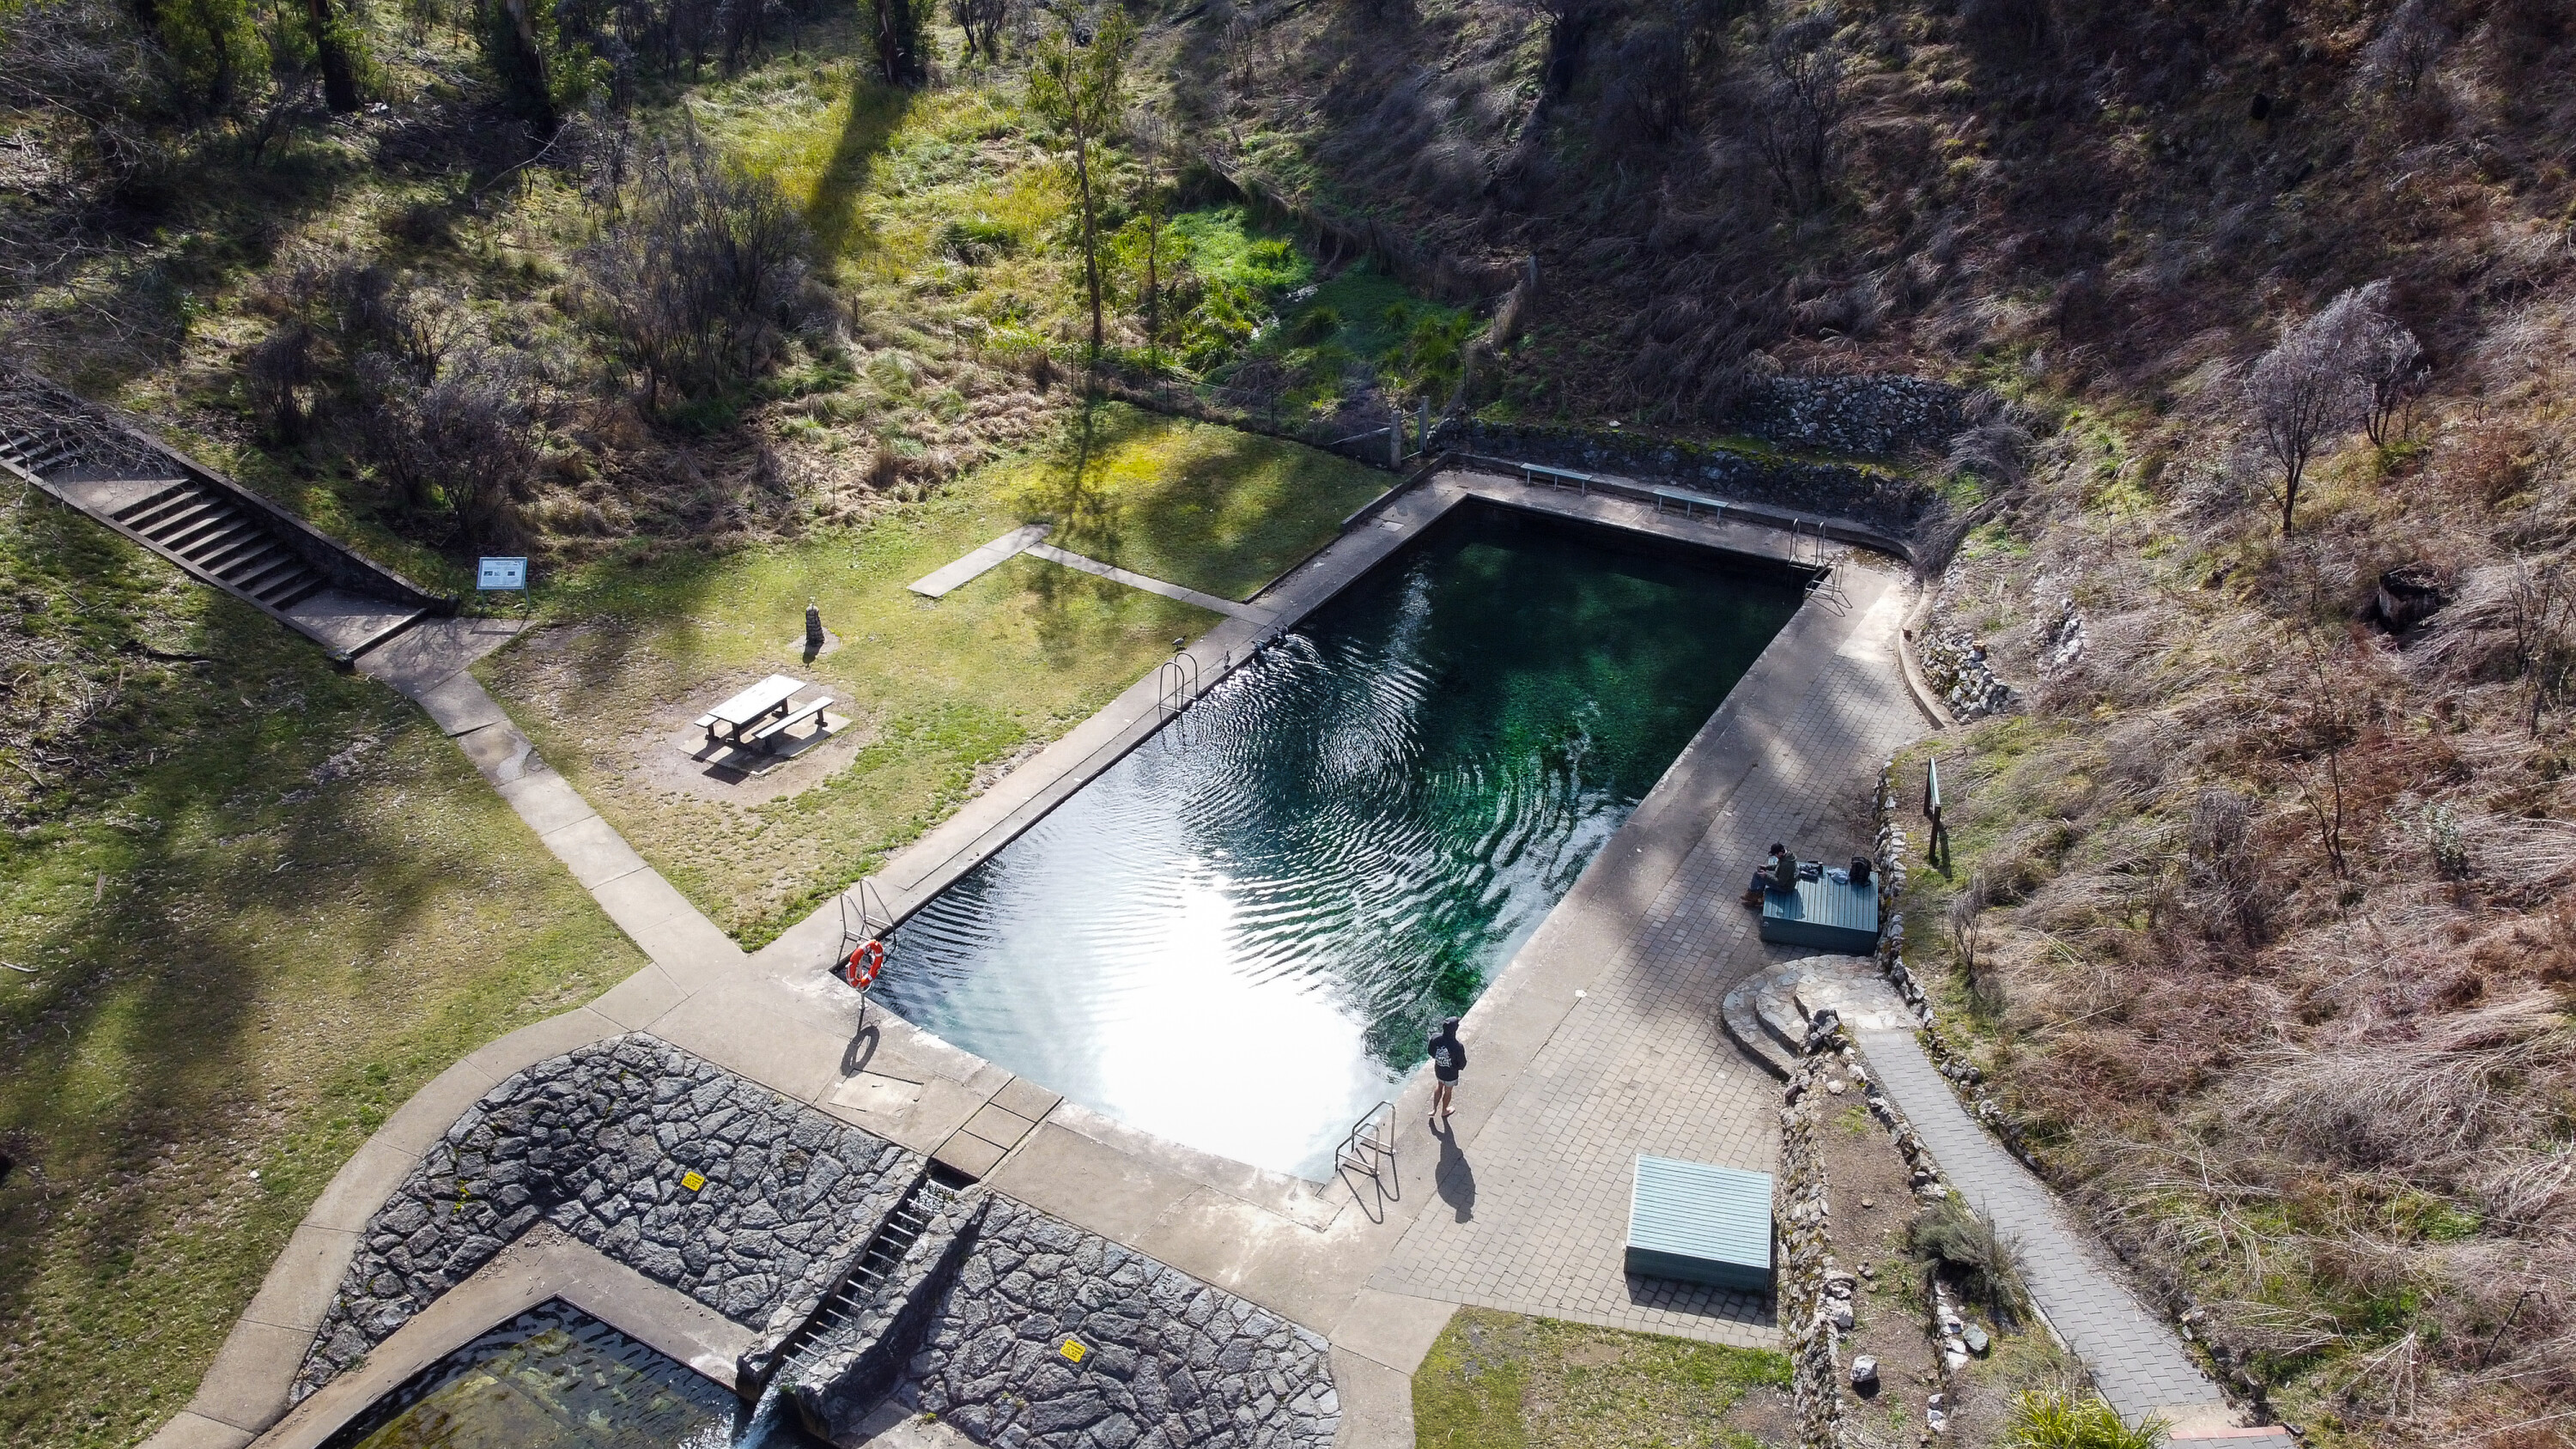
Yarrangobilly Region
If there are two things that go together like peas in a pod it’d have to be snow-covered alpine regions and outdoor swimming.
Alright, well not normally, but Yarrangobilly Thermal Pools aren’t your typical public pool. Heated from a subterranean water source 1km below ground level the pools are heated to a comfortable 27°C year round. There’s a 25m long pool cascading down into a smaller wading pool for kids. The climb back up to the carpark sucks so take your time and do the gentler 3km Yarrangobilly river walk instead to get back.
If you’re feeling extra adventurous, the area boasts six massive limestone caves through which you can do guided or self-guided tours.
1
Clarke Gorge
Dust off the lamborfeeties again as Clarke Gorge is one of the most spectacular must-dos in the Snowies, and it’s best done with a pair of hiking boots.
Kicking off near Blue Waterholes campground deep into Long Plain, Clarke Gorge is a 5km loop that’ll take you 400 million years back into the past. Cut deep into the limestone surroundings by Cave Creek, the Gorge features cave formations along both flanks with a stunning 15m waterfall at the end as well as views down into Wilkinsons Gorge.
The going will be tough with several creek crossings along the way but is well worth it if you’re up for the physical challenge. The creek dips underground some way before popping up again at Blue Waterholes.
1
Coolamine Homestead
If you’re travelling along Long Plain Road you’d have to be bonkers not to duck on into historic Coolamine Homestead for a quick visit.
A remnant of the old sheep and cattle grazing days where drovers would utilise the plains for easy summer grazing, the Coolamine Homestead features four unique buildings constructed in the late 1800s.
The Cheese Hut constructed out of interlocking whole logs is well worth a look, the thick logs designed as a thermal battery to maintain a consistent temperature perfect for storing dairy products.
But the newspaper-lined Campbell House is the main attraction. Constructed out of horizontal timber slabs, the inside is lined with newspapers as wall coverings dating from the early 1900s to the 1980s when restoration works were undertaken. It makes for interesting reading and a unique look at our history.
1
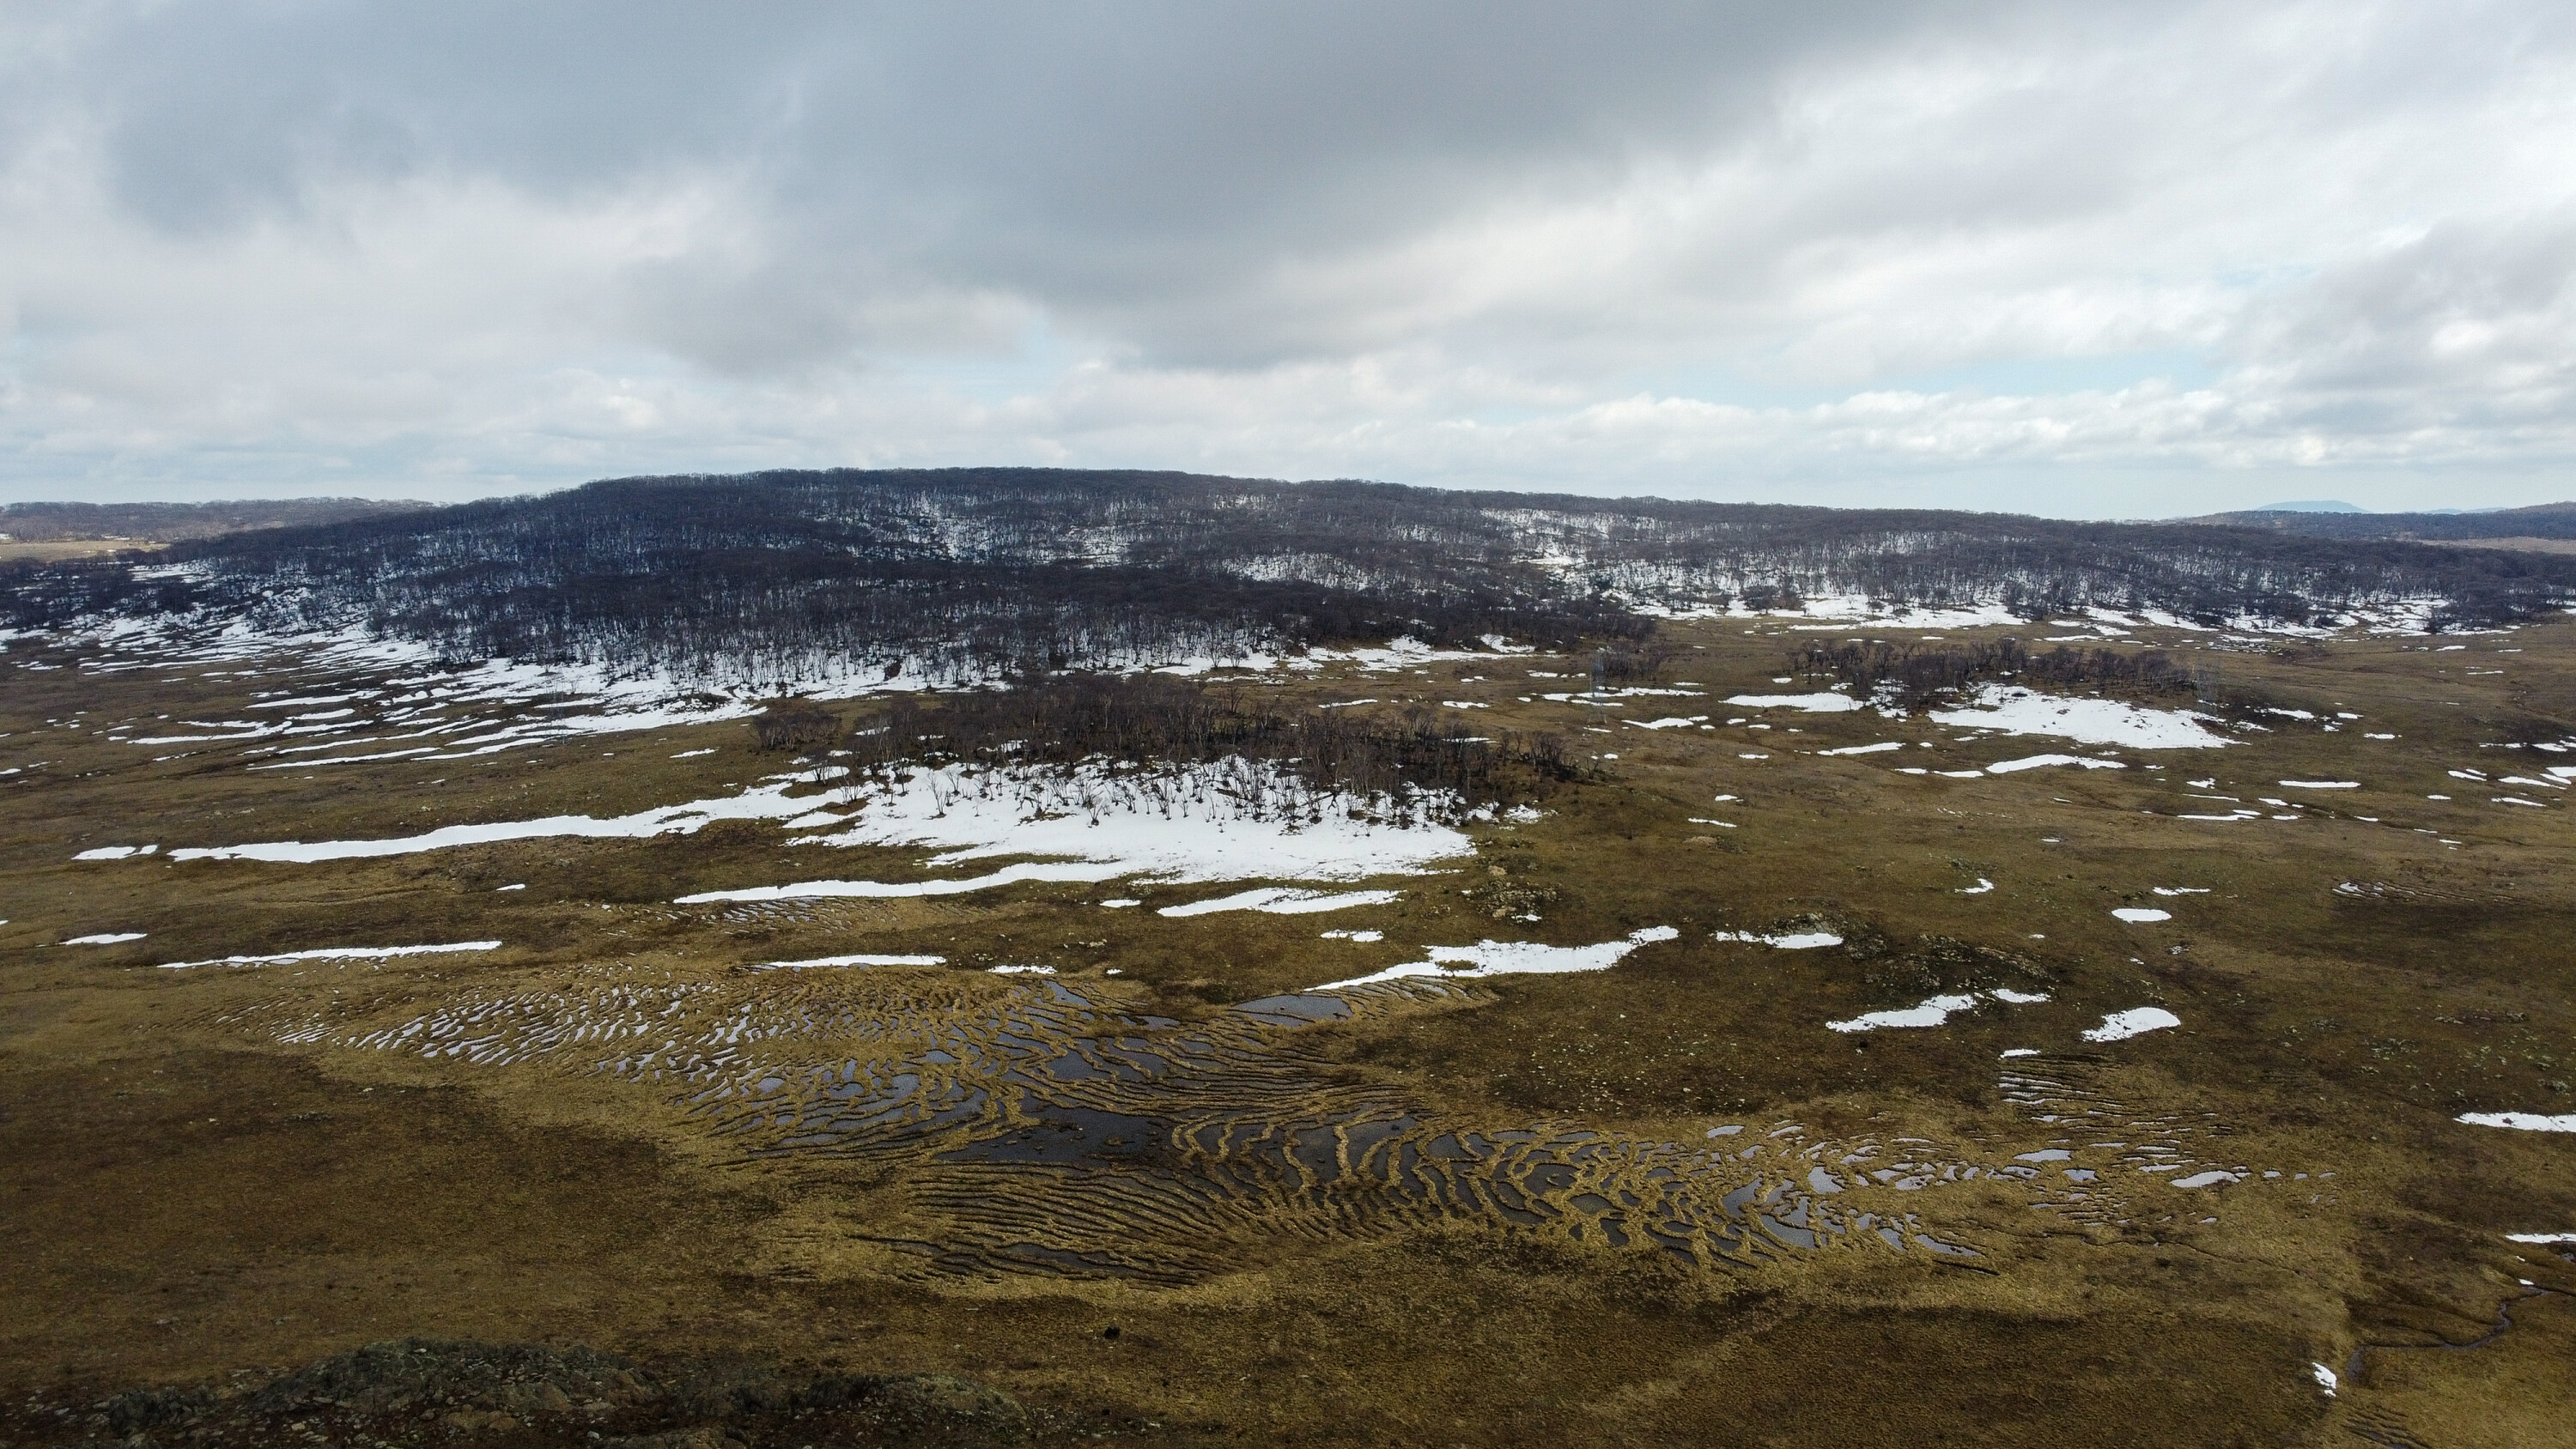
Mt Kosciuszko Summit Walk
Look, most attractions on a trip like this are best experienced somewhere down a dirt track, but we do need to make a few exceptions from time to time.
The hike to the top of Mt Kosciuszko is an experience like no other, and what better time to tick it off the bucket list.
The quick option is to head up in summer, catch the chairlift up to Eagles Nest and do the 13k return hike. If you’re a little more adventurous, the Alpine Lakes Hike is an all day 19km effort along the ridge line that’ll swing past the summit and head out past the glacial lakes too.
It can be looped into a 32km return loop picking up the Seamans Hut as well. Built in 1929, the hut is a memorial to Laurie Seaman and William Hayes who perished attempting to ski the summit in 1928, both men within an inch of salvation refusing to leave the other behind, a testament to the fact that despite the ski lifts and bakeries, this is still wild country.
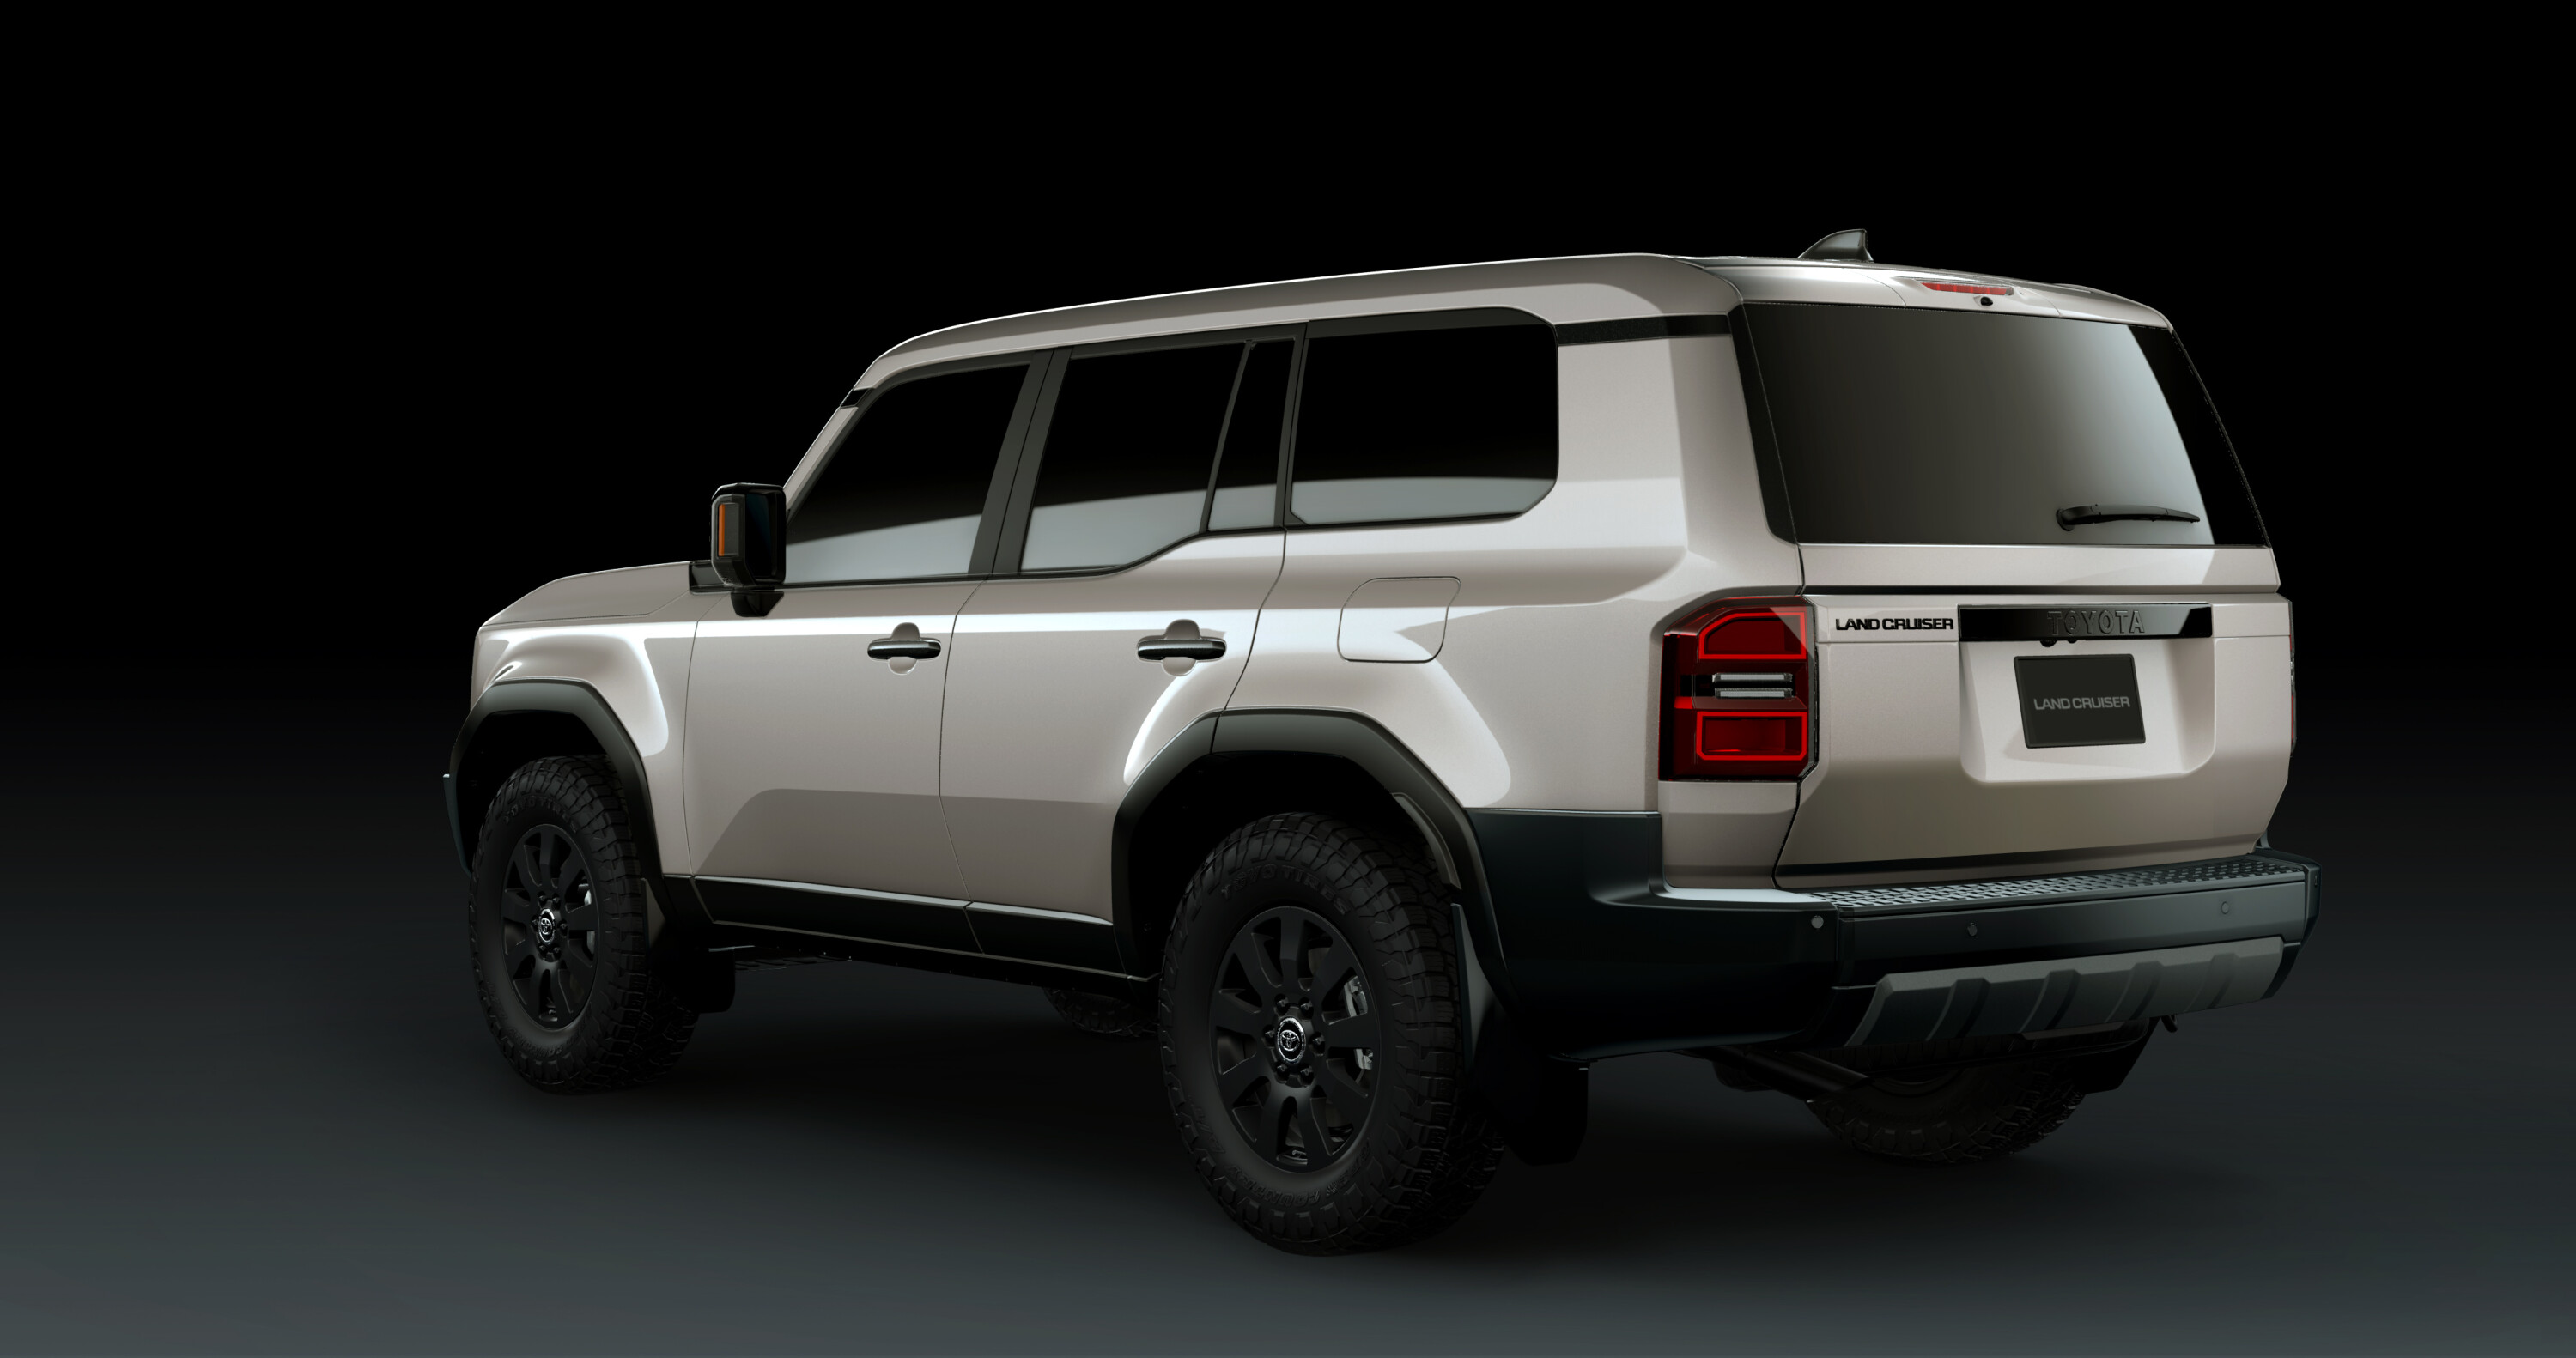
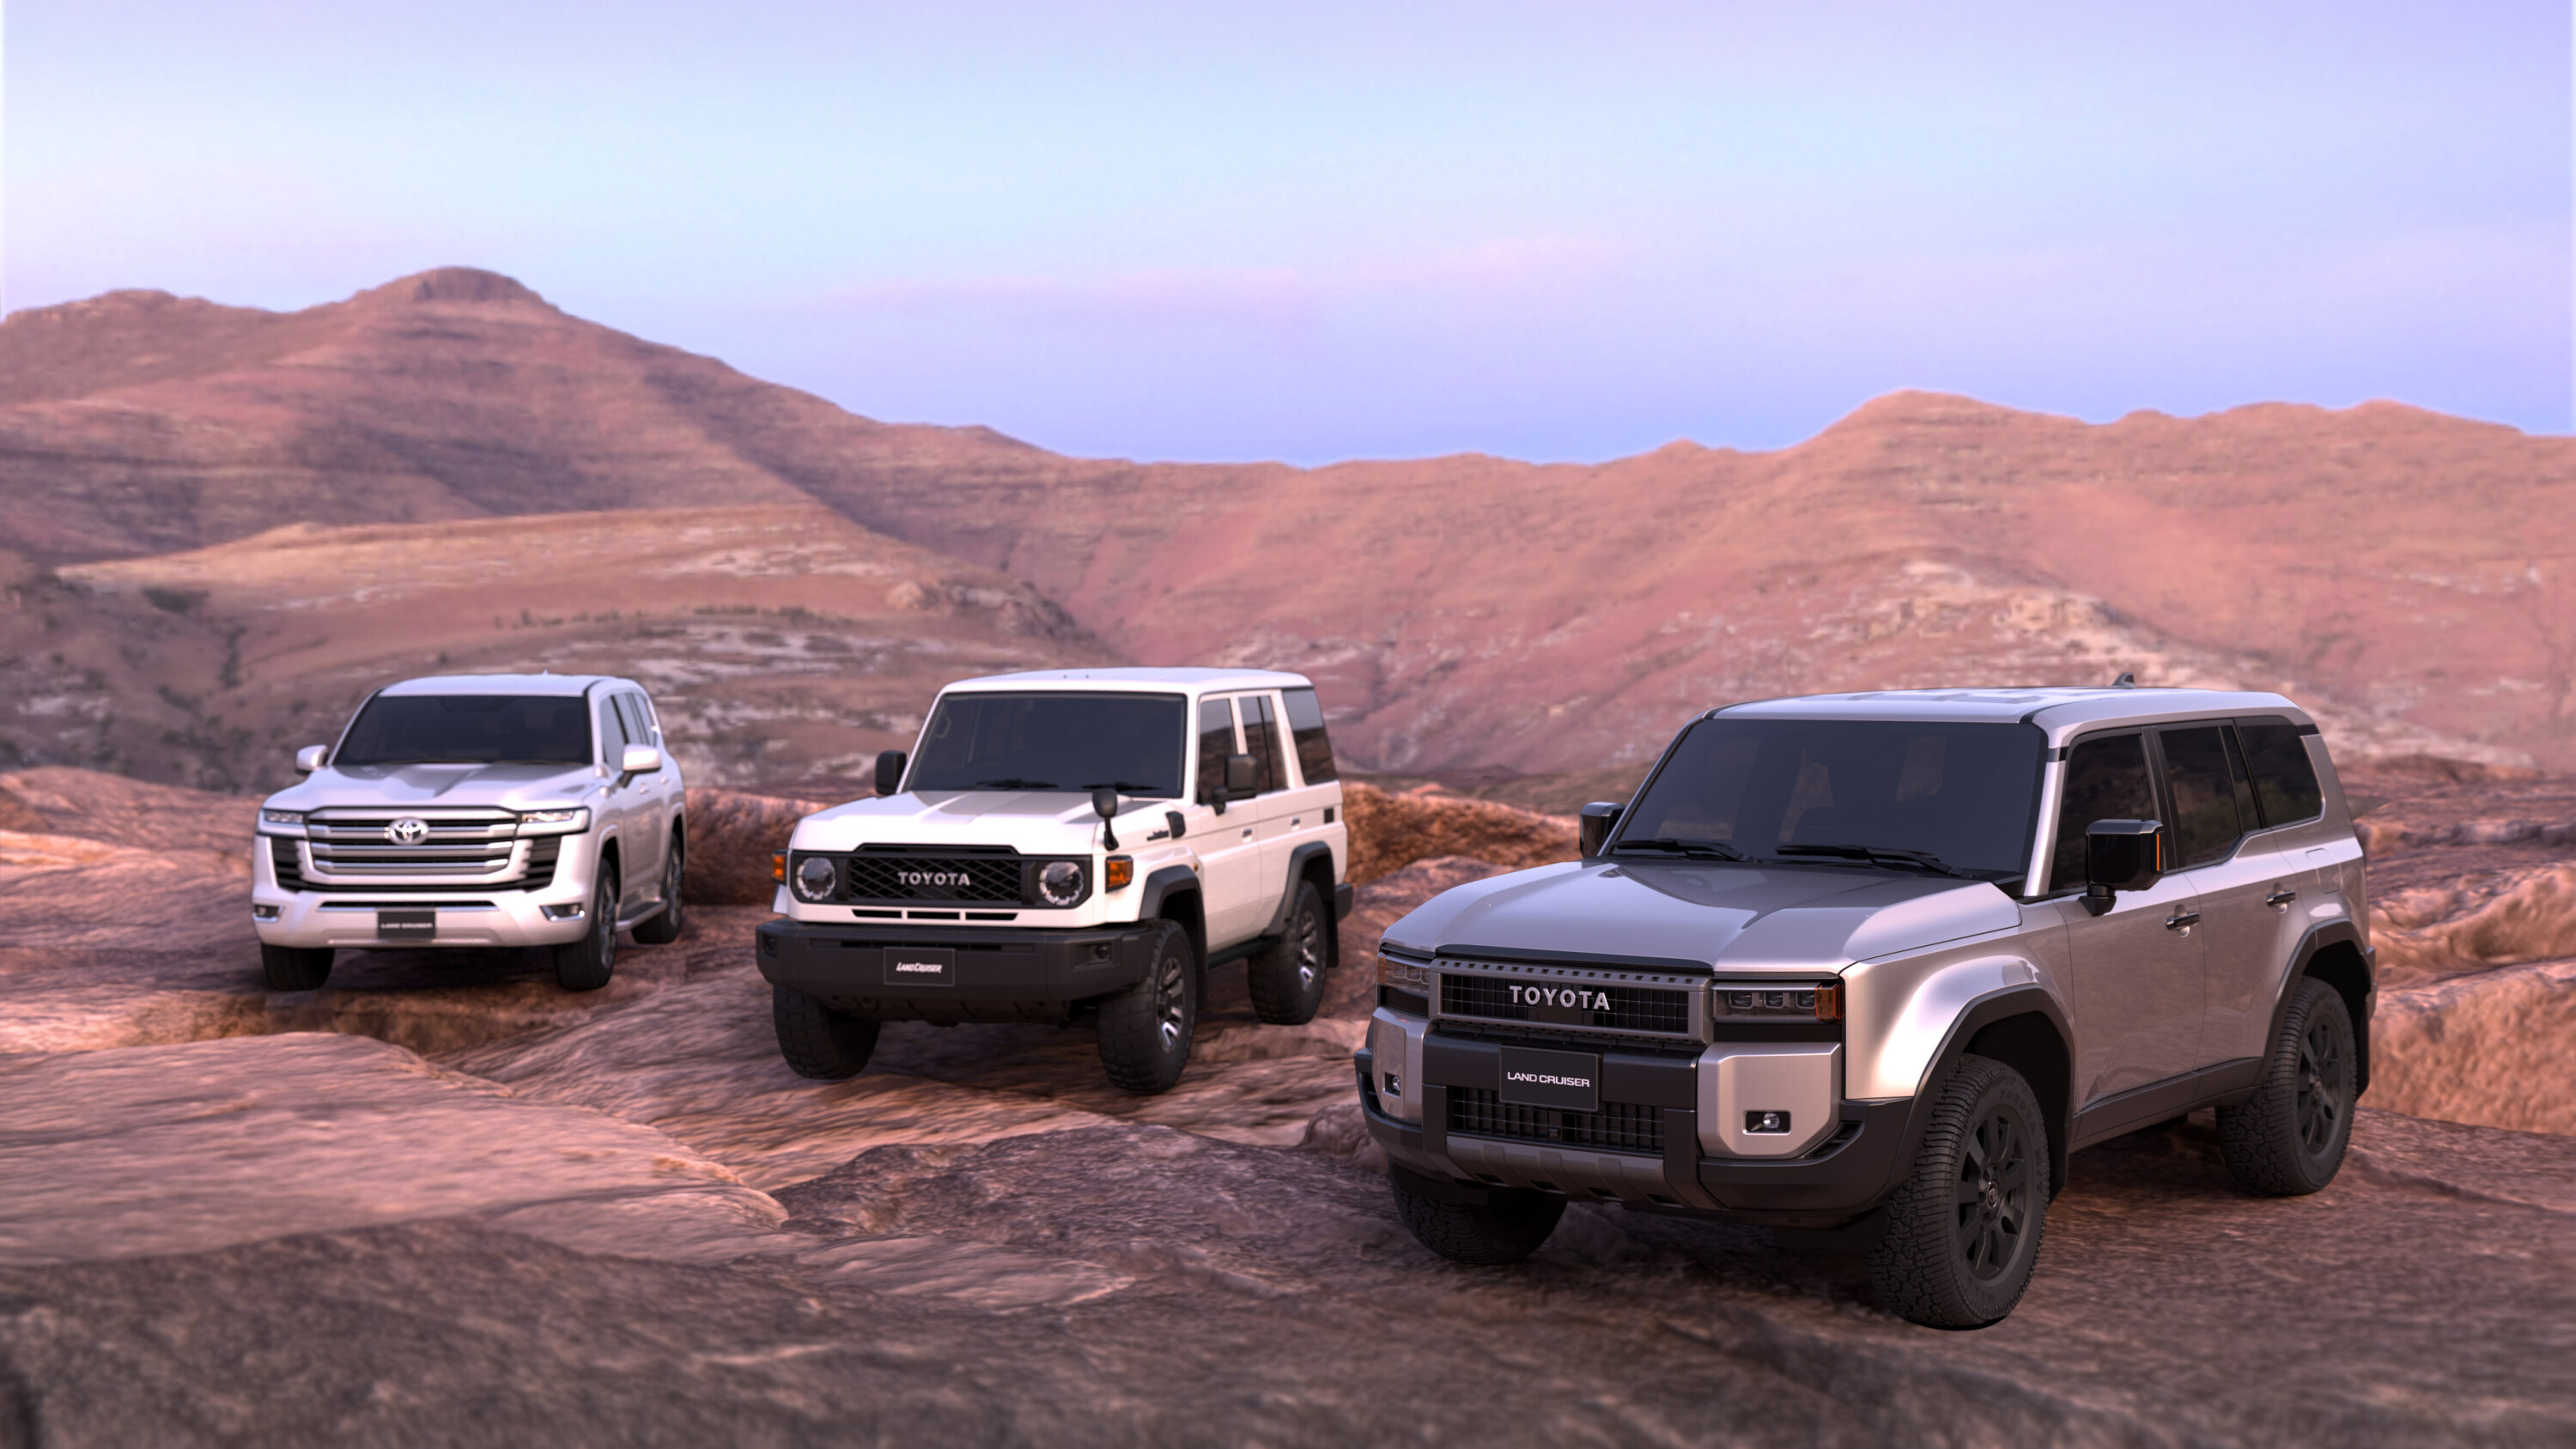
It’s been some 14 years, but finally the fifth-generation Toyota Prado is heaving into view… and this time around it’s got some stiff opposition to overcome to keep its place in the hearts and minds of large SUV-loving Aussies.
Not due to land until next year, first impressions are positive, with a bold, sharp yet evocative design language striking the right chord with a brace of increasingly emboldened buyers.
Based on the same ladder-frame platform that underpins the hugely popular 300 Series LandCruiser, the Prado will back up its boxy visage with proven diesel powertrain tech, mixed in with fuel-saving hybrid technology.
1
But the new Prado has been a long time coming, and its rivals haven’t been hanging about.
Launched last year to great fanfare, Ford’s put more than a little bit of effort into its new T6.2 Ranger/Everest pairing, which are now sold in more than 20 markets around the world.
In fact, Wheels rated the Everest so highly that it took the coveted 2023 Car of the Year trophy back to Broadmeadows.
Does the Prado have what it takes to not only hang onto its loyal army of current owners, but to knock the Everest off its perch as the pick of the 4×4 SUV circus troupe?
Get up to speed on the new Prado
The stories below will give you a guide to everything we learned about the new Prado when it was unveiled. All fresh stories published since then will be found on our Toyota Prado model page here.
At 4914mm long, up to 2015mm wide and 1842mm high depending on variant and the Everest is 50mm longer than the previous model, and a whisker shorter, wider and lower than the new Prado.
Measuring 4925mm long, 1980mm wide and 1870mm tall, the new Prado is 100mm longer, 95mm wider and 20mm taller than the outgoing car.
When it comes to wheelbase measurements, the new Prado’s TNGA-F platform measures 2850mm between the wheels; it’s the same as the current LandCruiser L300 and 60mm longer than its predecessor.
1
The Everest is a lick longer at 2900mm long; it’s a vital stat when it comes to interior room as well as on-road manners.
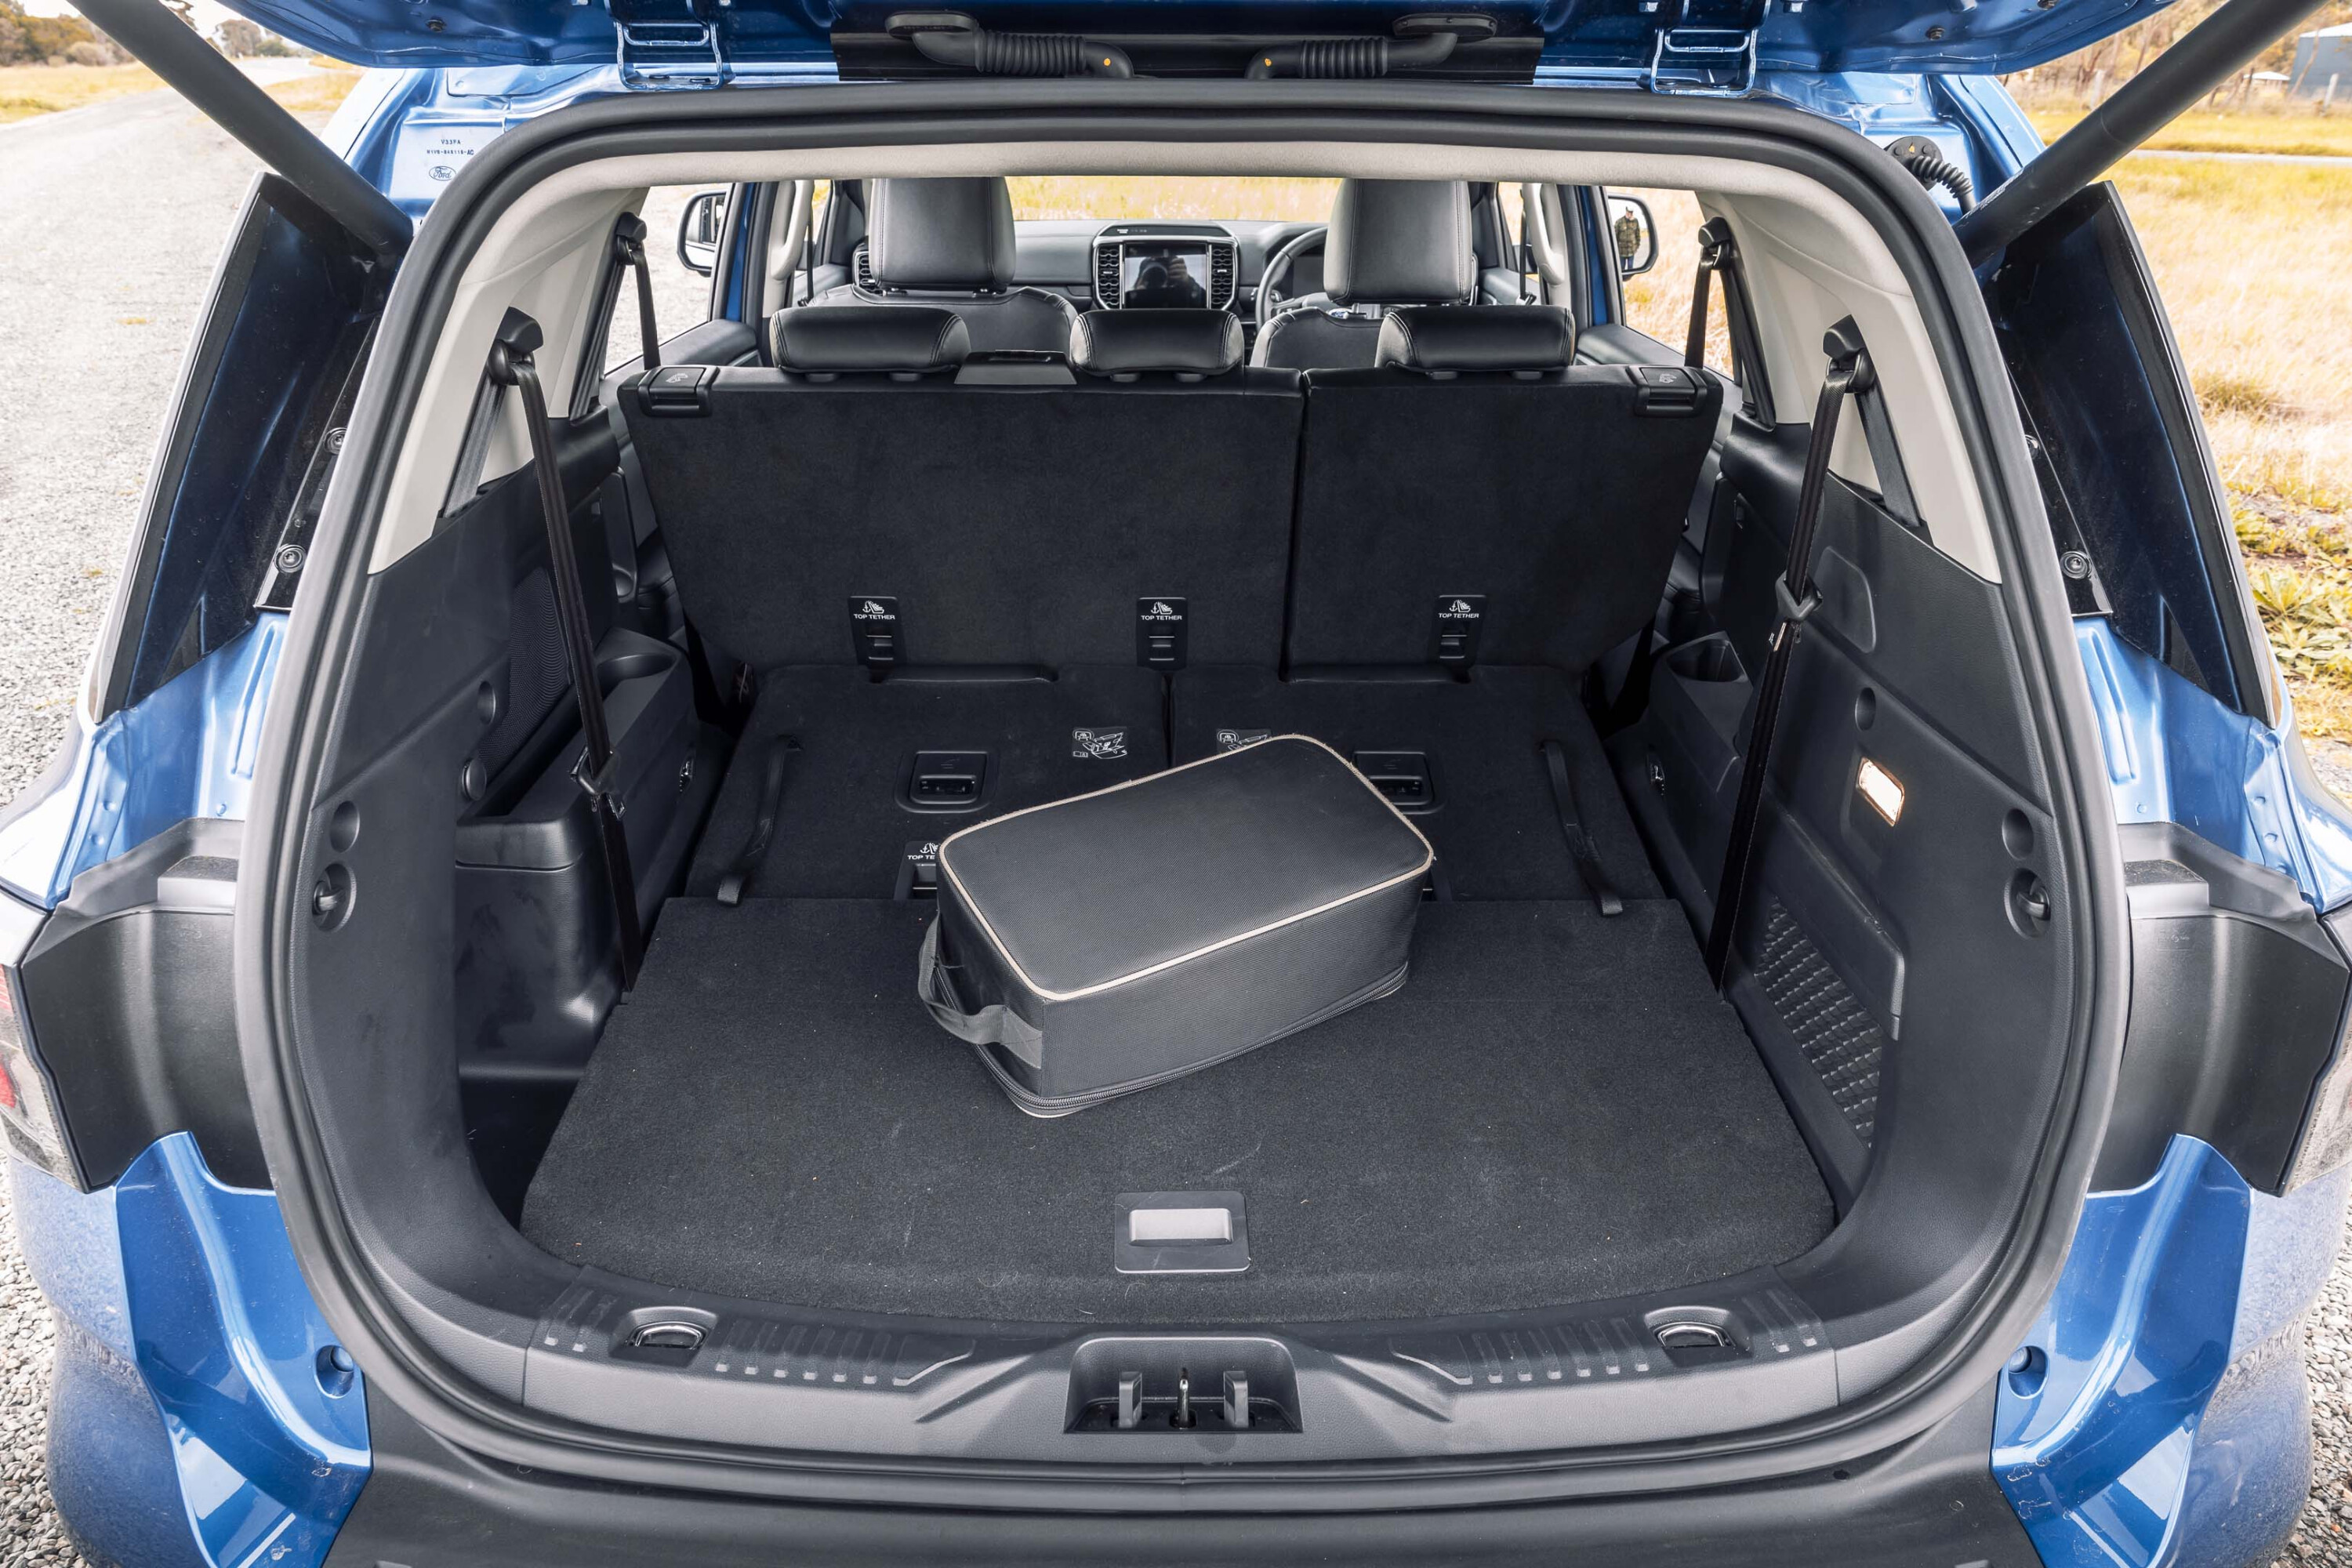
Details like the boot space capacity of the new Prado have yet to be released, but it will need to compete with the Everest’s 898-litre capacity with its third row of seats stowed and 259 when all three rows are in use.
Given that it’s being dubbed the LandCruiser 250 in overseas markets, and that it’s based upon the same chassis as the L300, the new Prado was always going to present with a formidable set of off-road chops.
The Prado runs high-mount double-wishbone front suspension and a four-link rigid axle with lateral control arms at the rear.
It will have a full-time all-wheel drive system with a low-range transfer case and a locking centre differential, as well as an electronic locking rear differential and front a sway-bar disconnect system.
1
Unlike the hydraulically actuated KDSS, the new system allows stabiliser-bar disconnection on demand via a button in the cabin. This should make for excellent wheel articulation without sacrificing roadholding.
Electric power steering replaces the hydraulic system to increase steering feel, too.
Compare this to the Everest, which also uses a separate ladder chassis to which the body is mounted. Independent front suspension features double wishbones and coil springs, while a live axle suspended on coils and a multi-link set-up out back uses a Watts link to keep the rear axle in check.
1
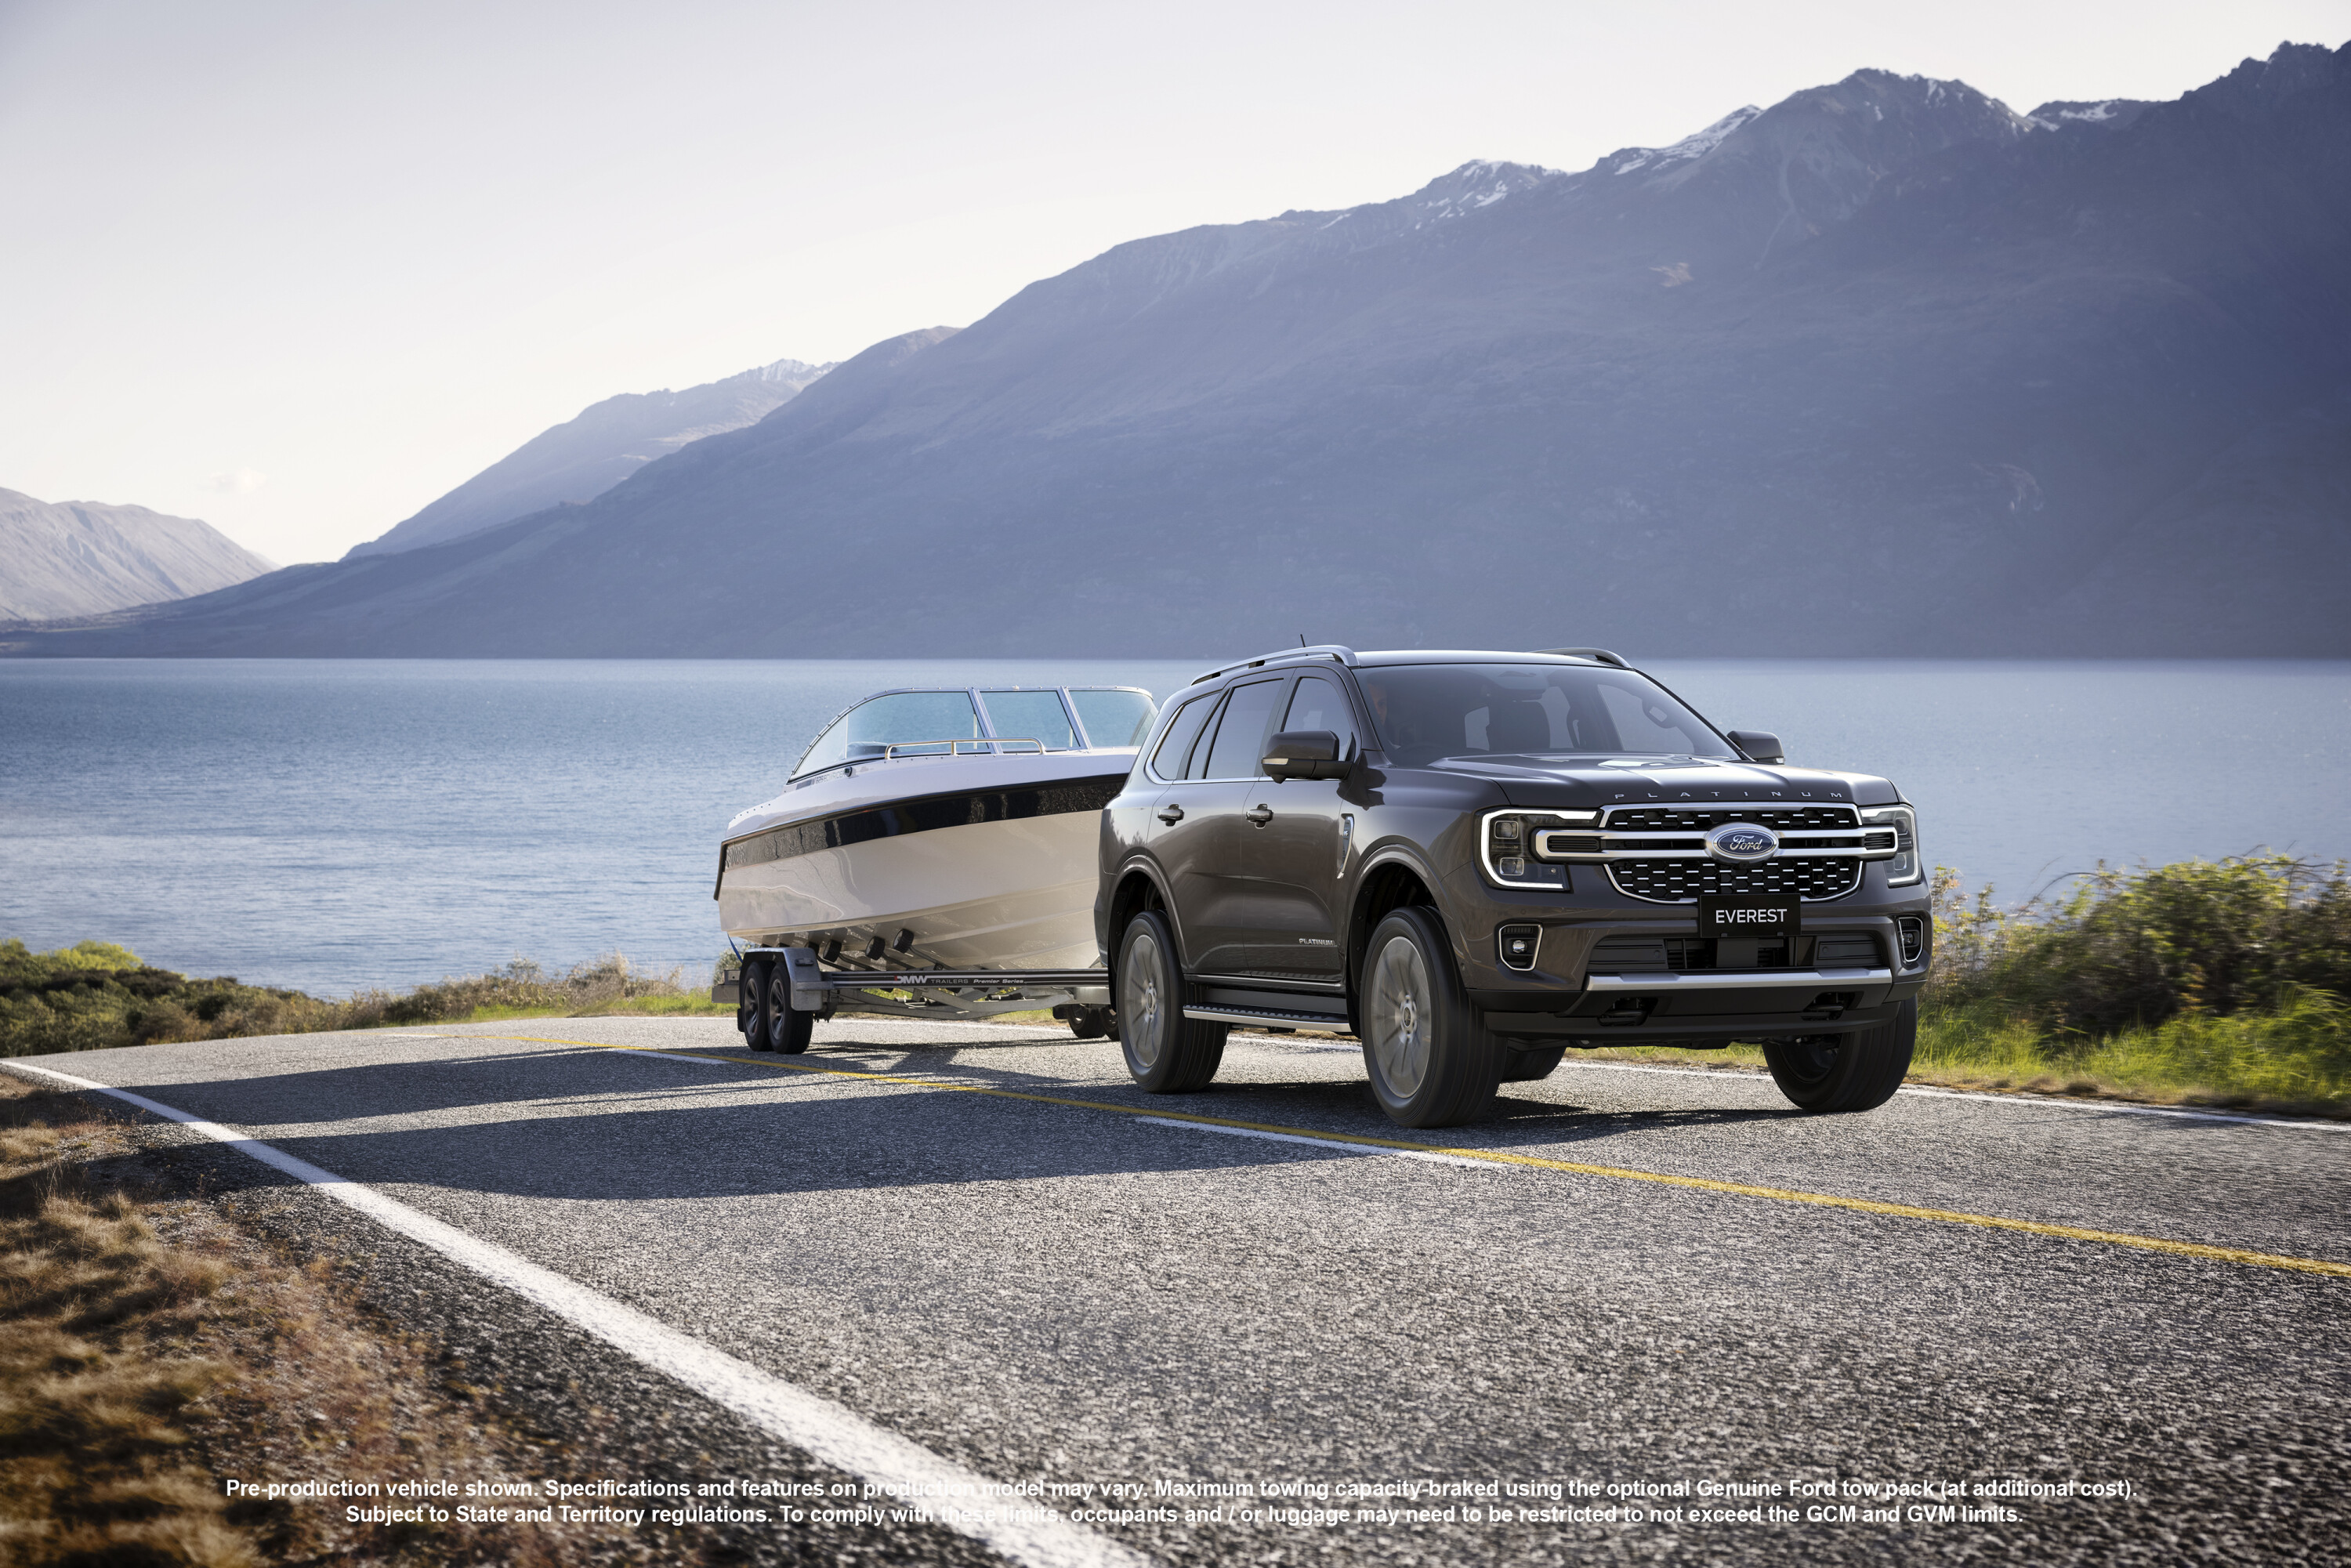
US specs suggest that the Prado is likely to be offered with 3500kg braked towing capacity
While it uses traction control linked to multiple driver modes in combination with its electro-mechanically operated diffs in its full-time 4×4 variant, the Everest eschews all other forms of electron-powered trickery in its suspension system.
The Ambiente, Trend and Sport-model Everests can be bought as 4×2 vehicles, while all are offered as 4×4.
Towing capacity for the new Toyota Prado is yet to be confirmed, but US specs suggest that the Prado is likely to be offered with 3500kg braked towing capacity for the first time ever, jumping by 500kg and matching the Everest’s towing figure.
Similarly, gross combined mass figures for the new Prado aren’t available, which of course would reveal its potential payload capability.
It’s a fair bet, however, that the new Prado will weigh a fair bit more than the current car, which comes in at a claimed 2350kg kerb weight, giving it a 640kg payload. Expect a similar payload figure for the new car, despite an expected 150-200kg jump in weight.
The Everest was praised highly by our COTY judges for its towing technology, and its GCM of 6250kg across the entire range nets it a payload of 741kg.
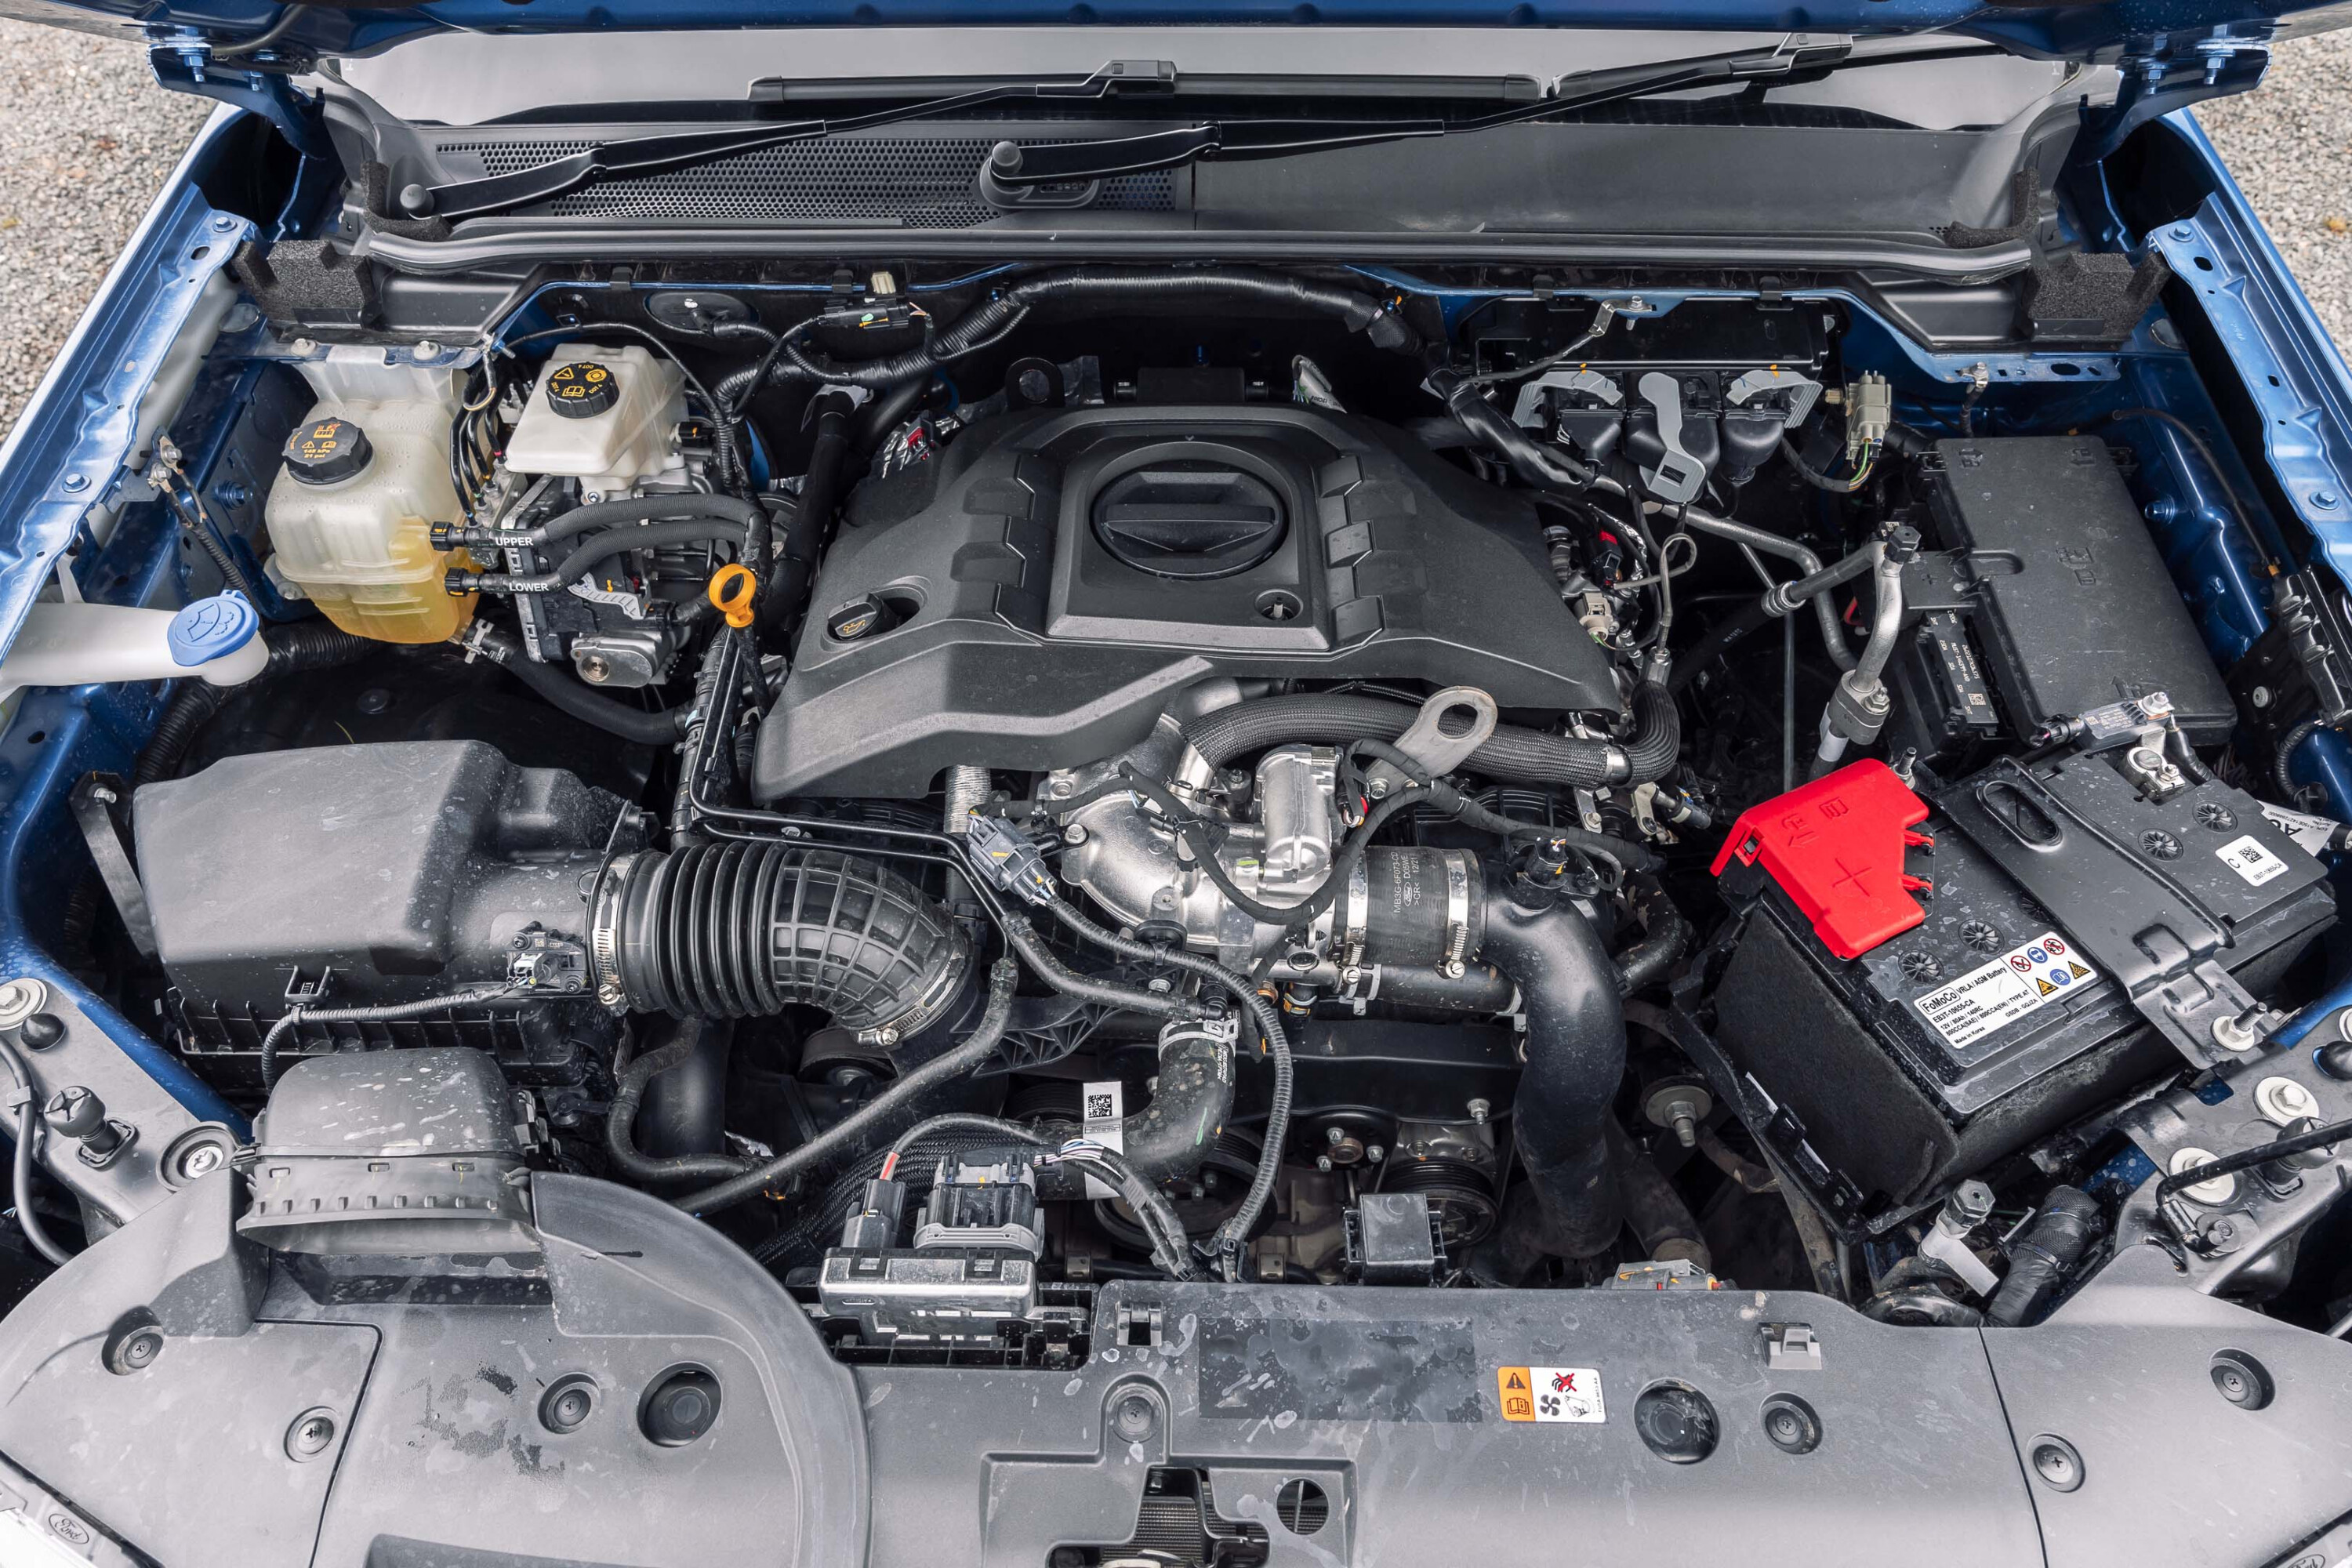
For the 2024 Toyota Prado, mild hybrid assistance will be added to Toyota’s familiar 150kW/500Nm 2.8-litre four-cylinder diesel motor.
There’s also a small electric motor mounted between the motor and new eight-speed gearbox supplemented by a 48-volt battery and a stop/start system to net an estimated 10 per cent fuel saving.
The Everest, meanwhile, comes with the choice of a 154kW/500Nm twin-turbo 2.0-litre four-cylinder diesel engine or a 184kW/600Nm V6 turbo diesel.
1
The Ambient and Trend models come with the four-cylinder bi-turbo diesel engine only, while the Sport is offered with a choice of either a four-cylinder or the V6, and the Platinum only comes with the V6 diesel engine.
Despite being several decades old in origin, the V6 gives the Everest a real point of difference over the Prado, which is unlikely to benefit from any other drivetrain in its model life.
One spec that many prospective buyers will be awaiting is the fuel tank capacity of the new Toyota Prado. If, as is predicted, the Prado’s full-size spare wheel moves from the tailgate to the underside of the rear bumper, it’ll likely mean the end of the Prado’s 63-litre sub-tank option – and the demise of its 150-litre fuel capacity.
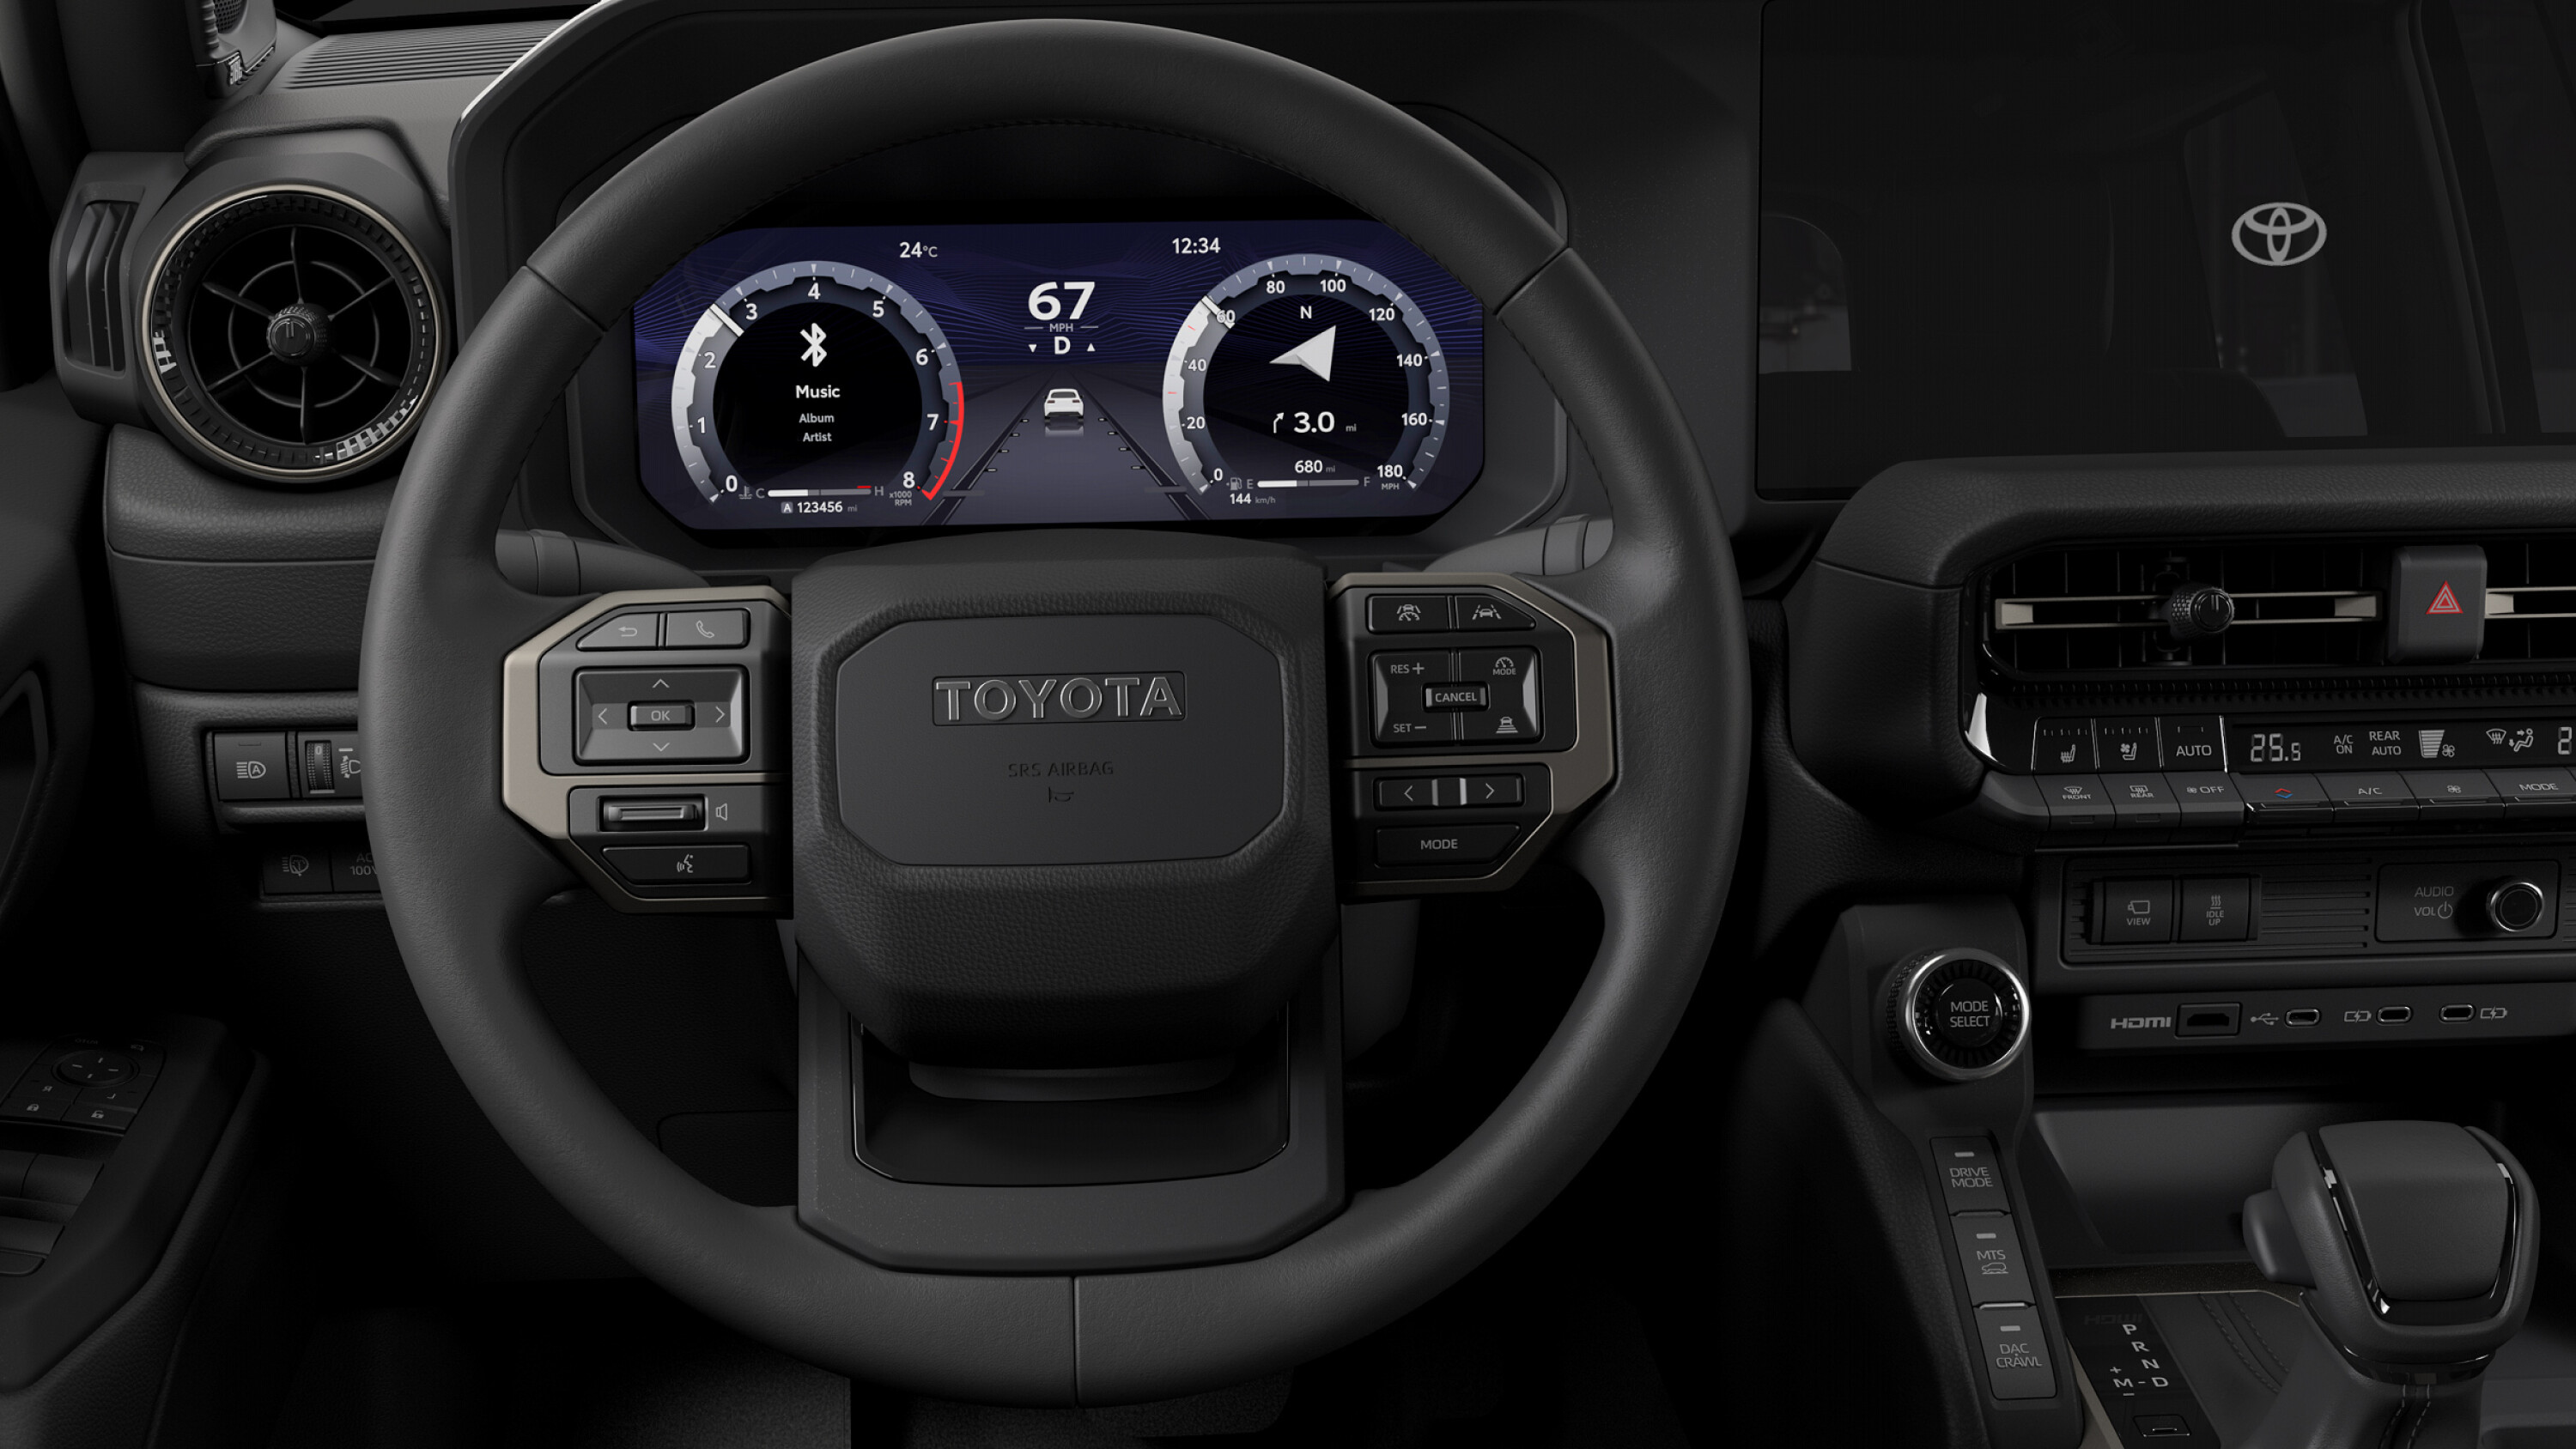
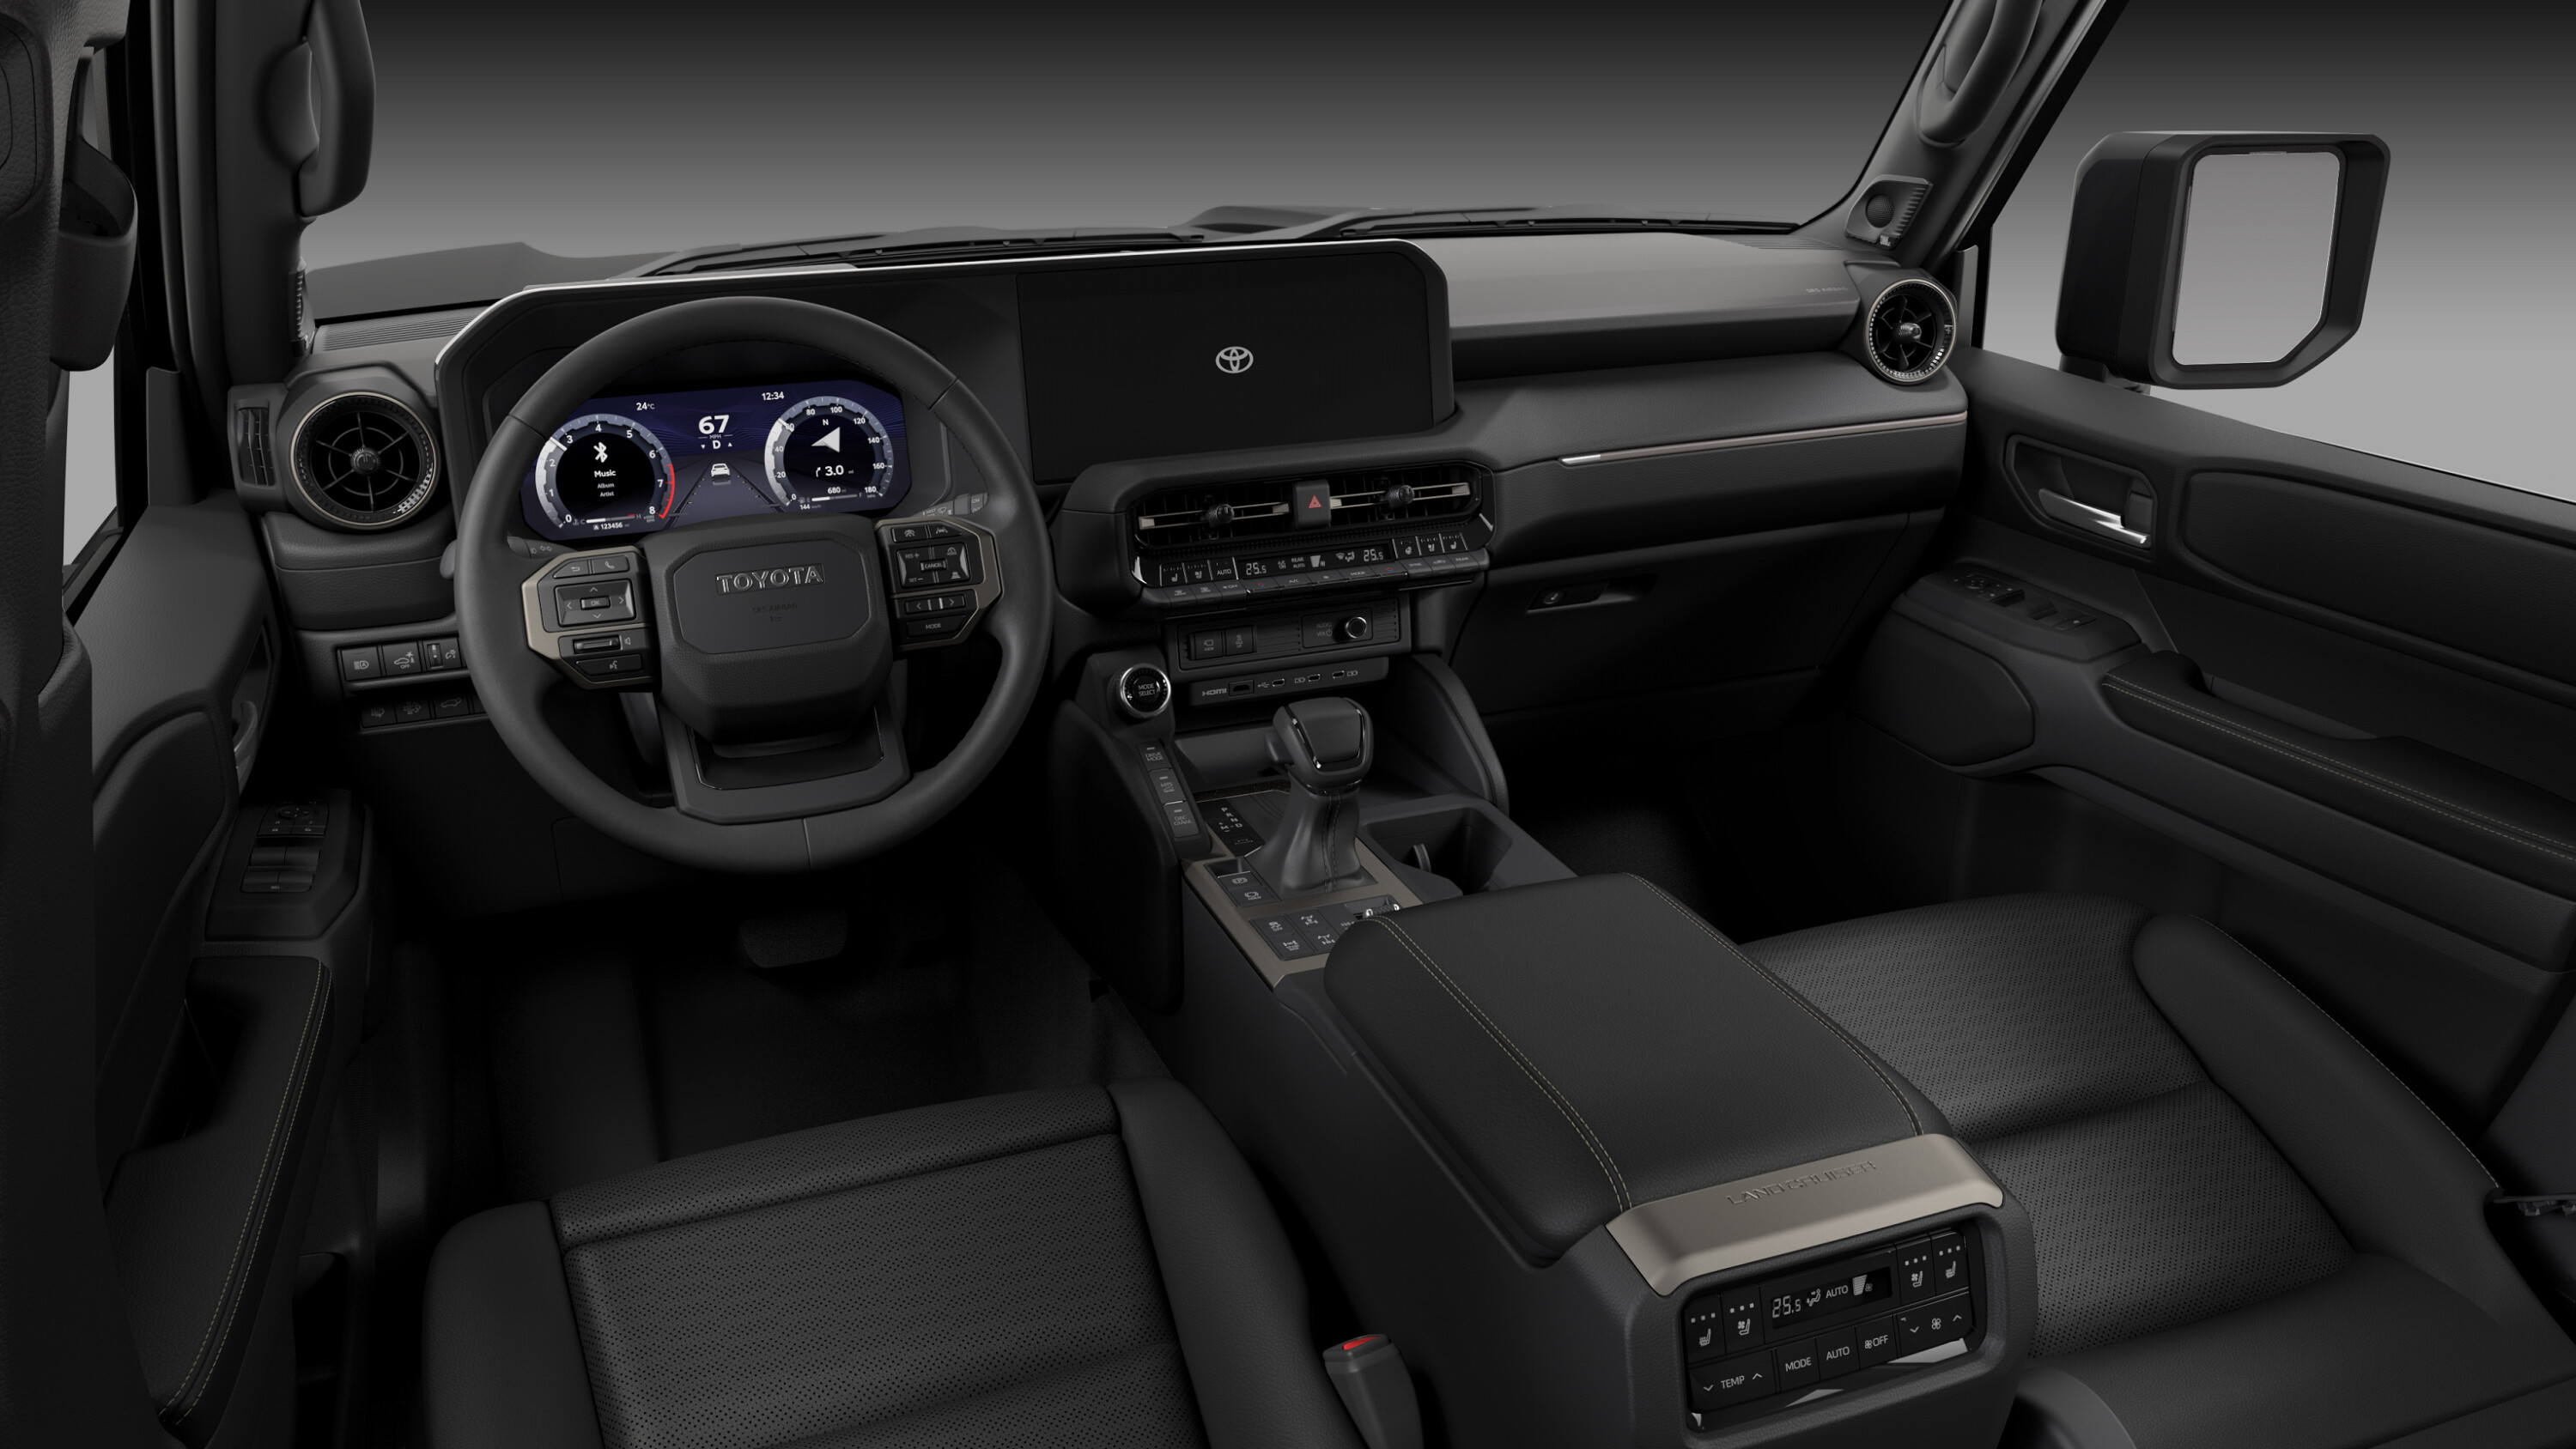
Toyota has gone all in on the new Prado, presenting a sharp, rugged and confident interior that’s not overly dominated by a massive screen up front.
Though the Prado will likely adopt a digital dash across the range, traditional analogue controls still feature strongly, with more than a nod to the LandCruiser’s storied past in the bulky, squared-off steering wheel with its prominent type-written badge.
In fact, the explosion of buttons across the dash and centre console is prolific by modern standards. Not only are all the climate controls easily accessible, drive modes can be accessed by both button and dial, while the overseas model pictured even sports an HDMI port along with a brace of USB-C outlets.
1
The extra width of the new Prado is evident in the huge centre bin and console layout, while a traditional gear selector is retained.
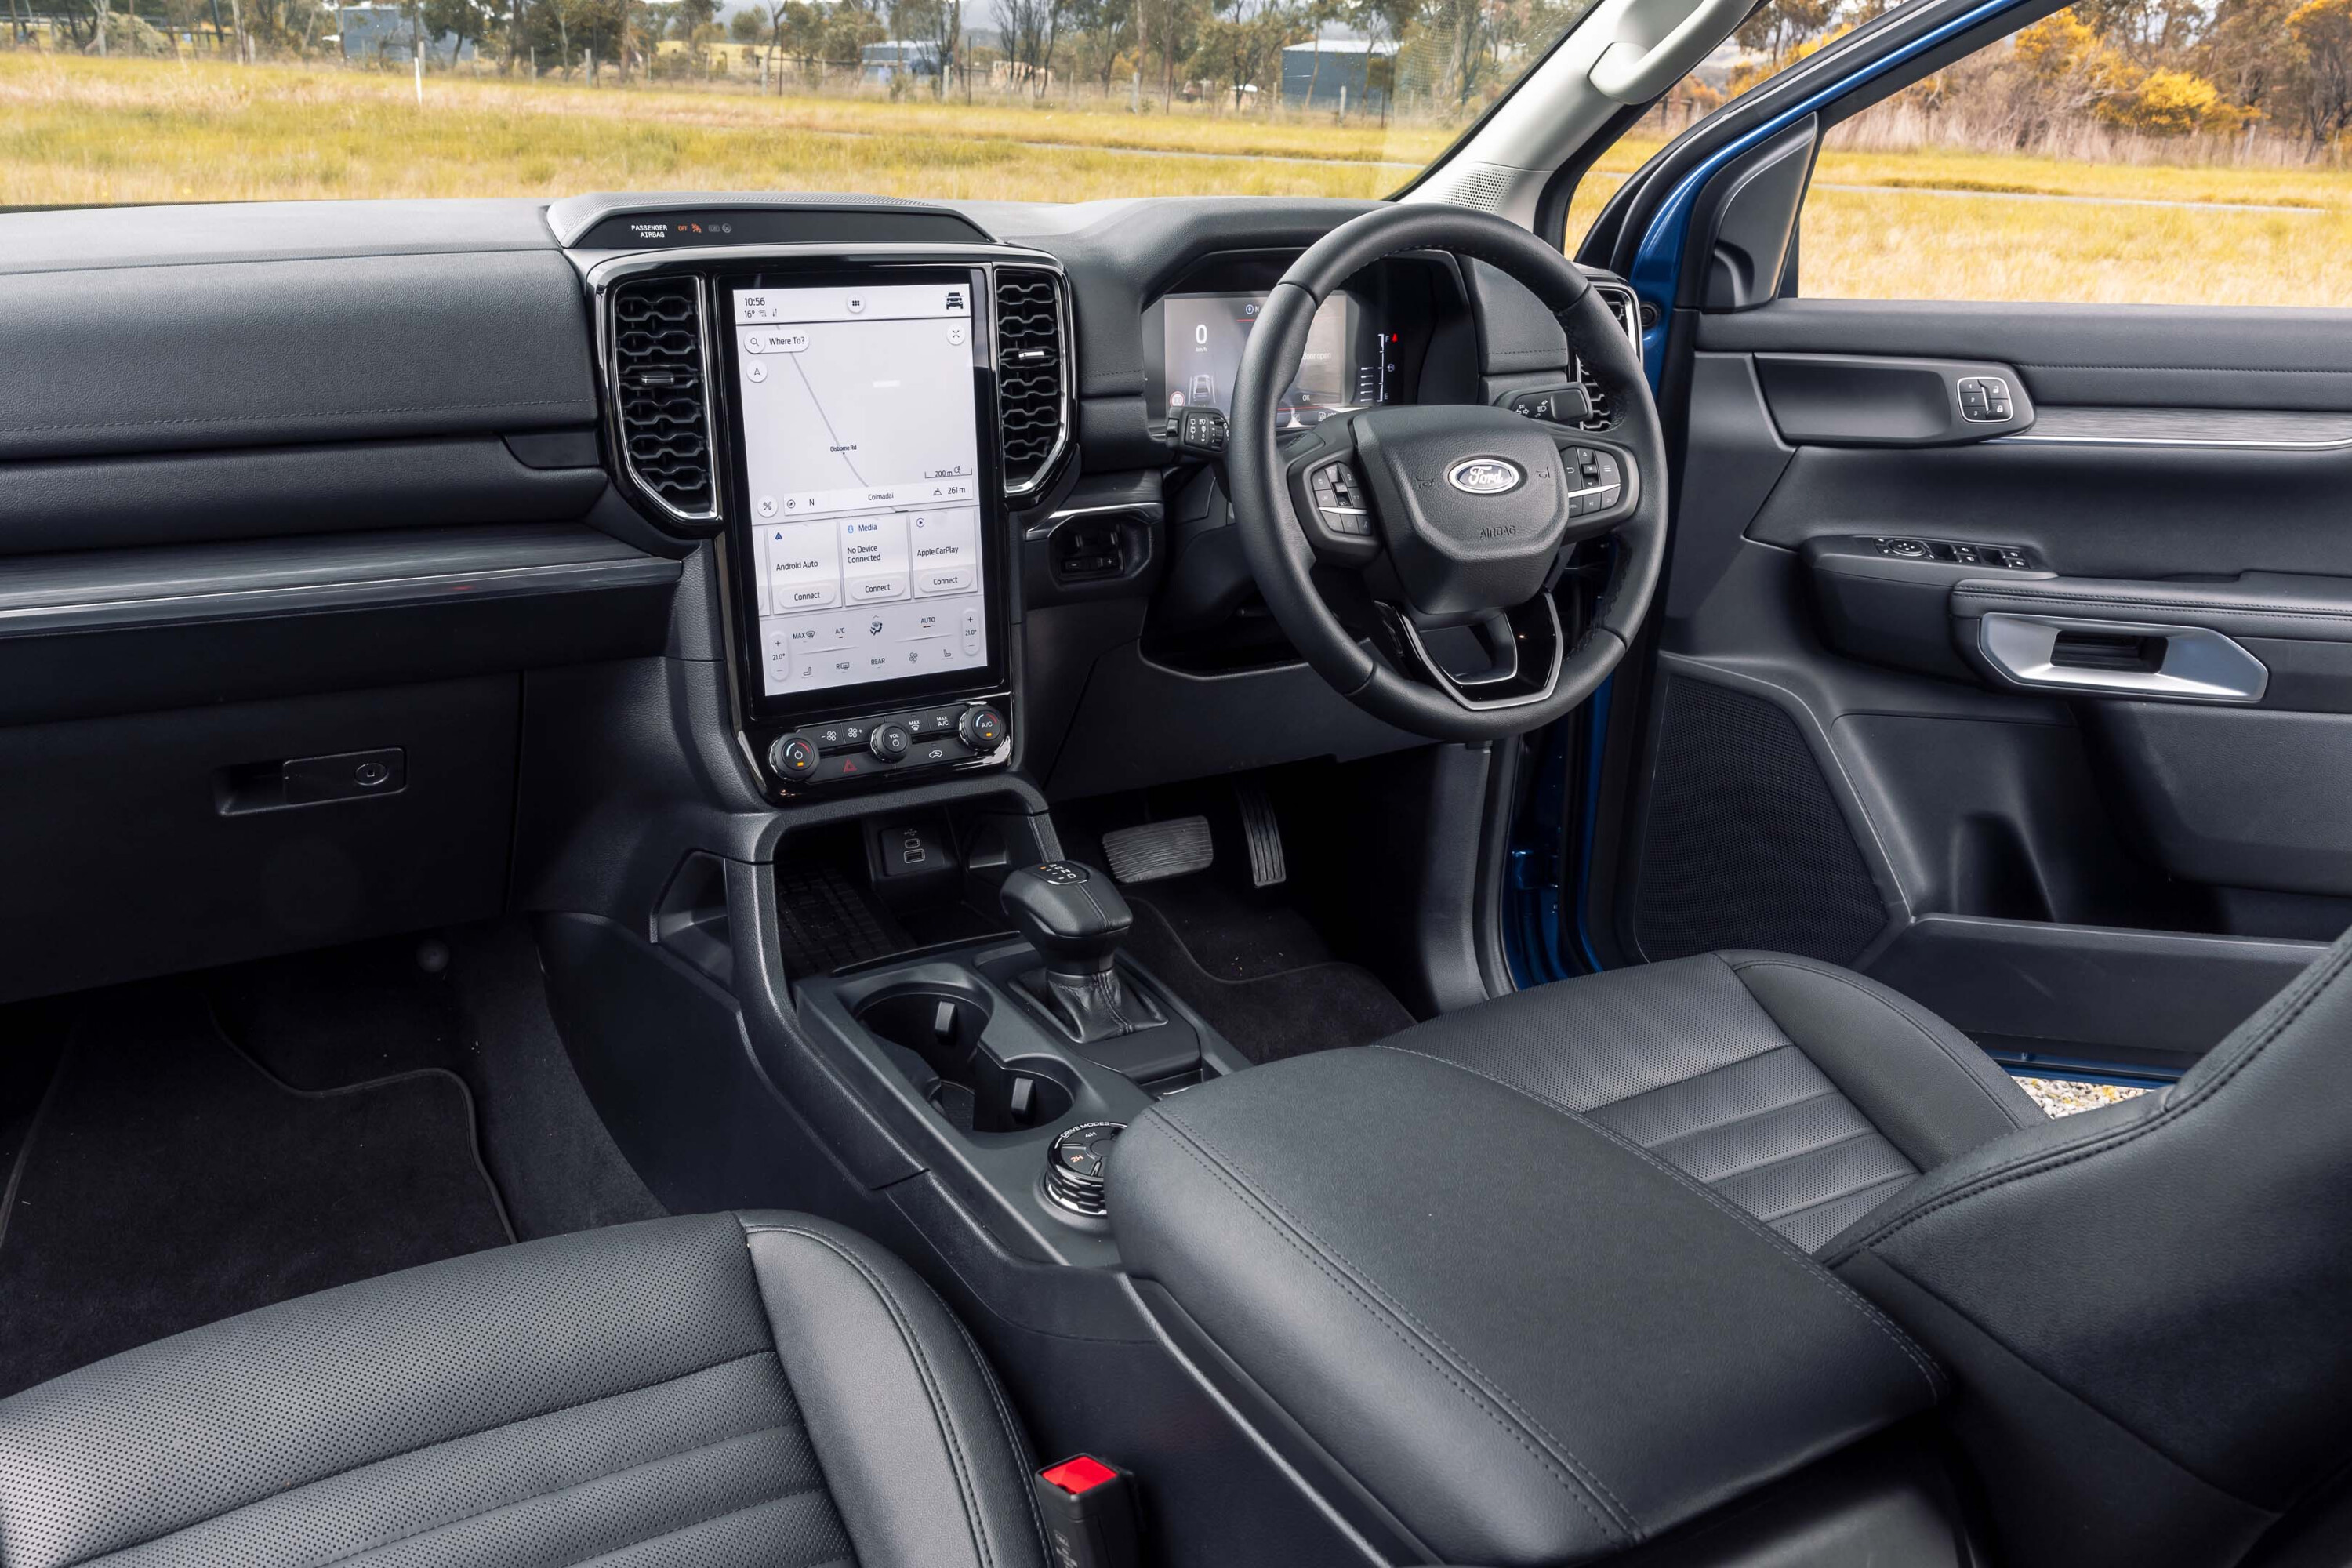
The more classically styled Everest relies heavily on a massive vertical screen to provide access for many onboard systems, though it too has retained sufficient traditional dials to sate the traditionalists.
Not so traditional is its rocker-action gear actuator, which is very much a love-it-or-hate-it proposition.
Given its previous spec and its positioning in the Toyotas SUV range, the Prado is likely to offer seven seats as standard fitment, matching the layout of the Everest.
Prices for the 2024 Toyota Prado are yet to be confirmed, but it’s likely that there will be an increase across the board given the expected rise in equipment levels and the addition of a hybridised powertrain.
Currently, the Everest undercuts the Prado right across the range, even though the latter is an older vehicle at heart. When comparing like with like, the Ambiente 4WD costs $58,290 plus on-road costs, compared with the Prado GX at $62,830 plus ORC.
A richer variant mix for the Everest offers buyers more options; in our view, the Sport variant provides a great mix of spec and value, particularly in its 2.0-litre twin-turbo guise. Buyers have voted with their wallets, though, with the V6 Sport one of the strongest-selling Everest variants to date.
1
Expect Toyota to largely mirror the current four-strong Prado variant mix, though it’s reasonable to expect that a sporty GR will feature within the range at some stage in the model’s lifecycle.
Prices will definitely come under pressure, as well. Though specs haven’t been revealed for Australia, the 2024 Toyota Prado is likely to be available only in diesel hybrid form, despite the presence of petrol-powered hybrid drivetrains in the Toyota family. This will instantly add a minimum of $2500 to $3000 to the current price.
As well, the Prado is likely to present with an organically increased MSRP, given its move to a new platform, the addition of new tech and the general state of the automotive world.
How much will the 2024 Toyota Prado cost? We expect to hear more about final specs and pricing later in 2023, ahead of its launch in the first quarter of 2024.
The stories below will give you a guide to everything we learned about the new Prado when it was unveiled. All fresh stories published since then will be found on our Toyota Prado model page here.
The all-new 2024 Toyota Prado is gathering plenty of attention with its retro-themed look – but the short-wheelbase variant is no more.
Our rendering wizard Theottle has imagined a new take on the small LandCruiser: a restyled and rebadged Suzuki Jimny, which we’ve dubbed the ‘LandCruiser 25’.
1
While there are no plans for a tiny LandCruiser-badged vehicle, the imaginary LandCruiser 25 here borrows the Jimny’s body, but features a Prado-derived front end.
Overseas, the two Japanese brands have a vehicle-sharing agreement, particularly in India, Africa, and Europe.
For instance, the Suzuki Baleno hatch is sold as the Toyota Glanza in India or Starlet in Africa, and the Toyota Corolla hybrid wagon and RAV4 plug-in hybrid are available as the Suzuki Swace and Across, respectively, in Europe.
A small Toyota four-wheel-drive would also act as the spiritual successor to the Japan-only Toyota Cami, which was a version of the Jimny-sized Daihatsu Terios.
So, could the iconic Jimny become a Toyota product, potentially with the even-more-iconic LandCruiser badge? Not so fast…
There are no known plans for a rebadged Jimny, but a production version of the small Toyota Compact Cruiser concept is in the works, with a teaser image shown at the debut of the new Prado and updated 70 Series last week.
Potentially reviving the FJ Cruiser badge, the production Compact Cruiser – likely based on LandCruiser’s TNGA-F platform – would rival the Jeep Wrangler and Ford Bronco, rather than the smaller Jimny.
What would you call it?
Jump into the comments to share your thoughts, and catch our ongoing new Prado coverage at the links below.
Get up to speed on the new Prado
The stories below will give you a guide to everything we learned about the new Prado when it was unveiled. All fresh stories published since then will be found on our Toyota Prado model page here.
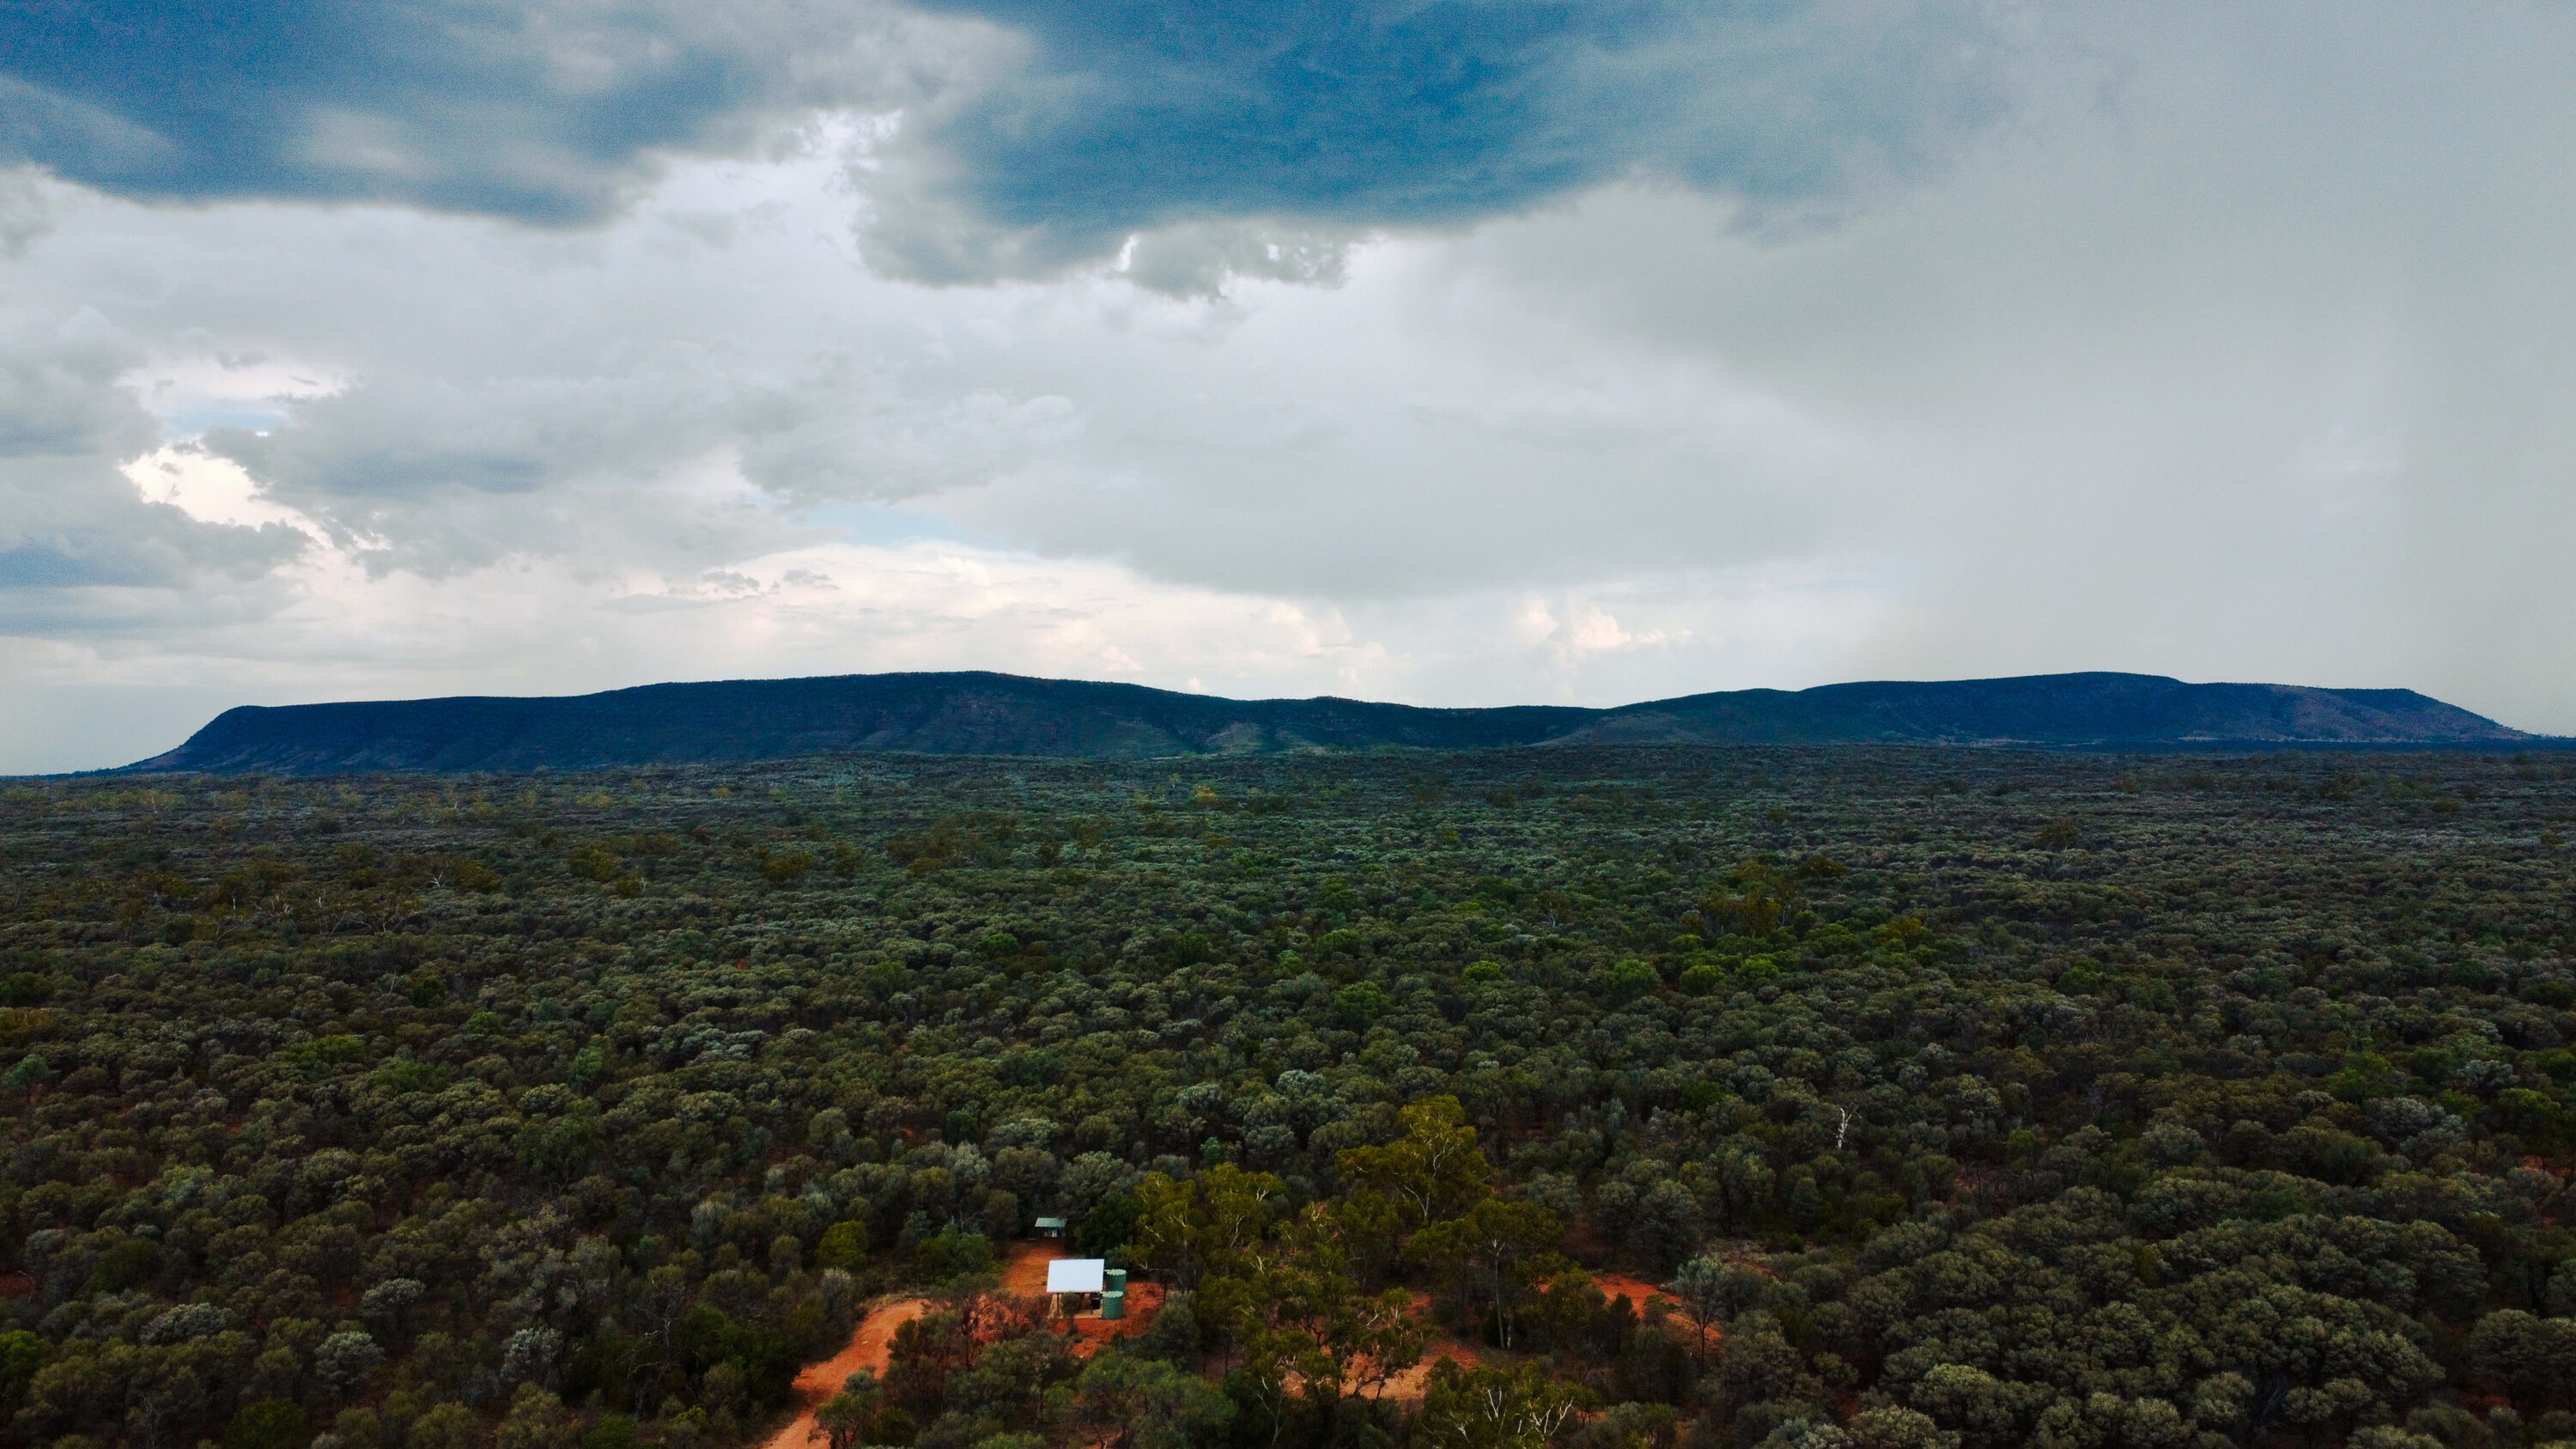
Gundabooka National Park, which is situated 60km south of Bourke and covers 64,000ha, is a hidden gem and it is well worth spending a few days exploring if you can afford the time, or is within easy reach of Bourke for those who want to make it a day trip.
Bourke itself is around 800km northwest of Sydney, and is situated on the Darling River. While the traditional owners of this land (the Ngemba and Paakandji people) have called this place home for hundreds of years, the first white explorer to come here was Charles Sturt in 1828.
Several years after Sturt’s excursion, explorer and surveyor Thomas Mitchell travelled through the area, and in 1835 the settlement of Bourke was begun.
The Darling River was used as a transport system for various types of freight and Bourke soon began to boom when the river level was up. Today, Bourke is a picturesque town where you can visit galleries, exhibition centres or even cruise the Darling River on a traditional steamboat.
1
Going to Gundabooka
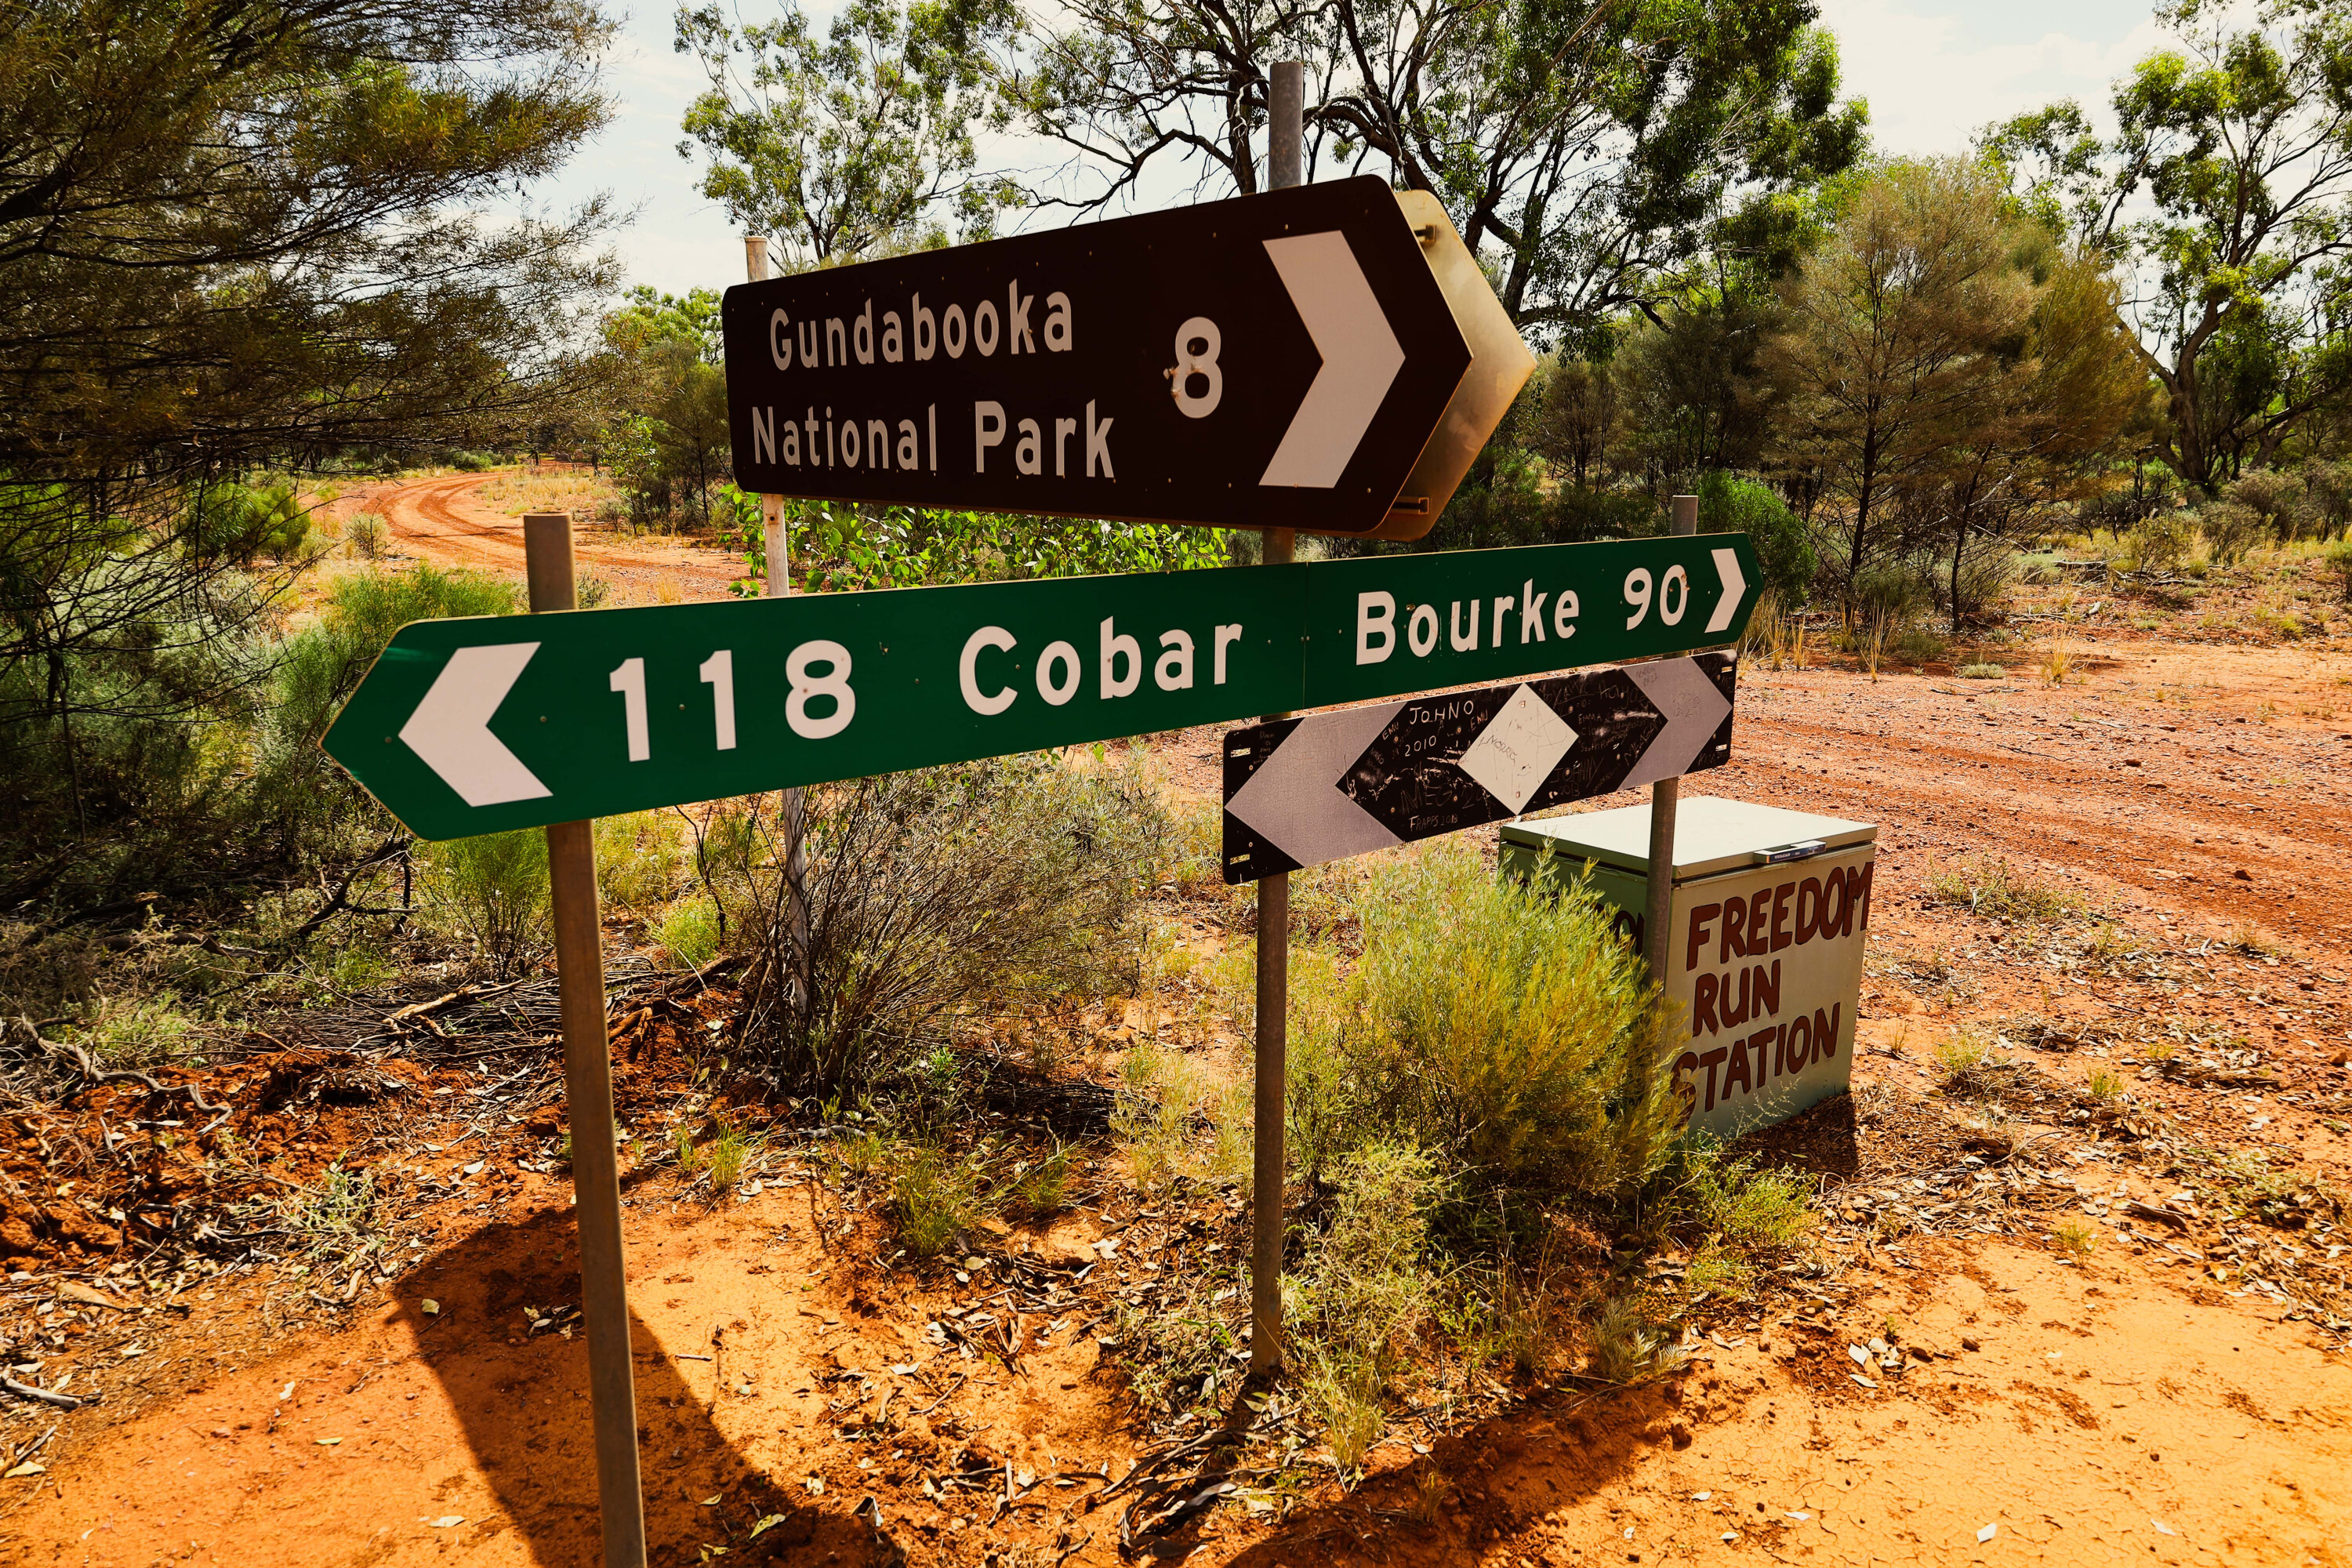
There are two ways to get to Gundabooka NP; either off Kidman Way (Bourke to Cobar Road) or along the Bourke to Louth Road, which runs close to the Darling River.
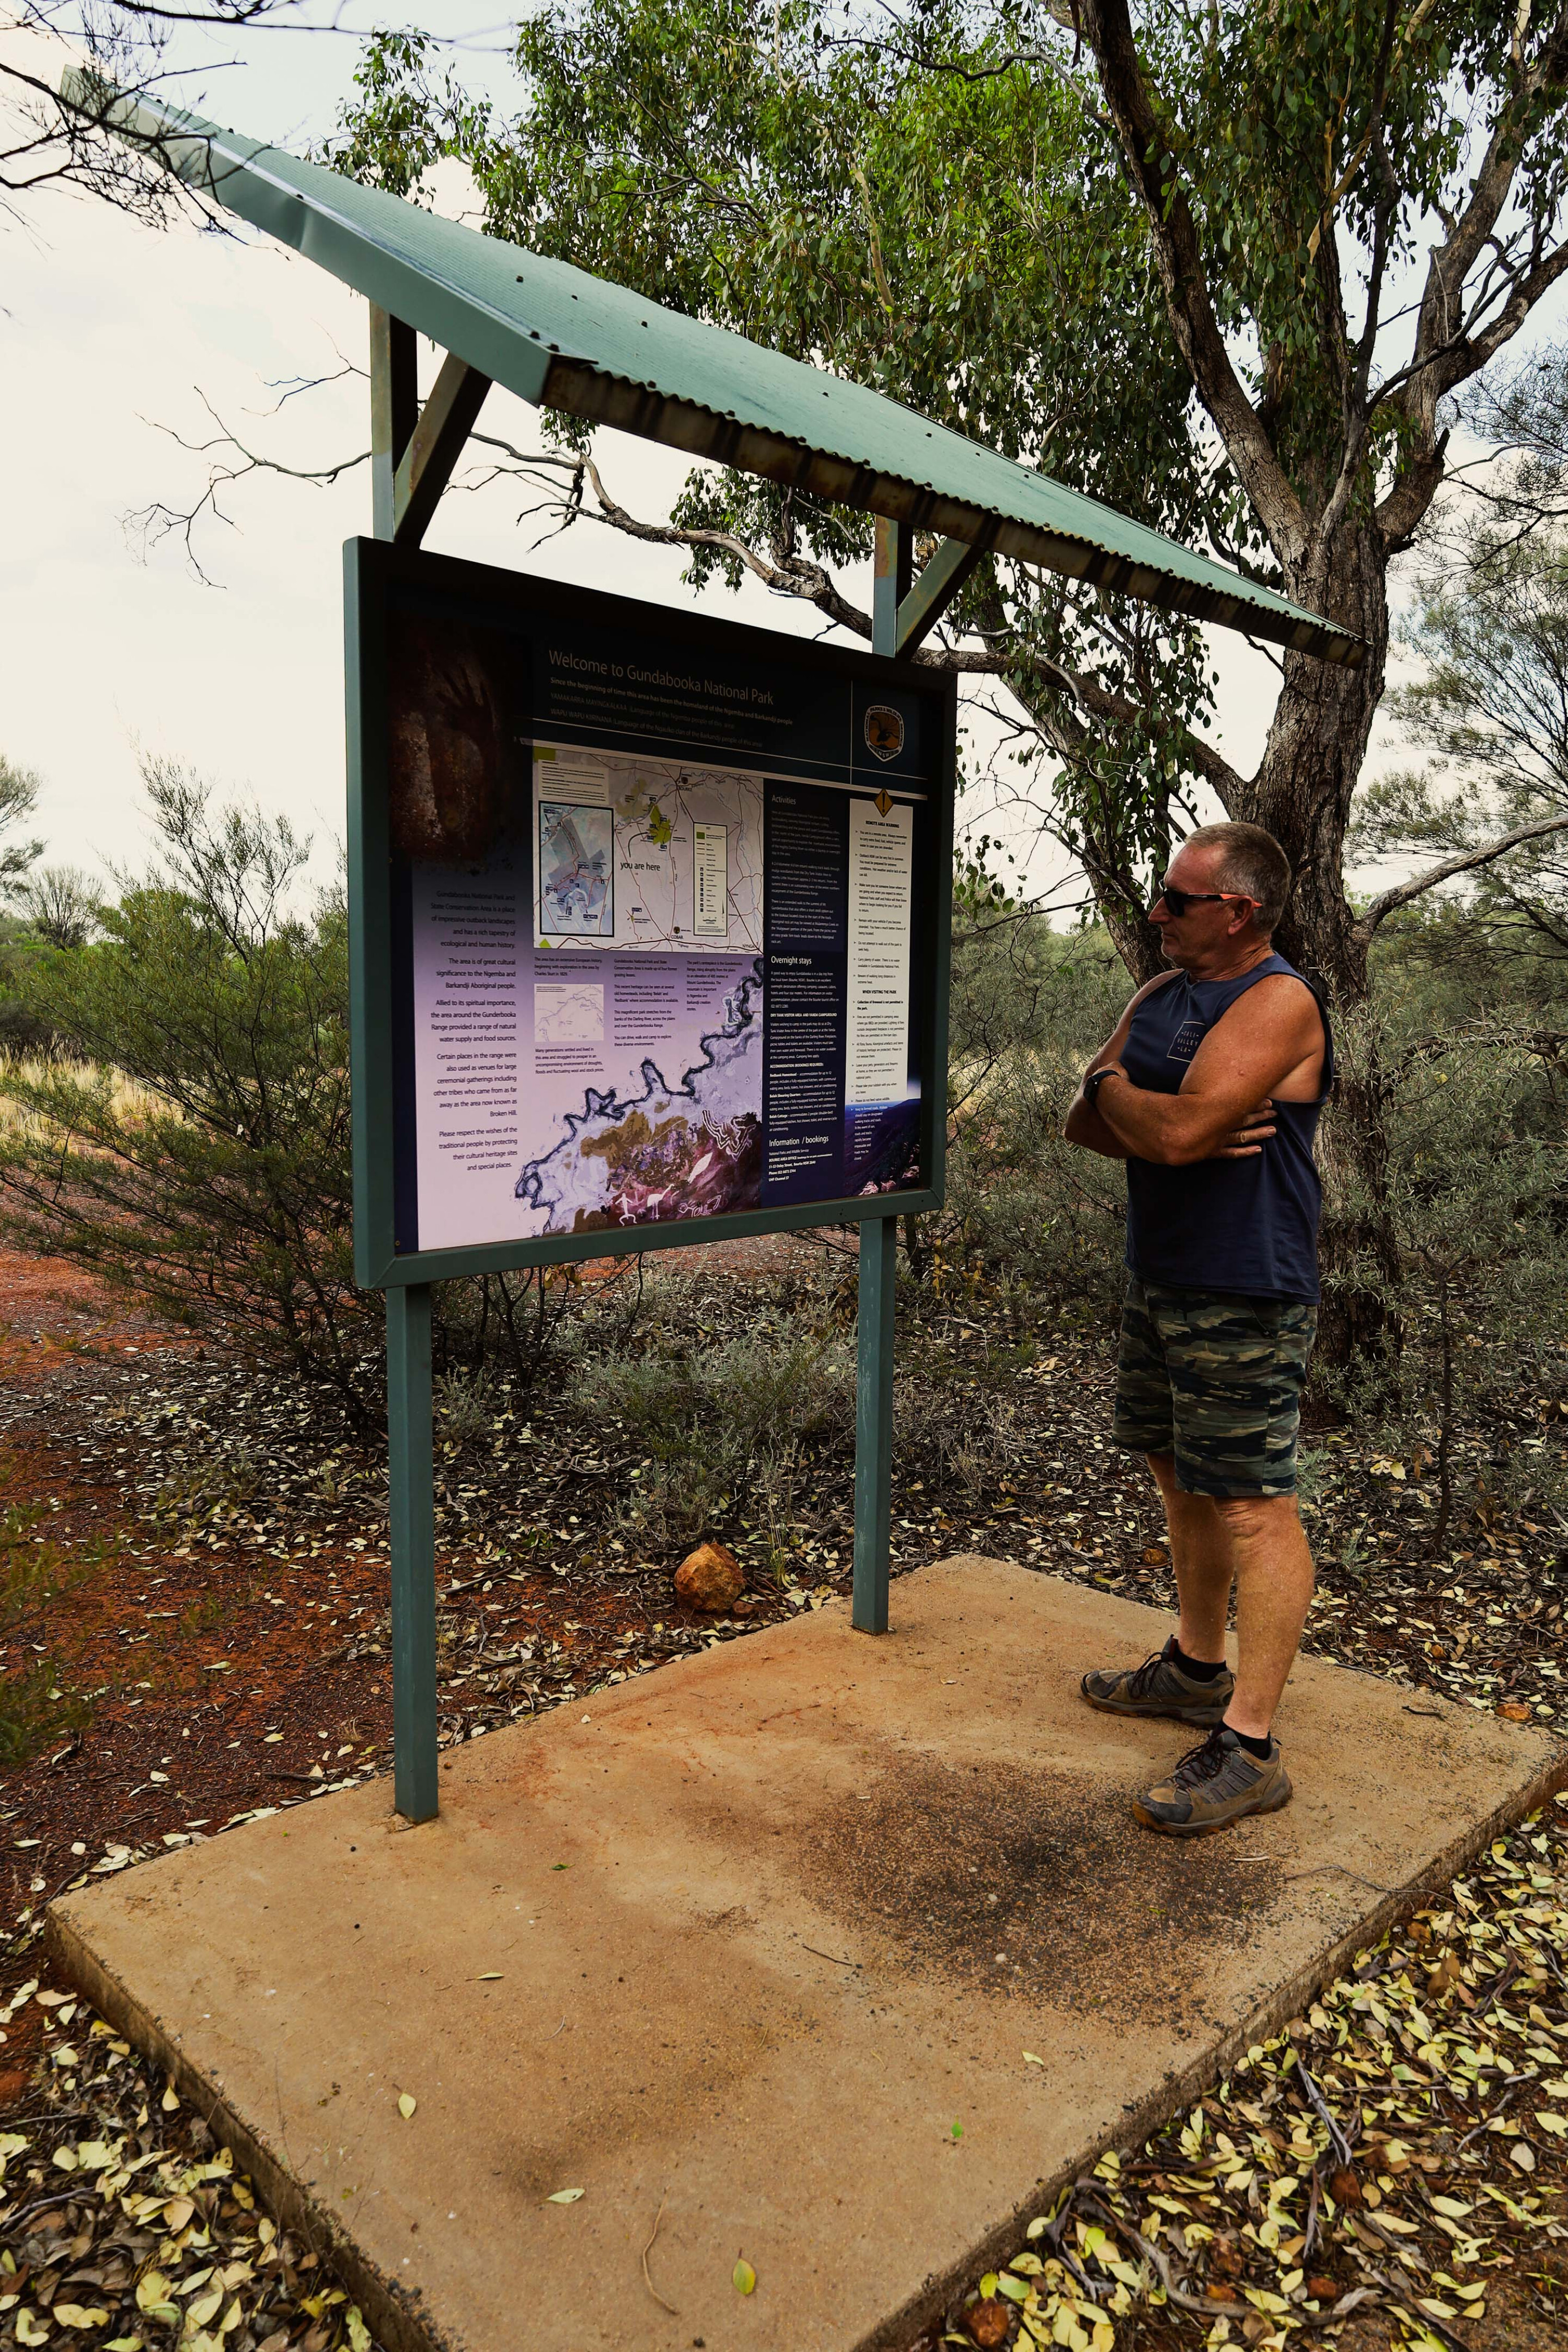
As soon as you enter the park, it feels like the real outback, with dusty red roads and stunning white gums towering over the mulga bush. Just inside the park, an information bay provides all the relevant information on what you’ll be able to see and do here, where to camp, what dangers are lurking and general map information.
My designated campsite for the next few nights was Dry Tank campground, located 20km into Gundabooka NP. Another campsite, Yanda campground, is located beside the Darling River, but I wanted to set up in the heart of Gundabooka.
1
Dry Tank has had a makeover since I was here last and I was pleasantly surprised with the new layout.
There’s parking for day-trippers and those wanting to start off here for the walking trails, private areas for camper trailers and tents hidden in the mulga, plus a large open area for group camping with picnic tables and a barbecue under a new shelter.
Bookings now must be made online through the NSW National Parks and Wildlife Service website before you get to the park, because phone service here is very patchy.
1
Mountain Views
Dry Tank is situated at the start of the 5km trail known as Little Mountain Walking Track, which meanders through thick Mulga and outback grevilleas to a viewing platform that offers uninterrupted views across the plain towards Mount Gundabooka.
The mountain, which rises 500m above sea level, was formed from millions of years of constant weathering from winds and rain. For those keen to do so, you can also walk the trail that leads you to the base of the mountain, but you need to be well prepared and experienced for this hike.
Around the scrub I was lucky enough to spot a few large mounds that are home to the Mulga Ant. These large black ants are omnivores that eat any dead matter, and are mostly nocturnal.
1
Rock Art
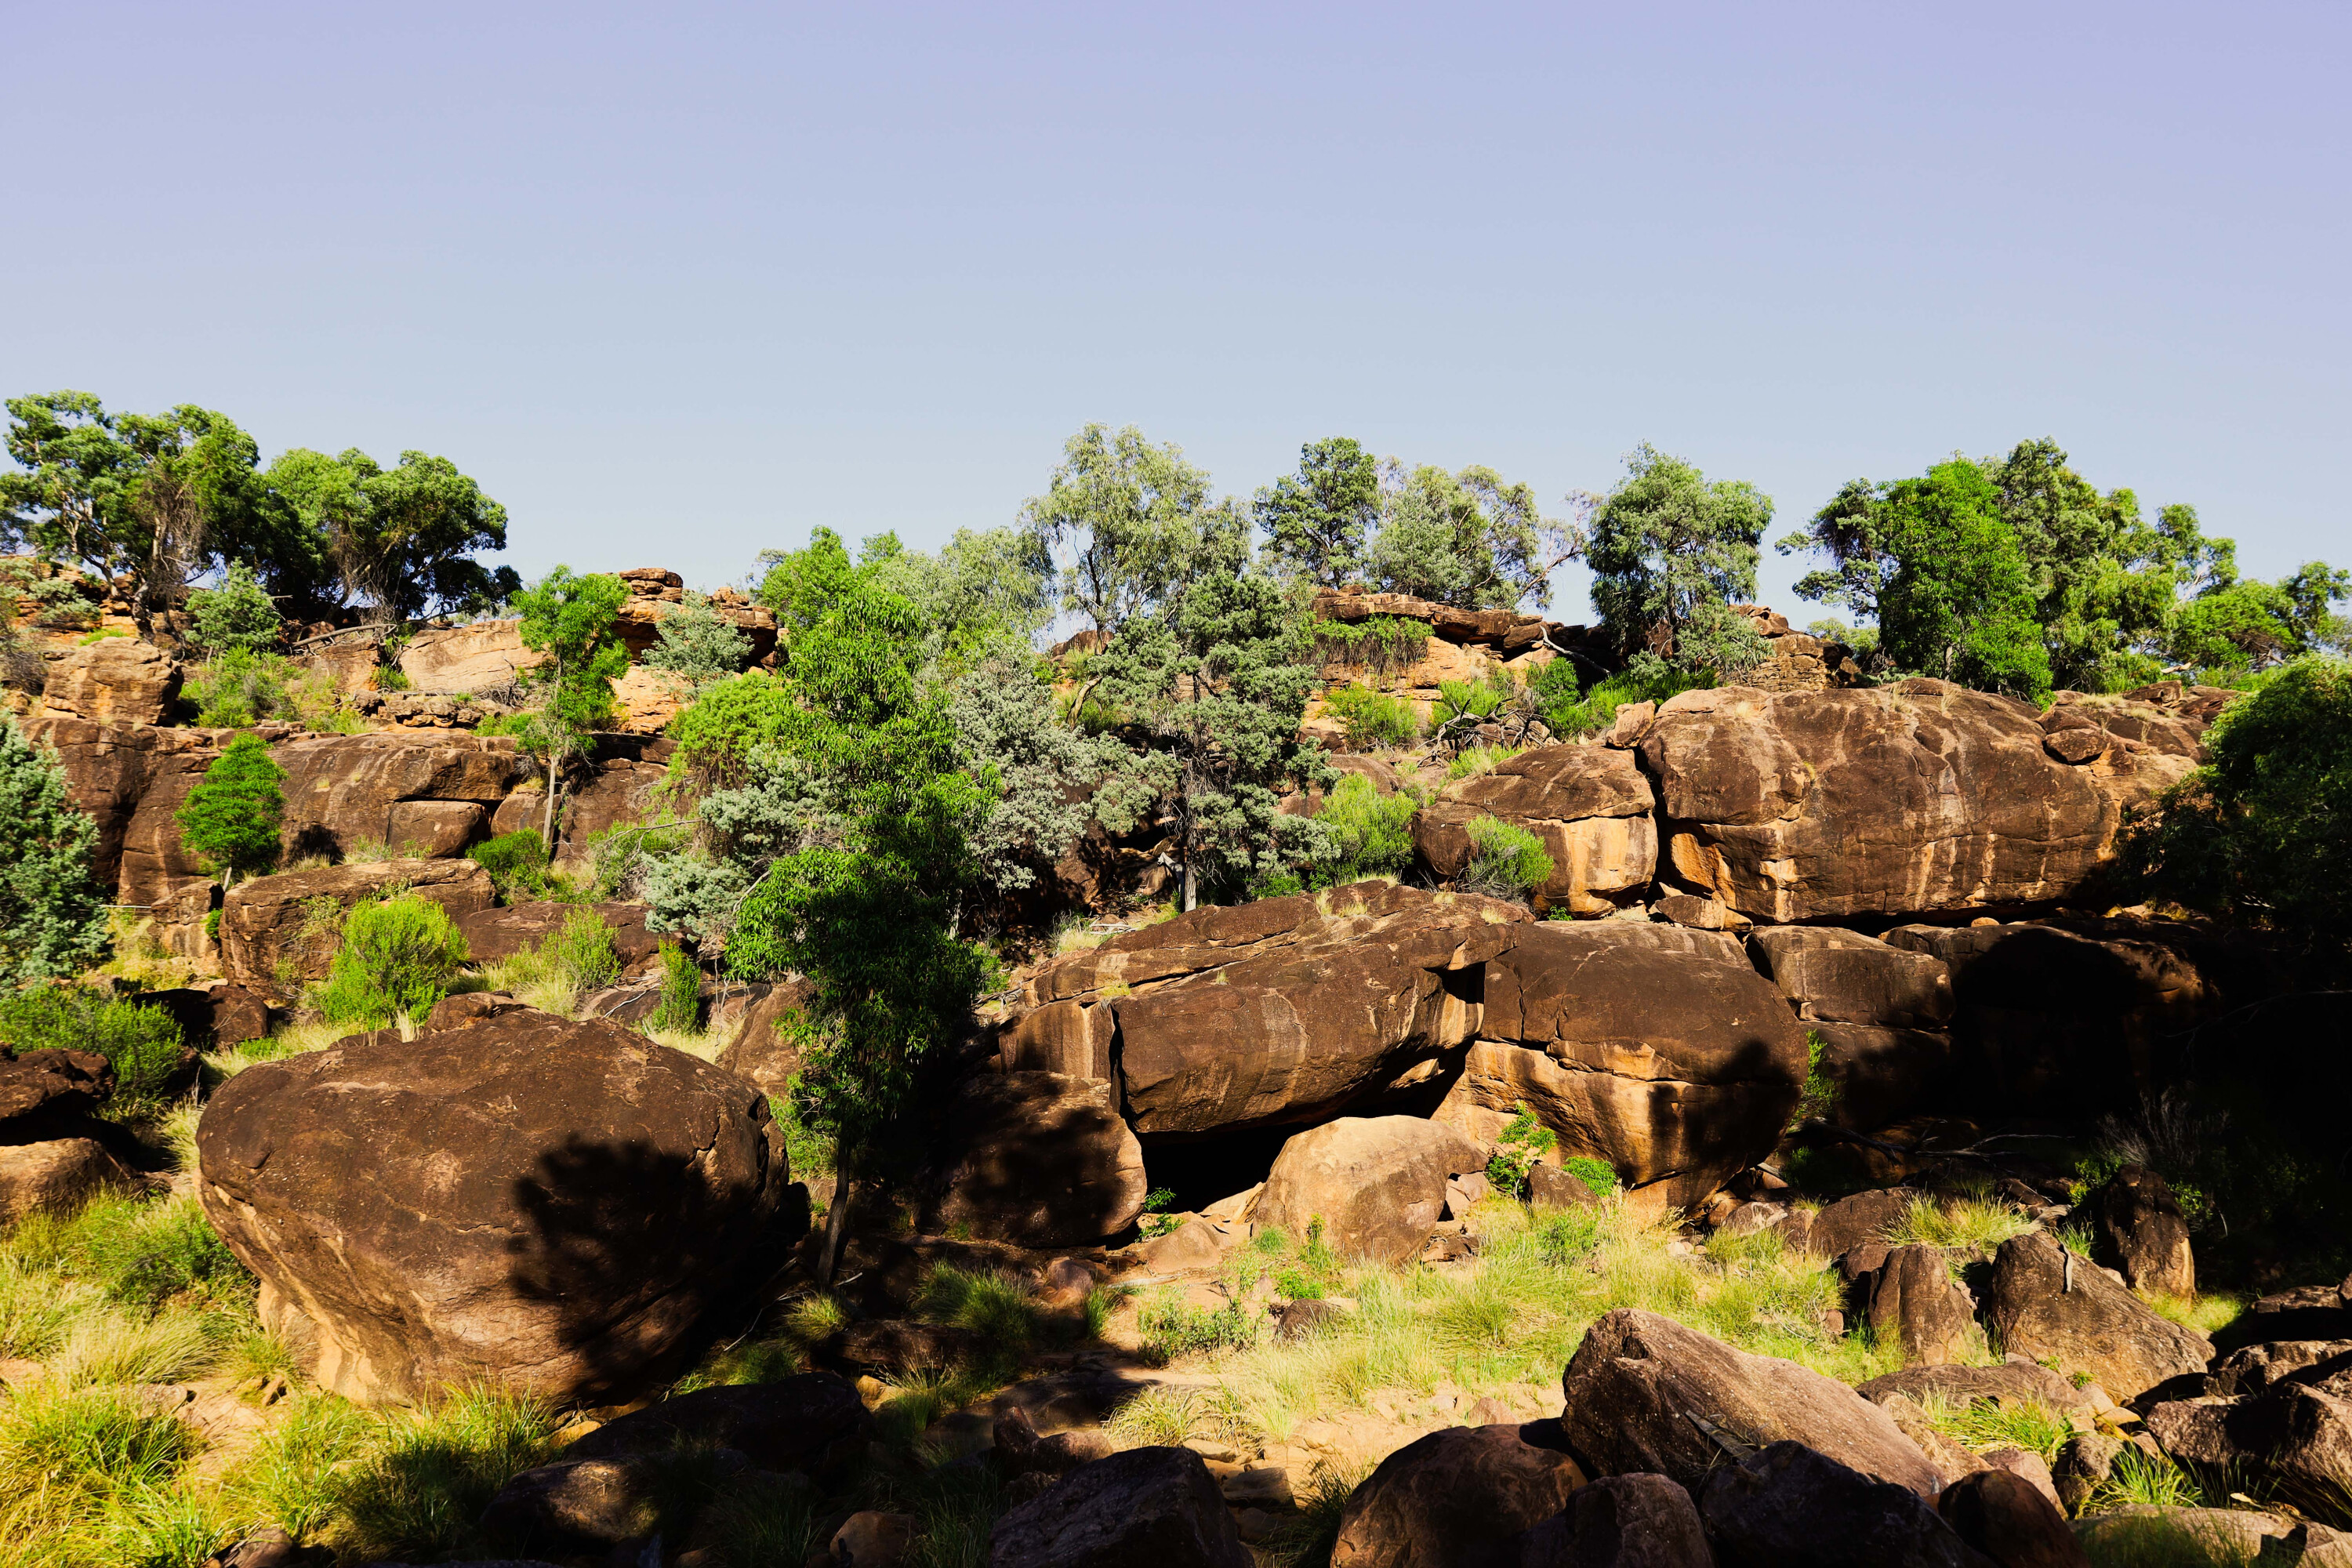
On the eastern side of the park, there’s the Yapa (Mulgowan) aboriginal rock art hike into Mulareenya gully where you’ll be able to view an array of artwork on the undercliff, with helpful signage that delves into the origin and meanings of the pieces.
This artwork near Mulareenya Creek is related to the heritage-listed Brewarrina Fish Traps on the Barwon River and the Byrock Rock Holes. This site is now on the register of the National Estate due to its significance as an important historical and cultural site.
Fires are permitted in the park but you need to bring your own timber and watch for restrictions. Gundabooka is a relaxing place to sit by a campfire as the mulga scrub goes quiet at night and has a relaxed feel to it. The stars appear as bright as some city lights and it makes for a great ambience.
1
My next mission was to head up the road to the Bennetts Gorge area.
After a 10km drive heading west from camp I was soon turning left into Corella Tank Road. With a further 2km drive in towards the looming base of Mount Gundabooka, the views towards the plateau are nothing short of spectacular.
NPWS class Bennetts Gorge as a picnic area, and in addition to the amazing views there is plenty of shade and toilets here, as well as intermittent phone reception.
1
From the Bennetts Gorge carpark you can head off on the Valley of the Eagles walk, which is an easy 1km stroll to the base of the mountain viewing area where you can sit and take in the Mount Gundabooka.
There are detailed information boards that list the history of the area, point out the location of the gorges and highlights that can be seen on the mountain, and explain how the resident eagles use warm air currents to glide around while they search for prey.
The walk takes around 30 minutes, but I spent a good two hours here just admiring the views of the surrounding landscape.
1
Three parts
The park was broken up into three separate outback stations just after the First World War, and this is evident by the number of fence lines you’ll spot and grid lines you’ll cross.
Up along the Yanda Track Road, there’s an out-station that’s pretty much as it was left 50 years ago, with the home, wrecks around the scrub and the shed up the back with a few relics still inside.
Towards the western end of the park the Louth Road cuts straight through, separating Yanda Campground from the main Gundabooka area. This area is different to the main camp, and here camping is permitted close to the Darling River. There’s plenty of room for trailers, tents and off-road vans, and there are also toilets and shelters.
1
Take a short stroll down to the water’s edge and you’ll be greeted by stunning views of old river gums looking over the slow moving Darling River, and good spots to fish or throw a yabbie trap in.
For those not wanting to camp within the park, there are homestay options nearby where you can stay in outback luxury, and still be able to explore the park. The park is certainly isolated, so you’ll need to be totally self-sufficient in terms of food, water and fuel. And bear in mind that winter temperatures can drop below freezing, and in summer it can be stifling hot.
NPWS has put a lot of resources into preserving Gundabooka in terms of pest control and weed management so we can all continue to explore and enjoy this precious park. For those looking for a fabulous outback experience, Gundabooka proves you don’t need to head much past the back o’ Bourke to find one.
1
TOP 5
Wander up the 5km Little Mountain Walking Track to the viewing platform that offers uninterrupted views across the plain towards Mount Gundabooka.
Take the Yapa (Mulgowan) aboriginal rock art hike into Mulareenya gully where you’ll be able to view an array of artwork on the undercliff.
Relax by the campfire as the mulga scrub goes quiet, enjoy the serenity and take in the spectacular night sky.
Check out Bennetts Gorge picnic area and then continue on for a couple of kilometres to the looming base of Mount Gundabooka.
Stroll down to the water’s edge and throw in a fishing line or a yabbie trap beneath the old river gums that line the slow moving Darling River.
Travel planner
Wander up the 5km Little Mountain Walking Track to the viewing platform that offers uninterrupted views across the plain towards Mount Gundabooka.
Take the Yapa (Mulgowan) aboriginal rock art hike into Mulareenya gully where you’ll be able to view an array of artwork on the undercliff.
Relax by the campfire as the mulga scrub goes quiet, enjoy the serenity and take in the spectacular night sky.
Check out Bennetts Gorge picnic area and then continue on for a couple of kilometres to the looming base of Mount Gundabooka.
Stroll down to the water’s edge and throw in a fishing line or a yabbie trap beneath the old river gums that line the slow moving Darling River.
Where
Gundabooka NP is 800km northwest of Sydney and 60km south of Bourke in NSW’s outback region. Once made up of several stations, it’s now a protected National Park with a heritage listing.
What to see and do
Gundabooka NP is a naturalist’s delight with walking trails, birdwatching and isolated camping. Walking trails range from an easy one kilometre stroll through to overnight hikes to Mount Gundabooka. Stunning Aboriginal art can be viewed here with signage explaining the rock art.
More information
Most information can be found online through the NSW NPWS website or by calling into the Back O’ Bourke Information & Exhibition Centre on Kidman Way, Bourke.
When it comes to varied terrains, Australia has to be darn close to first place the world over.
There are not too many places out there where you can experience 50°C days in the desert, freezing alpine blizzards, and pristine sub-tropical sand islands all within a few days of driving.
Each terrain not only requires an entirely different skill set and mentality to tackle, they also require vastly different vehicle preparation to get the most out of them. A temperature range of nearly 60°C is no laughing matter.
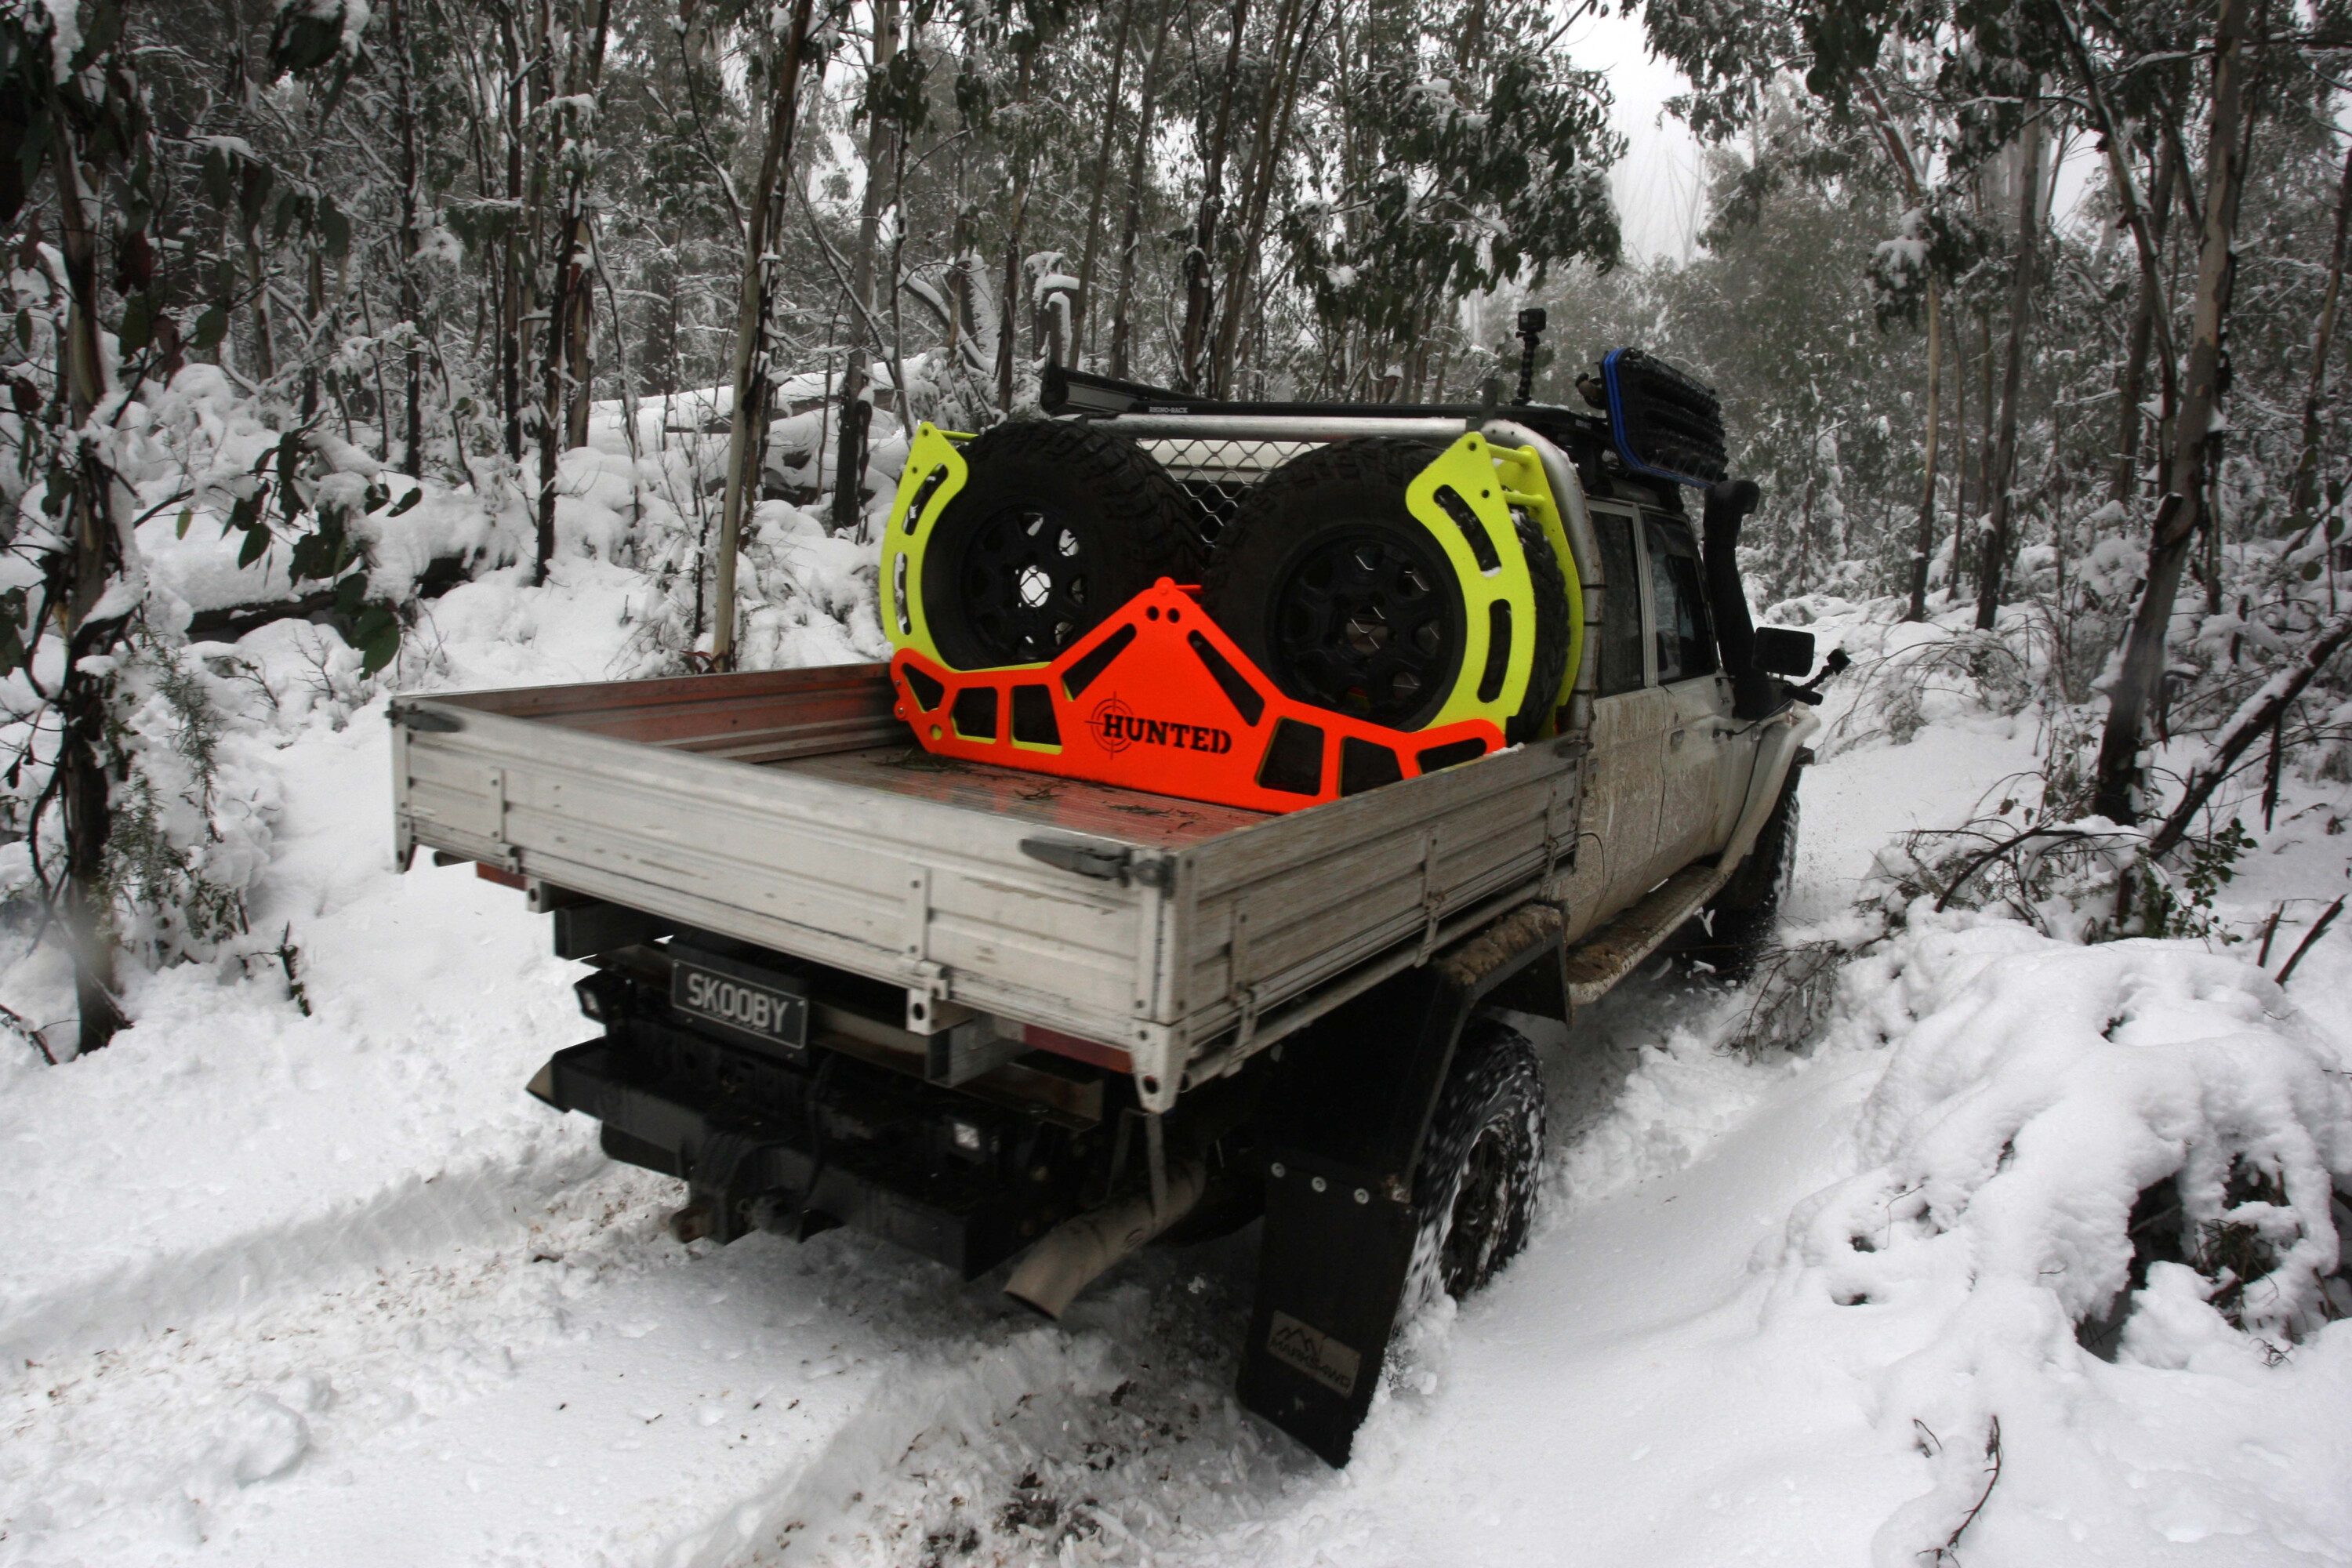
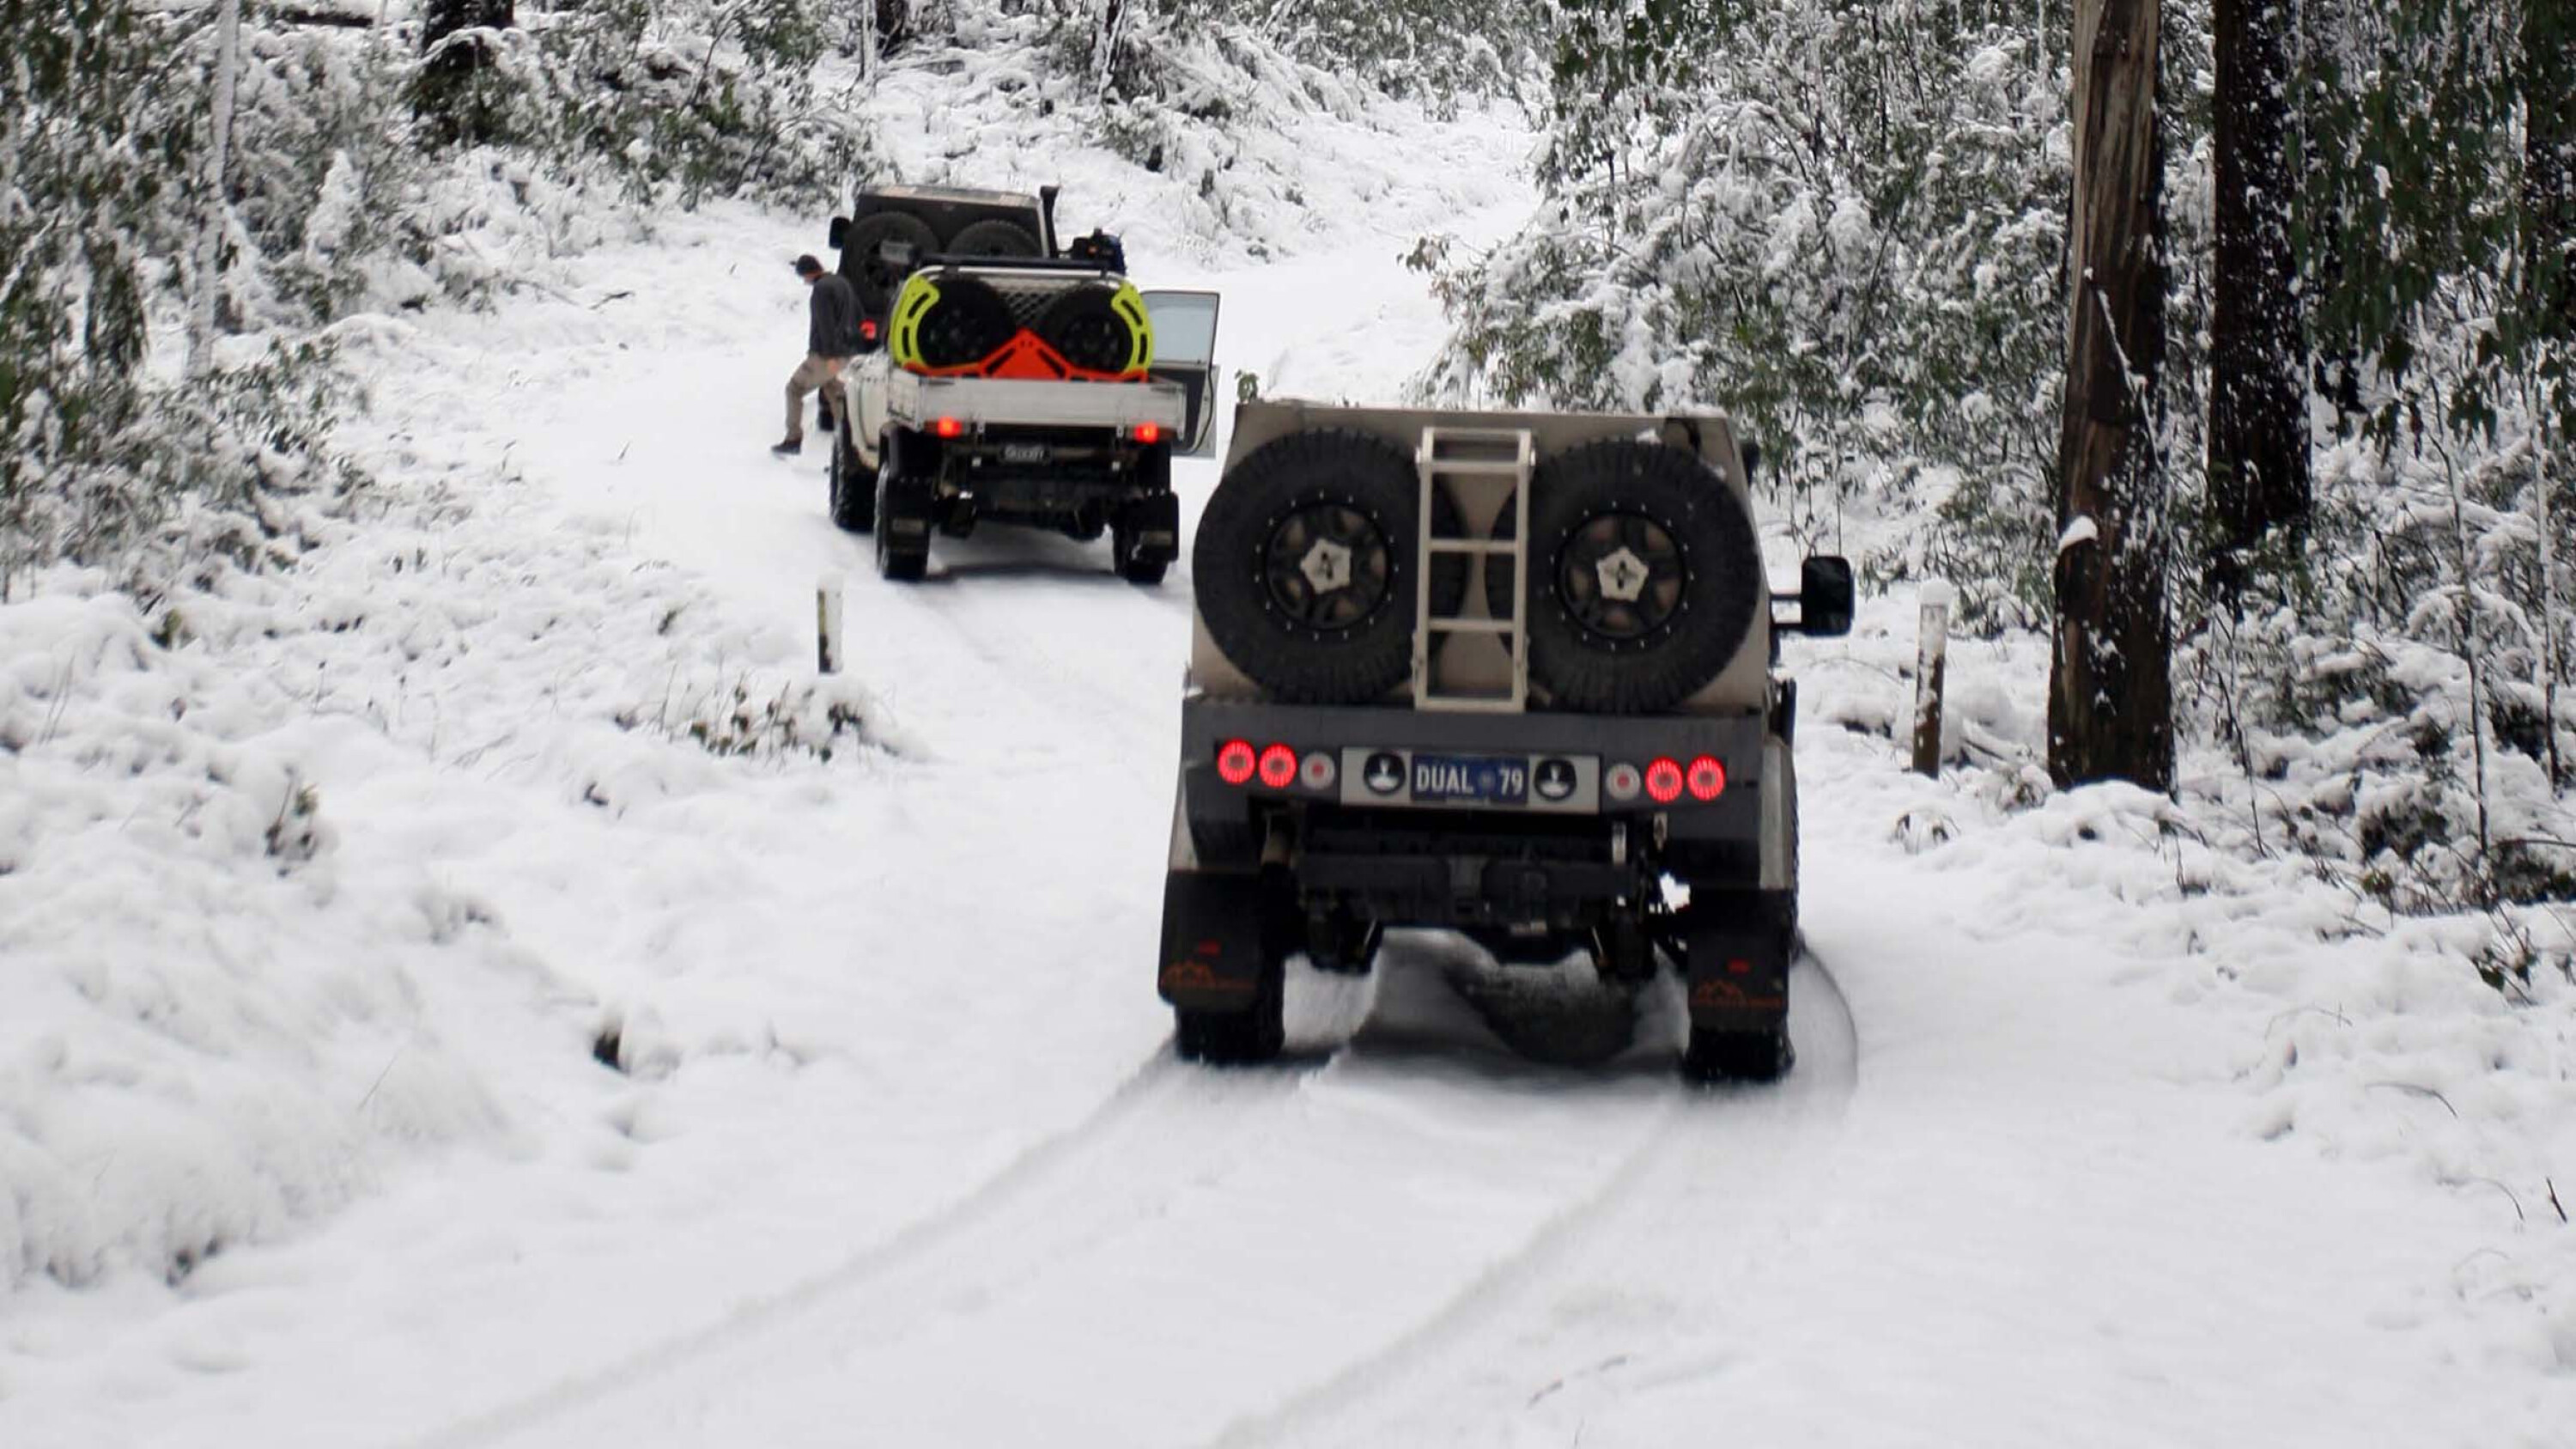
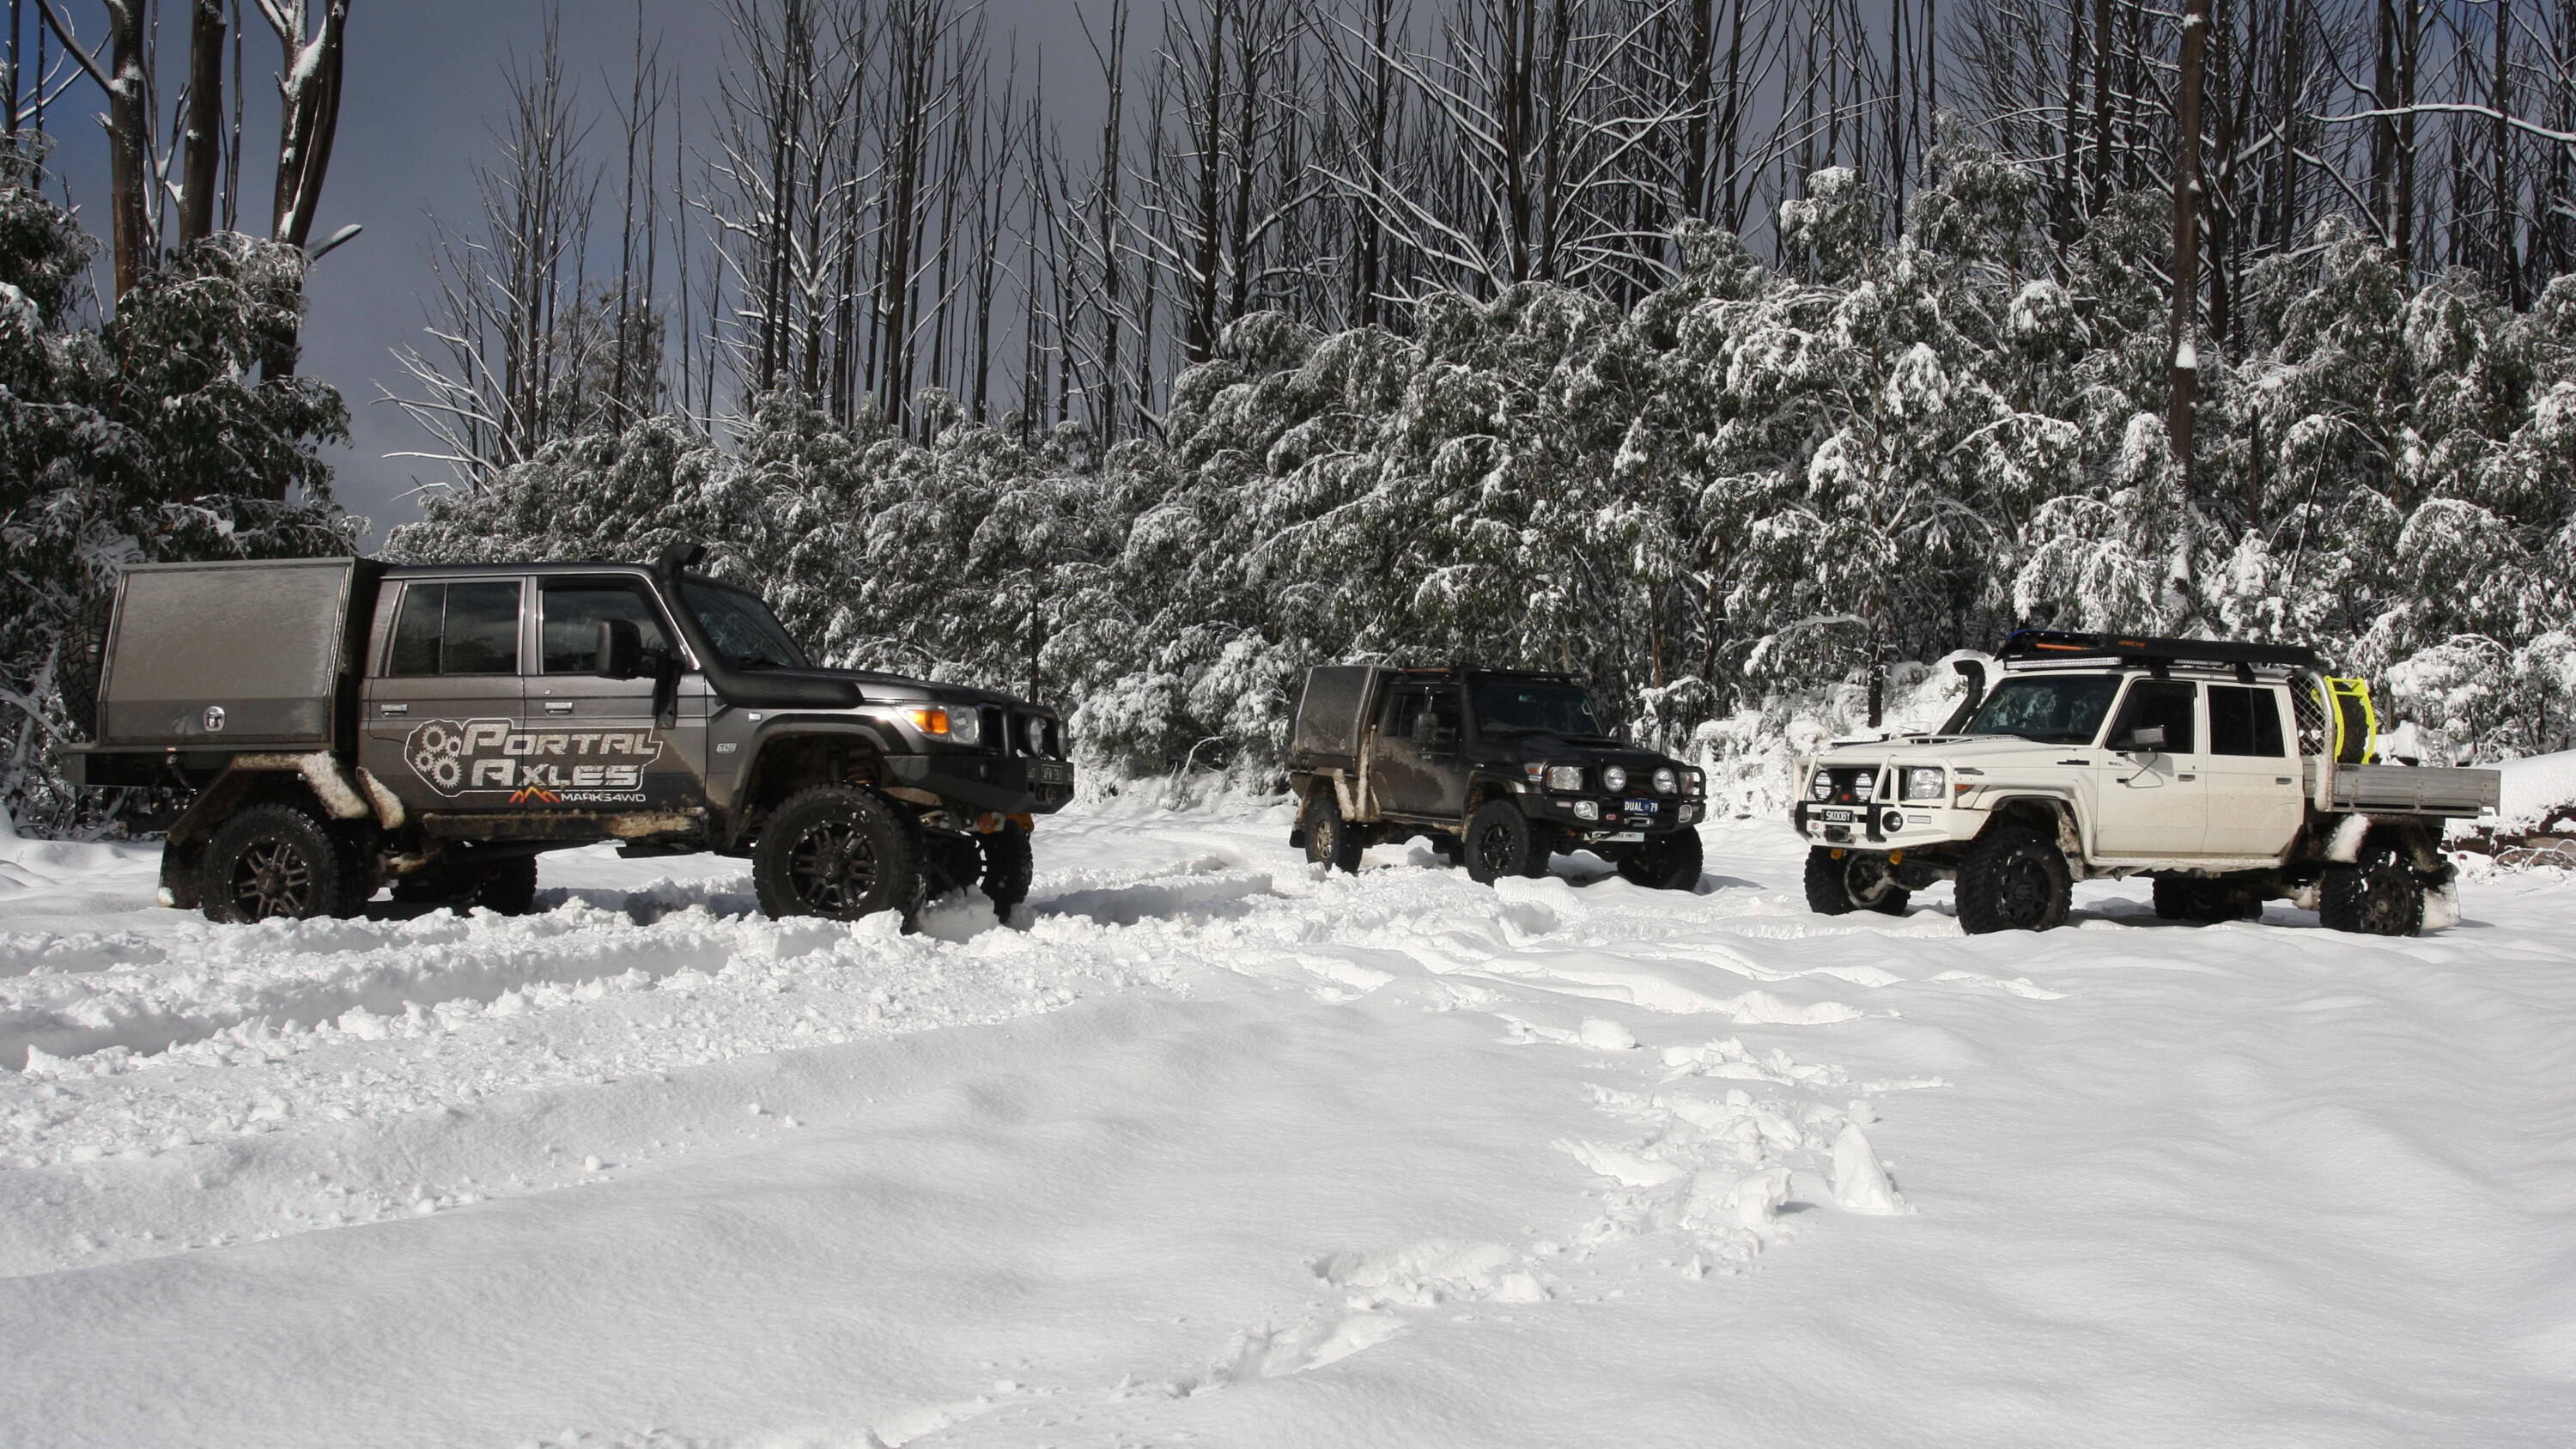
Whether it’s a quick reminder for the southern states, or a 101 intro to snow wheeling for our northern brothers and sisters, we’re looking at a quick hit list of everything you need to not only survive the snow this winter, but thrive.
1
Get the rig ready
Most of us tend to think of mechanical contraptions as generally infallible; they either work or they don’t.
After all, when was the last time you thought about the operating temperature range of your toaster? But your 4×4 is a little different, especially as it ages.
The difference between -5°C and 25°C will have a drastic effect on the viscosity or thickness of your engine’s oil; the colder it is, the thicker the oil, and as a result the engine becomes harder to turn over requiring significantly more oomph from the battery to get it fired up.
1
Ironically, the cold weather also slows the chemical reaction in your battery giving you less oomph as well.
If your battery is on its last legs, that first alpine night might just tip you over the edge where it can’t overcome the cold. Before heading to the snow, replace your old starter battery and ensure your engine’s oil has the correct winter weight. The low temperatures will also stiffen up any plastic or rubber components so run your eyes over fan belts and radiator hoses too.
You’ll need to pay special attention to the fuel in your tanks too. Diesel contains paraffin wax to help with lubrication but down around 0°C that paraffin starts to solidify, causing the diesel to thicken to the point it’ll clog injectors and fuel filters.
1
If you’re heading anywhere snow is possible, fill up your tanks with alpine diesel.
There’s a variety of additives that can be mixed in depending on the blend that’ll allow your diesel to run as normal below freezing temperatures.
Finally, poke a watchful eye under the radiator cap to have a look at your coolant situation, to make sure the last dodgy mechanic didn’t just fill it with straight water.
Coolant, or anti-freeze as it’s otherwise known, has additives to not only raise the boiling point above 100°C, but lower the freeze point below 0°C. It doesn’t take an active imagination to see the effects of a frozen radiator on reliability.
1
The gear to bring
When it comes time to decide the right tyres for your snow-bound adventure machine there are endless arguments back and forth between mud terrains and all terrains.
It’s generally thought that an AT will perform better than an MT on hard-packed snow due to the higher number of biting edges, while the MT’s large voids allow them to dig deep into soft powder.
Either way, an M+S symbol will mean your tyre’s rubber compound has been formulated to stay pliable in low temperatures.
1
If you find the limits of traction, a set of recovery boards can be a handy ‘get out of jail free card’
Like any other terrain, dropping air pressures will give your tyres significantly more traction; you’ll need to go lower in soft pack vs hard pack, so don’t be afraid to experiment. If you find the limits of traction, a set of recovery boards can be a handy ‘get out of jail free card’ and can double as a shovel in a bind.
Like any backcountry adventure, you’ll need to have some means of self-extrication, so make sure your rig has a recovery kit and either a winch or a second 4×4 in the convoy.
Don’t forget a UHF and a satellite phone for if things go proper pear shaped.
1
Behind the wheel
Snow driving is one of the best experiences you’ll ever have behind the wheel, but your rig making it home afterwards is even better.
Whether you’re on the soft stuff itself or still on the winding mountain pass to get there, it’s important to keep all your inputs smooth. That means gentle steering and subtle brake and accelerator inputs to ensure your rig does exactly what you need it to. Don’t white knuckle the steering wheel in terror, but do leave a little extra braking room to account for the low traction.
When you get higher up in the mountains remember that snow won’t sit evenly on the ground.
1
If you don’t know 100 percent what you’re driving into, stay on the track.
Ditches, washouts and culverts can all quickly fill with soft-packed snow, bringing them to the same level as the road, until you put a wheel into them and find yourself helplessly bogged. If you don’t know 100 percent what you’re driving into, stay on the track.
If you do find yourself bogged, and you haven’t gone with a mate in a second vehicle, stay with the vehicle. If it’s cold enough to snow, it’s cold enough that you’ll have a bad time trying to hike out of the bush to get help.
Even if you’re low on fuel your engine will idle all night, keeping the heater running. If the UHF or satphone don’t get you out of strife, the friend or family member you told your plans to will be able to help.
1
In chains
If you’re looking for a little extra something up your sleeve when it comes to snow capability you can’t go past a set of chains.
Available in a variety of different sizes to suit your tyres perfectly, snow chains are mandatory in a bunch of alpine regions thanks to the additional safety on icy roads they provide.
Fitted up to your steer tyres, they’ll see you safely driving through terrain that’d have others spinning on the spot, but you will need to adjust them when you air down and take them back off when you’re out of the danger zones. If you’ve never fitted them up before, have a practice run in the dry when your fingers don’t hurt.
Stick around the land of 4x4s long enough and you’ll notice trends come and go. Retro graphics made way for matte paint jobs, but now they’re cool again.
Slide-on campers were replaced with swags and awnings, only to be replaced with decked-out canopies. Polished alloy wheels faded away for white and then black steelies, now we’re back to alloys again. But unlike flashing LED headlights and headboard-mounted subwoofers, some trends stand the test of time.
From the earliest days of hot-rodding, through to the pioneers of 4x4ing, long nights in the shed, ingenuity, and plenty of DIYing on the business end of a welder is something that has never gone out of fashion.
1
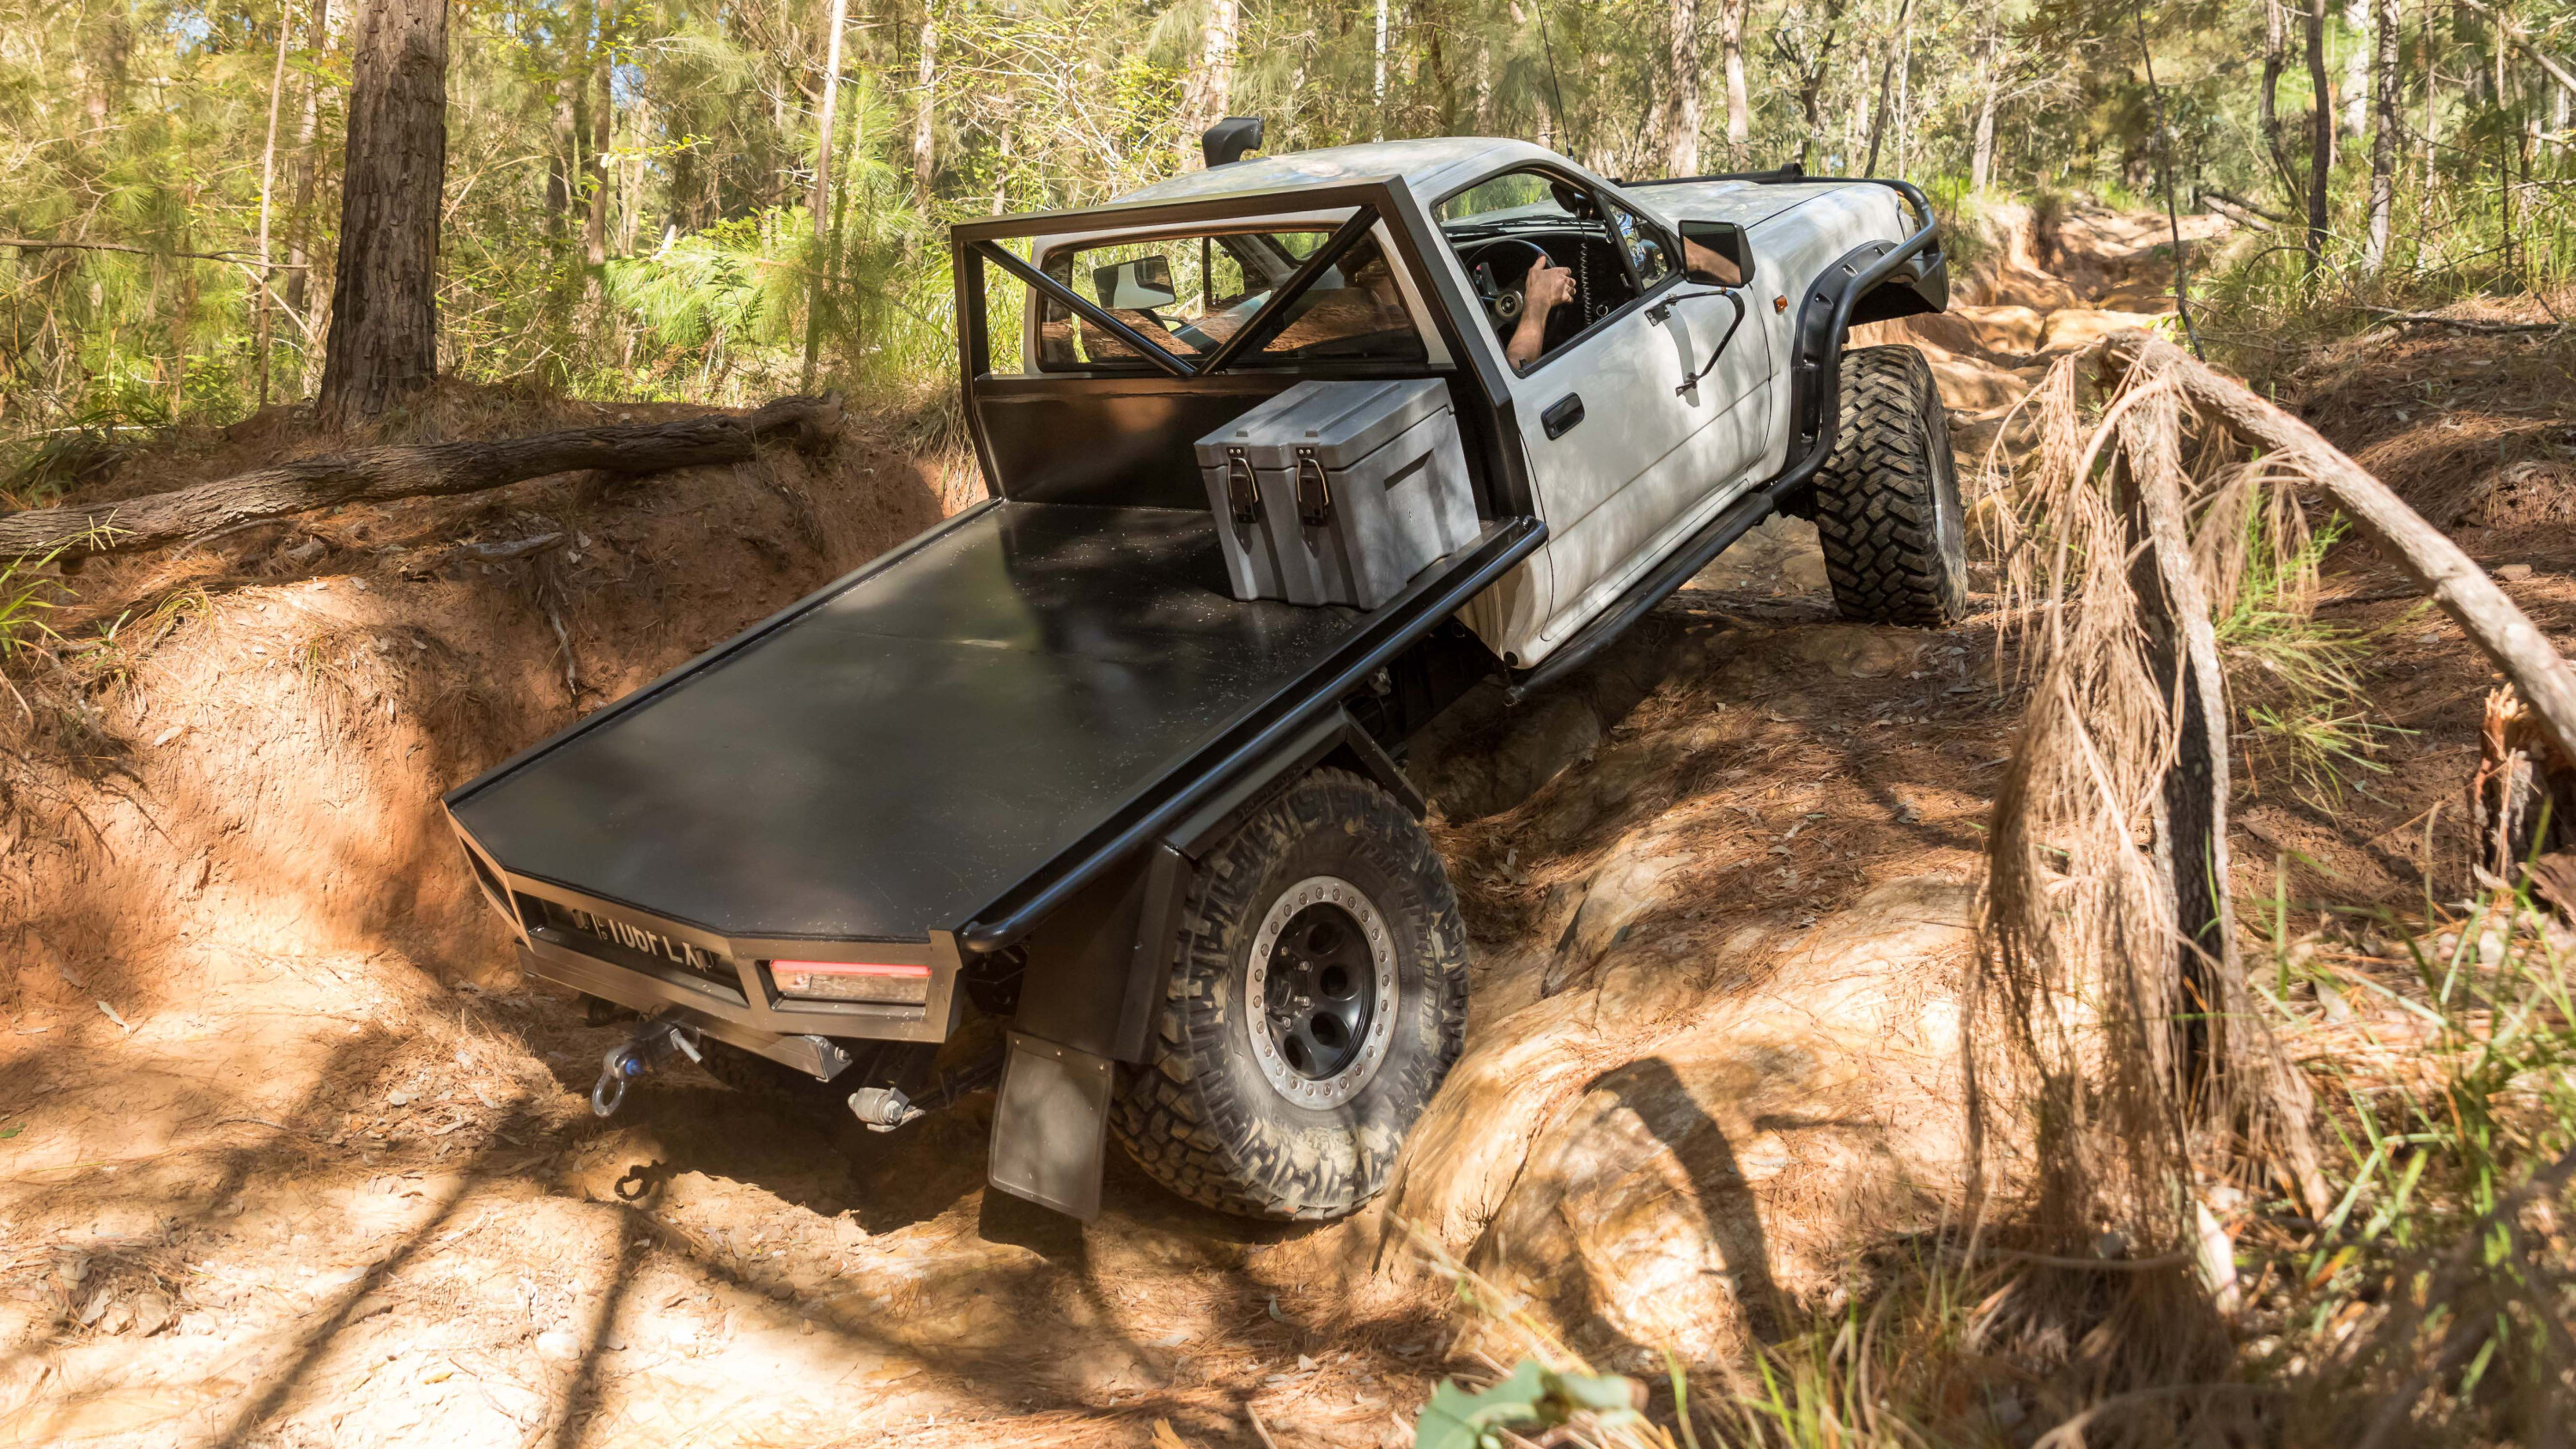
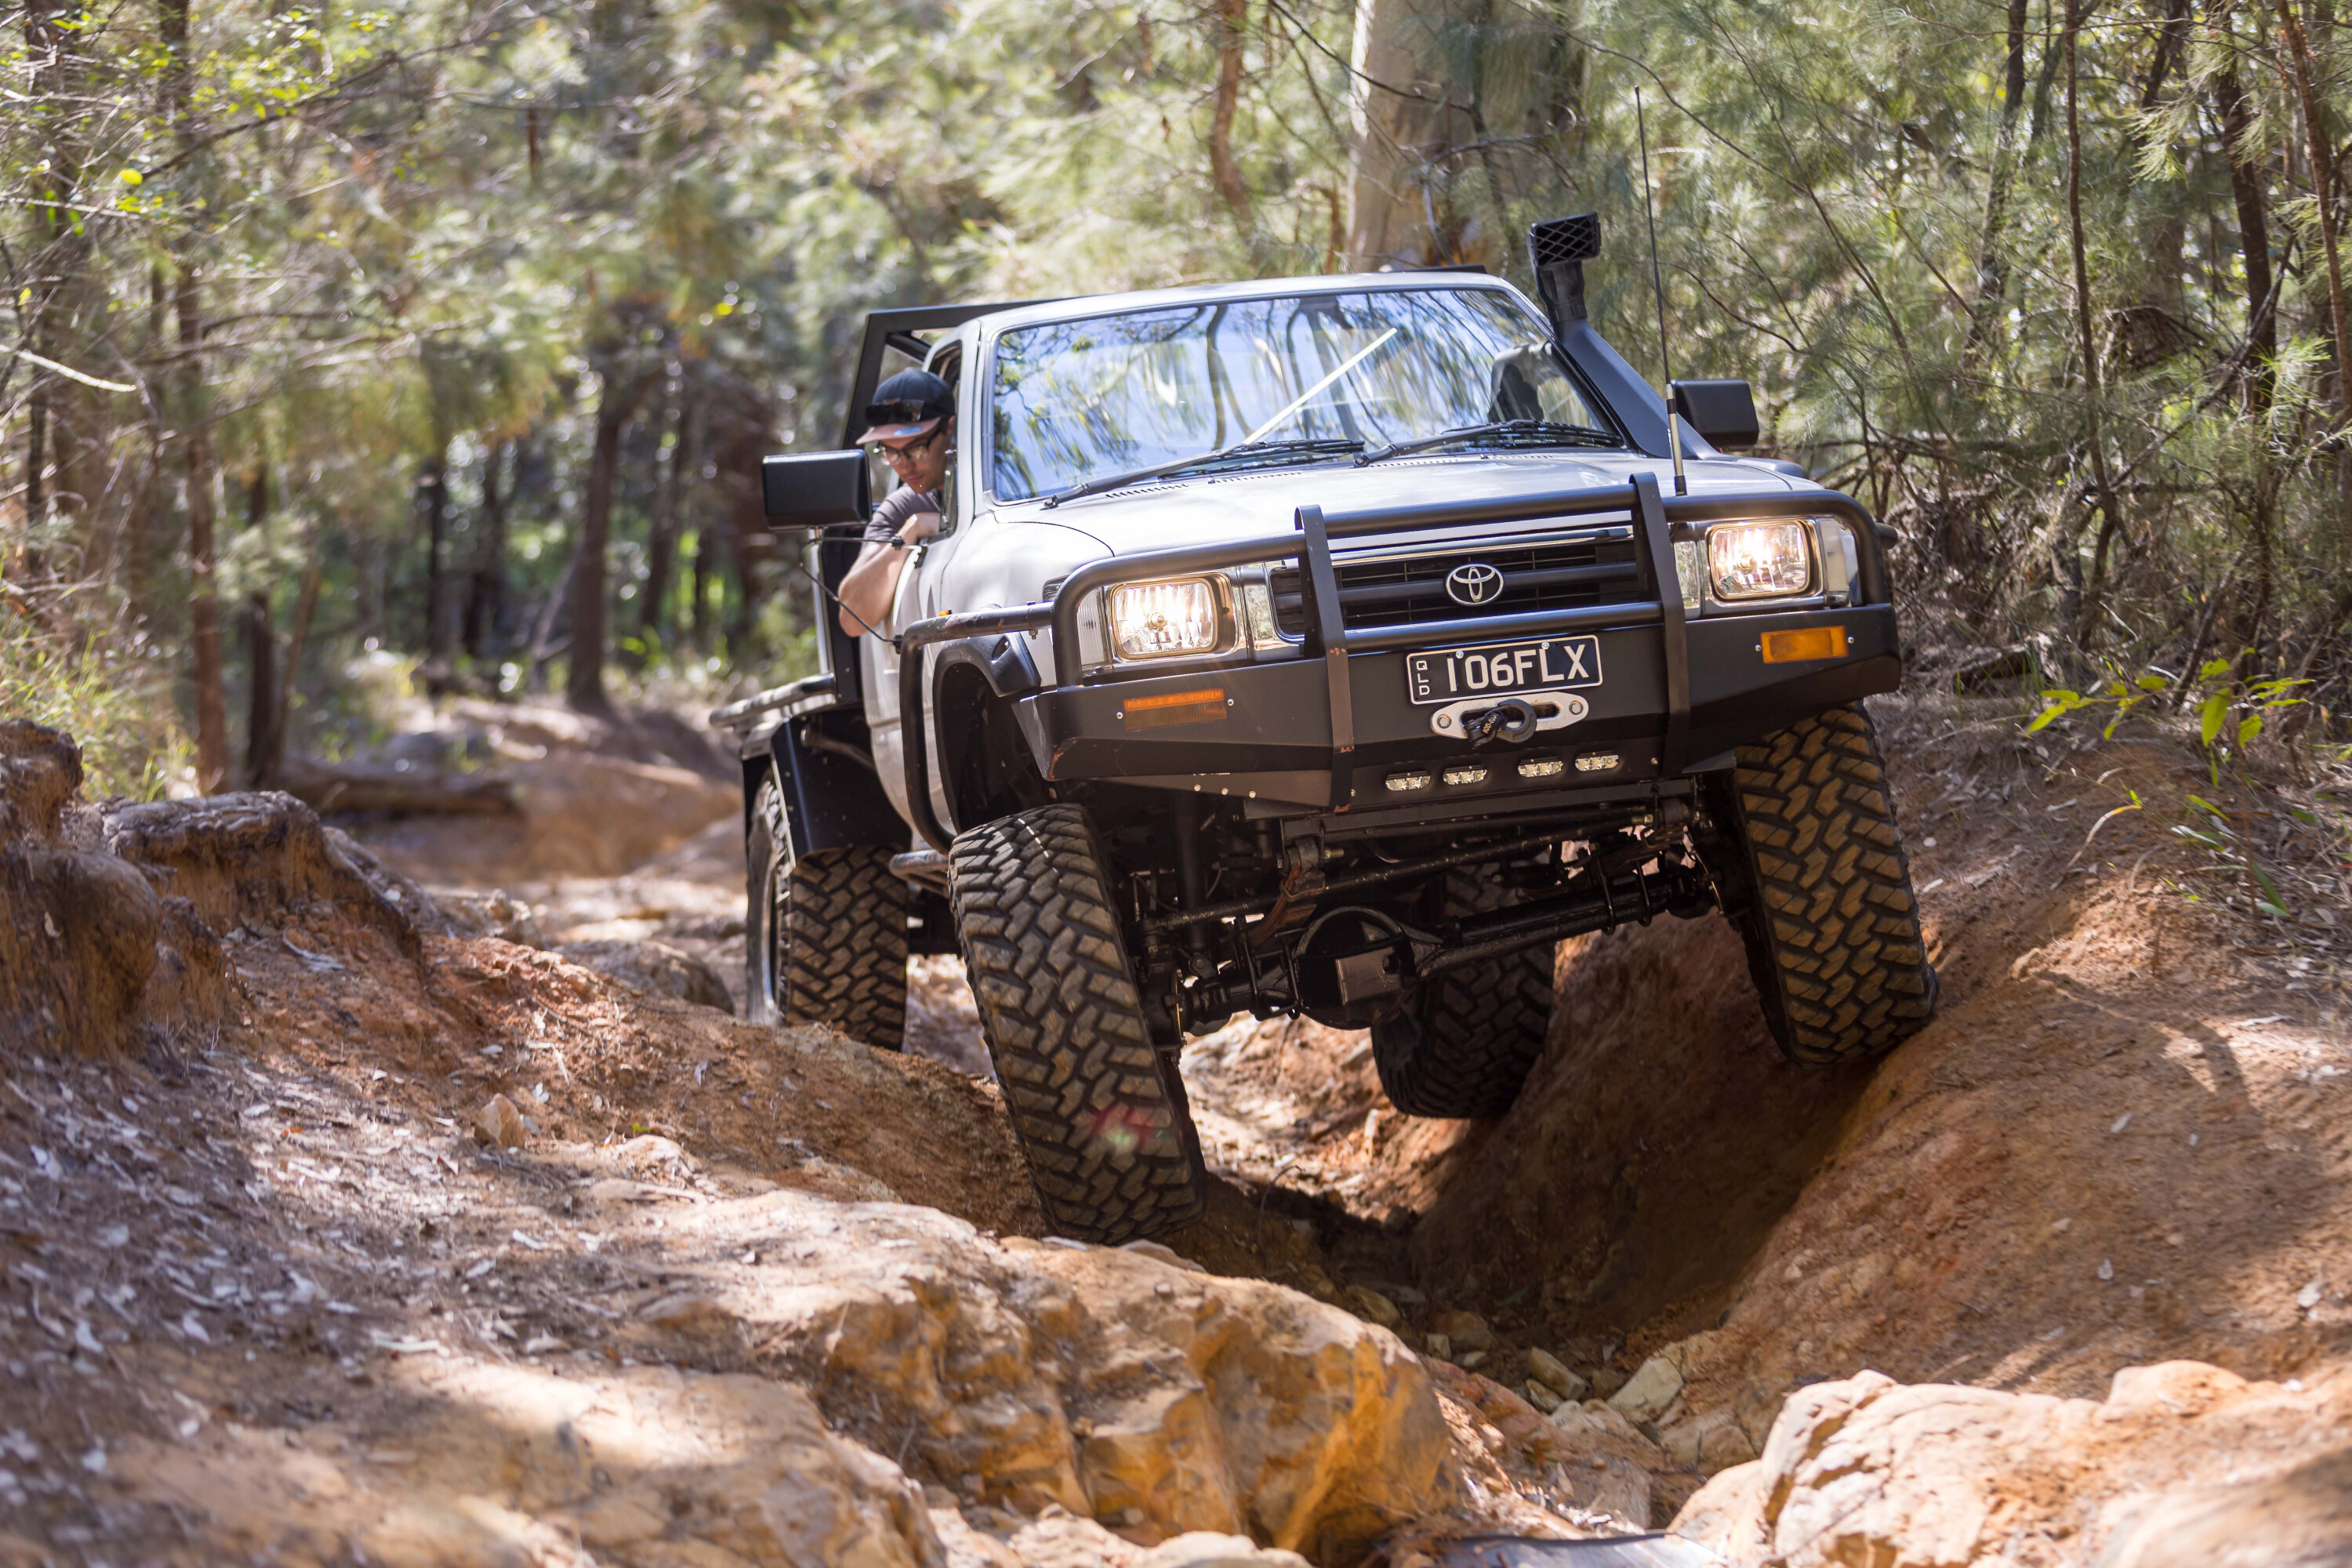
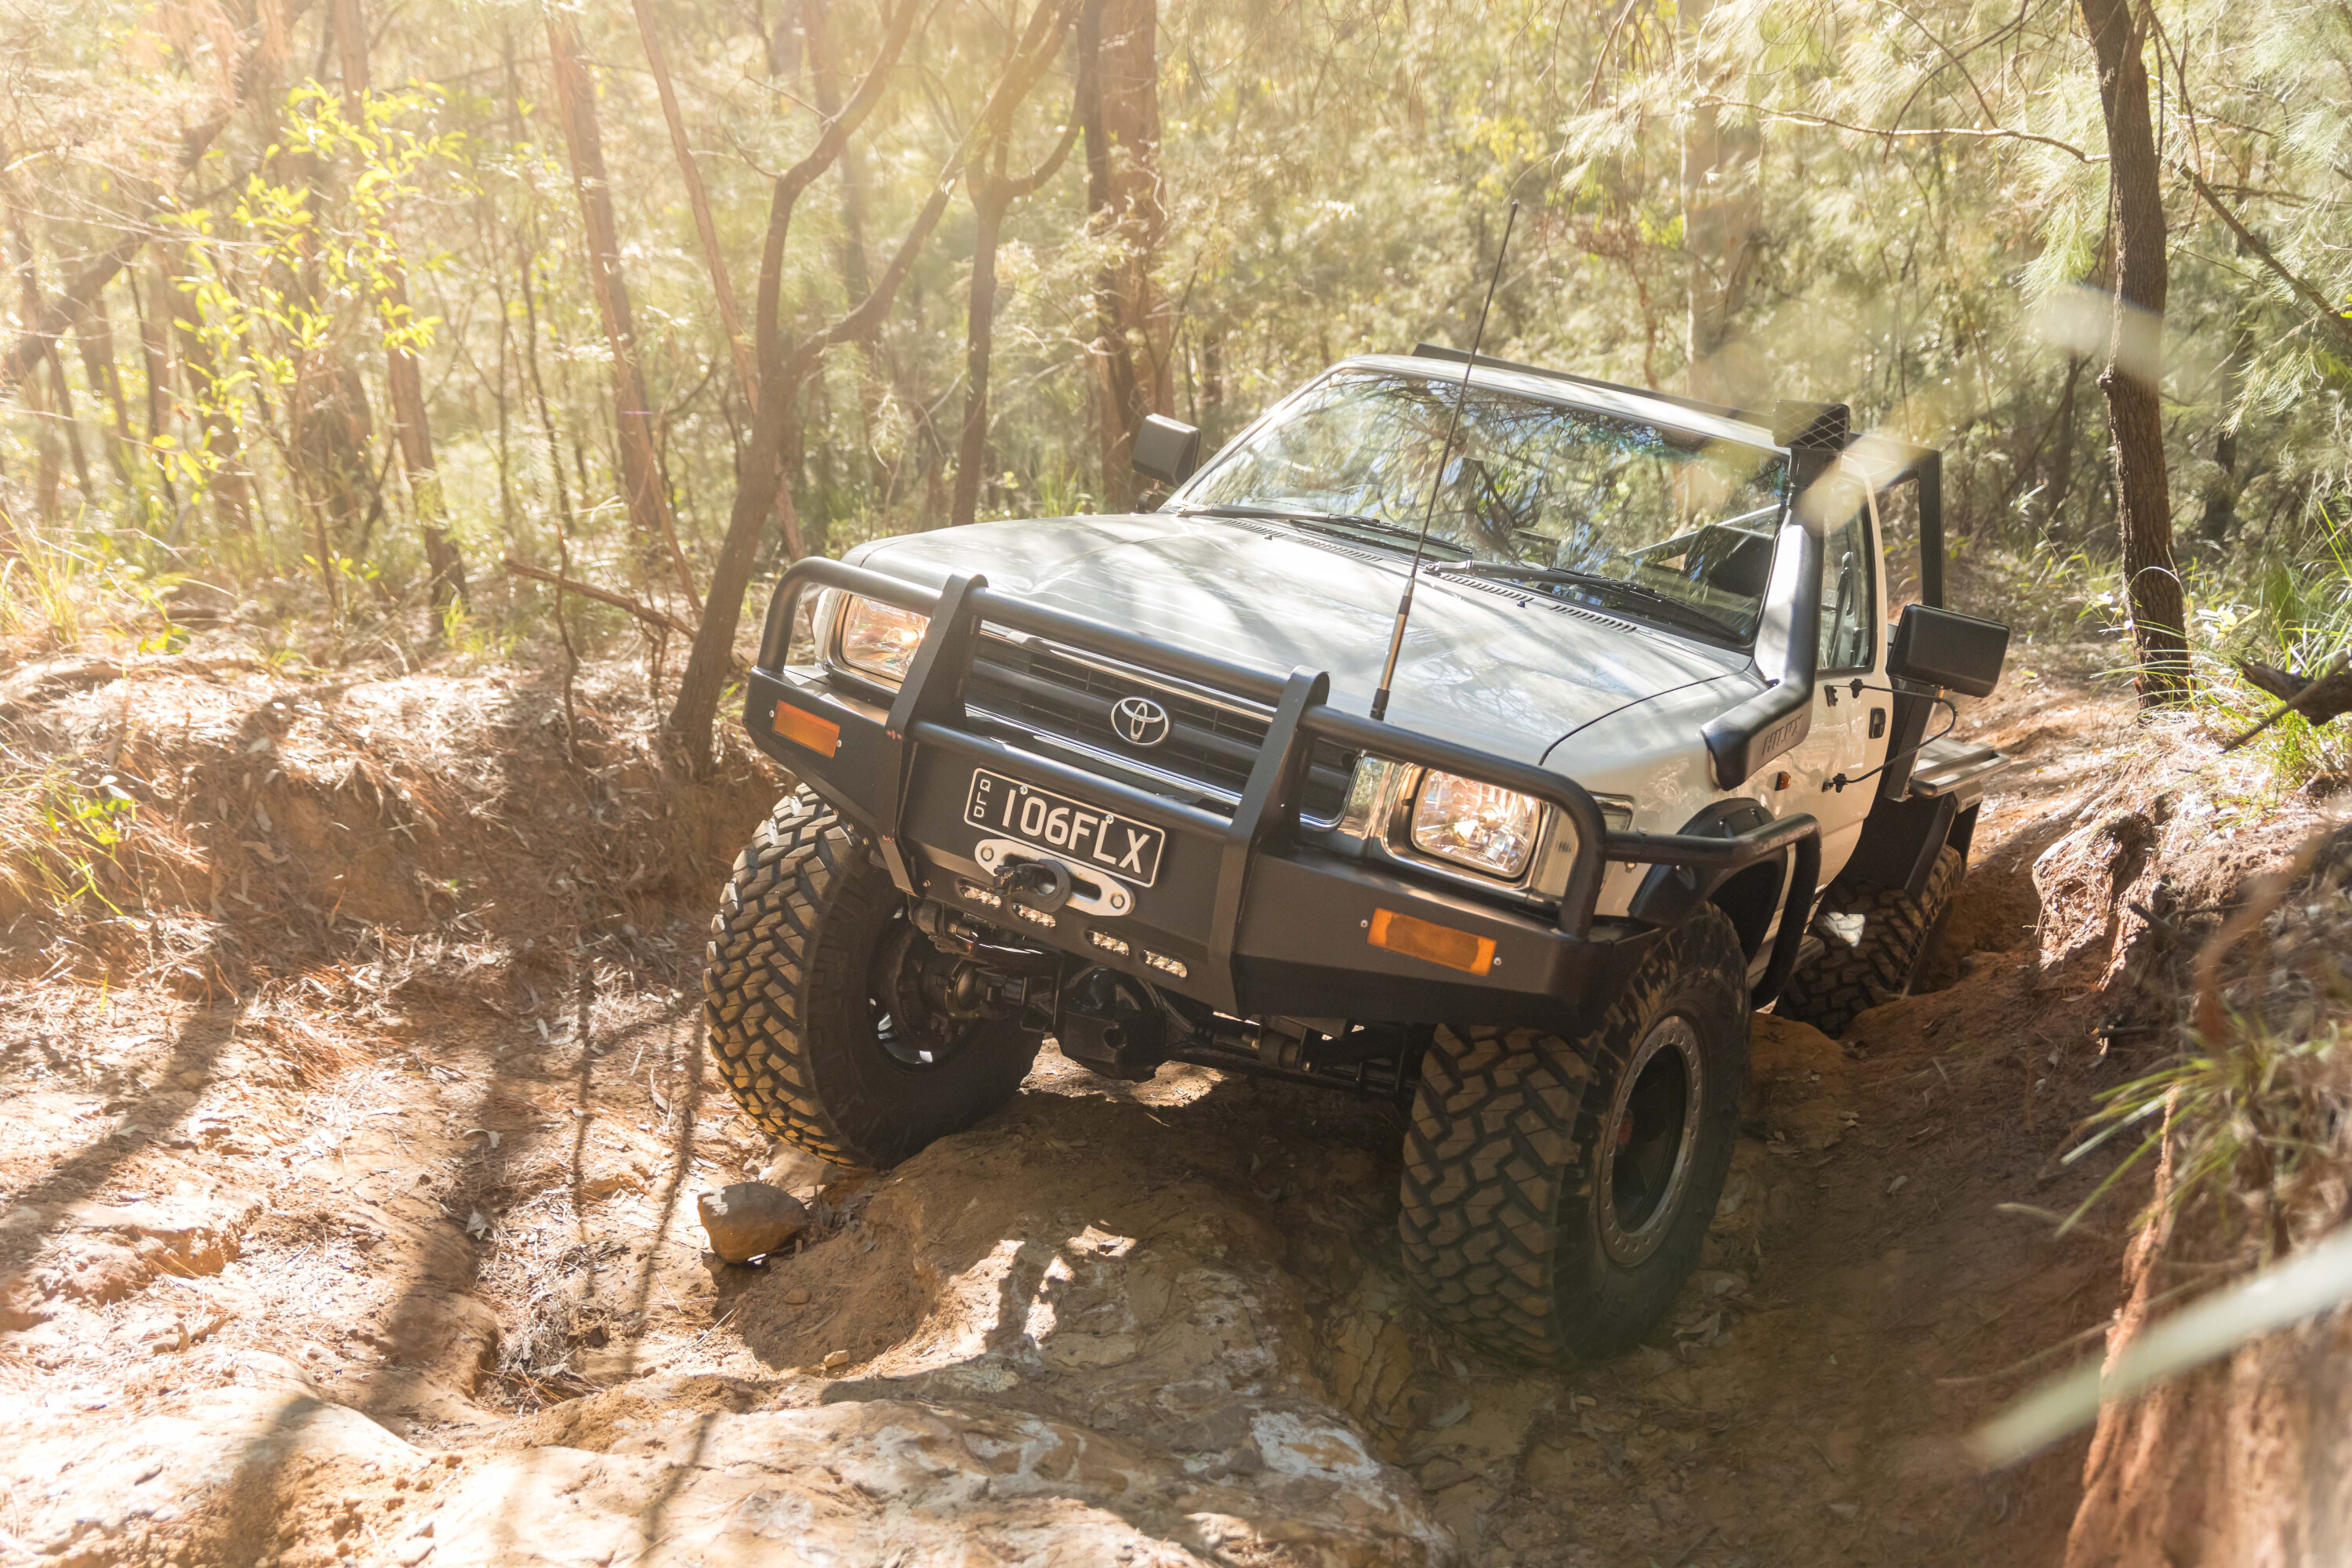
The HiLux you’re looking at here is the perfect epitome of everything that hard graft can create.
A total build sheet that’d cost less than the price of some canopies but infinitely more capable, and absolutely timeless. “My mate bought it a few years back,” Haydn tells us.
“I was super keen on buying it off him if he ever went to sell it. It was super clean and tidy for its age. When he eventually advertised it, I jumped on it straight away and picked it up that arvy. He didn’t realise I was serious about purchasing it!”
1
When Haydn picked it up with nearly 400,000km on the odometer it’d already had a handful of modifications made; a set of 33s, a 4-inch lift, and an uninspiring turbo setup. But Haydn had far bigger plans than that.
While the front live axle in a sea of rudimentary independent setups is something that’s made the LN106 platform legendary over the last 30 years, it’d be an understatement and a half to say it was more than a little flawed.
Poor articulation, woeful steering, and a track width far too narrow for any serious angles meant Haydn had some serious work to do on the tools to see out his vision.
1
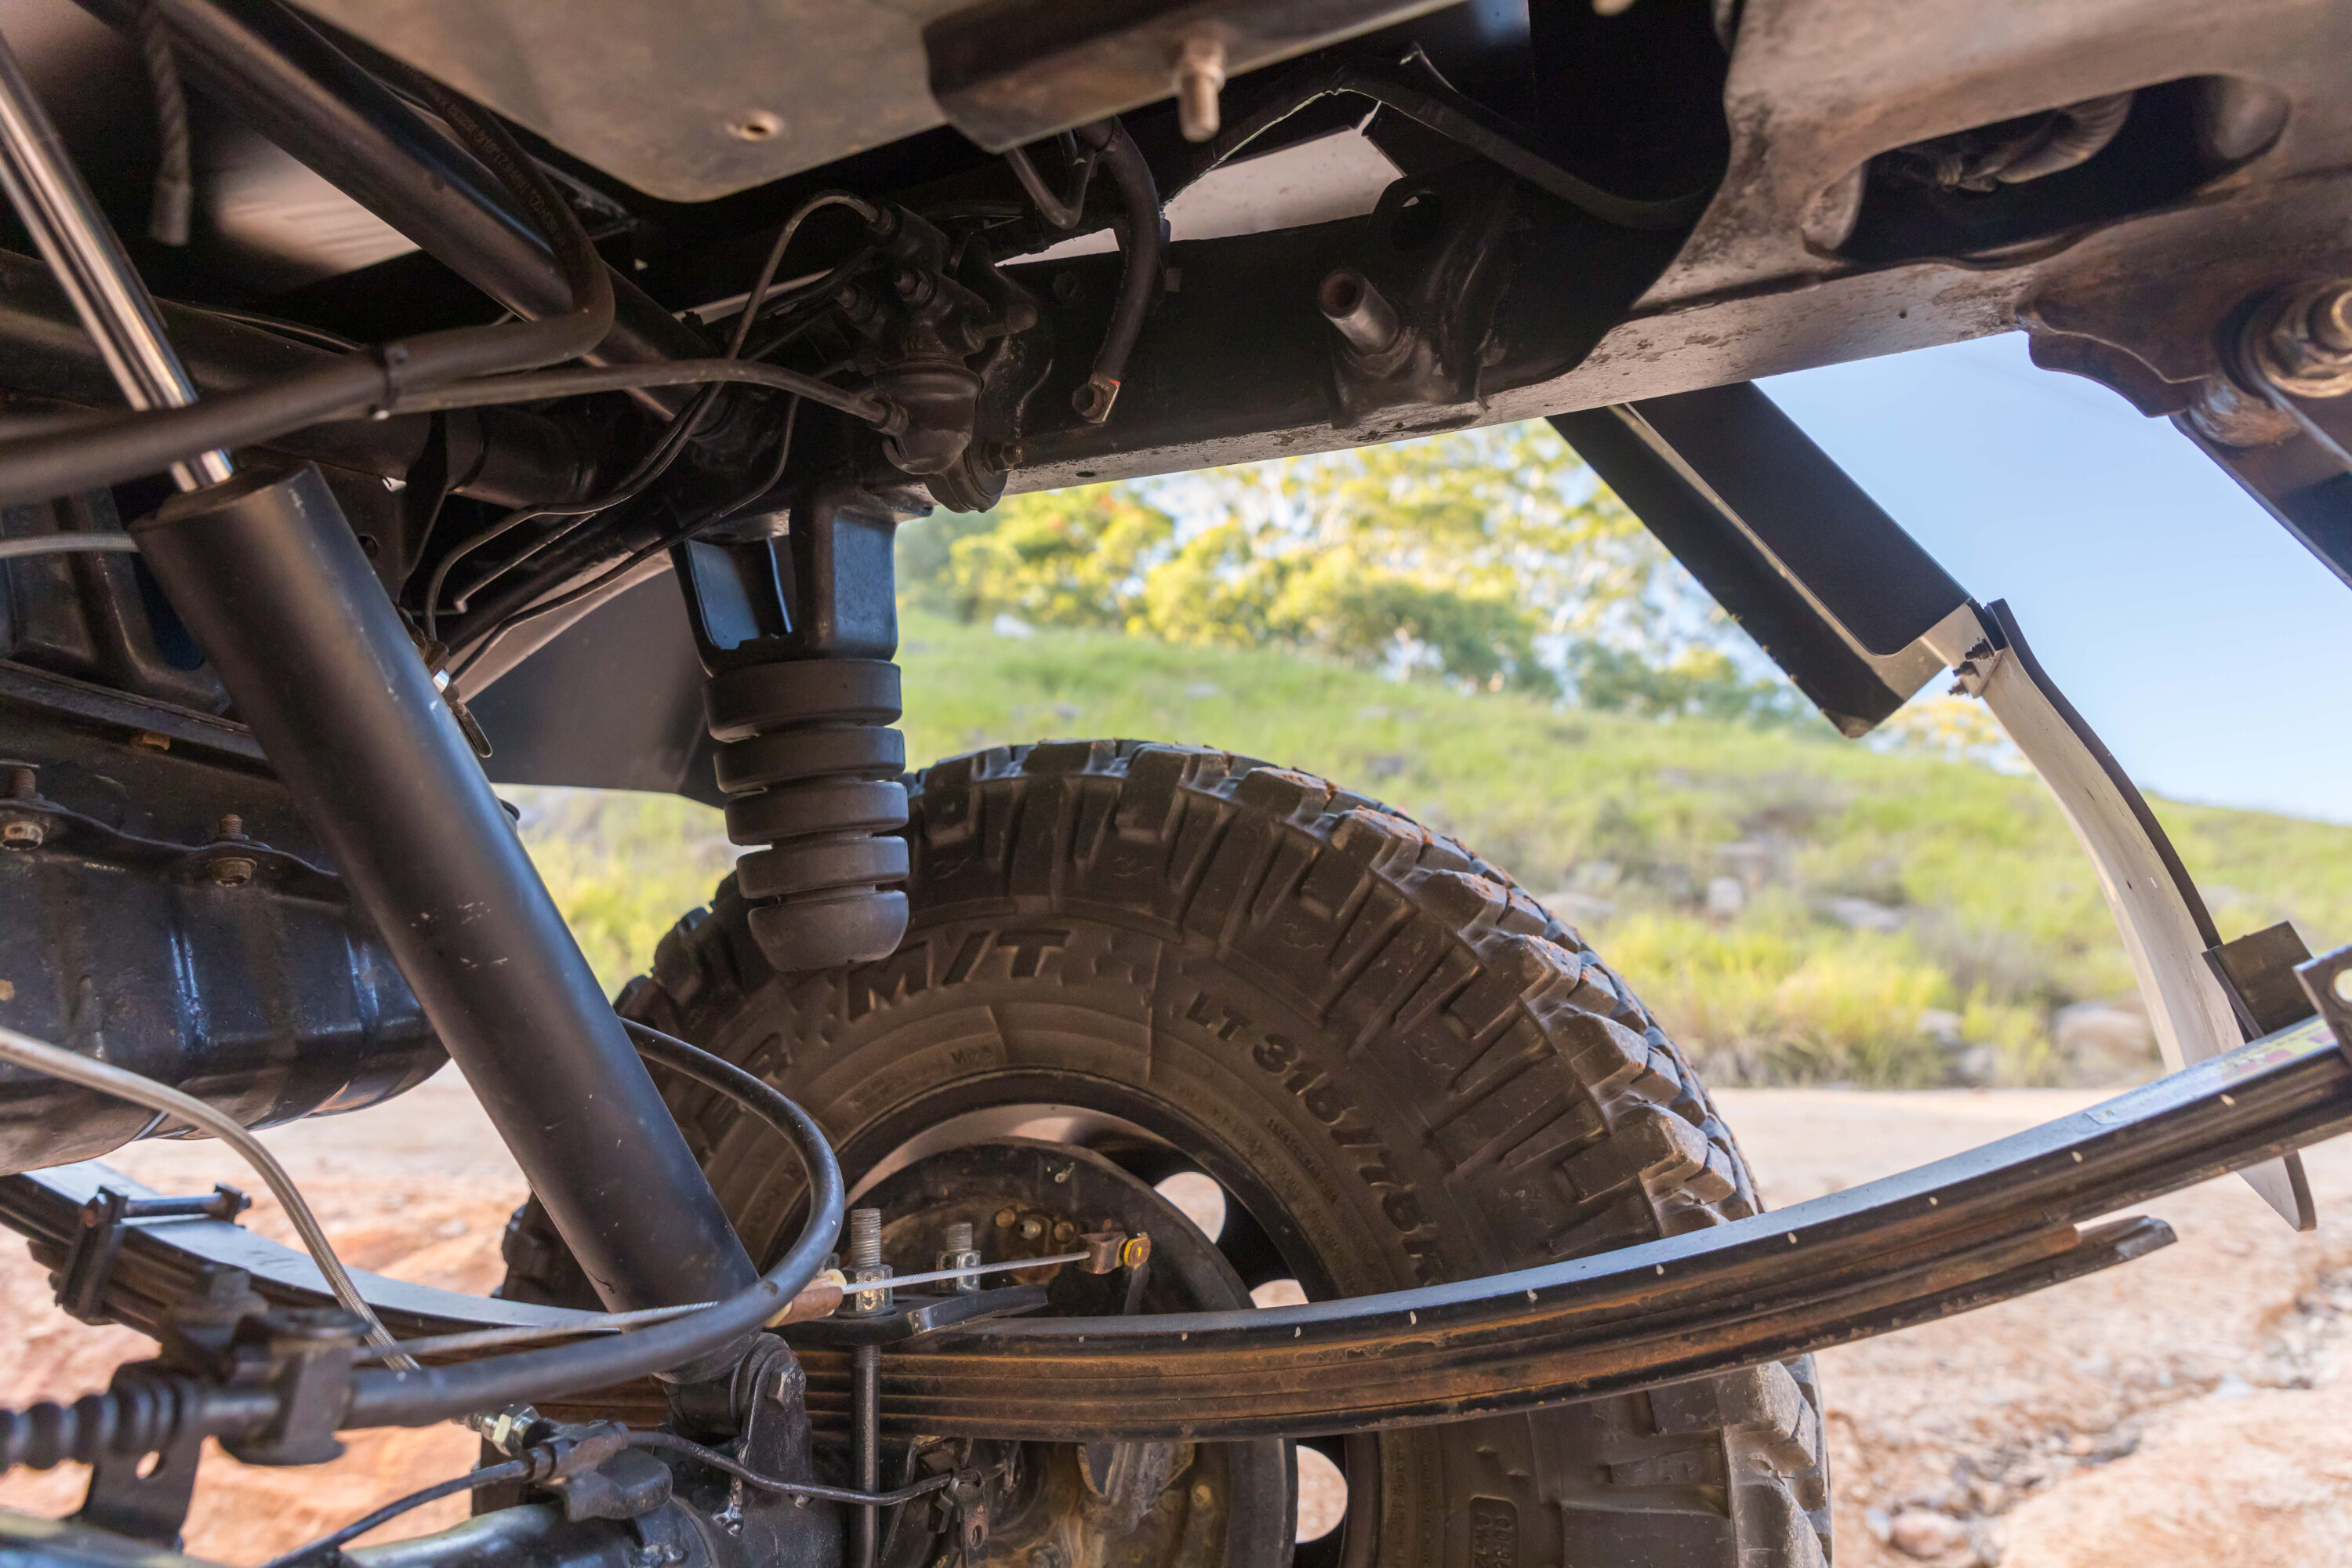
Stretch and lift
The first thing to go was the factory front leaf springs; in their place Haydn performed a mod known as RUF (rears up front).
The longer leaf springs from the rear were re-set in Haydn’s press and moved up front with a new heavy duty cross member known as a ‘dropped hanger’ providing a solid mounting point. A pair of longer ‘banana’ shackles were required to fit the longer leaves without fouling on the body mounts, and to help give the ’Lux a 50mm bump in ride height over stock and a 40mm longer wheelbase for a better approach angle.
Haydn fitted up a Rampt Customs chassis brace and a set of trick plate steel shock towers from TM Fabrication to allow the fitment of Superior Engineering shocks originally designed for a GU Patrol.
1
One look at the factory HiLux steering made it abundantly clear serious upgrades would be needed and Haydn has more than delivered.
Sitting high above the leaf springs Haydn has fitted a set of Trail-Gear’s forged steering arms to the top of the knuckles with ARP studs holding them down. They’re linked together with a heavy duty drag link and tie rod with beefier 80 Series tie-rod ends.
An IFS steering box was fabricated into place with a steering shaft extension and this allows the live-axle to max out those 13.5-inch shocks without bump steer.
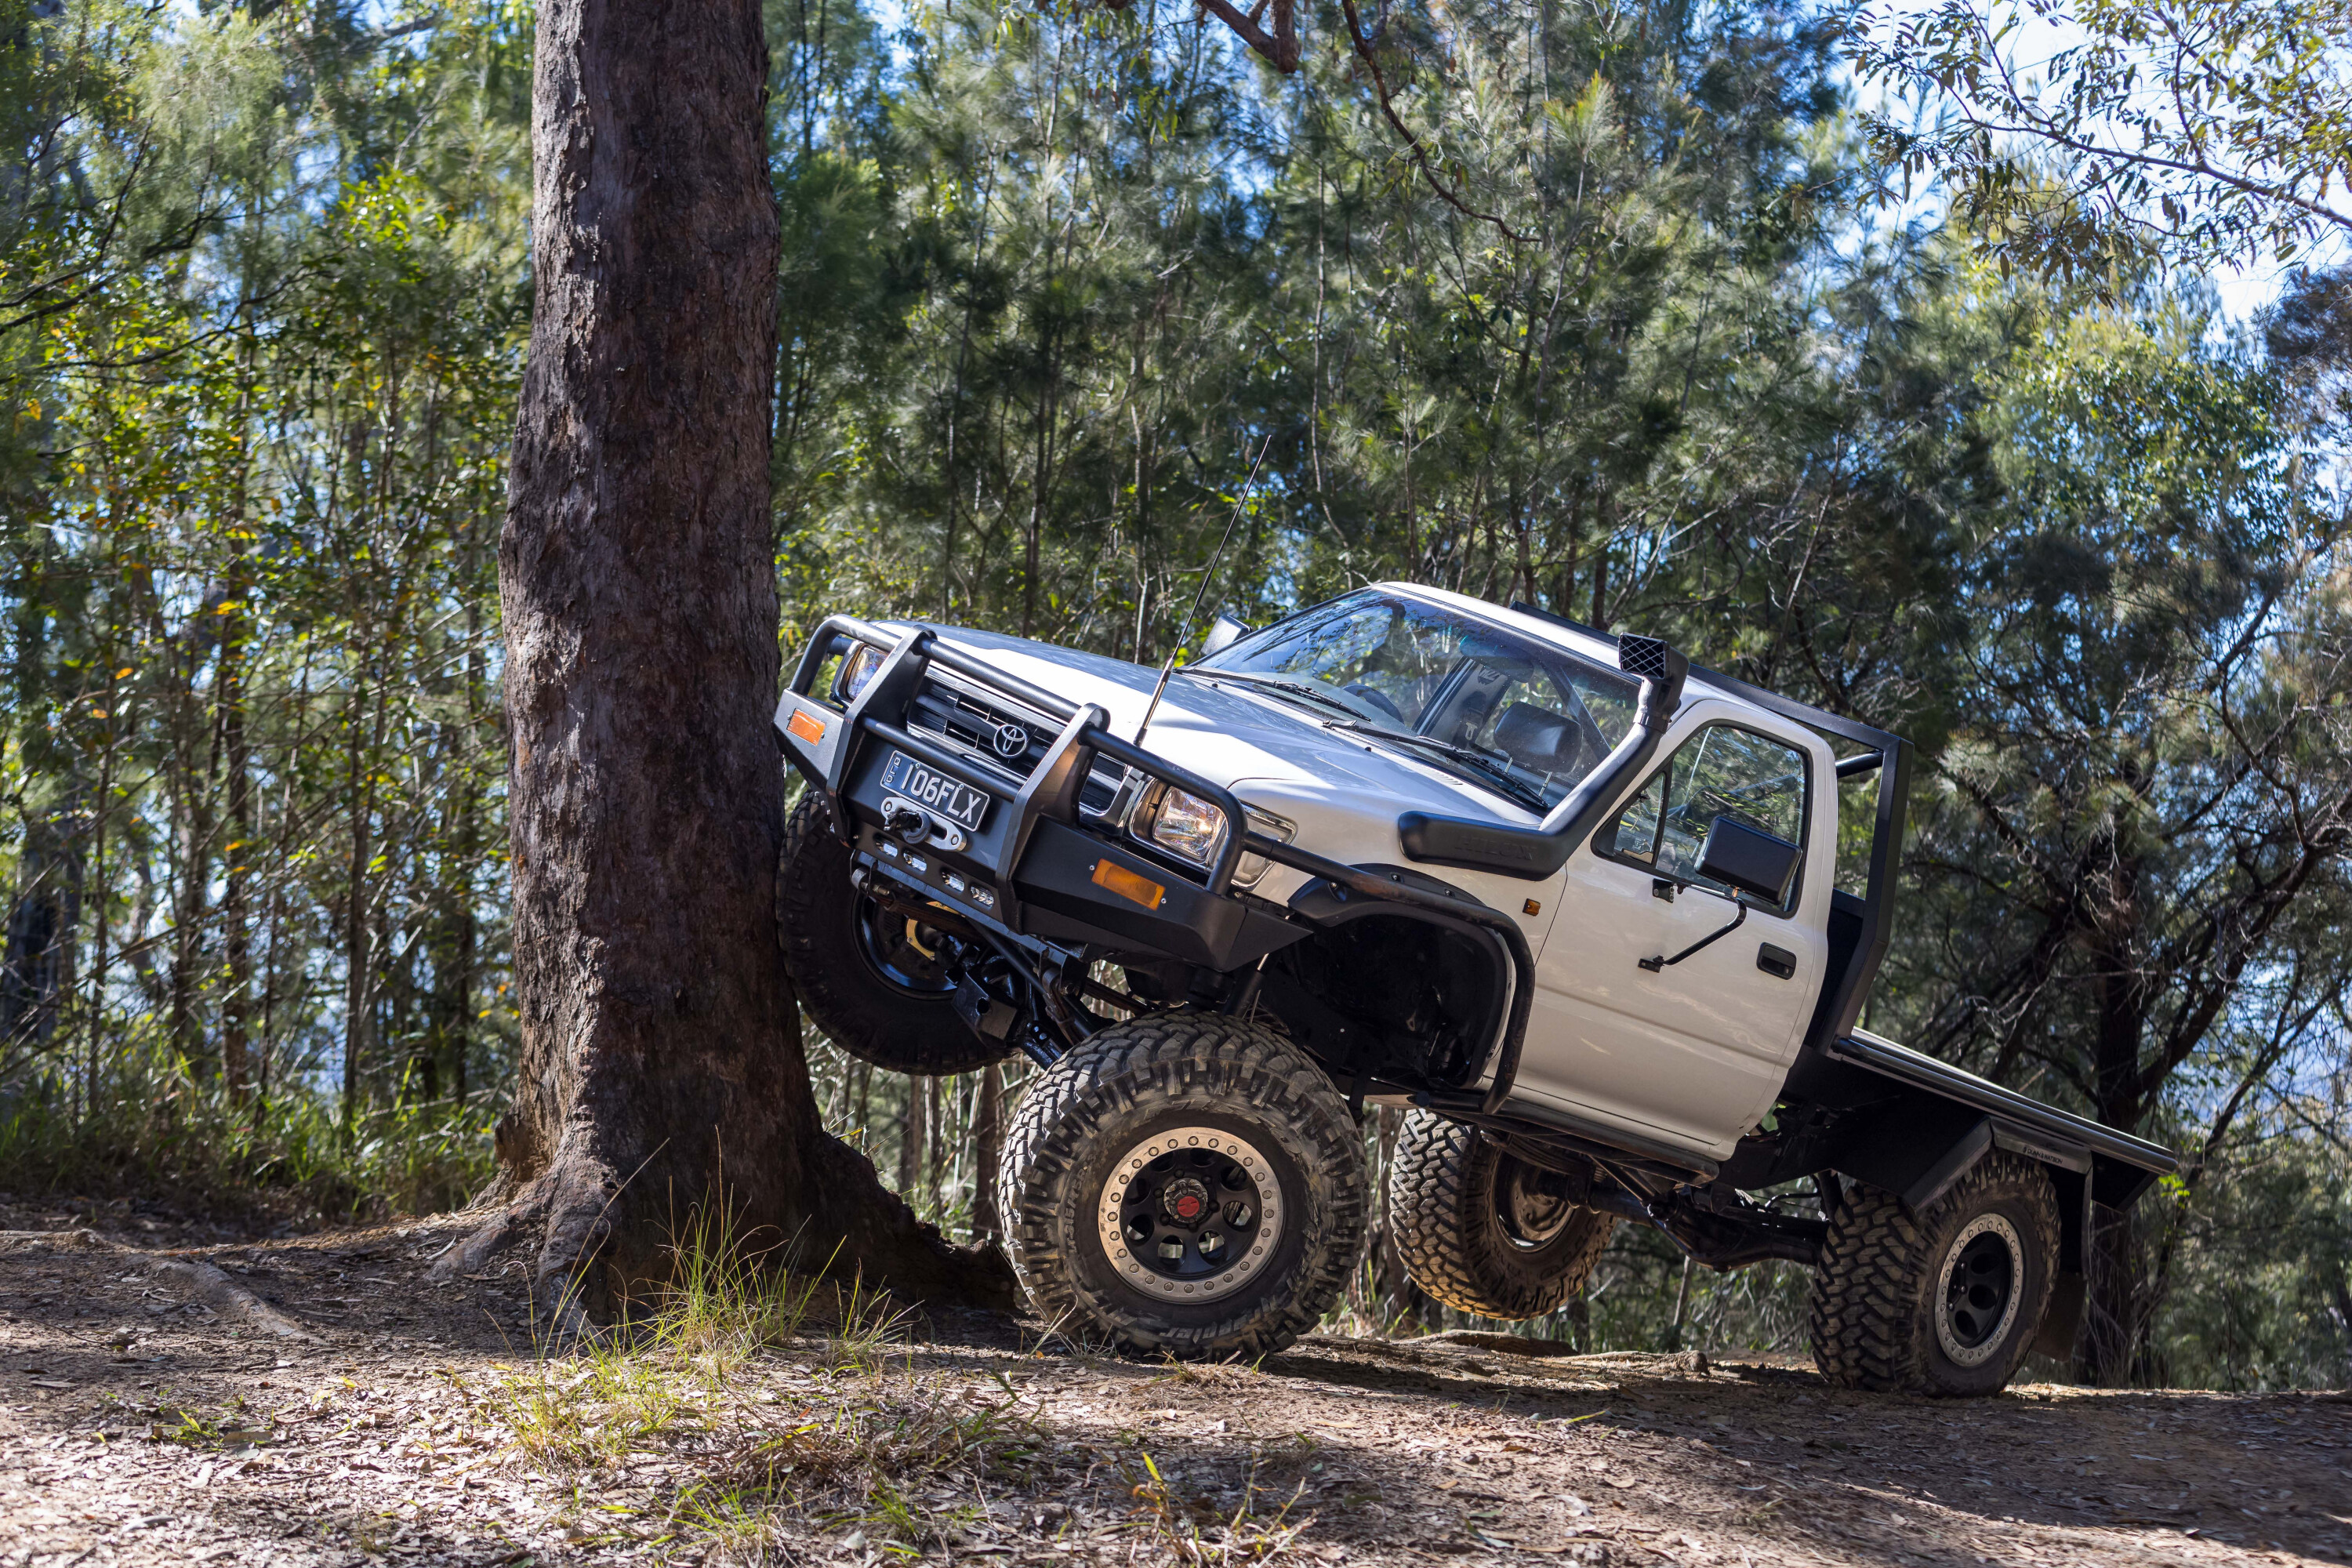
Eagle eyed readers may notice the front end looks a whole lot wider than any 30-year-old HiLux has the right to.
1
The secret sauce is the IFS hubs Haydn fitted up to the live-axle spindles; paired with a set of spacers to bump the brake rotor back to its stock location it adds a huge 80mm of width to the front axle.
A set of stock-looking Aisin free-wheeling hubs send drive to the front wheels through chromoly hub gears, linking up to Trail-Gear chromoly CV joints. Haydn left no stone unturned with upgraded hub studs, Knuckle Felt Protectors, extended diff breathers and even upgraded oil seals spec’d up on the build sheet.
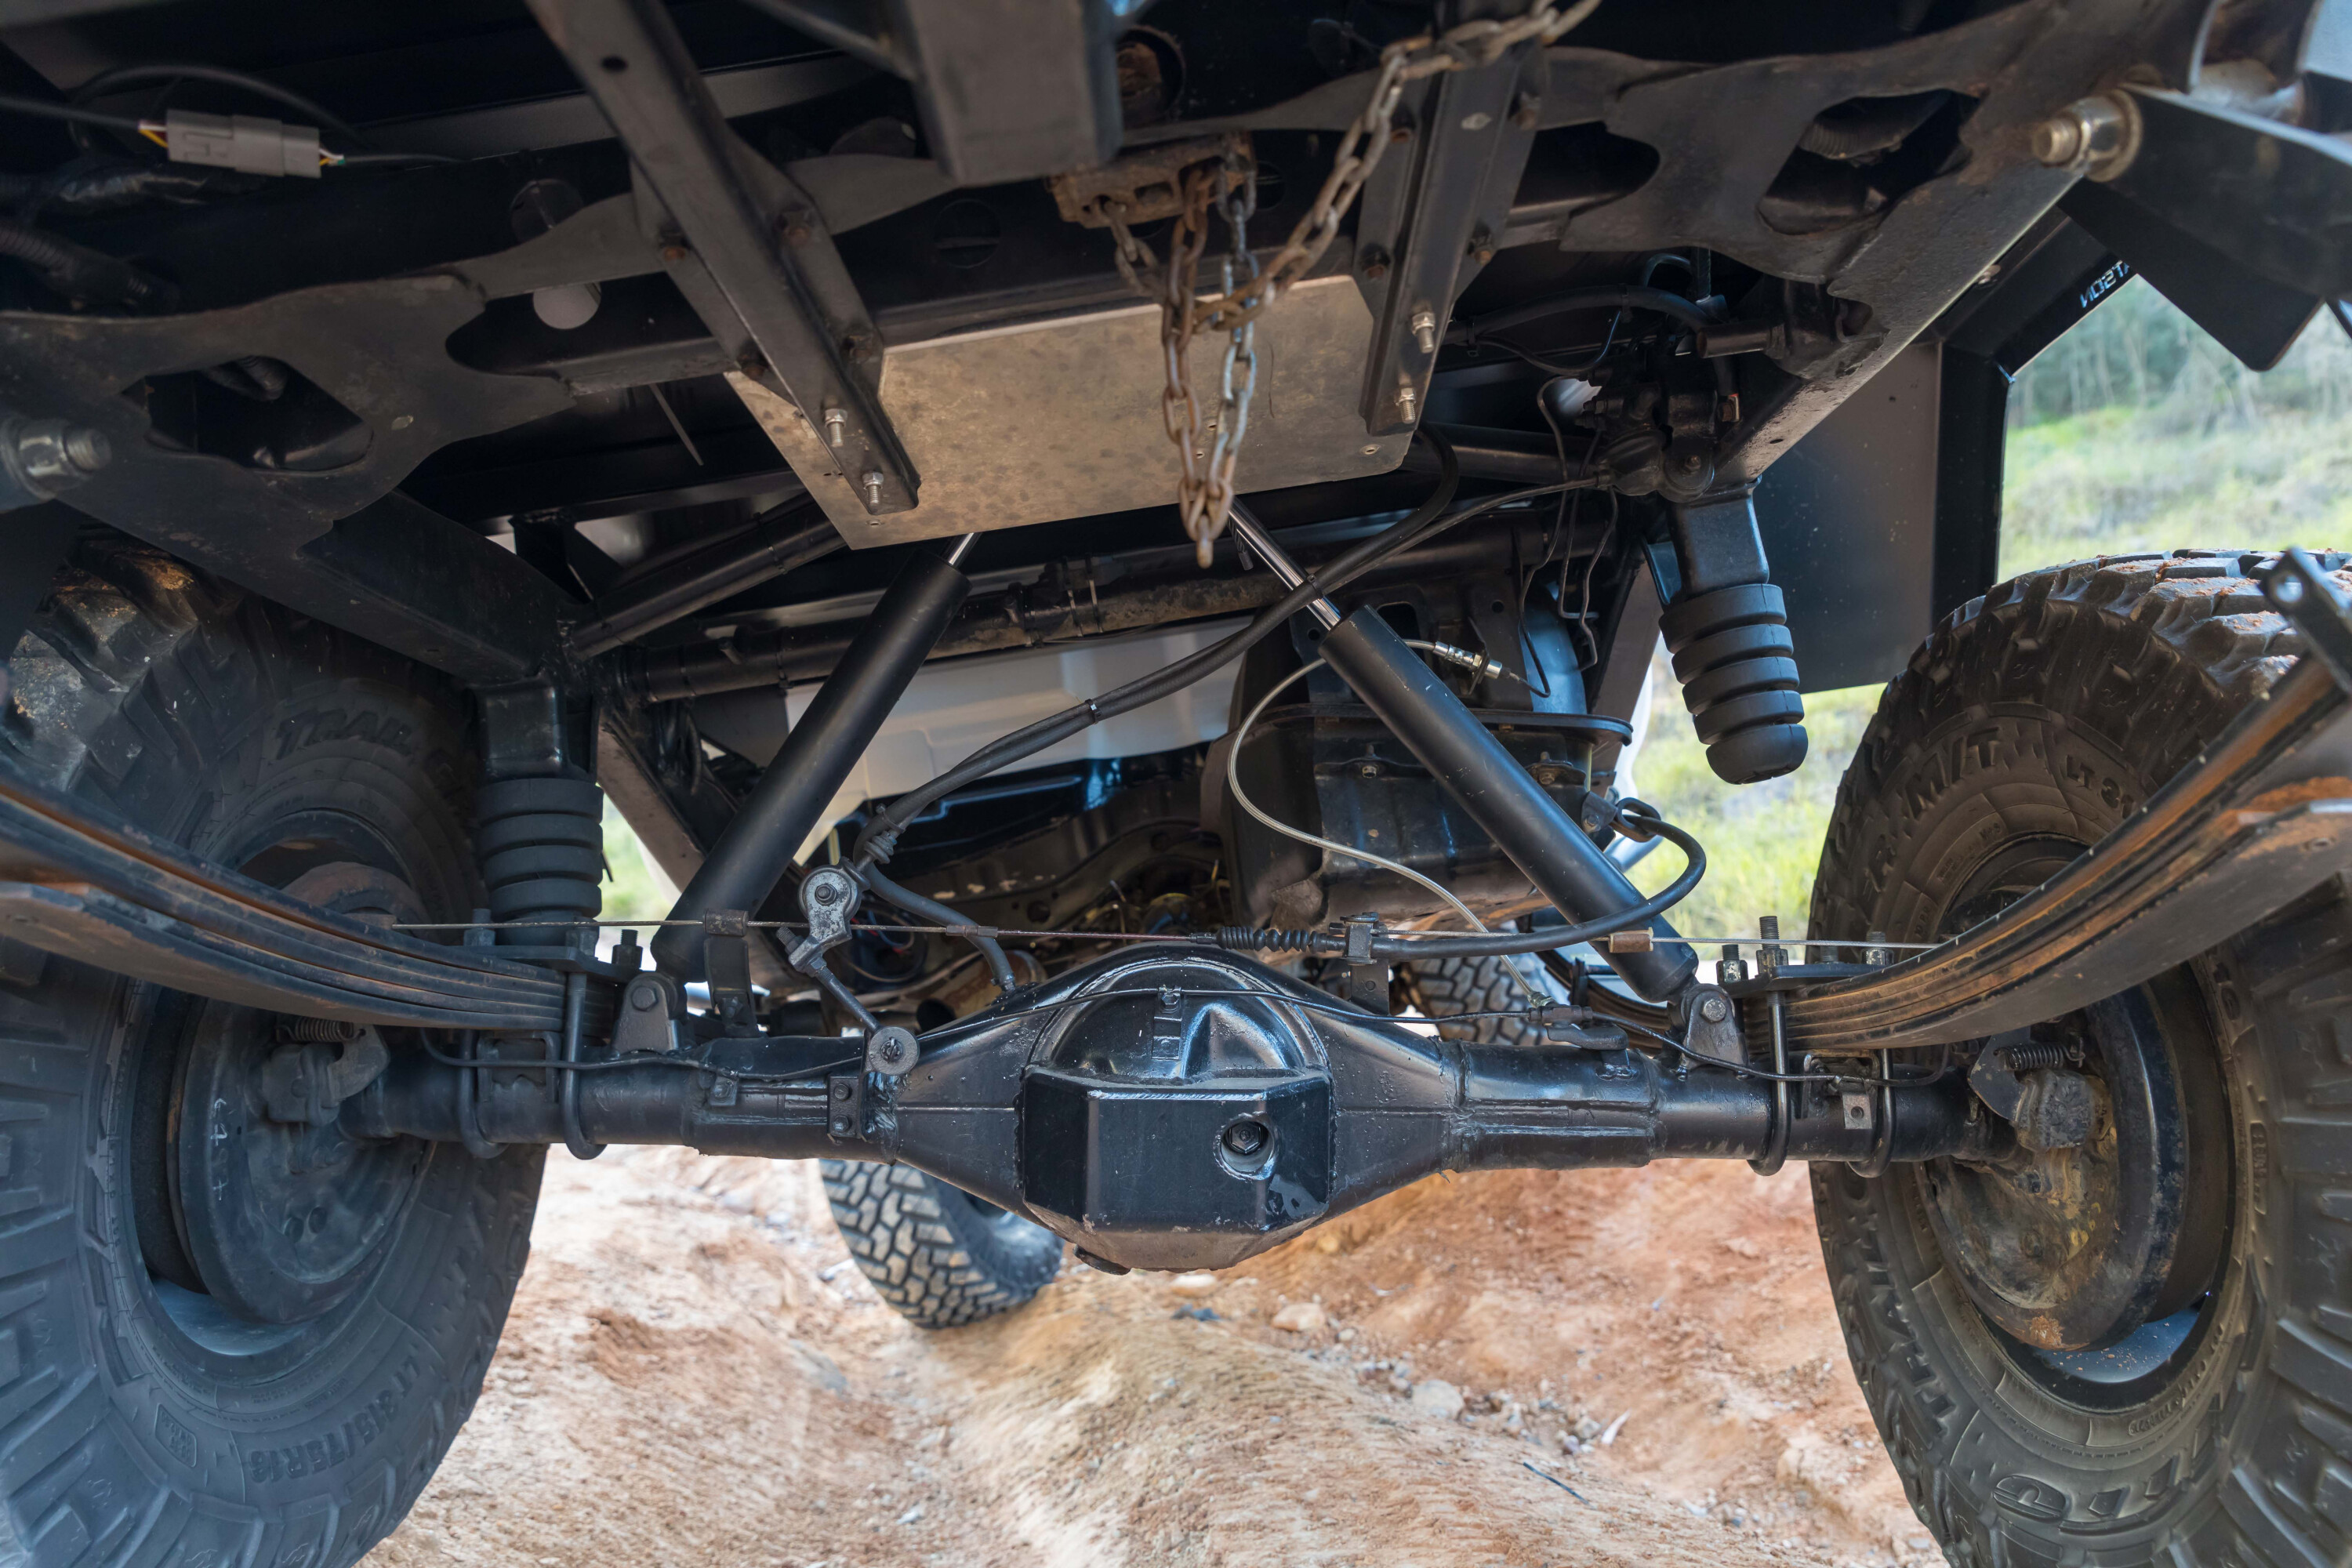
If your head isn’t spinning yet with the endless list of front-axle upgrades, wait’ll you see what’s been done down the back. A rear axle from an IFS N60 HiLux has been swapped in to match the track width increase up front.
1
Haydn’s got it hanging in place off a set of mega-sized leaf springs from a US-spec 2008 Toyota Tundra with custom hangers up front and 200mm TM Fabrication shackles in the rear.
A second set of Patrol-spec Superior Engineering shocks have been fitted with the upper mounts canted inwards to allow for more shock travel without eating into the tray, while 80 Series bump stops reign in both front and rear axles, although more on that later…
1
Power to the ground
Under the bonnet, the ever-reliable 2.8L four-cylinder-diesel is still chugging away, although Haydn has managed to screw slightly more power out of it.
Follow that eBay snorkel down through the K&N air filter and you’ll find a “budget friendly” CT20 turbo blowing directly into the inlet manifold; no intercooler needed. Haydn slung it off a secondhand exhaust manifold sourced from an imported Toyota Surf, and he had it surface machined before bolting it in place with an MLS gasket and high-tensile HD Automotive studs.
There’s a 3-inch turbo back exhaust shooting spent gases out through a simple hotdog style muffler. Haydn’s pushing around 18psi through the combination with driveability the goal over outright power.
1
An upgraded 10-blade fan and tweaked fan clutch help the 2.8 stay cool in low-range crawling.
Sending that power rearwards, an Exedy heavy duty clutch in the factory five-speed cog-swapper links up with the legendary HiLux gear-driven transfer case. The factory 2.28 low range gear set has been swapped out for an oh-so-low 4.7:1 Trail-Gear Creeper reduction set, allowing Haydn maximum control and endless climbing power.
Out the rear, a 30mm longer one-off chromoly driveshaft links up to the 4.3:1 diff centre and ‘Lokka’ auto-locker combo. Up front, an 85mm longer shaft features a huge long-slip extension sending drive to a second Lokka in the front axle.
All up that combination not only gives Haydn insane articulation and uber control off-road, it also allows fitment of oversized 35×12.5R16 Nitto Trail Grapplers, a full six inches taller than the factory fitments. Haydn’s got them wrapped around a set of bona fide YiLi beadlocks allowing for good looks and low-pressures without breaking the bank.
1
Keep it simple stupid
Moving onto the outside and Haydn’s continued that theme of budget friendly and bad-arse DIY to give the ’Lux its functional looks.
Up front, the same steel bar the HiLux came with still takes pride of place. If it ain’t broke don’t fix it, right? It’s now sporting a 12,000lb Kings Domin8r winch wired up with in-cab controls for quick deployment. Hiding underneath the winch a 22-inch LED light bar provides ample forward-facing light, while a set of Raybrig headlights and full suite of underbody lighting take care of on-road work and night-run fun.
Following along the flanks and a set of Outlaw Kustoms scrub bars tie the TJM bar into the Shires Fabrication rock sliders to protect the soft sheet metal, while underneath a Shires Fabrication high-clearance crossmember has had more than a few tickles by Haydn to make it suit his needs.
1
Don’t expect any big brand names for the killer 2000mm long tray though, Haydn and his good mates Wayne, Luke and Kyle pieced it together out of nothing more than box tube and flat sheet, including the trick integrated scrub bars.
When it comes to touring mods Haydn has opted for the old KISS approach. A simple 120Ah slimline AGM battery powers the fridge he throws on the tray, a couple of space cases, and an Oricom UHF are about all he needs. Well, that and the endless patience of his wife Rach for all the hours in the shed.
At first glance Haydn’s LN106 may seem like any other old ’Lux in the lineup but it really is something special. It’s one of the first 4x4s we’ve seen in a long time where the creativity and hard work far outweigh the budget. Hopefully it inspires the next generation of 4x4ers to spend less time keeping up with the Jones’s and more time spinning spanners with mates.
1
Smooth criminal
The concept of a bump stop is pretty simple. Stop one expensive metal thing hitting another expensive metal thing, normally with a piece of rubber.
No matter how good your rig is, eventually it’ll run out of suspension travel and something will hit something else. If the bump stop in between those two bits of metal is a solid chunk of hard rubber the result will be physically and literally jarring.
So how does fitting bump stops out of a heavier car help smooth things out?
1
Toyota 80 Series bump stops run a unique Christmas tree like design.
A cone shape with relief cuts means that despite being initially very soft the more the bump stop is compressed, the harder it gets. Think of it like catching a cricket ball with your arm locked out to full extension, vs catching it and absorbing the energy with your arms.
The end result is what’s known as a ‘progressive’ bump stop, and for $40 a corner and a few custom mounts it’s a simple DIY way to make your 4×4 cop even the hardest hits like a smooth criminal.
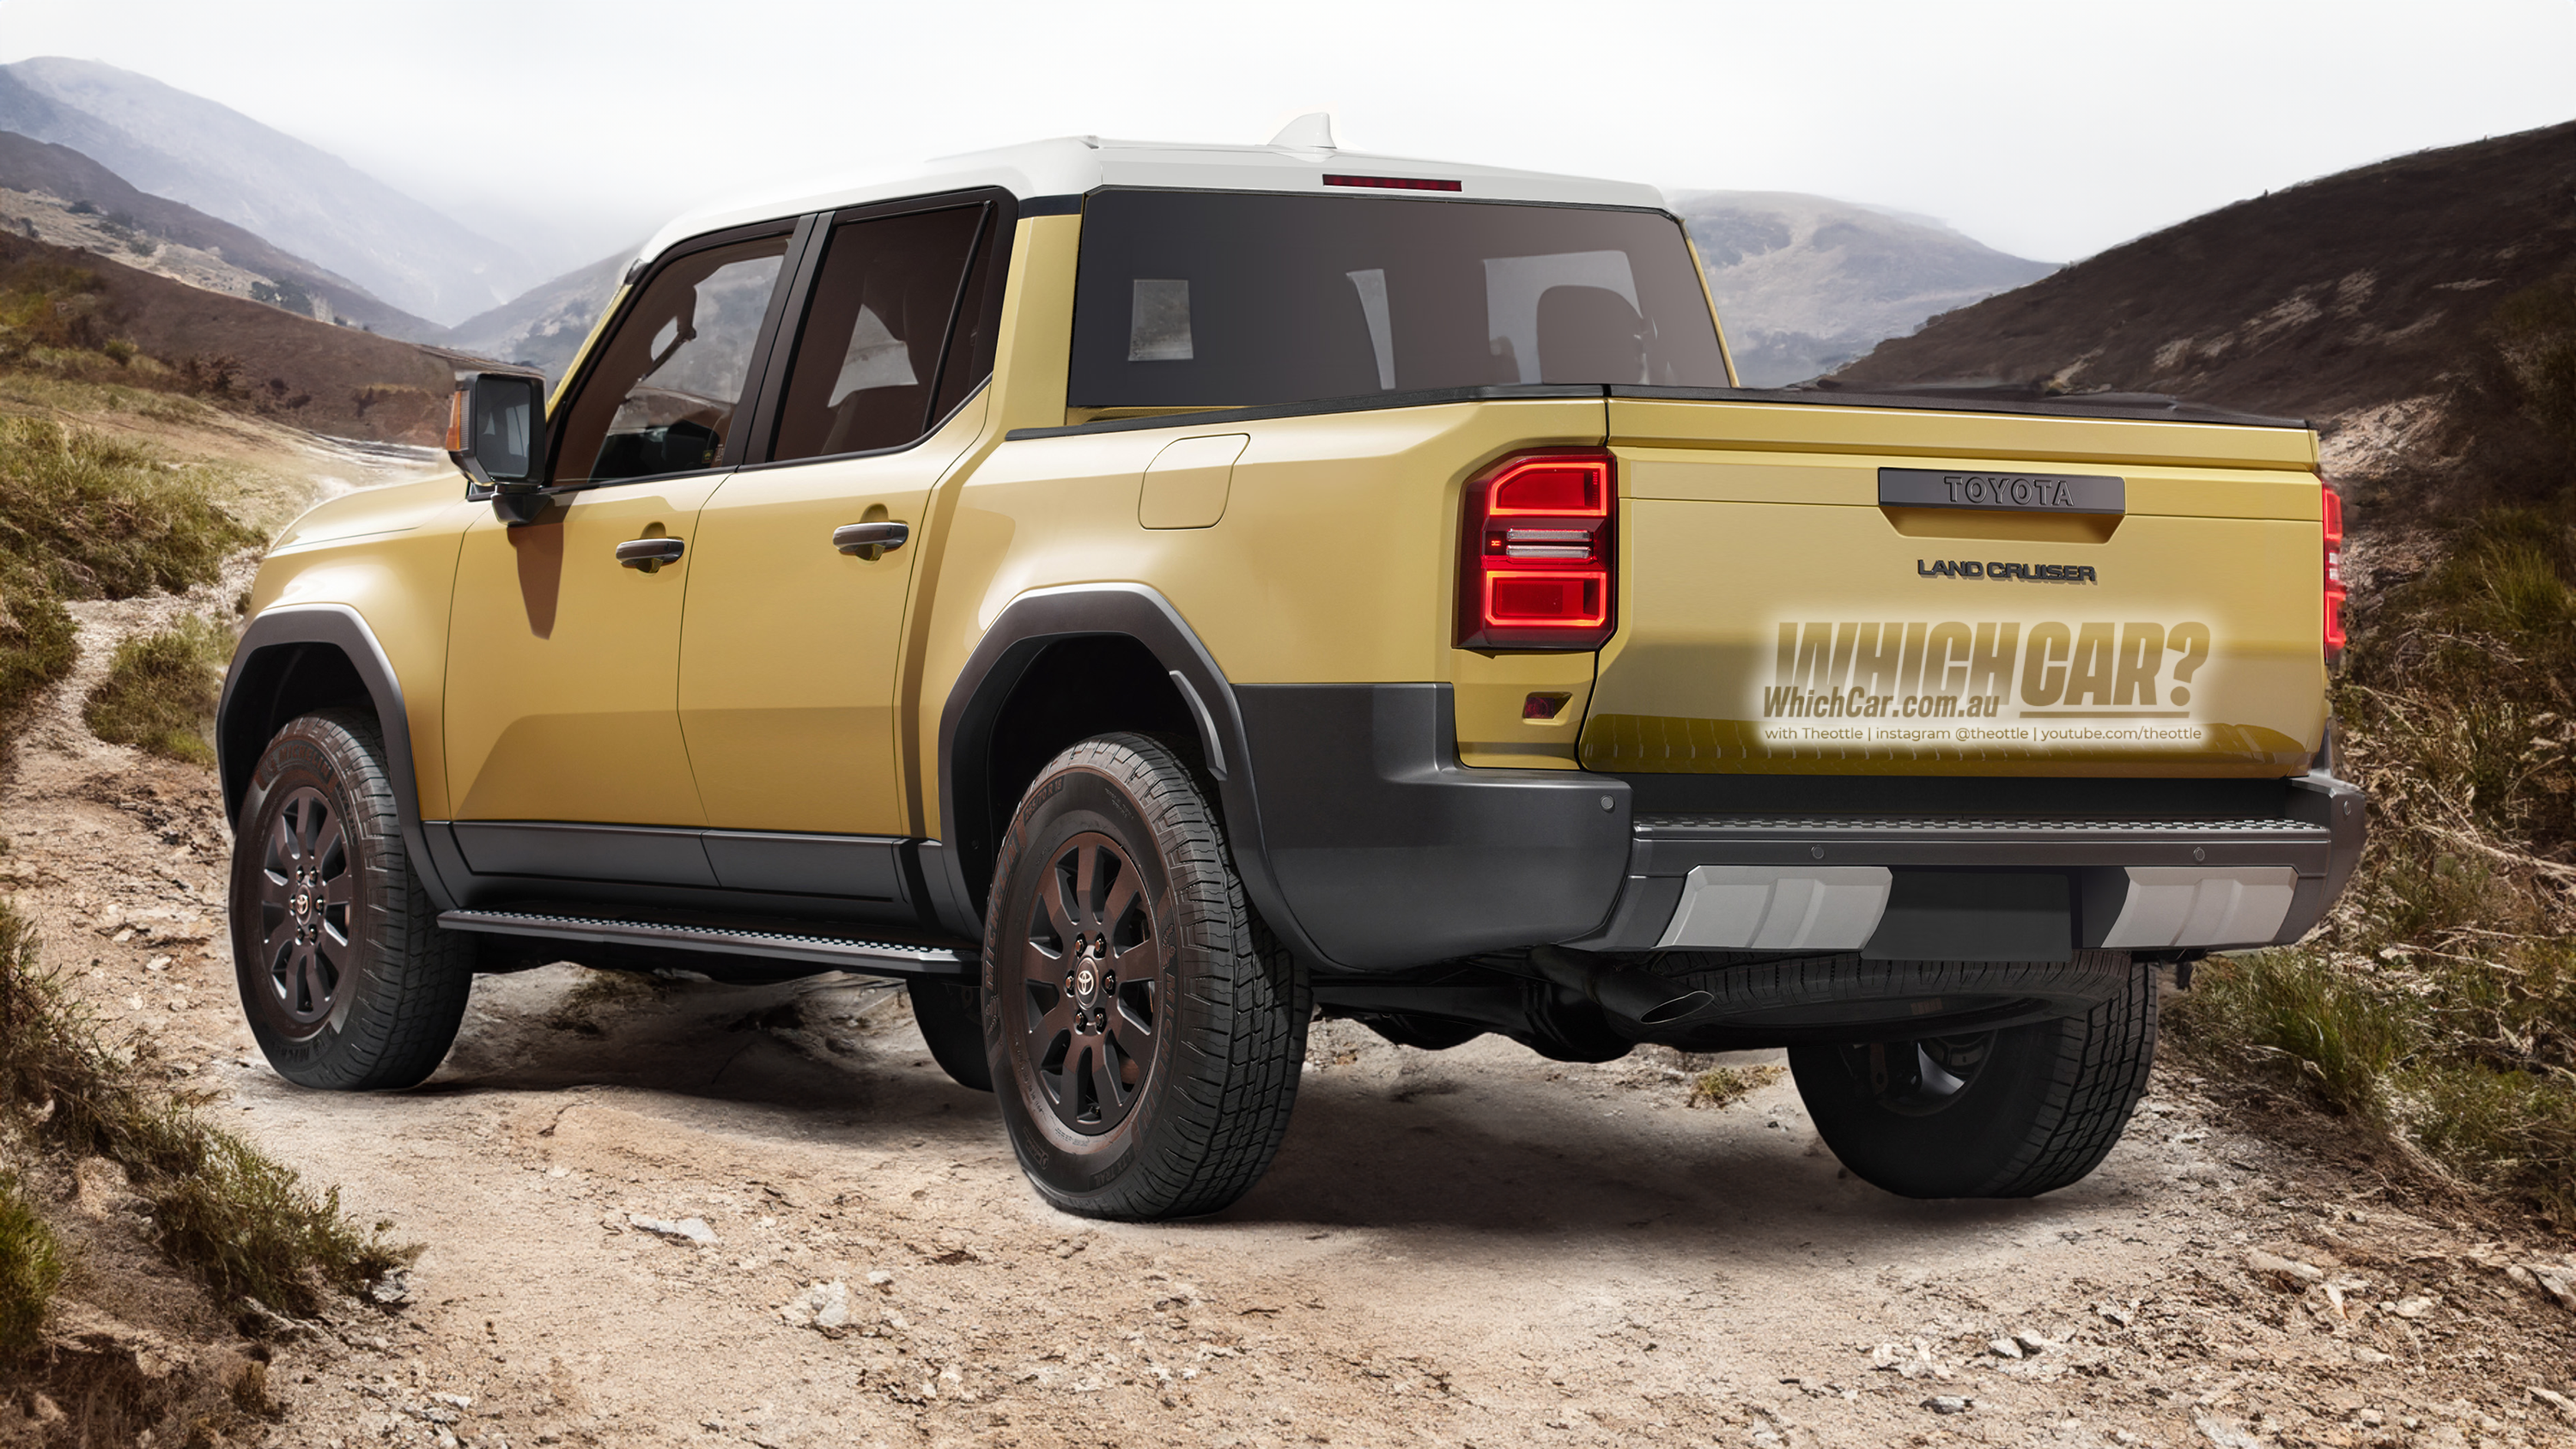
As the world goes wild for the new-generation 2024 Toyota Prado, revealed last week, we’re currently ga-ga for the idea of a ute wearing the same retro looks.
Would you call it a Prado ute, or is it more of a (long overdue?) new Defender-like take on the iconic 70 Series, which was also given an overhaul last week to see it through 40 years.
Jump into the comments to share your thoughts, and catch our ongoing new Prado coverage at the links below.
Get up to speed on the new Prado
The stories below will give you a guide to everything we learned about the new Prado when it was unveiled. All fresh stories published since then will be found on our Toyota Prado model page here.
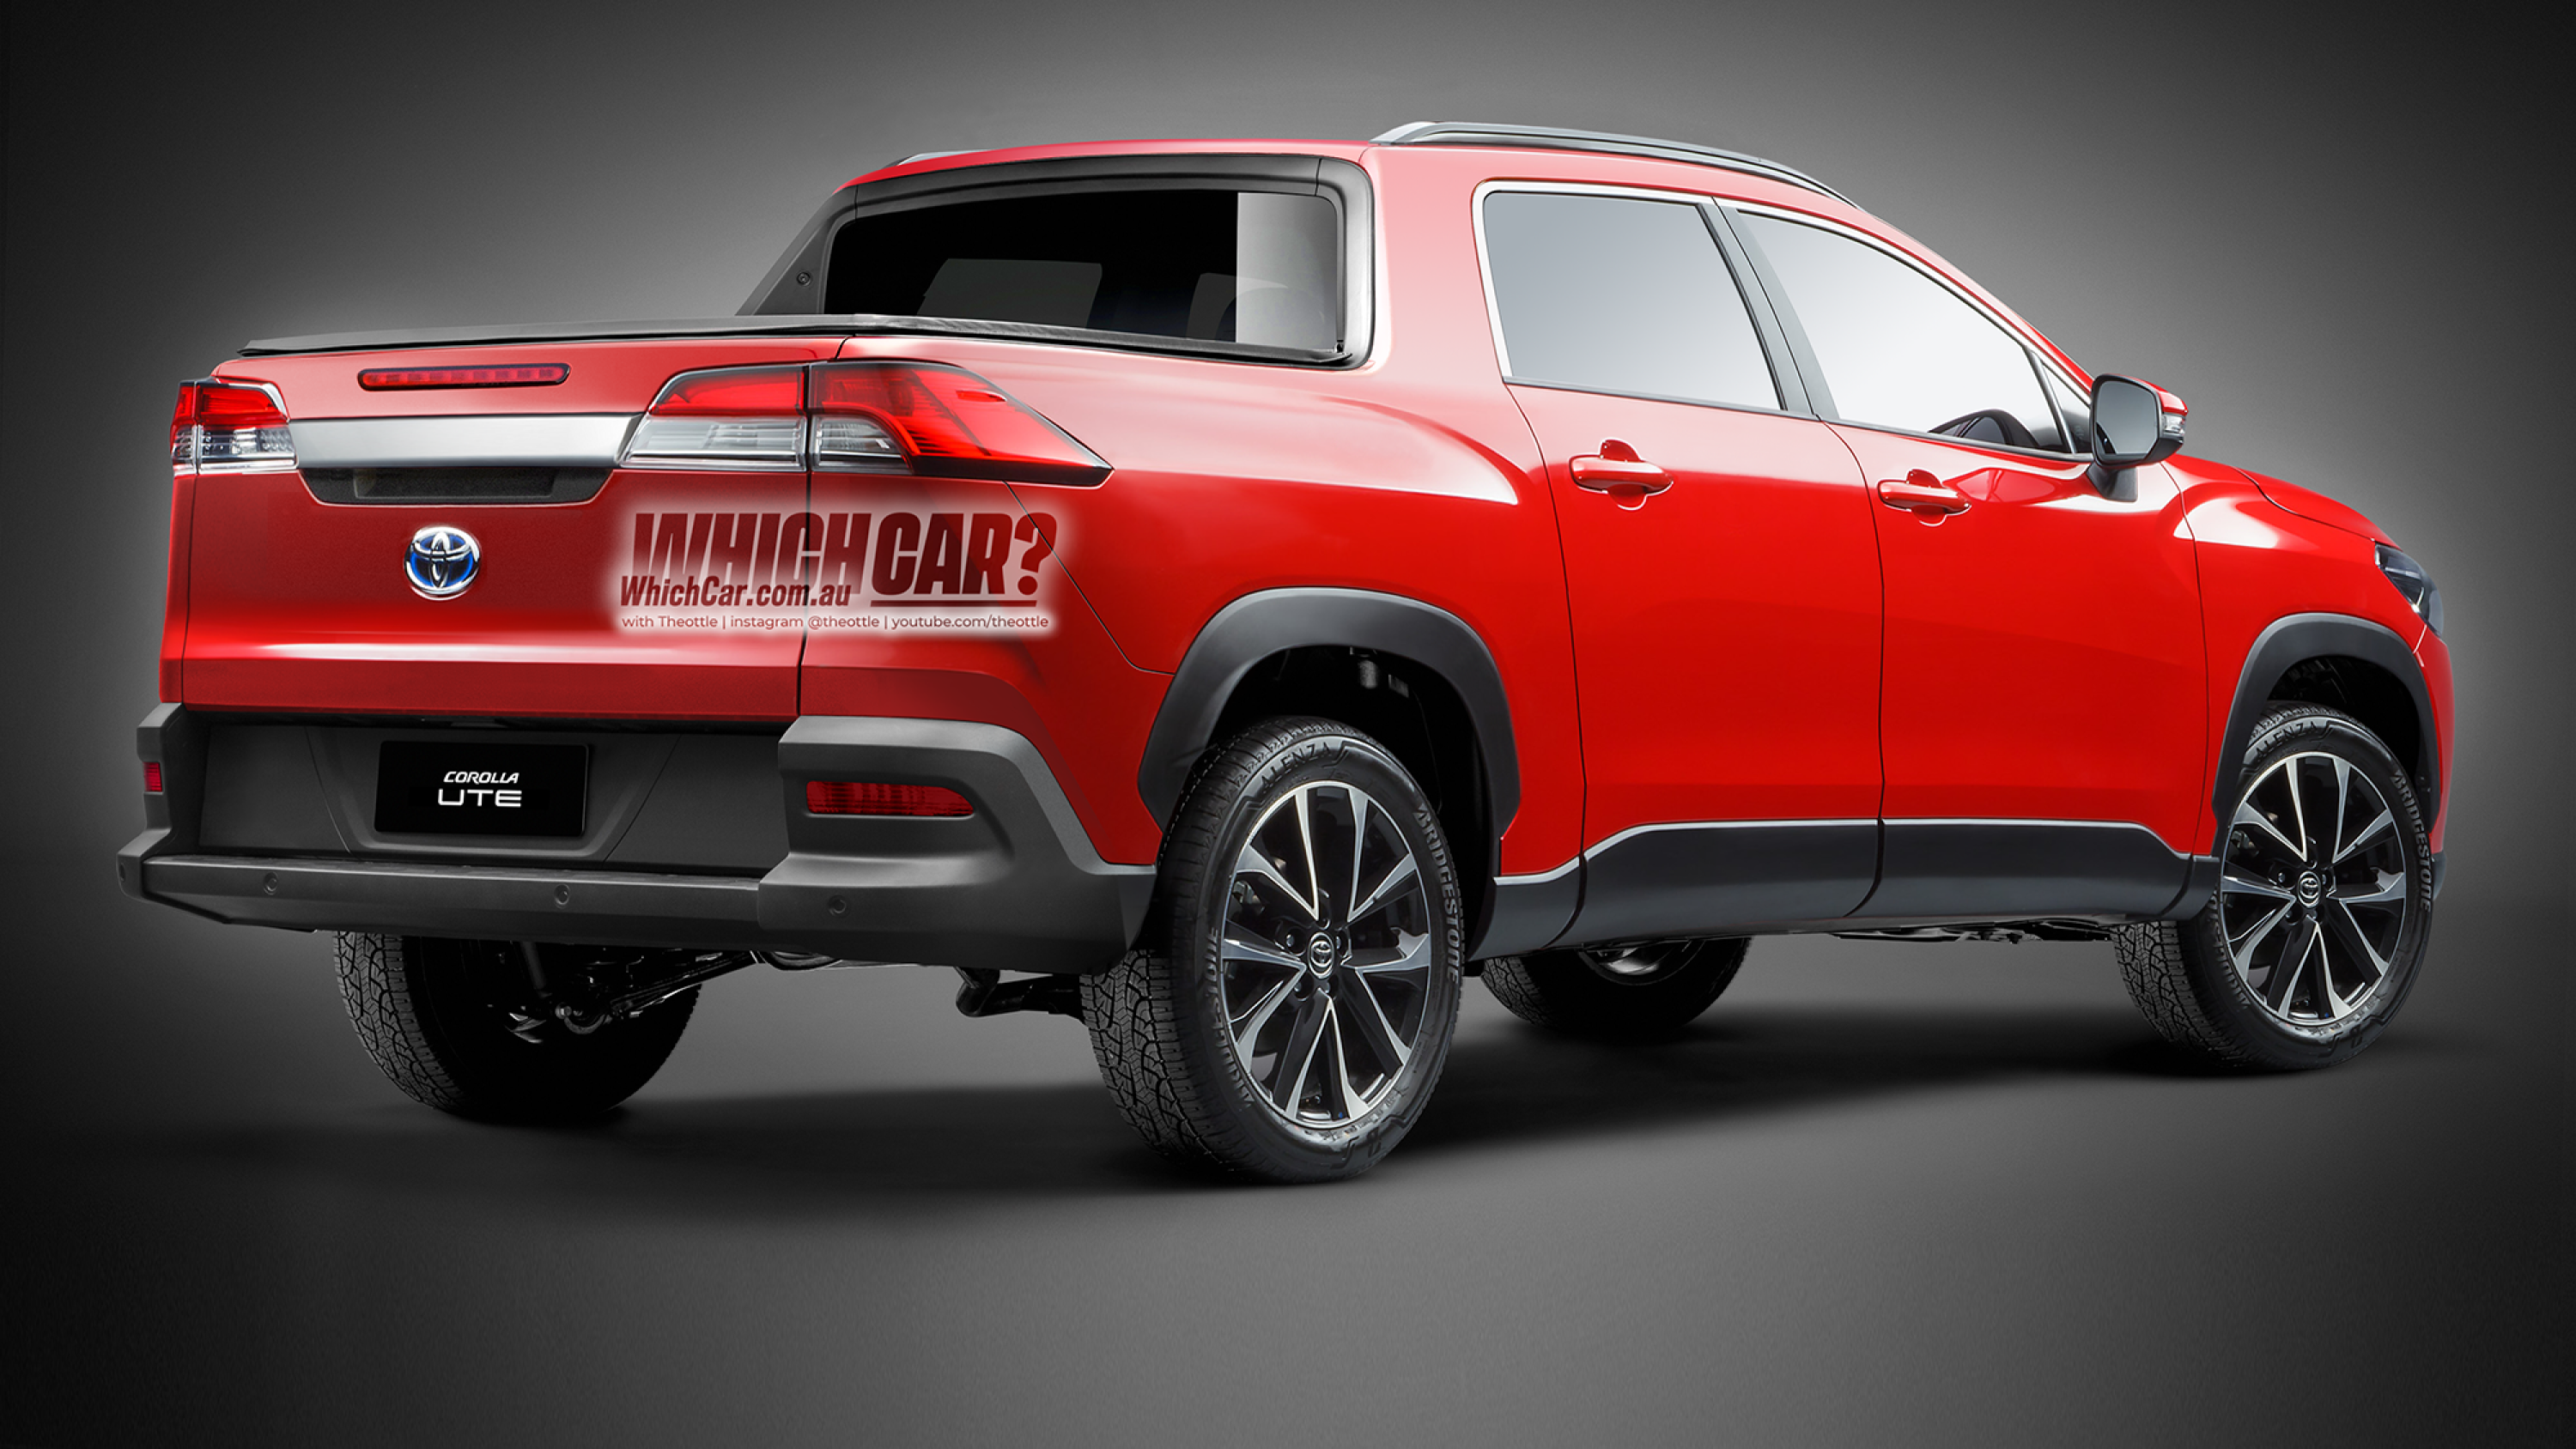
August 7: A compact Toyota ute based on… the Corolla Cross?
Following last week’s report, our digital artistry mate Theottle reminded us that he rendered a speculative Corolla Cross Ute back in 2021.
How do you think this would go as a rival to the Hyundai Santa Cruz and the Ford Maverick? It’s a more subtle look, perhaps even a little tame, but some buyers could be drawn to that…
August 4: Is Toyota planning a car-based ute to rival the Hyundai Santa Cruz and Ford Maverick?
At the reveal of its new Prado and 70 Series, Toyota was keen to discuss the future as it grapples with the need to reduce emissions – especially in Europe – and the insatiable demand for full-size off-roaders in a number of markets.
It’s a possibility for Toyota, though signs point to it being built exclusively at the Mississippi plant where Corolla is made for domestic consumption.
However, an all-new Corolla small car is due in 2025 (see our speculative rendering above), so the ute isn’t a short-term project.
Instead, sources suggest it won’t come to market until 2027, if at all. A turbo-diesel mill is unlikely; a petrol-electric hybrid or compact turbo-petrol engine is more plausible.
Toyota’s Australian division had a knack for turning up early when local manufacturing was still a thing.
Remember the TRD HiLux? A 225kW supercharged 4.0-litre V6-powered hyper ute that hit 100km/h from rest in 7.2 seconds and was similar in concept to today’s Ranger Raptor.
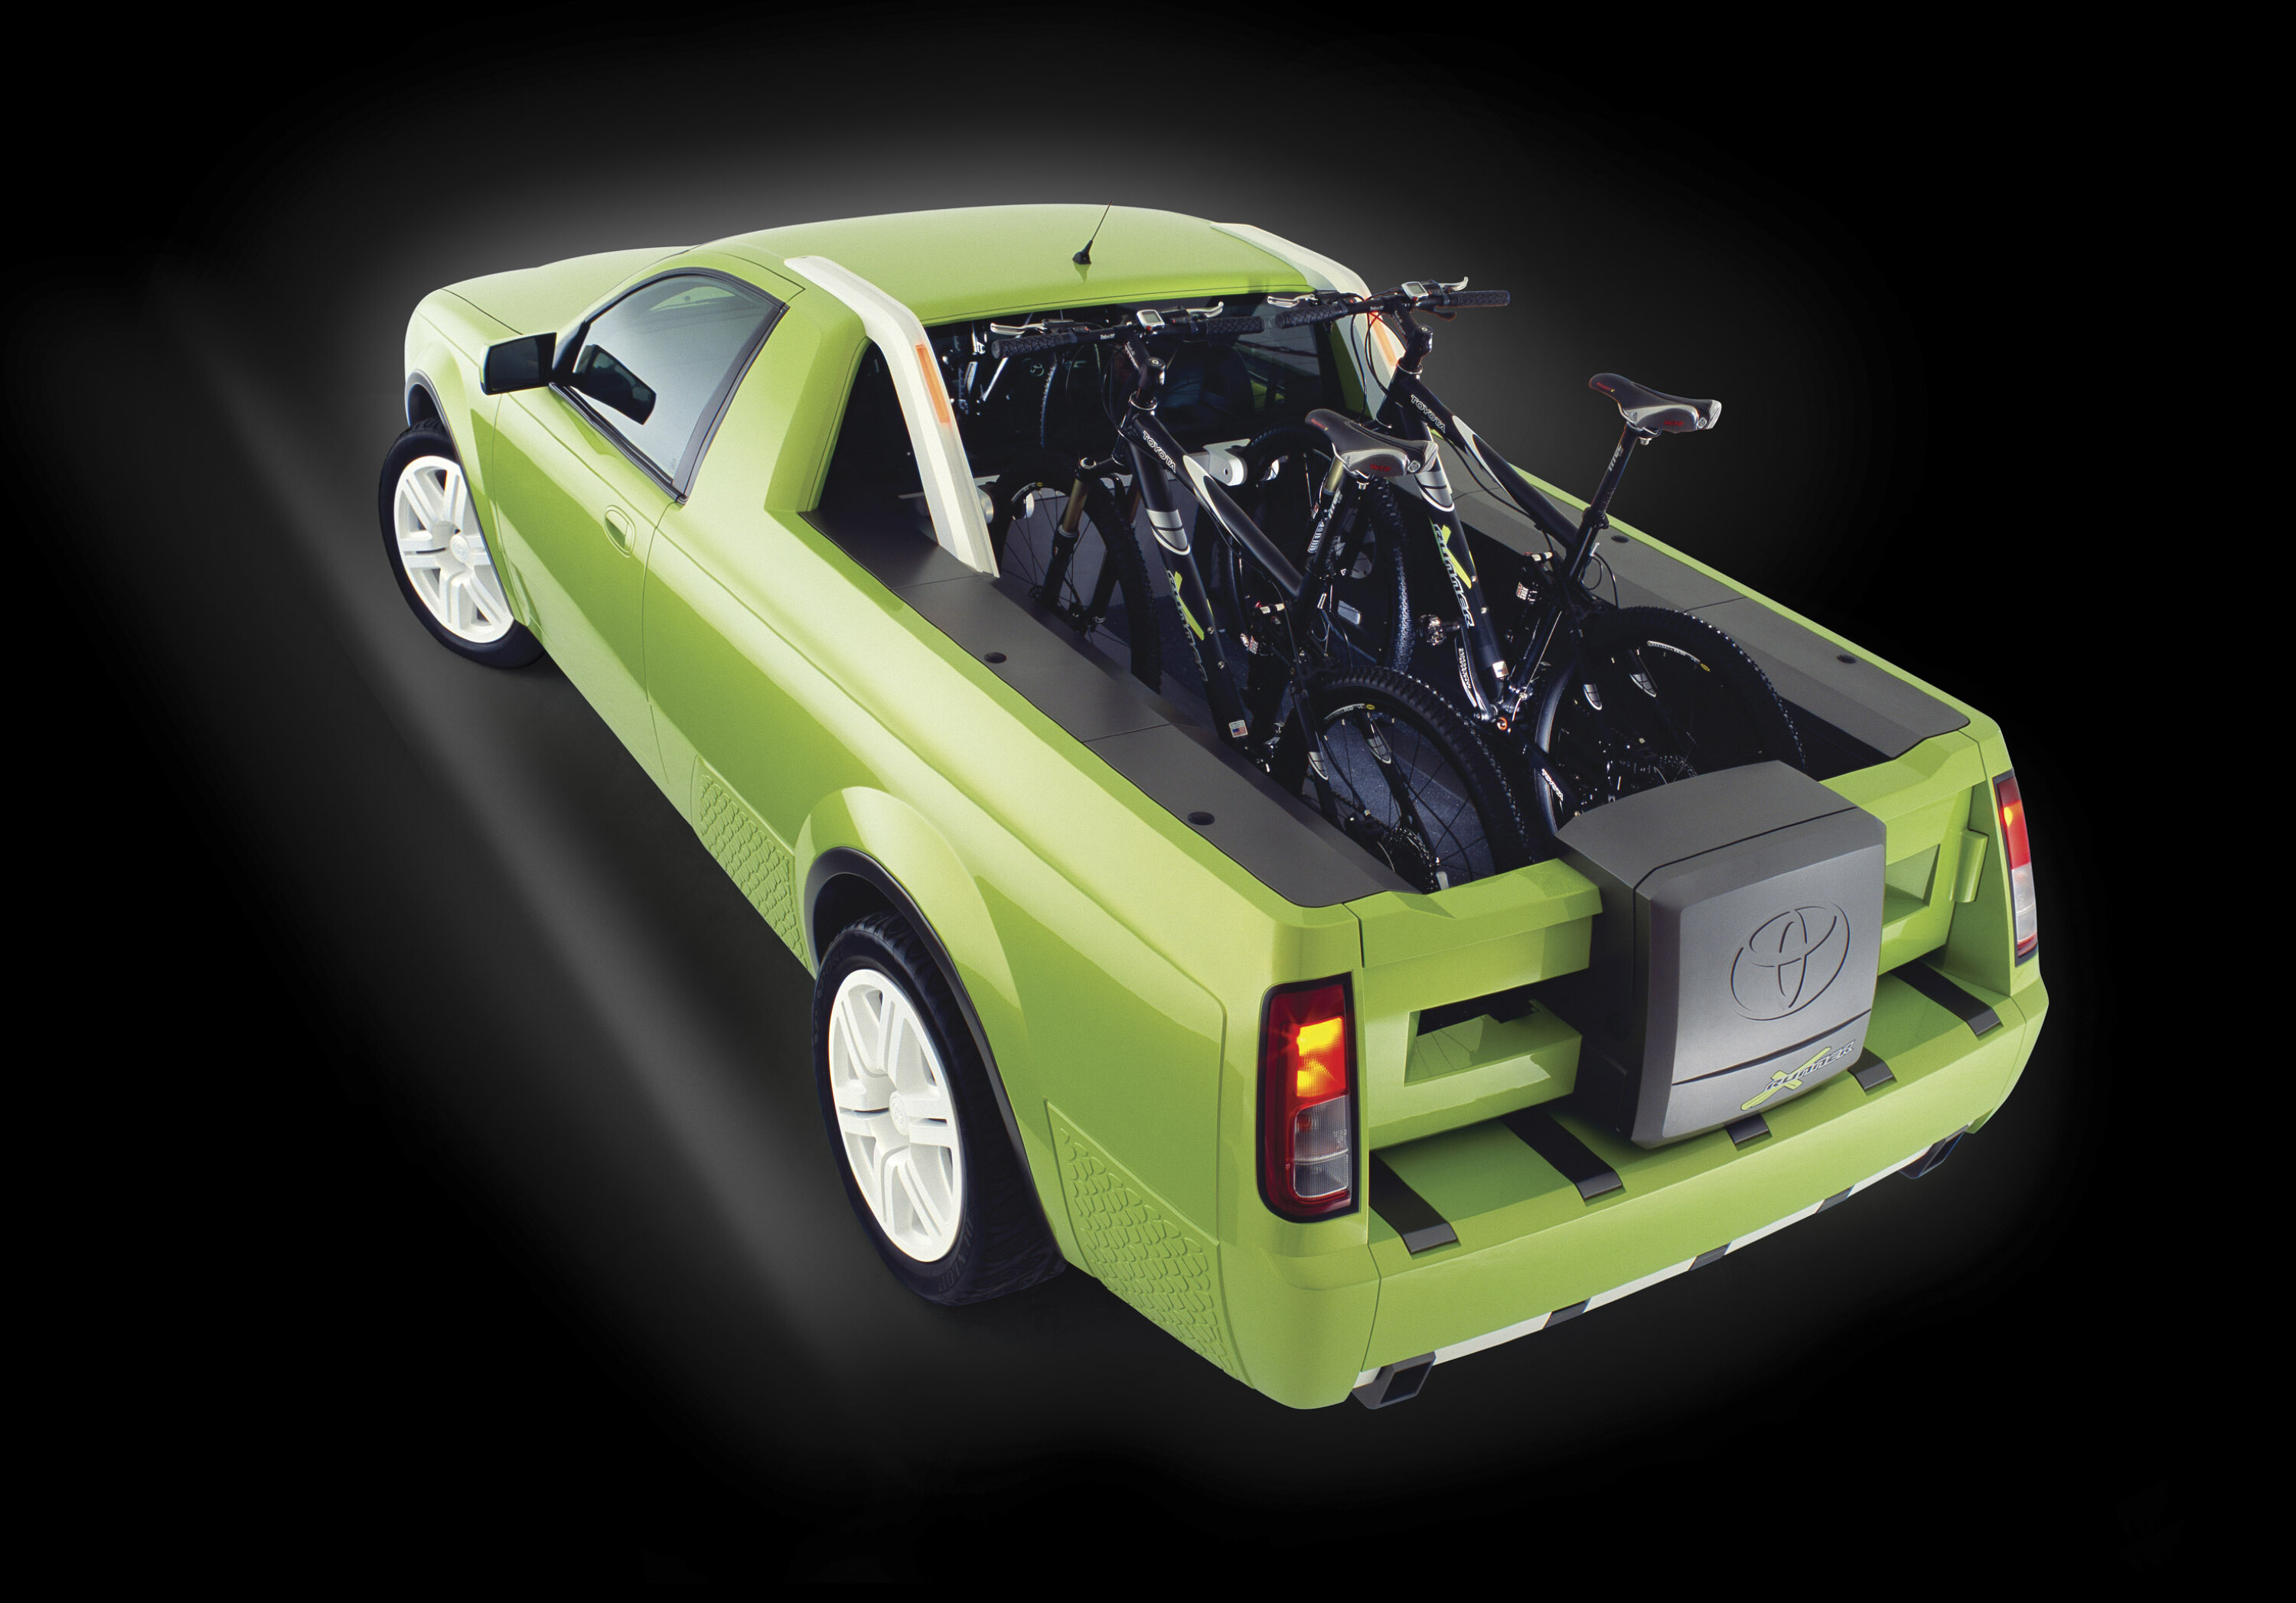
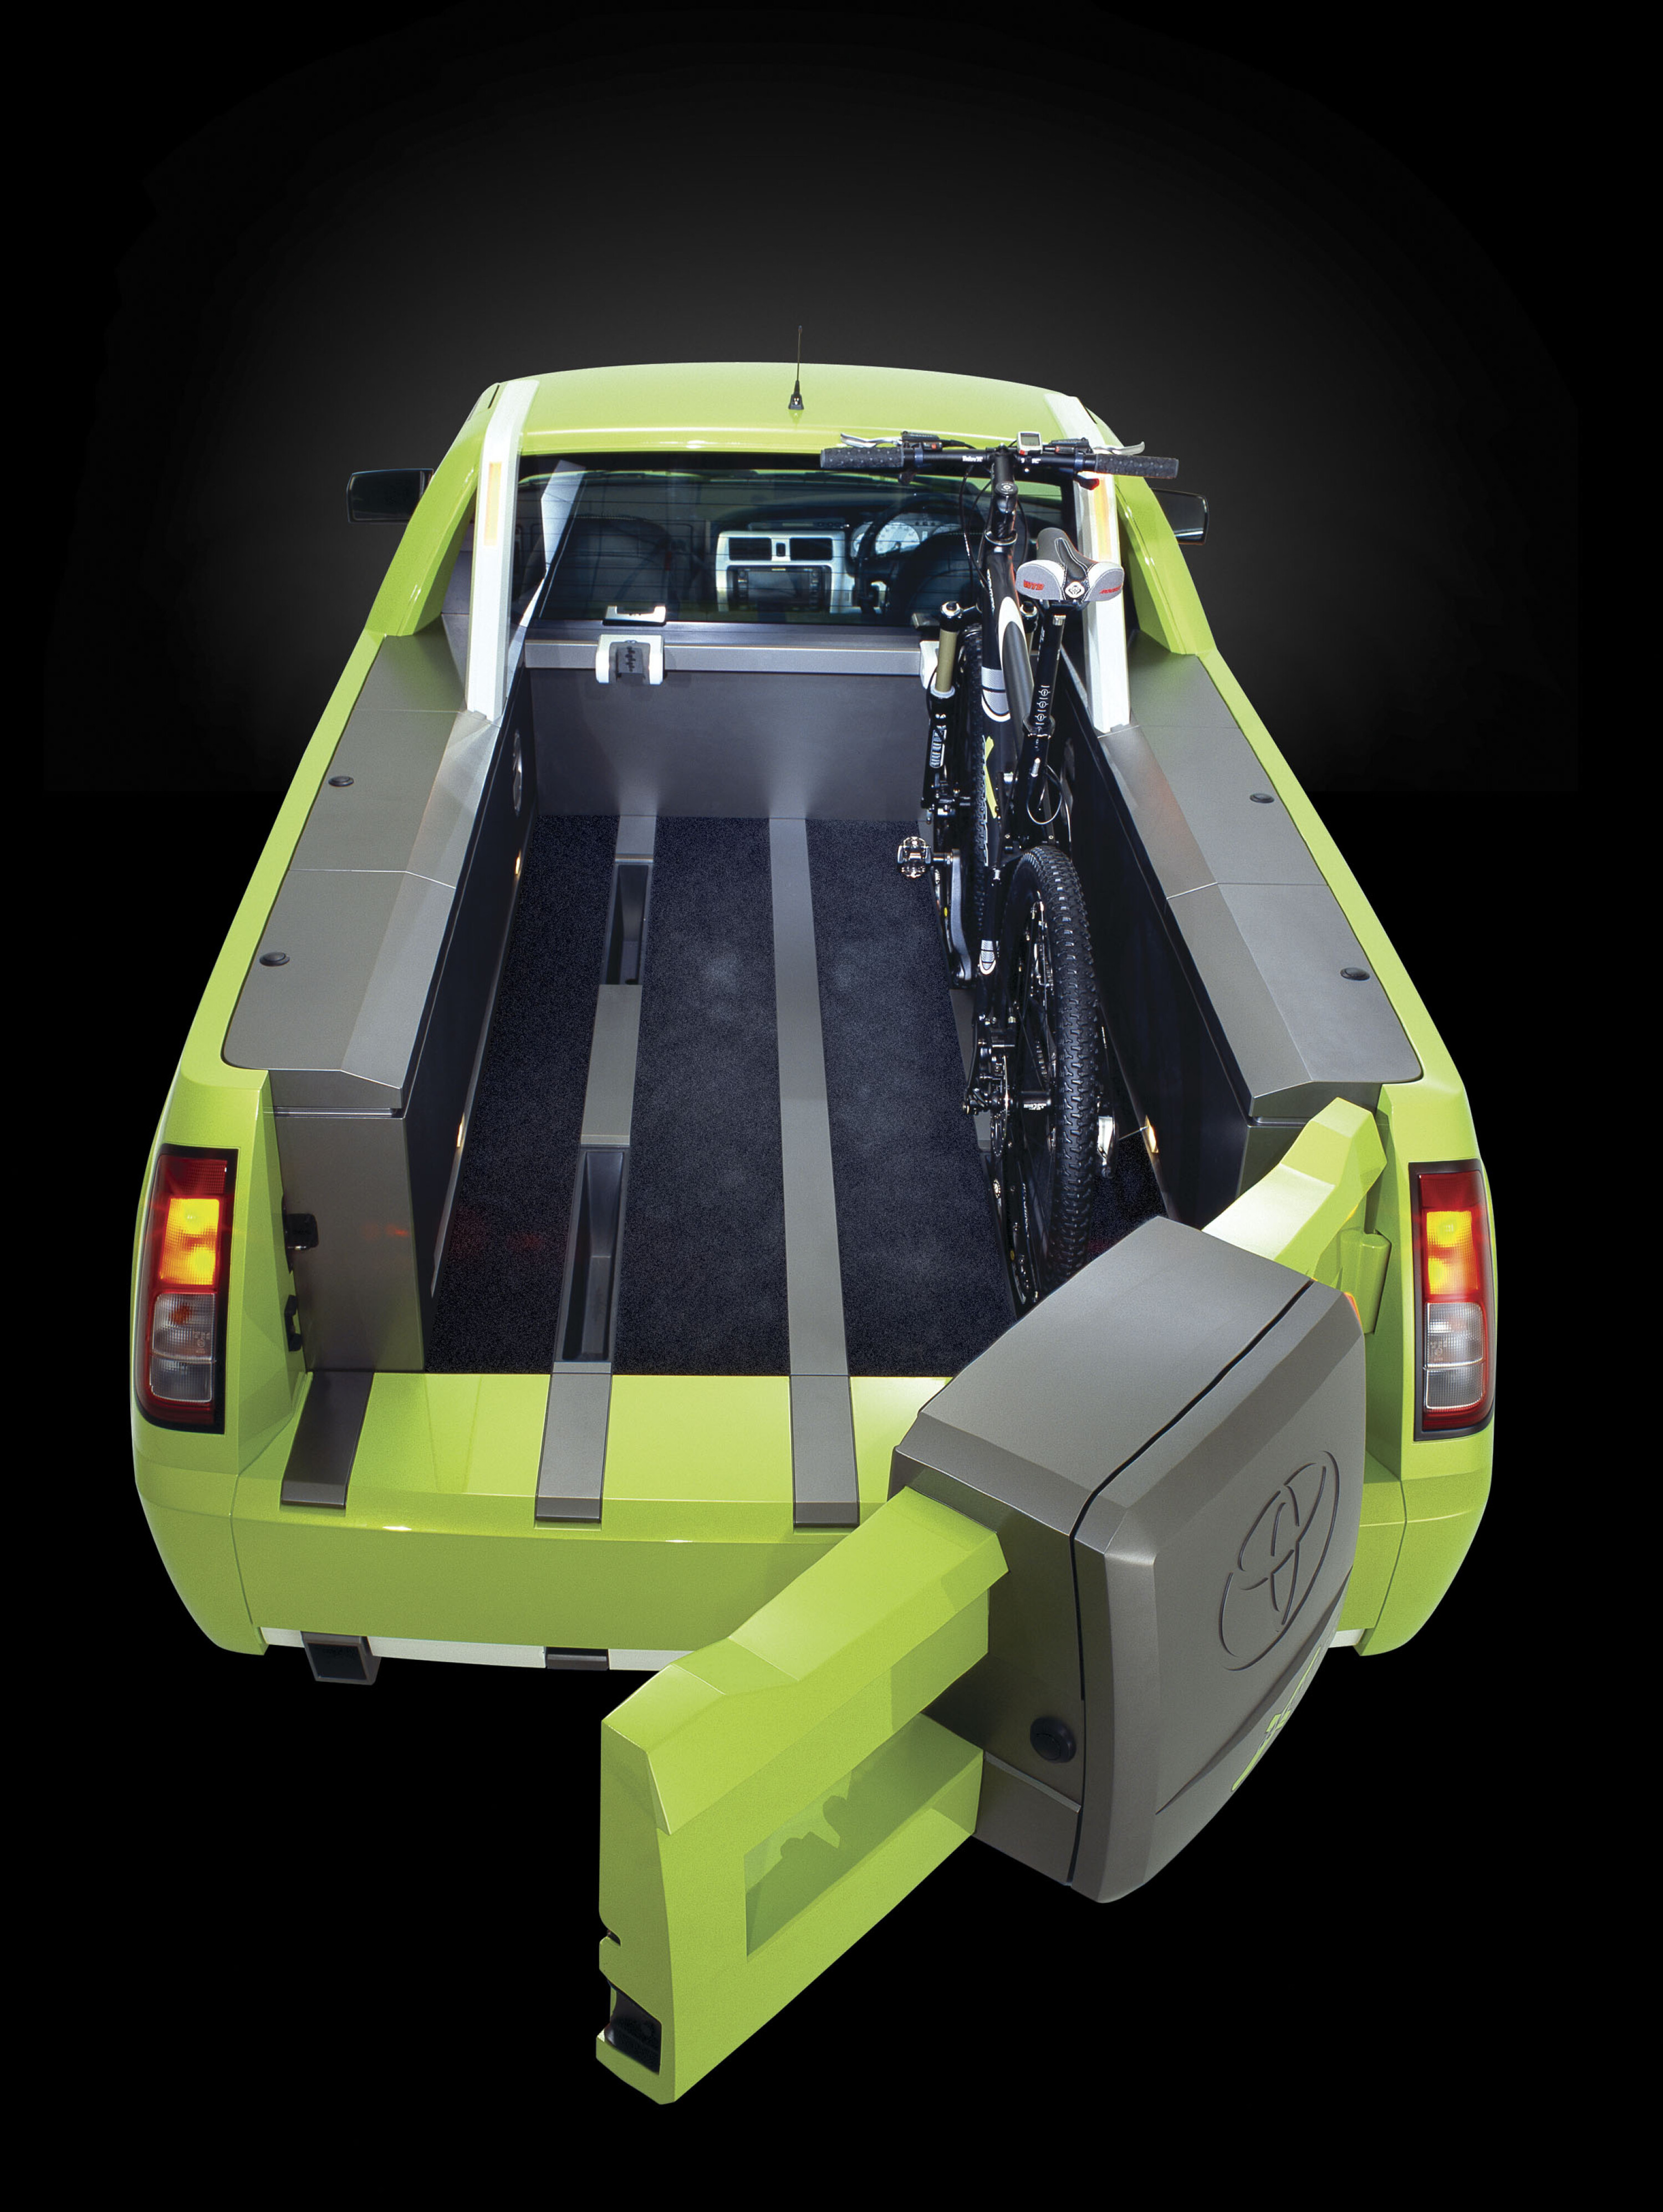
More relevant to this story is the X-Runner Concept (main picture). Revealed at the 2003 Melbourne motor show, the X-Runner was a pick-up based on the Avalon and Camry platform designed to compete with the then-popular Holden Commodore and Ford Falcon utes.
1
Although not based on a Corolla, it does show prior interest in this type of vehicle locally. Speaking to brands including Hyundai, Kia, and Mitsubishi, suggests product planners are again open to discussing this kind of vehicle’s ability to resonate with Australian buyers.
Hyundai even has a pair of left-hand drive Santa Cruzes in Sydney, though we’ll reiterate that the Korean carmaker says there’s a slim-to-zero chance of right-hookers ever becoming available.
The rise of the HiLux and its one-tonne ladder-frame compatriots effectively killed the monocoque ute in Australia, but they’re on the rise again in the US as lifestyle vehicles after continued popularity in South America.
Have your say
Would you sacrifice towing capability and some off-road ability for a more fuel-efficient and comfortable ute?
Double black diamonds are a symbol recognised all over the world.
From extreme enduro trailbike riders to Olympic level downhill skiers, those two black diamonds at the start of the trail indicate this track ain’t like the others. It’ll push them to their limits. Beyond what most would consider achievable.
And offer ultimate bragging rights to all who conquer it.
1
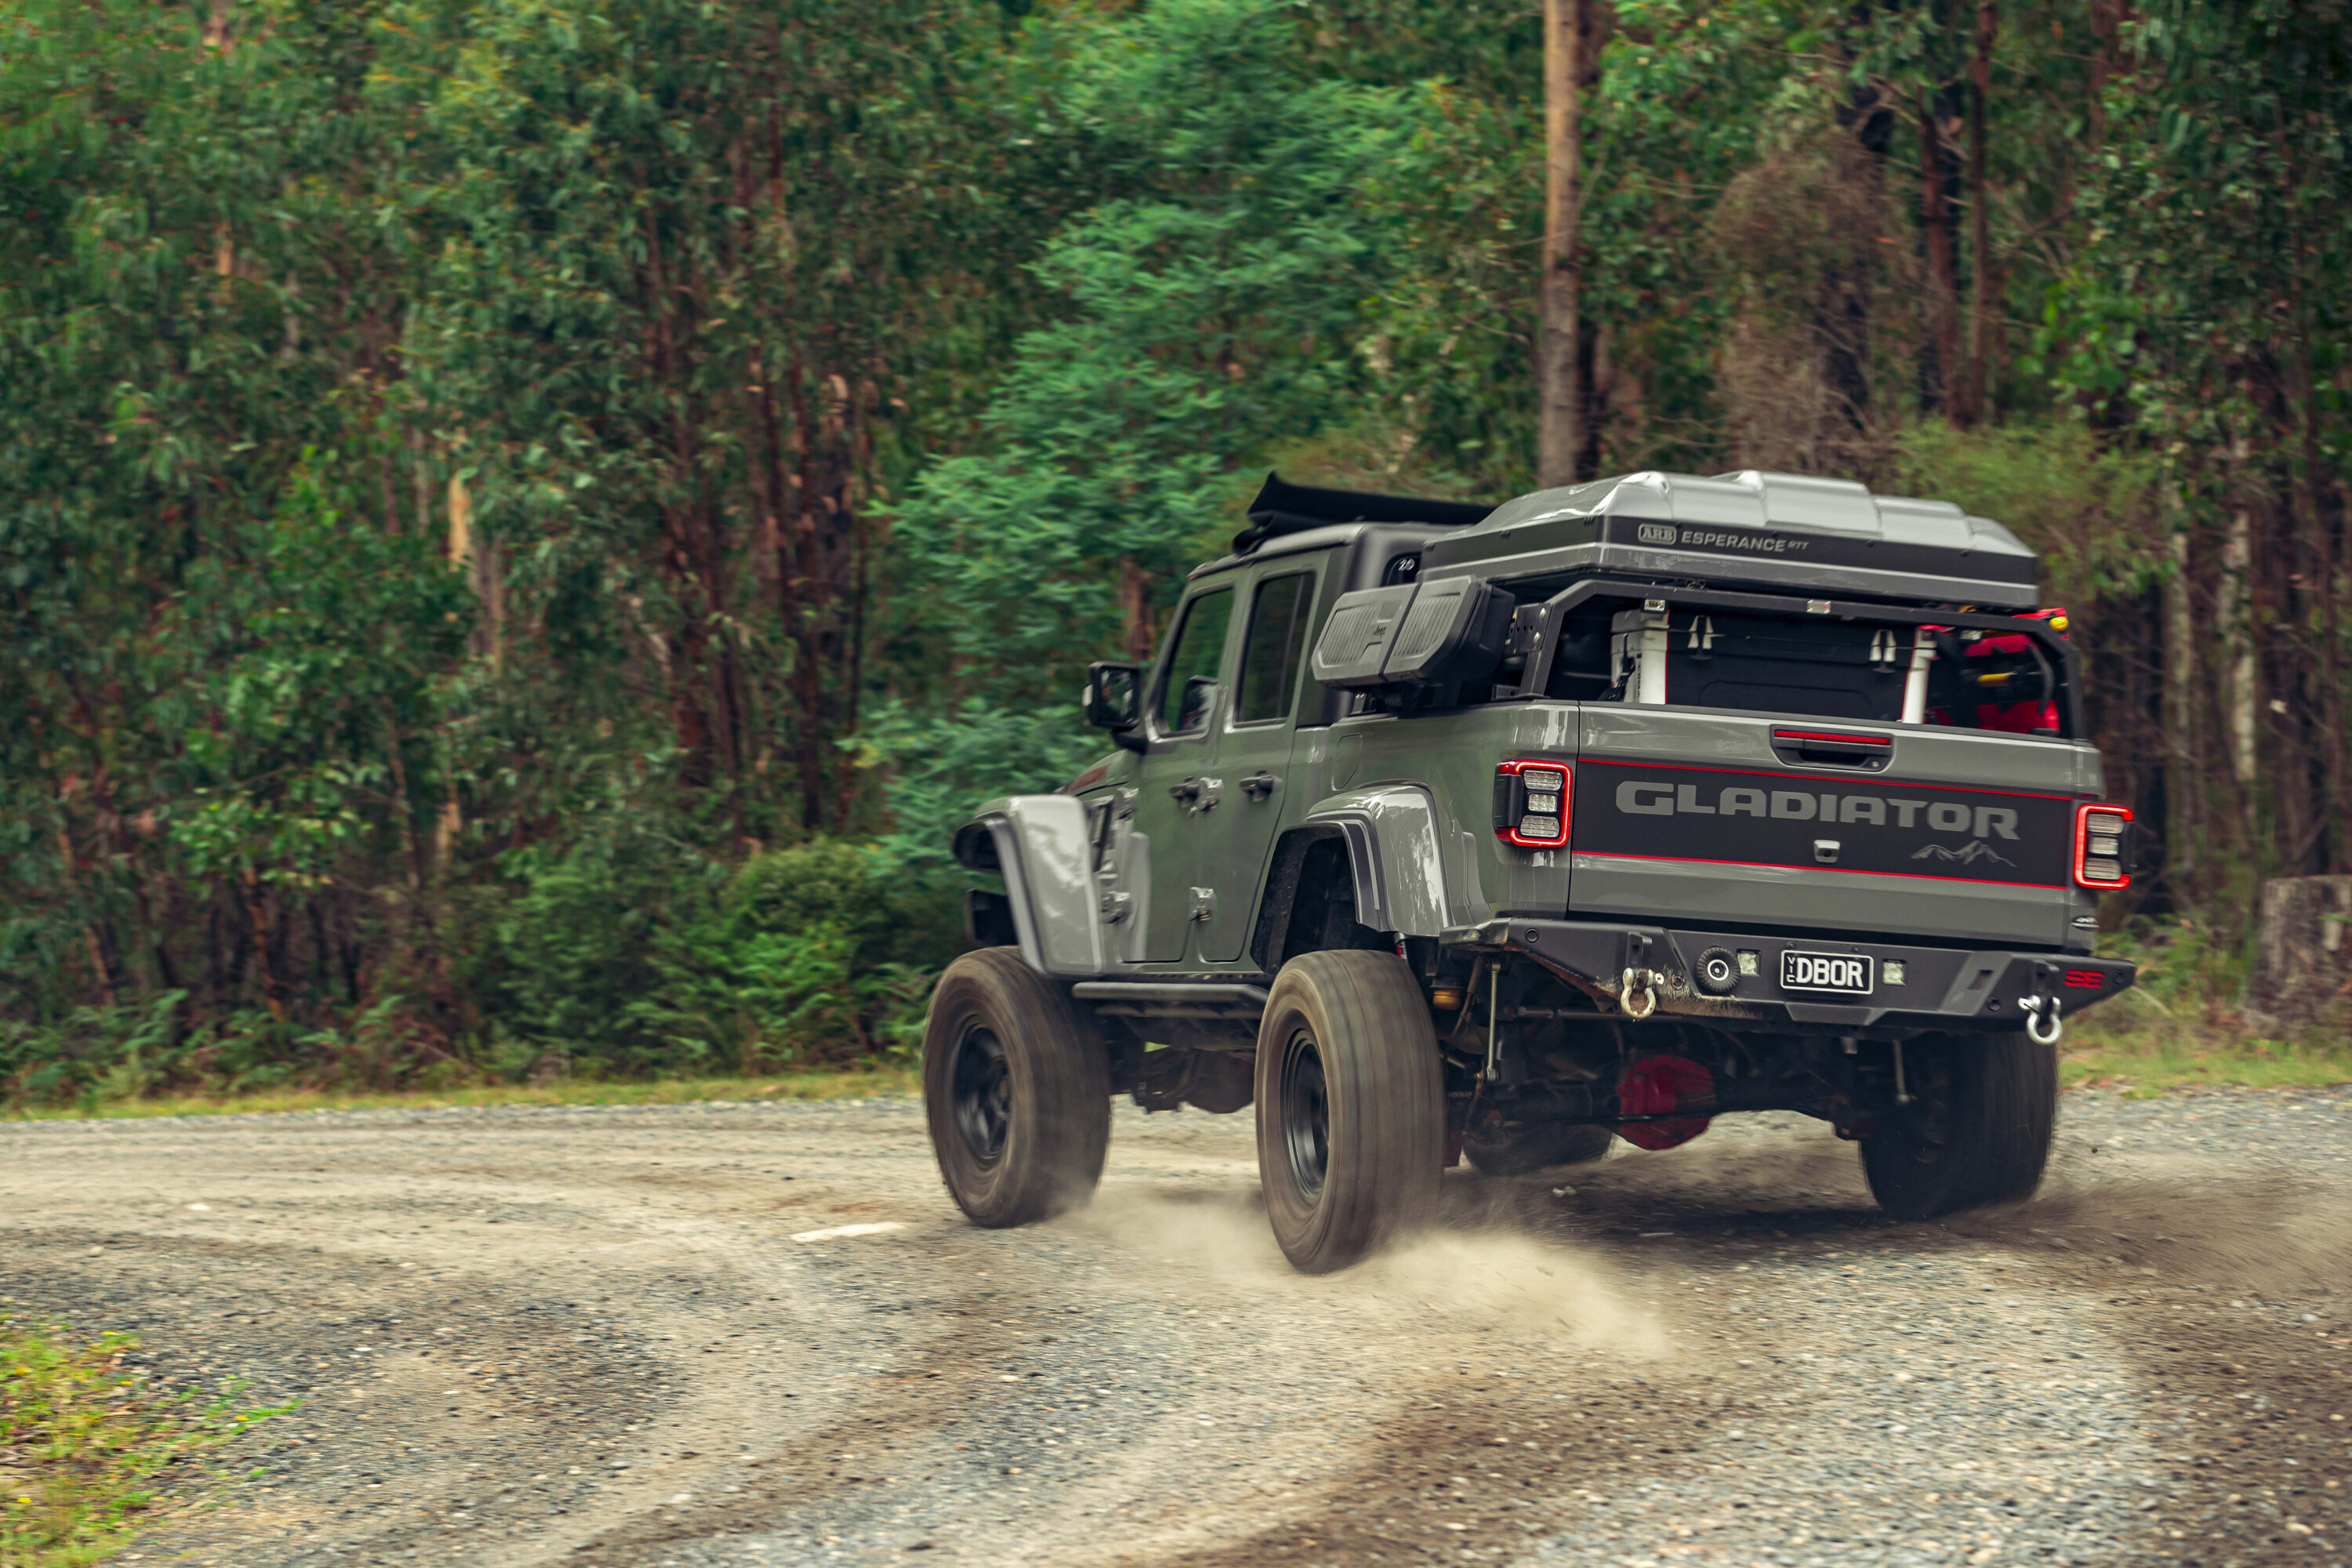
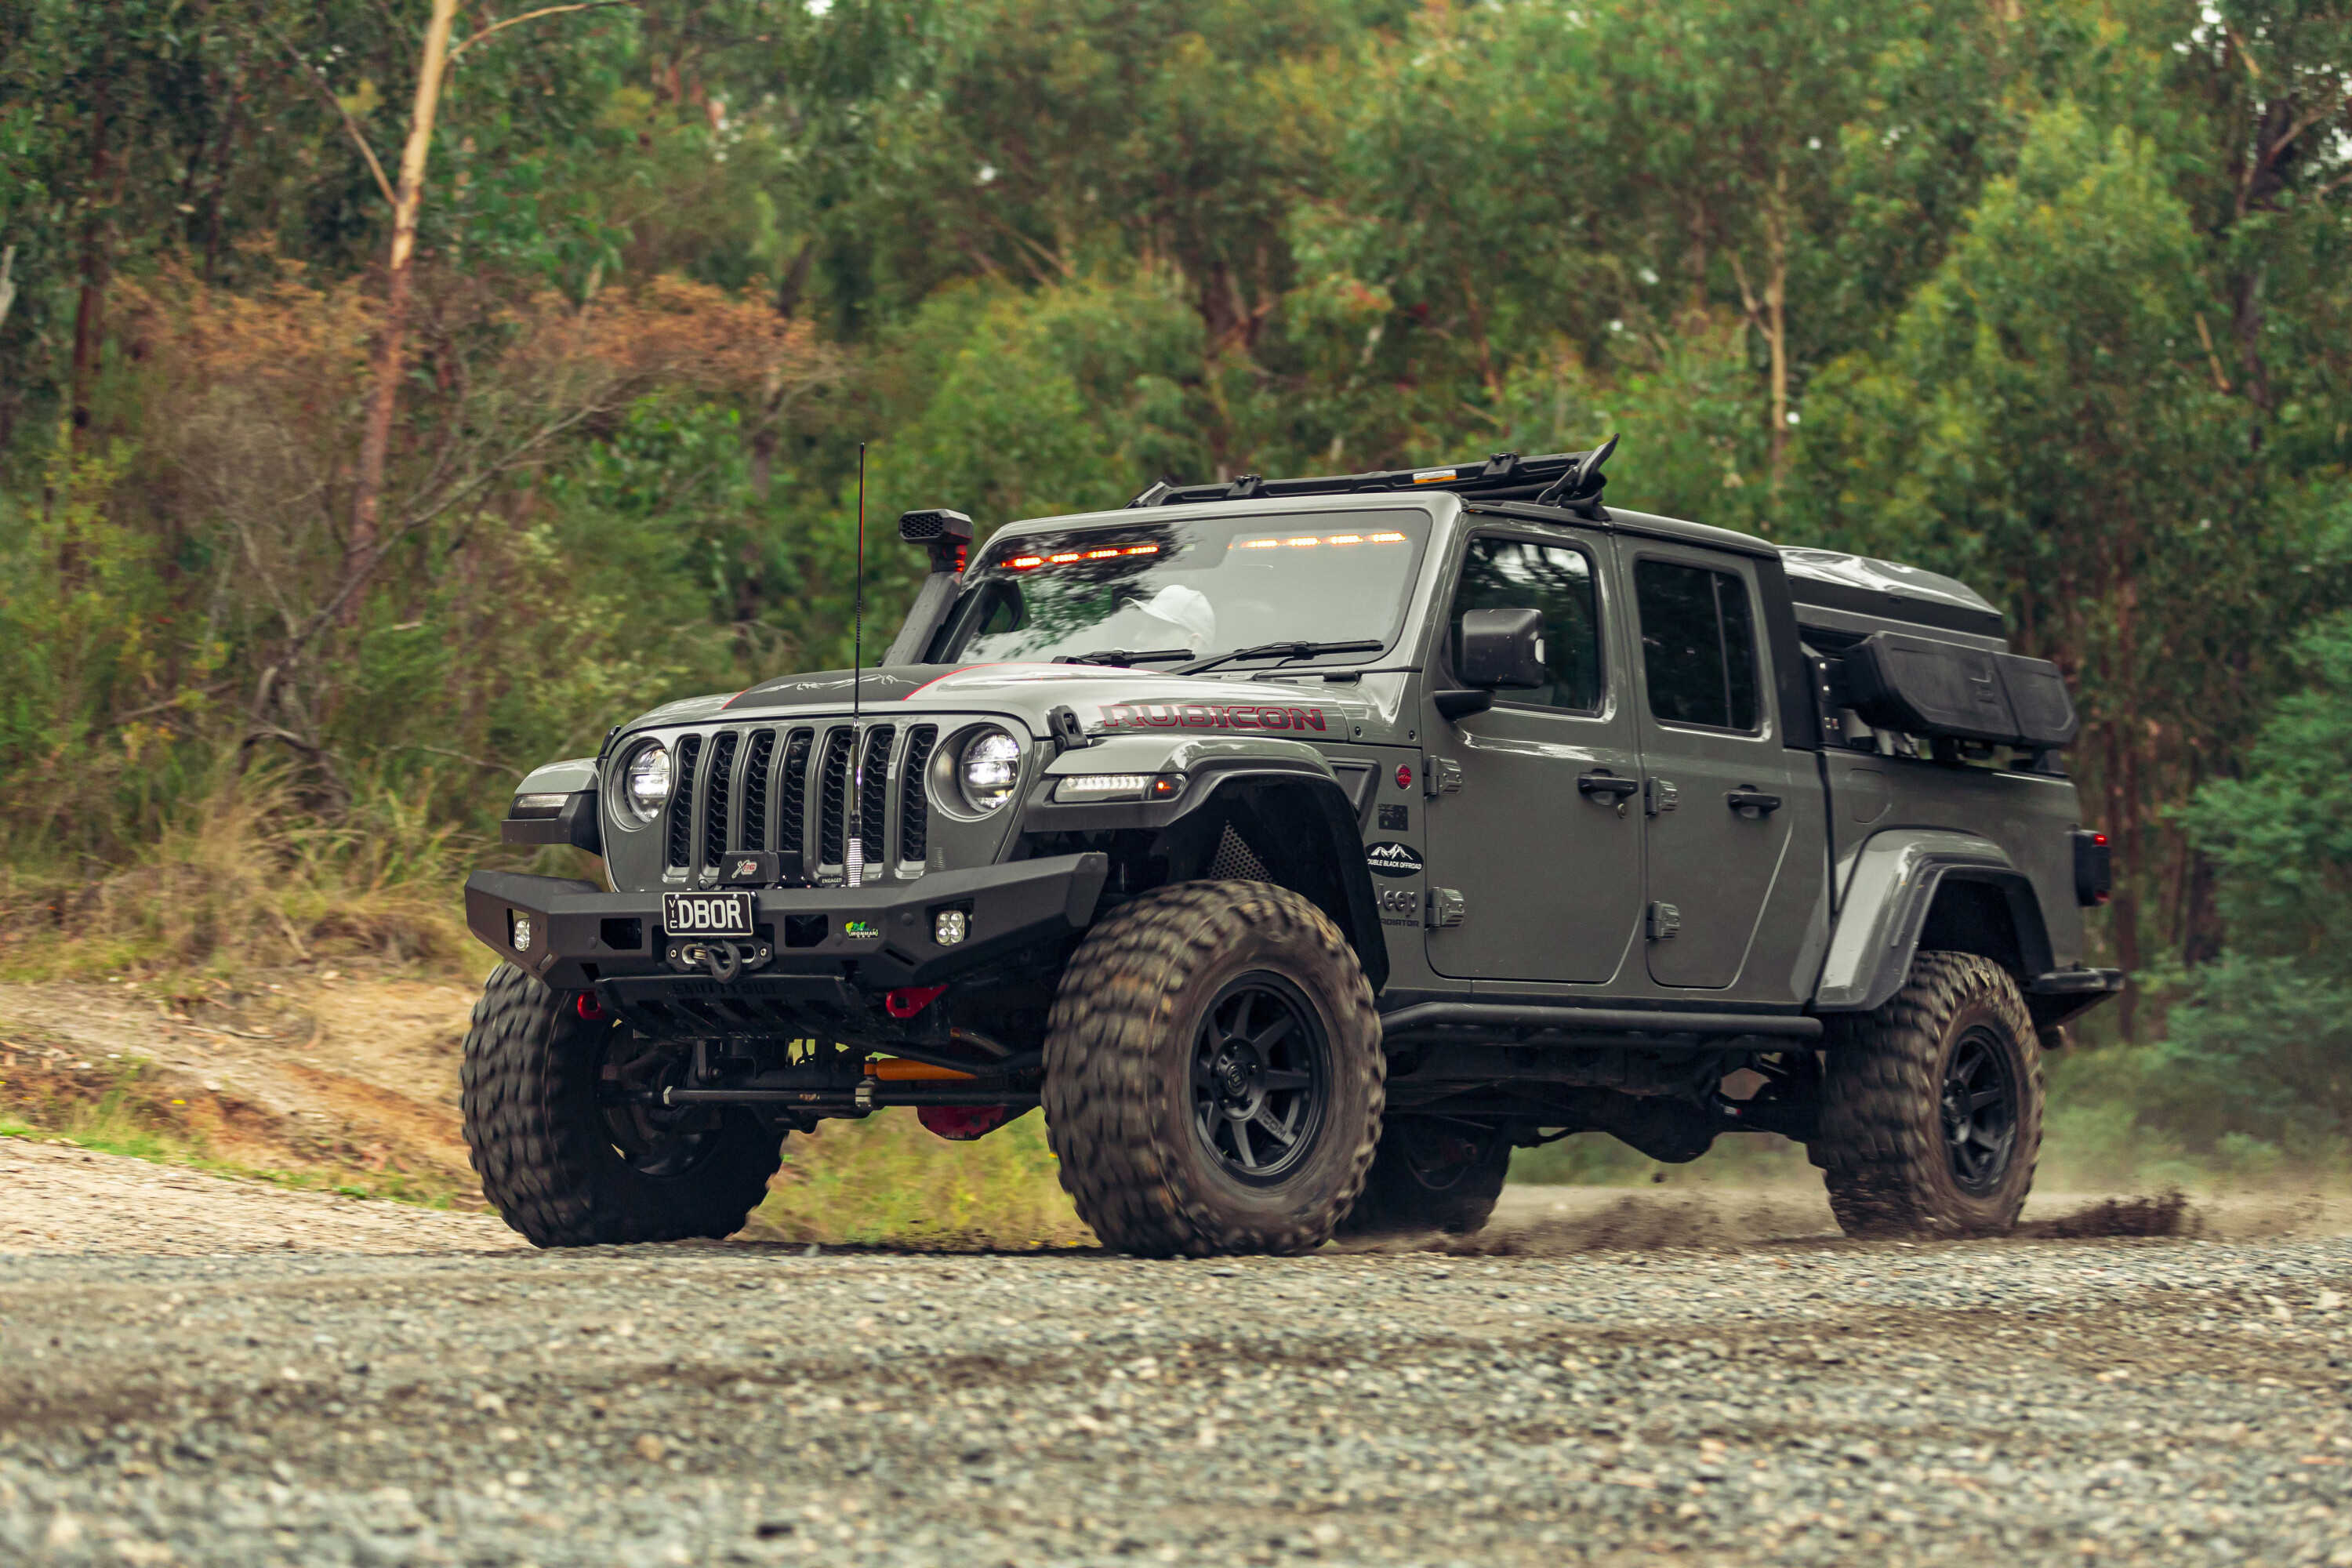
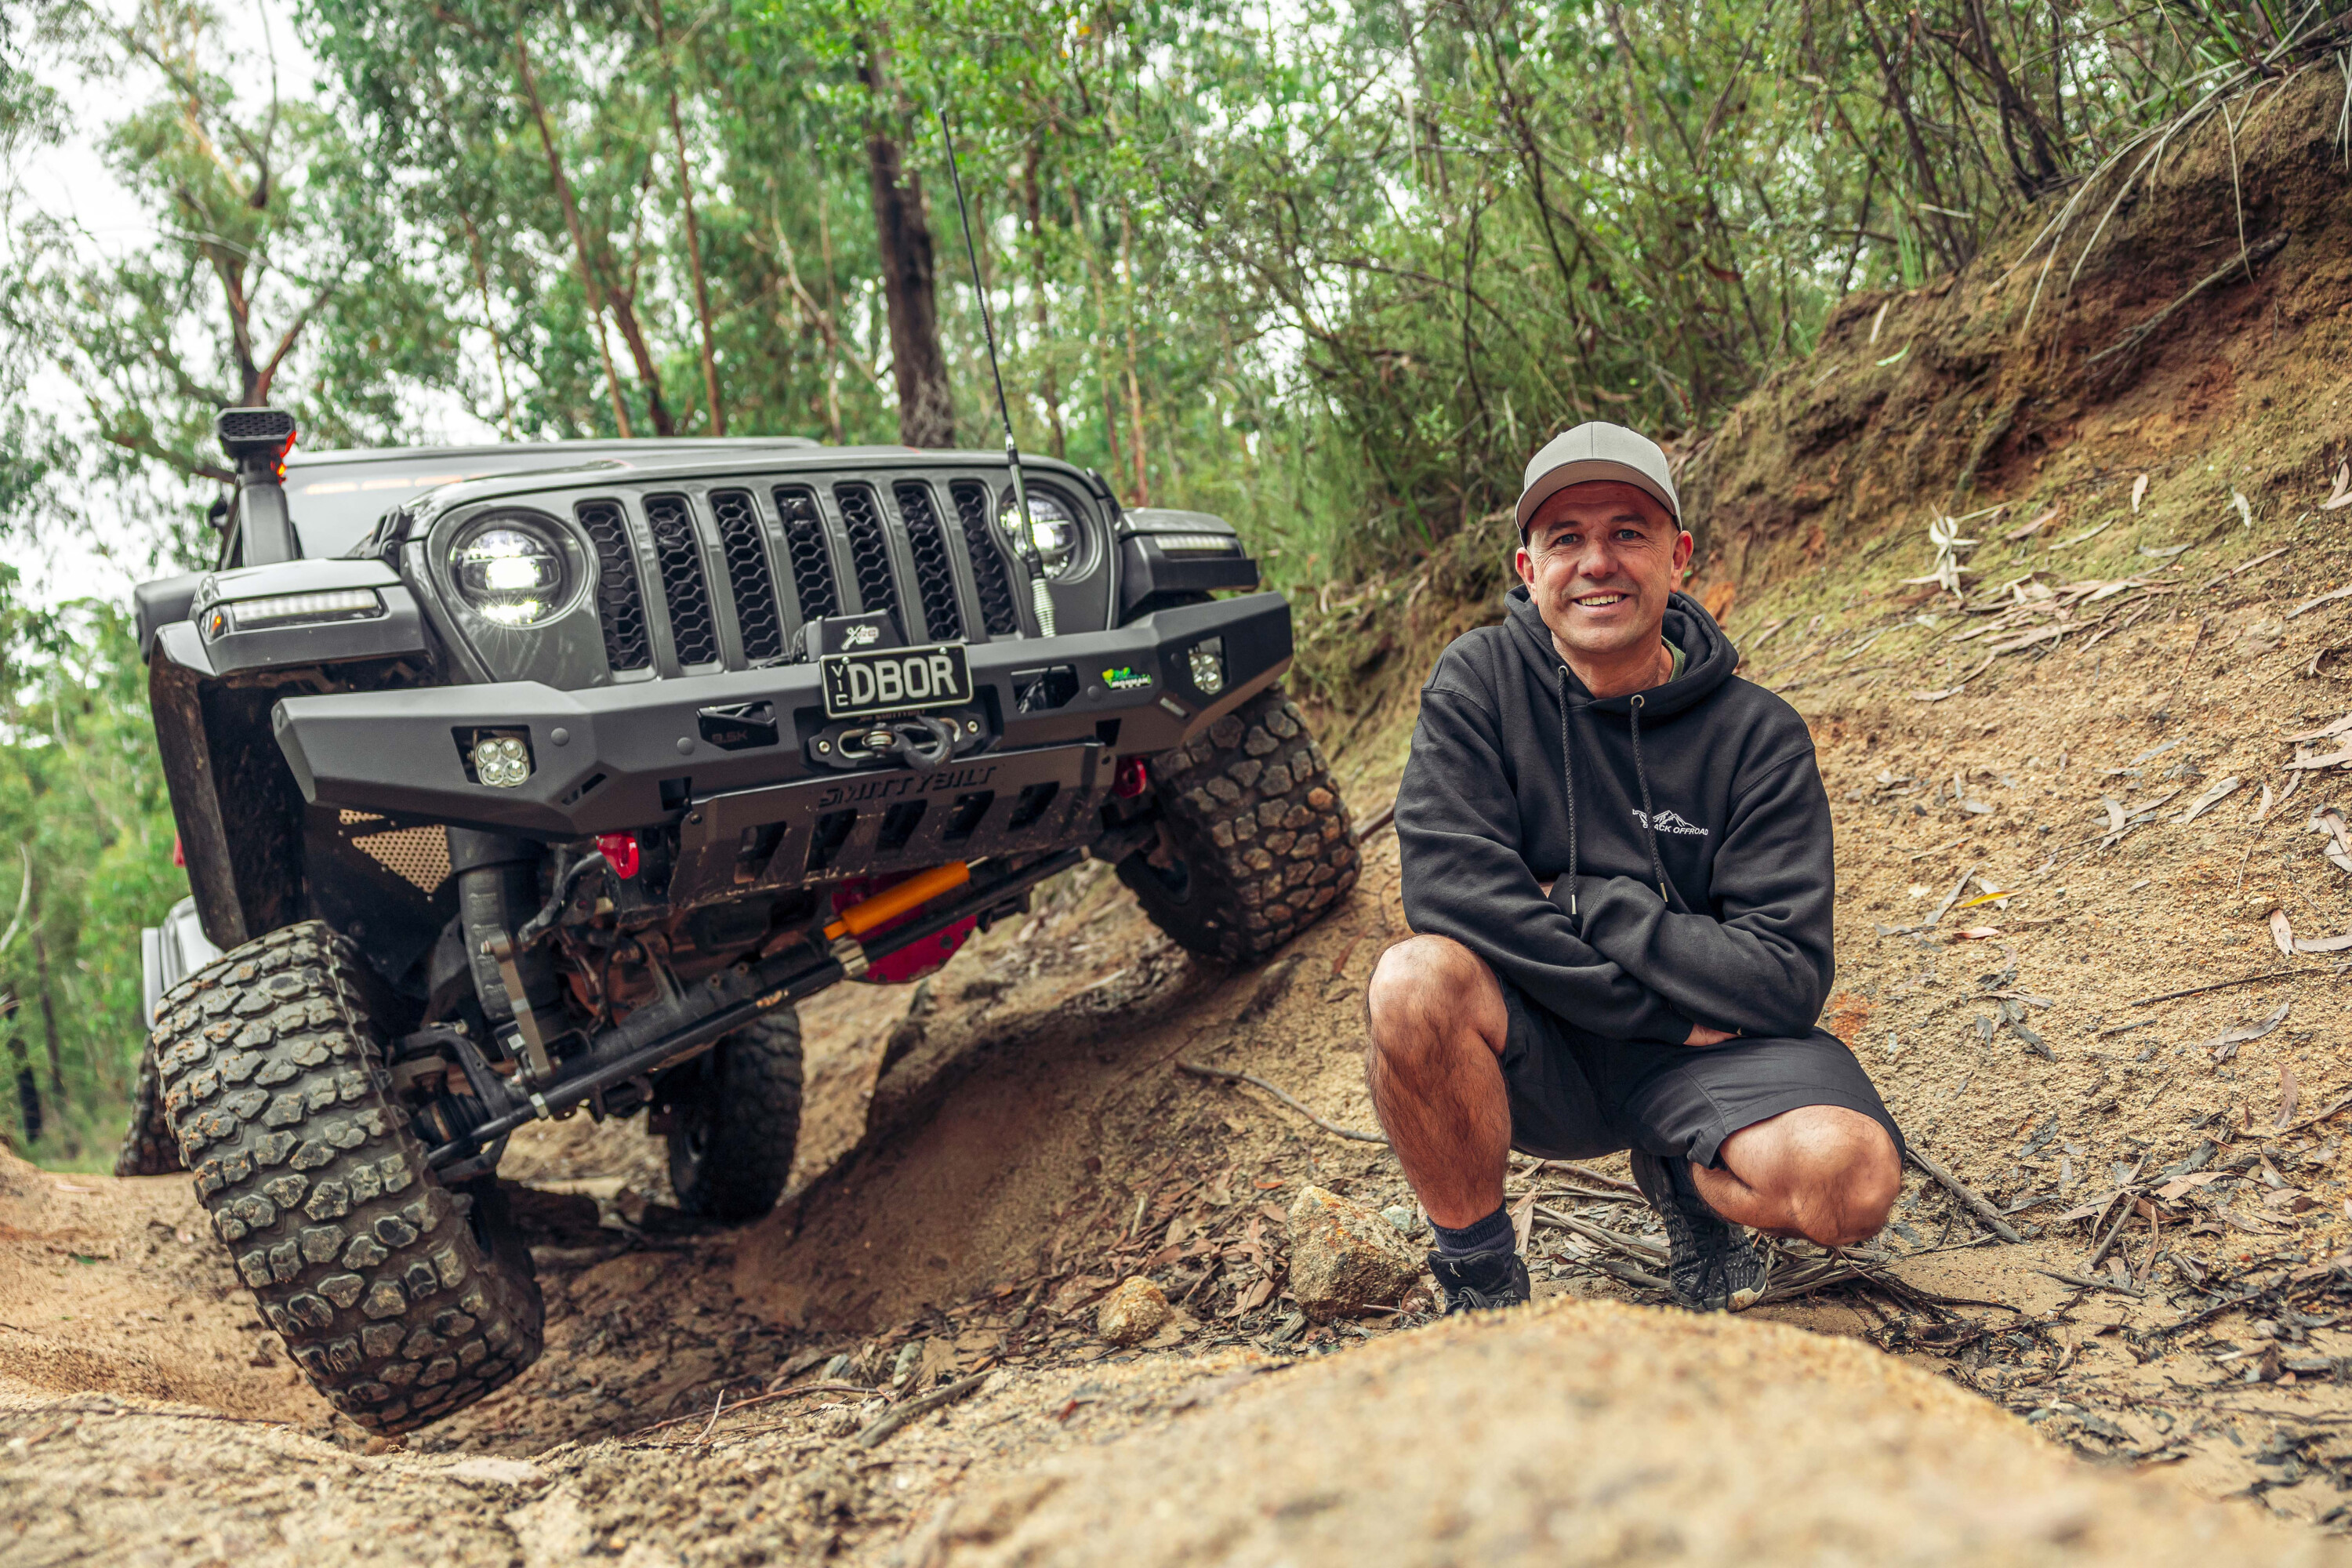
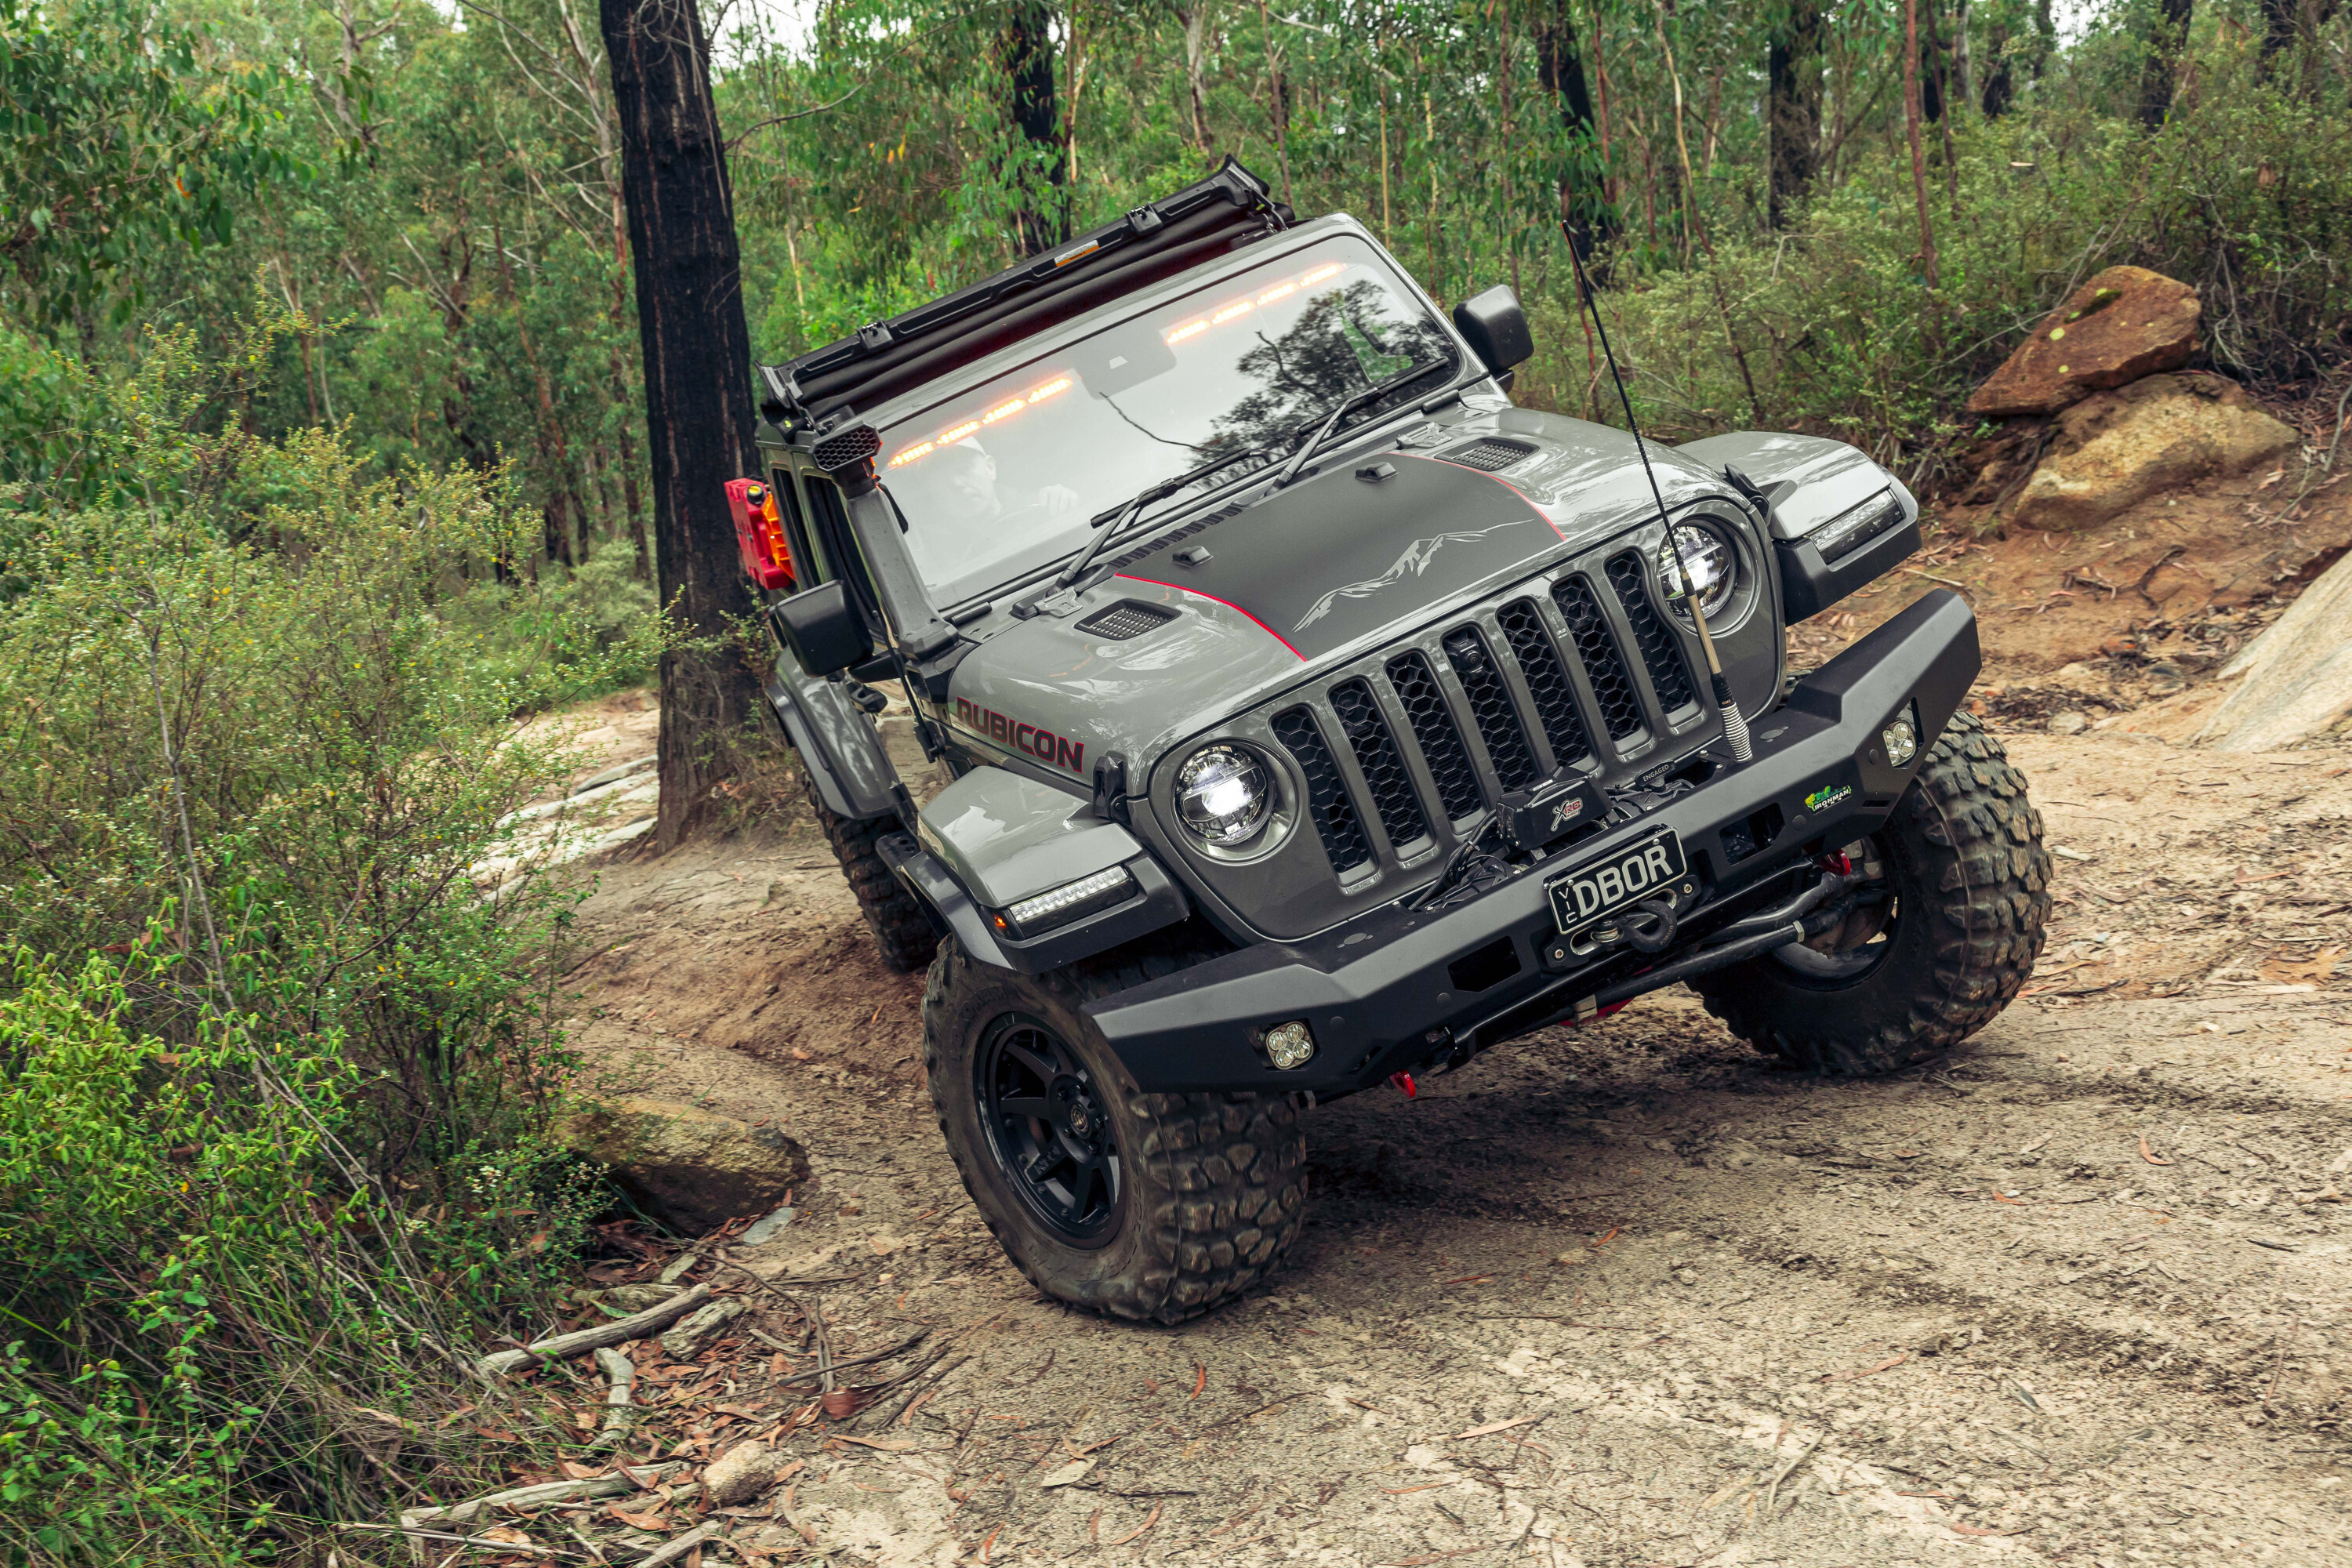
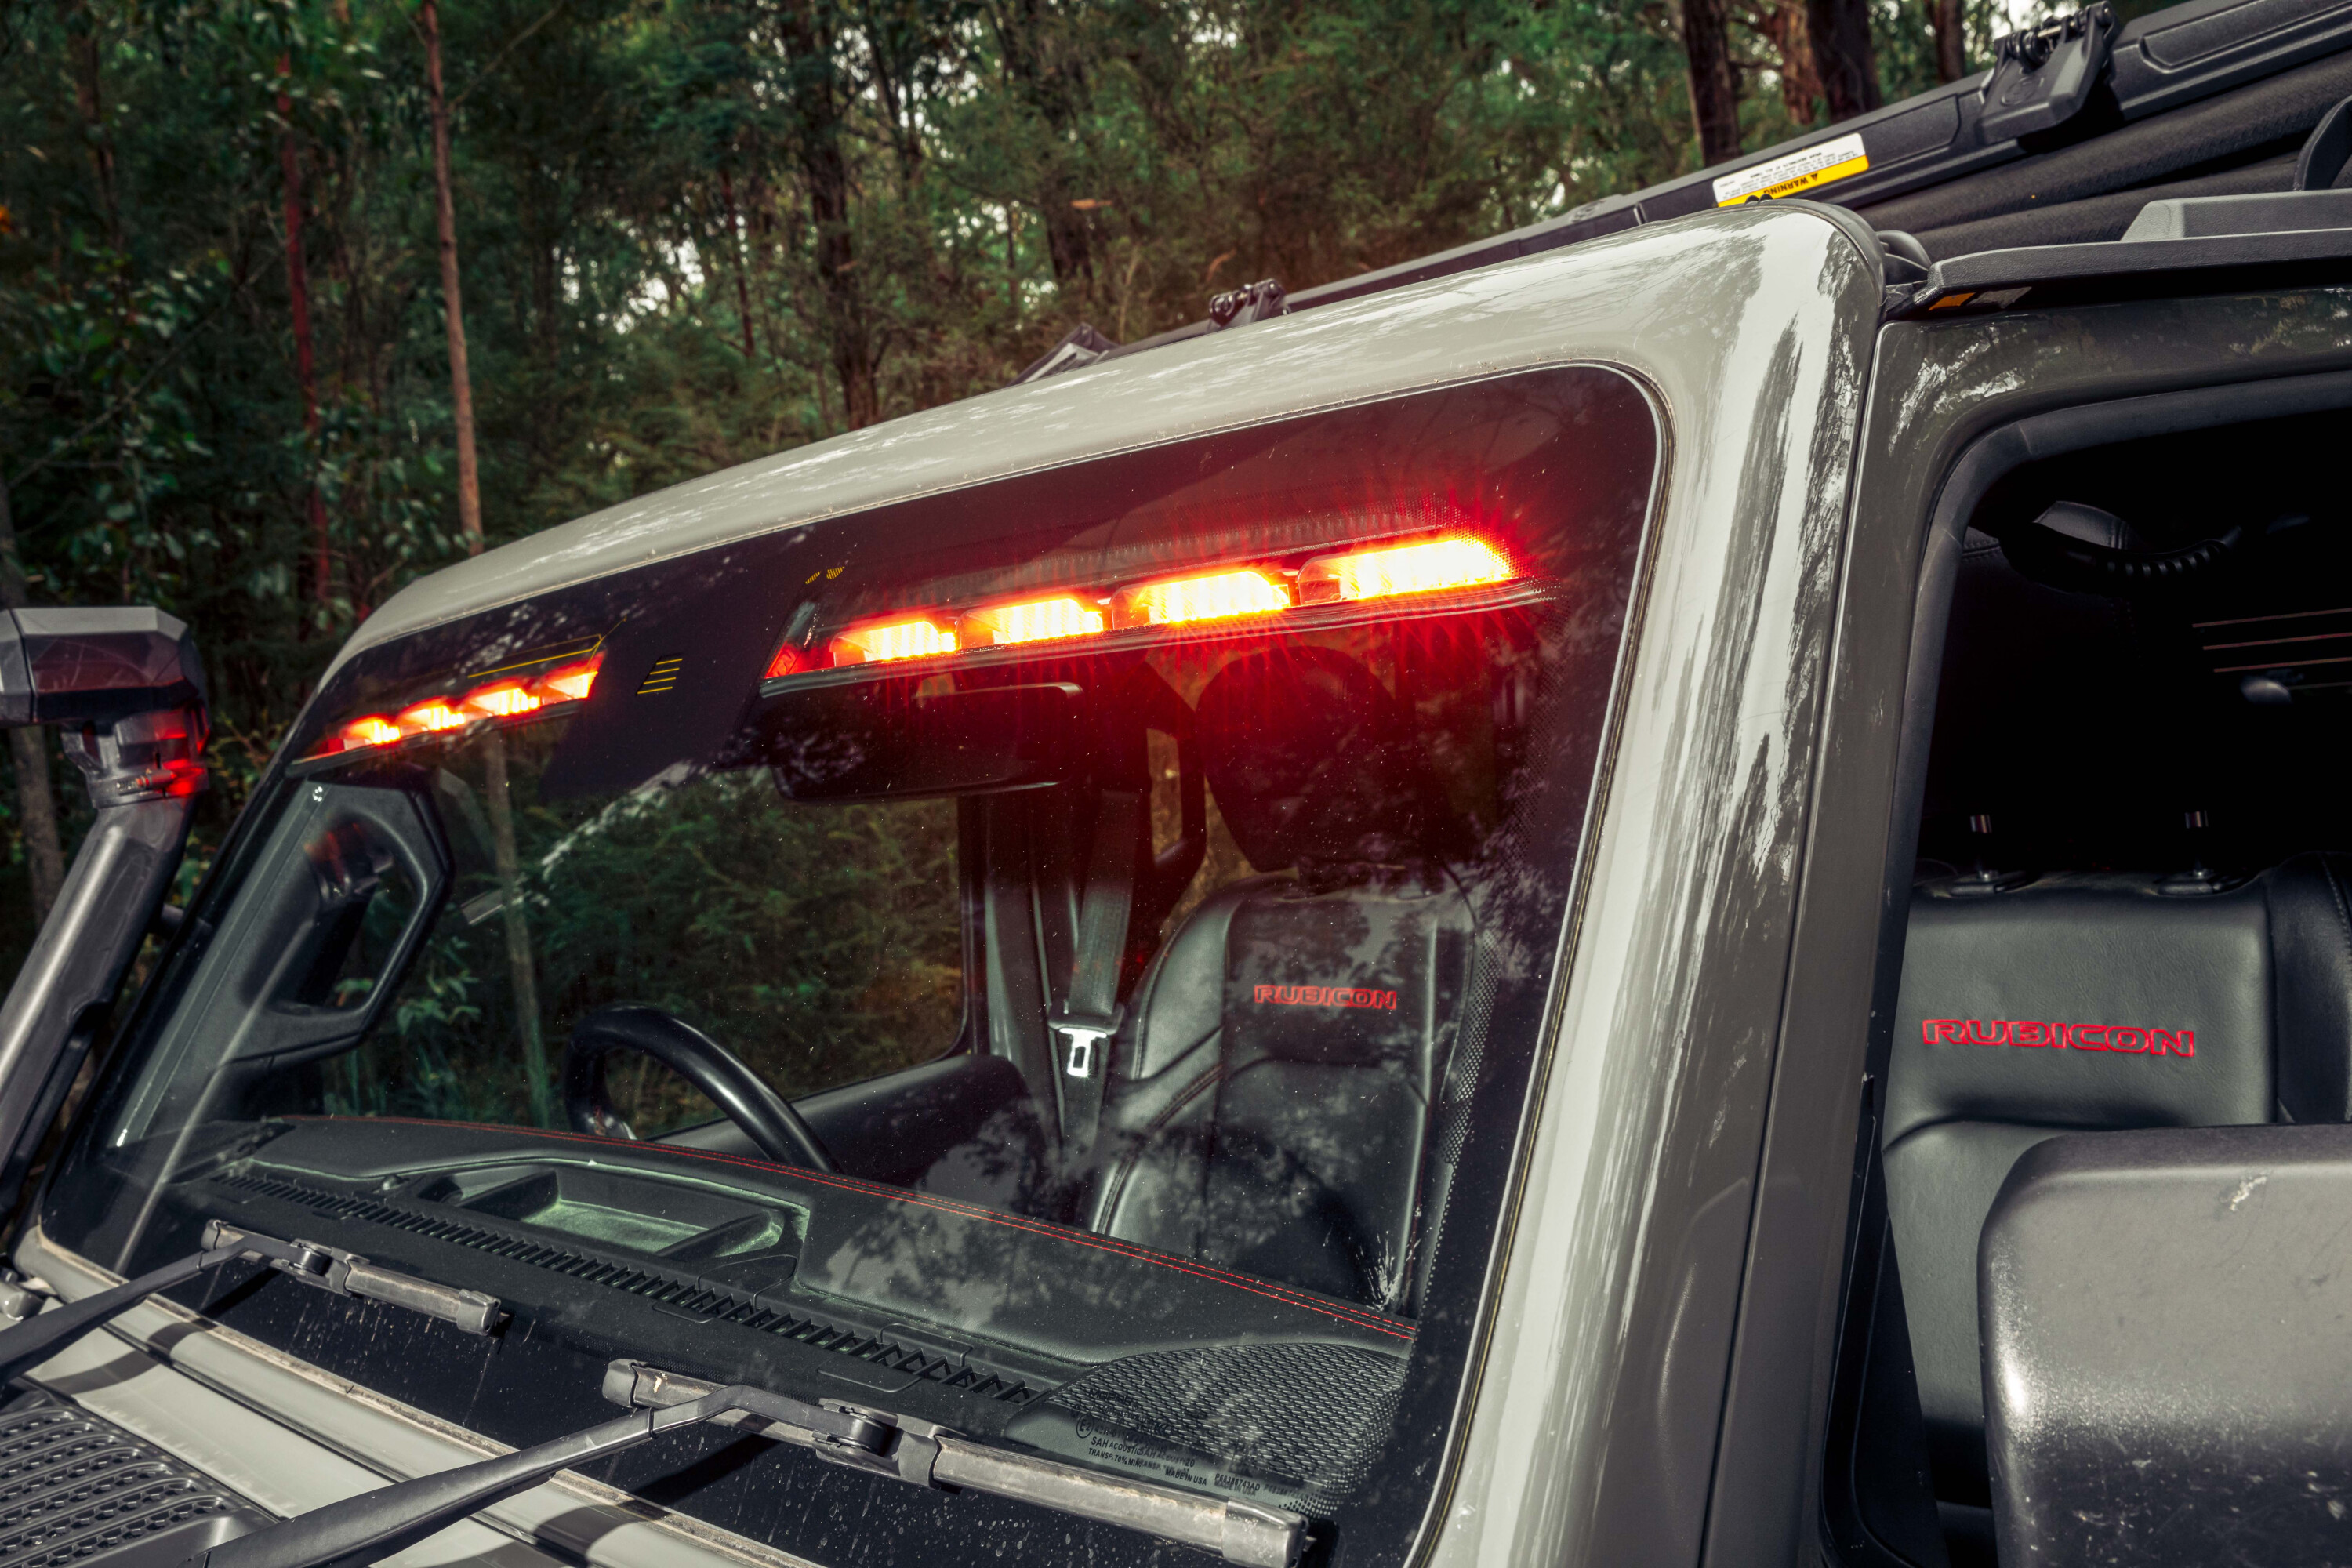
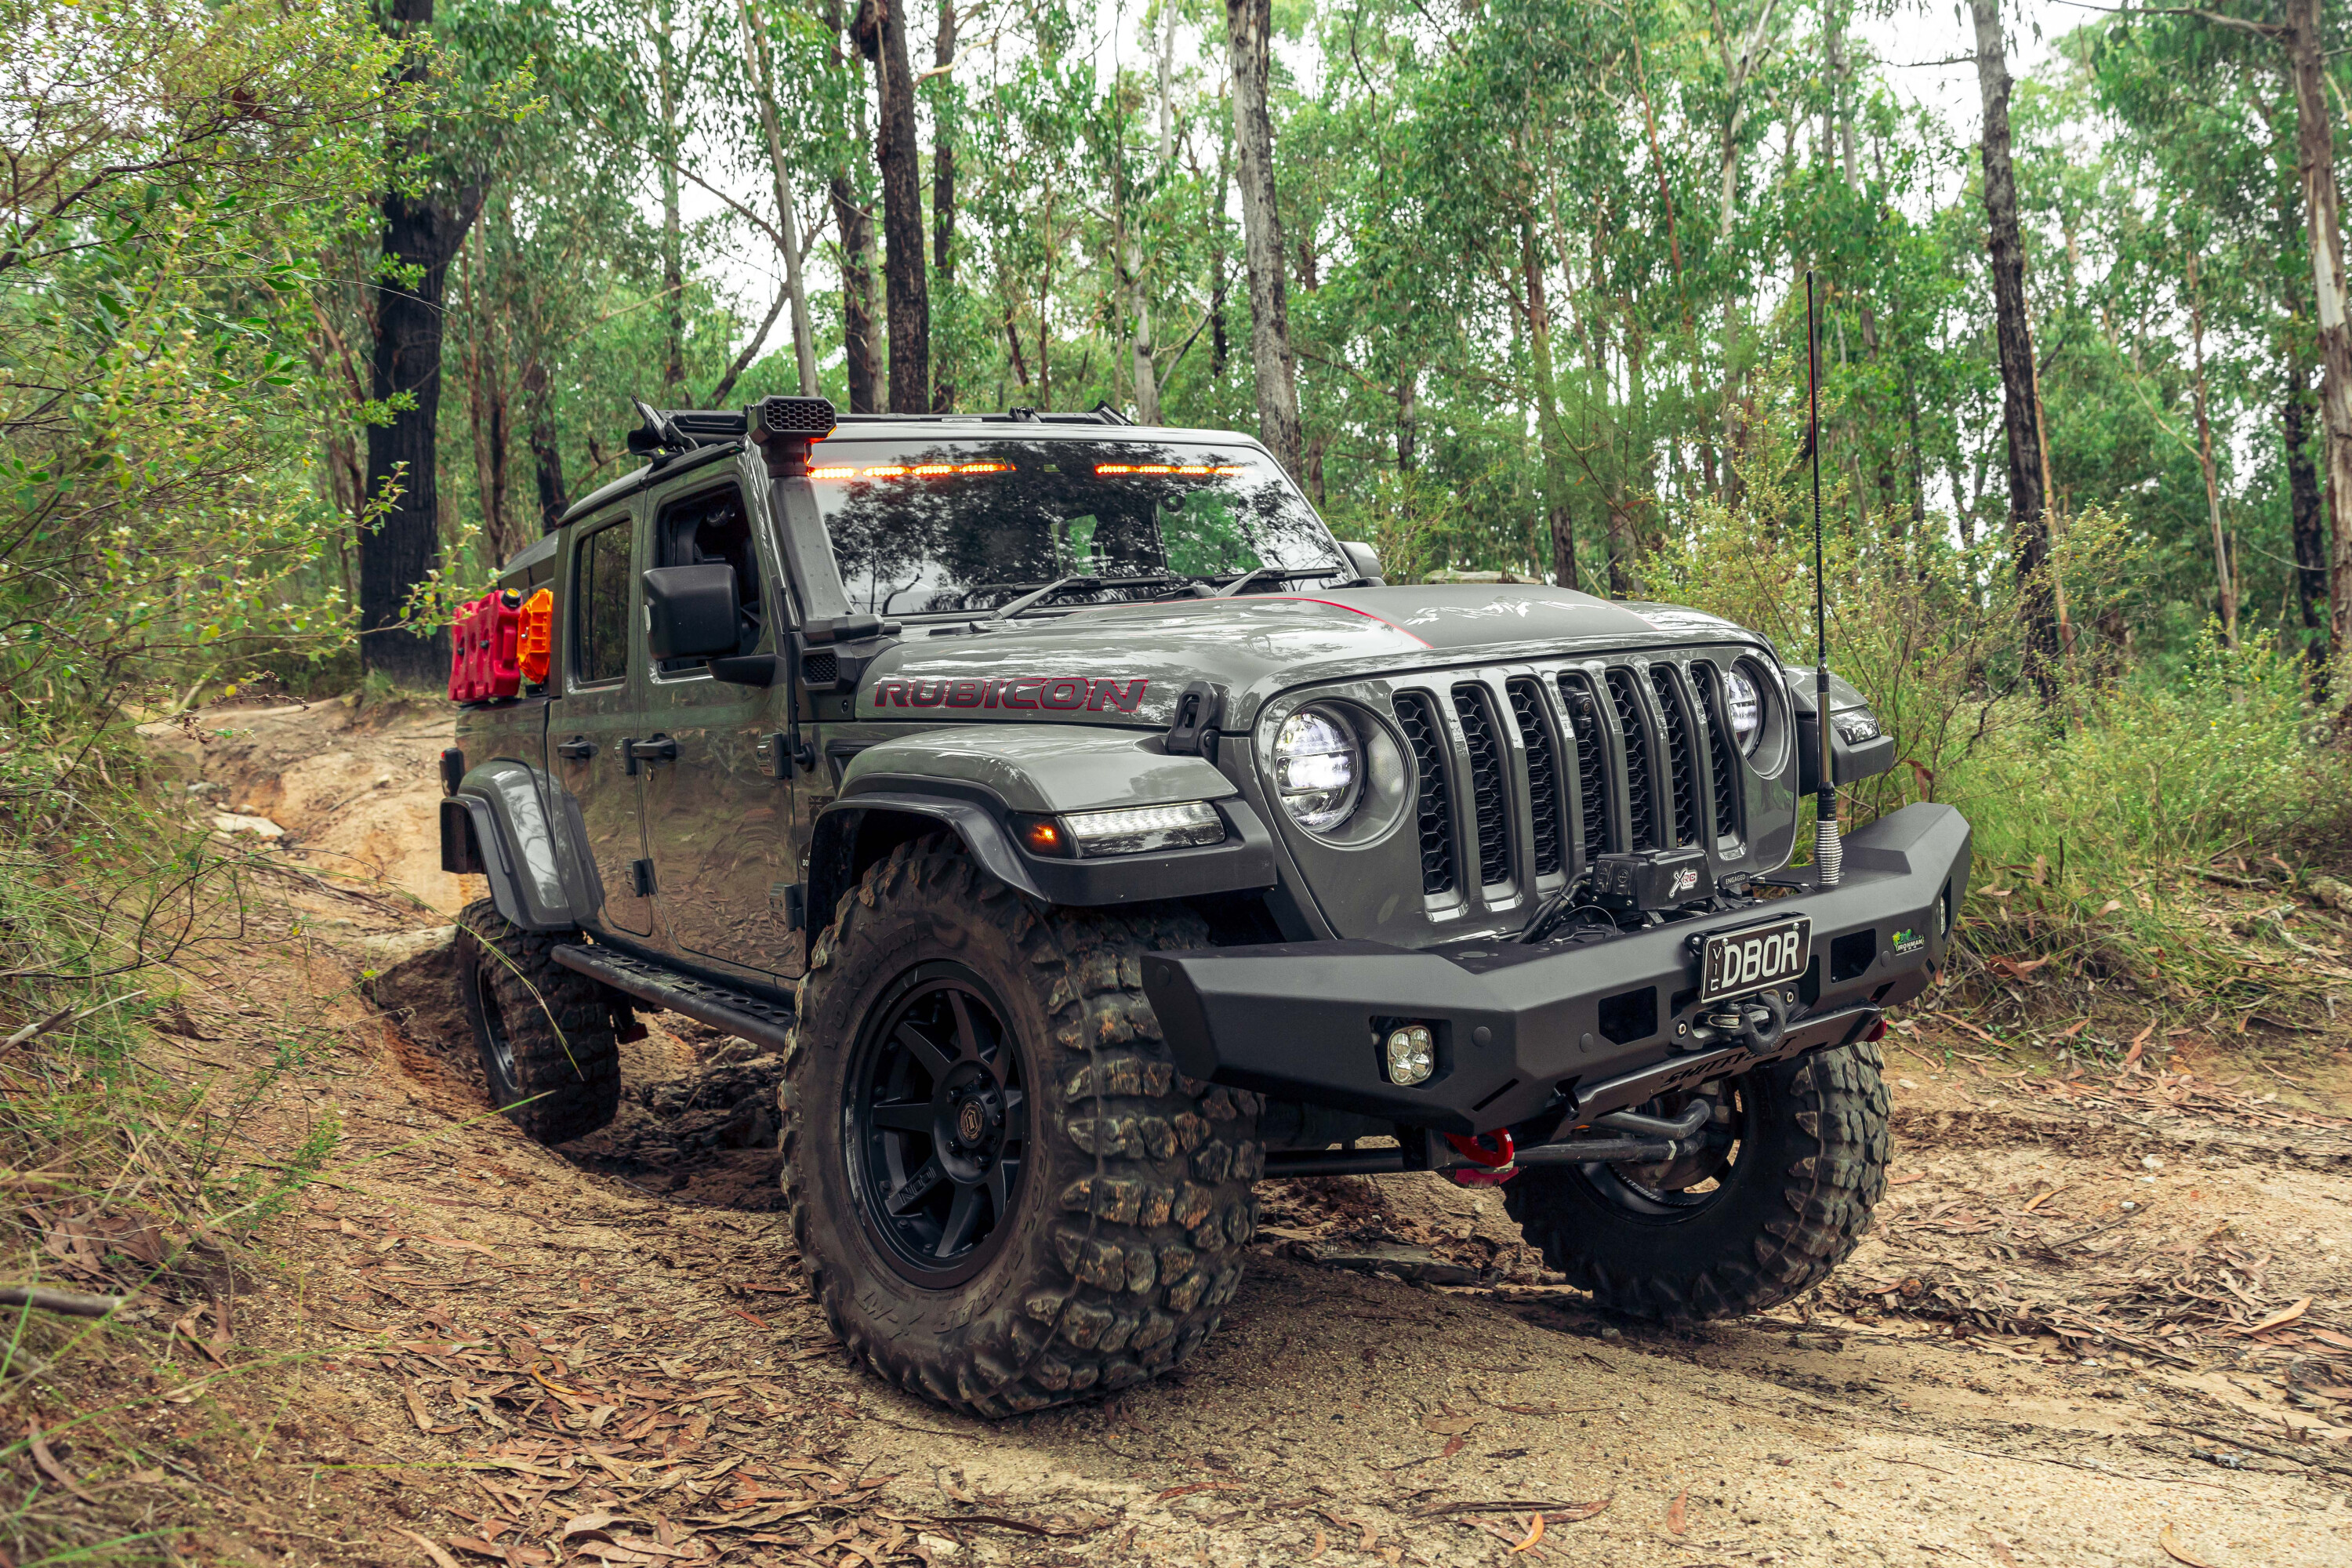
It’s no surprise that in the land of extreme off-road Jeeps, Aussie based Double Black Off Road (DBOR) has that same reputation for taking things to the next level.
What you’re looking at is one of the biggest and baddest Jeeps in the country. A ’21-plated Gladiator Rubicon with some insane modifications in places you’d never expect, and factory gear in places that’ll surprise you.
The perfect platform to show off not only how capable the Gladiator is from the factory, but how Double Black Off Road can bolt together an even better version.
1
Under the skin
For Jeep-heads, what’s hiding under the skin here should be of no surprise.
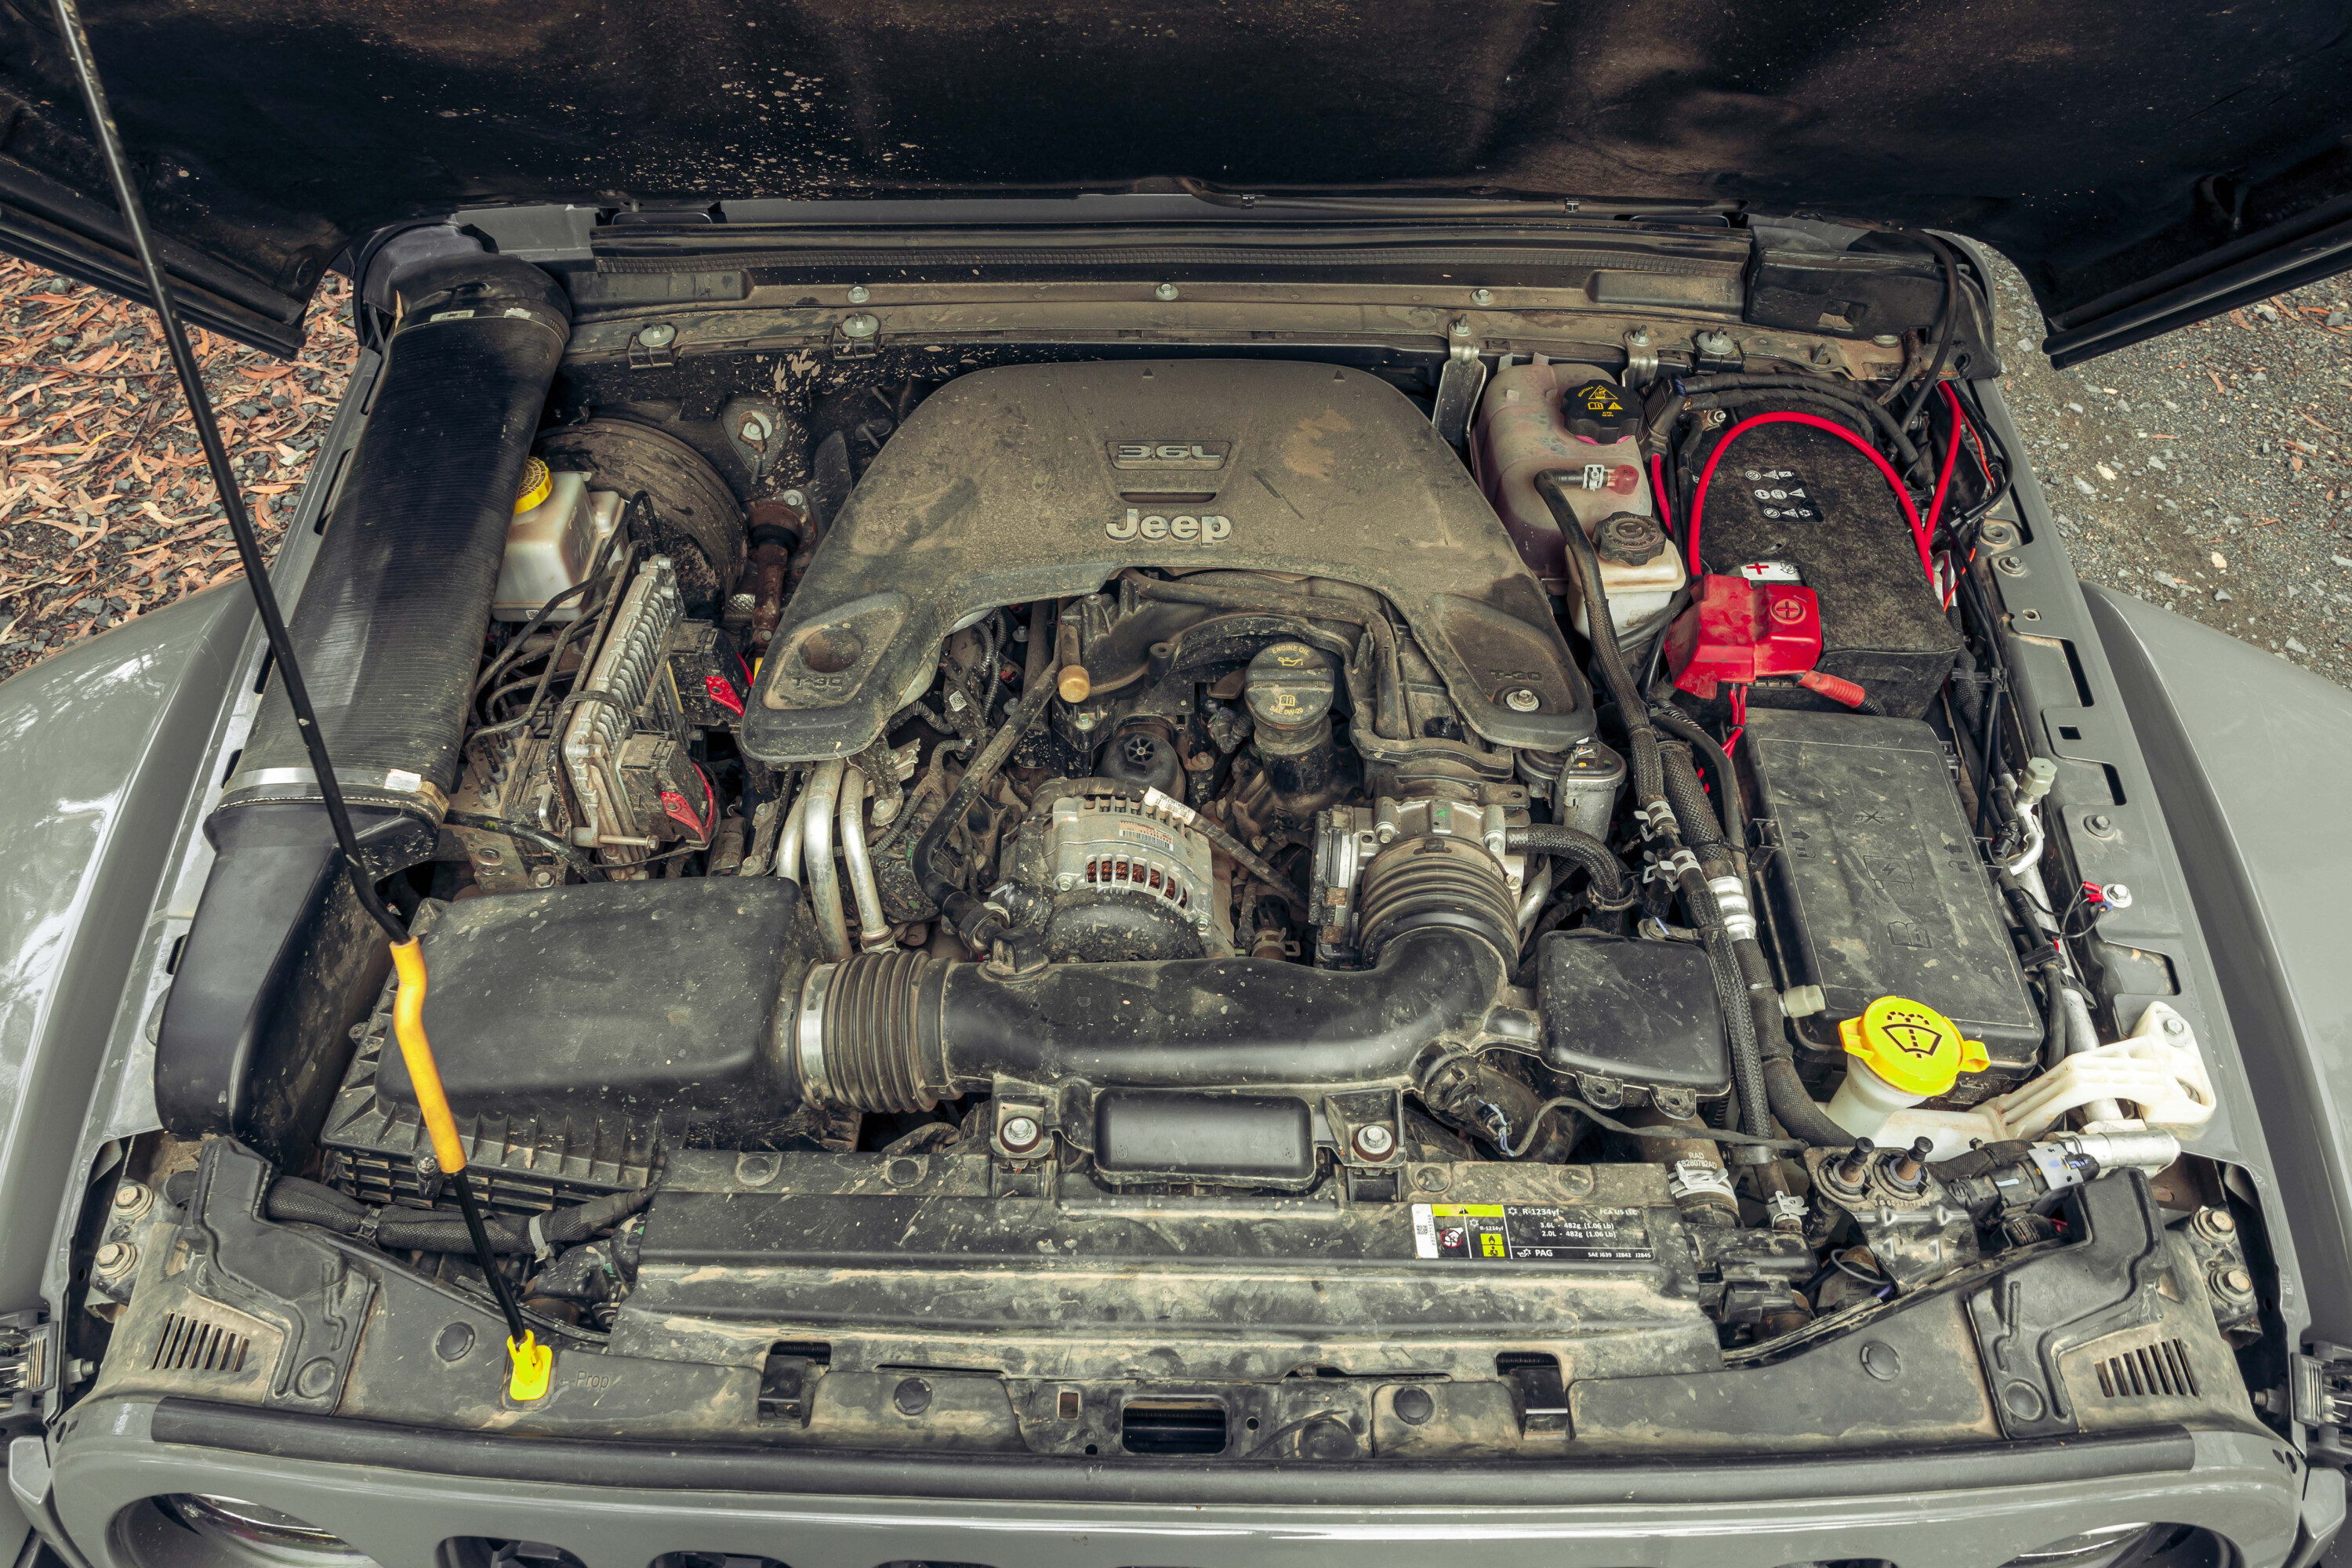
To everyone else, following that Rugged Ridge AmFib Snorkel down through the guards leads to the same 209kW 3.6L V6 and eight-speed auto combo found in all current Aussie-market Jeeps. From here, the Rubicon badge kicks things down a gear.
The ‘Rock-Trac’ 4×4 systems sports an epic 77.2:1 crawl ratio thanks to lower 4:1 gears in the transfer case; the base model Jeeps make do with a paltry 2.72:1.
1
Power is sent front and back through DBOR-tweaked driveshafts to heavy-duty Dana M210 and M220 axles, a serious upgrade over the M186 and M200 axles found in non-Rubicon models.
In true Rubicon fashion, both front and rear diffs have 4.1:1 diff centres wrapped around factory lockers, providing serious crawl control compared to the 3.45:1 and open diff combo in the lower tiers. But that’s about where stock ends…
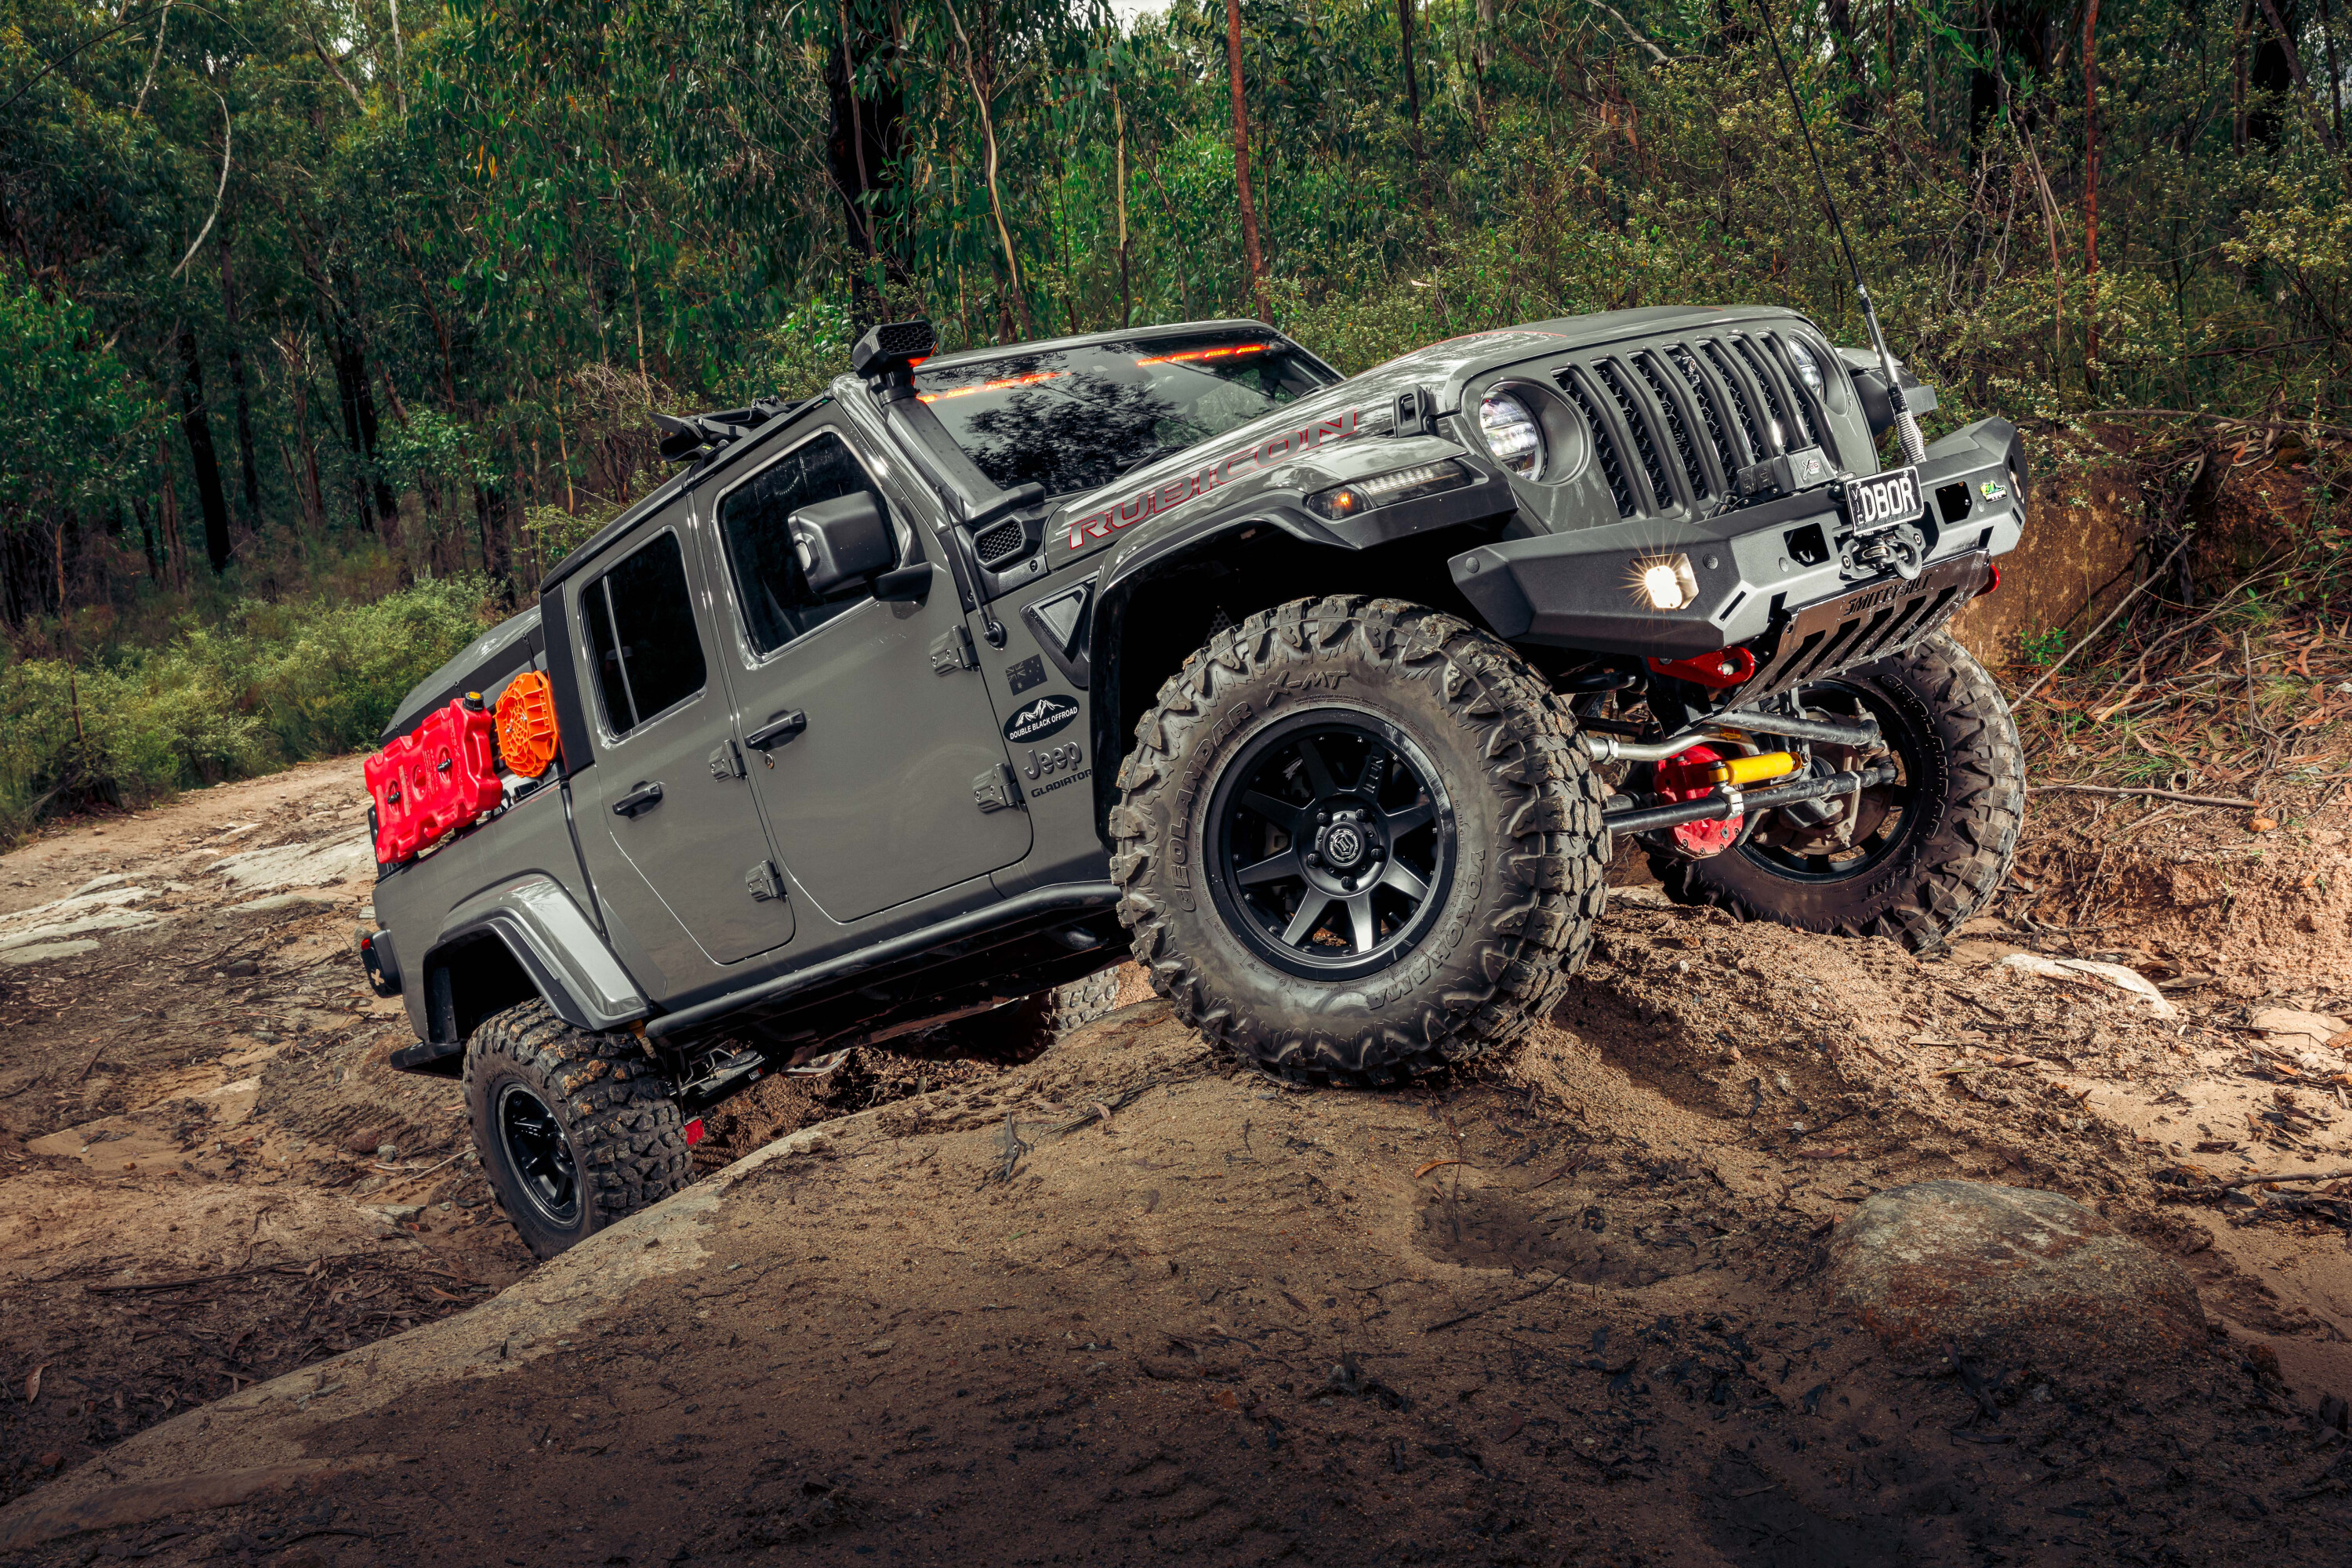
Where you’d normally find coil springs front and rear, DBOR has fitted up a full AccuAir air-ride system with an air bellow on each corner.
1
Paired up with a suite of JRi shocks, the infinitely variable spring rate air springs means the ride is always smooth as butter.
Height sensors on each corner link up with a full on-board air system allowing the Jeep to be dumped into the weeds for easy loading, jacked up five inches above stock to clear obstacles on the trail, self-levelled for uneven campsites, and lifted up to four inches when hitting the blacktop at the end of the trails.
Paired up with a suite of JRi shocks, the infinitely variable spring rate air springs means the ride is always smooth as butter. An 18L air tank and Viair 485C compressor combination serve double duties for feeding the air suspension as well as for tyre inflation and air tools on the trail.
1
Big hoops
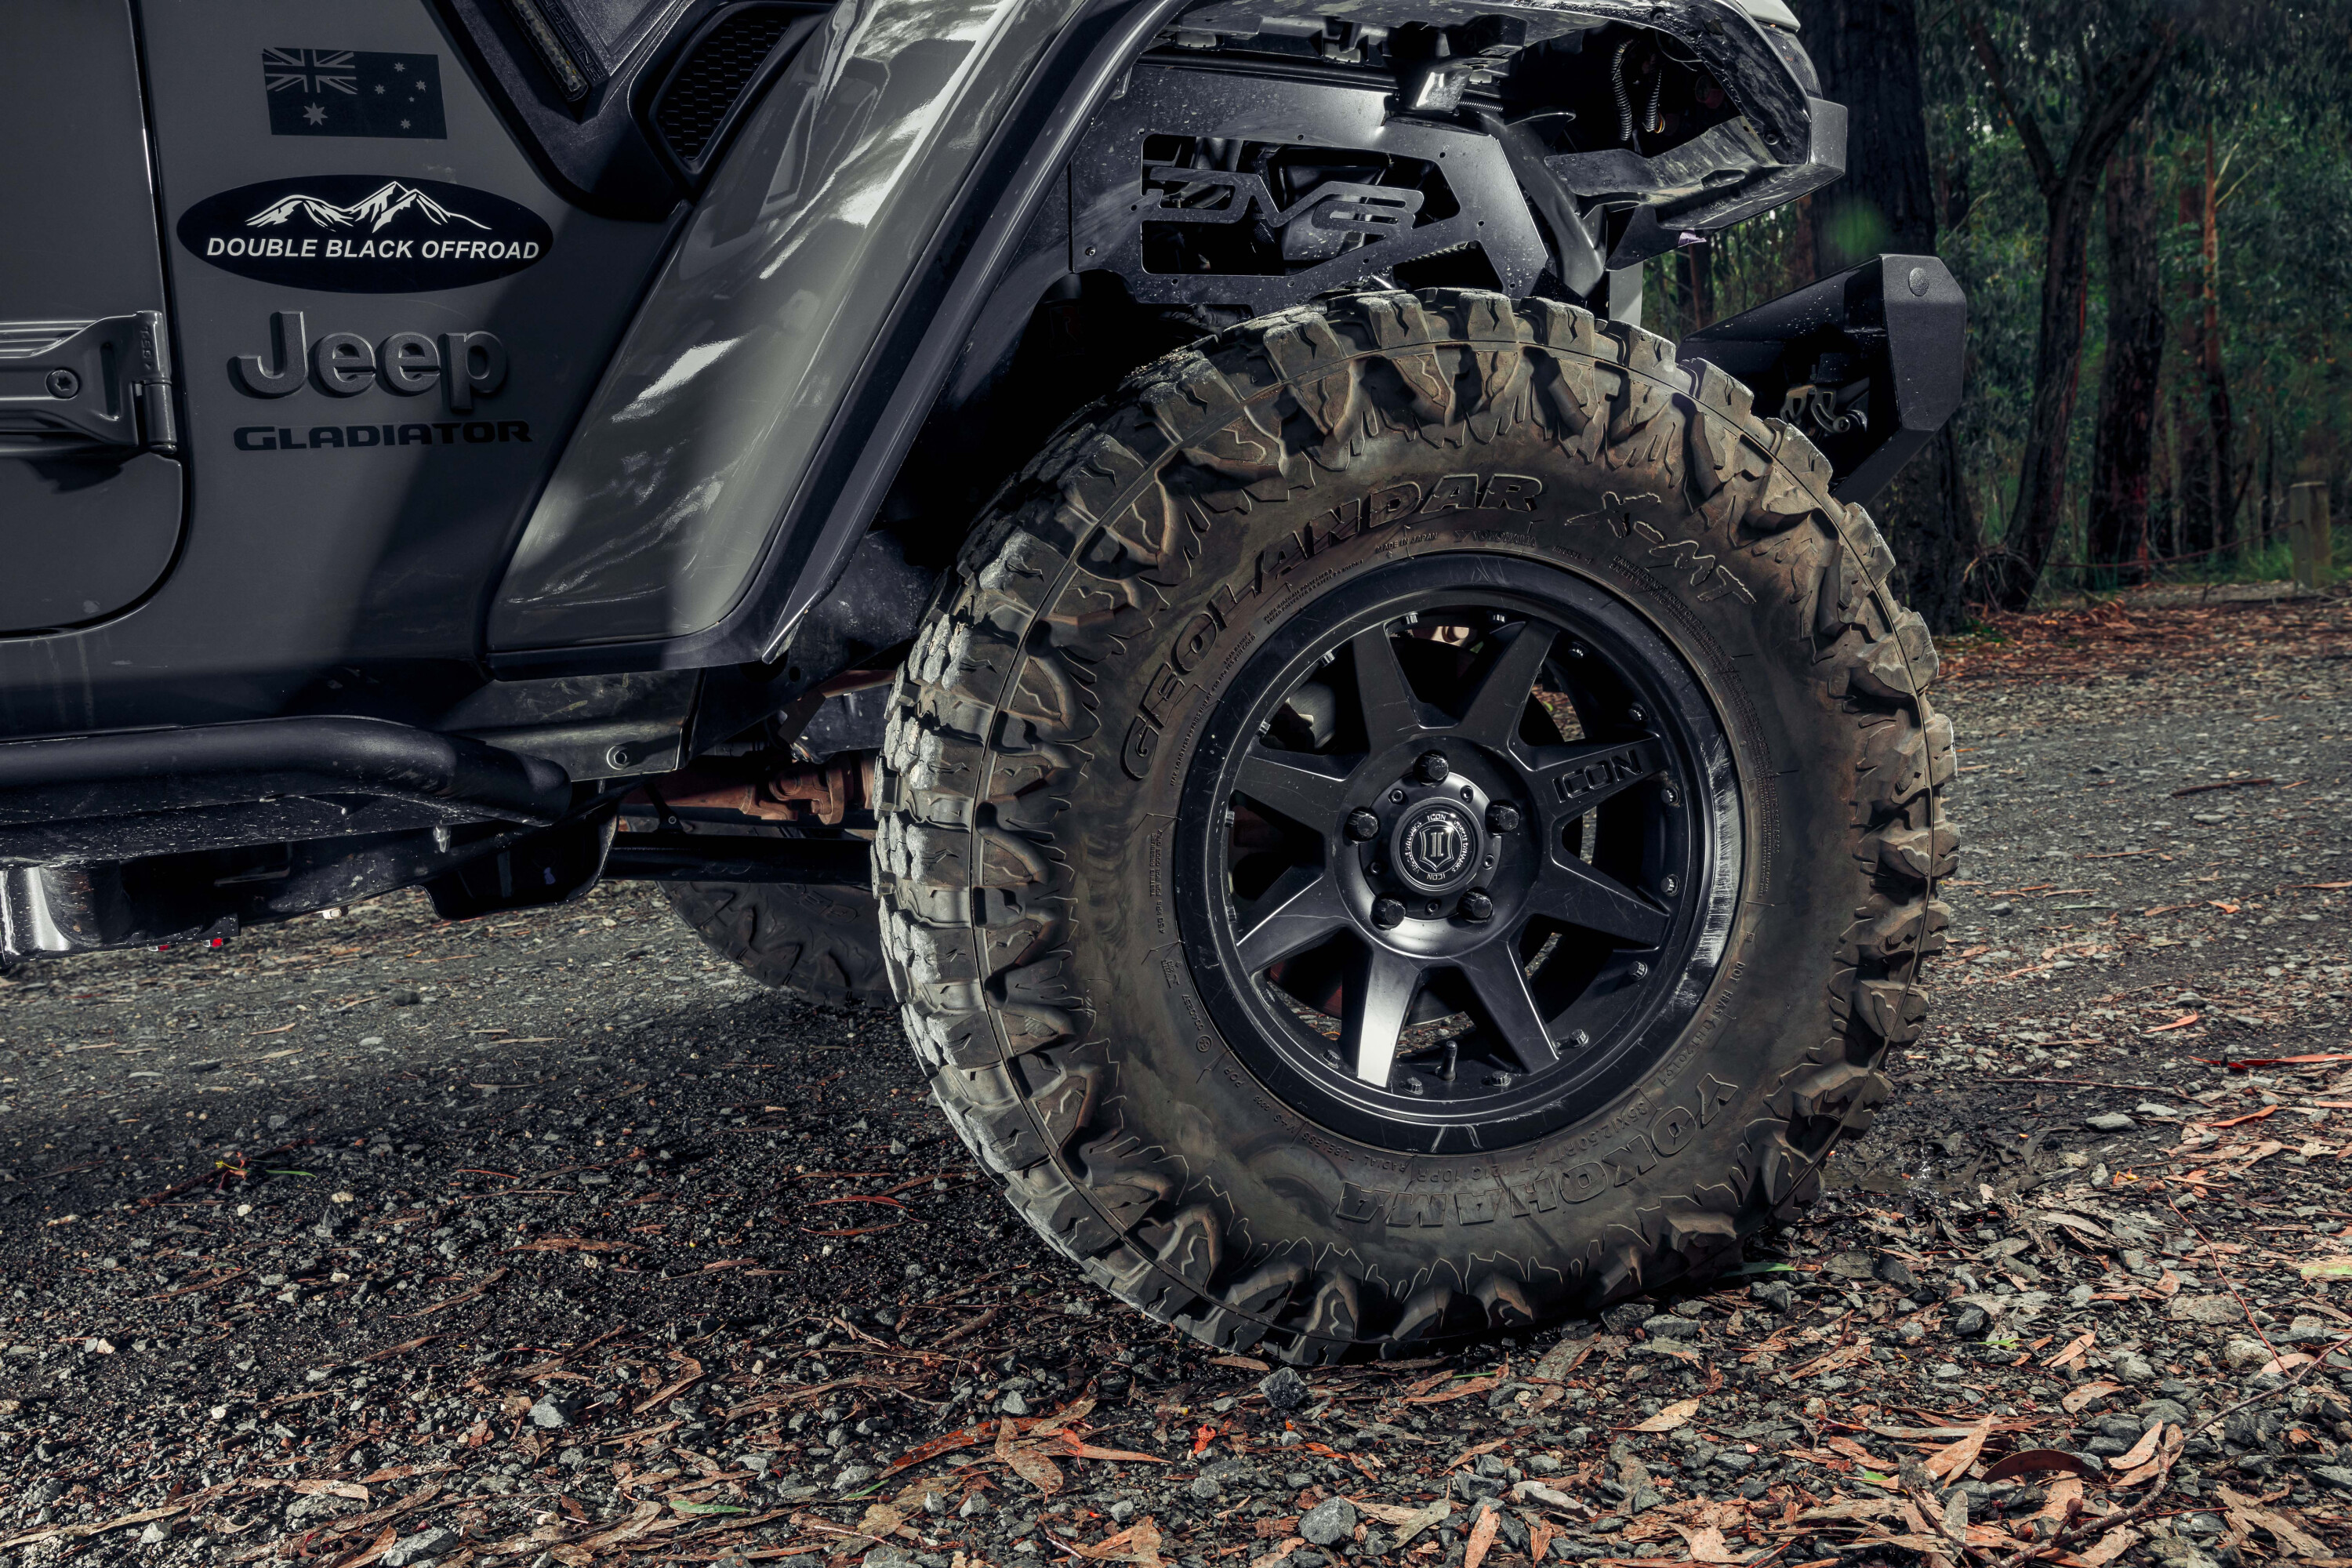
To make the most of the newfound articulation and ground clearance, DBOR has binned the factory 32-inch tyres and opted for a set of hyper aggressive Yokohama Geolander X MTs in a far more suitable 34.4-inch (315/70R17) size.
They’re held firmly in place by one of the most unique wheel designs we’ve seen in years; dubbed ‘InnerLock’, the Icon Rebound Pros fitted to the Jeep have a trick feature where 16 o-ring sealed bolts run in through the outer face of the rim, pinning the tyre’s bead to the rim without the clunky and questionably legal design of a traditional beadlock wheel.
To keep the chunkier wheel and tyre combo in the shade, DBOR has swapped out the factory wheel arch flares on all four corners for MP Concepts High Clearance Fender Flares.
1
With an OEM look, they ride a full two-inches higher than stock allowing for big tyres and bigger flex without scrubbing.
DBOR two-inch Fender Extensions help cover the increase in track width, and MP Concepts sequential turn signals give the Gladiator a sleek look.
1
Hardware
Moving up front and the Gladiator cops an unholy union of Aussie and US parts that just seem to work perfectly together.
Ironman 4×4’s Aussie designed and engineered sleek, low-profile Raid bar takes pride of place, housing a Smittybilt 10k winch that comes to the rescue when the DBOR team finds 79s on tracks they don’t belong on.
The front-end is where we’d normally talk about driving lights too, but the Gladiator’s forward vision comes from inside the cab. Yep, hiding in behind the windshield is a monster 50-inch LED light bar from Quadratec, with a solid seal against the windscreen, the full 10,200 Lumens firing forward with a variety of beam patterns and colours all without the annoying whistle of an externally mounted light bar.
1
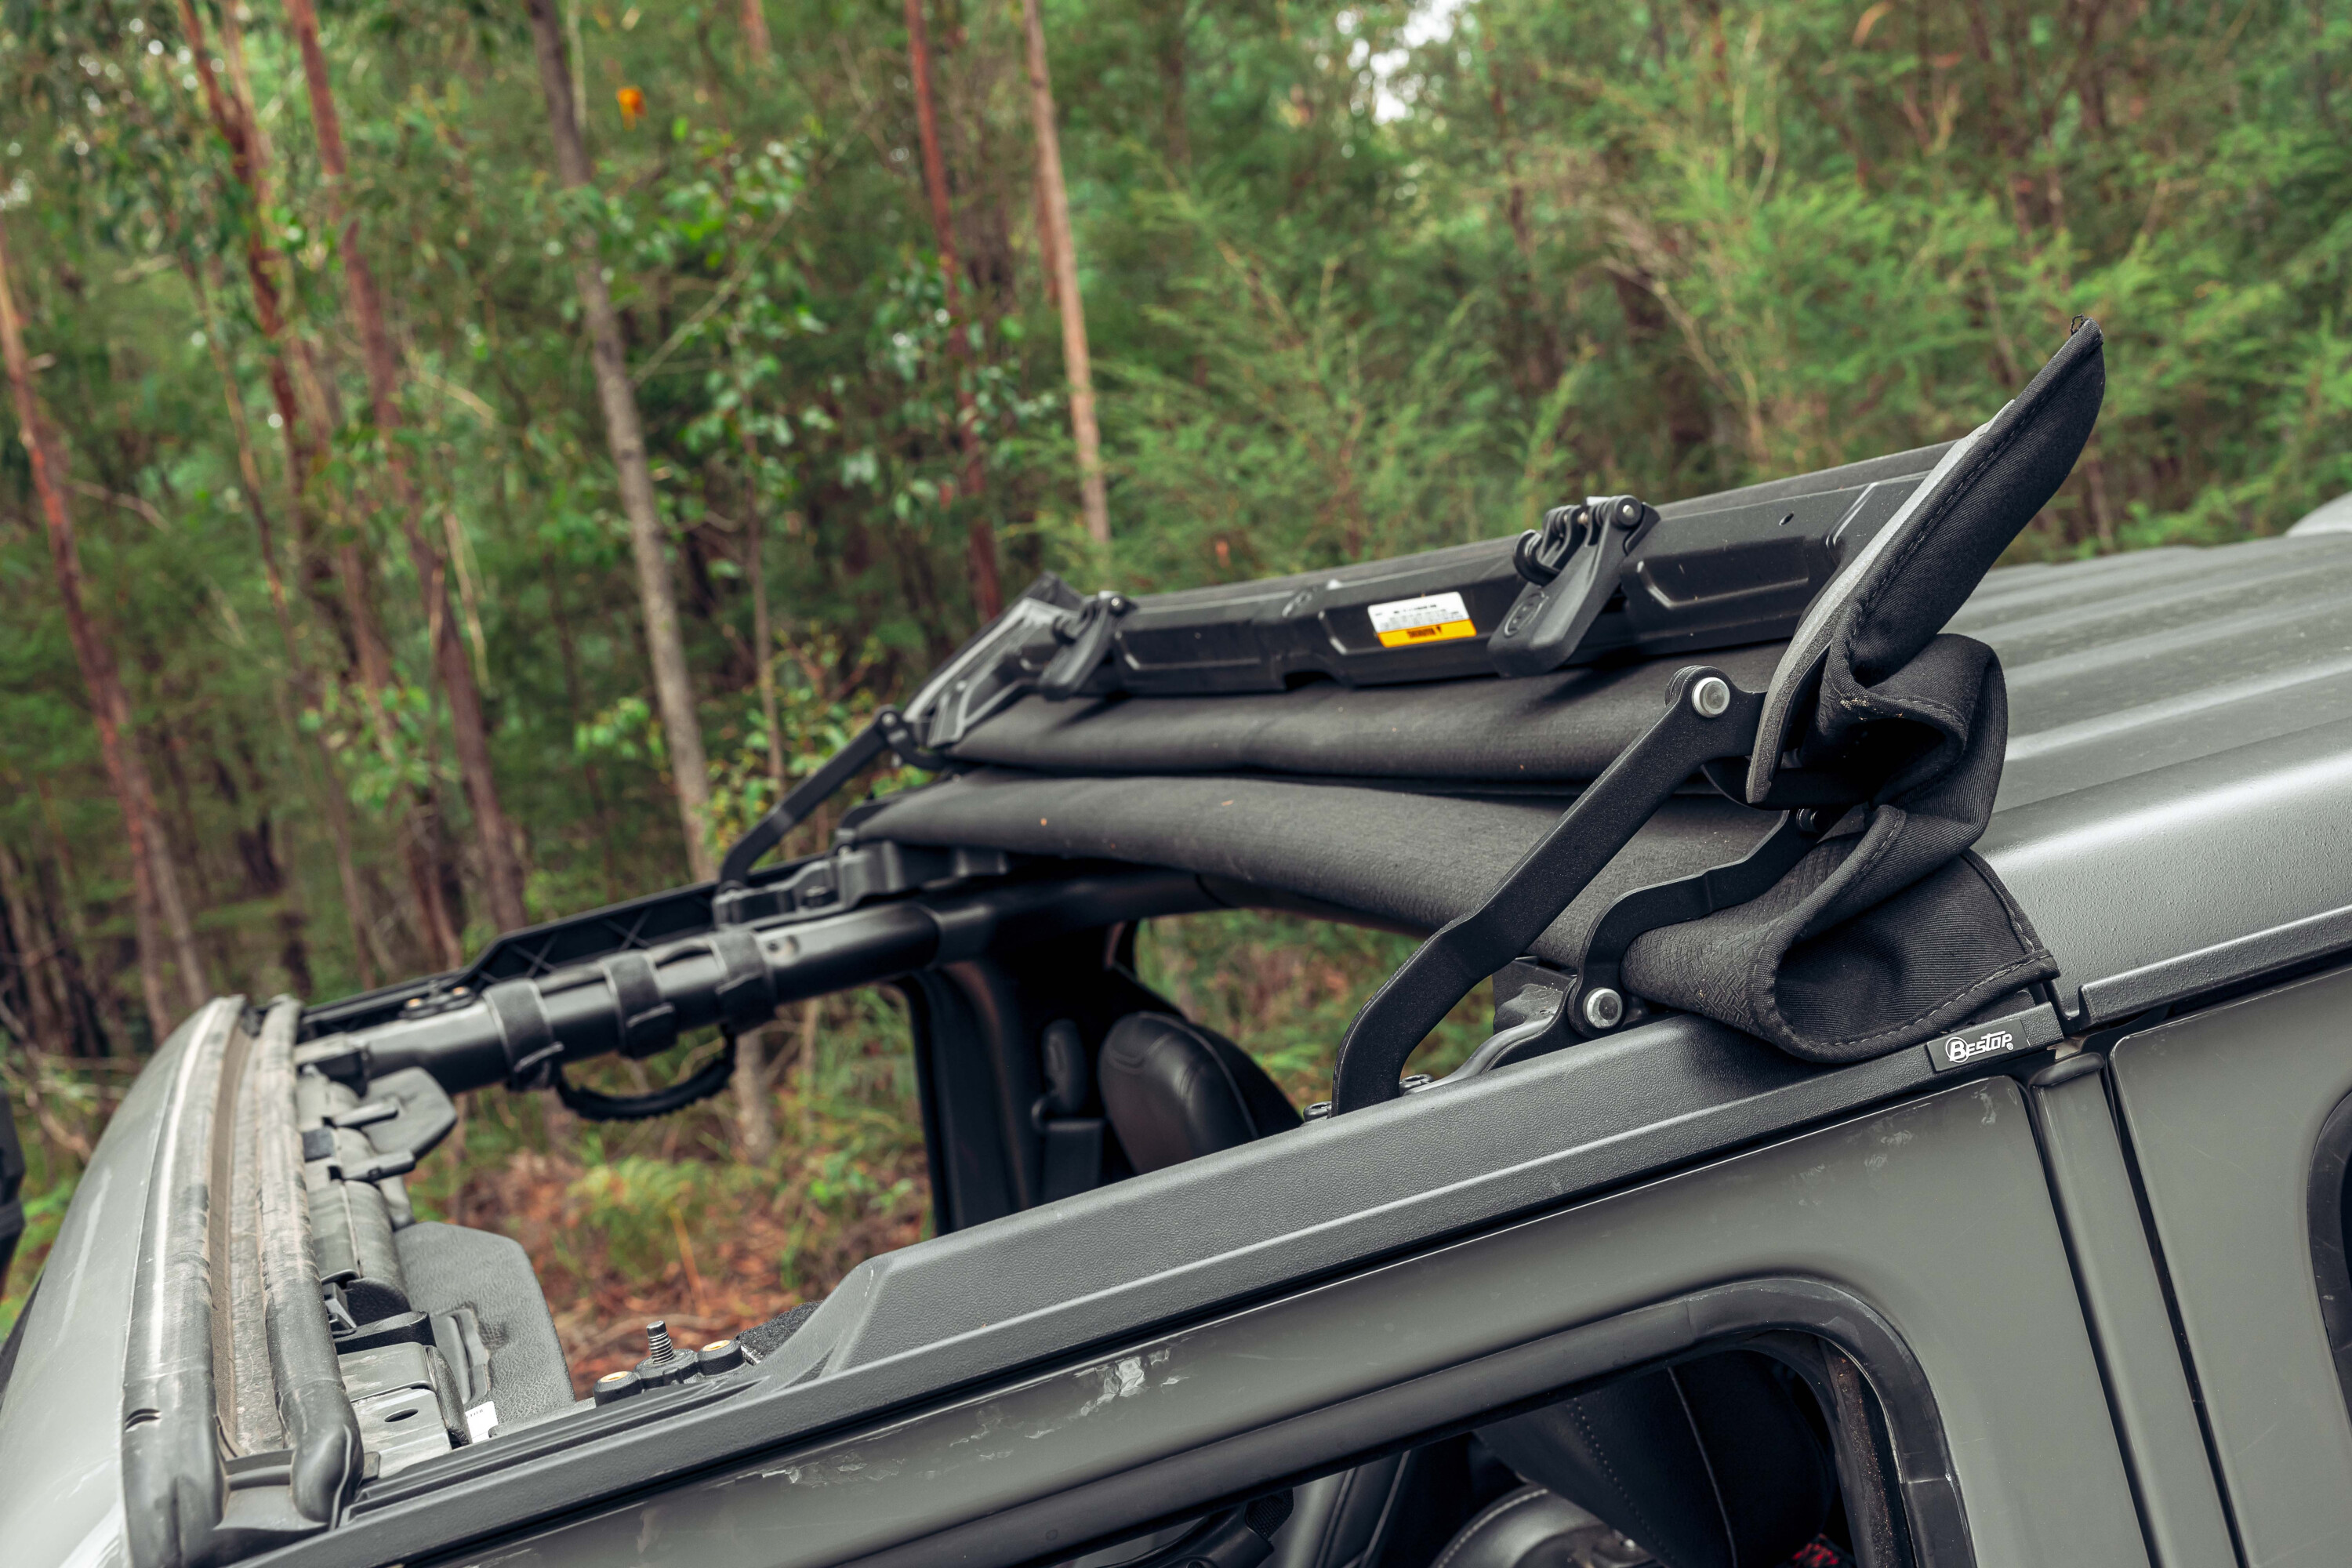
Moving back along the roofline and DBOR has worked more aftermarket magic with a Sunrider setup from Bestop.
Replacing the bulky fibreglass Freedom panels above the driver and passenger, the Sunrider lets the crew quickly and easily open up the top for summer wheeling without needing to stow half a roof on the back seat.
1
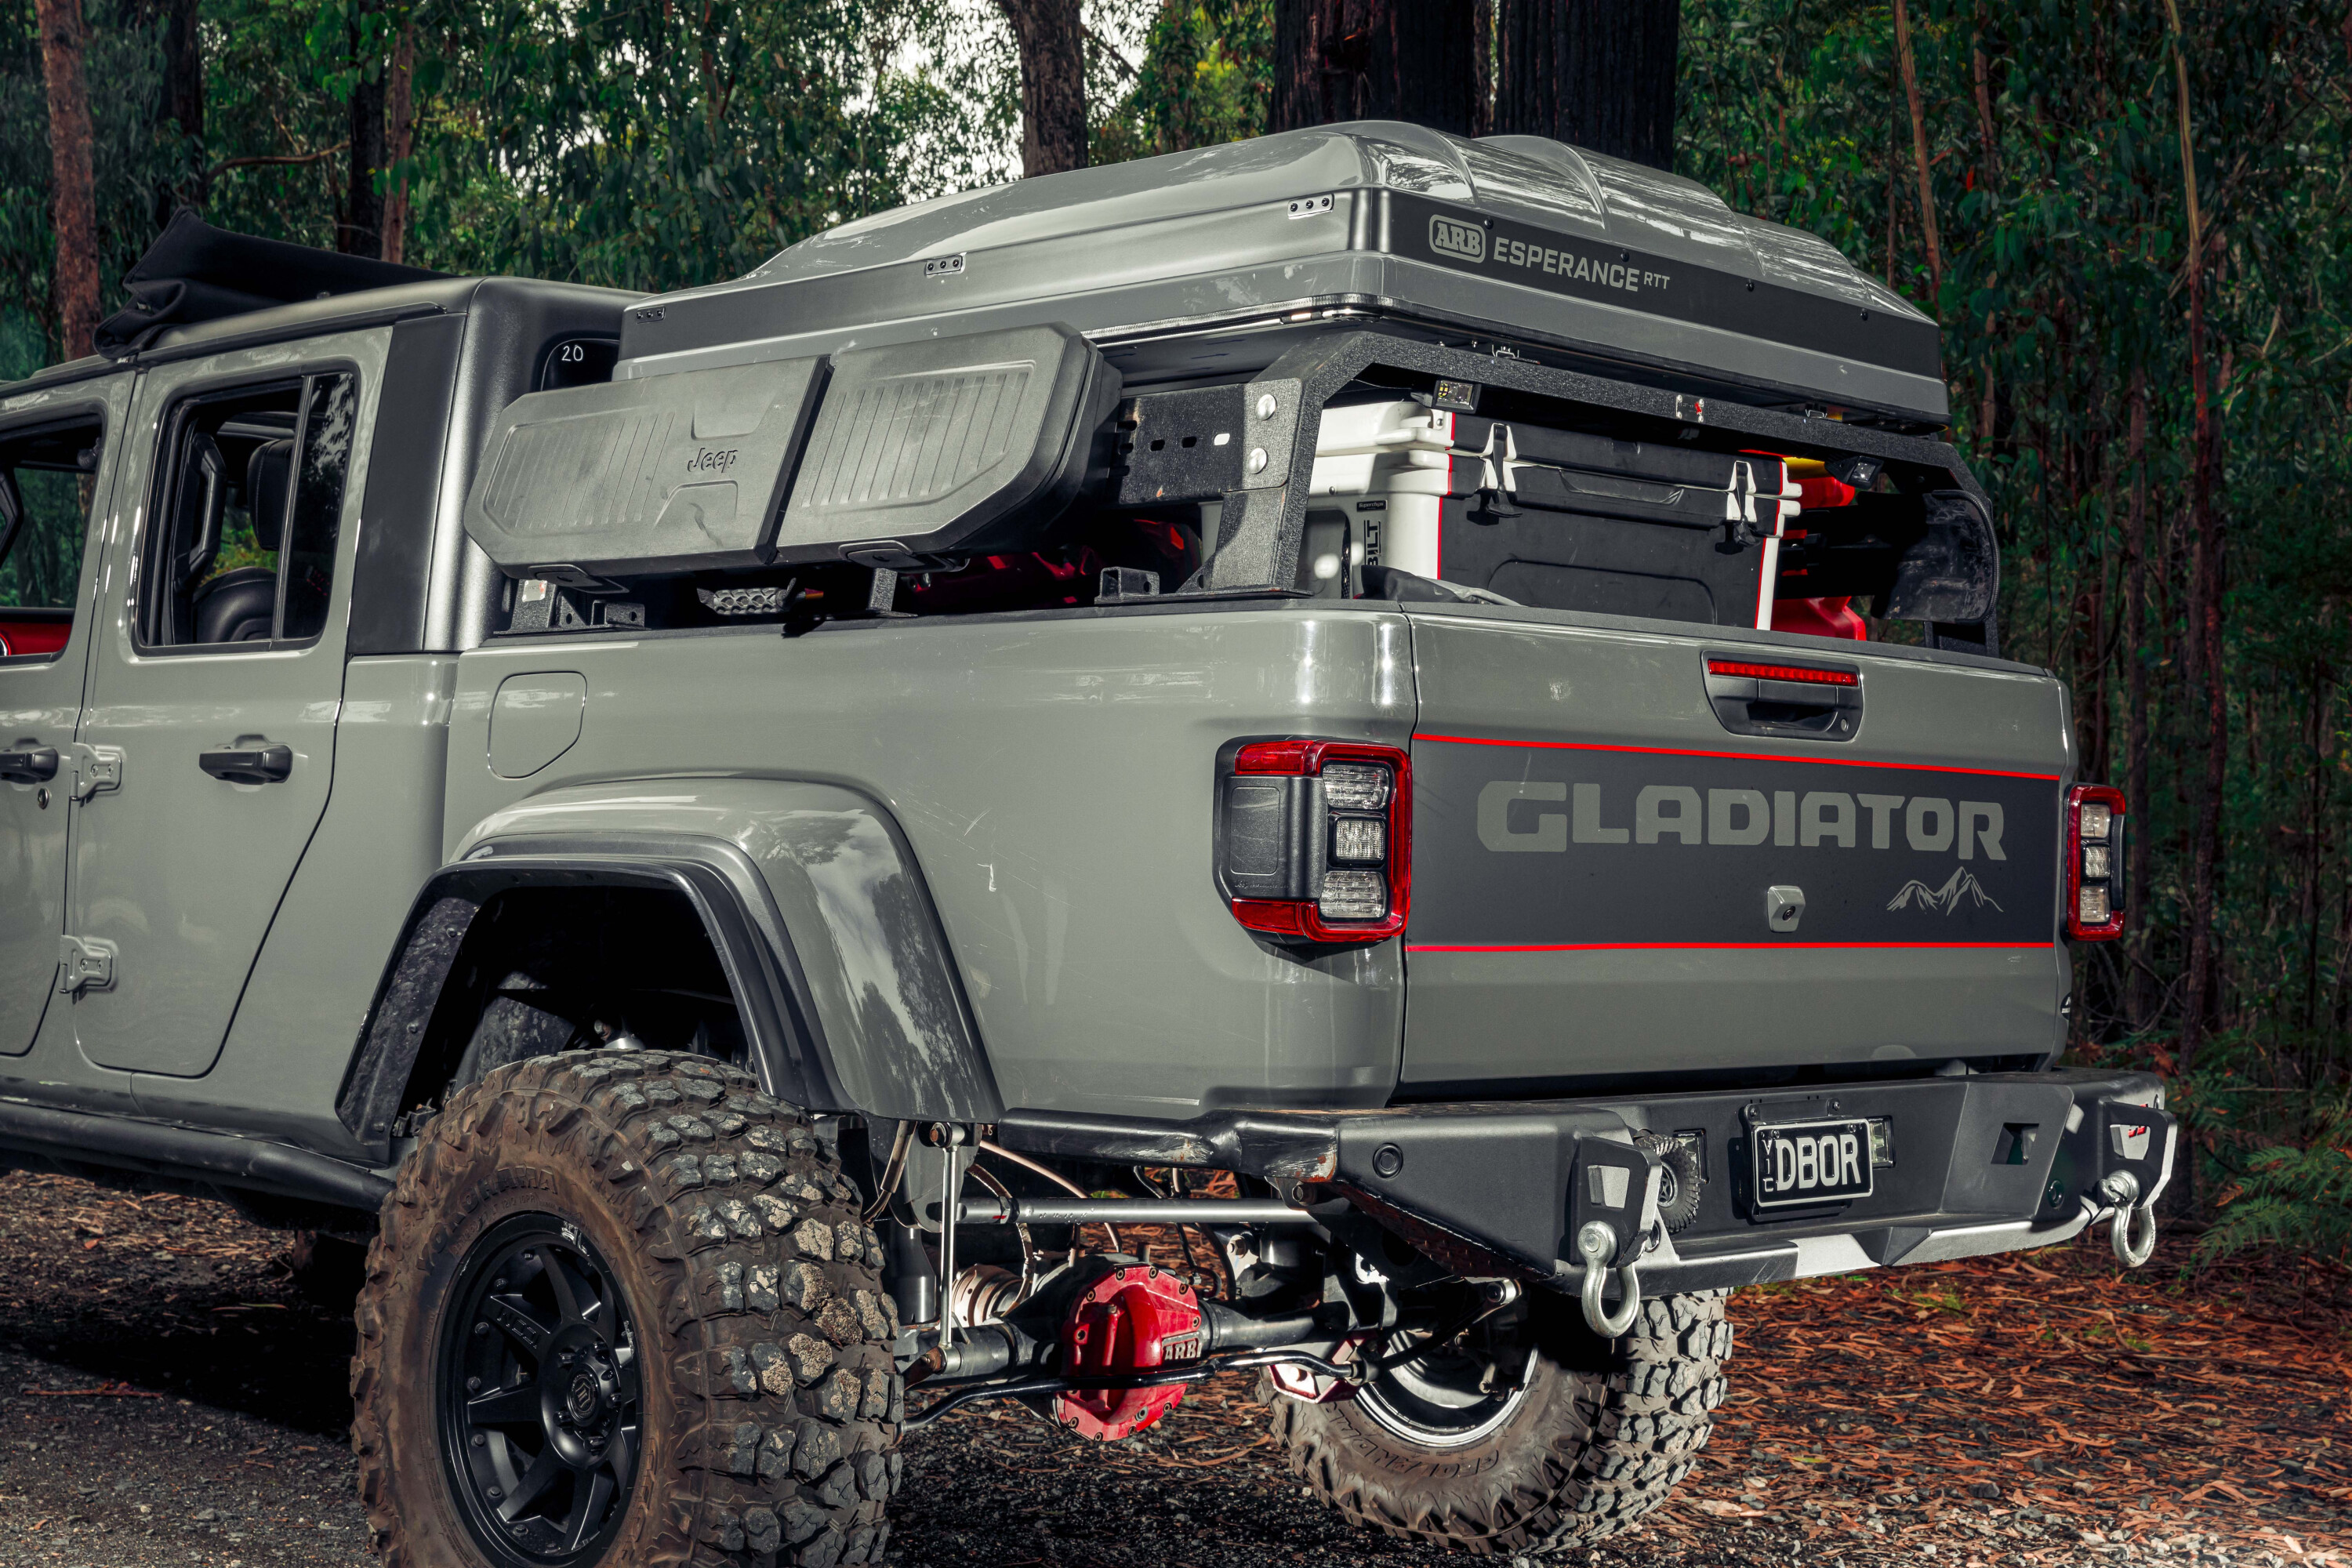
Out back
Out the back DBOR has left no stone unturned, slicing and dicing not only the factory tub with a quarter chop, but modifying the Smittybilt XRC Gen2 rear bar to sit two inches higher and tighter for a more aggressive departure angle.
Opening that big Jeep tailgate reveals one of the most unique storage systems on the market today (seeing a theme here?).
Pieced together by US-based Decked, the HDPE setup is rated to a full 900kg payload on the platform thanks to a galvanized steel subframe, while the twin full length drawers themselves boast full weatherproofing, making them the perfect place to stash recovery kit and any miscellaneous camp goodies.
1
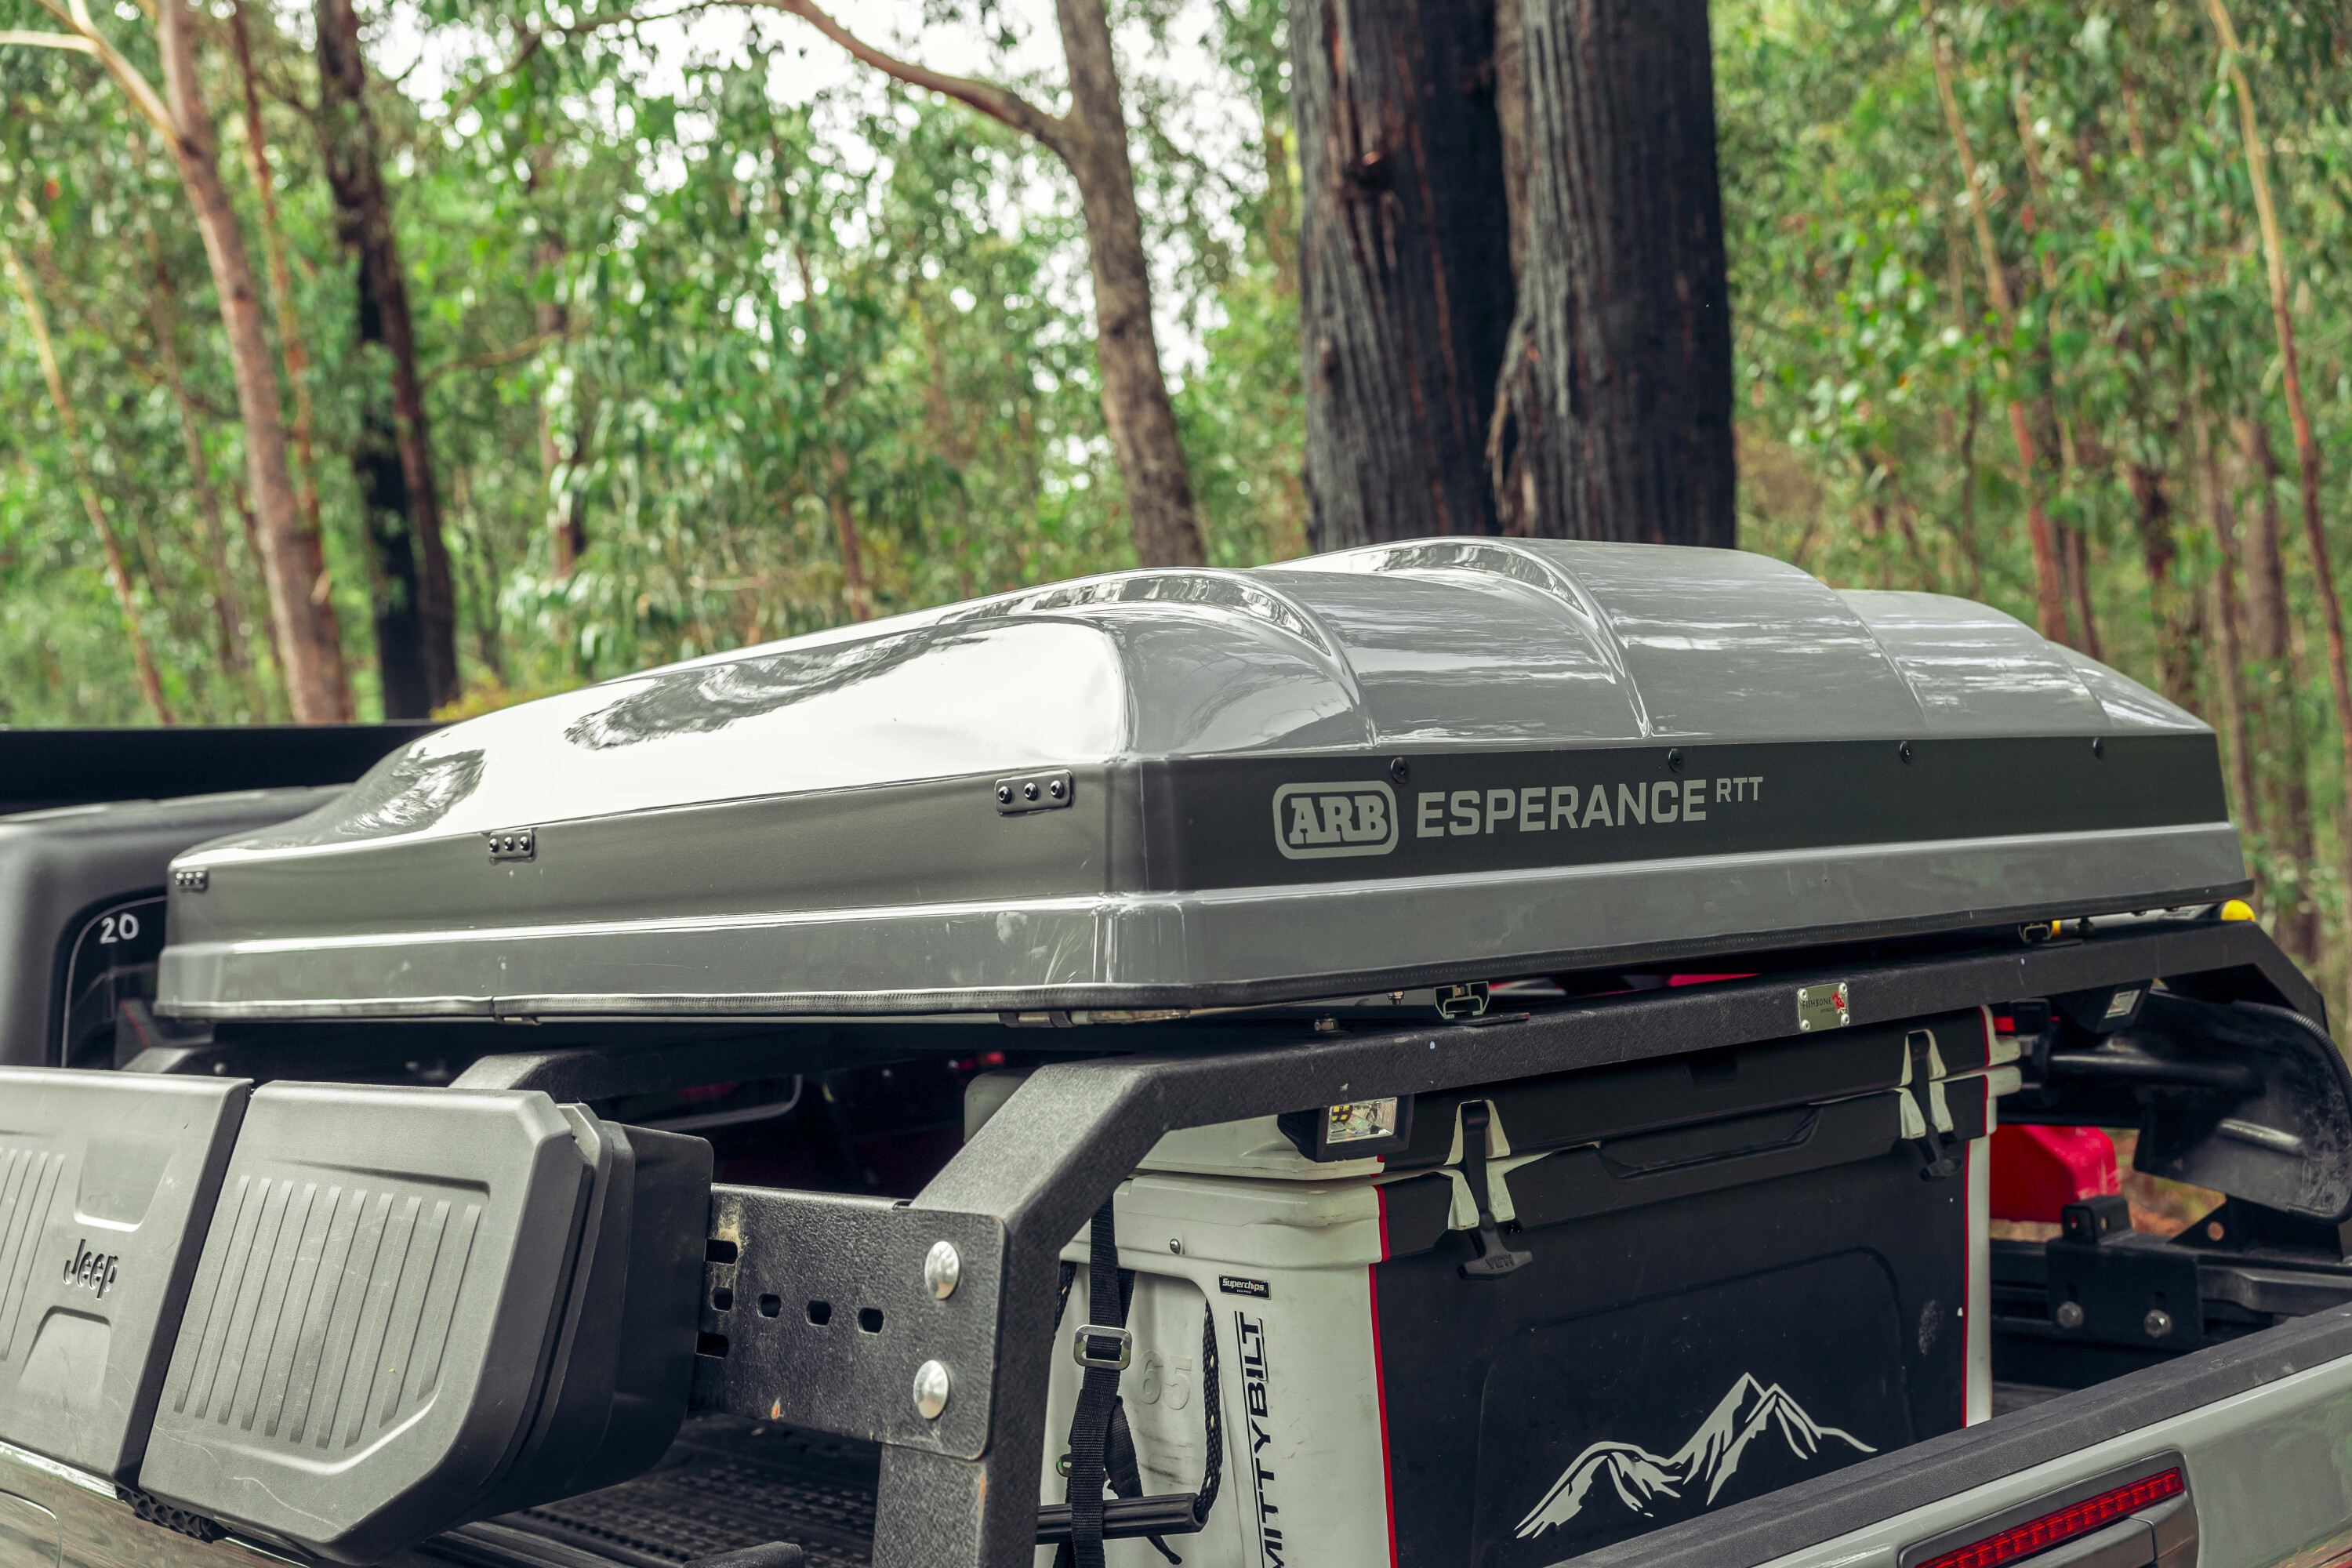
Up above the drawers a Fishbone Offroad Half Tackle Rack boosts the storage options with an ARB Esperance rooftop tent taking full advantage of the newfound real estate.
The rack also plays host to a set of Maxtrax, and an additional 15-litres of fuel storage in an oh-so-hot-right-now Rotopax storage solution.
1
Tech head
Tech nerds rejoice too; there’s no shortage of 12V goodies to catch your attention.
Sure, there are the usual suspects like an XRS UHF from GME (sheesh that’s a lot of acronyms!) and LED camp lighting from Rugged Ridge and Oracle Lighting pointing in every direction, but a trick bit of kit known as a Tazer JL Mini from Z Automotive takes things up a notch; it allows calibration for different tyre sizes, gear ratios, lighting patterns, winch modes for higher RPMs, line locks, and even custom pin codes for a sneaky immobiliser.
We’ll be honest, it’s almost getting exhausting rattling off all the weird and wonderful modifications Double Black Off Road has managed to make to this Gladiator without actually changing any major components.
It’s a testament to not only the Jeep platform right out of the box, but the ingenuity of the aftermarket companies to really deliver what four-wheel drivers need out on the trail. Now if only we can work out how to get the boss to sign off on a line locker in the 4X4 Australia fleet.
2
Old dog, old tricks
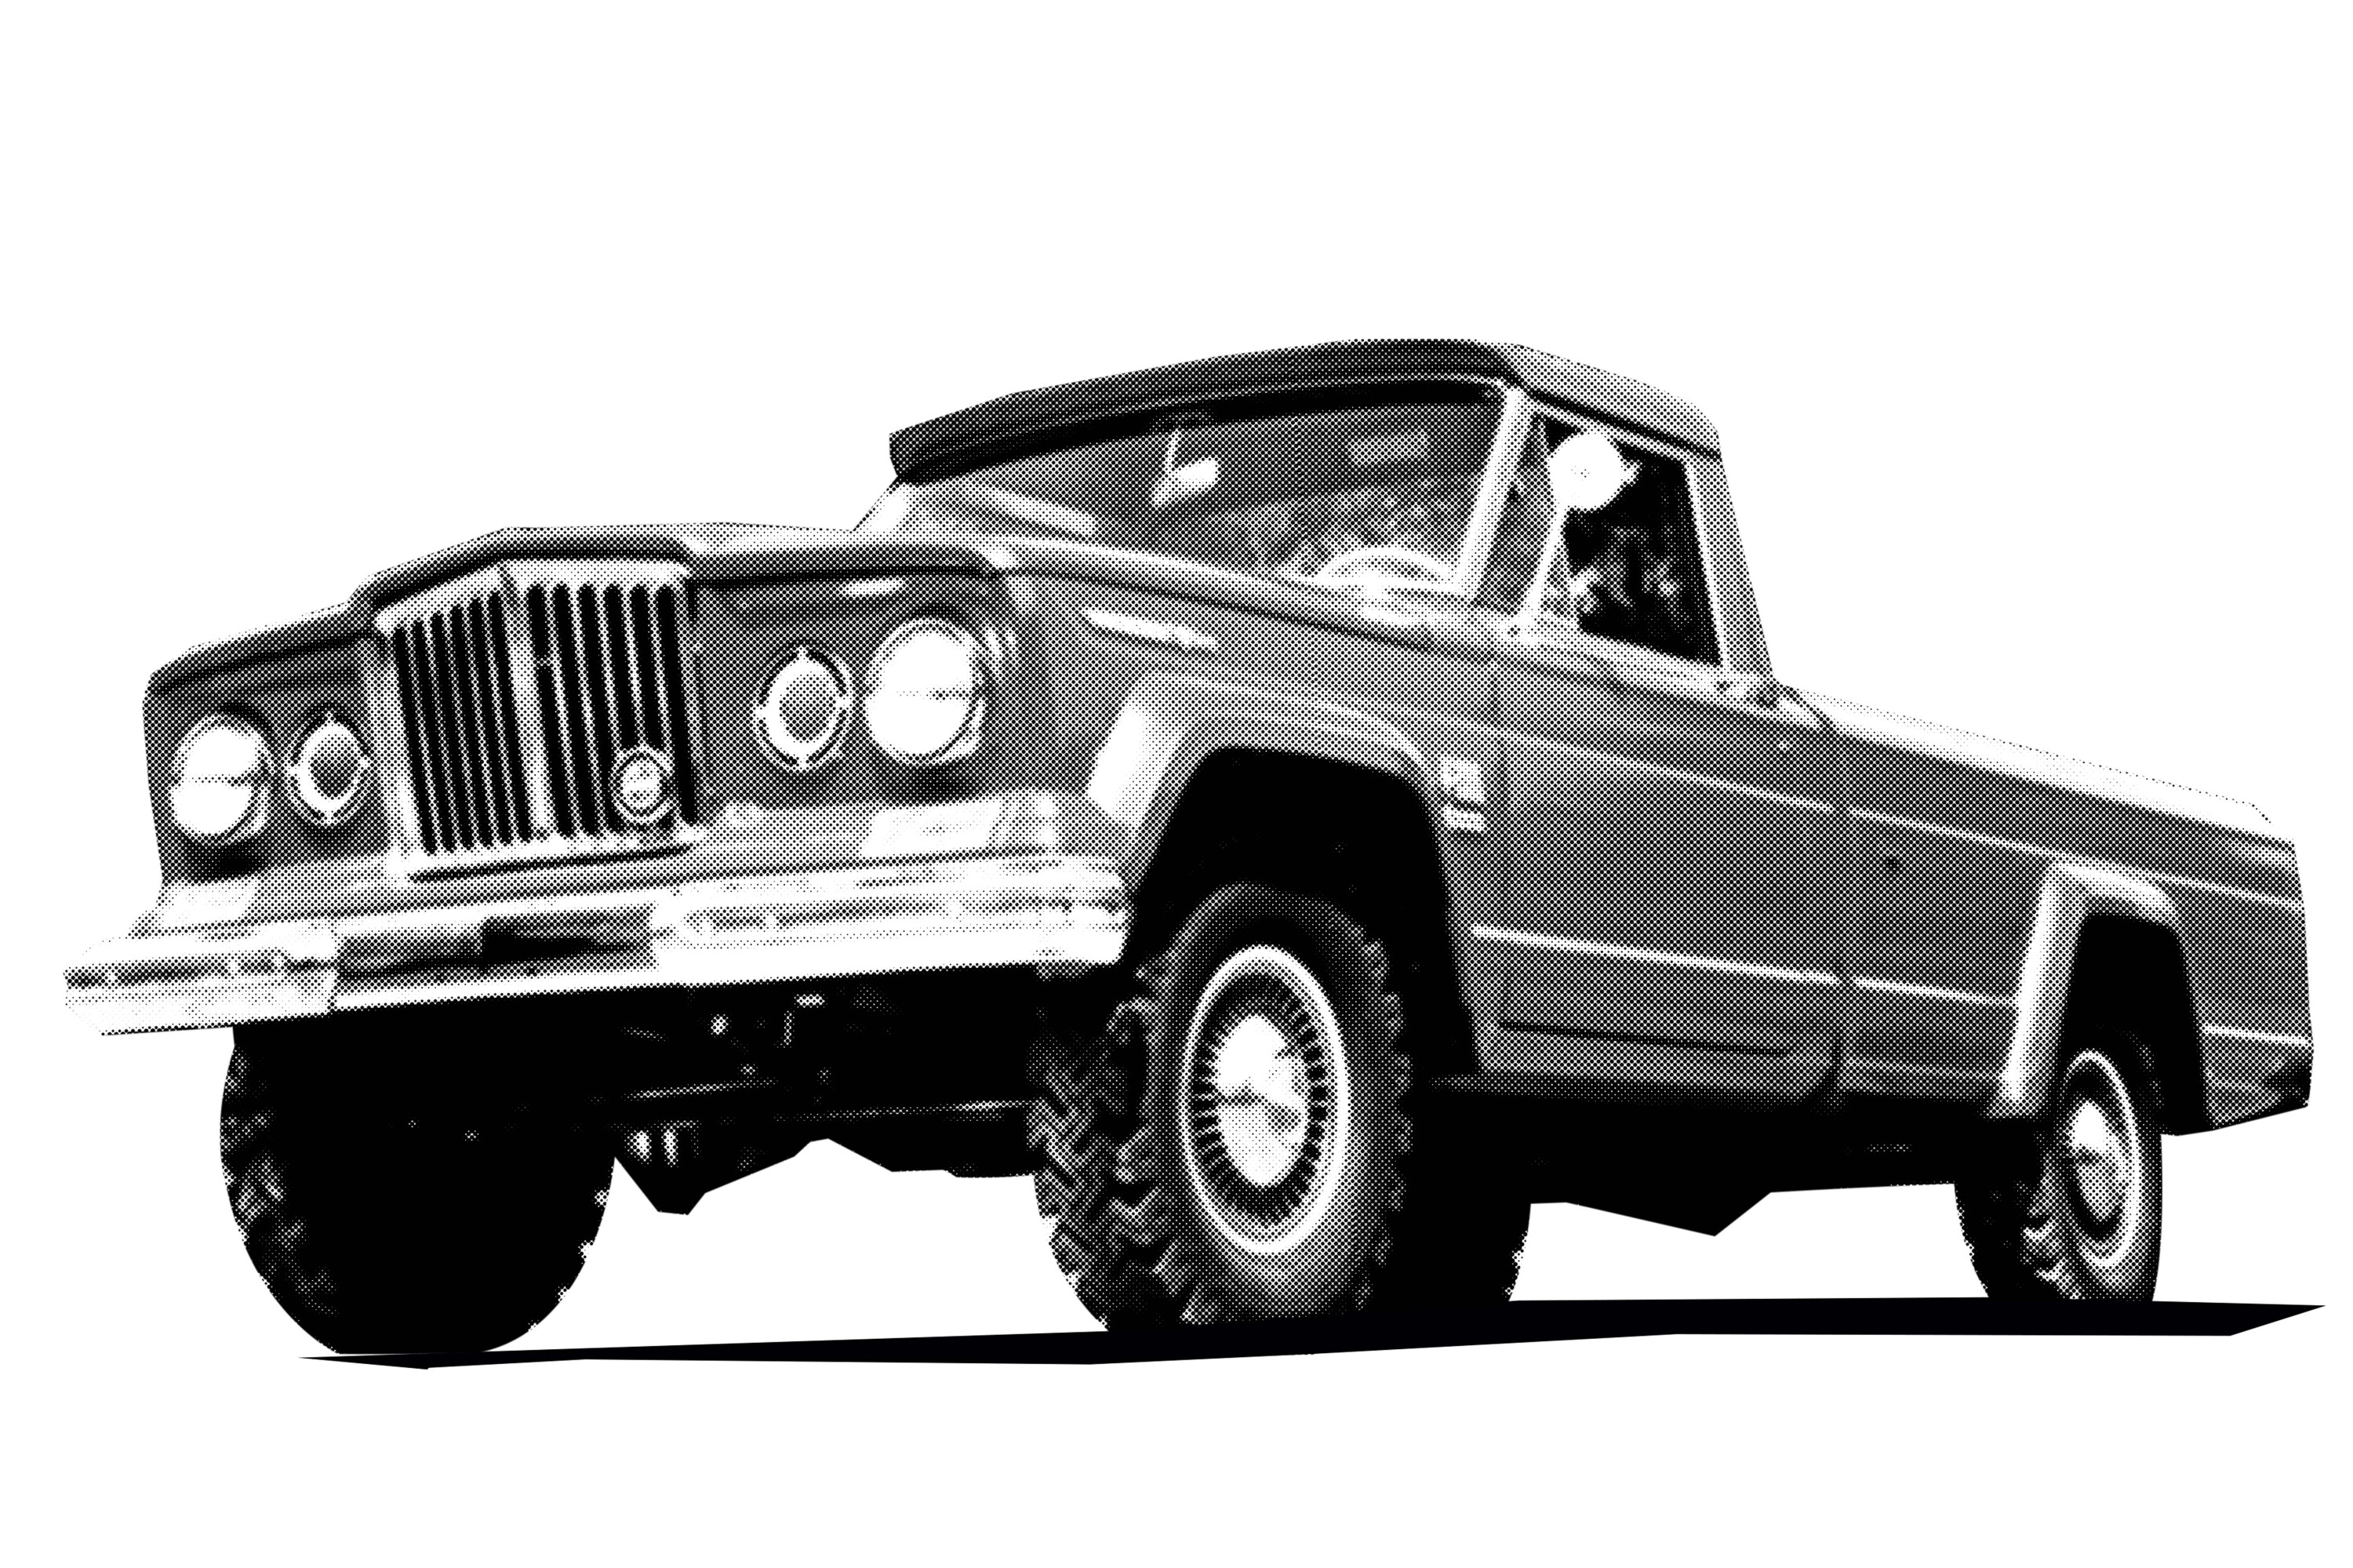
When Jeep announced the Gladiator platform a few years back the internet went wild.
The off-road ability of a solid axle coil-sprung Jeep mixed with the versatility of an Aussie-style dual-cab ute. On paper, it’s almost the perfect combination. But it wasn’t Jeep’s first foray into the ute market, far from it in fact.
Way back in the 1940s when civilian Jeeps first became widely available, the then manufacturer Willys-Overland brought to market a bulkier single cab ute version known as the Jeep Truck. The Jeep Truck offered serious off-road ability and practicality for a good 20 years before being superseded by none other than the Jeep Gladiator in 1963.
1
Based on the full-size Jeep Wagoneer platform, the Gladiator was available in a host of different configurations including long-wheelbase camper setups and even dual-rear-wheel versions with big 401ci V8s under the bonnet.
Throughout this period Jeep experimented with many short-lived ute models, from the kooky forward-control FC models to the stylish Jeepster Commando line-up and many other obscure options in between, before finally finding reasonable success with the XJ Cherokee-based Comanche.
Jeep unveiled a JK-styled ute concept back in 2005 and teased the market for another 15 years with various concepts and factory-backed ute conversion kits before reviving the Gladiator name again nearly 50 years after it was retired, although this time sporting four doors, a lesson Jeep learned with the uber-popular JK Unlimited Wrangler.
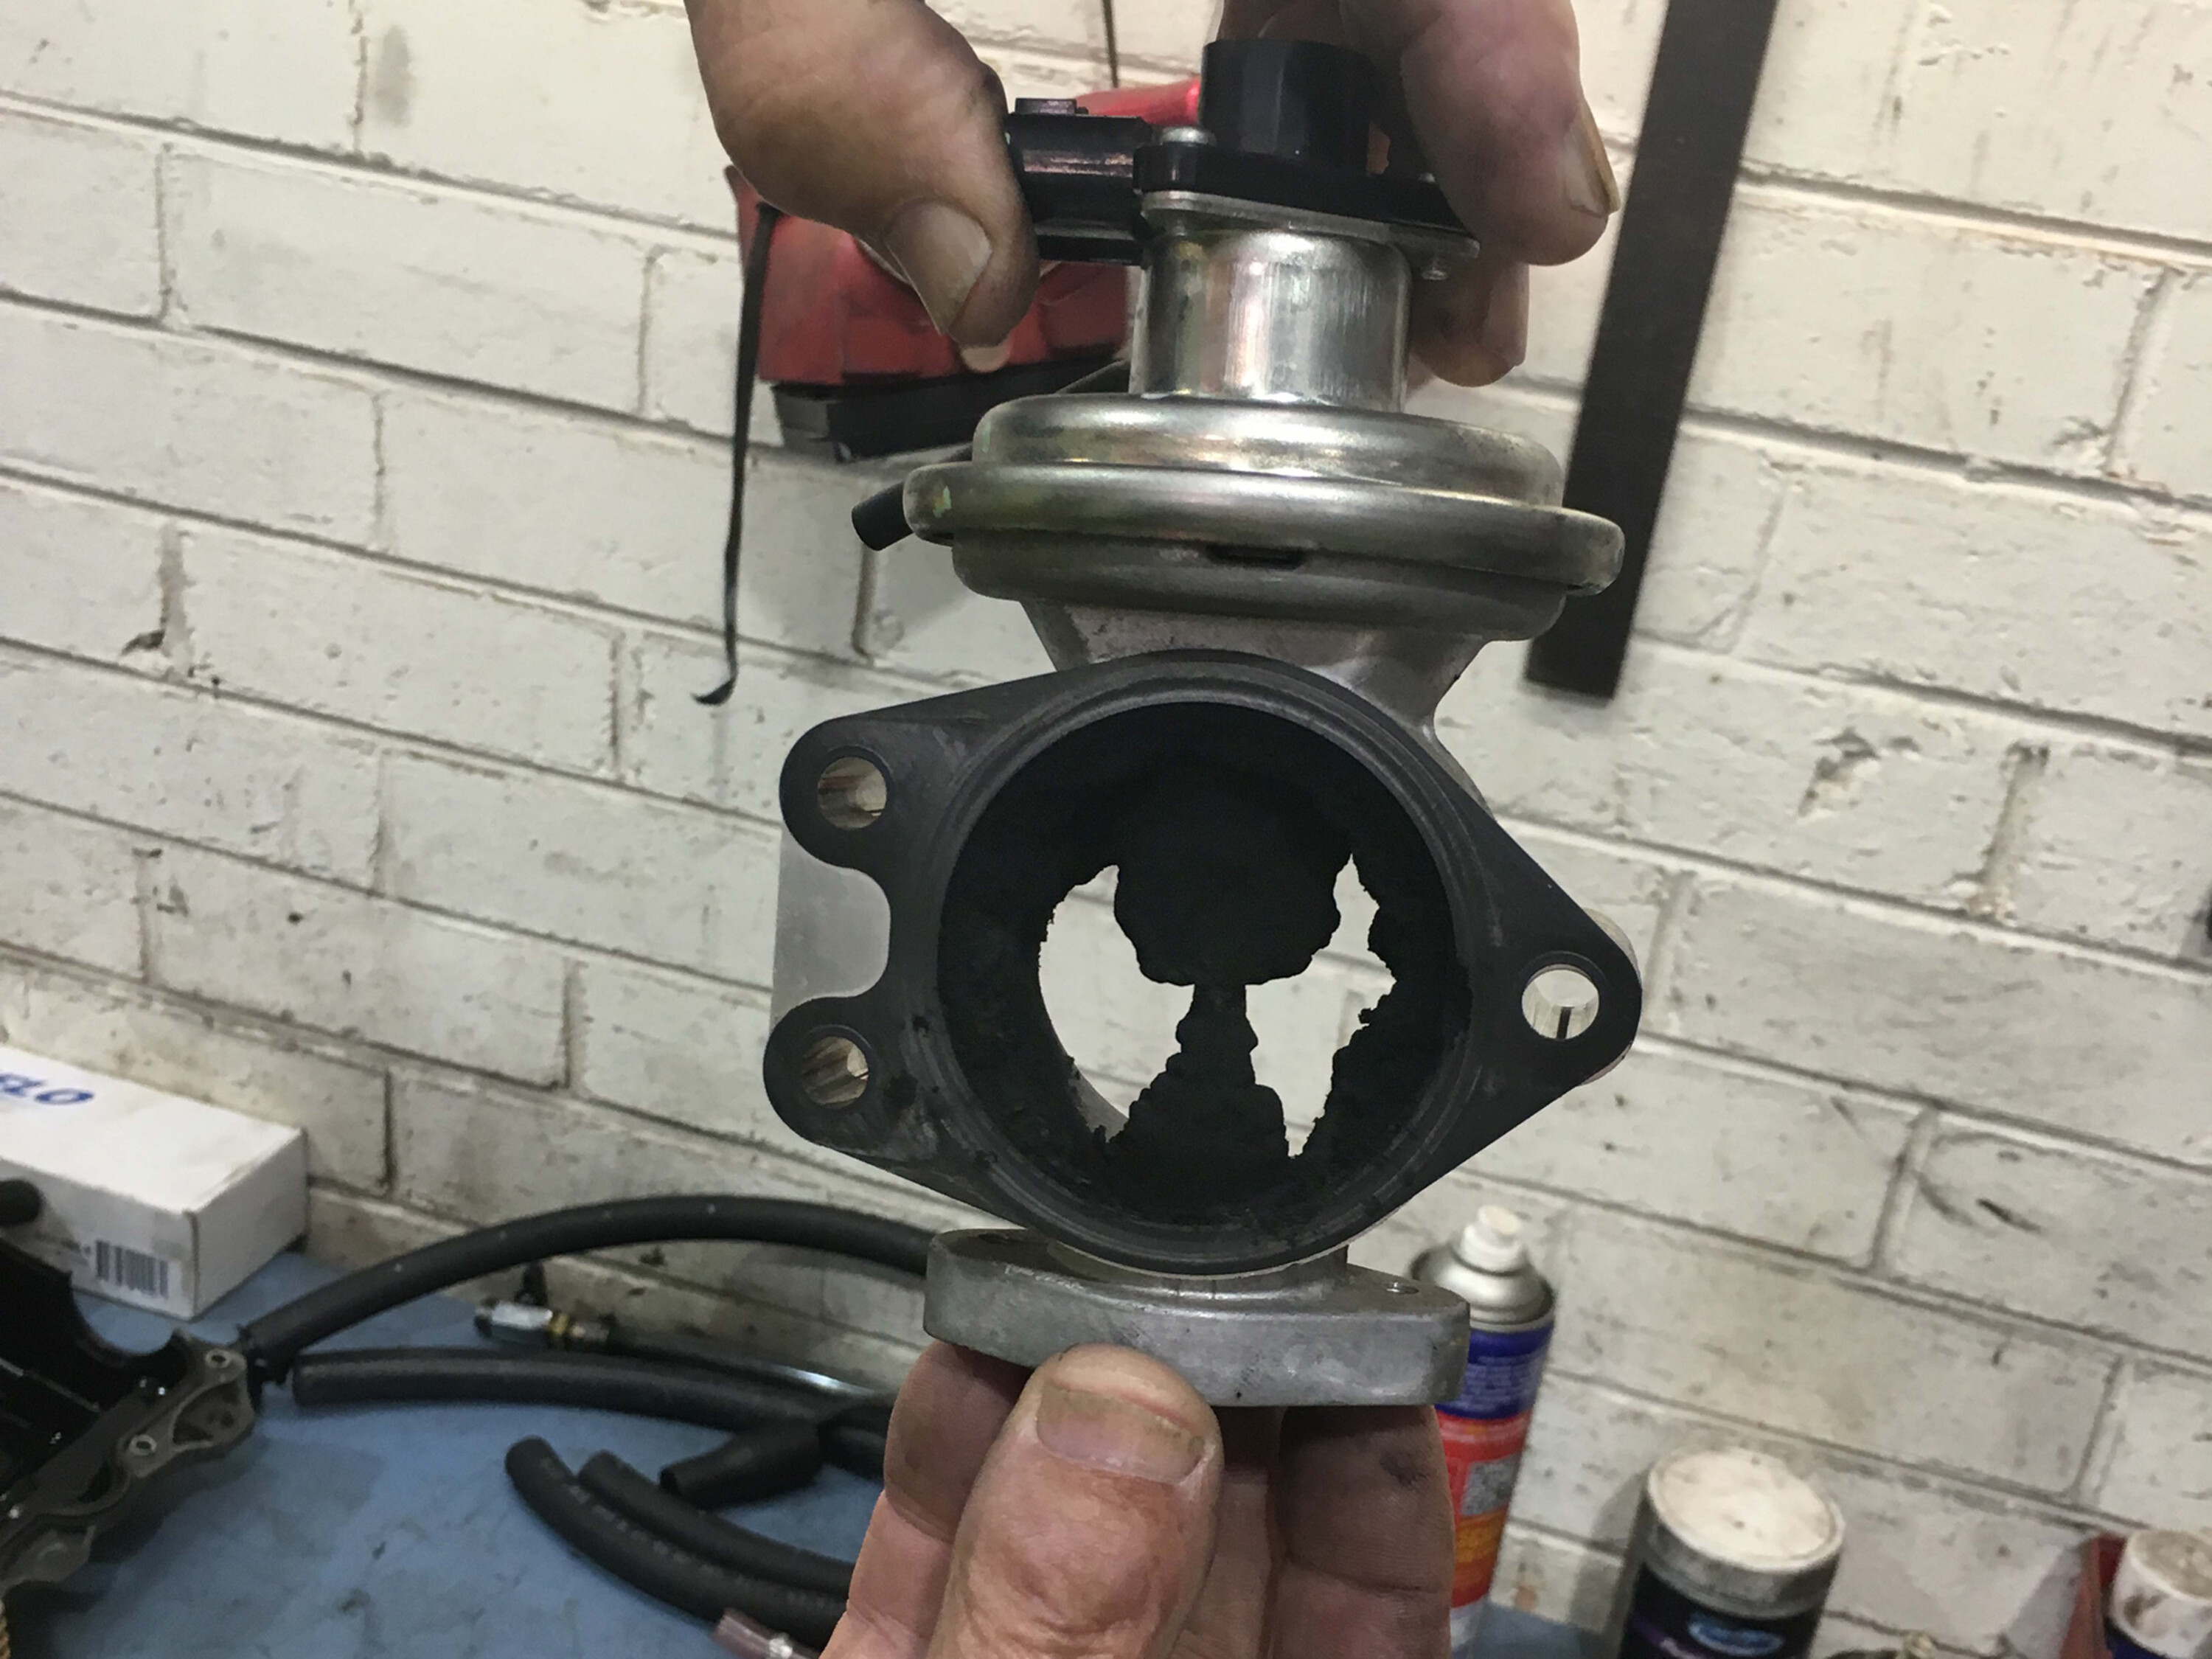
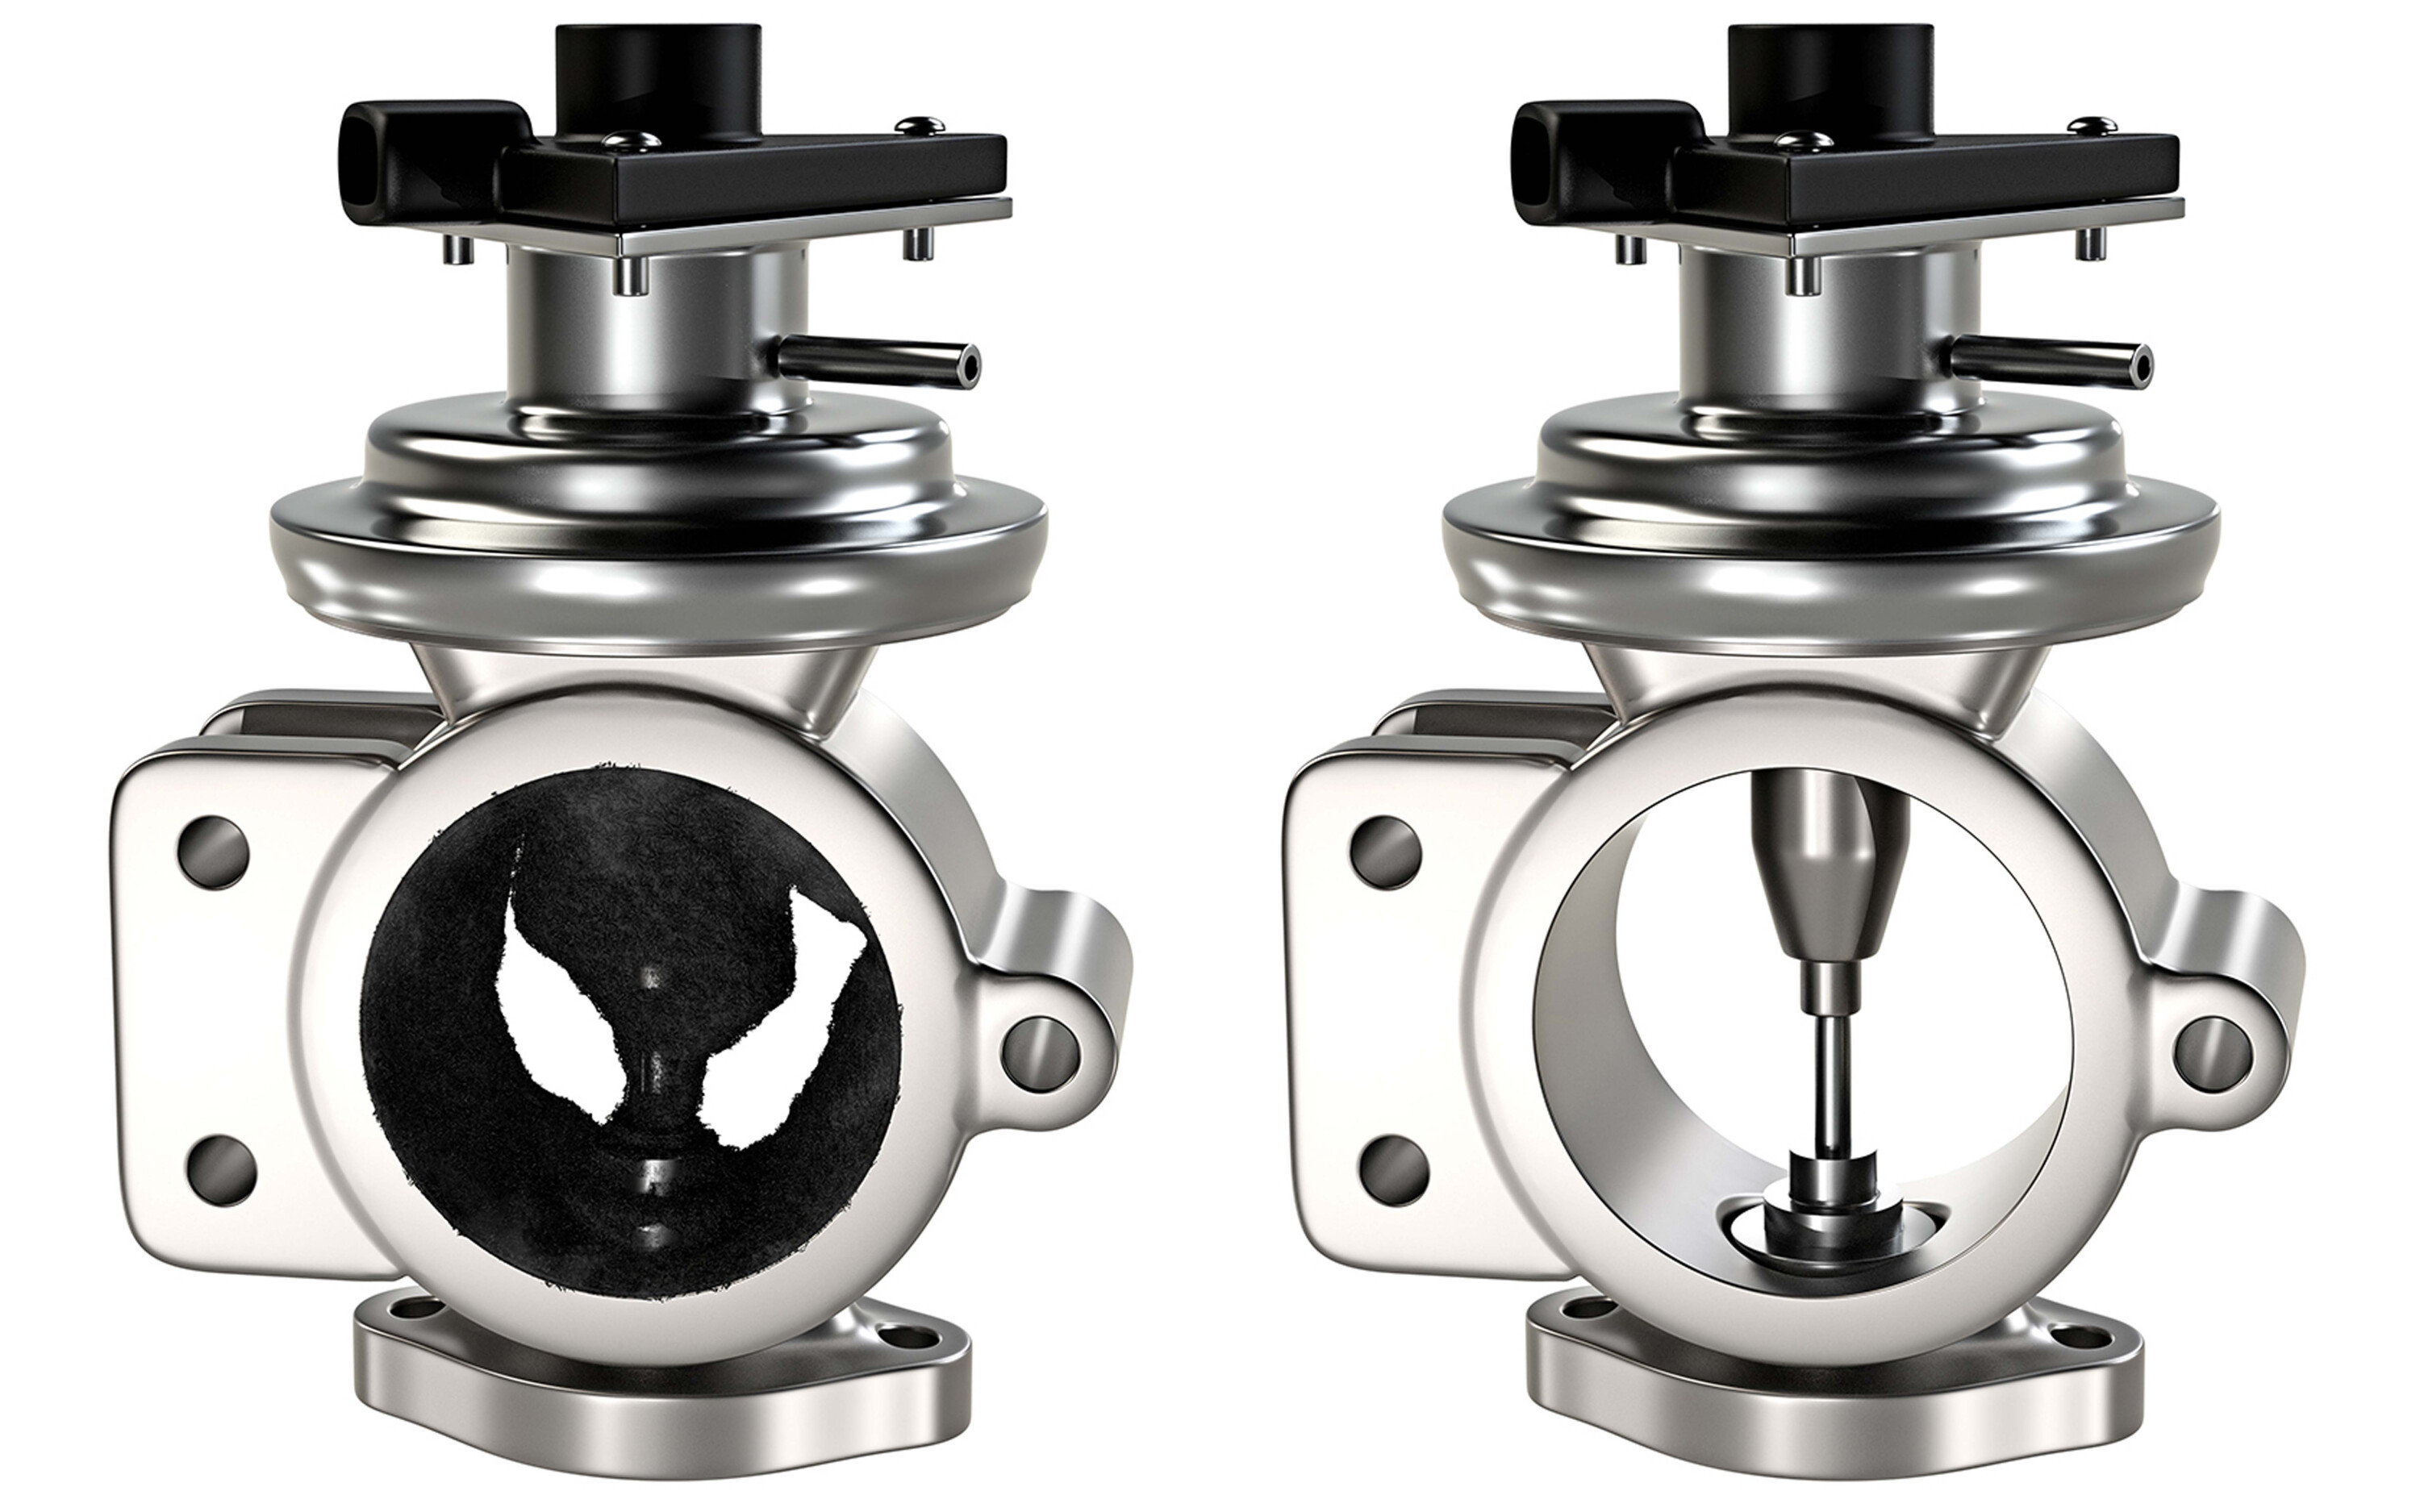
Catch-cans. Can of worms more like it. Car-makers don’t like them, some mechanics don’t understand them and four-wheel-drive owners who have them fitted, tend to love them.
So what’s the reality? Do you need one? Will it wreck your engine? Will it void your warranty? Will it save the day, or even the planet?
Let’s break it down as it happened.
1
How did the catch-can come about?
The catch-can was initially developed for stationary diesels and the trucking industry.
As recreational four-wheel-drives have become ever more reliant on common-rail diesel technology, so has the catch-can debate become a hot-button topic.
What’s the problem, anyway?
To answer that, you need to understand what’s happening inside the modern turbo-diesel engine.
Essentially, pollution laws around the world (including here) have meant that a certain percentage of the engine’s exhaust has to be directed back into the combustion chambers so the engine can have a second crack at burning it and reducing tailpipe nasties.
Since the engine is now eating its own exhaust fumes, there’s a percentage of diesel soot that also gets ingested as part of that process.
1
At the same time, the emissions laws also state that crankcase pressure – a natural part of having pistons pumping up and down in their cylinders – is no longer allowed to be vented to the atmosphere.
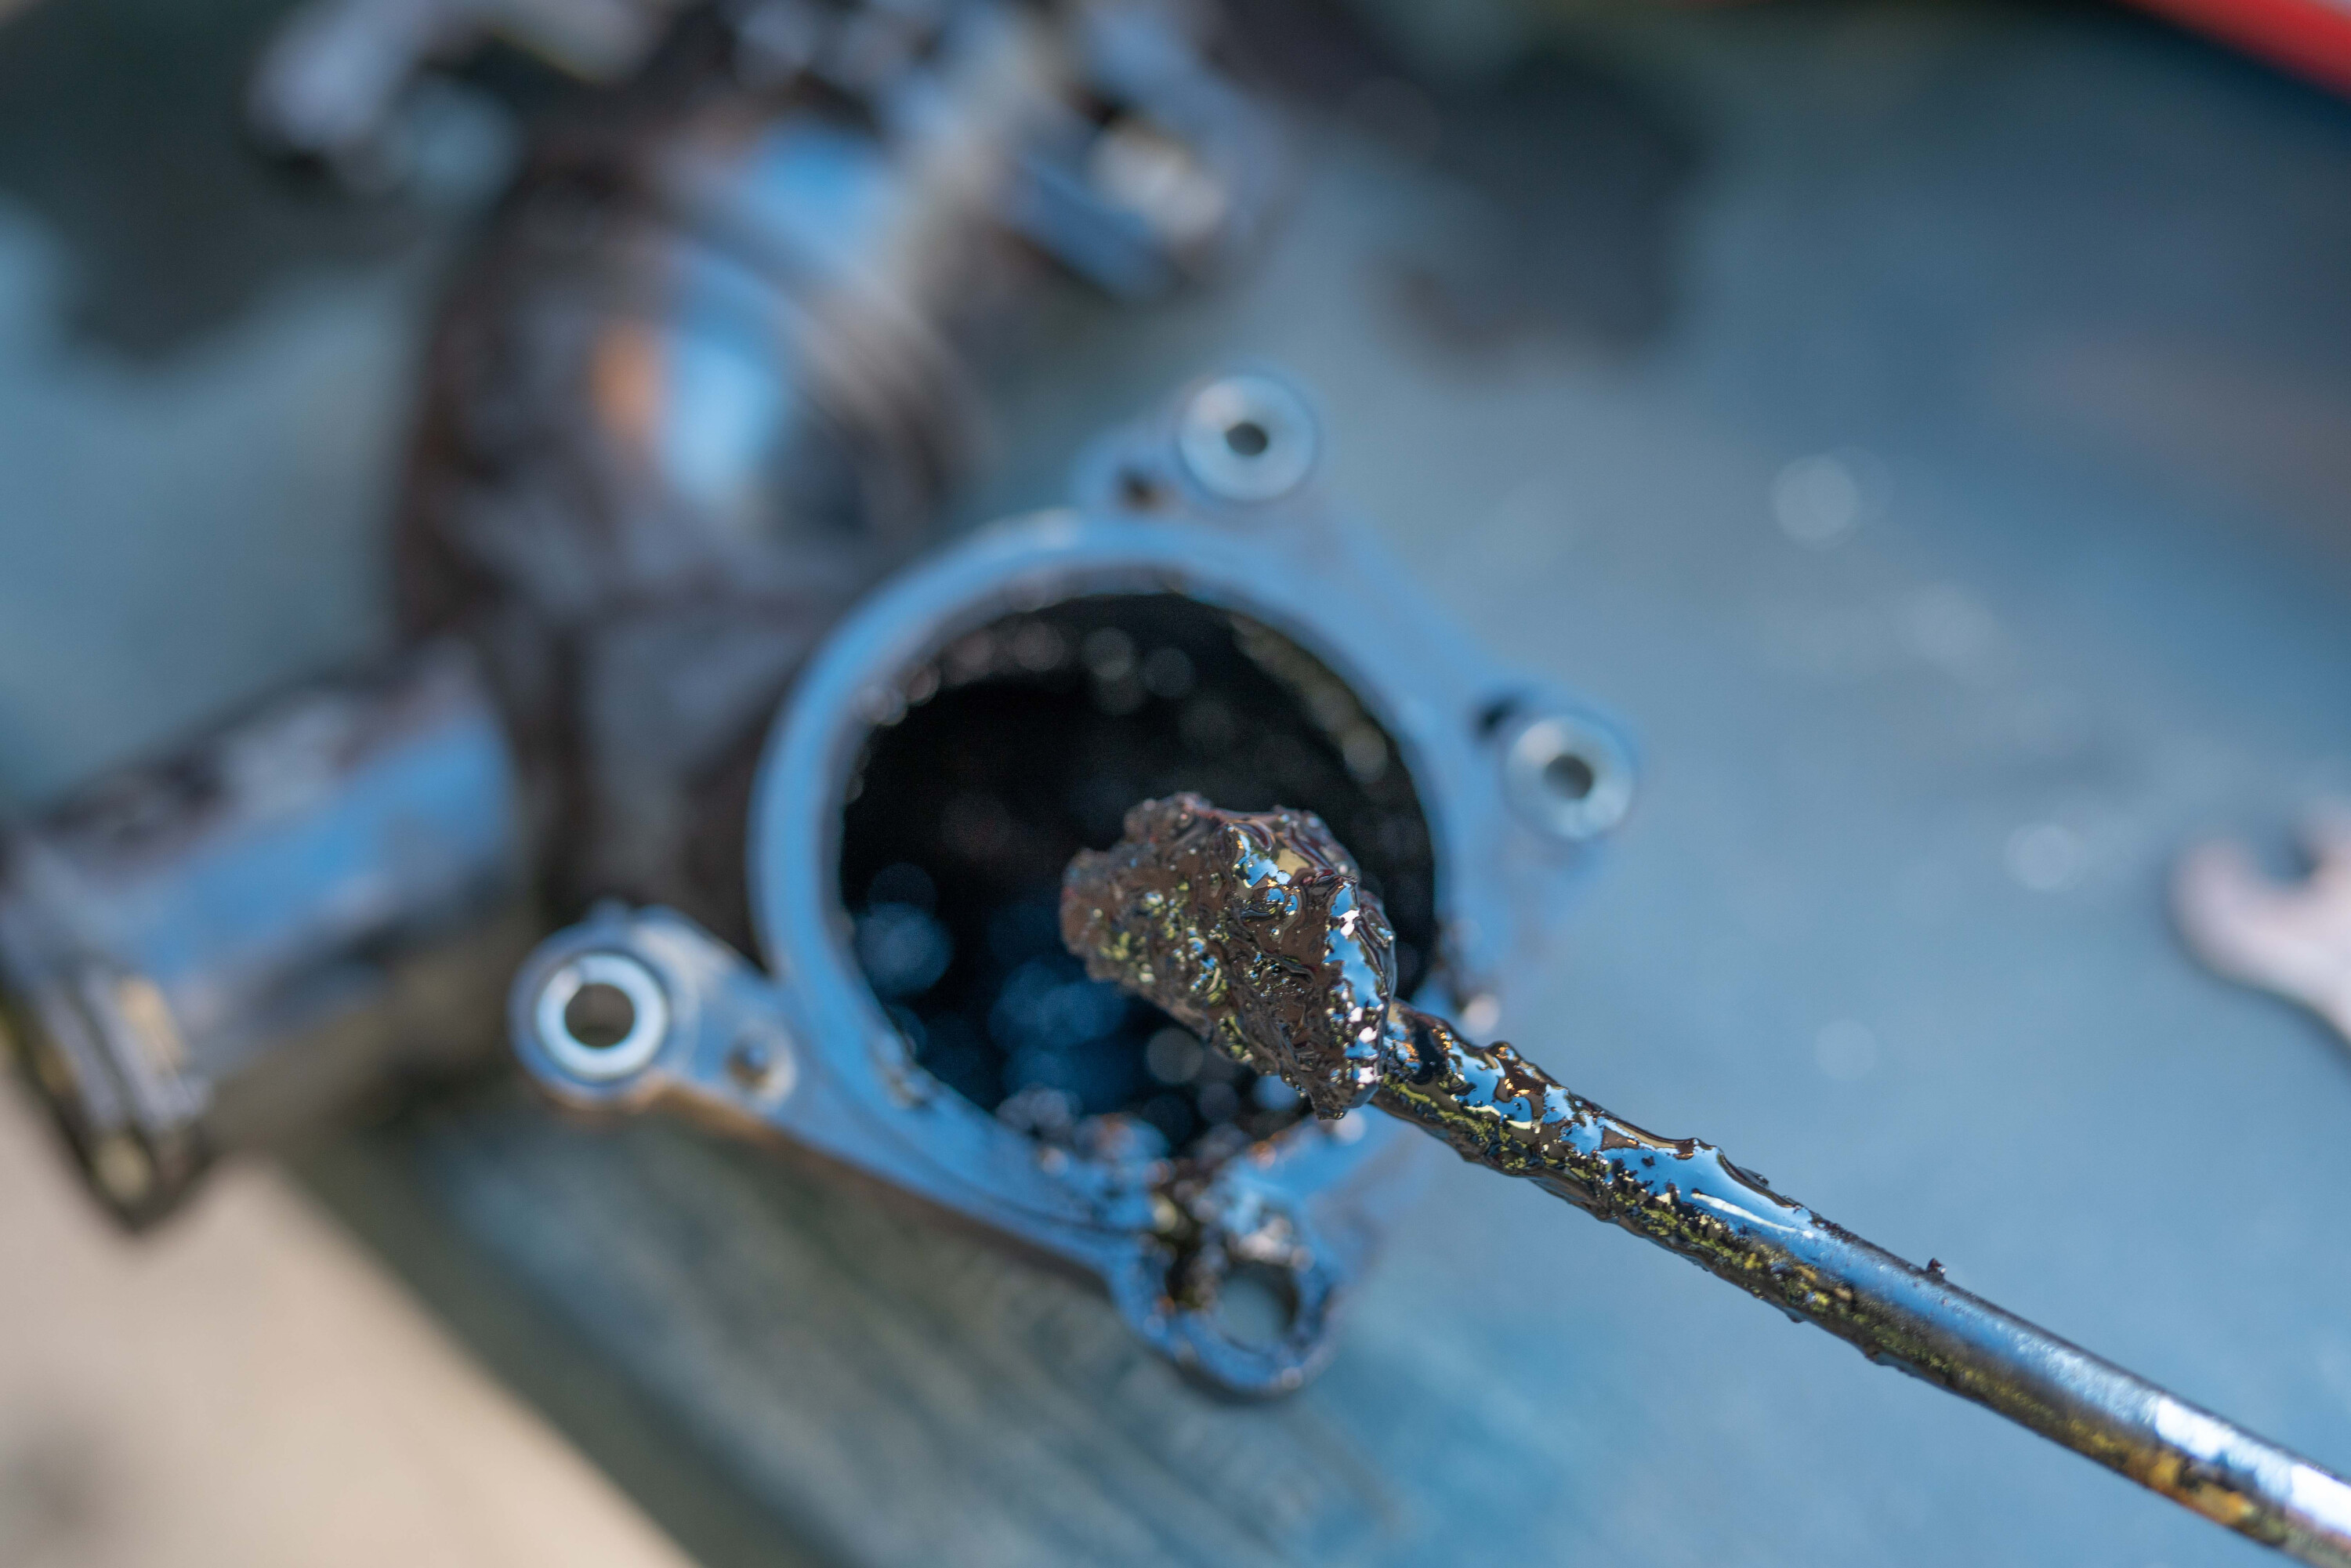
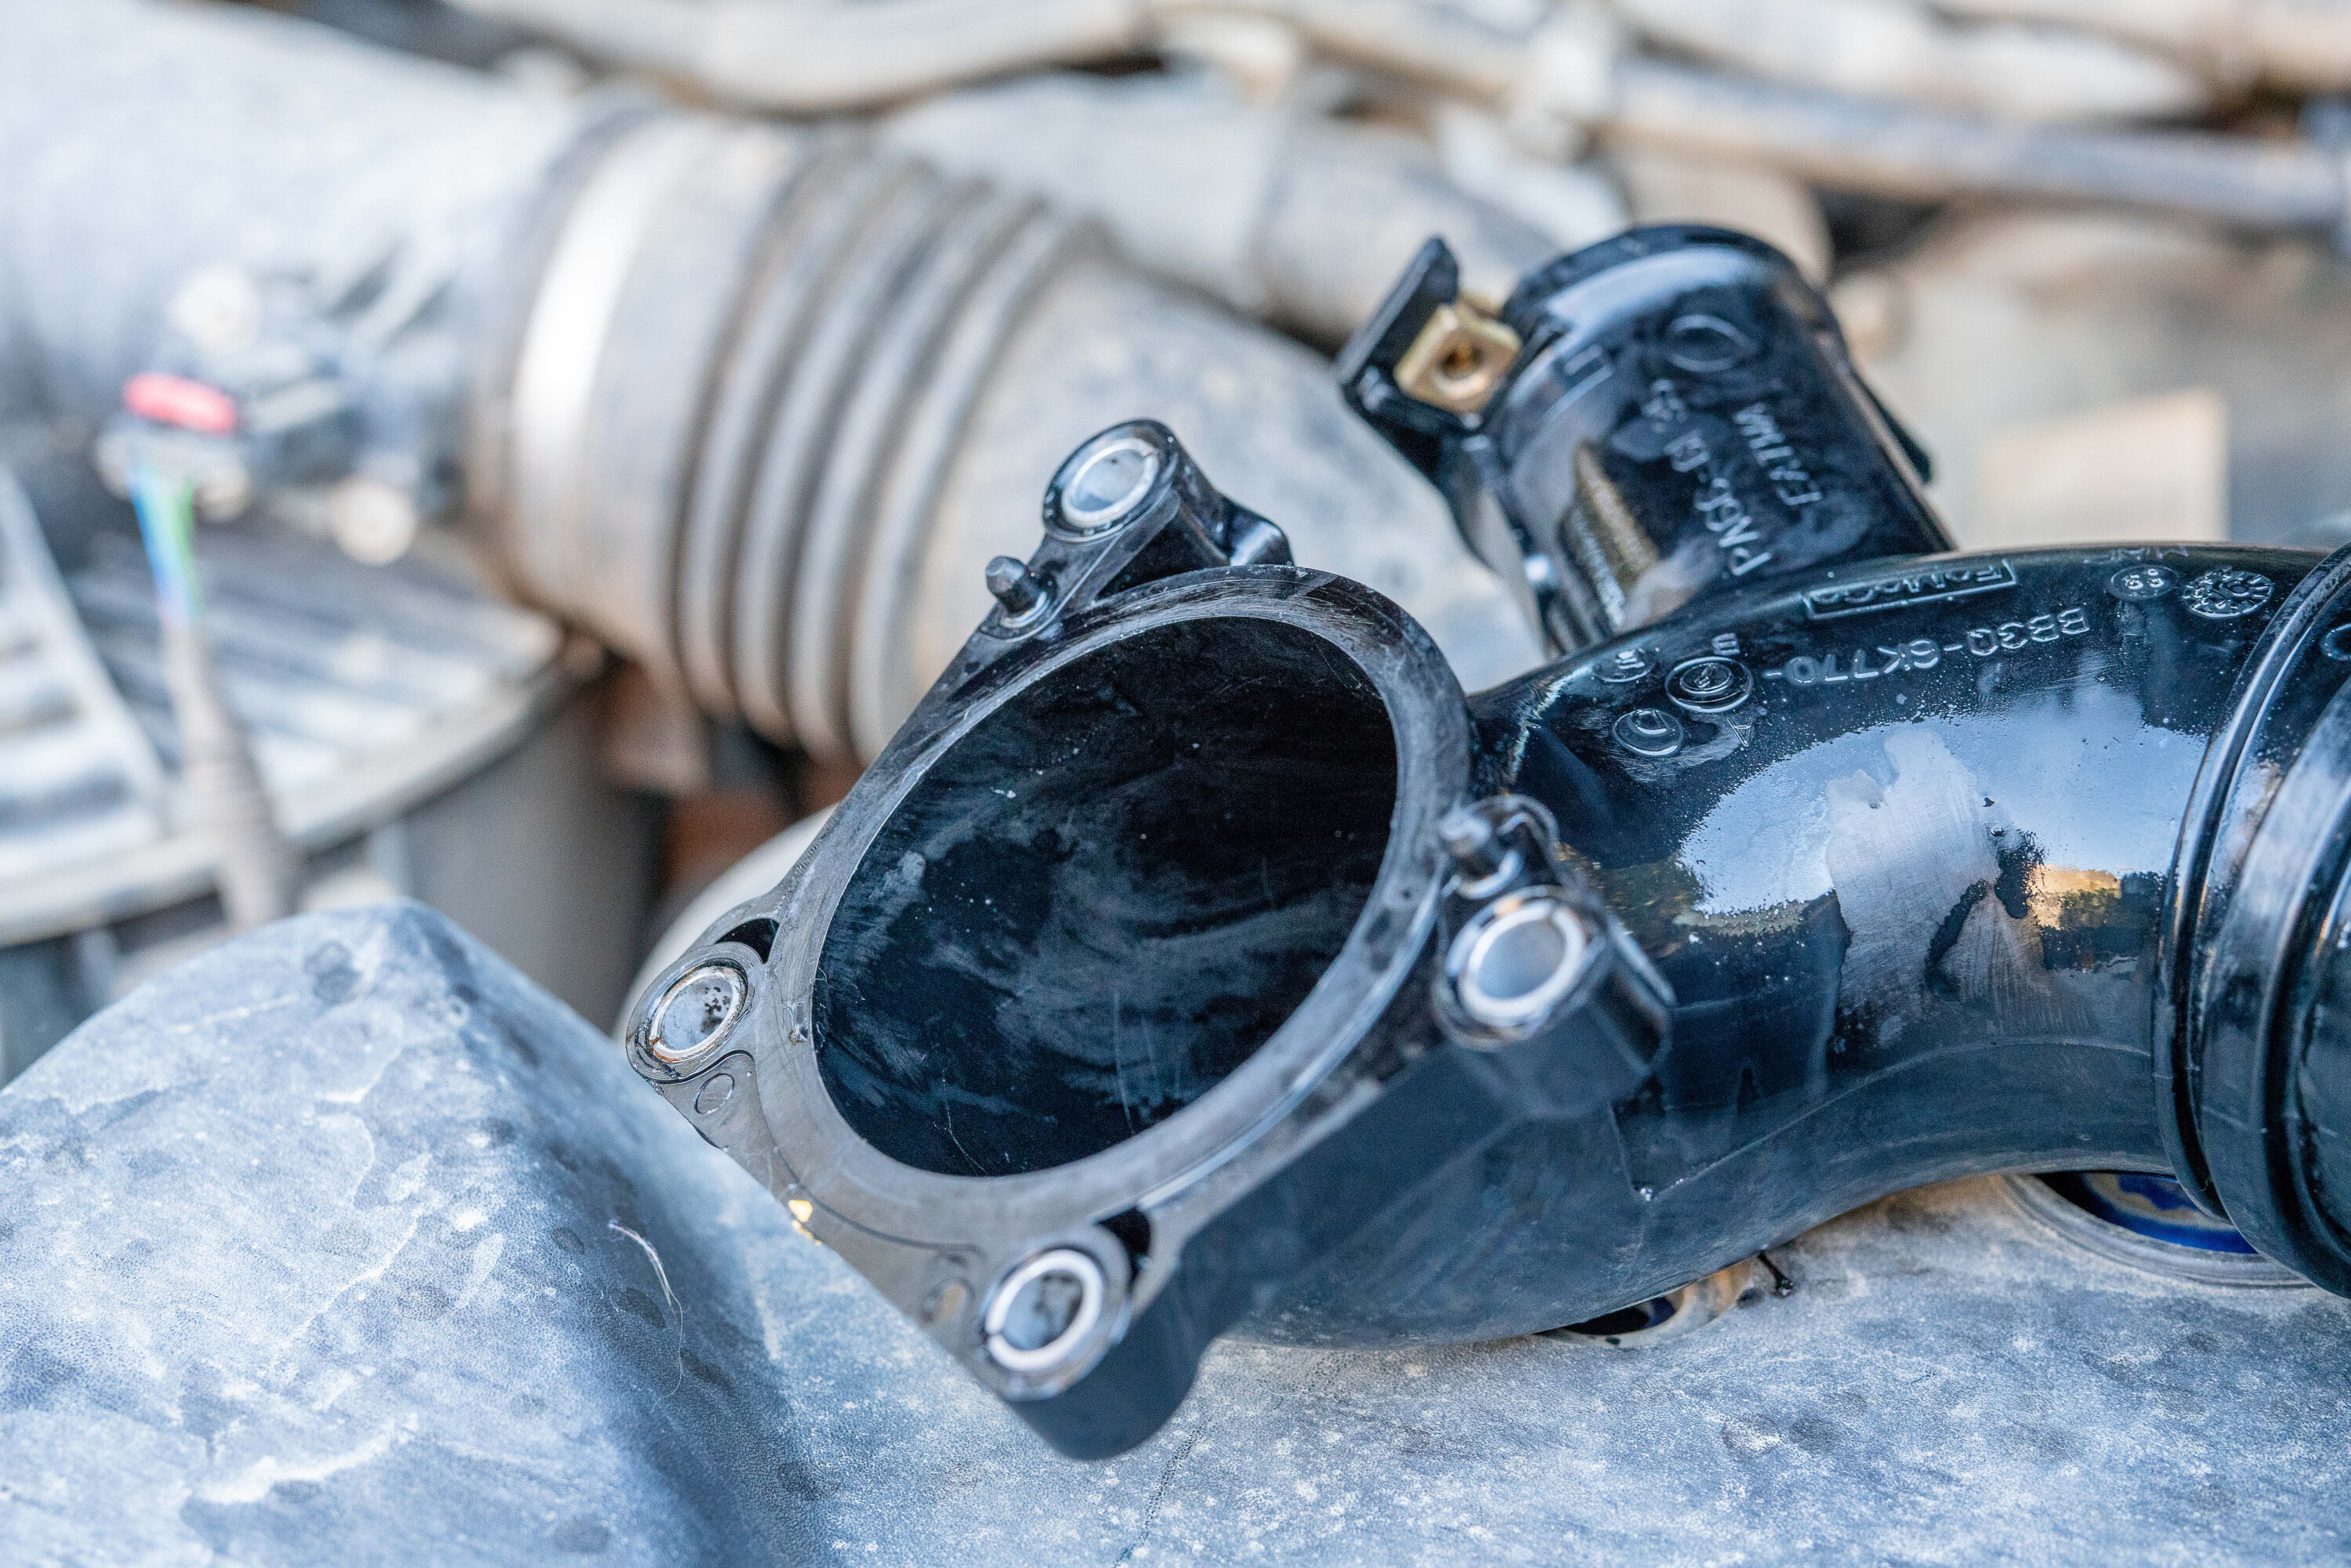
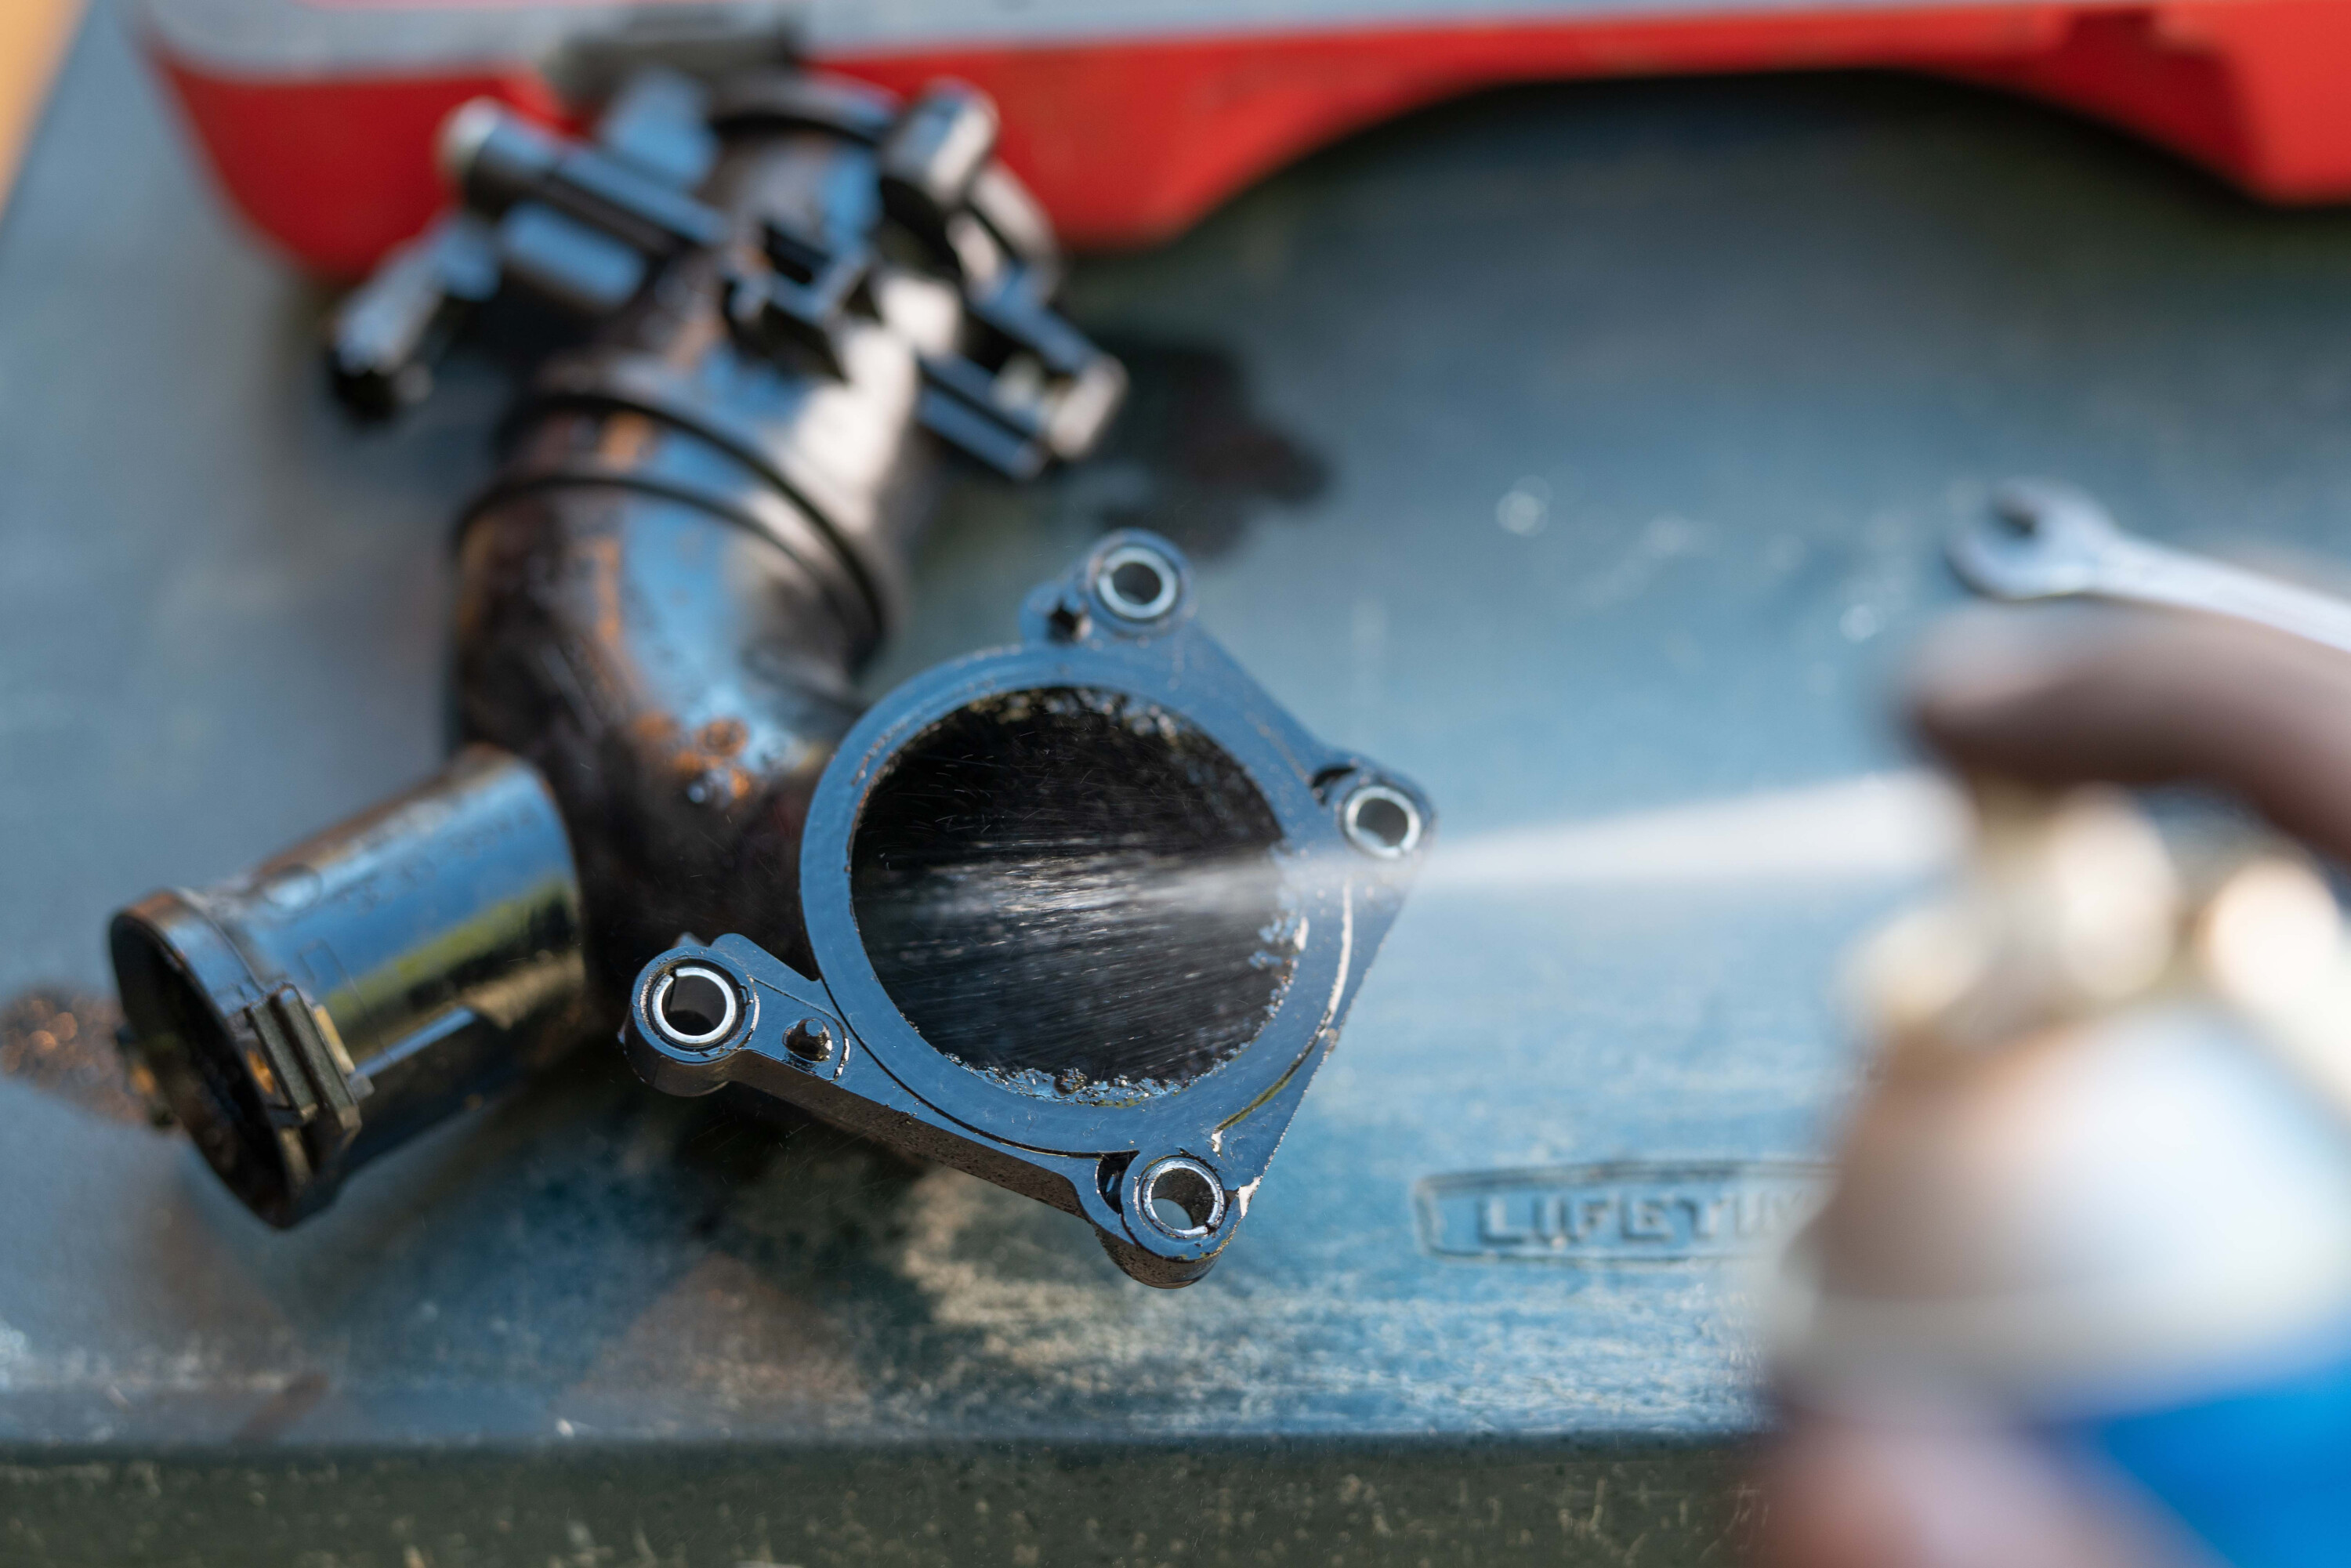
So the engine is required to swallow those fumes as well. The vapours present in the crankcase fumes contain a lot of oil mist and, guess what, those oily crankcase fumes and the sooty, black exhaust gas that is being recirculated mix together and form a horrible black gunk that gradually sticks to the engine’s inlet tract and can eventually cause the air intake system to become more or less totally blocked.
Think of it like black cholesterol. At which point your engine loses efficiency and performance.
Even disregarding the soot issue for a moment, the oil-mist fumes from the crankcase also pass over the intercooler on the way to the engine and that eventually puts an oily film on the intercooler’s internal surfaces, reducing its efficiency as well.
1
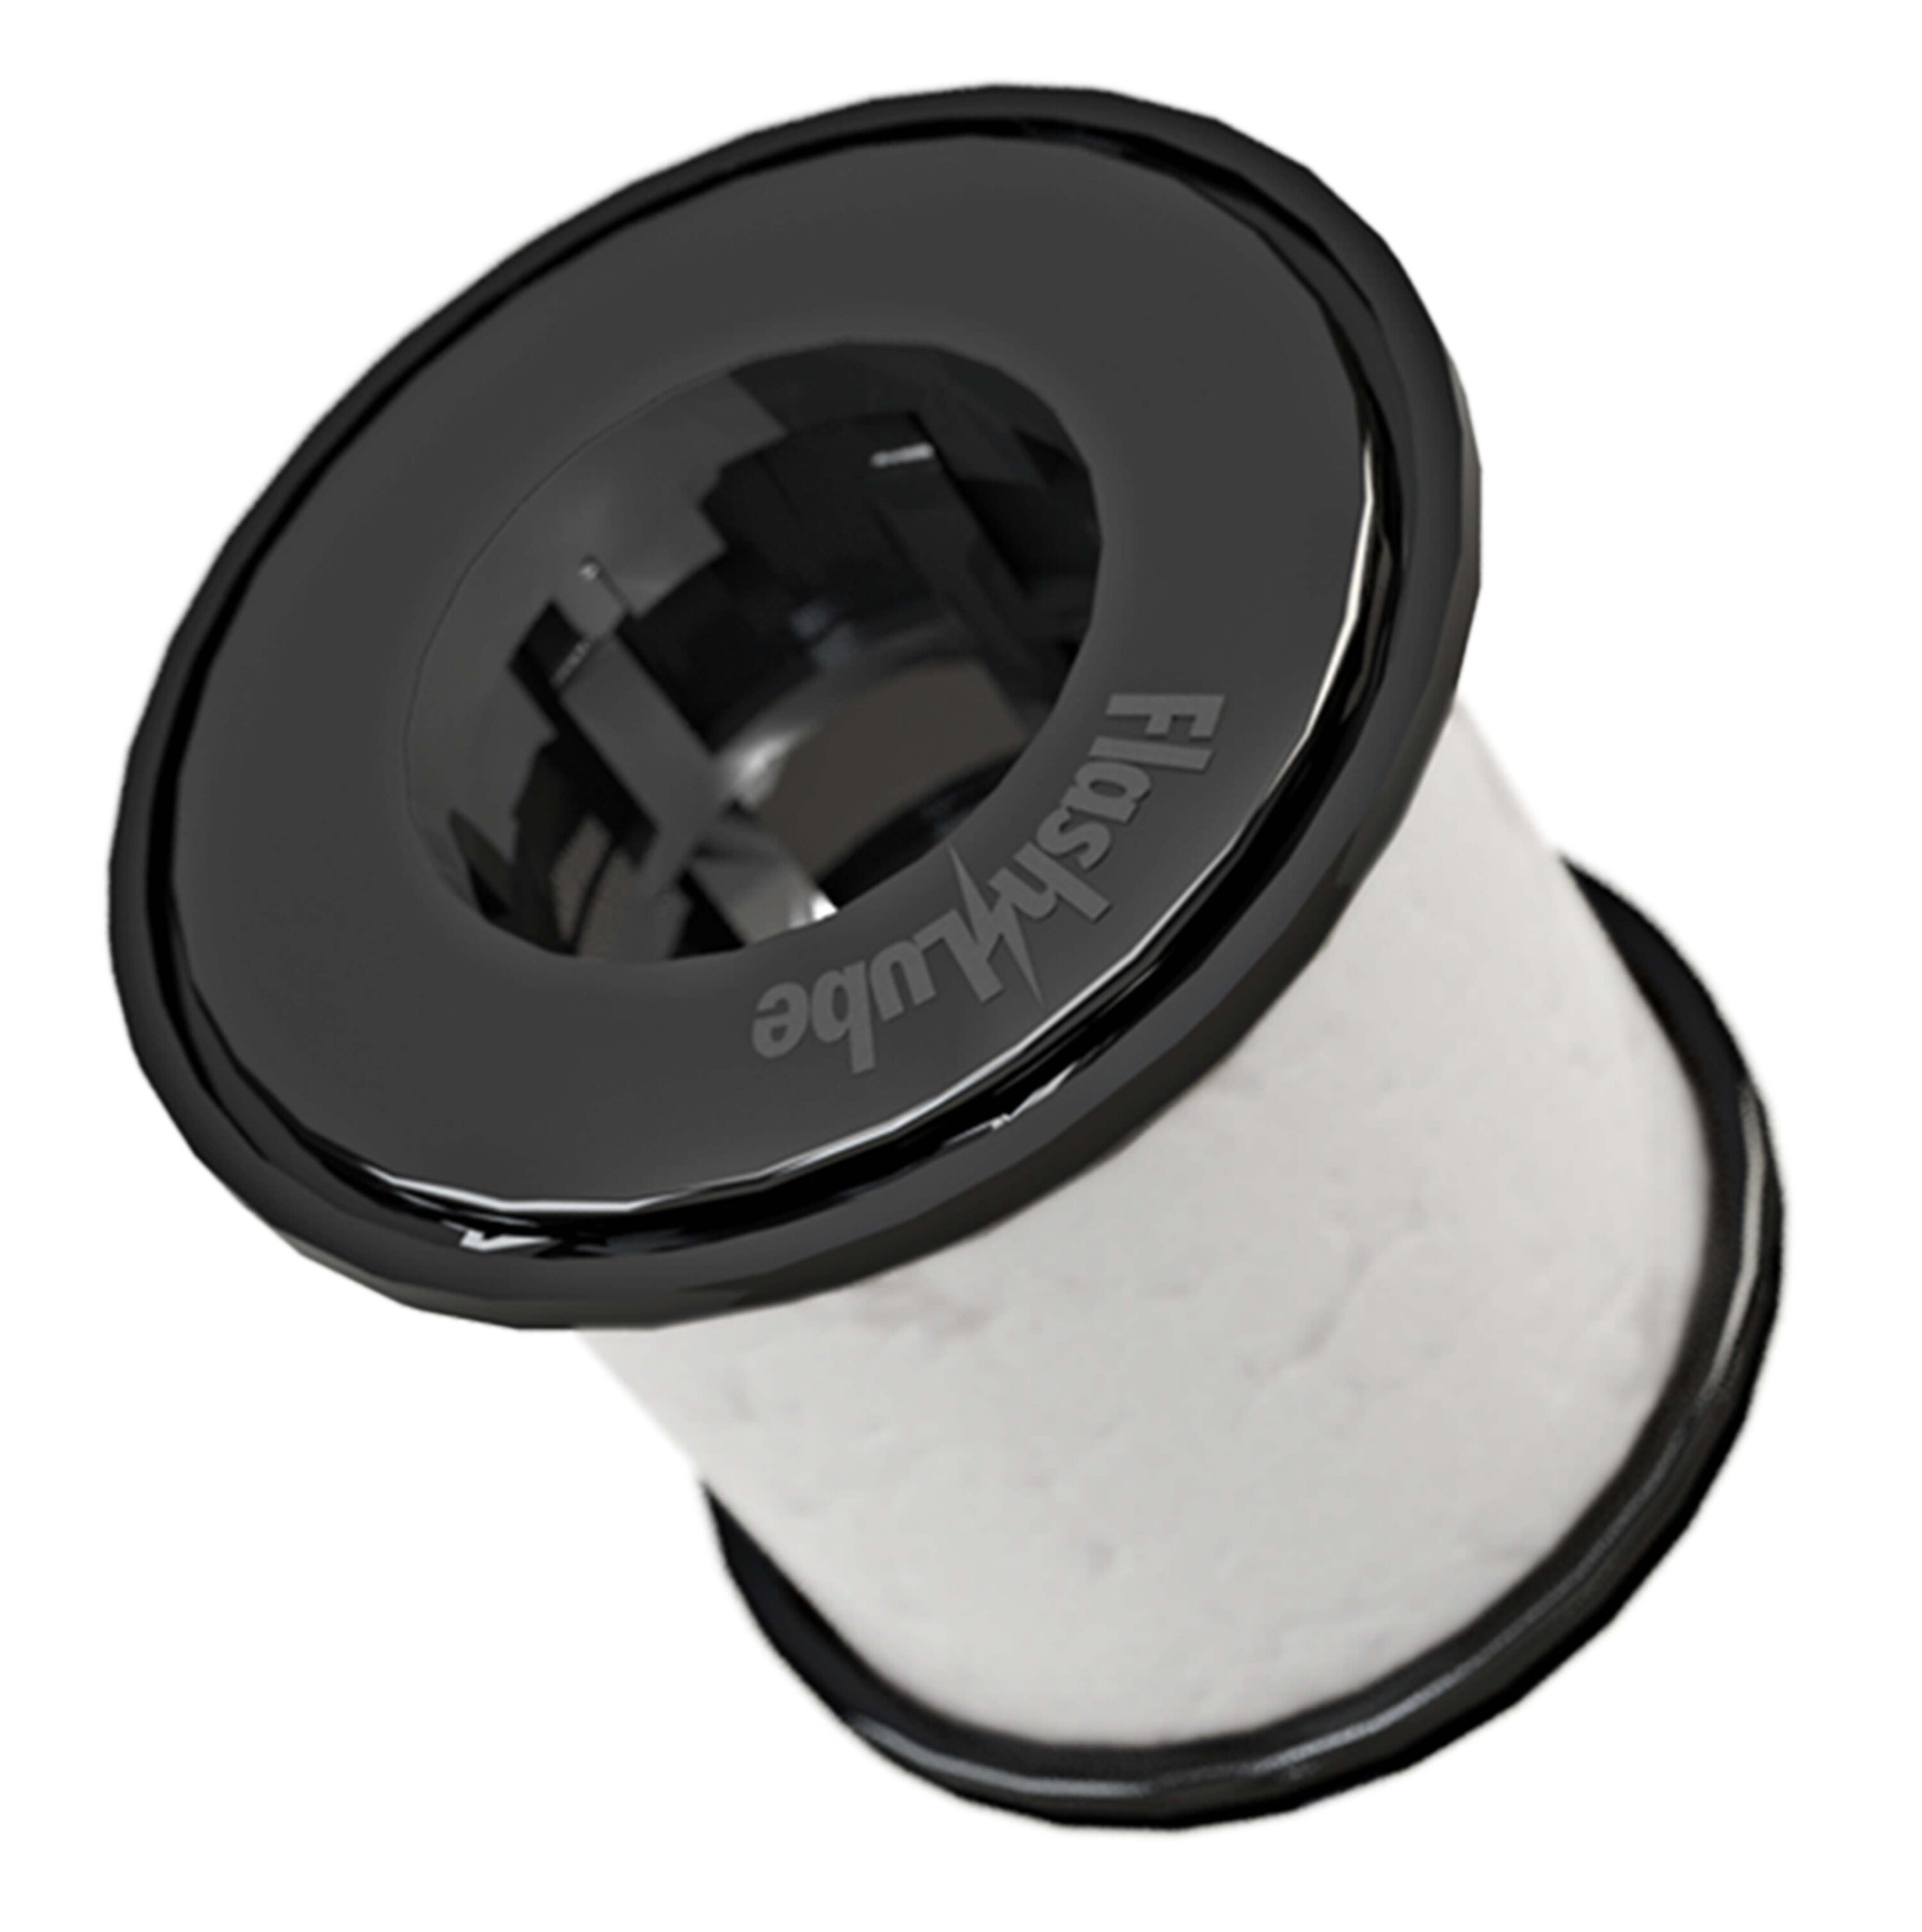
How does a catch-can fix that?
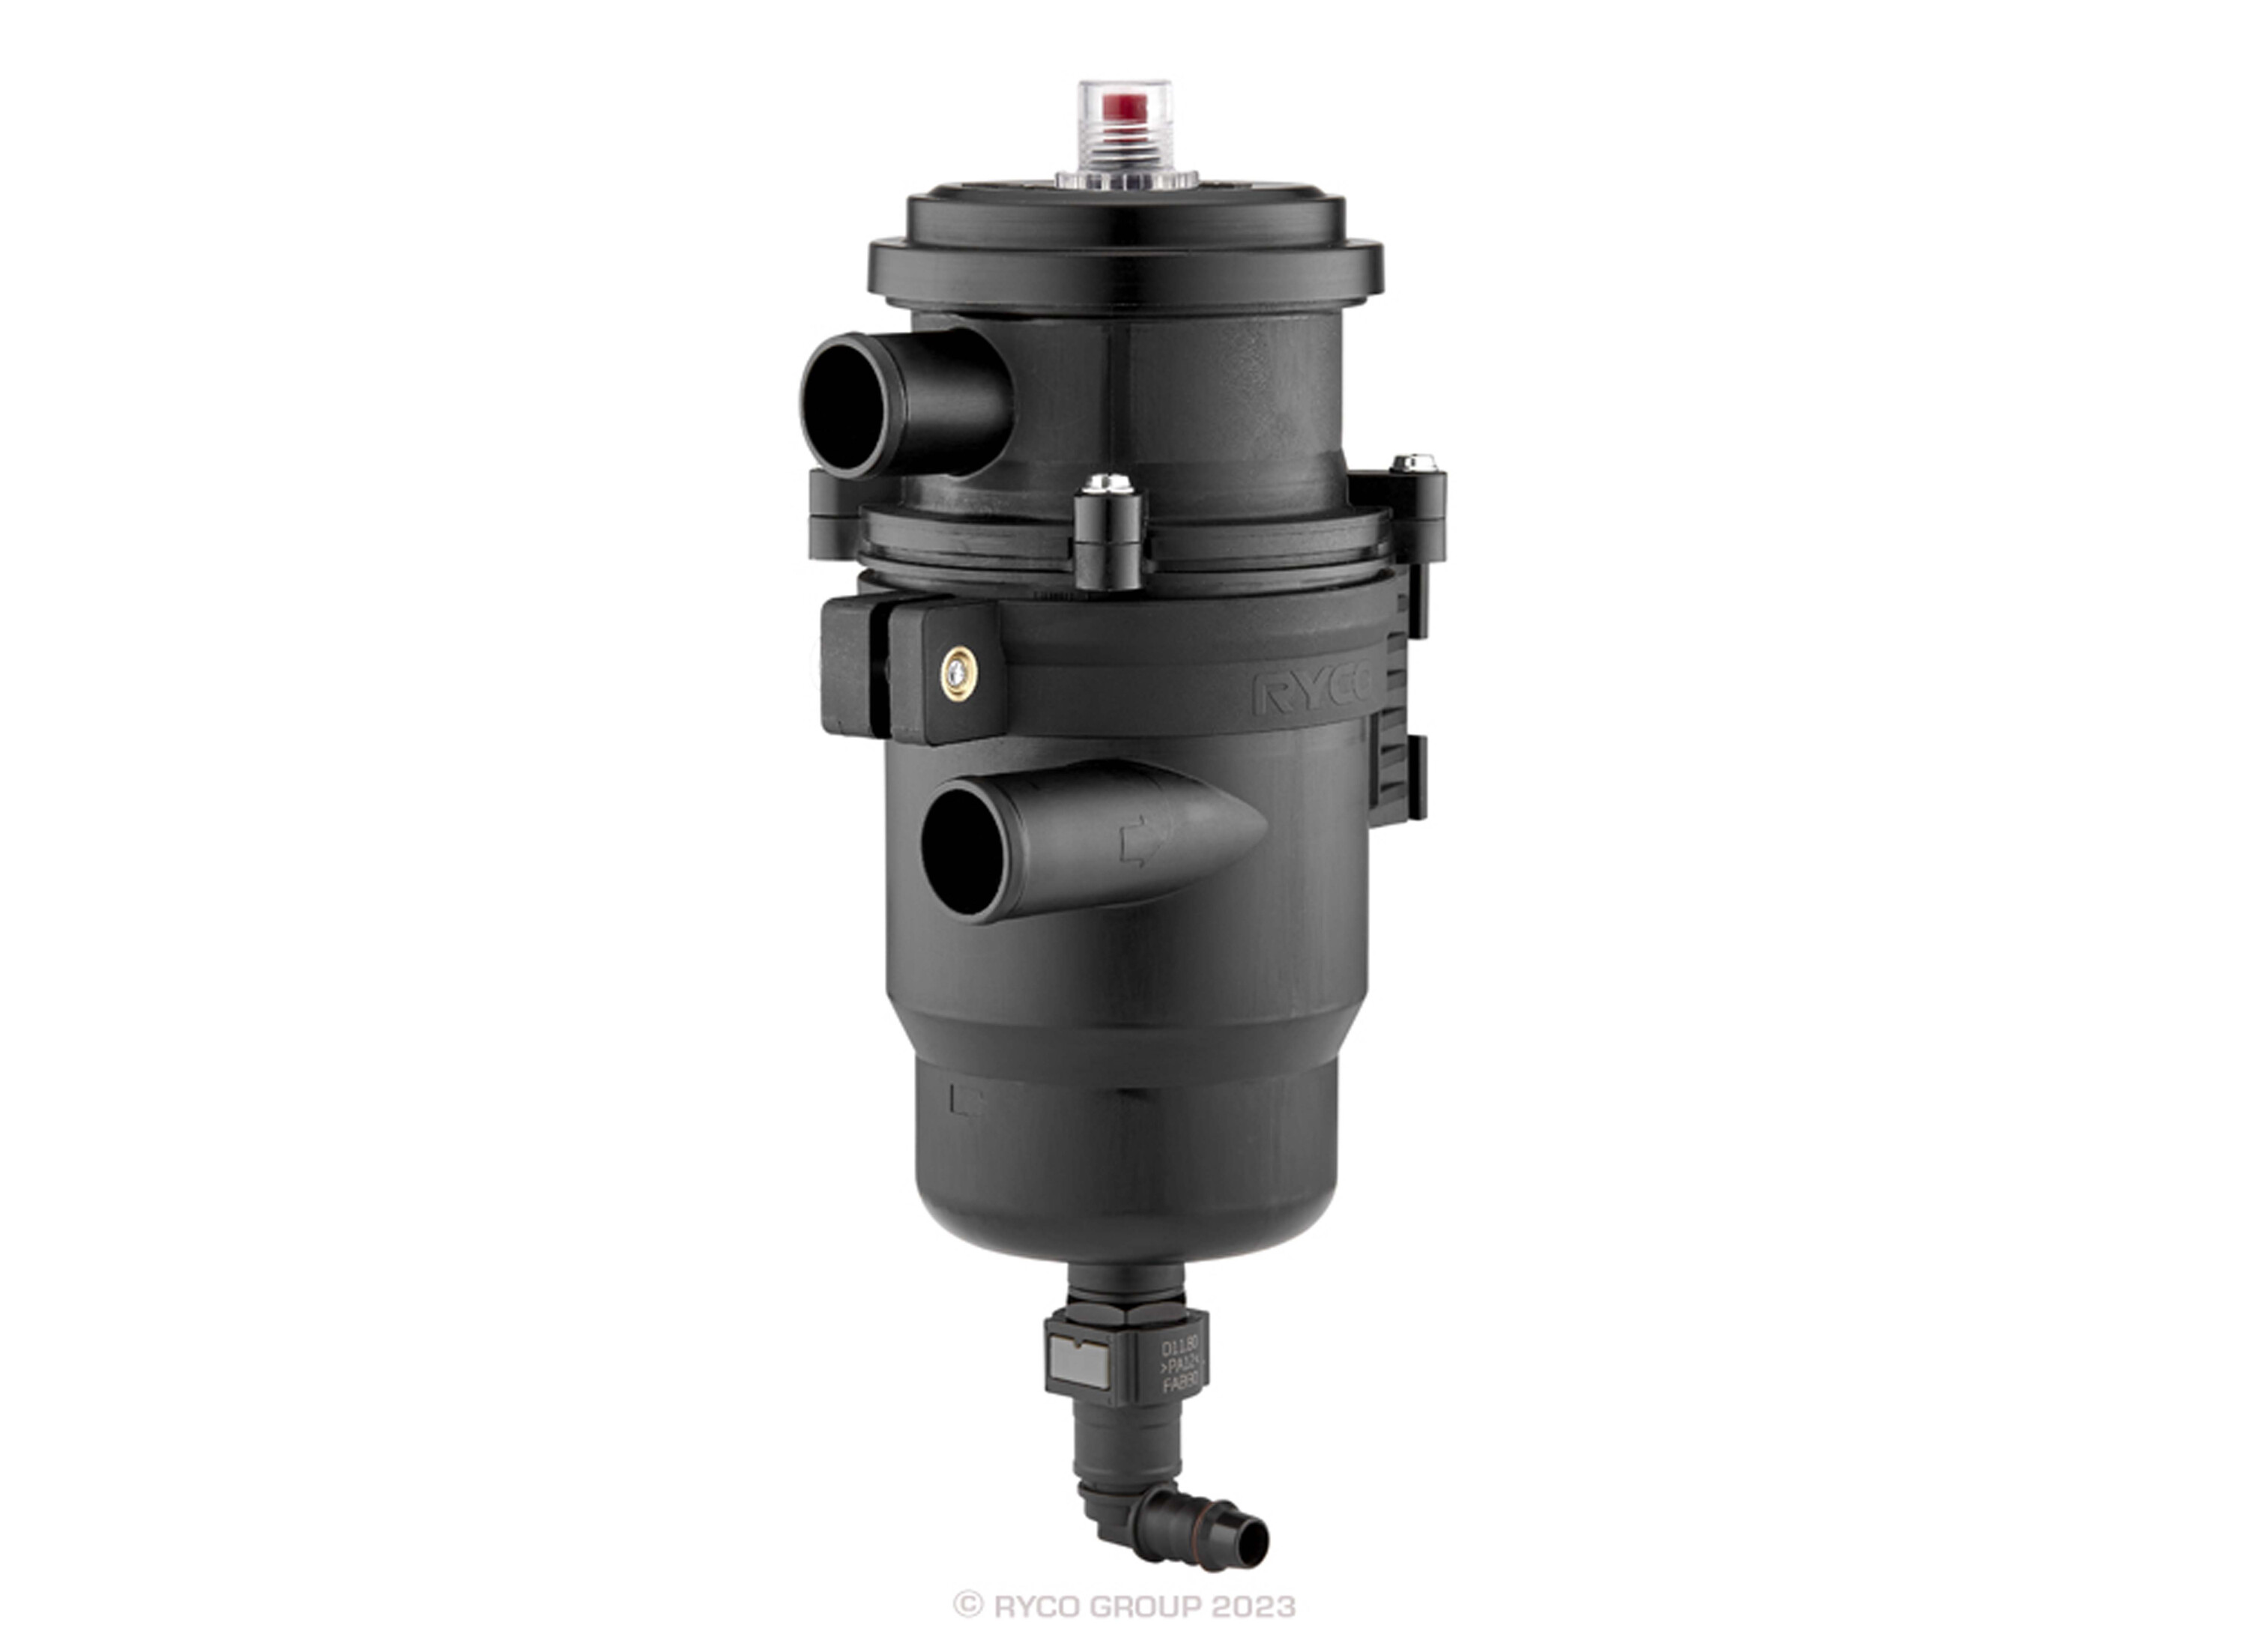
It’s beautifully simple, actually; the catch-can acts as a filter between the crankcase and the inlet tract and intercooler.
In a way, the name catch-can is a bit misleading because it sounds like a device to catch drips, not a filter, but a form of filtration is its real job.
The filter medium is a pretty high-tech material that essentially contacts the oil mist and – for want of a better word – condenses it to droplets. Gravity does the rest, causing the droplets to fall into the bottom of the can (hence catch-can) where they’re trapped.
With the oil mist out of the equation, the crankcase fumes can now be directed through the inlet tract (as the law dictates) without its oil content and without the chance to clag up the intercooler or start producing Satan’s Vegemite in the inlet manifold.
1
And if I don’t have a catch-can?
Then you can be pretty certain that over time, a modern common-rail turbo-diesel will begin the process of clogging its inlet tracts with the dreaded black stuff.
And once the build-up reaches a certain stage, you’ll start to notice the engine losing efficiency. As in, burning more fuel and making less power. Sub optimal, for sure.
The fix is to disassemble the entire intake system and hand or chemically clean the gunk from the air passages. It’s a dirty, thankless task and it can consume plenty of workshop hours, so it’s not a cheap procedure.
And the moment it’s put back together and run without a catch-can, the whole process begins again. Oh, and in reality, even once you’ve forked out for the repairs, you’re really only back to square one in terms of how the car should perform.
1
So why don’t car-makers like catch-cans?
This one is a bit harder to answer, but the reality is that, depending on the manufacturer, you’ll be threatened with having your factory warranty torn up if you fit a catch-can.
Again, though, it’s far from that simple. See, unless an engine failure can be traced back to a problem caused by the catch-can system, then it becomes a bit of a grey area over whose responsibility the failure becomes. Think of it as if you’d fitted a bullbar to your vehicle.
Now, if the car throws a con-rod into the mulga, that’s not going to be the fault of the bullbar, right? But if the suspension fails under the extra mass of the aftermarket bar and winch, then maybe you’ve got a warranty problem.
1
So why would a manufacturer have a problem with a device like a catch-can that is likely to reduce warranty claims, not increase them?
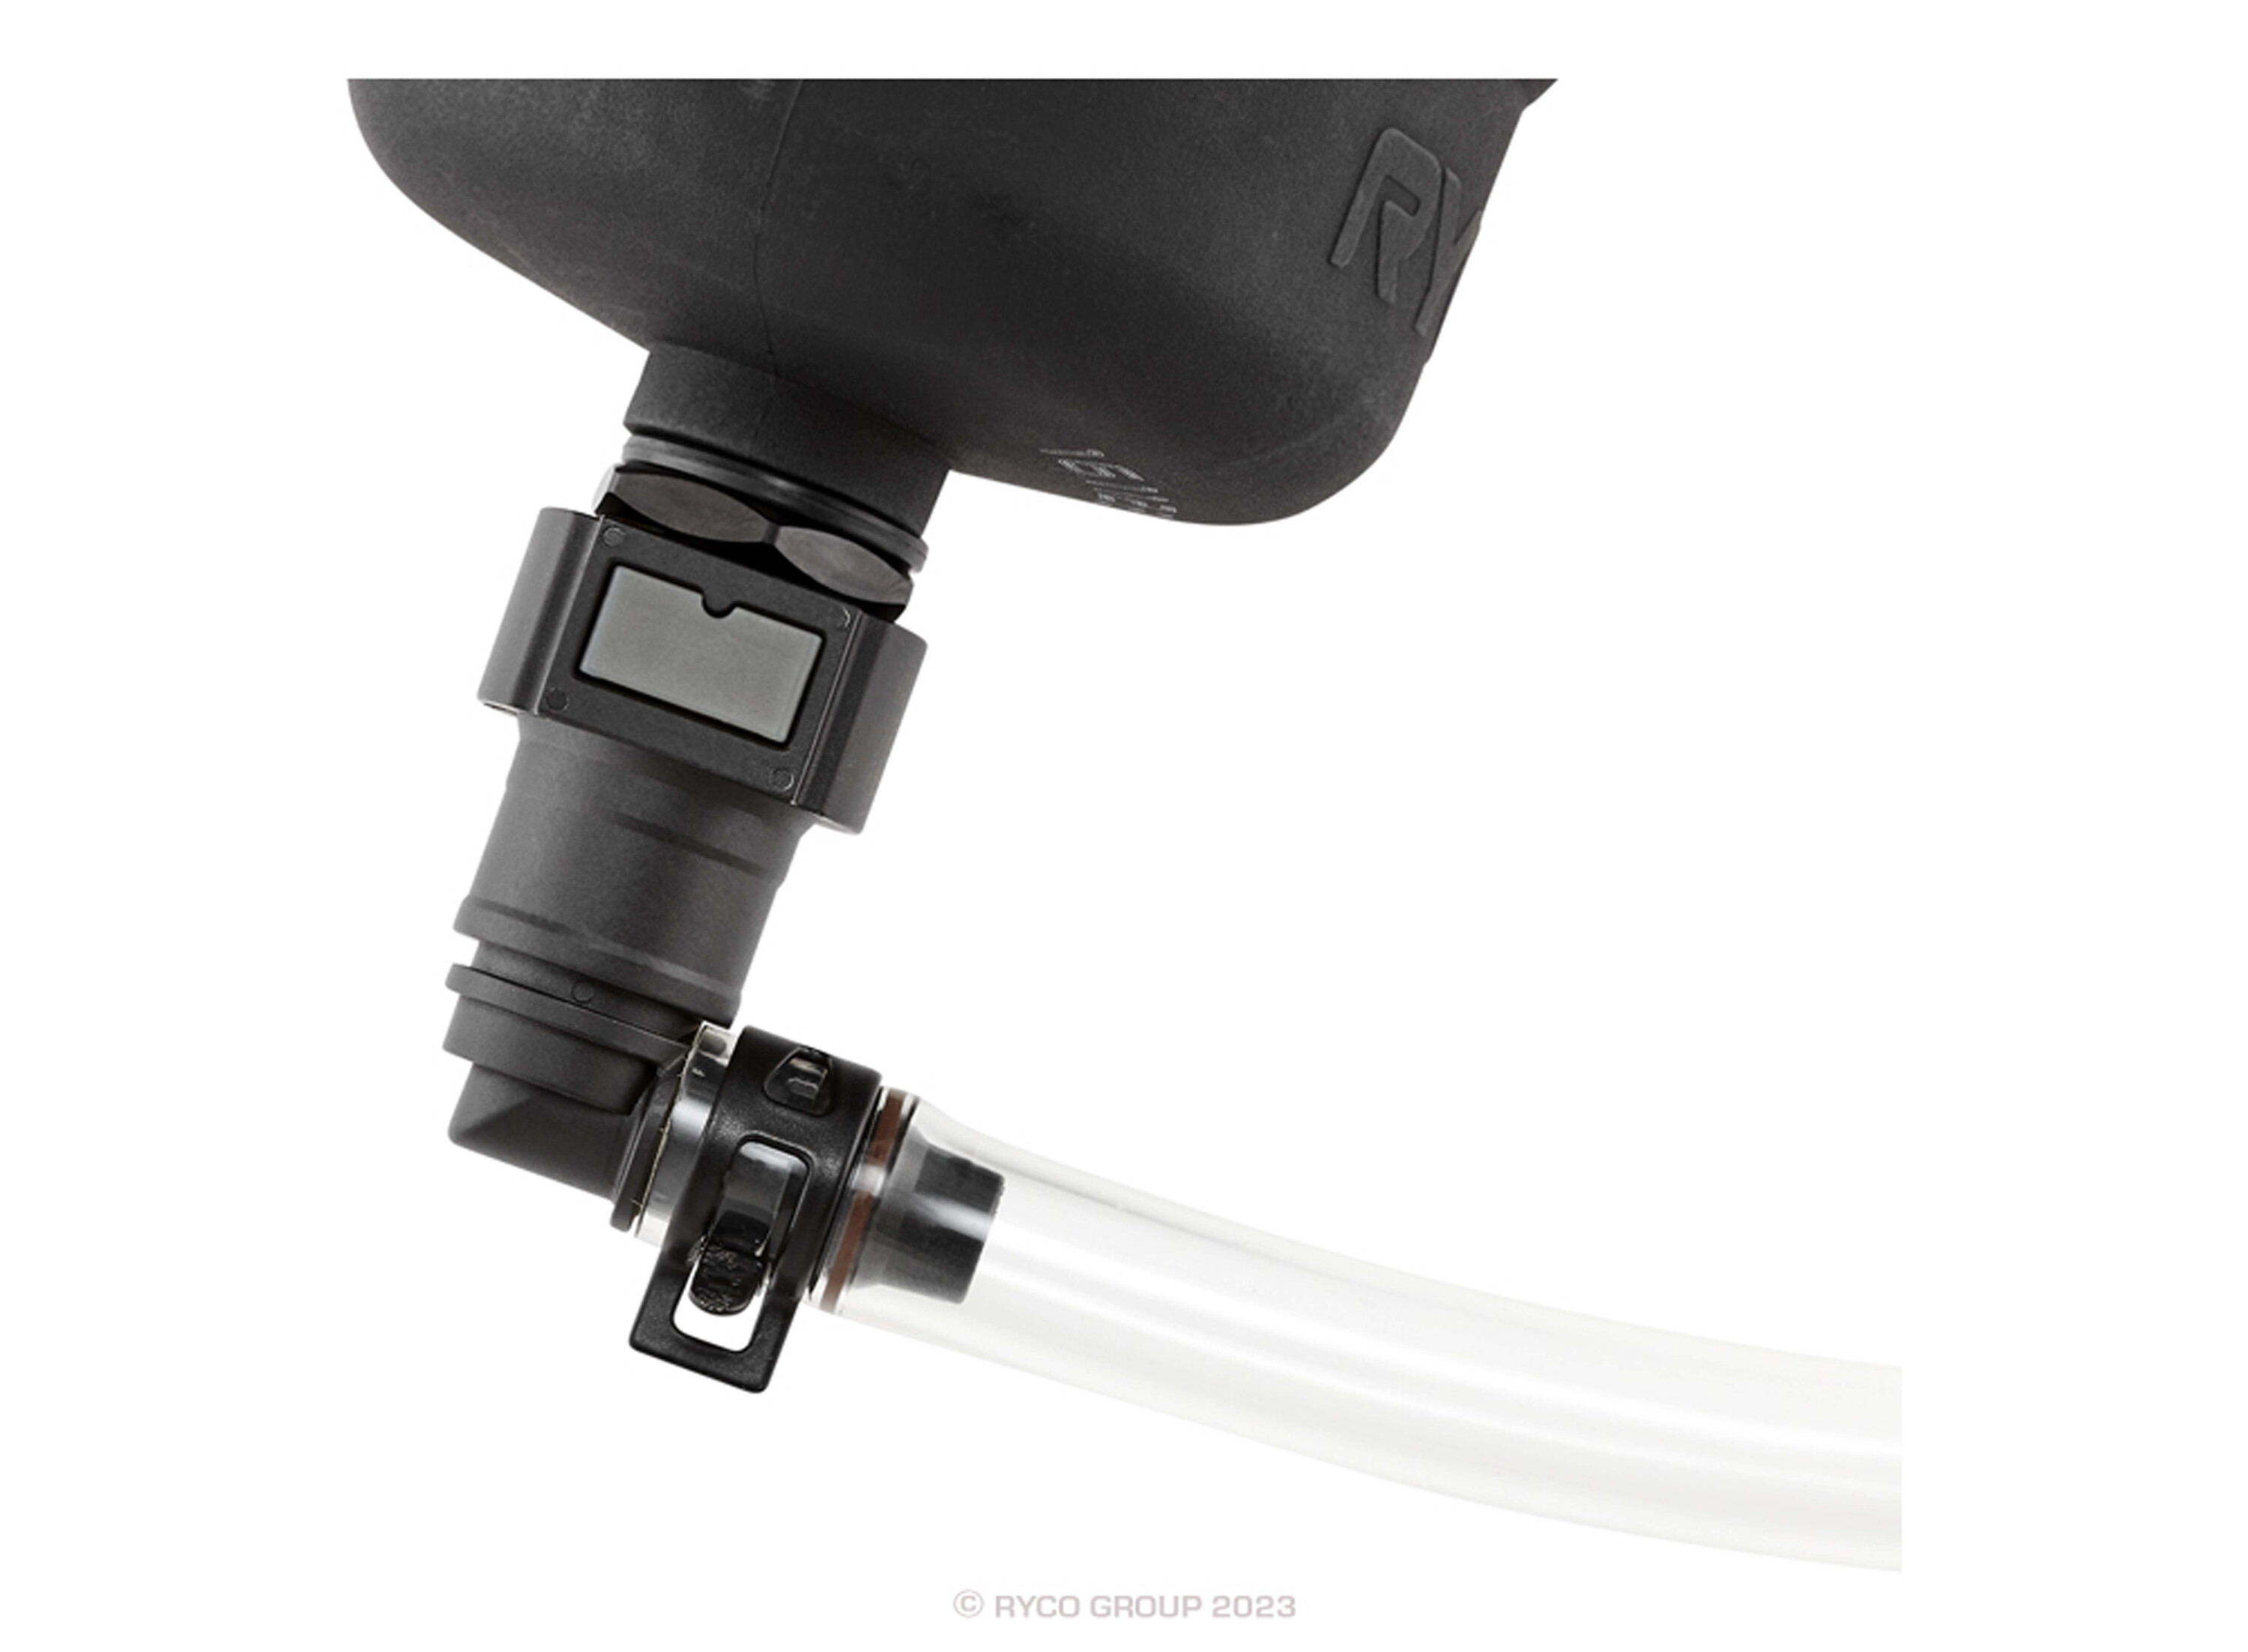
According to Brent Hutchinson, general manager of the Don Kyatt Group (which markets the Flashlube branded catch-can kits) the reality is more likely to be that manufacturers don’t like poor quality catch-cans. But since there’s so much misinformation about, the OEMs have mentally written them all off.
And there’s some sense in that, because a poor catch-can set-up will not only allow the same oil mist to run riot through your engine (through a poor filtering medium) if things like the pressure relief valve aren’t quality items, the set-up can allow damaging pressure to build up in the crankcase, at which point you’re looking at a whole new raft of problems.
1
Ben Heselev who runs the Melbourne-based Ultimate Off Road Centre in Ferntree Gully and who fits plenty of catch-cans to his customers’ rigs, agrees that a poor catch-can or an incorrectly installed one can cause huge problems.
“Hook it up wrong, and you can blow the rocker cover off the engine,” he says. Again, once this sort of stuff happens a few times, car makers start to lump all catch-cans into the too-hard basket.
“There are some bad ones out there,” agrees Brent Hutchinson. “Some of them don’t do much at all, some have poor filtration. There are a whole bunch of things that can go (damagingly) wrong with a cheapie,” he says. “In fact, (turbocharger manufacturer) Garrett agrees with the fitment of a catch-can system, provided it’s a good one. That tells you a lot.”
1
“Just be sure to spend the money, and get a good one.”
“As for Toyota and other car makers threatening warranty issues… the conversation is up to you. Do you want to protect your engine or do you wanna play by their rules and lose performance and efficiency. Think about it like this: You’re unlikely to have a warranty claim in the first few years anyway, right? So why not play the long game and base your decision on owning the vehicle for many years after the warranty has expired. Now, how risky does a catch-can system look?”
“Just be sure to spend the money, and get a good one.”
And what is a good one? Ben Heselev says the features to look out for include a separate filter unit and a built-in pressure-relief valve. “Make sure the kit you buy has a separate filter element (that can be changed easily). Some of them only have a lump of what looks like steel wool. That’s not a proper filter element, and those ones rely on a change of temperature to work, rather than a proper filter medium.”
1
So how much money are we talking?
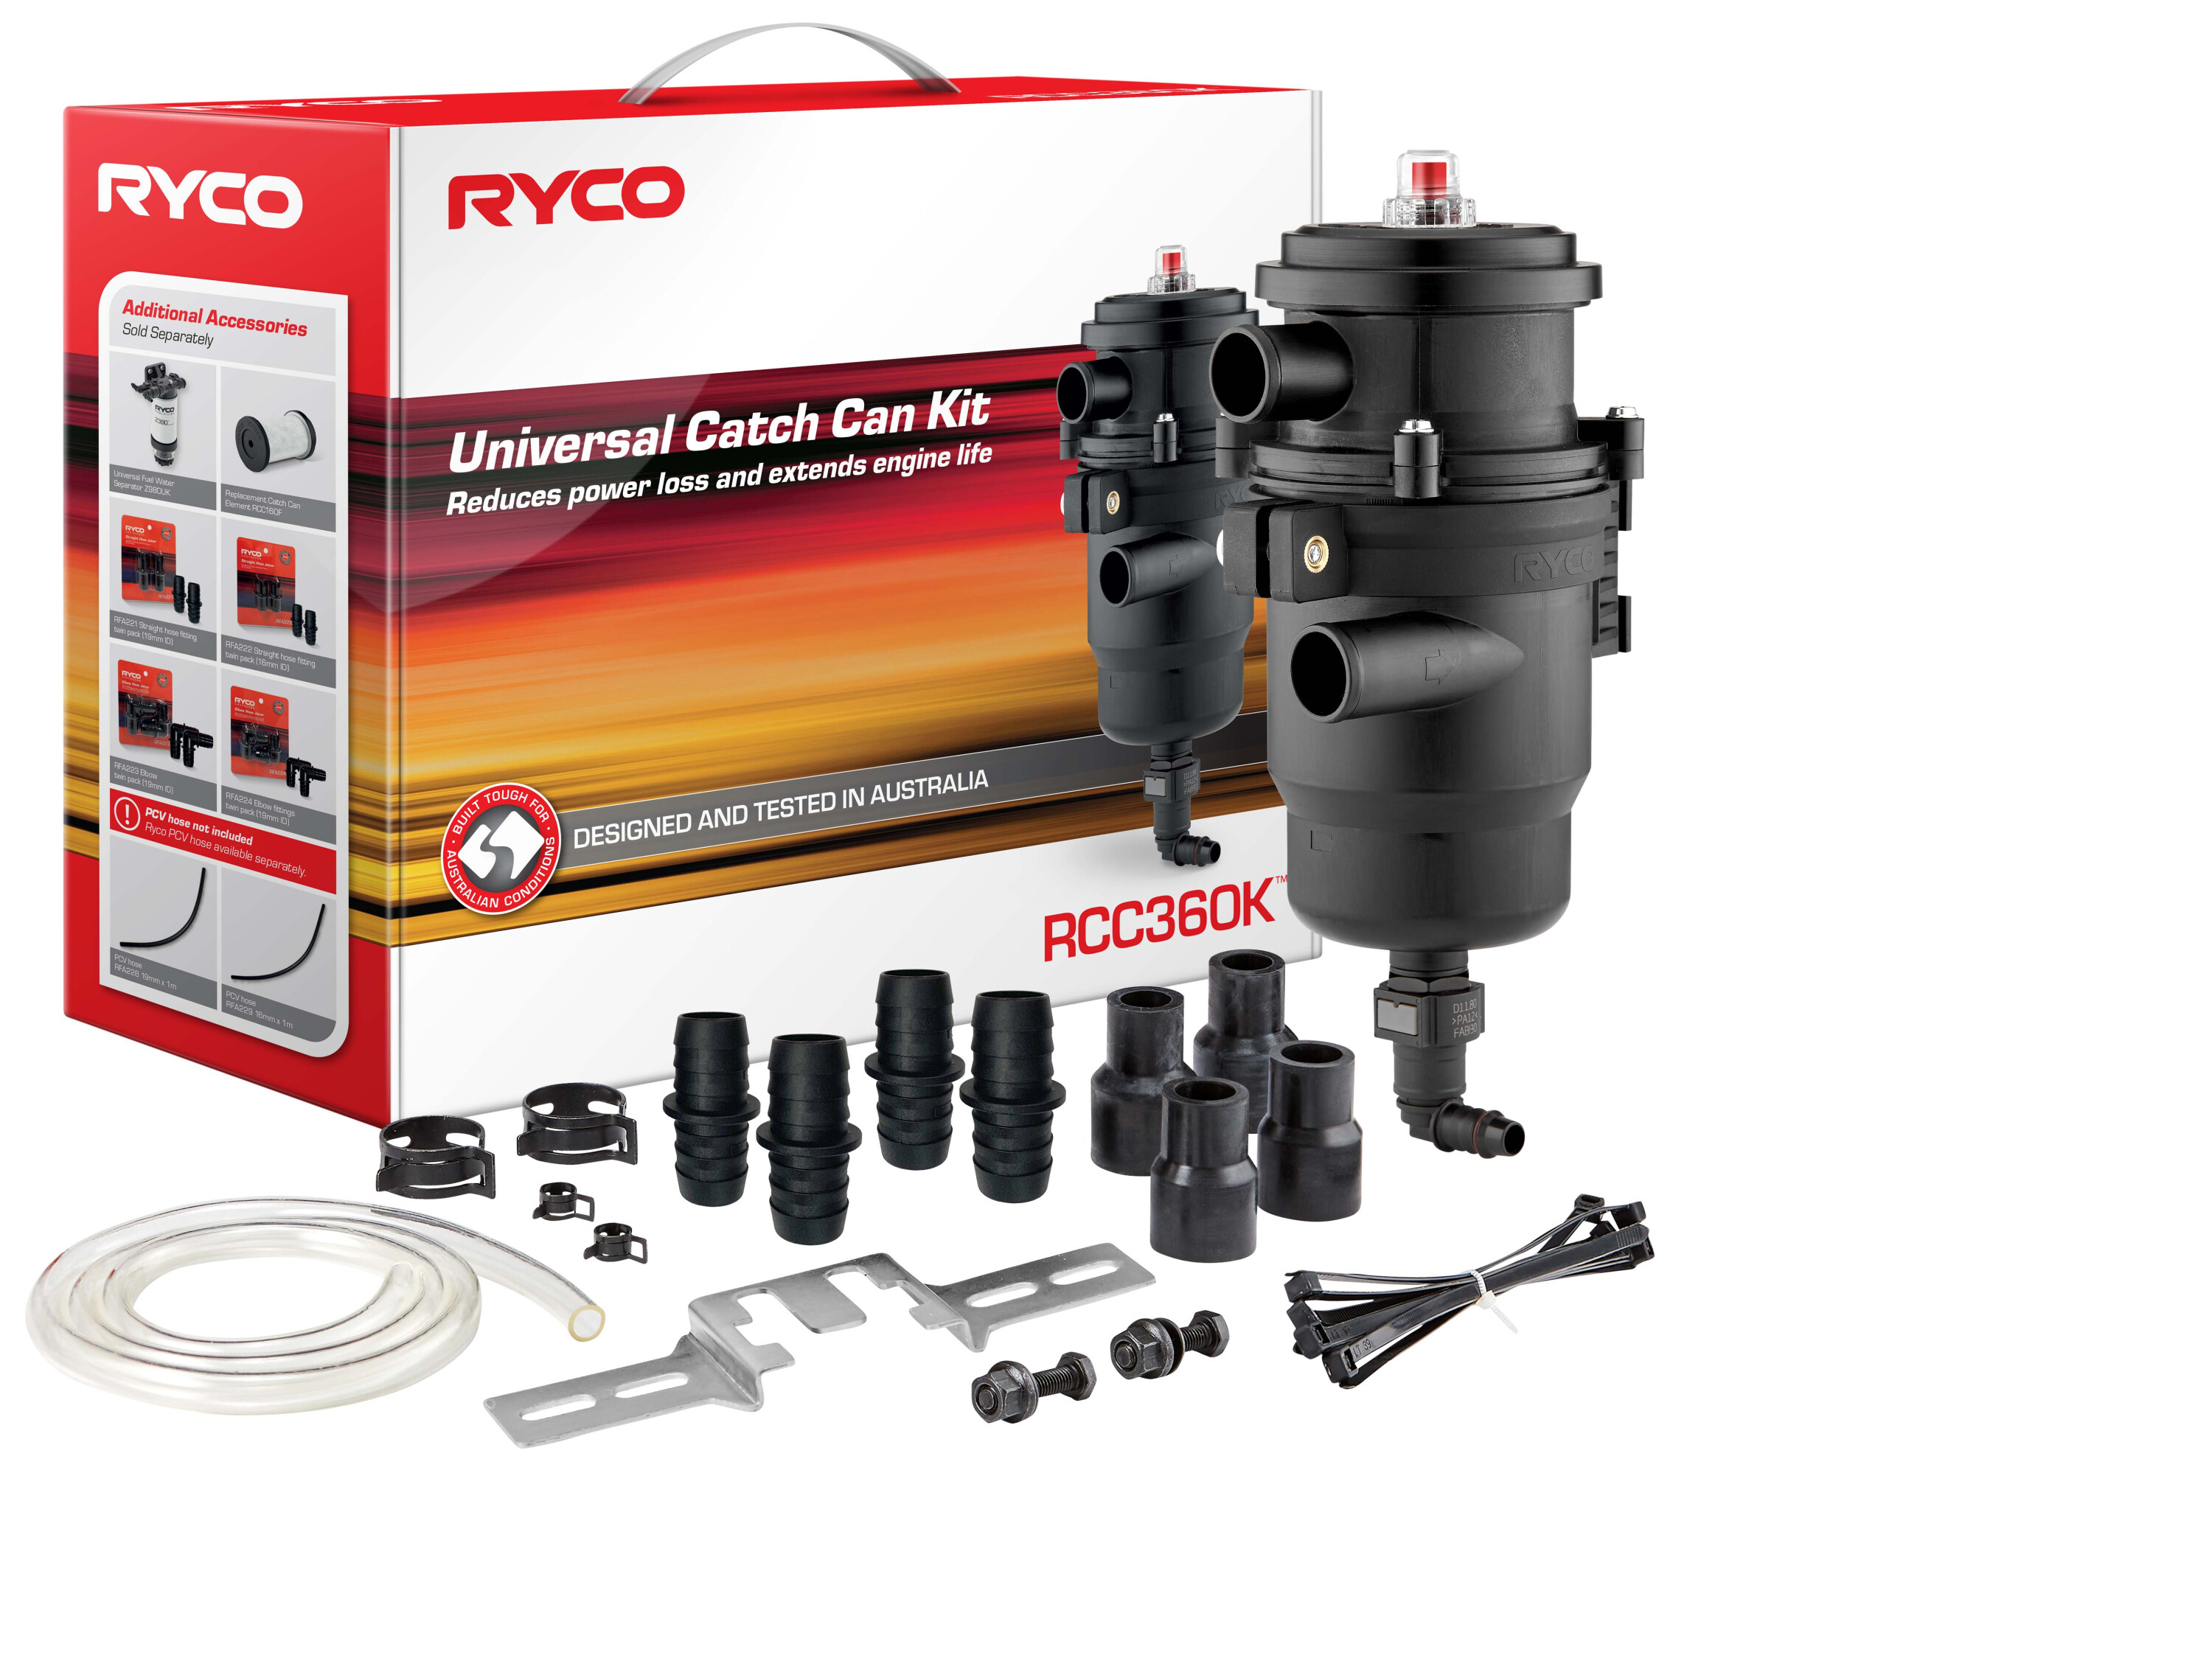
Compared with the cost of manually cleaning out an engine’s intake system, the $450 or so that a quality catch-can system costs is peanuts.
And in the case of the Flashlube product, that will include everything down to moulded hoses for a perfect fit and even the smallest clips.
There are about 40 different kits to suit particular makes and models with the emphasis on keeping an OE appearance under the bonnet. Fitting should take the average mechanic somewhere between 15 and 30 minutes.
1
Ben Heselev is on exactly the same page here, and says that between $400 and $500 is where you need to be.
“Below that and you’re probably wasting your time,” he reckons.
Once the kit is fitted, it should be more or less set and forget. That said, the filter will need to be changed every 20,000km and any oil inside drained out and disposed of correctly. But, again, as an alternative to acid-bathing the entire intake system to clean it, this doesn’t seem so bad.