A vehicle-mounted electric winch is one of the most effective recovery tools available to four-wheel drivers, especially those who venture off the beaten track on their own.
As long as the winch is in operable condition, you have the right equipment on hand, and have a solid anchor point within reach, you should be able to perform a basic winch recovery. Here’s how…
The right winch
There are plenty of electric winches on the market, and before you slap down the hard-earned it’s important to know what one will best suit your vehicle.
Before looking at different winch brands, the first thing to figure out is what capacity winch you need to safely recover your vehicle should it become stuck. As a rule, it’s advisable that a winch should be rated to around one-and-a-half times the Gross Vehicle Mass (GVM) of the vehicle.
The GVM of my Ford Ranger, for example, is 3200kg, so it should ideally run a winch with a capacity in the vicinity of 4800kg (10,500lb). Bearing this in mind, I have fitted a 10,000lb Warn EVO 10-S winch.
Once you have calculated the capacity of the winch required, you’ll then need to look at other factors including gear ratio, line-pull speed and waterproof rating, as well as features such as how the controller connects (wired or wireless options) and whether it’s supplied with a steel cable or synthetic rope.
Most winches have a standardised mounting design, but you’ll still need to ensure that the winch you choose matches the winch cradle in your vehicle’s bar.
While there are plenty of budget-priced winches on the market, and some owners swear by them, when it comes to buying an electric winch, you don’t want to scrimp; after all, you need it to work when you really need it! Having said that, even the top brands can fail from time to time, so it’s important to regularly run the winch and to service it.
What else do you need?
A winch alone will not get you out of strife if you get stuck; you’ll also need a winch recovery kit. Here is a list of the gear you will need at a minimum: gloves; rated shackles; winch extension strap; tree-trunk protector; snatch block(s)/winch ring(s); and winch cable damper.
Other stuff that can come in handy for winch recoveries includes a shovel and a machete, the former for digging around the vehicle where it’s stuck or for clearing the track, and the latter in case you need to clear away scrub to reach a suitable anchor point..
You’ll also need to ensure your winch controller is handy and that if it’s a wireless model it has charged batteries.
Setting up a basic recovery
We’re going to focus here on a straightforward, single-line pull winch recovery; we’ll look at more complex winching techniques in a future issue, including double-line pulls and how to use snatch blocks to winch a vehicle sideways.
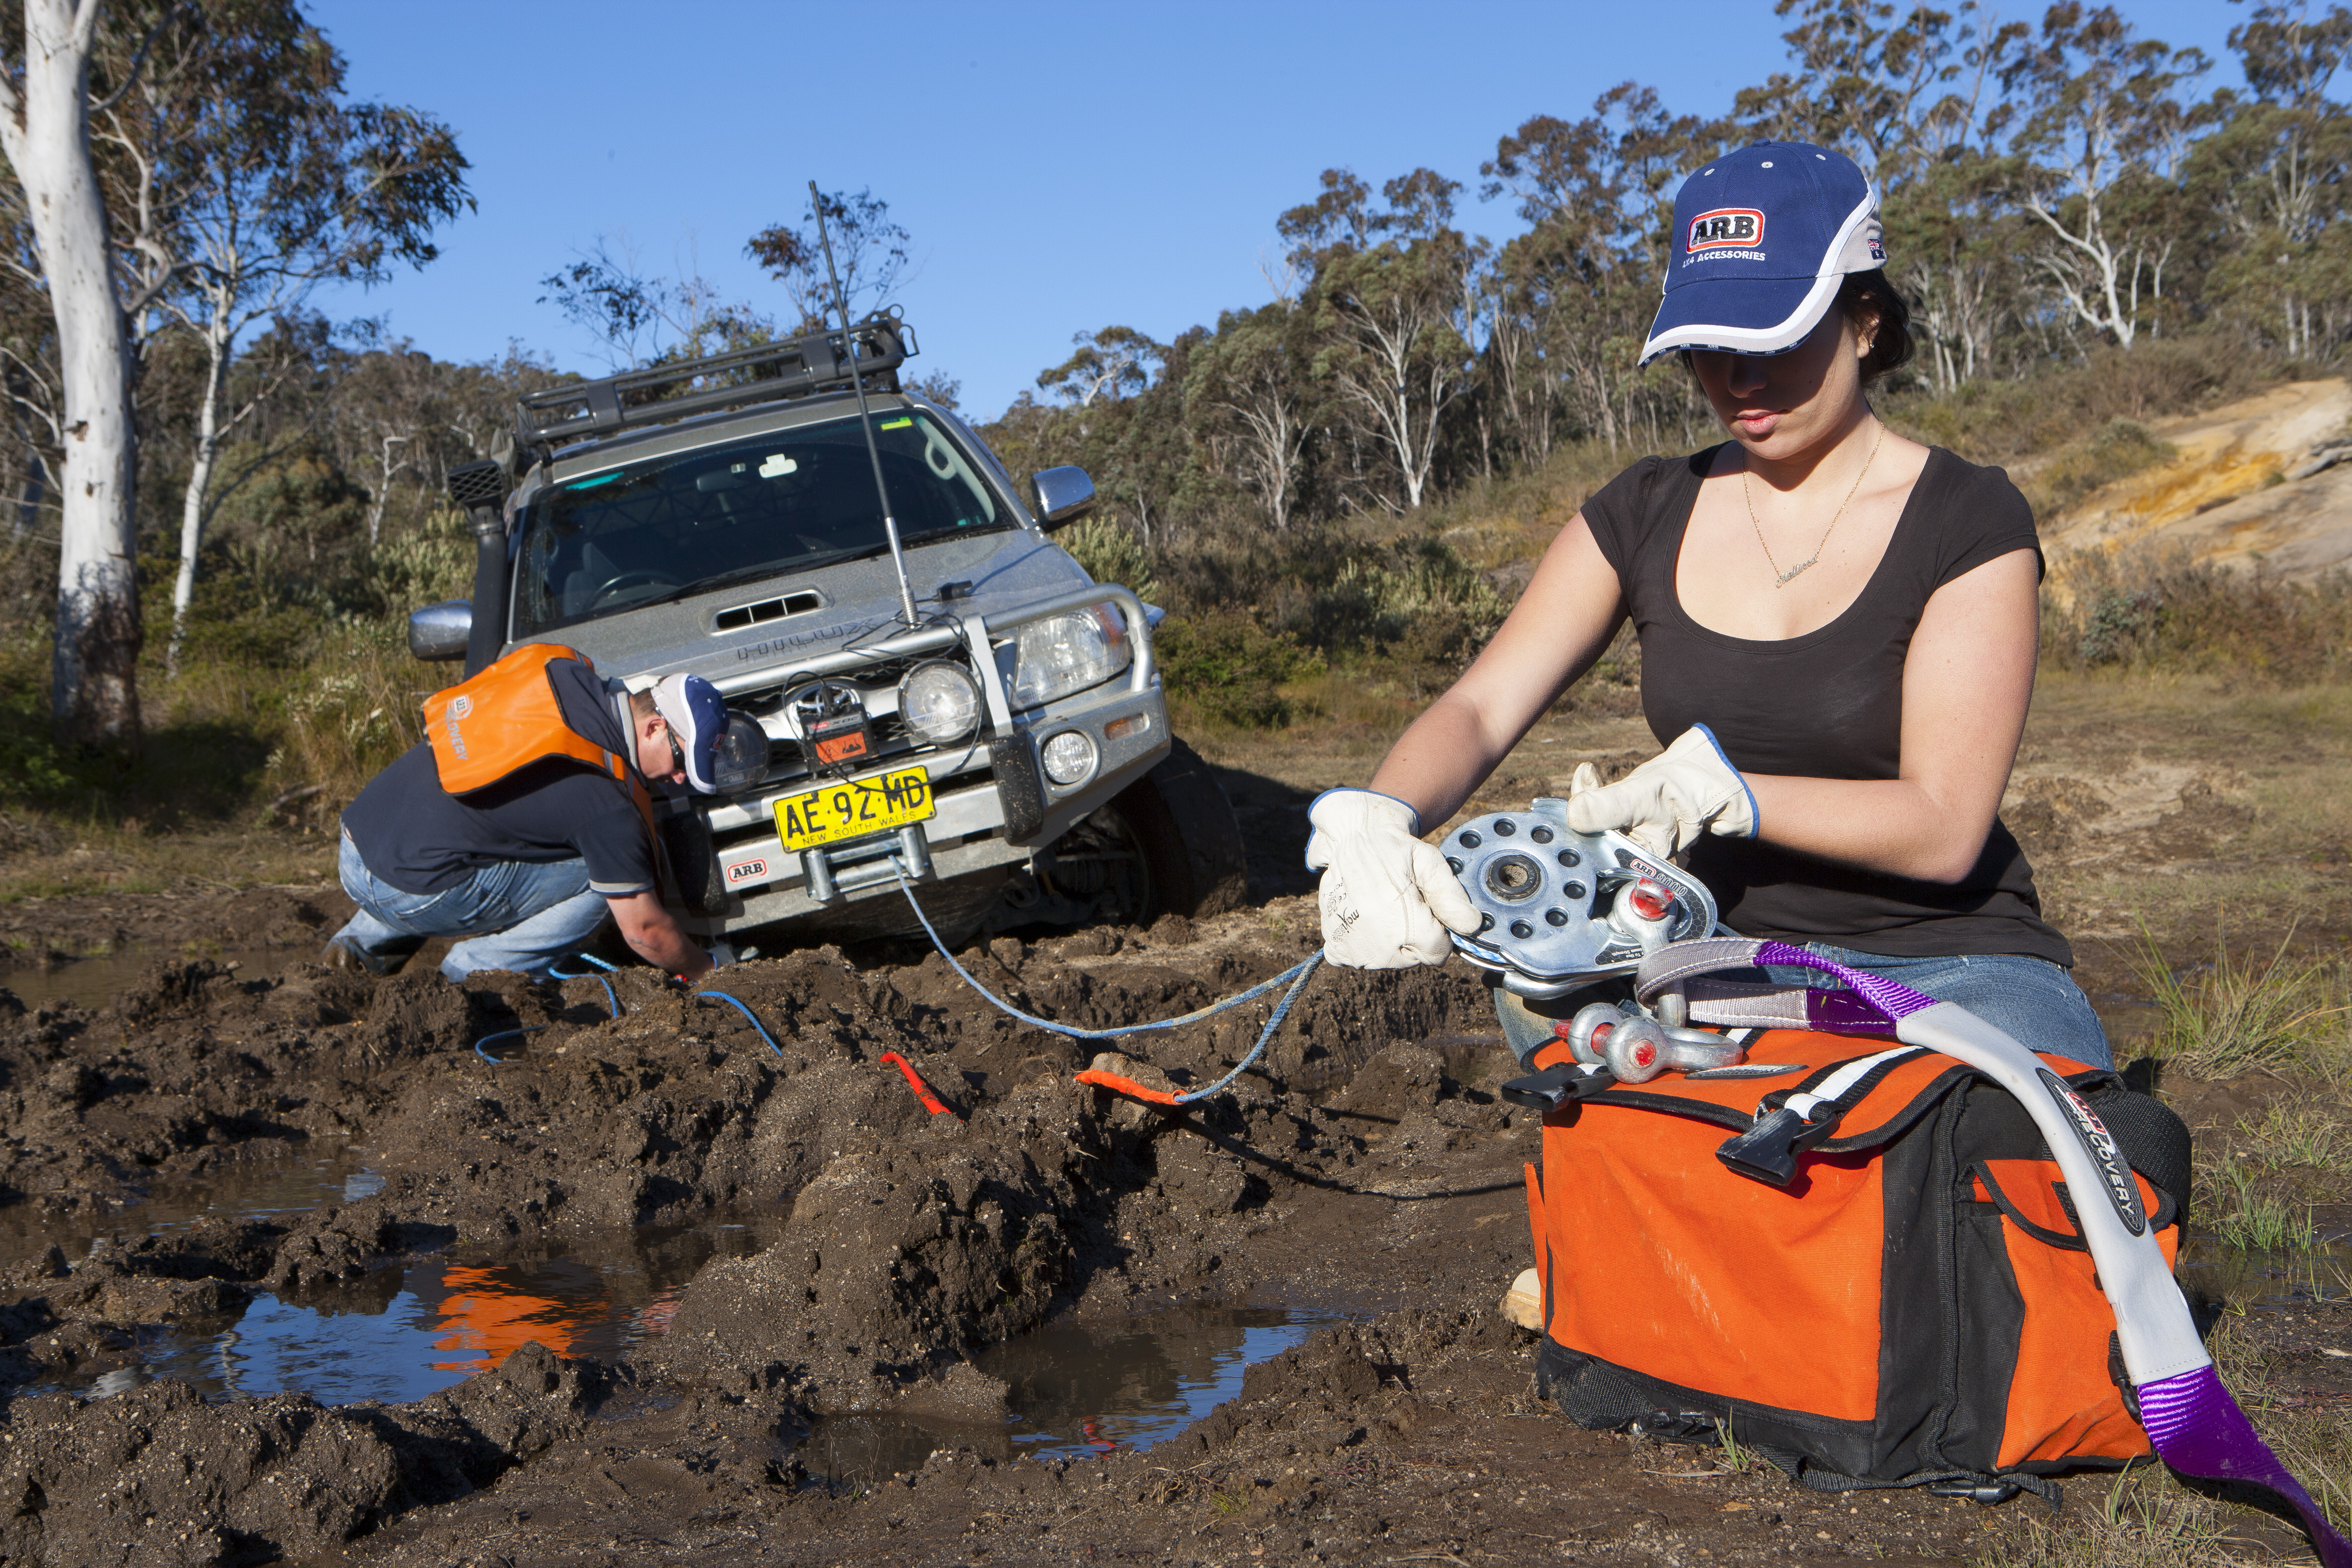
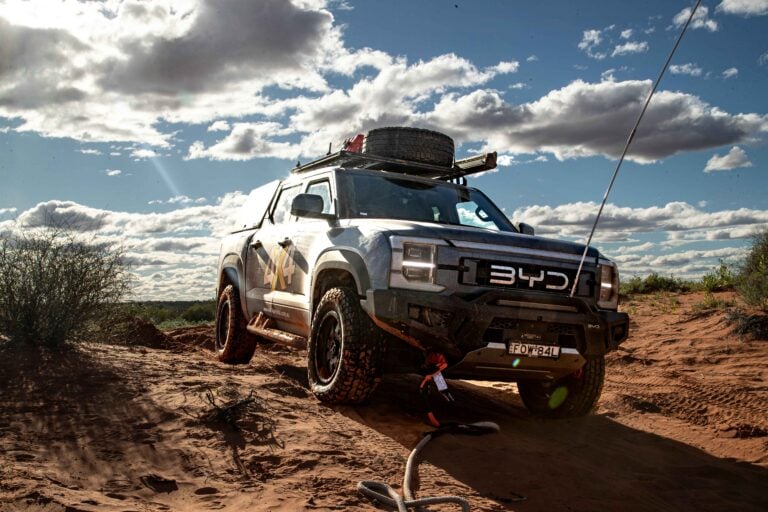
Once your vehicle is stuck and you have decided that using the winch will be the best recovery option, you’ll need to survey the situation and locate a suitable anchor point. If you’re in a wooded area, a substantial tree will likely be the ideal anchor point, but if you’re stuck in sand dunes or out in the open, you may have to use a sand anchor or even bury your spare wheel to use as an anchor point.
In the example pictured above, the vehicle is stuck in deep ruts on a muddy track, and it can’t be driven forwards or backwards. You could use a shovel to try and free the vehicle, or use recovery tracks to try to drive out, but with a big tree within reach right in front of the vehicle, using the winch will be the easiest extraction method.

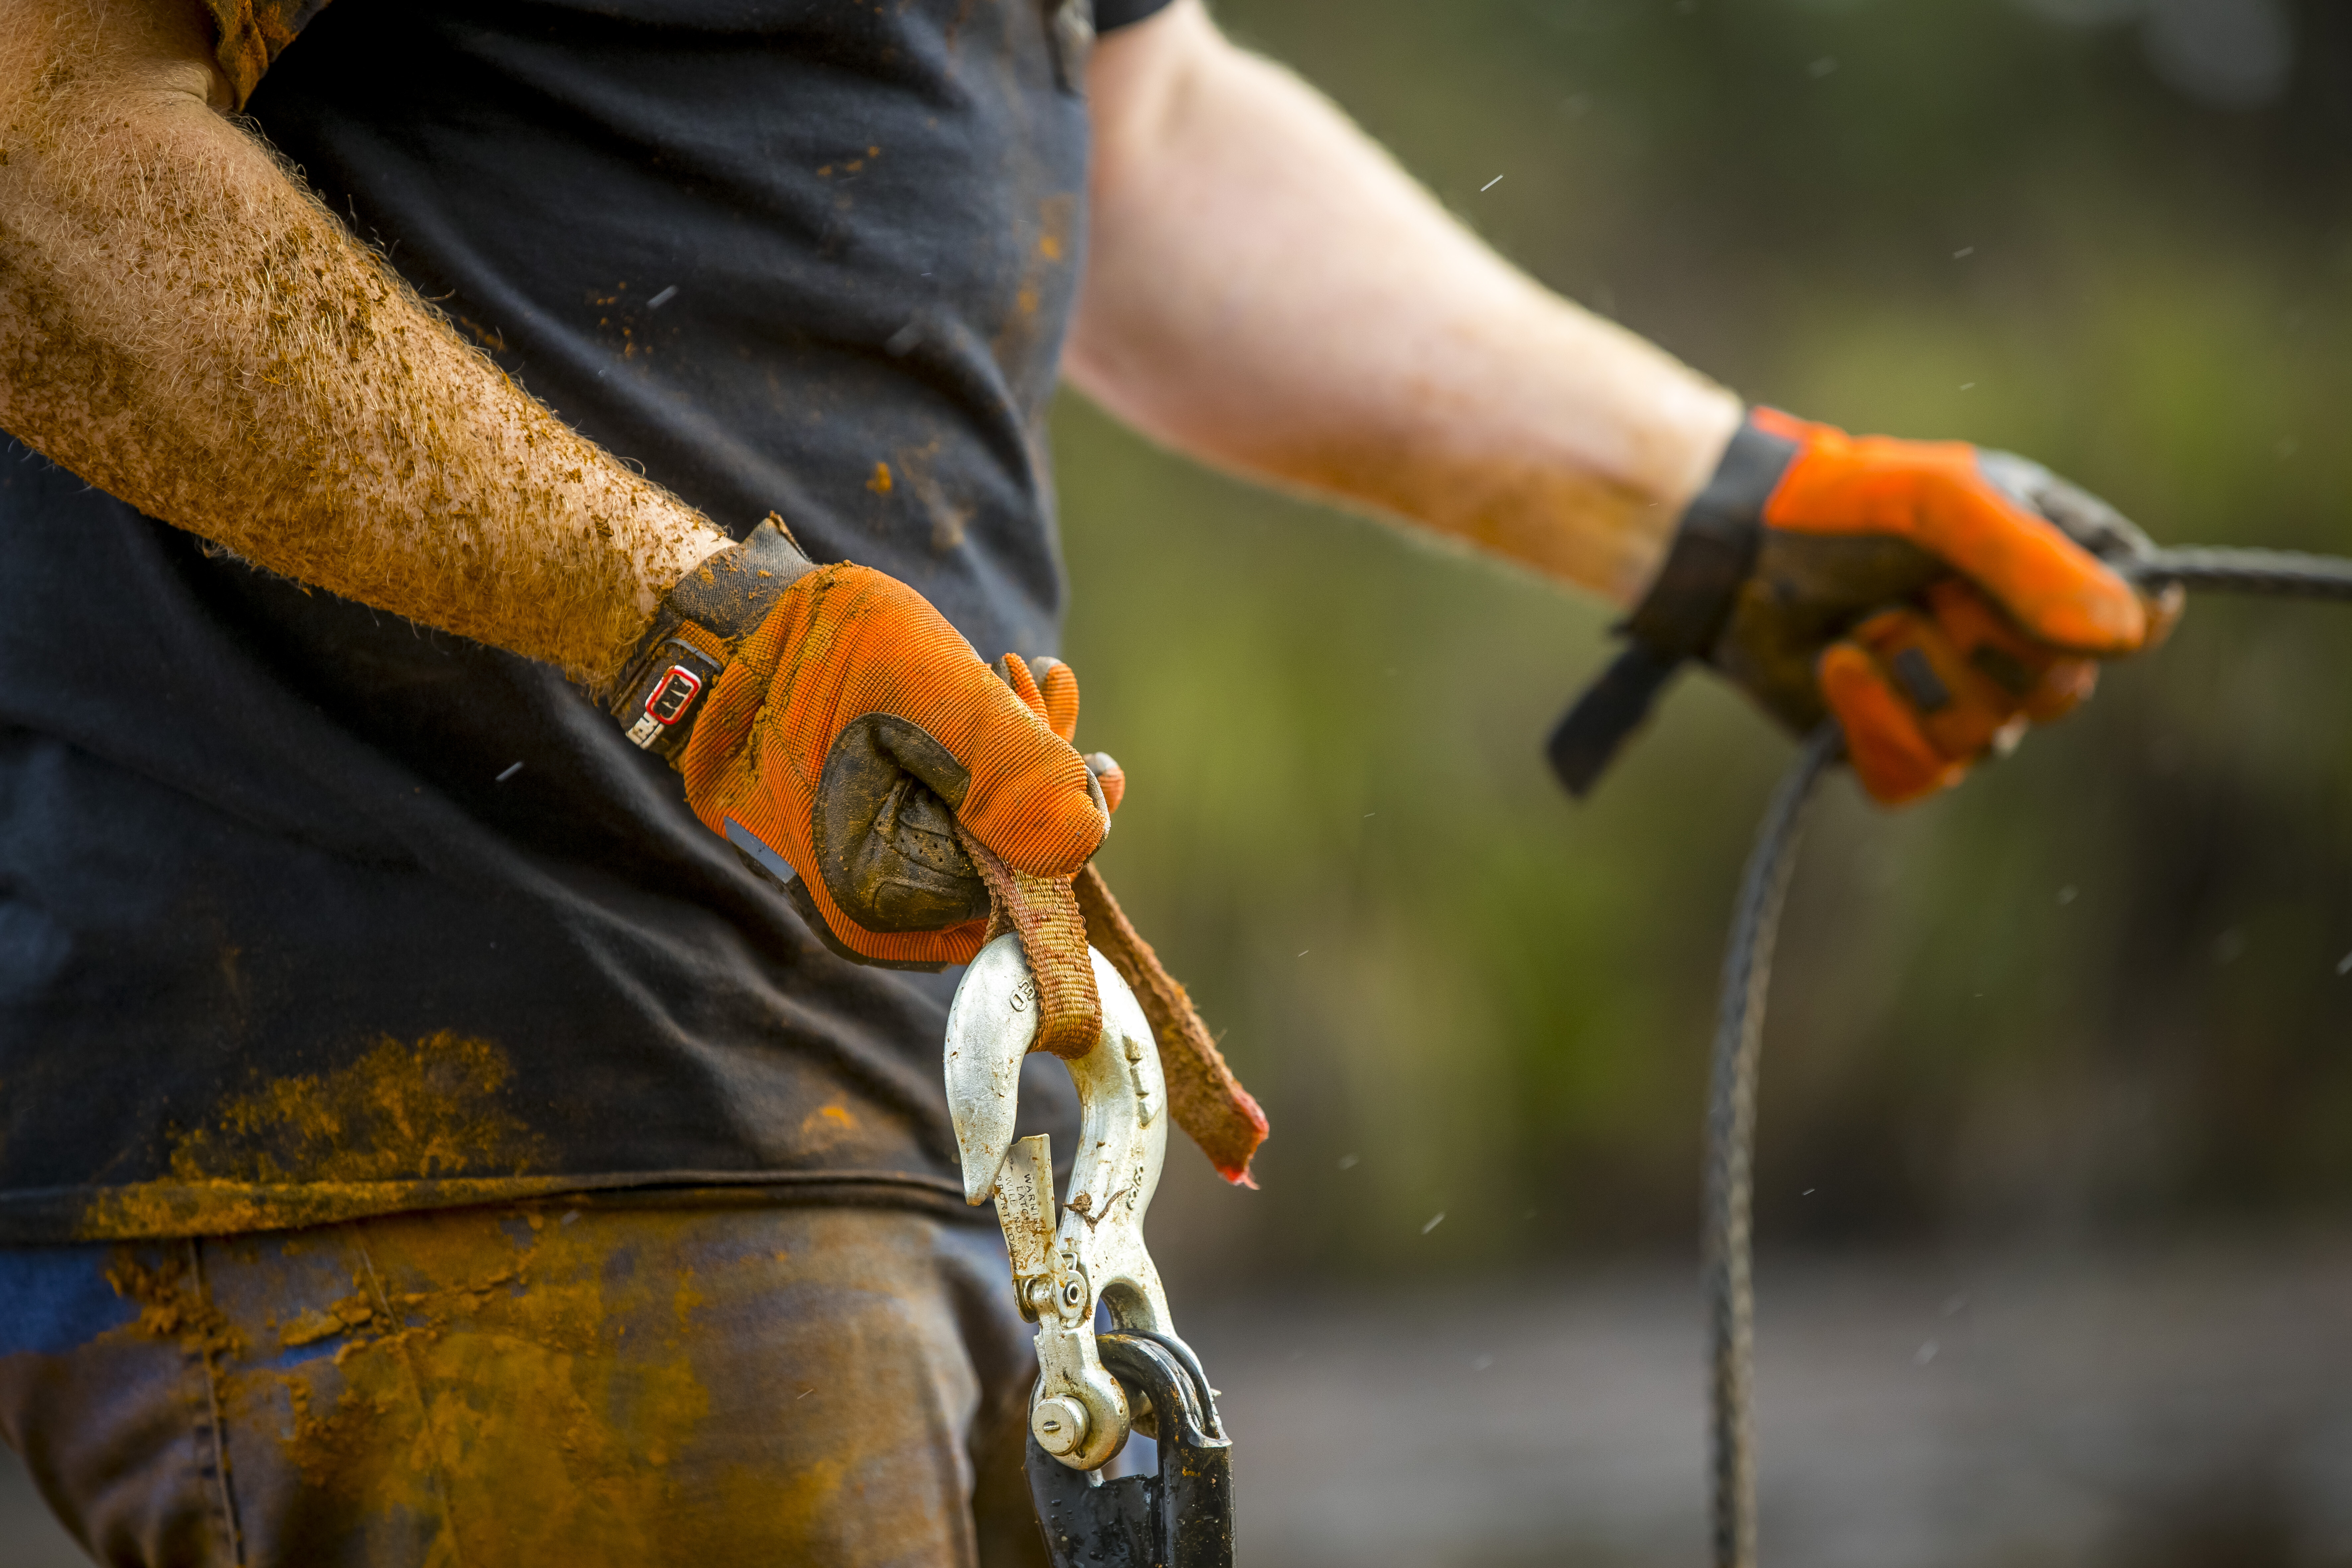
The first thing to do is grab the winch recovery bag and pull out the gear that will be needed in the recovery, which in this case includes gloves, tree-trunk protector, soft shackle and winch-rope damper. The next thing to do is to connect the winch controller to the winch, which in this case is via a lead with a plug on the end.
There’s a clutch lever on the winch that needs to be moved to the free-spool position to pull out the required amount of winch rope. Make sure you’re wearing gloves when you grab hold of the winch hook and pull out the line as you walk towards the tree.
Once you have ascertained that the tree is strong enough to handle the weight of the vehicle recovery, run the tree-trunk protector around it and join the two looped ends using a rated shackle.
The tree-trunk protector should be positioned as low as possible around the tree as that is where it will be the strongest, and make sure there are no twists in the tree-trunk protector as it’s the width of this strap that prevents the tree from being ringbarked or otherwise damaged.
My preference is for soft shackles over steel D-shackles or bow shackles, as the heavy steel shackles can become lethal missiles in the event of an equipment failure. The winch hook can now be connected to the shackle.
As you walk back towards the vehicle, make sure the winch rope isn’t positioned where it could snag on obstacles, and bear in mind that rocks like sandstone can be abrasive to synthetic rope, so protect it where you can. Place the winch-rope damper over the rope at around the halfway mark between your vehicle and the anchor point.
Once back at the vehicle, shift the winch clutch lever back in to the engaged position. If on your own, you will need to operate the winch from inside the vehicle, so feed the cable for the controller over the bullbar and bonnet and through the driver’s window in such a way that it won’t slide off and fall under the vehicle while winching.
If there are other people around, you could enlist one of them to operate the winch controller from outside the vehicle, but there will always need to be a driver sitting in the driver’s seat during the vehicle recovery.
Make sure everyone is well clear of the recovery operation before starting the vehicle’s engine and then tension the winch rope by winding in via the controller. Electric winches draw a lot of current, so you will need to have the vehicle’s engine running so as to not drain the starting battery while winching. Once everyone is clear and the winch rope has been tensioned, you’re ready to start the recovery process. Note: never let anyone step over a tensioned winch rope; if it fails it could cause serious injury.
Before you start winching, make sure the vehicle is in low-range first gear, ensure the park brake is off and take your foot off the brake pedal; the vehicle will not roll backwards once the winch rope has been tensioned. Apply some throttle while winching in to take as much load off the winch as possible, but don’t drive too fast; you want some tension on the winch rope at all times so that it winds on to the drum evenly, and so you don’t run over it.
While winching in, keep an eye on the position of the winch rope damper. If it starts getting too close to the fairlead, you will need to reposition it closer to the anchor point. When doing this, remember not to step over the tensioned winch rope. If you need to winch over a long distance, make sure you give the winch a rest every couple of minutes so that it doesn’t overheat.
If the winch is straining, you may need to employ a double-line pull, but as mentioned we’ll get to that in another issue. However, if all goes well and you have successfully winched out of your stuck situation, you can stop winching and drive forward slightly to take the tension out of the winch rope.
This will make it safe to step over the rope if you need to, and will also make it easier to detach the winch hook from the shackle so you can retrieve the tree-trunk protector. Before getting out of the vehicle though, ensure the park brake is on and it’s in gear, or if it has an automatic transmission make sure Park is selected.
Packing up
You can now start packing away your gear. Make sure your gloves are on when handling recovery gear. Remove the winch-rope damper from the rope and then disconnect the winch hook from the shackle. Pack away the tree-trunk protector and then start winching in to feed the winch rope back on to the winch drum.
As you winch in, hold the winch rope to keep tension on it and feed it on to the drum as evenly as possible, starting from one side and moving across to the other, one rope width at a time, and then moving back across to the other side. This will prevent the rope from becoming tangled so it will be easier to spool out the next time you need to use it.
As the winch hook starts to get close to the fairlead, make sure you grab the hook itself and keep your fingers away from the fairlead. Take your time to finish off the job here and ensure there is just enough tension to keep the winch hook in place against the fairlead.
Finally, take a good look around the area to make sure you haven’t left anything behind such as a shackle or your tree-trunk protector, then pack away your winch controller.
When you get home
If you have used your winch in muddy conditions, you will need to clean the winch rope when you get the chance. If you leave it muddy, it will dry out and all the abrasive dirt and grit in there will damage the rope the next time you use it.
You should also check to make sure the winch rope is not tangled on the drum. If it is, spool it out and winch it back on to the drum evenly with some tension on it.
Check that your winch recovery kit is complete before you head bush again and, as mentioned, make sure you service your winch regularly.
Do
- Wear gloves when handling recovery equipment
- Run vehicle engine when winching
- Be smooth when winching in
- Wind winch cable/rope evenly on to the drum
- Maintain and service winch regularly and check operation
Don’t
- Step over a tensioned winch cable/rope
- Allow spectators near recovery operation
- Overload winch (give it a rest every couple of minutes)
- Switch winch on and off constantly (it wears out solenoids)
- Get fingers near winch fairlead
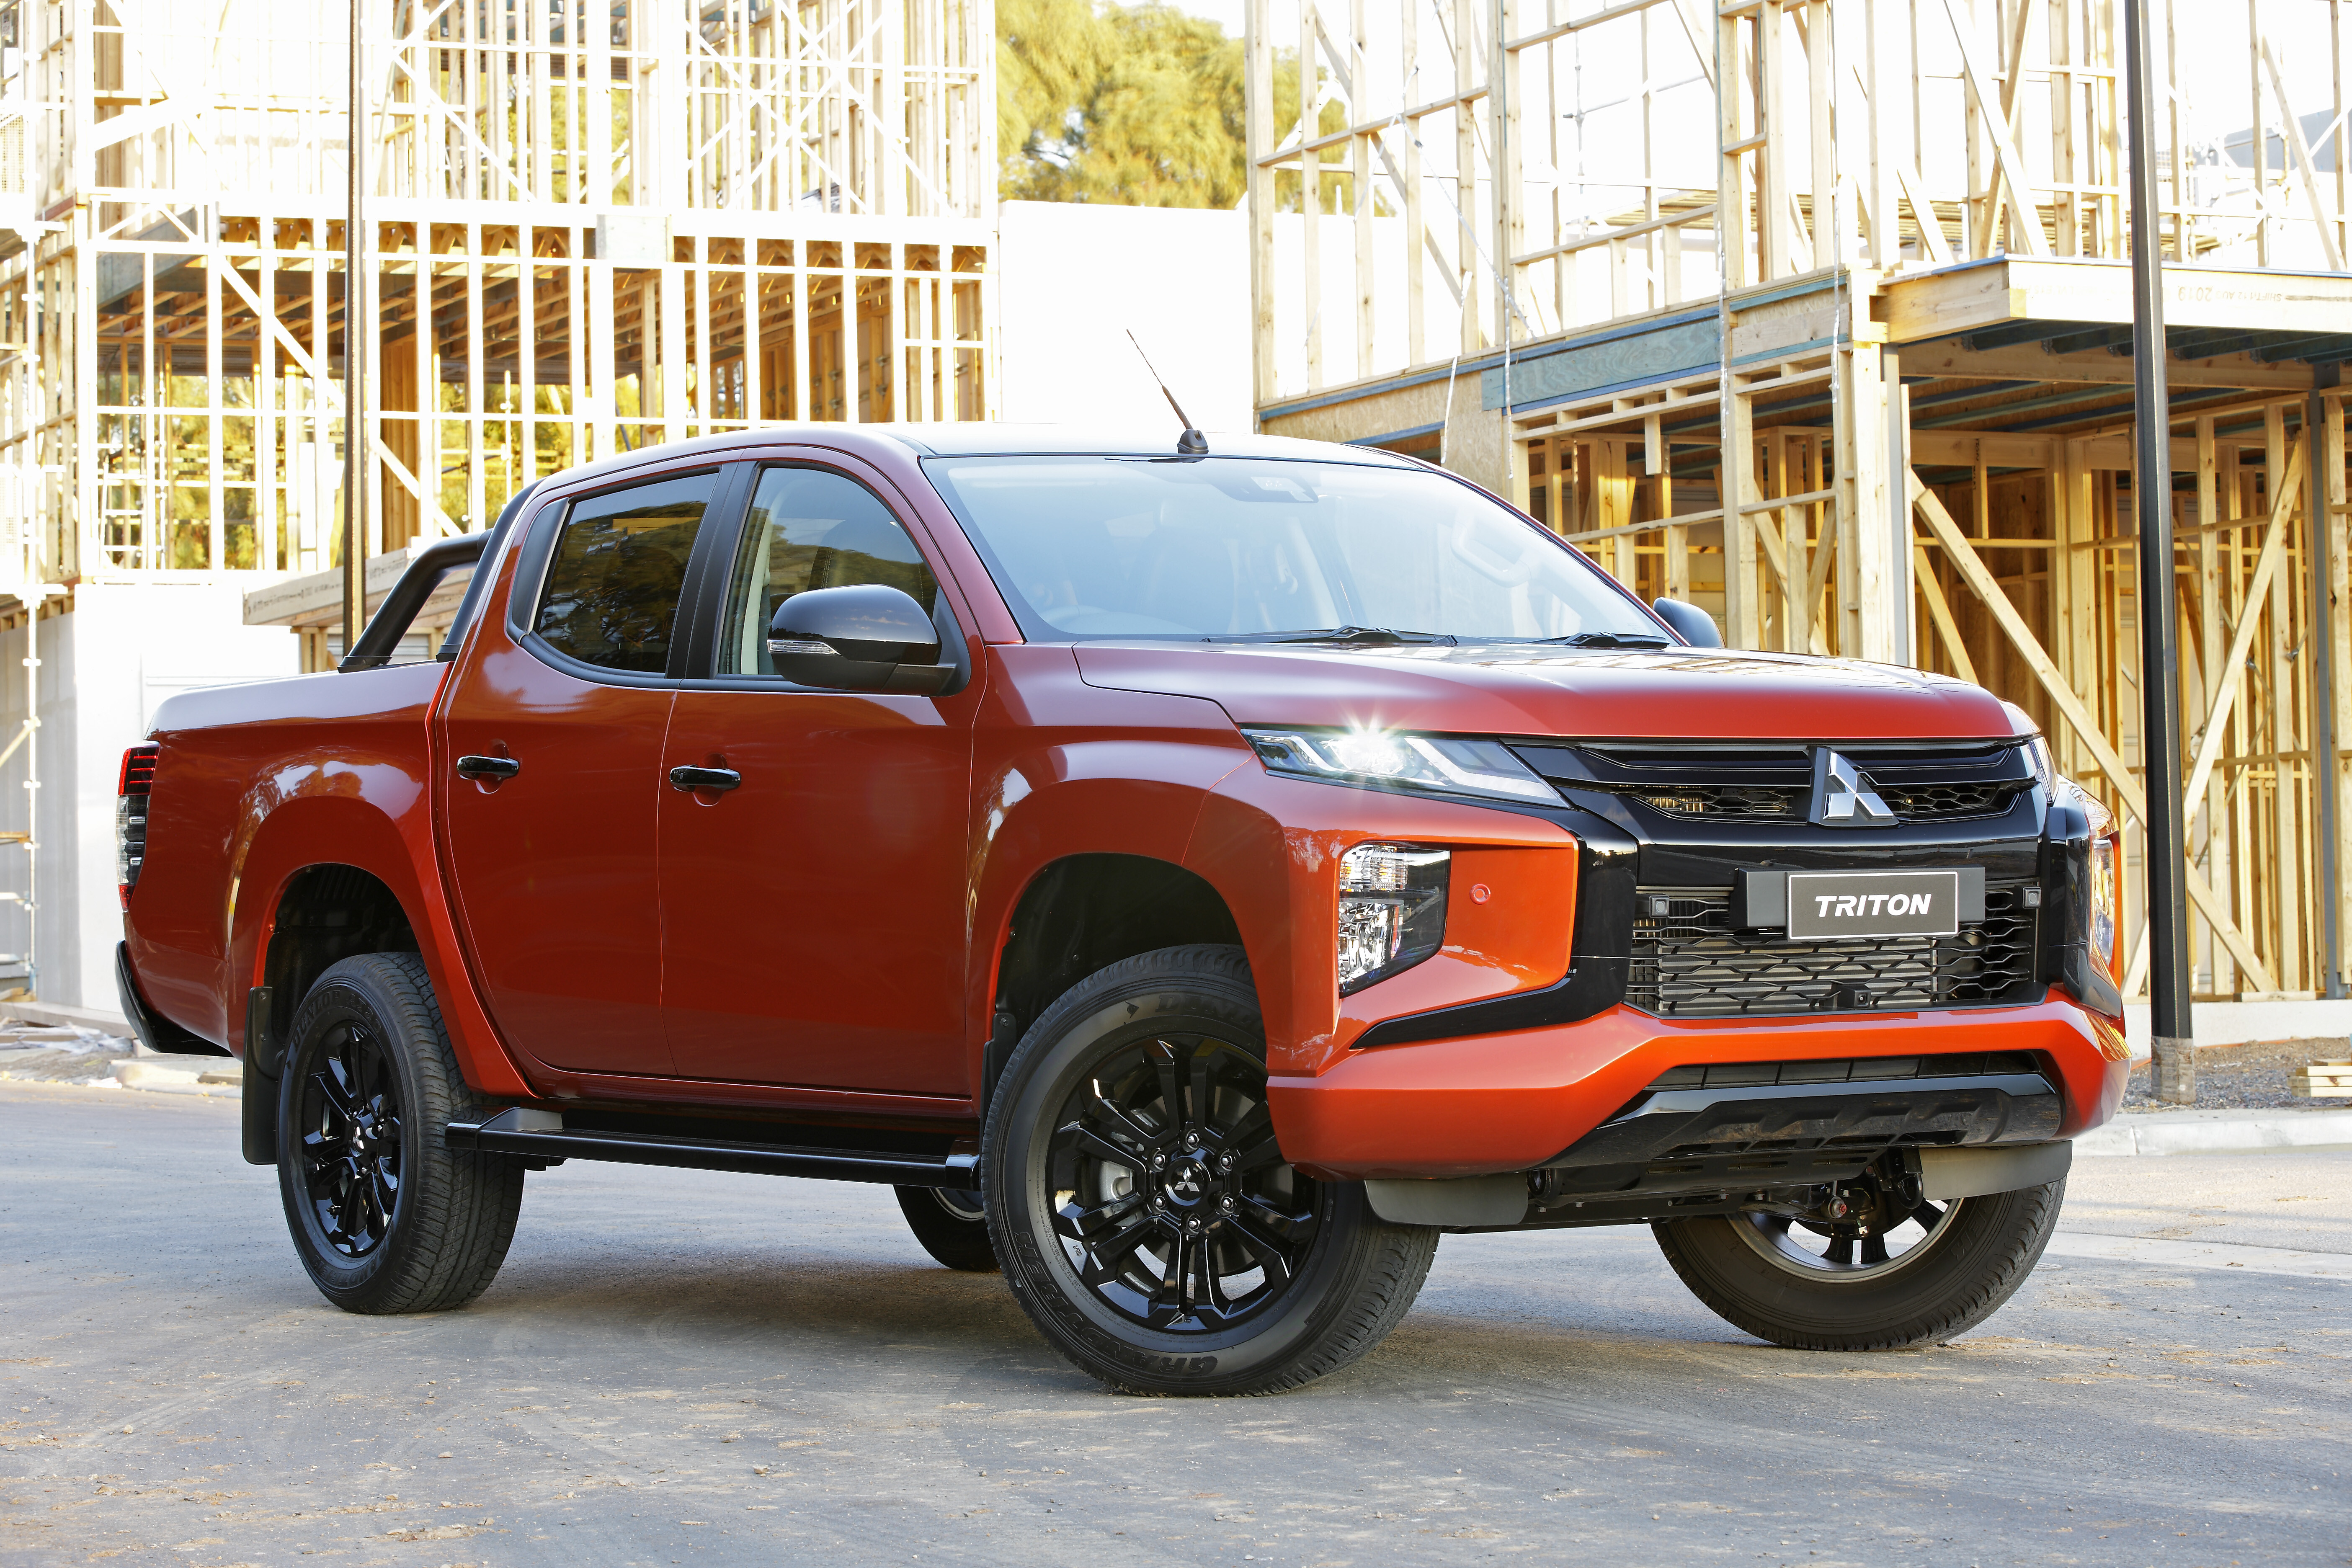
The 2022 Mitsubishi Triton has been updated for the MY22.5 – with a price rise to reflect the added spec.
Mitsubishi says the updated MY22.5 model is scheduled to arrive in showrooms toward the middle of this year.
The GLX Single Cab Chassis, GLX Club Cab Chassis and GLX Double Cab Chassis – all 4×4 variants – are now $1000 dearer. Meanwhile, the top-spec GSR Double Cab Pick-Up now lists at $55,690, up from $53,240. A full pricing list can be found below.
The top-spec Triton GSR will now come with the carmaker’s Smartphone link Display Audio system as standard, which comprises a Multi-Around Monitor to give occupants a 360-degree bird’s eye view of the ute – handy for tight bush tracks.
Lower-spec Cab-Chassis and GLX pick-up variants have been updated with the 7.0-inch MiDisplay infotainment system, bringing with it Apple CarPlay and Android Auto connectivity. The only vehicle that now retains the 6.1-inch touchscreen Display Audio unit with CD player and two speakers is the entry-level GLX Cab Chassis 4×2 manual.
As seen on MY22 vehicles, Mitsubishi will continue to offer ‘interior option packs’ for both its GLS dual-cab and Triton GSR grades.
The GLS Deluxe package comprises leather-appointed seat trim, powered driver’s seat adjustment, heated front seats, door trims with leather-appointed inserts, and a Multi-Around Monitor system.
Production will begin this month
The GSR Tan Orange Pack dresses the Triton with orange highlights throughout the cabin – an orange console box, orange stitching on the door trims, steering wheel, gear shifter and park brake, and orange highlights on the leather-appointed seats.
All Triton 4×4 variants are powered by Mitsubishi’s 133kW/430Nm MIVEC 2.4-litre turbocharged diesel engine, which can be paired to either a six-speed manual or six-speed automatic transmission.
Production of the updated model will begin this month.
MY22.5 Mitsubishi Triton 4×2 Australian pricing
Prices are before on-road costs.
| Triton 4×2 Grades | Engine and fuel | Transmission | RRP |
|---|---|---|---|
| GLX Single Cab Chassis (Two seat) | 2.4L Petrol; 94kW/194Nm; 11.4L/100km* | Five-speed manual | $24,240 |
| GLX Single Cab Chassisu00a0(Two seat) | 2.4L Turbo-Diesel;u00a0133kW/430Nm;u00a07.8L/100km* | Six-speed manual | $29,240 |
| GLX Single Cab Chassisu00a0(Two seat) | 2.4L Turbo-Diesel;u00a0133kW/430Nm;u00a08.3L/100km* | Six-speed auto | $31,490 |
| GLX Double Cab Pick-Upu00a0(Five seat) | 2.4L Turbo-Diesel;u00a0133kW/430Nm;u00a08.4L/100km* | Six-speed auto | $38,940 |
| GLX-R Double Cab Pick-Upu00a0(Five seat) | 2.4L Turbo-Diesel;u00a0133kW/430Nm;u00a08.4L/100km* | Six-speed auto | $42,940 |
MY22.5 Mitsubishi Triton 4×4 Australian pricing
Prices are before on-road costs.
| Triton 4×4 Grades | Engine and fuel | Transmission | Pricing |
|---|---|---|---|
| GLX Single Cab Chassis (Two seat) | 2.4L Turbo-Diesel;u00a0133kW/430Nm;u00a07.9L/100km* | Six-speed manual | $35,990 |
| GLX Single Cab Chassisu00a0(Two seat) | 2.4L Turbo-Diesel;u00a0133kW/430Nm;u00a08.6L/100km* | Six-speed auto | $38,240 |
| GLX Club Cab Chassisu00a0(Four seat) | 2.4L Turbo-Diesel;u00a0133kW/430Nm;u00a07.9L/100km* | Six-speed manual | $38,440 |
| GLX Club Cab Chassisu00a0(Four seat) | 2.4L Turbo-Diesel;u00a0133kW/430Nm;u00a08.6L/100km* | Six-speed auto | $41,440 |
| GLX+ Club Cab Pick-Upu00a0(Four seat) | 2.4L Turbo-Diesel;u00a0133kW/430Nm;u00a08.6L/100km* | Six-speed auto | $44,440 |
| GLX Double Cab Chassisu00a0(Five seat) | 2.4L Turbo-Diesel;u00a0133kW/430Nm;u00a07.9L/100km* | Six-speed manual | $39,940 |
| GLX Double Cab Chassisu00a0(Five seat) | 2.4L Turbo-Diesel;u00a0133kW/430Nm;u00a08.6L/100km* | Six-speed auto | $42,190 |
| GLX Double Cab Pick-Upu00a0(Five seat) | 2.4L Turbo-Diesel;u00a0133kW/430Nm;u00a08.6L/100km* | Six-speed auto | $43,190 |
| GLX+ Double Cab Pick-Upu00a0(Five seat) | 2.4L Turbo-Diesel;u00a0133kW/430Nm;u00a07.9L/100km* | Six-speed manual | $43,940 |
| GLX+ Double Cab Pick-Upu00a0(Five seat) | 2.4L Turbo-Diesel;u00a0133kW/430Nm;u00a08.6L/100km* | Six-speed auto | $46,190 |
| GLX-R Double Cab Pick-Upu00a0(Five seat) | 2.4L Turbo-Diesel;u00a0133kW/430Nm;u00a08.6L/100km* | Six-speed auto | $47,190 |
| GLS Double Cab Pick-Upu00a0(Five seat) | 2.4L Turbo-Diesel;u00a0133kW/430Nm;u00a07.9L/100km* | Six-speed manual | $48,940 |
| GLS Double Cab Pick-Upu00a0(Five seat) | 2.4L Turbo-Diesel;u00a0133kW/430Nm;u00a08.6L/100km* | Six-speed auto | $51,190 |
| GLS Deluxe Double Cab Pick-Up (Five seat) | 2.4L Turbo-Diesel;u00a0133kW/430Nm;u00a08.6L/100km* | Six-speed auto | $54,190 |
| GSR Double Cab Pick-Upu00a0(Five seat) | 2.4L Turbo-Diesel;u00a0133kW/430Nm;u00a08.6L/100km* | Six-speed auto | $55,690 |
| GSR Double Cab Pick-Up with Roll Top Tonneau Packu00a0 (Five seat) | 2.4L Turbo-Diesel;u00a0133kW/430Nm;u00a08.6L/100km* | Six-speed auto | $62,390 |
| GSR Tan Orange Interior Double Cab Pick-Upu00a0(Five seat) | 2.4L Turbo-Diesel;u00a0133kW/430Nm;u00a08.6L/100km* | Six-speed auto | $56,690 |
| GSR Tan Orange Interior Double Cab Pick-Up with Roll Top Tonneau Packu00a0(Five seat) | 2.4L Turbo-Diesel;u00a0133kW/430Nm;u00a08.6L/100km* | Six-speed auto | $63,390 |
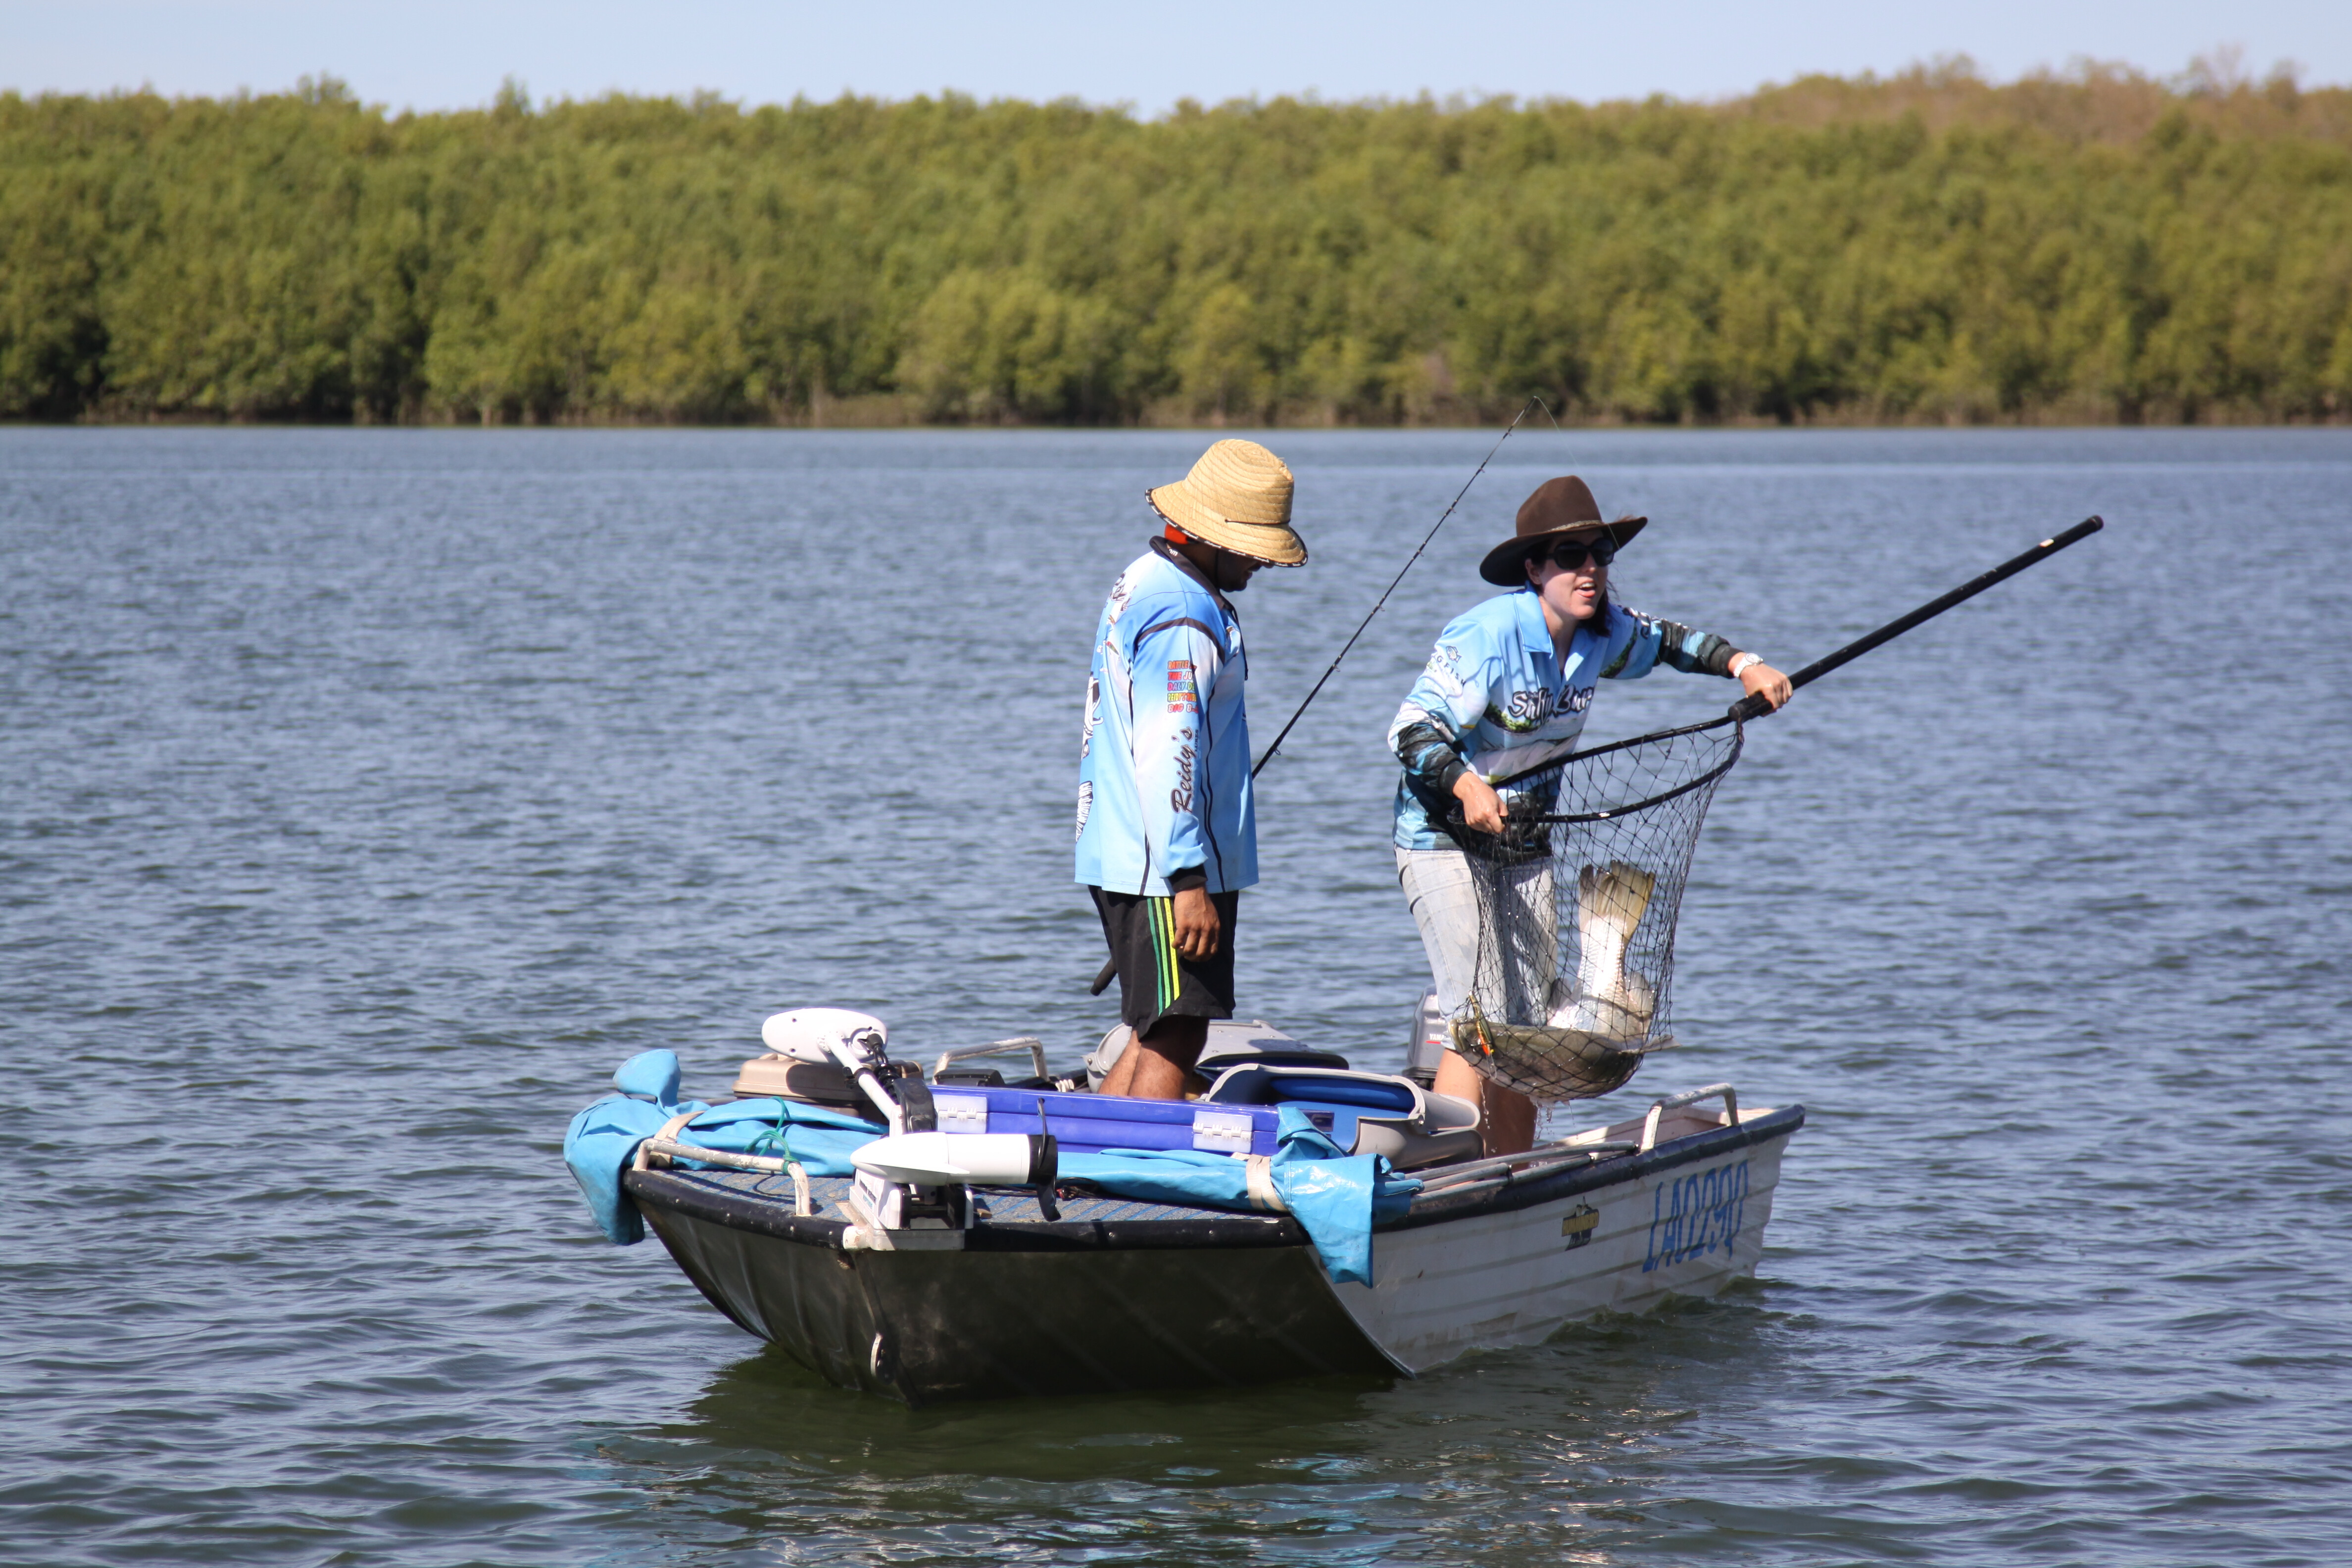
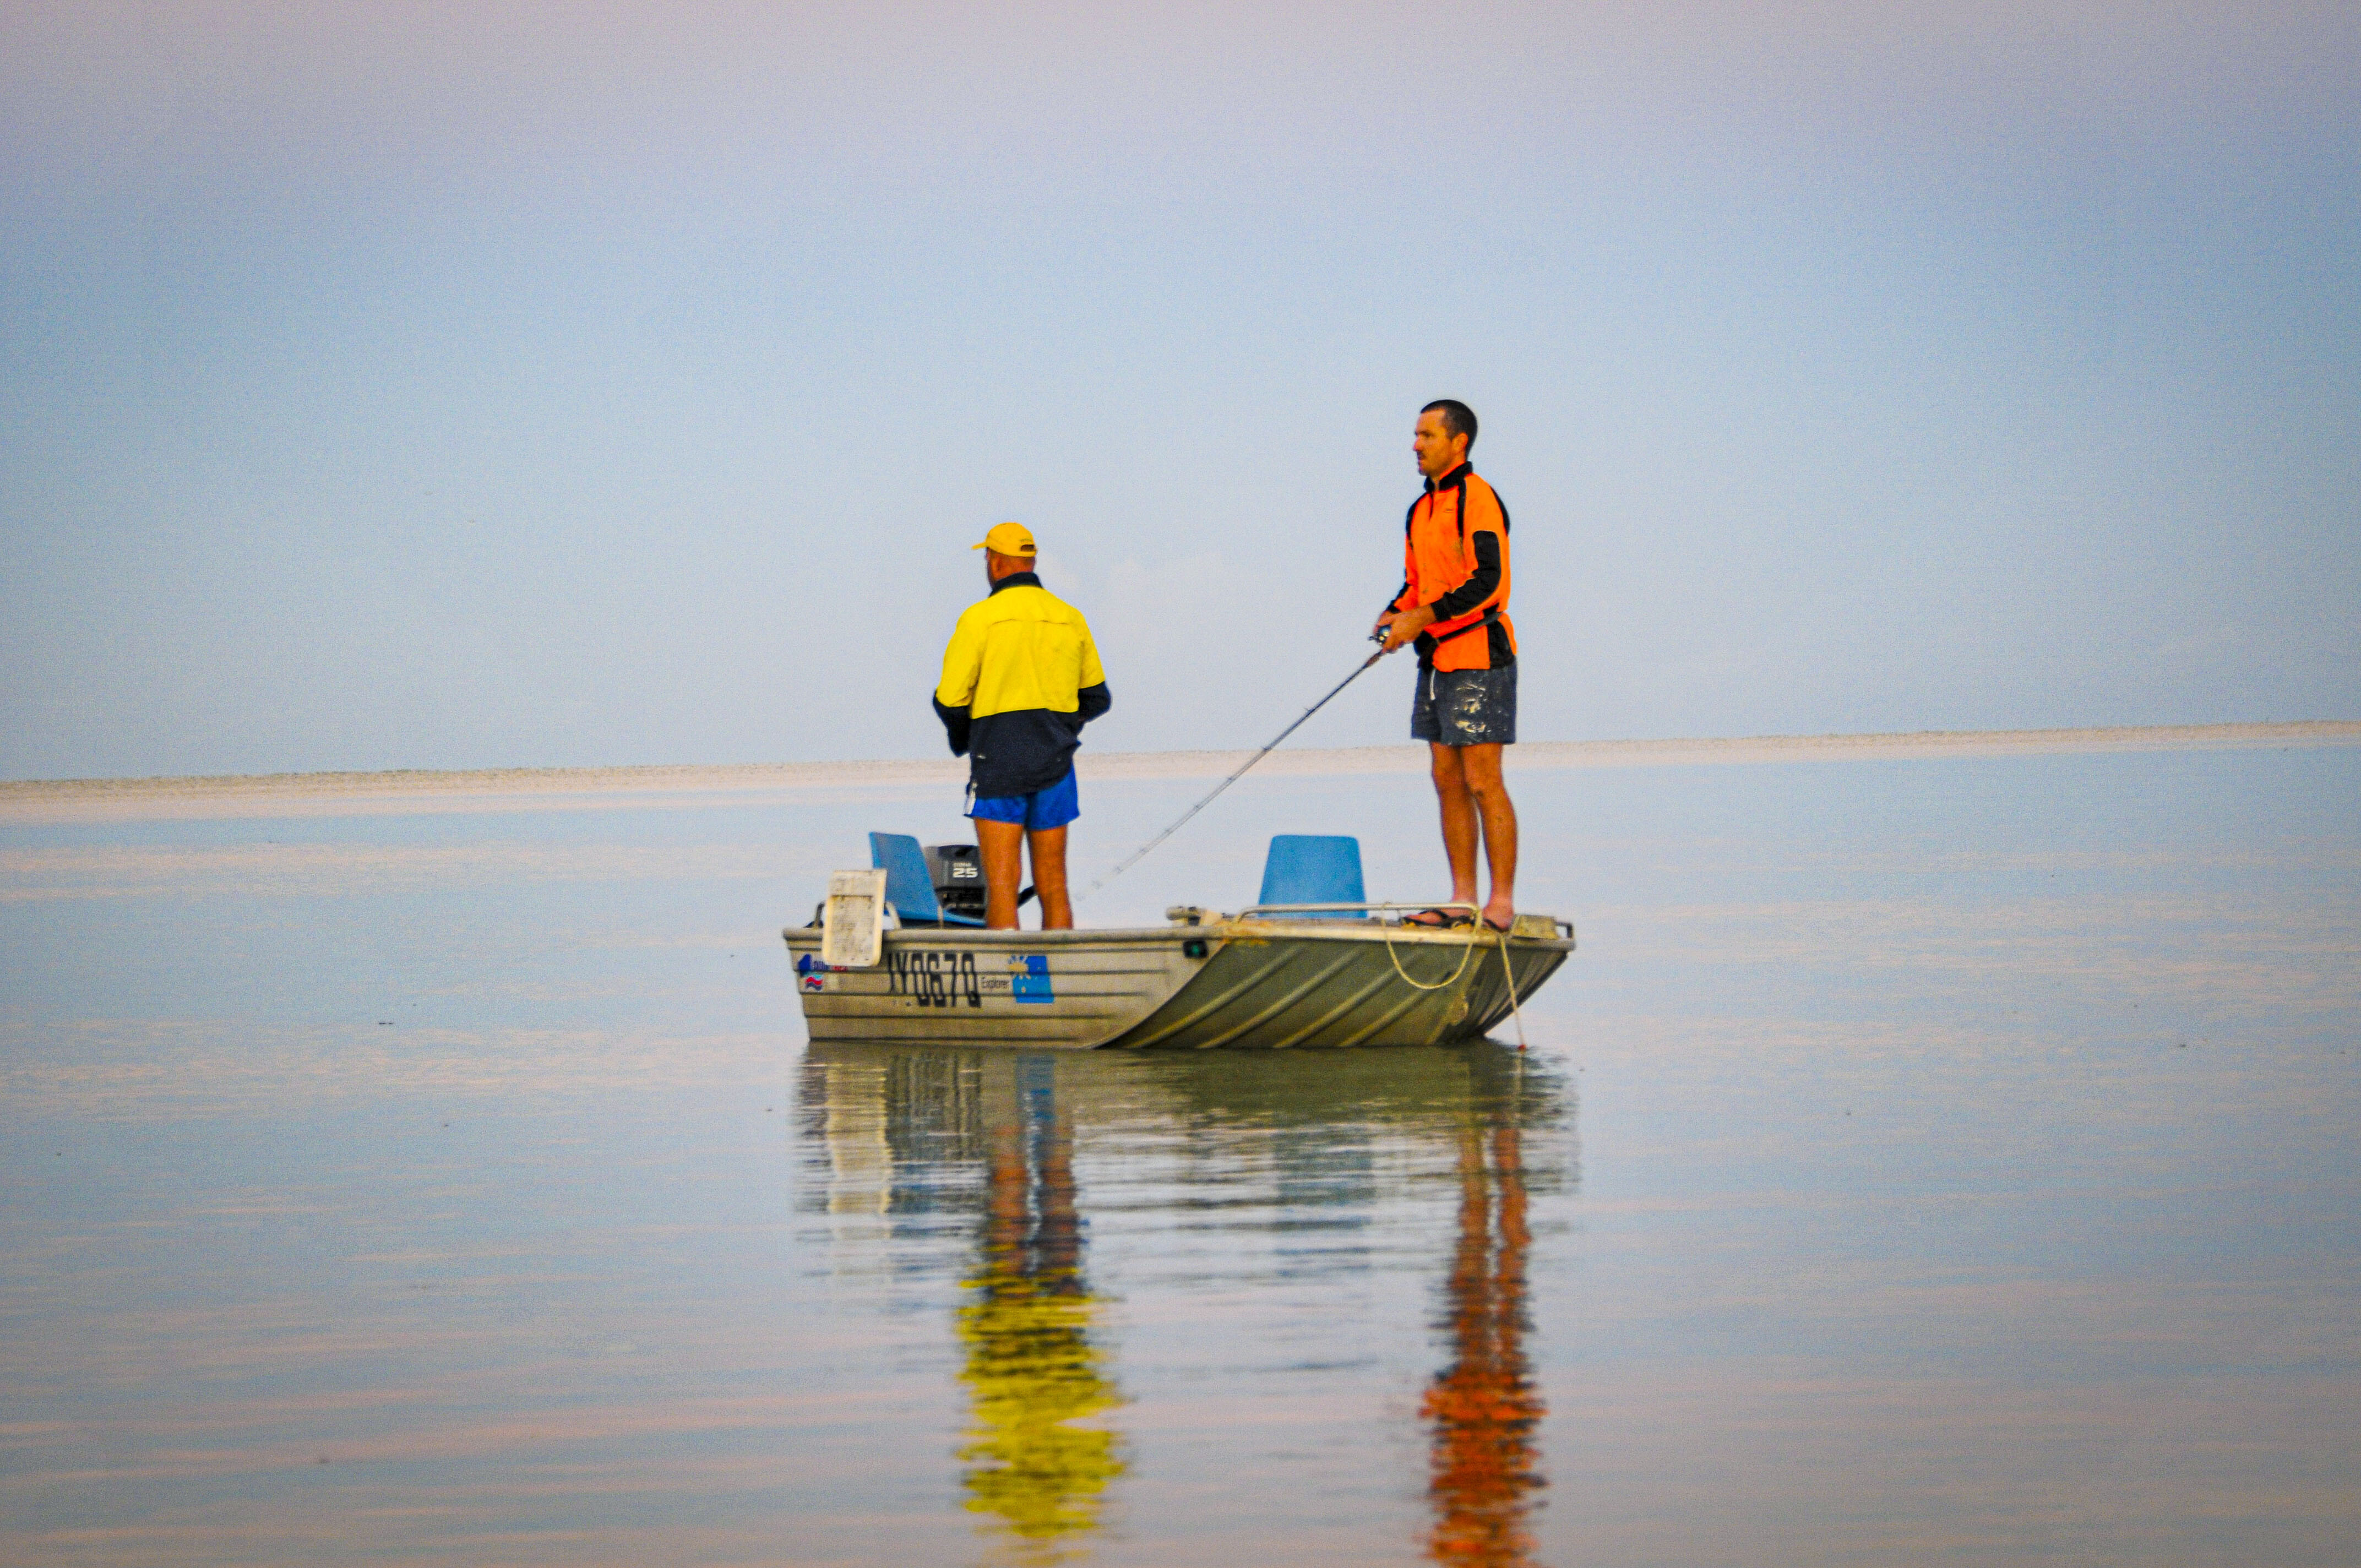
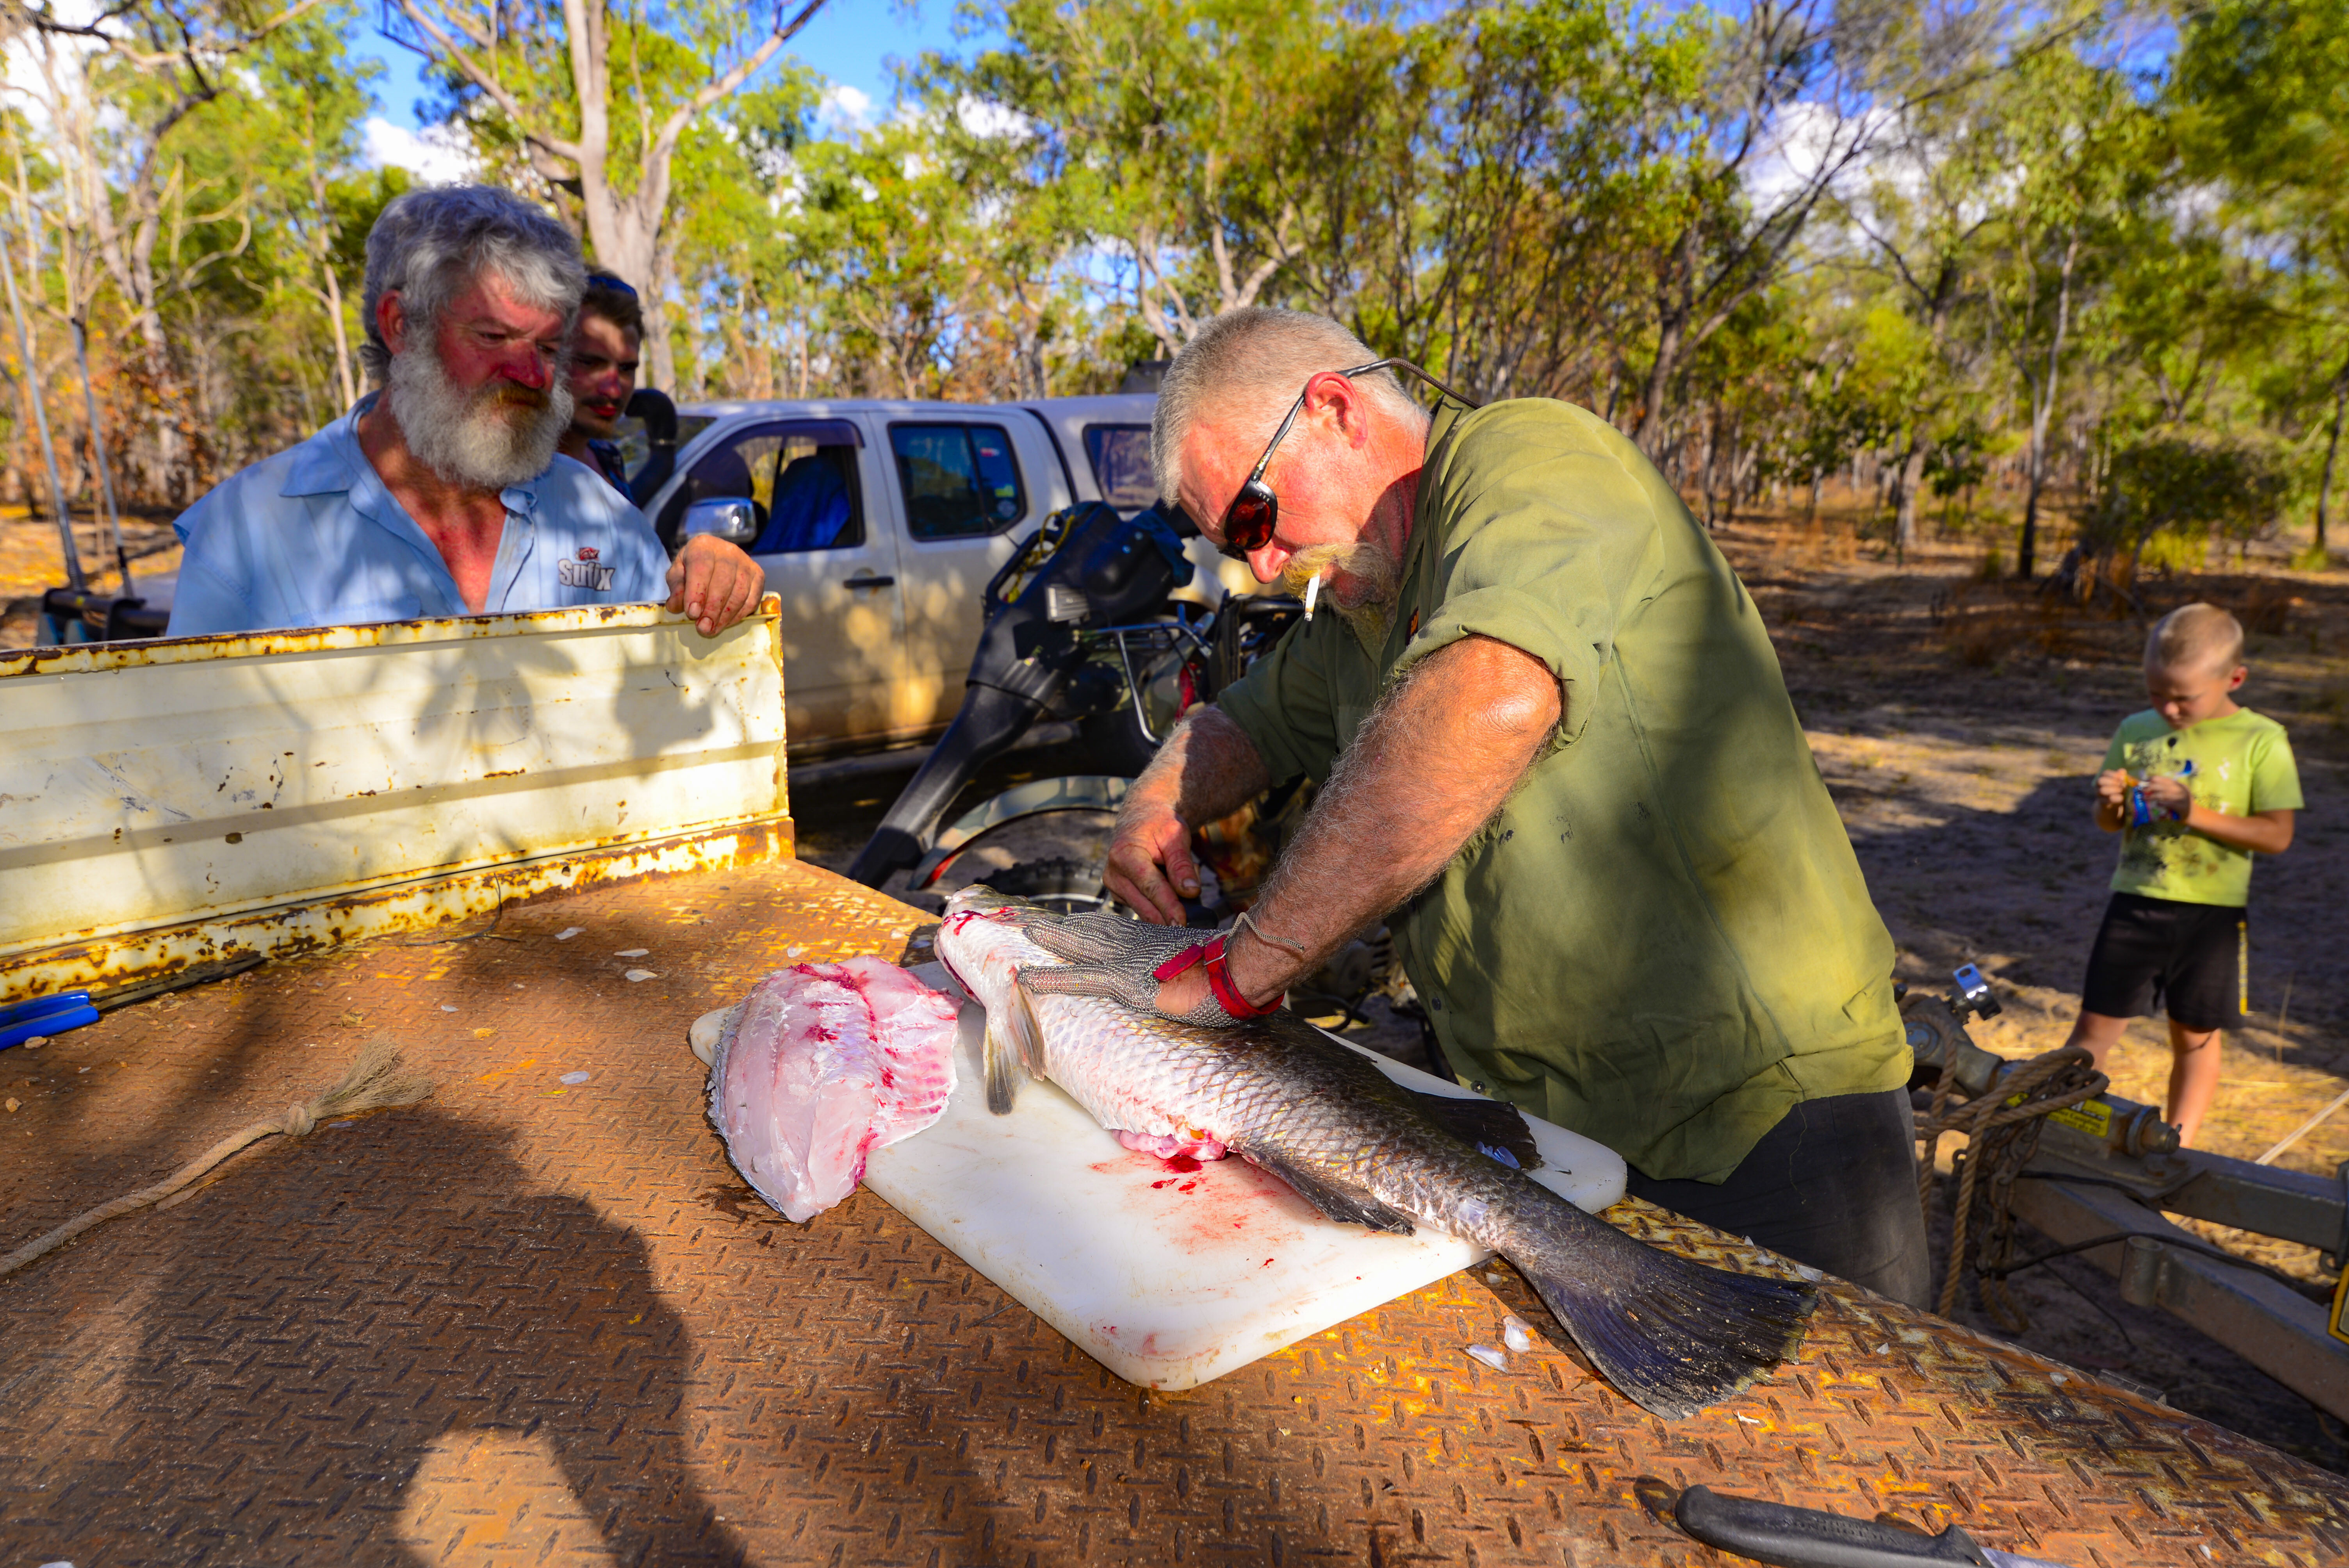
Fishing is Australia’s most popular outdoor activity, and many four-wheel enthusiasts are eager participants in the sport. The northern tropics have the best fishing in the world, all accessible to visitors and locals alike.
While you may know a lot about fishing in your backyard, the tropics are challenging to anglers on a first-time visit – a shame really, as any tropical excursion is worth the time and effort when it comes to all things fishing.
However, most know little about the north – what tackle to take, whether it’s worth car-topping a tinnie or towing a larger boat all the way to the tip of the Cape, Darwin, Broome or places in-between, and what about crocodiles that eat fishers for breakfast?

The answer to the second question is a big yes, provided you have the time to do so. Most keen southern-based off-roaders own a 4WD because of their love of fishing, but have no clue about tropical angling, apart from reading books, magazines and watching dream fishing action on TV.
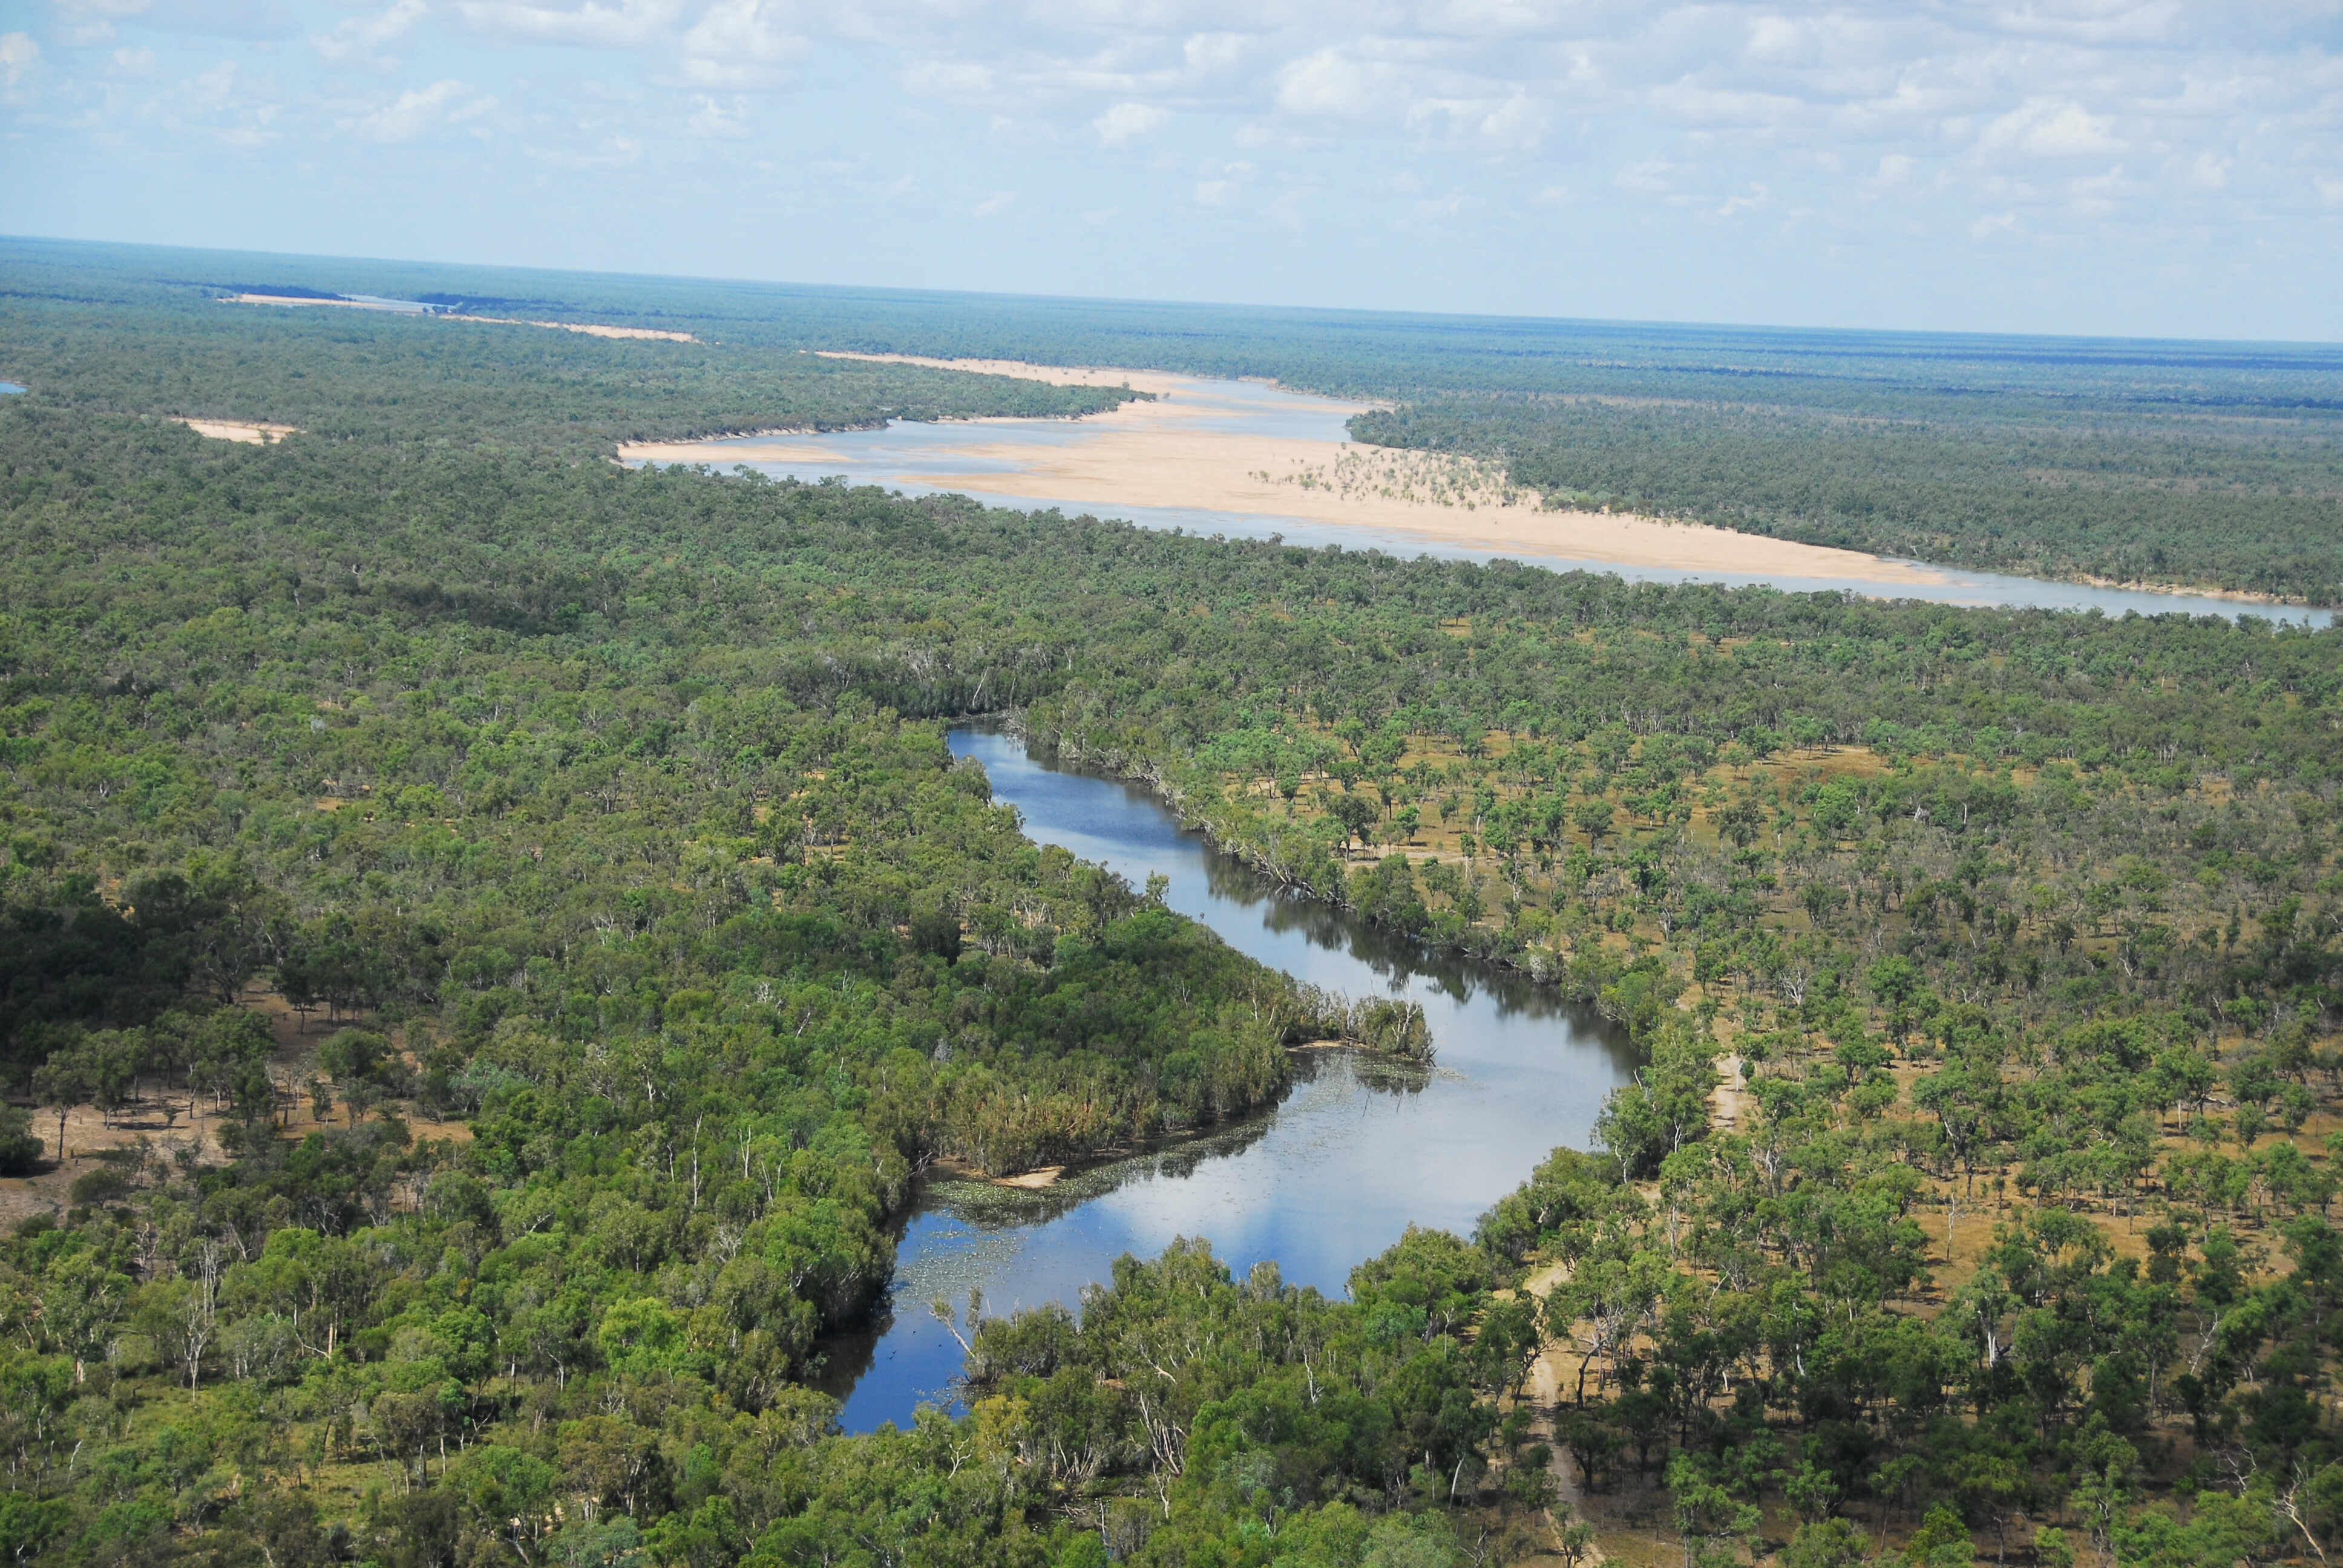
The Savannah Way, which crosses the continent from Cairns to Broome, should have been called the ‘Barramundi Highway’, because it bisects some of the largest rivers in Australia, While ‘side tracks’ turn to even more remote places: the Cape York Peninsula, the Gulf country, Arnhem Land, Top End, Victoria River region and the vastness of the Kimberley. Fishing adventure country, all of it.
Over the last 60 years, I have been fortunate enough to fish almost every major river system between Townsville and Broome – from land and sea. There have been many changes across the whole northern coast since I first fished the Daintree River and caught my first barramundi back in 1959. I have been living in the tropics ever since, as the fishing, hunting, photography and off-road trips keep me forever young in the search of outdoor adventure.

All of it is fishing frontier for the people who live up here and the hordes of visitors who head north in their thousands every dry season – grey nomads chasing the sun, urban-based off-roaders keen to tackle unbridled bush tracks, and anglers with a wish list that is topped with catching a ‘meteri barra’, what a metre-long barramundi is called up there. Yes, they grow that big and more.
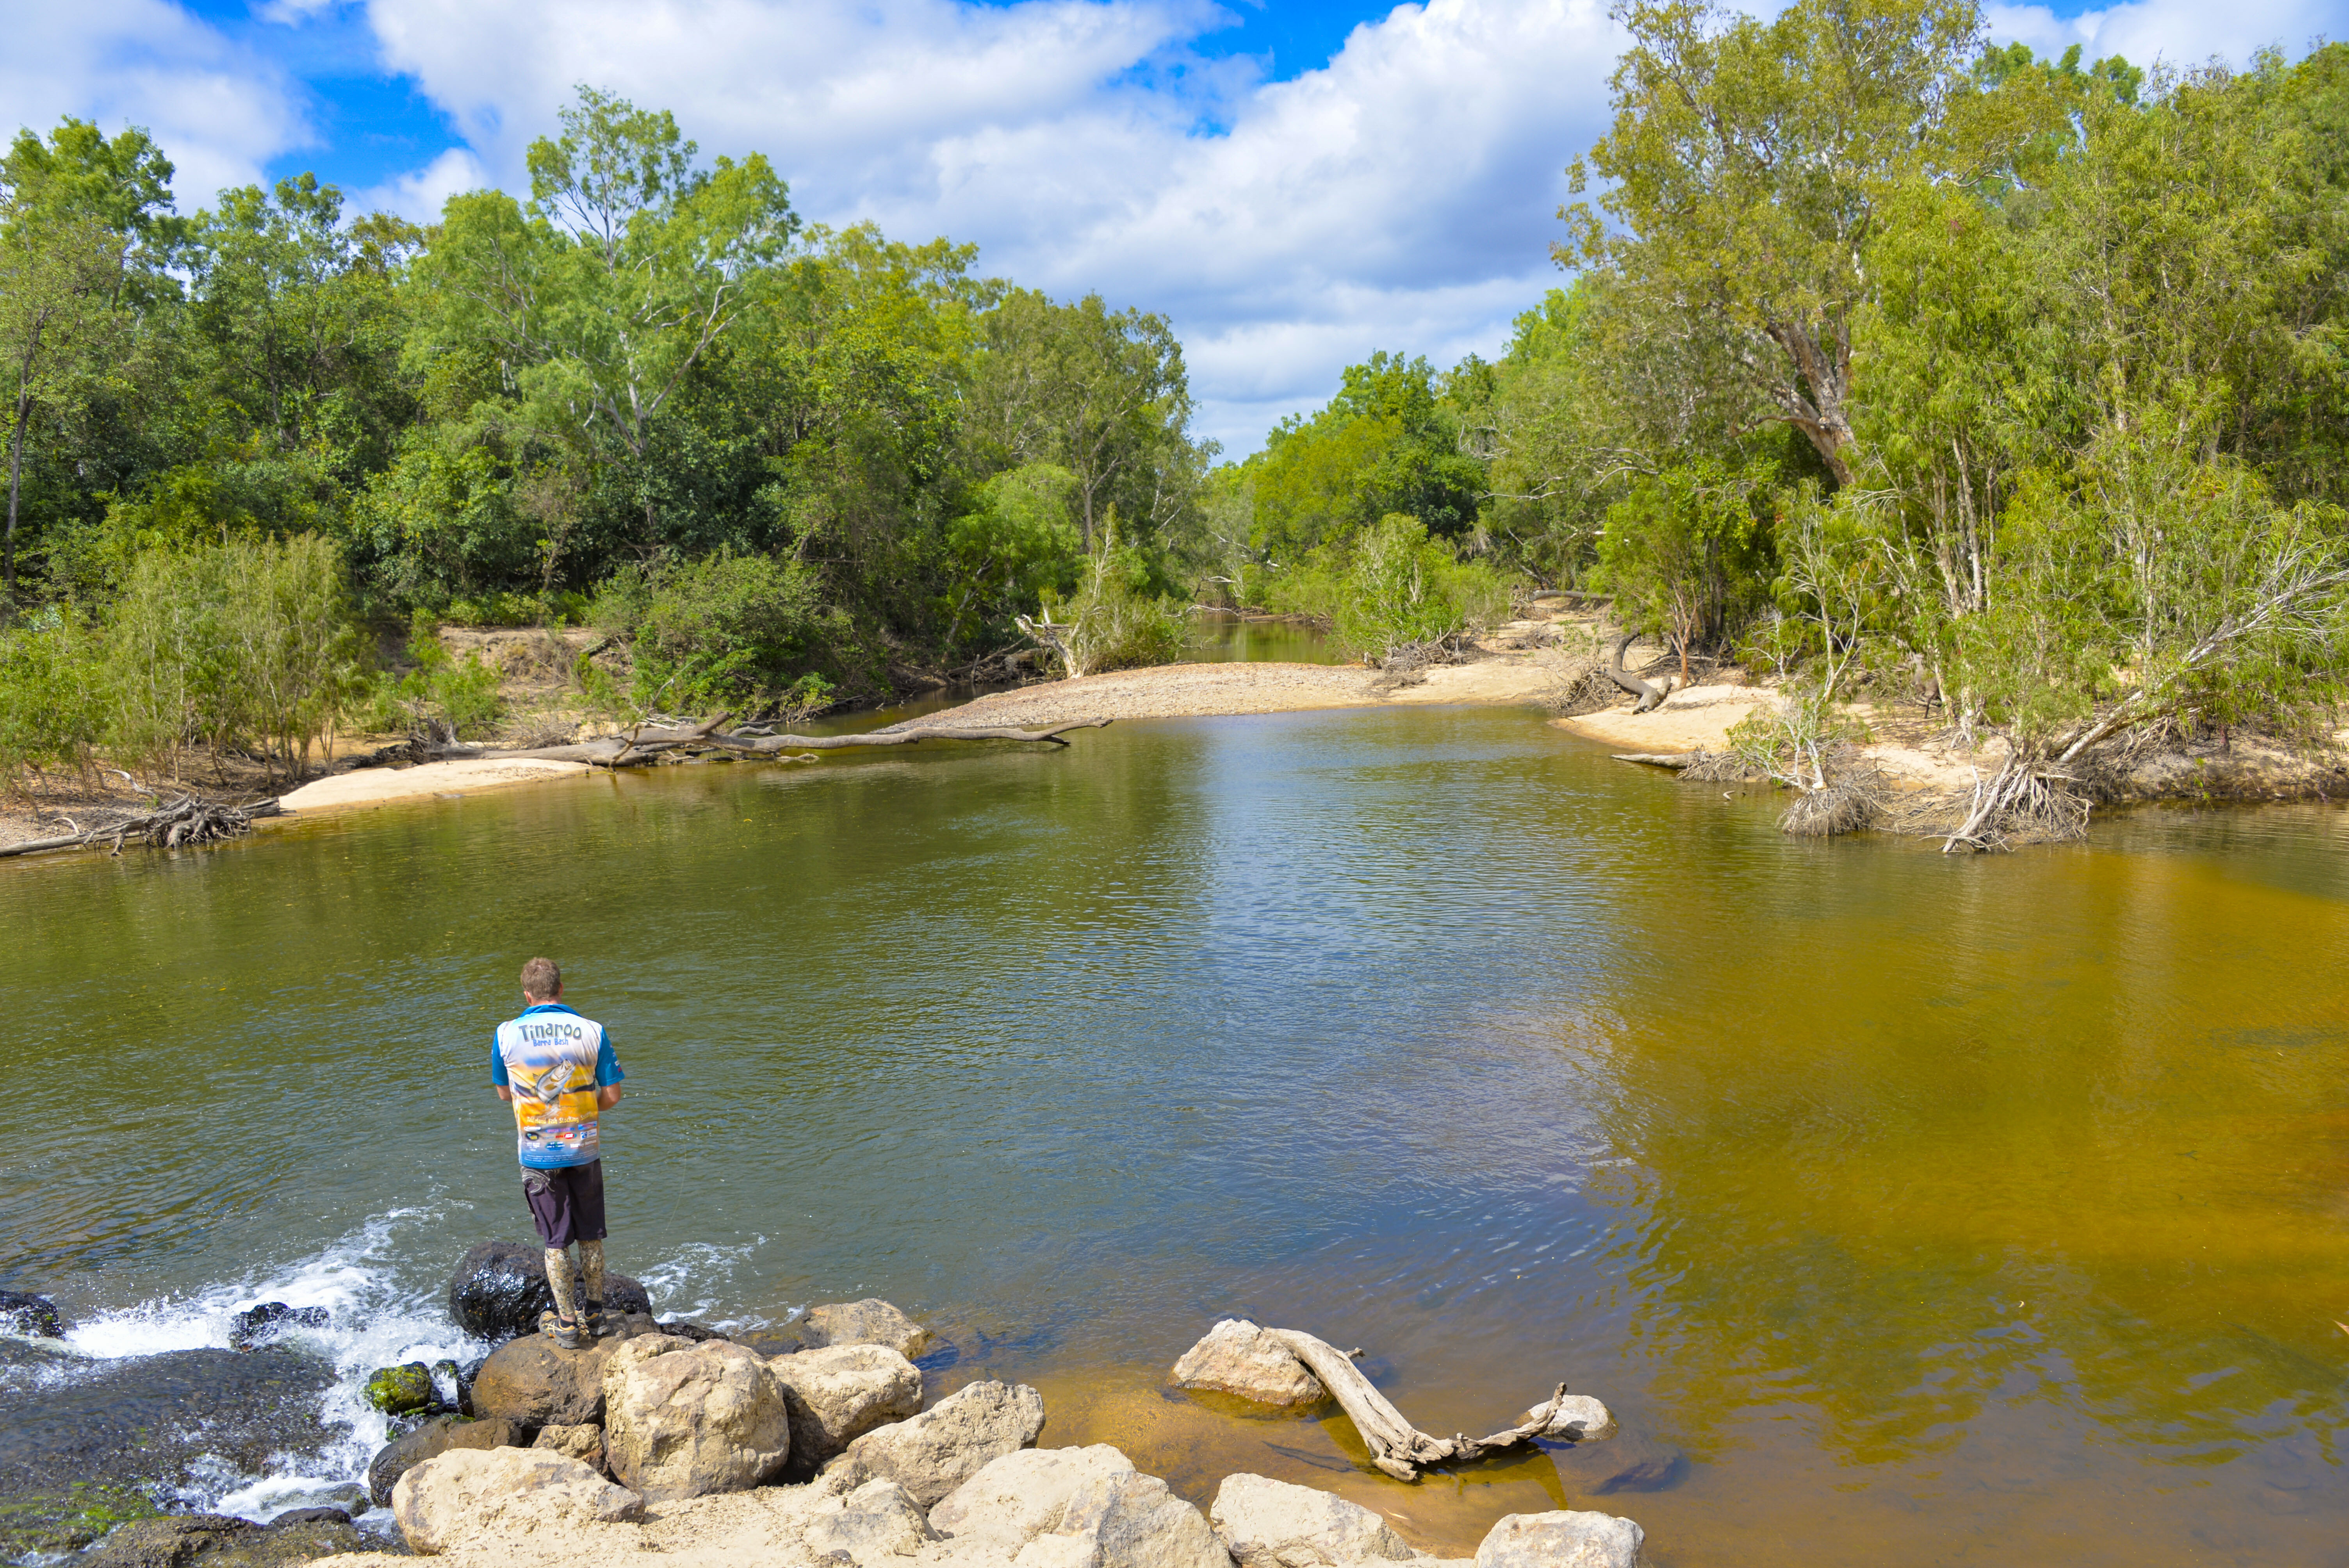
Once you cross the Tropic of Capricorn on the East Coast, you are never too far away from stocked fishing impoundments, rivers, creeks and billabongs, all of which hold fish of several species. It matters naught if you are here to enjoy the sun, climate, fishing or just to explore this great land, but fishing may be the most attractive and motivating reason for your visit.
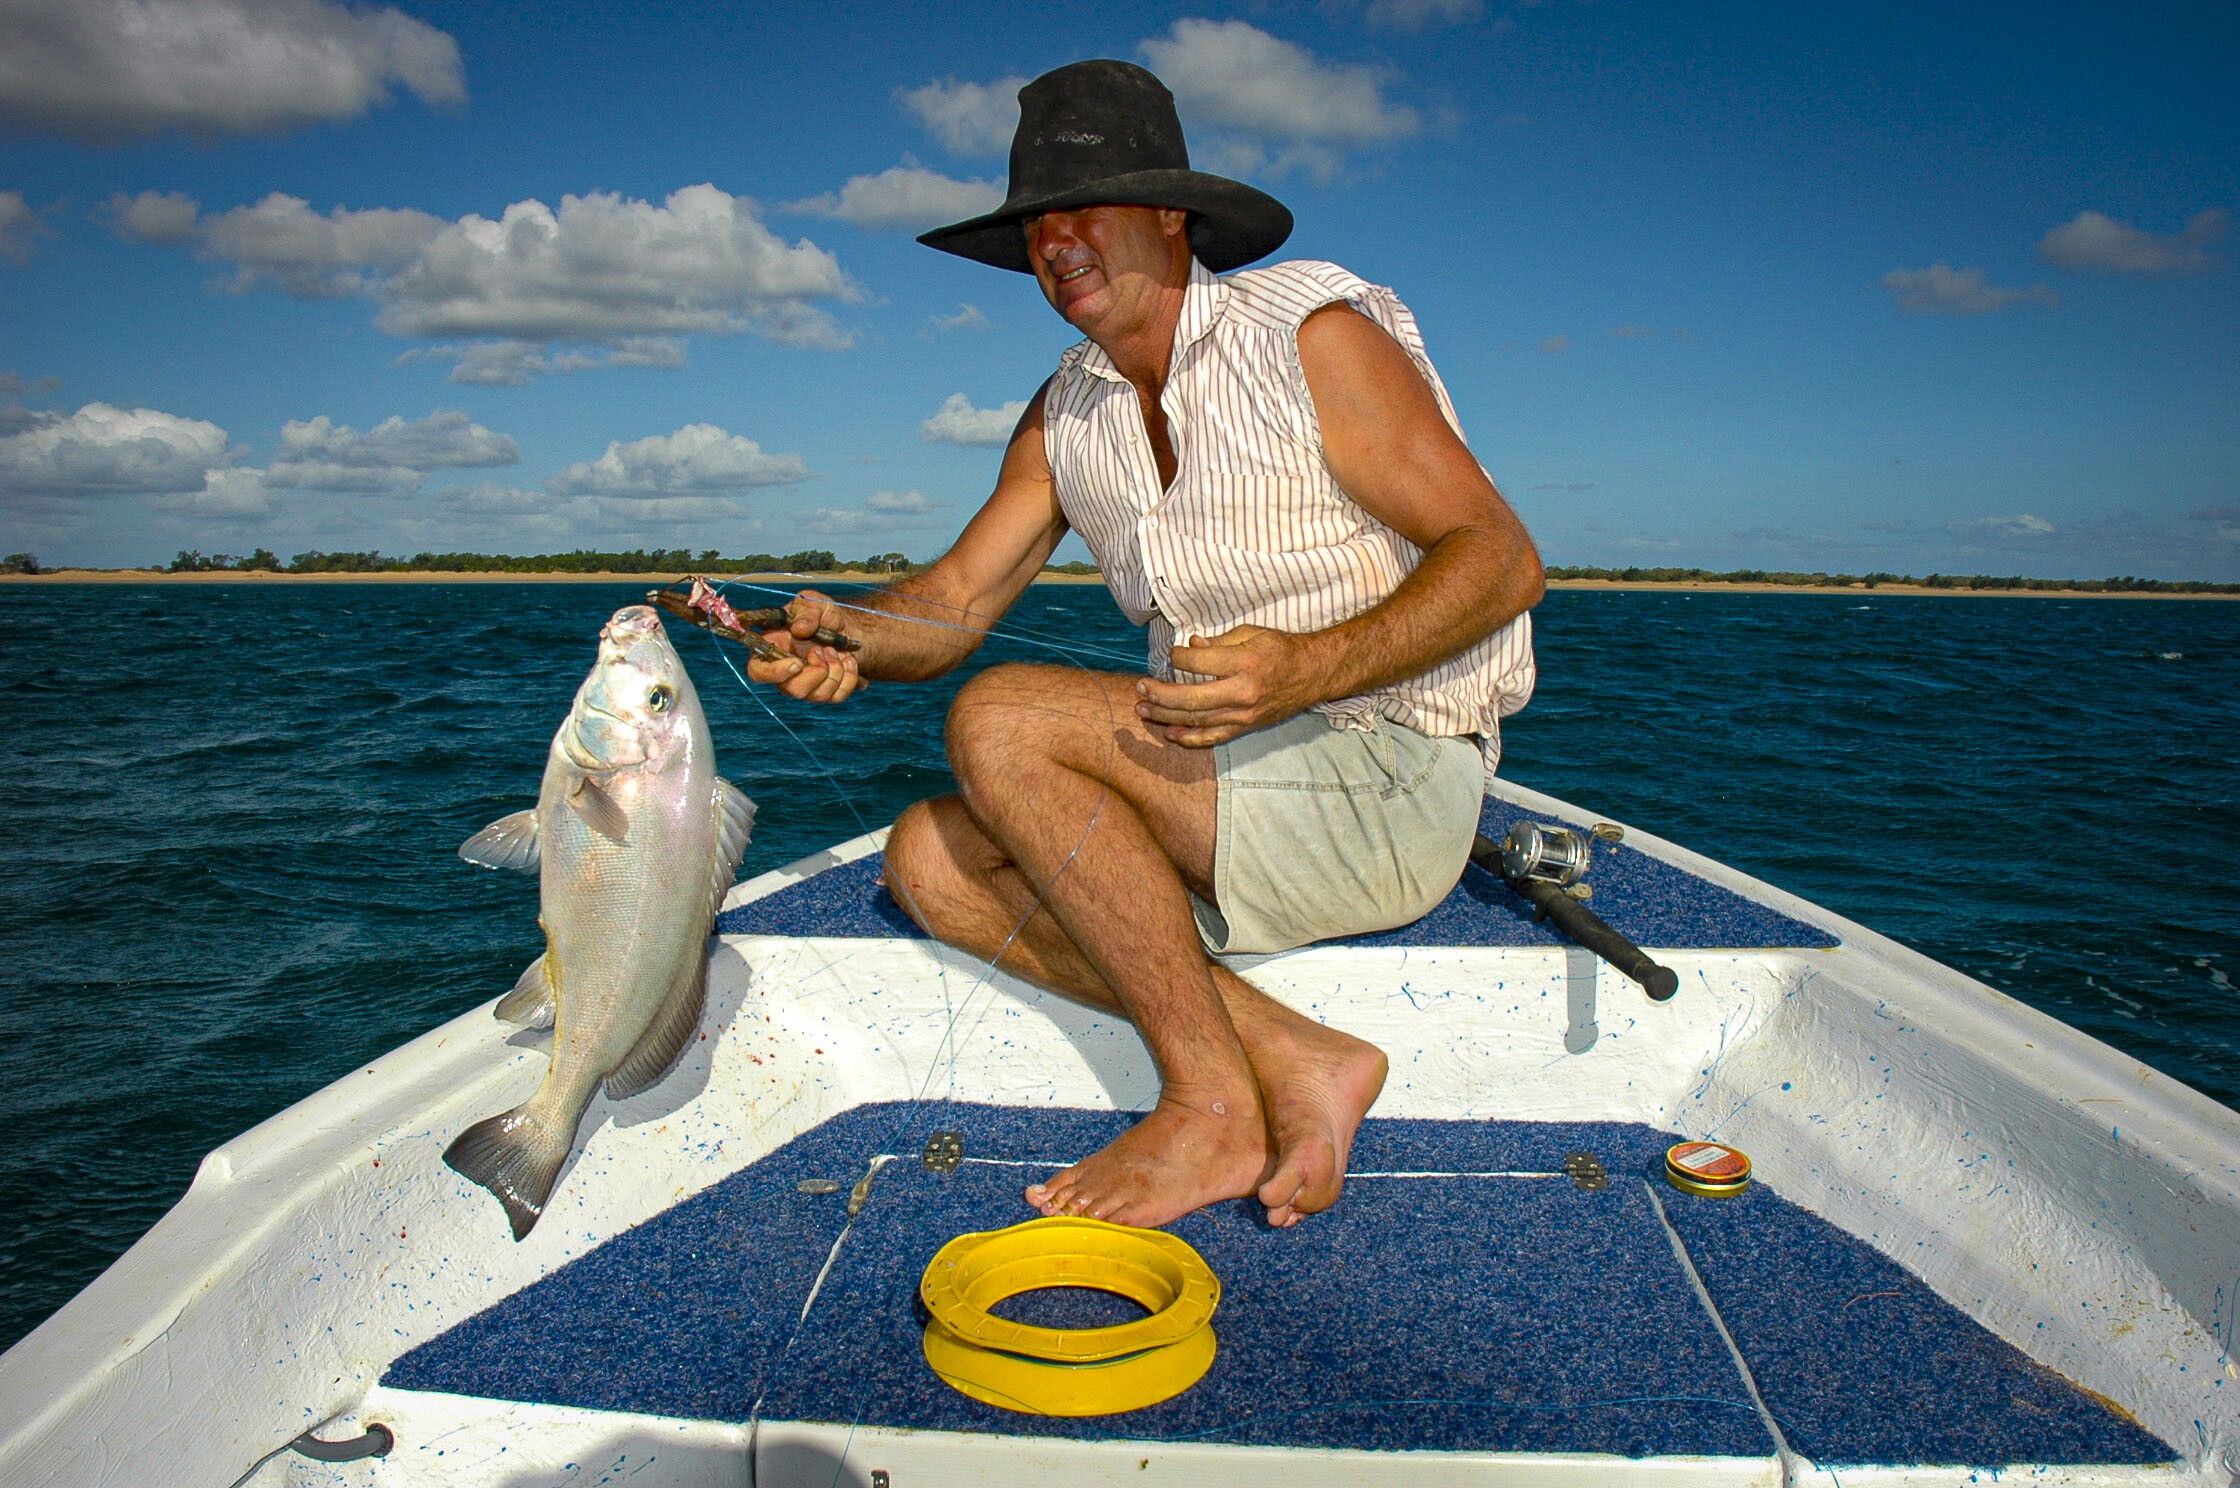
The northern freshwater waters are home to giant barramundi, saratoga, catfish, grunters, perches, cod and more, while the seas that lap these remote shores between Cairns and Broome are home to more than 30 sports and eating species – all attractive to anglers.
Fishing gear
You probably already know that all the best tropical fishers use expensive reels and rods, along with tackle boxes that require a trailer for transportation. Yes, they have all that and more and, should I ever sell my fishing tackle, I will be able to afford fish and chips from the takeaway for the rest of my days.
The truth is that any solid, quality fishing gear that you use at home will do for tropical fishing. Why waste money to buy a purpose ‘barramundi’ outfit some southern-based tackle salesperson will try and sell you when your own gear will do the trick.
This applies to lures, hooks, sinkers and more. Buy barramundi lures in a northern tackle shop, along with some helpful advice from a savvy salesperson who knows about the local fish and where to catch them. You will find that tackle, especially lures and terminal tackle, is cheaper up here than in the south. Plus, they only sell tackle that catches local fish and is tough enough for the brutal assault from gear-smashing species and the titans of the tropical seas.
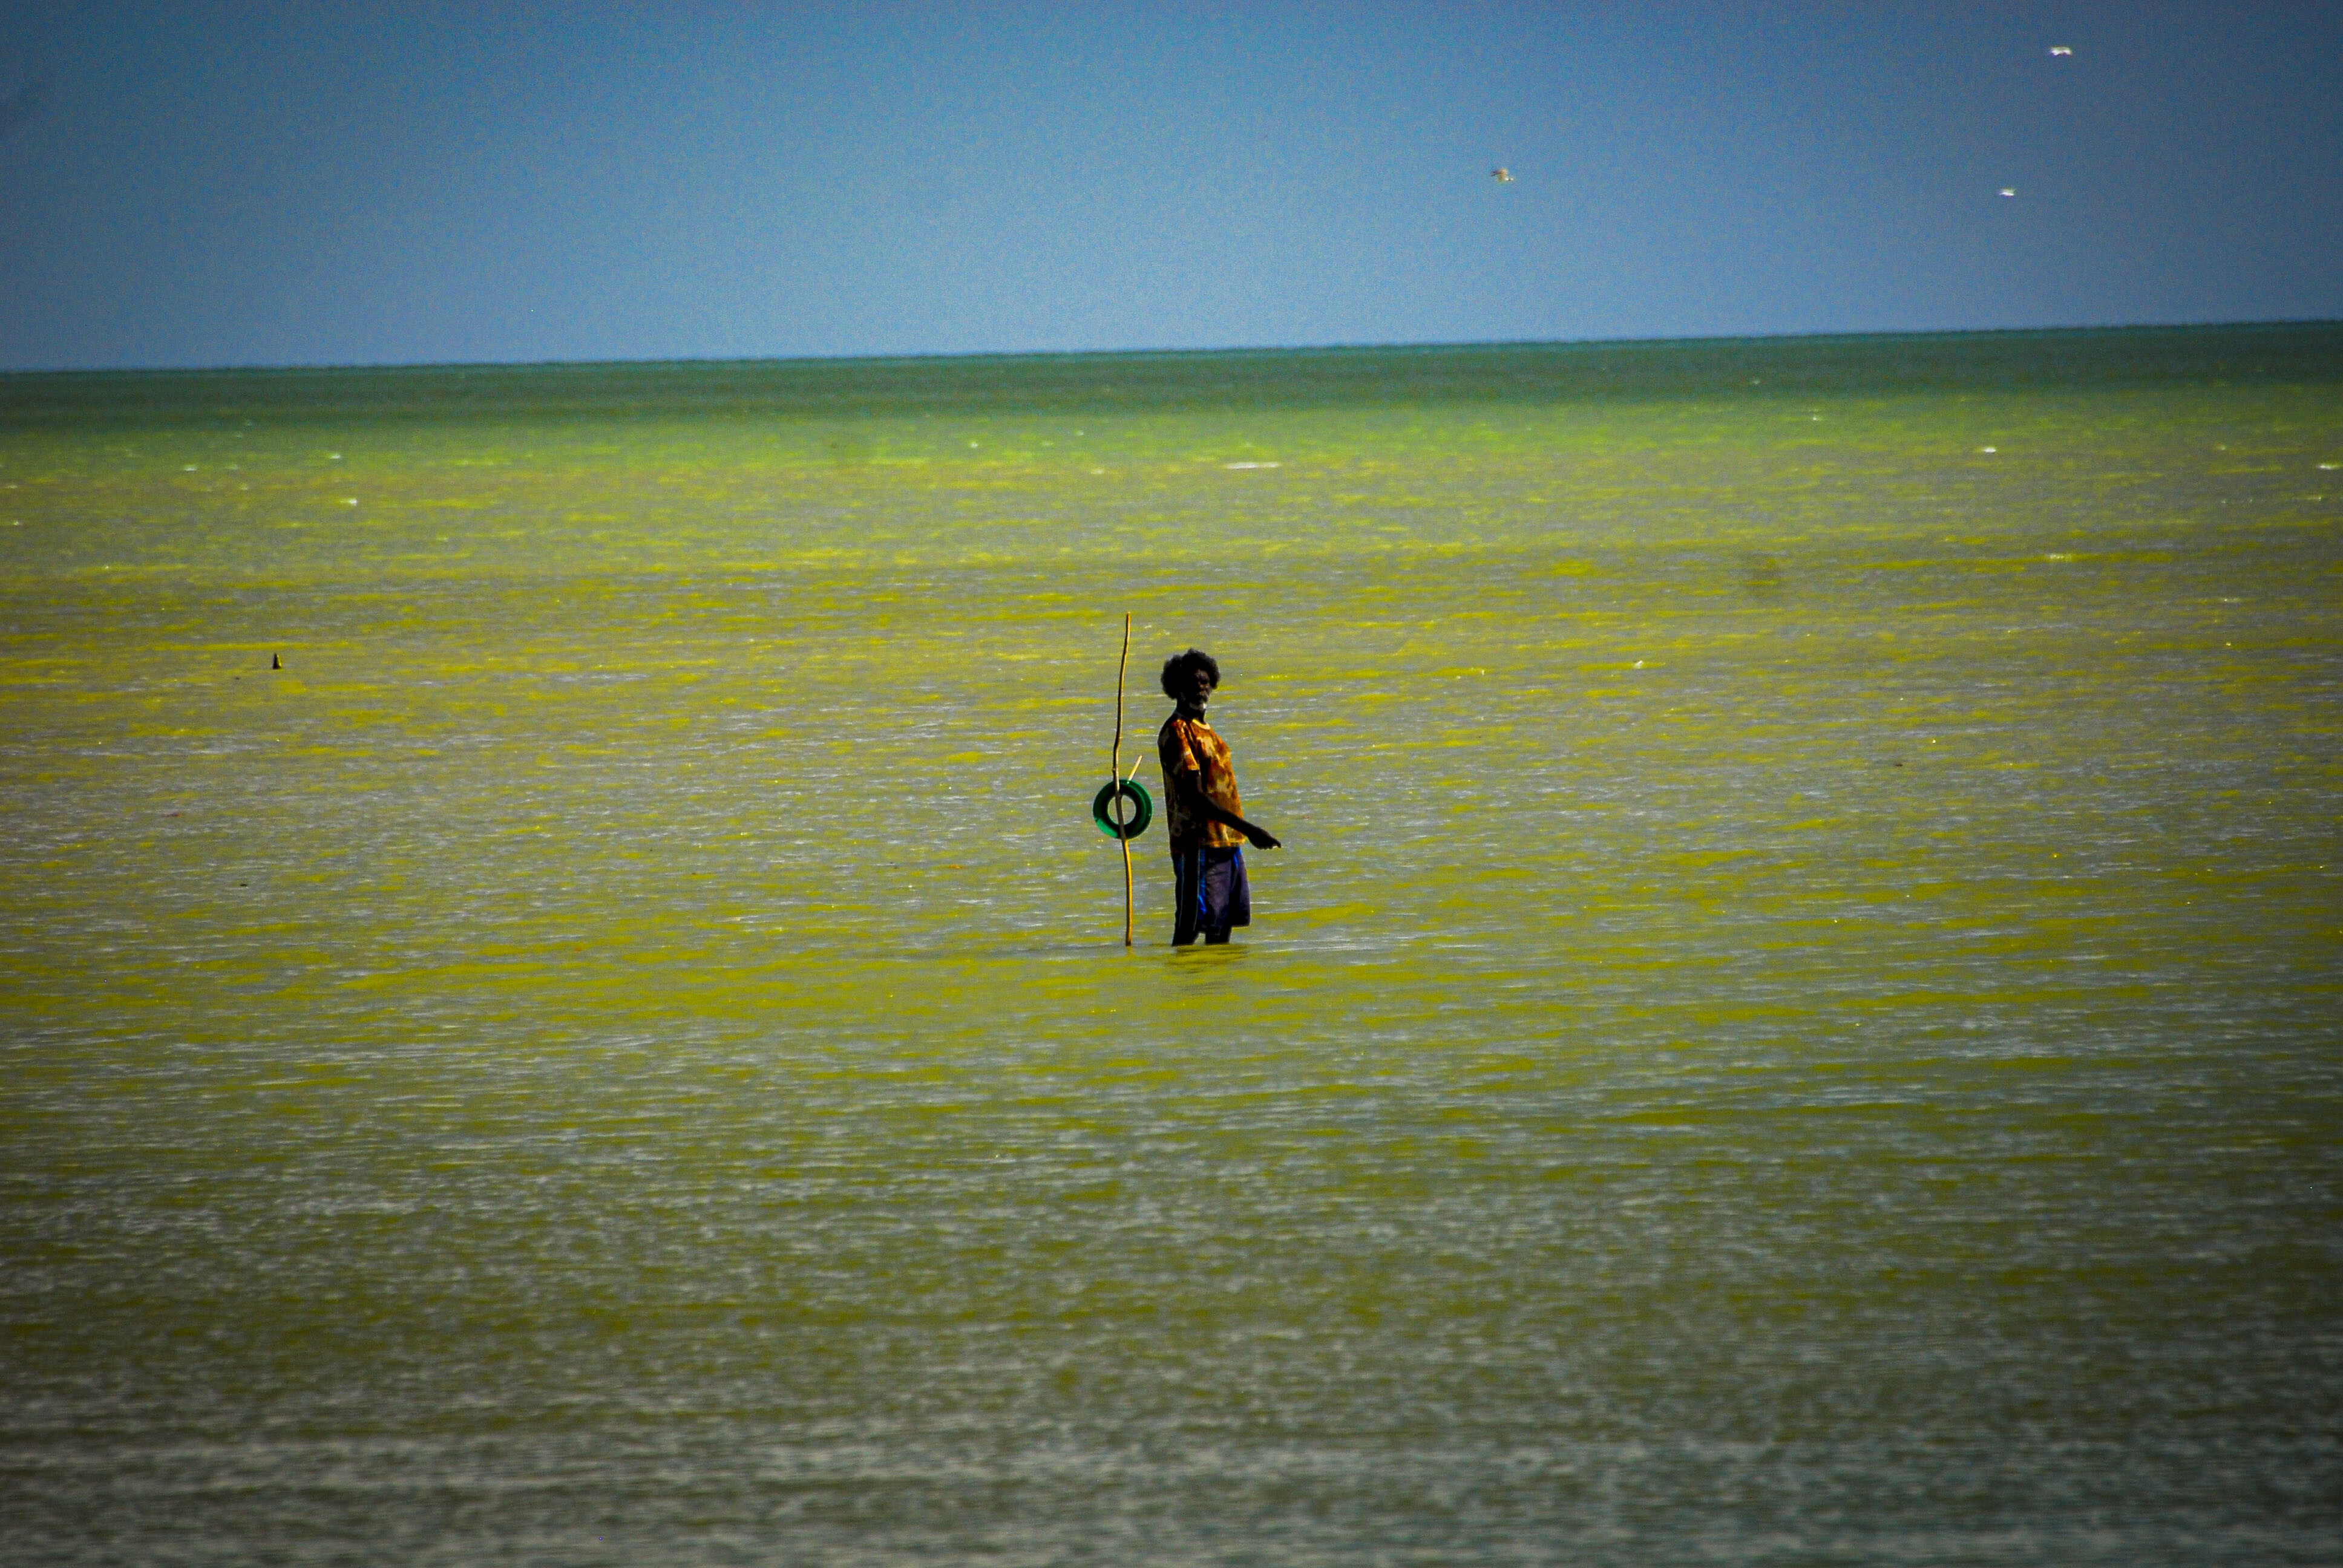
Basically, all you need to catch a fish is a length of line, a hook and bait. That was all we used decades ago, and many Indigenous people fish with a rudimentary monofilament line wound on a plastic spool. However, angling has evolved in to a sport that requires top gear for anyone who is half serious, meaning you need to move up the ranks in hustling up a feed with something better than the traditional hand spool.
I won’t go in to detail as to what gear is needed, because you are probably an angler anyway if you are reading this. I have yet to meet anyone who moved up here, or a casual fishing visitor, who was not aware of the gear needed, with many having their own robust fishing equipment more than capable of matching it with tropical species – think Murray cod and yellowbelly in freshwater, and kingfish, tuna and jewfish gear for saltwater in southern waters. If you have the fishing gear to catch those, you have the ideal gear needed for tropical fish.
If you are new to fishing, my recommendation is that you heed the advice of someone with local experience – don’t hand out the credit card to a southern counter jumper who has just convinced you to buy $1000 worth of fishing tackle because that is “what you need for a northern fishing trip”. Never mind that he has never been out of Melbourne.
Hiring a guide for the day is another good way to get to know the local scene and methods, especially some good solid advice on how to deal with crocodiles. Even as I write this, an angler was attacked by a four-metre croc north of Cooktown while fishing in shallow water. He stuck a knife in its head, and it let him go. He is recovering in the Cairns Base Hospital. Be careful out there and live longer.
This guide is not aimed at first timers, but for people who know about fishing and wish to gain some tropical experience. First timers rarely spend a great deal of money first up anyway because they may not like it, or they just want to get their kids involved in outdoor activities. Like I mentioned, most people who dream of tackling the tropical titans know about fishing and very few start off raw.
Tackle
The monofilament line on a plastic spool is the cheapest way to start fishing. You will see lines wound on plastic bottles and sticks used by many people – who can’t afford the latest Shimano and Sabre rod and a tackle box full of Reidy’s Lures – fishing from piers and jetties, seashores and elsewhere. Many parents start their kids off with a handline, but like us, kids don’t like to be left out and soon migrate to better gear, especially if they are keen.
Pre-spooled hand lines are cheap and easy to store when on the road. If you are a casual bait angler, it’s not to be written off, but a handline has its limitations – long-distance casting is out, and hooking yourself in the leg while twirling a large lure to get extra casting distance is an occupational hazard.
The tropics’ beaches and waterways are littered with discarded lines and spools of various kinds, especially about Indigenous communities. Leave them be, as the locals toss them in the bushes to be recovered and used on the next outing.
However, for most of us, a rod and reel are preferred, and having a good quality fishing outfit reel is paramount. Many visitors to the north hail from Victoria and the NSW coast – anglers who have cut their teeth on a long beach road armed with the ever-reliable Alvey sidecast reel, while others use spinning reels for their beach fishing. These beach outfits are entirely suited for tropical beach and estuary fishing, but totally unsuited for boat fishing or casting lures from under the gallery and tidal forest-clad streams.
You will need a few sinkers, 3/0 to 7/0 hooks, or 5/0 for all-round use, while a hand reel should be spooled with 30- to 50-pound breaking strain (lbbs) monofilament. You will also need 50-lbbs wire or braided wire leaders/traces for toothy fish as they bite braid and monofilament lines in half.
Most of us prefer monofilament leaders ranging from 50- to 80-lbbs, depending on what fish we are chasing. Mackerel for instance require a wire trace, while barramundi, who are armed with razor-sharp gill rakers, are stopped with a 50-lbbs monofilament leader. It’s preferred over wire, being more flexible – important when lure fishing.
Most northern anglers ignore beach fishing, even though tropical beaches produce fine fishing when the tides are right. Barramundi, threadfin and blue salmon, black jewfish, groper, cods, queenfish, trevally and mackerel are caught off many beaches, especially where sandy reaches meet rocky headlands. The same happens off the Cooktown, Seisia, Darwin, Wyndham and Broome wharves – the best land-based fishing platforms in the tropics. The southern beach outfit is entirely suited for tropical beaches, and many of us up here use one.
Spin outfits are popular, especially when casting light lures and rubbers, and for bait fishing. If you have a medium to salt to heavy freshwater outfit already, you have one that is used by many tropical anglers. Double-handed baitcasting rods ranging from 1.8 to 2.2m in length and matched with a Shimano ‘Curado’ reel spooled with 30kg braid line are ideal for bait fishing and lure casting.
That is the outfit of my own choice, a traditional bait casting outfit, as I love casting lures from boats and from foliage-covered riverbanks. Mated to a double-handled rod in the 1.8 to 2m range, such an outfit matches the aforementioned outfits, while accurate lure casting of various weights is unmatched.
The baitcast rig is a specialised one which has evolved from the handline as a purpose barramundi outfit. Hand lines, once the traditional weapon for barramundi fishing (when rubber thongs were turned in to ‘frogs’ and .303 shells in to barramundi lures, none which worked that well compared to modern lures – although the local pub’s bar fly will tell you otherwise) are not used by sports fishers.
Don’t believe the B/S from the bar flies because few have lived long enough to know about them, as the early 1970s saw the evolution of tropical sportfishing when modern lures became available.
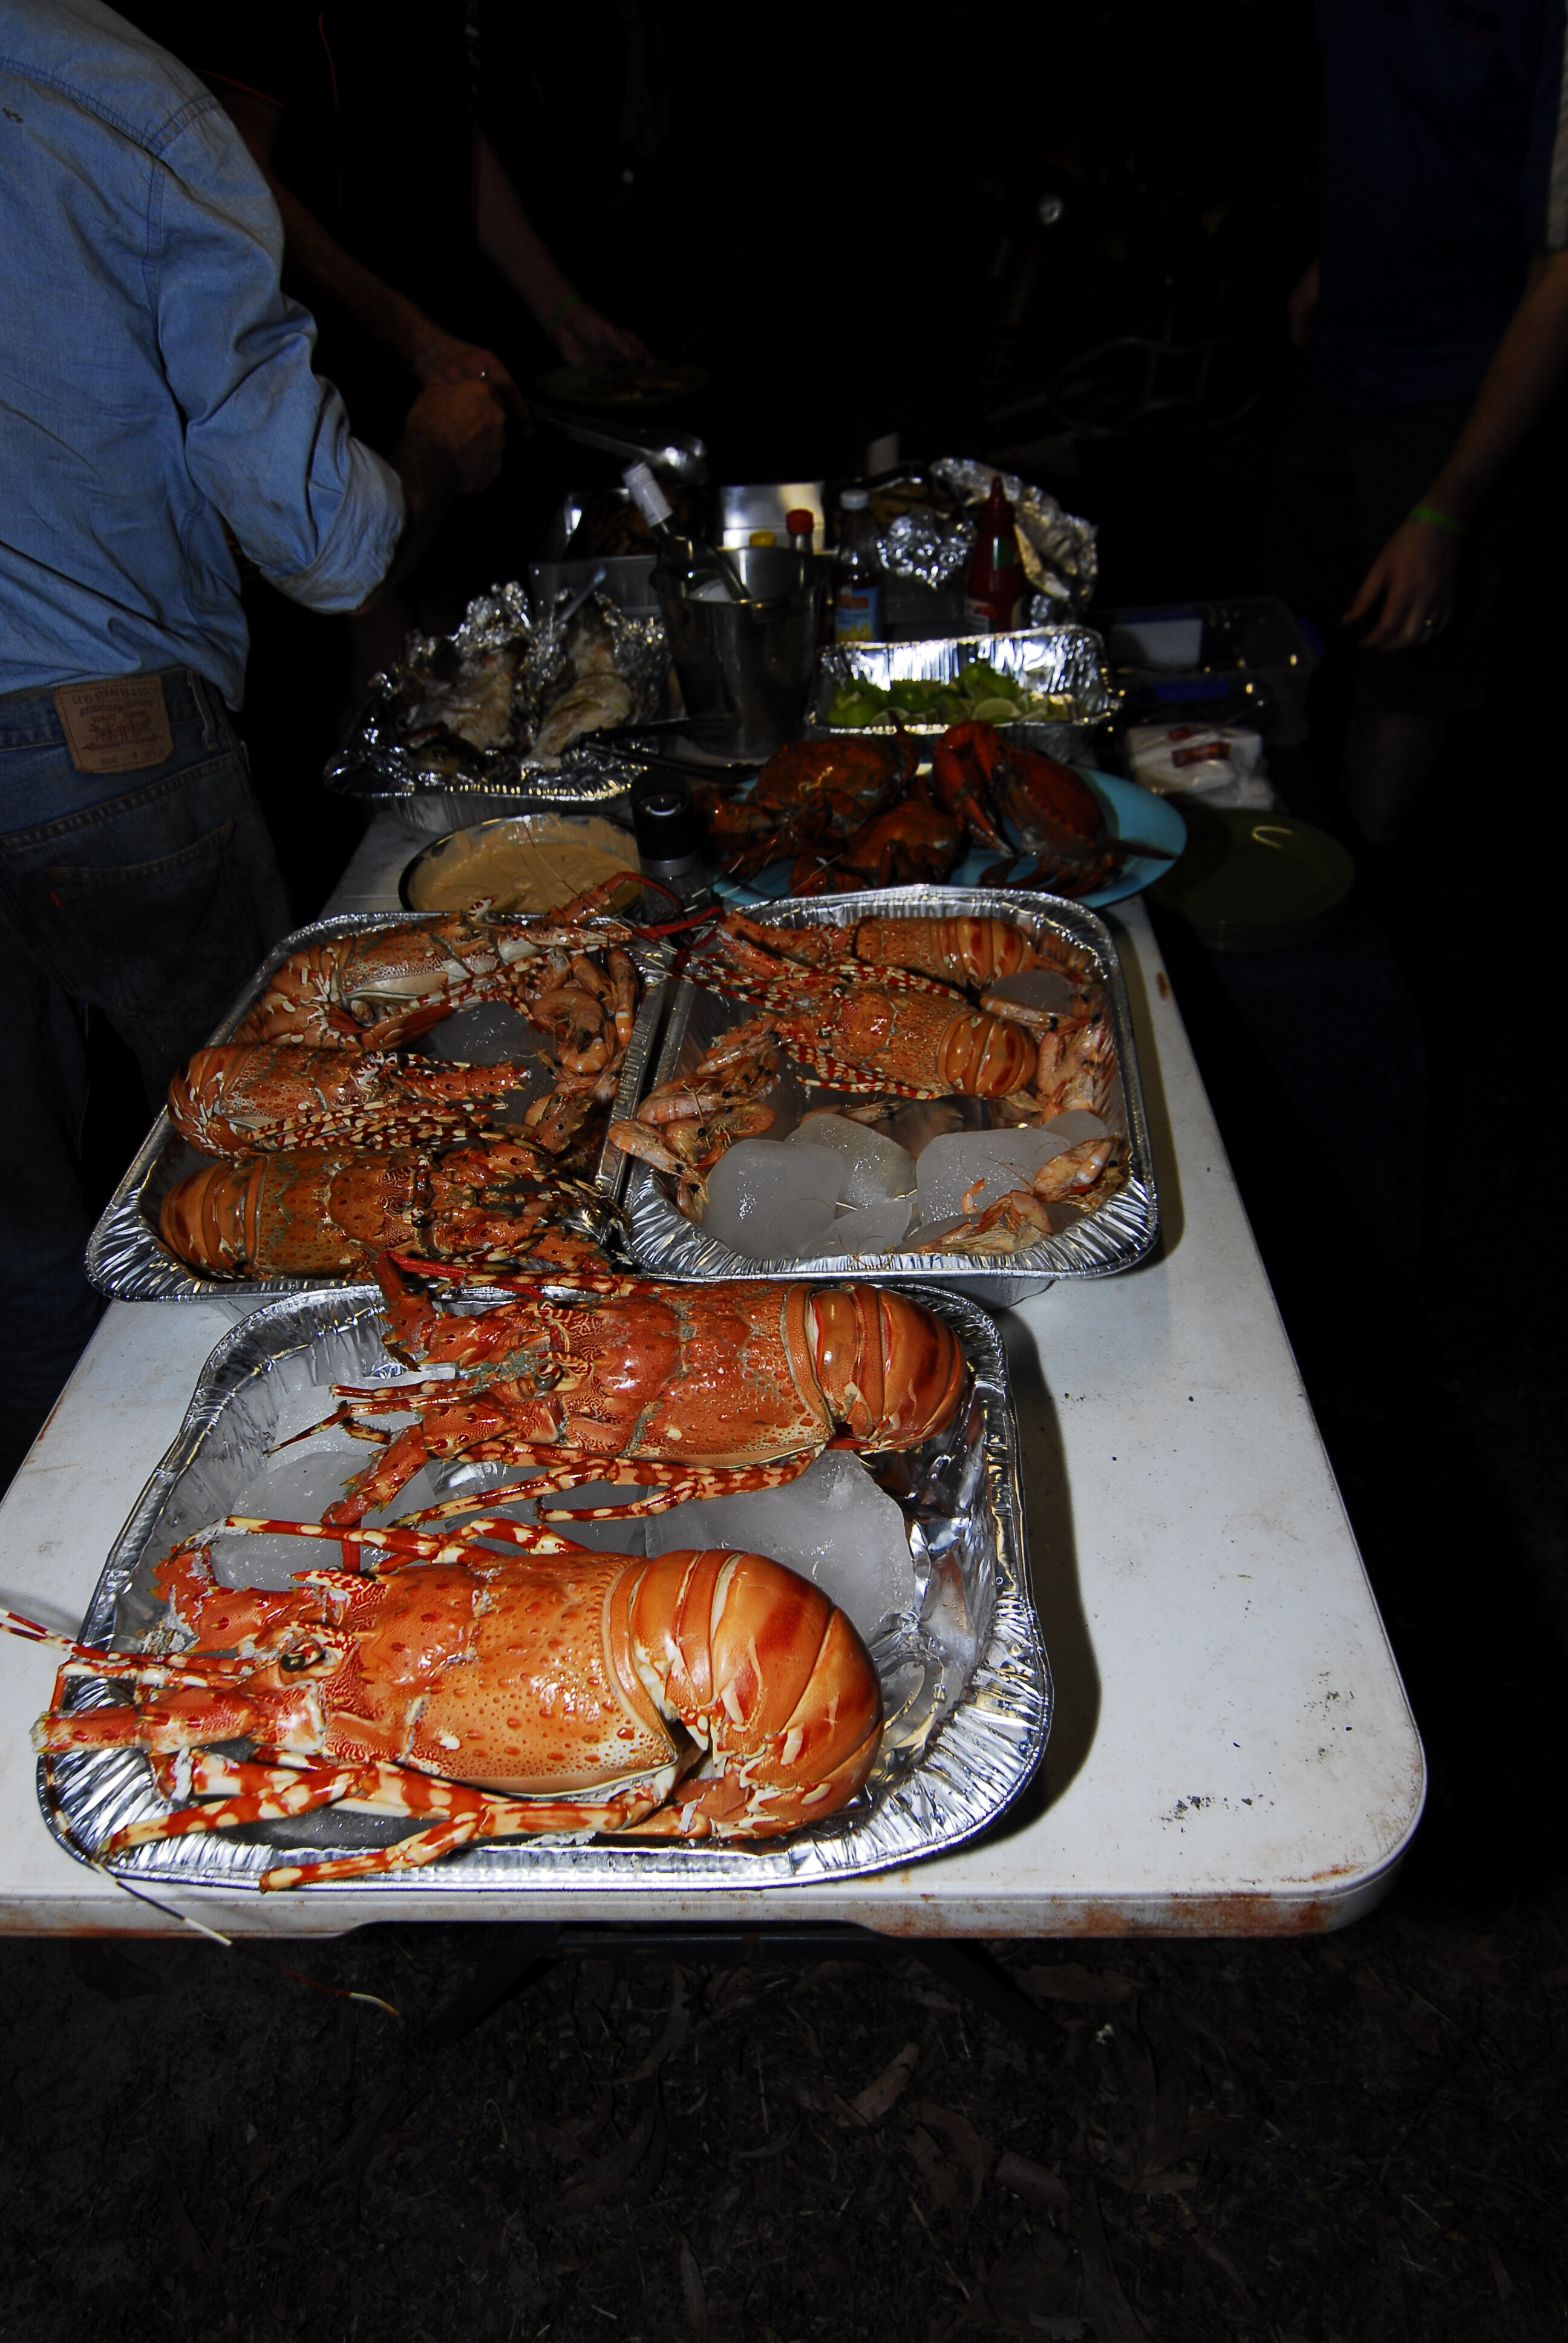
Crustaceans
You may get lucky to find prawns schooling along beaches. Both the baitcast and drag bait nets are ideal for collecting a bucket of green fresh prawns for the barbie – or bait. You have not tasted fresh prawns until you catch your own. We also have cherabin, a freshwater prawn, in our northern freshwater streams and billabongs. They grow to a length of more than 80cm, including the nippers.
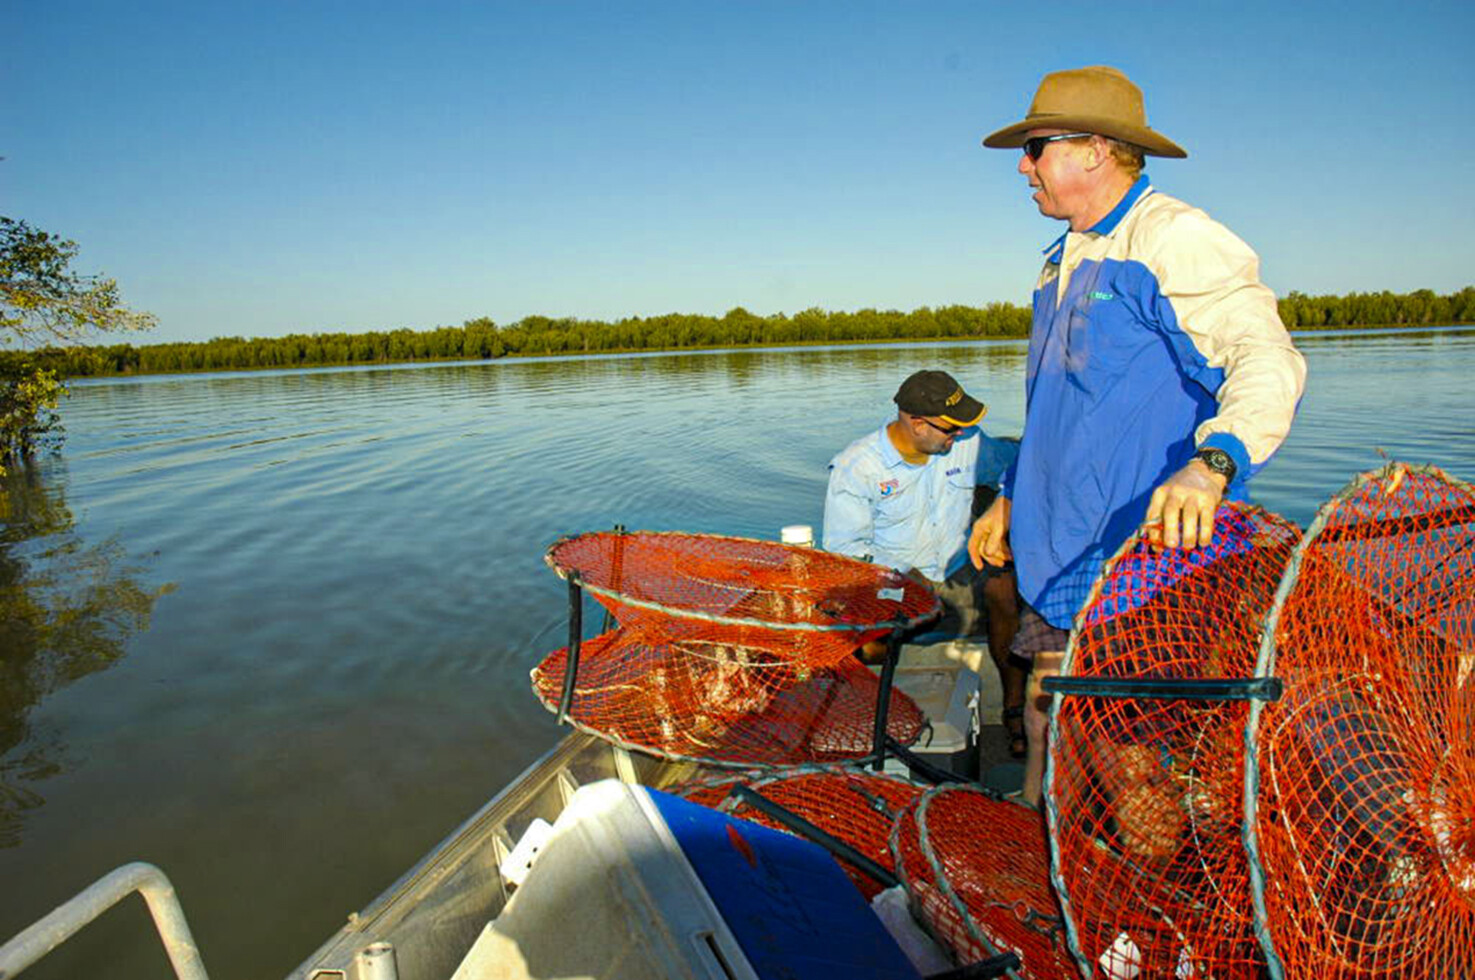
Cherabin are easily caught in shallows and deep holes in ‘yabbie’ or opera pots baited with fruit, meat, chicken and bait prawns. Red claw, a tasty freshwater lobster, are also attracted to these traps – most impoundments are alive with them. My own ‘best’ bait for cherabin pots are a couple of bait prawns placed in the bait pouch. Cherabin can’t ignore them.
Mud crabs are another tropical delight and are caught in crab pots, which are at their best when set from a boat in tidal estuaries. Pots can also be set from beaches and mangrove banks in estuaries, but beware of crocodiles when setting traps in both fresh and saltwater environments. They are attracted by the bait and the alarm signals of trapped crustaceans and fish in the pots. A crabber was killed by a crocodile at Cooktown some years back when he was checking his pot, only a stone’s throw from his local caravan park site. Like I said, you need eyes in the back of your head …
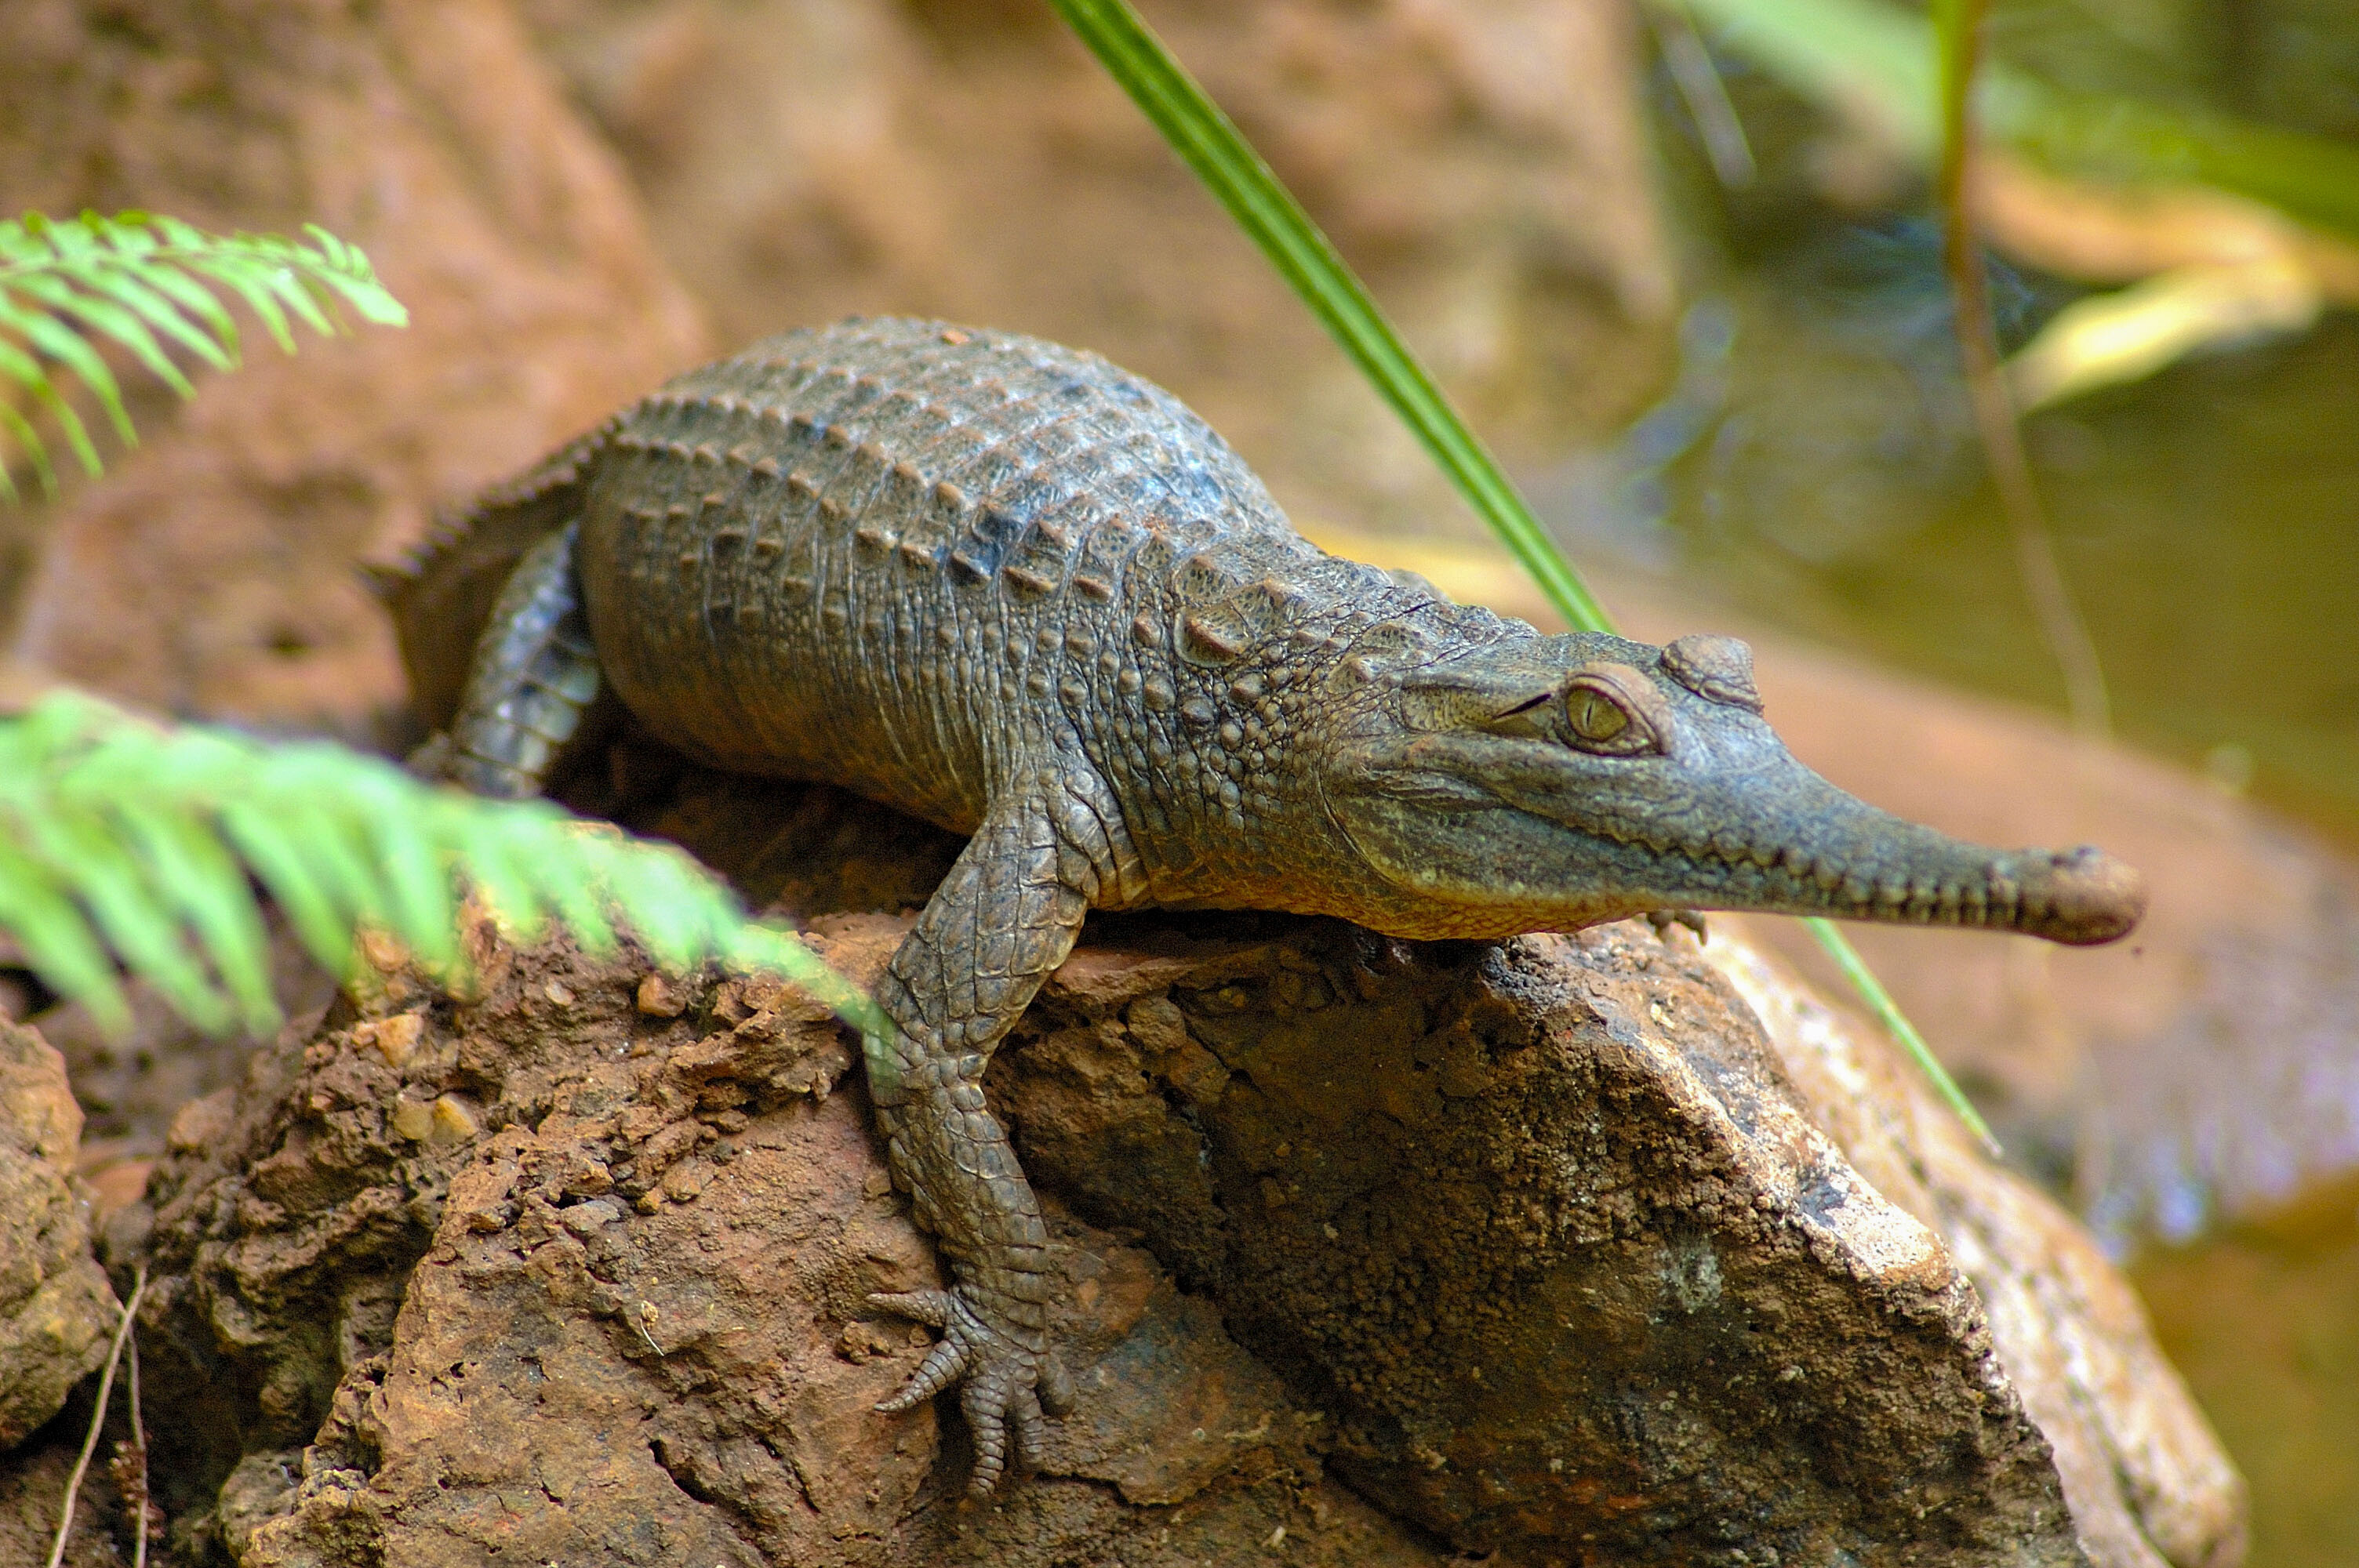
No tropical fishing guide is complete without mentioning crocodiles. We have two species, the Johnstone or freshwater crocodile, a relatively harmless fish eater that can grow to 3.5m, and the misnamed saltwater or estuarine crocodile, the largest predator in the world. It has been recorded at more than eight metres, but they average four metres these days – and growing.
Many live their entire life in the upper freshwater reaches of rivers, creeks, swamps and billabongs, thus don’t be fooled in to thinking you are safe. You can see now why they are misnamed, which gives a false impression of their habitat. Take great care in crocodile areas, ignore them and you will die. I am not joking, having lost a couple of mates to crocodiles and experienced close encounters myself in unguarded moments.
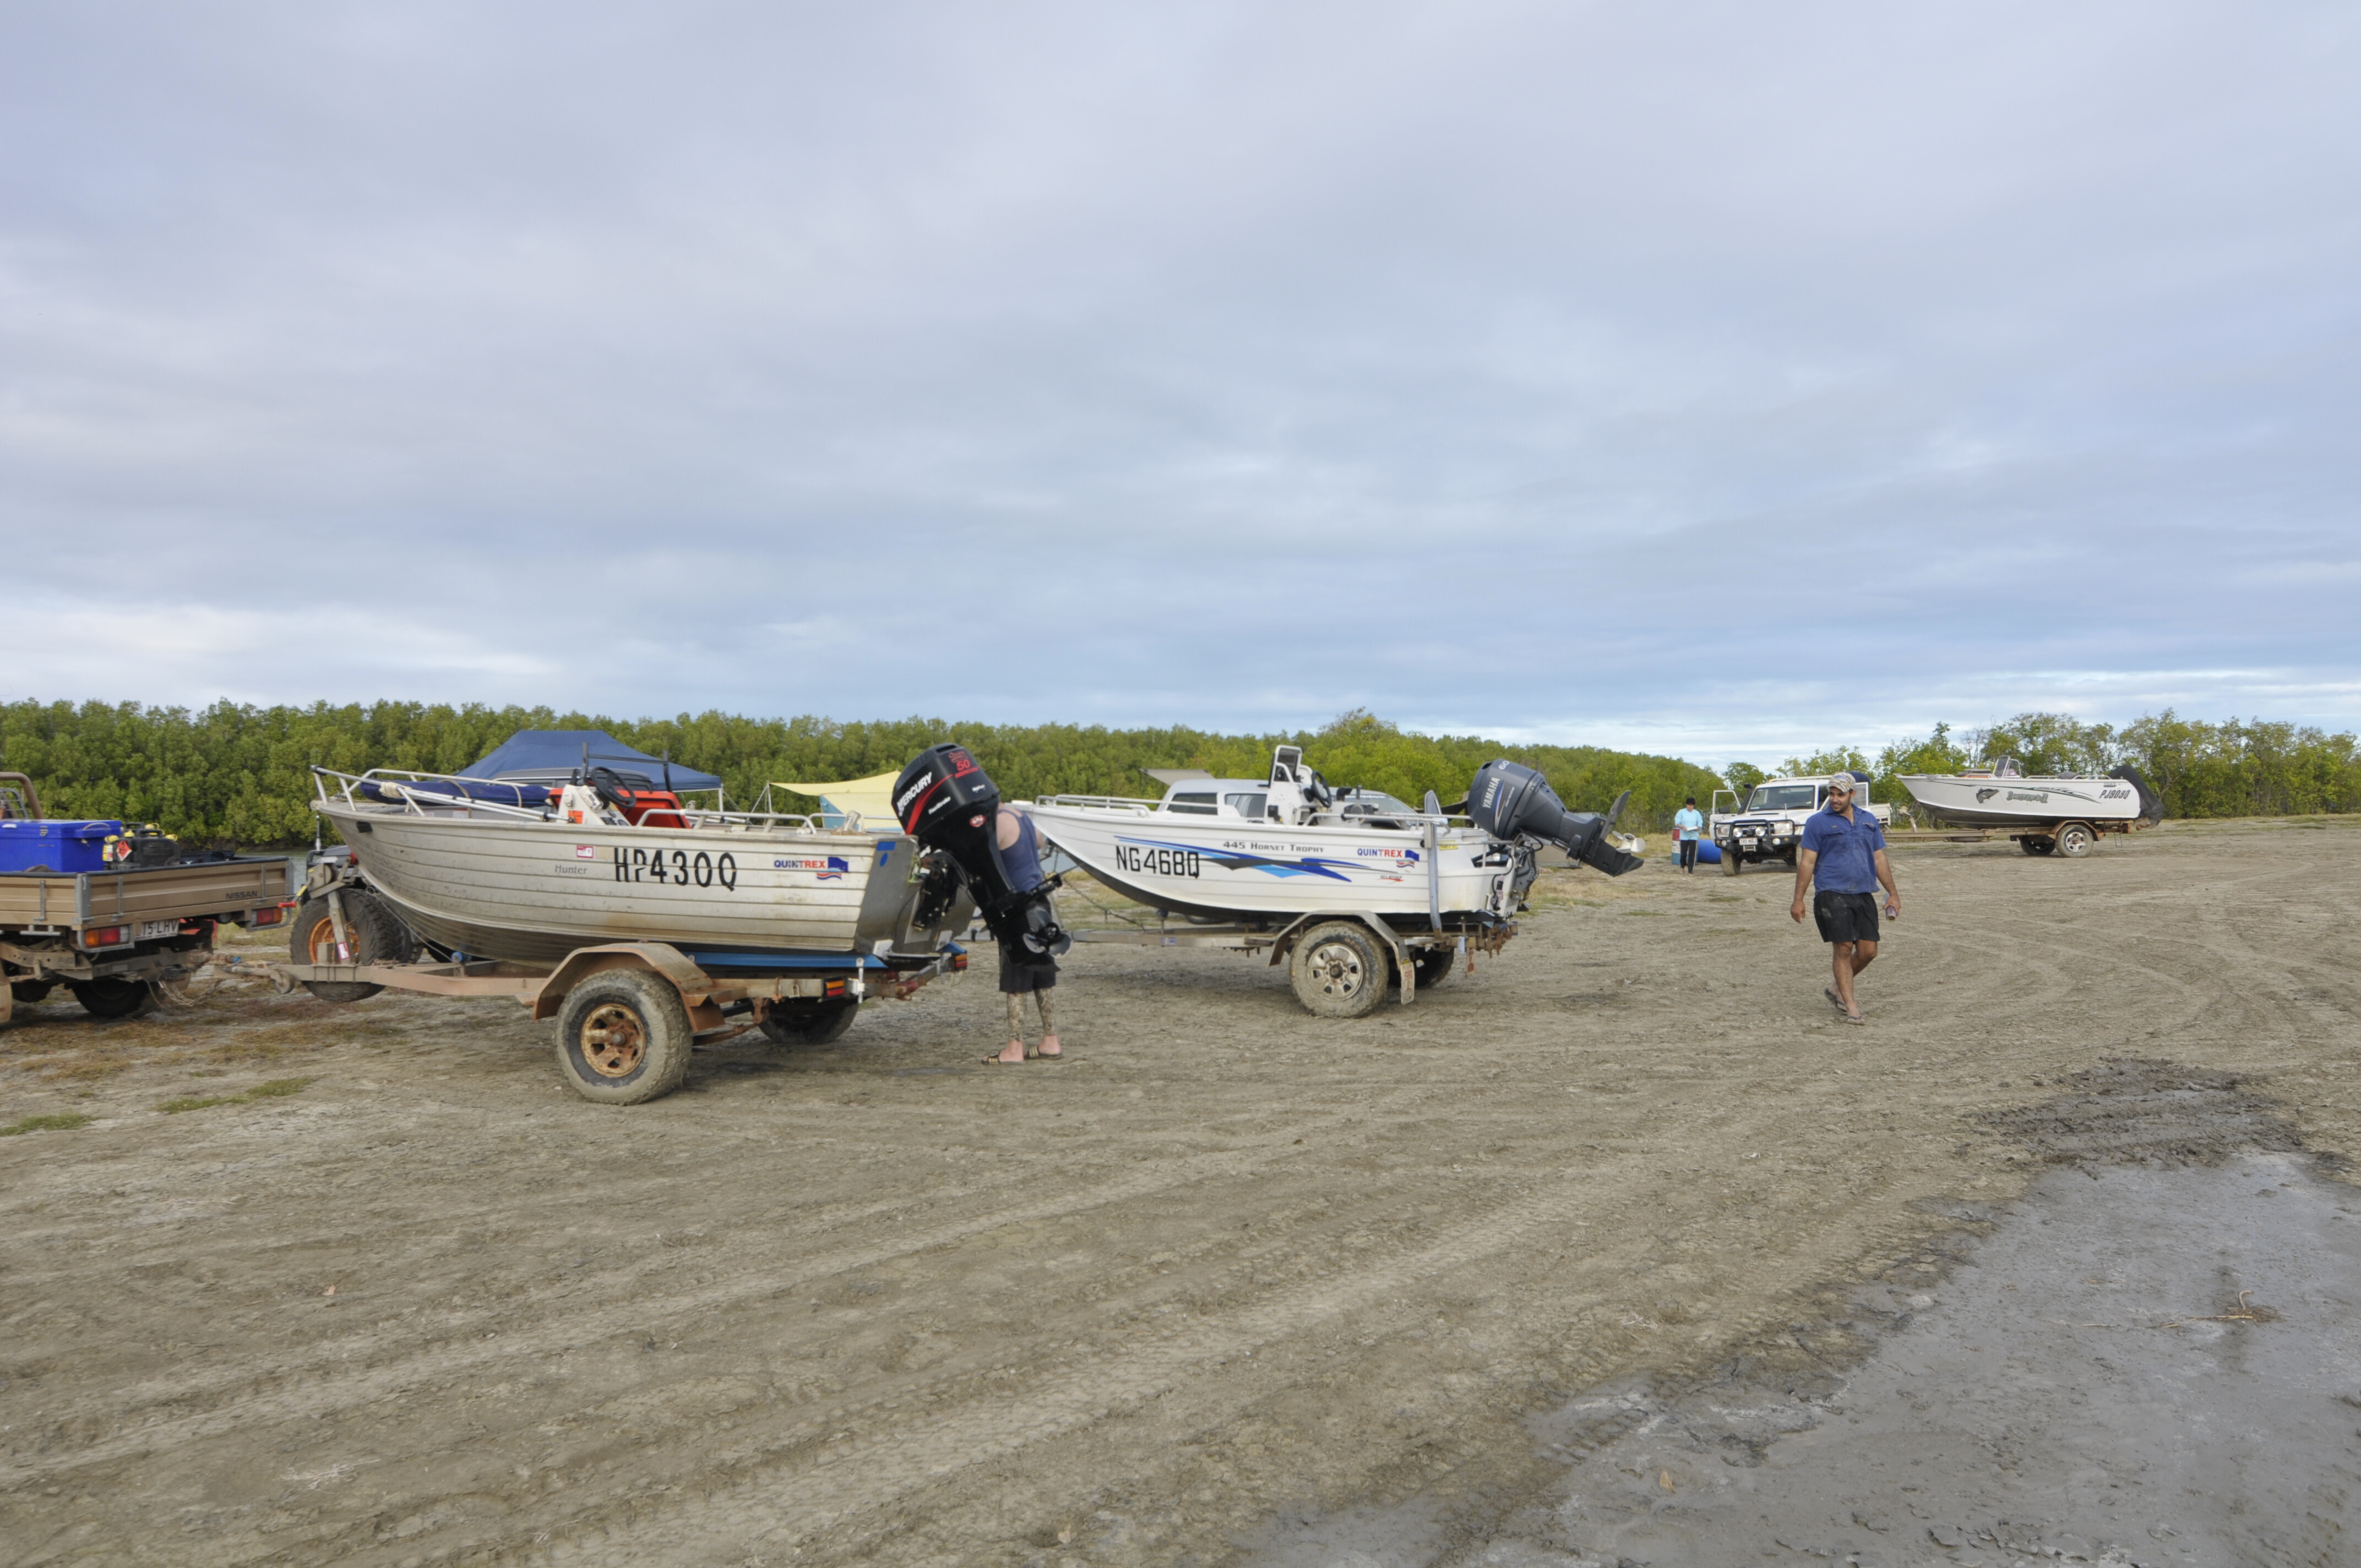
Tinnies rule
Years ago, the car-top tinnie ruled up here, but with more crocodiles than ever before, most resident anglers have upgraded their vessels to trailer boats. However, car-toppers endure, and many vehicles on the Cape carry one; though most never see water once their owners are told by the local roadhouse or pub ‘expert’ that crocodiles eat tinnies for breakfast – never mind that the ‘expert’ is probably doing a first-time ever trip and passing on the pub lore he has been conned with.
I have and still use 3.7m tinnies and have never had a problem with a crocodile attacking one; although, I did have a close call once when one almost pulled me over the side when I was dozing on the seat against the outboard. That was my fault, because I lost caution by ignoring the dangers that surrounded me.
Aluminium car-top tinnies are the best pick, being sturdy, hole-proof and light. The thickness of the sheeting indicates the strength, weight and rigidness of the vessel. Some tinnies are too light and tend to flex when on the water; others are too heavy and require a more powerful outboard, while also being too weighty to heave on to roof racks of vehicles and campers. Be aware that racks ‘secured’ on the vehicle roof-rim channels suffer from vibrations on corrugated roads that can shear the clamps off. The best are models that bolt on to the frame, like those on Toyota LandCruisers.
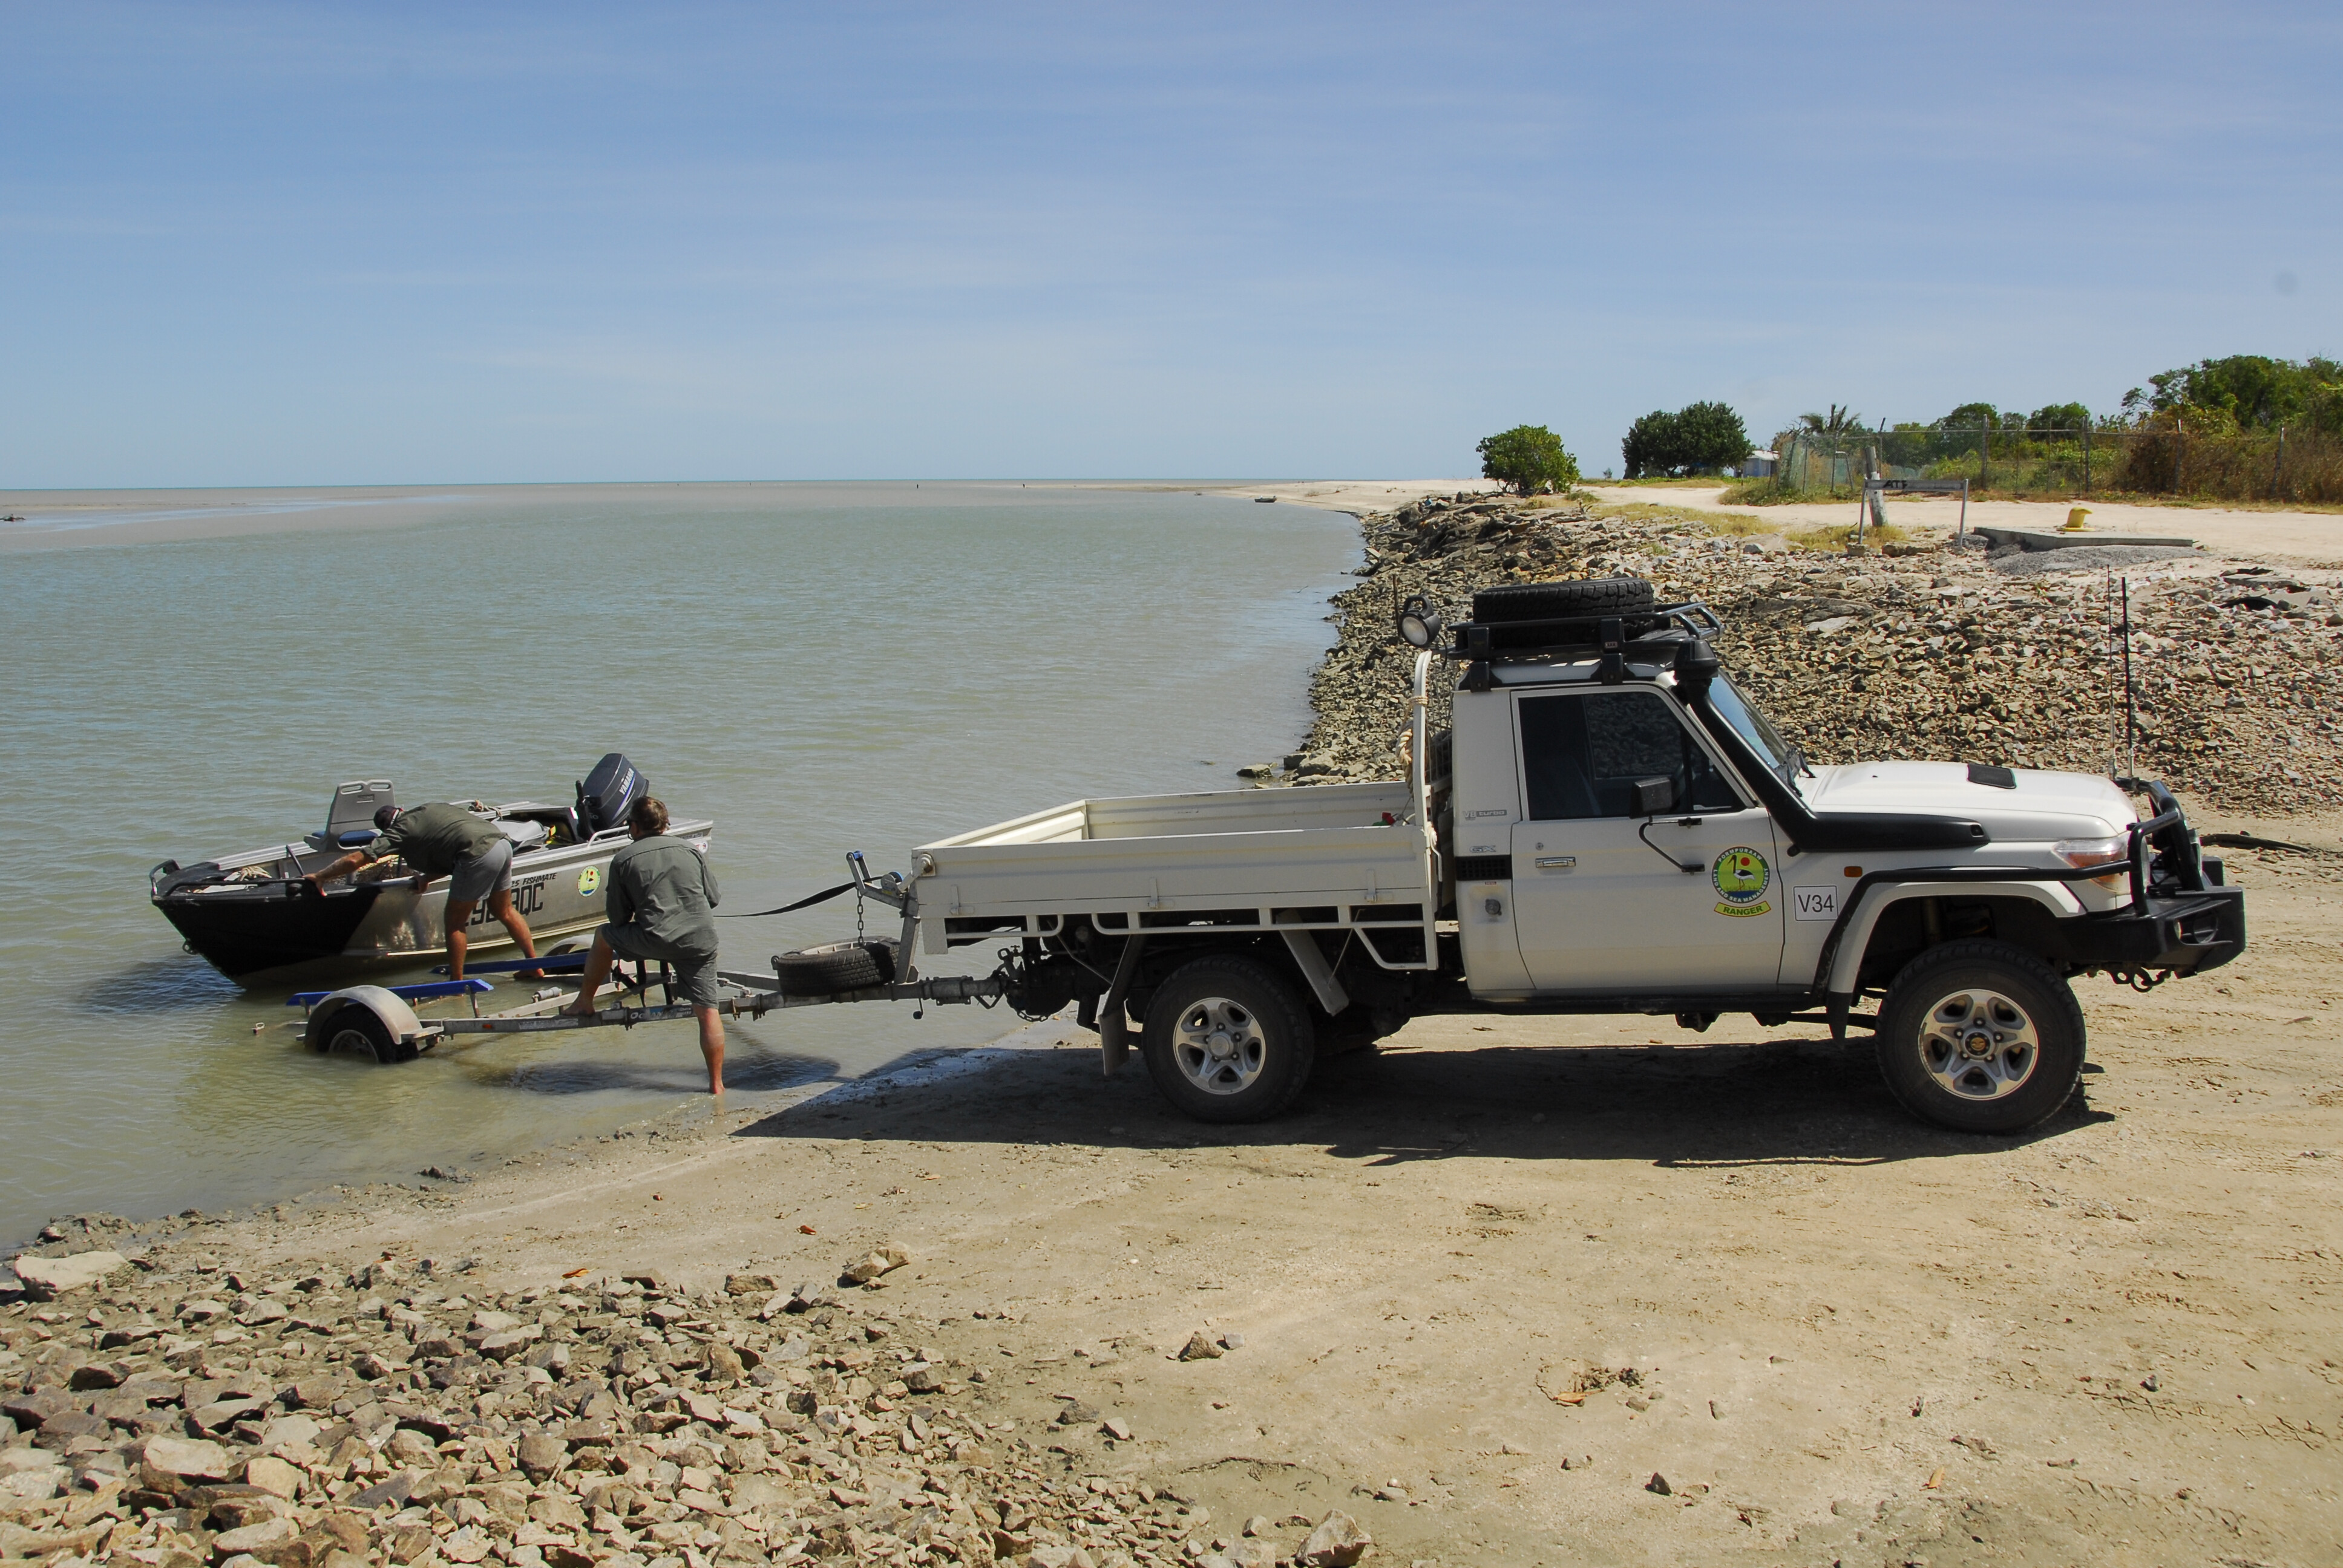
Tinnies come in two configurations: the flat-bottomed punt and the V-hull model. Both are excellent for transporting on either the vehicle roof rack, a trailer or camper, provided they are less than four metres and lightweight. The most popular is 3.7m long and weighs around 80kg. That may not sound like much, but launching, recovery from steep banks and loading requires two people, unless you have a purpose boat loader, which are available for both vehicle and camper/trailers. Tinnies can be dragged up steep banks with a winch, vehicle or by manpower.
Tinnies are unsuitable on rough water that can be experienced on open impoundments, and they’re always a risk on large estuaries. Having said that, I have taken 3.7m tinnies to the offshore islands off Seisia on the tip of the Cape York, and to Arnhem Land in the NT, and never had a problem. However, such outings must be planned by ensuring that the weather does not blow up in the evening, with a 20-knot southwest or westerly wind.
The punt is especially at risk in rough water, as are lightweight V-bottomed tinnies. Most tinnies are suitable for two and even three people, depending on how heavy and large they are. There are some real heavyweights on the water, anglers who ‘train’ and spend more time drinking beer than fishing. I have seen tinnies with a 50mm freeboard loaded with heavyweights gulping down copious amounts of beer on the water … “Crocodiles? What crocodiles?”
Tinnies are best powered by a suitably recommended horsepower outboard. Your dealer will advise you on that, while the compliance plate recommends the maximum horsepower size outboard for the vessel.
Safety gear must be carried, which includes either a paddle or oars, bailing bucket and lifejackets in protected water. Some states require occupants to always wear a lifejacket on board, which may be okay for the cooler southern climes, but not in the tropics where the chance of heat stroke and exhaustion is real when day temperatures are high and any extra ‘clothing’ does not help to keep cool. It’s a reason why copious amounts of liquid must be consumed, and that means water must be part of the load, not alcohol.
Boats to be wary of
Another vessel, one that sees little use by recreational anglers, is the blow-up ‘rubber ducky’. Similar to aluminium tinnies, they come in various sizes and are easily stored and transported in most 4WDs.
The larger ones are seaworthy, which, coupled with a soft ride, makes them attractive to some anglers. The disadvantage is that you are a sitting duck, being close to the water, and that the sides are subject to wave splashes, sticks, fish spines, knife punctures − and crocodile bites. Laugh not, it has happened. A ‘ducky’ can be left inflated and carried on a rack, like a tinnie; although if you have a compressor, they are easy and quick to pump up.

The ‘Porta-bote’ is a foldable vessel that is available in a couple of sizes. Similar to a surfboard when folded, it consists of several planks that when fitted together make up the boat. It can be powered by a small outboard, or an electric one, but having been in one on the crocodile-infested Daintree River I have no wish to promote it as a fishing platform for such rivers, estuaries and seashores, though it’s suitable for protected lakes and river pools.
Power options
All fishing boats need power, even a Canadian canoe can be propelled with a small 2 to 4hp outboard or an electric one, but the above-mentioned tinnies require a bigger plant. If you have a dual-battery system in your 4WD, one which should be a slow-discharge battery, an electric outboard makes a lot of sense to potter about in the water.
But tinnies, both punts and V-shaped hulls, need something bigger to get about, though many anglers also use an electric motor for stealth fishing and as a spare. Most tinnies will take a 15hp outboard, but again I stress the importance of the recommended engine as per the compliance plate. A 10 to 15hp outboard is light enough for a fit person to carry, but when you move up to a 25 to 30hp motor, two strong people are needed.
On the other hand, if you trailer your vessel, the outboard can be left on the transom, although I recommend you bolt it on to the transom, as clamp bolts have an annoying habit of coming loose on corrugated roads. I know of several cases where drivers have pulled up and discovered the outboard has gone missing or has been dragging behind the trailer for miles secured by its safety chain. A mate had one come loose from the transom when he hit a rock … it’s still in the mud of the East Alligator River.
Outboard leg supports are available, but most are useless on corrugated roads and will drop out, especially the spring-loaded models. A better support is to have a purpose Y-yoke made for you that secures on the trailer frame and holds the outboard leg at a 45-degree angle in the V-frame. Of course, all must be strapped down and checked each time you pull up.
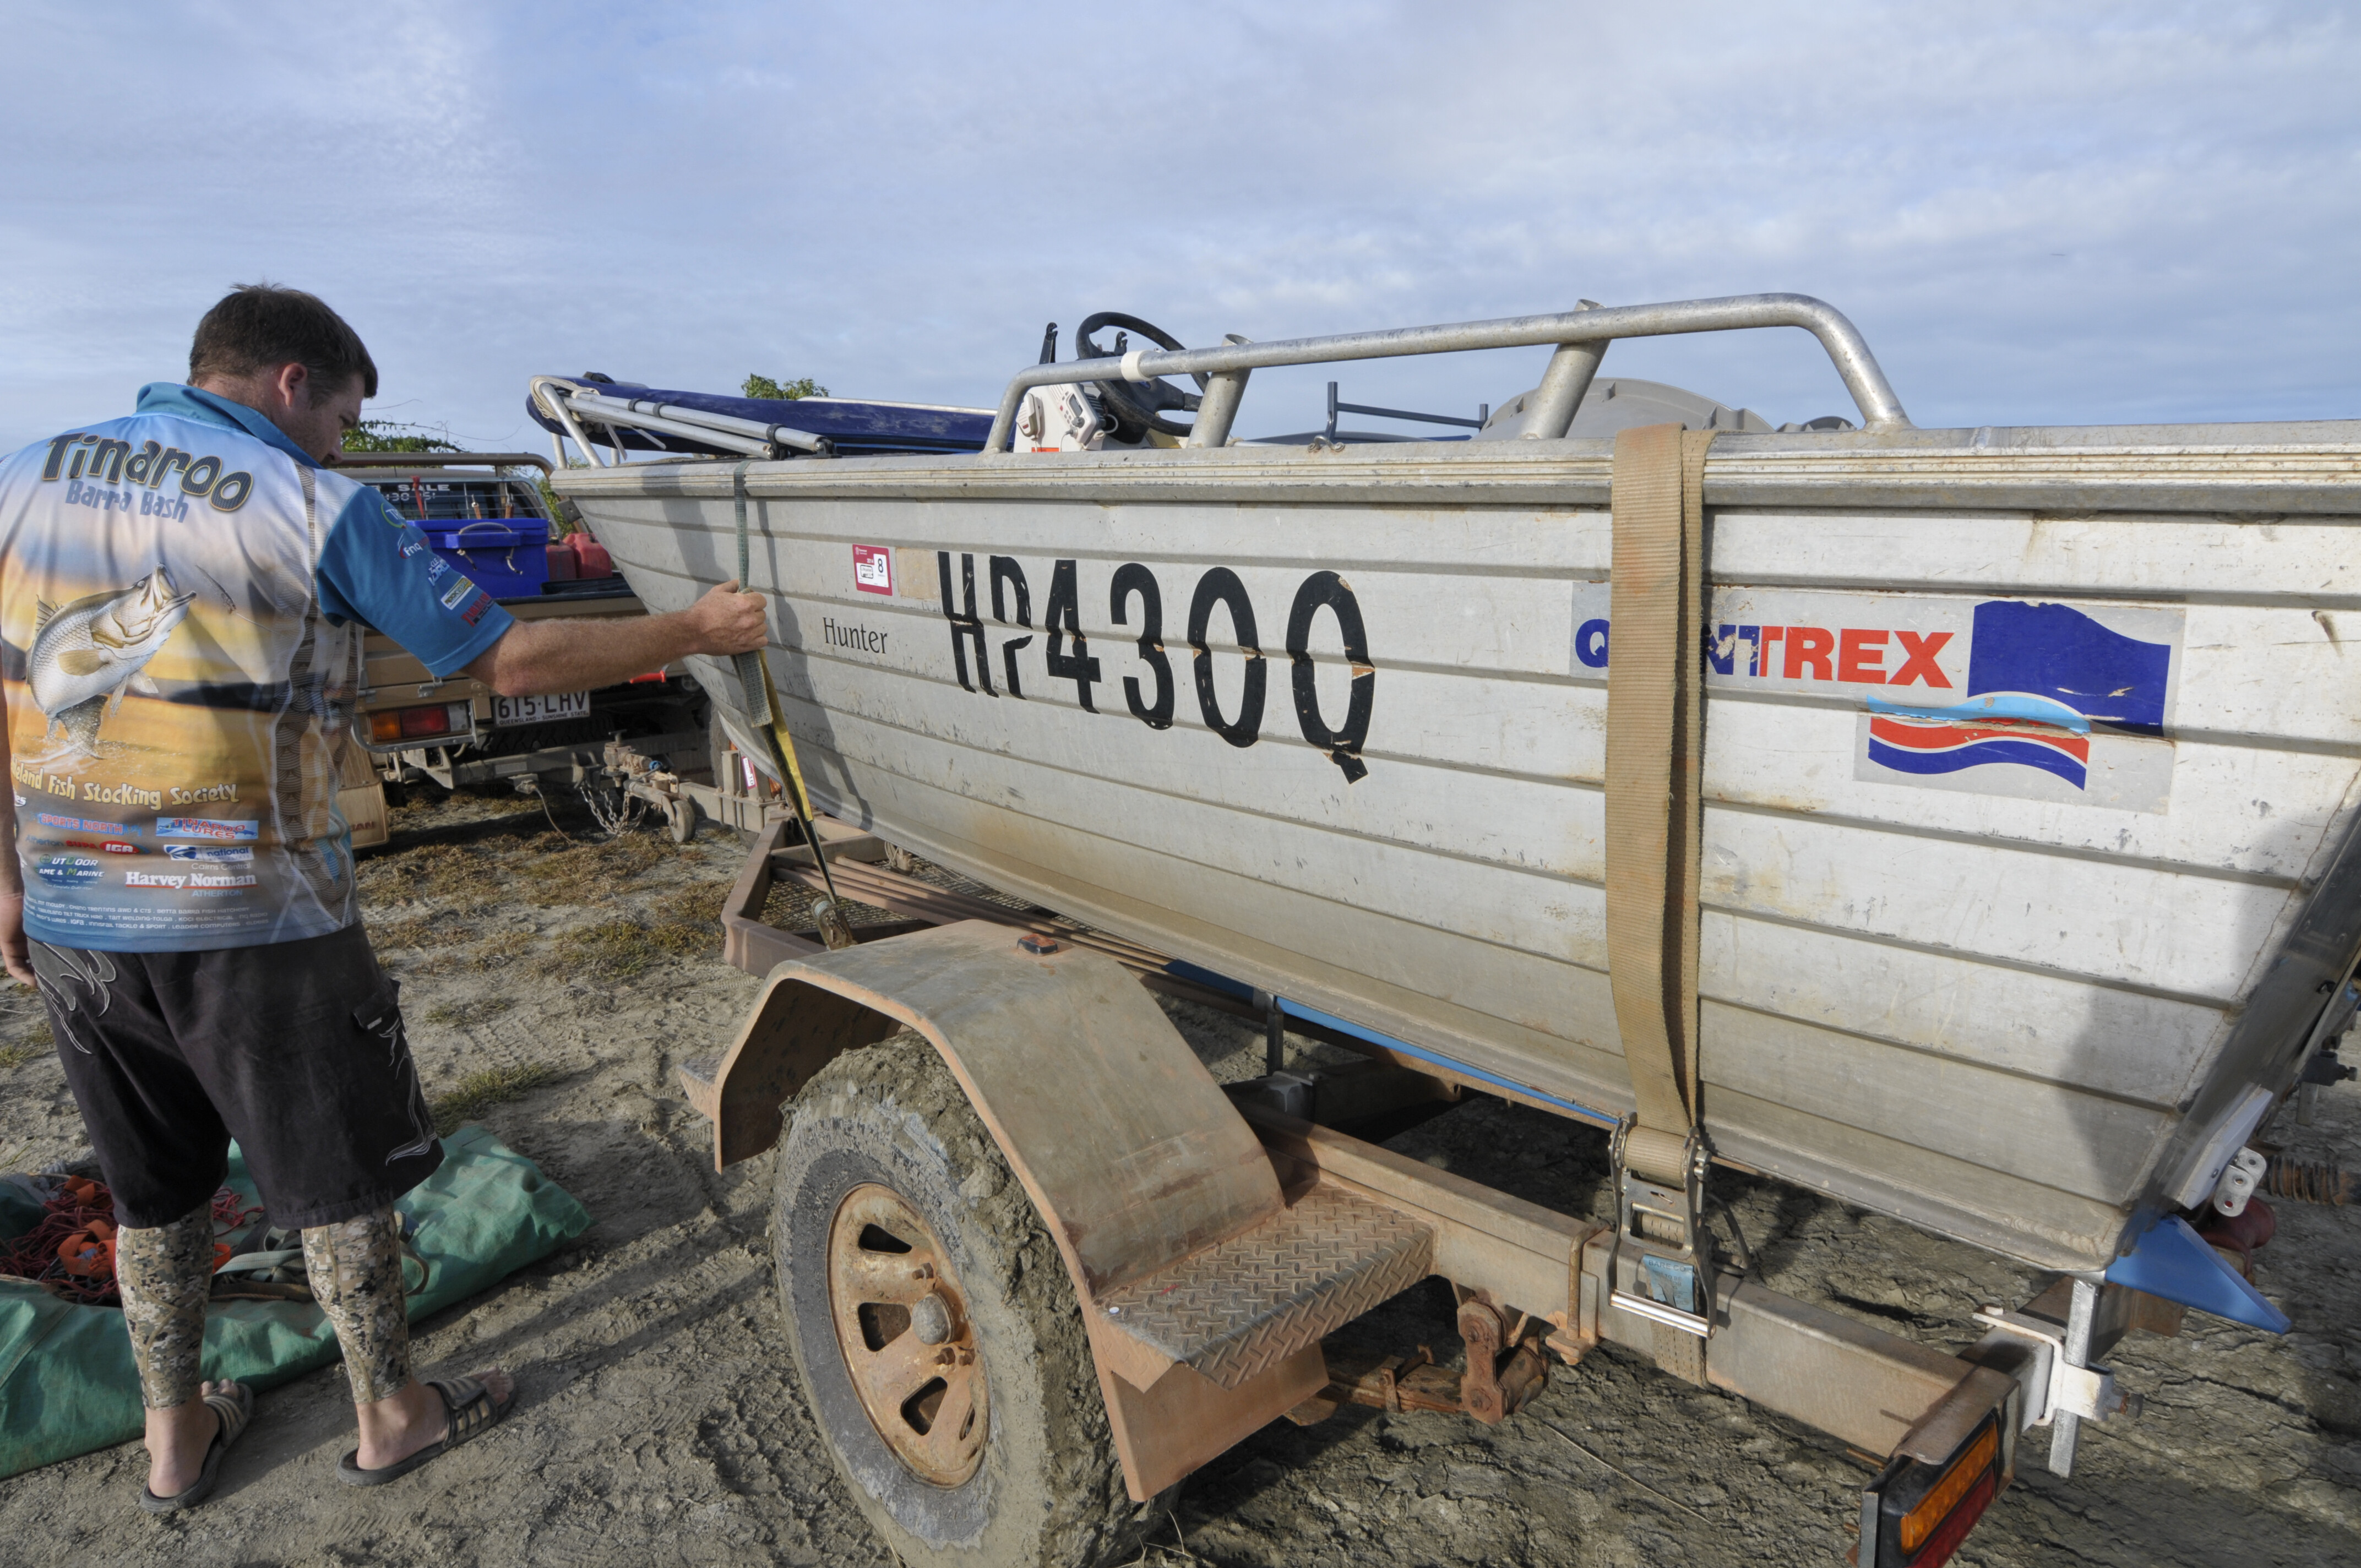
Trailer boats must be secured on both the front and rear with straps, never rely on the winch rope and front secure point to hold the vessel on bad roads. If you are car-topping the tinnie, it’s best to carry outboards in an upright position; for instance, clamping it to the cabin guard in a trayback. If you must carry it on its side, place it on a thick padding to protect the cowl. Never carry it upside down.
Finding fish
The adage that fish can be caught anywhere up north is incorrect. Like elsewhere, you must work for your fish. Yes, some people get lucky, like the bloke who walked on to the Cooktown wharf, cast a lure off it and caught an 18kg Spanish mackerel. Never mind that half the town’s population has spent the whole morning trying to catch a fish … and failed.
Another bloke walked on to Cahills Crossing in Kakadu and lucked a metre-long barramundi on his second cast. By the time he landed it, half the crocodile population in the park were after his catch. That stuff happens, but mostly when you pull up somewhere on a likely looking spot where you have no idea how many others before you got lucky or failed. Thus, it’s best to find your own fishing spot away from popular places, study the tides and pick the weather, or camp beside a long freshwater reach. And never ignore beaches and headlands.
Fish, especially barramundi, are notoriously difficult to catch when the weather is cool and the water cold, which is what happens in our dry season when temperatures plummet and fish suffer from ‘lockjaw’ and won’t bite. So, it stands to reason that catching a feed in our northern winter is a challenge for casual visitors.
Fish move about a lot and tend to move with tides up and down estuaries and along beaches. If you have a lure or bait in when a school passes, you will be in luck, otherwise it’s a long wait between traffic. The top spots are off headlands, rocky foreshores and snags.
The best fishing is generally from a boat, because it allows you to get in close to target the fishy places. Colour changes in the current also hold fish because bait uses dirty water to hide in. Predators know this and will attack any lure they come across.
Beach fishing is largely ignored in the tropics by locals, but it can be rewarding, especially on the turn of the tides when fish and bait become active. The best spots are shallow gutters, rocks and headlands where both lure and bait fishing can be done. Bream, flathead, barramundi, salmon, jewfish, queenfish, catfish and trevallies all hunt prey and forage along beaches by working with an incoming flood tide.
You will need a bait net to catch mullet and other baitfish. They gather in tight bait balls in the shallows or shelter in gutters. Both frozen fish and bait prawns are available from tackle outlets and many service stations, in case you don’t want to risk a face-to-face encounter with a crocodile while knee-deep in water ‘armed’ with a bait net. It’s always a risk and one you must be aware of.
Dangerous critters
During the tropical build-up season (the prelude to the monsoon) from October onwards, box and Irukandji jellyfish, the deadliest creatures in the world, swarm on to the tropical beaches. If you contact one, or the tentacles, and are stung, you may die if help is not available. Stay out of the water and check the cast net for tentacles.
Crocodiles are also more active during the build-up. Carry a couple of litres of vinegar, the recognised first-aid treatment for box jellyfish. The Irukandji sting is similar to a wasp sting and may not be immediately noticed until hours later. Yes, tropical fishing is adventurous, including the lowly task of bait collecting.
Another thing, when collecting bait with either a cast or drag net, unwanted fish like the deadly stonefish, stingrays, sawfish, sharks and even small crocodiles are sometimes caught in bait nets.
Fun, huh? But such things are rare and the stuff that legends are made from. Just be aware of the bity things and stay alive.
Cooking and taking care of fish
Fish go off rapidly when the humidity and sun are high, thus you need to ensure that the fish you catch stay fresh. This is best done by cutting its throat and bleeding it, before storing it on ice or in the car fridge for dinner. You can also make up an ice-slurry by mixing 20 percent of seawater with one percent of ice. This provides an instant ‘freeze’ and is ideal when ice supplies are low.
Humid conditions cause gut bacteria to spread rapidly when a fish dies. Leaving fish in the bottom of a tinnie exposed in the sun ‘cooks’ it with solar radiation and spreads bacteria. If eaten, it may kill you. A damp hessian bag is okay for a short period if you have no ice. A popular method of keeping fish alive is to tether them behind the tinnie, but it’s illegal in some parts across the north and will incur the wrath of the RSPCA.
Check the laws regarding filleting fish as it’s illegal to do so until you are back on land in some States and Territories. You may also be required to keep the skin on the fillet. More importantly, there are bag limits and size restrictions to adhere to, so check States and Territory fishing regulations before fishing.
Fresh fish is the best bush tucker you can eat, and the top part is cooking it and enjoying a great meal with drinks of choice. Apart from toad fish, freshwater bullrout and stonefish, we don’t have any poisonous fish, though ciguatera poisoning is a problem from regularly dining on some tropical sea fishes, with Chinaman fish, big Spanish mackerel and coral trout being the most suspect. It’s a local issue and most of us release large species to avoid risks.
Some freshwater fish such as saratoga and tarpon are best released as they are riddled with bones and are not that tasty anyway. Catfish are frowned at by purists, but the fact remains they are good bush tucker. I have seen Aboriginal’s swap barramundi for catfish on the infamous East Alligator Crossing. They cook them whole on a campfire. Catfish make great fish cakes by part-boiling the fillets first.
Fish are simple to cook, but most bush ‘cooks’ stuff tasty fillets up by under- and over-cooking or adding so many condiments to the point that it does not taste like fish anymore. All you need is little flour to stop the meat from sticking, toss it on a hot barbecue plate, turn over once and it’s done. Freshwater fish benefit from a little salt and pepper, which is best mixed with the flour dusting.
I use a mix of virgin olive oil and butter on the plate, or in a frypan, on high heat, for best taste. Coals are ideal for cooking and most fillets can be cooked in less than 10 minutes. When baking fillets; place a lid or even al-foil over them for the first turn. This ‘steams’ the flesh and holds the juices. Remove the cover when the fillets are turned for the final cooking stage. Jab a knife point in the flesh. If it goes in without resistance, the fish is cooked to perfection.
Another method is to cook fillets or whole fish wrapped in layers of al-foil, along with vegetables, salt and pepper. Some people spoil good fish by adding chillies – your choice. Hot fish is not everyone’s cup of tea …
The al-foil-wrapped fish can be cooked in campfire ashes, frypan or on a barbecue plate. Again, it should only be turned over once. When cooking whole fish, only remove the gut and don’t scale it. You can add a whole list of condiments to cooked fish, but apart from salt, pepper and a squeeze of fresh lemon juice, fish is at its best when cooked and eaten in a simple way.
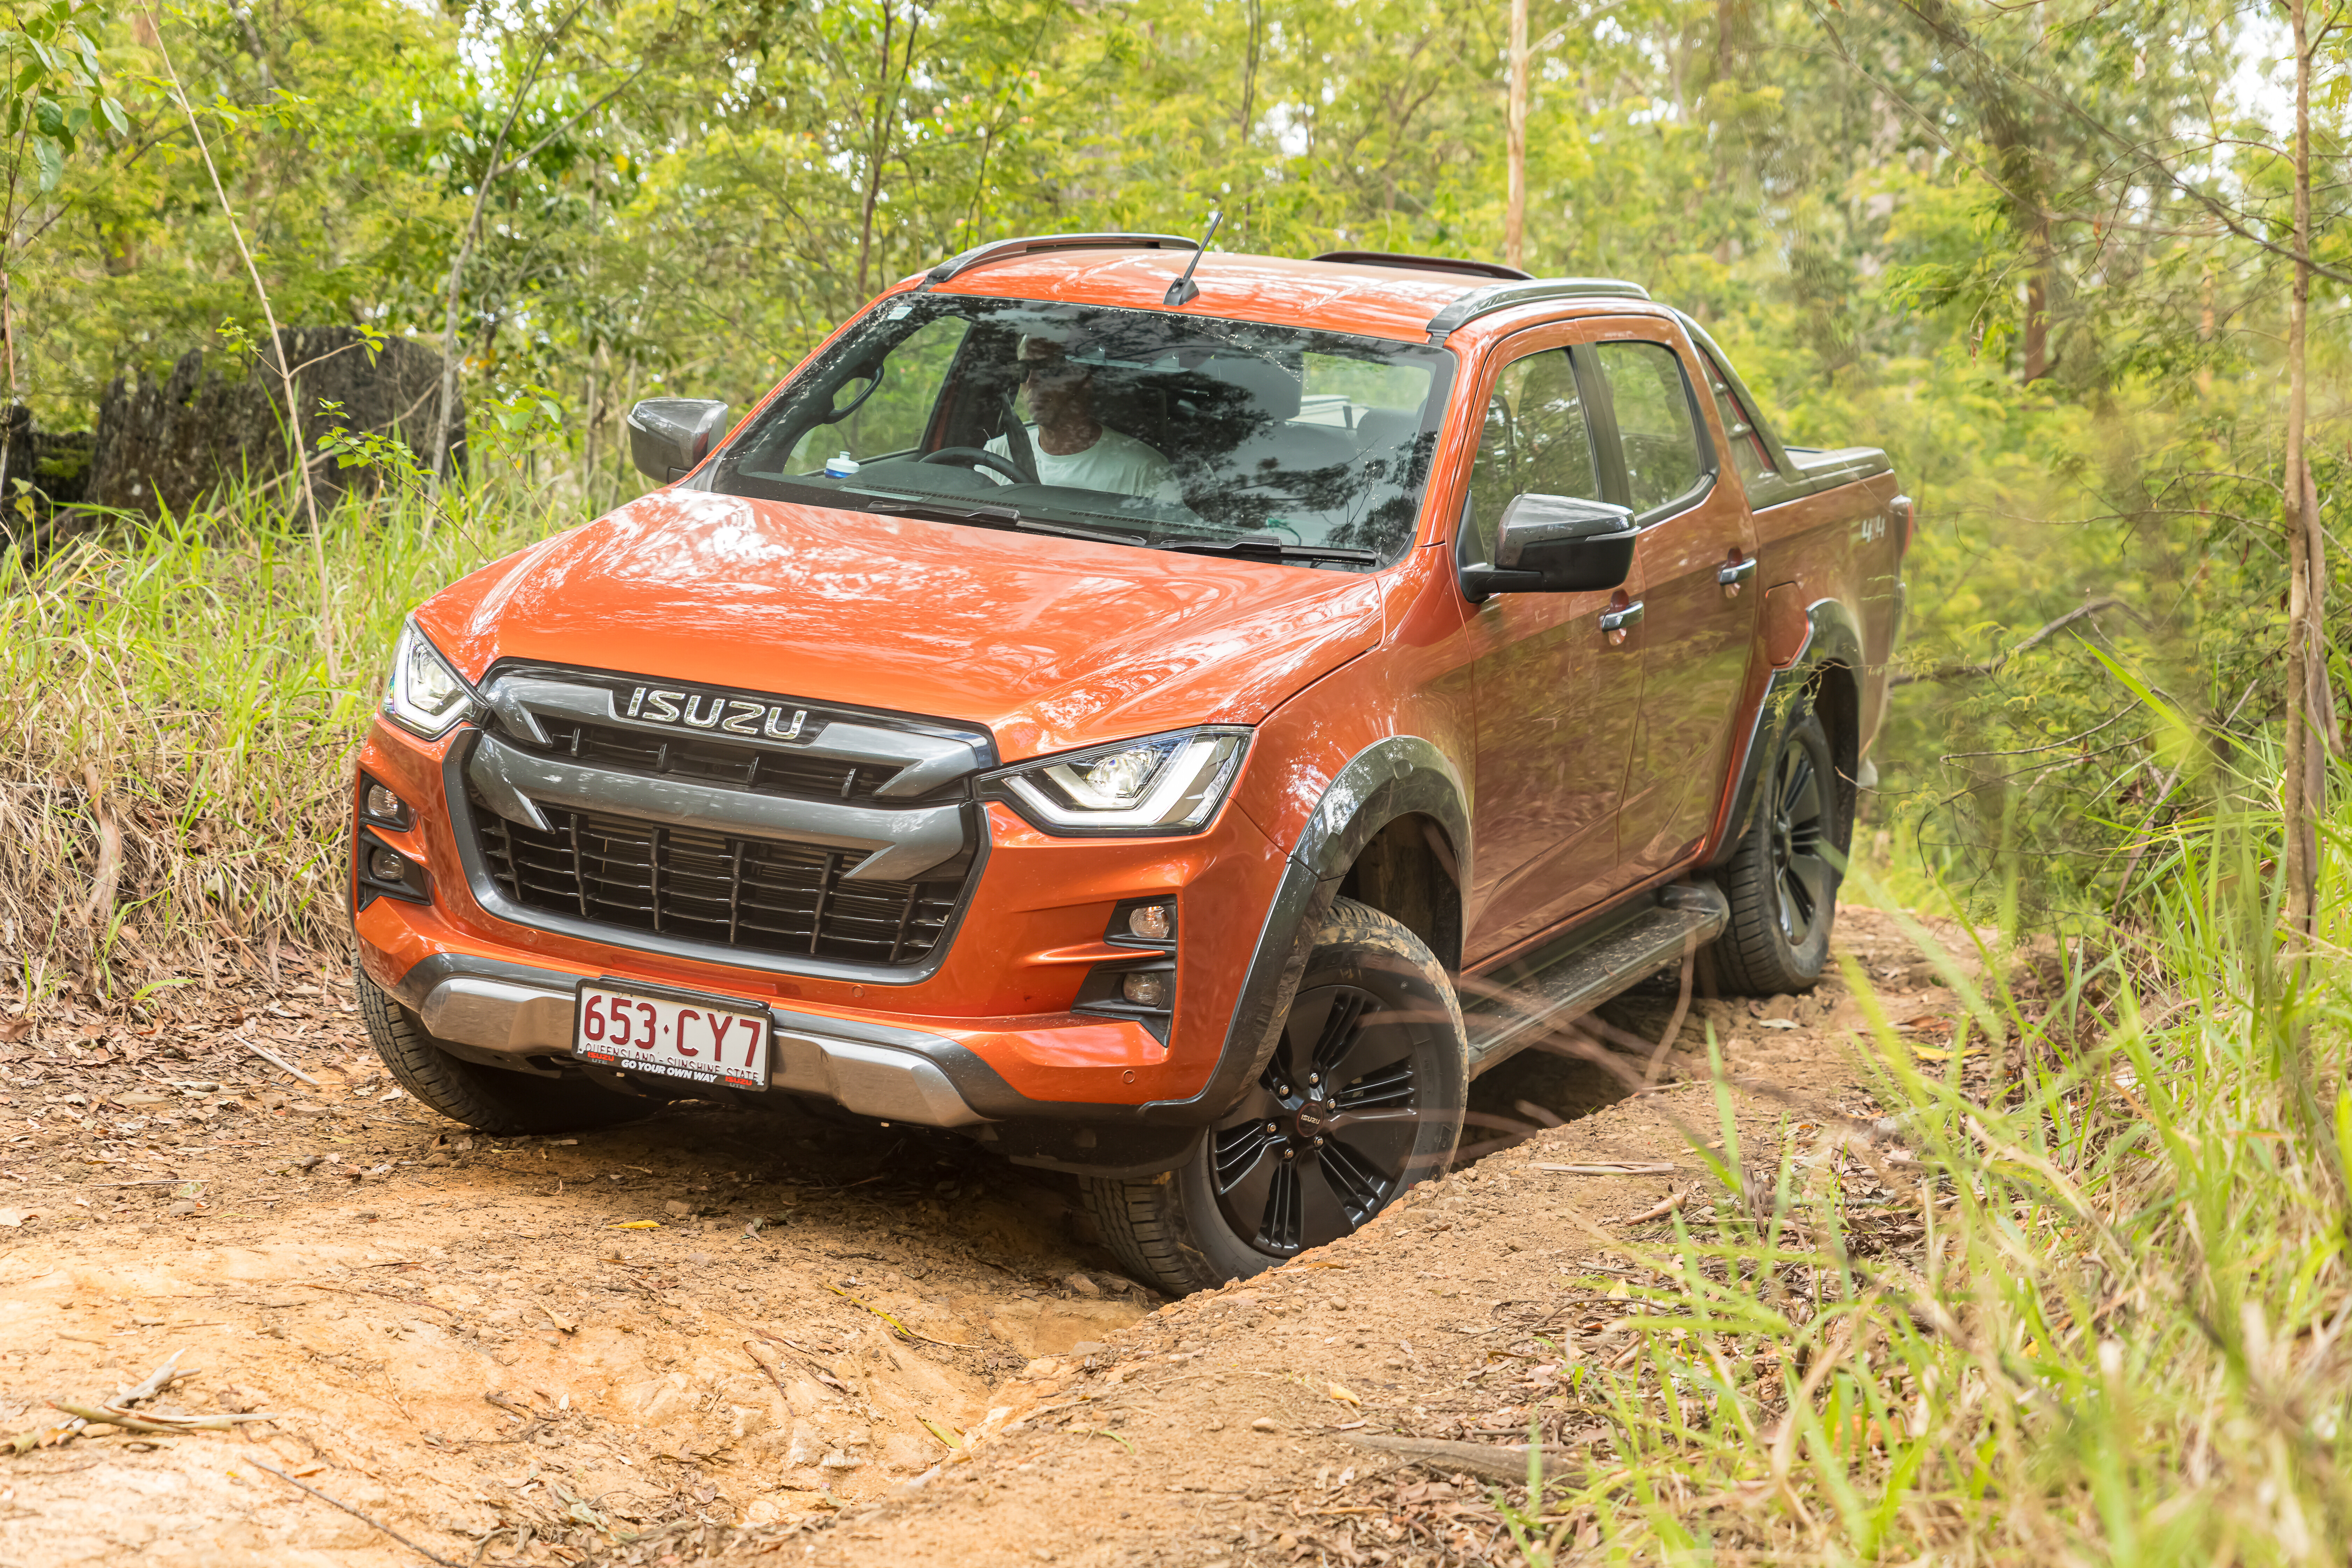
Isuzu Ute Australia has raised the prices of its popular 2022 D-Max ute and MU-X SUV citing “market driven factors” such as increased production costs are to blame.
The rises are due to affect the entire D-Max and MU-X ranges, with listed prices going up by $1000 to $1600 for most variants.
However, the drive-away pricing for the entry-level D-Max SX Single Cab Chassis 1.9-litre manual 4×2, D-Max X-Terrain 4×4 and MU-X LS-T 4×4 will increase by $2000.
The changes come into effect from today – though IUA has guaranteed pricing on all orders made by midnight on March 31.
The company claims there are a range of reasons behind the hike, including increasing international and domestic transport and logistics costs.
“The constantly-shifting global situation affecting production, transport and logistics costs has driven the need to increase pricing across the MY22 D-Max and MU-X range – but this decision was not taken lightly with all options deeply considered,” said Isuzu Ute Australia’s Director of Sales and Marketing, Koichiro Yoshida.
“Regardless of an order status – whether it be in transit or planned for production – IUA guarantees the price protection on all confirmed orders taken before the end of March.”

IUA said raising the prices has also allowed it to continue to keep the latest features and safety technology in its vehicles, which are in higher demand than ever, without reducing spec due to global issues such as the shortage of semiconductors.
“IUA remains committed to delivering our vehicles completed, without compromise and without taking any shortcuts; a commitment to our customers who have expectations which we will always strive to meet and exceed,” Yoshida added.
The news comes after the Japanese carmaker altered the eligibility for a rebate on its D-Max SX Single Cab Chassis 4×2 manual in November.

Before that time, the entry-level grade was available to buy for $29,990 drive-away when fitted with a 3.0-litre, turbo-diesel engine as rebates from Isuzu undercut its own list price of $33,200.
However, with the introduction of a new 1.9-litre, turbo-diesel engine in November, the 3.0-litre was replaced on the bottom rung – with the rebates only applying to the 1.9-litre engine, bringing the 3.0-litre’s drive-away price up to $39,719, though keeping the 1.9’s at $29,990.
It also follows a further increase to the MY21 D-Max line-up from April 1 last year, with every variant rising by $1000 across the board.

2022 Isuzu D-Max Australian recommended retail pricing
Prices are before on-road costs unless otherwise indicated.
| Model grade | Price before March 31 | April 1 price | $ increase | Percentage rise |
| D-Max SX Single Cab Chassis 4×2 MT 1.9L | $31,200 | $32,200 | $1000 | 3.21% |
| D-Max SX Single Cab Chassis 4×2 AT 1.9L | $33,200 | $34,200 | $1000 | 3.01% |
| D-Max SX Single Cab Chassis 4×2 MT 3.0L | $33,200 | $34,200 | $1000 | 3.01% |
| D-Max SX Single Cab Chassis 4×2 AT 3.0L | $35,200 | $36,200 | $1000 | 2.84% |
| D-Max SX Space Cab Chassis 4×2 AT 3.0L | $38,700 | $39,700 | $1000 | 2.58% |
| D-Max SX Crew Cab Chassis 4×2 AT 3.0L | $41,700 | $42,700 | $1000 | 2.40% |
| D-Max SX Crew Cab Ute 4×2 AT 3.0L | $42,900 | $44,200 | $1300 | 3.03% |
| D-Max LS-U Crew Cab Ute 4×2 AT 3.0L | $51,400 | $53,000 | $1600 | 3.11% |
| D-Max SX Single Cab Chassis 4×4 MT | $41,200 | $42,200 | $1000 | 2.43% |
| D-Max SX Single Cab Chassis 4×4 AT | $43,200 | $44,200 | $1000 | 2.31% |
| D-Max SX Space Cab Chassis 4×4 MT | $44,700 | $45,700 | $1000 | 2.24% |
| D-Max SX Space Cab Chassis 4×4 AT | $46,700 | $47,700 | $1000 | 2.14% |
| D-Max SX Crew Cab Chassis 4×4 MT | $47,700 | $48,700 | $1000 | 2.10% |
| D-Max SX Crew Cab Chassis 4×4 AT | $49,700 | $50,700 | $1000 | 2.01% |
| D-Max LS-M Crew Cab Chassis 4×4 AT | $52,800 | $53,800 | $1000 | 1.89% |
| D-Max LS-U Crew Cab Chassis 4×4 AT | $58,200 | $59,500 | $1300 | 2.23% |
| D-Max SX Crew Cab Ute 4×4 AT | $50,900 | $52,200 | $1300 | 2.55% |
| D-Max LS-M Crew Cab Ute 4×4 MT | $52,000 | $53,300 | $1300 | 2.50% |
| D-Max LS-M Crew Cab Ute 4×4 AT | $54,000 | $55,300 | $1300 | 2.41% |
| D-Max LS-U Space Cab Ute 4×4 AT | $56,400 | $58,000 | $1600 | 2.84% |
| D-Max LS-U Crew Cab Ute 4×4 MT | $57,400 | $59,000 | $1600 | 2.79% |
| D-Max LS-U Crew Cab Ute 4×4 AT | $59,400 | $61,000 | $1600 | 2.69% |
| D-Max LS-U+ Crew Cab Ute 4×4 AT | $61,900 | $63,500 | $1600 | 2.58% |
| D-Max X-TERRAIN Crew Cab Ute 4×4 AT | $65,900 | $67,500 | $1600 | 2.43% |
2022 Isuzu MU-X Australian recommended retail pricing
Prices are before on-road costs unless otherwise indicated.
| Model grade | Price before March 31 | April 1 price | $ increase | Percentage rise |
| MU-X LS-M 4×2 AT | $47,900 | $48,900 | $1000 | 2.09% |
| MU-X LS-U 4×2 AT | $53,900 | $55,400 | $1500 | 2.78% |
| MU-X LS-T 4×2 AT | $59,900 | $61,400 | $1500 | 2.50% |
| MU-X LS-M 4×4 AT | $53,900 | $54,900 | $1000 | 1.86% |
| MU-X LS-U 4×4 AT | $59,900 | $61,400 | $1500 | 2.50% |
| MU-X LS-T 4×4 AT | $65,900 | $67,400 | $1500 | 2.28% |
2022 Isuzu D-Max Australian drive-away pricing
| Model grade | Price before March 31 | April 1 price | $ increase | Percentage rise |
| D-Max SX Single Cab Chassis 4×2 MT 1.9L | $29,990 | $31,990 | $2000 | 6.67% |
| D-Max X-TERRAIN Crew Cab Ute 4×4 AT | $62,990 | $64,990 | $2000 | 3.18% |
2022 Isuzu MU-X Australian drive-away pricing
| Model grade | Price before March 31 | April 1 price | $ increase | Percentage rise |
| MU-X LS-T 4×4 AT | $63,990 | $65,990 | $2000 | 3.13% |
Key Points
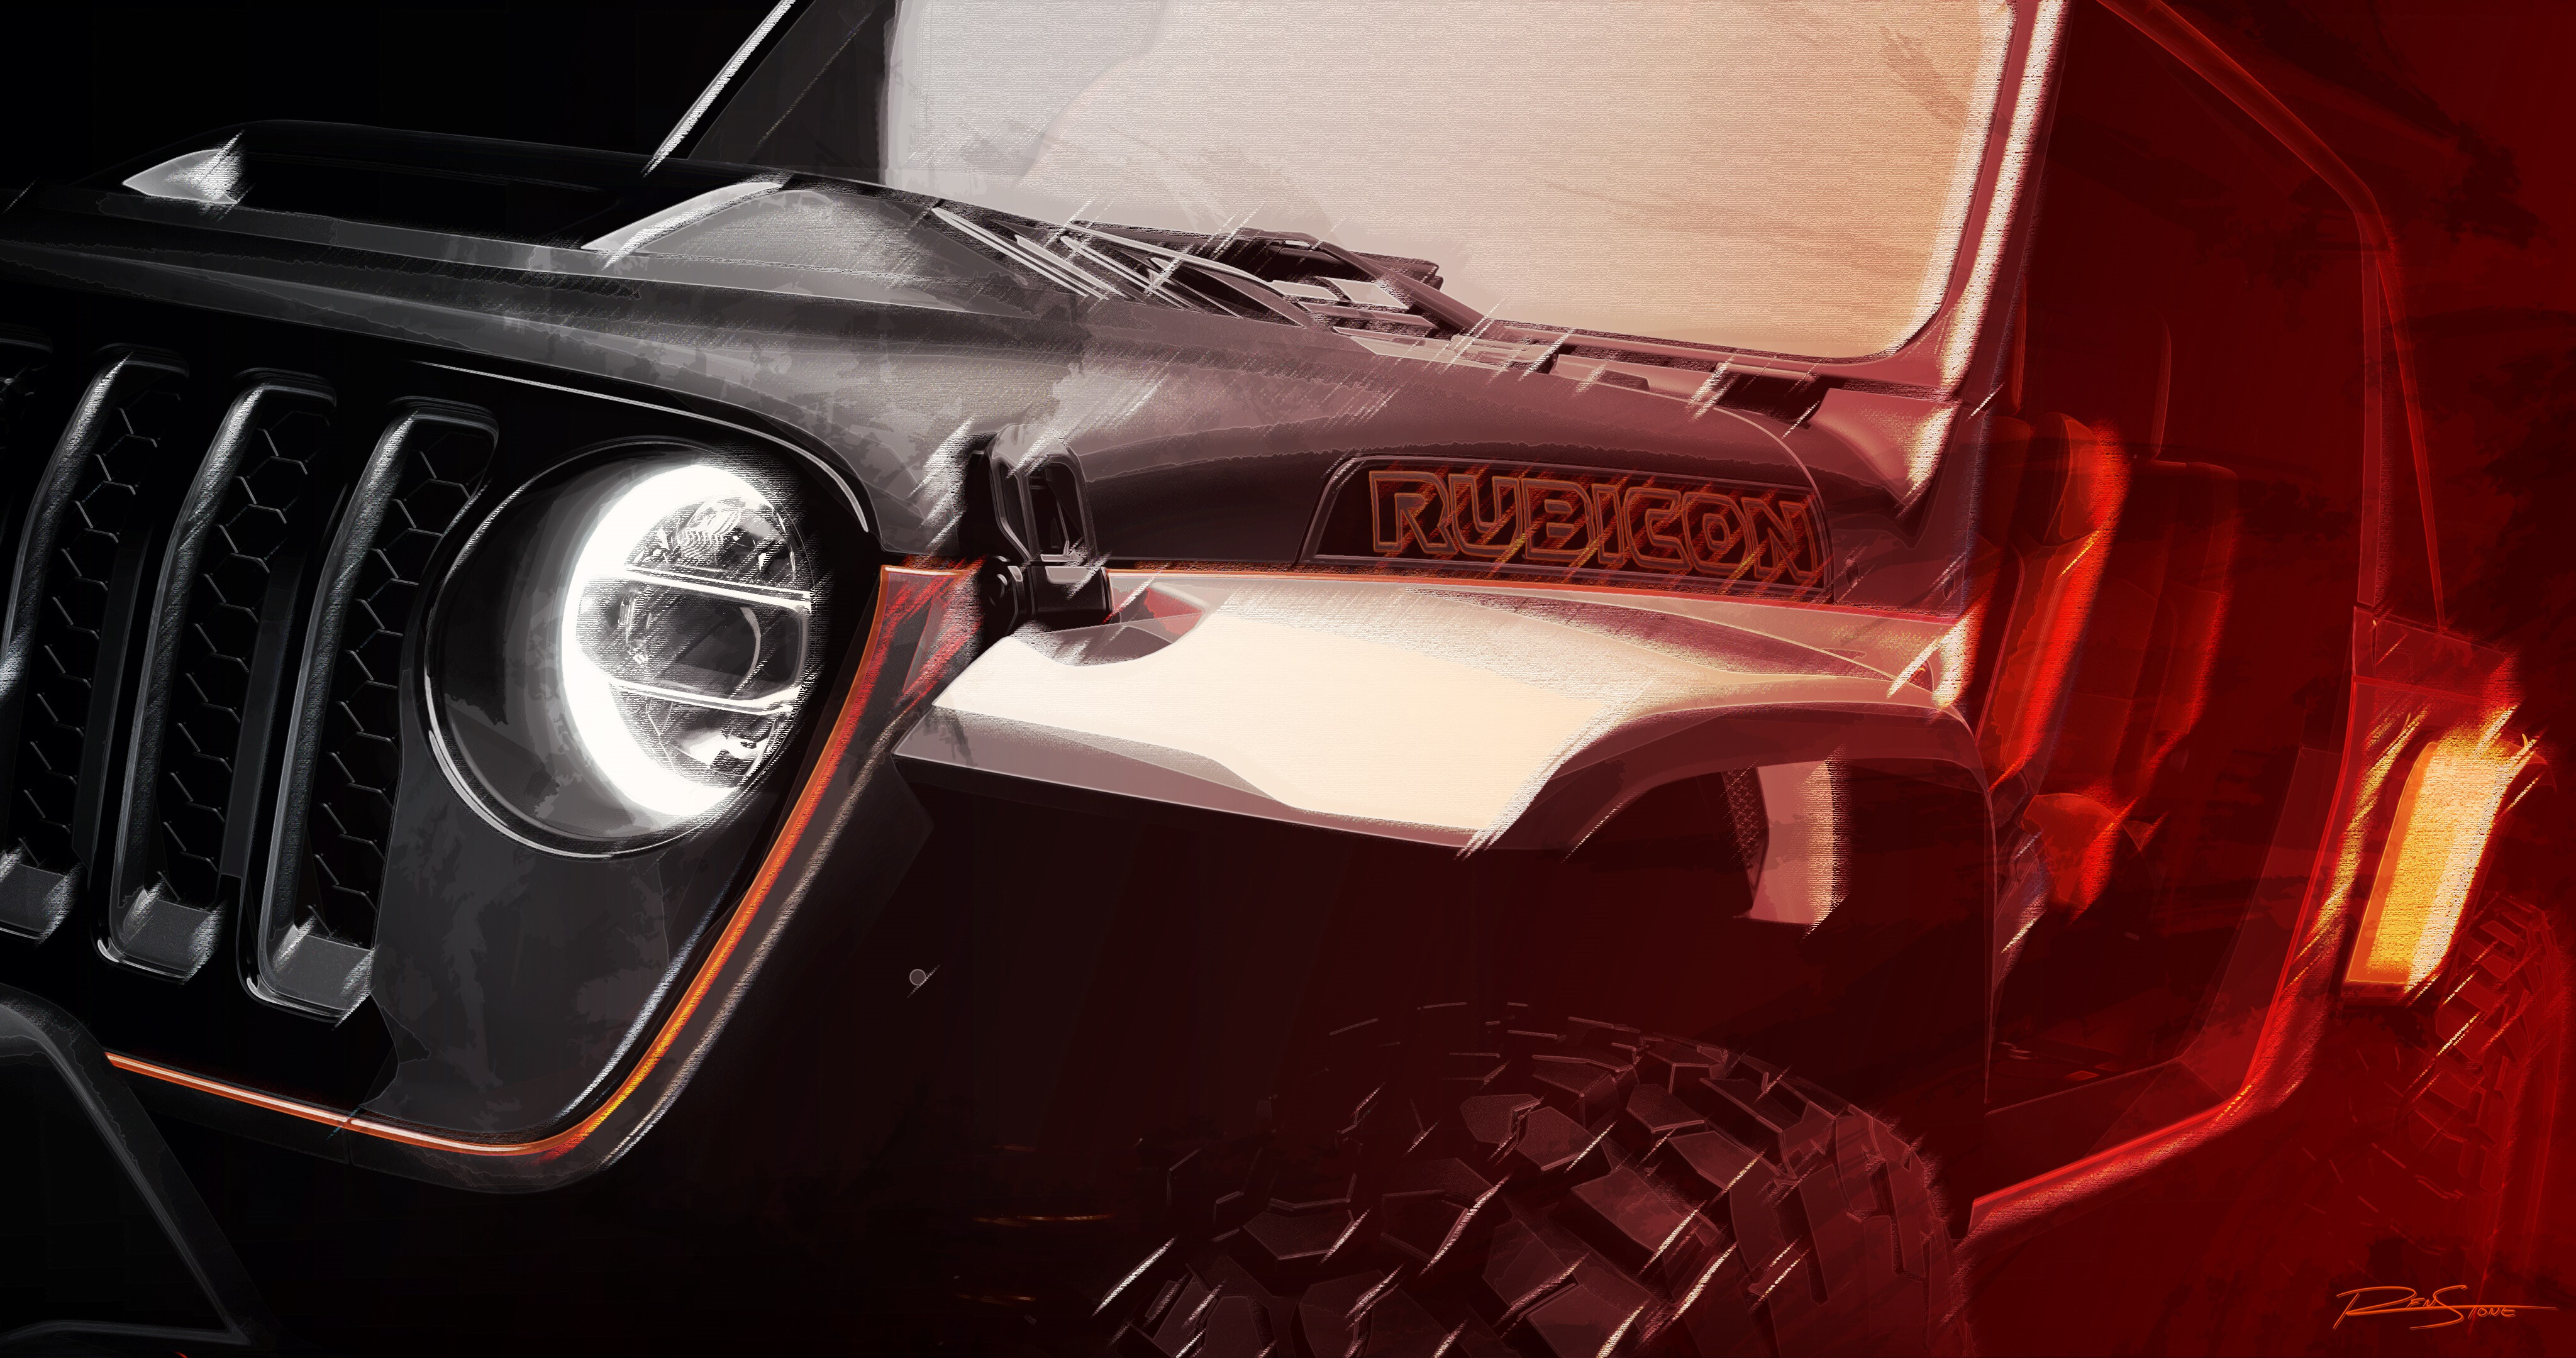
- 20th Anniversary Wrangler Rubicon to be unveiled at EJS
- Updated Wrangler Magneto to make its second EJS appearance
- New performance parts to be shown off for model range
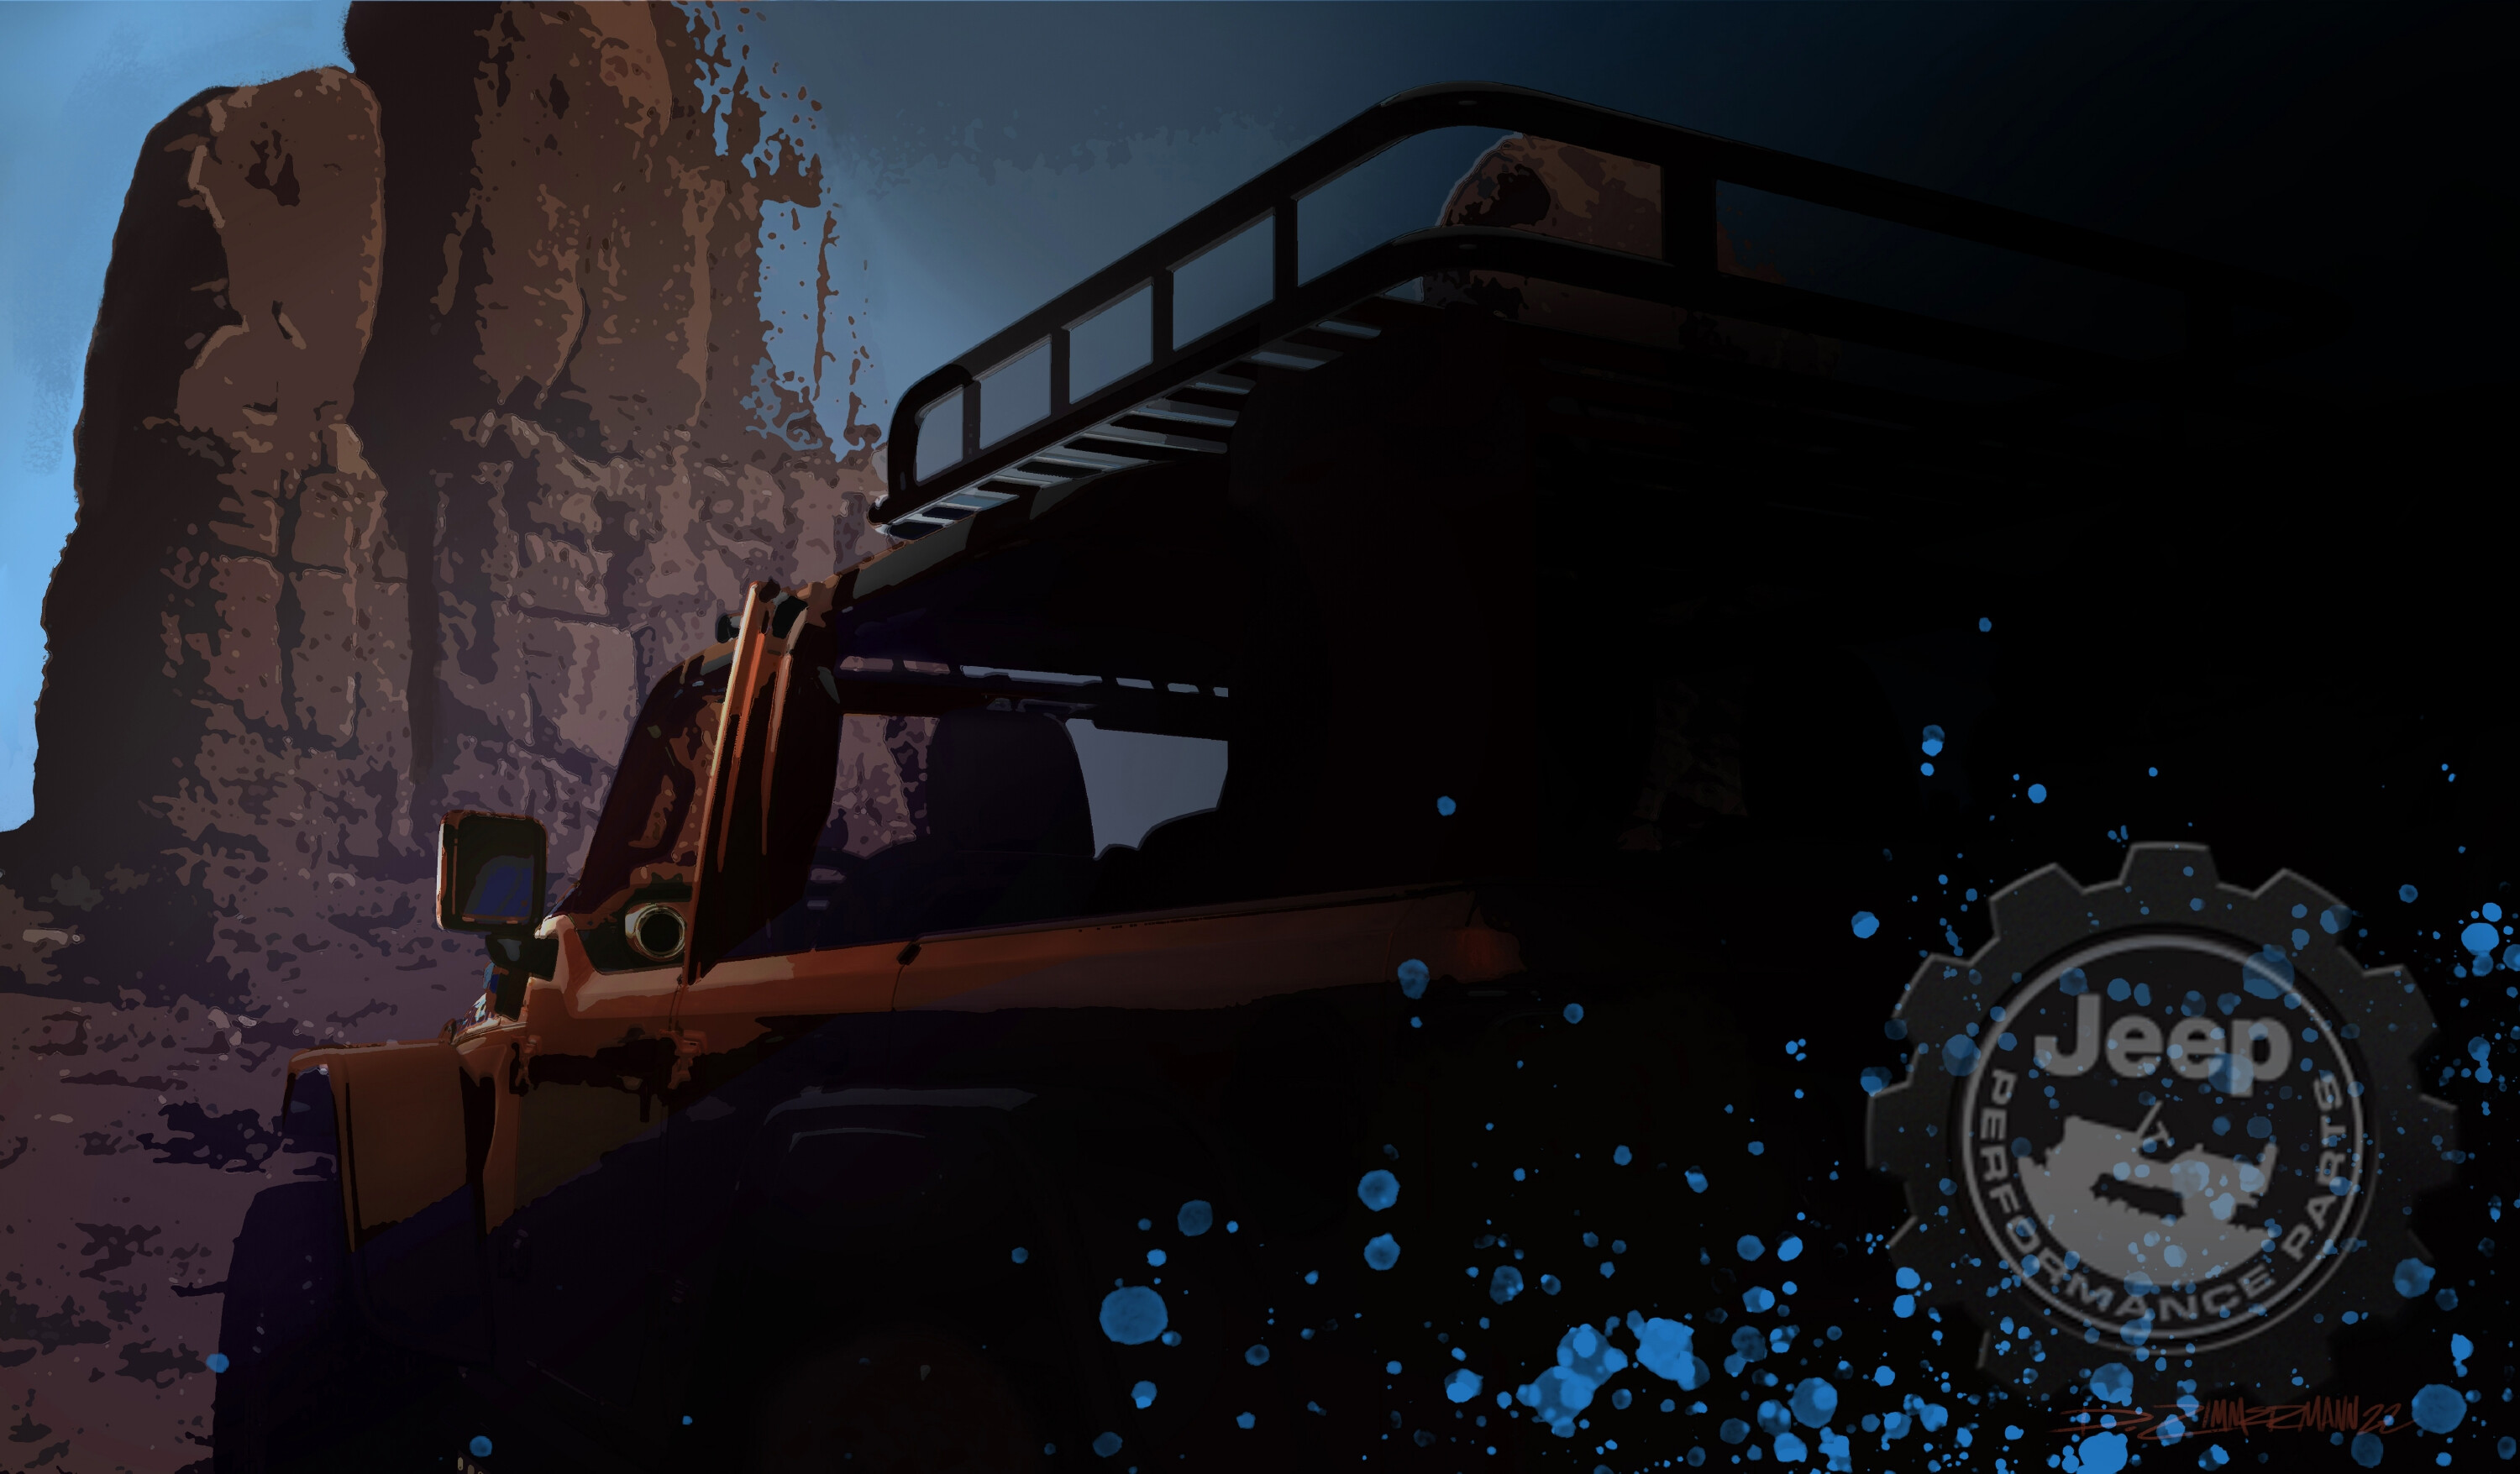
UPDATE, April 1: An all-electric Jeep Wrangler will be a part of this year’s Easter Jeep Safari, with the Magneto 20 edition teased today.
The latest in a line of teasers rolled out by the American manufacturer ahead of its annual off-roading event, the Wrangler Magneto has been seen before – with Jeep fitting a two-door Wrangler Rubicon with an electric motor for last year’s Easter Safari.
However, the addition of the ’20’ on its bonnet hints at this being an updated version, potentially tying in with the Wrangler Rubicon 20th Anniversary Edition, which will also take to the trails of Moab, although that particular concept is expected to feature a 392-cubic inch Hemi V8 engine.
Jeep claims its final concept for EJS is “ready to push the limits on legendary Jeep 4×4 capability and off-road development even further”.
Read on below to find out what else Jeep is planning to take to Utah.
The story to here
March 30: Another teaser for the Easter Jeep Safari has hinted at more in-house performance products from the American manufacturer.
At least one of its upcoming concept vehicles will feature custom equipment from Jeep Performance Parts and Mopar, setting it apart as a more aggressive model than anything in the brand’s existing line-up.
Jeep also promises to demonstrate the off-roading capabilities of its new 4xe plug-in hybrids at Moab, the spiritual home of American off-roading.
March 18: The upcoming Easter Jeep Safari is set to be the stage upon which the manufacturer releases its latest concepts, as has become tradition.
Held in Moab, Utah every year, the past few years have seen a plethora of concepts from Jeep unveiled to its hardcore fans first, celebrating off-roading at its spiritual home.
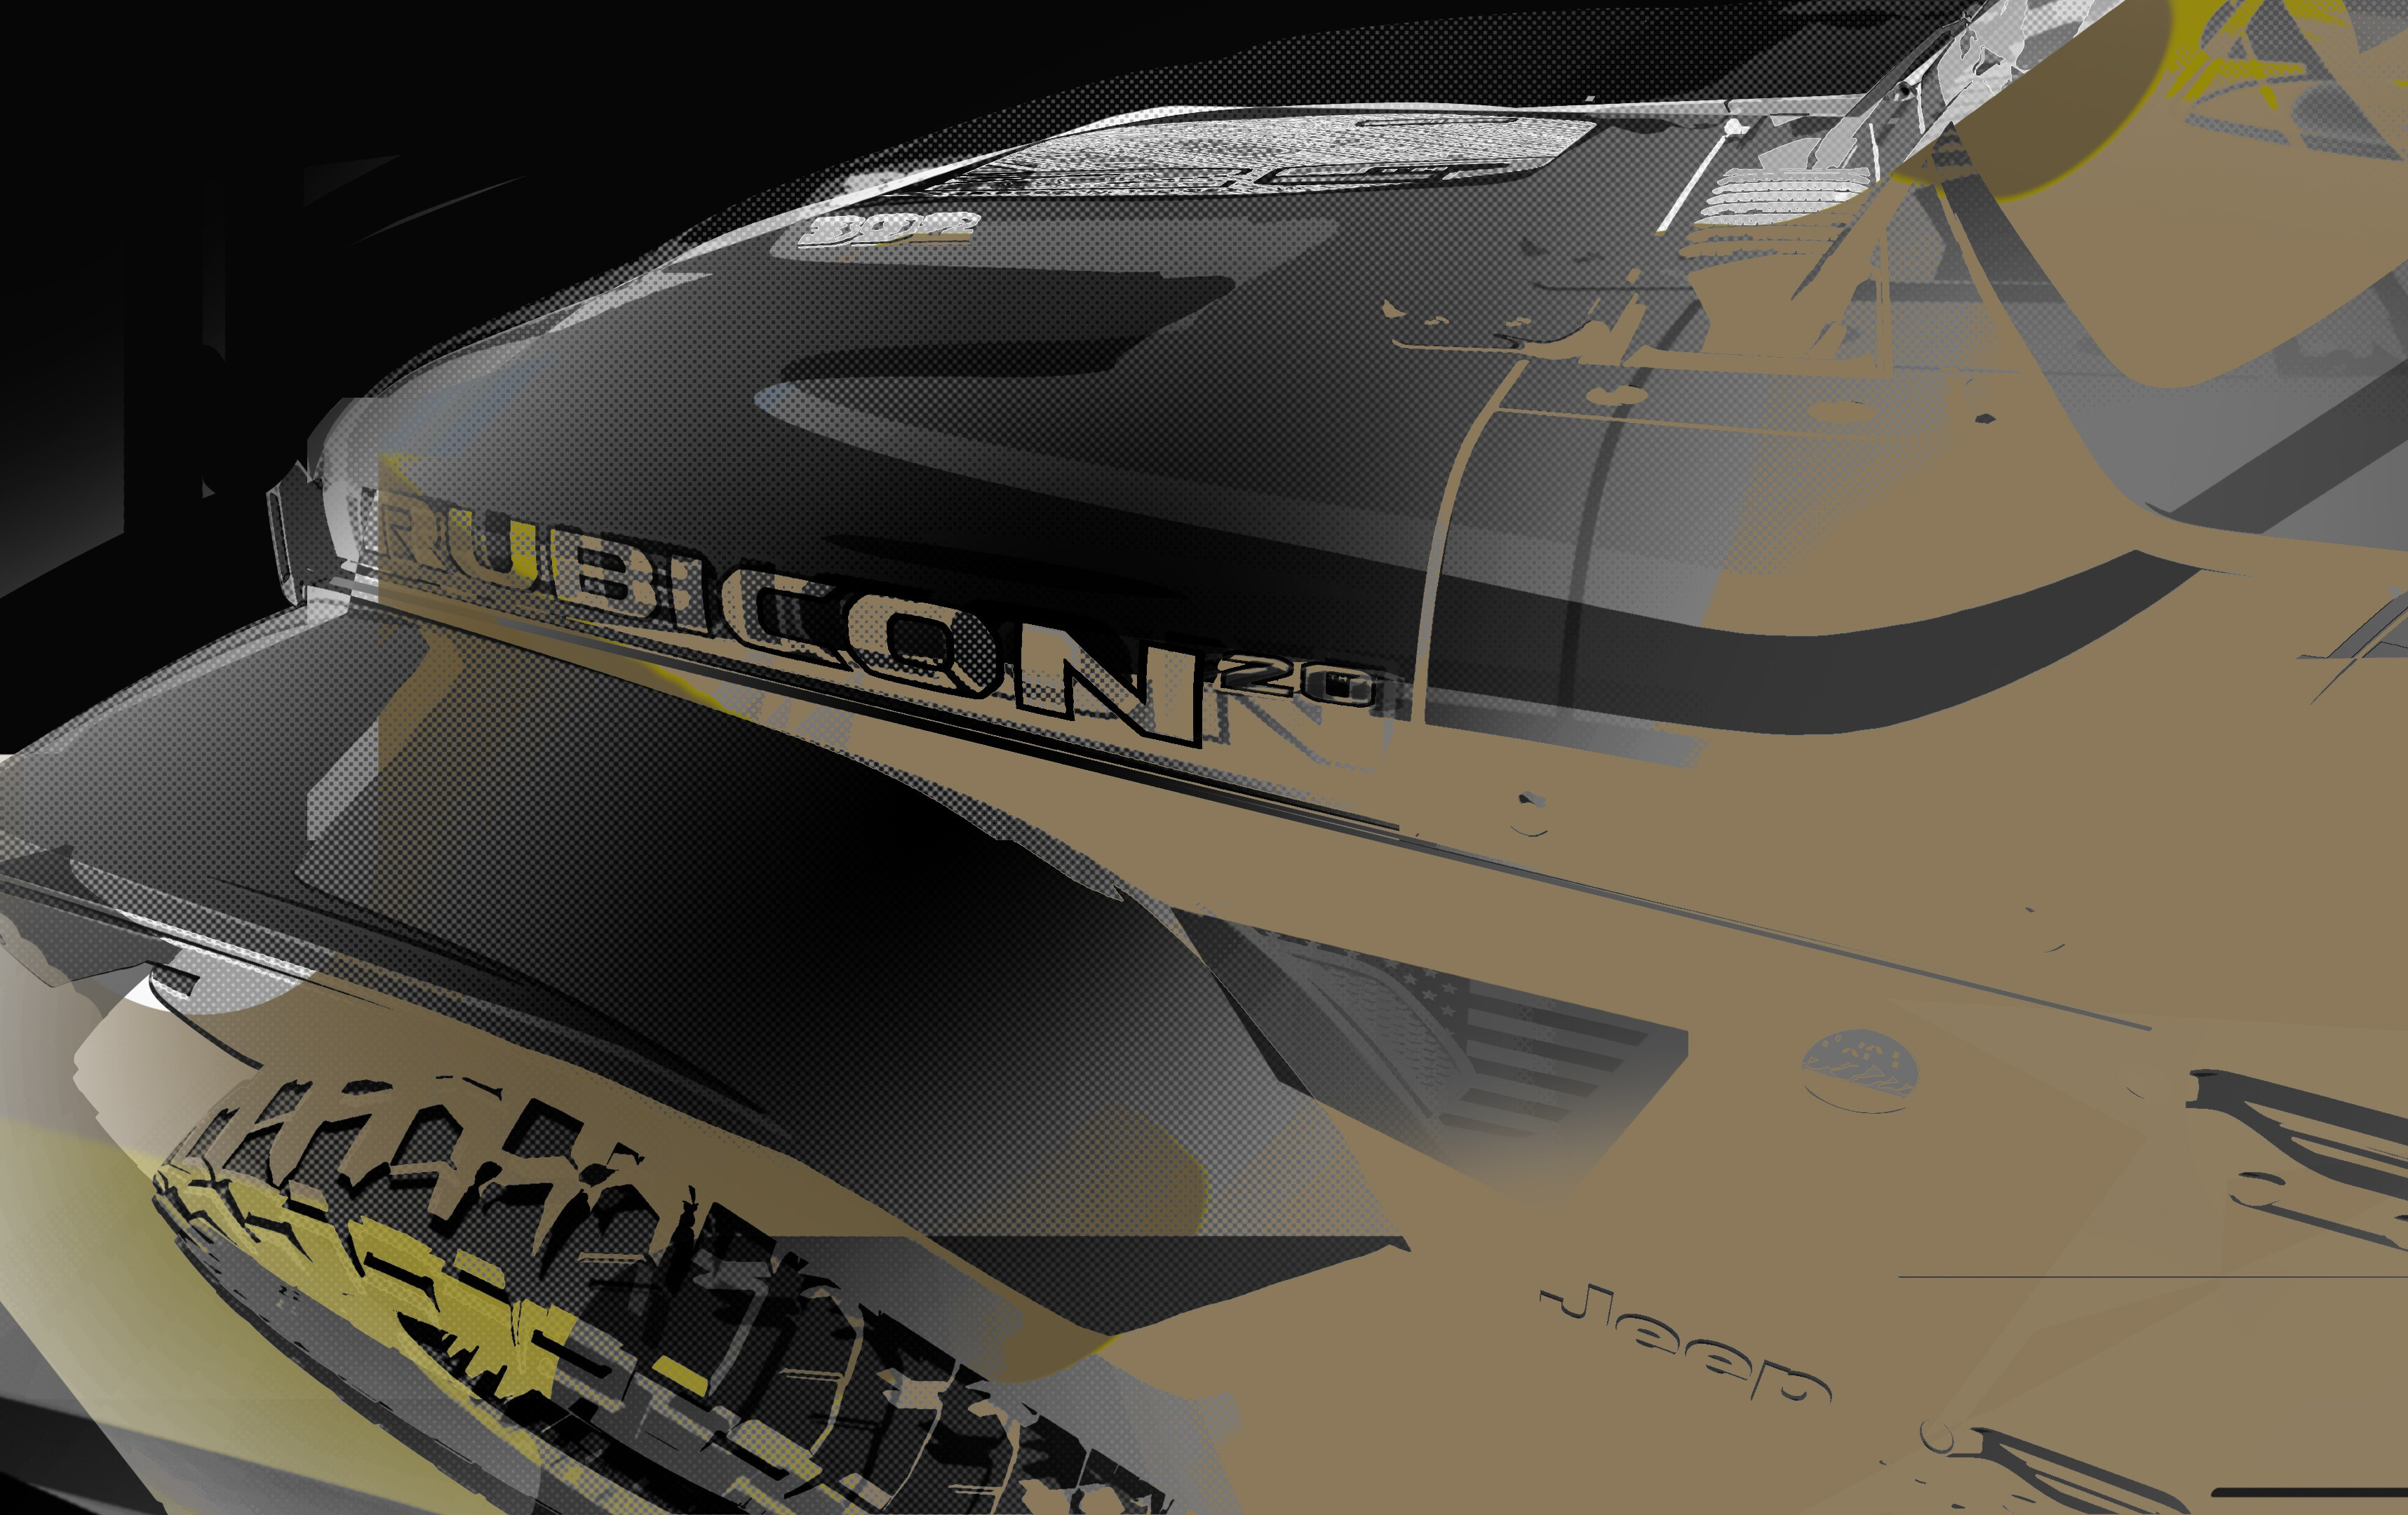
On top of the already-teased 20th anniversary edition Wrangler Rubicon (more below), it will also debut a concept which blends the aforementioned off-roader with its Gladiator lifted pick-up truck, teasing the hybrid mash-up in a render.
Jeep believes by adopting the Wrangler’s short overhangs, it could enhance its off-road capabilities, with the range-topping Rubicon lettering hinting at its credentials.
“Ever wonder what blending two mighty off-roaders like the Jeep Wrangler and Jeep Gladiator might look like?” Jeep asked.
“What if a truck dared to be more like an SUV to increase its departure angle? The latest Jeep concept heading to this year’s Easter Jeep Safari reinvents what the ultimate terrain tackler dares to be, delivering an abundance of four-wheeling confidence and a pinch of open-air freedom.”
It’s also understood vehicles inspired by Jeep’s performance parts division will feature at the Easter Safari, with its 4xe hybrid models also making their debut at the annual event.
March 11: The Jeep Wrangler is possibly the American marque’s most iconic model, while its Rubicon variant remains as the flagship grade of the line-up.
To celebrate 20 years of Rubicon – named after the famous off-road trail in Sierra Nevada – it seems like Jeep is set to launch a limited edition Wrangler in honour of its range-topping off-roader.
From the teaser released by Jeep, we can see a small ’20’ above the Rubicon lettering as well as a ‘392’ on its bonnet bulge, suggesting this will be powered by Jeep’s 6.4-litre Hemi V8, delivering 351kW and 637Nm in the current North American-spec Wrangler Rubicon 392.
A small American flag can also be seen just above the flared guards, hinting at some kind of patriotic tribute.
Jeep will unveil the new model at this year’s Easter Jeep Safari, held at the Mecca of off-roading in Moab, Utah between April 9 and 17.
Given the Wrangler Rubicon tops out with a 3.6-litre, Pentastar V6 in Australia, it’s unlikely local Jeep fans will get their chance to own a production version of the upcoming concept.
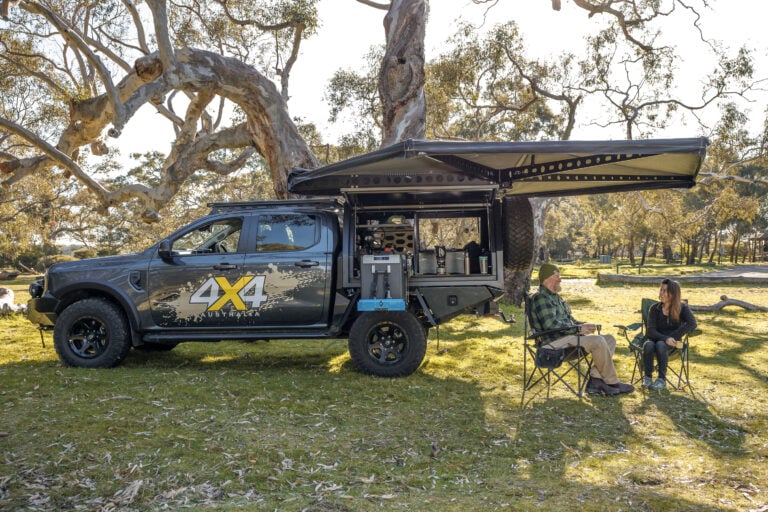
We’ve dedicated more than 50 pages in the April 2022 magazine to our annual 4X4 Of The Year competition, and this year we’ve tweaked the formula to enable us to award two winners.
A total of 18 contenders met at the AARC in Anglesea, Victoria, where our experienced team of judges whittled the field down to six finalists following an exhaustive on- and off-road testing process.

The six finalists escaped the confines of the AARC, raising dust in the Western Deserts of Victoria before continuing north in to NSW and beyond Broken Hill. Votes were then lodged for the Best 4×4 Ute and Best 4×4 Wagon, against the long-serving 4X4OTY criteria: Value for money; breaking new ground; built tough; bushability; and doing the job.
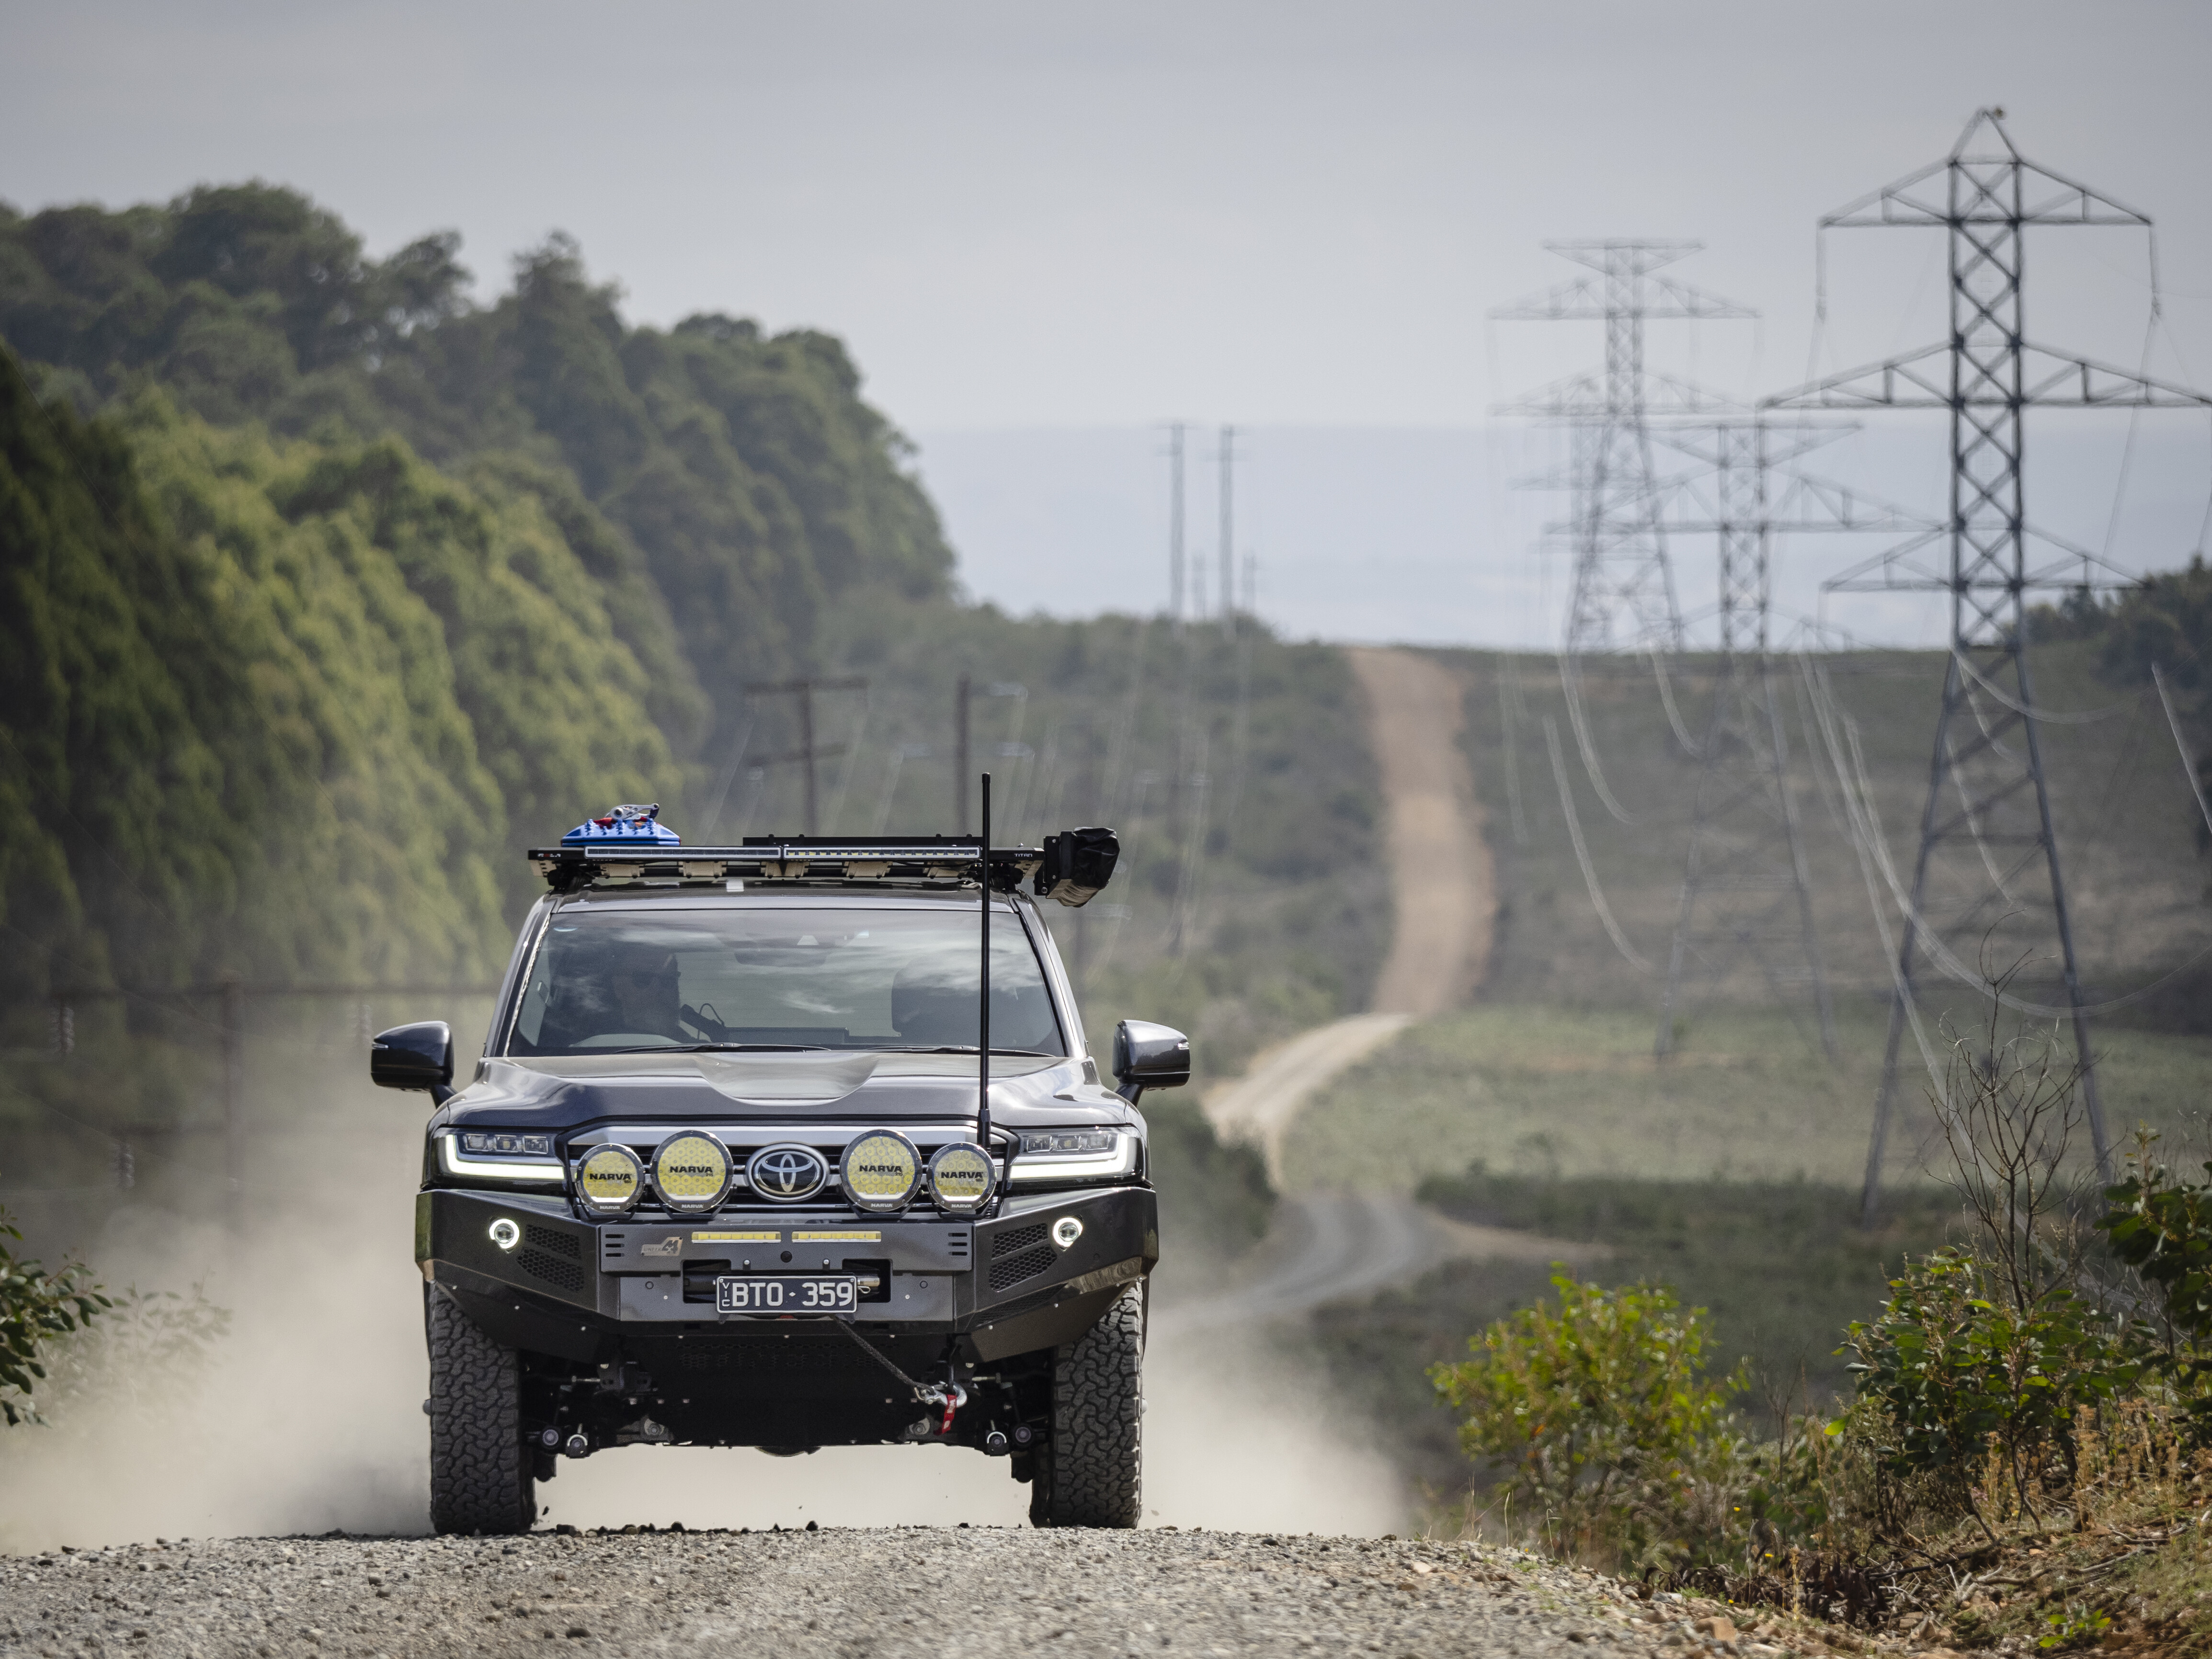
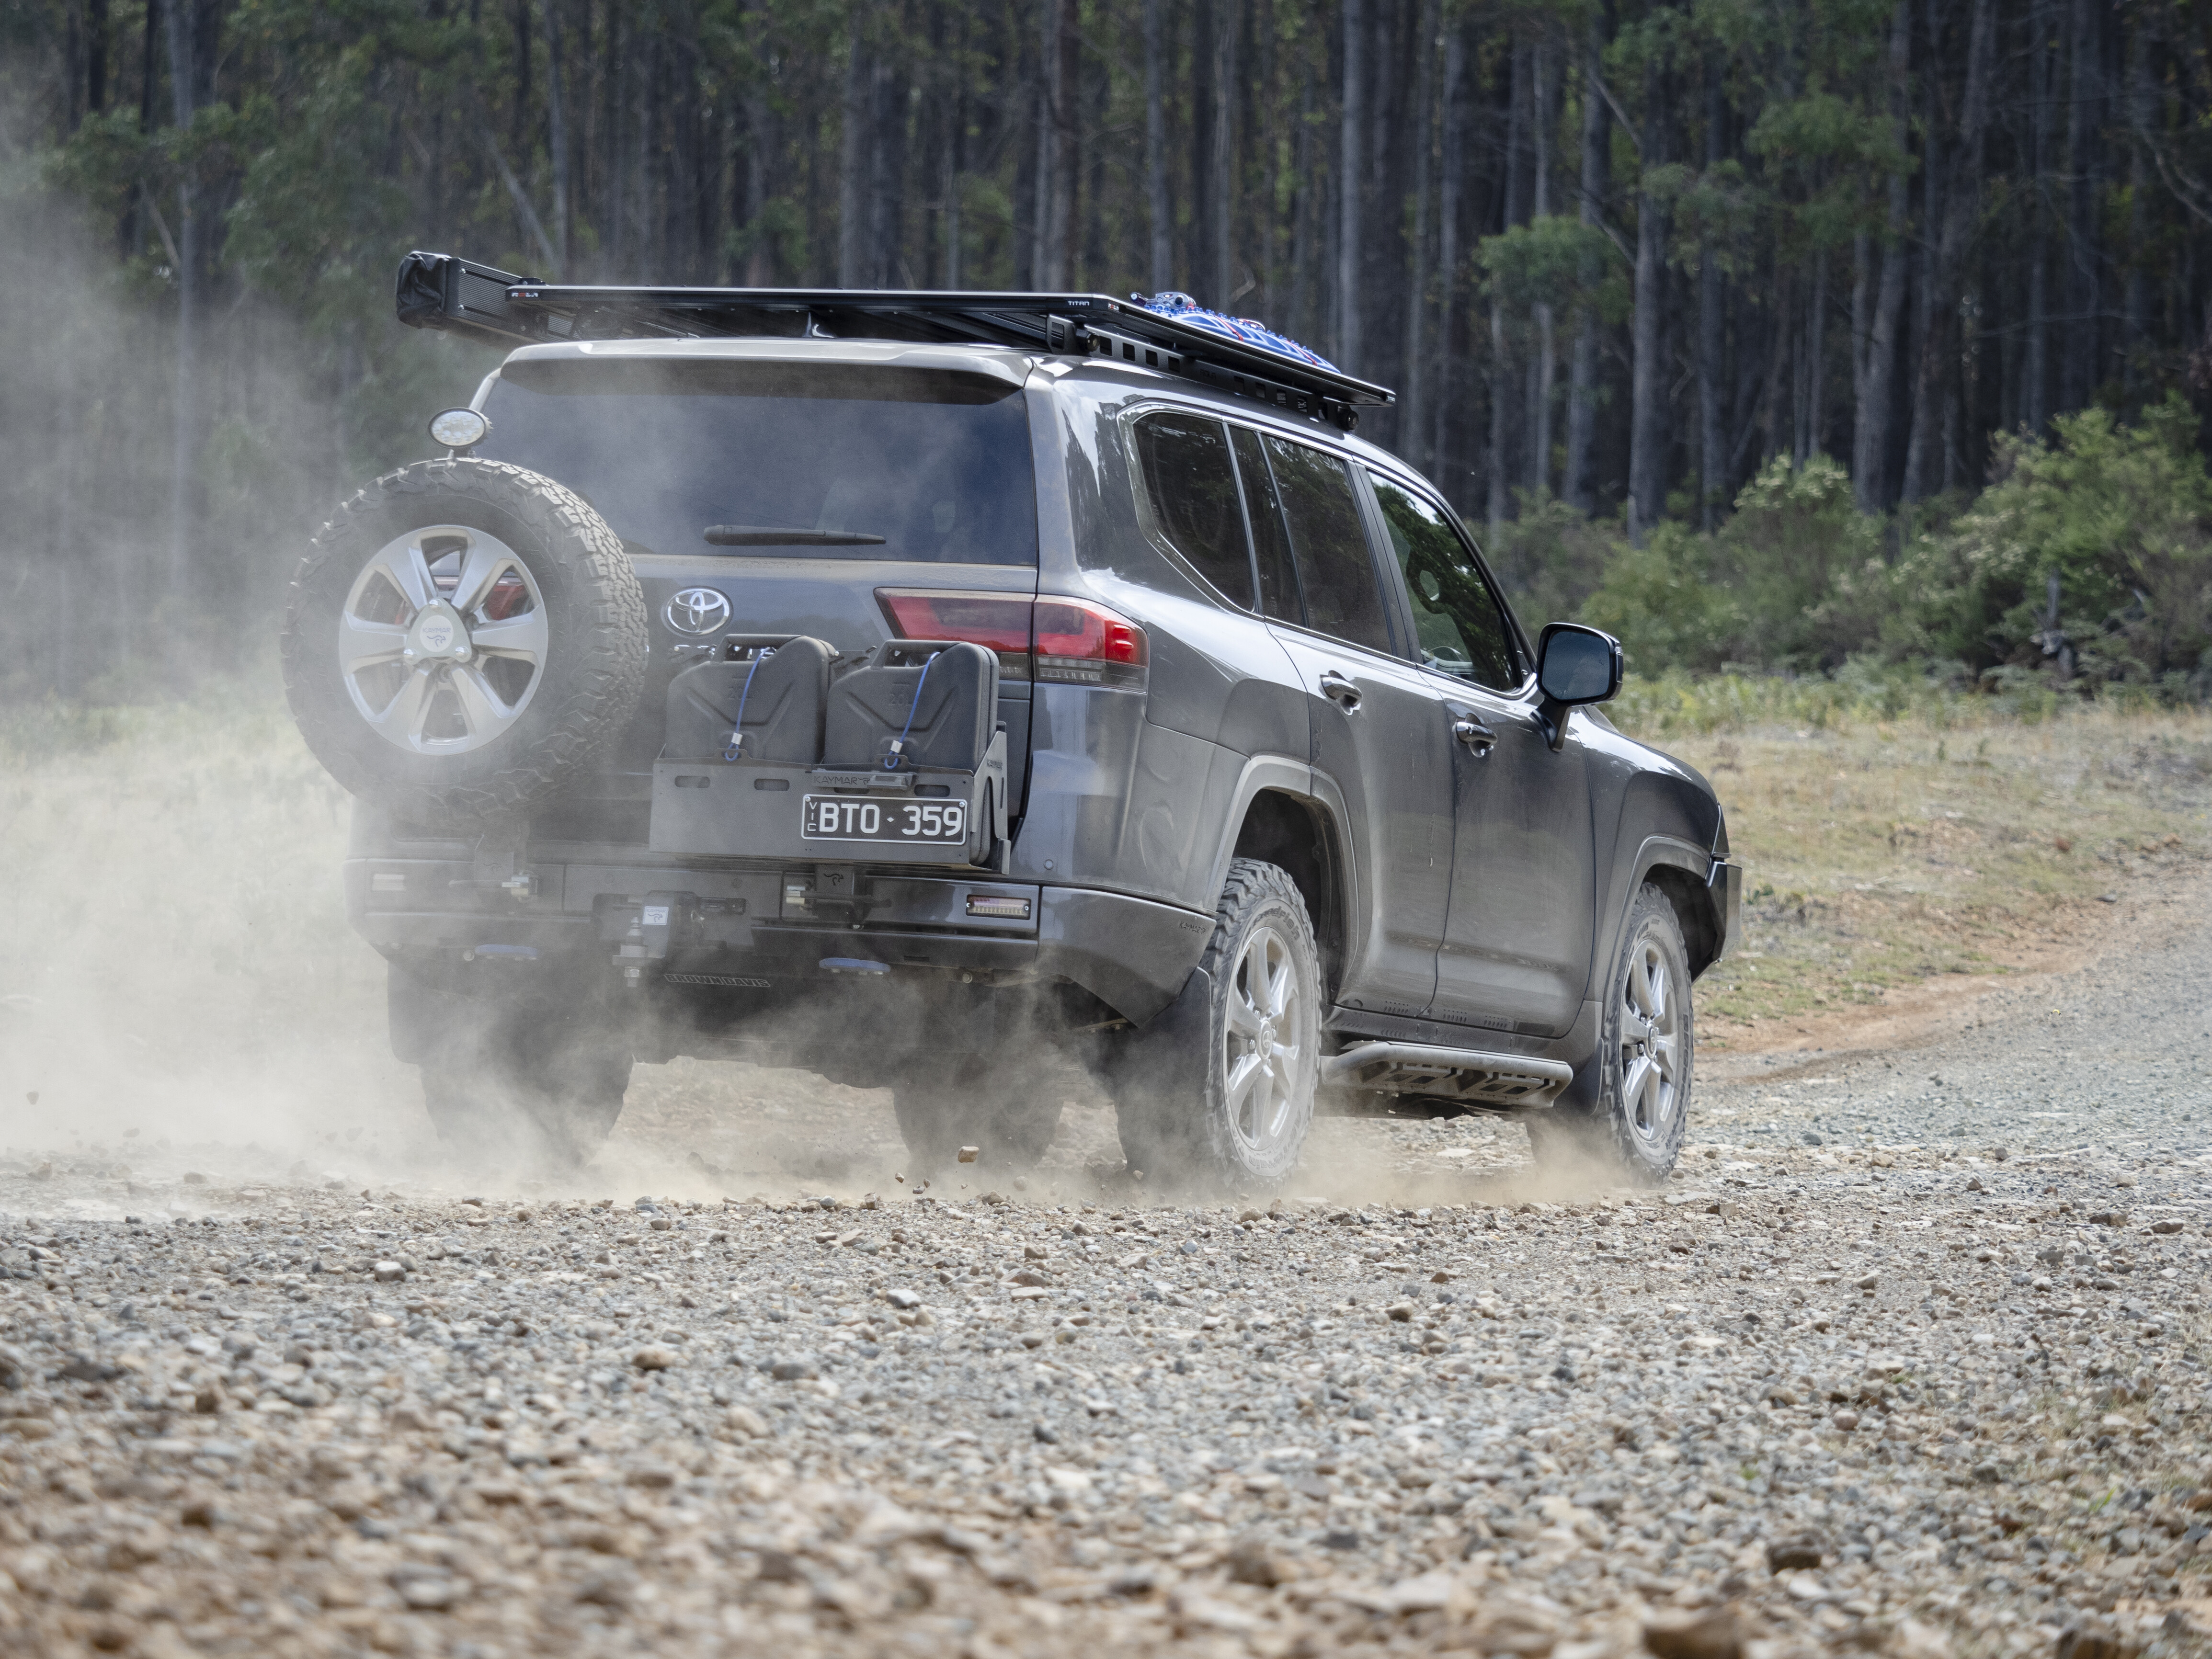
We also ran our eyeballs over one of the first accessorised 300 Series LandCruisers in Australia – it was only a matter of time. This example is dressed in quality gear from the Australian 4×4 aftermarket industry, with equipment from Uneek 4×4, Kaymar, Rola and Narva.
Another custom build featured in the April magazine is a purpose-built 2015 Ford Ranger that has been fettled as the ultimate work rig, family runabout and weekend play toy. The lifted all-rounder is stacked with equipment to make it a highly capable rig.
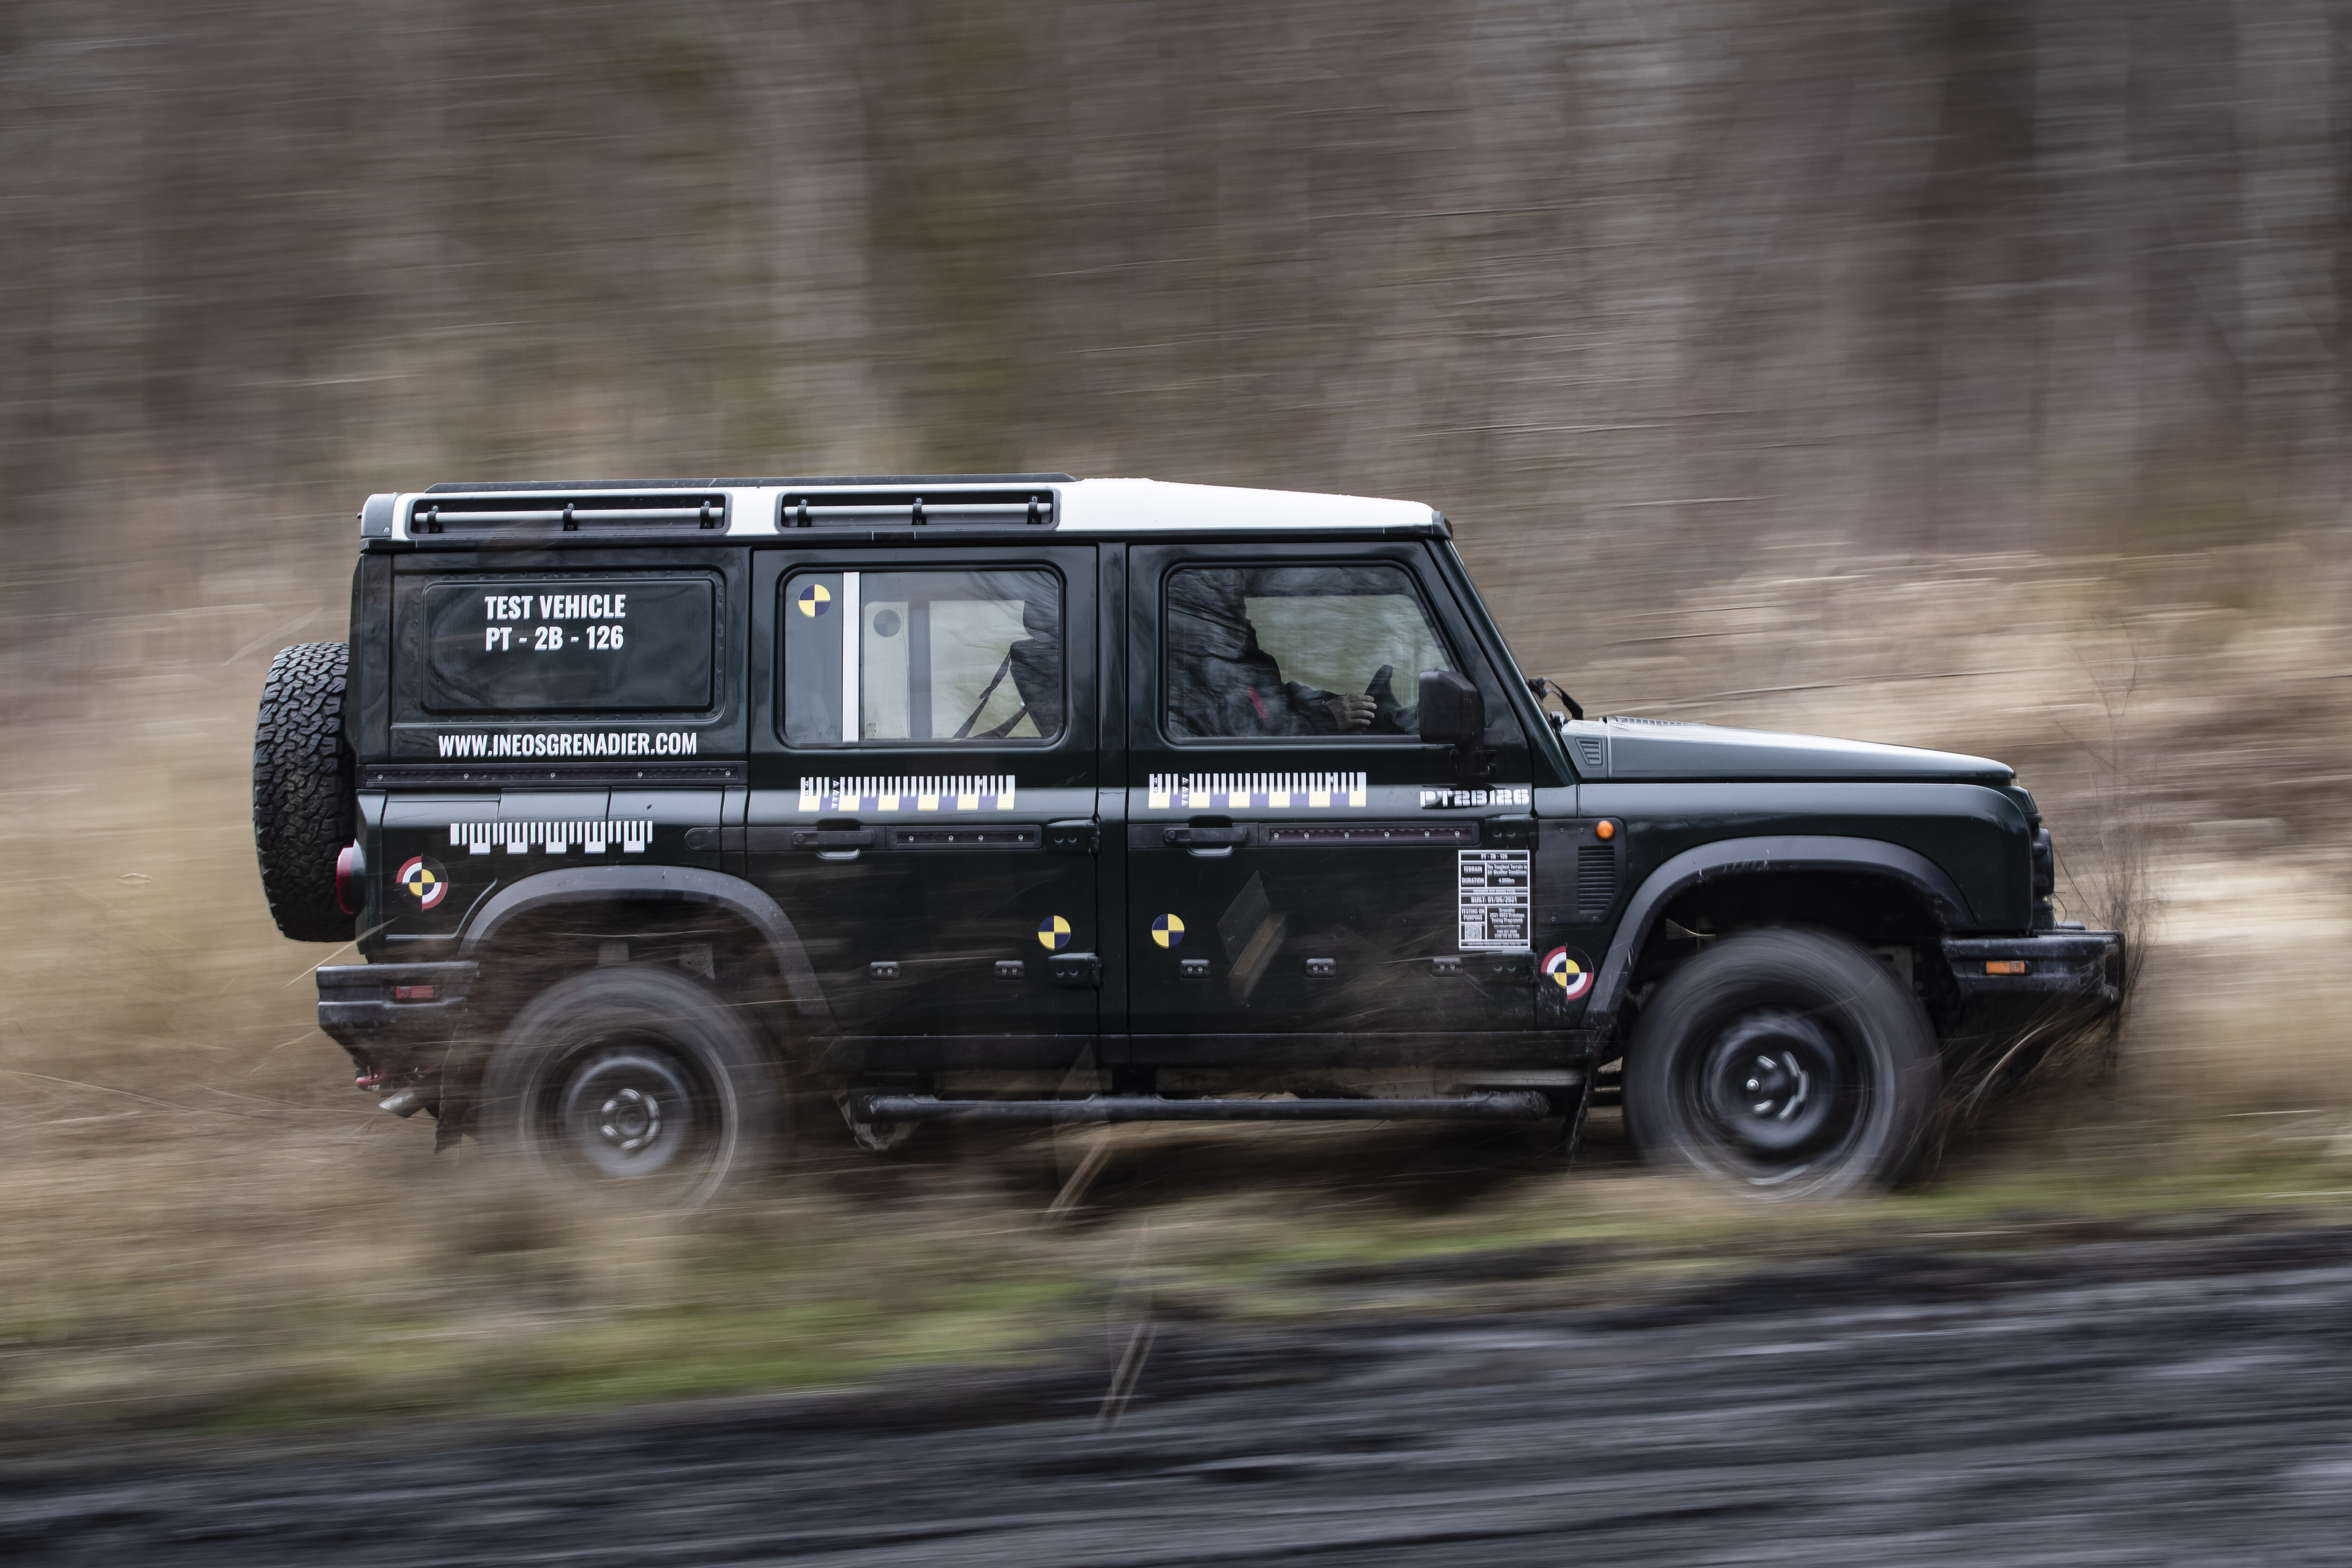
The INEOS Grenadier is arguably the most anticipated new 4×4 to hit the market, and we managed to snare a steer of a prototype. Is it everything it has been touted to be? Read all about it in this issue.
Plus, in the latest ‘How to 4×4’ instalment, Deano explains how to use an electric winch to perform a basic vehicle recovery. Valuable advice, especially for solo travellers.
What else is in there?
- Mazda BT-50 XS tested off-road
- Kalbarri, WA + Woods Point, Vic
- Perentie in the 4X4 Shed
- Maxxis RAZR muddies update
- Products, news, opinions and more!
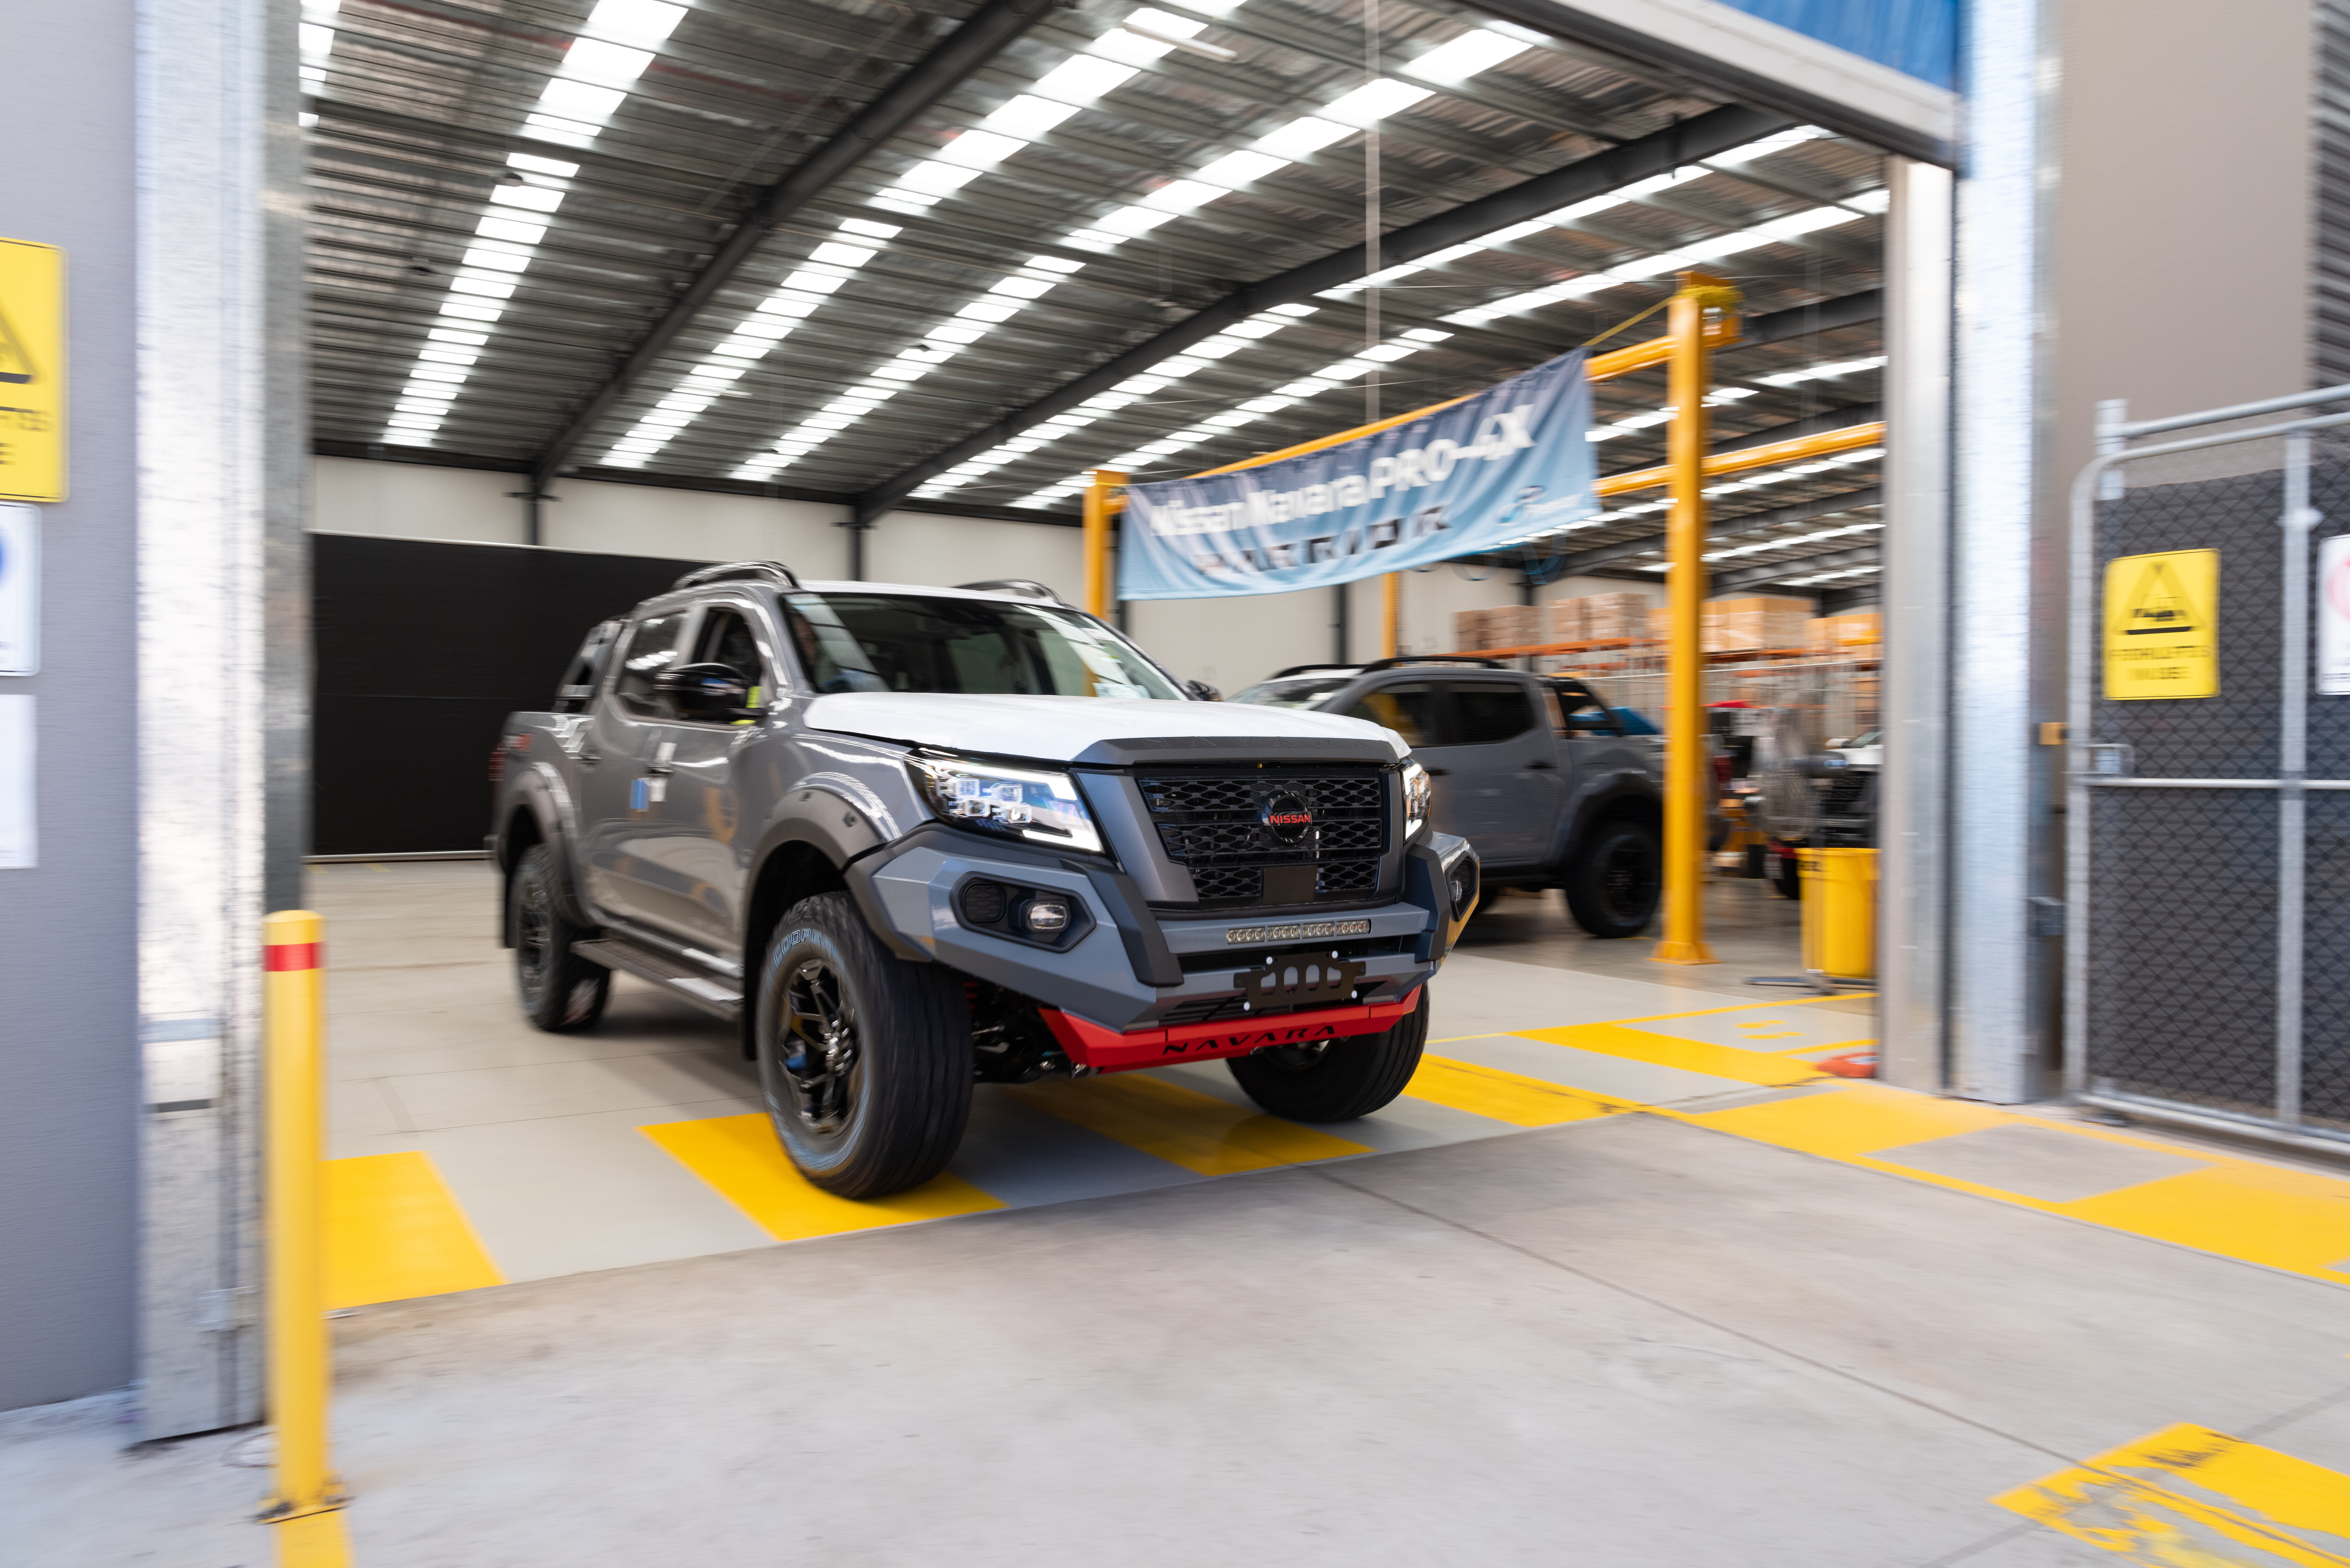
Testing cars long-term is something we do regularly at 4X4 Australia. Rather than just having the car for the usual one week to do our driving, photography and filming, we get our long-termers for an extended stay so we get a true feel of what it’s like to live with the car and really get to know its good and not so good points. It’s surprising what you can learn about a car over a few months and more kilometres than you’d ever get in a week.We were excited when Nissan offered us its halo model ute, the Navara PRO-4X Warrior for a long-term review. We’ve said in previous tests that we think the Warrior is the best out-of-the-box Navara ever, so we’re only too happy to get some more time and kilometres in one.
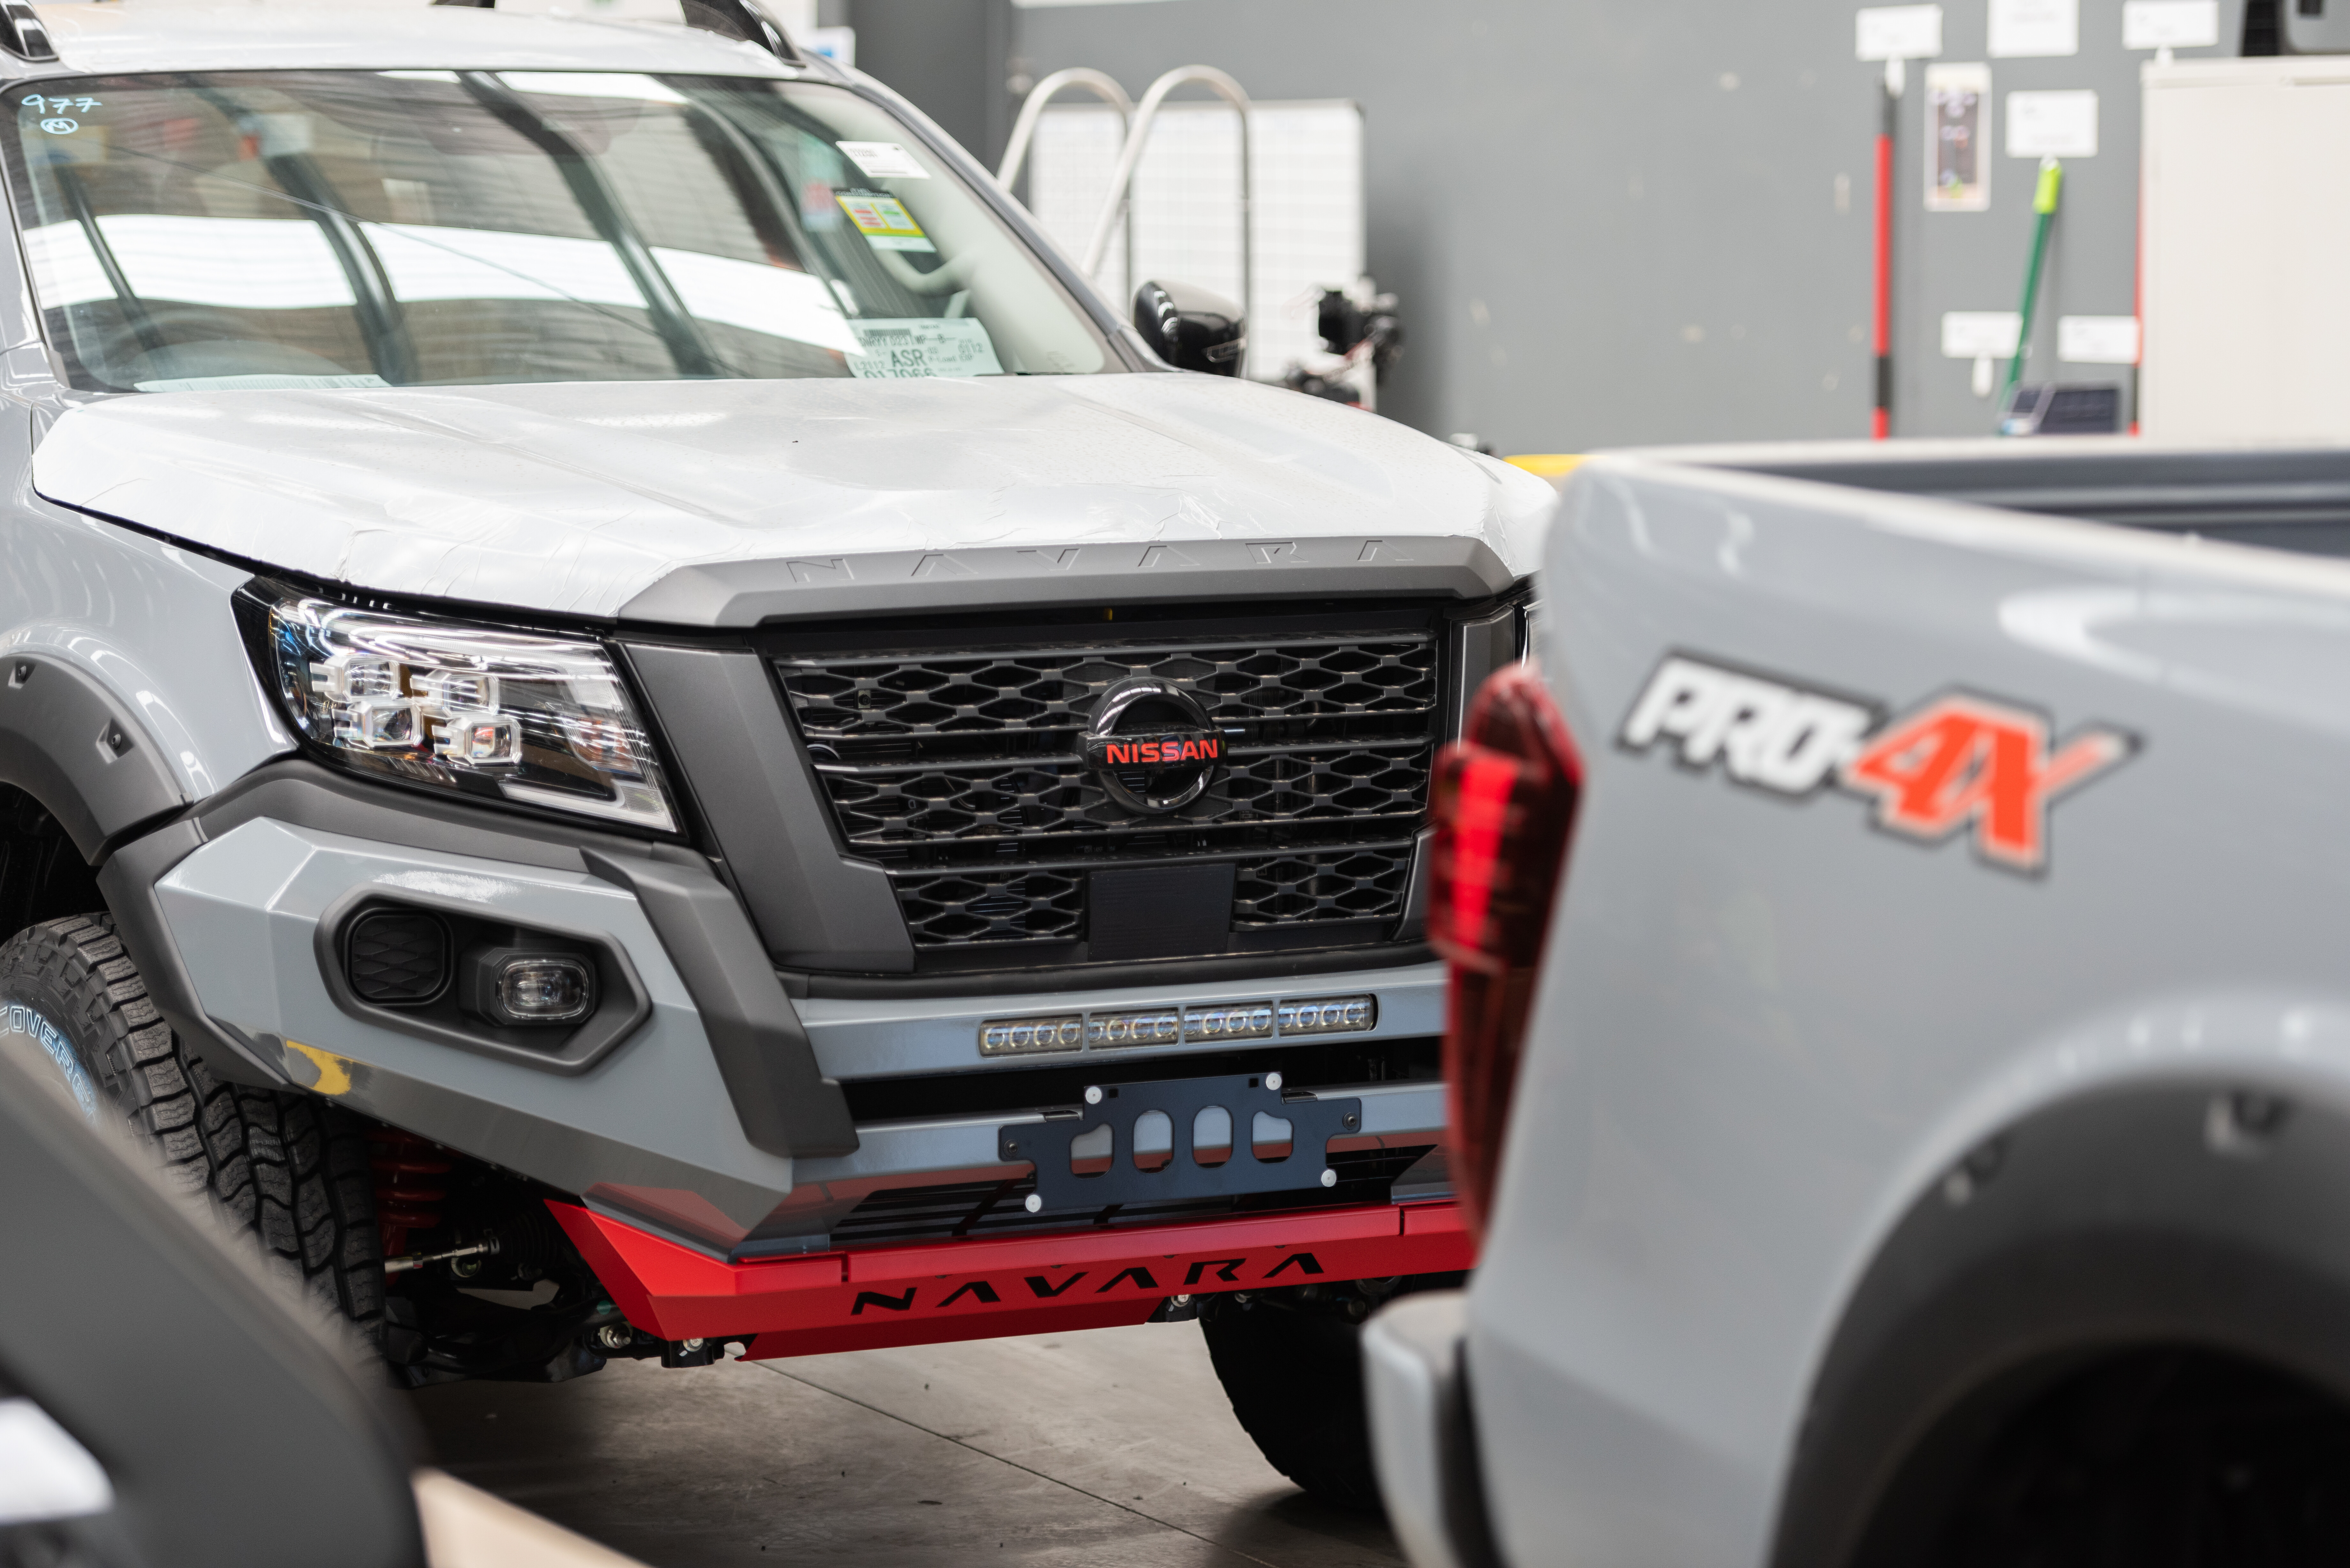
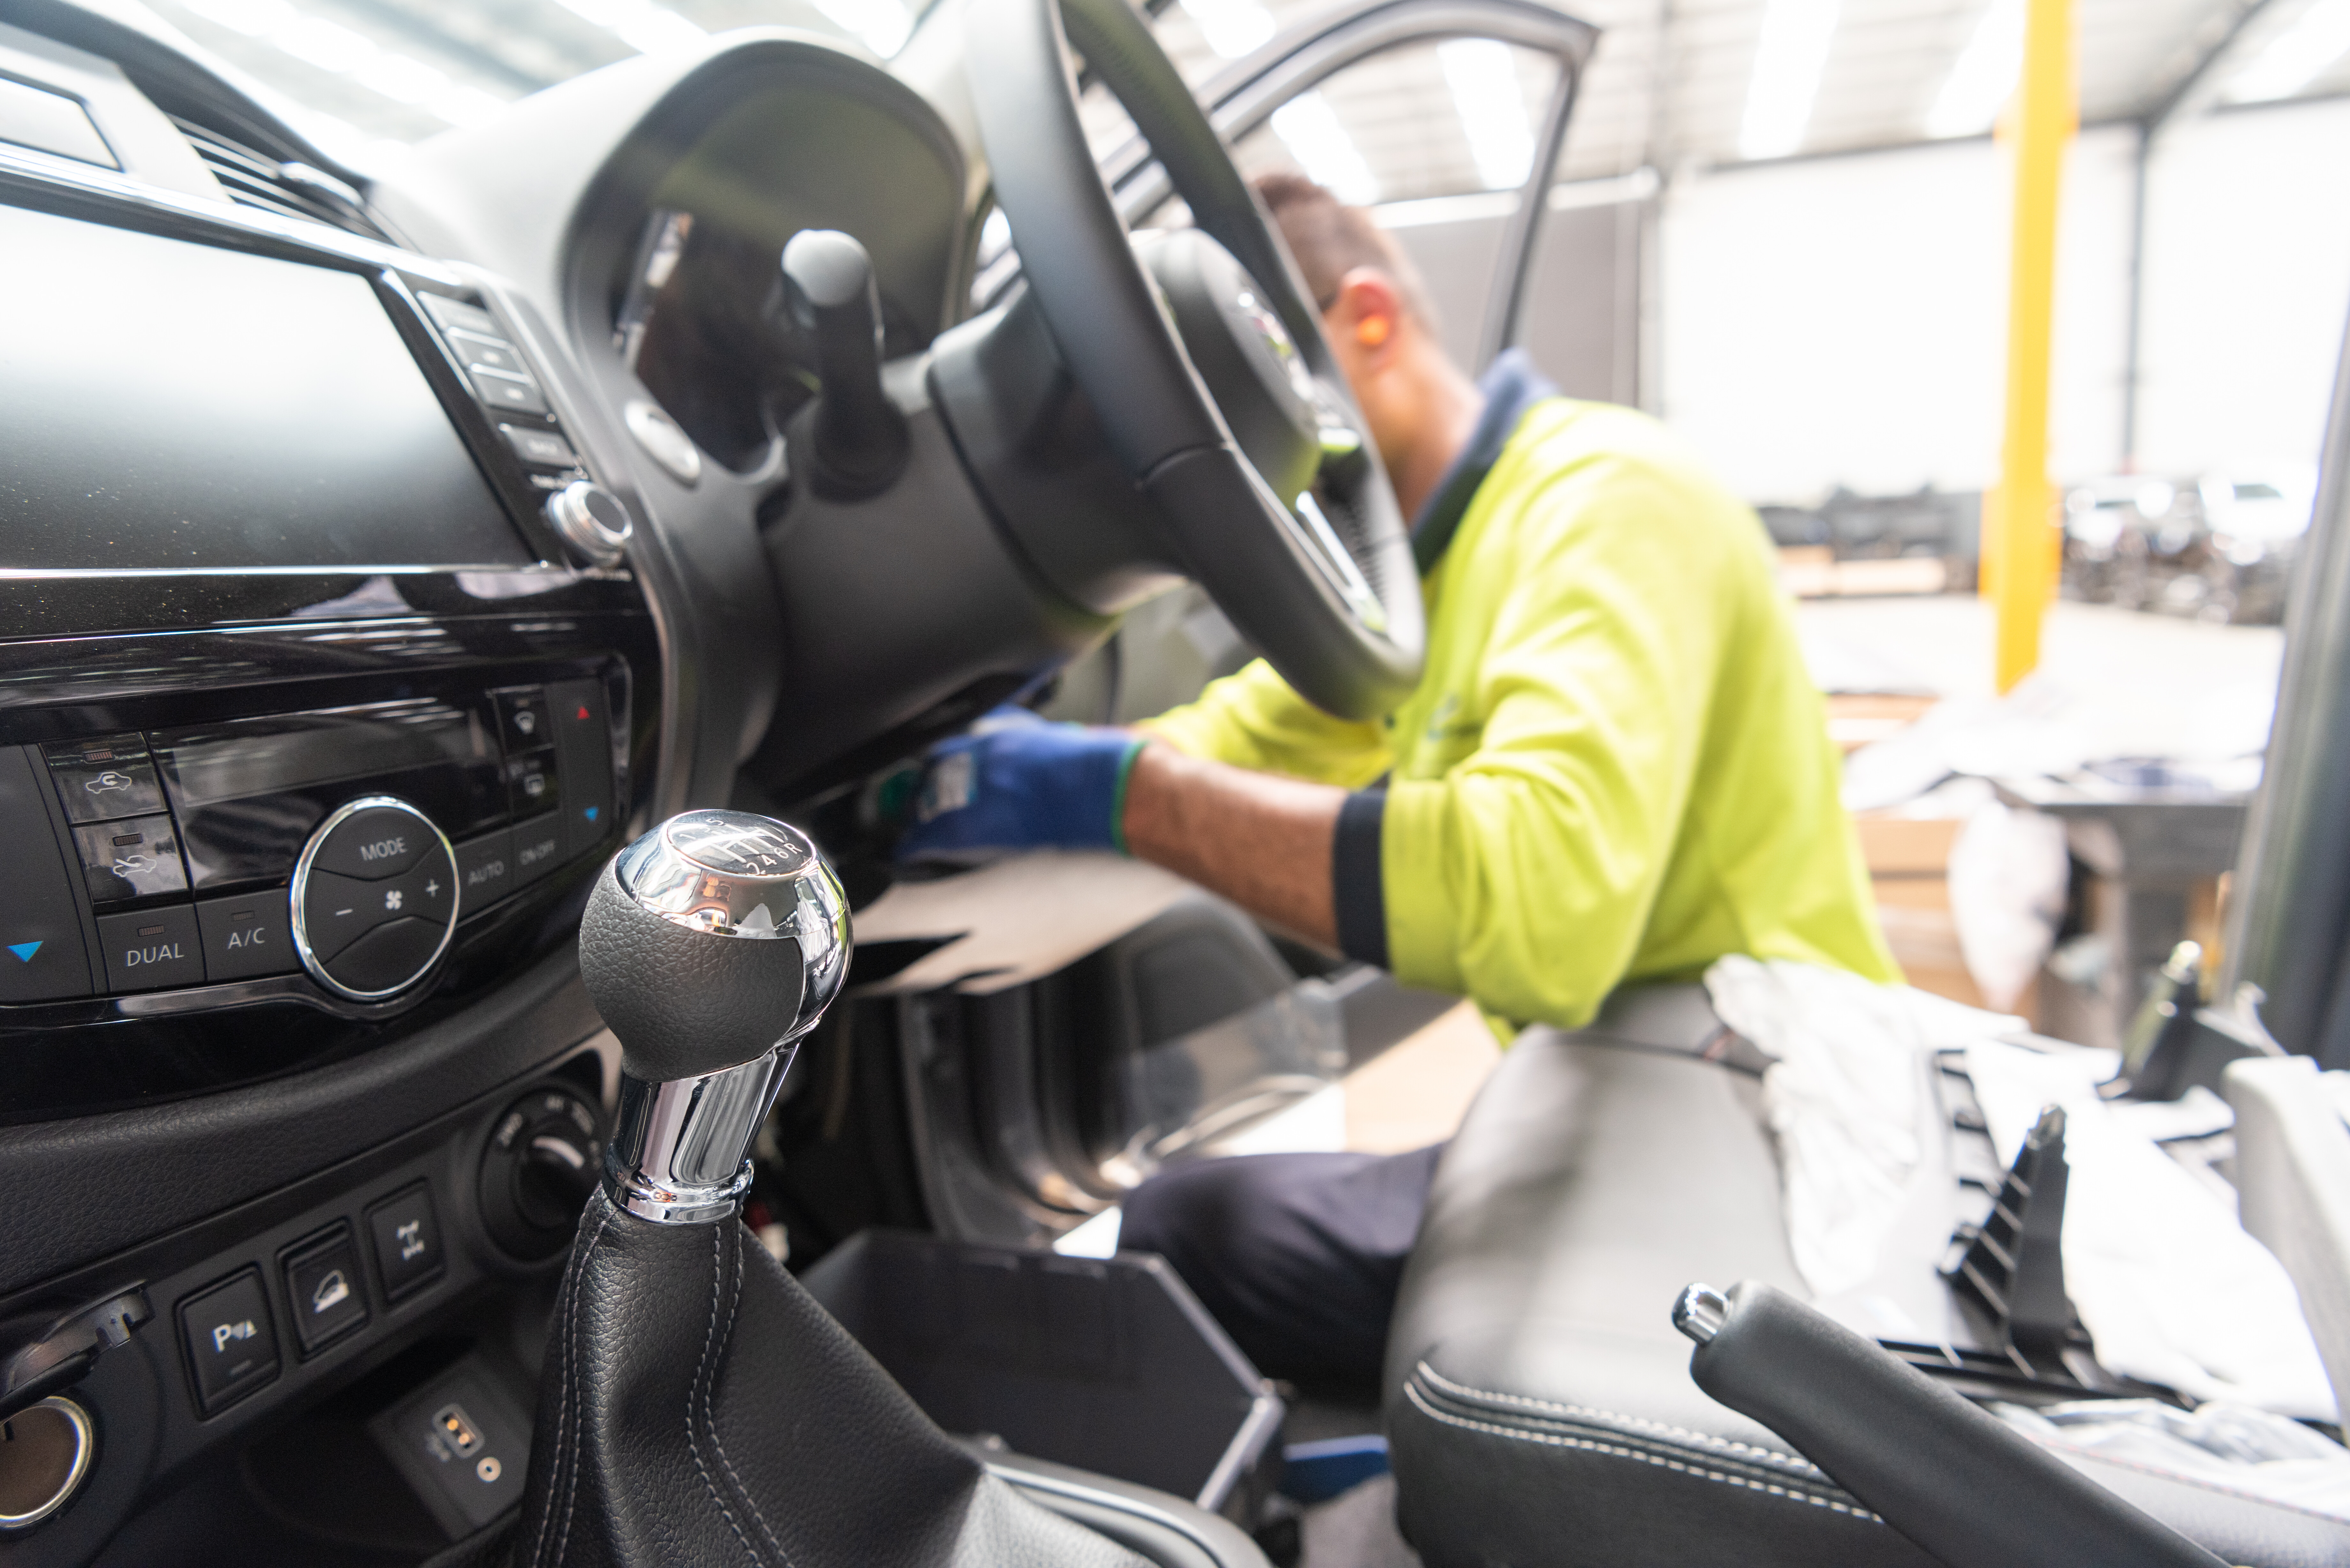
Made in Melbourne
Nissan’s collaboration with engineering firm Premcar transforms a regular Navara PRO-4X in to the Warrior at its facility in Melbourne where a dedicated team hand-builds each car down an assembly line. We joined the line for a day to help assemble our long-term Warrior.
Premcar has been operating in Melbourne for more than 20 years and grew from what was Ford Performance Vehicles in to the stand-alone engineering firm it is today. Nissan’s Warrior program is just one of Premcar’s programs, but probably the most visible one as others entail behind-the-scenes engineering for a range of clients.
Premcar currently employs around 85 people, 35 of whom work on the Warrior production line.While some might think that what Premcar does with the Warrior is just the same as what happens at any aftermarket 4×4 accessory workshop, they couldn’t be further from the truth.
The work that the team at Premcar does is next level! It’s way above anything I’ve seen in any aftermarket workshop and this comes from the history of working with the OEM (Original Equipment Manufacturers) such as Ford and now Nissan. Many of the team currently at Premcar have worked for OEMs in the past and have brought this level of skill and attention to detail to the job.
Our Warrior
Nissan gave us a choice of colour when selecting our Warrior (it only comes in three shades) but I used the opportunity to request a manual gearbox.
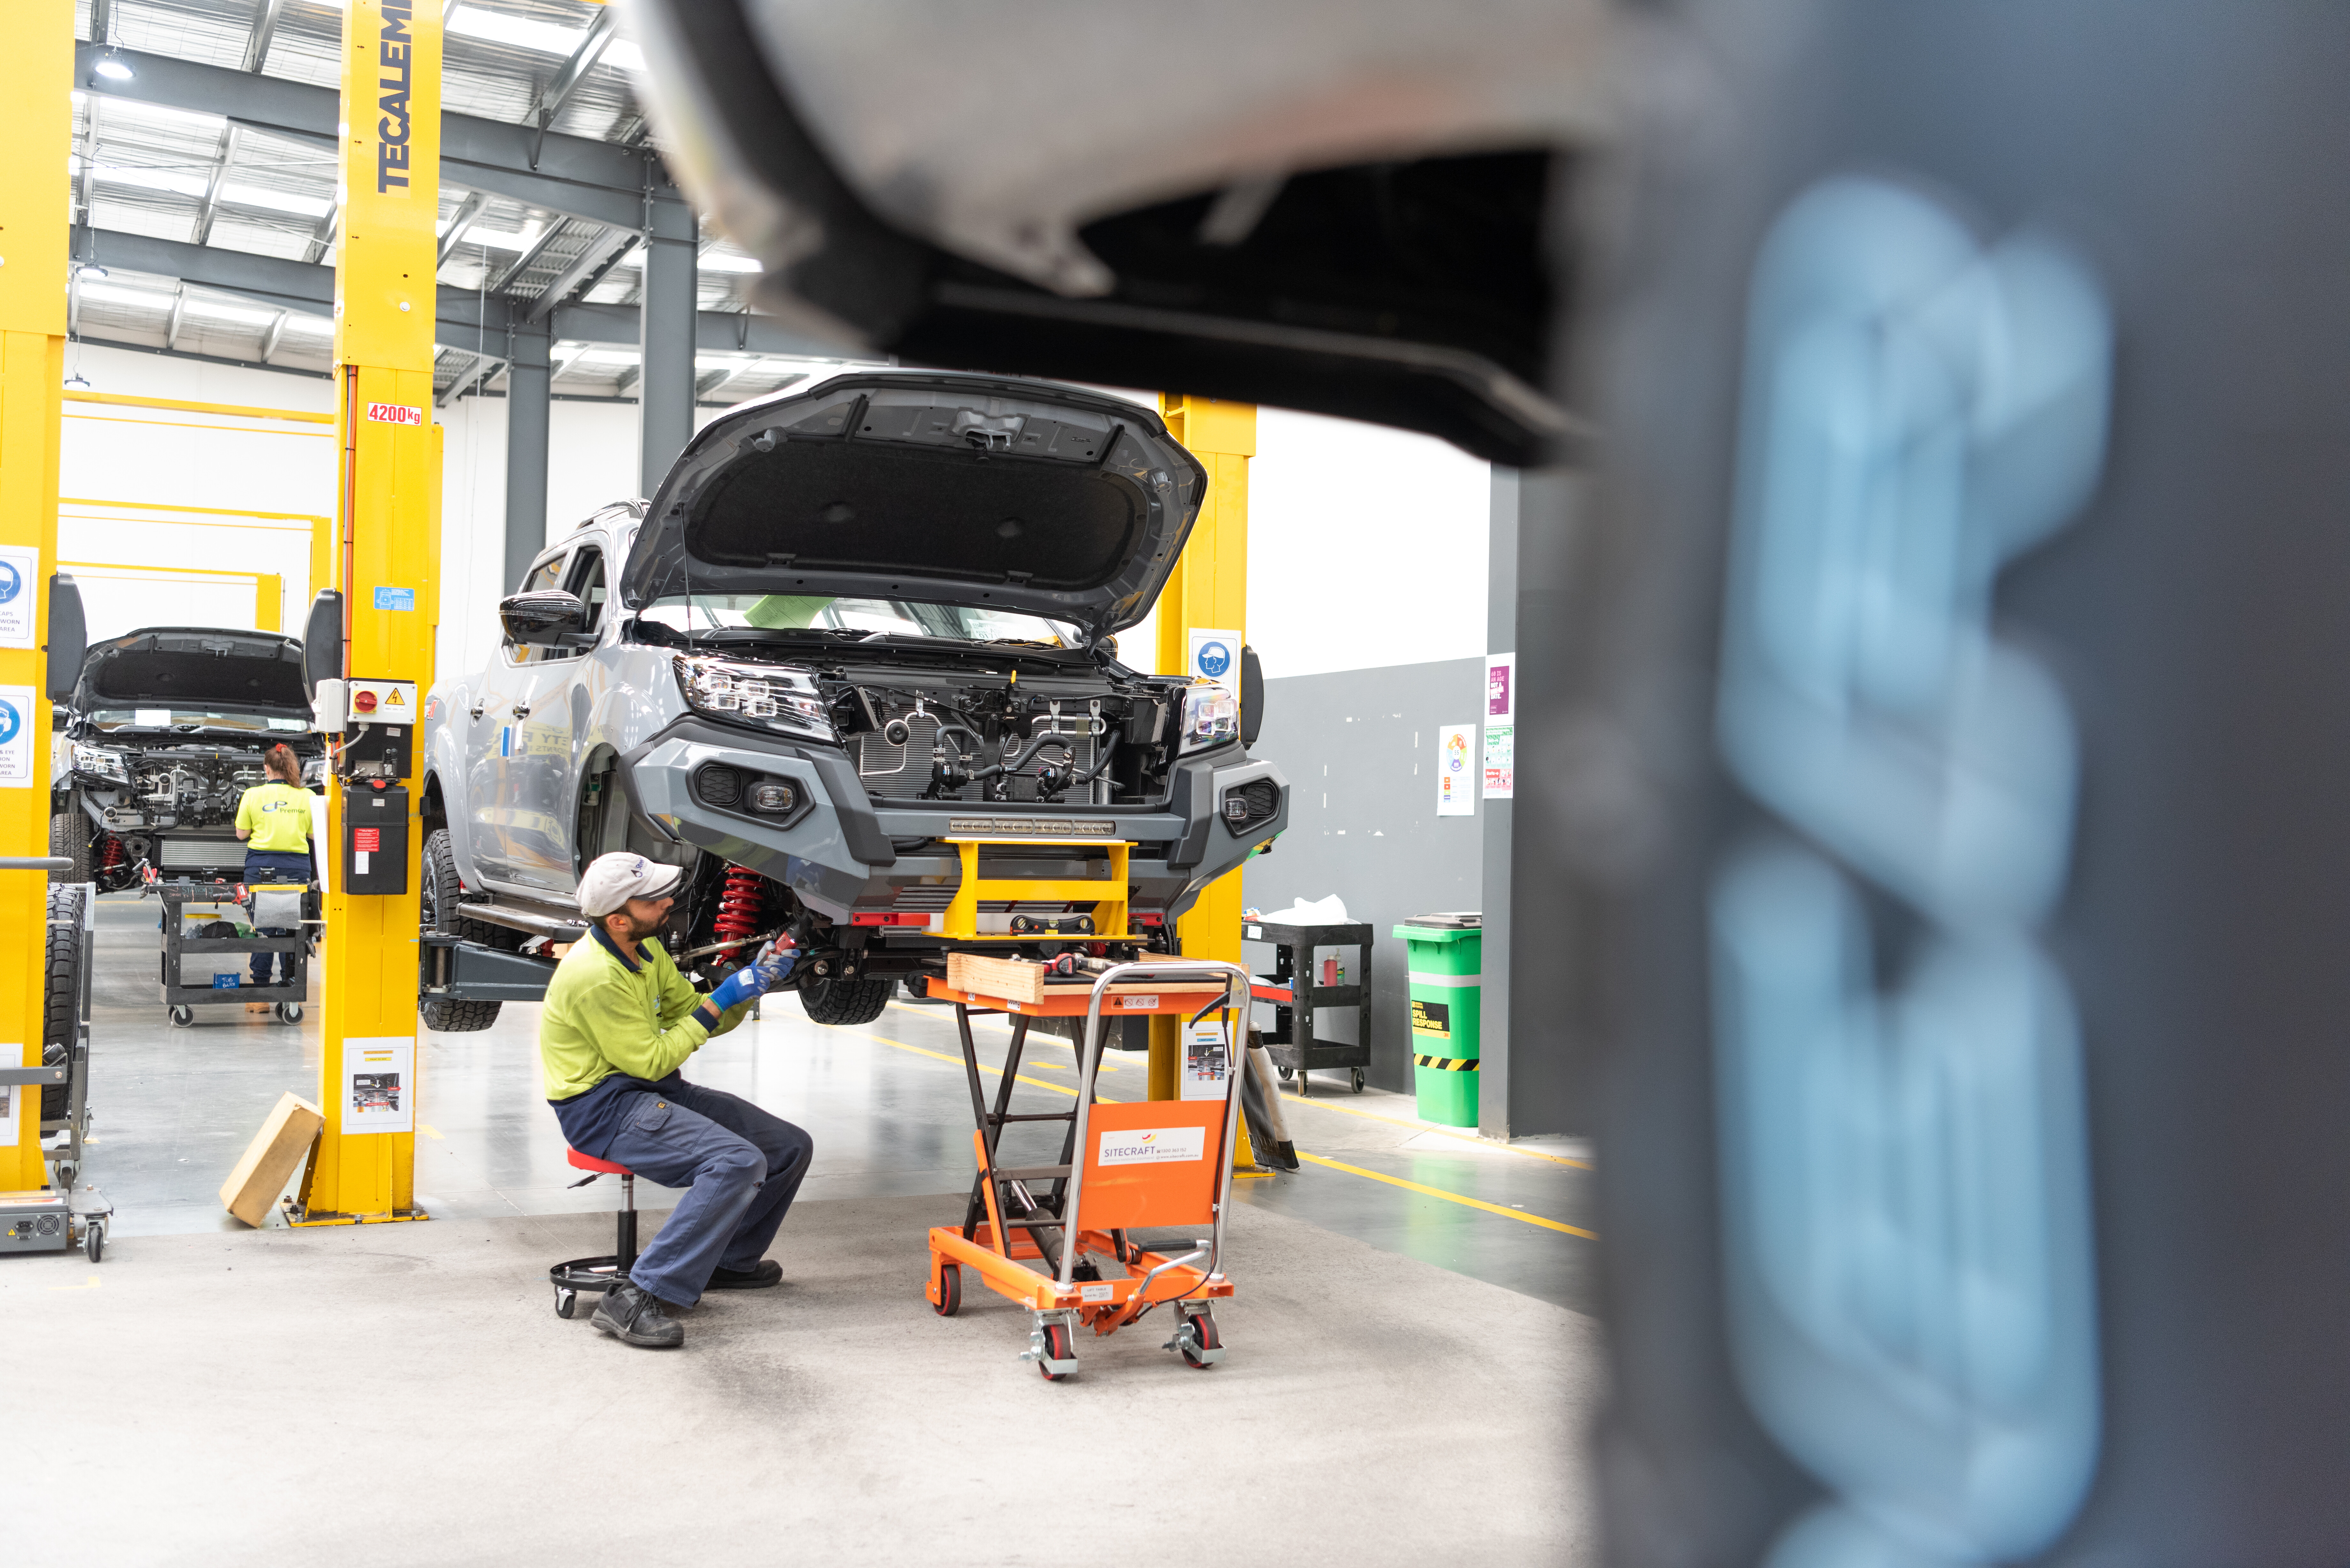
veryone has their own preferences and opinions on transmission choice and while automatics might make life easier, I like the interaction of a manual cog-swapper; and manuals are getting harder to find in new-car showrooms. So it took a little while for our Stealth Grey PRO-4X to arrive at Premcar.The PRO-4X Navaras arrive complete at Premcar, straight off the boat from Nissan and ready to be transformed. The production line consists of nine stages before the newborn Warrior is wheel aligned, quality checked, road tested and ready for delivery to the Nissan dealer.
At stage one, the original rear wheel and tyres and suspension are the first things to be removed. They are replaced with new coil springs and shocks designed and engineered to Premcar’s specifications to improve the ride quality and chassis control both on and off road and improve off-road capability.The standard Nissan wheel arch trims also say goodbye at this stage and will be replaced with bigger flares at a later stage in the process. Some of the standard Navara parts go back to Nissan, while others are sent for recycling.Also at this stage, the rear section of the tailpipe is modified to give clearance for the new tow bar and the centre crossmember is removed and has two holes drilled ready to accept the underbody protection plates farther down the line.
It was here that I began to appreciate the attention to detail that is paid by all the staff on the line. After drilling the holes in the crossmember, the raw metal is touched up with paint to protect against any future corrosion and when I bumped a new front strut on the control arm when installing it on stage two, the bright red paint was again touched up to maintain protection.Every single nut and bolt that is removed and refitted or replaced in the build process is torqued to specification using a selection of preset torque wrenches specifically located at each stage on the line. The team appears to find the right wrench for each bolt without looking, as everything is positioned where it needs to be to make the process as easy and safe as possible. They get the job done much smoother than my bumbling and fumbling for the right tools.Premcar usually gets around 10 Warriors down the line each day, but on this day it was only nine. Put that down to my slowing the process down with our car.
At stage two the standard front struts are removed and stripped, and the replacement struts assembled. Again, the springs and shocks were specifically tuned to Premcar’s specs, in this case the dampeners have a 44 per cent decrease in low-speed rebound to improve wheel travel and ride comfort, but a 55 per cent increase at high speeds to improve control. The standard bump stops are also replaced with ‘jounce bumpers’ that are more progressive than stock to better absorb shock at full suspension compression.Our experience with driving Warriors to date has shown that Premcar has got the suspension just right on this car, creating better on and off road control and ride quality than the standard Navara and most any standard mid-size 4×4 ute.The original front bumper, undertray and inner ’guards are removed at this point too and the plastic inner ’guards are trimmed in readiness to be refitted farther down the line.
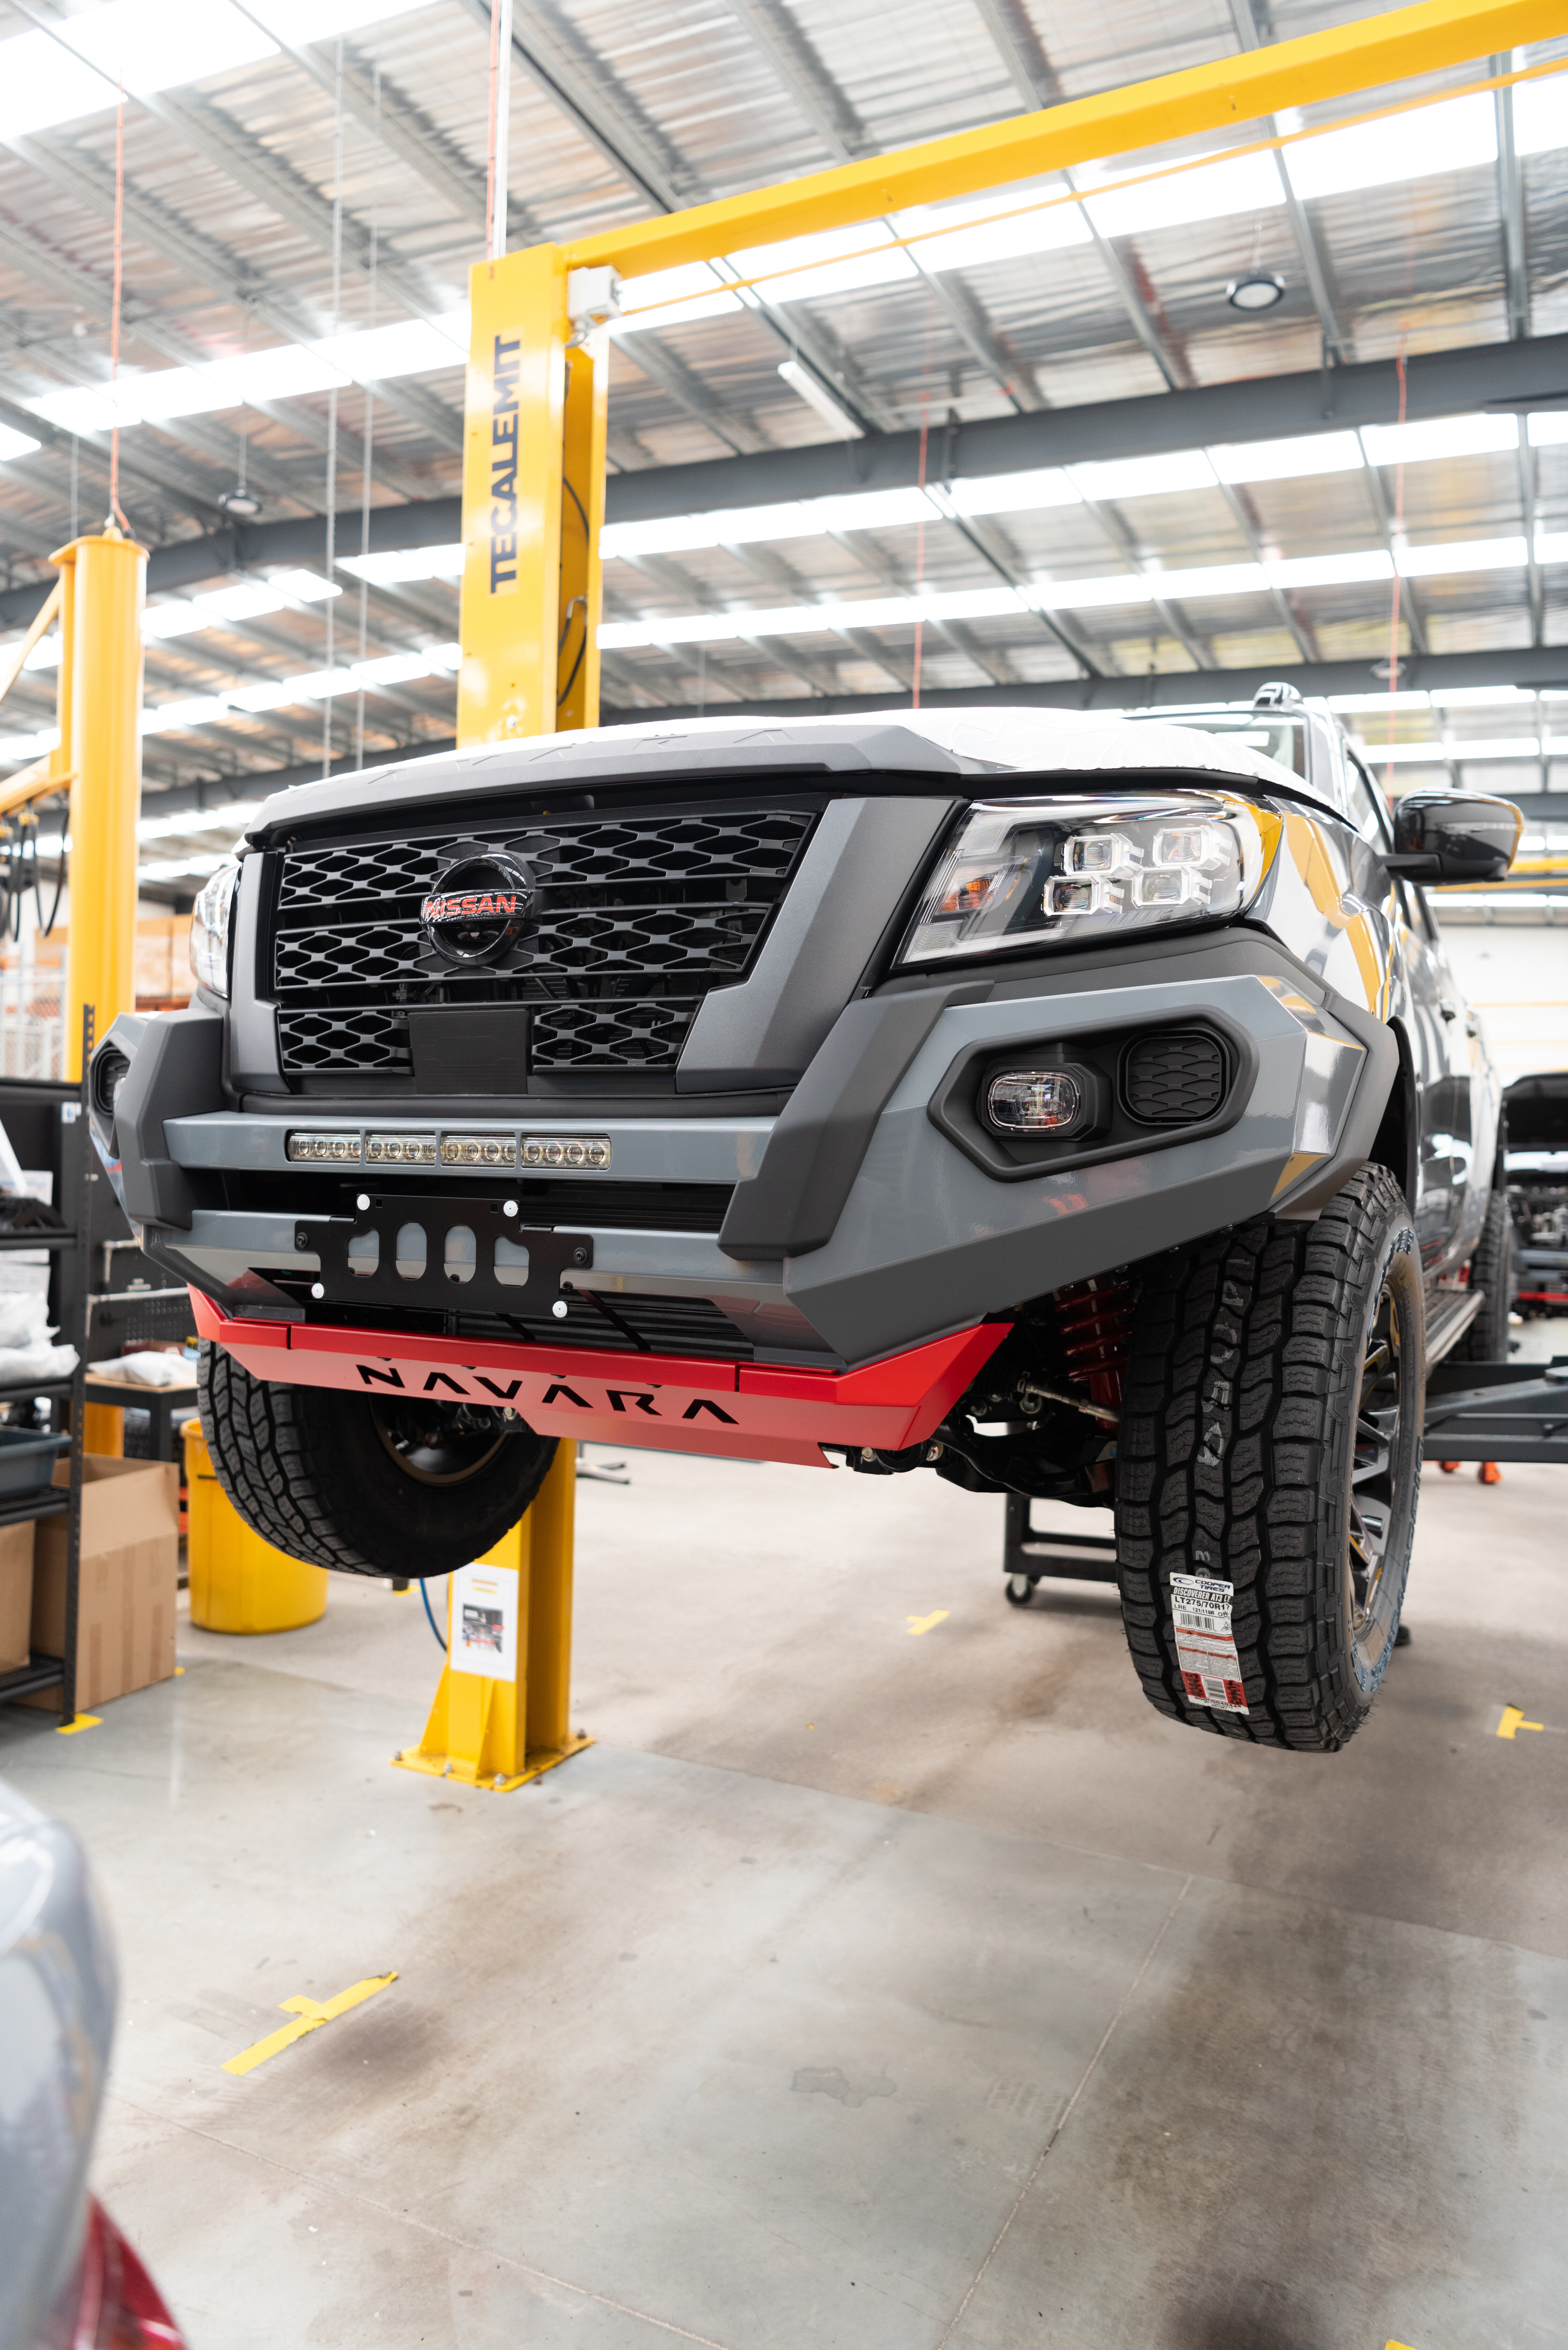
Stage three and with the front of the car fully exposed, it’s time to start fitting the new front bumper. But before that we fit the wiring looms for the LED light bar and the new rear brake light that will go on as part of the sports bar in the cargo tub. Like everything that goes on to the Warrior, the looms are all made to OE specification and look factory in their installation.The Australian-made and locally painted Warrior front bumpers are pre-assembled with their fog lamps, sealing strips and mounts to one side of the main production line, while we fit the mounting brackets to the front of the chassis. The heavy-duty mounts allow for adjustments side-to-side and up and down when the bar is lifted in to place and measurements are taken to make sure it’s all squared away before the bolts are torqued up.With the front bar fitted and the front Warrior wheels and Cooper AT3 tyres in place, our Navara is really starting to look like a Warrior now and this also allows the installation of the bright red under-tray and underbody protection plates before moving on to the next stage. The new tow bar is also fitted here. This bar is different to a regular Navara part as it allows more space for the bigger spare wheel to match the new wheels on the car.
Bigger wheels and tyres, a steel bumper and the capability to fit a winch to that bumper, all add weight to a car so the Warrior gets an added 100kg to its GVM and the new suspension is designed to manage that increased weight.The next step is to cover those wider wheels and tyres with a new set of flares. Again, these are pre-assembled on site and ready to install.The Warrior package adds a plastic cargo tub liner to the Navara so the team has to remove the internal tie-down points and Utili-Track mounts before fitting the liner. The sports bar can then be fitted and the wiring for the brake light that was fitted a few stages back, is plugged in.
While that work is going on in the tray, the wiring for the light bar switch is threaded through a grommet in the firewall to allow the switch to be fitted on the dash. The gauge binnacle is also removed and a speedometer correction box is installed. This little electronic box accounts for the larger wheels and tyres now fitted to the Navara and calibrates the speedo accordingly.The final stages of the assembly see the Warrior get its warpaint on in the decal bay, just so there’s no mistaking the identity of this ute. Then it’s on to the wheel-alignment hoist for final adjustments to bring the settings back to spec with the new suspension, wheel and tyres.The road test starts with a visual inspection of every part that was touched as part of the Warrior build process. This includes checking for paint marks on all the bolts and fasteners signifying that they were torqued up to spec. A full-lock turn on leaving the car park will reveal any tyres touching inner guards that may not have been correctly fitted and the lap around the block includes a stretch of freeway that allows the speedometer to be checked against the GPS.
Our Warrior passed all tests and was ready for delivery, but we couldn’t drive it away on the day. It still had to be registered and detailed, so we had to wait another week to get behind the wheel.My day at Premcar following our Navara down the line, helping where I could but generally trying not to get in the way, was very interesting. Most impressive was the way the assembly line works, the attention to detail at every stage of the process and the pride and care shown by all of the folks that work on it. It’s a credit to all the staff and those behind the scenes that designed and engineered the processes and the car itself. As I said at the start, the professionalism shown by everyone is next level and far beyond anything I’ve seen in aftermarket workshops.Premcar head honcho Bernie Quinn, told me later, “That’s because we’re not aftermarket. This level of workmanship comes from years of working directly with the OEMs, improving the vehicles so that the manufacturer can sell them.”While we’ve previously reviewed the PRO-4X Warrior, this will be our first drive of one with the manual gearbox and we’re looking forward to hitting the tracks in it over the coming months. In fact, I think we’ll run it in with a good old fashioned road trip!
It was always going to happen, but it took less time than I imagined.
The 300 Series LandCruiser is a vehicle just begging to be modified. From the moment I first laid eyes on them at the official launch last year, I wanted to see what they would look like with a quality bullbar, suspension and the usual swag of off-road touring accessories.
Well, the wait is over, as we’ve managed to track down one of the first modified 300 Series Cruisers in the country right now. It’s only the beginning of the process too, with many further additions planned when gear becomes more readily available.
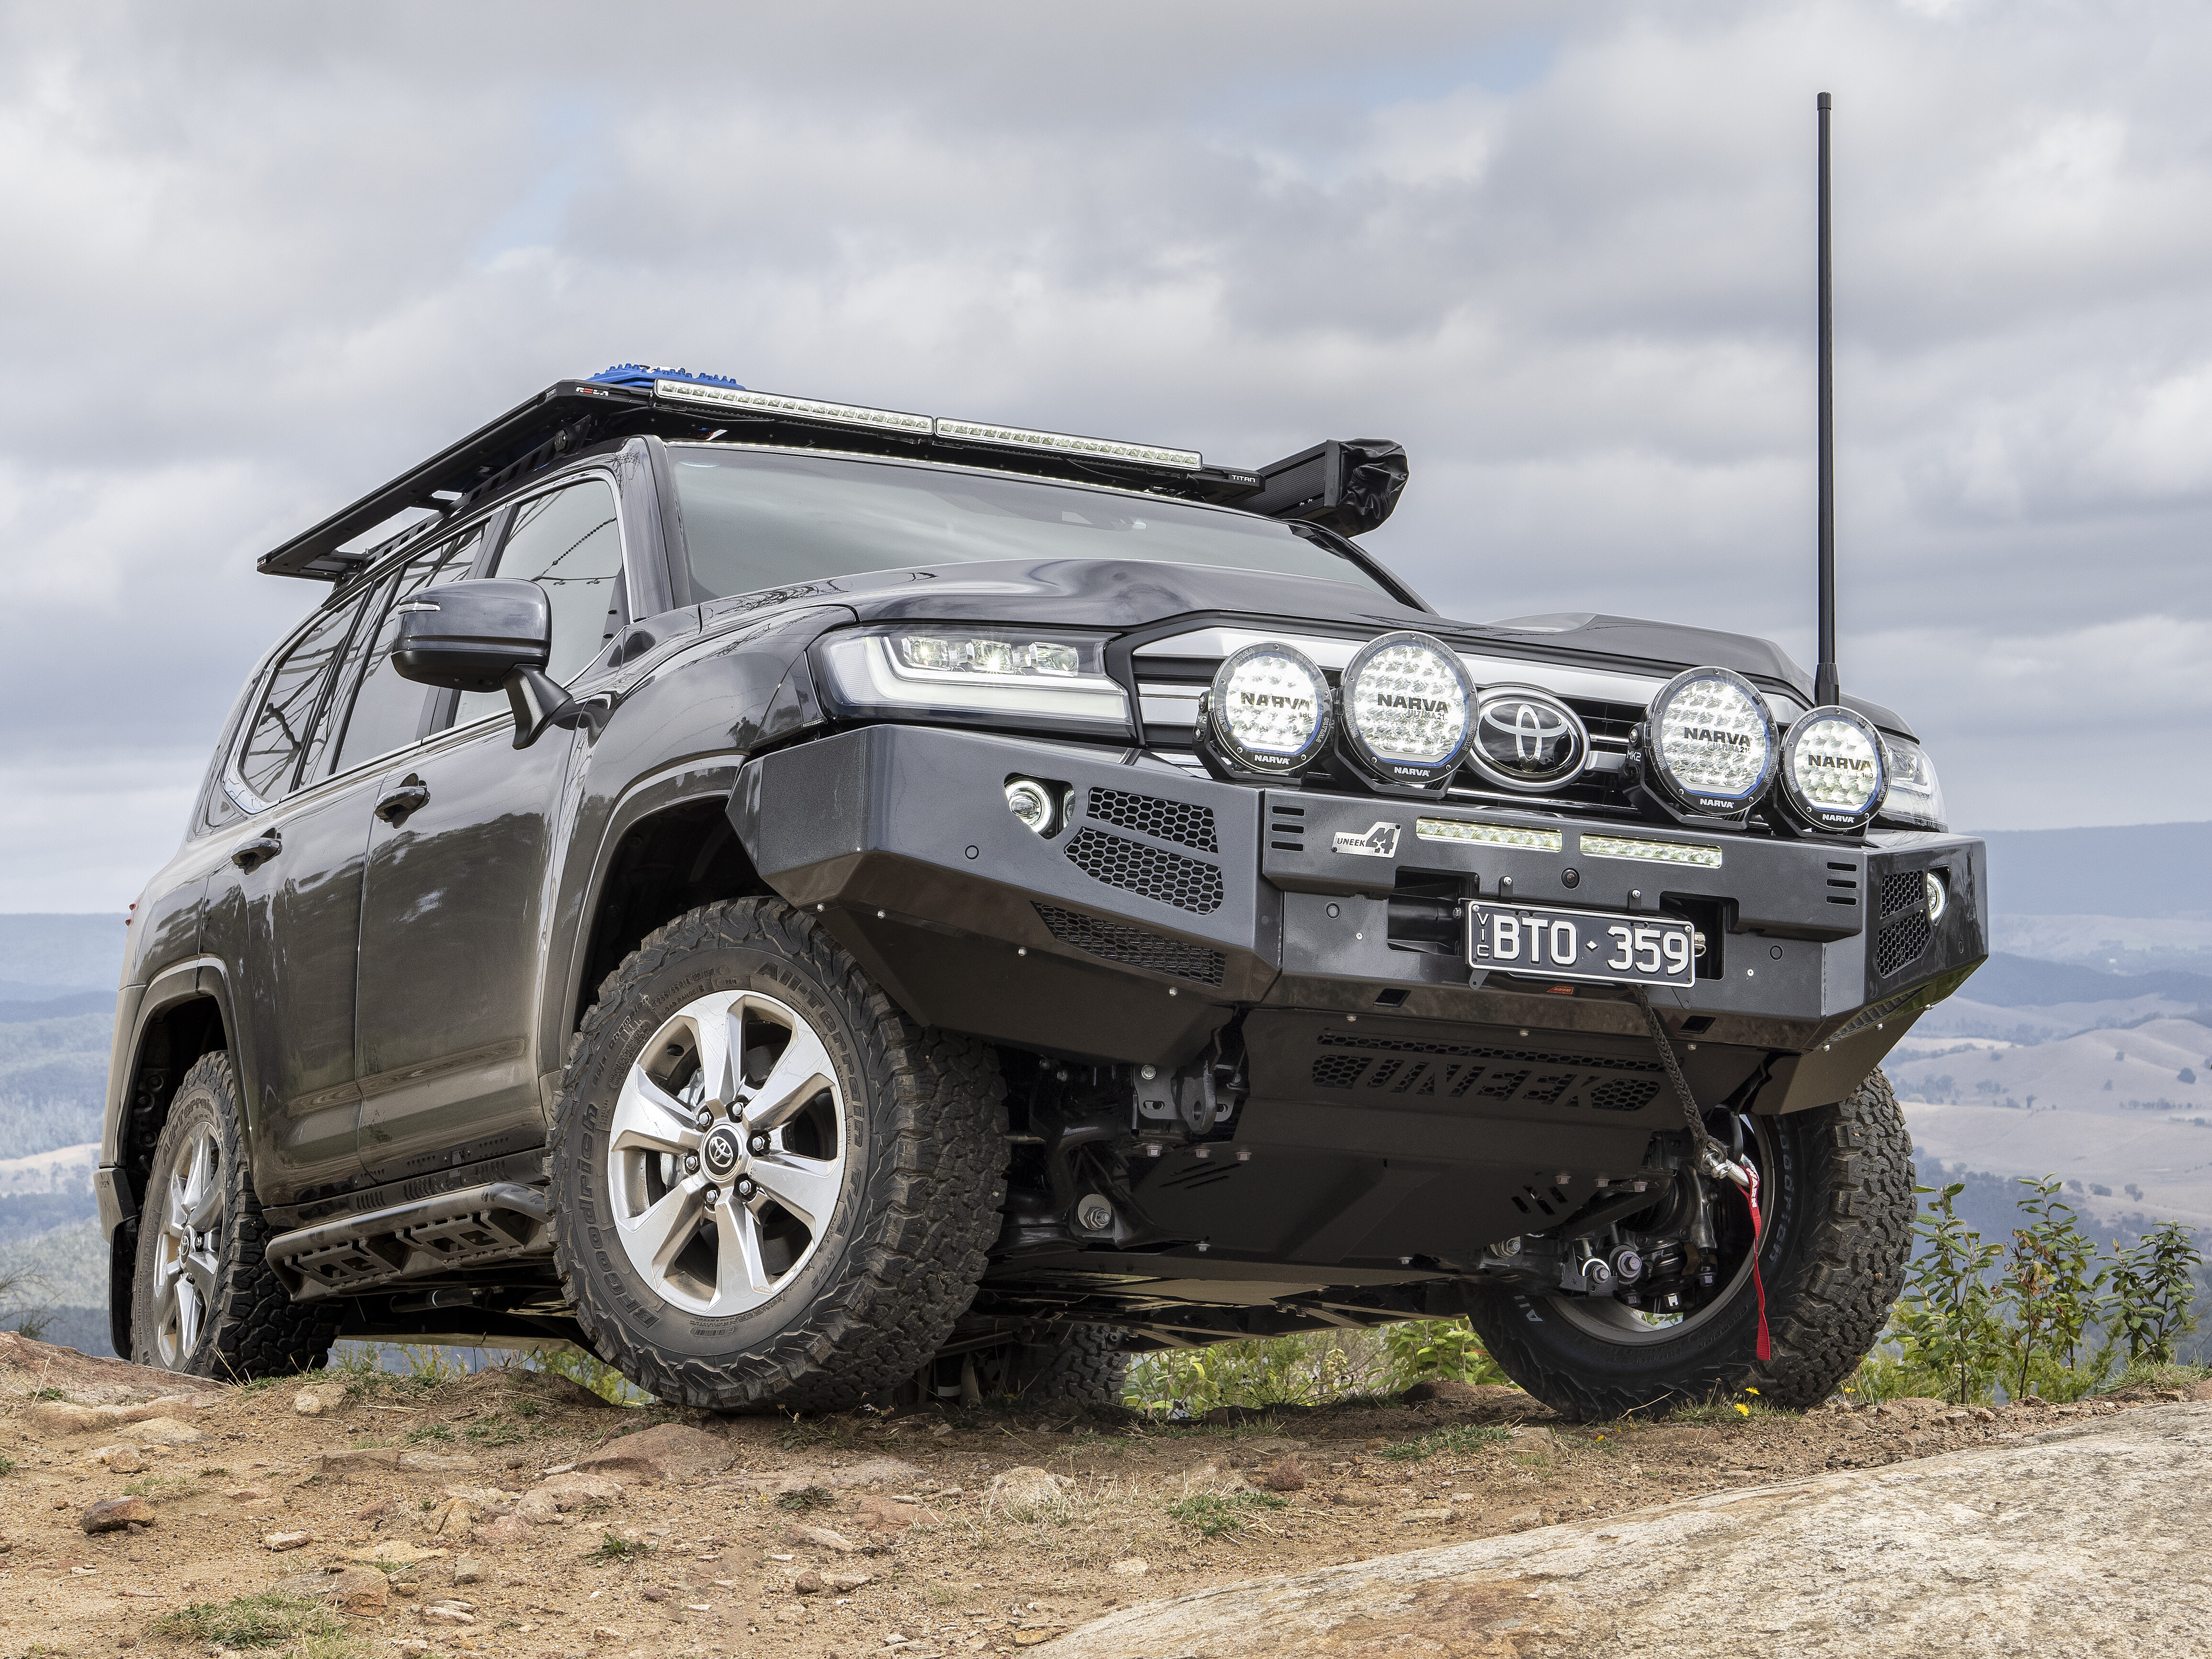
What you see before you is a 2022 300 Series VX, picked up brand-new from the dealership and sent straight in to hiding where the modifications began.
There’s so much hype around the new LandCruiser, you’d be mad to not develop a range of products to suit. Which is exactly what the team at the Towing and 4×4 Division of GUD set out to achieve. This build is a collective effort from brands under the GUD group including Rola roof racks, Uneek 4×4, Kaymar and Narva, to name a few.
This vehicle will be a constant evolution, which will be on display at many of the 4×4 shows around Australia. This is just the beginning too, as we’re told the team wants to build plenty more off-roaders to display the products available for Aussie four-wheel drivers.
Show stopper
Built to showcase the products available to suit the 300 Series, its first priority was displaying its wares at the National 4×4 Outdoors Show in Brisbane.
Sadly, the stock suspension was still fitted on the day of this shoot, but by the time you read this, that will have all changed. A Fulcrum Suspensions lift has been chosen, which provides 50mm of lift in the front and 35mm in the rear.
There are other lift heights available from Fulcrum to suit your needs and load carrying. Word on the street is Fulcrum is also currently developing a GVM upgrade solution for the 300 Series, offering a much-needed boost in load-carrying ability.
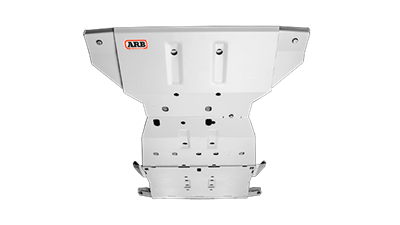
Uneek armour
The first thing you’ll notice on this particular vehicle is the front bar from Uneek 4×4. A proudly Australian-owned company, Uneek also manufactures in Australia. This bar has been specially designed and engineered for Australian conditions, as well as ADRs (Australian Design Rules).
What we like most about the Crawler Bar from Uneek 4×4 is the protection offered for Toyota’s front-mounted intercoolers. This still allows full airflow to these vital intercoolers, while keeping them protected from impact or debris when out touring.
That Uneek 4×4 Crawler Bar fitted to the front end is a work of art, design-wise. It’s a full steel construction, comprising a 5mm centre section, with 3mm wings to save weight.
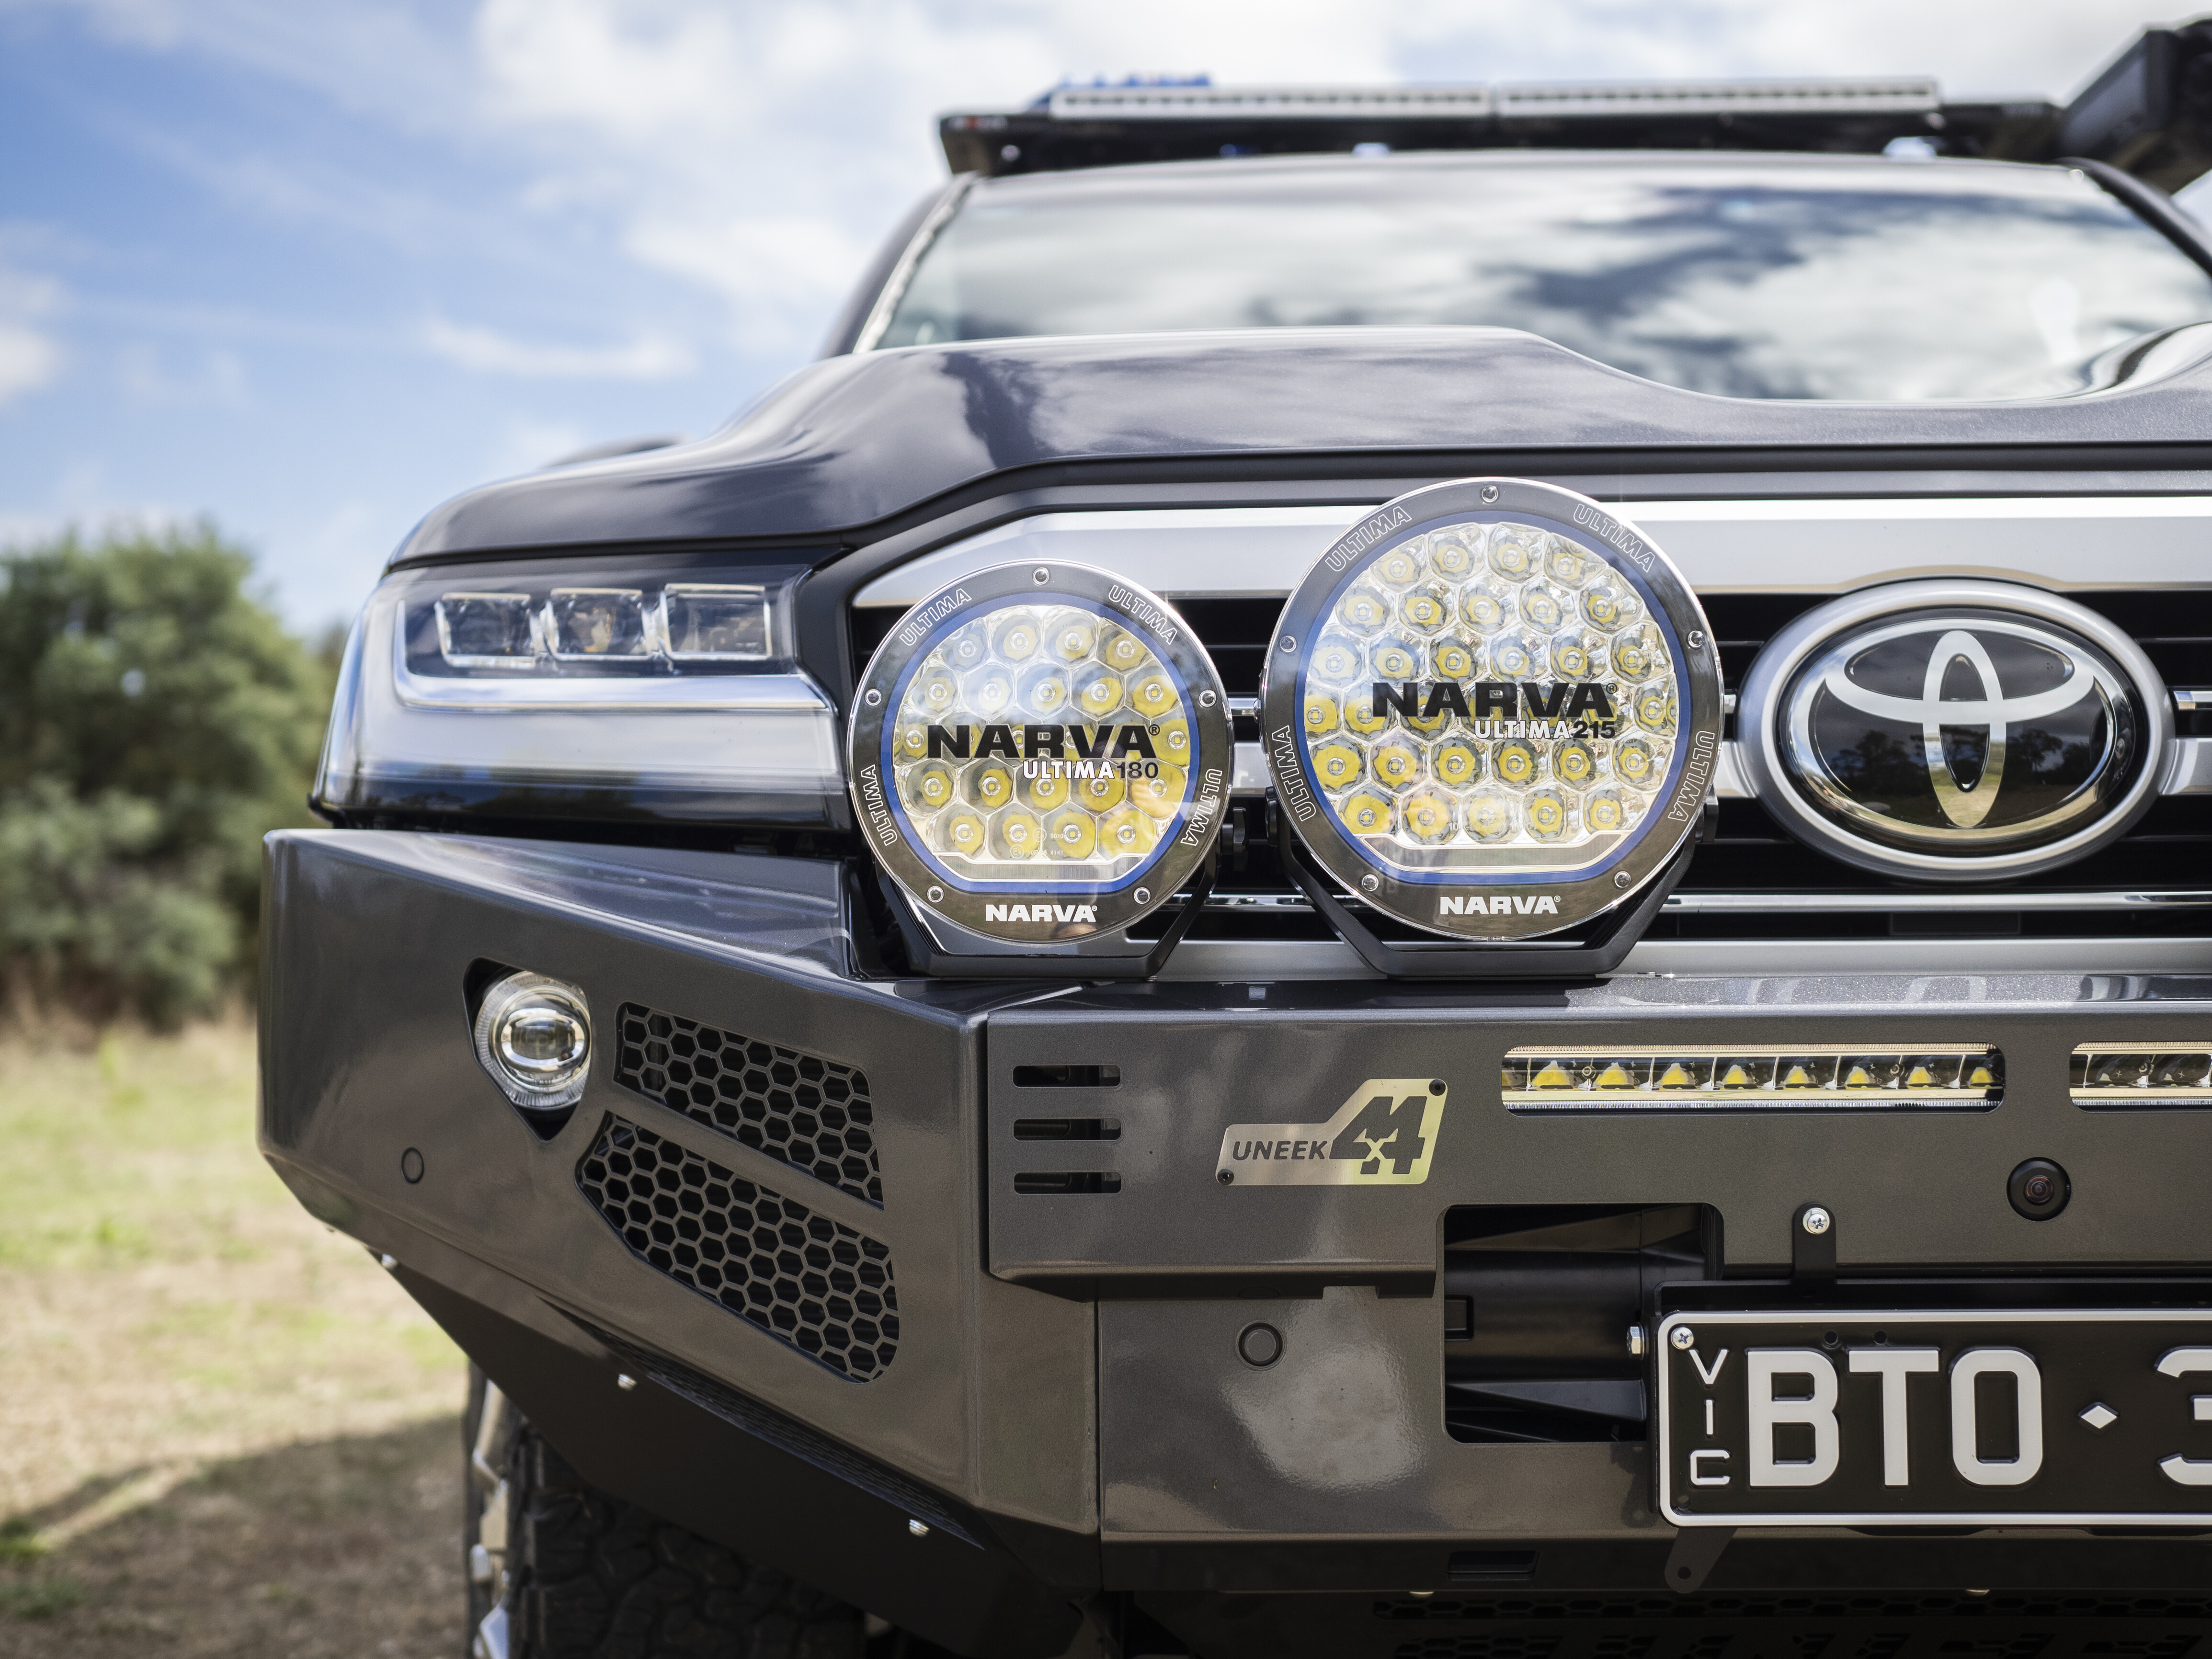
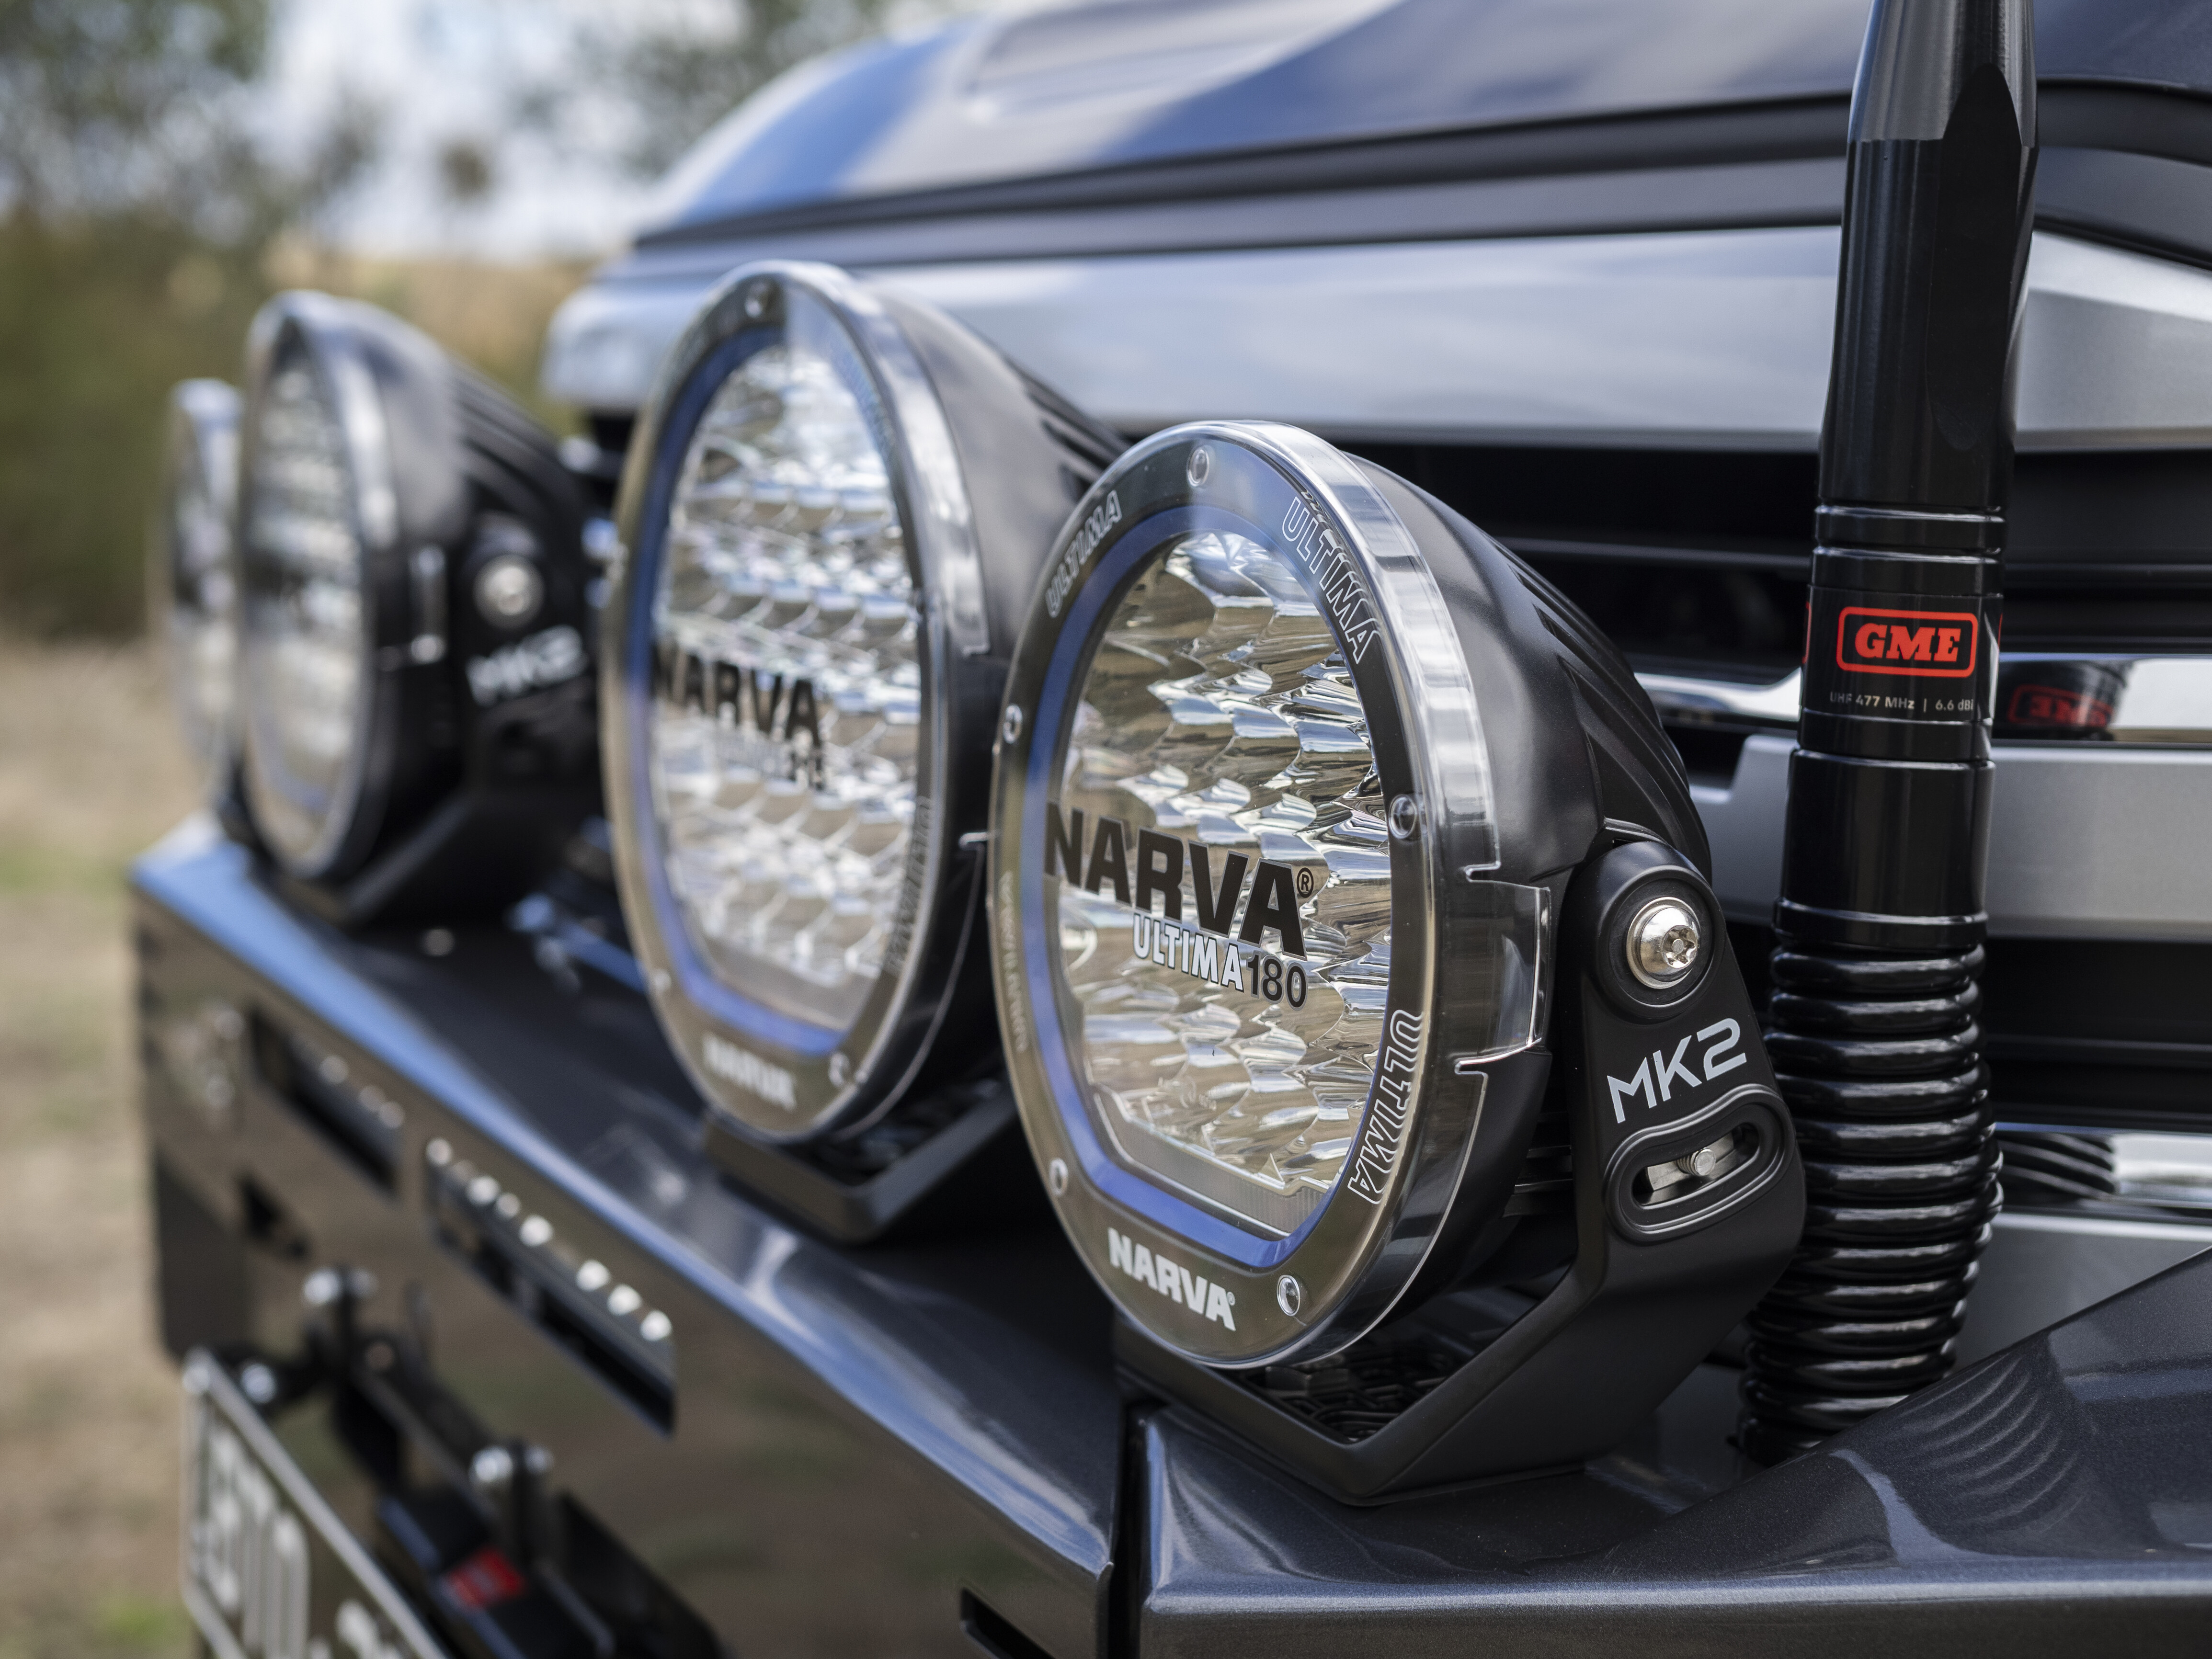
The Crawler bar is winch-compatible to house a 12,000lb winch, has built-in high-lift jack points, includes 90mm LED fog lights, and has a space to integrate a 22-inch LED light bar in the centre section of the bar. There’s plenty of space to mount larger LED driving lights too, as you can see there are four Narva Ultima MK2 units bolted across the face of the 300 Series.
Uneek 4×4 rock sliders are another engineering marvel that look as good as they are strong – they just look right on the big 300.
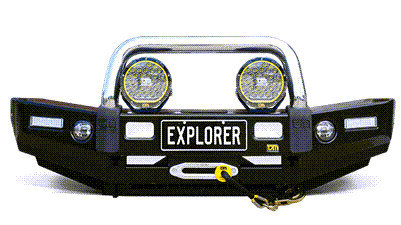
Light work
There is a seriously impressive number of LEDs bolted to this 300 Series. Starting with Narva Ultima MK2 180 and 215 LED driving lights on the front bar, giving a total of four round LEDs on the front.
There are also two 22-inch Explora single-row LED light bars on the roof rack facing forwards, and one 22-inch Explora single-row LED light bar in the front bumper.
BFG tyres
Tyres are such an important addition to any touring 4WD, as such BFG all-terrains have been fitted to the stock rims, which is a smart call.
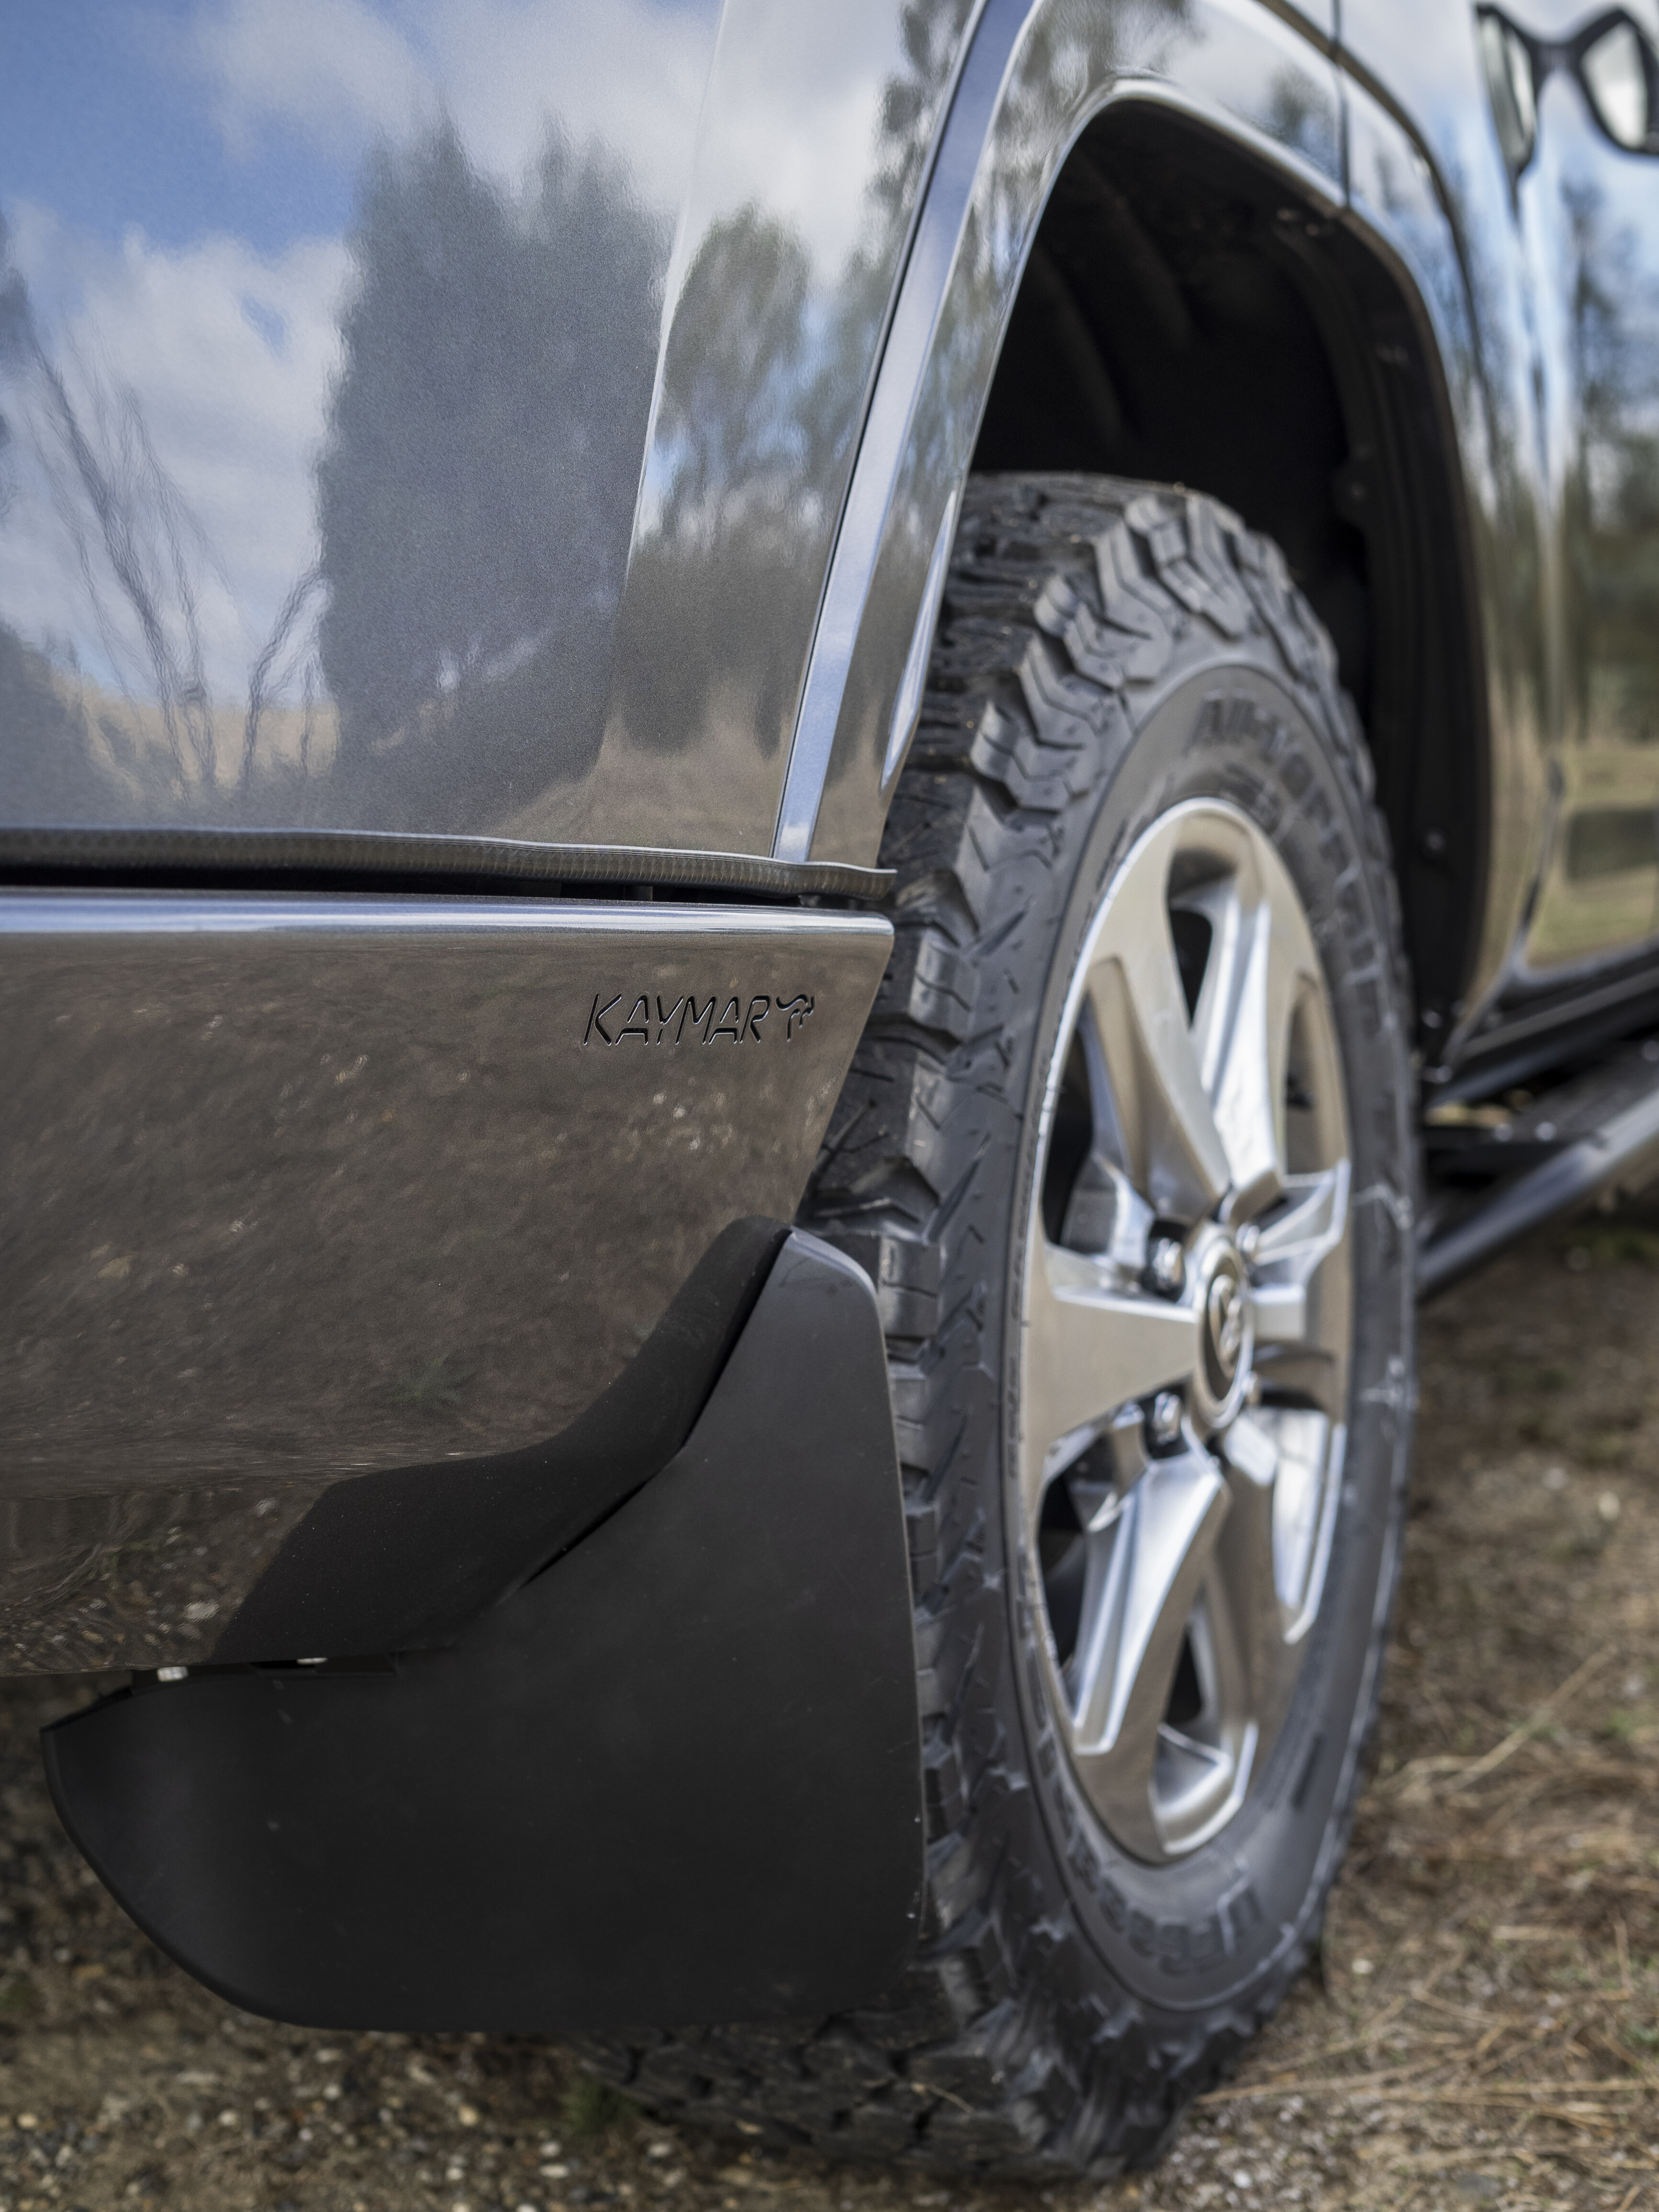
They will help provide more grip when off-road, as well as much more puncture protection compared to the factory rubber the 300 Series originally wore.
Storage
For additional storage, a Rola roof rack has been fitted using a new Ridge Mount system, which has a few neat tricks up its sleeves. There are provisions for running any external wiring to be secured to the underside of the Ridge Mount, which is not only a neat solution, but it’s going to keep any electrical wiring safe and out of harm’s way.
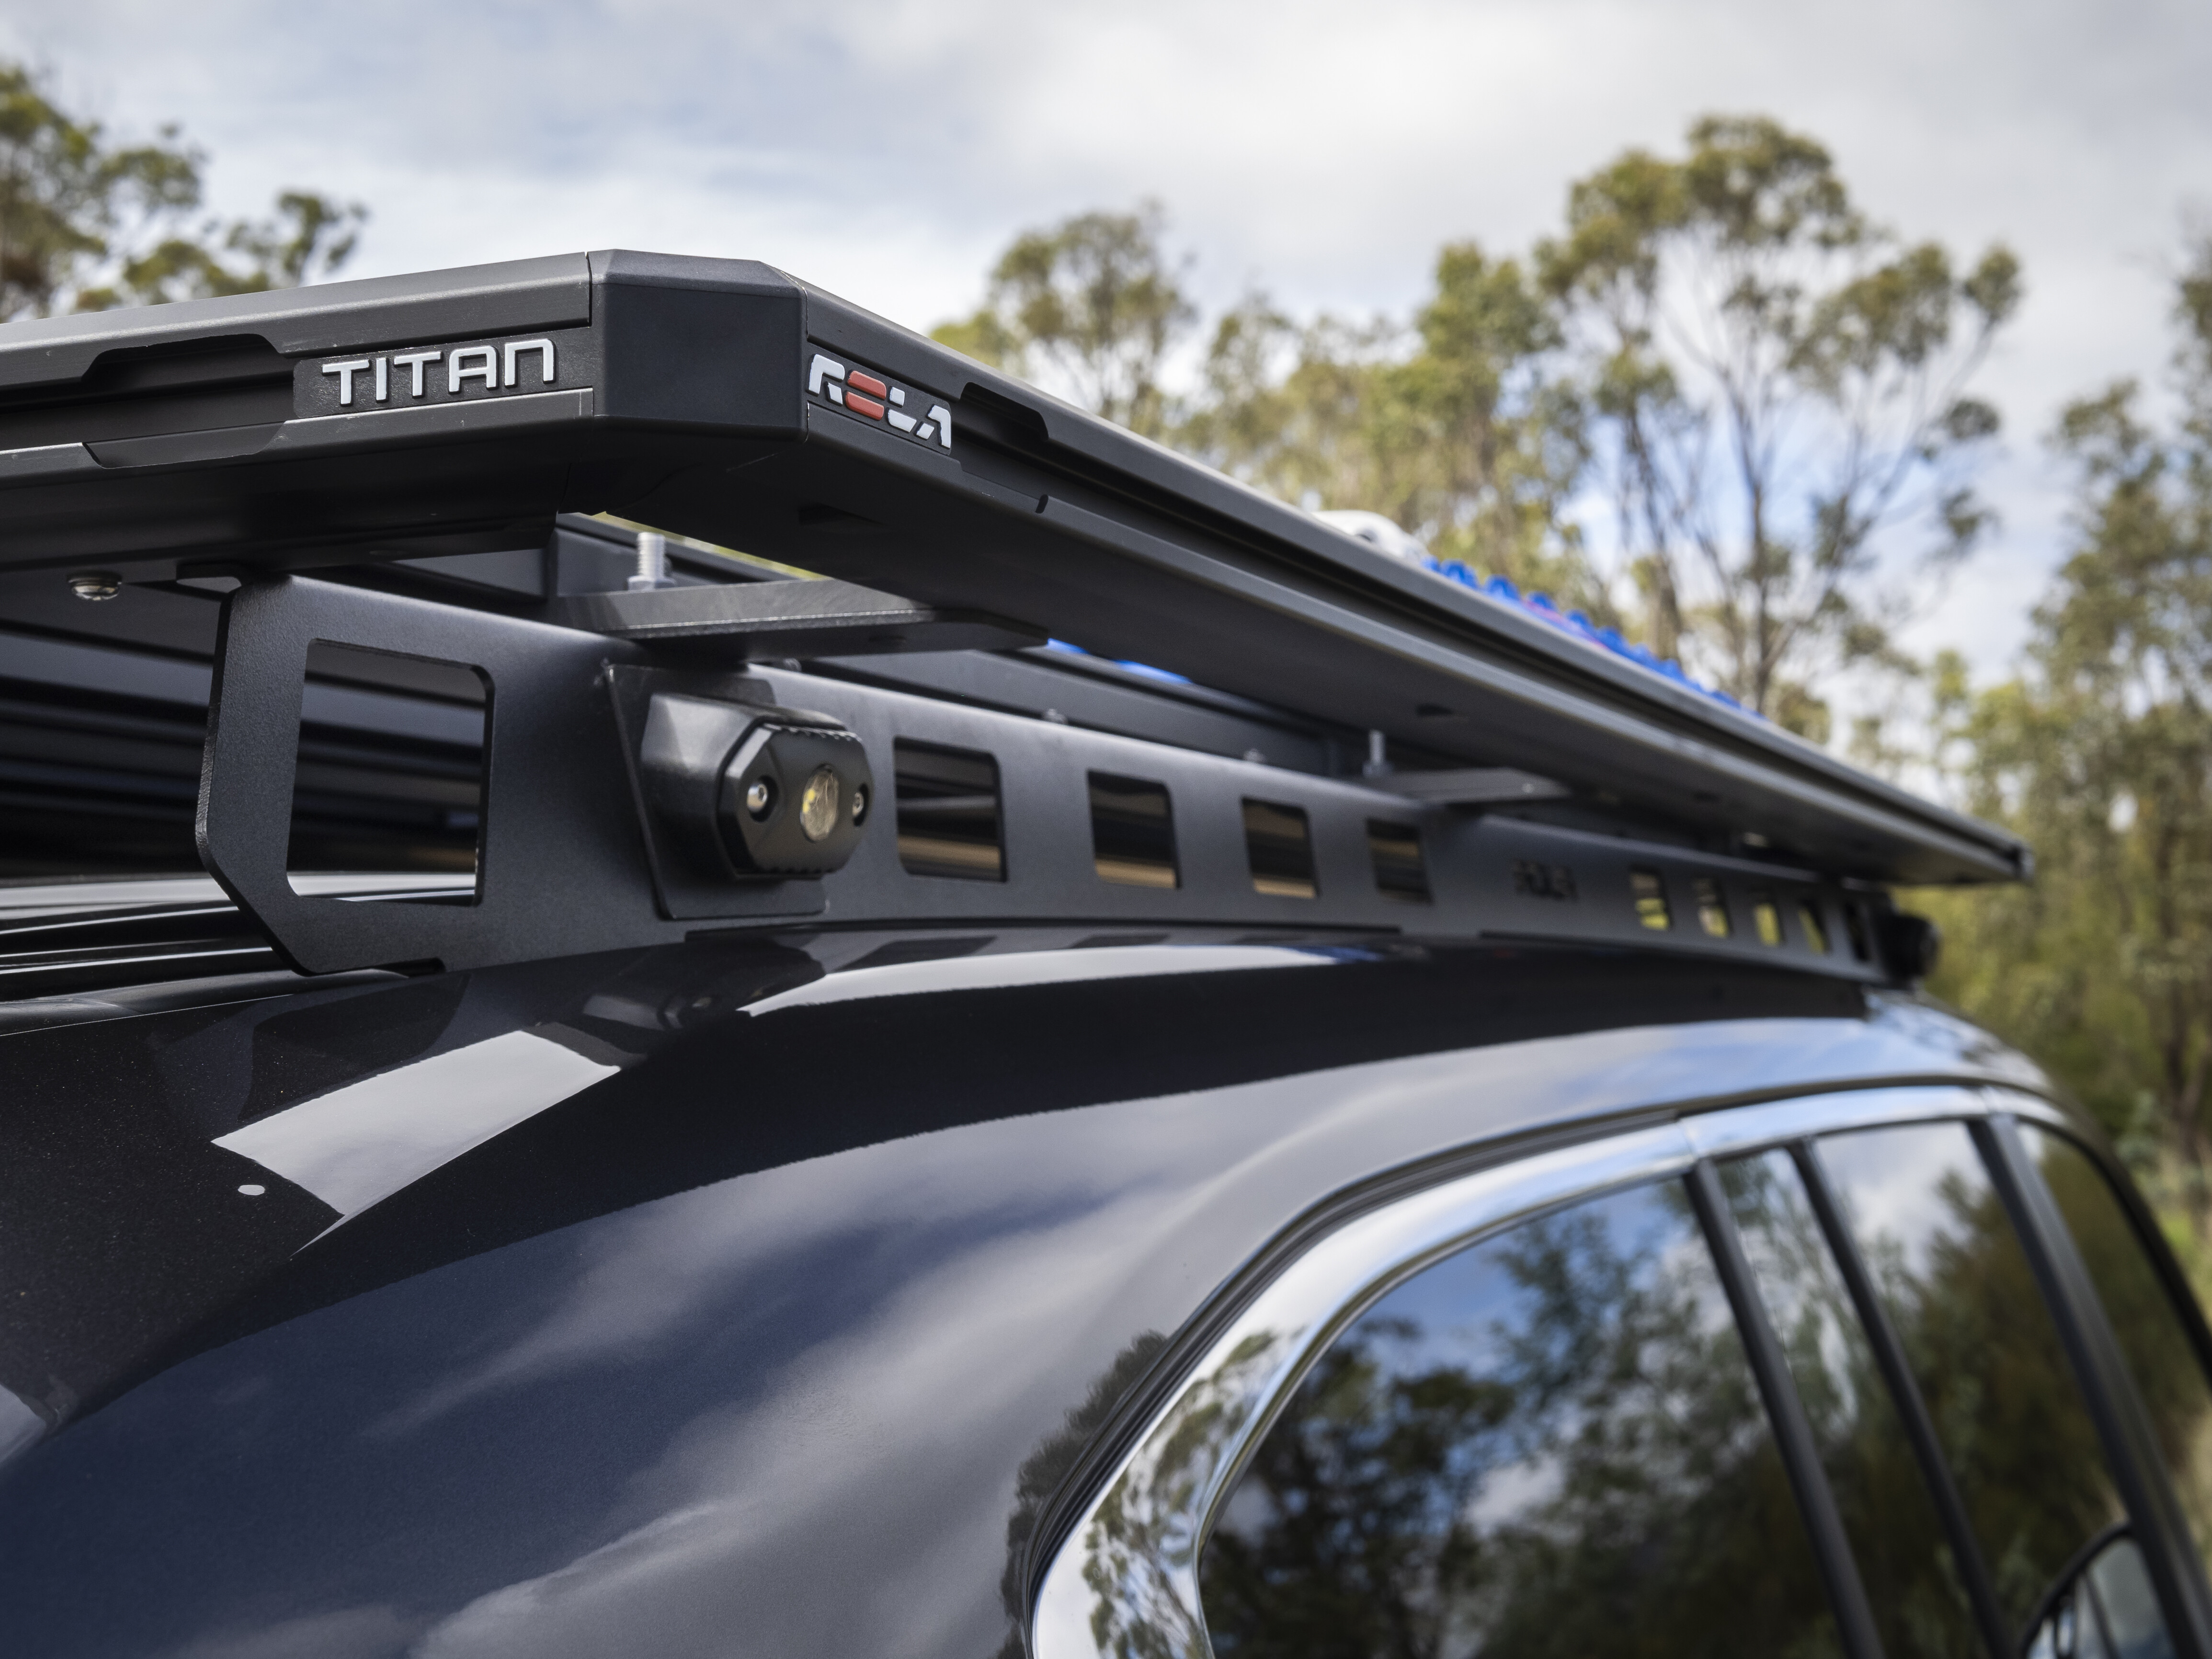
The Ridge Mount is constructed from stainless steel for strength, with the Rola Titan platform bolted to it being made from lighter-weight alloy, providing an excellent compromise between weight and strength.
A solar panel, recovery tracks and an Eezi-Awn 270-degree awning live up there full-time.
Projecta power
When it comes to 12V goodies, this 300 Series has been decked out with a variety of gear from Projecta. Starting with a Projecta pure sine wave 1000W inverter, to keep things powered when on the road, and run any household items that need 240V to function.
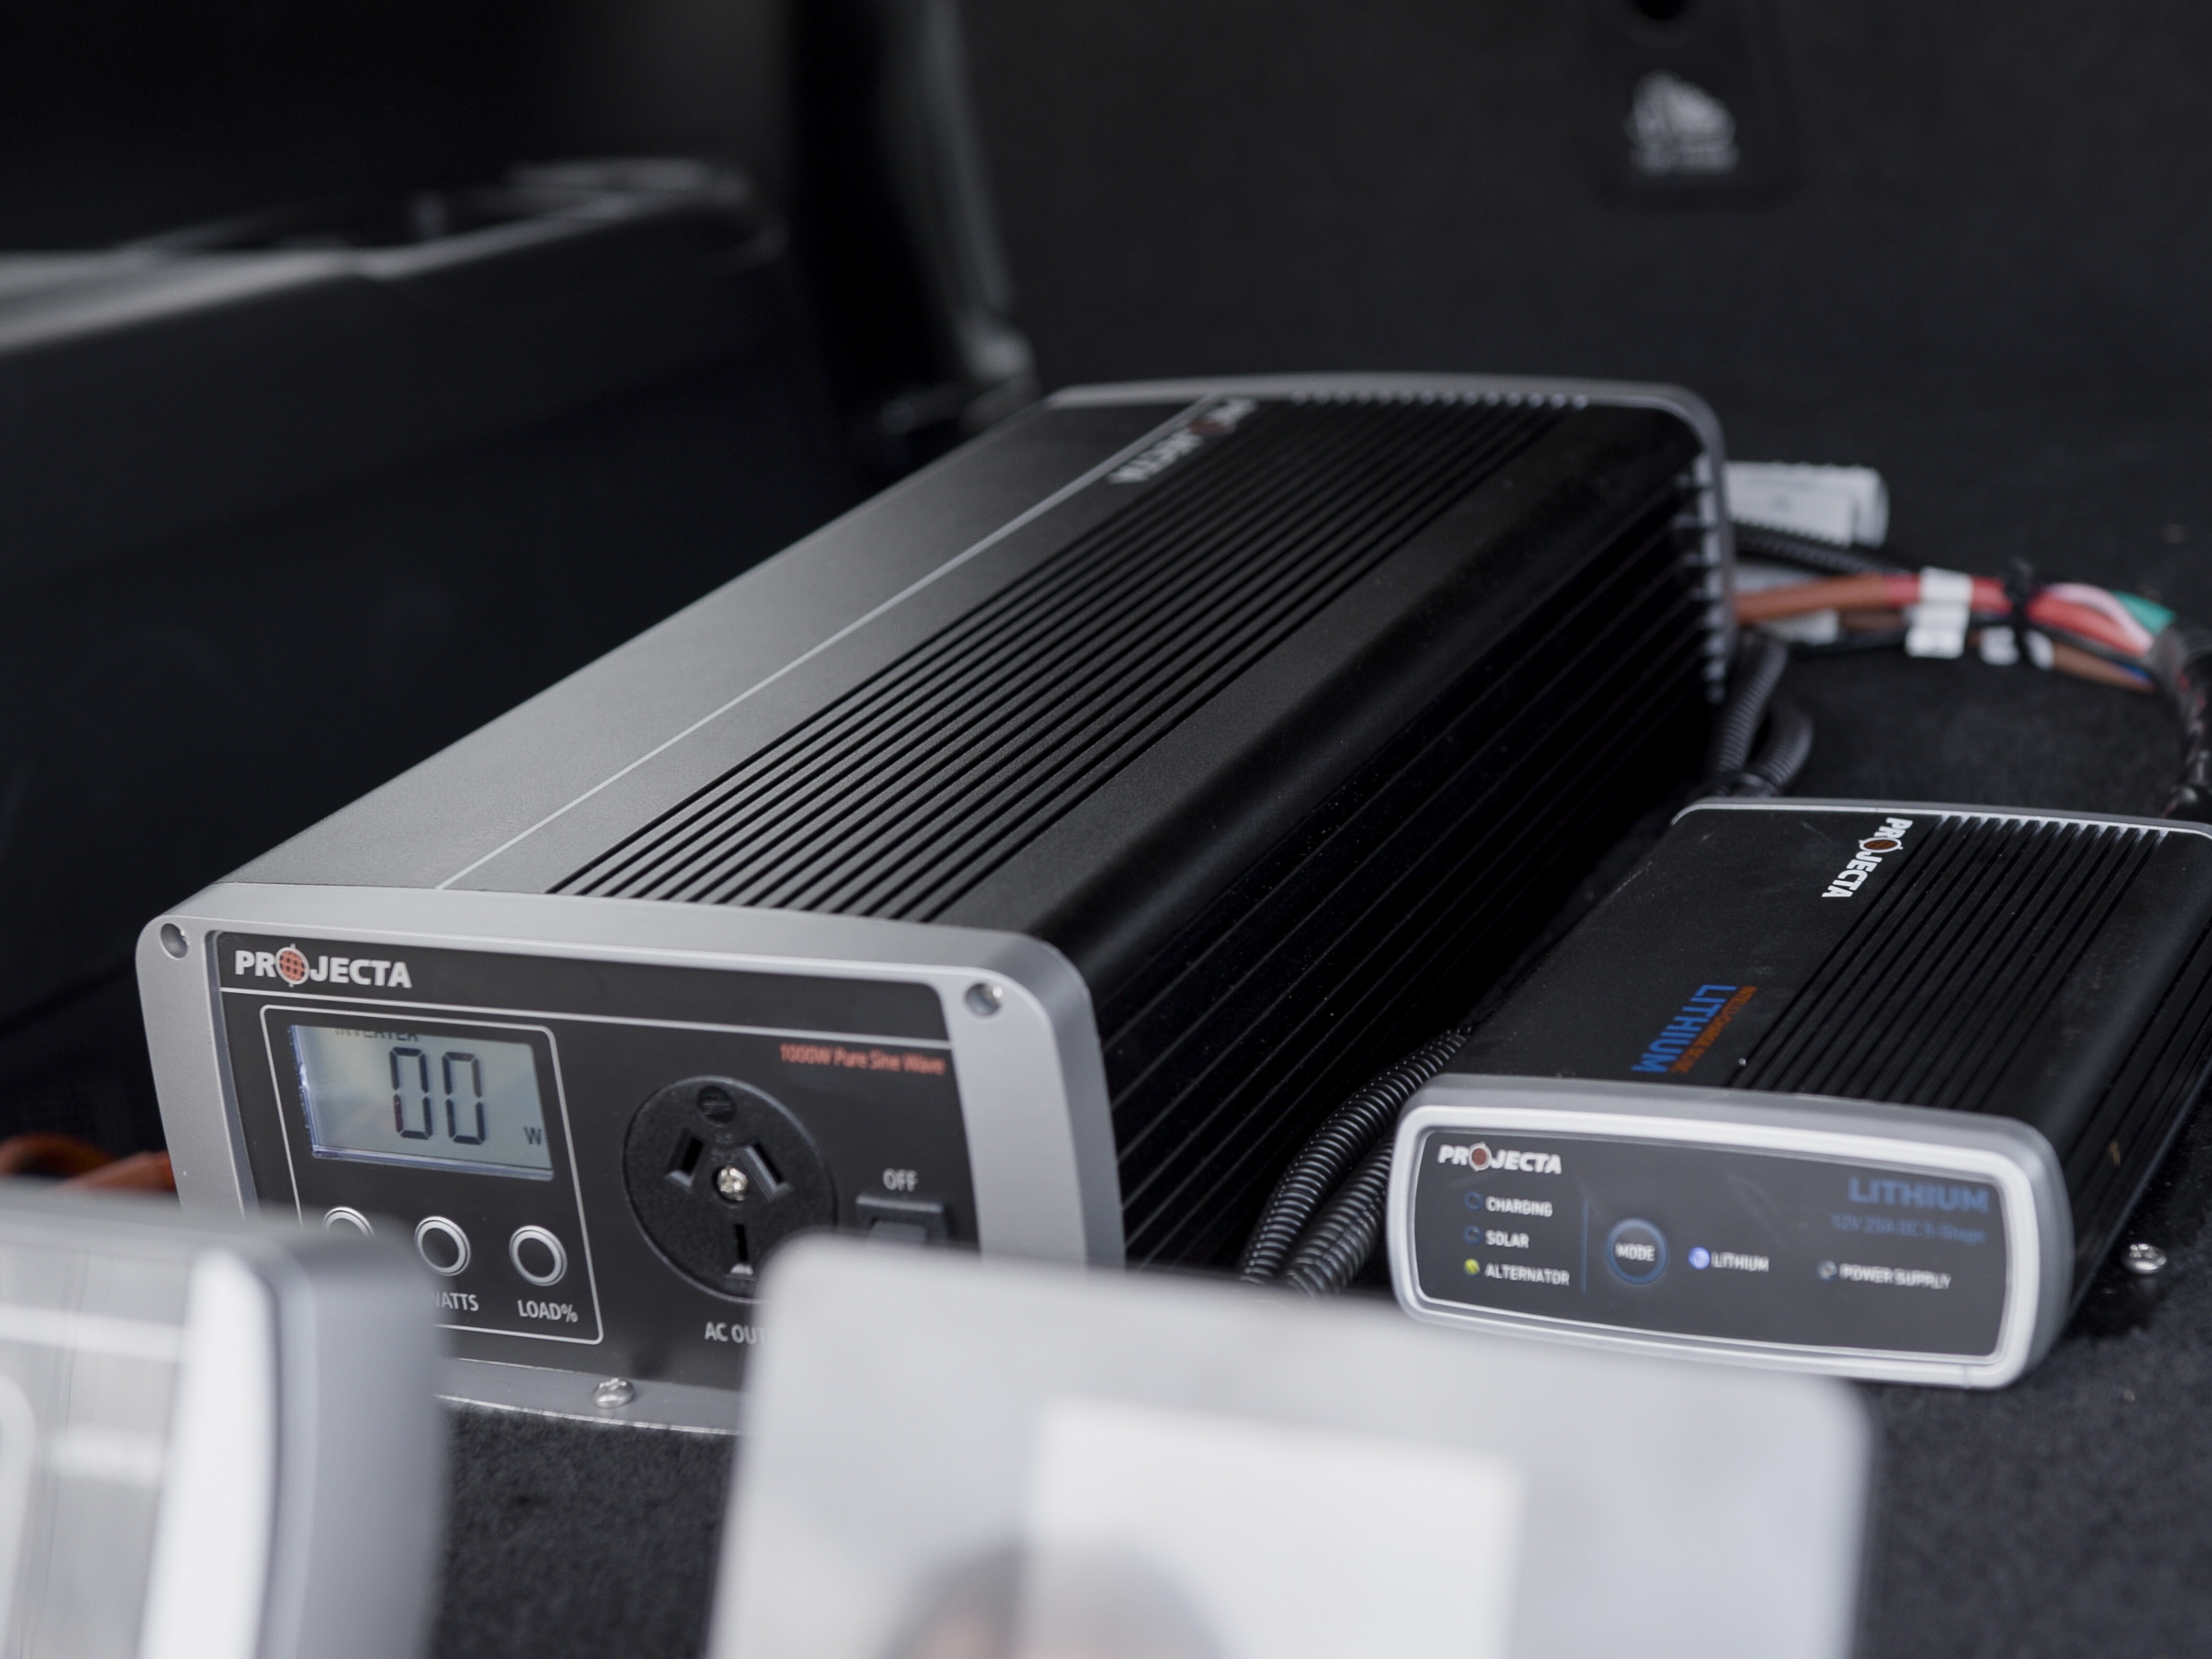
Keeping charge to any auxiliary batteries fitted is a Projecta IDC25 DCDC battery charger that is lithium-compatible. We’ve said it before, but you’d be mad to not run lithium in a new 4WD if you are setting it up from scratch. The benefits far outweigh the negatives, and it will genuinely save you money in the long-term.
Rear-end protection
A Brown Davis replacement 150L long-range fuel tank has been fitted to extend fuel range, which required the spare wheel to be relocated. This provided the perfect opportunity to upgrade the factory rear bar to a high-quality Kaymar unit, complete with swing-away tyre carrier and a twin jerry can holder. This also offers far more protection to the rear-end compared to the vulnerable stock plastic rear bumper.
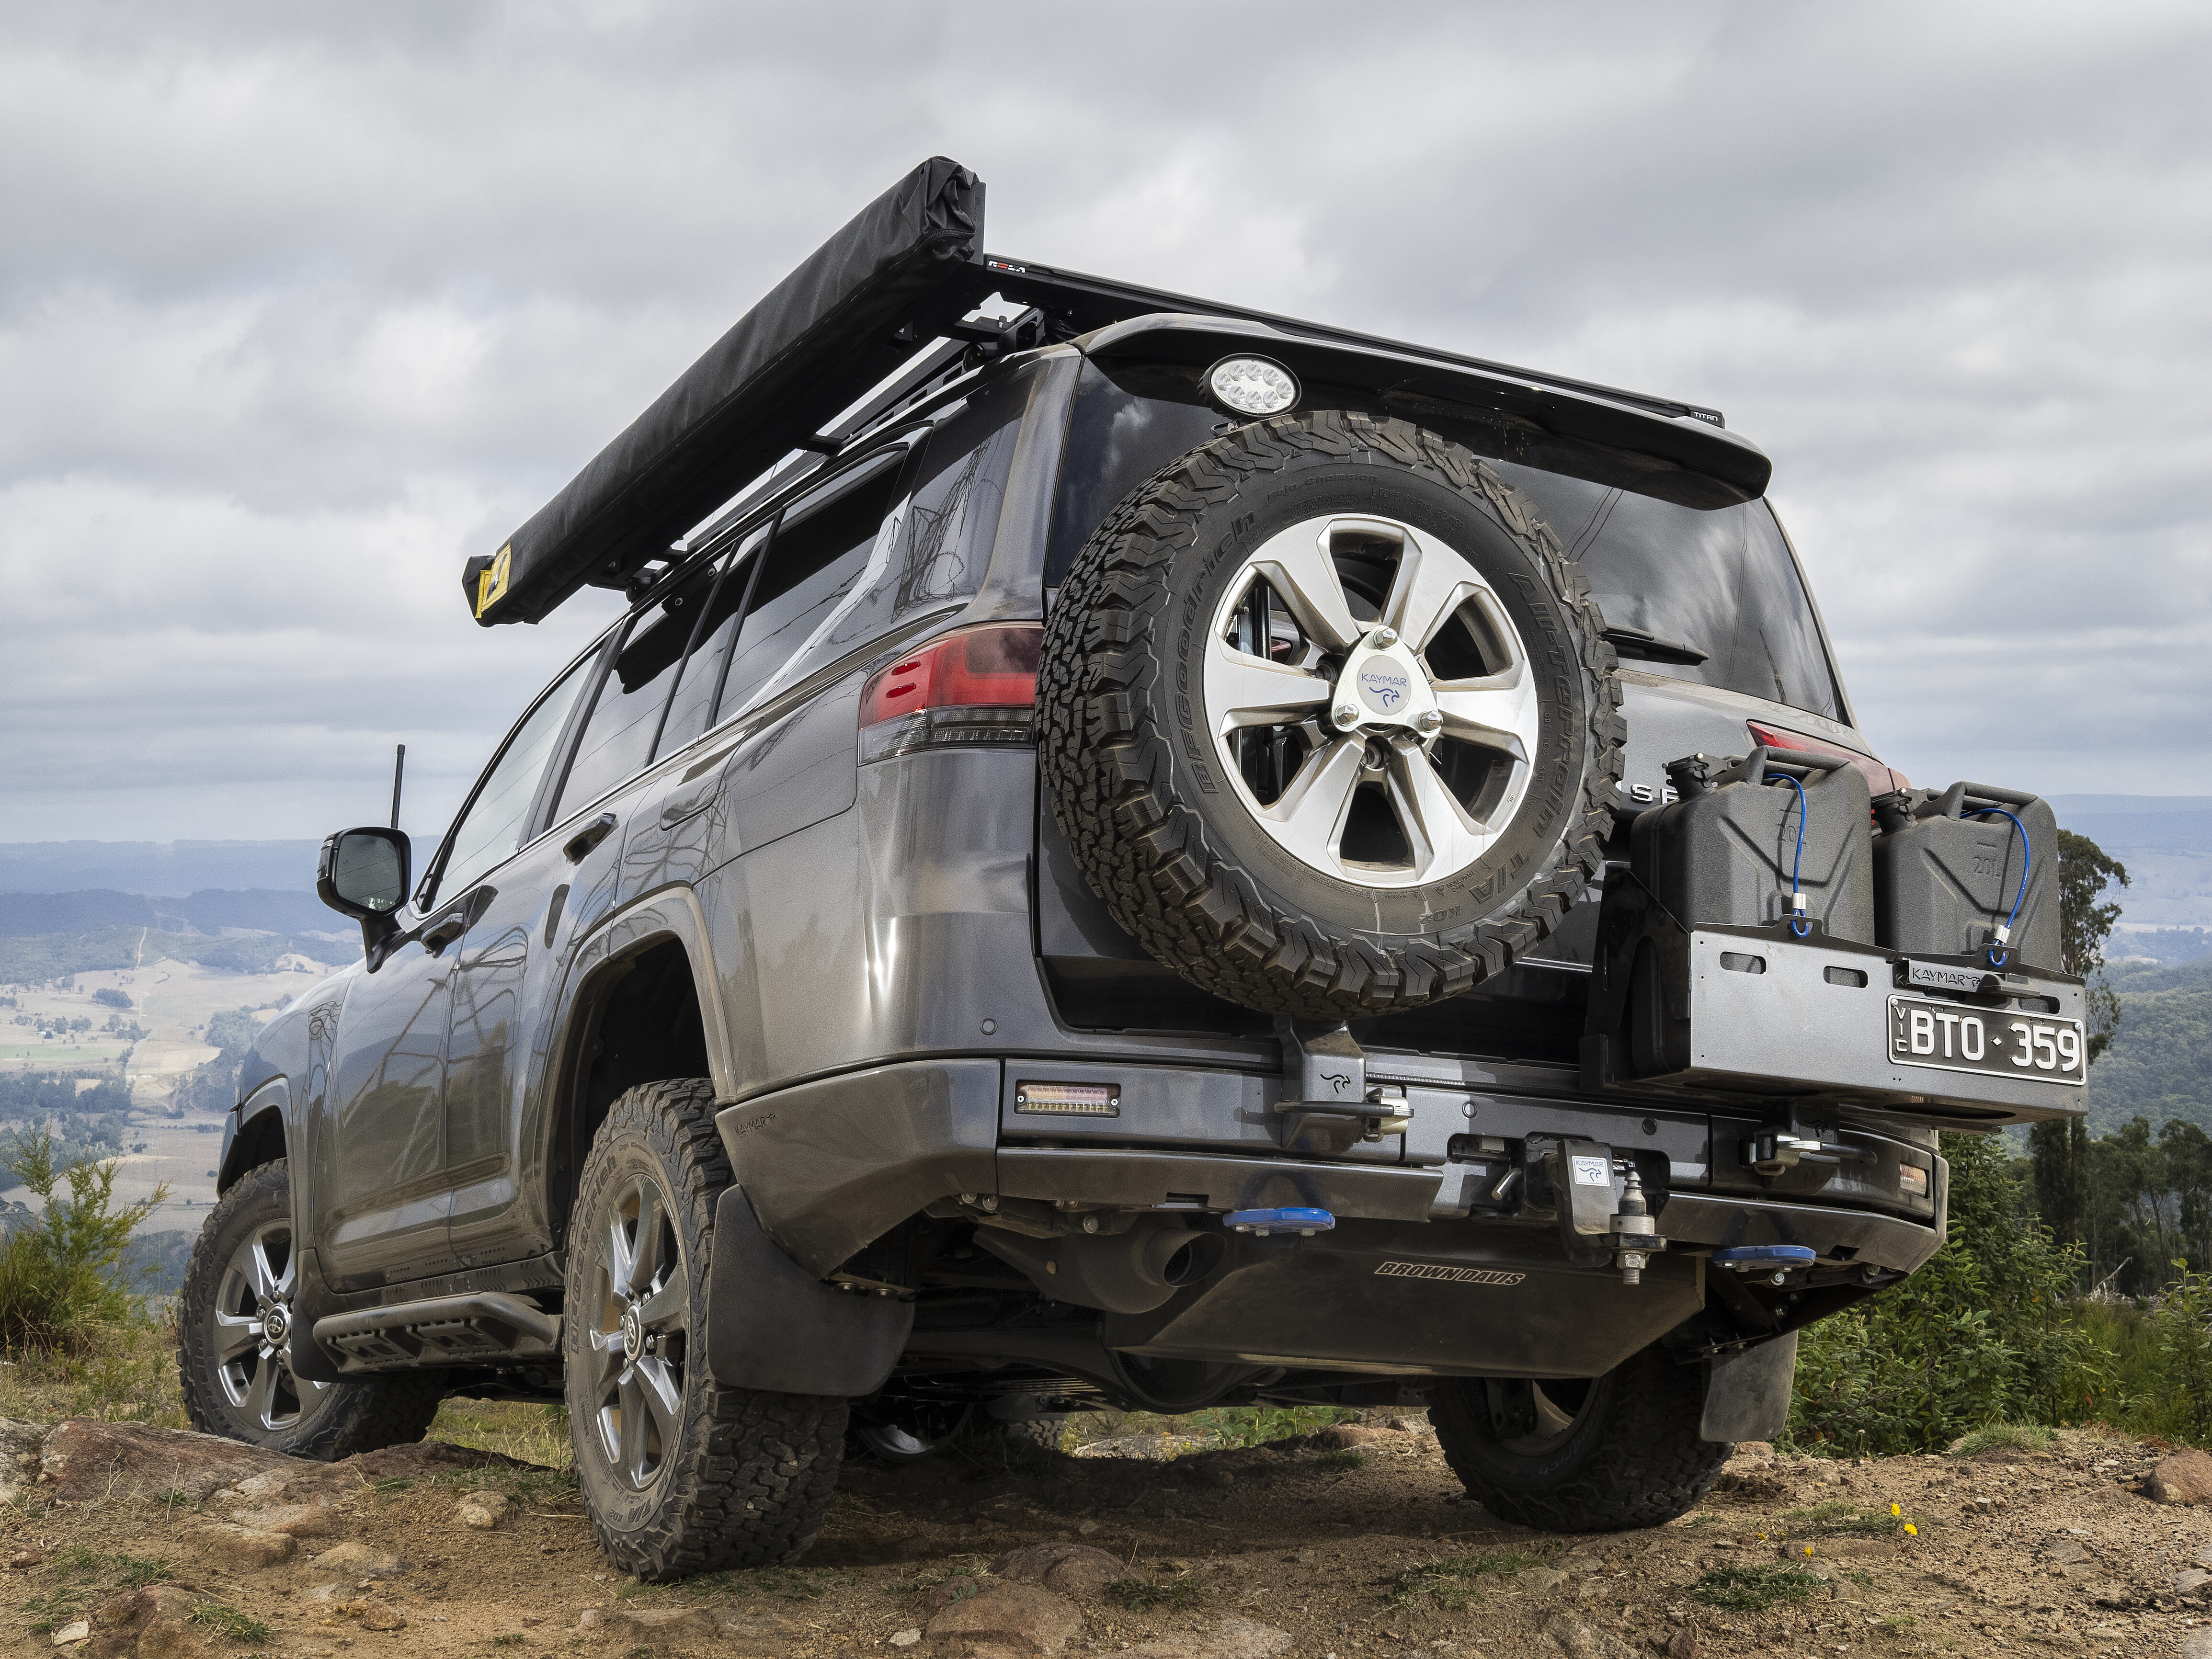
The Kaymar bar has twin swing-aways – one for a spare tyre and another for Jerry cans, and these have now been made easier to remove when not in use, like when you are at home in the city. Of course you can run dual spare wheels and the regular range of Kaymar accessories to fit the bars.
This 300 Series will be doing the rounds at 4WD shows around the country, so be sure to check it out in the flesh to see just what can be done to a 300 Series LandCruiser.
It is early days, but we are super excited to see this platform develop and grow to better suit Australian conditions and the Australian off-road market. A job well done so far.
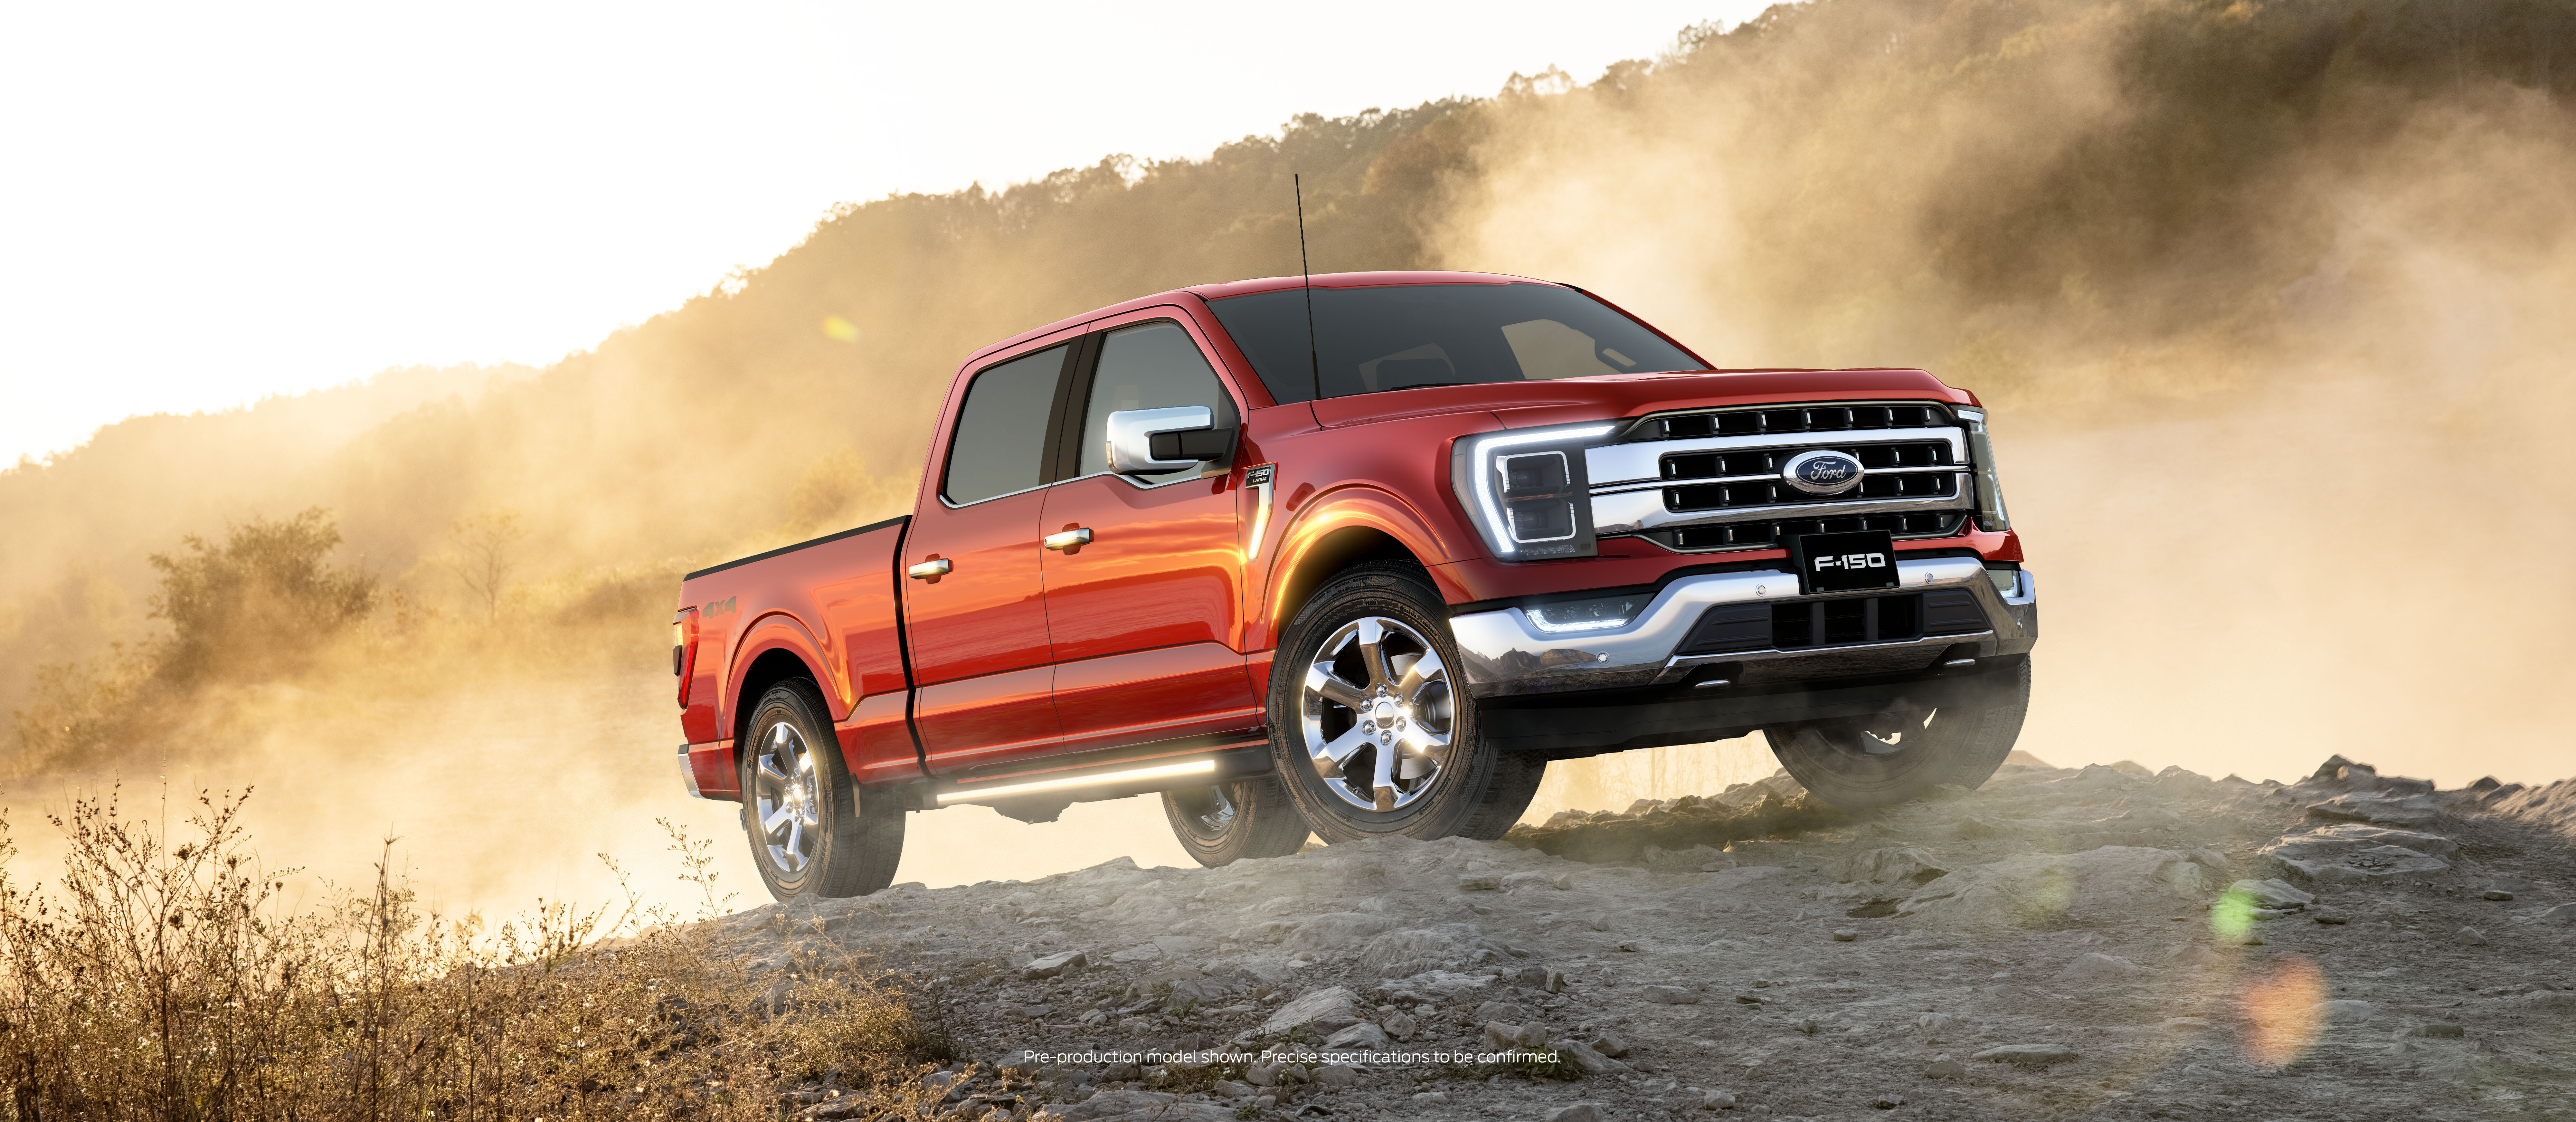
Ram and Chevrolet will have a new competitor in the full-size truck space, with Ford Australia confirming we will receive the 14th-generation F-150 XLT and Lariat variants in Crew Cab trim by mid-2023.
The vehicles will be flown in and remanufactured from left-hand to right-hand drive by engineering specialist RMA Automotive. The remanufacturing facility will be based in Mickelham, Victoria, close to Ford’s head office in Campbellfield, and Ford Australia says three quarters of parts will be remanufactured for local ADR and safety standards.It’s a big move by the Blue Oval, considering its all-new, highly anticipated Ford Ranger is set to launch later in 2022. By bringing both vehicles to Australia, Ford will be the first OEM to bring mid-size and full-size utes to the Aussie market – but is there room in the segment for both?
Upgrade your Ranger
President and CEO for Ford Australia and New Zealand, Andrew Birkic, believes there is.
“We’re pretty confident both vehicles complement each other. We’re confident with Ranger we’ve got a broad customer base with fleet and government and small business, we’re confident in our aspirations and volumes.“F-150 buyers could well be more private, but could be fleet applications. There’s a lot of recreational usage in this space.”The appetite for full-size trucks in Australia is clear, with Birkic adding that sales of the big utes have tripled in recent years.
“We just knew we had to find a way to bring it back to Australia,” he said.
“With the introduction of F-150, alongside our Ranger line-up, Ford’s comprehensive pick-up truck range will offer a vehicle for every situation.”
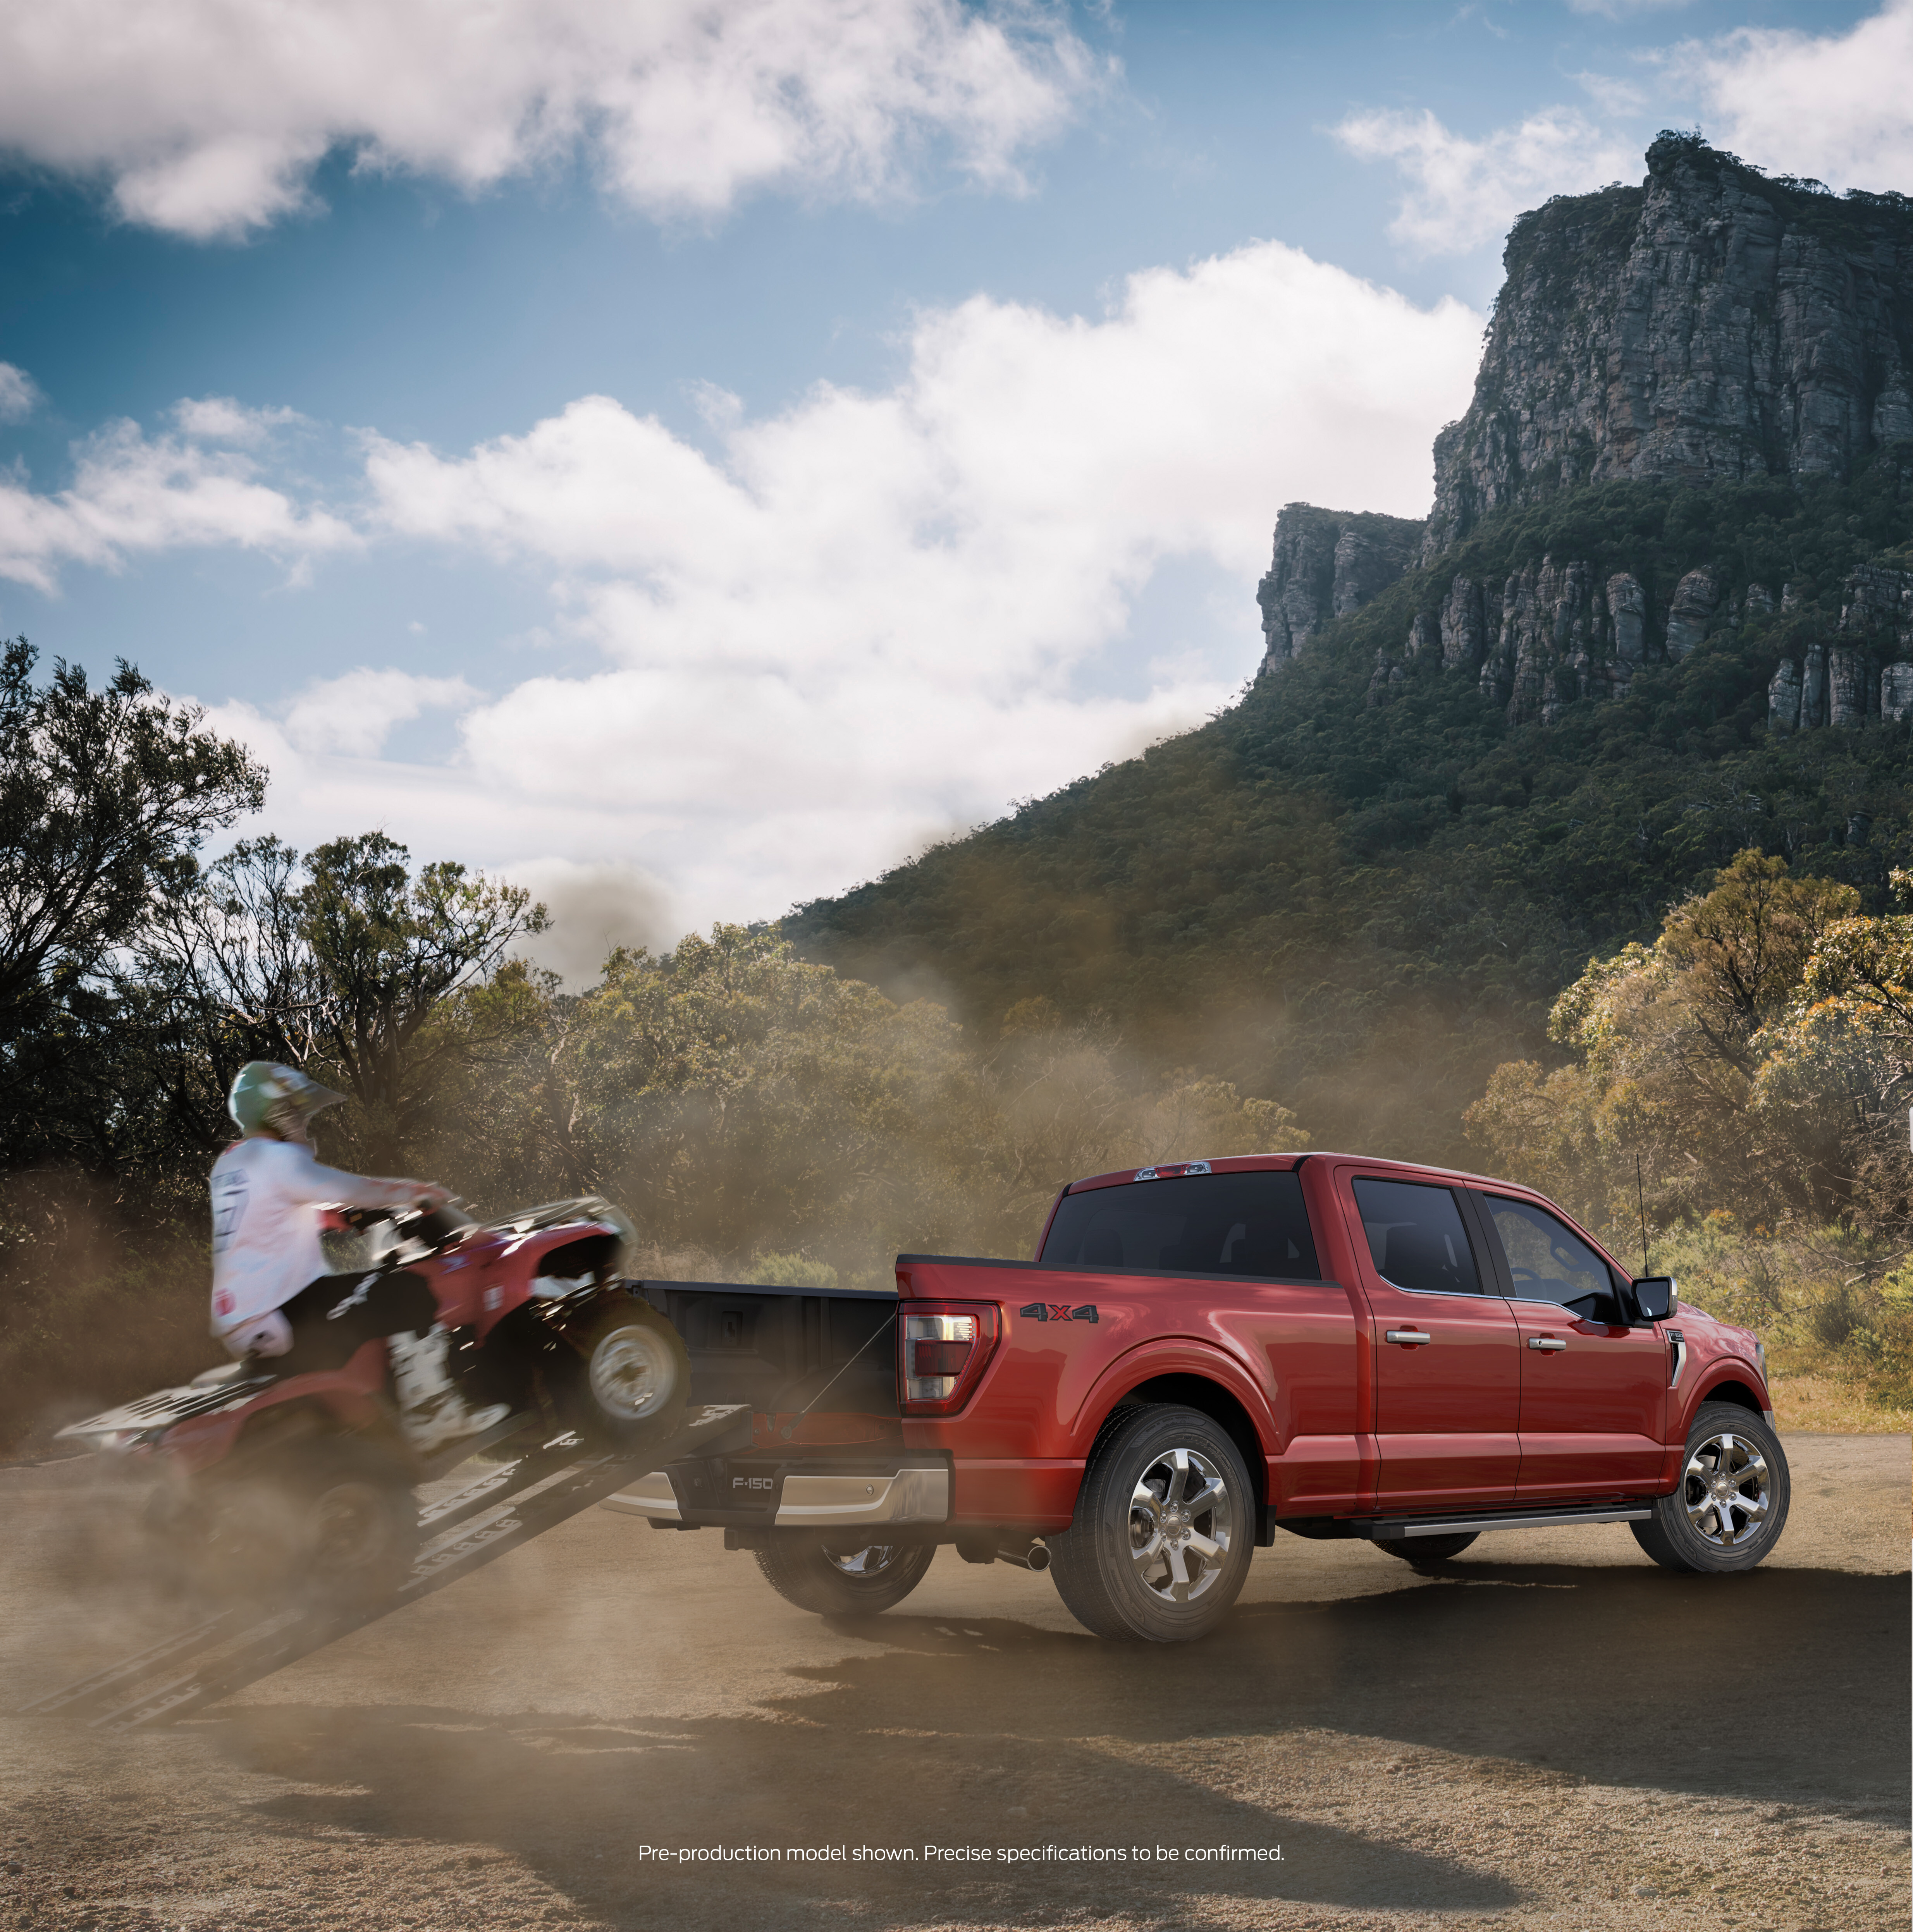
Natalie Manariti, Ford Australia’s Global Trucks Enterprise Product Line Manager, added that research indicates there is a customer base for both.“That customer looking for the full-sized truck is really looking for the ultimate recreational tool, they’ve got big toys they want to tow. Today it will be the 20ft trailer, tomorrow it will be the cabin cruiser with the quad bikes, they’re looking for that unrestricted capability on any day they choose,” she said.
Engines
Aussie-delivered F-150s are to be powered exclusively by the 3.5-litre EcoBoost V6, an engine from the same family as the 3.0-litre EcoBoost that powers the incoming Ranger Raptor. The EcoBoost V6 delivers 298kW and 678Nm and is paired to a 10-speed automatic transmission.“When we began looking at F-150 for an Australian return, there was one engine that stood out for us – the 3.5L EcoBoost – which gives F-150 immense power and torque, more than many of its V8 competitors,” said Natalie Manariti.
Four engines will be available with the 2023 Ford Ranger line-up, with the aforementioned 292kW/583Nm 3.0-litre EcoBoost petrol V6 exclusive to the Raptor.The remaining engines to power the Ranger include Ford’s 2.0-litre single-turbo four-cylinder diesel (125kW/405Nm), which will power the entry-level XL; a bi-turbo diesel 2.0-litre (154kW/500Nm) variant, also available for XL models; and a new 3.0-litre V6 turbo-diesel (184kW/600Nm) for XLT, Sport and Wildtrak variants.
F-150 buyers in the US can choose from a 2.7-litre turbo-petrol V6, a 3.5-litre turbo-petrol V6 and a 5.0-litre petrol V8. Will we see these here in the future?“We’re absolutely open to other opportunities. We’ve gone for the most popular engine as our first rodeo. Let’s get it into the country and kick things off from there,” said Manariti.
Towing
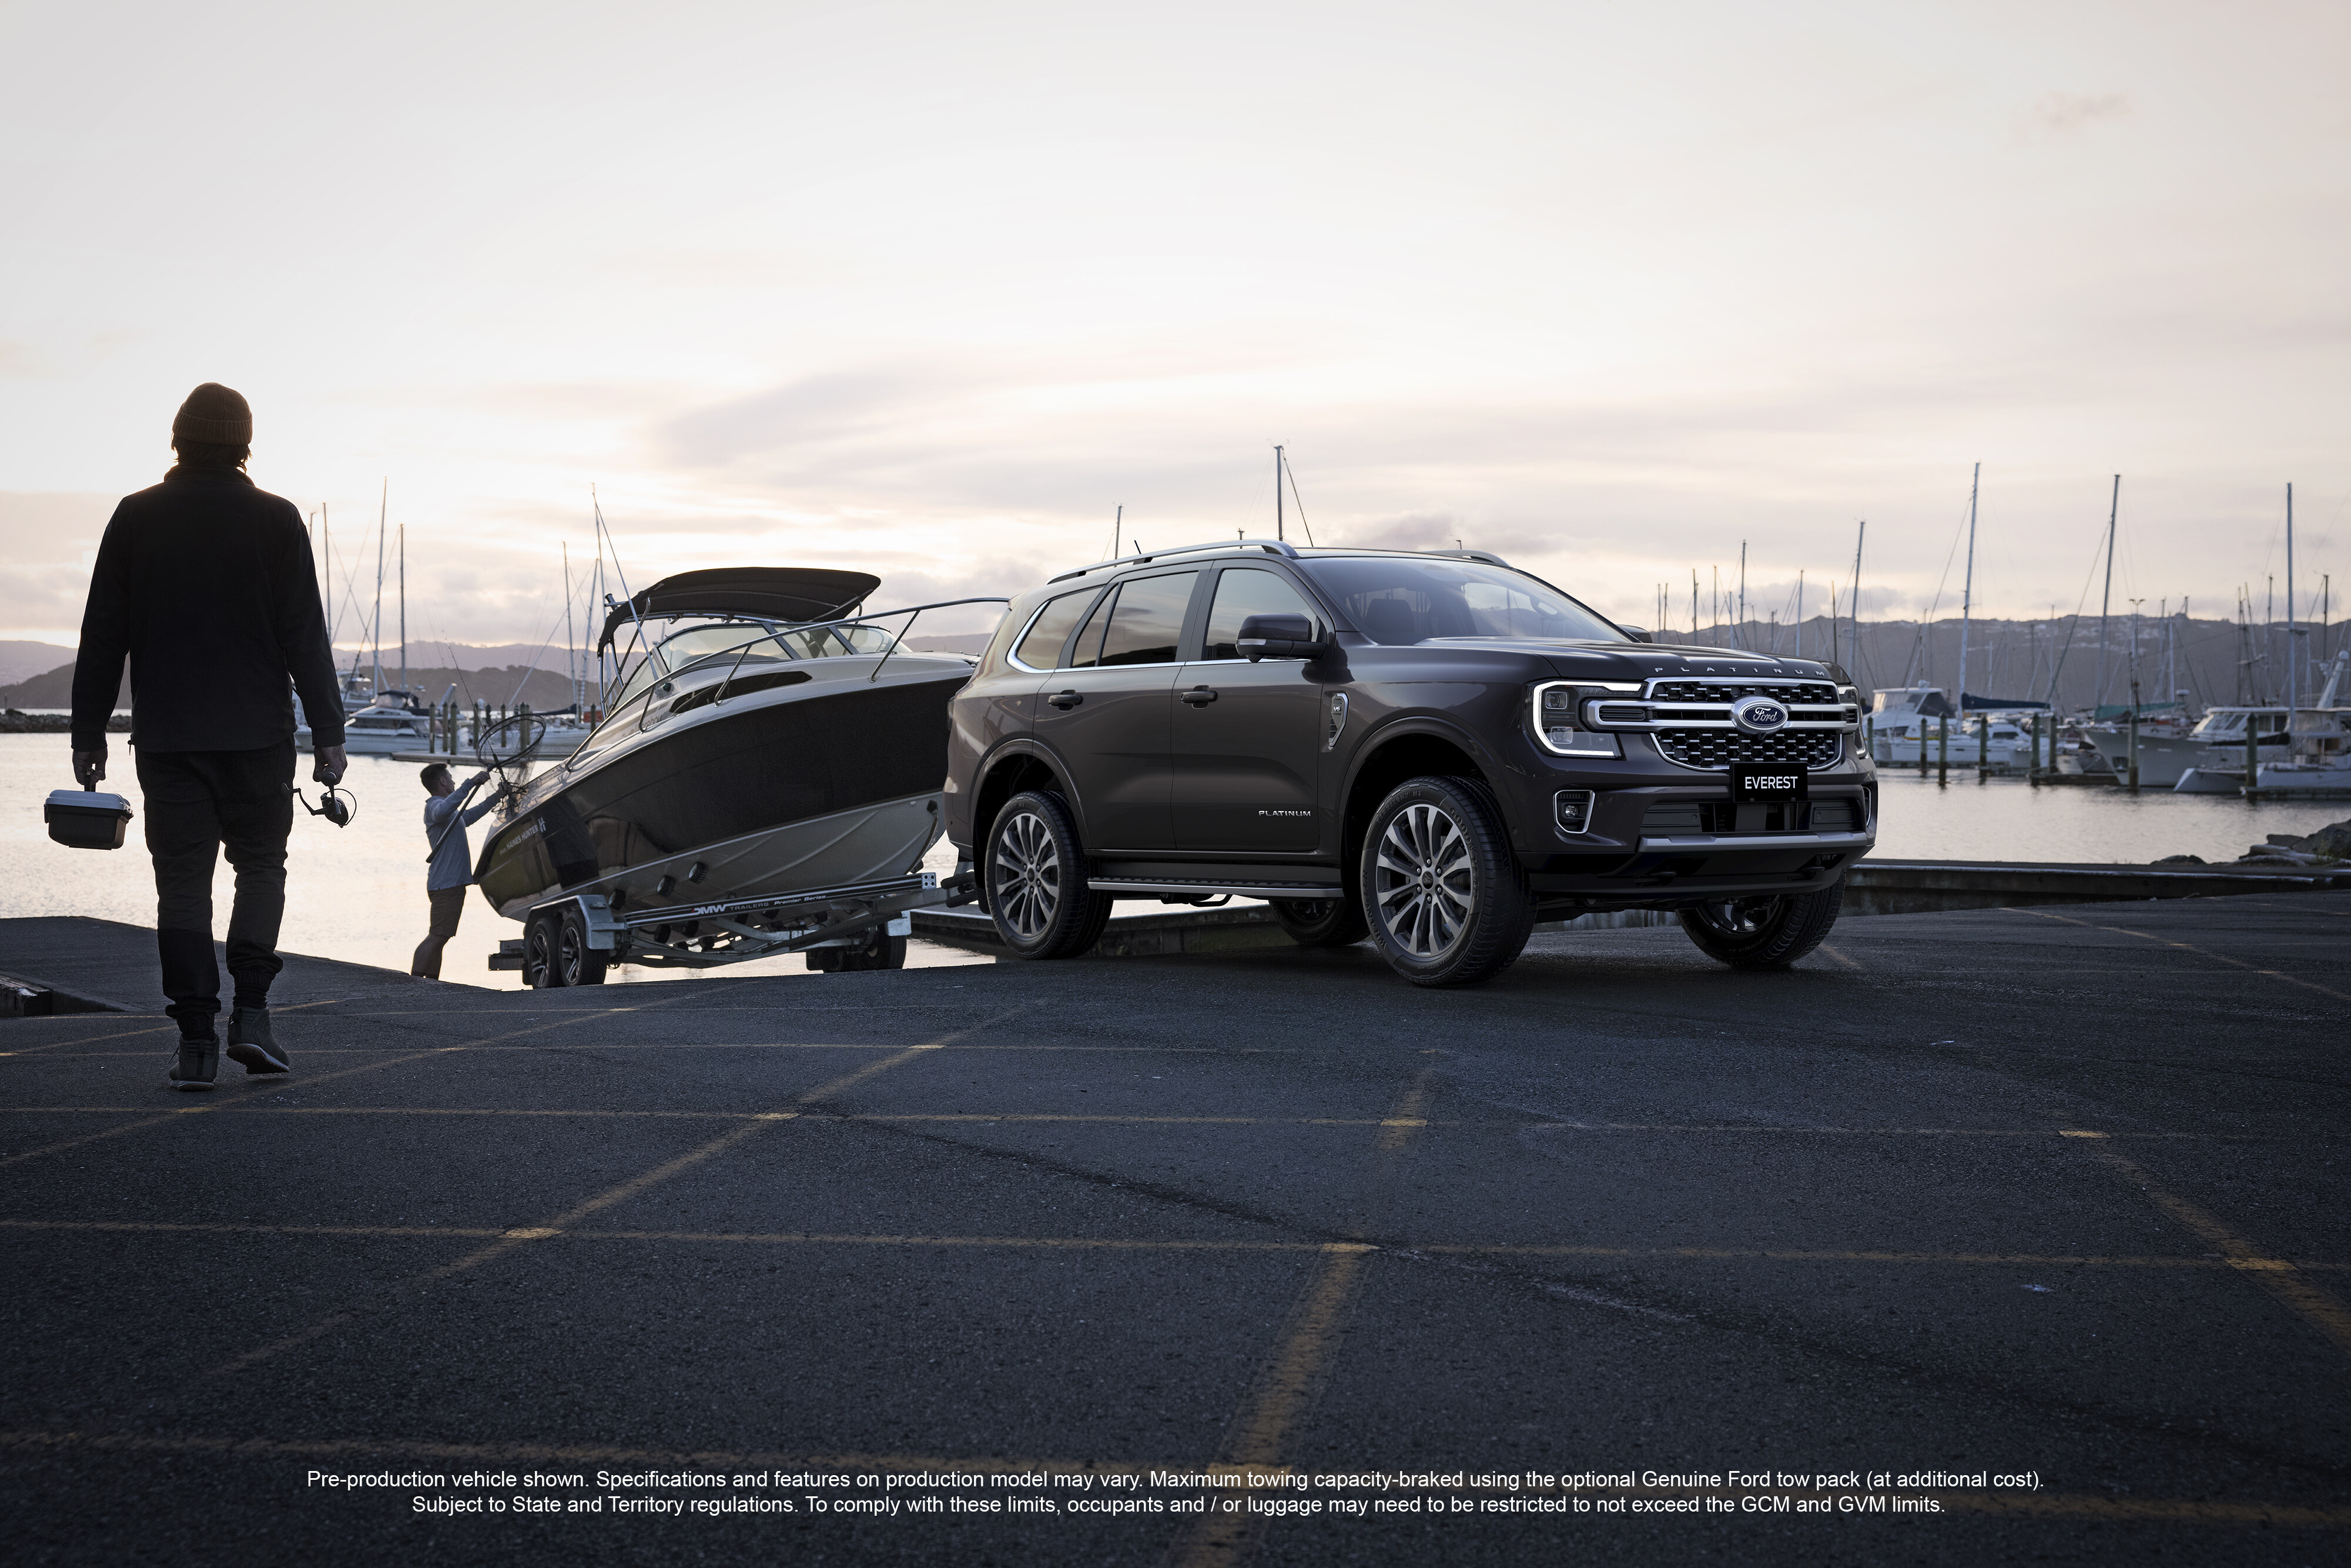
The EcoBoost V6 allows the F-150 to tow up to 4500 kilograms (maximum braked towing capacity when using the Genuine Ford tow pack).
The towing capacity of the 2023 Ford Ranger is capped at 3500kg – so if yachts and extravagant motorhomes need transporting, then the F-150 is the answer. The only exception is the Raptor variant, which can only tow 2500kg braked.
Measurements and payload
The 2023 Ford Ranger has a 50 millimetre longer wheelbase and 50mm wider track than the outgoing model, with the 1233-litre tub capable of swallowing a Euro pallet (1200x800mm) – the US-spec F-150 has a 1285mm tub space between the wheel arches.Payload for 4×4 Rangers varies, with the XL 2.0L bi-turbo single cab-chassis leading the pack with a payload capacity of 1327kg. Of the V6-powered models, the top-spec Wildtrak has the greatest payload capacity of 997kg. The Ranger Raptor is limited to just 753kg.

GCM is 6350kg across the entire Ranger 4×4 range, but drops to 5370kg for the Raptor.
Exact specs for Australian-delivered F-150 models are yet to be confirmed, but if we look at US-spec LHD vehicles, the F-150 has a payload capacity of up to 1508kg and the Lariat SuperCrew measures at 6185mm (length), 2029mm (width; without mirrors) and 1971mm (height).For comparison’s sake, the 2021 Ranger measures 5446mm (length), 1977mm (width) and 1852mm (height). Stay tuned for further details when they’re announced.
Further variants
How well the F-150 performs on the Australian sales charts will be an important factor in dictating whether other F-150 variants – the zero-emissions Lightning as well as the performance-focused Raptor – are brought here.“Success will be popular when determining if going ahead with Lightning or Raptor. Priority is to get a new Ranger and Everest out mid-year,” said Andrew Birkic.
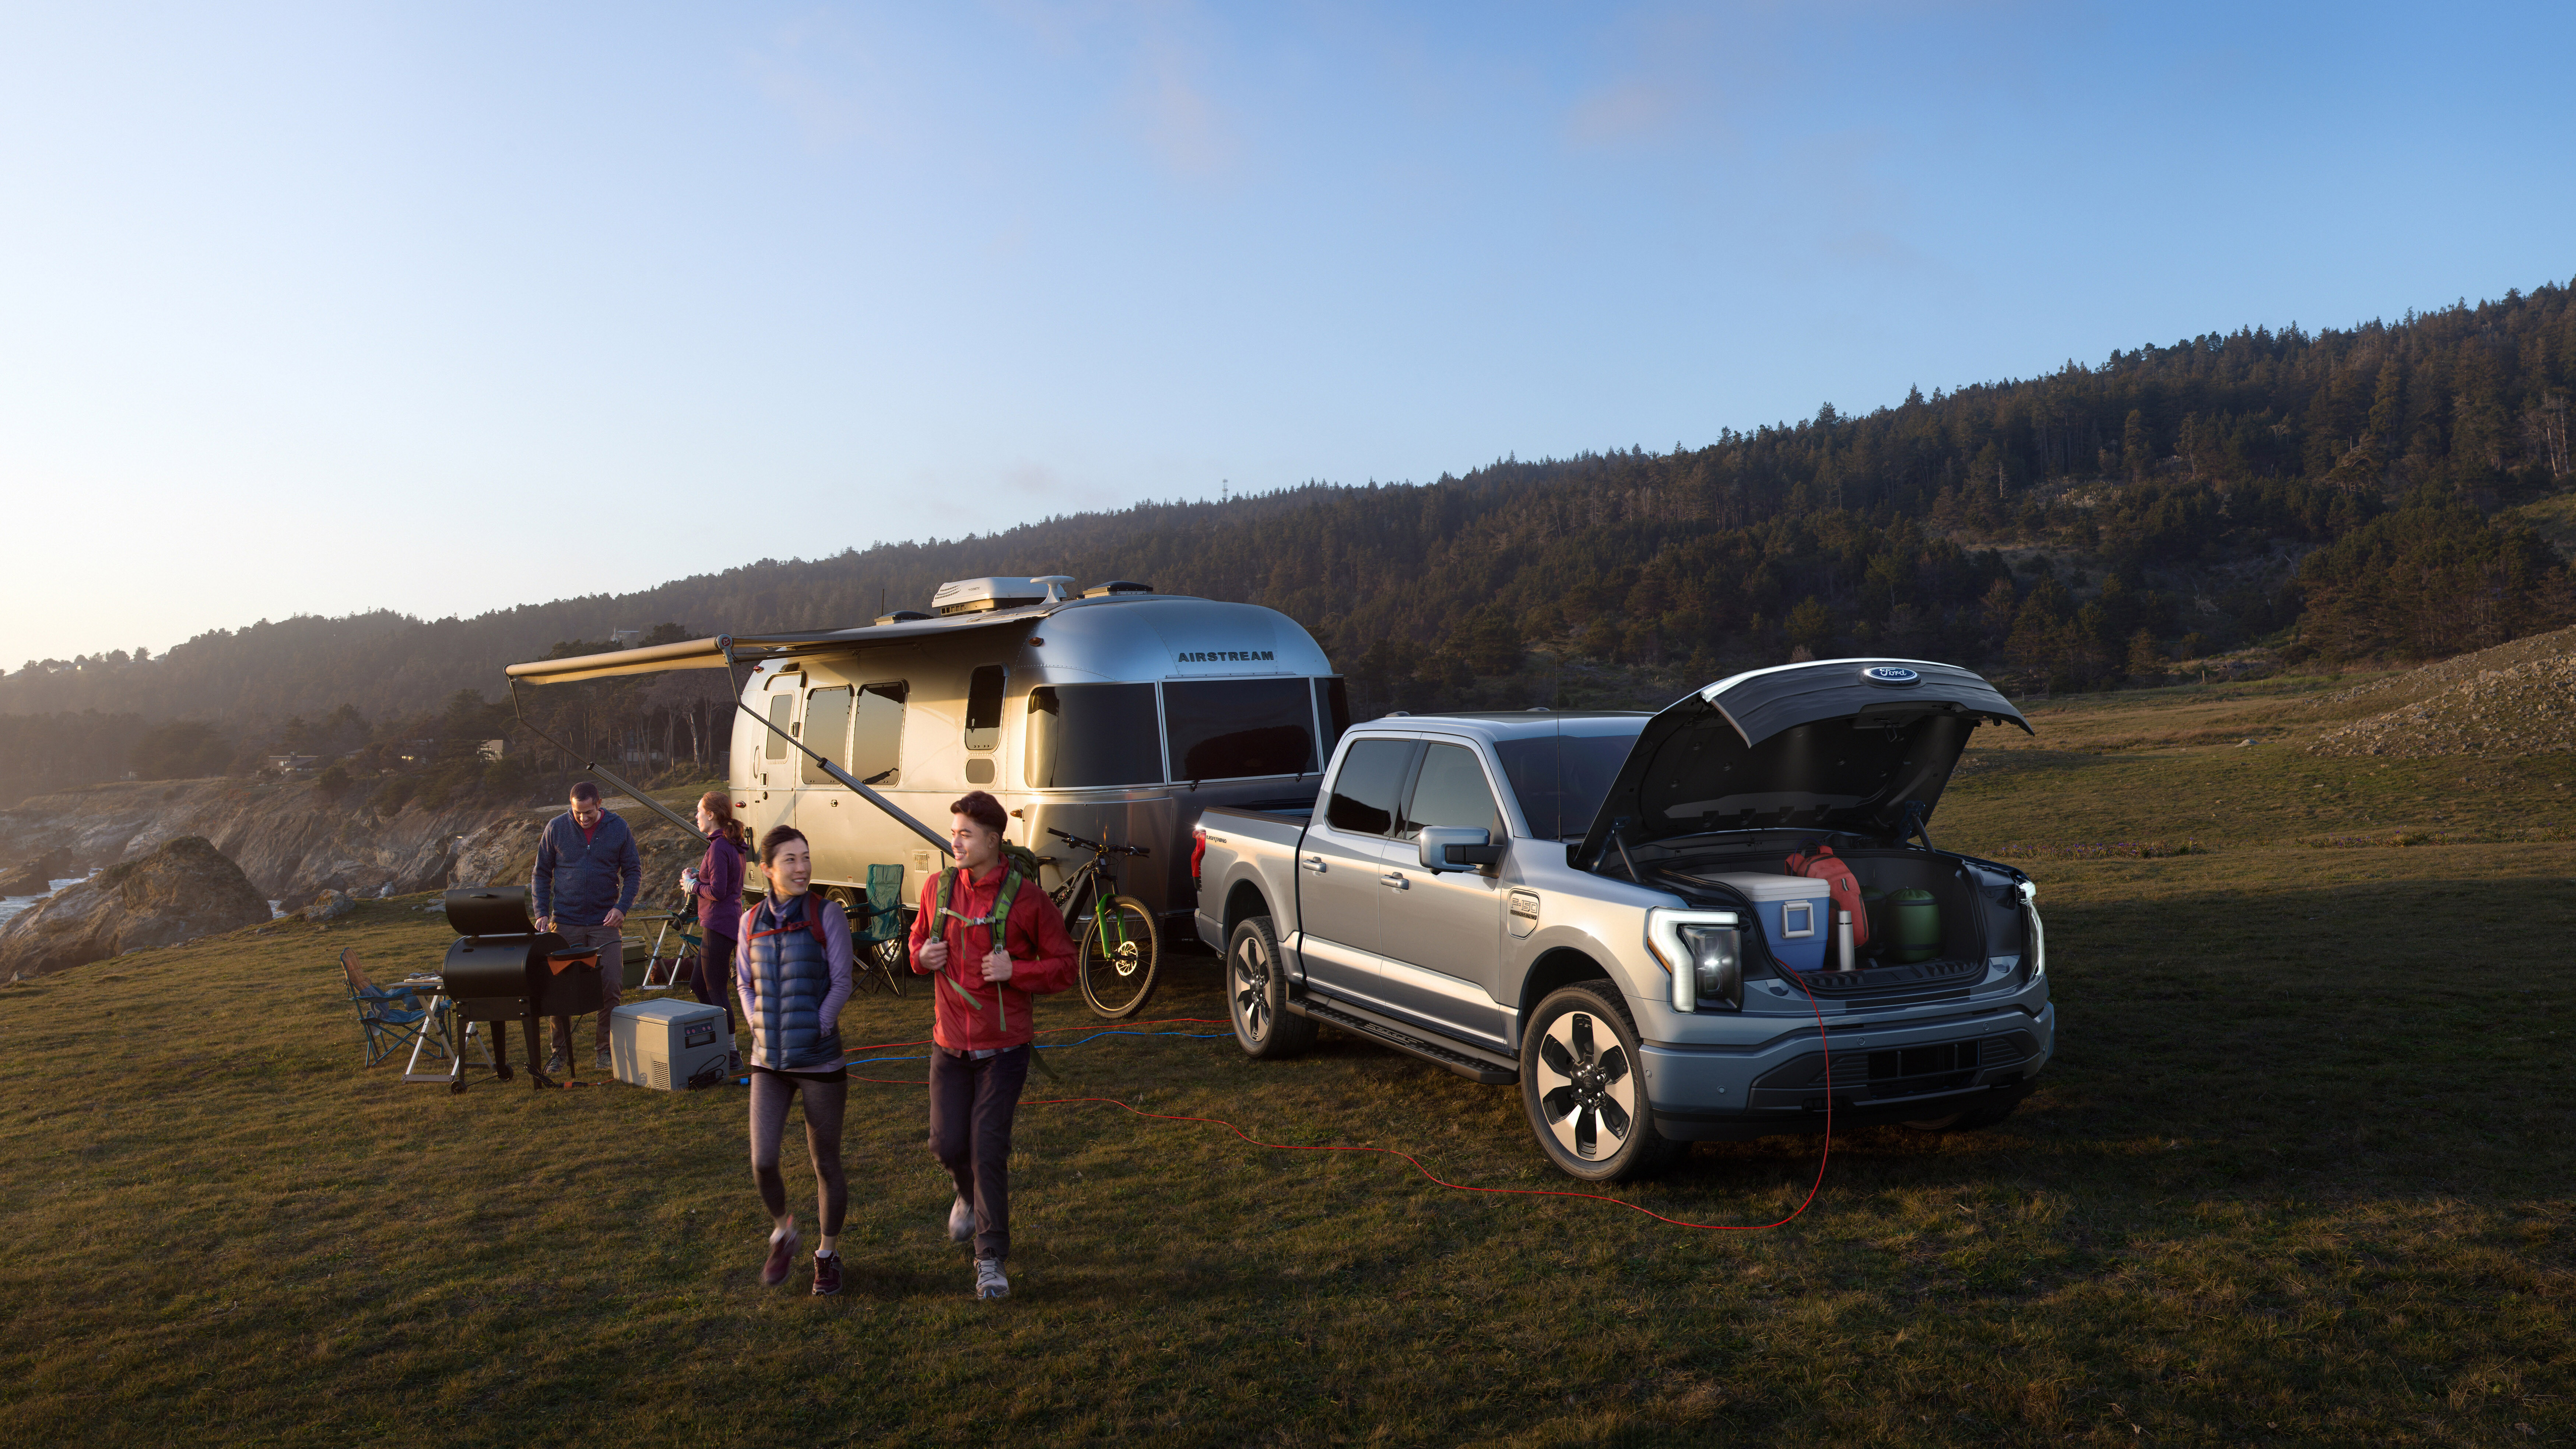
“Let’s get F-150 here, let’s get it down the line, let’s spend the time on the remanufacture, get it to our customers. Then we can look at the next step, there’s no hard and fast timing.”
Australian pricing for the F-150 is yet to be confirmed, but Ford Australia says it will be “priced favourably.”
4X4 Australia's project builds
Part 1: Simpson Desert
Our 3.0-litre Toyota Hilux just returned from a nine-day jaunt from Melbourne to the Simpson Desert and back again. It completed the trip without an issue – mind you, we did do a few things to make the job easier for the vehicle.We’d previously fitted an ARB Sahara bar, OME suspension system all ’round, Cooper ST Maxx tyres, a Safari snorkel, Rhino-Rack roof bars, an ARB ute liner and a Hayman Reese tow hitch.We had given them and the vehicle quite a workout in the Victorian High Country over the summer months, but now the Hilux was being geared up for its first outback trip. We took it to Outback 4WD in Bayswater, Victoria, for all the planned work.
We knew we were going to do a bit of night driving, so we fitted a set of Lightforce LED 215 driving lights. These performed faultlessly and made those long stints on outback roads safer, easier and more enjoyable. They illuminate the road and the peripheries well, while the mounting system and the direction of the lights didn’t need any adjustment for the entire trip.We also fitted an iDrive throttle tuner and couldn’t believe the difference it made to step-off and overtaking. We generally run ours at U4, which is around the mid-point for ‘Ultimate Performance’. We could get even snappier performance if we cranked the setting up to U8 or U9, but we don’t think we need it.With two people and all our gear, along with a motorbike and subsequent extra fuel, storage was going to be an issue. To make it possible to carry all the necessary equipment we added a large Rhino-Rack XTray to the set of Rhino-Rack bars we’d fitted. The XTray is of black powder-coated steel construction and weighs just 21kg – its carrying capacity of 75kg was pushed to the limit with a spare tyre and more.
A wind deflector helped to cut wind noise down, but we had extra gear sticking out which didn’t help too much – nor did it help fuel economy. We also fitted a small awning to the rack to give it a bit of protection from the elements.The OME suspension we’d fitted earlier wasn’t suitable for all of this added weight, so we went and fitted an OME extra leaf to the rear spring pack. This stopped the Hilux sagging in the bum when fully loaded and gave it a great ride over whoopty-doos and corrugations. There is a difference in ride quality when the vehicle is empty, but you can’t have everything.The Hilux returned a thirsty 20.0L/100km for the trip, which is a big and surprising jump from its normal range of 11.0-12.0L/100km. Mind you, we weren’t standing still on the highway or backroads and we did play on Big Red with a few mates for a few hours. Whatever the cause, we got to Mount Dare running on fumes – highlighting the paltry 76-litre fuel capacity of the OE fuel tank.
In all the HiLux has clocked up more than 32,000km since we bought it; 21,000km with the Cooper tyres fitted. The tyres are showing minimal wear and tear with no obvious chipping, which is pretty good considering we’ve ran up and down Billy Goat Bluff and a few other tough tracks in the mountains a few times.Tread depth on the rear tyres is down to 10.5mm (from a max of 12.5mm when new) so at that rate we’ve got another 50,000-60,000km left before we start looking for new rubber.
DATE ACQUIRED: Feb 2015 PRICE: $48,000 KM THIS MONTH: 5700km AVERAGE FUEL USE: 16.2L/100km
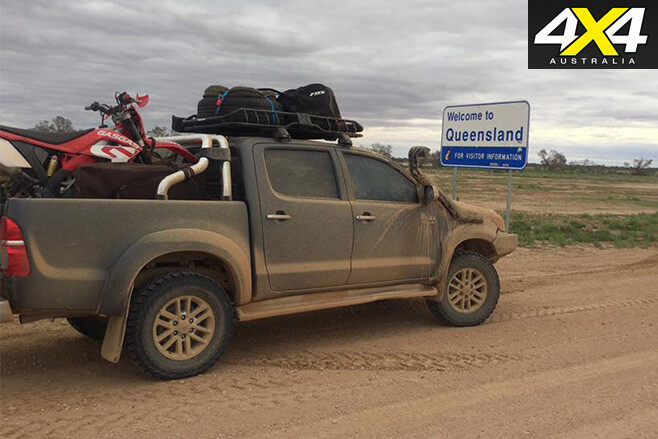
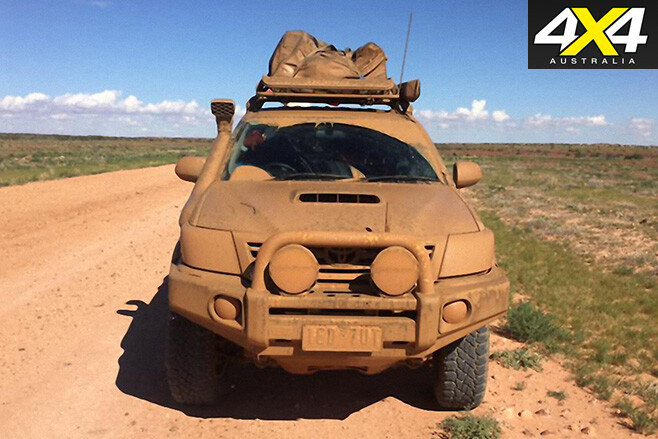
Part 2: Hard-knock life
Since the last report we’ve bashed the mighty Hilux over the Simpson a couple of times, blasted through outback Queensland and the Victorian High Country, and then took it on a beach holiday to Fraser Island.Some of the time it’s driven by other people (hence Hire-lux) and it’s more often than not leading the convoy across steep dunes and through creeks. It’s a hard life for most of the kilometres it does, and when it’s back home it’s relegated to resting in the backyard or spending time at Outback 4WD in Bayswater, for a health and spa retreat.
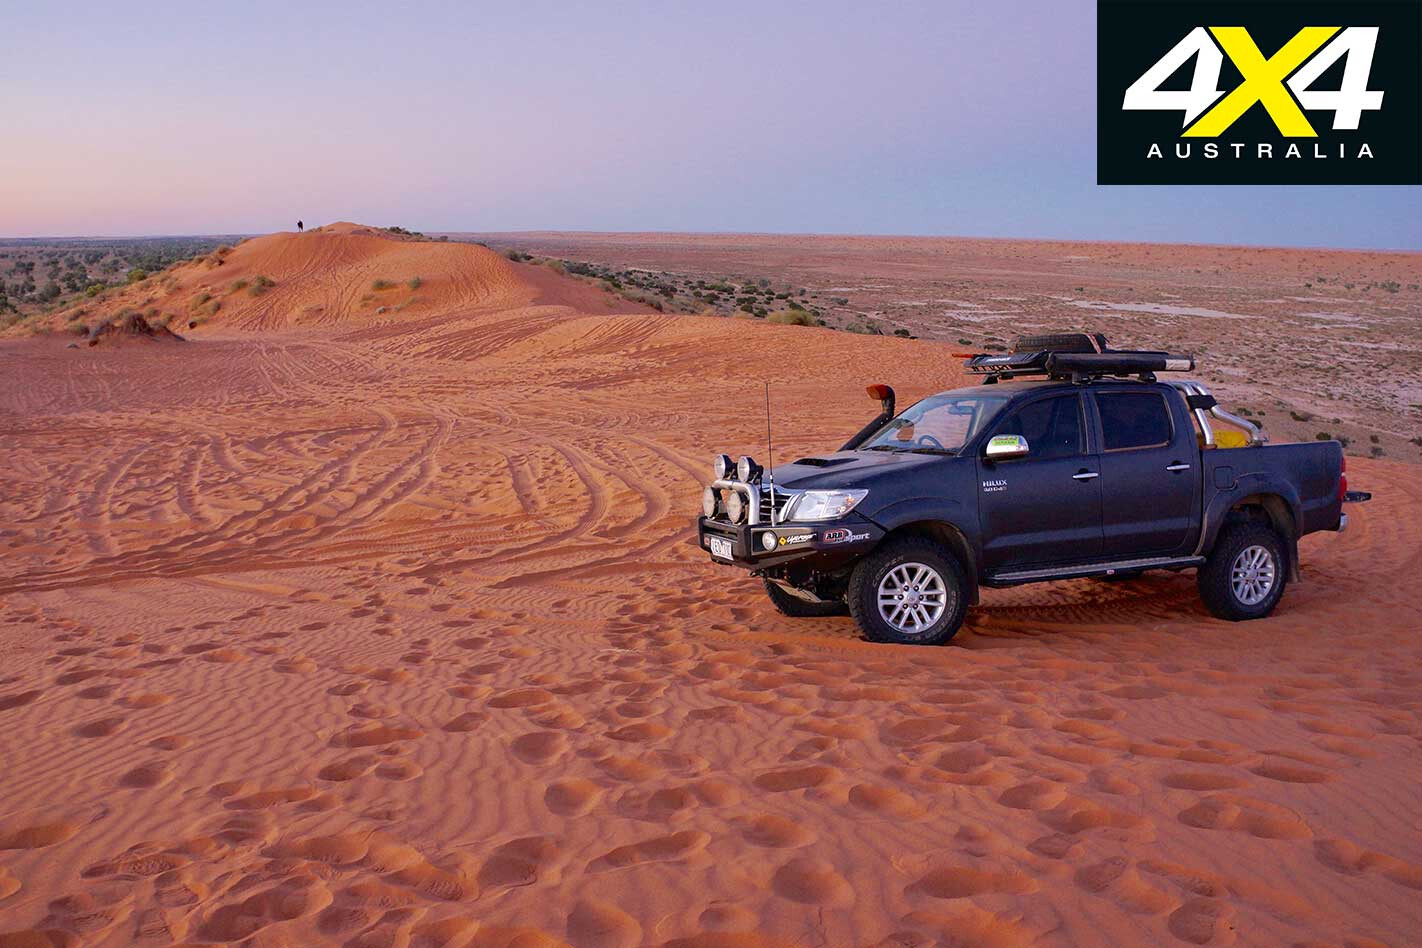
For the latest forays we’ve added a few things including a 145-litre Frontier long-range fuel tank; we’ve got a similar one in the 79 Land Cruiser and have been bloody impressed with it.These ARB Frontier tanks are made from an impact-resistant crosslink polymer material which is tough and will not rust or corrode, and it features a one-piece body construction with a wall thickness of 7 to 9mm. While they all come with a three-year warranty, one of their big advantages over a steel tank (which we have in our long-serving Patrol) is the considerable weight savings.To protect the underbody from scrapes and hits we have also fitted ARB underbody protection, which directly bolts onto the chassis from the ARB bullbar back to the transfer case. While we were at it, we added ARB-rated recovery points and side-steps.
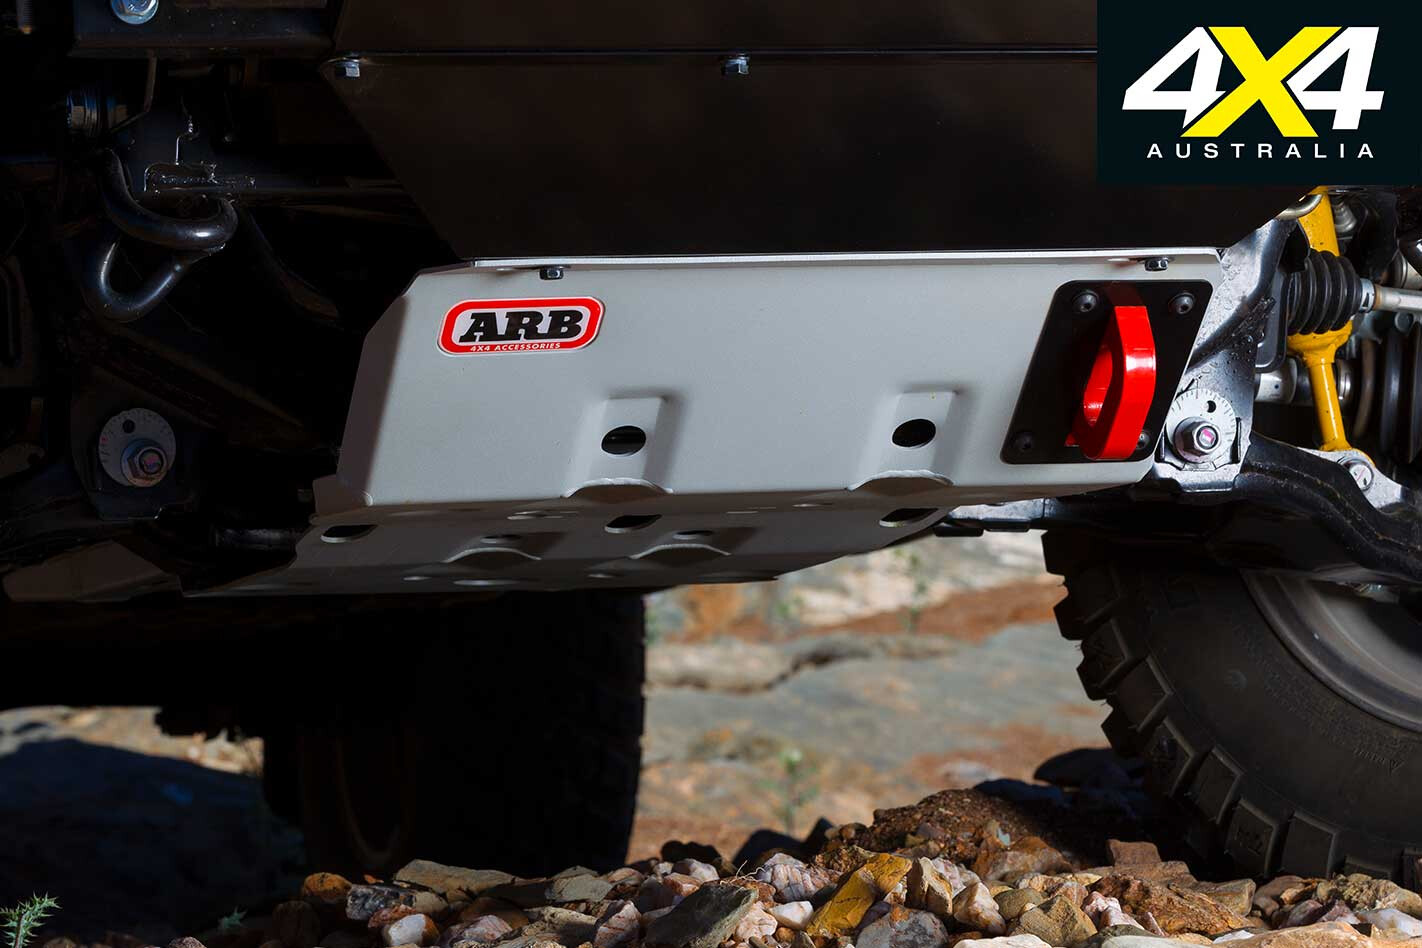
As luck would have it we conned a 10,000lb second-hand winch off a mate and, like most winches, we’ve yet to use it in anger. Likewise, we got a 60-litre water tank which fits over the wheel-arch between the tub wall and the Ironman single-drawer system we’ve fitted to the tub. Why only a single drawer? We wanted to be able to carry a trailbike in the tub, and with the tailgate down we can still easily do that.We’ve also given the engine better breathing capability by fitting an Ironman three-inch exhaust system, and to improve wading ability and protect the diffs from water ingress we added Ironman diff breathers.Sick and tired of worrying about the vehicle’s starter battery running flat because of a fridge being left to run overnight, we finally fitted a dual-battery system to the Tojo. Mounted on an ARB tray (because of the weight of the battery, you need a good battery mounting system) we backed it up with a Redarc BCDC1225D charger. This 25A in-vehicle DC to DC battery charger features the next generation in charging technology, charging from solar and DC inputs simultaneously. They’re a cracker of a setup.
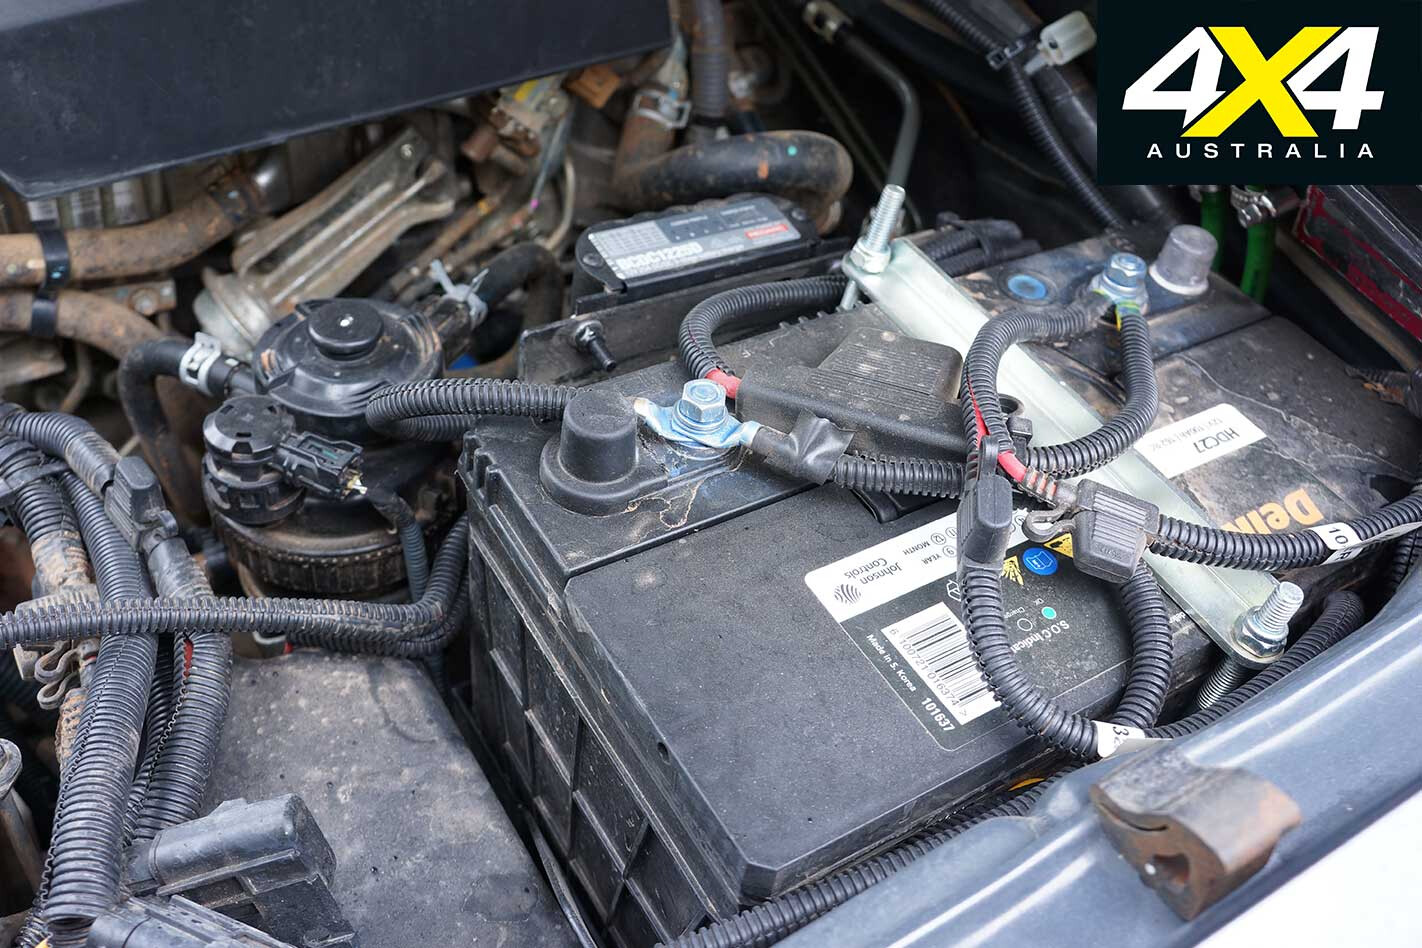
We replaced the roof rack bars with a set of heavier duty Rhino-Rack track-mounted roof bars, as the previous set was too light for the weights we wanted to carry. Fitted to the roof bars is an XTray basket and a handy, easy-to-use shovel holder.We’ve now clocked up 69,000km on the set of Cooper ST tyres, but, as we speak, a set of Mickey Thompson ATZ P3s are being fitted at Outback 4WD. With their big shoulder blocks and wide lateral offset grooves they look the business, provide good off-road traction, and expel water to improve on-road grip. We’ll let you know how they go after we’ve clocked up more than 10,000km.TOTAL KM: 81,120km KM THIS MONTH: 49,000km AVERAGE FUEL USE: 12.2L/100km
Part 3: Quality kit
In the last 18 months the Moon Tours ‘dirty ol’ Hilux’, as we affectionately call the little Toyota, has clocked up a pretty gruelling 39,000km which has included a couple of crossings of the Simpson Desert, a few weekends at LandCruiser Park, easy jaunts along the sands at Fraser Island and Double Island Point and, much more recently, two trips up Cape York.As you read this we are driving across the Simpson again, this time with our new AOR Sierra ZR Expedition Camper, before heading to the Gulf Country to check out the tracks and activities in that incredible part of Australia. Hopefully, once this COVID thing is under some form of control, we can run tagalong trips again and even make a dollar.The Hilux mightn’t be a showpiece but mechanically, Trent keeps the little ’Lux meticulously maintained, replacing most things well before they become a problem in the bush. Most of that work, when the rig is within cooee of the Sunshine Coast is done by Scott Jennings and his crew at Caloundra ARB.
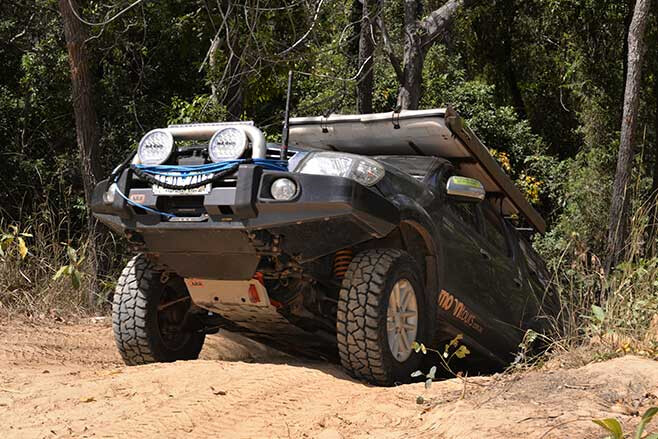
Before the Cape York jaunts, we fitted a Terrain Tamer Harrop Eaton ELocker. Needless to say Trent gave it a pretty thorough workout on all the tough tracks up that way and it worked flawlessly until near the end when it stopped for some reason. We checked all the wiring and switches but couldn’t see anything wrong, so once we were back on the Sunshine Coast we had the diff repaired under warranty – a wire had come adrift inside the diff – and it’s now working like it should and hopefully it’ll stay that way.With the camper on the back and a heap of other gear we decided we would upgrade the suspension with Ironman Foam Cell Pro shocks and struts while also fitting, just before our latest Simpson jaunt, a set of Terrain Tamer’s 500kg parabolic springs for the back end.These are a brand-new item from Terrain Tamer and with only three leaves making up the spring pack, we’ve been pleasantly surprised at the ride quality when the ol’ girl is running pretty empty and pleased about the way it sits when loaded up. The desert will be a real test, so we’ll let you know how they all perform further down the track.With everything we’re hauling we decided we’d go for a bit of a performance upgrade so, apart from the Ironman stainless-steel exhaust we fitted some time back to help the engine breathe a bit easier, we have now fitted a performance chip.Thanks to a long-time friend of the Moon’s, Ed Mulligan from Bluetooth Diesel Tuning and 4WD World, the Hilux is being blessed with a Bluetooth Diesel tuning box, a modern version of a chip that can be controlled and adjusted from inside the cab and on the fly using your smartphone. The improved power and torque is something the Hilux is going to appreciate towing the new AOR camper across the desert, with torque increased to 488Nm.
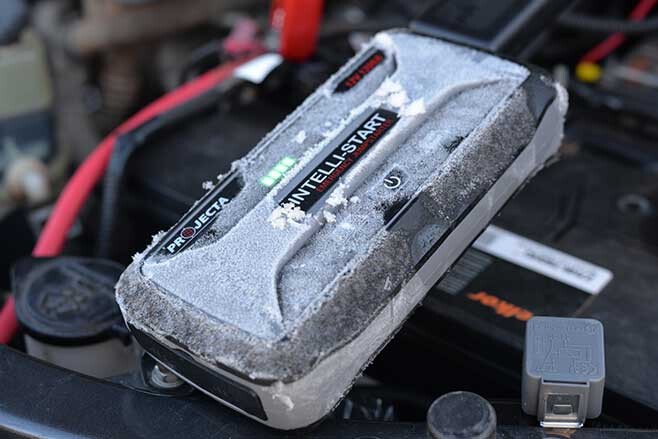
On our quick 1600km run to Birdsville we compared the fuel economy towing with the chip switched off and with a setting of seven. The fuel economy remained the same at 16L/100km in both cases, while the vehicle performed better with the Chip clicked to ‘7’, and cruised easier with less hunting for gears. We’re bloody pleased with that!Of course, with a trailer on the back we had to install a trailer brake controller and they don’t come any better than Redarc’s Tow-Pro Elite V3. We’ve got one of these on the 79 Cruiser and an earlier version on the Patrol, and wouldn’t go for anything less.We’ve also changed rubber since last report and have been running Mickey Thompson ATZ P3 tyres for the last 20K and are more than pleased with them in all the various conditions we find ourselves in.You’ll note our fuel consumption has increased a little since last report and while that has bugger all to do with the tyres, it does have much to do with the extra weight we’re hauling and the James Baroud rooftop tent. We’ve now shifted that off the roof and onto the camper trailer, but it goes to show even a streamlined roof pod such as the James Baroud can knock the fuel economy around.
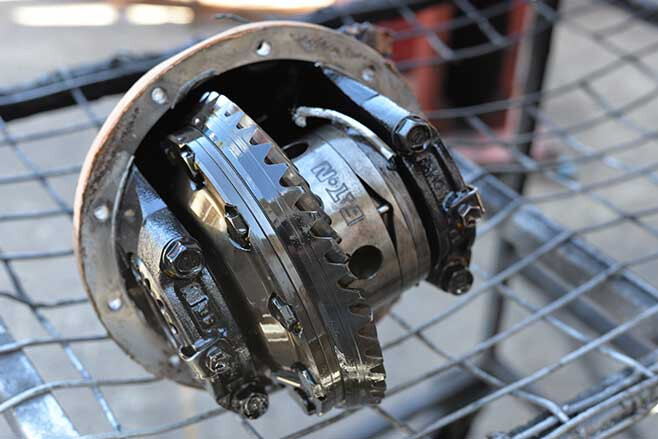
There’s been a lot of night driving amongst all our trips, so as far as lights are concerned, we’ve fitted a pair of Narva 215 Ultima LED spotlights and backed them up with an LED slim light bar and an LED headlight globe upgrade. They illuminate the road and tracks for a long way ahead as well as off to each side where wayward cattle and ’roos lurk. One thing you gotta do though with the headlight upgrade is make sure your headlights are aimed correctly so as not to dazzle on-coming traffic.Trying to run our business on the road we’ve upped the ante as far as communication is concerned. For our convoy work we’ve been using the GME XRS-370C compact UHF radio which is a beauty for car-to-car communications. Keeping in touch with the office and home, we’ve upgraded to a Thuraya SatSleeve which turns our iPhones into a satphone. We’ve found it great to use with all our phone contacts easily accessible, while reception hasn’t been an issue.Keeping the batteries charged and all the electrics and electronic gear we carry working, we’ve fitted a Projecta DC/Solar charger, a 130W fixed solar panel, a 180W portable solar panel, and a 350W Pure Sine Wave inverter for charging laptops and the like. For those emergencies we have an Intelli-Start 12V 900amp lithium jump starter and power bank – they are bloody amazing!We’ve also got some of that new soft-shackle recovery gear from Camp Boss and teamed that up with an alloy recovery hitch and winch ring from Maxtrax. Needless to say, Trent reckons we should ditch all the old recovery gear that has steel shackles, hooks and eyes and embrace the future as its lighter and a darn sight safer.Stay tuned, we’ll bring you a full report of how this stuff is handling the recoveries we’ve been subjecting it to.TOTAL KM: 120,128km KM SINCE LAST UPDATE: 39,008 AVERAGE FUEL USE: 14L/100km (17-18L/100km on Simpson jaunts)
Part 4: Big bangs
It started with a ‘BANG!’ Just out of Ballarat, on our way to meet a tour group on our Coast2Coast expedition (see: moontours.com.au), the Hilux expired, in a cloud of smoke, rolled and rattled to a stop.While a quick recovery and a change of vehicle was in order to keep the trip on schedule, the Hilux made its way to Outback 4WD where it sat forlorn waiting for a decision on what to do. In the end, it was pretty simple – replace the engine!Shopping around, we got a brand-new engine from Toyota, including injectors (but lacking starter motor, alternator, etc) for less than eight grand, which we thought was pretty darn good.
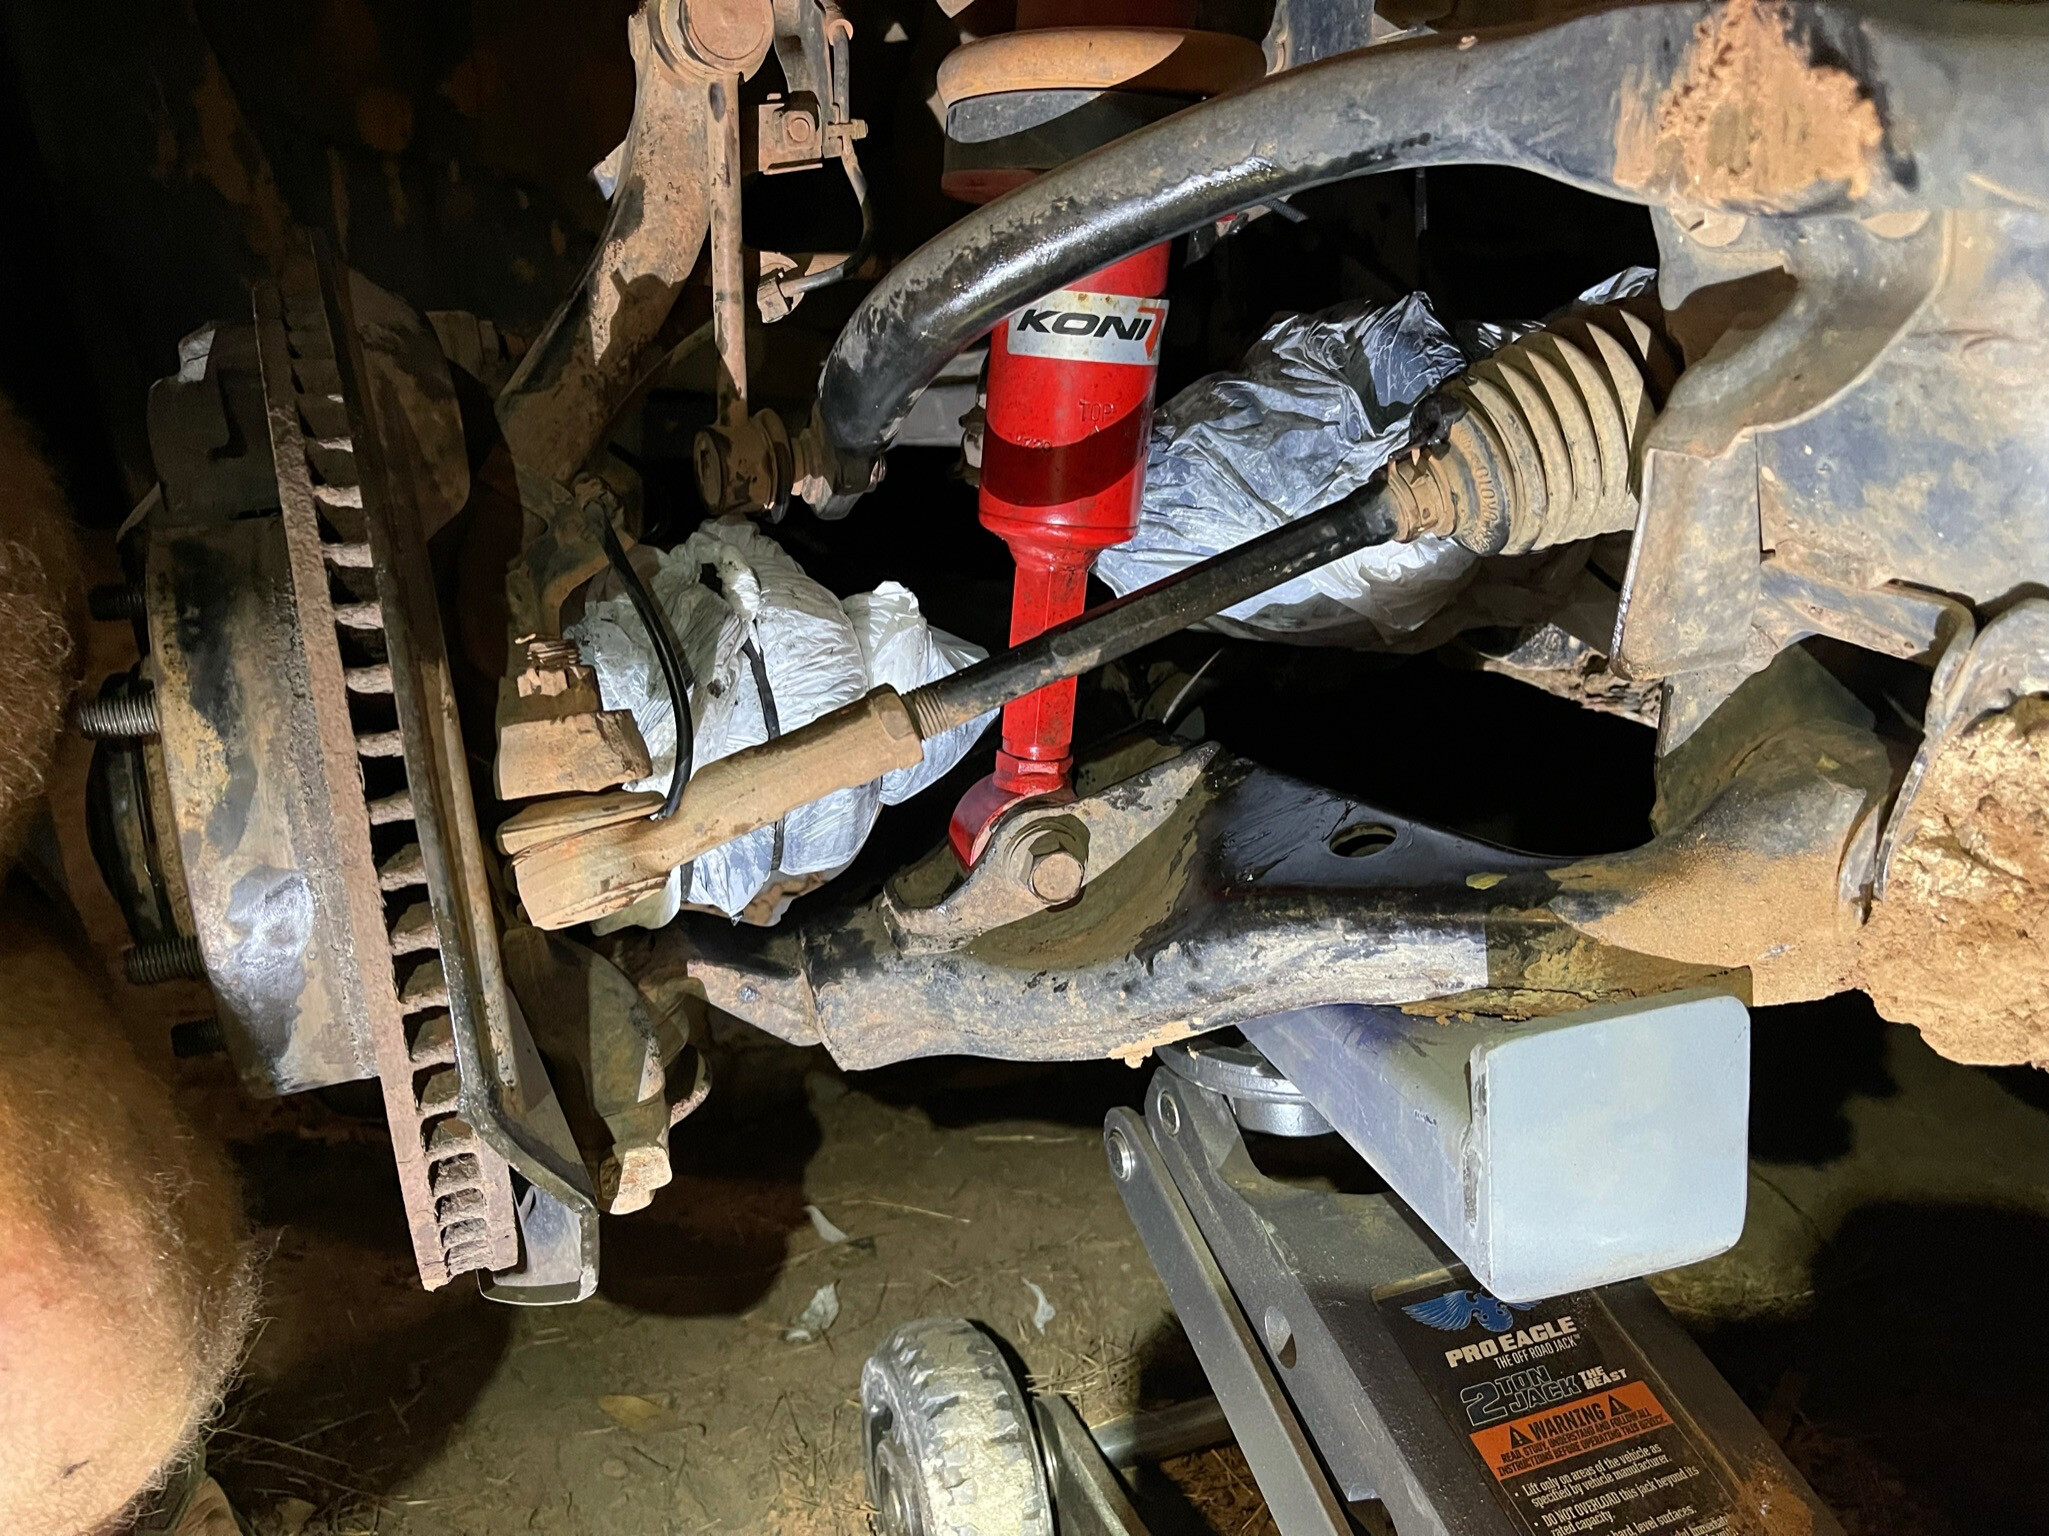
With the engine in place, we also fitted a Flash-Lube diesel fuel filter which is rated at 30 microns and helps ensure the engine gets clean fuel free of water, which is devastating to modern diesel engines. If you are refuelling from remote servos, or from jerry cans or even 200-litre drums, we couldn’t recommend an extra fuel filter enough.While the work was going on, we also decided to fit a set of Koni shocks to the Hilux. We have had a great run out of these shocks on previous vehicles, including our 79 Cruiser, and just love the ride they give and how they continue to work, even under the most severe conditions.For the Hilux we fitted Koni Raid 90s to the rear axle and Koni Raid 88s to the front. While both exhibit the excellent build quality and oil that Koni is acclaimed for, the 90 comes with a huge 70mm body diameter, a massive 42mm piston, and an 18mm hard-chromed rod.
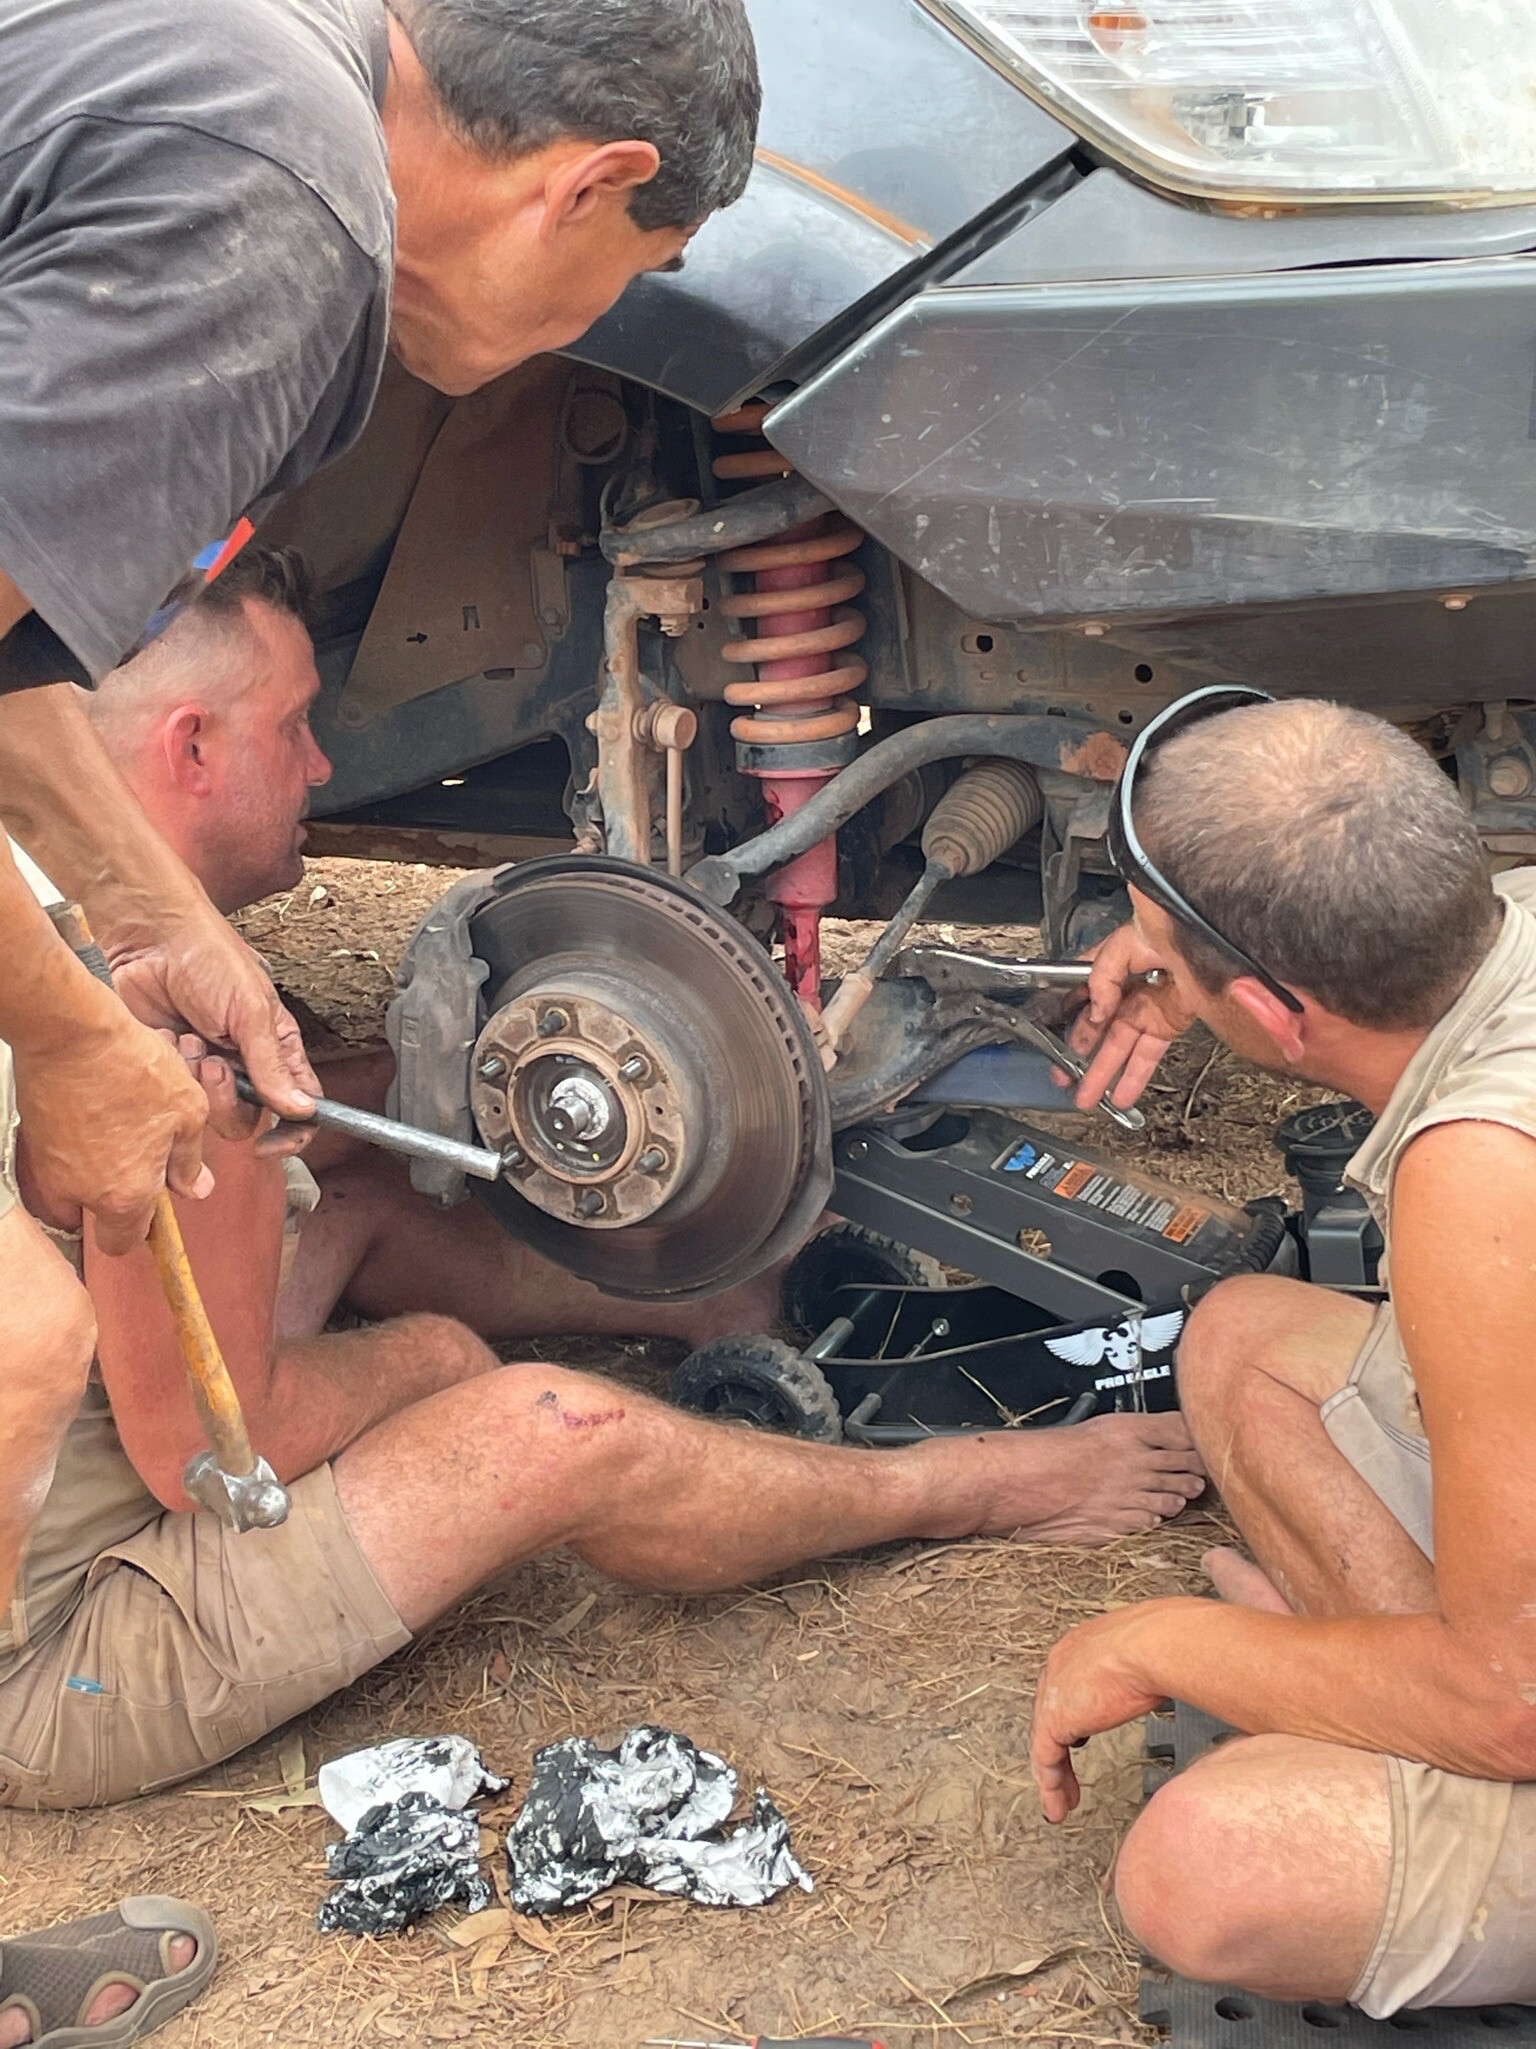
Meanwhile, as space is at a premium under the front of the Hilux, the Raid 88 Series come with 55mm body diameter and a 36mm Teflon coated piston. While they are a great product, the Koni range is also adjustable and rebuildable.So with that behind us, the Hilux headed out on its annual jaunt north being better late than never. First were a couple of crossings of the Simpson Desert before it headed to Cape York for two tough trips north from the infamous Lion’s Den Hotel along the Starke Track and the Running Creek route to Coen, before heading along Frenchmans track and the OTL track to the top.
On the return journey from the Tip, the old Coach Road south from Coen was tackled on the first trip, while on the second jaunt we opted for a more leisurely and sandy west coast run, north of Weipa.
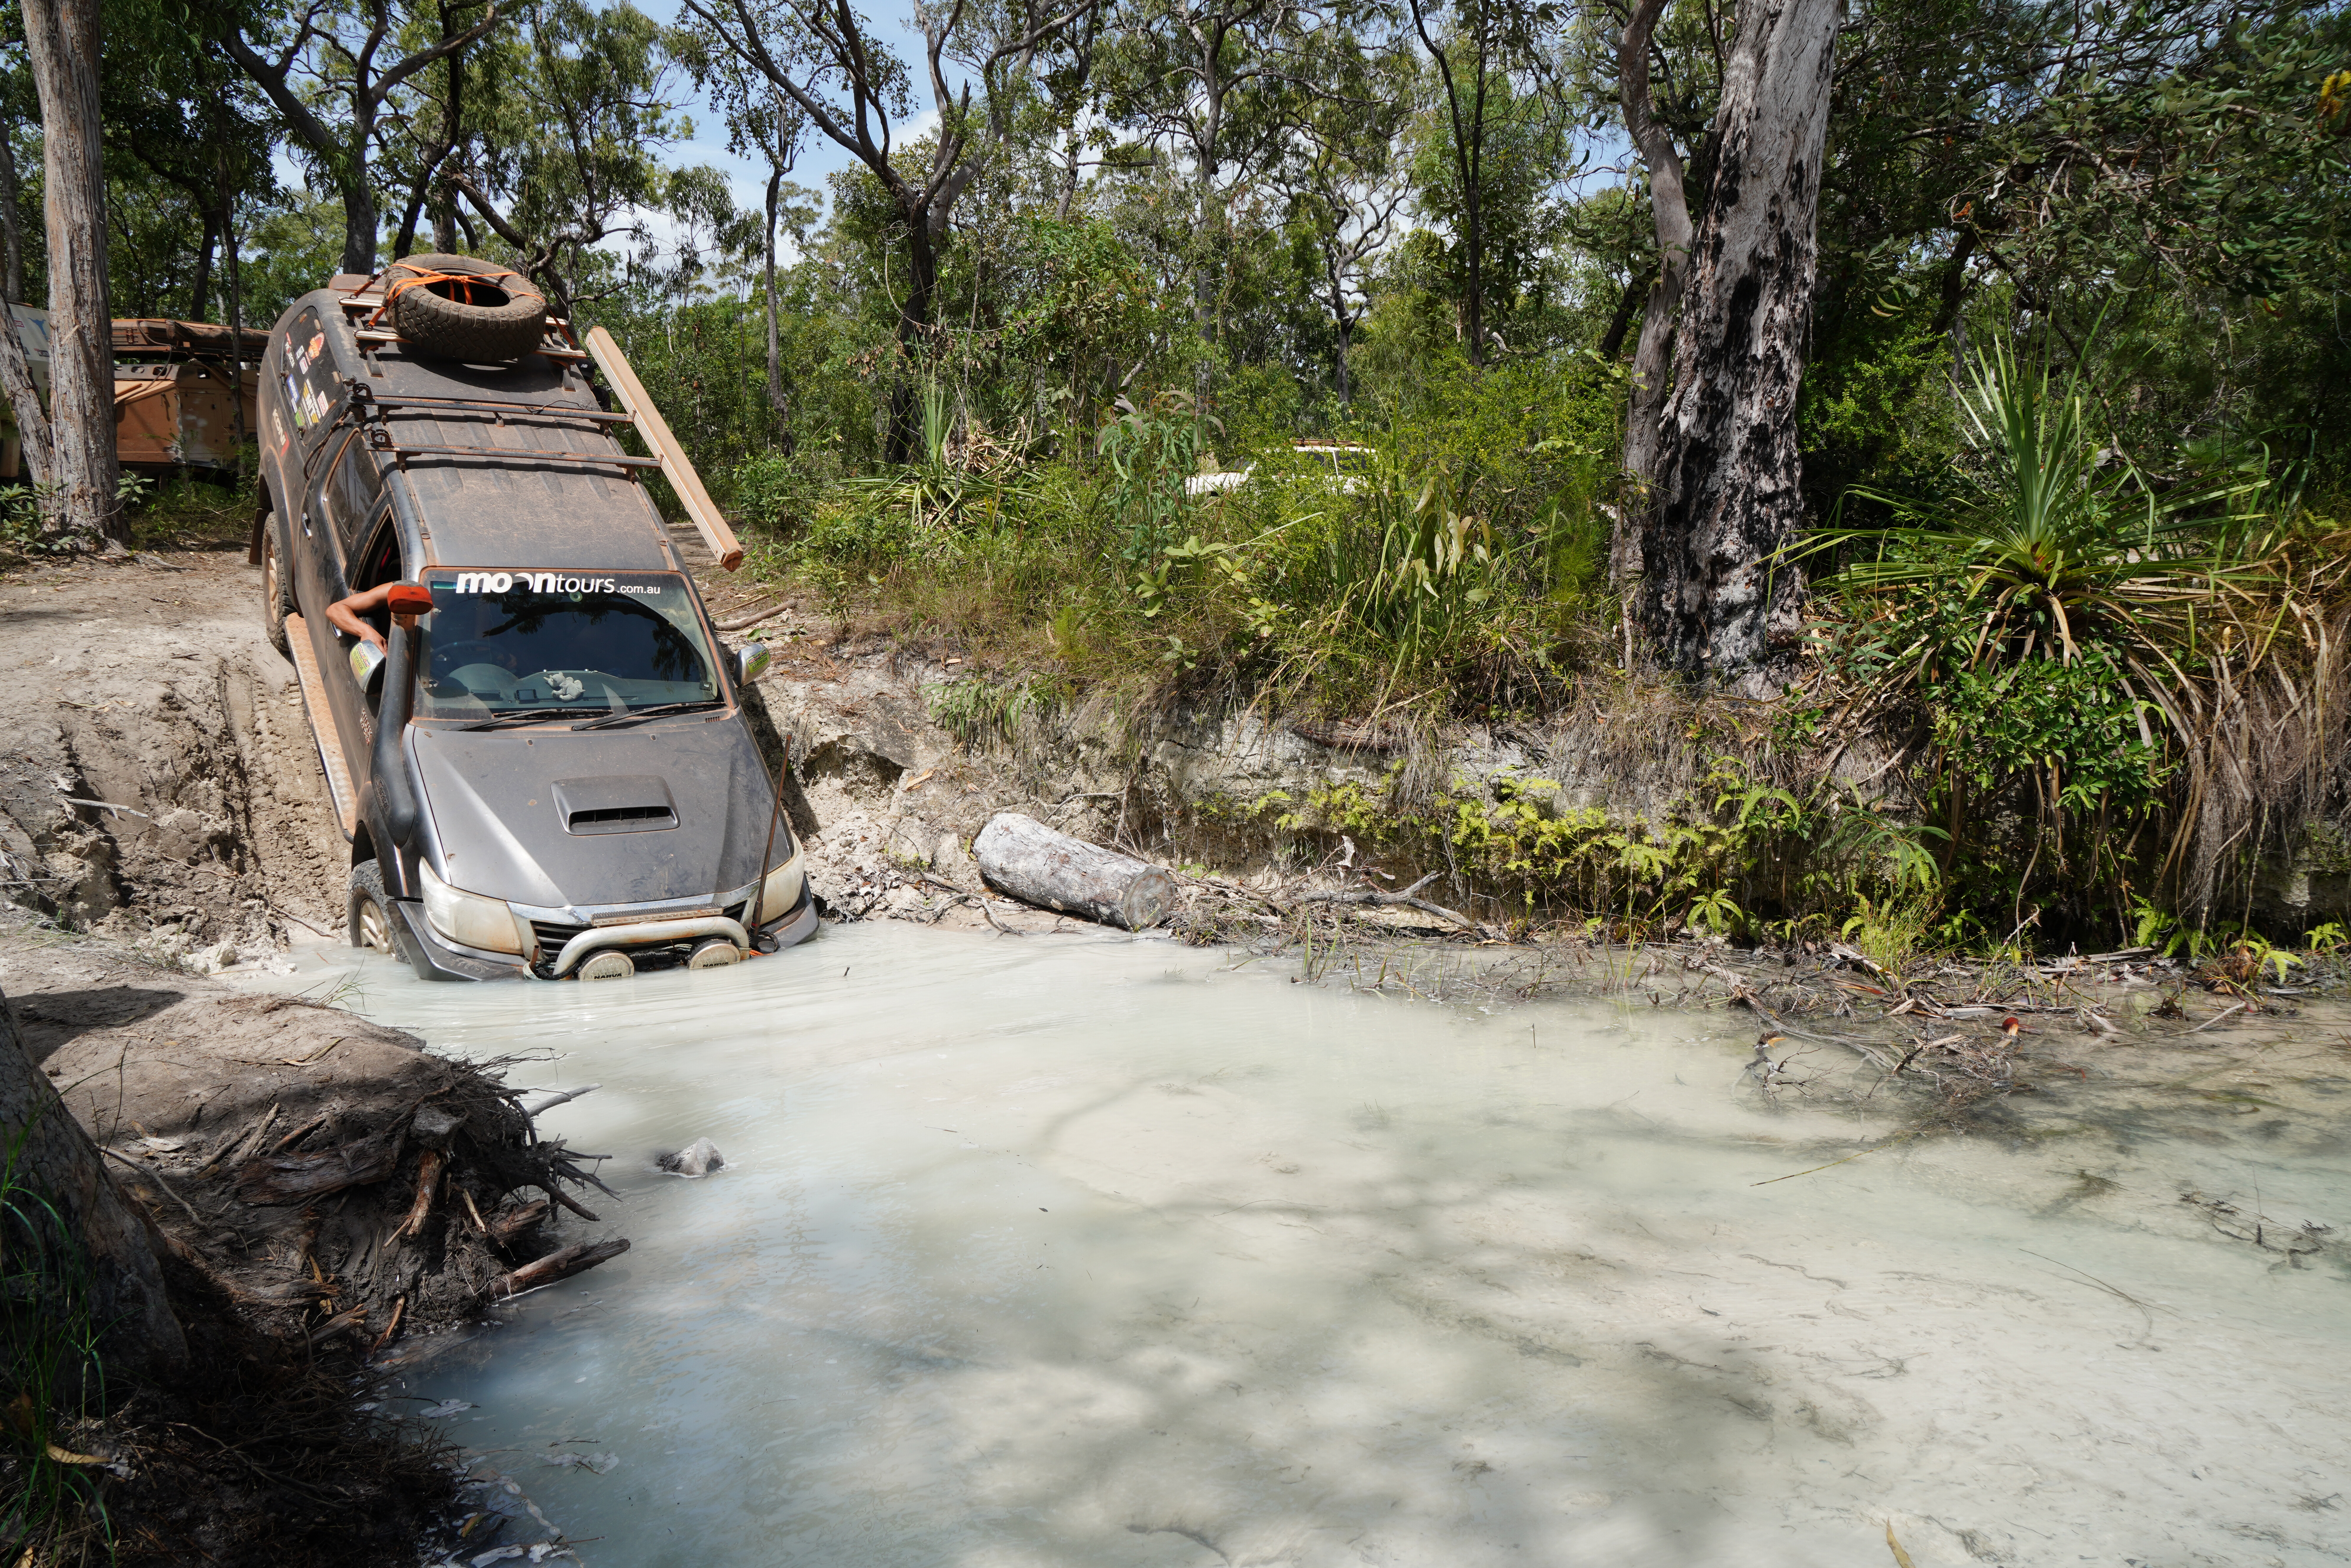
It was on the second trip that while climbing the slippery, steep slope of Palm Creek, heading south, that a CV joint broke, heralded by a sharp bang from the front end. Not as loud as the first big bang, it was still noticeable and warned of problems somewhere around the front end.
A late night ensued, as with cutting discs on the Ryobi battery-powered grinder we cut away the offending broken drive shaft which was flailing around threatening anything within reach. We covered the open wounds at the diff and wheel hub with plastic bags and with the vehicle now being mobile, a late night run to Weipa was called for.But there was a gremlin at work. The mud and water of the previous trips had rendered the alternator unserviceable and it then decided not to work. We got through with lights working by rigging up some wiring between the auxiliary battery and the by-then flat main battery, to keep everything working and the lights glowing.
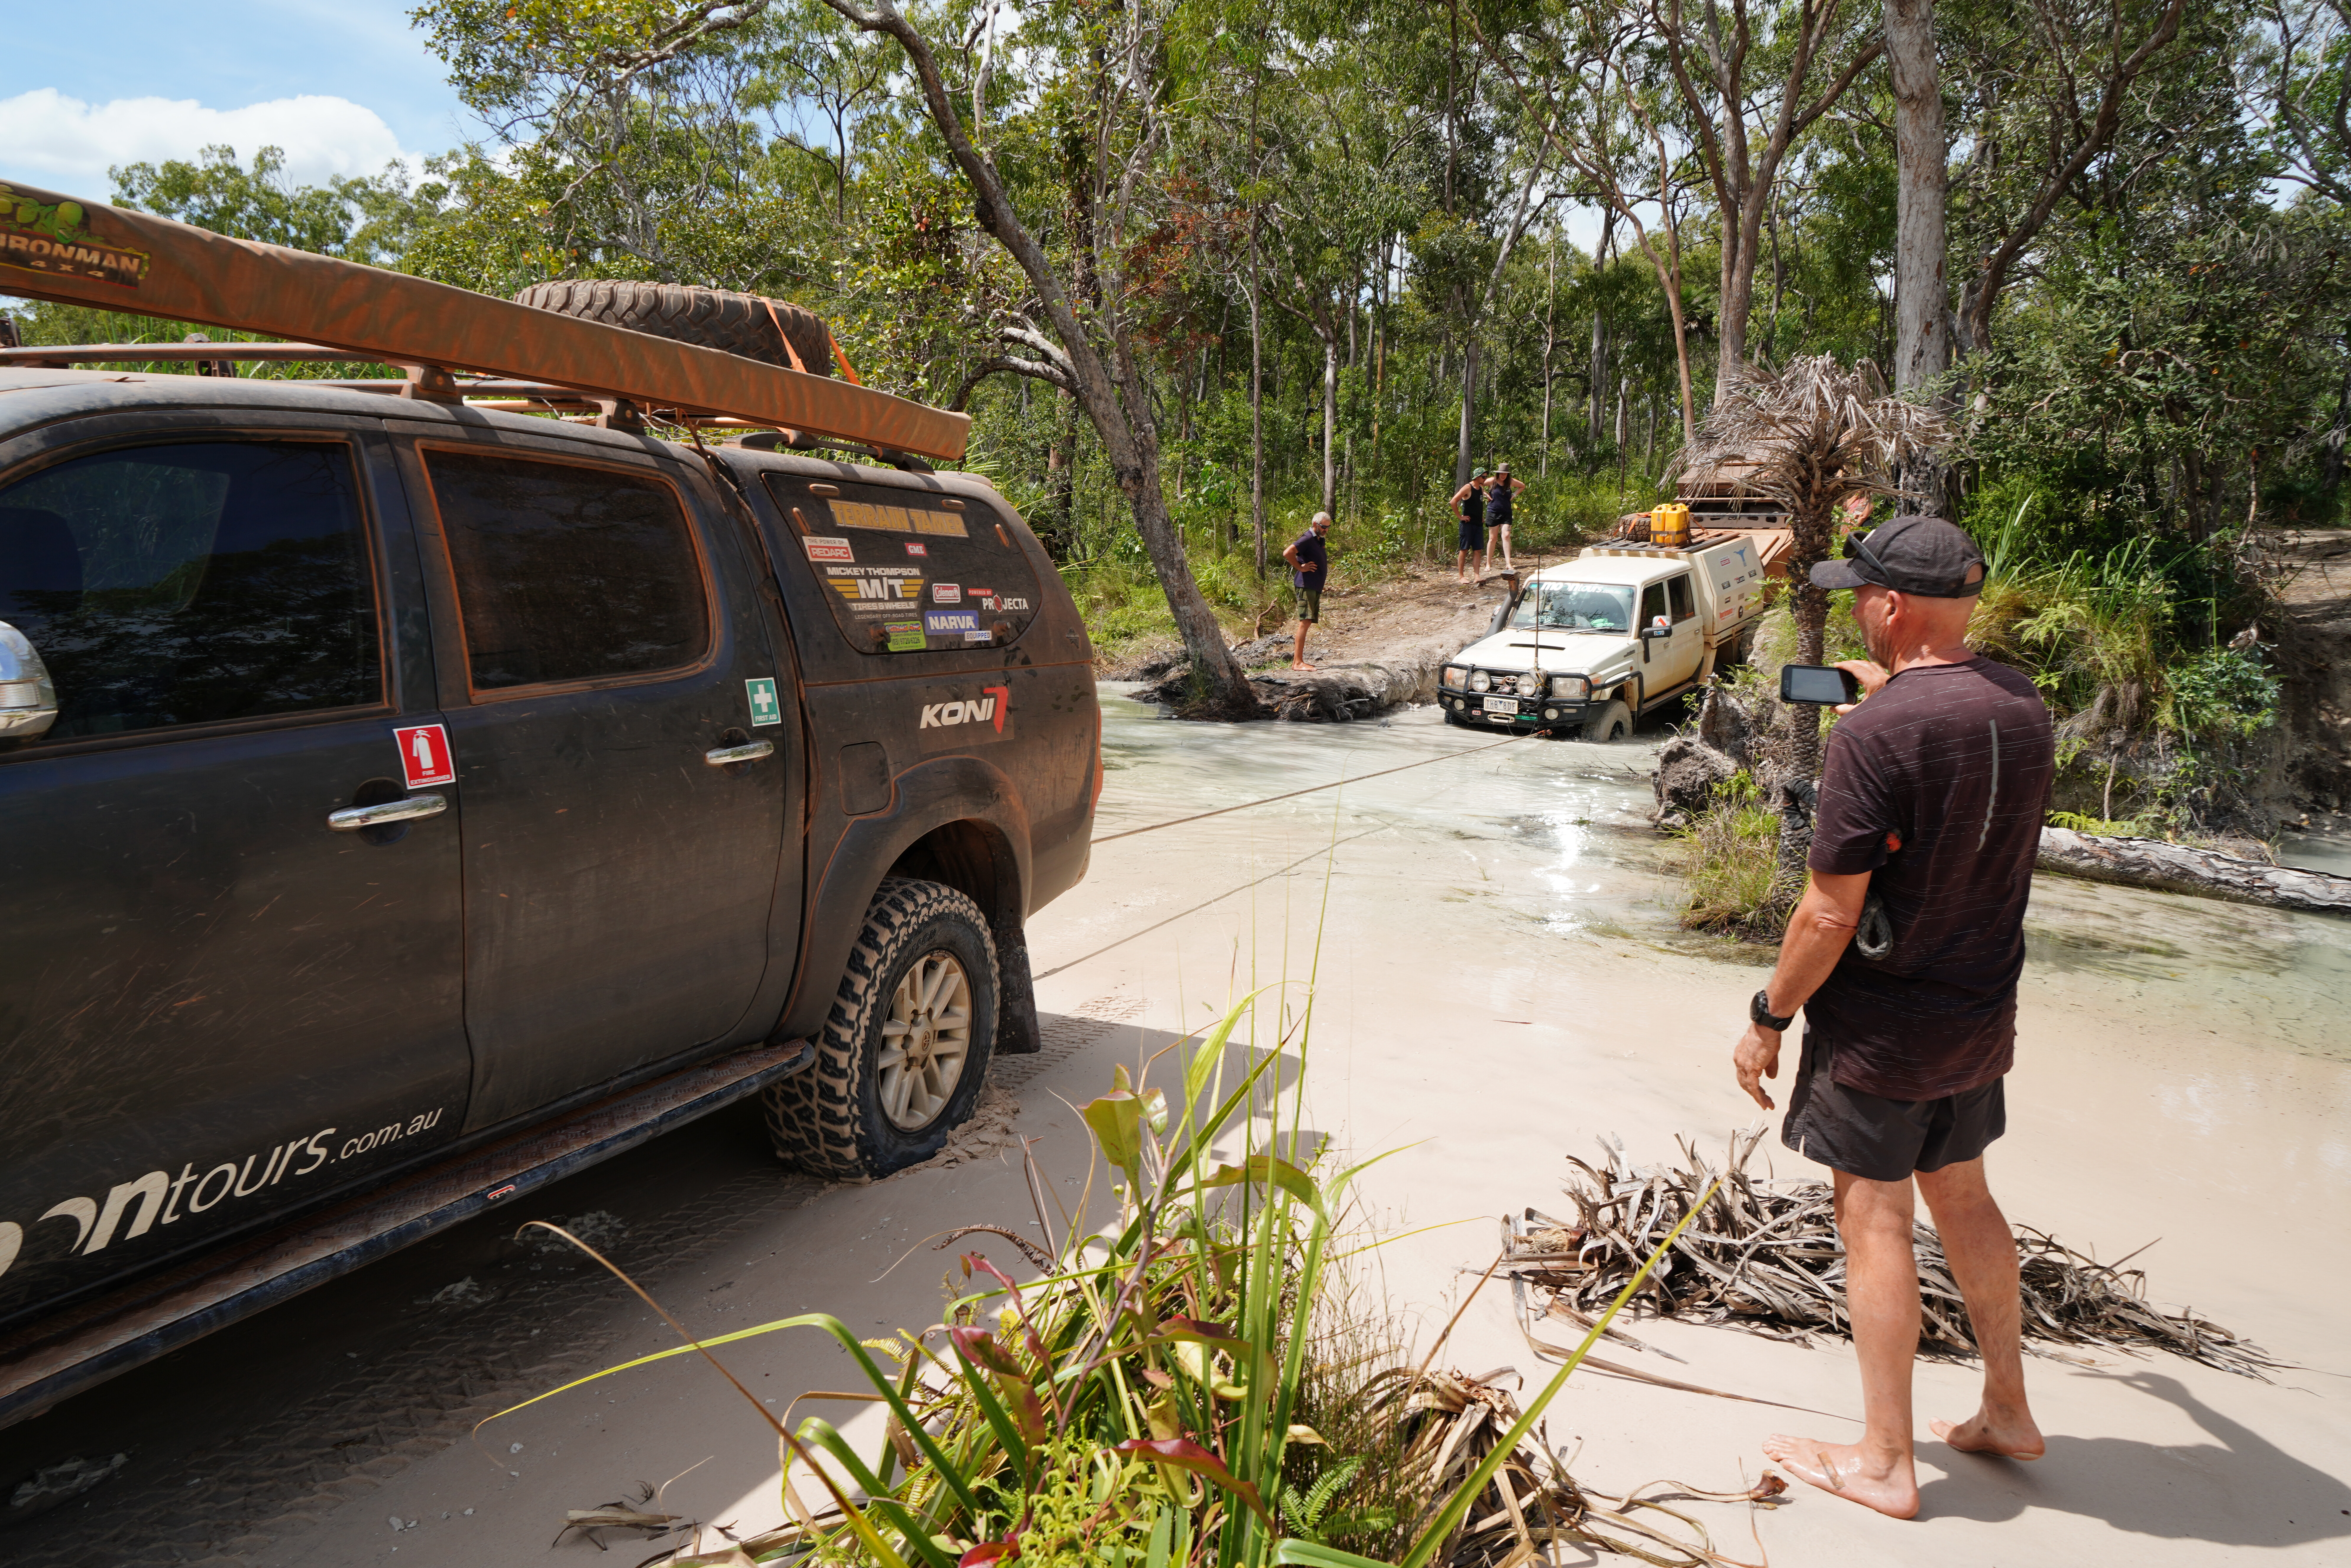
We arrived in Weipa, grabbed a few hours’ sleep, and when the doors of Weipa Auto & Marine opened, we were there pleading our case. The crew did a great job under a bit of pressure and time, and early in the afternoon with a new alternator and CV joint, the Hilux was on its way north to meet our party of adventurers.The rest of the trip was uneventful and back in Cairns, we gave the ol’ girl a bit of a service before heading south for the long black-top haul to Melbourne. It had been an eventful year for the old Hilux!TOTAL KM: 153,558 KM SINCE LAST UPDATE: 33,430 AVERAGE FUEL USE: 17-18L/100km