The Toyota HiLux has long been one of the most popular foundations for 4×4 builds in Australia and around the world, and for good reason. It’s tough, widely supported in the aftermarket, and adaptable enough to suit everything from daily driving to full-scale remote touring and competition-level off-roading.
Across these builds, there’s a clear split in purpose but a shared focus on reliability and capability. Some setups are built for long-distance travel, carrying the essentials for weeks off-grid across deserts, coastlines and high country tracks. Others are far more extreme, with portal axles, long-travel suspension and heavily modified drivetrains designed to handle rock crawling, competition events and punishing terrain.
What ties them together is real-world use. These aren’t showroom builds, they’re rigs that have been pushed into remote parts of Australia, tested on rough tracks, and refined over time based on experience rather than theory. The result is a cross-section of HiLux builds that show just how far the platform can be taken, depending on how far you want to go.
SUBMIT YOUR HILUX BUILD
Want to see your HiLux build here? Jump on over to the 4X4 Australia Facebook page and show us your rig!
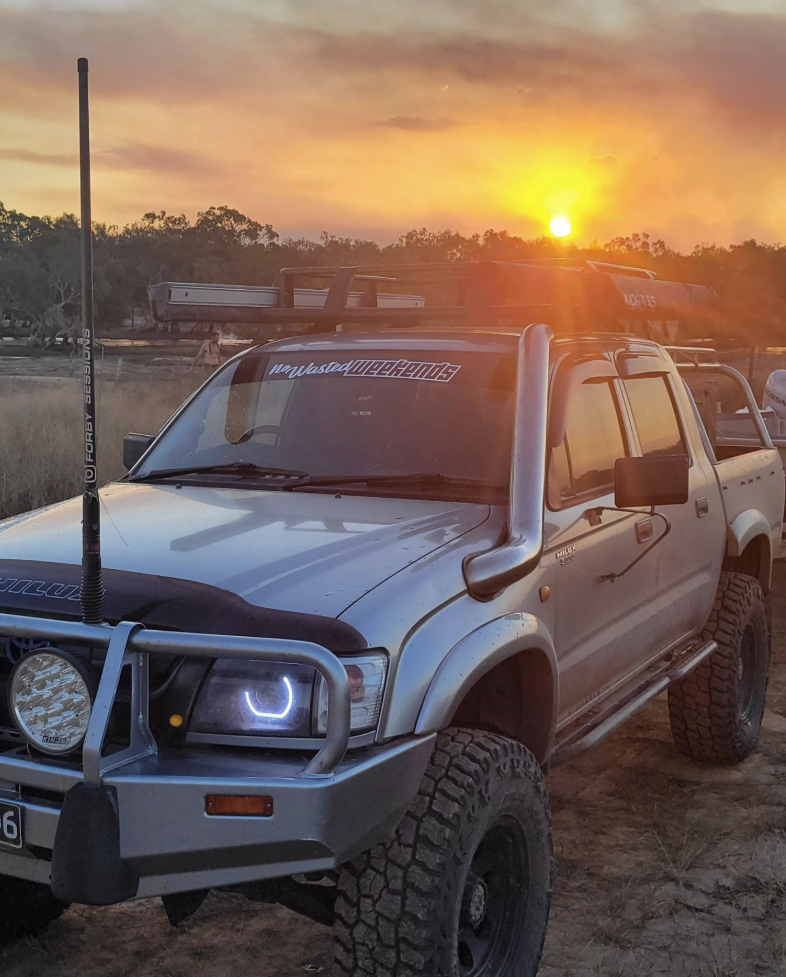
2015 Toyota HiLux SR5
Submitted by True Blue Overland
True Blue Overland’s SR5 is set up for full-time touring, and three-and-a-half years on the road has the runs on the board to prove it.
Out front it runs ARB protection. Underneath, a three-inch suspension lift using Bilstein shocks with a GVM upgrade carries the extra touring weight. In the tray, a chassis-mounted canopy houses a REDARC lithium battery system that keeps the rig running off-grid.
The build has been earning its keep across some of the more remote parts of the country, most recently a fortnight wandering through the West MacDonnell Ranges in the Northern Territory.

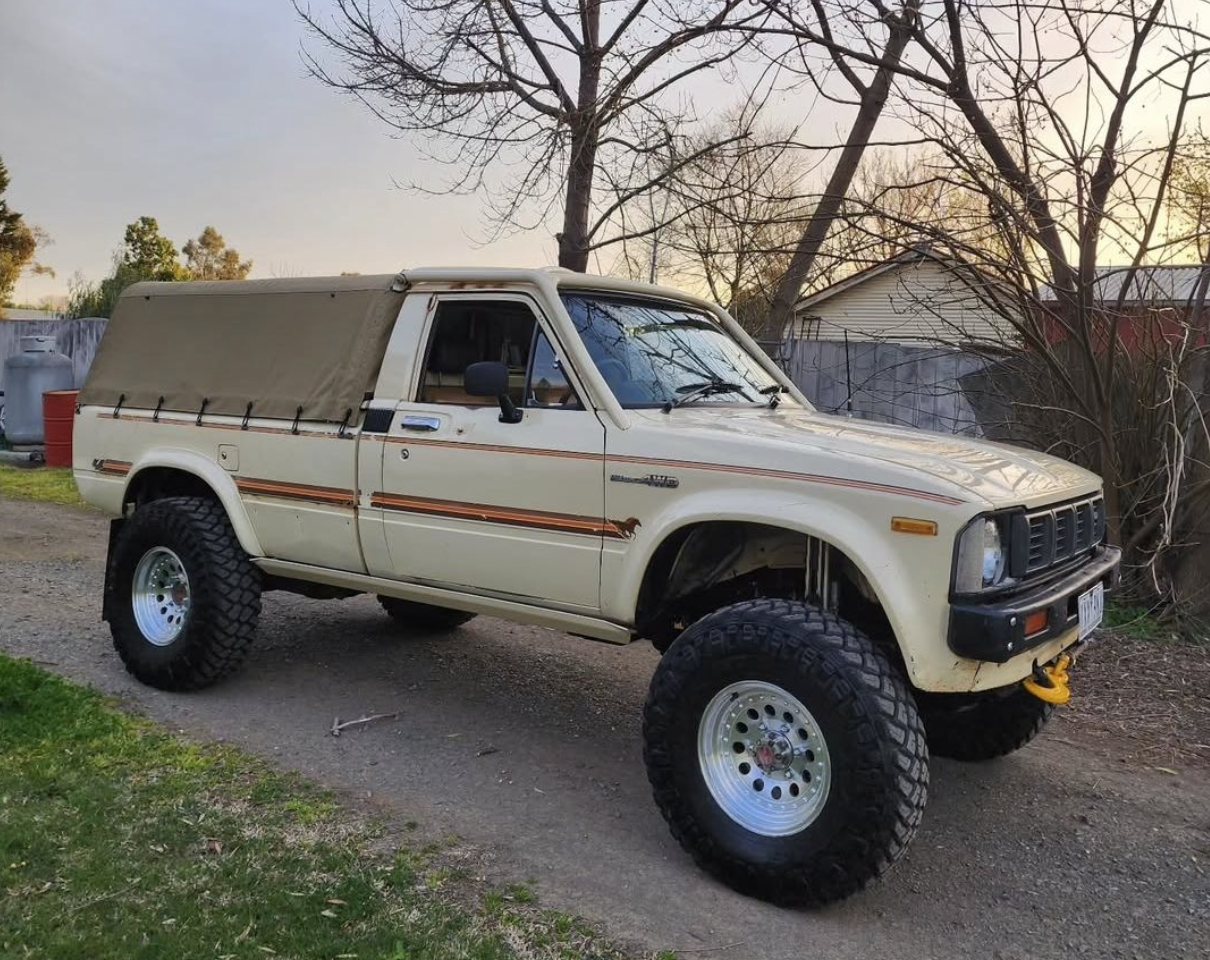
1983 Toyota HiLux RN46
Submitted by Josh Bohm
Josh Bohm built this RN46 as a no-compromise tough tourer, and the spec list shows it.
The engine is a 2.4-litre diesel that has been comprehensively reworked: a 12mm pump, TD04 turbo, new injectors, heavy-duty clutch, front-mount intercooler, and a tune by JP Performance. The driveline matches the engine, with braced front and rear diffs, 4.88 gears with air lockers, Longfield CVs, Trail Gear twin sticks, and Trail Gear 4.7 transfer case gears sitting behind a five-speed manual.
Underneath, 16-inch 2.5 triple bypass shocks work with custom one-off leaf springs front and rear, a wide-track setup, U-bolt flip kit, Snake Racing track bar, high steer, and a high-clearance crossmember. Rolling stock is 33-inch Maxxis Razrs on 15-inch rims, with disc brakes all round, power steering, and a CCDA-spec half cage tying the chassis together.
Recovery and electrical are equally serious: a mid-mounted Warn high-mount winch behind the cab with air free-spool and braced mount, a 24-volt system, an Enerdrive setup, and Stedi rock lights. The body has been worked over with an exo cage, half doors, sliding rear window, bobbed tub, custom rock sliders, fully restored interior, and a custom canopy. A three-week trip to Tasmania has been the best place Josh has taken it.
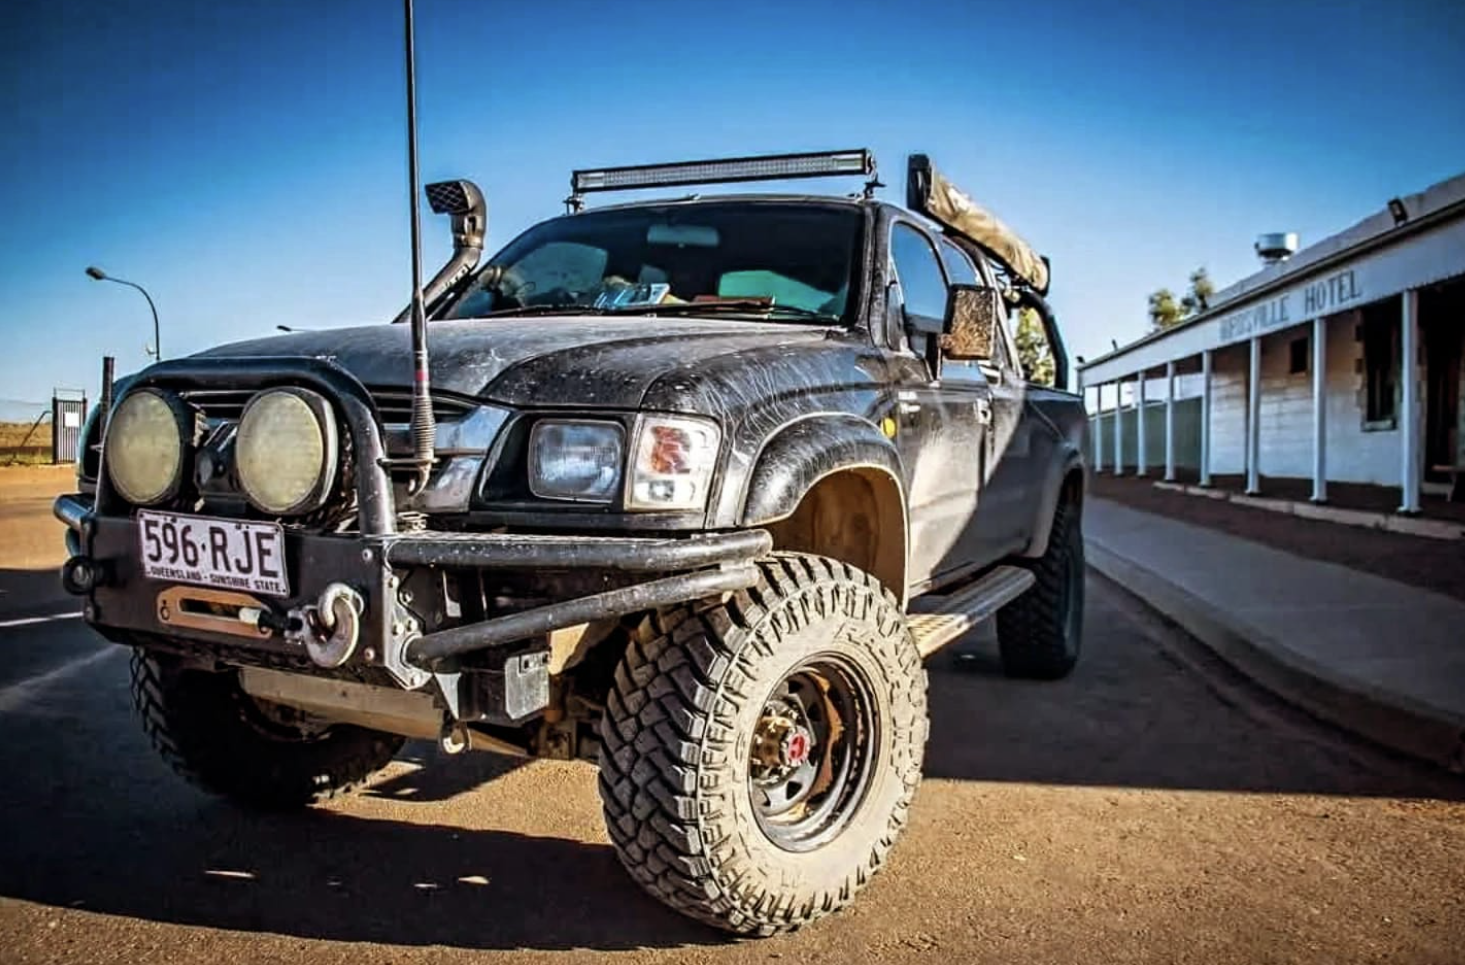
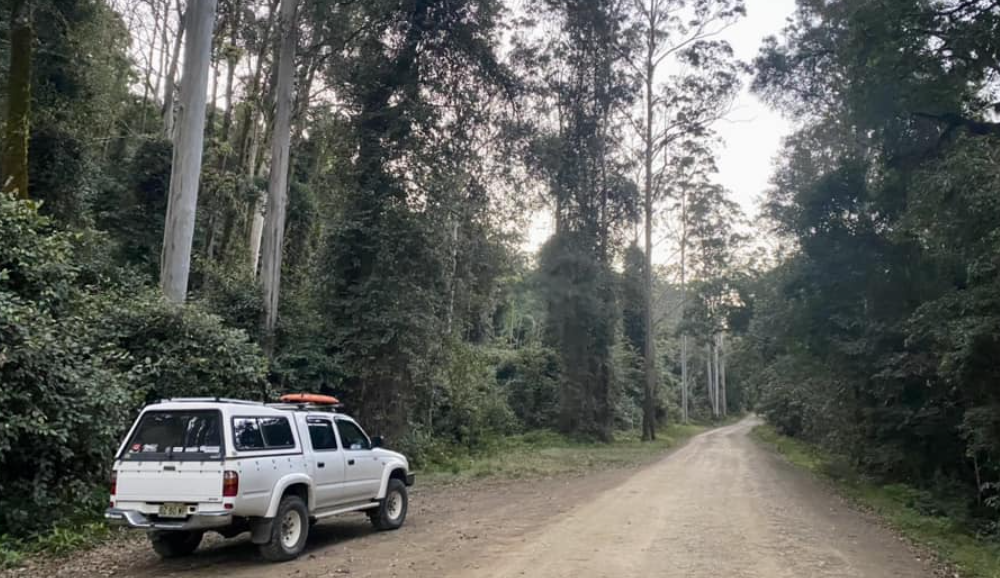
2003 Toyota HiLux
Submitted by Tim Rumble
Tim Rumble’s V6 petrol HiLux was built to go anywhere, and nearly two years of full-time travel proved it could.
The 2003 model ran a full exhaust, two-inch lift, one-inch body lift, and a front diff locker, rolling on 32-inch mud tyres mounted to 15-inch Bushproof steel wheels. Up front, an XROX bull bar and 12,000lb winch handled the hard work, with rock sliders and custom rear tub bar work rounding out the build.
The Cape York Peninsula in 2019 was the standout trip, along with countless other remote destinations across the country. After nearly two years of full-time travel, Tim upgraded to a 2015 model better suited to long-distance touring.
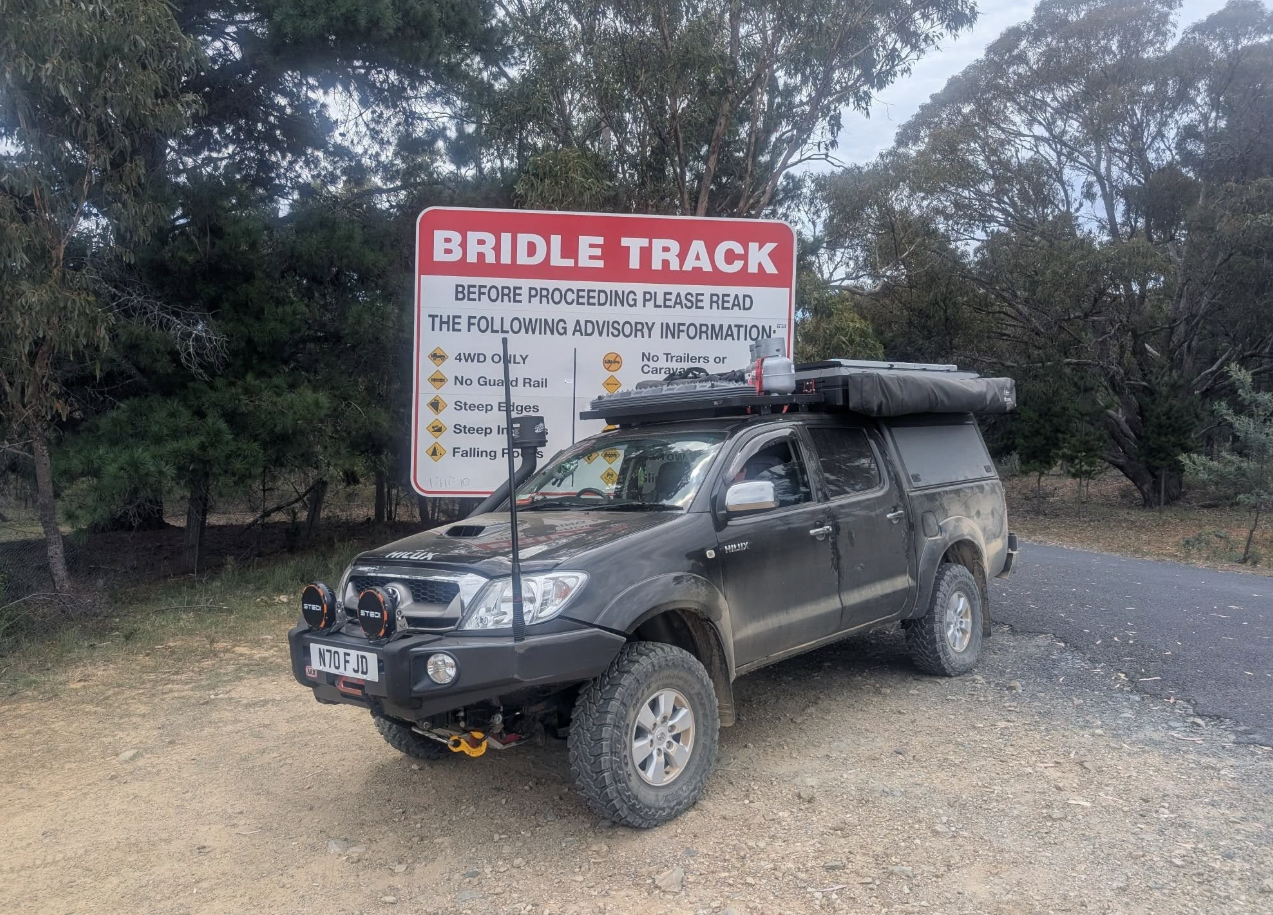
Toyota HiLux
Submitted by Freddie Dougall
Freddie Dougall’s UK-registered HiLux was built for an extended overland journey, and it has already covered Portugal, Spain, Morocco, and most of Australia.
The build centres on Old Man Emu suspension, an ARB front bar, and a Gobi-X rear swing-away bumper. Power on board is handled by a full REDARC 12V setup in the rear, with a Bush Company rooftop tent and awning completing the self-sufficient touring configuration. The HiLux was shipped to Australia for a 12-month road trip, with Coffin Bay National Park in South Australia a recent highlight.
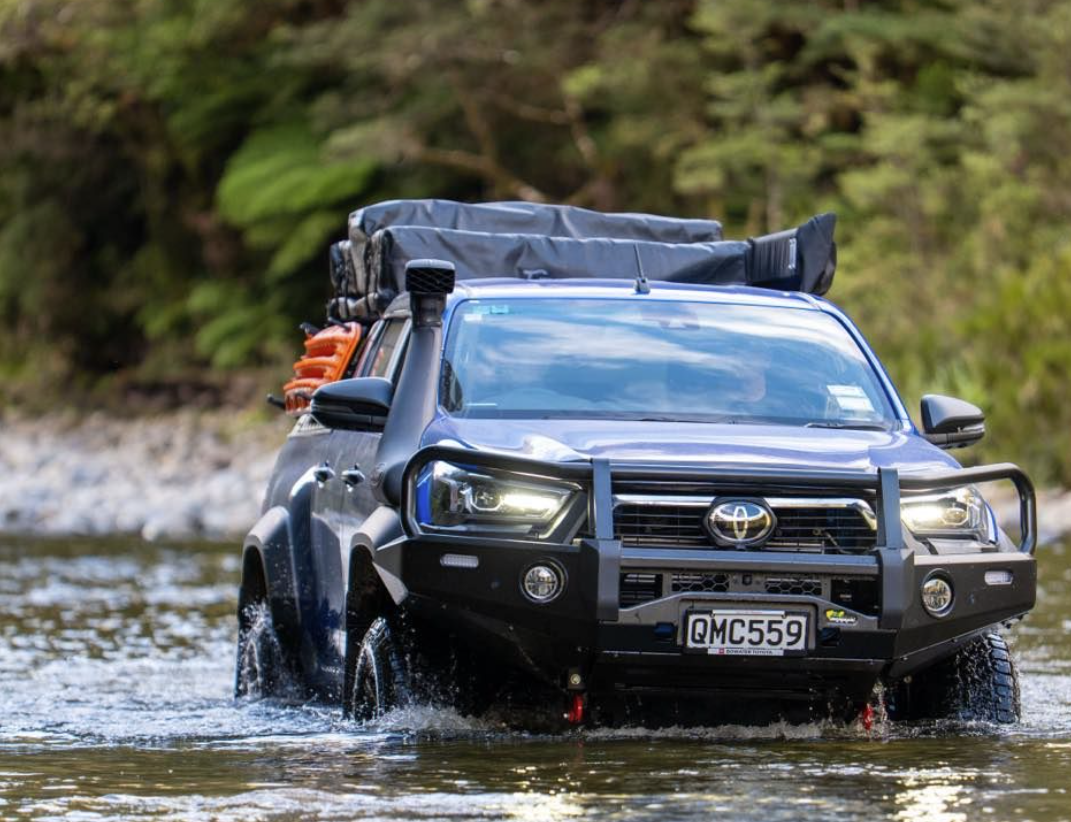
2024 Toyota HiLux SR5
Submitted by Nigel Bruce
Nigel Bruce’s SR5 is a clean touring build based in New Zealand, already earning its keep on river crossings below the Denniston Plateau.
The HiLux runs an EFS lift and an Ironman 4×4 bull bar, with an OzRoo tub rack carrying a Feldon Shelter rooftop tent and Darche 270 awning. The image of the Mackley River crossing below the Denniston Plateau shows the build in exactly the kind of country it was set up for.
2003 Toyota HiLux
Submitted by Zac Miller
Zac Miller’s 1KZ HiLux is a simple, practical build that has already proven itself on some of Queensland’s most remote tracks.
The 2003 model runs a two-inch suspension lift, 33-inch Baja Boss AT tyres, an ARB bull bar, custom side steps, and a custom alloy tub rack. Inside the tray, a drawer setup and dual batteries keep the rig self-sufficient, with a rear locker and RG Colorado leaf conversion rounding out a no-nonsense setup.
A trip north to Lakefield and across to Kowanyama for remote fishing and camping has been the standout run so far.
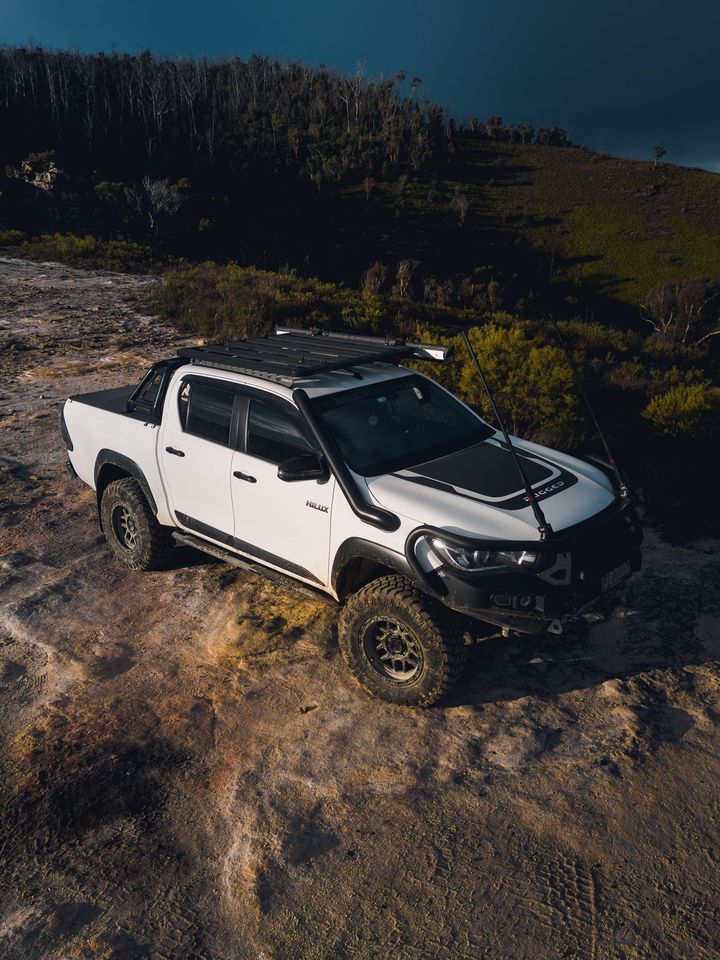
2020 Toyota HiLux Rugged X
Submitted by Jack Brook
Jack Brook’s Rugged X is a well-equipped tourer built around a Superior Engineering three-inch lift and a strong lighting and recovery spec.
The HiLux sits on KMC Mesa rims wrapped in Maxxis RAZR 285/70R17s, with an AFN bull bar up front. Three Stedi light bars handle visibility after dark, while a GME XRS UHF keeps communications covered. A Rhino-Rack roof platform, Darche awning, and stainless-steel snorkel from In-House Fabrication round out a clean, trail-ready build.
2002 Toyota HiLux SR5
Submitted by Jack Macpherson
Jack Macpherson’s 1KZ-TE SR5 is a work in progress, and the trip list is already ahead of the build sheet.
The 3.0-litre turbo-diesel runs a straight-through exhaust and is backed by a 140-amp AGM dual-battery system with a solar controller and ABR Sidewinder isolator. Up front, a steel bar sits alongside XTM spotlights and a KingOne winch, with a Uniden UHF handling comms. Rolling stock is 31-inch Hankook MT2 tyres, and a two-inch Fulcrum lift kit is imminent.
In the tray, a single rear drawer with fridge slide carries a 60-litre myCOOLMAN fridge. A Dune 2.5m awning is already fitted, with a 270-degree unit to follow. HD Prorack roof racks run a custom Maxtrax mounting system, with additional lighting wired into the canopy.
Fraser Island, the Barringtons, and the Watagans have been the standout runs so far, with a planned trip across to South Australia taking in Robe, Beachport, the Great Ocean Road, the Victorian High Country, Kosciuszko, and the NSW south coast next on the list.
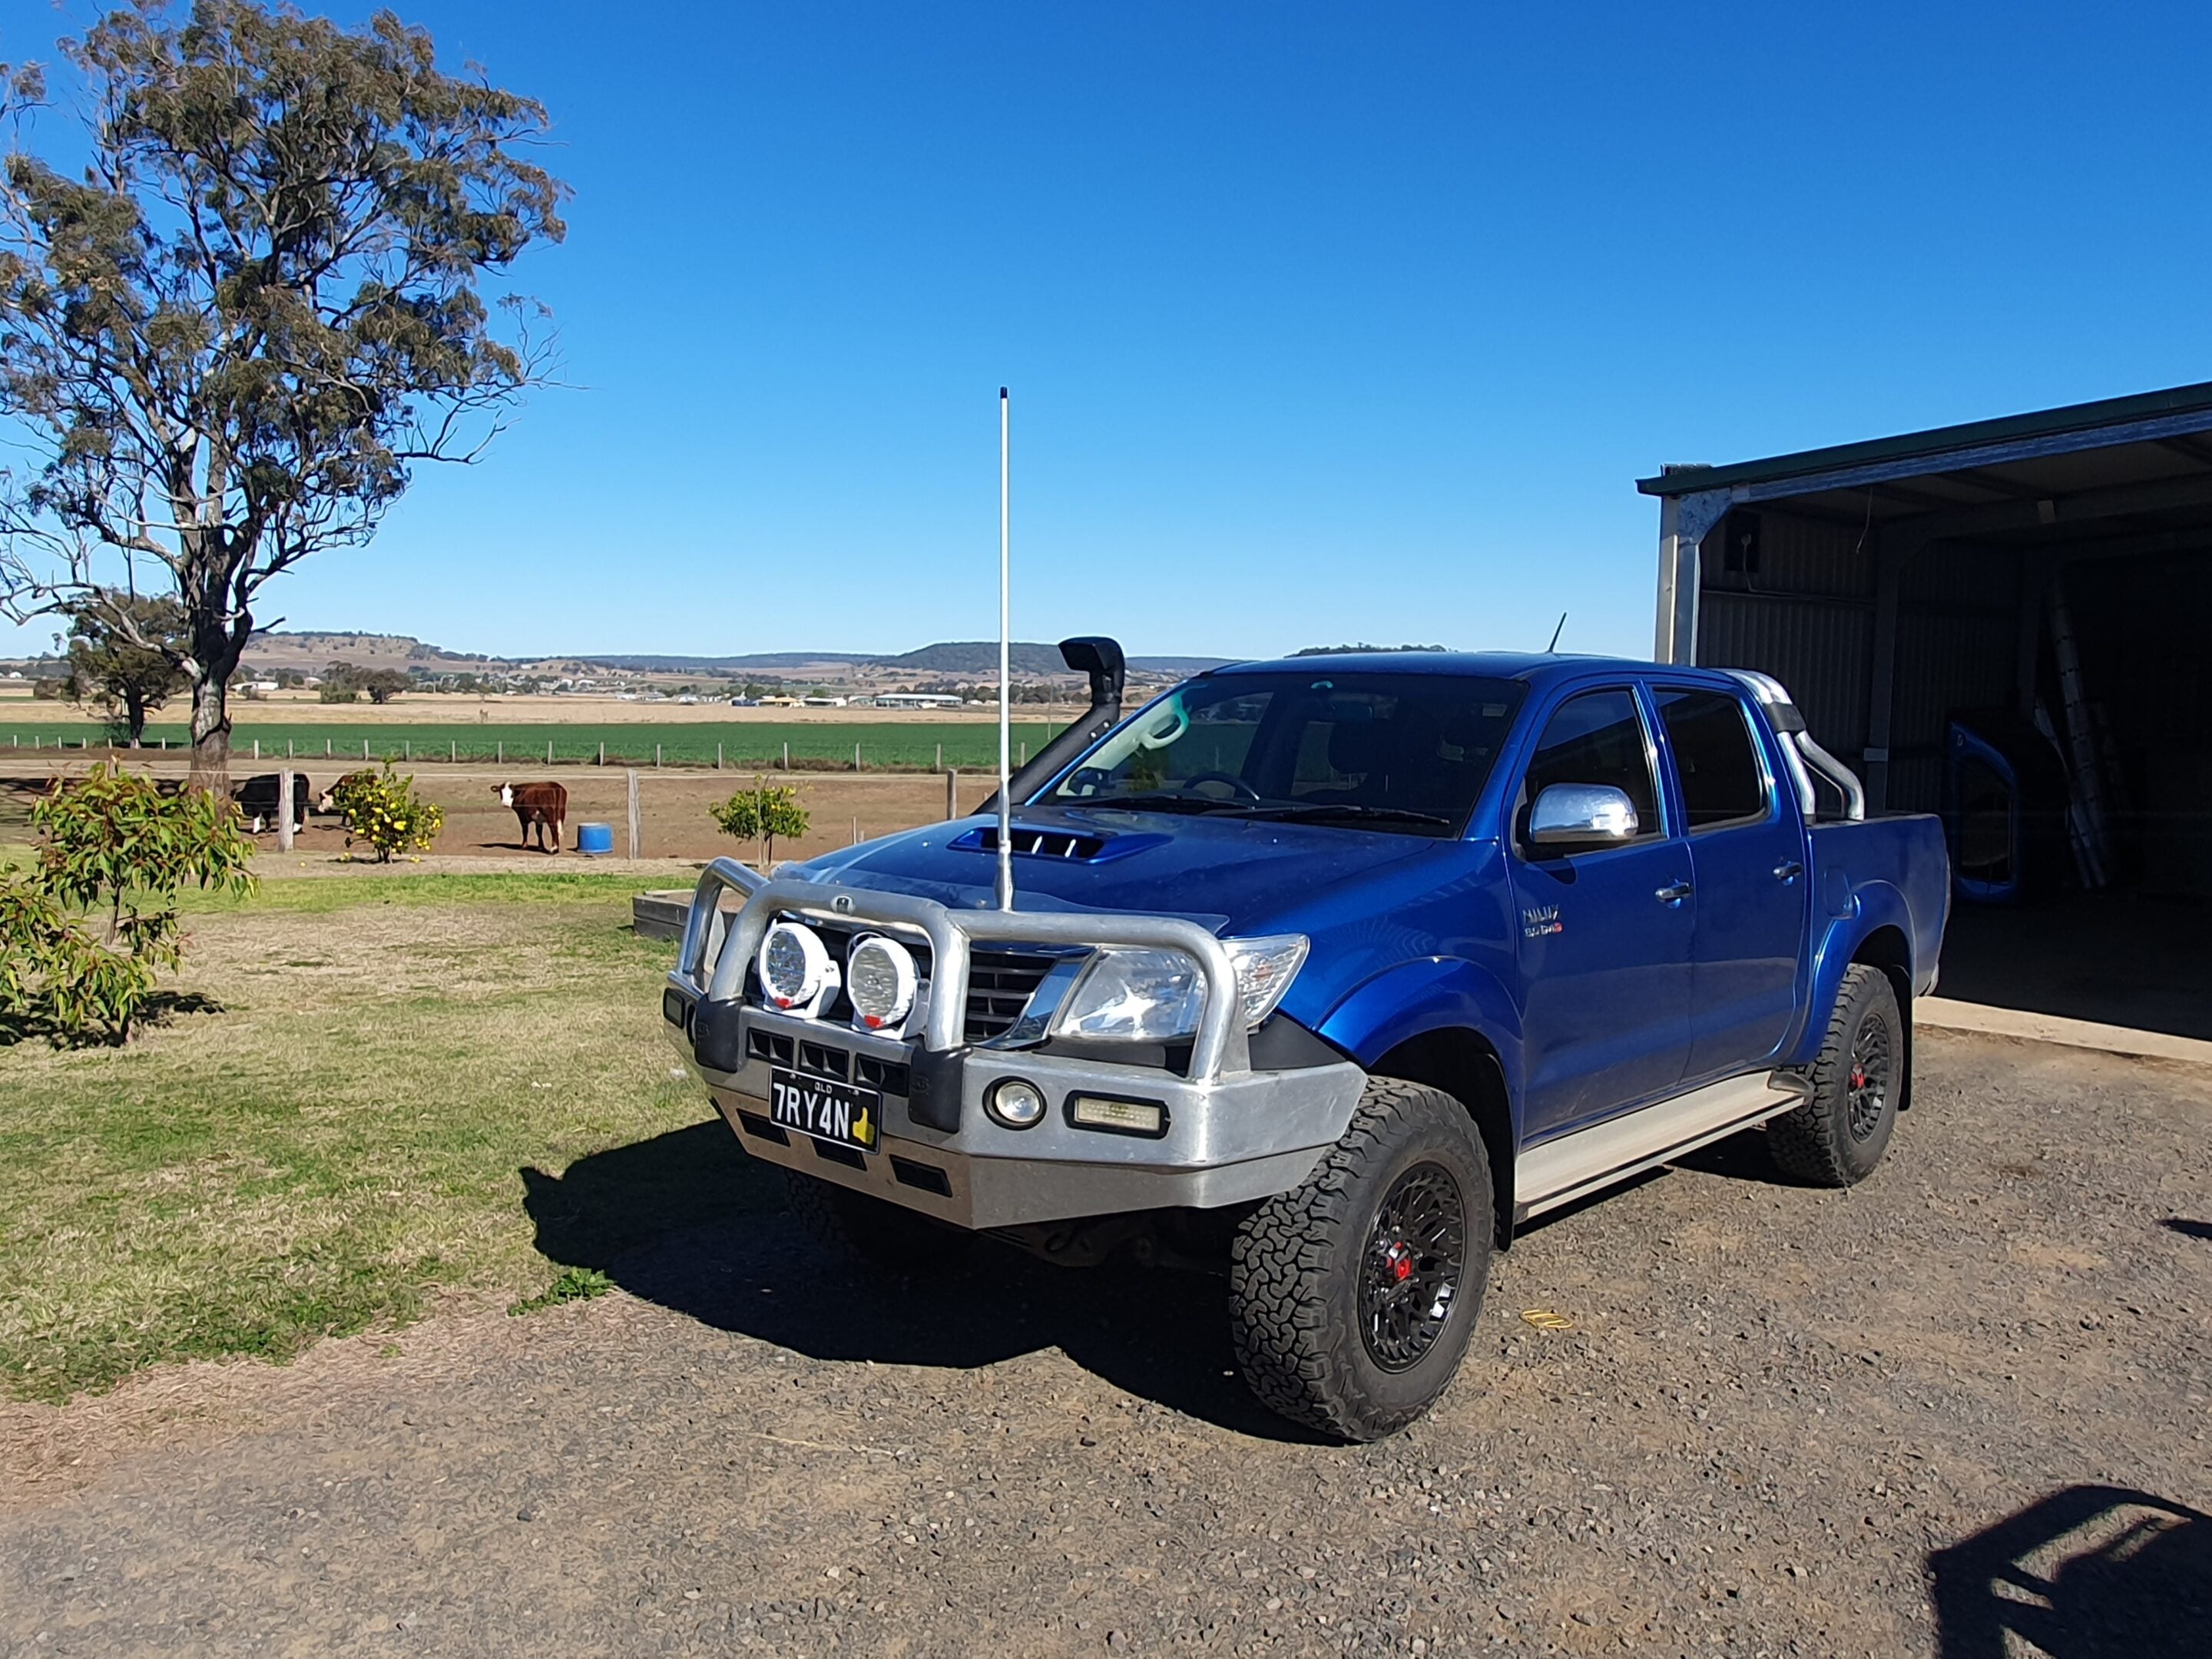
2014 Toyota HiLux SR5
Submitted by Ryan Barnsley
Ryan Barnsley’s inherited SR5 has been steadily upgraded since handover, with lighting and wheels leading the way.
The 3.0-litre turbo-diesel runs Narva LED headlights and 7-inch LED spotlights up front, backed by Himod LED tail lights and a Pedal Torq throttle controller. An ECB bull bar and 3-inch Safari snorkel handle the practical work, with Monster Delta wheels and 32-inch BFG KO2 all-terrains underneath. A half-canopy tray is the next planned addition as the build continues to take shape.
1987 Toyota HiLux LN65
Submitted by Cameron Grayson
Cameron Grayson’s 1987 LN65 is more than a 4×4 build. It’s a family heirloom that has been rebuilt, driven hard, and handed down with intention.
Cameron’s father purchased the HiLux in 1990, three years after it left the factory, and used it for years of High Country runs with mates before it passed to a family member for 18 years. When the Graysons got it back, a full rebuild followed: a fresh 2.8 turbo-diesel, new gearbox, suspension, and a complete recommission from the ground up.
The rebuilt LN65 made it back to the High Country in 2022, and completed several father and son trips to the Grampians before Cameron’s father passed away from cancer on 3 August 2024. His last wish was to ride on the back of the tray with his dog, Boy. He handed Cameron the keys.
Ford’s 2026 Ranger PHEV range for Australia arrives later this year, with a simplified three-grade lineup and a new XL variant priced to undercut key rivals including the BYD Shark 6.
The range covers three grades: XL, Sport and Wildtrak, with the XL opening at $59,000 driveaway. That sits below the BYD Shark’s $57,900 before on-road costs, meaning the entry Ranger PHEV lands cheaper once those are added.
Power comes from a 2.3-litre EcoBoost petrol engine paired with a 10-speed modular hybrid transmission and a 75kW electric motor, backed by an 11.8kWh usable battery. Combined output is 207kW and 697Nm, with a 3,500kg braked towing capacity across all variants.
The XL comes well-equipped for an entry model: 17-inch alloy wheels, a 12.4-inch digital instrument cluster, a 12-inch infotainment screen, dual-zone climate control with rear air vents, Intelligent Cruise Control with Stop & Go, steel underbody protection and a drop-in bedliner.
The Sport sits in the middle, adding 18-inch alloys, LED lighting, leather-accented trim, wireless charging, a 360-degree camera and upgraded driver assistance including Pro Trailer Backup Assist.
The Wildtrak tops the range with Matrix LED lighting, a Power Roller Shutter, heated front seats, ambient lighting, a Bang & Olufsen audio system and a new colour option, Ignite Orange.
All variants come in Frozen White as standard, with additional paint options and accessory packs varying by grade. The 2026 Ranger PHEV is due in Australian showrooms in the third quarter of 2026. Full specs will be released closer to vehicle arrivals later this year.
Pricing (driveaway):
- Ranger PHEV XL: $59,000
- Ranger PHEV Sport: $66,000
- Ranger PHEV Wildtrak: $70,000
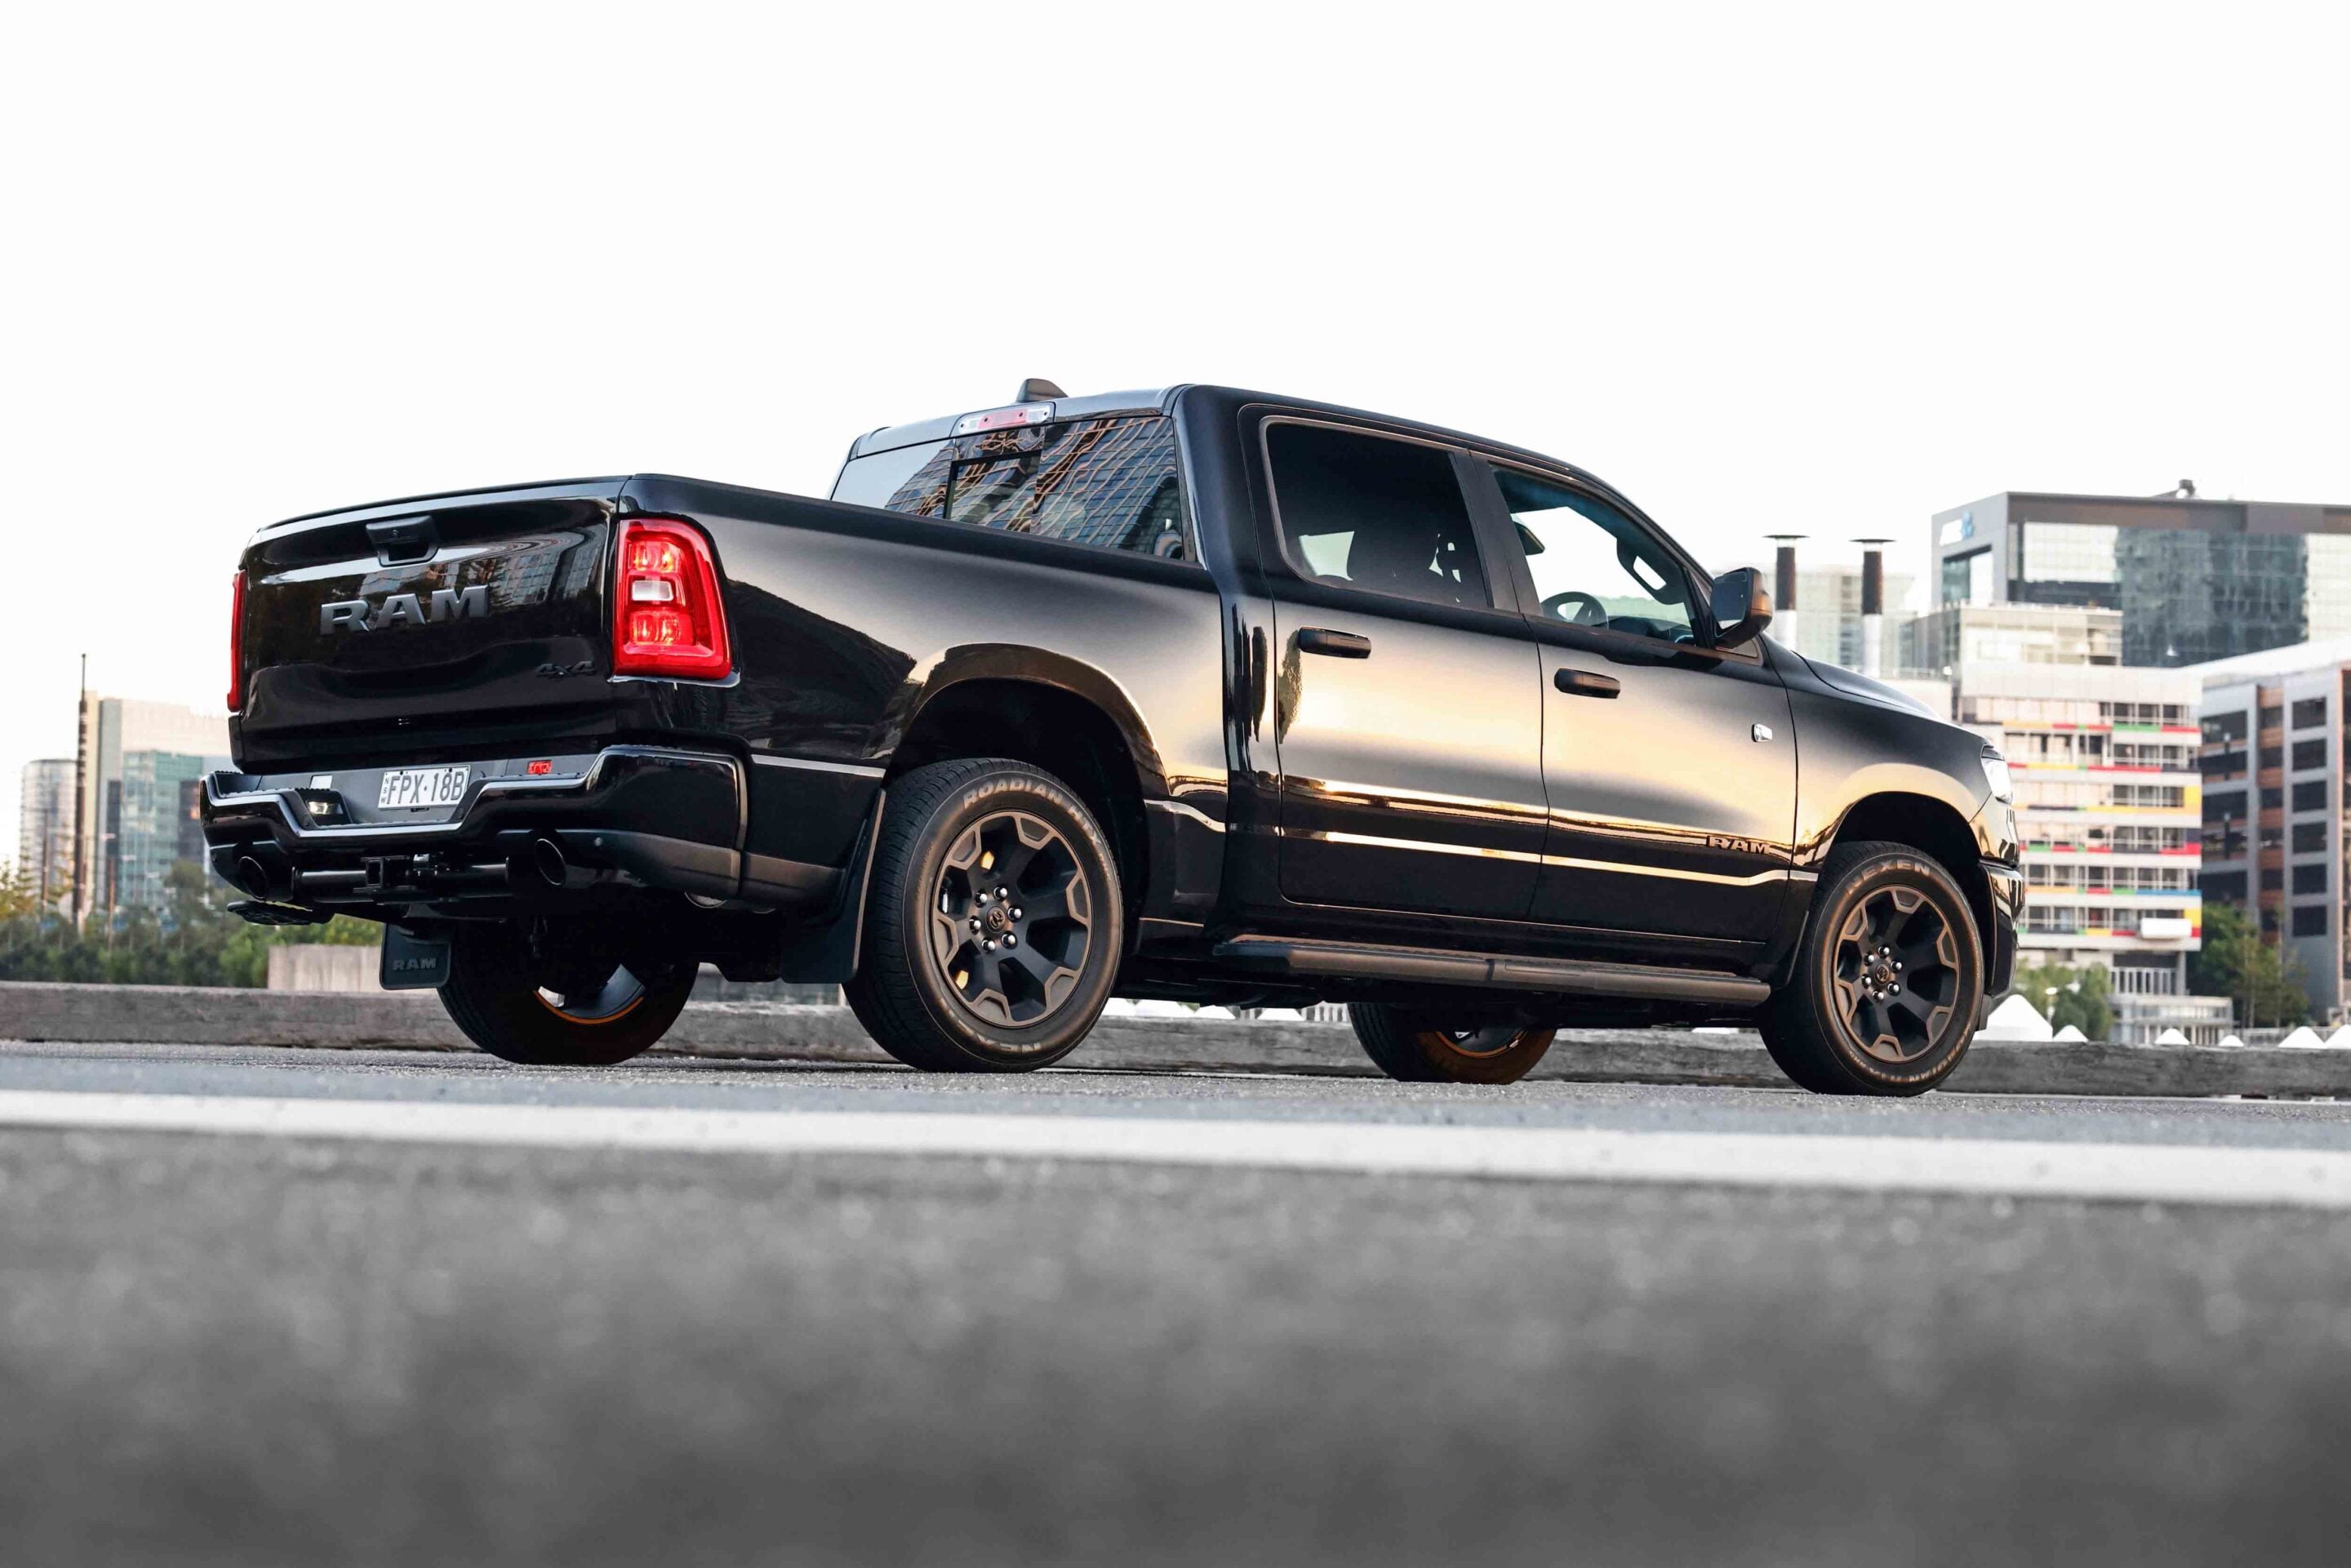
Ram has added a new entry point to its Australian full-size pick-up range with the MY26 Ram 1500 Express Black Edition, due in local showrooms from June 2026.
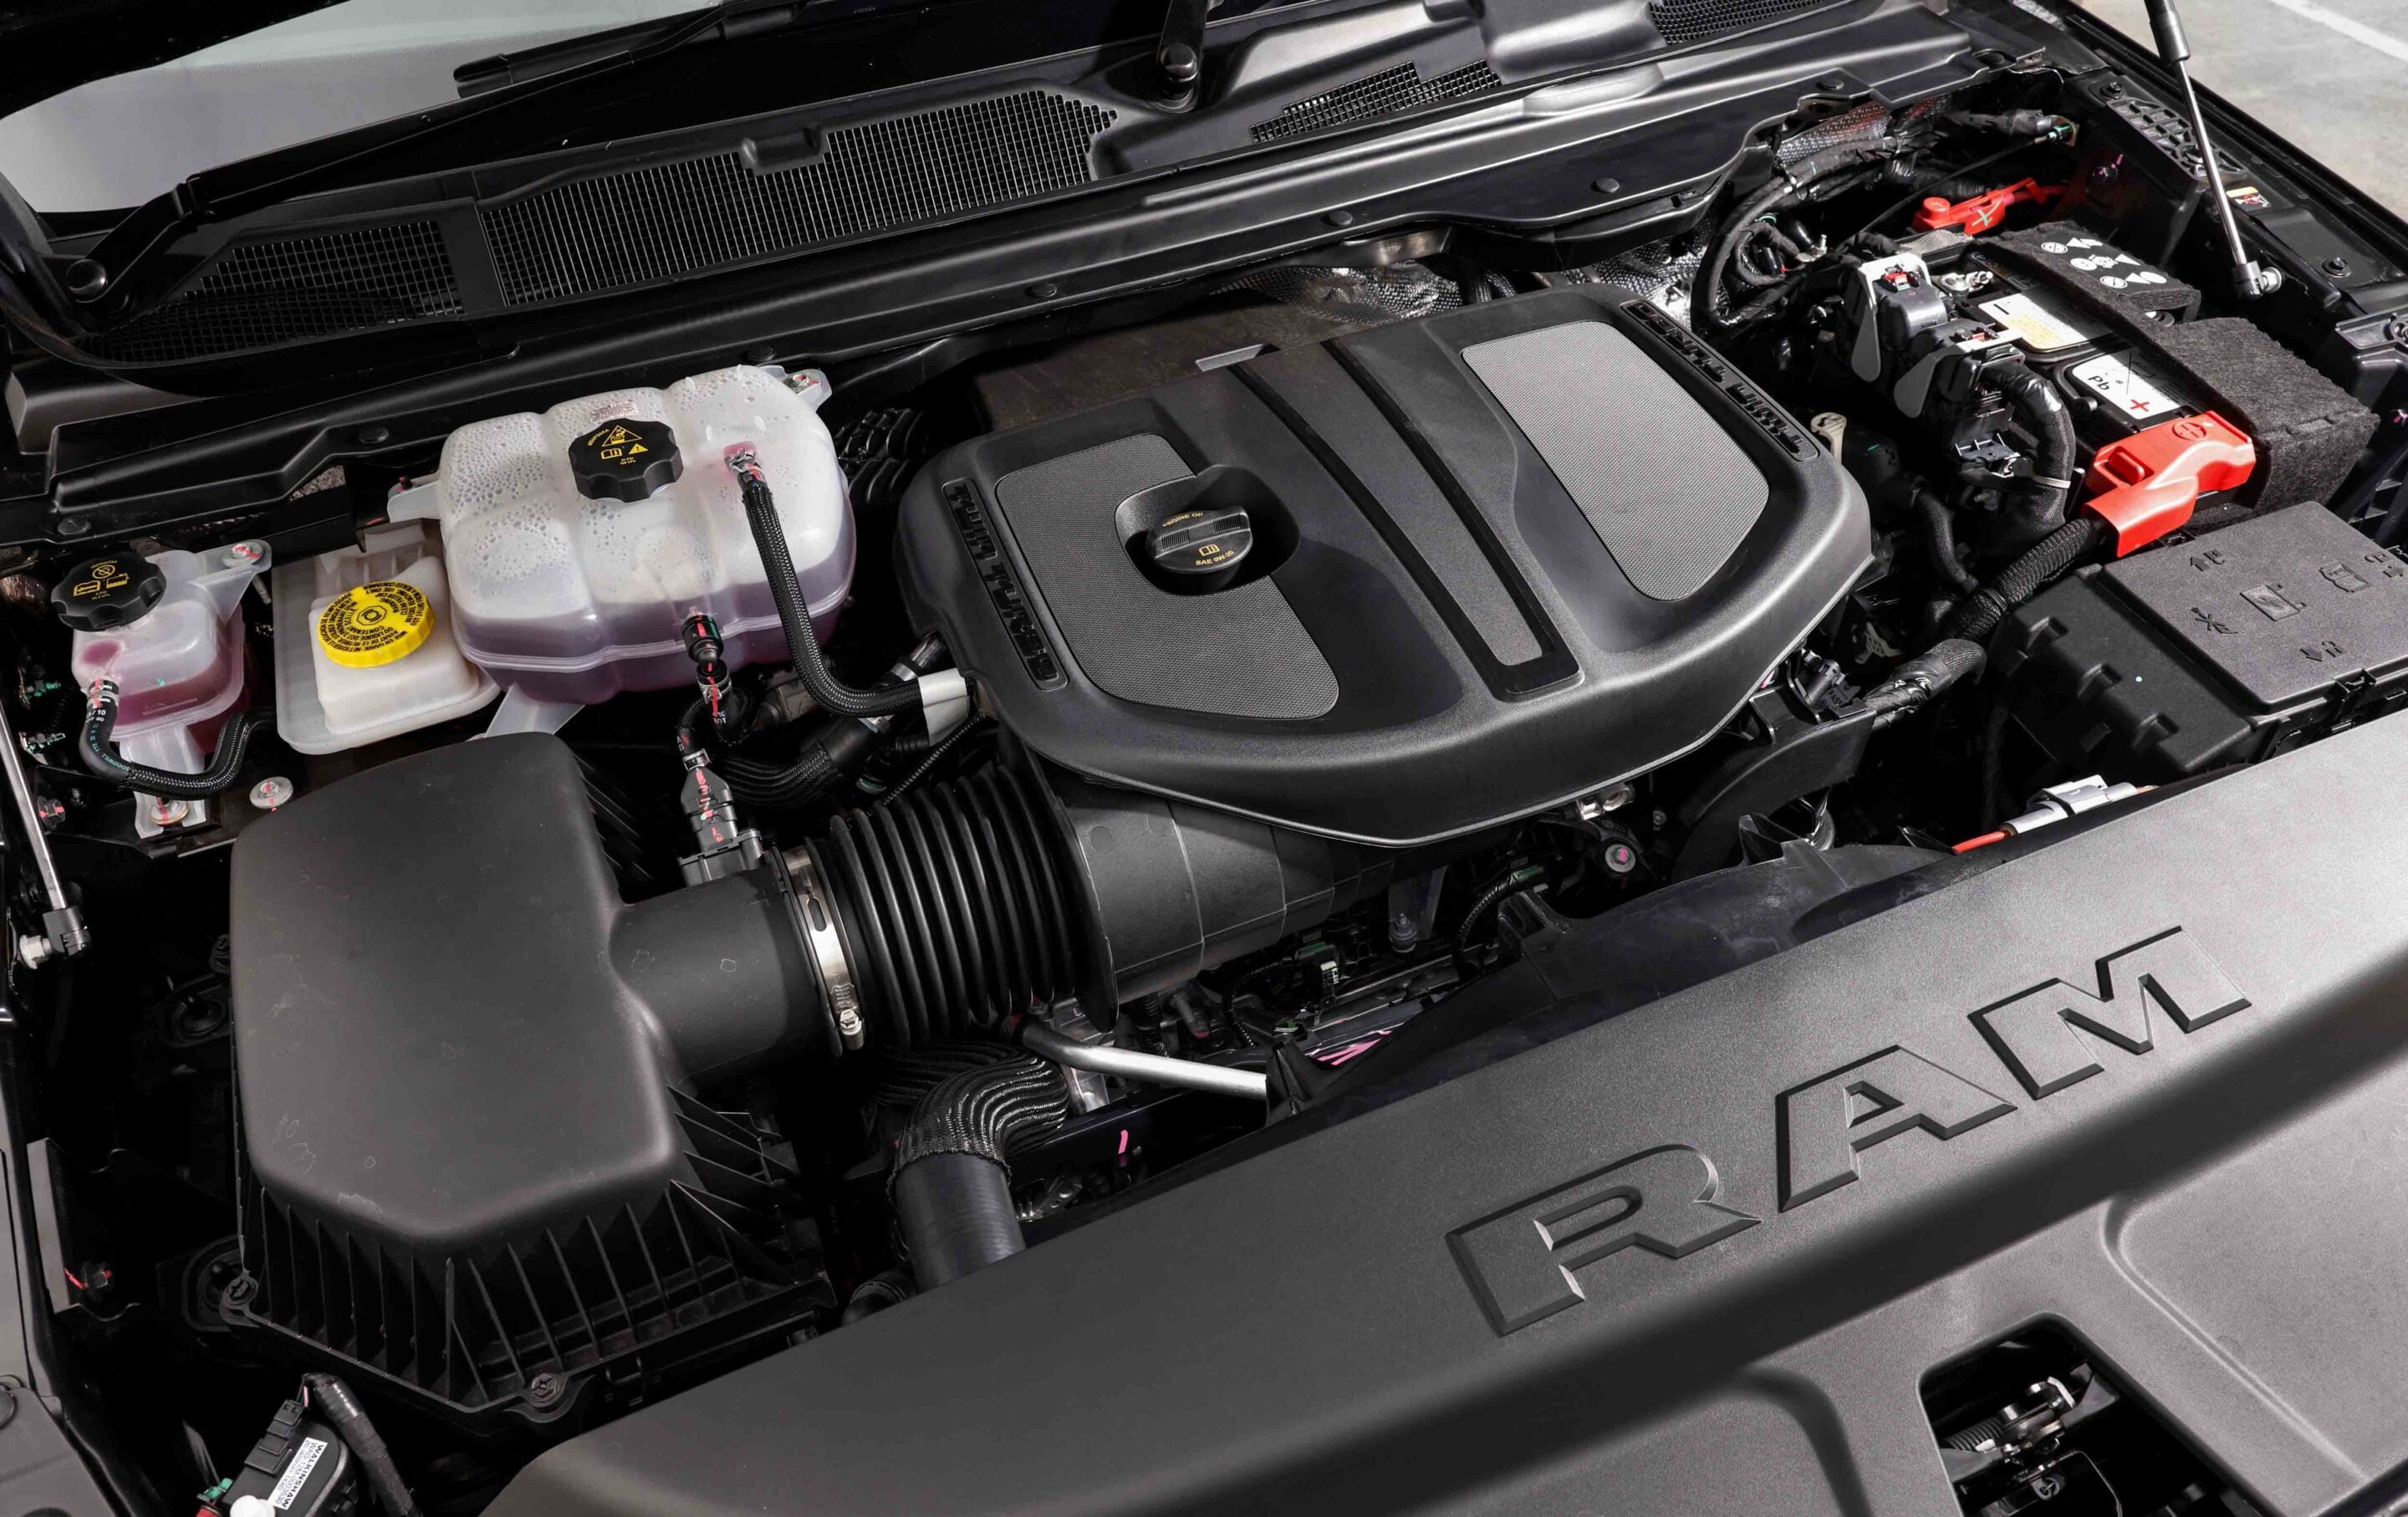
Priced from $109,950 plus on-road costs, the Express Black Edition is the most affordable variant in the updated MY26 Ram 1500 lineup, powered by the brand’s 3.0-litre twin-turbo inline-six Hurricane petrol engine producing 313kW and 635Nm, paired with an eight-speed automatic and part-time four-wheel drive.
“The Ram 1500 Express Black Edition brings a new entry price to the updated MY26 Ram 1500 Series,” said Jeff Barber, General Manager, Ram Trucks Australia. “With the Ram 1500 Express Black Edition we have reduced the price gap between mid-size utes and our full-size Ram 1500 range.
“The Ram 1500 Express Black Edition delivers the benefits of a US pick-up in terms of size, space, comfort and capability – at an attainable price point. In addition, the Ram 1500 Express Black Edition has many of the styling upgrades from our flagship models – such as the Sports Hood and black highlights. Our customers have been asking for a package like this and we’re pleased to be able to deliver it,” added Barber.
Towing capacity is rated at 4500kg with a 70mm tow ball or 3500kg with a 50mm tow ball. Payload is 1014kg, maximum combined tub and towball load is 520kg, GVM is 3505kg, GCM is 7711kg, and a 98-litre fuel tank is fitted as standard.
The Express Black Edition gets a blacked-out styling package including Ram’s power bulge sports hood, black mirror caps, door handles, badging, grille and 20-inch alloy wheels wrapped in 275/55R20 tyres. LED headlights are standard.

Six exterior colours are available: Diamond Black, Granite Crystal, Silver Zynith, Bright White, Molten Red and Forged Blue. Metallic paint adds $950 to the price.
Like the rest of the Australian Ram range, the Express Black Edition is imported from the United States in left-hand drive before being converted to right-hand drive in Melbourne.
Ram 1500 Express Black Edition feature highlights:
- ‘Power bulge’ Sports Hood
- Black grille
- Black badging
- Black side mirror caps
- Black door handles
- Black exhaust tips
- Black side steps
- Black 20-inch wheels
- Body-coloured bumpers
- Spray-in bed liner
- Damped tailgate
- ‘Kick down’ bed step on passenger side
- Power operated sliding rear window port
- Tinted rear windows
- LED headlights and fog lights
- Cargo area light
- Cloth trim
- Black interior highlights
- Large centre console with internal sliding tray
- 8.4-inch infotainment screen
- 7.0-inch digital instrument display
- Wired and wireless Apple CarPlay and Android Auto
- 6-speaker audio
- Sensor key with push button start
- Remote engine start
- Gear selector dial
- Electric park brake
- Rear underfloor covered storage pockets x 2
- Storage space under the rear seats
- Adaptive cruise control
- Forward collision alert with AEB
- Lane-keeping assistance
- Blind spot monitoring
- Rear cross-traffic alert
- Front and rear parking sensors
- Rear view camera
- Trailer brake control
Pricing: MY26 Ram model line-up (before on-road costs)
- Ram 1500 Express Black Edition: $109,950
- Ram 1500 Rebel: $141,950
- Ram 1500 Laramie Sport: $141,950
- Ram 1500 Limited: $159,950
- Ram 2500 HD Laramie: $172,950
- Ram 3500 HD Laramie: $177,950
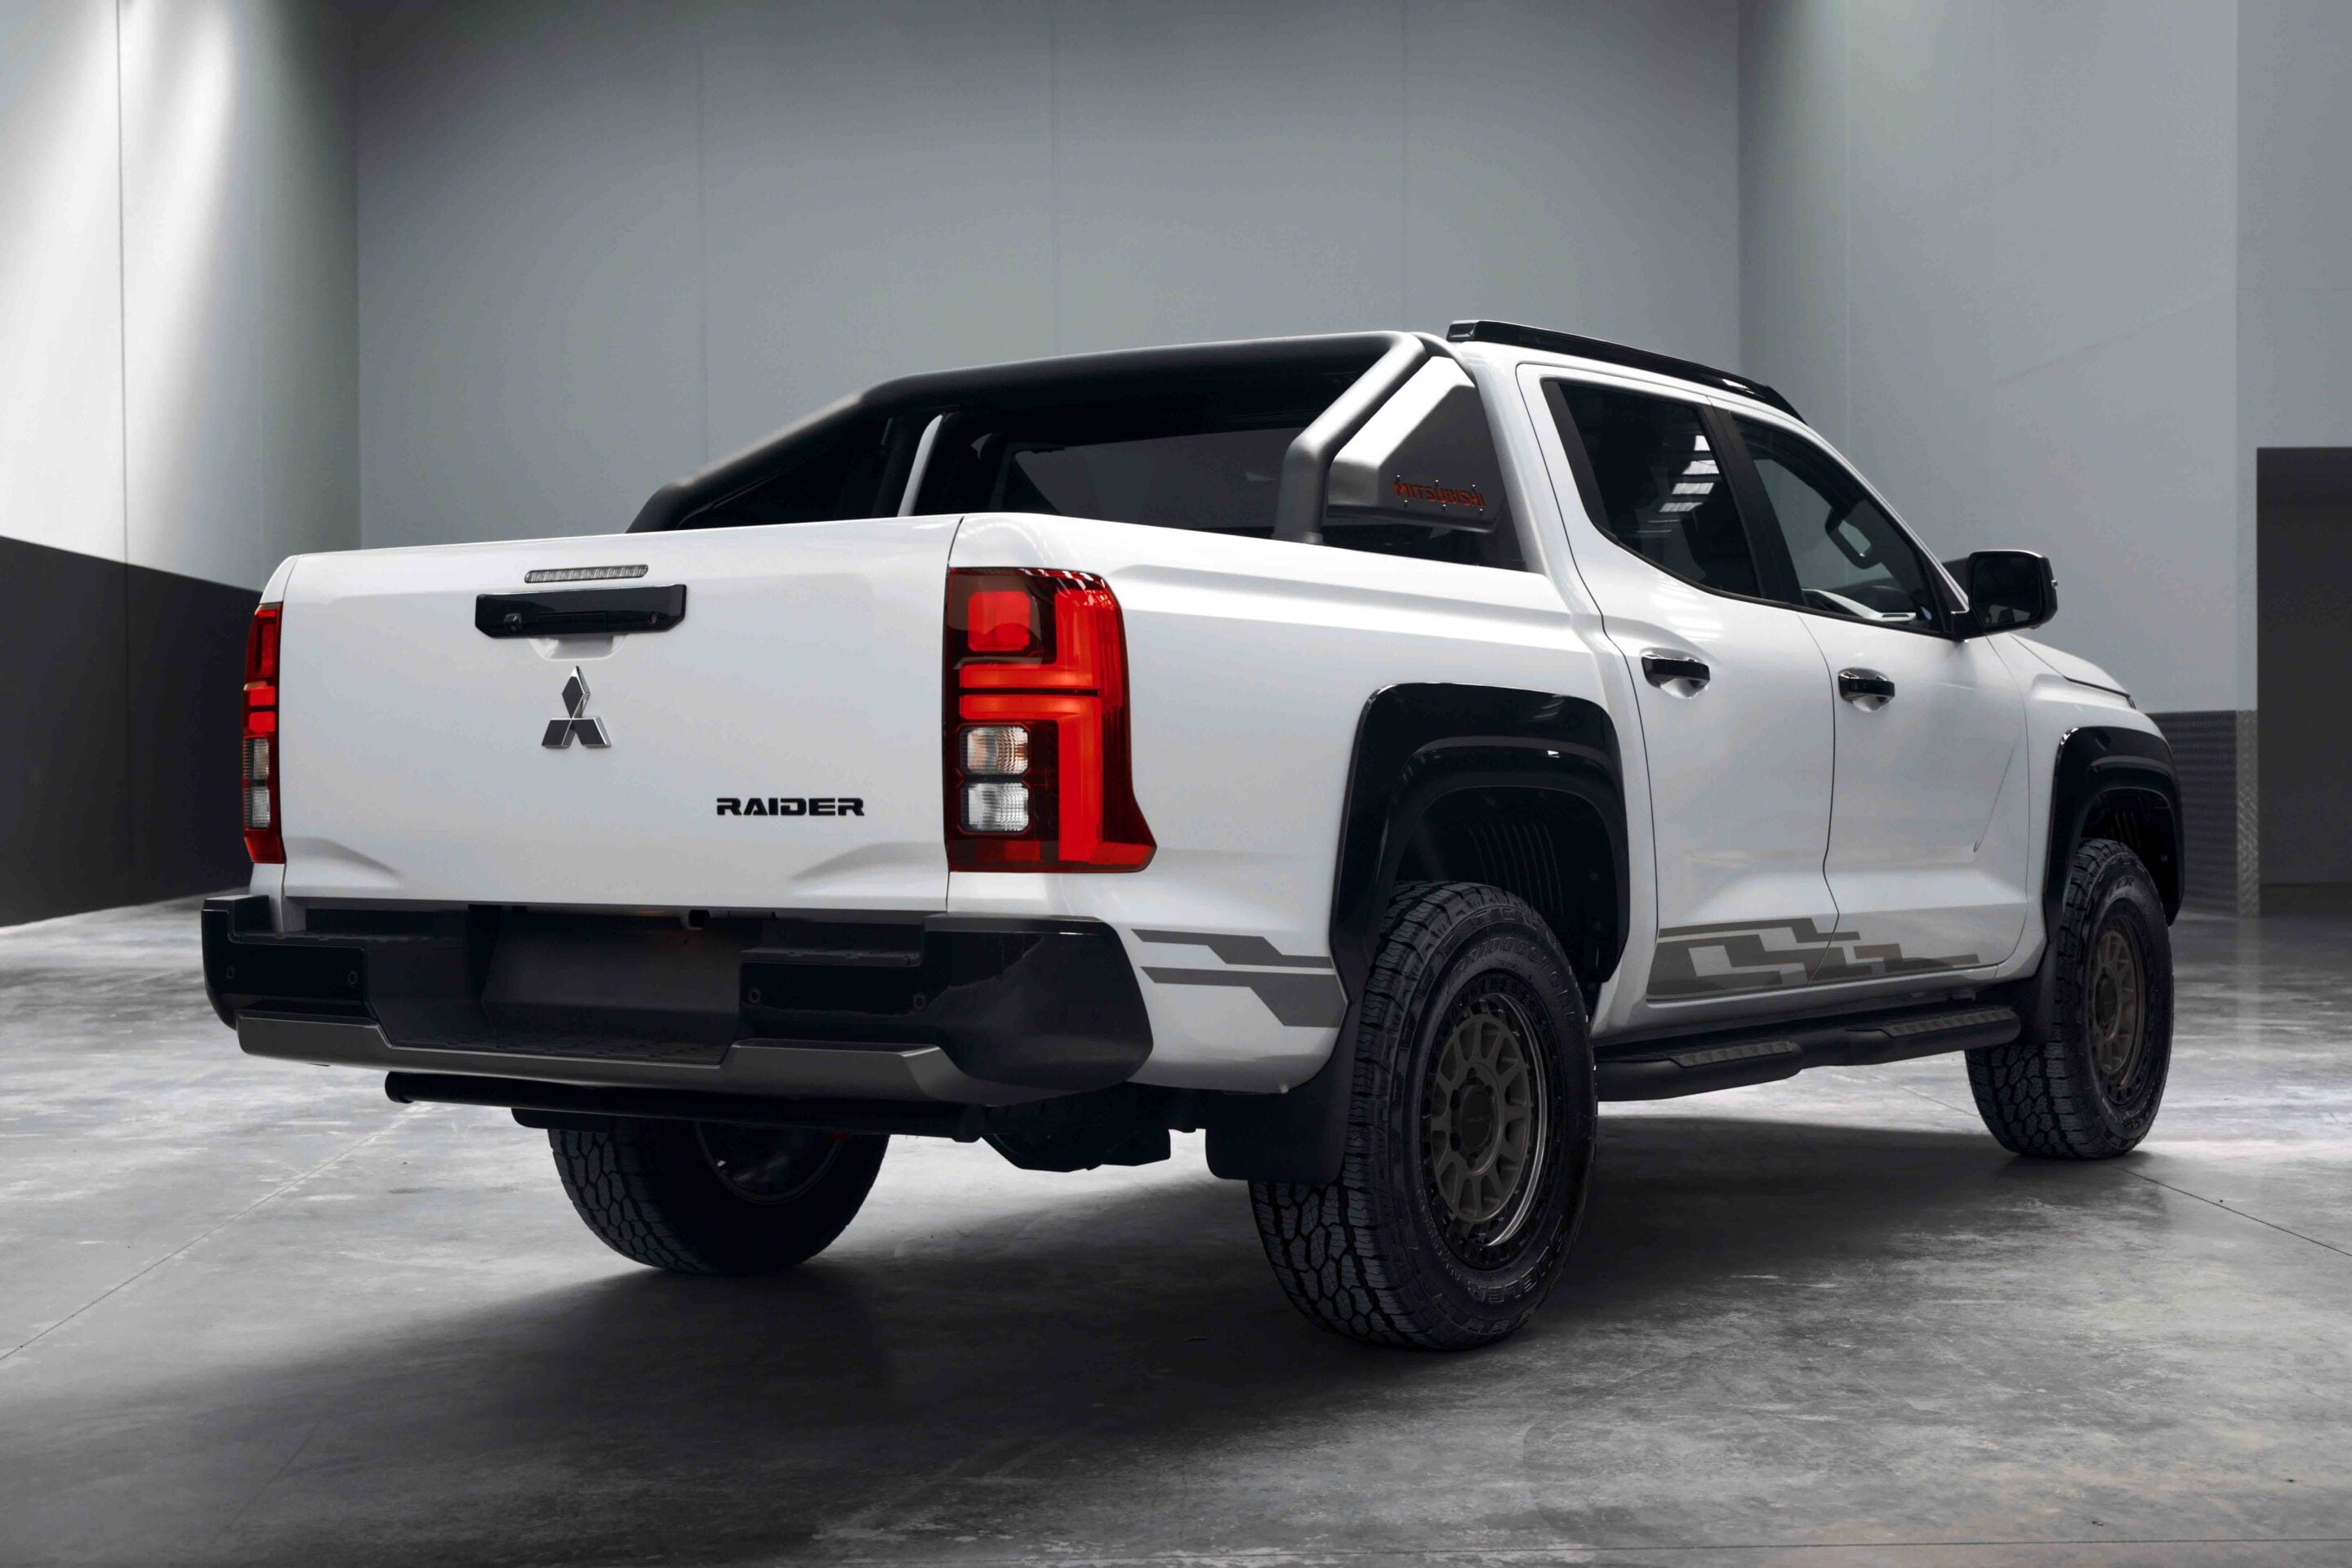
Mitsubishi has confirmed pricing for its new flagship Triton Raider, with the locally developed dual-cab ute landing in Australian dealerships from June 2026 priced at $74,990 driveaway.
First announced earlier this year, the Raider sits at the top of the 2026 Triton range and is based on the Triton GSR dual-cab. The vehicle was developed in partnership with Victorian engineering firm Premcar, with second-stage manufacturing completed at Premcar’s Epping facility.
The Raider builds on the updated 2026 Triton GSR with a package of suspension, wheel, tyre and styling upgrades aimed at improving capability for Australian conditions. Power comes from the same 2.4-litre four-cylinder turbo-diesel carried across the Triton range, producing 150kW and 470Nm and paired with a six-speed automatic. Mitsubishi’s SuperSelect II 4×4 system, with 2H, 4H, 4HLc and 4LLc modes, is also retained, as is the 3500kg braked towing capacity.
“Triton Raider is already breaking new ground for the Mitsubishi brand in Australia,” said Bruce Hampel, GM of Product Strategy at MMAL. “Early feedback from our dealer network since unveiling has been resoundingly positive, with specific callouts for Raider’s improved wheel control, aggressive styling and off-road performance.
“We are incredibly proud of the product our team has delivered in collaboration with Premcar. Along with our dealer network, we can’t wait for customers to experience the Triton Raider for themselves,” added Hampel.
Central to the changes is a unique suspension package engineered specifically for the Raider, featuring revised front and rear dampers. The front units use an internal rebound spring to improve suspension control, alongside new front springs and a revised jounce bumper setup.
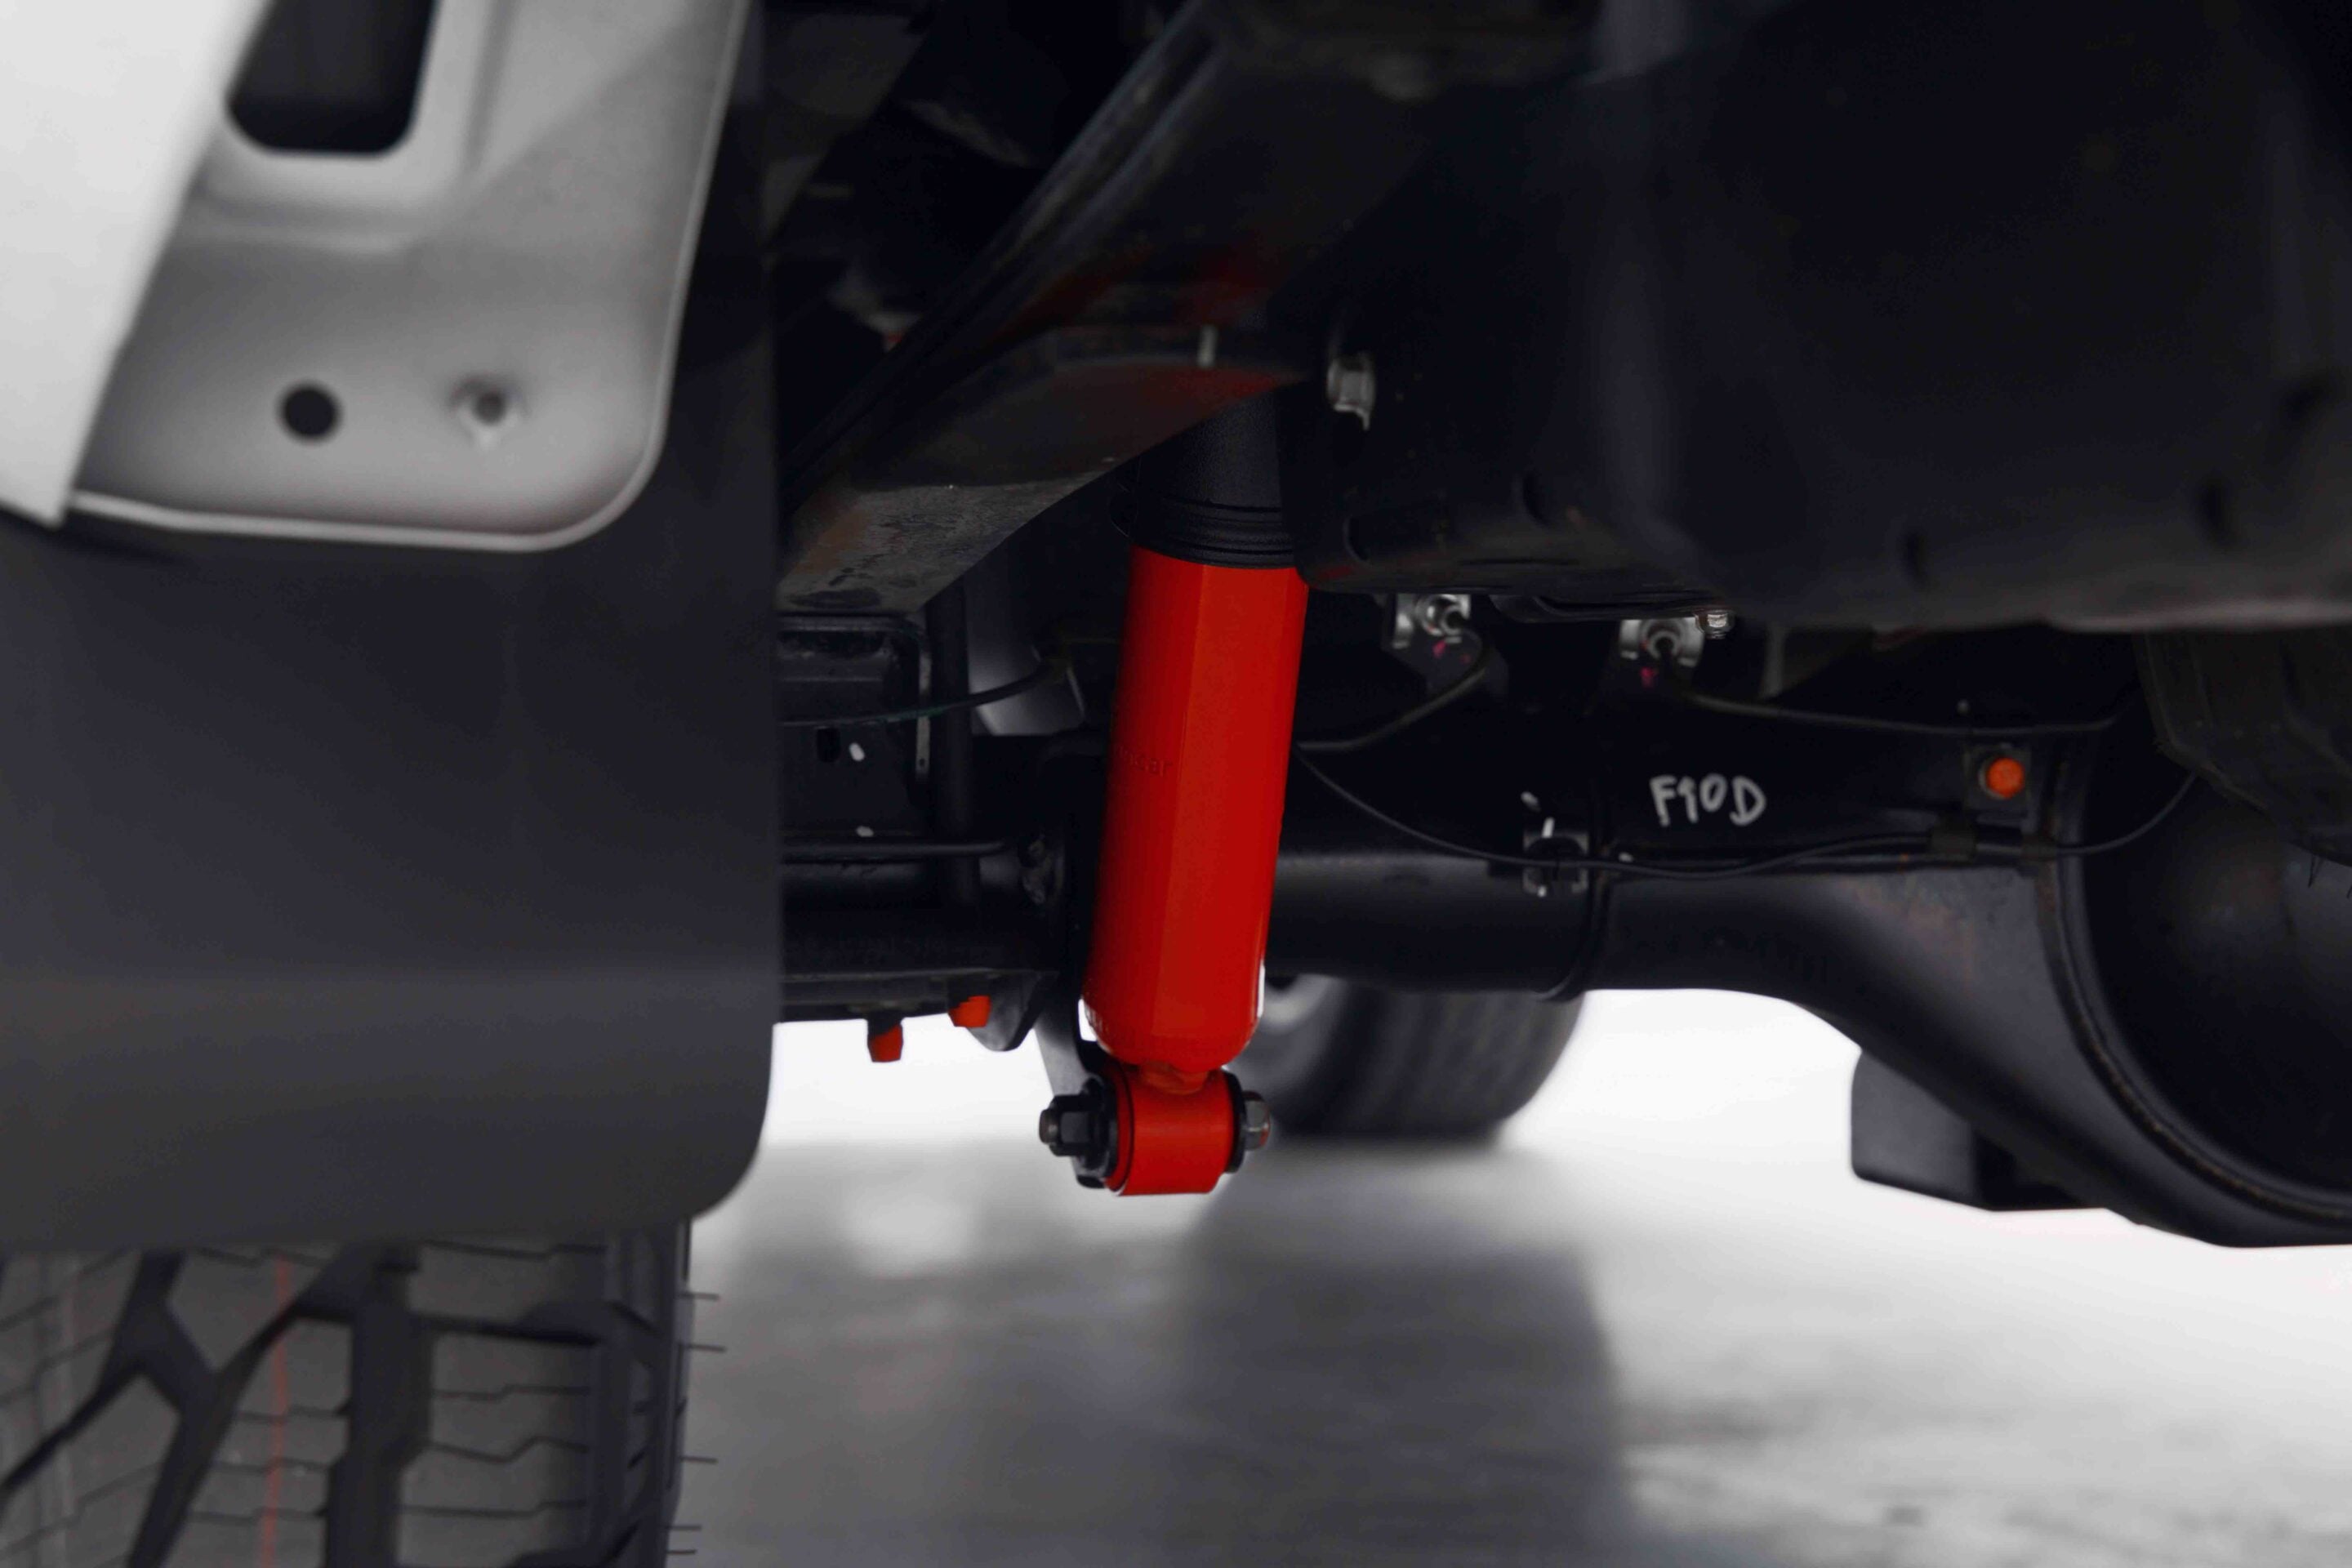
The suspension changes deliver a 25mm increase in front ride height and 15mm at the rear. At the front, 10mm of lift comes from the revised springs, with the remaining 15mm from the upgraded wheel and tyre package. Track width has also been increased by 20mm overall.
The Raider retains the Yamaha Performance Damper system introduced on the 2026 Triton GSR, with the chassis-mounted unit reducing noise, vibration and harshness. The upgraded rolling stock consists of 18-inch ROH Assault alloy wheels in Brushed Bronze, paired with Bridgestone Dueler AT002 all-terrain tyres and Raider-specific hub caps.
Externally, Mitsubishi has given the Raider a more aggressive look with Sandstorm side decals featuring bronze detailing, Raider badging on the tailgate, a Dark Warm Grey front garnish, upgraded side protection bars, a sports bar with red inserts, and red-finished underbody protection with Raider lettering. A chrome grille emblem contrasts against the black grille and lower garnish.
Inside, the Raider carries over the Triton GSR’s equipment list, with black leather seats featuring orange stitching, Raider-branded front headrests and a Raider badge on the centre console. Four exterior colours are offered at launch: White Diamond, Black Mica, Blade Silver and Graphite Grey.
At $74,990 driveaway, the Triton Raider is the most expensive Triton in Mitsubishi’s Australian lineup, serving as a factory-backed halo model for buyers.
- UPDATE 1: From the showroom to the tracks
- UPDATE 2: Mods tested in the Vic High Country
- UPDATE 3: Bigger tyres give the Grenadier a boost in the bush
- UPDATE 4: Grenadier to the rescue
Part 1: From the showroom to the tracks
“What kind of car is that?” It’s a question I’ve been asked many times in the first month of driving the Grenadier.
Is it a Land Rover? Is it electric? Is it Chinese? Not many people seem to know exactly what it is. The only other vehicle I’ve driven that causes this much confusion is my 1968 Country Buggy. Yep, Google it.
By now, most people know the story of why the Grenadier was created. Man drives Defender. Defender stops being made. Man decides to build his own four-wheel drive to replace his much-loved Defender – but better. That man is Sir Jim Ratcliffe, owner of Ineos, Manchester United and a large part of the Mercedes F1 team.
I owned a 2015 Defender back in 2023 in the UK, and I’ve also owned a 1976 VW Kombi. In many ways, the Kombi and Defender feel like a closer driving experience than the Defender and Grenadier. Yes, the Grenadier looks a little like an old Defender, but that’s where the similarities stop. I was lucky enough to go on a few of the Grenadier’s Australian development trips in the Outback a few years back. These were all pre-production vehicles and not final spec. They were rough and still being worked on by engineers, but even then I could tell they were highly capable, and I was looking forward to driving the production model.
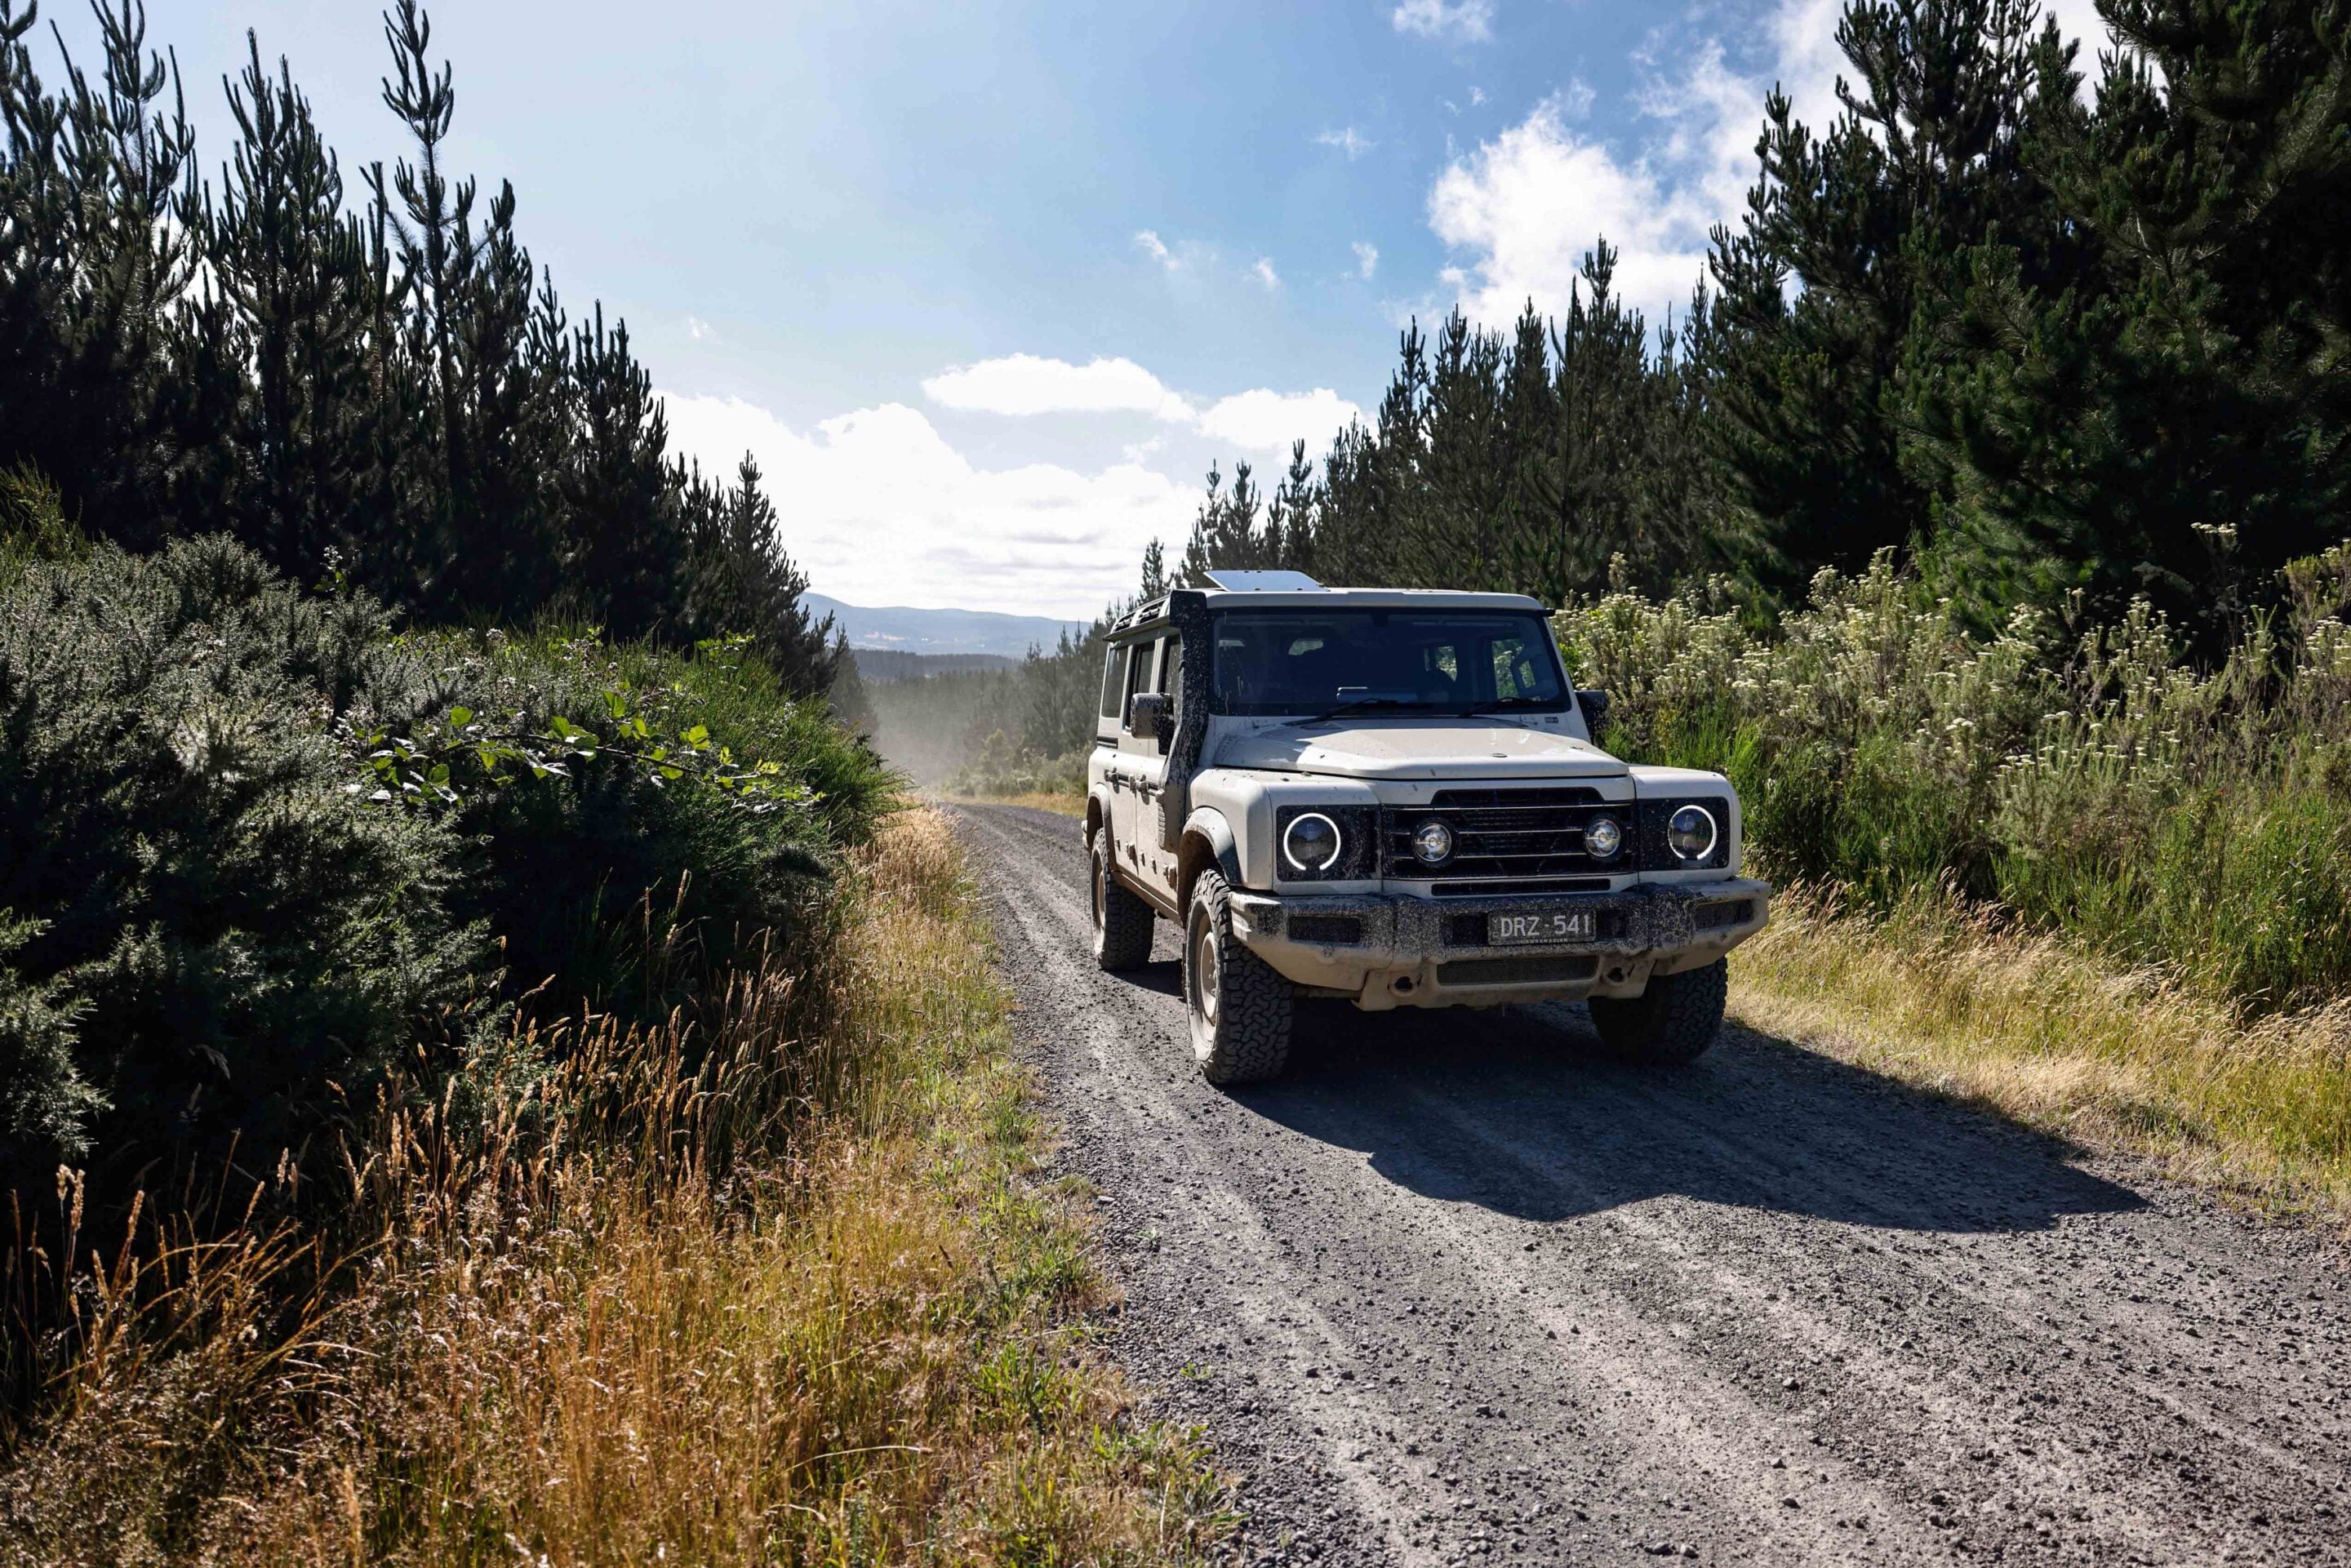
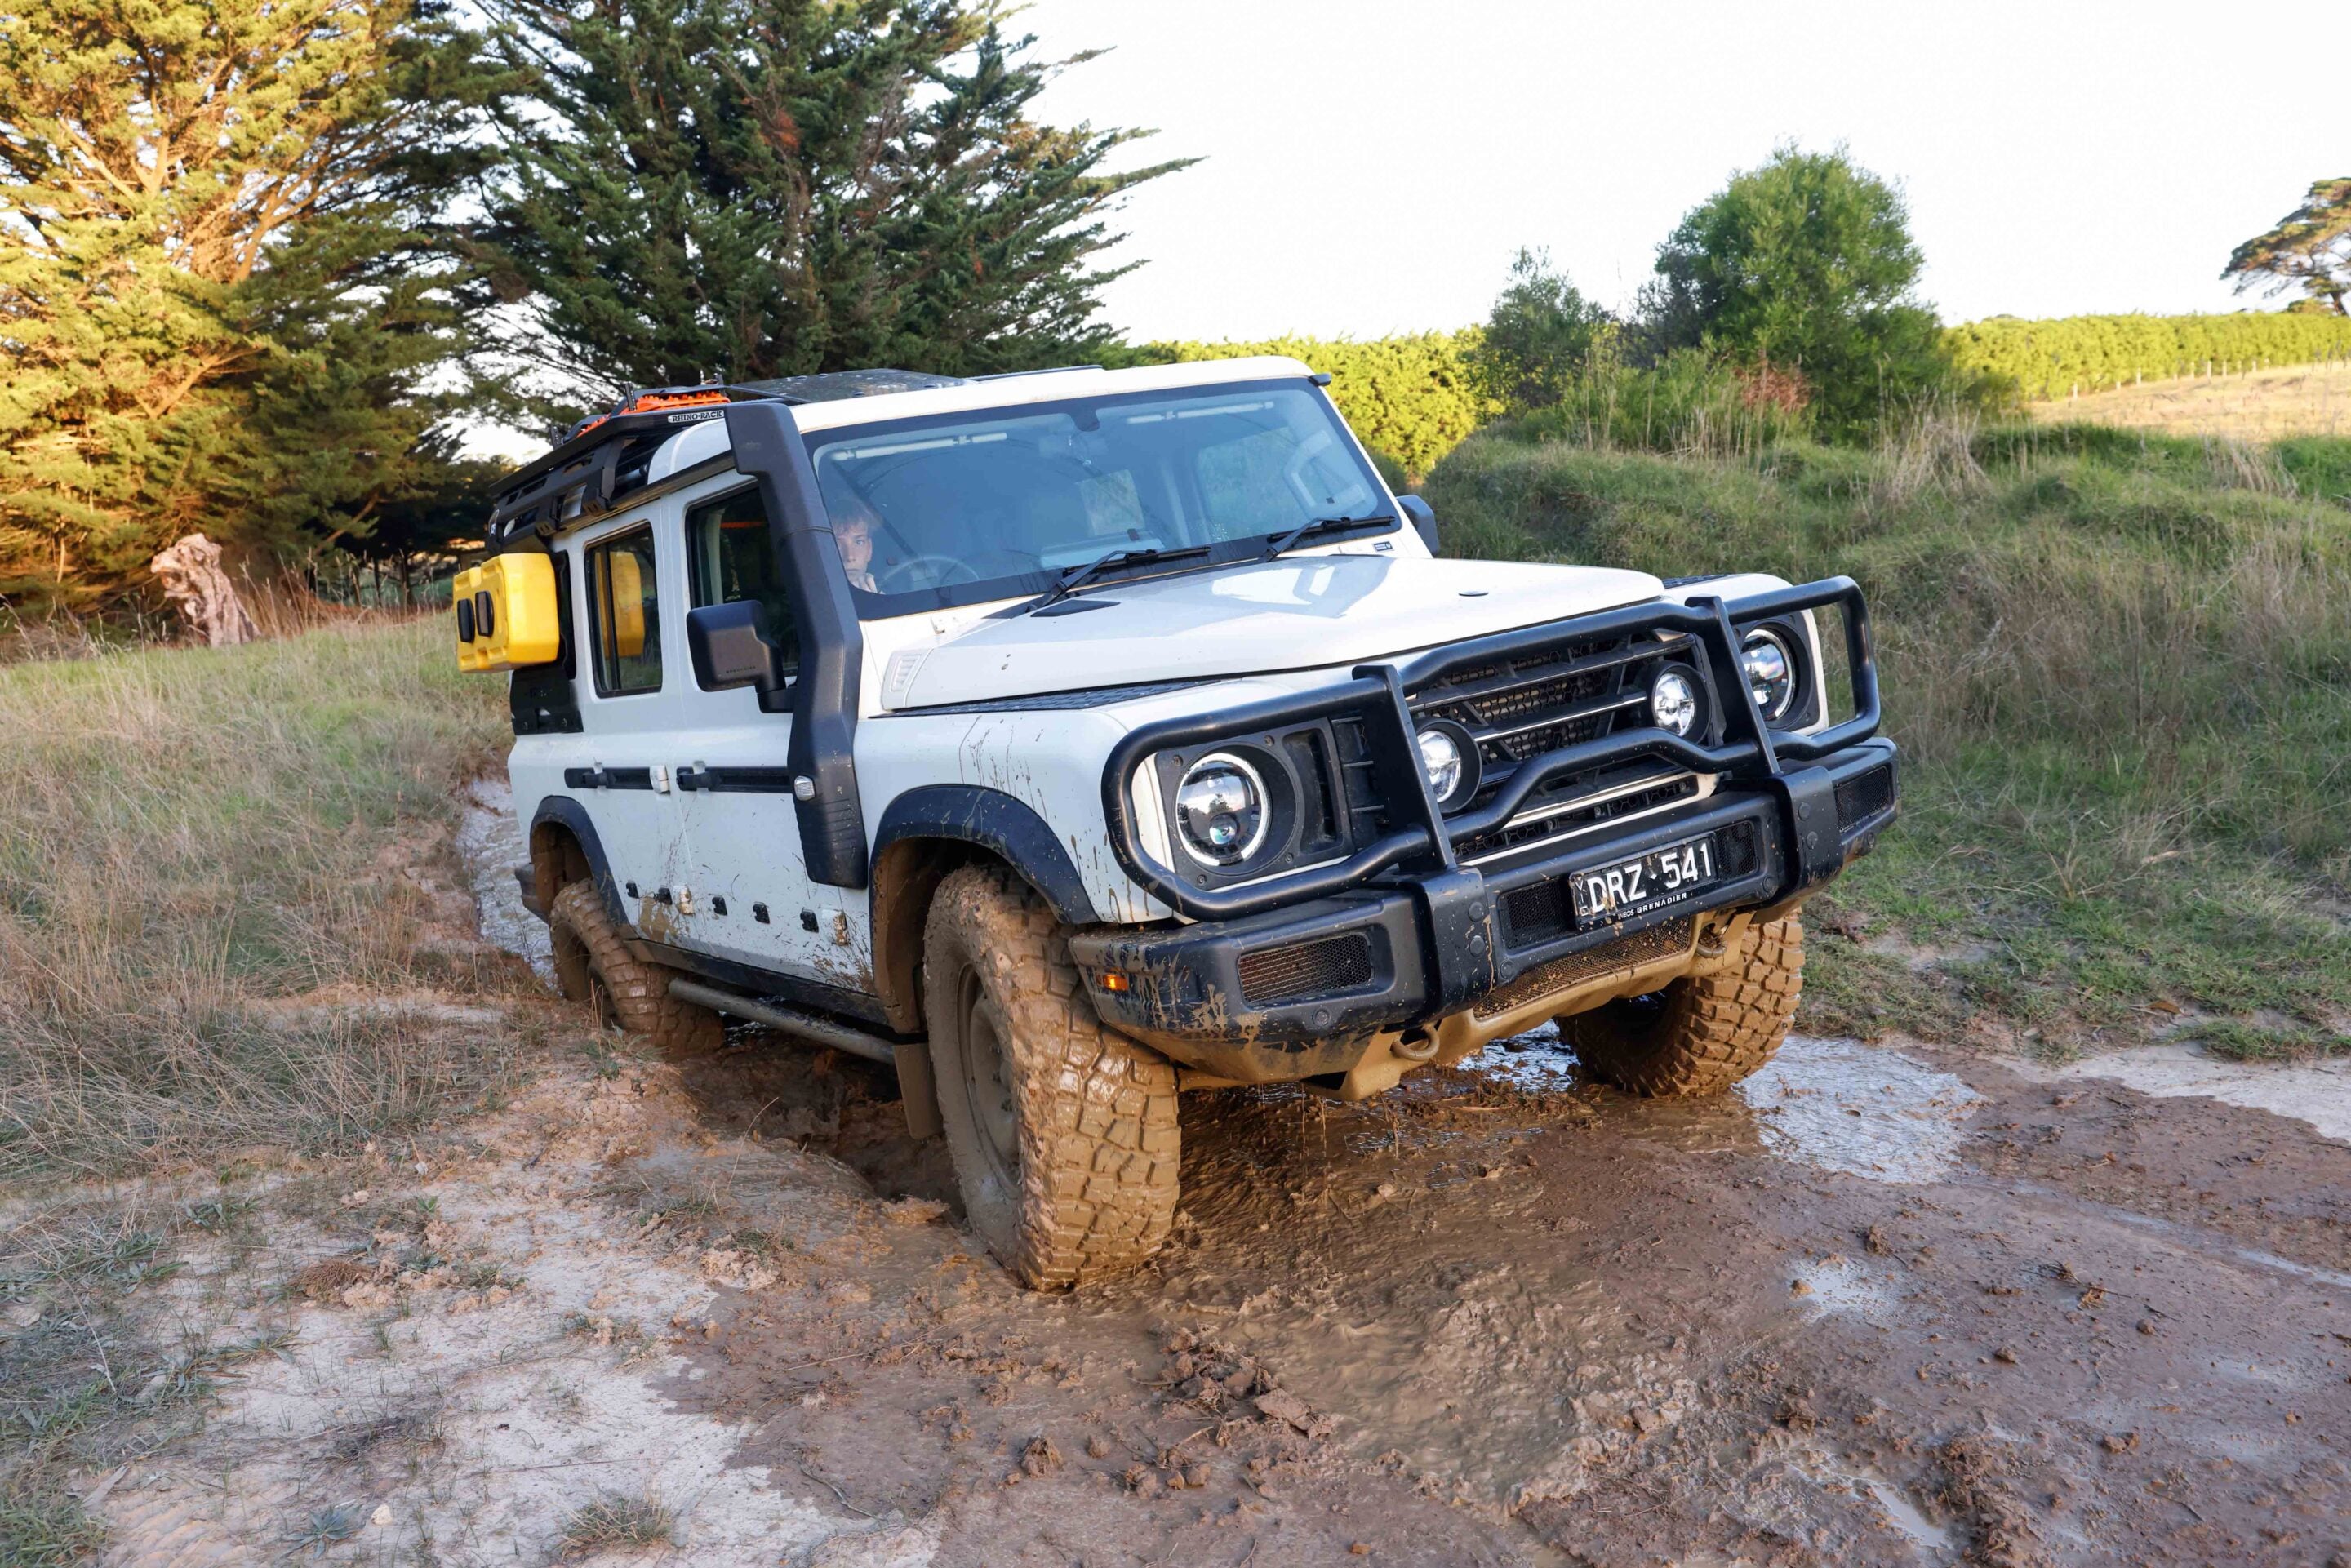
Fast forward to late 2025 and I’m picking up my long-term Grenadier. I’ve gone for a Trialmaster Station Wagon in Scottish White (apparently named after one of Sir Jim’s Scottish mates and his white legs), powered by the BMW B57 diesel engine. I opted for steel wheels, leather trim, heated seats and Safari Windows. The base price is $120,000, plus $8670 in options.
The Trialmaster comes standard with front and rear diff locks, a raised air intake, Class III 1-7/8” NAS tow hitch and electrics, and an access ladder. I also had factory rubber mats added. There are no carpets in this vehicle and that’s exactly how I like it – rubber mats and a vinyl floor are the best.
The very first thing you notice when you drive a Grenadier is the steering. It doesn’t self-centre very quickly compared to most other vehicles. Once you’re aware of this and get used to the steering technique required, it’s fine. Just be ready for it. The Recaro seats are very comfortable and help soak up the kays, plus they look cool. Rear passengers also get a Recaro bench seat, and I like how high it sits you in the back. It’s great for kids, as it makes it easier to look out of the vehicle, placing rear passengers at a similar head height to those in the front.
I picked up the Grenadier just before the start of the summer holidays, and it’s proven to be a great beach vehicle. Having no carpets makes it super easy to get sand out, and the interior utility rails work well when you’ve got lots of gear to tie down in the back.
I strap the surfboards to the roof, with four factory rails fitted. I’m planning to get a roof rack, but more on that later. Running to and from the beach is fun, and the kids have found it to be a great family vehicle so far. It’s not really what this vehicle is designed for, though. Yes, it will do the day-to-day tarmac stuff just fine. The 550Nm of torque that the BMW engine pumps out makes keeping up with traffic easy as well.
It was time to head off-road, so I pointed it toward Lerderderg State Park. I’ve photographed and driven many four-wheel drives up here, so it’s a great place to get to know the Grenadier. The first thing I do once I hit the dirt is flick the low-range selector lever across to lock the centre diff. This also automatically turns off the ESC.
I leave it in high range to begin with. The ride on gravel roads is excellent and, as I start to push it a little harder, it actually feels light on its feet and keen to turn in sharply. I then head to some fairly steep, rutted tracks. I select low range and start driving up the first climb. The Grenadier has solid axles front and rear, which gives it excellent wheel articulation. I try engaging the rear diff lock and it just walks up the track. No need to even try the front diff lock – I need to find a harder track. That will have to wait until my next trip, though. My first experience off-road has shown that the Grenadier is highly capable, and I’m going to enjoy finding gnarlier places to drive it.
One thing that takes a while to get used to is having the speedo in the centre display rather than directly in front of you. Living in Victoria and constantly stressing about being 3km/h over the limit, I sort of wish it was straight ahead. My other small gripe is that the driver’s-side wiper misses a chunk of the windscreen near the A-pillar. It only becomes an issue if you really get the vehicle and screen super muddy, but I do notice it.
Plans? We’re going to throw some factory and non-factory accessories at the Grenadier while we have it, starting next month. Can’t wait.
- Kilometres this month: 4780km
- Average fuel use: 11.7L/100km
Part 2: Mods tested in the Vic High Country
The Grenadier wave is alive and well. I used to get the Jeep wave back when I had a JK Wrangler and was wondering if Ineos owners would do the same. Well, they do! I even got a wave from a guy in a 110 Defender – maybe the sun was in his eyes?
This month has seen quite a few kays racked up in the Grenadier. I wish I could say they were all off-road kays; sadly not. As a daily driver, though, I’m really enjoying the Grenadier. It has such a nice ride – comfortable on the tarmac and even better when you hit the dirt. I think they’ve done a great job with the suspension tune.
I headed up to Mt Disappointment in Vic this month to shoot a HiLux vs Ranger comparo. One of the tracks we drove was pretty gnarly and it was the first time I needed the rear diff lock. Once engaged, the Grenadier just walked up in low range – no issue. The way it moulds itself to the terrain is amazing to watch. It also does all the hard work for you. I tried picking the worst lines and it just ate them up.
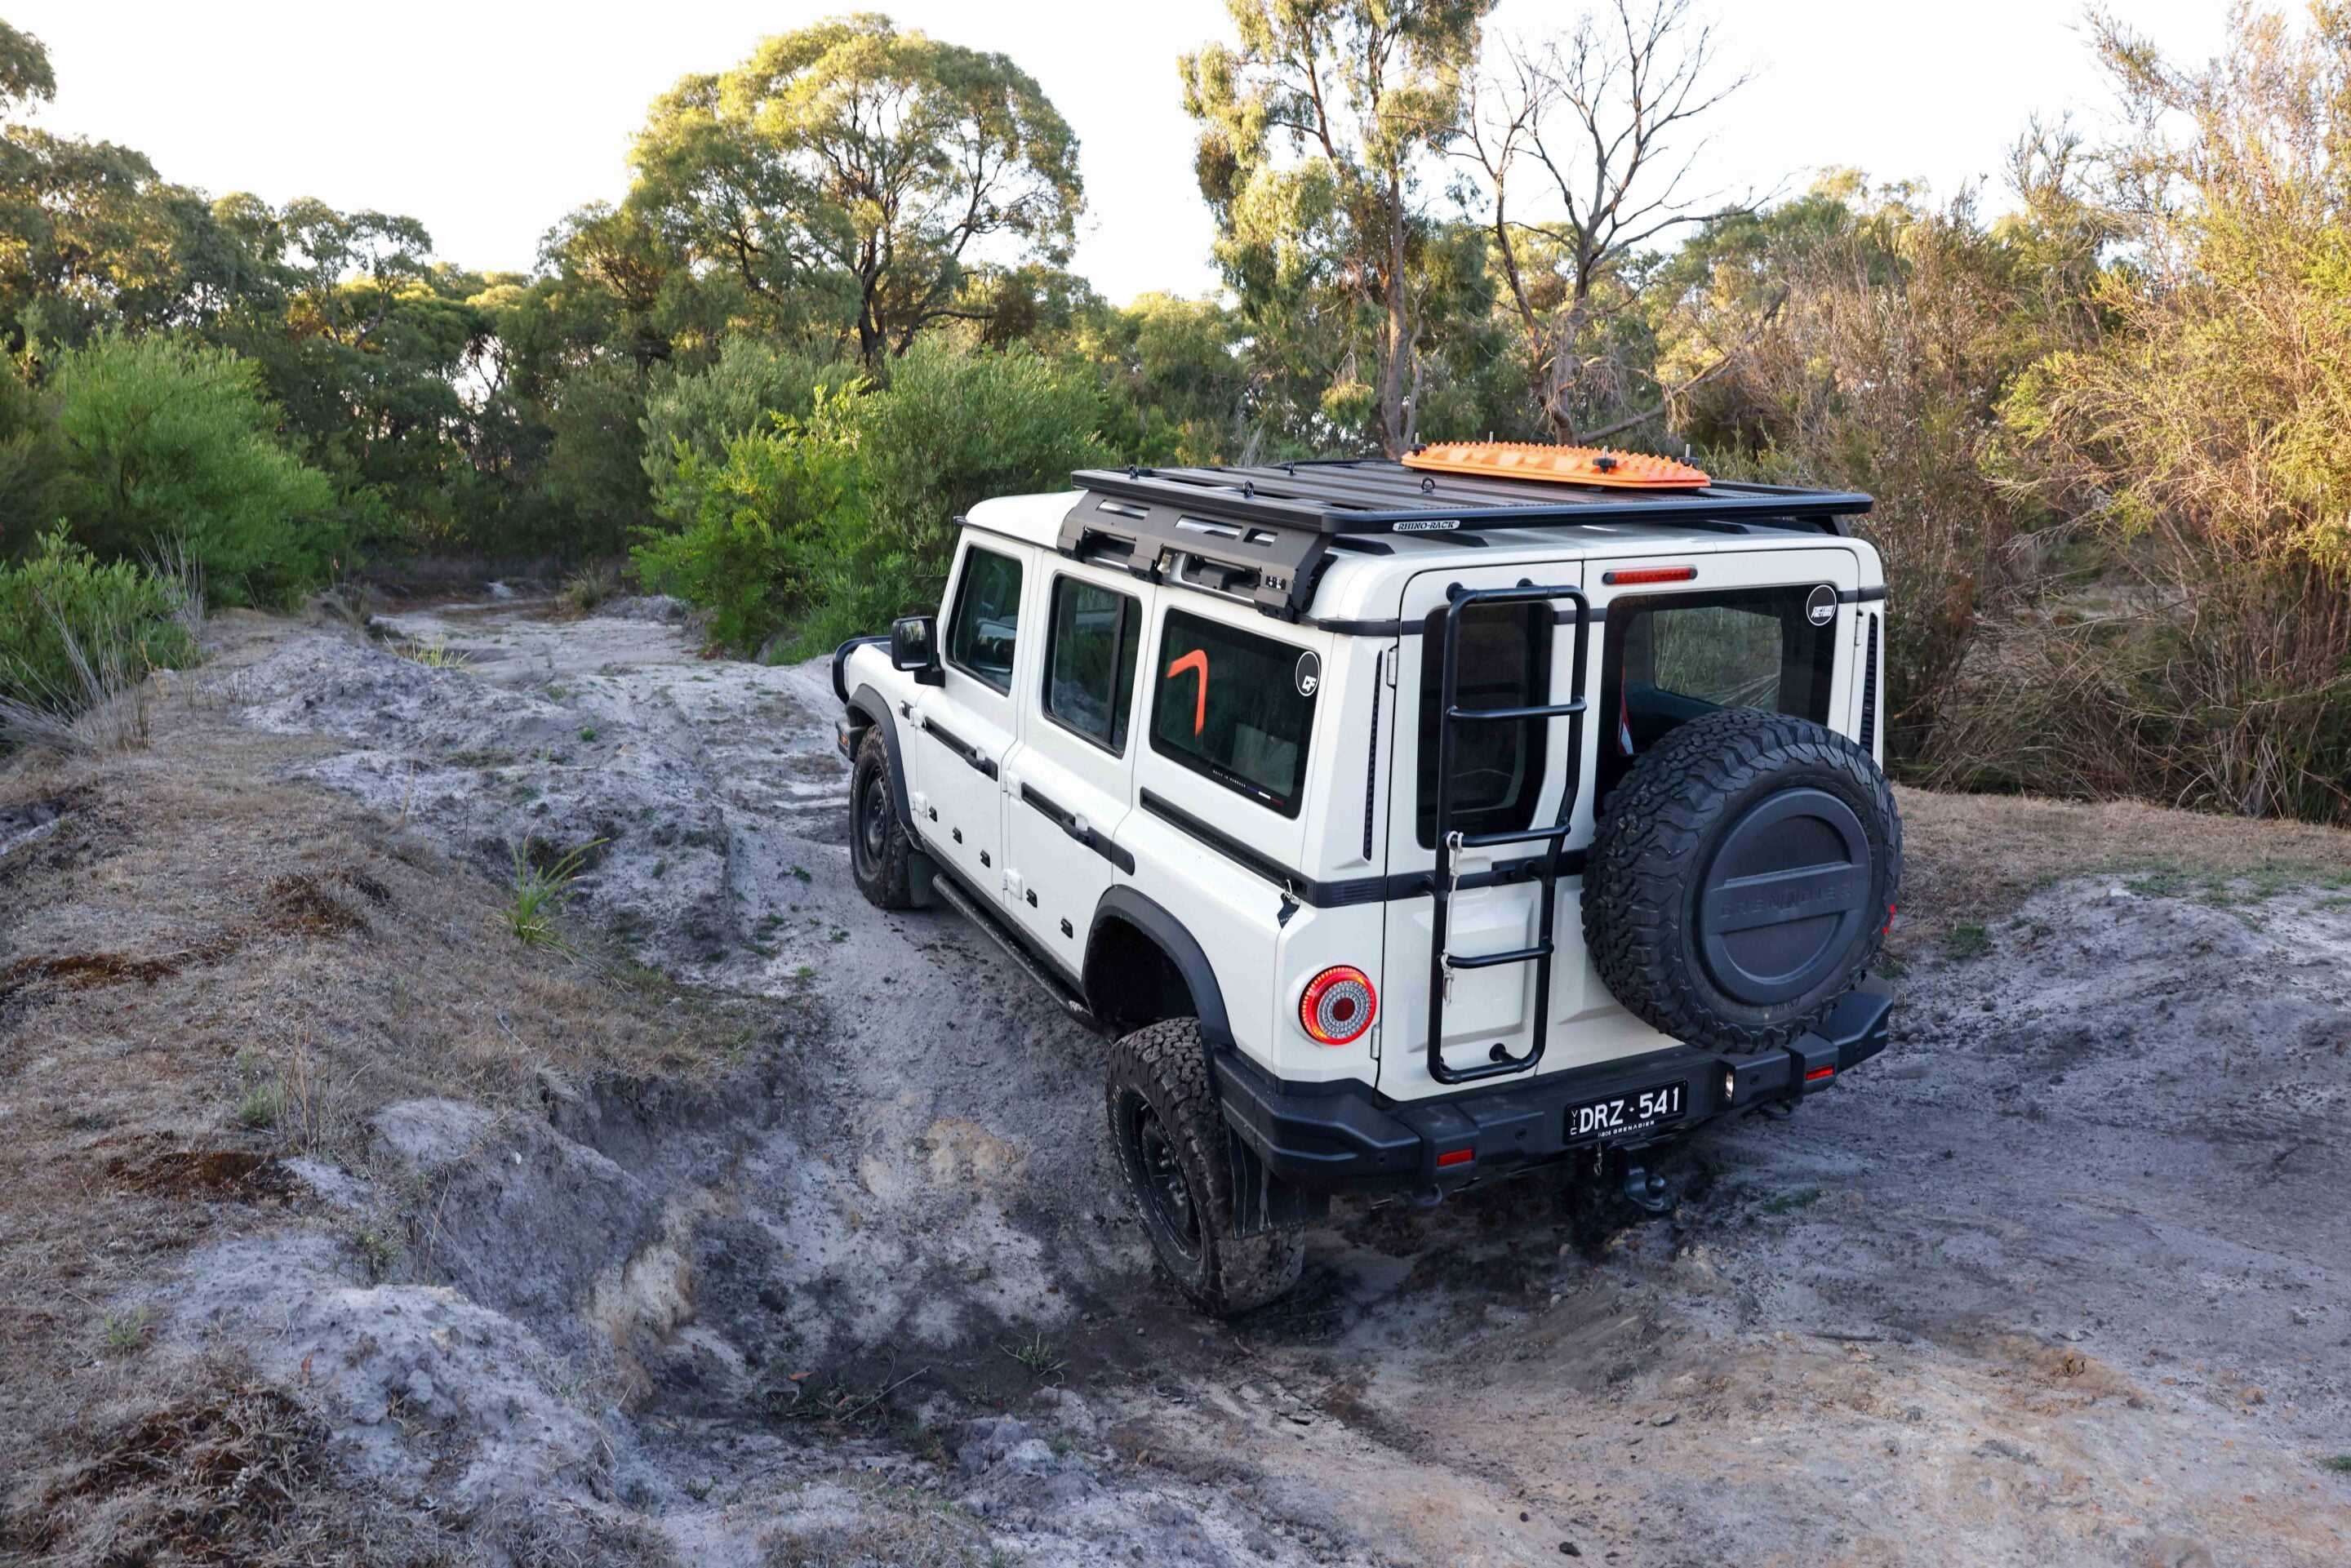
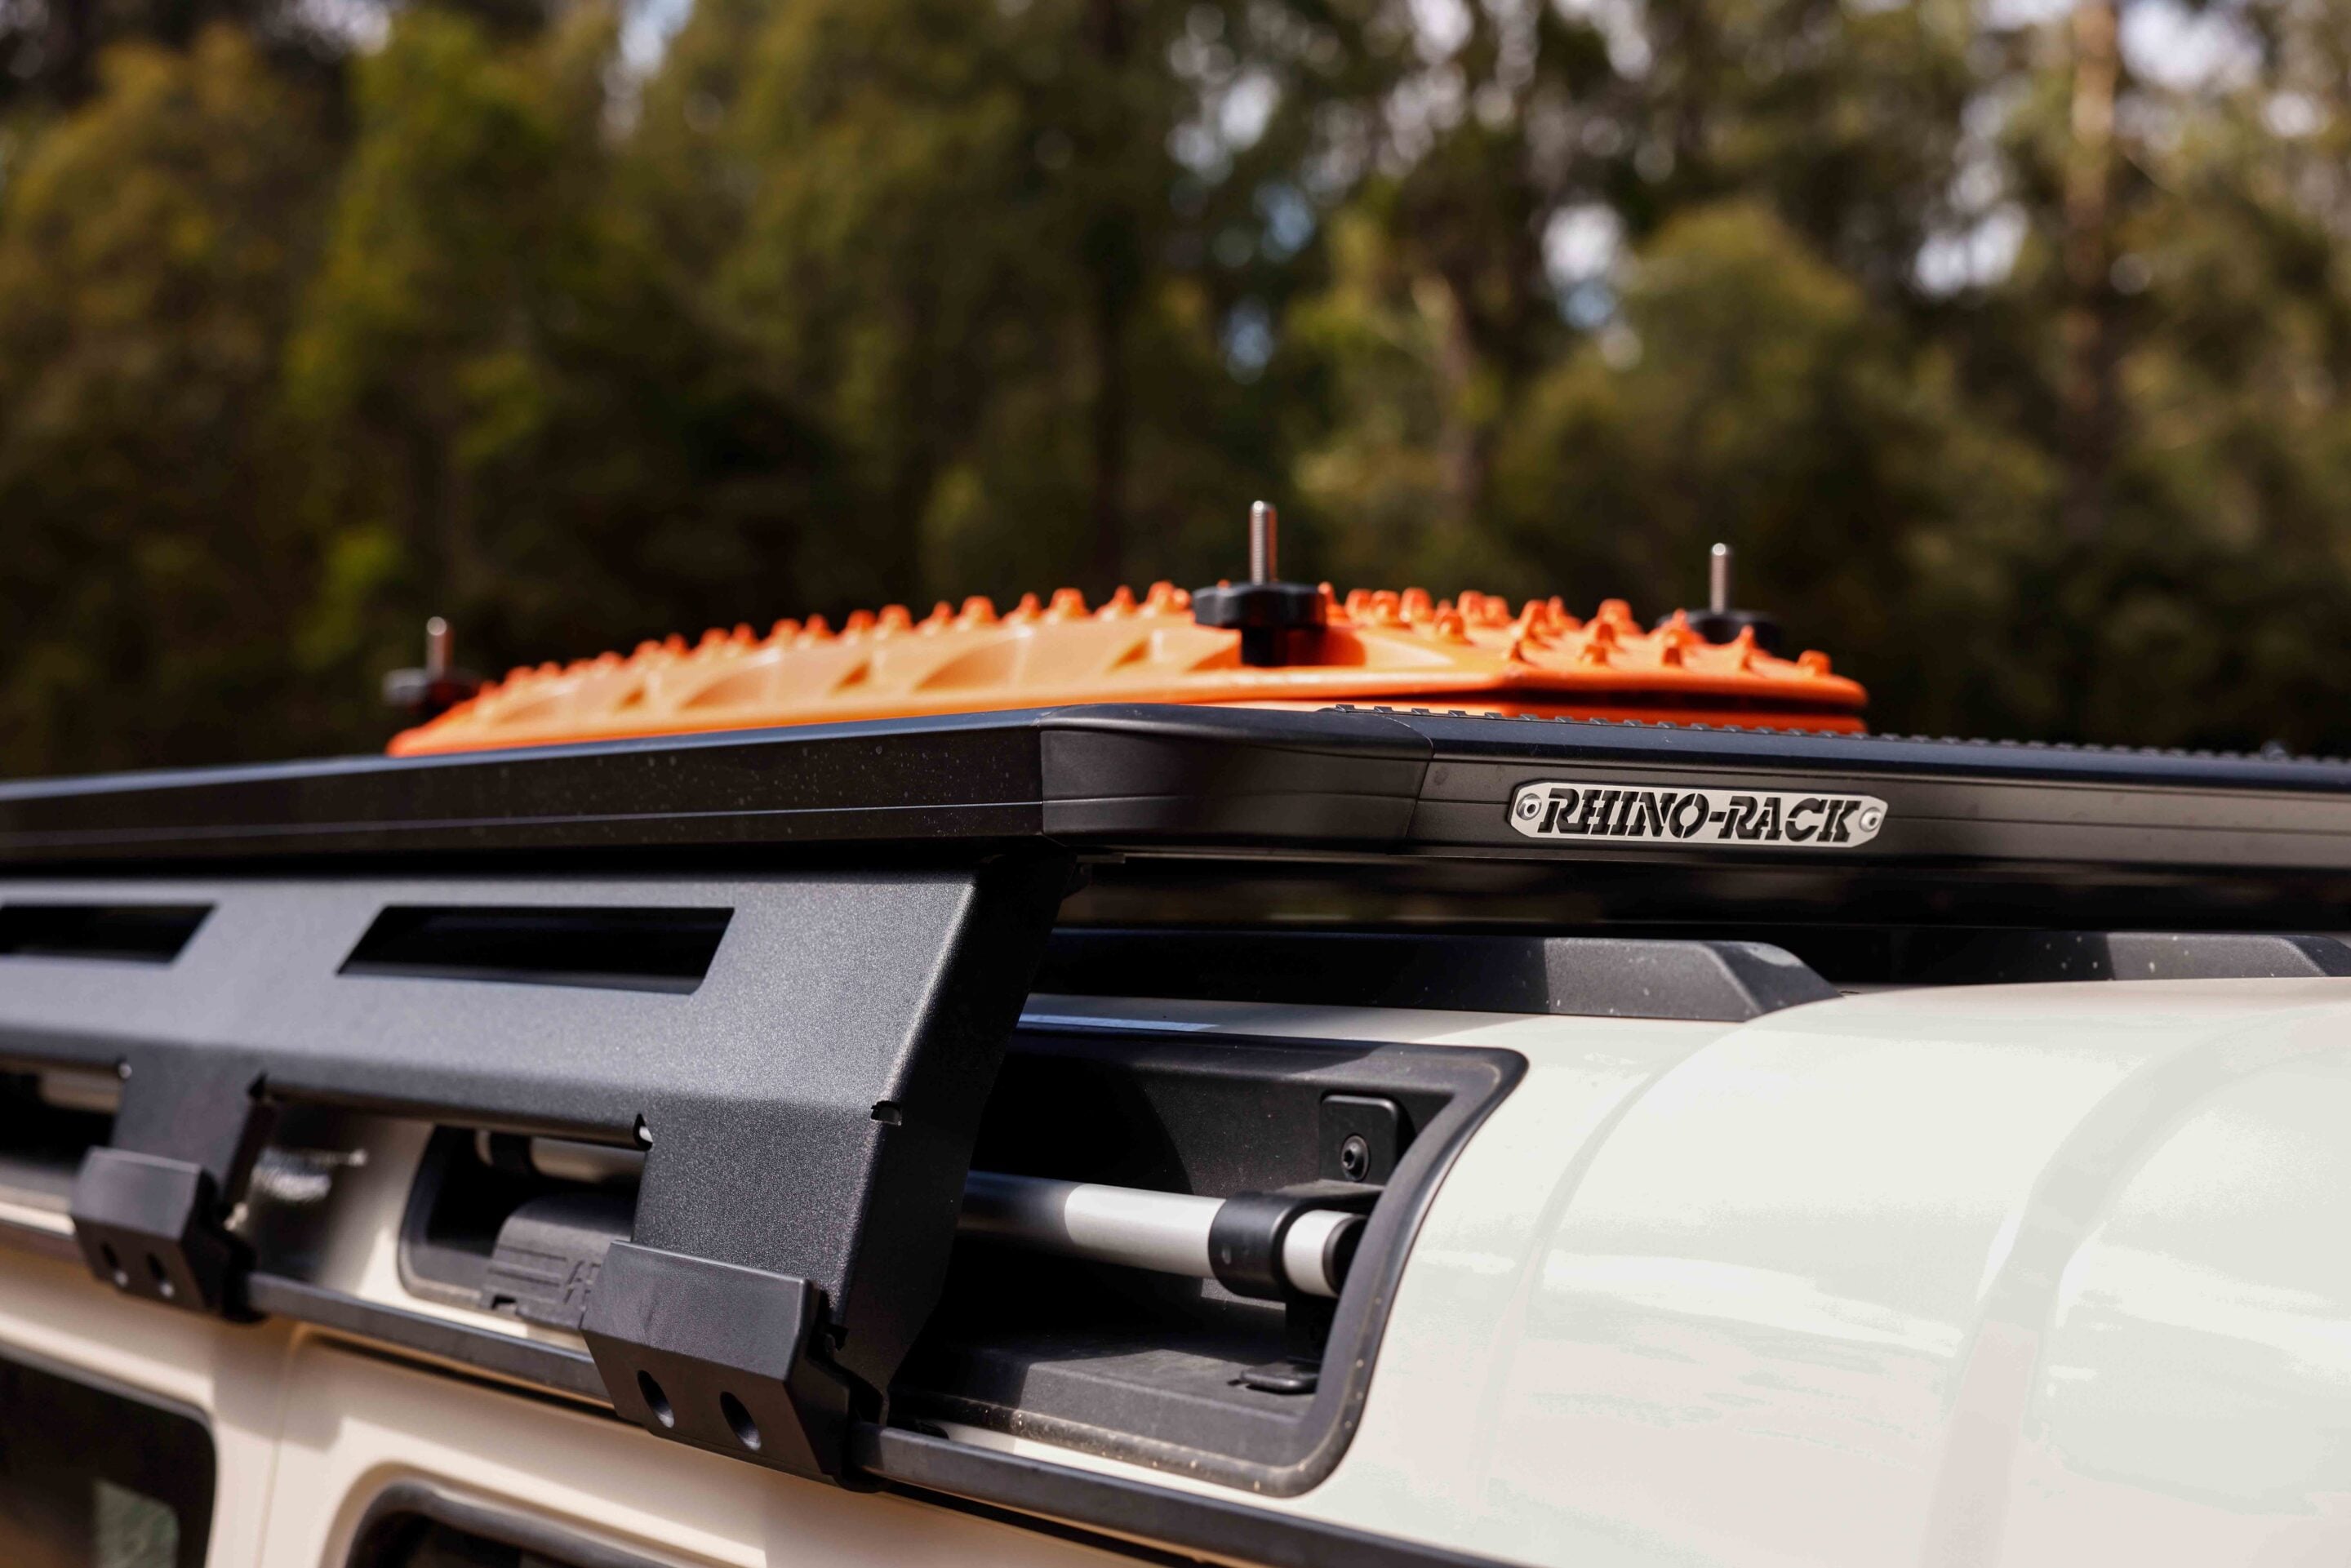
I used the freshly fitted Rhino-Rack Pioneer platform to photograph the utes from. I went for the three-quarter length option as it still allows me to open the safari windows. It was $3688 plus fitting. It’s great now – the factory ladder on the back door actually goes somewhere! I also fitted a set of MaxTrax up on the platform – thanks Matt.
A factory Ineos roo bar ($2720), rock sliders ($1921) and checker plates ($560) were also fitted. The roo bar is a smart design that works with the existing factory bumper. You just take a couple of caps off and it bolts straight on. Job done! The rock sliders are also well designed and solid. They bolt directly to the chassis rails and offer a twin-tube setup. The checker plates sit on top of the front guards and allow up to 120kg load. Luckily I’m only 103kg, so I’ve been up there quite often just because I can.
Hopefully I won’t have to test out the roo bar. The rock sliders, however, have had their first slide. Yes, it was a little painful, but I figure that’s what they’re for. They feel super strong and can take the weight of the Grenadier no worries. Plus, the scratches are underneath so I can’t see them.
I had to top up the AdBlue this month. It gave me a warning that it was running low, which was handy. The front parking sensors have been triggering at random. Apparently it’s some dirt stuck on the edge of a sensor that’s setting it off. No big deal, as you can manually turn them off and it stops the beeping. I might try giving them a proper clean.
Next mods? I want to try a bigger tyre size. The standard 265s are fine and do a great job, but I’d love to see those guards filled a little more. Maybe a 295? Mud-terrains? Let’s see what happens.
- Kilometres this month: 5300km
- Average fuel use: 12.4L/100km
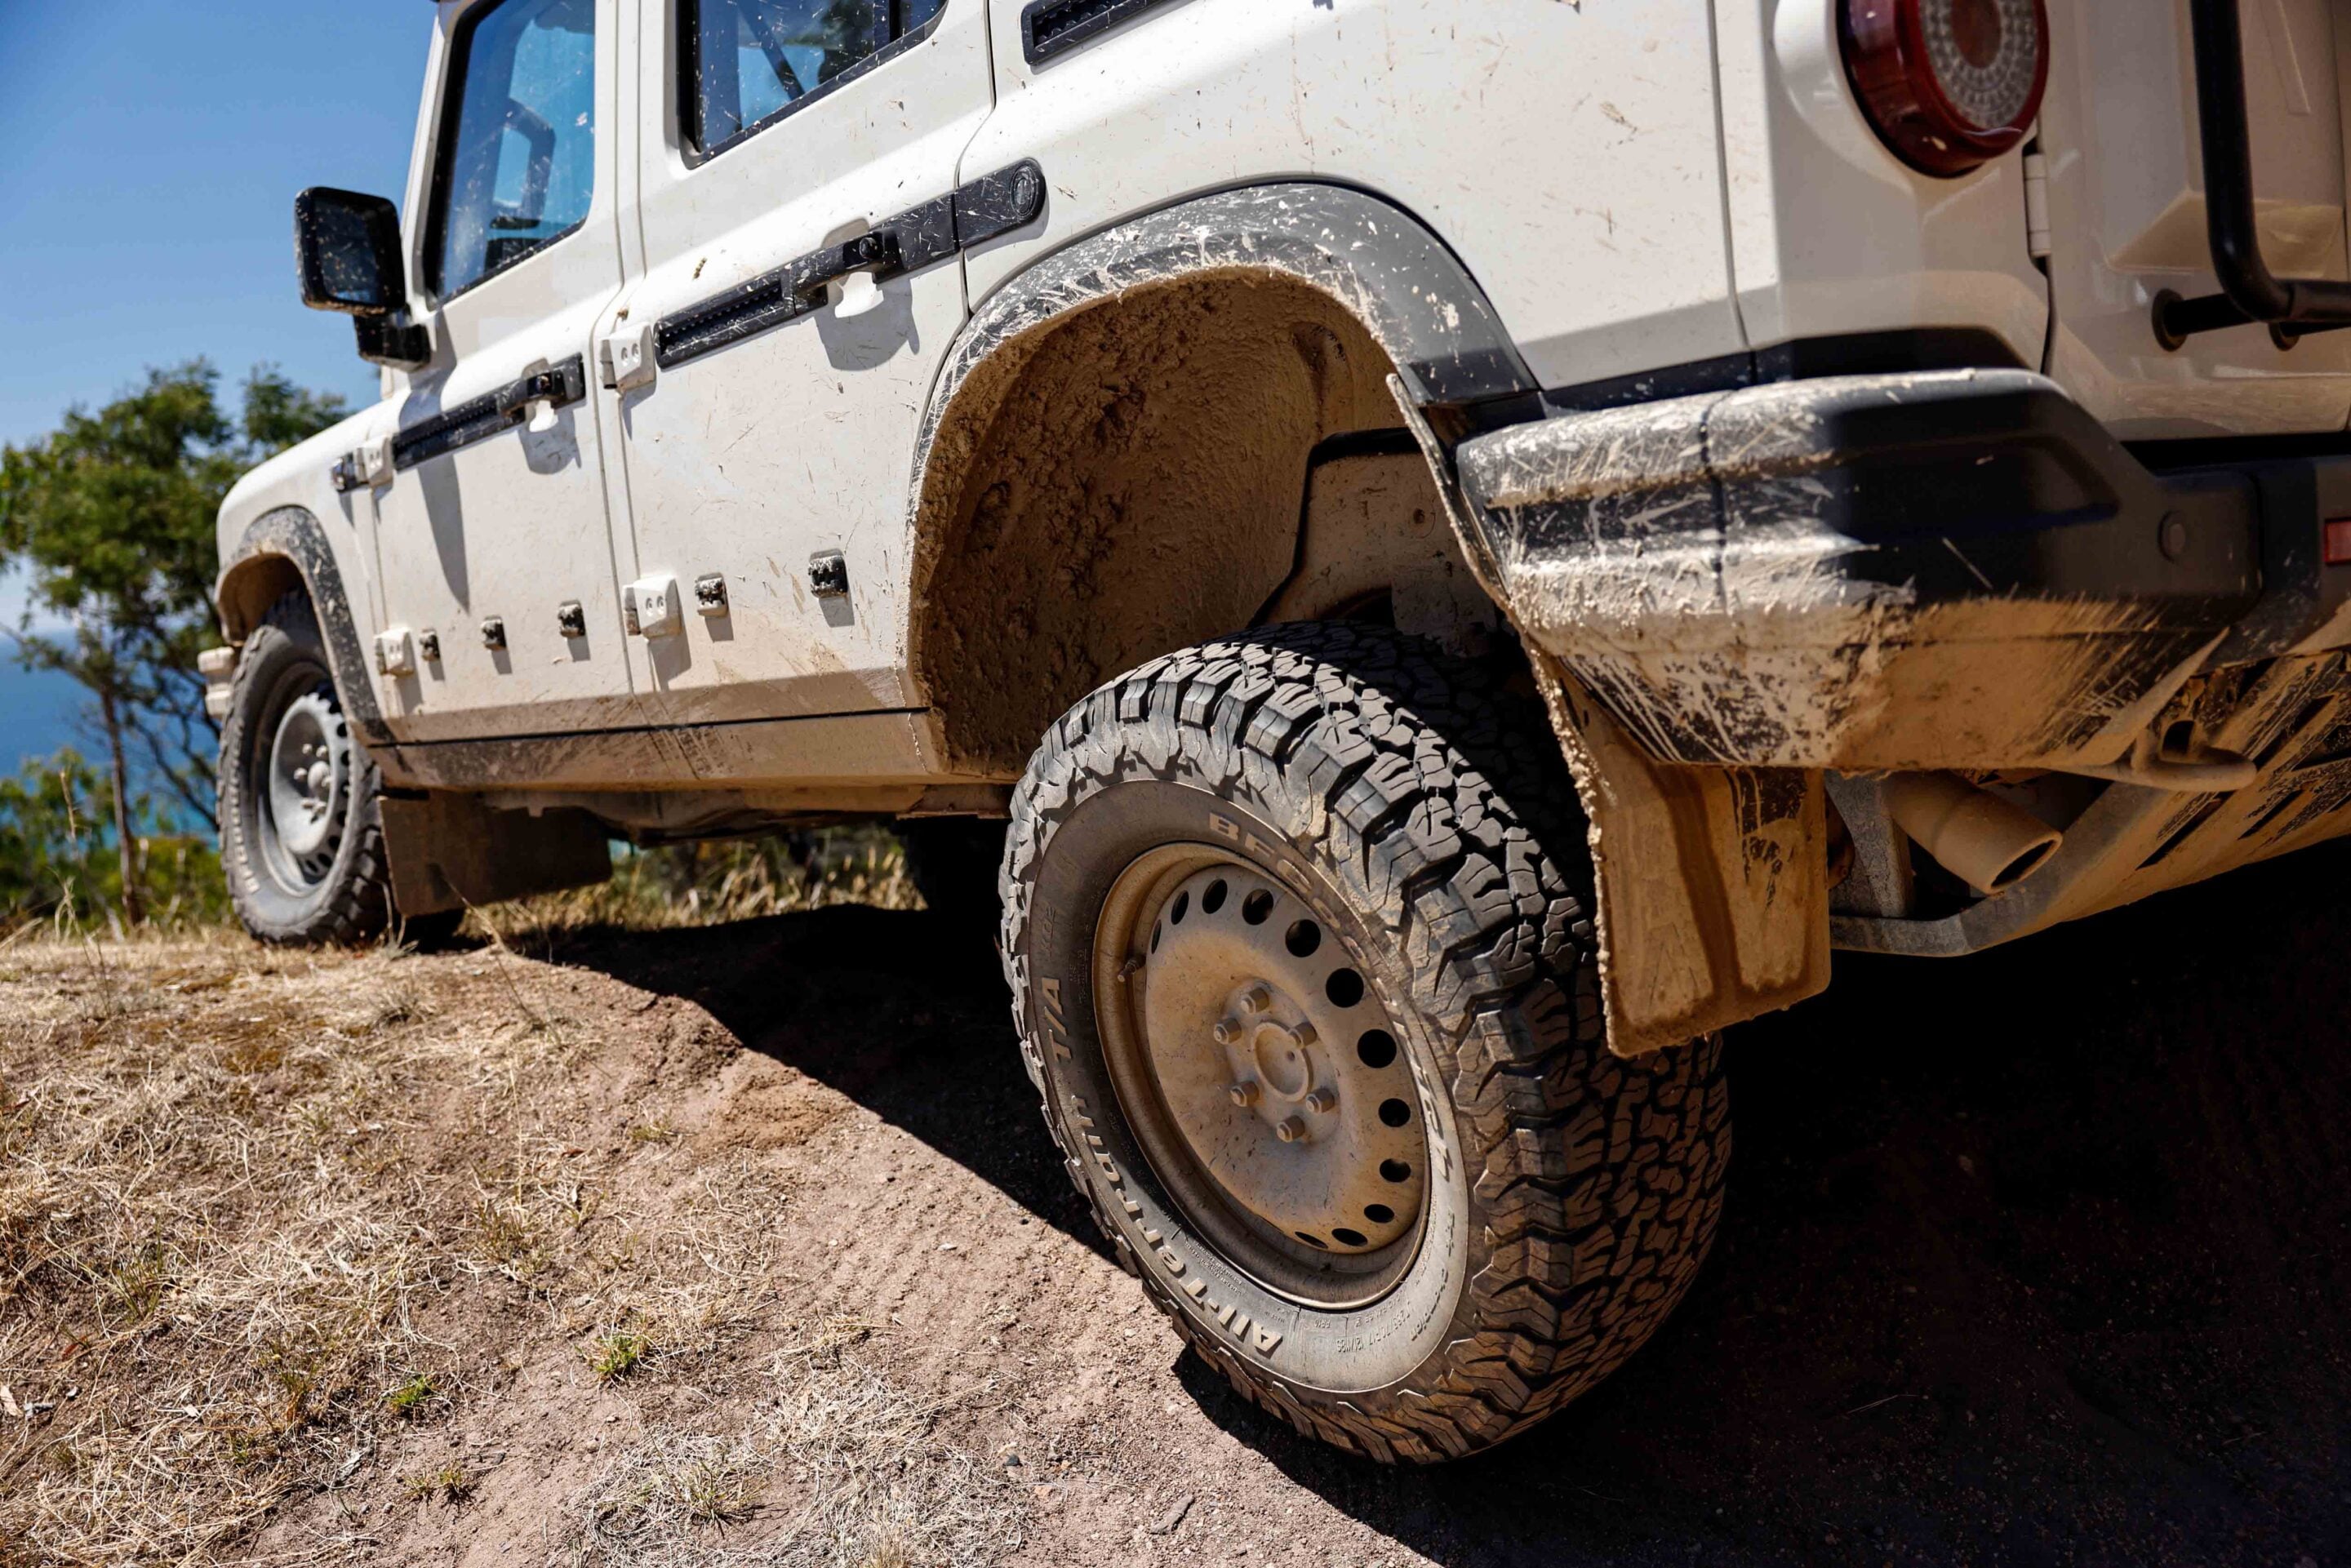
Part 3: Bigger tyres give the Grenadier a boost in the bush
New tyres for the Grenadier this month. I had my local tyre store (thanks Tyrepower Mornington) fit five BFGoodrich Mud Terrain KM3s in a 295/70R17 size, at $590 each.
The original BFG All Terrains weren’t worn out and were still doing a great job; I just wanted to try a bigger size than the standard 265/70R17 tyres fitted as stock. I had a set of KM2s on a JK Wrangler about 15 years ago, so it is going to be interesting to see how the KM3s compare.
Standing the 295 Mud Terrains next to the original tyres, the size difference is noticeable without being extreme. I think it’s a worthwhile upgrade for the Grenadier, especially considering it’s on stock ride height and wheels. I also like that BFG has done away with the white lettering – I was never a fan. Clearance to the brake lines has reduced slightly, but I don’t think it will be an issue. There are also no signs of rubbing, even with the suspension fully articulated, which is reassuring.
With the first opportunity, I headed to the Yarra Valley in search of mud. It’s been a dry summer in Victoria, so finding mud hasn’t been easy. The only option was to head to Toolangi State Forest, where I knew I’d be guaranteed to find some. To get there, I had a fair amount of highway driving to cover. The KM3s are definitely louder on-road than the ATs, but nothing you couldn’t live with, even as a daily driver. You do feel a touch more tyre roll through corners because of the taller sidewalls, but overall the ride is better. It’s simply a more comfortable experience now, both on- and off-road.
Before any mud could be sprayed, I found Rocky Track, dropped the Grenadier into low range and began the climb. If you’re familiar with Rocky Track, you’ll know it’s a very challenging drive. I completed the first section fairly easily with the centre and rear diffs locked. The aggressive sidewalls on the KM3s helped bite into the rocks and push the Grenadier forward.
The second section is much tougher, and line choice really matters. With the front locker engaged, I continued to make forward progress. The rock rails were taking a beating and things were getting pretty serious. I’m confident the Grenadier would have made it to the end of Rocky Track, but I chose not to push on. With just the two of us in one vehicle, it wasn’t worth the risk. If we got stuck – or worse – there was no one around to help. It’s a serious track.
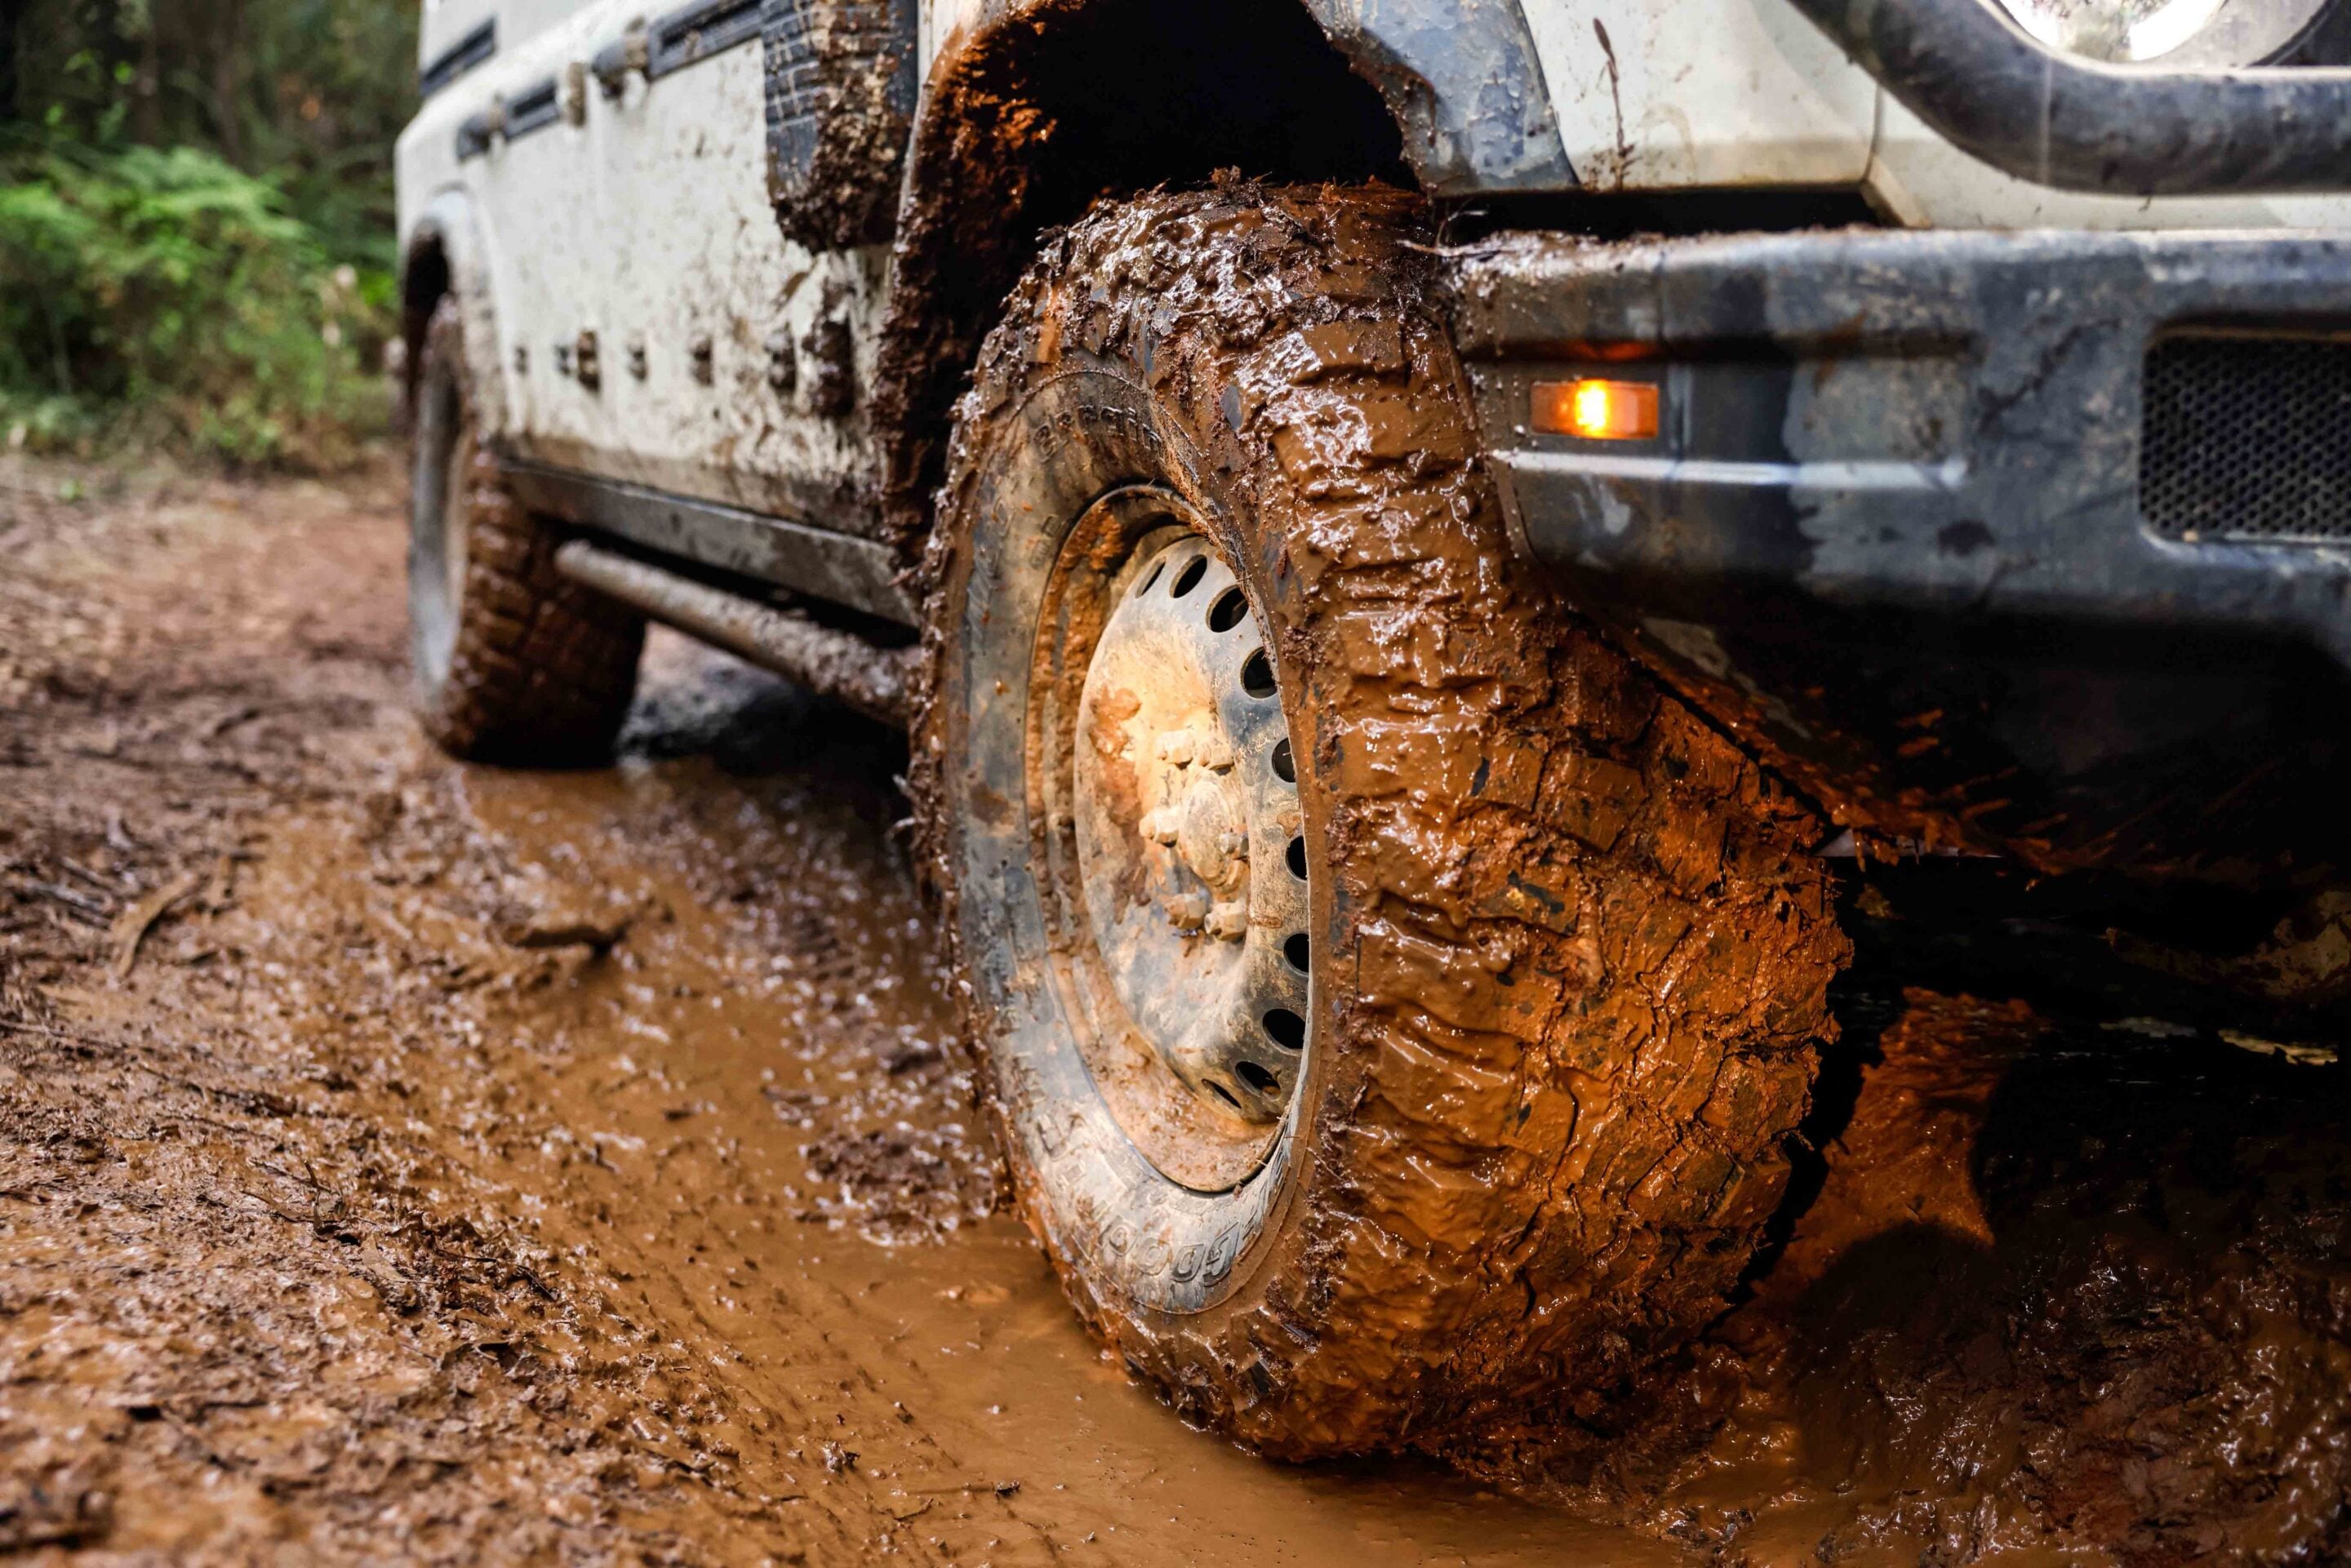
So my son William and I headed off in search of muddy tracks, and we found them. The KM3s performed exactly as you’d expect in sloppy conditions. Where the ATs would turn into slicks, the KM3s cleared mud far more effectively. I’m really impressed with the BFGoodrich Mud Terrain KM3s so far and happy I opted for the larger size.
They suit the Grenadier perfectly and make it an even more capable vehicle. I also fitted the new MAXTRAX Recovery Shovel this month. It’s a clever storage solution, with the shovel and extension handle integrating neatly with MKII and Extreme MAXTRAX boards. Hopefully I won’t need to use it too often.
One thing I would like for the Grenadier is a way to shade the safari windows. Don’t get me wrong, I really like them and at least one side is nearly always open, but there are times when the sun is directly overhead and some sort of shade system would be ideal. Maybe that’s my next mod?
- Kilometres this month: 4650km
- Average fuel use: 12.7L/100km
Part 4: Grenadier to the rescue
Are you busy right now? We have a slight need for a tow from a 4×4.
This was a message I received on a rainy Wednesday afternoon at around 1pm. Do you need help? I wrote back. Yes please! The message had come from my son Charlie’s friend, Sylvan. He was in a hired MG hatchback on a steep dirt road, doing P-plater things, and it had just started raining heavily. Yes, I do have a 4×4, I thought. So, I headed off to try and help.
The first thing I thought when I arrived at the muddy location was that he had put in a decent effort to get that far down the track in a 2WD hatch! It was a rental car, after all. A car that, now, was going nowhere under its own steam.
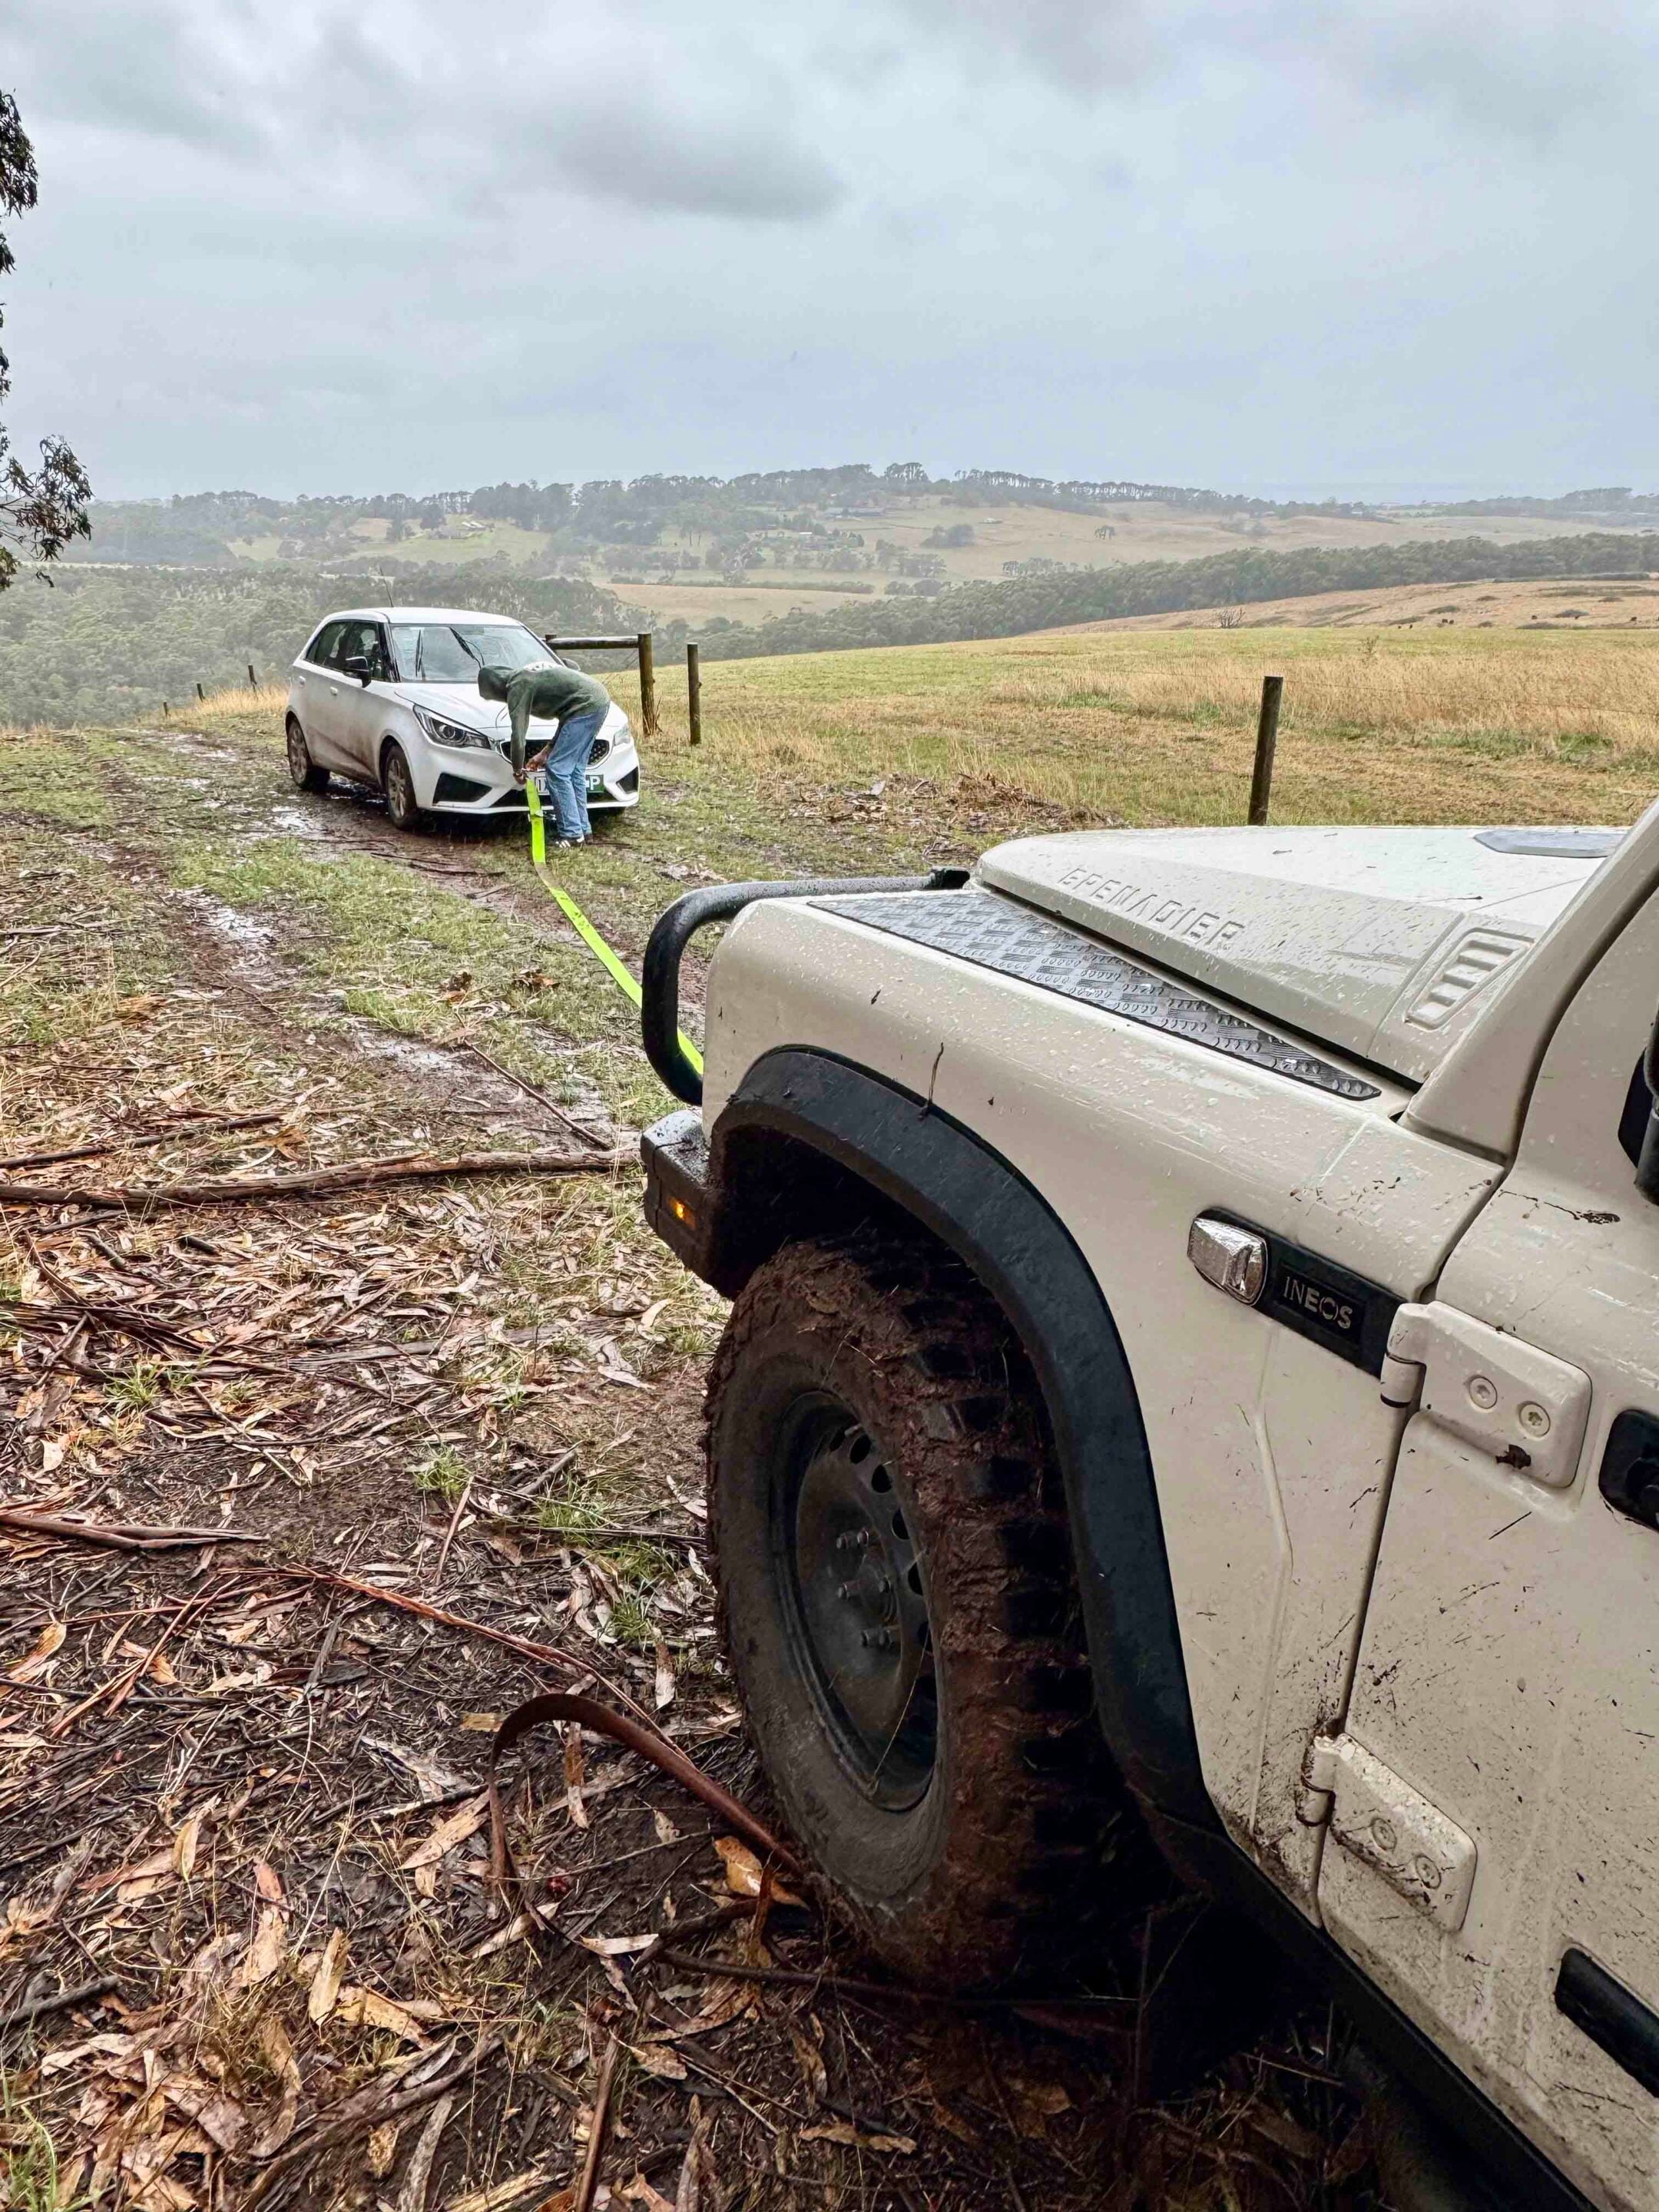
We were on a slippery track between farms near Red Hill and the rain was getting heavier. At this point, I was very happy that I had recently switched to BFG Mud Terrains; they were about to get a proper workout. So, I positioned the Grenadier close enough to the stricken rental, secured the snatch strap and gave Sylvan some brief instructions. With the Grenadier in low range, I started to reverse up the track slowly, waiting for the slack to be taken up.
This gentle approach just didn’t work. As soon as the slack was gone, the INEOS was spinning all four wheels on the spot, gymkhana-style, and we were going nowhere. For a second, I thought we might actually be cooked here, as the track was getting worse by the minute. So, take two, and the plan this time was to use some speed and hopefully snatch the hatch into forward movement.
With Sylvan ready, it was go time. I also engaged the rear diff lock on this attempt. I drove the Grenadier backwards at a brisk pace and, when the slack took up this time, the MG lunged forward. Now the Grenadier was doing it easily and I towed the rental car all the way up the hill. Sylvan and I were both really impressed with how well the Grenadier got this job done. A quick pressure wash on the MG and no one will ever know!
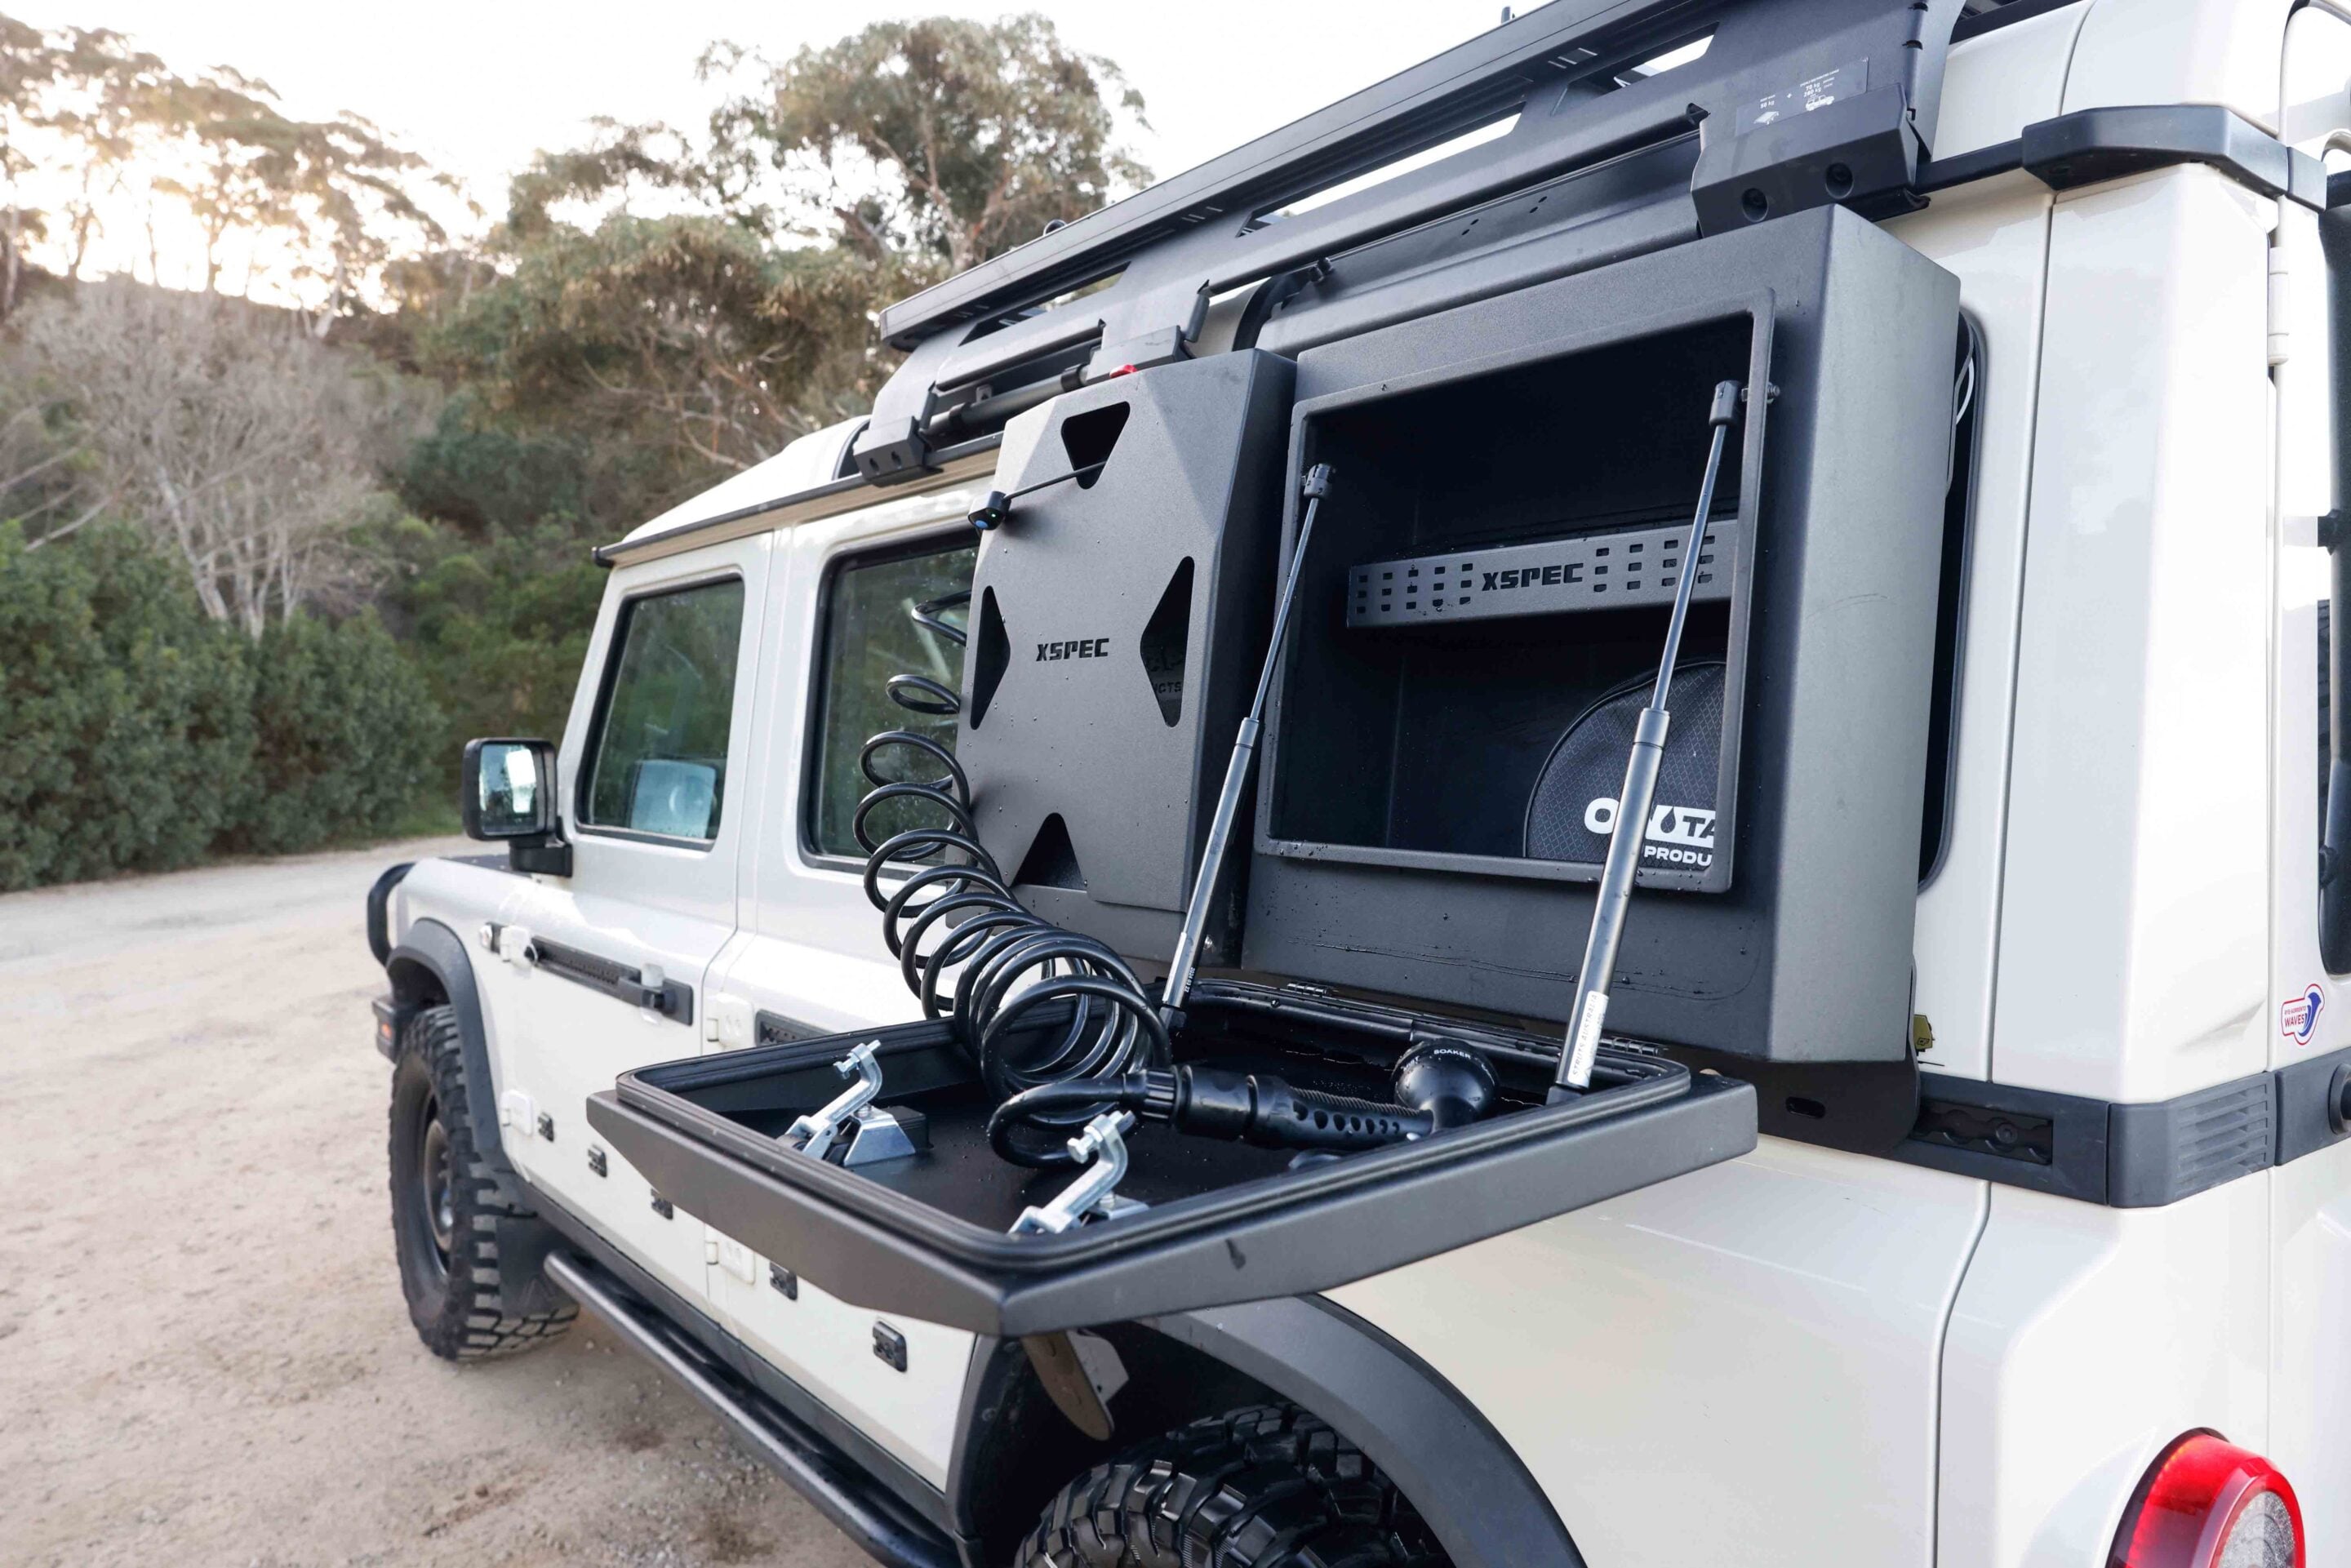
This month, the Grenadier received some new bits in the form of an XSPEC 30L gravity-feed diesel tank with a 12V transfer pump. On the passenger side, we also had an XSPEC storage locker and an XSPEC 20L lockable jerry can holder fitted with an ONTAP 22L portable shower. These products were mounted to the Grenadier with the XSPEC rear-window utility frame.
We tried out the ONTAP portable shower while out surfing for the day with my son William. It’s really simple to use. Just fill it up before you head out and then insert the plug into a 12V outlet. The Grenadier has one in the rear load area, which is great.
The storage locker next door is also really handy. I stored the hose and seven-function spray gun in there, along with some snacks. I could also see the shower system being really useful to spray down mountain bikes after a day off-road. All these products from Expedition HQ are well designed and very well integrated into the Grenadier. Hopefully, I won’t have to fill up the 30L diesel tank too often, as fuel prices this month were hectic!
Also this month, the Grenadier’s front windscreen took a beating. I was on a narrow country road – the type where you need to drop a wheel into the gravel – when a big tipper truck passed me in the opposite direction. It managed to throw up enough rocks that I had three cracks appear all at once. Great!
I feel the upright design of the Grenadier windscreen – much like my old Wrangler’s as well – makes it more prone to getting stone chips. Not much you can really do, though. The Grenadier is asking me to be serviced, so I’ll let you know next month what the INEOS dealer service experience is like.
- Kilometres this month: 2300km
- Average fuel use: 12.5L/100km
Understanding the difference between agreed value and market value is critical for 4x4s equipped with modifications, accessories and touring gear.
These additions, from lift kits and bull bars to rooftop tents, drawers, and recovery equipment, can add tens of thousands of dollars to a vehicle’s real-world value. Without the right type of cover, a total loss payout may only reflect the base vehicle’s depreciated market price, leaving owners out-of-pocket to replace costly upgrades.
Choosing the correct insurance ensures the vehicle, its modifications, and essential touring gear are fully protected, giving owners confidence to drive hard, tackle off-road tracks, and use the vehicle exactly as intended.
Market value: What the insurer pays
Market value is the amount an insurer will pay based on the vehicle’s current worth in the used car market at the time of a total loss.
Depreciation, age, mileage and market demand all factor into the pay-out. For stock vehicles with minimal modifications, market value may be adequate. But for modified 4x4s that are lifted, accessorised and loaded for touring, market value often underestimates the cost of replacing the vehicle. Even a relatively new vehicle can leave owners underinsured if the aftermarket upgrades are expensive or specialised.
Agreed value: Locking in the full replacement cost
Agreed value works differently. The insurer and owner agree on a set value for the vehicle at the start of the policy, usually including modifications and accessories.
If the vehicle is written off, that agreed amount is what will be paid – no depreciation, no debate. Specialist insurers like Club 4X4 allow agreed value policies to cover aftermarket gear, labour and installation costs, protecting bull bars, winches, suspension upgrades, drawers and other touring equipment. This ensures the pay-out reflects the true investment in the vehicle, not just its factory price.
When agreed value makes sense
- Heavily modified or accessorised
- Relatively new, with a full replacement value worth securing
- Frequently used off-road or in high-risk touring environments
- Carrying touring or recovery gear that significantly adds to the vehicle’s value
When agreed value doesn’t make sense
- Older 4x4s with minimal modifications or accessories
- Vehicles where the aftermarket investment is low or easily replaceable
- Cars mainly used for commuting or light touring, rather than off-road adventures
- Situations where the extra premium for agreed value outweighs the potential benefit
Bottom line
Knowing the difference between agreed and market value is critical for protecting the real-world value of a 4×4.
Market value reflects what a typical buyer might pay today, while agreed value ensures your investment, including mods and gear, is fully covered. Specialist insurers like Club 4X4 exist to make sure off-road vehicles and their owners aren’t caught short, giving confidence to drive hard, tour far, and kit the vehicle for adventure without worrying about being underinsured.
New filings published by Russia’s Federal Institute of Industrial Property (FIPS) show a compact SUV design that appears to represent a successor to the Lada Niva. The documents were submitted in December 2025 and have recently been made public.
The design is linked to the T-134 project, which began under Renault. After the partnership ended, development continued in altered form. A 2028 launch had been referenced previously, but the programme has reportedly been paused and restarted multiple times.
The images, published by UK’s Auto Express, show a boxy SUV with “NIVA” on the grille, indicating a continuation of the nameplate.
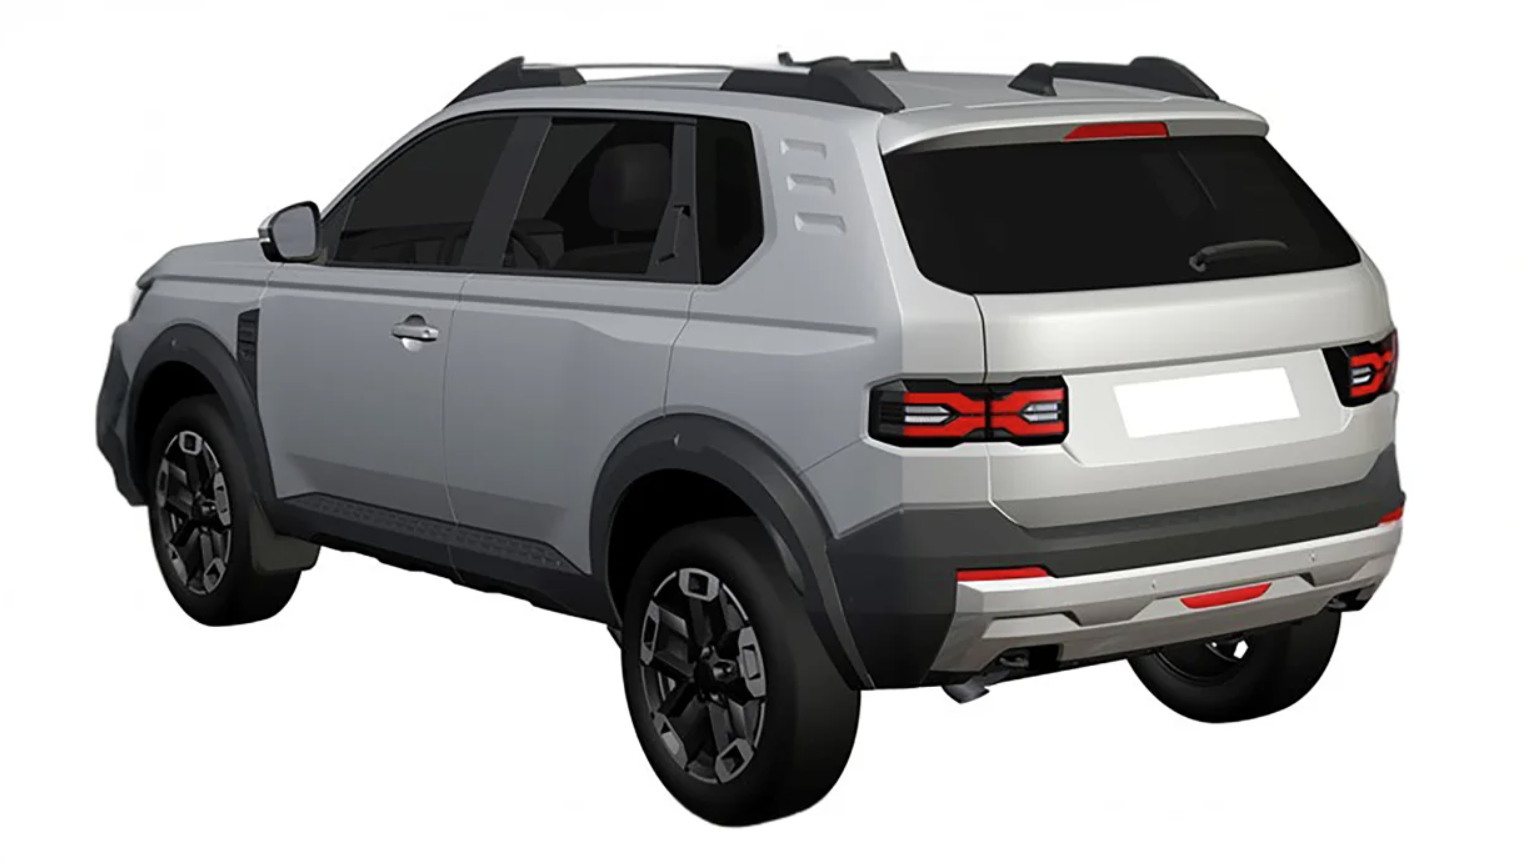
Front-end details include a dark grille, indicator units positioned above the main lighting elements, and circular daytime running lights integrated into the headlamps. The bumper appears revised compared to earlier concepts. Side elements include black wheel-arch extensions, roof rails, and rear door handles mounted on the C-pillars. At the rear, the SUV features a dark and body-coloured bumper with simple LED tail-lights.
The Lada Niva was first introduced in 1977 and is known for its simple mechanical layout, including a small petrol engine and permanent four-wheel drive, with its core engineering largely unchanged over its lifespan. It was also sold in Australia in limited numbers via independent retailers during the 1980s and 1990s, before exiting the market.
The filings indicate AvtoVAZ is still working on a successor, though no production timing has been confirmed.
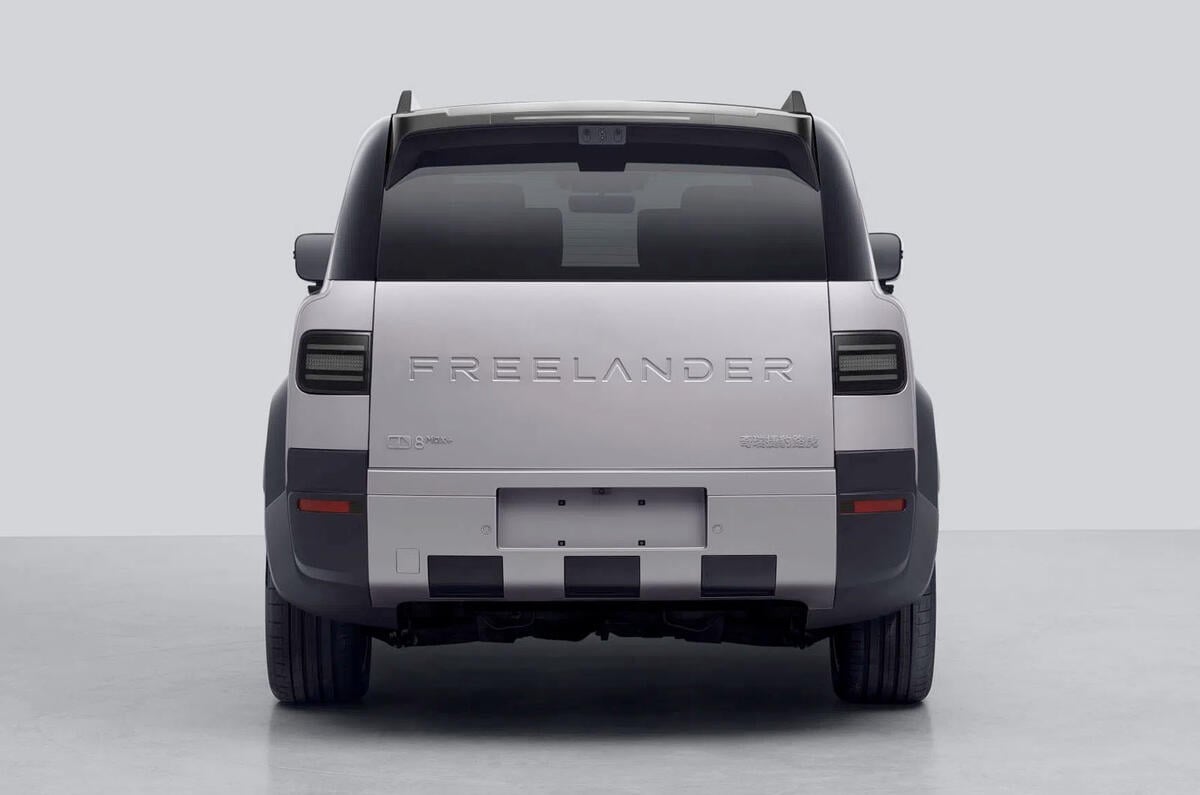
Chinese regulatory filings have confirmed key production details for the Freelander 8, the first model from the revived Freelander brand, a joint venture between Chery and Jaguar Land Rover.
The SUV is scheduled to launch in China later this year, with right-hand-drive testing underway and an Australian launch targeted for around 2027.
The filings show a large SUV positioned well above the size of previous Freelander models. It measures up to 5185mm in length, 2050mm in width and 1898mm in height, with a 3040mm wheelbase. Kerb weight is listed at 2980kg for range-extender and plug-in hybrid variants, while gross vehicle weight is 3495kg.
The Freelander 8 will be built on an 800V architecture developed by Chery and will be offered in electric, plug-in hybrid and extended-range electric versions. The range-extender model uses a 1.5-litre petrol engine producing 105kW, operating solely as a generator for the electric drivetrain. The battery system is supplied by CATL and supports DC fast charging at up to 350kW, with claimed fuel consumption of 0.76L/100km.
Chassis equipment is said to include twin-chamber air suspension, an electronic limited-slip differential and an automatic all-terrain management system. A roof-mounted LiDAR unit scans road and terrain conditions and feeds data into the vehicle’s control systems. Driver assistance software comes from Huawei via its Qiankun ADS platform, with a Snapdragon 8397 processor from Qualcomm handling computer duties.
Inside, the cabin is expected to feature a pillar-to-pillar display, a secondary touchscreen and physical rotary controls. The interior is configured as a six-seat layout in a 2-2-2 arrangement across three rows.
The Freelander 8 is the first of six models planned under the revived brand over the next five years.
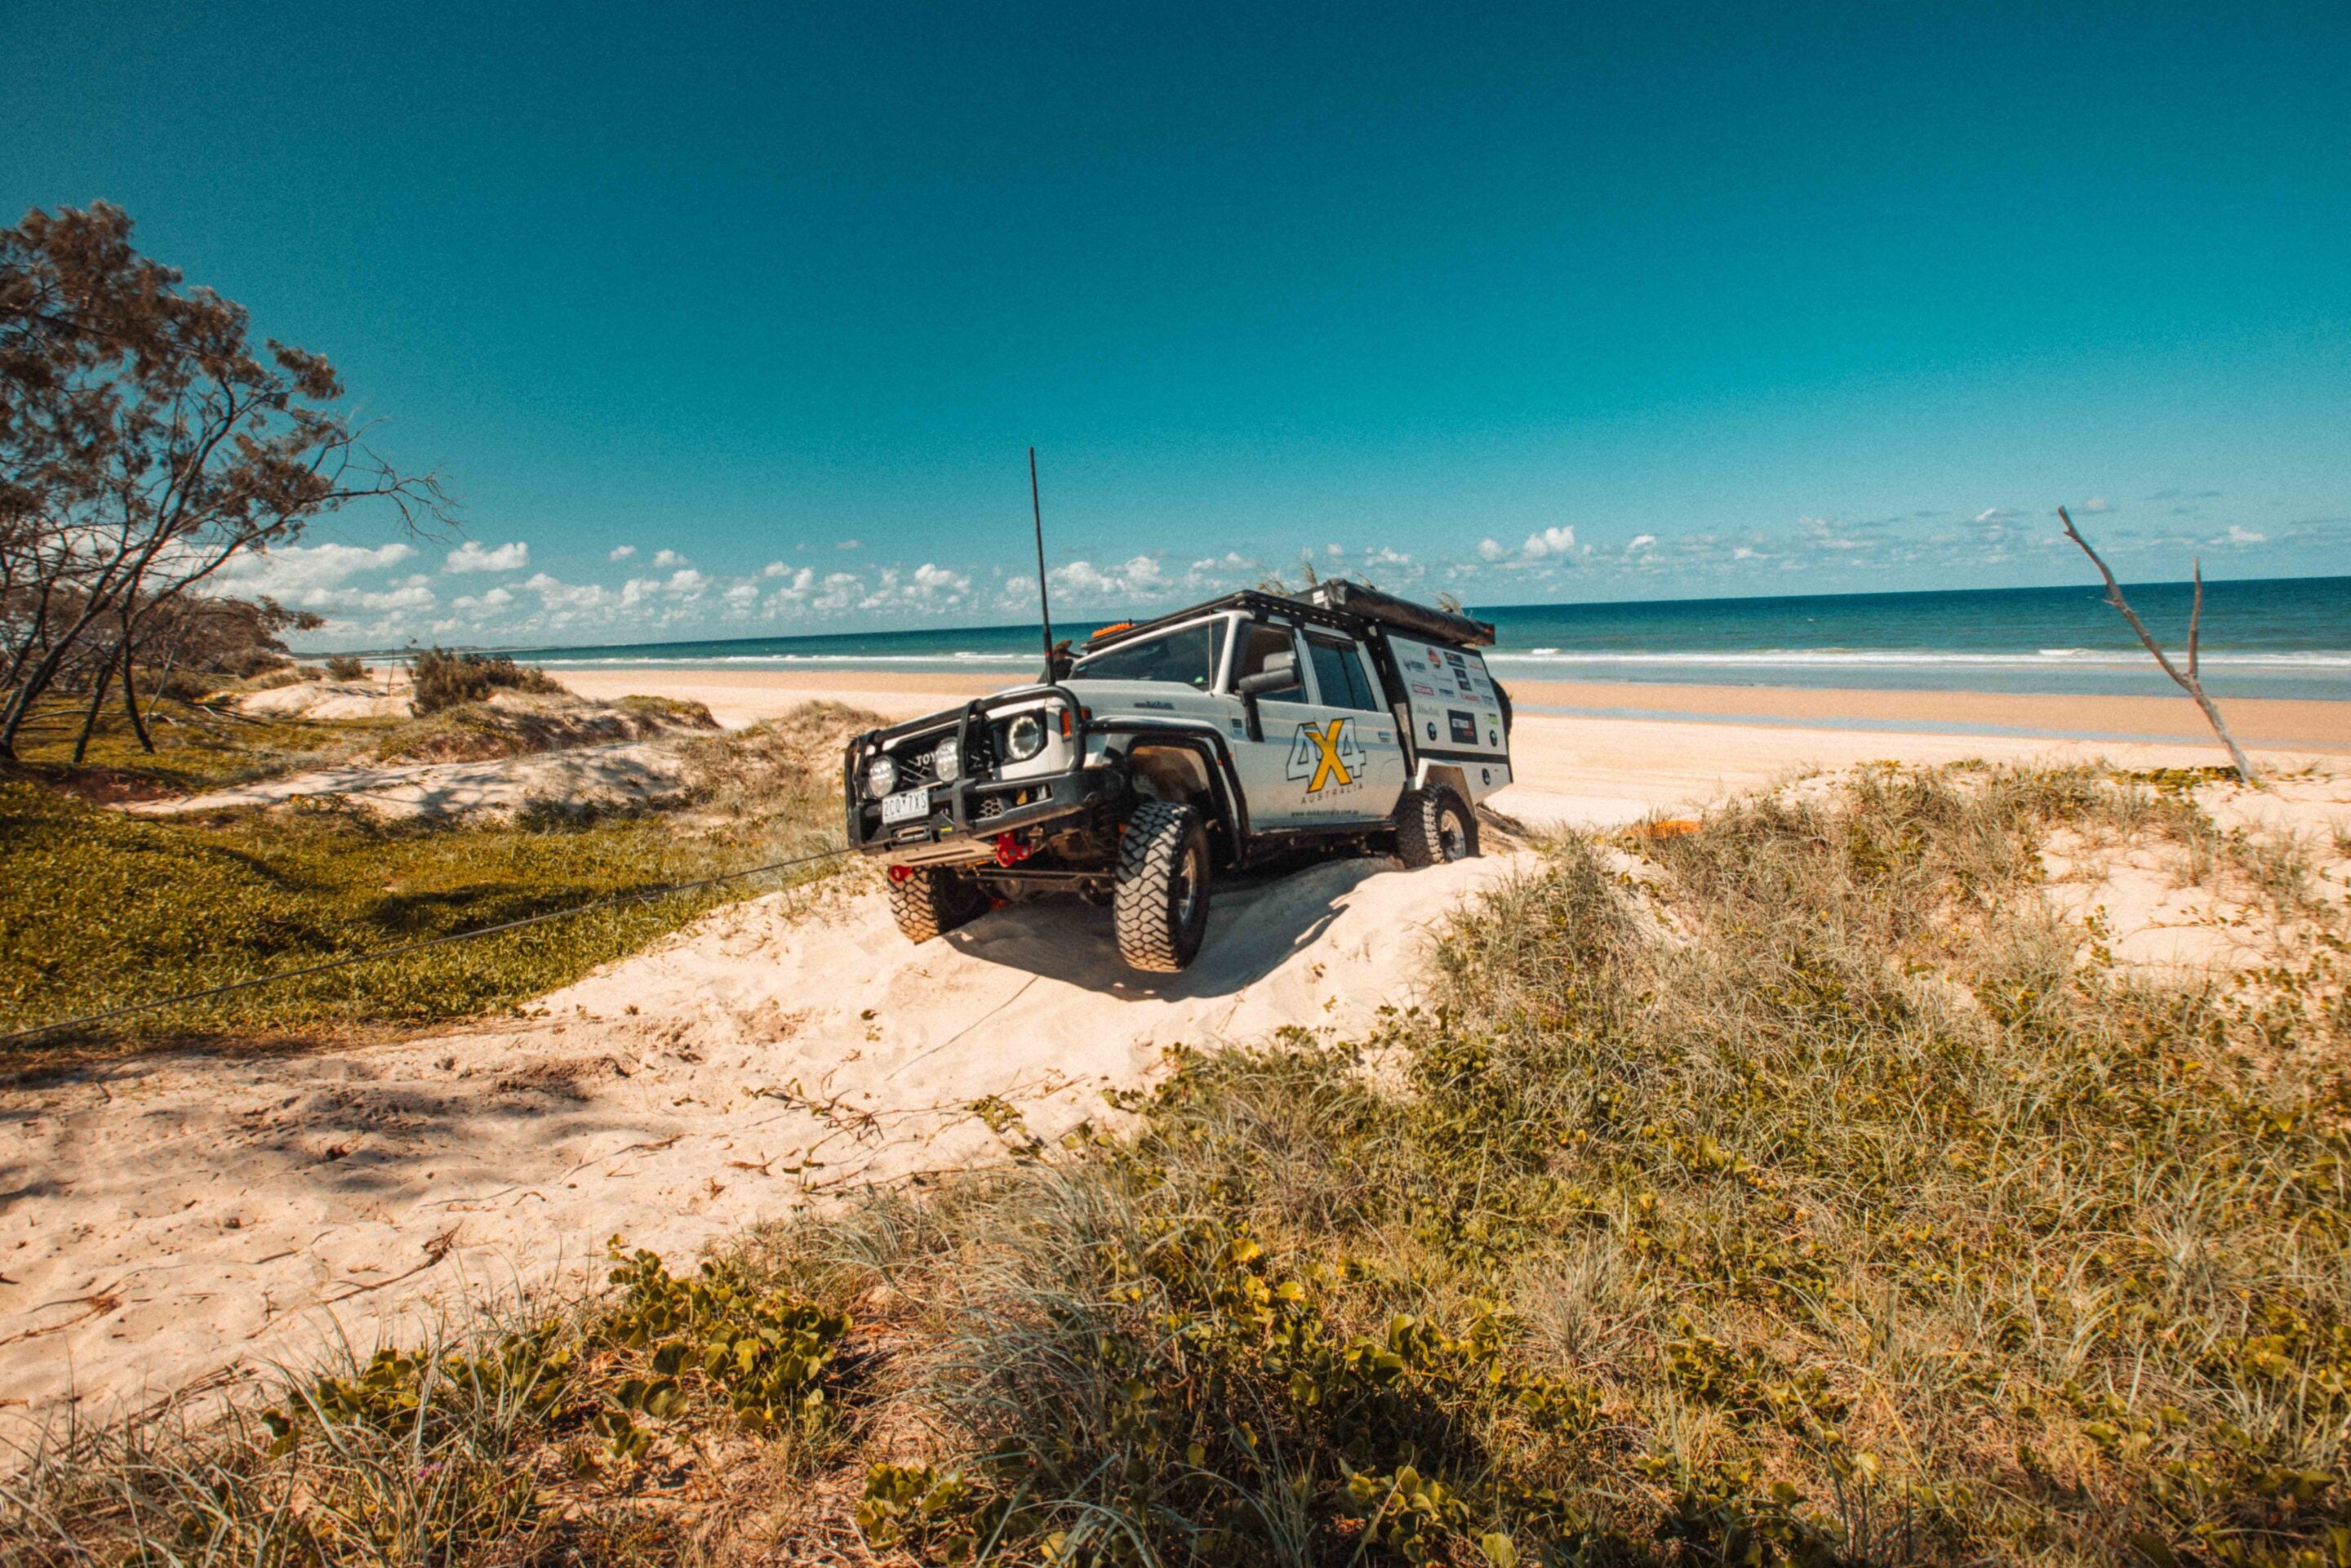
Hitting the beaches of the South-East Queensland, carving up the Simpson Desert, or threading your way along a remote coastal track, driving on soft sand is one of the most rewarding and humbling experiences a 4×4 can offer.
Get it right and you’ll be grinning from ear to ear. Get it wrong and you’ll be digging out your tyres along with your pride. Sand driving demands respect, preparation, and a bit of know-how. Here are the five main things you need to get right before you hit the tracks.
JUMP AHEAD
- Tyre pressure if everything
- Watch the waterline
- Know your clearance
- Pack recovery gear and know how to use it
- Respect the environment and everyone in it
- FAQs
1. Tyre pressure is everything
This is the single most important thing you can do before you hit the sand, and yet it’s still the step that catches out more drivers than any other.
When you air down, your tyre’s footprint increases dramatically. Instead of a small, firm contact patch fighting against the surface, you get a longer, flatter profile that floats across the sand rather than digging into it.
As a general rule, drop to somewhere between 16 and 25psi for beach driving, but treat that as a starting point rather than gospel. A heavily loaded LandCruiser towing a camper trailer will behave differently to a stock Jimny, so adjust accordingly and don’t be afraid to go lower if you’re struggling. Soft, fine beach sand will typically need lower pressures than the coarser, firmer stuff you’ll find further inland.
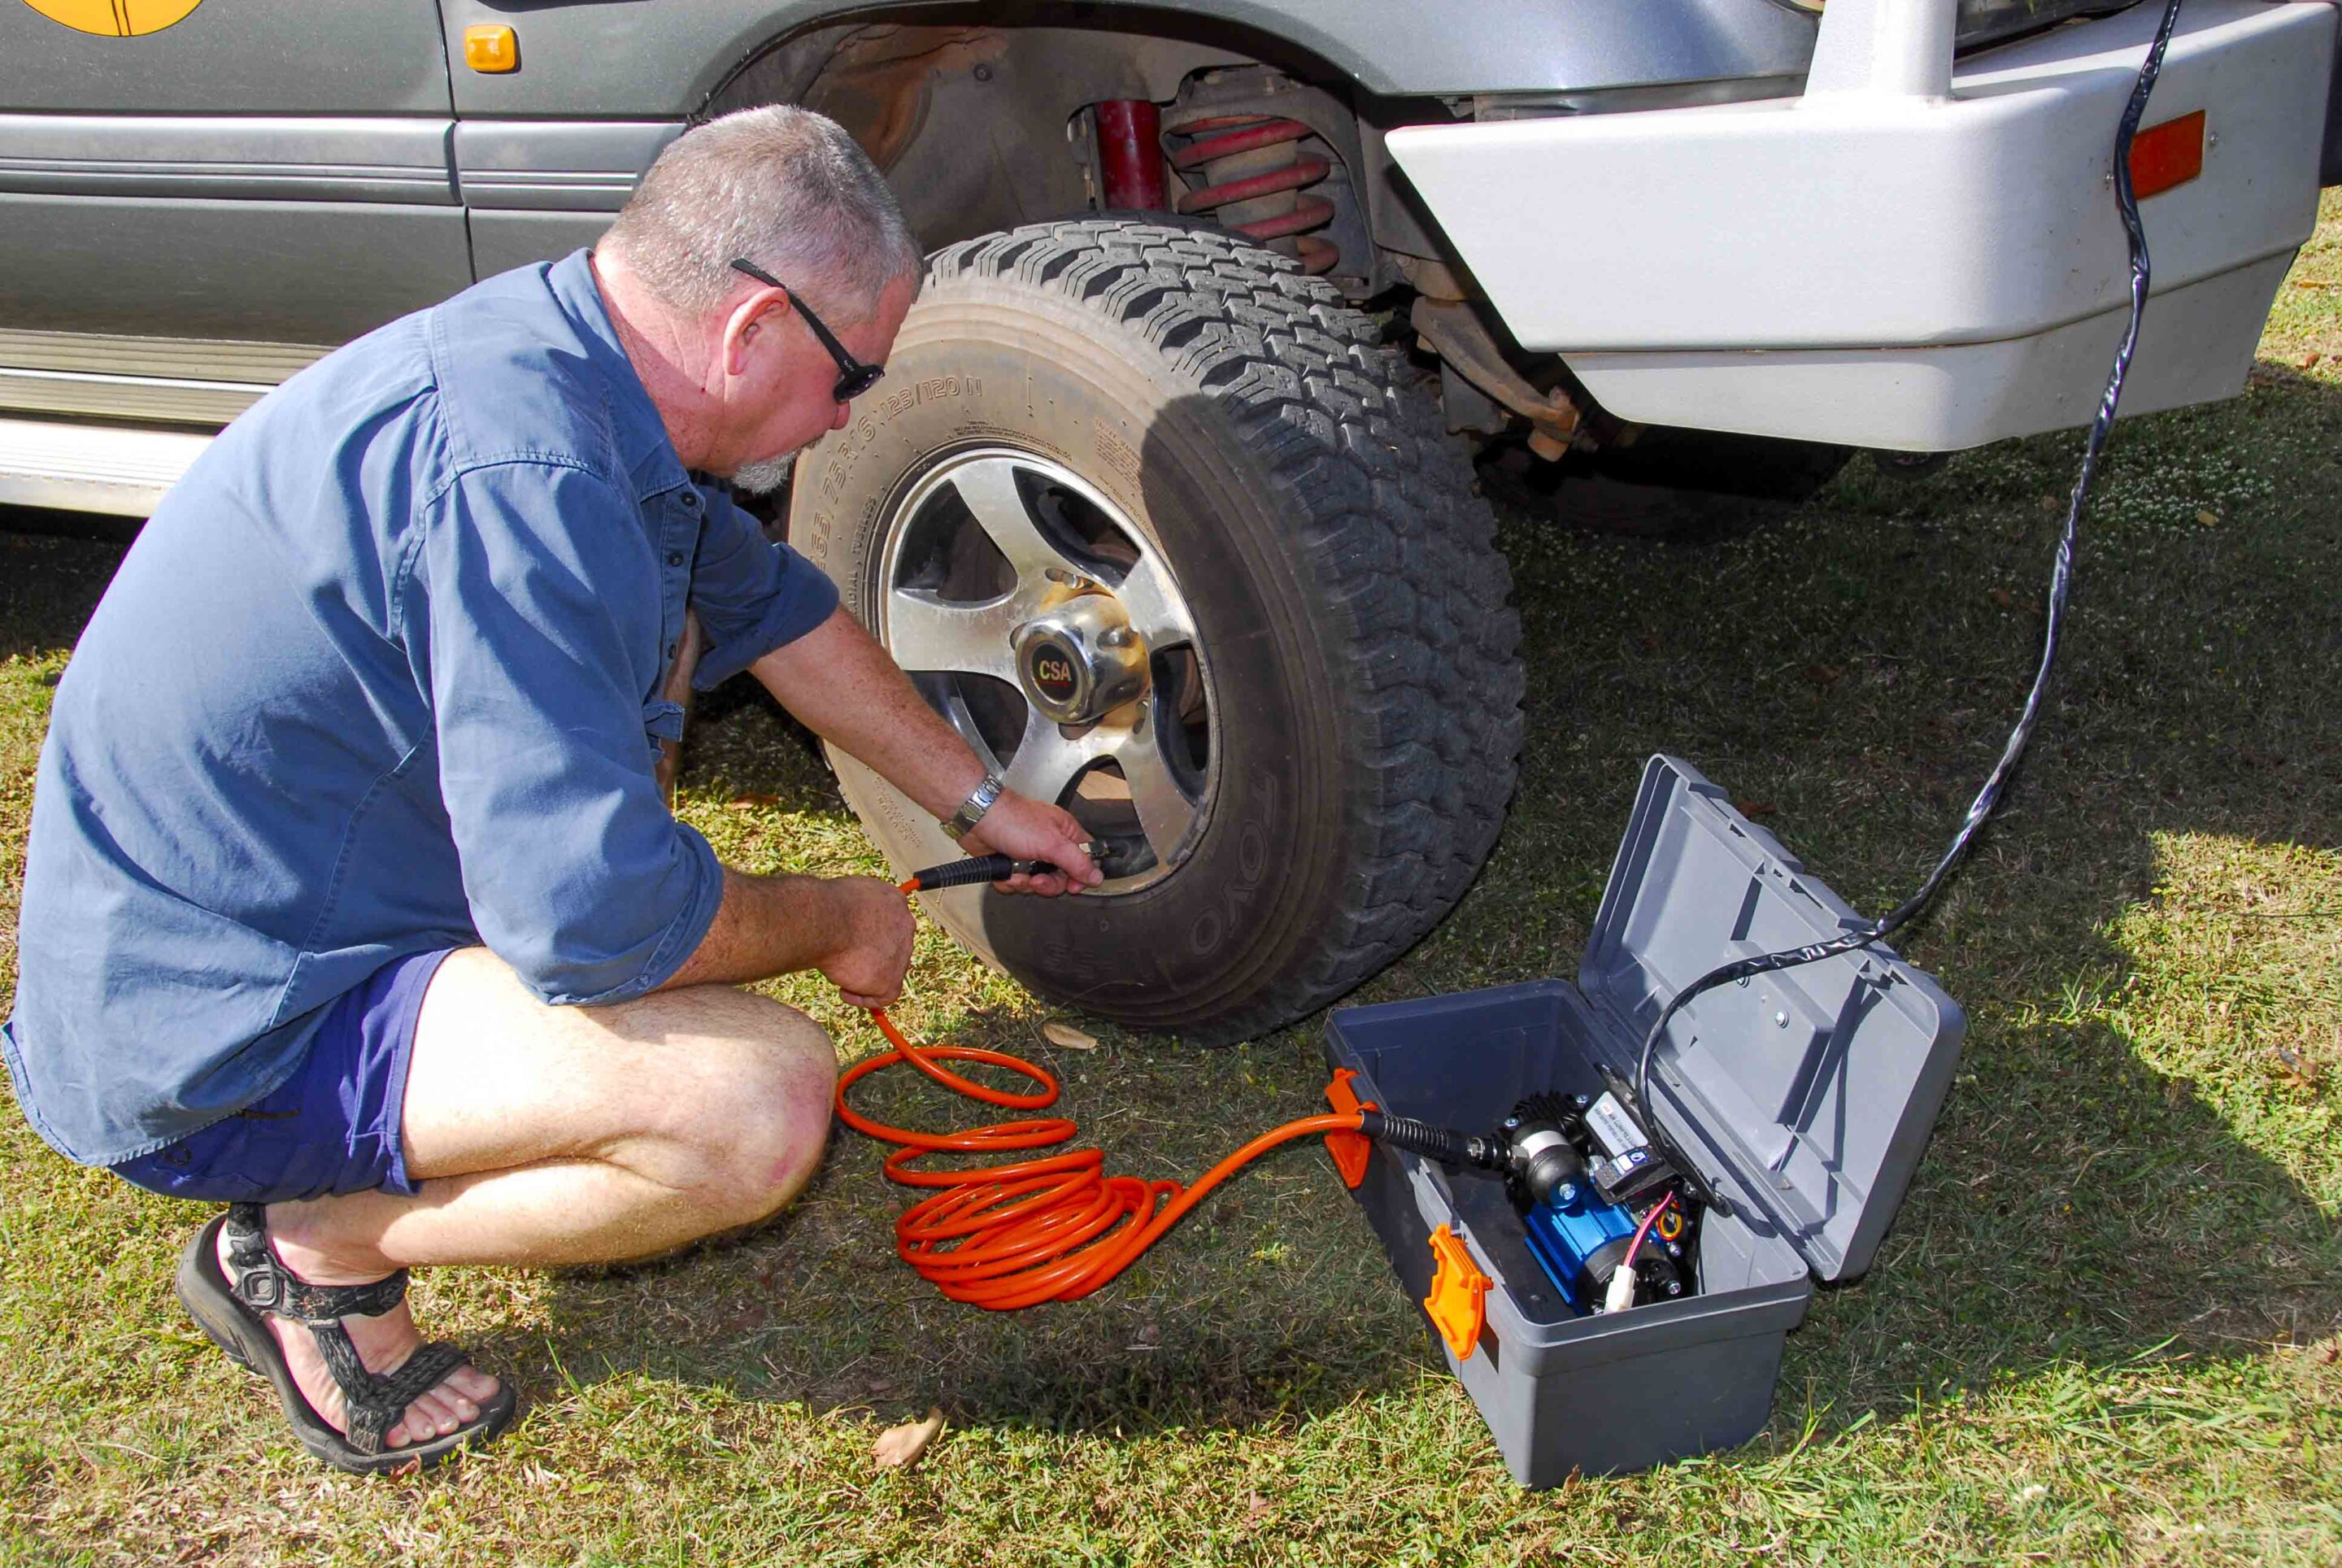
Once you’re back on the blacktop, get those pressures back up before you hit highway speeds or you’ll be chewing through rubber and killing your fuel economy. Carry a quality compressor and a reliable pressure gauge. Mean Mother and Ironman 4×4 both make solid portable compressor setups worth keeping in the kit.
2. Watch the waterline
Saltwater and 4x4s have a complicated relationship, and not a good one.
Salt is relentlessly corrosive, working its way into brake components, diff housings, chassis rails and electrical connections long after you’ve left the beach. Give the water’s edge a wide berth where you can and stick to the drier sand above the tide line. More importantly, keep a constant eye on the tide itself. What looks like a wide, forgiving run of hard-packed sand at low tide can turn into a narrow, wheel-sucking bog within an hour when the water comes back in.
Check the tide charts before you head out, know which direction it’s moving, and always have an exit plan. Getting cut off by the tide is not a story you want to be telling, especially when your recovery kit is locked in a rig that’s now surrounded by knee-deep saltwater.
If you do cop a splash, get home and give the whole underbody a thorough rinse with fresh water as soon as you can. Don’t leave it until the weekend.
3. Know your clearance
Sand is deceptive.
It looks smooth and manageable right up until the moment your chassis is resting on a crest and all four wheels are spinning in the air.
Dunes, crests, and soft-sided tracks all present real risks of high-centring your rig, where the undercarriage makes contact with the ground before the tyres do, effectively beaching you. Before you head to K’gari, the Tip Track, or anywhere else that demands serious sand driving, know exactly how much ground clearance your wagon is running. If it’s not enough, think seriously about a suspension lift and some quality aftermarket protection.
Approach crests with momentum but not recklessness, and if you’re unsure what’s on the other side, get out and walk it first. Two minutes on foot can save you two hours of digging.
4. Pack recovery gear and know how to use it
Spend enough time driving on sand and you will get bogged. It’s not a question of if, it’s when.
The difference between a minor inconvenience and a full-blown ordeal comes down to what you’ve got in the back of the ute and whether you know how to use it properly. Every sand-going 4×4 should be carrying a solid set of traction boards. Maxtrax are the benchmark for a reason, but Terrain Tamer also stock quality recovery gear worth a look.
Pack a long-handled shovel for digging out around the tyres and under the chassis, and a hi-lift jack for getting a bogged wheel clear so you can pack boards underneath. If you’re running a winch, good. Warn and Runva both make reliable units that have proven themselves in the field. But sand offers very little to anchor off, so a ground anchor or a deadman setup using your spare tyre buried deep is worth knowing how to rig.
Better still, travel with at least one other vehicle whenever the country allows it. A snatch strap between two rigs and someone who knows what they’re doing will get you out of almost anything. Practice your recovery before you need it in anger.
5. Respect the environment and everyone in it
Beach and desert environments are fragile, and they don’t recover quickly from people doing the wrong thing.
A few seconds of wheel-spinning stupidity can leave marks that last far longer than your trip, and the cumulative damage from vehicles doing the wrong thing has already cost 4×4 owners access to plenty of tracks that previous generations took for granted.
Drive at a sensible, controlled speed. Not because the rangers are watching, but because high speed on soft, unpredictable sand is how rollovers happen and how ecosystems get wrecked. Stick to designated vehicle areas, stay well clear of nesting sites and vegetation lines, and follow local access rules to the letter. Checking access conditions before you leave through your state’s national parks authority takes five minutes and can save a wasted trip or a hefty fine.
And when you pack up and head home, take everything with you. Every piece of rubbish, every stake, every scrap of packaging. The tracks you love exist because people before you treated them with respect. Return the favour.
FAQs
Q: What tyre pressure should I run on sand?
A: Most 4x4s will need to drop to between 16 and 25psi for sand driving. Heavier, more loaded vehicles generally need to go lower. Always re-inflate to normal highway pressures before returning to sealed roads.
Q: Can I drive my 4×4 through saltwater?
A: It’s best avoided where possible. Salt accelerates corrosion in brake components, diff housings, and chassis rails. If you do get wet, rinse the underbody thoroughly with fresh water as soon as possible.
Q: What recovery gear do I need for beach driving?
A: At minimum: traction boards, a long-handled shovel, and a hi-lift jack. A winch and ground anchor add serious capability if you’re heading somewhere remote. Always travel with at least one other vehicle if the country allows it.
Q: What are the best destinations in Australia for beach driving?
A: K’gari (formerly Fraser Island) is the most iconic, with hundreds of kilometres of beach tracks, freshwater lakes, and coloured sand cliffs. Stockton Beach in New South Wales offers big dunes and hard-packed runs close to Newcastle.
In Western Australia, Steep Point and the Coral Coast are worth the effort. The Coorong in South Australia is flat, fast, and seriously remote once you get further in. Wherever you go, check access permits, tide charts, and local conditions before you leave.
Q: What are the best destinations in Australia for sand dune driving?
A: The Simpson Desert is the benchmark, with more than a thousand parallel dunes and Big Red just outside Birdsville as the headline act. The Strzelecki Desert offers a similar challenge with less traffic. The dunes around Lancelin in Western Australia are a popular training ground for newer drivers, close to Perth and forgiving enough to build confidence.
Further north, Broome and the Gibb River Road corridor offer genuine remote-area dune driving. Wherever you’re headed: air down before you hit the dunes, know your escape route off every crest, and never tackle big dune country solo.
All too often we hear folks talking about their new 4×4 and say it will mainly see on-road use with maybe an easy beach drive on occasion.
It’s as if driving on a beach is easy but, in reality, you’re more likely to get bogged in sand than in any other off-road conditions, and you’re more likely to lose that new 4×4 to an incoming tide than from some off-road incident out in the bush.
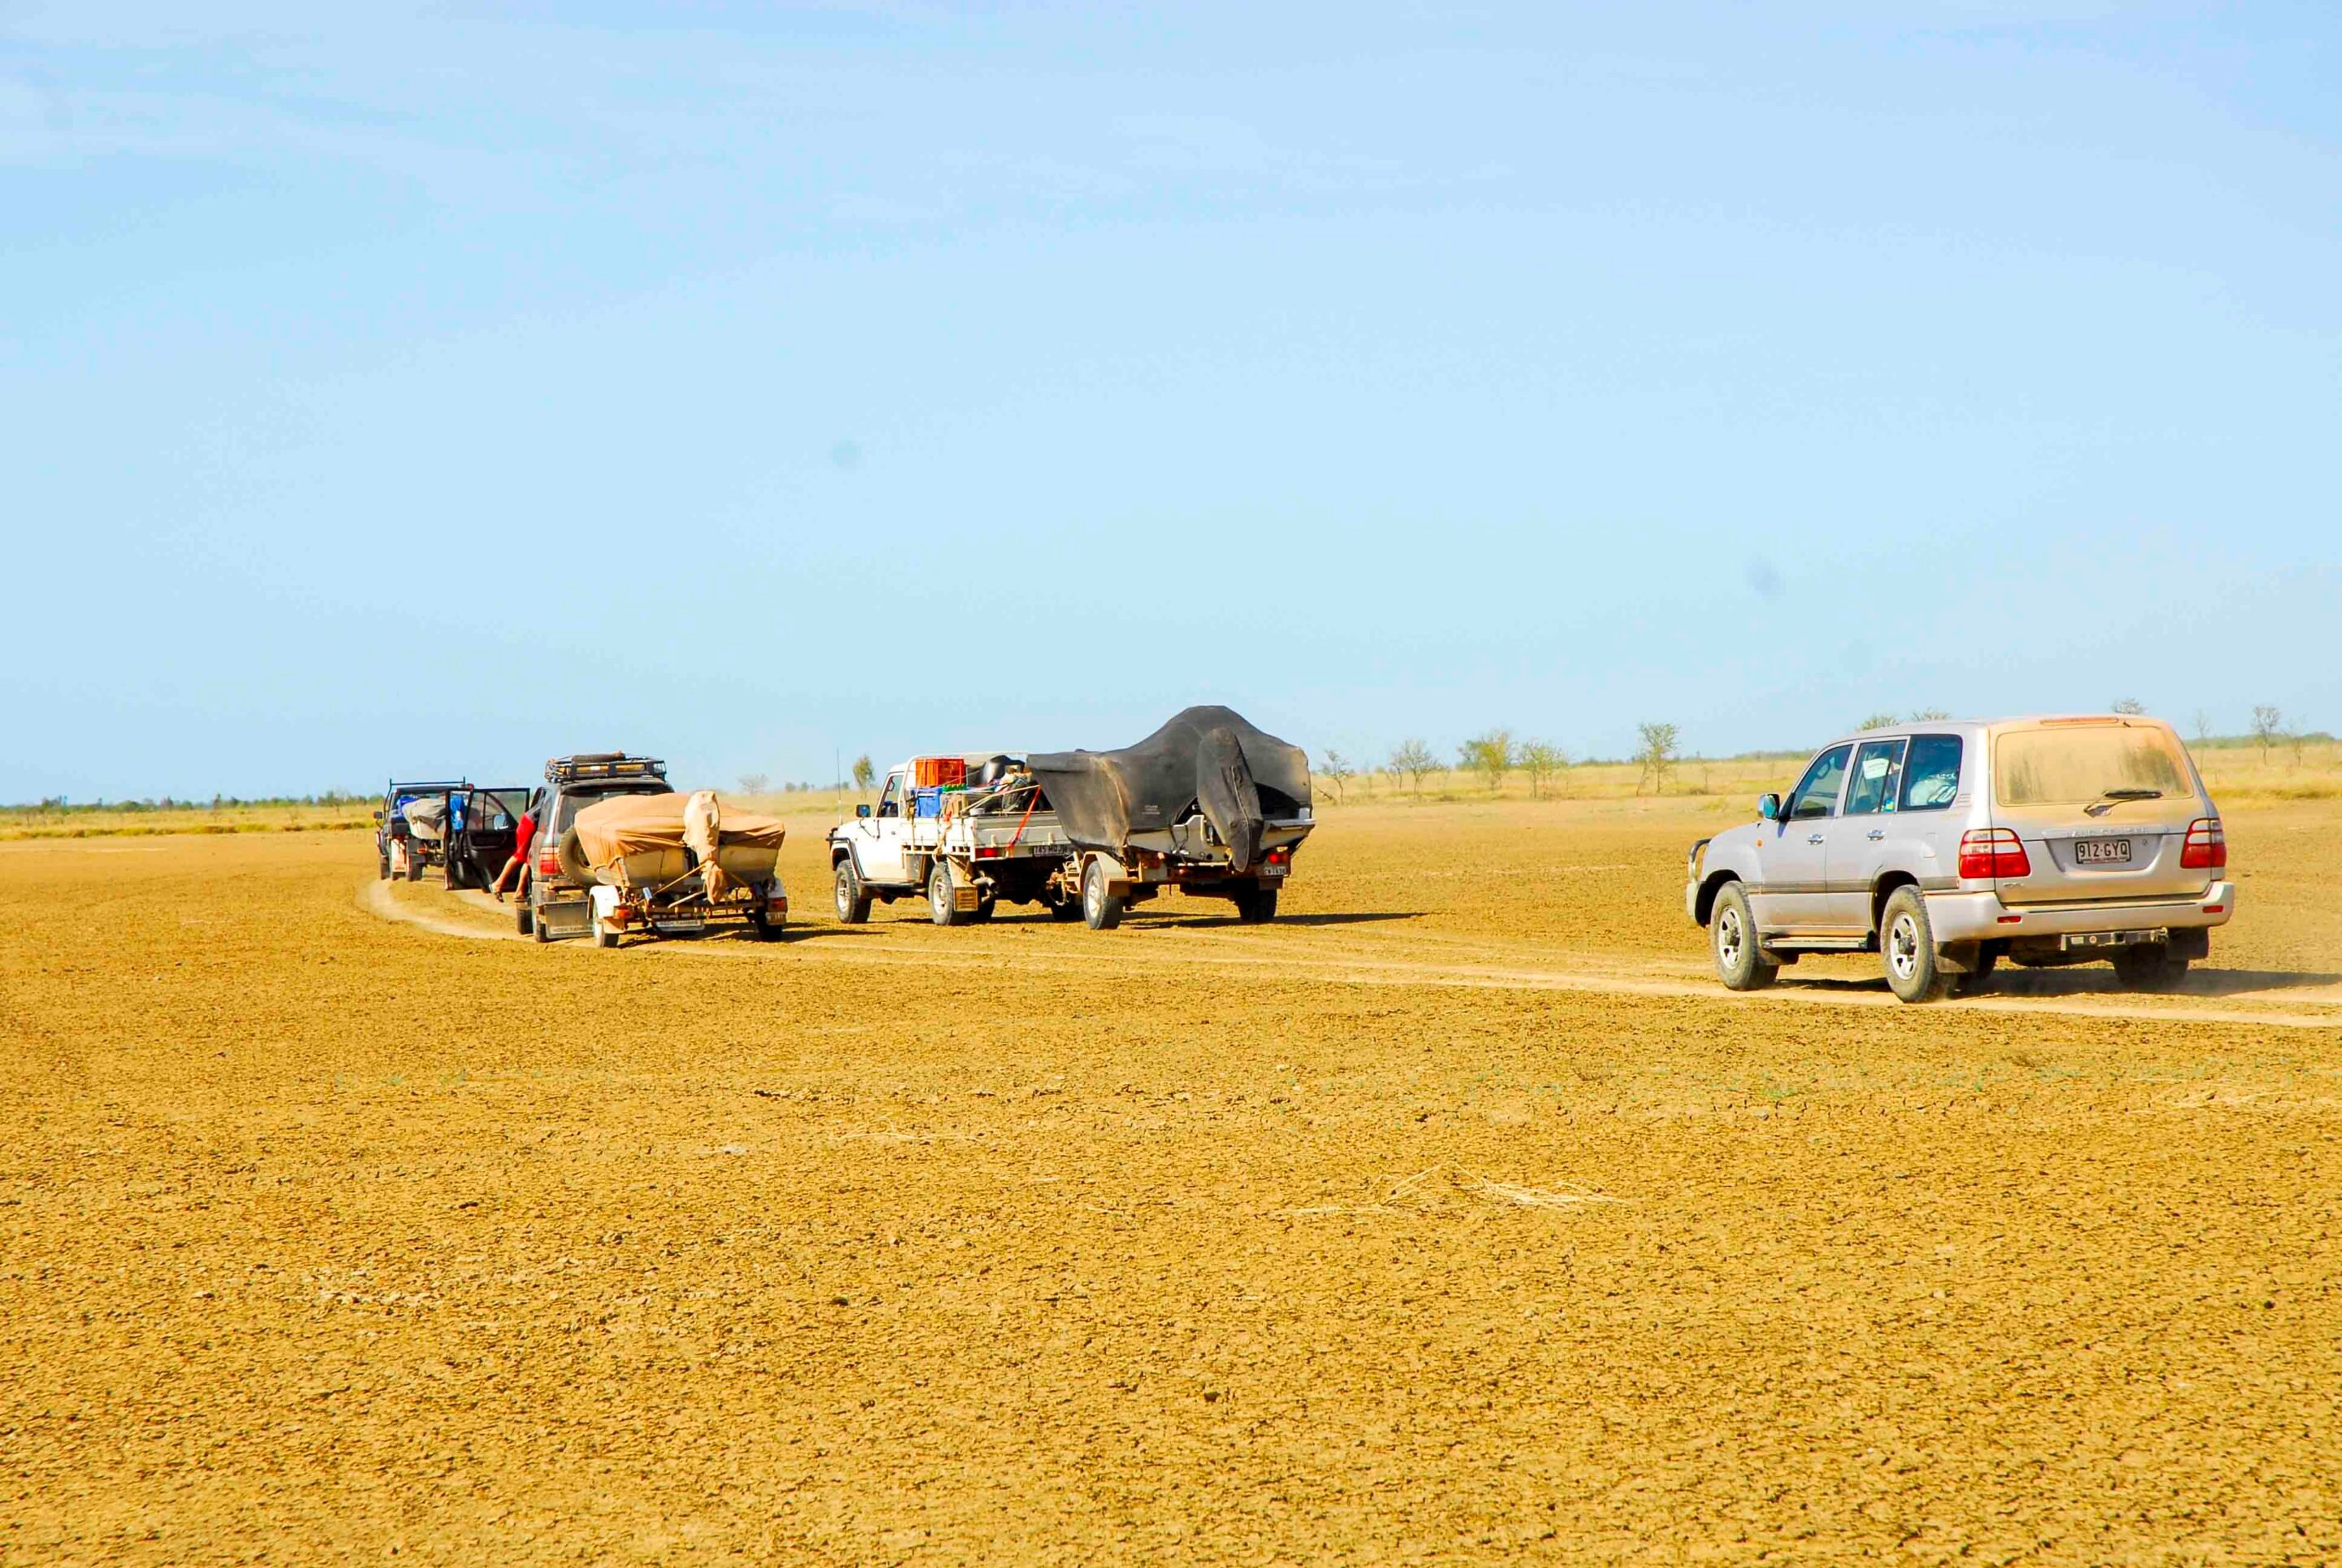
I love heading out bush, even on short trips to a mate’s place to boil the billy or pass Lakelands, south of Cooktown, to cast lures for barra and sooty grunters in the Laur and Normanby rivers. But it’s the country north of Cooktown on the Starkey Track where offroad adventure begins, sand dunes and rutted sandy and windy bulldust tracks that terminate at amazing fishing spots.
It’s in my front yard as I live in Mareeba, the gateway to the Cape and the Northern Gulf. A mate and I often go on a day trip by getting an early start, though mostly we make the most of the escape and camp for a night or more, sitting around a friendly campfire under a starry sky, listening to howling dingoes.
But a trip can go wrong in seconds unless one is aware and prepared for the pitfalls, bogs, slashed tyres and other unforeseen events. It’s all about preparation and driving to the conditions, something I have been doing for decades in my quest for adventures. Allow me to provide you with some handy bush-driving skills that have been part of my life.
JUMP AHEAD
Sand driving tips
We all tend to drive overloaded vehicles because of touring gear or a roof rack stacked with kit from the likes of ARB or Rhino-Rack. I run the Toyo A/T tyres on my HiLux at 40psi on bitumen and 36psi on hard dirt roads, but let them down to 12psi on sand dunes. Corrugated roads are best done at 30psi.
When driving in soft sand, highly inflated tyres will get you bogged before you get started and while some drivers reckon that wide tyres are better they actually push up more sand in front of the tyres and increase the risk of sticks and stones damaging bulging sidewalls. Don’t be fooled that tyres with low air pressures will ‘roll’ over obstacles without being damaged because they ‘flex’ better; the vulnerable sidewalls are exposed at low pressures.
Setting the correct tyre pressure will depend on the weight of the vehicle and the terrain. Some sand, especially on damp beaches, tends to be hard. Always drive on the tidal section of a beach, not on the soft sand above it, because that is where birds and turtles lay their eggs.
Soft sand will bog a 4×4, but getting stuck can be largely avoided by lowering tyre pressures down to 16psi or lower. Deflated tyres can roll off the rims when cornering or from hitting an obstacle, so slow down to crawl-speed to avoid popping a tyre off the rim. If you have a flat on a beach, changing the wheel on an incoming tide is risky. Drive as high as possible above the high tide mark when doing so.
The headlands of many beaches are rocky and driving on aired-down tyres could result in a shredded sidewall from sharp rocks. Even smooth rocks can cause tyre damage. It’s wise to pump tyres up on long rocky beach sections to minimise the chance of sidewall damage.
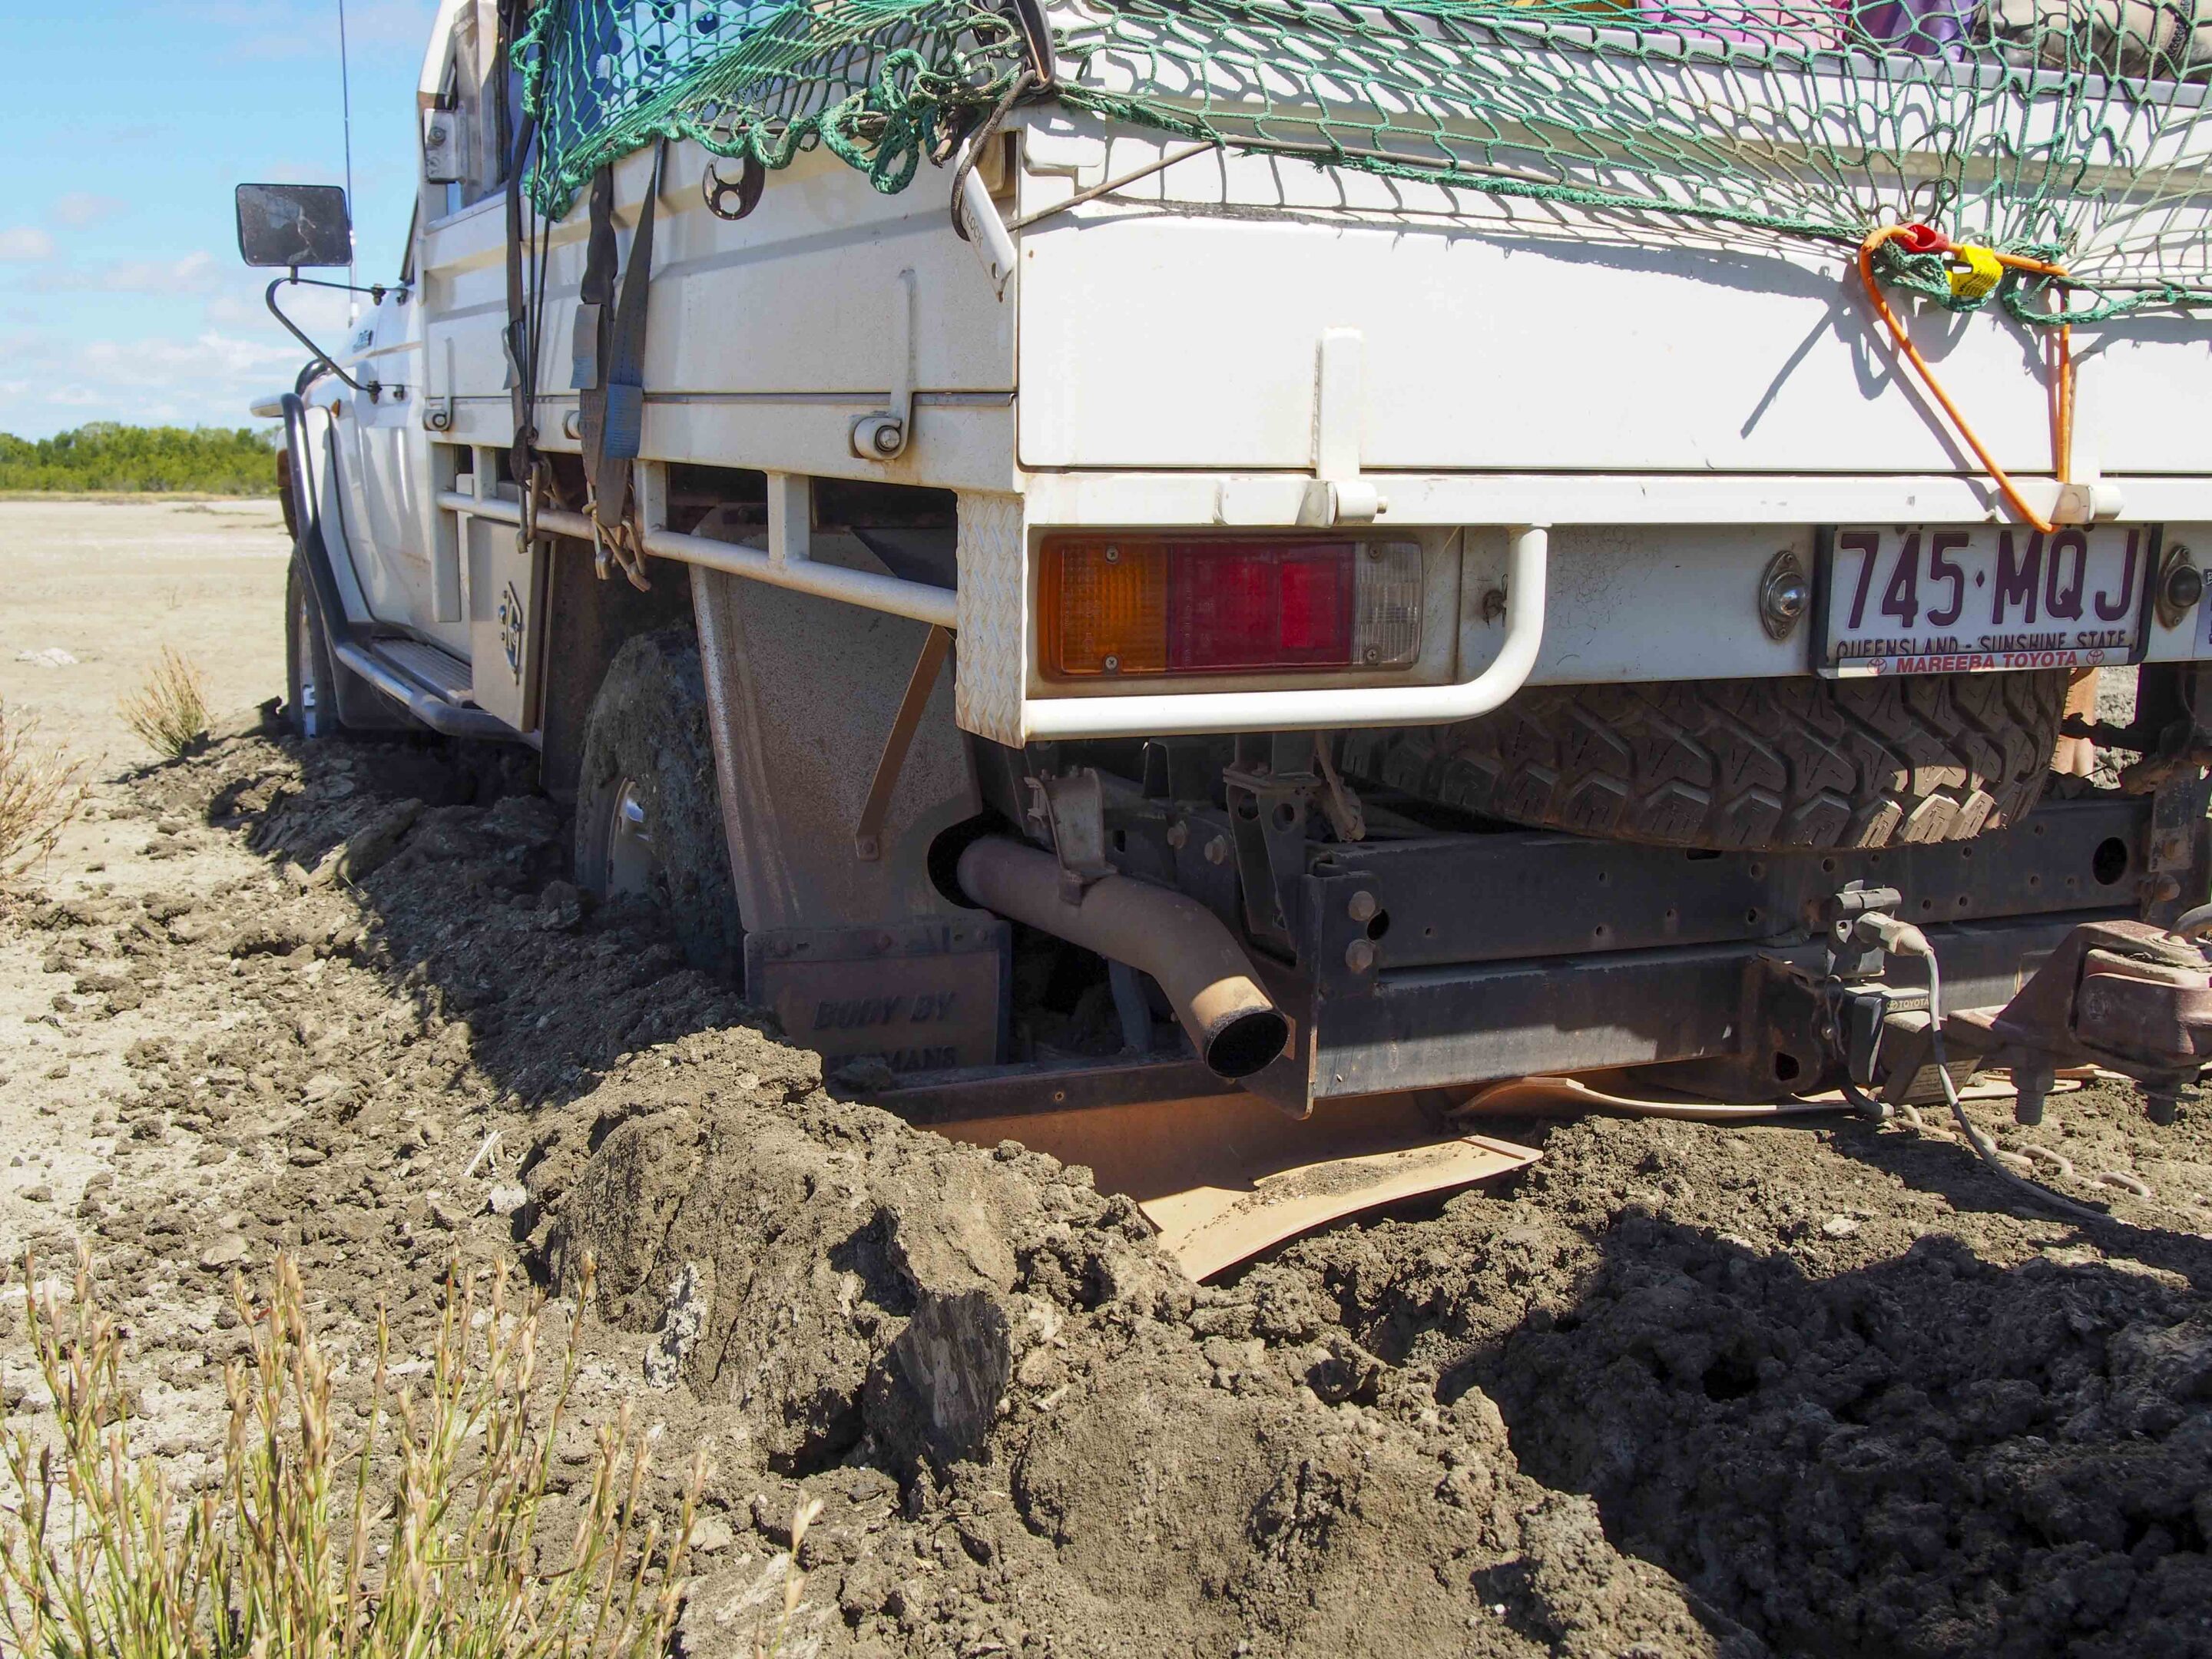
Many beaches have springs and running creeks that wash out deep holes. If you happen to run into one it can be hard yakka getting your 4×4 out. I know a former commercial fisherman who lost his trayback when he ran into a spring hole on a beach north of Pormpuraaw – the vehicle has now rusted away…
Dunes are tricky and often too steep to traverse because of fine deep sand. Wide, aired-down tyres and speed are best for dunes, but be slow on the crest if you don’t know what is on the other side of it. Drive over one too fast and you may launch into space. Be careful on unstable slopes, especially if the vehicle loses traction and drifts down it, trapped in a fine sand avalanche. Trying to turn when this happens may result in a roll over on a steep slope. Be careful braking; instead, let the natural friction of the sand and its suction to control stops.
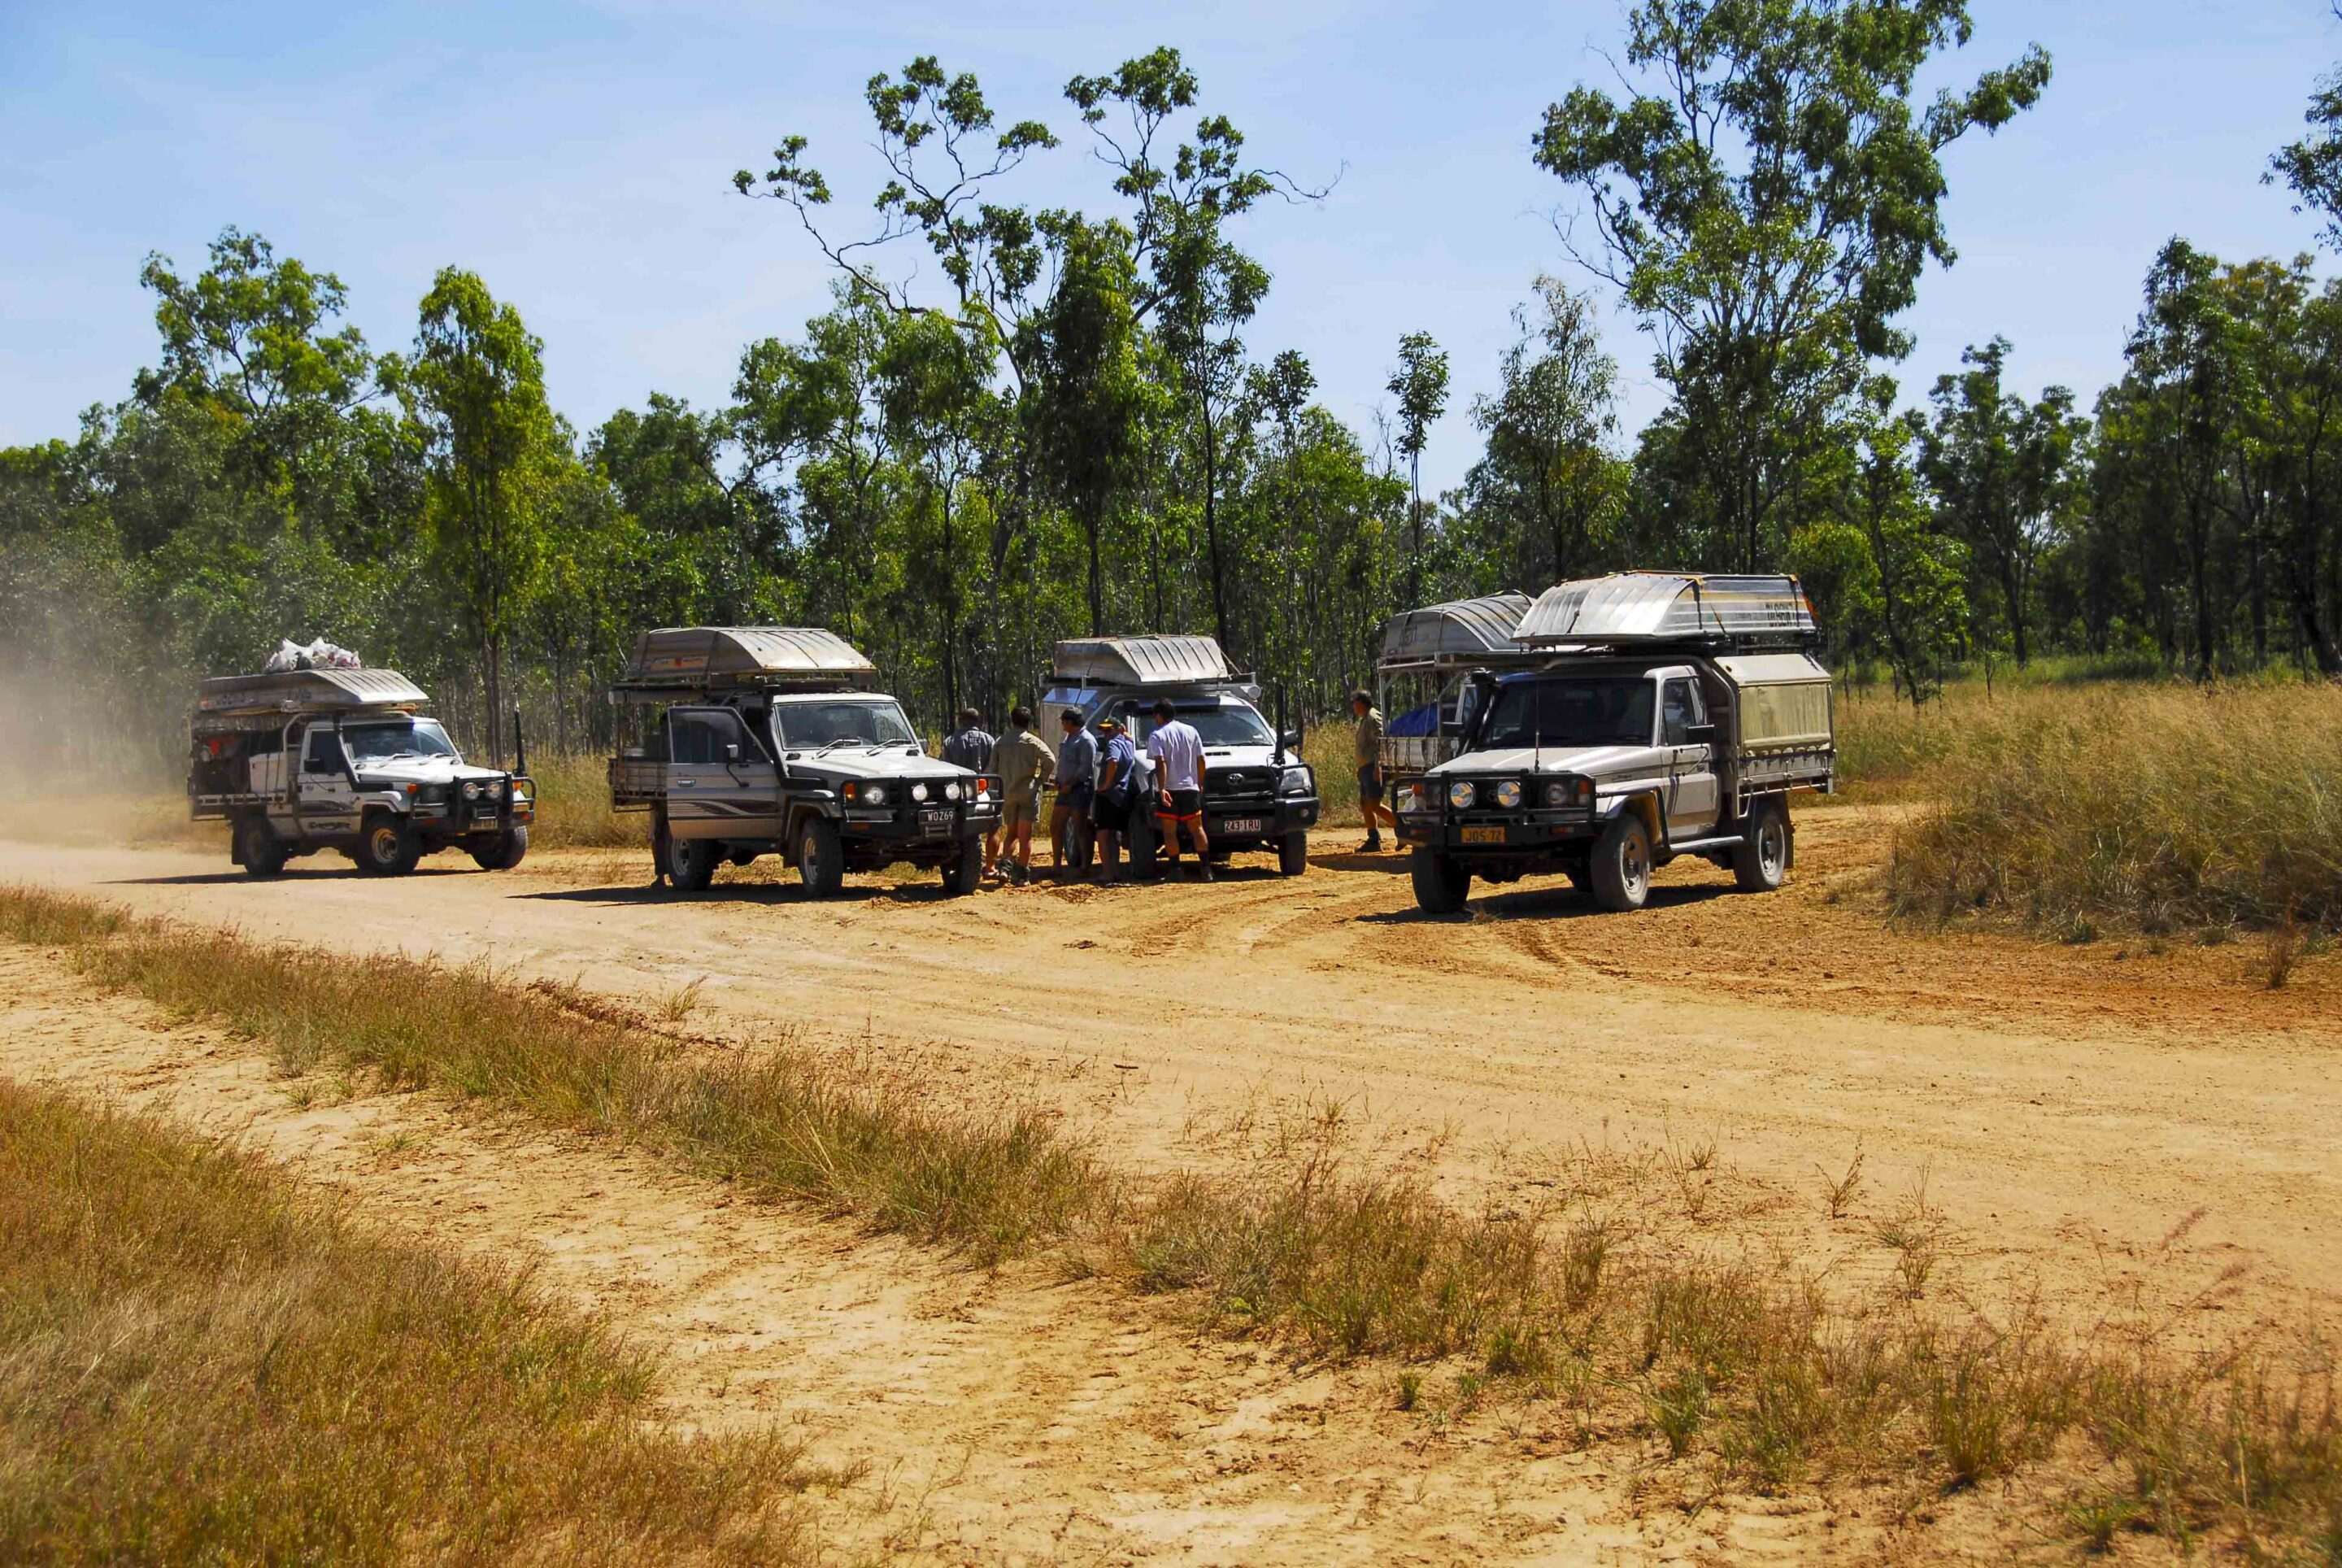
Bush track driving
The bush tracks through monsoon woodlands turn from corrugation in the early stages of the dry season to bulldust or heavy sand at the end of it. The bulldust is very capable of dry bogging vehicles. When traversing such tracks it’s best to air down to half the pressure of your sealed-road pressures, whether you’re running standard rubber or something more aggressive from BFGoodrich.
Unlike beach driving, it’s impossible to get any speed up on winding, timber-lined and sandy bush tracks. Use low range, third gear when conditions demand it. The problem is that sand sucks tyres in; just stop to see how it piles up about the wheels. This increases drag and the wider the foot print the more drag. Speed will get you through most patches, but as bush tracks often have deep potholes and washouts, take care when doing so.
If you don’t air down you can get dry bogged in this stuff when your vehicle progressively slows down and runs out of power. I have aired-down and still got bogged down because I was towing a heavy boat trailer. You must lower trailer tyre pressure also.
Avoid using the brakes and rely on the gears. Lock auto transmissions in the preferred gear and mode before entering sandy sections, not after you are bogged and need a winch or the recovery boards to get you out.
Bulldust worries newcomers, but it won’t bog you unless you hit a deep hole and are hung up with the vehicle sitting firm and flush on the hard centre and the wheels unable to grip on a soft bottom. It’s rare but it happens, especially after a road train convoy has gone over it. The fine talcum-powder-like dust penetrates everything; a good reason to turn up the aircon to full bore when entering a long stretch. Use the windscreen wipers when it splashes over the bonnet… and it will.
Something to remember is that as with the sand on beaches and dunes, bulldust is firmer in the morning, or when damp from a shower. The same applies to beach sand which is best driven over on a receding tide.
Bush tracks often hide exposed roots, rocks and even fallen trees that are covered in sand or bulldust. Keep an eye open for them or it may mean suspension damage or a tyre change, an unpleasant job in bulldust.
Take care on dirt and gravel roads where gravel is piled up in the centre. Be wary when changing lanes’ at speed because the vehicle will fish-tail and roll, which is almost guaranteed if you are towing a trailer/van when it crosses the centre pile. Many such roll-overs happen on the Cape’s Peninsula Developmental Road, with most drivers having no clue what happened. The same occurs when driving on low-pressure tyres and taking corners at 100km/h, and the rubber rolls off the rim. Game over…
Recovery basics
Bogs happen when you suddenly hit a soft patch or run out of engine power to get you over the top of a dune or across a long stretch of heavy sand.
The first thing to do is to stop, because spinning wheels dig down deeper and can damage your vehicle’s gearbox. If there is another vehicle with you it’s an easy escape with a snatch strap, while a winch hooked up with a sand anchor (or buried tyre) is another method when stuck on a beach or dune. On tree-lined bush tracks it’s simple to hook the winch cable to a tree, though in the damp parts and after the wet season, small trees will pull out from the ground.
One of the easiest means of un-bogging a vehicle from sand is with recovery boards, whether they’re MaxTrax or another quality brand. However, don’t forget to carry a long-handled shovel in case some digging about the wheels is required. Avoid short-handled and survival shovels if you want to avoid a bad back.
If you head off the dirt roads and onto monsoon forest tracks on the Cape, or pretty much anywhere in the tropical north, you will encounter conditions as described. Plan for them because it can all go wrong in a split second…
Essential 4×4 gear
Carry recovery gear when heading into the wilderness. It starts with a reliable air compressor; buy the best you can afford, not a $30 special as it won’t pump large 4×4 tyres up. A quality unit from ARB will last the distance. You will also need a tyre gauge and deflator set.
A winch is handy, but you can spend a lifetime in the bush and never use one. I carry a 50-year-old Tirfor hand winch that has seen some heavy work. Backing the winch is a recovery kit, including an extra 10,000lb breaking strain snatch strap. I carry two and have used both to recover vehicles. What applies to winches applies to MaxTrax recovery boards, but when you do need them they are invaluable. They are not that heavy and are easy to store and carry.
A spare 10t hydraulic jack lives in my tool kit. It’s used for changing tyres instead of the Toyota jack. Have a long-handled shovel. Avoid trench shovels; they are only good for a walk in the scrub with a toilet roll.
A few days back, old mate and I went hunting on a property that has been in limbo for years. The tracks are in disrepair and only used by buggies and quadbikes, with some sections so tight that we had to use an axe to cut small trees down; a good reason to carry an axe or one of those nifty battery-operated chainsaws.
FAQs
Q: What tyre pressure should I run in sand?
A: It depends on vehicle weight, but generally around 12 to 16psi for soft sand, while keeping speeds low to avoid rolling a bead.
Q: Is driving on beaches safe?
A: It can be, but it carries risks like tides, soft patches, and hidden washouts. Always drive near the tidal zone and avoid soft upper sand.
Q: What’s the most common cause of getting bogged?
A: Loss of momentum in soft sand or bulldust, or carrying too much speed control without enough tyre pressure adjustment.
Q: Do I really need recovery gear for light off-roading?
A: Yes. Even easy tracks can turn quickly. At minimum, carry recovery boards, a compressor, and a rated snatch strap.
Q: Are wider tyres better in sand?
A: Not necessarily. Wider tyres can float more but also push up sand and increase sidewall risk if pressures are too high or too low.