I had been looking to fit a range of gauges to my Nissan Patrol and had been surfing the net when Redarc launched its comprehensive range of white-faced gauges onto the Australian market. What timing!
I’m a bit of a fan of Redarc gear; it’s Aussie-designed and manufactured in South Australia and has a great reputation, so what’s not to like?
There are about a dozen gauges in the line-up and I ordered two units (each with three different readouts) plus the extra accessories to get them to work, including an Enhanced Lighting Controller to dim or brighten the gauges for night driving.
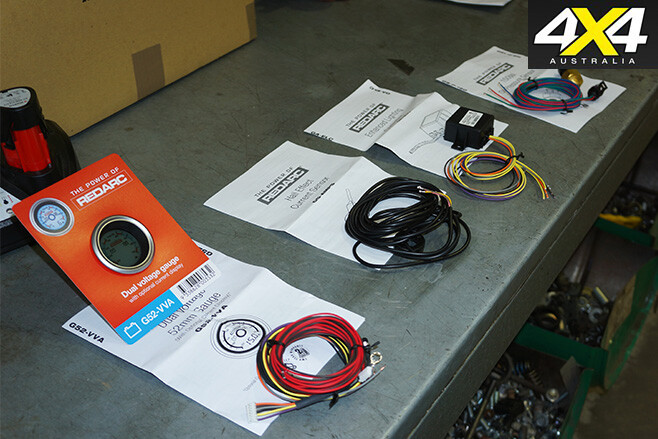
The gauges included a Redarc dual voltage gauge, which constantly monitors the main battery and the auxiliary battery. It also gives a digital readout of the output amperage of the alternator. For this to work you require an (optional) hall effect current sensor.
The second Redarc gauge I had fitted, by the crew at Outback 4WD in Bayswater, Victoria, monitors the turbo with a boost readout and exhaust gas temperature (EGT) display. This kit comes with everything that’s required, including probes, control units and connectors. A digital readout of engine oil pressure on the same gauge completes the display, though it requires an optional oil gauge sender.
Both gauges are mounted in a pillar pod, keeping them out of the way but still easily readable.
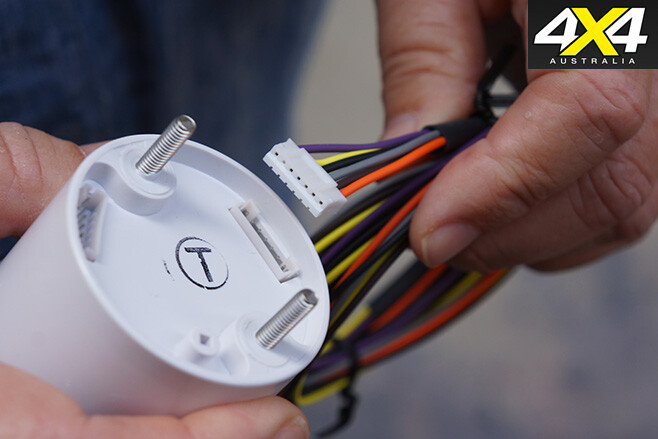
While wiring these two units is a relatively undemanding job, it can be fiddly and very time-consuming as the wiring has to be run from the batteries, the alternator and the sensors, back through the firewall to the pillar pod.
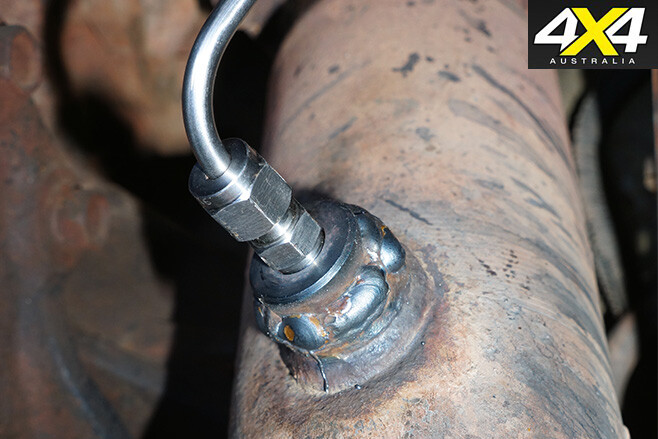
The mounting of the EGT probe in the engine exhaust can demand some specialist gear and experience. Not to mention welding; we had to replace the EGT probe-mounting nut on the exhaust with the one supplied. After a few unsuccessful phone calls to all known suppliers there was nothing more we could do other than remove the old mounting nut and replace it.
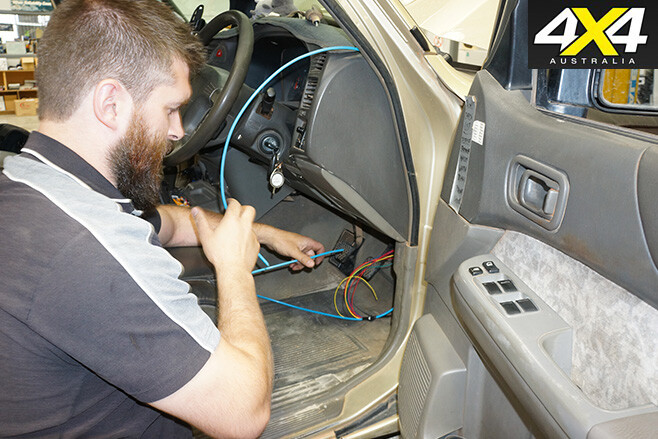
If you do the installation yourself, it’s best to lay out all your gauge kits and wiring and then read the instructions carefully. Then work methodically through the process. At times you will have wires seemingly running everywhere. A second pair of hands comes in handy to run wiring through the firewall, not to mention a second pair of eyes to keep track of everything.
We’ve had these gauges fitted for a few months now and they’ve worked splendidly well with absolutely no issues. It’s great to have a continuous and accurate readout of battery voltage and alternator current, as well as EGT, turbo boost and engine oil pressure. I’ve been pleasantly surprised at how cool EGT temps are in a wide range of ambient temperatures and operating conditions. I also never realised how much oil pressure fluctuated. You live and learn!
For peace of mind, you can’t go past a set of good gauges, and these are as good as vehicle-monitoring gauges get. The range from Redarc also includes various temperature, oil pressure, boost, voltage and combination gauges – some of them come with a programmable warning (an audible beep and the backlight colour changing to red).
Just the thing to alert you to high coolant or exhaust gas temps, or low oil pressure. The backlighting is programmable to 13 different colours so you can select one that best suits your vehicle’s OE lighting.
RATED We say: Excellent product; well made, reliable and easy to read. RRP: From $170 to $407 each; depending on gauge, readouts and options. Info: www.redarc.com.au
At a servo in Deniliquin the young lady behind the counter passed her dubious gaze over the two Toyotas sitting at the pumps: one a shiny new HiLux SR 4×4; the other a well-used and abused ’89 4×2 HiLux.
“So where are you headed?” She asked as I paid for the fuel. “Quilpie in Western Queensland,” I replied.
She looked at me wide-eyed: “Quilpie? I once stayed there for three days and just cried the whole time it was so hot!” I nodded sympathetically.
She continued: “Do you know they even have to keep chocolate biscuits in the fridge out there?”
The drought and subsequent rains recently in Western Queensland have been in the news quite a bit of late, as more than 80 per cent of the state has squirmed in the parched grip of a drought that is well into its fourth year.
In fact, some parts of the state have been dry for nearly five years. Many were even calling this drought the worst in living memory.
We thought we’d take the new Toyota HiLux 4×4 for a long-haul test drive with tandem trailer and a tonne of hay on board to see how the new banger handles a load and a long drive. And to make it a little more interesting we also took my own 25-year-old, 2.4-litre petrol HiLux along to see if that old unbreakable tagline still rings true.
Brian Egan runs the bush charity Aussie Helpers and has been working seven days a week to keep assistance flowing out to where the rivers and creeks run dry. The Aussie Helpers team clocked up more than 500,000km and helped more than 1100 people during 2015.
We caught up with Brian on a pre-Christmas hamper run to some properties in the Quilpie and Adavale areas to see the severity of the drought first-hand.
As we headed towards the Victorian border I was again a little worried that I may have been asking a bit much of the old-banger. A headwind saw me stuck in fourth gear at about 80 clicks, while a thunderstorm saw me back to third as I peered through the unrelenting rain.
With one-tonne of hay on board and nearly a tonne of tandem trailer behind, the old HiLux was pretty much at maximum legal payload.
The new SR’s 2.8-litre powerplant was just idling along with the same load. The trend towards taller gearing in virtually all new vehicles meant the new HiLux rarely spent any time in sixth gear when loaded, but even in fifth the tacho needle was below 2000rpm when cruising at the speed limit.
The mercury stayed in the high 30s as we headed through Cobar and on to Bourke. Steve had his stint behind the wheel of the old dual-cab, while I took advantage of the air-con in the new beast. Road speed was pretty much determined by the temperature gauge of the old ute; however, it just plugged away and only needed to stop in the shade to cool off on a couple of occasions.
The ever-changing landscape scrolled past our windows: scrub and feral goats between Cobar and Bourke; the startling burst of greenery of the river flood plains at the Queensland border; the dry open country out to Cunnamulla; and the bush surrounding Charleville. But the red rock and scrub that flanks the Diamantina Development Road, as it stretches west toward Quilpie and beyond, highlighted the harsh realities of farming in the outback. It’s an unforgiving landscape.
We rolled to a stop at the turn-off to the remote hamlet of Adavale (population 20). Brian was already waiting for us in his tinsel-covered LandCruiser, eager to get going and deliver some Christmas cheer.
Brian and his wife Nerida started Aussie Helpers more than 13 years ago after Brian – a Navy veteran-cum-farmer – was hospitalised with depression and post-traumatic stress disorder.
Brian and Nerida lost their own farm on the Darling Downs due to drought. During his recovery, a counsellor suggested Brian should find someone worse off than himself and help them and it was this suggestion that saw the birth of Aussie Helpers. From humble country pub hamper raffles to thrift shops, the organisation has grown to run a modest fleet of vehicles distributing everything – from toiletries and food, to hay – to those in need in the bush.
With Brian leading the way we set off up the 125km dirt road that led to Adavale. It soon had me thinking that maybe I really was going to kill the old ute. With the exception of a couple of optimistic stretches of asphalt, it was like an endless cattle grid that had my teeth jumping in my head.
I was sure something important, like maybe the gearbox, was going to fall out. Yet with a bit of care it continued to chug along. I quickly became coated in a film of red dust while clanging along in the old girl.
North of Adavale we popped in to see Debbie and Ben Pegler at their 769km² property. The Peglers had been weathering the dry stoically, putting out licks and holding on to their 900-head breeding herd. This area has the advantage of artesian water, so Debbie keeps the garden around the house lush. “It just makes you feel better to look out the window and see some green,” she said. Son Darcy was helping sand floorboards upstairs in the absence of any stockwork to do.
This area had about three inches of rain just over six months ago, then quite a bit more over the new-year period. But with follow-up rain, cattle can walk themselves to death trying to eat enough of the modest green pick that emerges. Energy expended versus energy consumed.
We dropped some more hay at Leopardwood Park, which is owned by Vin and Jenny Richardson. Like many of the stations in this area, Leopardwood Park was historically a sheep property, though cattle mainly dominate now when times are good. The 312km² station is relatively modest in size by local standards.
Leopardwood is now pretty much destocked while the family contracts with the local shire, carrying out road maintenance with their own heavy machinery. This sees the family away from home quite a bit while earning a crust. Again, sulphurous sub-artesian ground water keeps the house block cheerfully green – an unlikely green dot on an otherwise parched red-and-brown-patchwork landscape.
Our last stop was the historic Milo station Established in the 19th century, Milo was a massive sheep property well into the 20th century. The beautiful homestead is surrounded by outbuildings buckling in the fierce heat.
Nobody was home, so Brian unloaded his cargo of hampers and left them for the family to find when they return. Steve and I kicked off the last bales of hay and listened to the old HiLux almost sigh with relief as it slowly sprung back up on its suspension.
It was a hell of a journey: desiccated road kill baking in the sun; big trucks thundering out of the heat haze on lonely highways; slat-sided, hollow-eyed cattle regarding our progress with bovine indifference; and stoic country dwellers reluctant to complain too much about their circumstances, instead riding out the storm and searching an empty horizon for rain clouds.
And maybe I’m just starting to get the whole Toyota thing. My old farm hack gamely chugged from Melbourne to Western Queensland and back to Brisbane – a 3000km round trip – without even a hiccup. I found myself getting strangely attached to the ugly old bucket.
The new HiLux seems a worthy successor, though. Some may say it’s gone a little soft in an effort to compete with other offerings on the market, but after spending many hours behind the wheel of the new jigger, both loaded and unloaded on a variety of road surfaces, my initial impressions haven’t changed. It’s quiet and comfortable with long highway legs for a big country, yet it retains that uniquely Toyota kind of pragmatic charm.
Checkout Aussie Helpers to see how you can contribute to making life on the land a bit easier during these dry times.
Getting ‘unstuck’ from a bog hole, sand trap or from being bellied out in the rocks is an art.
Sure, winches are great, but there are times when they can’t be used. That’s where traction aids (sand tracks, bog mats, traction ladders, bridging ladders, or whatever you want to call them) can come in handy.
Basically, once a 4×4 becomes stuck, shoving something under the wheels to give them traction is how these devices work; you’re introducing a firmer surface for your 4×4 to drive on to (hopefully) free yourself.
We recently rounded up all the various types of traction aids on the market and hit the sand to see how each performed. We filmed each to show exactly how they work, so head on over to the Recovery boards beach test to see the action.
Some aids are great in just sand, some benefit in the rocks, while others can be used as bridging ladders. Some can be easily stored under your vehicle’s seats, while others (due to their physical size) are relegated to the roof racks for storage. To take it further, some of these aids can double as tent door mats, whereas others would be downright uncomfortable to stand on and would cause pain if used as an impromptu seat – you’ve been warned!
One piece of equipment that should be carried and used prior to any of these traction aids (on sand) is the shovel. A bit of hard work prior to any attempt at driving out of the bog will help the situation, so start digging first. A point to note about all these products is that you should avoid wheel spin while trying to drive up/on/over them. Doing so will damage some of the products and/or render them a little useless. So, low range and a gentle throttle is the go.
With a little hard work, a cool head and a light right boot, you should be able to extract yourself from most boggings by yourself.
Oh, and one last tip – tie a length of rope or a strap to the end of each track to help find and remove them from the sand, water, mud or snow. If you can’t pull it out by hand, use your 4×4 to pull them out and save yourself from the hard work of digging them up.
THE METHOD We undertook considerable effort to ensure the Land Cruiser was bogged and placed in a similar position for each recovery device, plus we always used first-gear low range to idle onto or up each device to minimise wheel spin and momentum. This was to help show which device delivered superior traction to allow self recovery with a minimum of fuss. Any slight variances experienced would make bugger-all difference in real-life recovery situations.
We set the whole show up on a soft uphill track that exits the main beach, which is often the most difficult place to drive. Tyre pressures were set at 20psi, front and rear lockers were engaged to provide constant drive to all wheels. This gave the tyres the best chance of gripping the boards. We also ensured the Cruiser was bogged to a similar depth each time, checking that the diffs and chassis rails were not bottomed out. All up, everything was fair and equal.
One point we noted was that most devices needed the board or matt to be placed at least partially under the tyres to enable the initial recovery process. The better designs with leading-edge ramps and increased grip via protruding lugs allowed the tyre to grip and ‘suck’ the board under it, helping the 4×4 to drive forward and lift out of the bog.
So, before we divulge the results of the traction-aid comparison, here’s all you need to know about each piece of recovery gear that we put to the test.
BUSHRANGER X-TRAX
The Bushranger X-Trax (Series II) measure 1400mm long by 300mm wide per track and are sold in pairs, with each wrapped in a sturdy PVC carry bag. A pair weighs 16.4kg.
The X-Trax are a cast rubber compound, bound together via a length of galvanised steel cable, which allows the whole track to flex under the weight of the wheel and conform to the shape of the ground. Each small rubber section is shaped to interlock into the next and forms a series of ridges and valleys to provide a good rippled surface to drive on. This interlocking pattern somewhat helps to resist the ‘bunching up’ of the tracks while powering over them.
Being flexible, they can’t be used as a bridging ladder or a ramp unless you do some packing under the product, but they could be rolled and shoved into a hole to drive over.
Given the compact size of the X-Trax, they could easily be stowed in the cargo area of any 4×4 or in the tool box of any camper trailer.
RRP is $198 per pair and they come with a decent five-year warranty.
Would I use them as a camping mat for the tent or an impromptu seat? Nope. They are a bit harsh on bare feet, unless you’re as tough as nails or regularly walk over coals or glass for fun.
For more information: www.bushranger.com.au
MAXTRAX MKII
Unique in their shape, each UV-stabilised, semi-flexible, reinforced-nylon MAXTRAX has six (three on each side) handles. These come in handy when carrying the device and when using the tapered ends as a shovel. The ramped ends allow for an easier drive up for the stranded vehicle.
MAXTRAX measure 1150mm long by 330mm wide and weigh in at 7.2kg per set of two. Being easily stackable, one track measures 7cm high, while two are just 8.5cm high and four are only 11.5cm in height.
MAXTRAX are up to their second generation of product and it’s this latest release that incorporates a linking system to join the tracks end-on-end, with improved ribbing making them more robust. There is also a roof-rack mounting kit and a leash to tie to the ends of the tracks. A stack of colours are available to choose from, although bright orange is their ‘signature’ colour.
Being a long, non-rollable board, you’ll have to consider whether they will fit in or outside your vehicle, but mounting kits and carry bags are available. MAXTRAX are not recommended for use as bridges or ramps.
Would I use them as a camping mat for the tent or an impromptu seat? Not on your life, though we did gently try sitting on one after one recovery session and, yes, the 88 little teeth do make you grimace!
RRP is $299 per pair of MAXTRAX and they have a 12-month warranty.
The linking kit is $24.99 and the vehicle-mounting kit is $26.99.
For more information: www.maxtrax.com.au
TRED
Incorporating hex-shaped grip nodules along their length, plus aggressive teeth on the ramp area, the TREDs can be used as a shovel at one end. And, while there are no dedicated handholds along the edges, most people would be able to hold the boards’ deep ribbed sides. TRED boards are manufactured from a blend of polyolefin materials and offer slight flexing to help maintain tyre contact during recovery.
There are two sizes: a longer version measures in at 1080mm long by 317mm wide (the size we used) and weighs 3.074kg, with a RRP of $229. The shorter version is 790mm long and 268mm wide and weighs 2.16kg, at a RRP of $179. It’s great for those that can’t quite fit the larger version into or on their vehicles. Both versions are 73mm high and measure 105mm when two-stacked.
Being a non-flexible board, you’ll have to find a suitable place to carry them, but they do offer mounting kits, leashes and carry bags.
Available in nine colours, you’ll surely find one that matches your duco, or your favourite hue. TRED offers a lifetime warranty and are recommended for use on vehicles weighing up to 3.5 tonnes, but they are not recommended for use as bridges or ramps.
Would I use them as a camping mat for the tent or as an impromptu seat? Not on your life, but I did try hanging my ring spanners off all those little hex-shaped nodules.
For more information: www.Tred4x4.com
LIFTTRAX
As the name suggests, the LiftTrax (or PillowTracks as they used to be known) are giant heavy-duty pillows that have the ability to carry the weight of a fully-laden 4×4 of up to 4000kg in weight. The LiftTrax measure in at 1020mm long by 490mm wide and are up to 40cm high when inflated. They can be interconnected end-to-end and the outer sleeve is of a high-strength non-tear material with a high friction surface. The replaceable inner bladder is an air-tight, pinch-resistant membrane.
The LiftTrax work effectively over a pressure range of 1-10psi and can be used as a track in soft surfaces (like sand), as a bridging ladder between rocks, or as a ramp to help climb rocks. If you’re bellied out on a rock or sand dune, they can act as a (limited) jack to lift a 4×4 straight up. You can do this by placing the LiftTrax under the front or rear wheels before inflating the devices to (hopefully) free the stuck vehicle.
The bags can be inflated with an air compressor (the kit comes with an adaptor for this and you’d have to use this method to lift a vehicle). To inflate them at other times you can use your lungs… hopefully you’re not out of breath from all that shovelling!
In their deflated state they can be conveniently rolled and stored in their own carry bag and weigh 8kg per pair.
RRP is $349, which includes the carry case and shipping costs.
For more information: www.lifttrax.com.au
FRONT RUNNER TRACTION MATS
Front Runner traction mats are a fibreglass composite board with a high-traction, non-slip surface on the top face and a smooth surface underneath. They are 6mm thick and stack flat on top of each other. Measuring 1150mm long by 260mm wide, you’ll need to be sure where you can store them in your vehicle or on the roof racks, but given that they’re only 6mm thick each, they stack quite compactly. With a pair weighing in at only 5.2kg, the Sand Lizards are one of the lightest tracks around.
The Front Runner mats are best used on soft surfaces like sand, mud and snow and will not double as bridging ladders or ramps unless packed with support underneath. Each mat is quite flexible and has a handle cut into one side. There’s also a hole at one end for attaching a lanyard to help recover each track after a recovery.
Would I use them as a camping mat for the tent or an impromptu seat? Ummm…a bit rough to stand on for me, but tougher soles could do so. The abrasive surface would chaff you if used as a seat – but then again, if they’re turned upside down, the nice smooth finish solves your problems!
RRP is $220 plus shipping (imported).
For more information: www.frontrunner.co.za
SAND TRAX TRACTION MAT
The Sand Trax are roto-moulded poly tracks that measure 1400mm long by 280mm wide by 40mm high, and are stackable. Each track can be linked via a single hole in each end.
Being the second longest semi-rigid tracks available, they are pretty much a roof-rack option only – unless you have the room to store them in a Troop Carrier, a Defender or the likes.
The tracks are best used on soft surfaces including sand, mud and snow, and will not double as bridging ladders or ramps unless time is spent packing support underneath them. They are semi-flexible and weigh in at 3kg per track.
When using these ramps, as you slowly drive, the stuck vehicle tends to pull the tracks underneath. The vehicle will ‘lift up’ out of the bog as well as forward. With the ‘corrugations’ in the lateral position only, there is little grip across the boards.
Would I use them as a camping mat for the tent or an impromptu seat? Nup, too rough and irregular for me.
RRP is $150 per pair and they have a 12-month warranty.
For more information: www.dolium.com.au
MUPUTRAX
Muputrax are made of a 32mm-square-holed grate that originates from the FRP industrial grating industry. The top surface is impregnated with a hard-wearing quartz grit to enhance traction and grip. It’s also non-corrosive, non-slip, UV-stabilised and fire retardant. The larger tracks measure 123cm long by 31cm wide by 3cm thick and weigh 5.9kg per track, while the shorter versions are 84cm long by 31cm wide by 3cm thick and weigh 4.3kg per track. Because the product has so many square holes, the user can easily attach a lanyard to help recover it from a bog hole.
The Muputrax can be used in most off-road situations as a traction board on soft ground (sand, mud and snow), but they can also be used as a bridging ladder or ramp to bridge over difficult terrain, to help your vehicle climb rocks and steep slopes and to aid in tackling washouts. When put to the test as ramps and bridges, they deflected a lot under the weight of our Land Cruiser, but they returned to their original shape without damage once the Cruiser was removed.
Each Muputrax is rated to carry a load of 5000kg as a sand ladder and 1500kg as a temporary bridge. Would I use them as camping mats or seats. No. They’re too rough for my wimpy feet.
RRP is $250 (plus delivery) for the larger set including leg kit, and $225 (plus delivery) for the smaller set including leg kit. Both have a three-year warranty.
For more information: www.muputrax.com.au
HOMEMADE
There will always be the option of making your own traction boards or mats using materials like carpet, Weldmesh, shade cloth, cut-up milk crates or anything equivalent. We’ve opted to use a length of shade cloth as it should be easier than carpet to clean and dry, is easily stored, is lightweight… and … plenty of soles claim it works, so we wanted to see for ourselves.
There are no specific specs for it; I used two pieces folded up to about half a metre wide by two metres long… because that’s what I had in my shed. Of course, you could easily use longer lengths to help in long sections of soft sand and the like.
As for sitting on these homemade options; you betcha, I would. Plus, they cast a beaut shade at lunch time, can be used under your swag or tent and they make great picnic rugs for a smoko.
ALUMINIUM BRIDGING LADDERS: SAND LADDER
Remember the old Camel Trophy days? You know, when real men (supposedly) smoked Camel ciggies, drove Land Rover Defenders and carried huge metal bridging ladders on the sides of their 4x4s. Well, some things haven’t changed (like real men driving Land Rovers… let the debates begin ehh!), but those old-style ladders aren’t readily accessible in Australia and have been replaced by lighter and better-designed versions.
Yours truly was unfortunate enough to have to use a substandard, thin, aluminium set in the 2010 Dakar Rally while bogged to the knees in mud. Unfortunately for us, they bent like bananas under the weight of the 4×4, couldn’t be straightened and also couldn’t be stored back where they came from in the vehicle, because of the bending. The semi-smoothed surface tracks, combined with mud, ended up just too slippery to be of much use, which shows how vital it is for the upper surface to have as much grip as possible.
The ladders we used would never have taken the weight of our 4×4 due to their inherent weakness but, from watching the use of higher-quality equivalents, I can attest to their strength for use in bridging and ramping.
We purchased and imported a superior set, which offers a range of sizes (125cm, 150cm, 175cm and 200cm long by 44cm wide), plus the option of reinforcing the underside as per the 150cm set we used. The alloy Sand Ladders offer plenty of strength to carry our Land Cruiser during bridging and would be at home on most long distance tourers. The alloy will (or should) never wear out, so it will last a lifetime. I guess the only downside to that is perhaps they might damage your tyres more during wheel spin compared to the sacrificial qualities of the plastic versions.
For more information: www.sandladder.net
SAFETY FIRST For safety’s sake, no, we shouldn’t drive alone in remote areas – bush or beach – but, in reality, solo driving is sometimes going to happen. That’s the reality of 4x4ing; we get out and about to be away from the crowds for a bit of adventure, serenity and downtime.
Unfortunately, that’s when things tend to go wrong – when there’s no one around for miles or days to help you out of the pickle you’ve gotten yourself into.
So, for your own safety, be sure to use a bucket of common sense, mixed with a shovel load of good judgement, blended with as much realistic discretion about the use of these ‘get yourself outta jail’ devices.
THE RESULTS The Muputrax: This recovery device offers great versatility. It can be used as a recovery track, a bridging ladder, a jacking base plate and a ramp. The standard leg kit means it can even be used as a table, chair, doormat, clothesline or walkway – if you believe the more gimmicky aspects of the company’s advertising.
Unfortunately, in the sand, the Muputrax didn’t perform too well. The small squares filled with sand (this added considerable weight) and the ‘drag’ on the sand didn’t allow the whole board to slide under the 4×4. We tried several times, but the lack of grip made for one of the hardest recoveries of the day.
The units were heavy and didn’t have wedge-shaped leading edges, so they weren’t ideal for sand recovery. They’d be best kept for bridging, ramps or to be used as a clothesline with the included kit. With our constant recovery attempts (yep, with dreaded wheel spin), we did grind away the abrasive top surface, as well as slightly wear down the fibreglass board.
The Sand Ladder (imported): It certainly lends itself to being multi-use as it’s plenty strong enough to double as a bridging ladder, ramp and jacking base. It’s longer than all the others, so that’s also a big plus… until it comes time to pack it away.
It doesn’t deliver the same initial grip on its leading edge, or overall surface, with its smoother texture and perforated pattern not allowing anywhere near the traction of some others.
The price is pretty high with the importing costs added on, but if you really want the ‘look’ of the old-time ladders, then these would be your pick.
Provided you don’t bend them, these aluminium boards should never wear out, making them perhaps a good long-term investment, depending on your needs. Then again, because they don’t wear out during accidental wheel spin, they might cause damage to your tyres!
The LiftTrax: They are fiddly because you have to inflate and deflate them for simple recoveries, but an advantage is their ability to act somewhat like an exhaust jack to slightly lift a vehicle to help fill a hole. The available vertical-lift height, however, is nowhere near high enough when compared to a dedicated exhaust jack, so it’s relatively useless in real life.
While not strictly useable as a ramp, the LiftTrax can be used to ‘fill’ a hole to allow your 4×4 to drive over. While the inner bladders are said to be ‘heavy duty’ and replaceable, I’d still be worried about punctures at the most inopportune times.
During our use, they also tended to roll out of position just as the Cruiser mounted them. We tried a few different inflation pressures, with the best results being at quite low inflation… almost negating the ‘inflatable’ virtues. We did damage the rubbery grips slightly and found the bags lacking in overall performance. They do, however, provide a great spot to sit on at lunch time!
The Sand Tracks: These offer good longitudinal grip, but little lateral grip. They did, however, work well in our tests, allowing the tyre to grip and slide under the 4×4. A lack of rigidity was evident, with one use of the product resulting in bends in both boards. But they did return to shape to allow further use. Watching our video carefully, you’ll see the boards suck under the tyre, bend in half and eject rearwards.
Front Runner: These flexible fibreglass boards returned reasonable grip, but the sad fact was that we snapped one board in half on the second (failed) attempt.
Initially, both boards gripped and spat out the rear of the tyres only to be flexed and jammed under the Cruiser, which didn’t move too far forwards and remained bogged. After extracting the boards and giving them a second shot, we snapped one board clean in half, rendering it useless.
The Bushranger X-Trax: In theory, they should have helped to extract the bogged Cruiser, but in reality, they did little due to a lack of rigidity. Sure they gripped well, but only to eject rear of the tyre with little forward movement. After plenty of attempts, we resigned to using another board to get ourselves unstuck from the bog.
MAXTRAX and TRED (We’ve combined comments for these two products): When used in softer driving situations like sand, mud and snow, the semi-stiff boards of these products wedge under your tyres. Your stuck vehicle tends to pull the boards underneath as you slowly drive, lifting the vehicle up, forward and out of the bog.
MAXTRAX and TRED boards quickly became our back-up devices when one of the others didn’t work. Given that, they got more of a workout in situations that were much harder than the testing standards, so I’ll give both boards full marks for their extracting abilities.
It’s a close call between the two, but I reckon MAXTRAX takes out top honours, given the product’s in-built design features: the handles down both sides of the boards make for easier shovelling, the overall shape was easier to handle and because the MAXTRAX have ramps at both ends (compared to the TREDs, which have them at just one end) their service life is effectively doubled as the high-grip nodules eventually wear down. Plus, as an added benefit, they come standard with a leash to help find and remove the boards from bogging. They also supply components that hook sets together to form a longer track, roof-rack mounting kits, a spare wheel-mounting harness and carry bags.
The MAXTRAX product was the best self-recovery device, outperforming all the others on the day. Its only downside is its lack of bridging ability. If I were in a pickle, however, I would just stack a couple on top of each other for added strength. MAXTRAX are renowned worldwide, are Aussie designed and made, and would be a compliment to any recovery kit.
Oh, don’t forget my homemade set of Shade Cloth Recovery Eventual Anti-bog Mats (I called them SCREAM for short, because that’s generally what happens when you can’t get yourself unstuck with them).
They didn’t work one little bit. They just sucked under the wheels, bunched up into one huge mess and spat out the rear, full of sand. The biggest advantage of my SCREAMs is the shade they cast when sitting down for lunch.
Regardless of which device you choose, one important part of any recovery kit should be a shovel. Sure, some boards in our test can double as a shovel, but using the right tool for the job makes life easier.
Happy 4x4ing, happy self-recoveries and most of all, stay safe and take your time when extracting your 4×4 from any sort of bogging.
Remember, we’ve filmed the whole Recovery boards 4×4 beach test; there’s some beaut footage showing exactly how each product works.
Earlier this week Roothy served up a delicious hash brown that’d have Ronald McDonald shaking in his boots. Now he has turned the dial up even further, with a delicious Spanish omelette.
All you need is some Chorizo sausage, canned (or leftover) spuds, three eggs and some Spanish onion.
The omelette only takes a few minutes to put together and it’s the perfect way to start one’s day in the scrub.
Be sure to check in with 4X4 Australia every Friday for more of Roothy’s bush cooking adventures.
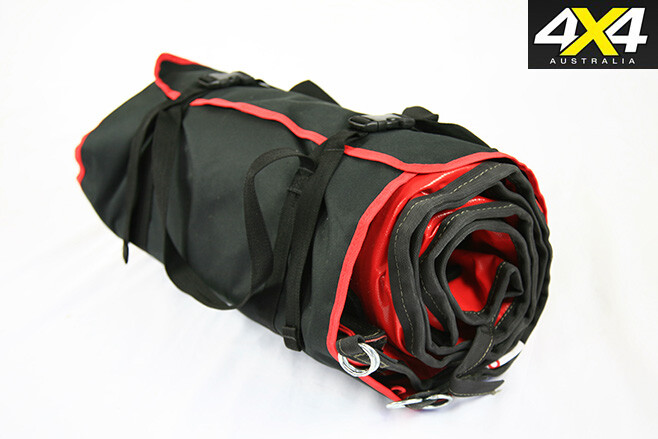
After installing my Bedrug I was after a new tonneau cover. Wanting to be able to carry valuables in the ute, but still lock it and use it at the drop of a hat, I ruled out any sort of soft or one-piece hard covers.
I was surprised at how limited the options are for this kind of thing – basically I had two. The first option was more than $2000 and needed a professional to install it (they wouldn’t sell me the kit), the second option was the Roll-N-Lock you see here.
Luckily, Ash at Wolf 4×4 came to the rescue with a user-friendly kit to suit my Hilux SR5 dual cab.
The design utilises Roll-N-Lock’s patented clamp-on track design, which greatly simplifies the installation process and minimises the need for drilling holes on most tubs.
Following the instructions, installation was fairly straightforward and took me about three hours. It can be done on your own, but it’s easier with a friend.
“What sets Roll-N-Lock’s tonneau cover construction apart from others is not just the superior quality of the vinyl surface material, but also the design of the slatted aluminium substrate which supports the vinyl,” Roll-N-Lock said in a statement.
“It is the geometry of this uniquely contoured hinge that gives the tonneau cover its strength, its quiet, smooth, non-binding movement and its roll compactness.”
Close examination of the Roll-N-Lock hinge, in the flat position, reveals that each slat is inseparably locked together, yet when rotated no metal-to-metal contact occurs. Also, the housing for the cover, made of aluminium, is very compact and doesn’t waste ute space.
There are multiple latching positions. With just a turn of the lock-lever the Roll-N-Lock tonneau cover slides open. As the cover is pulled back, using the convenient built-in pull strap, the patented ratchet-style locking mechanism latches in place at quarter, half, three-quarter or fully-closed positions. A nice bonus is that the cover also locks the tailgate closed.
As far as being weatherproof, I have had the ute parked outside during recent storms and thanks to the supplied drain pipes, everything in the ute stayed dry.
Overall, I’m very happy with the Roll-N-Lock unit. What I really like is the flexibility of being able to roll back the lid and carry whatever I want.
The only downside (with the Hilux anyway) is that the factory sports bar won’t go back on. They do make an adaptor called “QwikFoot” but it isn’t available in Australia just yet.
Now, I wonder how a rooftop tent would go over the top?
RATED We say: By far the most intelligent and versatile tonneau cover available. RRP: $1795 Info: www.wolf4x4.com.au.
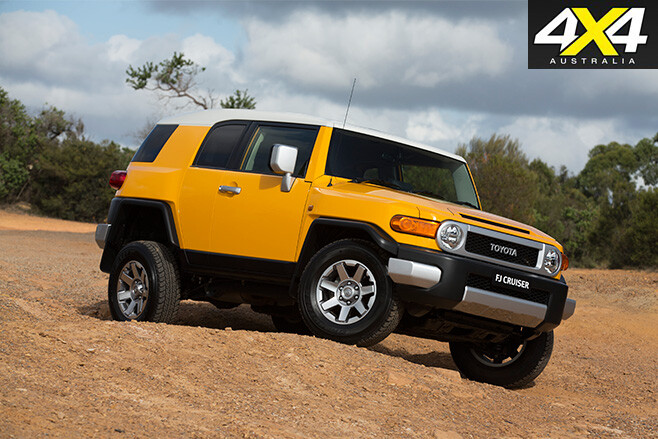
TOYOTA’S FJ Cruiser was born out of desire to bring back the spirit of the iconic FJ40, the vehicle that won over the hearts of 4×4 enthusiasts around the world for its rugged simplicity, reliability and go-anywhere ability. It was the vehicle that cemented Toyota’s reputation as a world power in 4×4 design and manufacture.
The FJ Cruiser is now being discontinued, and to mark the occasion Toyota Australia, with the valuable assistance of the Toyota Land Cruiser Club of Australia, gathered together this line-up of Land Cruisers spanning the better part of 60 years.
Toyota Land Cruiser FJ25
Year of Manufacture: 1958 Owner: Toyota Australia
THE FJ25 started the Land Cruiser legend in Australia. Back in the late 1950s Sir Leslie Thiess purchased a handful of FJ25s for his construction company, which at the time was contracting the massive Snowy Mountains Hydro-electric Scheme. So impressed with the FJ25s was Thiess that he founded Thiess Toyota, with the aim of importing Toyota vehicles into Australia for commercial sale.
The FJ25 is powered by the 3.9-litre OHV straight-six ‘F’ petrol engine, driving through a four-speed gearbox. The FJ25 didn’t have low range, just selectable two- or four-wheel drive, but the extra-low first gear helped make good this shortcoming. Vacuum indicators, windscreen wipers and ultra-skinny bar-tread tyres are some of its notable features.
Toyota Australia acquired this vehicle in early 1970s and it subsequently underwent a restoration by company apprentices, before a full bare-metal respray in 2013. The vehicle makes regular appearances at 4×4 shows and the like and is well worth a close look if you ever come across it.
Toyota Land Cruiser FJ40
Year of Manufacture: 1979 Owners: Andrew Boyd and Mark Willock
THE FJ40 is an iconic model in the 40 Series range. The 40 Series established Toyota’s reputation as a manufacturer of quality 4x4s and it effectively ended the then-market-dominance of Land Rover.
Introduced in 1960, the 40 Series would remain in production for the next 24 years. It brought dual-range 4×4 as well as comfort and convenience features rarely seen in 4x4s of the day. More importantly, it introduced changes in production processes that meant a better-quality vehicle could be produced more quickly and at lower cost compared to the 20 Series.
This particular late-model FJ40, built in July 1979, has the 4.2-litre 2F petrol six with a four-speed gearbox and is in immaculate factory-stock condition. Purchased two years ago by its current (and third owners), it’s been on display at Sydney City Toyota’s showroom ever since.
Toyota Land Cruiser BJ42 LX
Year of Manufacture: 1984 Owner: Daniel Ragusi
THE vast 40 Series range came with petrol or diesel engines, three different wheelbases and various body styles.
Here we have a very late model (1984) BJ42 in LX spec, which was the deluxe model of the 40 Series range, with features including cloth trim, air-conditioning and power steering.
Being a BJ it’s powered by a diesel engine, namely the 3.4-litre four-cylinder 3B. Unusually it has a five-speed manual, where most of the 40s – except the early three-speed models – had a four-speed ’box. And, as it’s a 42, it utilises a short wheelbase (like the 40 and 41).
In Australia, diesels first appeared in the 40 Series in the late 70s, and they brought better fuel economy than the F and 2F petrol engines at the expense of performance. This particular example was purchased from the second owner in Melbourne around eight years ago.
Toyota Land Cruiser HJ47 Troopcarrier
Year of Manufacture: 1984 Owner: Daniel Ragusi
LAND Cruiser 40s built on the long wheelbase chassis were designated either 45 or 47. What we have here is a HJ47, which means it’s a long-wheelbase, 11-seat Troopcarrier with the 4.0-litre 2H six-cylinder diesel and four-speed gearbox. The two four-person rear seats run along the sides of the cabin, rather than across the cabin, hence the Troopcarrier designation.
The 40 came with a number of different diesels including the 3.0-litre B; the 3.2-litre 2B and 3.4-litre 3B four-cylinder engines; and the 3.6-litre H and 4.0-litre 2H six-cylinder engines. Long-wheelbase models only came with a six-cylinder engine.
This very tidy example is from the last year of 40 Series production in 1984, and it was purchased from its original owner in Melbourne around ten years ago.
Toyota Land Cruiser FJ55
Year of Manufacture: 1967 Owner: Luke Casaceli
THE FJ55 grew off the back of the 40 Series and was Toyota’s first move towards a recreational family 4×4 and away from commercial 4x4s. It was only offered in petrol – initially the F engine and later the 2F – and was built on a wheelbase between the medium and long 40s.
This beautiful example comes from the first year of FJ55 production – 1967 – and has the 3.9-litre six-cylinder F petrol engine, three-speed gearbox and dual-range 4×4. It has undergone a complete restoration since being rescued from a paddock in central NSW in 2013, after serving its life as a farm vehicle. Despite this it still ran – albeit roughly – and was relatively rust-free.
During restoration it was found to have the original engine and gearbox both requiring just a good service to bring them back to operational condition. The owner also sourced some five or six other FJ55s to complete the restoration, including the fitting of factory-original three-row seating.
Toyota Land Cruiser HJ61 Sahara
Year of Manufacture: 1988 Owner: Walter Ragusi
THE 60 Series replaced the 55 in 1980 and lasted ten years, eventually being replaced by the 80 Series.
In Australia the 60 was initially offered with the 2F six-cylinder petrol engine, later to be replaced by the 3F. These models were designated FJ60.
The HJ60, with its six-cylinder 4.0-litre 2H diesel engine, came along soon after and in many ways proved to be the defining vehicle of the 60 Series range. A four-speed manual with both engines gave way to a five-speed in 1984.
What we have here is arguably the ultimate 60: a late-model (1988) HJ61 Sahara with the 12H-T six-cylinder turbo-diesel, widely regarded as one of the Toyota’s most durable 4×4 engines.
The HJ61 Sahara has eight cloth seats, front and rear air-conditioning, a high roof to accommodate the rear air-con, a sunroof and power steering. More significantly it has the optional four-speed automatic rather than the late-model five-speed manual – in fact, the 60 Series was the first Land Cruiser to be offered with an automatic gearbox. For the current (and third) owner, this HJ61 is a daily driver.
Toyota Land Cruiser BJ74 VX
Year of Manufacture: 1987 Owner: Glenn Austin
THE 70 Series arrived in 1984 (1985 in Australia) as a replacement for the enormously successful 40 Series. Larger overall than the 40, the 70 retained front and rear leaf-sprung live axles and, like the 40, was primarily designed for commercial use – the main exception being the largely unloved coil-sprung Bundera.
In Australia the 70 came in a mind-boggling array of models with a vast array of engines. It also came with wagon, ute, cab-chassis and Troopcarrier bodies on three different wheelbases.
However, not all leaf-sprung 70s were aimed just at the commercial market, as this BJ74 demonstrates. This mid-wheelbase model has the well-regarded 13B-T 3.4-litre four-cylinder turbo-diesel backed by a four-speed automatic – the BJ74 being one of the few 70s to be offered with an auto.
It’s VX spec and has a removable FRP top, push-button transfer and central locking. It’s a nicely original and very tidy example purchased from its first owner two years ago, and it now has 311,000km on its engine and gearbox.
Toyota Land Cruiser VDJ78 Troopcarrier
Year of Manufacture: 2015 Owner: Toyota Australia
WHAT started with the FJ25 – and brought to prominence with the FJ40 – has ended up here. This 78 Series Troopcarrier, along the 76 wagon and 79 utes in single- and double-cab variants, are the latest vehicles in a long line of commercial Land Cruisers.
Like all 70 Series models since 1999 it has coils springs in place of leaf springs for the front live axle and, like all 70 Series since 2007, it has the 1VD-FTV 4.5-litre V8 turbo-diesel backed by a five-speed manual. With its cavernous interior, front and rear live axles, high ground clearance, front and rear lockers, and 180-litre fuel capacity, it offers 4×4 and remote-area functionality no other showroom-stock 4×4 can match.
Sometimes we get so hung up on the big trips, like those to Cape York, the Kimberley or even the Simpson Desert, we forget about the little beauties in our backyard.
On the doorstep of New South Wales’ north coast are many popular beach-side destinations to explore, but why not head the other way – west of Coffs Harbour, into the heart of NSW’s New England region?
There are several national parks in the area, and few are as surprisingly good as Cathedral Rock National Park. A relatively small park of about 89km², it’s not as well-known as some others, but it’s certainly worth the drive.
The only vehicle entry into the park is 65km east of Armidale, towards the Ebor Volcano. The 8km road into the centre of the park passes through several properties and is irregularly maintained, so be prepared for corrugations and the occasional washaway. Also, keep your eyes on the ecosystem, which transforms as the road snakes around huge granite boulders – lush green paddocks will become low heathlands among dry scrub with impressive granite formations above.
It won’t be long before you enter Barokee Campground, which caters for day trippers, those who want to explore the park and those with camper trailers or tents. Facilities here are limited, with only one pit toilet, some fire places and several picnic tables offered. Firewood is often provided but don’t count on it.
After setting up camp and paying your fees to the campground honesty box, you can start to explore by taking a three-hour hike to Cathedral Rock. For those with at least medium-level fitness, this walk will pass through fern-filled heathlands beside several creeks before winding through granite boulders.
Most people will find the walk easy until the final 400m climb towards the top of the rock formations. While the track is pretty informal, you’ll need to follow the arrows that lead to the top. However, take care, as the arrows are a fair distance apart through some sections.
When you reach the summit the sights are stunning, with 360-degree views across the valley below and across to other granite tors (free-standing rock formations) in the distance. You’re on a break, so sit here for an hour and soak up how peaceful it is. At 1550m above sea level, the views are terrific.
After the scramble back down to the main walking trail, the track will lead you around the base of the granite boulders and back to camp. Along the way, you’ll pass the intersection for the 10.5km walk to the Native Dog campground, situated on the northern side of the park. It’s interesting to see that the granite formations are only found within Cathedral Rock National Park.
Back at camp you’ll see plenty of birdlife and wallabies minding their own business as they feed nearby. To keep less likeable animals (vermin) to a minimum there are no bins in the park, so as with any similar campground, take your rubbish with you.
After a crisp, cool night’s sleep, you can head back out of the park to Point Lookout, one of the highest outside of the Snowy/Kosciuszko region, around 1000km to the south. From here it’s possible to see remnants of the rim of Ebor Volcano, which was active about 30 million years ago.
Heading west towards Armidale, you’ll find a turn-off that will lead you to the lookout. The 14km dirt road to the lookout passes through a diverse range of plant types, from rich pastures on the plateau to thick pockets of rainforest. As you climb higher, moss-covered snow gums appear.
Then, heading towards the lookout, you’ll enter the New England National Park, where it’s possible to hire cabins near the summit of Point Lookout. This is a great option for those who wish to spend their time exploring nearby walking trails, or those who want an alternative to tent camping in winter – temperatures are consistently below freezing here in the winter months.
At the summit of Point Lookout, the NSW National Parks and Wildlife Service (NPWS) has implemented some worthwhile features. There are lookouts, walking trails that have been graded for different fitness levels, an information shelter with a barbecue, picnic areas, and a preserved, historic rock cairn.
The most common trek from here is a 20-minute walk that grants views of Ebor Volcano’s outer rim remnants. This volcano was last active 30 million years ago, so don’t expect to see the top of the rim glowing! After 30 million years of weathering, it’s amazing you can still see the 300m-thick rim down in the wilderness.
The views from Point Lookout down through the valleys and into the wilderness are nothing short of breathtaking. A great tip is to arrive in the afternoon when the sun is to the west (behind you) and it’s possible to see the blue of the ocean down in the distance. You’ll also be able to appreciate just how rugged the landscape is below you. This is what it feels like to be on top of the world, even if it’s only for a short time. And to think all of this is only 140km from the hustle and bustle of the tourist coastal strip!
EBOR VOLCANO
Before man walked the earth, the NSW coast was alive with volcanic eruptions. One significant volcano was near Ebor, 65km east of Armidale on the state’s mid-north coast. It’s been estimated the Ebor Volcano was very active 30-60 million years ago.
The lava-flows from this volcano extend for several hundred kilometres around it to such areas as the Barrington Tops and Mount Kaputar. This is evidenced by the rich-red farming land the NSW mid-north coast is known for. There are floodplains to the west, where the basalt soils are black. From the potato-growing area near Dorrigo to the lush sub-tropical rainforest areas that run along and meet the coast to the north and to the south, this is known as Gondwanaland.
The New England NP, which surrounds the volcano, plays a significant part in the protection of a wide diversity of plants and animals. This was recognised in the late 1980s and was listed as a World Heritage area.
Ebor Volcano’s 300m-thick rim can be viewed from Point Lookout, which is 1565m above sea level. The lookout provides stunning views into the wilderness areas that surround the rim, and at this high altitude you can see cold, tolerant snow gums covered in thick moss.
TRAVEL PLANNER
- WHERE: Cathedral Rock National Park is on the New England Tableland: 560km north of Sydney, 400km south of Brisbane and 60km east of Armidale, NSW. The surrounding parks are accessible from Waterfall Way, which runs between Armidale and the coast.
- CAMPING: Cathedral Rock NP has two camping areas available: Barokee and Native Dog. Barokee campground is 8km into the park. Its sites are great for tents and camper trailers, but caravans are advised to use the Native Dog rest area because of the narrow access road and lack of turning bays at the campground.
- The Native Dog rest area is situated on the northern side of Cathedral Rock NP, along a 1km access road. This campground is suitable for tents, camper trailers and caravans. Facilities at both campsites include pit toilets, several picnic tables and wood barbecues with firewood provided by NPWS.
- Fees are payable via an honesty system at the information board at each campground. Camping fees are $5 per adult and $3 per child per night. No bookings required.
- WHAT TO TAKE: You need to be totally self-sufficient at either campground, with your own food and water. Several streams flow through the park and water points are signposted by NPWS for collection of water. It’s best to boil any water for at least three minutes before drinking.
- SUPPLIES AND FACILITIES: An advantage for families spending several days on the New England Tableland is that supplies are not far away. Armidale, a major regional town, is only 60km away if you need extra supplies. For smaller items, the hamlet of Ebor is a 10-minute drive away. Ebor has very limited facilities, so be prepared. Phone service is available with the main carriers in most locations in the park.
- TRIP STANDARD: The main road into Cathedral Rock is an 8km unsealed road. It is irregularly maintained, so be prepared for corrugations and a few potholes. As always on dirt roads, select 4WD.
- CONTACTS AND INFORMATION: For more information on the Cathedral Rock or New England national parks, contact the Dorrigo Rainforest Centre on (02) 6657 2309, or visit NSW Office of Environment & Heritage. The Rainforest Centre has a range of maps, PDF files and offers information on local weather and road conditions.
- PERMITS AND MAPS: The standard national park daily vehicle entry fee of $7 applies if you are visiting any of the parks in the area. This is payable at either the Dorrigo Rainforest Centre or at the information boards located within the park.
OUR GIVEAWAY HiLux is a 2010 SR spec, so it predates electronic traction control (ETC), and while it might be okay off-road, the tractive ability of these early rigs is pretty average without some form of aftermarket help.
Click here for your chance to win 4×4 Australia’s Custom Toyota Hilux.
Thankfully, the Australian 4×4 aftermarket industry is incredibly strong and turns out top-notch products that’ll transform your vehicle into whatever custom rig you desire.
A big player in the industry is Harrop Engineering. With a history in motorsport that spans decades, the Melbourne manufacturer is now turning its talents to the 4×4 game, and one of its key components is the Harrop ELocker. With proven reliability and a simplistic design, the ELocker is just the ticket for our HiLux.
Harrop makes the locker using technology from US driveline giant, Eaton. Eaton makes driveline components for heavy vehicles, and it originally developed the ELocker for use in the AM General HMMWV military vehicle. It was soon adapted for recreational four-wheel drive applications.
Harrop saw the potential of the Eaton ELocker in the extensive number of 4x4s sold here, and – Aussies being Aussies – thought it could improve on the product. This involved developing a stronger four-pinion-design differential, and casting and machining the carriers here to suit our vehicles. This also ensured the best quality control.
The simplicity of the Harrop-Eaton ELocker centres on its electro-magnetic actuation, which means there’s just one wire going to the differential. That means no air compressors or lines are needed, as with many other selectable locking differentials. The single wire comes from a relay in the engine bay, with its switch located in the cabin.
Once powered, the electromagnet locks the two sides of the differential together to send equal drive to both wheels. Simple, selectable traction!
The Harrop ELocker can be fitted to the front, rear or both axles of most popular 4×4 vehicles. When fitted to both axles they can be locked individually front or rear, or both together to provide maximum drive to all four wheels. Harrop recently fitted a trio of ELockers to a 6×6 Land Rover, with lockers in all three axles.
Being in Melbourne, we took the HiLux to the Harrop Performance Centre to install the ELocker in the rear diff. The ELockers are also sold through Opposite Lock stores and Terrain Tamer stockists nationally.
The HiLux looked a bit out of place in the Harrop workshop, where it was surrounded by supercharged Holdens and BMWs, but Kevin Braunton’s muddy TJ Wrangler sitting outside on 35s was reassuring. Kevin, who did the install for us, started by draining the diff oil, pulling the axles, dropping the tailshaft and removing the original LSD centre. It was then taken to a special diff assembly room where the carrier was removed from the pumpkin, the crown wheel removed from the OE carrier and all the re-usable parts sent off for a hot wash.
The ELocker is a fully assembled unit and comes with a wiring harness including the relay, switch and detailed fitting instructions. After checking that the original crown wheel and pinion gears were serviceable, Kevin fitted the former to the ELocker by heating it up in the parts washer and then torqueing it down. Before it was re-installed, a hole was drilled and the fitting inserted to pass the power wire through.
The locker was then placed back into the centre and the lash was set. It was then ready to go back into the car with fresh LSD oil.
With the mechanical parts back in the car, the wire was run along the top of the chassis rail to the engine bay, where Kevin picked up 12V from the Piranha Off Road fuse block we installed with the dual-battery system. The wiring was then passed through the firewall and along the back of the dash to where we mounted the switch within easy reach of the driver.
The ELocker installation took the best part of a day, but we messed around quite a bit with photography and video.
Aside from setting the lash on the crown wheel and pinion, the job is one that any competent home mechanic could carry out with basic tools and jack stands. But if you’re in any doubt, leave it to a qualified installer.
RATED Available from: www.harrop.com.au RRP: From $1500 (approx.) We say: Fully assembled and easy to install, if you’re competent with a spanner.
CONTACTS HARROP ENGINEERING 96 Bell Street, Preston, Victoria www.harrop.com.au
Want to know more about the Project Toyota HiLux build? Follow the link to find out.
BUILDING a capable off-road rig is something that many of us dream of. First you select a vehicle (either new or secondhand) with the right options, and then you buy it.
Then the real fun begins – leafing through various catalogues or websites researching, specifying and choosing the gun hardware before getting the vehicle fitted-out, nose to tail, ready for some outback adventure.
It’s fun, but we often forget how intensive it is to design and develop aftermarket equipment. The process usually begins long before a new vehicle goes on sale. Most larger, established companies, such as TJM, usually know when a model is due to be replaced, so they can make preliminary plans to develop products for the replacement models.
“We hear snippets of information from world-wide media,” TJM’s Jason Lock explains. “That will give us grounding on when to expect a new vehicle.”
In fact, 2015 was a big and busy year for new product, with Nissan, Toyota and Mitsubishi launching new models, and Ford and Mazda revising the Ranger and the BT-50 respectively.
For TJM, the hands-on process for designing a new suite of hardware for Mitsubishi’s new Triton began with the purchase of this bright blue Triton. With the Triton manufactured in Thailand – as are most dual-cab utes – Thai showrooms are usually the first to see new models. These showrooms therefore give aftermarket specialists an opportunity to get a head-start on product development before the new models arrive in Australia.
TJM was able to strip the new Triton’s nose and most of its undercarriage for inspection before the vehicle was available here.
“We take a look at all the critical areas for the installation of frontal protection bars, canopies, snorkels and suspension – after the strip-down,” Jason explains. “All that data is put into CAD and modelled.”
With the homework completed, the Triton was pieced back together and loaded, ready for shipping to TJM’s head office in Brisbane. In the meantime, the engineers and fabricators got cracking on product design and prototype fabrication, and had much of the hard work done, ready for testing, by the time the Triton’s shipping container arrived.
As well as double-checking that the products fit, testing was performed to ensure the vehicle could keep itself cool. Rigged-up with temperature probes, this Triton was loaded to its GCM (Gross Combination Mass) – the maximum loaded vehicle and trailer weight specified by the vehicle manufacturer – to ensure there was no effect on the vehicles’ radiators and the ability of the vehicle to keep itself cool.
Testing to government regulations is critical, too. Unlike home-made parts, premium aftermarket manufacturers, such as TJM, ensure the vehicle’s continuing safety and legality – and ability to be registered and insured – by complying with federal design rules and state legislation. Sign-off occurs only after CAD modelling and destructive (crash) testing of prototype equipment.
For many Aussies, a frontal protection bar is a must-have, so its design was a priority for TJM. While that was happening, there were engineering staff working on other products such as a rear bar and side steps. And there’s plenty of other equipment underneath, such as suspension, battery trays, underbody protection and diff locks, and they all require similar commitment to engineering and testing.
The Triton’s diff lockers were relatively easy – revisions were required to the front diff, but the rear locker from the previous model could be carried over. The Triton’s canopy, too, was a fuss-free process. “The canopy went straight from scan, to mould, to product and onto the vehicle [in one hit],” Jason says. “It was a pretty quick process.”
Sometimes there’s also some unexpected ‘testing’ involved. “I was on my way to the [Sydney] show, cruising along, all the lights blazing, the other morning,” Jason relates. “I hit a ’roo. I got out of the car thinking the worst… but all I’d done is knocked-around a driving light.
The bars are designed to be sacrificial; they’re designed to absorb energy from bigger impacts but keep the engine running and the vehicle mobile. That’s the priority. But like the other premium manufacturers, we need to do that with respect to the regulations, with deformation testing and rig testing for the ADRs.”
Other less glamorous details such as fitting instructions and parts lists must be finalised, too, before they can create advertising material. At the end of the process, overseas-spec vehicles must re-exported according to Customs requirements, so this Triton will end up back in Thailand. The designs are approved for manufacture only after all these processes – measuring, designing, hand-building of prototypes and testing – are complete.
It’s usually a smooth, well-practiced process, but sometimes a spanner gets dropped into the cogs. “This year has been a big year for new vehicle releases,” Jason says. “So we’ve been working hard. We’ve had this new Triton, plus Navara and Hilux, and a facelifted Land Cruiser. There’s been a revision to Ranger and BT50 – a facelift – and the Navaras with the leaf-sprung rear, as they launched with coils first. So we’ve really had to prioritise product development. We have been flat-out!
“There are some traps, too,” Jason continues. “For instance, there may be spec differences depending on the market. What is for sale overseas may not match what we see here, so we may have to revise the design for the Aussie-spec cars when they arrive.
“But we design for export markets, too, so the effort is hardly ever wasted.”
The result is world-renowned equipment. “What works in Australia – as far as quality and durability is concerned – works anywhere in the world,” he says. “All our gear – and the gear produced by other premium Australian companies – is well regarded all around the world.”
4X4 Australia was lucky enough to snag TJM’s freshly built MQ Triton straight after it was built for an off-road test in the Victorian High Country. Some of the gear on it was still in development stages and not yet the final product.
Possibly the first twin-locked MQ Triton on the planet, the TJM truck features the company’s Pro Lockers front and rear; the necessary air compressor to activate the lockers; a full Series 4000 suspension kit; a new-design 63mm T13 outback bullbar; a TJM Torq 9500lb winch; a TJM rear bar and side steps; TJM underbody protection plates; an Airtec intake snorkel; an Xray LED Optic lightbar; a GME UHF radio and an aerial; a Strike car phone kit with an aerial; TJM floor mats; TJM space cases; a TJM recovery kit; a TJM high-lift jack and base; an Aeroklas tub liner; and back alloy wheels with 33-inch Achilles muddies.
We were impressed at the ease with which it tackled the terrain and deep snow, and the control the Series 4000 suspension afforded on gravel roads. In the deeper snow that challenged some other vehicles on this trip, the trim Pro Lockers allowed us to power on without too much fuss. The barwork protected the pretty blue paint and provided a platform to mount the extra lighting that proved its worth in the dark.
The TJM transformation shows just how an affordable ute like the Triton can be transformed into a competent, go-anywhere vehicle.
IT’S easy to give into temptation when driving past the golden arches after a long day on the road. But it’s just as easy – and cheaper – to whip up some grub with a few leftover ingredients stored down back.
All that’s needed to cook Roothy’s signature hash browns are a couple of spuds, some garlic, a good dollop of oyster sauce, a tin of corned beef, corn kernels, curry powder, a few onions and some chilli (if so desired).
In fact, feel free to chop and change whatever ingredients you think will work. So long as the potato foundations remain!
Watch the video to see just how simple it is to knock up a quick and healthy(ish) meal.