This wild JK Wrangler might be called Unlimited, but with just 30 examples landing in Australia back in 2013 it’s anything but.
Vote for Jason’s wild JK Jeep to decide this year’s Custom 4×4 of the Year.
Y’see, to celebrate the 10th anniversary of the Rubicon nameplate, Jeep decided a special edition model should be launched in very limited numbers, and Australia’s allocation of the imaginatively named Rubicon 10th Anniversary Model was just 12 examples of the two-door Wrangler and 18 of the four-door Unlimited.
Jason Storace was already a Jeep Wrangler Rubicon owner when he first heard about the launch of this anniversary edition, and he knew straight away it was the vehicle for him, which would mean waving goodbye to his 2010 Wrangler Rubicon shorty… so long as he got his order in early enough for his local dealer to secure him one of the very limited Unlimiteds.
“My dealer and I basically had to fight to get allocated one,” Jason says. “There were only 18 coming into the country, and I got the only one in this colour, with a manual gearbox, for Victoria.”
The Rubicon-spec Wrangler is a pretty serious bit of off-road kit, even straight from the factory floor. Super-low 4:1 gearing in the transfer case combines with 4.1:1 diff ratios to provide a handy 73:1 crawl ratio in low-first gear. Team this with a live-axle suspension set-up with long-travel coil springs, electronic front sway-bar disconnect and heavy-duty Dana 44 locking differentials and you have something that’s pretty much unstoppable.
The 10th Anniversary Model also has an additional inch-and-a-half of ground clearance, MOPAR rock sliders and extra underbody skid-plate protection. But like many Jeep aficionados, once they get the bug, Jason soon discovered that too much off-road capability is never enough.
“Having owned the shorty, I already knew how good the Rubicon was, so I made the decision to upgrade to the four-door Unlimited to make use of all the money I was going to spend on it,” laughs Jason. A mechanic by trade, Jason could at least save a bit of money on labour. But parts don’t come cheap and Jason didn’t want to make any mistakes with this build, so he called on the advice of some Jeep experts to make sure he made all the right decisions.
“I definitely want to say a special thank you to Andrew Bottomley and all the guys at Double Black Off Road, as well as all the guys at JeepKonection, because they were all terrific in helping me with set-up,” says Jason, who had a pretty clear picture in his mind’s eye of exactly how he wanted his Anvil grey Wrangler to look.
“Everyone comments that I’ve maintained what looks to be a military edition as it would’ve left the dealership, and that’s what I was after,” Jason says. “And the idea is I can still rip off the roof and cruise down the beach and have that nice look that you expect from a convertible. So a lot goes into the thinking, all the way down to the finer details. I mean the wheel nuts are black instead of the standard chrome ones. I pay a lot of attention to detail in anything I do to make sure I get the look that I want.”
Like many Jeep owners, Jason turned to US-based AEV (American Expedition Vehicles) for many of the goodies you see on his rig, starting with the suspension. “It has an AEV 2.5-inch lift on it, with the high-steer geometry kit to improve the steering,” Jason explains.
As well as springs and matched Bilstein shocks, the AEV DualSport 2.5-Inch XT Suspension System includes a custom rear track-arm, front stabiliser end-link relocation brackets, bump-stop extensions and brake line relocation brackets. As Jason’s Jeep has a fair bit of gear on it, he soon found the rear-end wanting, so he beefed it up with heavier-rated King Springs. “That’s been a lot better with the extra weight that I’ve put on it,” he says.
That extra weight is a result of fitting items such as the neat-looking steel bar up front, winch, rear bar, roof rack, rooftop tent and all the other goodies you need for a long trip away in the bush. “I really wanted it to look like, and be set up for, expeditions, so I can be on the road for two or three weeks and be 100 per cent self-sufficient,” Jason says.
The steel bar up front is from an American company called Rock-Slide Engineering. It houses a pair of seven-inch LED driving lights and is home to a Warn Zeon 10-S winch running Dynamica rope. Extra light output comes courtesy of four LED light bars mounted to a Smittybilt light rack above the windscreen. In addition to the Rubicon’s standard underbody protection package, Jason has added a Rock-Slider Engineering bash plate beneath the bar and an AEV rear diff slider. It has an AEV rear bar, too.
“It has an AEV rear bar and that has water storage with an electric tap set-up on the bumper bar for easy access,” Jason explains. “Then I have the AEV spare wheel carrier, and built into that is an AEV moulded fuel tank that literally sits on the inside of the spare wheel, in between the wheel and the tailgate, and gives about 38 litres of fuel storage. You just siphon it out of there with a jiggler and fill up the tank and you can do another 250-300 kays.”
Jason reckons the Wrangler averages around 15.0L/100km on the highway with its 35-inch Pro Comp muddies on 17-inch AEV alloy wheels, which he says is about on par with many of the diesel vehicles he regularly goes touring with.
As for those black AEV wheels, Jason says they have a factory offset, so they sit neatly within the standard wheel-arches, helping him to maintain that factory-standard look he wants.
Up top, Jason has fitted a James Baroud Explorer Evolution rooftop tent, which is mounted to a three-quarter length rack. “The roof rack is from Double Black Off Road; the rack is from MBRP in the States, and it allows me to put the James Baroud Explorer camper on top,” Jason says.
“You just release some clips and the tent pops up. And your bed is in there with your pillows and your sleeping bag, and you’re in bed in about eight seconds… very lazy mate; it’s about how quick you can get to your beer,” he laughs. “It only takes about a minute to pack away. You just walk around the car and pull against the struts and put the clamps in, and then you’re off and running.”
As well as the tent, the MBRP roof rack is home to an Eezi-Awn Manta 270 swing-out awning that offers shade from the side around to the back of the Wrangler. Pop open the tailgate and you’re presented with a well-thought-out and functional storage space; although, there’s no drawer system in sight. “I’ve got a fold-down TeraFlex picnic table on the tailgate, an 80-litre Waeco in the back on a custom-made slide, and an Adventure Trailers upper storage shelf, Camp is set up in less than five minutes and I’m good to go,” Jason says.
“I’ve kept the fridge down the bottom and the shelf up top because I can rip off the roof rack and sleeper and then take the hardtop off. I can head down the beach with the dog and have the red leather out in the breeze. I didn’t want to go the whole drawer system; I’ve got Pelican boxes that I use.
“The back seat is still in there; the whole idea is to have as much storage space in the back as possible. I’ve got a hot water camp shower I keep in the back, all my cargo gear and everything. The only time I’ve got to put the seats down is if I’m taking the dog with me,” Jason says.
There’s not a hell of a lot of space under the bonnet of a Wrangler, so rather than fit a traditional dual-battery set-up, Jason opted for a more portable solution. “It has a second battery in the back, a Thumper 105Ah battery, and that’s a mobile power unit,” he explains. “It comes with a charging kit, so it’s literally plugged into your main battery system.
I’ve got it hardwired through the isolator switch and then all I’ve got to do is disconnect an Anderson plug and I can pull it out of the car if I want to. It’s in its own case and, if you want, you can rip it out and put it in your boat. The Waeco will run off it for five days with no problems, and if I’m not driving I just whack out the solar panel.”
Compared with the engineering, accommodation and storage modifications, Jason hasn’t done a hell of a lot to the interior of the Wrangler, other than fitting a Uniden UHF and a mount for his phone.
“It comes standard with an Alpine premium seven-speaker sound system. It’s probably one of the better sound systems I’ve heard,” Jason says. “I use the standard Jeep navigation system and my phone with Hema Maps loaded; I like to keep a very factory look inside.
“I’ve got a few bits and pieces to go on the inside, like cargo bags. I’m looking for that military SWAT look for some of the luggage stuff, but nothing fancy. Generally the interior is quite stock standard, it has heated seats – all that comfort stuff,” Jason says.
Jason reckons he’s “pretty happy” with where his Rubicon 10th Anniversary Model is at right now and that, other than a custom-made shade system for the roof-top tent, there aren’t any serious mods on the cards… but he does admit to grander ambitions. “The dream mod would probably be the 6.4-litre Hellcat V8 conversion,” he laughs. “One day… or Jeep might bring out a V8.
“Right now? I just want to keep on enjoying it,” Jason says. “We head out with the dirtbikes a fair bit, I probably go camping about once a month. We do a lot of day trips, a lot of weekend trips. We’re about to do the Victorian High Country for nine days, starting from Haunted Stream near Omeo, then doing Davies High Plain and Tom Groggin. I’m just dying to dip into that. I’m really looking forward to getting across to that side, because we’ve done heaps around Dargo and all through there, and Wonnangatta.
“We’ve got a two-week trip planned for September through Oodnadatta, Alice Springs, Birdsville and all through there. A friend of mine did it last year so he’s dragging a whole bunch of us out.”
These days working as a mortgage broker, Jason says he can be quite flexible with his time, which allows him to get out onto the scrub quite a bit.
“We do a lot from the office but also a lot of mobile work,” he says, “so I can go away and be four-wheel driving and do two or three hours’ work, and then call it quits for the day and keep going.”
But for some blokes with the off-road bug, getting away from it all, even regularly, simply isn’t enough.
“I’m based in [Melbourne’s] western suburbs, Caroline Springs, and I’m looking at land near the Wombat Forest. I’m trying to put the forest in my backyard,” Jason laughs.
Once he’s done that, we reckon you’d need a crowbar to pry him out of his beloved limited Unlimited.
2013MY Rubicon 10th Anniversary features
• 3.6-litre Pentastar V6 (209kW/347Nm) • 6-speed manual (optional 5-speed auto) • Dana 44 axles with 4.10 axle ratio • Tru-Lok electronic locking differentials • Rok-Trac transfer case (4:1 low-range) • Electronic front sway-bar disconnect • Lifted suspension • 17-inch Rubicon black alloy wheels • Power Dome bonnet • MOPAR rock rails, black fuel filler and tail lamp guards • 10 Anniversary badges on front guards • Red silhouette ‘Rubicon’ decals on the bonnet • 3-piece body-colour Freedom hardtop • Soft-top also included • White or Anvil paint schemes only • Red leather seats with Rubicon 10th Anniversary embroidery • Unique gauge cluster and switches • Body-coloured guard flares • Tinted rear windows • 6.4-inch touchscreen GPS navigation • Reversing camera
Vote for Jason’s wild JK Jeep to decide this year’s Custom 4×4 of the Year.
Omelettes are quick and easy to whip up at camp, but you can only fry one at a time. So why not bake an omelette dish big enough for the whole family?
INGREDIENTS Serves 4 to 6 8 large eggs. 1/2 cup of light cream. ½ to 1 cup of shredded cheese (cheddar, tasty or whatever you prefer). 1 cup of cooked ham – chopped. 2 to 4 spring onions – finely chopped (or use chives). 1/2 small/medium onion – finely chopped (optional). Salt and pepper (seasoning to taste).
COOKING IT Preparation: 5 to 10 minutes
- Cooking time: 25 to 30 minutes (depending on how deep your dish is).
- Preheat your oven or camp oven. Its temperature should be 200°C.
- Grease a 20-23cm square baking dish, or use a square, deep-sided foil tray. Use a dish that fits inside your camp oven.
- In a large bowl, whisk the eggs and milk/cream.
- Add the remaining ingredients and stir until well mixed.
- Pour ingredients into the prepared baking dish and place it in the
- hot oven. Bake for about 25 minutes or until golden brown and
- cooked right through.
VIV’S HINTS You can add whatever you want to your omelette, such as mushrooms, tomatoes, bacon, cooked sausage pieces, green capsicum, spinach, fresh herbs and more.
Take time to sauté the onion, bacon and vegetables in a little oil or butter before adding them to the egg mixture. It is worth the effort as you’ll get a much better flavour.
HANDY HINTS TO MAKE A TRADITIONAL OMELETTE Add 1 tbs of cool water to 2 eggs. This will help give the omelette a fluffy texture. Use a fork to whisk the egg mix until well combined.
Melt a small knob of butter in your pan before adding the omelette mix. Use a non-stick pan and one that is the right size – 18-25cm. If you use an oversized pan, your omelette will spread out too much and it won’t be high and fluffy. Make sure your pan is hot when you add the omelette mix.
Cook over a med-high heat. Keep gently moving the cooked portion of the eggs towards the centre and tilt the pan so the uncooked egg mixture runs underneath and around to the edges.
Cook until lightly golden brown on the bottom – the top should still be a little soft and wet. The eggs will finish cooking in the residual heat of the omelette after you fold it. Add grated cheese to the top just before you’ve finished cooking, so it slightly melts. Add your filling to the top of one half of the omelette and fold it over.
It’s best to first sauté ingredients such as onion, ham, mushrooms and tomatoes before adding them to the omelette. Use the same pan you are going to cook the omelette in. Once the ingredients are sautéed, remove them, set them aside and keep them warm.
It’s 10,000km since my 1999 NL Pajero went up a shoe size. I’m not into the monster-truck look but the Paj’s stock 15x7s never filled the guards.
More importantly, any time I’ve bellied the beast, it’s been by the barest of margins when a smidge more ground clearance would have made all the difference. More momentum might have done it too, but that’s not the approach I like to take.
Reading VSI8 from Vic Roads, you can fit wheels up to 25mm wider and a wheel and tyre package with an overall diameter no more than 15mm larger than the largest “specified by the vehicle manufacturer for that model or vehicle series”. So my Pajero now wears Exceed-sized 16×8 Dynamic steelies wrapped in Cooper Discoverer AT3 265/75 LT rubber. That threw the speedo out by seven per cent the bad way (speeding when you think you’re safe), but it’s in hand.
Replacing a set of heavily worn mud terrain tyres, these Coopers seemed near silent at first. As familiarity has worn on through one-ninth of the guaranteed lifespan, I hear them a little now but it’s far from intrusive – I only notice after driving a regular passenger car. They’re overdue for a rotation too and doing that often lessens the tyre noise.
In a real emergency braking situation early in their life, they locked up with substantially less effort than I’d have liked, but it’s impossible to say whether the lack of grip was due to tyres with only 200-odd kilometres on them, or something on the road surface. Having given them a few test stops (on empty roads) since, they seem fine now.
Off the blacktop, they’re impressive. No Outback treks yet, but my new fascination with hang-gliding means they’re making frequent runs up and down mountains, loaded with a few gliders on the roof and their pilots on-board. Some of these climbs are accessible for ‘twobies’ but as responsible off-roaders know, a fourbie makes it easier and leaves the track in good condition for everyone else.
The Coopers didn’t so much as slip on the loose shale corners at The Paps, near Mansfield, Victoria, or slide downhill in the mud created by the torrential rain that cancelled flying at Ben Nevis (Ararat, Vic) before it even began.
The Coopers’ performance is great so far, but there’s one downside. The extra ground clearance that I wanted means I now struggle to reach the roof rack!
RATED We say: Terrific all-rounder for use in mixed on- and off-road conditions. Info: www.coopertires.com.au
Mid-range Pajero Sport GLS has plenty of bang for its buck!
WHAT’S THE DEAL? DESPITE the name, the Pajero Sport has nothing to do with the Pajero. It’s more closely related to the Triton ute, sharing much of its underbody structure, some panels and its 2.4-litre engine. The Pajero Sport is the replacement for the Challenger.
There are three models in the range, starting with the GLX priced from $45,000. For that coin you get an auto transmission, LED headlights, smart key entry and start, reversing camera, rear parking sensors, digital radio and 18-inch alloy wheels. It’s a decent spread, undercutting many ute-based rivals. The five-year warranty seals a good value deal.
The GLS we tested here is $48,500 and brings a rear diff lock, leather seats, dual-zone ventilation and auto wipers and headlights. It’s arguably the pick of the bunch, especially at this price.
At the top of the range is the Exceed, which is a $52,750 proposition. It adds a better sound system and a DVD player for the rear, as well as various active safety features including blind spot warning and auto braking.
PRACTICALITY FROM the second you step into it there’s a feeling the Pajero Sport isn’t particularly big, and it’s certainly not as spacious as the Prado.
The front seats are quite high and the roof line above the windscreen is low. Plus, the cabin isn’t especially wide, so three across the back will be a squeeze.
Speaking of back seats, the Pajero Sport misses out on third-row seats common in this segment. The third row is available overseas, but because side curtain airbags don’t stretch all the way it was decided not to bring it to Australia.
That said, the lack of a third row of seats means luggage space isn’t bad. As a car for two people (or even a small family) looking to do a big trip, it’s a sensible size.
Even the second row of seats has compromises. There are no air vents, for example, and the child seat anchor points are in the roof at the back of the car, so anyone looking to travel with kids will have child seat straps feeding through the luggage area. The middle seatbelt also retracts out of the roof.
Up front, storage space is minimal. There’s a pair of cupholders, some door pockets and a covered binnacle. The only additional storage is a slim pen or coin holder on either side of the main centre console. Our experience with off-roading suggests a few more hidey-holes would be useful.
ON THE ROAD AT 2.4 litres the Pajero Sport’s engine is towards the smaller end of the scale for its class. But it still manages decent figures, with a fairly useful 430Nm peak.
But it’s the eight-speed auto that transforms its performance, compared with the Triton. There are plenty of ratios to choose from and the gearing is fairly short – for example, accelerate hard and it drops into fourth gear by 85km/h.
Fortunately the shifts are smooth and well timed, so as the transmission goes about making the most out of the engine, you can go about enjoying respectable performance.
Fuel economy is also a winner. The official claim is 8.0L/100km and, while we got close to that with some gentle suburban cruising mixed with some interurban freeways, on our four-wheel drive route it used a conservative 10.8L/100km.
It’s lucky it doesn’t use much fuel because it has a very modest tank. At 68 litres you’ll limit your usable range to about 500km – less if you’re towing or going off-road.
Speaking of which, the Pajero Sport trumps key rivals by 100kg on claimed tow capacity, at 3100kg.
Through bends the steering is pretty awful, with an overly light feel that does little to inspire confidence on country roads. The soft suspension also translates to some leaning if you tip in hard.
That suspension at least does a good job of soaking up bumps, especially big ones. It’s a car that somehow revels in a large washout or speed hump, albeit not as convincing on smaller imperfections.
OFF-ROAD BEING based on the Triton, there’s a proven – read: ageing – ladder frame chassis that delivers on ruggedness. There’s also good ground clearance and some protection underneath.
The 218mm of clearance teams with good articulation to make for relatively easy progress.
Up front the approach angle is good, and there are small plastic spats that act as an early warning. While the rear only improves on the Triton’s departure angle by about one degree, the result is more convincing. It’s far less prone to dragging its tail, and if you are going to hit it’ll likely grab the spare tyre or exhaust tip before damaging anything substantial.
The Pajero Sport’s biggest asset is its Super Select II four-wheel drive system. With a centre diff it allows the car to be driven on bitumen with all four wheels driving, which is handy on greasy roads or when regularly transitioning from gravel to bitumen.
The traction control occasionally needs encouragement in the form of extra throttle to direct drive to a wheel that’s not spinning, but it soon works it out and maintains progress. There’s also a centre diff lock and, in the GLS, a rear diff lock, ensuring better traction if you know you’re headed somewhere that needs it.
VERDICT AS a two-person tourer, the Pajero Sport is a winner: good size, rugged design and great off-road credentials. The drivetrain is also impressive, especially the way it doesn’t use much fuel.
However, as a family car it’s less convincing. The child seat and middle rear seatbelt set-up is sub-standard, and the compact space is quickly eaten up by bodies and luggage.
PRICE AND SPECIFICATIONS Price: $48,500 Engine: 2.4-litre 4-cylinder turbo-diesel Power: 133kW at 3500rpm Torque: 430Nm at 2500rpm Transmission: 8-speed auto 4WD system: part-time dual-range Braked tow capacity: 3100kg Spare tyre: full size Fuel tank: 68 litres Fuel use (claimed): 8.0L/100km Fuel use on test: 10.8L/100km Approach angle: 30.0deg Departure angle: 23.1deg Ground clearance: 218mm
CHINA’S budget-priced SUV manufacturer, Haval, has committed to a line-up exclusively made up of turbocharged petrol engines.
“Our engineers made a clear case they believe the development of diesel engines has reached its zenith,” said Haval Motors Australia Chief Marketing Officer, Tim Smith. “And the era of smaller, more fuel efficient petrol engines and powerful hybrid and electric engines was upon us.”
Haval plans to complement its range of turbo-petrol engines with a mix of hybrid, plug-in hybrid and electric powertrains.
The reason for this “diesel-free” future appears to be environmentally driven, with a recent Australian delegation to Haval’s head office raising questions about diesel fuel.
“Ultimately the future of that fuel (diesel) has been decided by the market, the actions of other companies and a growing push for more stringent clean air policies,” Smith said.
“We have already seen reactions from markets like India, where the sales of vehicles powered by diesel engines greater than two litres in capacity have been banned since December last year.”
With keen Aussie off-roaders preferring diesel power, it’ll be interesting to see how well the move to petrol power is received.
In addition to the dismissal of the diesel donk, Haval will also ditch its manual transmission.
The brand has adopted a policy that will see every future turbo-petrol engine mated to an automatic transmission.
“Australia has one of the highest proportions of automatic ownership so this is a welcome move for Australian customers,” Smith said.
TERRAIN Tamer has been unlocking the most remote parts of outback Australia since 1969.
Early on, founders Don Kyatt and Frank Hutchinson serviced Bedford 4WDs, the most famous being Bill King’s.
Bill would tackle the outback in his Bedford and bring back parts that had copped a fair beating, and Frank would then modify or source parts to make the rig stronger.
This method would serve as the backbone for the company that would spend the next 50 years developing parts best-suited to the harsh Aussie terrain.
The Victorian-based four-wheel drive parts supplier now has a range of more than 40,000 parts, which are exported all over the globe, including to Iceland, Africa and South America.
Testing is conducted on the company’s private 4WD track at Melbourne HQ. And at the nearby R&D centre the staff continually improves and strengthens parts.
To see the entire Terrain Tamer process, check out the video!
For the past five months I’ve been driving my trusty Patrol with a set of Lightforce LED215 driving lights illuminating the way through all sorts of terrain.
But before we go too far into the test results, I’ve got to say for the past two months I’ve also been driving a couple of other vehicles with LED driving lights fitted to them.
While the light output is impressive, the amount of LED glare that comes back from road signs and the like, no matter the make or model of the light, is off-putting. Maybe they all need a yellow filter fitted, which is something a truckie acquaintance of mine has done to cut back on the glare.
With all that said, let’s take a look at this offering from Lightforce.
I’m a bit of a Lightforce fan. This great Aussie brand offers excellent build quality and performance, with engineering and testing all done in sunny South Australia.
The LED215 is a robust unit with a body made from high-pressure cast aluminium, 215mm in diameter. The housing, with its military-spec cabling, waterproof membrane and seal (rated at IP68 against moisture and dust ingress) can be immersed as deep as three metres – not that I’d want it to go that far under while on the bullbar of the Patrol!
The light is supported by high-impact, scratch-resistant lenses and filters, while total power is 108W, producing an output of more than 5000 effective lumens.
The colour temperature is 5000 Kelvin, which means a pleasing white light. There’s little strain on the eyes after a long time driving with the lights.
In my case, I didn’t have to fit a new wiring harness, because the plugs of these lights fit the previous waterproof plugs perfectly. So all I had to do was drill an extra hole or two, mount the sturdy stainless bracket and fit the lights – the spacer between the housing and the bracket were the fiddliest parts of the whole operation. Aiming the lights was easy and that’s the way things stayed, which is another reason I love Lightforce’s mounting system: strength.
Out on the road, the effects of the new lights were impressive. Check out the two pics (taken with the same ISO, shutter and f-stop settings) – one with high-beam (below) and the other with the 215s lighting the way (main image).
A couple of things I like about these lights is the wide spread of light, which illuminates the edge of the road really well, and the centre of the beam, which shows no hint of poorly or unevenly lit patches of road. Dark objects such as the trees on the side of the road show up well in the light, too.
The beam of the 215s mightn’t reach out as far as some HID lights (1-lux range is 870-910m, depending on driving or spot configuration), but this is never an issue at 100-110km/h.
RATED Available from: www.lightforce.com RRP: $705 per light We say: A fine-performing LED driving light. Robust and well-made, with a great mounting system.
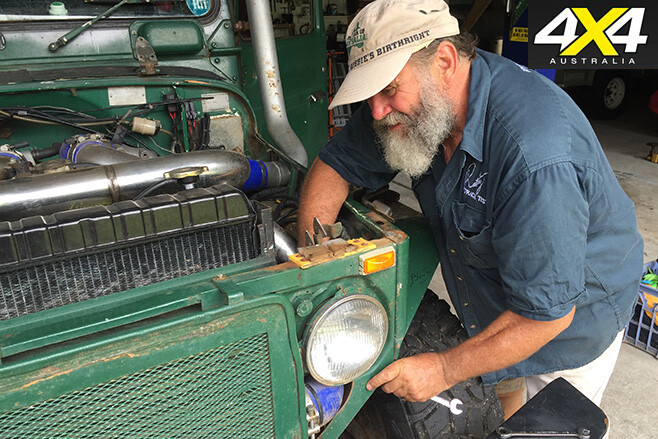
Back in March we had a look at the sort of damage copped by the front panel of a 40-Series Land Cruiser that’s used and abused on corrugated roads.
I may have mentioned we’d be hooking in and replacing all that pretty soon with some new trick engineering. Yes, and then Chooka showed up looking for a counter lunch and the job slowed down.
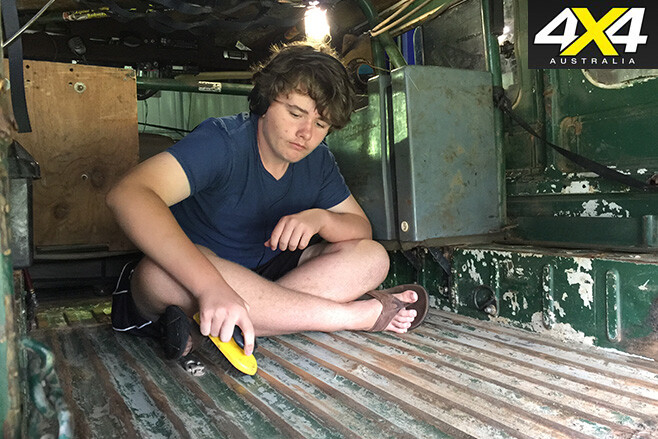
Life is like that, but with the school holidays on and the lads keen to help (keen to eat more like it!) we got back out to the shed and got stuck in. I’m pretty lucky like that because my sons have reached an age where they’re really useful. When they were younger they’d come out and spill paint everywhere and drop my spanners down the open drain just so they could see the splash!
Metal fatigue is what kills many old trucks and sees bits falling off in the dirt seemingly for no reason at all. Most people with some bush experience of machinery are well aware of it but, if you’re not, well, you probably will be soon unless you live in cotton wool.
The best way to explain it is to grab a piece of wire – a paper clip is good for this – and bend it up and down. Two things happen: it gets hot at the bend, it gets harder to bend and then eventually it’ll snap. Hang on, that’s three things. And you thought the only thing I could count was a shout.
Right, what’s happening is that the metal is changing at an intergranular level. One surface is being compressed, the other stretched, and then we bend it back and reverse the process. Engineers call this fatigue loading and, like Fat Kevvy after too many prawns, the result is that eventually something’s got to take a little lie down.
In the case of metals – and all metals have different properties here, which is why you don’t see too many die-cast aluminium shock absorber mounts – elasticity is lost and cracks are the result. Fatigue loading invariably means that cracks start on the edge of the metal first – this is what we call a stress fracture.
There’s a classic example of that in Milo’s mudguard inner panel. You can see the metal’s copped plenty of damage – it’s been flexed so much that it’s cracked in three places all around the mounting bolt hole without cracking the hole itself. Why’s that? Because there were thick washers on each side of the hole, which held it secure. Given time, that bolt, washers, the hole itself and the nut would have all dropped off together, leaving the mudguard free to beat up the next bolt down the line.
The original Toyota 40-Series engineers realised fatigue loading and that consequent stress fractures might be a possibility in a vehicle designed to be used on rough roads most of its life. So they took several steps to slow it down. You’ll note I said “slow it down” and not stop it, because nothing stops metal fatigue apart from leaving a vehicle in an hermetically sealed bag and never using it.
They used thick, mild steel panels for starters. At about one millimetre in thickness, they’re three times as thick as modern panels, but strength means weight and that means they had to mount them to allow for some movement. Hence the hinge you’ll see down the front of the front panel on an old Tojo.
For the same reason, the chassis on the old jiggers were always riveted together rather than welded – rivets allow a little flex. In fact, a long-wheelbase 40-Series chassis can be jacked up on one corner and you’ll get about 50mm of flex across its whole length.
This flexibility was even more important in the days when suspension was merely a development of the stuff they used under horse-drawn wagons. Yes folks, the introduction of coil springs and decent shock absorbers was possibly the largest step forward in the battle against metal fatigue on off-road vehicles.
Land Rover first introduced them in the 1970s. But by 1988, when Nissan released the GQ Patrol, metallurgy had caught up – processes such as coil scragging and shot peening were used to reduce surface tension on the coils that led to reliability problems such as breakages. Manufacturers everywhere realised you could have strength with suppleness. Real suspension was born.
But it was way too late for Milo and, while I have thought of doing a coil-over conversion, adding complexity to something that’s simpler than the average axe has always put me off.
Okay, so now you can appreciate why good suspension is such a critical thing for 4x4s that get used seriously off-road. You see, the more of that constant corrugation pounding you can absorb in the suspension, the less that gets transmitted to the chassis and then the body of the truck itself.
So if you want to save money you’ve got to spend on good suspension. Or spend plenty of time in the shed like my lads and I do.
Like many companies in the Australian four-wheel drive industry, 4Way Suspension had very humble beginnings. In 1985, company founder John Agostino imported a set of shock absorbers from the US for a mate.
“I used to be a Qantas flight steward and Frank Zofrea, who was spare parts manager of G Brothers at Mona Vale (NSW), a Mercedes-Benz dealership, asked me to bring back a set of shock absorbers for a Type 1 Beetle, for the very first Bourke to Burketown Bash that his boss, John Guberina, was entered into,” John says.
The shocks performed so well that John Agostino started importing them, operating out of a small office in the spare parts department of G Brothers. “For three years, that’s what I did,” he says. “Until 1988, [when] I took some time off from Qantas; I was off for about 10 months to get this thing going.”
Things weren’t easy in the early days. John was working long hours, but wasn’t making money. Times were tough. “In that 10 months I had lost a lot of money and the choices were to walk away or leave Qantas and give it a shot.”
With interest rates at around 19 per cent in 1991, being in debt was not good, so John and his wife sold their house to finance the fledgling business. And it wasn’t just high interest rates that were challenging the business.
The suspension brand that 4Way originally imported from the US was called Bulldog, and when Mack Trucks – the truck manufacturer with the bulldog logo – got wind of this, it threatened to sue. “That’s when Tough Dog replaced Bulldog,” John says.
To grow the business, John knew it was imperative to develop new product and grow the range, but that would require funds. From 1991 to 1992, John produced a cab-mount for the International T-Line truck, which the company (now Iveco) then fitted as original equipment.
“They spent between $30,000 to $50,000 per month, for the next four years or so, and that’s what took us to the next level, and gave us a little bit of money to start developing some products,” John recalls.
“4Way suspension originally sourced equipment from Trail Master in the US, but John wasn’t satisfied with their 35mm bore shock absorbers, so he went directly to the US manufacturer. This lead to the development of big bore shock absorbers, which Tough Dog has now become renowned for.
4Way then secured the exclusive rights to distribute the externally adjustable shock absorber in Australia. “We then developed that product,” John said.
“We developed the struts and it made us fairly unique, because it was the only 40 and 45mm externally adjustable strut on the market. It took a while, with a lot of development to get it right, but we put in place certain procedures and we did in fact get it right.”
These days Tough Dog suspension components are sourced from all over the world, with some components produced locally, others in the Americas and others in Asia, but nothing is shipped out of the 4Way Suspension facility without first being thoroughly checked in-house.
“Our coil springs are manufactured in Australia, to our specifications. Our leaf springs were manufactured locally for a good 23 or 24 years, but to maintain a competitive edge with leaf springs, without compromising on the quality we are known for, we were forced to reassess our options.
“Quality is always paramount no matter where the items may be manufactured. Our stated aim to our suppliers is: ‘We don’t want you to make it cheaper, we want you to make it better!’
“Our urethane shackle bushes are manufactured locally. Again, it’s dearer, but we prefer the quality, and that’s a very integral part of a leaf spring… There are certain key elements that we still prefer to get made here in Australia.” And that philosophy is adhered to at 4Way Suspension’s local distribution centre in Sydney’s west.
“We make sure that we bush and finish every shock absorber in-house,” John said. “There are three physical checks, so by the time it goes on the shelf it’s signed-off, has initials with who manufactured it, the date it was manufactured, and who’s checked it off. So when it gets to the other end, it’s what [the customer] is supposed to get.”
When it comes to shock absorber options, Tough Dog undoubtedly has the biggest range in the country. For many vehicles, in addition to the standard foam cell shock absorbers on offer, there are optional units including Nitro Gas, 40mm Adjustable, 45mm Adjustable or 53mm Big Bore ‘Ralph’ shock absorbers. “One of the things we wanted to do was make a product for different applications rather than one-size-fits-all,” John said.
“Most of our competitors have one shock absorber, and they make it for all applications. And you know, for probably 80 per cent of applications that’s fine, but when you get the guy who puts the kitchen sink on the back of his vehicle and goes up to The Cape, and he’s going to be away for three months, well, let me tell you, a 35mm bore shock just won’t cut it, not when it’s working 10 to 12 hours a day over corrugations.
“That’s why we went to the big 53mm bore and 45mm bore adjustable shock; the casing is 70mm, rather than a normal 55mm or 60mm for smaller bore shocks… there’s a lot more oil in there so it takes a lot longer to heat up, and there’s a far greater surface area so there’s a bigger area to cool down. If you can keep a shock absorber cooler, it will always perform longer.”
But not everyone is going to drive to Cape York fully laden. That’s why there’s choice in the Tough Dog range. “People driving around town don’t need a 53mm or a 45mm bore shock absorber, but the blokes who are doing those sort of trips, and prolonged trips, do,” John says.
“Consequently, the products that we do [offer] are quite diverse and unique, and we are very aware that the more product that you have, the more sales you’ll make… because you give people more choice.”
With such a big range of product available for so many vehicles, you might think it’d be difficult to select the right suspension set-up for your vehicle, but John says nothing could be further from the truth.
“If you go to our website, we’ve got a suspension kit builder. You can put in exactly what accessories the vehicle has fitted, what load it’s carrying, and it’ll give you the correct part number…
“And, of course, we’re always just a phone call away. People will pick up the phone and say, ‘I’ve got a vehicle and I’m not quite sure what to put on it’, so then we’ve got the expertise behind all that information. We’re always happy to talk suspension with people. We want to make sure customers get the right gear for their needs every time.
“We have a number of key people that are as passionate about the Tough Dog brand as I am. General Manager Simon Vella has been with me for 22 years. Avian Howard and Janelle Vella have been here for 12 years each. There are other key personnel that have all contributed to the brand’s success.
“In the last 12 to 18 months we’ve consciously gone out overseas and done quite a number of shows to try and grow our international business. We currently export to 28 countries and that number is growing.
Despite having been in the industry for almost 30 years, John has no plans to slow down. “I’m 64,” he admits. “I like coming to work. When you started something and you worked so hard to get to where it is today, it’s not about the money anymore…”
And he’s extremely proud of the company that he’s built: “What we’re finding is the level of awareness of our brand is really quite fantastic out there. We’re perceived as being a strong brand and a quality product.” Enough said.
Picture this: You’re out driving by yourself scouting out a new campsite you plan to visit with some friends and family in a couple of weeks. There are a few small rock ledges in your way, but you’ve driven them plenty of times before.
But this time you get the line slightly wrong and you’re high-sided, wheels spinning in the air, with no more forward momentum.
With no-one around it can be a pretty daunting experience, unless you have the most useful tool in the off-roaders arsenal – a winch.
With a basic recovery kit sitting on the back seat and a tree 30m away, a winch turns something that could be a disaster into a five-minute delay.
The downside is that winching places tremendous loads not only on your recovery gear but also on your four-wheel drive. It’s a simple enough process but one that can have deadly consequences.
This month we’re looking at the dos and don’ts of 12V winching, and the fundamentals that will get you home safely.
WINCHING: STEP BY STEP
1. CHECK IT Electronics have a funny way of malfunctioning at exactly the wrong time.
A quality winch install will always include an isolator to minimise the amount of live cables running around your engine bay, so now is the time to grab out the winch controller, turn on the isolator and give your winch a quick spool-out under power to test that it’s working.
There’s nothing worse than setting up for a recovery only to find the winch motor’s seized.
2. ANCHOR POINT From here you will need to select a suitable anchor point. Ideally, choose the largest and healthiest tree you can find.
Keeping the tree trunk protector as low as possible will also help minimise the stresses on the tree.
Side loading a winch can lead to catastrophic failure of the housing, so keep your pull as straight as possible to ensure that the cable or rope doesn’t rub against any hard or rough surfaces.
3. ENGAGE FREE SPOOL With your anchor point secure, engage your winch’s free spool and run out your cable or rope.
Your winch has more pulling power when more rope is off the drum. But never leave any less than one full layer on the winch. There’s a variety of ways you can use hooks and shackles to attach your cable or rope to the tree trunk protector but, as a rule, the fewer metal connectors the better.
If it doesn’t absolutely have to be there, get rid of it.
4. USE A DAMPER Before tensioning the rope or cable, attach at least one damper to the line.
There are two possible hazards: either the cable snaps and acts like a giant whip, or a hook or bow shackle fails.
With that in mind, best practice is to attach a damper in the middle of the line and a second damper as close as possible to any metal components.
If you’re in a bind, then a heavy jumper, a tarp, Driza-bone or a towel will also do the job.
5. CLEAR THE AREA If you find 100 ways to prevent an accident, there will be 100 more you didn’t think of. Things do go wrong, so ensure the immediate area is safe.
Clear a safe zone at least the length of the cable or rope and then run through your winching plan. Double check your connections and straps and plan out exactly what’s going to happen, what can go wrong, how to deal with it, where you need to steer and when you’ll reach a safe point to stop.
6. DISENGAGE SPOOL Disengage your winch’s free spool and take up the slack in the line. Put your 4×4 into low range first gear and begin winching in.
Slowly turning the wheels can help break suction in mud and take some load off the winch. You’ll want to match wheel speed with the winch to share the load, paying attention not to overrun it and tangle the line.
A winch’s internal components aren’t very strong, so winch in a 30 second on-off cycle as smoothly as possible.
7. RELEASE TENSION When you’re back on solid ground and your 4×4 is stable, release any tension off the winch line and begin disconnecting your recovery equipment.
Leave the damper on until last and never step across a winch line even if it’s not under tension. When running the winch line back onto your winch, keep some load on it and guide it onto the drum as neatly and tightly as possible.
A loose or messy winch line allows outer layers to pull through the lower layers of line, becoming tangled and complicating your next recovery.
8. DISCONNECT POWER With the winch line in and secure, disconnect your winch from the battery with your isolator again, and pack any controllers up in an easy to access location.
We recommend leaving it within reach of the driver to save digging through drawers if you’re stuck in mud. When you pack your straps and shackles away, put them in a separate storage bag to isolate them until you can wash them.
Mud and dirt are abrasive and friction can make thousands of microscopic cuts in a strap, so clean gear is vital.
10 RULES FOR SAFE WINCHING
1. Always use as few connections as possible – if you don’t need a shackle, don’t use it. 2. Always winch off a live tree – dead trees can be hollow and have rotten roots. 3. Keep the strap low to the ground – the less leverage on the tree, the less likely you’ll rip it out. 4. More line off the winch means an easier time for your winch motor. 5. Never use a snatch strap as a winch extension strap – it’s not designed for a constant load. 6. Winch lines can become tensioned or snap before you realise – never step over them. 7. Always agree on clear signals between spotter and driver before you begin. 8. Only the spotter talks directly to the driver – everyone else speaks via the spotter. 9. Keep the area clear – snapped cables can be deadly out to their full length. 10. Poorly maintained gear is more dangerous than cheap gear.