A 6×6 based on the Jeep Wrangler was unveiled earlier this month in China.
Pics of this G Patton Tomahawk were displayed at the Chengdu Auto Show, and have since caused quite a stir within the 4×4 fraternity.
Car News China got the scoop and plastered its site with pics of this crazy 6×6.
The Tomahawk, which started its life as a Jeep Wrangler Unlimited, has a modified rear section (behind the C pillar) which comprises of a tray bed and a longer hardtop – the Car News China article indicates that the badges and wheels are poorly aligned.
The drivetrain includes a Jeep 3.6-litre V6 with an added RIPP supercharger, though outputs remain unknown.
It’s also believed that the G Patton Tomahawk will run 17-inch alloys, 35-inch Mickey Thompson tyres, a remote-controlled winch and 50-inch LED light bars.
If, for some strange reason, you like the look of this monstrous-looking, poorly executed machine, bear in mind that the chances of this one-off Chinese-made 6×6 going into production are next to zero. And there will definitely be zero chance of it ever coming to Australia.
That’s probably a good thing, considering there are better 6x6s out there. Check out the custom 6×6 Hellhog Jeep Wrangler or this MDT Southern Scorpion LandCruiser if you need proof.
G Patton is based in Tianjin, China, and it has dealers in Beijing, Shanghai and Chengdu.
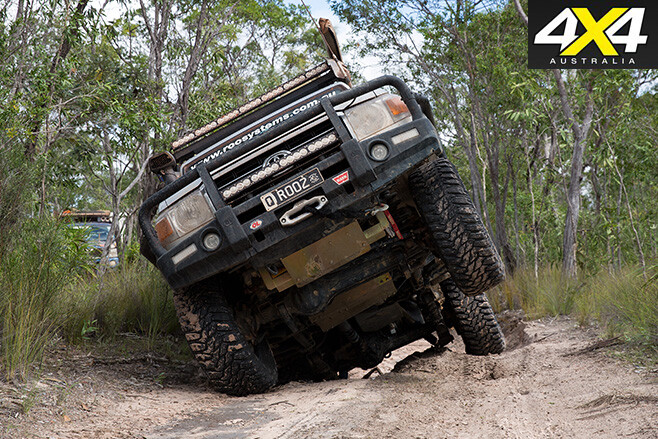
Not much knocks a truck around more than a season of filming hard-core off-road adventures.
In fact, the only thing that might be tougher is 4X4 Australia’s testing procedures, but at least they’re over in a few days; a DVD season could take a dozen weeks or more per year.
Which is why after 16 seasons of DVDs and TV shooting, old Milo was almost ready to chuck in the towel last year. Not so much ‘chuck’ the towel in, as let it drop through one of the holes in the floor.
Yep, she was clanking, rattling, sagging and moaning. We’re talking serious wear-and-tear here; the sort that often hides damage until a crack just opens up one day. I had a crack three years ago that, after a return trip across the Gibb, ran from under the dash, along the floor sill and then finished behind the seat. That might have been bad enough but every time Milo clunked over a cattle grid on the track home, the crack yawned like a shark sizing up a surfboard.
You’d be aware of that if you’ve read the last few issues of 4X4 Australia, because I’ve shown off plenty of the damage along the way. This time I’m showing off the new revised front end, having finally replaced the vital headlight panel with an angle iron frame. You can see in these photos the ‘new’ light panel sitting proudly up the front of the truck. That’s because it’s mounted on four thick bolts with rubber tube sleeves on each side on the panel itself, to let it flex. It’s a new idea for a Toyota – I’m not sure if it’ll work, but it’s worth a try.
Now for a word on my mate Paul Read: Mr. LandCruiser, the secondhand 40-Series parts specialist. Like most of us 40-Series nuts, Paul’s a 40 fanatic. He drives a 40-Series ute, has a yard full of spares, and puts in regular buying trips whenever he finds another paddock full of wrecks. Paul’s a jeweler by trade, and his company Treadz makes beautiful off-road-inspired jewelry (mud-tyre-styled earrings, for example).
You’d think there’d be a gap the size of Ayers Rock between his two trades – wrecking old Tojos by day, carving sophisticated patterns in silver and gold by night – but old Toyotas are addictive no matter what your walk in life.
We’re lucky here in Australia, because thanks to Aussie company Terrain Tamer you can get anything mechanical for an older Toyota (brand new and usually better than stock) for reasonable money.
In fact, Terrain Tamer have their own development programs to improve the parts they sell, something I guess you can do after nearly half a century of supplying vehicle parts.
Terrain Tamer understands Australian outback conditions so well they actually pack vehicle-specific belt and hose kits, so you know you’ll have spares for everything, including the clamps, ready to go if you need them.
All the LowRange vehicles were carrying them, but, predictably, because we had them, we didn’t need them.
That’s kind of the rule of the bush isn’t it? If you’re thinking ahead, chances are it won’t go wrong.
In fact, throughout that whole season, despite some incredible stresses on the vehicles, nothing serious popped on the track – just a few tyres, Milo’s doors, Glen’s egg poacher and a few busted fishing rods.
Now that’s pretty good, and a real tribute to modern vehicles. But remember that both Glen’s 79 and Kenno’s Hilux have been modified to crank out more power. Power is Glen’s business anyway, so you’d expect that with any vehicle he owns, and seeing as Kenno’s truck is invariably towing a camper or caravan, he needs the extra berries to get through, too. In fact, I’d rate towing in hard terrain as the best way to increase the strain on a vehicle.
How can you avoid it? A bit of care and a whole lot of common sense is a start, but that means not keeping to deadlines and shooting schedules. But that would take the fun out of it, hey lads?
Cure the sweet-tooth craving with these delicious camp oven muffins…
Preparation time: 15mins Cooking time: 25-45 mins, depending on heat of coals
Ingredients
4 tbsp butter melted 1 cup caster sugar 1 egg, beaten 1 cup milk 1 cup fresh blueberries (frozen work well, too) 2 cups plain flour 2 tsp baking powder Pinch of salt Fresh cream, to serve
Cooking it
• Start a fire and have some coals ready. • Reheat camp oven so it’s hot when you add the muffin mix. • You need a small camp oven – or use a cake pan, ovenproof dish or highsided enamel dish that fits inside your camp oven. (If you use a large camp oven or baking dish you’ll have a pancake, not a muffin!) • Line your camp oven (or baking dish) with baking paper all the way up the sides of the oven, to prevent the sides from burning. • Sift the flour, baking powder and salt into a bowl and set aside. • In a separate bowl, sprinkle the blueberries with about 1 tbsp of plain flour and mix gently to coat and set aside. This will stop the berries sinking to the bottom of the batter. • In another large basin, mix the butter and sugar together until it has turned slightly creamy. • Add the egg and milk then stir until everything is well combined. • Add the sifted flour, baking powder and salt to the wet ingredient mix. Gently fold and mix until it all comes together. Don’t over-mix or you’ll have a heavy muffin. Treat it like scone dough. • Add the floured berries and fold them through gently so they are evenly spread throughout the batter. • Spoon this batter into your prepared camp oven or baking dish. • If using a baking dish, place it on a trivet inside the camp oven. • Put the lid on the camp oven and then place the oven on a bed of coals over a medium heat for about 25-30 minutes. Add some coals on the lid.

Viv’s hints
Cooking time will depend on the heat generated from the coals. When baking this muffin I had to replace the coals three times before the muffin was properly cooked.
The muffin turned out great; in fact, I’d say the slower cooking worked well. And while the sides of the camp oven looked burnt, the muffin, while well-browned on the outside, wasn’t burnt.
If you cook it too fast, all you’ll get is a burnt muffin on the outside and uncooked batter on the inside. Interestingly, taking the lid off a few times to check didn’t seem to affect how the muffin cooked – it still rose nicely, with a good texture.
The muffin is ready when the top is firm to touch and it’s cooked through – find out by inserting a skewer or knife in the middle – if it comes out clean, it’s cooked.
When cooked, remove from the camp oven (or baking dish) and let the muffin cool a little before serving with a dollop of cream. It was still good the next day for morning tea.
Don’t use canned blueberries, as they are way too moist. The original recipe – which I came across while in South Africa – said to mix the muffin in a potjie (camp oven). But having baked it, I think it would be much better to make as I have here.
An engine basically needs five ingredients to run correctly – air and fuel to burn, compression to prepare the mixture for ignition, spark to ignite the air/fuel mixture and the correct timing to make sure it all happens at the right time.
So when it comes to diagnosing a problem, the first step is to find out which ingredient is missing.
Checking for fuel
You’ll want to ensure fuel is getting from the fuel tank to the engine. So try disconnecting the main fuel line after the fuel pump, either from the carburettor or injector rail inlet, and crank the engine over to see if any fuel comes out. Do not attempt this if you own a commonrail diesel engine as the fuel system operates under mind-blowing pressure – in excess of 20,000psi – and can be extremely dangerous if you’re not familiar with these systems.
The most common causes of failed fuel flow are a blocked fuel filter or a failed fuel pump, but don’t forget the simple things like simply running out of fuel (maybe a leaky fuel tank), or the fuel pump being unable to pick up fuel while you’re on a steep hill.
If you’ve just filled the tank, grab a sample of the fuel in a clear container and check it’s not stale or contaminated with water.
Bright spark
Next, check you’ve got spark. The most common spark-related problems in the bush are usually getting water in the distributor, having loose wiring to the coil or having fouled or worn spark plugs.
To check for spark, you’ll need insulated holding tools to avoid an electrical shock. Remove the spark plugs, and check for a bright blue spark jumping from the end of the hightension lead held close to each spark plug cap terminal as you crank the engine. A weak spark is often yellow.
Air intake
Your engine needs plenty of clean air to run properly, so make sure the air intake system is clean and free from any debris. Pay particular attention to any sticks or twigs that may have clogged up your snorkel, and make sure the air filter isn’t blocked or soaking wet.
The easiest way to check if this is the problem is to remove the air intake tube from the carburettor or throttle body and see if it makes any difference.
3 Common diesel engine dramas
1. Air in the fuel system One problem that can stop a diesel in its tracks is getting air in the fuel delivery system. In this case you’ll need to bleed the system for air, but it’s worth trying to figure out how it got in there in the first place. A faulty fuel filter seal, damaged fuel hose or loose injector are the most common suspects.
2. Fuel cut-off solenoid To turn your diesel engine off, a fuel cut-off solenoid basically cuts the fuel supply to stall the engine. So, if you don’t have fuel getting to the injectors, check that this solenoid has power when the ignition is on and the solenoid is open. Also check that the wiring is not damaged or that the vacuum lines are in good condition if it’s vacuum operated.
3. Slow starts and glow plugs Glow plugs are used to preheat the combustion chamber before you try starting the engine. If they’re faulty, it makes it very hard for the engine to start when cold. So check the glowplug fuse is okay and there’s power getting to the glow plugs.
For most Australians, driving in snow and ice is a bit of a novelty.
After all, it’s only really in the Alpine regions of NSW and Victoria, or down in Tassie, that we occasionally have the opportunity to brush up on our winterdriving skills.
The first time I experienced harsh winter conditions was in South Korea in 1985. There was so much ice on the roads that my mate and I could barely walk down the street to grab a bottle of Soju without falling arse-over.
Driving was an altogether different challenge, with thousands of cars, buses and trucks scrabbling for traction every time they turned off one of the main roads and attempted to tackle a frozen back street. But Koreans are used to harsh winters and their cars are equipped with studded winter tyres that are (mostly) able to gain purchase on ice.
I’ve since driven in several European and North American winters but would hardly call myself a snow-driving expert, which is why I exhibited extreme caution when the white stuff started falling out of the sky on a recent trip down to the NSW ski fields.
On the way to the ski fields the roads offered plenty of traction, but it was a very different story on the return journey. There was no visible snow on the road, but the temperature had dropped markedly and there was soon a distinct possibility of black ice forming.
As I rounded a gentle left-hand bend I noticed a 100 Series Land Cruiser on the opposite shoulder with hazard lights ablaze. Further around the bend, off the left side of the road, was a Ford Mondeo in a ditch. Fortunately we just missed all the action – and the occupants of the Mondeo were only shaken, not stirred. After checking everyone was okay I headed down to the next bend to alert oncoming traffic of the hazard ahead. Initially drivers were heading up the hill at a pace suggesting they were keen to go off-piste but as the snowfall became heavier, everyone settled down to a more sensible crawl.
We eventually continued on our way and saw countless cars pulled over with their occupants hastily fitting snow chains. I’ve had to do this myself in the past and it’s not a task I relish, so I was glad to have the security only a four-wheel drive can provide in such conditions, as well as decent tyres and a somewhat mature attitude.
The whole episode reminded me of a trip to the snow when I was still in my teens. I was with a few mates and we were heading to Perisher in my old Subaru. I’d proudly engaged four-wheel drive and gloated to my mates about not having to fit snow chains. Soon the snow was getting quite deep so I did pull over and fit the chains, but I was still feeling the confidence that only inexperience and bravado can build.
Never one to miss the opportunity for a piss-take, my mate Steve (aka Molar) goaded me off the edge of the blacktop: “Go on Deano, show us what she’s got!” Of course, what looked like a level shoulder was a deep ditch buried in snow, and over we went. While there was no damage to the Suby, my teenage pride was seriously dented. We eventually flagged down a bloke in a Land Cruiser who dragged the Suby back onto the road, and I’ve never had an incident in snow or ice since (touch wood).
Anyway, back to my latest snow trip. We copped a pretty significant amount of snow overnight and it was an effort to just unlock the doors of my Navara the following morning, let alone open them. The canopy glass was frozen to the tailgate and I’d neglected to lift the wiper blades the night before, so they were frozen to the windscreen, hidden beneath big chunks of ice.
After about 20 minutes of de-icing, I headed off for a play in the snow, driving up familiar tracks that couldn’t be seen for the snow that covered them. I had a ball (it was my birthday, after all) but we had to get going and I knew it’d be a long, slow trip on icy roads before we’d get home back on the coast.
Sure enough, we saw a couple of minor incidents on the way home, but to my surprise most of the drivers we witnessed were sensible, cautious and courteous.
Despite our relative lack of winterdriving skills, I reckon most Australian motorists do a pretty good job of dealing with snow- and ice-covered roads.
When it comes to touring this grand country of ours, the Top End is one of my all-time favourite places to visit.
Think of it like this: a warm tropical climate, untouched wilderness, unreal fishing, tons of wildlife and thousands of kilometres of tracks all meshed together to make one epic off-road adventure.
I’ve been up that way numerous times thinking I’d get the bug out of my system, but to tell you the truth it’s like scratching a mozzie bite – the harder you scratch, the itchier it gets! The thirst for a wicked off-road adventure just gets crazier and crazier until it basically takes an allout assault for it to be satisfied – for a while.
This time around I’ve opted to bring along the quad bike to make things a little bit more interesting, but in order to do that the old camper trailer had to undergo a few major modifications. In fact, it’s a completely different set-up than it was only a few months ago. So let’s check it out!
WHY A ROOF TOPPER?
Originally, this trailer was a custom-built soft-floor camper. However, bringing the quad bike along for the ride meant it would need the entire trailer tub. With plenty of snapping handbags up north, I’m not real keen on swagging or tenting, so the old soft-floor tent got the flick, along with the slide-out kitchen and internal water tank – and the roof topper got a new home.
The good things about roof-top tents are their light weight, that they get you up nice and high, and it doesn’t really matter if the ground is rocky or muddy.
So I built a frame out of box tube for the tent to sit above the bike. The only problem was I’m not a contortionist, and to load the quad bike up and under the tent proved a bit of a problem. The fix was actually quite simple: build a tilting frame. Using a 50x50x1.5mm square tube, I made a second frame on top of the other that articulates on a few heavy-duty bullet-style hinges. It’s latched down with four over-centre latches and uses two 800mm struts to help open up the frame. Now I simply tilt up the frame and load on the bike.
SPARE HUB & BEARINGS
One of the bare basic spares to carry for any trailer is spare wheel bearings; a complete spare hub is even better. I’ve been caught out once when the bearing seized and the wheel flew off down the side of a mountain as it tore the stub axle in half – I never saw the wheel or hub again!
So this time around I opted to get rid of the old spare wheel mount and replace it with a 45mm stub axle. This has allowed me to install a complete spare hub with brand new bearings, all greased up and ready to go. Plus the wheel bolts straight to it, so you’ve also got spare wheel nuts and studs. How’s that for thinking outside the box?
SUSPENSION TALK
Naturally, changing the trailer’s set-up impacts the overall weight, which means the suspension handles the load differently. This trailer has been set up with 60-series LandCruiser leaf springs, which are tough as teak but can be pretty damn rough if you don’t get the spring rates right. So once everything was built, I loaded it all up and took the camper down to the public weighbridge before deciding what to do with the springs. The springs have had a leaf removed to soften them up a bit, and I’ve gone with a decent set of shocks as well, for a more cushioned ride. I can tell you right now, you’d think it was coil sprung by the way they soak up the bumps.
Apart from that, I have also built a custom set of super-heavy-duty leaf spring mounting plates (6mm plate). It’s a bit of overkill, but who’s complaining? I’ve mounted a spare leaf to the front of the trailer as well. Usually you can get away with just replacing the one main leaf if things do end up going down the gurgler.
EXTERNAL PROTECTION
It’s often the little things that make a big difference when you’re travelling over harsh and remote terrain. One thing I’ve learnt first-hand is to put a bit of rubber between your jerry can and the jerry can holder to stop the metal rubbing a hole through the plastic. If you’ve got the open-style holder that leaves the front of the jerry can exposed to rocks, it’s also a good idea to place a strip of rubber or Corflute in front to help keep it protected.
The other thing I’ve done is fit a full-length drawbar stoneguard from Adventure Campers. The main advantage of this design is it doesn’t restrict access to the back of your 4WD, and it doesn’t flick stones at your back window like traditional stoneguards can.
TYRE REPAIR KIT
Now I know what you’re thinking – everybody needs a tyre repair kit, and that’s 100 per cent true! However, there are a few little extras that aren’t always in your kit but are worth their weight in gold. Spare valves are essential, especially if your tyre deflator is the type that removes the valve to drop your tyre pressure – I’ve lost count of the number of times I’ve lost the valves altogether. The second thing is a valve removing tool. Keep a few of them around your truck as you never know when a valve will need to be nipped up.
Also, keep a few valve rubbers handy, as they are prone to fatigue. Last but not least is a spare tube. I’ve kept a spare tyre tube in the back for years. In fact, a lot of the time it saves me from carrying a second spare. Plus, when you rock up to a swimming hole, there’s nothing better than pumping up the tube and floating downstream on it!
FIRST POINT OF CONTACT
One of the first things to get damaged on a camper trailer is the jockey wheel and auxiliary plug. In fact, my jockey wheel copped a beating the first trip it went on. So instead of sticking with the swing-away option, I’ve opted for a removable one.
I’ve also remounted the auxiliary plug up nice and high on the rear bar so it’s not the first point of contact.
BUDGET WATER TANK
With no water tank in the Troopy or camper, I was trying to figure out a super-easy way to carry water and keep it accessible. I ended up mounting an everyday plastic jerry can up on top of the Troopy’s drawer system. I then attached a plastic hose to the tap fitting, and ran it out to the back. There’s a tap fitting at the end, and it clips up nice and high. Not bad for a $30 water tank, eh?
HANDIER THAN WHAT YOU THINK Over the years I’ve come across a few unexpected items that are dead-set worth their weight in gold. I like to go by the old backpackers’ rule: only pack things that serve multiple purposes. So here are a few items out of left field that could be worth throwing in your box of tricks:
TARP ON First up is the humble tarp. It’s dead-set got a million uses out in the bush, from serving as a groundsheet under your camper at camp (or while you’re getting into a trackside repair) to a makeshift water bra and even an emergency shelter.
WATER DISPERSANT
Next up is a can of water dispersant, like WD-40. A few thousands kays of dusty tracks can take a real toll on a 4WD, so I like to give the door locks and hinges on the 4WD and camper a quick spray every week or so. The awning and tent zippers love a good spray to keep them from jamming up and, if you’ve drowned your petrol engine, it’s great for drying out the ignition distributor, as well.
THIS chilli beef dish won’t be setting any heat records on the Scoville scale, but it’ll have just enough oomph for those who like a bit of kick in their tucker.
Plus it’s simple and won’t take too long from go-to-whoa.
Not keen on chilli beef? Here are a few more recipes that might better suit your taste buds: Kraut dogs, mango chicken, or apple spring rolls.
Fry up some onion and garlic (the more the better) in a saucepan and give it a good stir.
Remove the beef from the Shuttle Chef and plonk it in the saucepan, constantly stirring to prevent the ingredients from sticking to the bottom of the pan.
Flip a bottle of oyster sauce over and empty a good portion into the pan.
Then it’s just a matter of stirring through until the beef browns and onion turns a nice golden colour – which won’t take long if you’ve got a Gladiator Stove.
Now it’s time to add the main ingredient: chilli.
Personal preference dictates how much and what type of chilli to put in. Roothy has gone the kid-friendly route and only used the mild stuff.
Next add a can of diced tomato and a dollop of tomato paste to add some texture and enhance the flavour.
Throw in some pre-prepared spuds – don’t skin them, as that’s where all the nutrients live.
This dish also provides the perfect opportunity to clean out all of the unused vegies sitting in your Engel. For Roothy, that meant beans and snow peas.
Dribble in about a tablespoon of honey to add some sweetness, add a few chilli flakes and bung in some Vegeta.
Leave it on the Gladiator until it’s cooked through. That’s all there is to it.
A simple, hearty meal – nothing beats tender-cooked beef when out bush!
EARLIER this month Jaguar Land Rover released the first official photos of its fifth-generation Discovery, due for a mid-2017 local launch.
This has been followed up with a teaser video, which provides the best footage so far of the new Discovery in action.
The drip-feed strategy seems to be working, with anticipation building for the less-boxy-shaped Discovery’s Paris Motor Show reveal next month.
JLR claimed the gruelling development process of the fifth-gen Discovery involved 35,000 individual component tests, 294 development vehicles and 20 countries.
According to the press release that accompanied the video, “Land Rover’s global engineering team subjected the vehicle to extreme climates and terrains in over 20 countries.
“Sand driving in plus-40°C heat in the dunes of Dubai, altitude testing in the Colorado mountains, and ice-driving in the sub-zero temperatures of Arjeplog, Sweden, were all part of the 28-month schedule.”
It continued: “The new model is the first Land Rover to undergo a full programme of virtual testing prior to the physical testing process, delivering robust quality and durability before any prototypes are built.”
The fifth-gen Disco, replacing 2009-2016 versions, will retain the petrol- and diesel-powered drivetrains. However, the new Discovery will also adopt the four-cylinder diesel from JLR’s new Ingenium range.
A petrol-powered drivetrain is yet to be confirmed for Australia.
Pricing is yet to be released, but expect the new Discovery to start from around $70K.
We tend to focus on squeezing more power from our engines, but many forget the exhaust can also be restricting performance.
Take the 4.5-litre TDV8 in the Troopcarrier (70 and 200 Series). The standard exhaust system is too small in diameter – though many go overboard with huge dump pipes and exhausts that mainly create noise but don’t help those who tour and tow with their 4x4s.
The system we’ve fitted to this Troopy doesn’t exceed noise limits but it sounds beaut. I love the sound of a rumbling V8 and that was a drawcard – until I heard how dull the stocker is. That was easily fixed via a trip to Taipan XP in Queensland for one of its three-inch aluminised steel (304-grade stainless is available) mandrelbent systems, complete with Vortex sports muffler, resonator and ceramic dump pipe.
The V8 throb from the pipe isn’t harsh or loud and doesn’t sound like a sick dog barking. The sports muffler we chose is a little louder than the standard Taipan offering but after 4500km, I’ve not had a single noise complaint from my wife.
Taipan includes a ceramic-coated dump pipe with the system, which is effectively a slippery surface to help heat and air escape faster. It also has a threaded plug to accept a pyro gauge, to keep track of engine temps. The ceramic coating prevents heat coming up into the floor at the passenger’s feet.
The Taipan system follows the original route, albeit tucked higher above the chassis rails. Notably, the tailpipe also exits higher than standard to improve departure angles and prevent scrapes, and a vortex muffler speeds up the gases to aid the free-flowing characteristics and reduce exhaust gas temperatures.
A dedicated diesel-specific 200-cell catalytic converter offers improved emissions control. The converter is higher quality than stock and maintains legality – any vehicle from a factory must still have a cat installed after a replacement exhaust system is fitted.
The 409 stainless steel flex smooths out vibrations from the engine to the exhaust system, thus reducing the likelihood of cracking and damaging other fixing components. Notably, all flange plates of the Taipan system are 10mm thick to prevent warping. The lads also change the OE exhaust mounting rubbers during fitting – even though this Troopy only had about 20,000km on it, they were already compressed and deformed from their original shape.
An important inclusion is a small tailpipe resonator, which helps get rid of the offensive barking noises heard on some systems when stabbing the go-pedal.
Having driven the Troopy with the Taipan exhaust for a couple of months, I can feel it is freer flowing – it revs out faster and easier and maintains torque, meaning the back pressure has been maintained – something an overly large or free-flowing system will lose out on, unless other modifications are made.
Speaking of modifications, while most engine management modules increase exhaust gas temperatures, this freeflowing exhaust system helps avoid those same potentially engine-damaging heat increases. So it’s a win-win fitment of two products to safely increase the all-round power output.
The complete system is made in Queensland and is offered in DIY kit form.
It offers excellent quality, increased offroad clearance and it returns an awesome note – I haven’t listened to my Troopie’s stereo in weeks.
RATED Available from: www.taipanxp.com.au RRP: Model dependent. We say: Awesome note; performance hike; improved ground clearance; Aussie-made.
THE live axle is the unquestionable off-road king.
It was in first place for decades before second place was even thought of and it earned that position due to its uncompromising strength, ease of maintenance and superior off-road ability. For some, they’re the defining factors for what makes a real 4×4.
Despite all this they’ve been dropping like flies from new car lineups.
If you’re in the market for a brand new 4×4 with a live axle up front, your choices are limited. The LandCruiser 70, Jeep Wrangler, GU Patrol and Land Rover Defender are the only factory options and they’ve stopped making both the Nissan and Land Rover, leaving buyers with even fewer choices.
Enter the live-axle swap. Previously the home of the competition truck crowd, live-axle swaps are gaining in popularity among newer vehicles, picking up where the factories dropped the ball. The idea is simple: get the 4×4 you know and love with all its modern reliability, then lose the independent front end and replace it with a live-axle to give you the best of both worlds.
But what’s involved in the process, how does it perform, how legal is it and how much is it going to hurt the back pocket? We’ve teamed up with Steve Etcell from Automotive Etcellence and Bud Dryden from Bud’s Customs to bring you everything you need to know.
THE BASICS THE introduction of independent front suspension in 4x4s was seen as a step forward by the road-going crowd and a giant leap backwards by remote-area travellers. While IFS drastically improved ride and handling it came at the cost of complexity, with the unintended side effect of less off-road ability due to lifted wheels. When one wheel is lifted on a live axle the weight of the 4×4 physically pushes the opposite wheel into the ground allowing it to continue gripping, whereas an IFS set-up will leave one wheel dangling – even if articulation is similar.
A live-axle conversion aims to fix both of these issues by physically replacing the complicated IFS set-up with a much simpler and stronger live axle.
The process in theory is simple: the vehicle is put on a hoist, the original suspension removed and the chassis rails ground clean. From here it’s as simple as either mounting leaf springs or a link and coil arrangement, depending on your goals. That’s the theory anyway, but as with most things in life the theory rarely touches on all aspects.
“Live-axle swaps involve precision bracketry, excellent welding and an in-depth understanding of the forces involved on individual components,” Steve stated. “The tricky bit is to sort out the steering and suspension geometry, as well as spring weights, so your vehicle doesn’t ride like a pig,” Buddy added.
While a leaf-spring conversion on older vehicles is essentially a paint-by-numbers affair, coil spring and link arrangements require painful fine tuning and a deep understanding of suspension geometry. If you’re performing the conversion yourself, a fine-tuned kit from an established supplier can reduce a lot of potential issues and be purchased for around $10,000. If you’re leaving it in the hands of the pros it can cost up to $20,000, depending on the upgrades chosen.
WHAT’S IN A NAME BEAM axles, live axles and solid axles are basically the same thing. The term live axle stems from the entire axle moving throughout the range of suspension travel.
Solid axle is in reference to the lack of control arms or additional components – the whole thing is more or less one solid chunk of steel. The term beam axle is because, well, they look like a beam.
OFF-ROAD ABILITY THERE’S a common misconception that lockers are a viable alternative to articulation. While both can achieve the goal of increased off-road ability, they each go about it in very different ways.
In fact, neither can reach their full potential without the other. Forward progression when off-road is most often halted by a loss of traction. Tyres can be to blame for this, but an unlocked axle sending drive to a lifted wheel is often the reason – a curse of an independent design. A locker will send equal drive to both wheels, allowing the wheel firmly on the ground to drive.
A suspension system with increased articulation can get around the same problem by keeping tyres on the ground longer. With both tyres planted firmly into the track there’s twice as much grip available. Steve raised the additional point of stability: “Lockers are great, but a wheel off the ground when in a big rut or rock step has to eventually come back down. This increases the risk of damage, loss of control and potentially having to push harder than the vehicle can or was built to.”
In an ideal world a vehicle would have both axles locked and a large, equal amount of articulation at both ends to ensure maximum grip and stability in every off-road situation. For most off-roaders, the ability of twin lockers and modern traction aids may be more than enough for their use.
For those pushing the capability of their vehicle, the increased articulation and physically stronger live axle can be an invaluable upgrade.
UPGRADE OPTIONS A LIVE-AXLE conversion is easily one of the most extreme modifications you can carry out on your 4×4, so it makes sense to do it right from the beginning.
Start with a clean slate – a disassembled (if not completely new) front axle and no existing mounts to conform to. This means that the only restrictions are your imagination and budget.
Steve and Bud both gave their insights into the upgrade paths often taken by their customers. “Generally, when a customer begins the process the main question we ask is what will you be using the vehicle for,” Steve told us. “The answer to that dictates the build. If it’s going to be used as a rock crawler rather than touring we’ll recommend a 3link [two lower links, one upper and a Panhard rod] with Johnny Joint rod ends, longtravel coil-overs and small, hard bumpstops.
If the vehicle is a remote tourer we’ll suggest a radius arm set-up with a spring and shock combo similar to a GU Patrol, as replacement parts are easier to source in the middle of nowhere.”
Bud added: “The conversion itself generally uses a front axle that is fabricated or simply taken from another vehicle. Invariably this results in mismatched diff ratios. If new diff gears are required there’s never a better time to fit a locker as it can be done at the same time for very little cost.”
Bud’s Customs favours coil-overs for their increased ride and suspension travel, but they’re often teamed up with a matching link and coil-over arrangement in the rear to further improve off-road ability and comfort – although, this can be done at a later date.
REAL-WORLD EXPERIENCES IT’S ALL well and good to throw money and parts at a 4×4, but it’s the results that matter. Recent improvements in shock and spring technology, combined with adjustable suspension links and tuneable sway-bars, means that ride and handling can be improved while suspension articulation can be dialled in to suit the driver’s needs perfectly.
Of course, this all pales in comparison to real-world experience, so we’ve enlisted the help of two owners of late-model, live axleconverted 4x4s to give their opinions. Ray Pisani is the owner of the pristine white Hilux on these pages, while Jarad Roberts is the owner of the tough-as-nails Triton featured in our July 2016 issue (page 64).
RAY PISANI “The first set-up was radius arms, and that handled just as good as IFS considering it was three inches taller on 35s. Seldom Seen Engineering did a good job setting it up as an all-round 4×4 as if it was done by Toyota. After a year or two I wanted more travel and that’s when Automotive Etcellence 3-linked the front. It’s a bit looser on-road but still drives well.
Off-road it flexes through the biggest ruts and sits so flat, a lot smoother than the radius arm set-up. If it was a dedicated tourer I’d run radius arms, but at the moment I’m having fun tackling the hard tracks and the 3link is perfect for that.”
JARAD ROBERTS “It’s a softer ride all around, but it does have a bit of body roll. The steering is a little heavier than it was originally, too. The front has a heavy spring rate, which helps keep it nice and stiff.
“Off-road it definitely shines. People get caught up with flex being the be all and end all, but having the strength in the front diff is the biggest advantage for me. I can run 37s and never worry about breakages, whereas with the IFS and 35s I was always snapping CV joints, even nursing it with custom-made, heavy-duty units.”
AVOID THE JUNKYARD THERE’S no skirting around the fact that a substantial reimagining of a 4×4’s suspension system isn’t exactly a cheap project. New springs and shocks, new suspension arms and new mounting points, so it’d be a borderline tragedy to then bolt a 30-year-old axle right in between it all. Thankfully the aftermarket is filled with brand new replacements from here or abroad.
If you’re aiming to keep your dollars in Australia, Bud’s Customs in Queensland and JMW Engineering in NSW both offer replacement fabricated housings. They’re built to order so can be made to spec for your application.
They can then be optioned up with other new components such as swivel hubs, spindles and diff centres. They’re often based on either Nissan Patrol or Toyota LandCruiser axles, making sourcing spare parts a simple exercise.
Alternatively, if you’re chasing a crate package, there are options available from the United States for complete units built to your spec from Dana-based axles. Dynatrac, Currie Enterprises and even Dana offer hub-to-hub axles with your choice of diff ratios, lockers, axles and armour. Off-the-shelf packages are available to run just about any wheel and tyre combination without the stress of component failure, although the price tag can be almost as high as the conversion itself.
SAFETY CONSIDERATIONS MODERN vehicles are appealing due to driver aids such as ABS, traction control, hill descent control and vehicle stability control. Despite their naysayers, these systems can make a 4×4 safer on- and off-road, and considerably more capable. Removing or bypassing these systems will make your 4×4 illegal, not to mention worse in almost every situation.
To get around this, workshops have gone to considerable lengths to retrofit newer safety systems to live axles. “A simple, reasonably priced conversion kit is available to restore ABS functionality to an LC80 axle when fi tted to late-model vehicles,” Bud said. “But this kit cannot be used in later vehicles with active ABS sensors that are also used for the stability control and traction control systems. We’ve recently developed a solution and have one on the road in an FJ Cruiser. We believe it’s a world first, which should also work in LC200s.”
LEGALLY SPEAKING DUE to our over-reaching and overcomplicated road laws, vehicles undergoing modifications like these must be certified differently depending on the state they’re being registered in.
This can cause some issues transferring vehicles between states, but it’s something that can be achieved.
While the paperwork and certification will be different in each state, the vehicle testing will be universal.
We spoke to Robert Elliot from VMC Engineering, who specialises in certifying extensive vehicle modifications, to find out the exact process to follow.
“People should always call a local engineer before they get started,” he said. “I’ve been to a few places and they’ve pretty much had to cut everything off and start again because they’ve got it slightly wrong.
“I’ll work with the owner as closely as they need me to, coming out after all existing brackets are cut off and guide them through where and how to make new mounts. Then I’ll come back once it’s all tacked in to check nothing will foul, the geometry is right and important components like sway bars are allowed for. When it’s all welded together we’ll road test it, then take it to a track for a day for a brake test and swerve test.”
The process generally costs around $2500-$3000, depending on how involved the engineer needs to be throughout.
However, it’s a vital component to ensure the vehicle is legal and safely built.
CONTACTS Automotive Etcellence W: www.autoetcellence.com.au Ph: (02) 8834 9711 Bud’s Customs W: www.budscustoms.com.au Ph: (07) 3133 1660 VMC Engineering W: www.vmcengineering.com Ph: 0403 328 574