- The Frenchmans Track is 179km long from Archer River Roadhouse to Moreton Telegraph Station
- There is fuel at the Archer River Roadhouse and Bramwell Junction RoadhouseThe best time to travel is May to October
- There is camping at the Archer River Roadhouse and Moreton Telegraph Station
- For navigation grab the Hema Cape York Atlas and Guide, and Hema Cape York Map
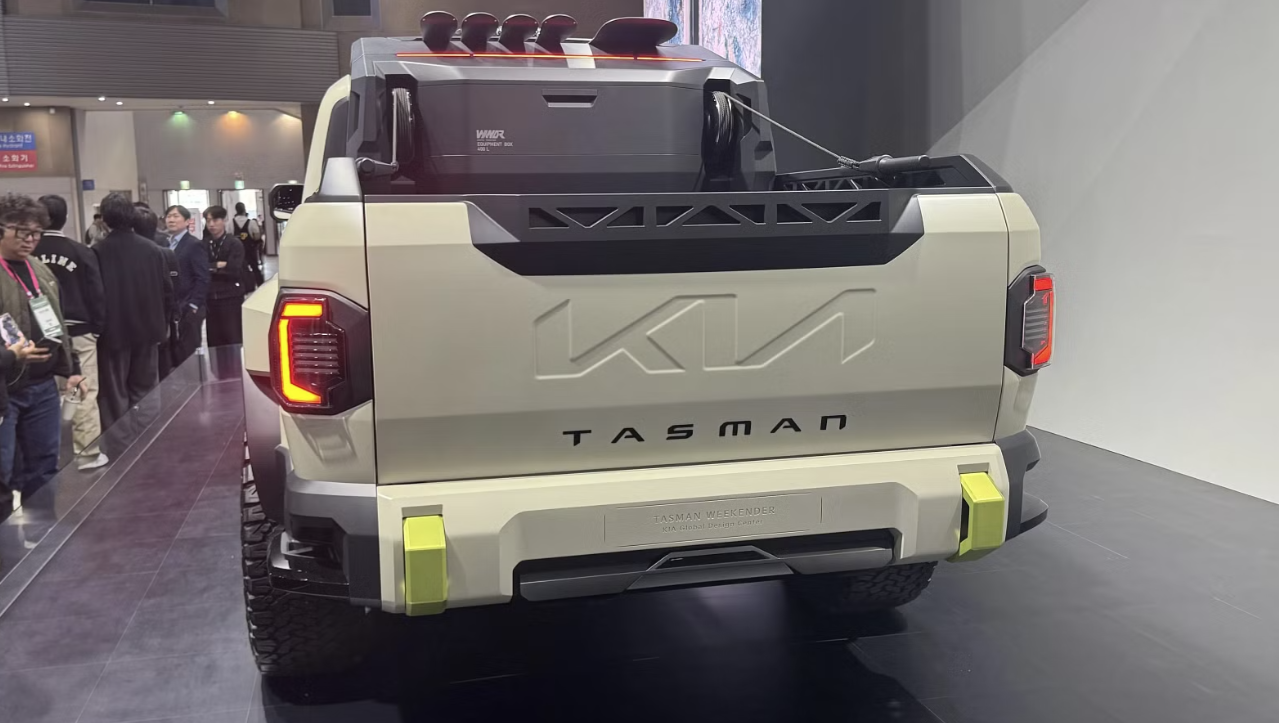
Kia has showcased a hardcore version of its Tasman dual-cab ute, dubbed the Weekender concept.
On display at the 2025 Seoul Motor Show, the rugged concept is shown wearing a Sandy Taupe-inspired beige colour scheme. While just a concept at this stage, this could indicate Kia’s desire to launch a hero variant akin to Ford’s Ranger Raptor in the future. However, that’s just speculation at this stage.
The concept is shown equipped with body-coloured wheel-arch flares, BFGoodrich all-terrain tyres, a new-look bonnet, enlarged front and rear bumpers, an integrated winch, and neon green style elements on the tow hooks, wheel-arches and rear bumper. Plus, a snowboard and set of skis can be found atop the large roof rack and sail-plane combo.
Kia has not released detailed specs of the rugged off-roader.
4
The regular Kia Tasman is slated to arrive in Australia later this year. It will be available with a 154kW/441Nm 2.2-litre diesel engine, paired with an eight-speed automatic transmission.
It will be offered in three trims: Baseline, X-Line, and X-Pro. The X-Pro variant is geared for off-road use with higher ground clearance, an electronic locking differential, and various terrain modes. The vehicle will also feature advanced suspension for improved body control and an 800mm wading depth.
Local pricing has not been confirmed – however, pricing revealed in South Korea indicates the Tasman could cost in the vicinity of AU$60K to AU$65K for the top model.
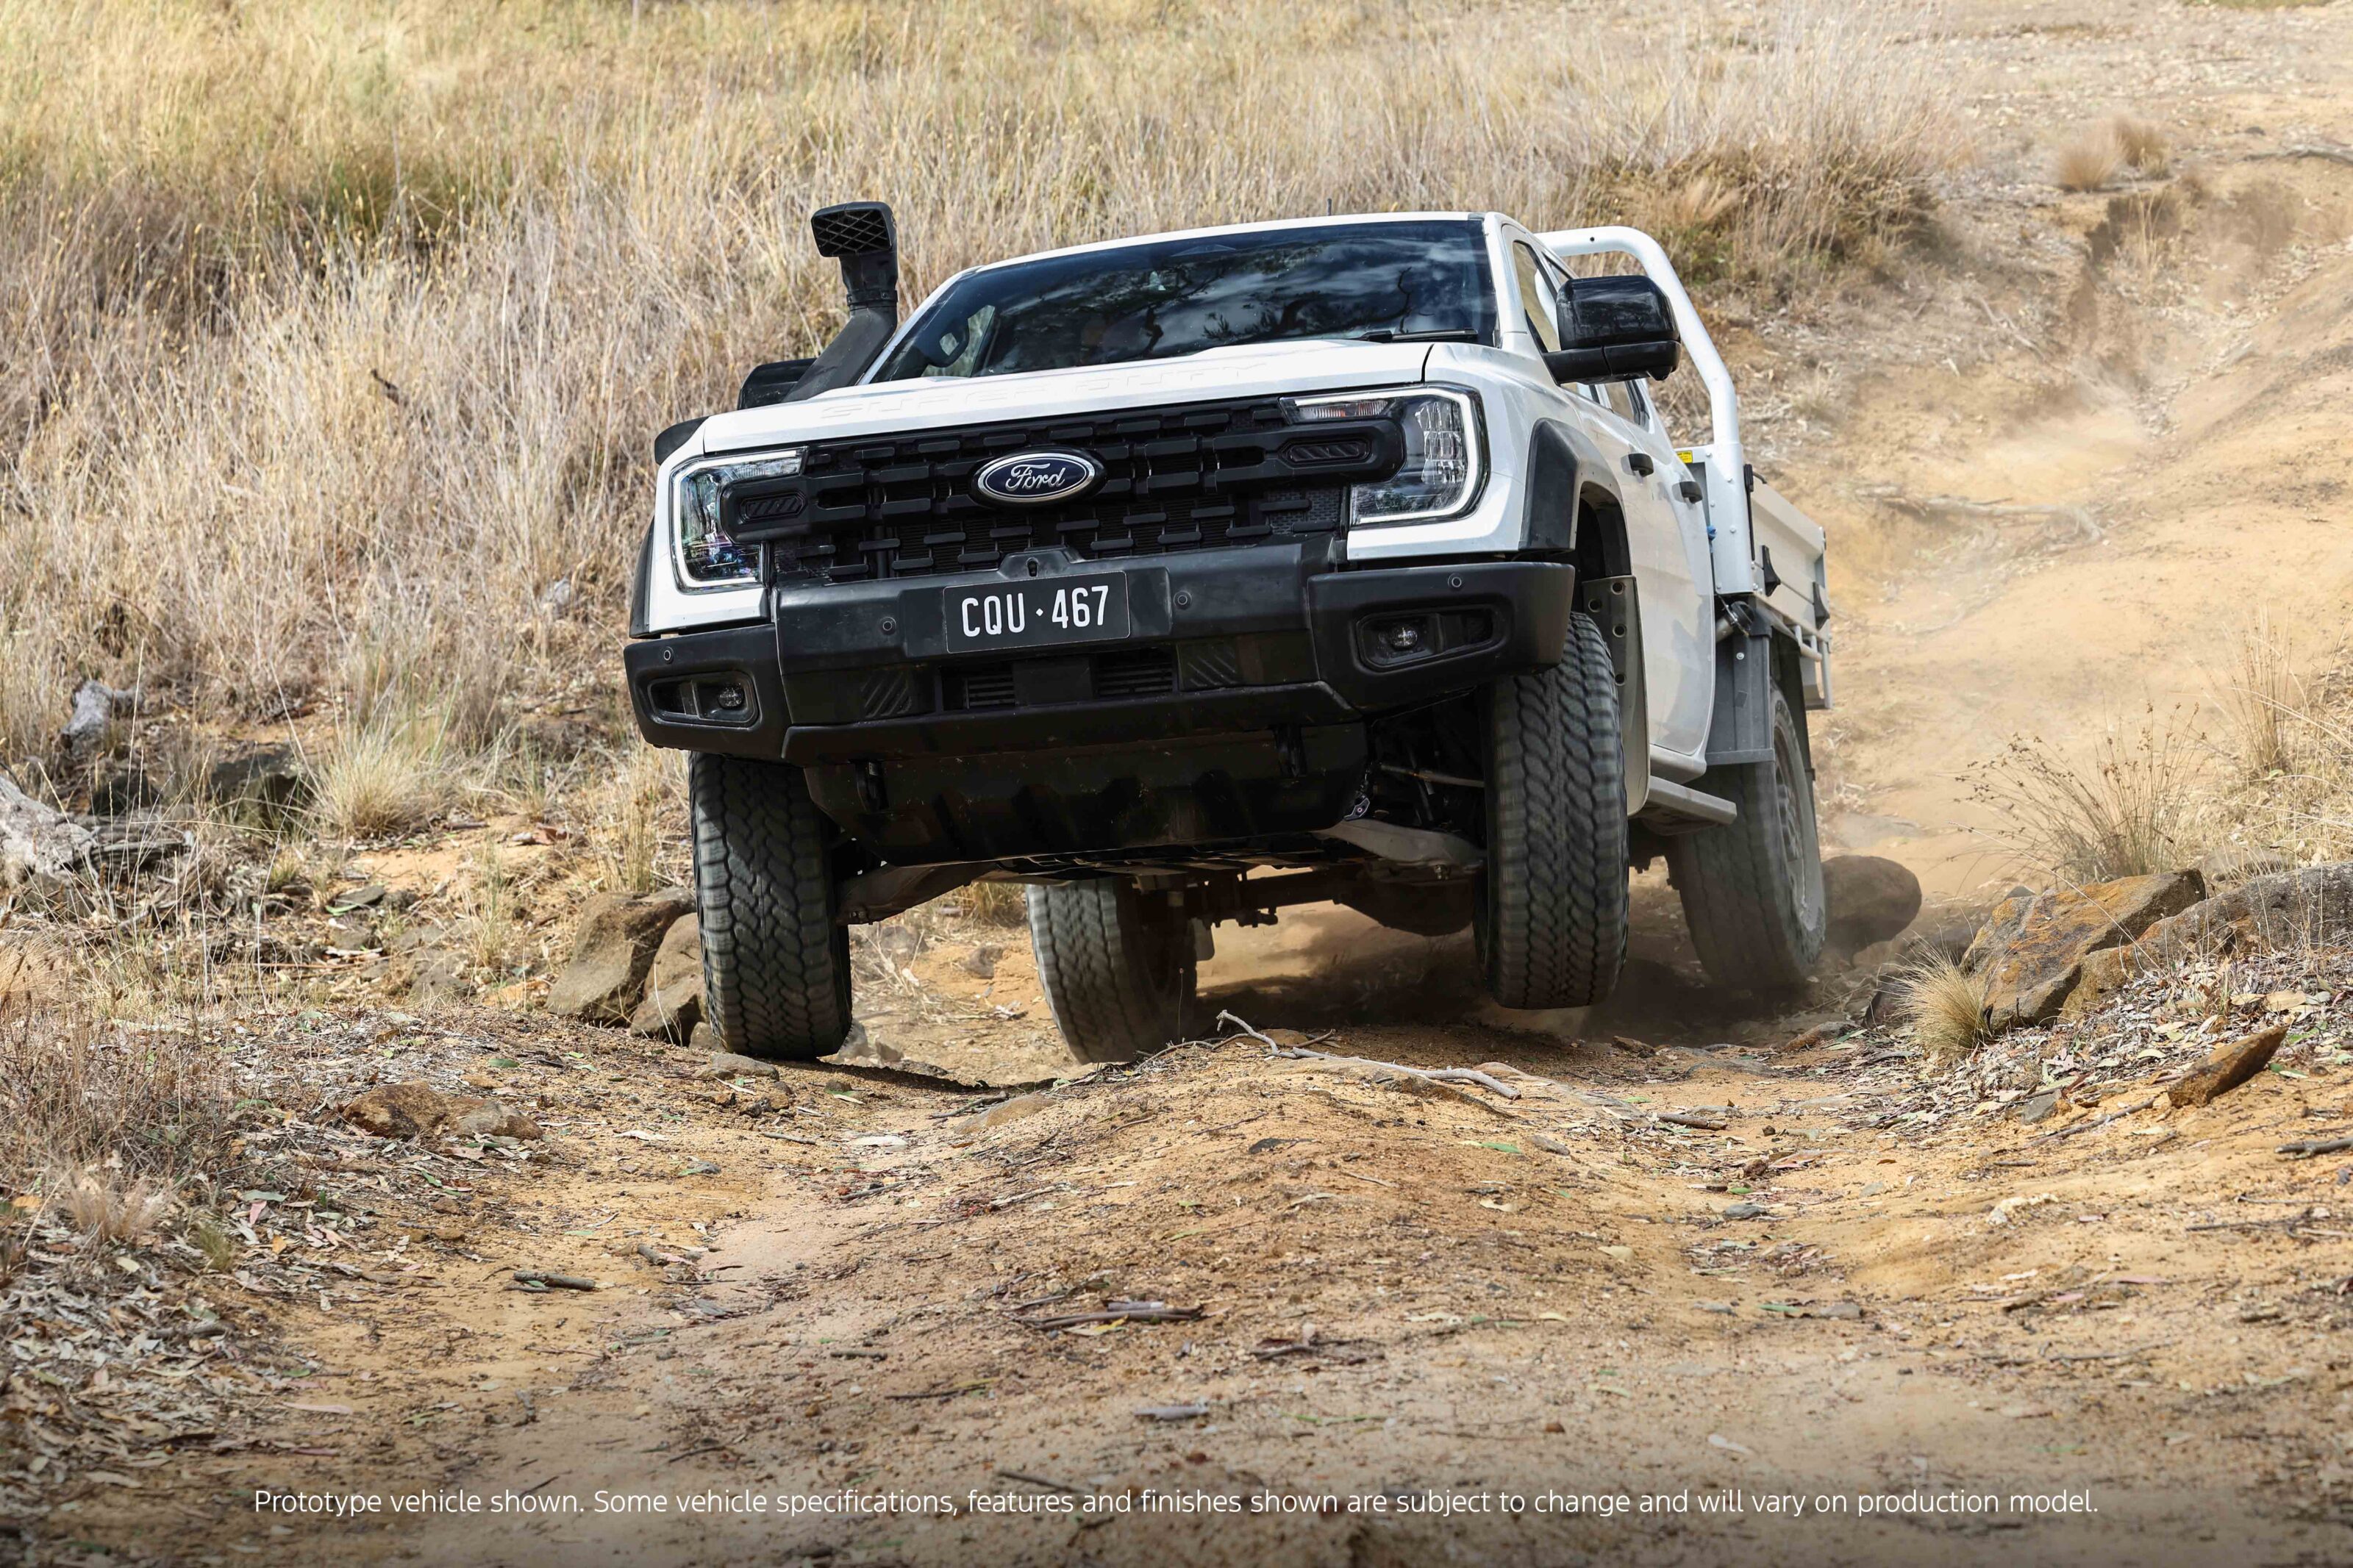
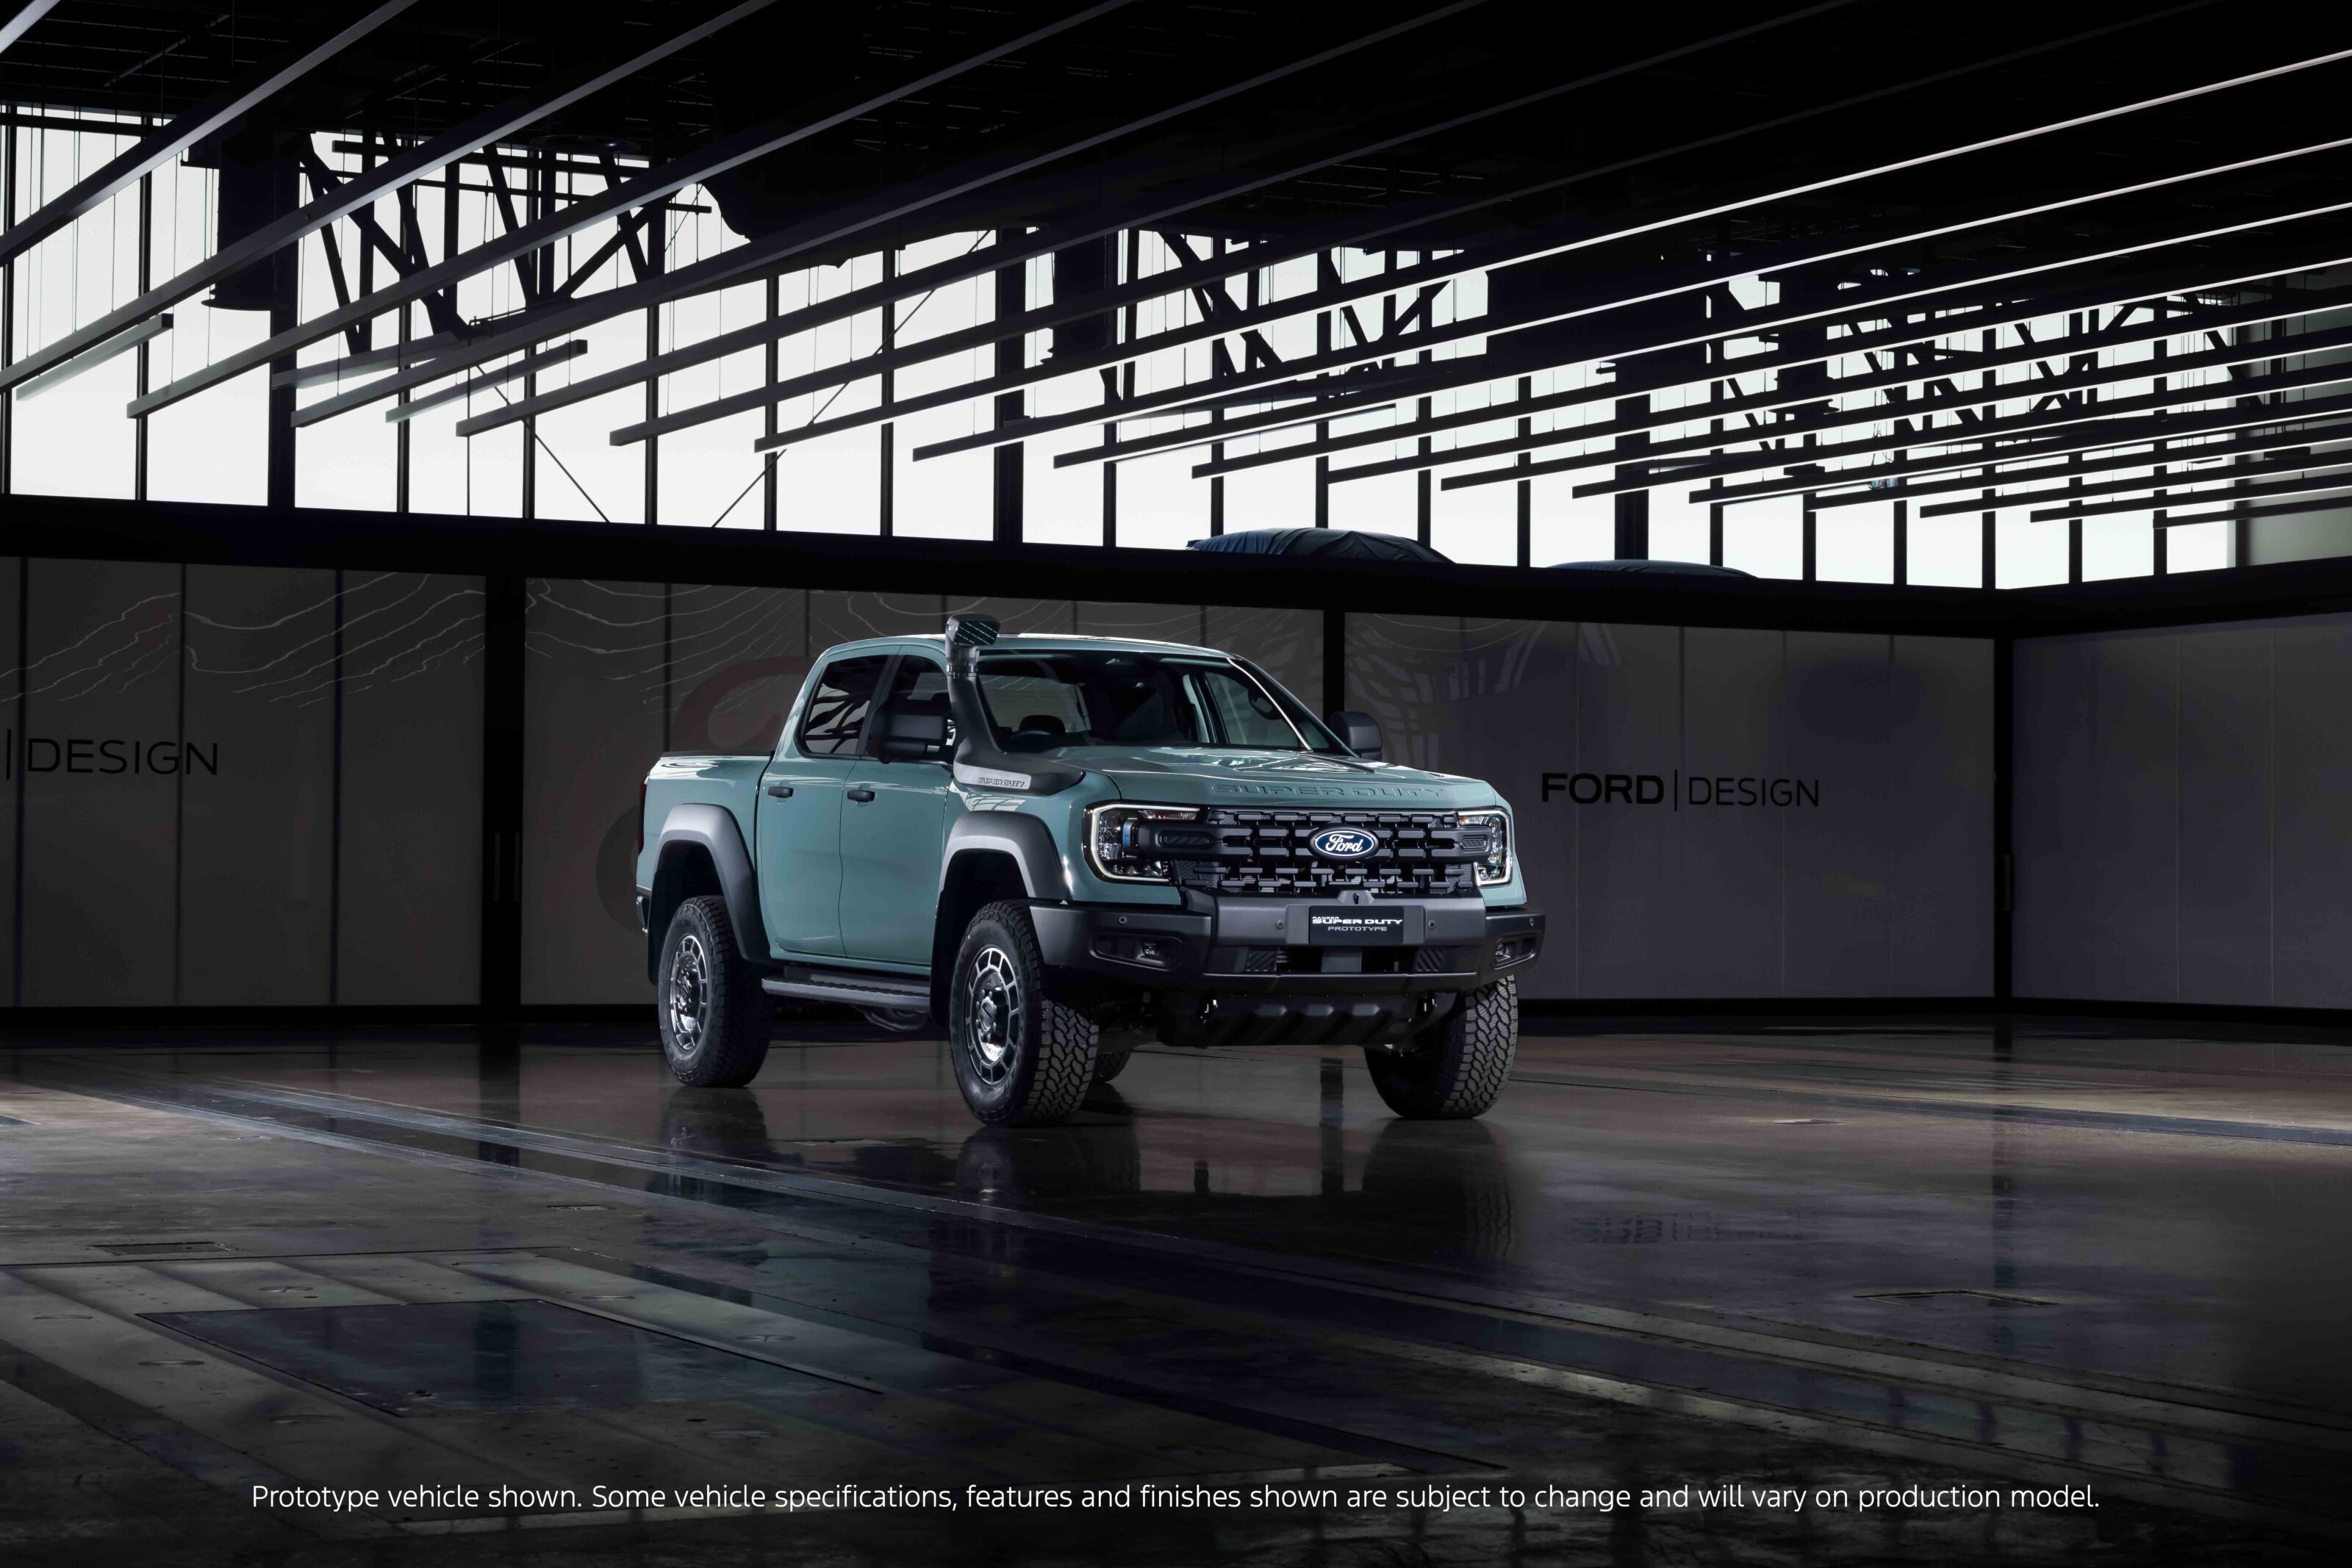
Ford Australia has pulled the wraps off its Ford Ranger Super Duty 4×4 ute, with the vehicle to launch early in 2026.
The Ranger SD is promising huge capacities including a 4500kg GVM, 4500kg towing capacity, and an 8000kg GCM. That’s big news for business and private owners who need a hard-working ute with increased capacity and don’t want to mess with aftermarket GVM upgrades and other modifications.
Industries like mining, forestry, fire and rescue, and others have stated to Ford they want a vehicle from the OEM with all the capacities in place from the manufacturers, with no third parties involved.
50
Ford is looking straight at the LandCruiser 79 Series with the Super Duty, as it will fill the space currently dominated by the venerable Toyota workhorse. However, users have said they don’t want to mess with aftermarket modifications and capacity upgrades, as they’ve had to do with the 79 to make it fit for purpose.
To a lesser extent, the Ranger SD would take the place of the Mercedes-Benz G-Wagen Professional, which is used by some organisations and the ADF. The increased capacities should also appeal to recreational four-wheel drivers, especially those who tow heavy trailers and need the increased GVM and GCM capacities.
The Ranger Super Duty promises to be fit for purpose straight off the showroom floor, and this is the first time the Super Duty name has been applied to anything but a Ford F-truck.
1
The reveal, conducted globally in line with Ford Australia’s celebration of 100 years in Australia, showed that the Ranger SD will be available in all current body styles including double-cab, extra-cab and single-cab variants.
It also showed some exciting new colours for the Ranger SD including Seismic Tan and Traction Green. These colours will be exclusive to the Ranger SD at first, but we think that demand might prompt Ford to make the colours more widely available across the Ranger line-up.
The Ranger SD maintains the standard Ranger cabins but has all new front sheetmetal including for the guards, bonnet and grille. The bonnet features the Super Duty name across the front, just like it does on the F-250 and F-350 models; while the driver’s side guard has an allowance for the intake snorkel. Ford worked with engine intake specialists, Safari Engineering, to develop the snorkel for the Ranger SD. The Ranger SD also features a steel front bumper and underbody protection plates.

1
The cargo tub – on models that have it fitted – maintains the standard Ranger dimensions, which means any tonneau covers or canopies made for the Ranger will also fit on the Super Duty. Many SD variants are expected to be sold as a cab-chassis, ready to accept a specialised service body, tank or other equipment on the back.
The Traction Green double-cab SD also revealed the factory alloy wheels will be offered with Super Duty branding and 275/70-18 all-terrain tyres. The Ranger SD uses eight-lug wheels and will be offered with steel wheels as standard.
The trick-looking alloy wheels will come on the Ranger SD XLT that will arrive mid-2026, and they’re designed for those who want a touring 4×4 and will be exclusively available on double-cab chassis and pick-up variants only.
1
Heavy duty
Within the heavy-duty chassis rails of the Ranger SD, a 130-litre fuel tank runs the length of the car, and the Ford team claims it is built so tough you can support the weight of the truck on it. The chassis rails are thicker than those on a standard Ranger, and the suspension mounts, box mount brackets and tow bar mounts have been reinforced to cope with heavier loads.
“These enhancements are key to Ranger Super Duty being able to carry and tow bigger loads than any other factory-built mid-size pickup,” said Dave Burn, chief program engineer, Ford Australia. “These larger, stronger components improve vehicle durability and reliability, which is something we know our customers will appreciate.”
The SD will need every bit of that fuel capacity, as it is powered by the 3.0 litre V6 (Lion) diesel engine currently used in the Ranger and Everest. Backed by the 10-speed automatic transmission, that engine can be thirsty, and with the added height, weight and bigger tyres of the SD, it will be akin to driving a kitted-up model.
1
Ford also revealed there will be updates to the Lion V6 engine to enhance durability and help it cope with the increased load limits, but didn’t go into specifics. The engine is being set to run to EU6 emissions standards and as such will use AdBlue SCR.
After consultation with key end-users of the Ranger SD, Ford has fitted the vehicle with a manual DPF re-gen button – so the re-gen can be done when the vehicle is in a safe place, not, for example, when parked on dry grass when the heat generated could start a fire. DPF regenerations in regular Rangers are done automatically when required and are usually unknown to the vehicle operator.
Other heavy duty items under the Ranger SD include uprated axles to give it its added capability. This includes a semi-floating rear differential taken from a Transit, and an HD front diff with all-new control arms and a front locker to go with the rear one. The wider wheel track is the same as that of the Ranger Raptor.
1
Another feature of Ranger SD that is taken from the F-truck is the inclusion of on-board scales. These are mounted in the vehicle and the operator is able to check load weights and balance via the multimedia screen. This is also helpful when judging downball weight when towing. The scales will work in conjunction with an updated version of Ford’s Tow Pro technology with Pro Back-Up assistance.
Ford is also working with ARB again to develop bull bars and other accessories for the SD. The OEM is also working with manufacturers of service bodies, canopies, water tanks and other equipment that operators will want to fit to a Ranger SD, so that they will be able to fit them with minimal fuss as soon as the SD goes on sale.
Ford says it has already received firm orders for fleets despite the price and final specifications being unknown. The new model will go on sale early in 2026 in standard trim, with the Ranger Super Duty XLT to follow mid-year.
Considering the bespoke heavy duty hardware under the Ranger SD, we expect the price would have to be around that of the $90,000 Ranger Raptor, or higher depending on the final model and spec.
MORE
Ford Ranger
Things we like
- Great performance from I6 engine
- High level of interior equipment
- Improved fuel consumption
- On-road dynamics
Not so much
- Harsh ride from air suspension and low profile tyres
- Small model range at launch
- Safety tech not on all models
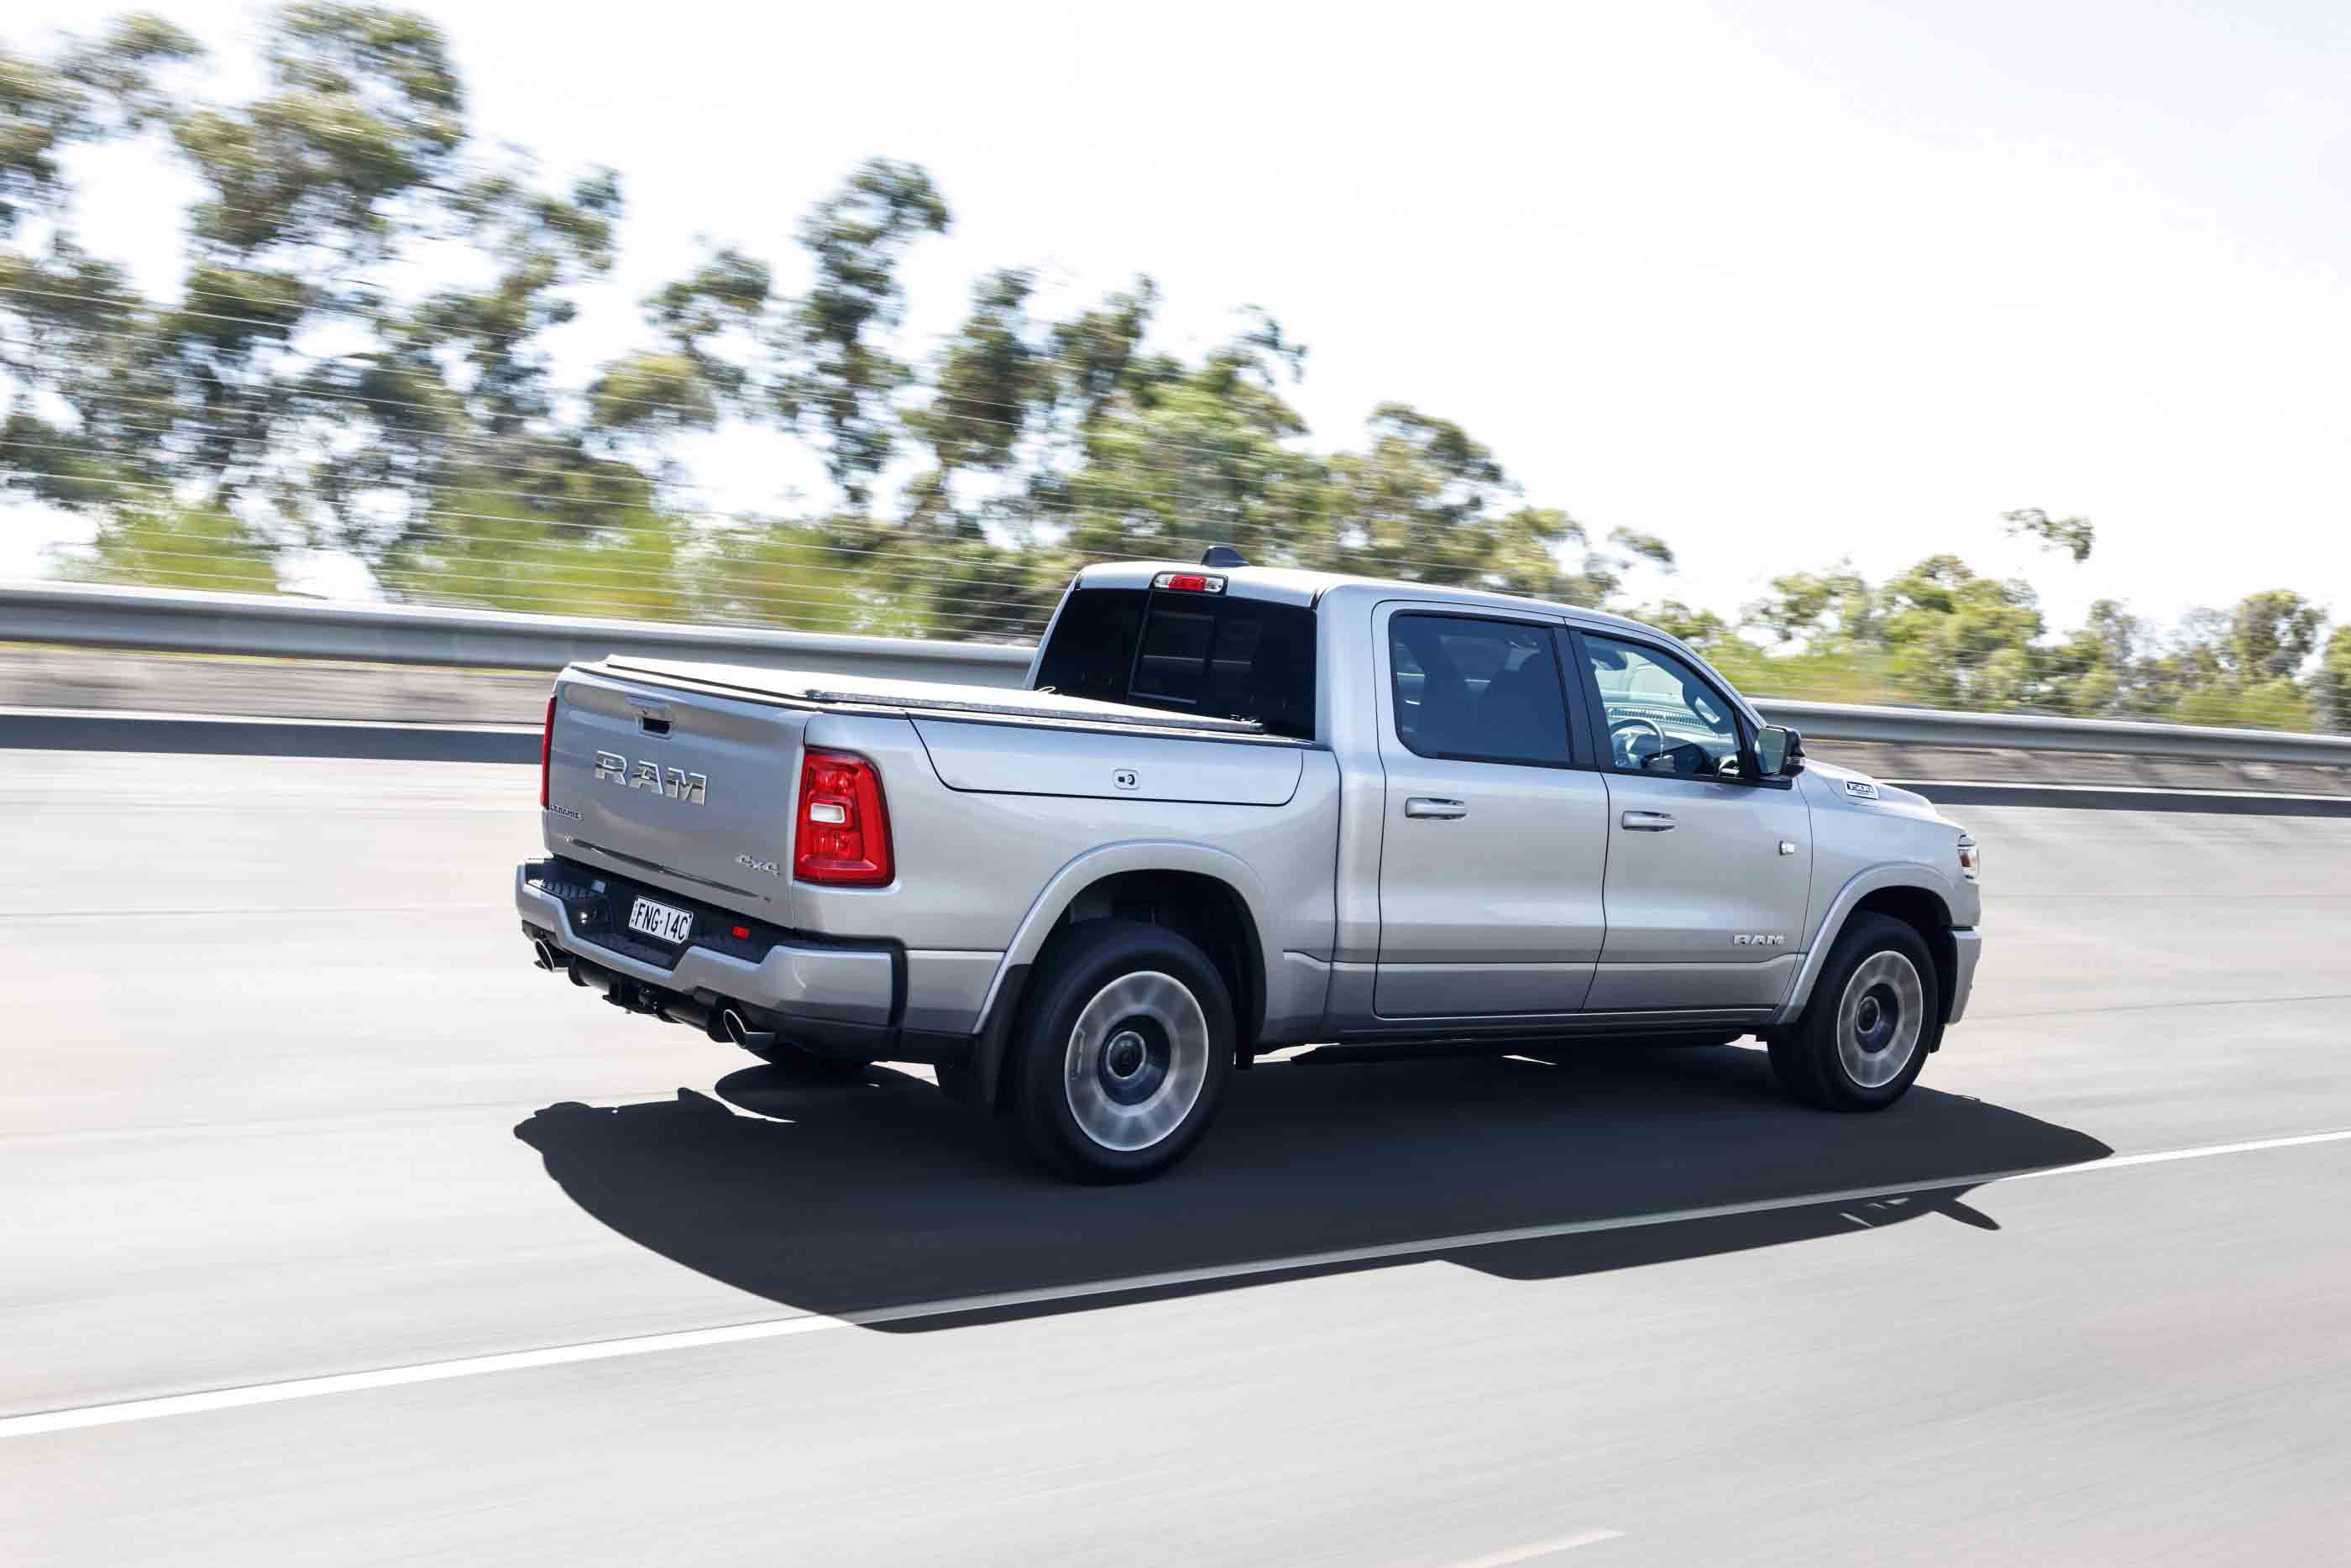
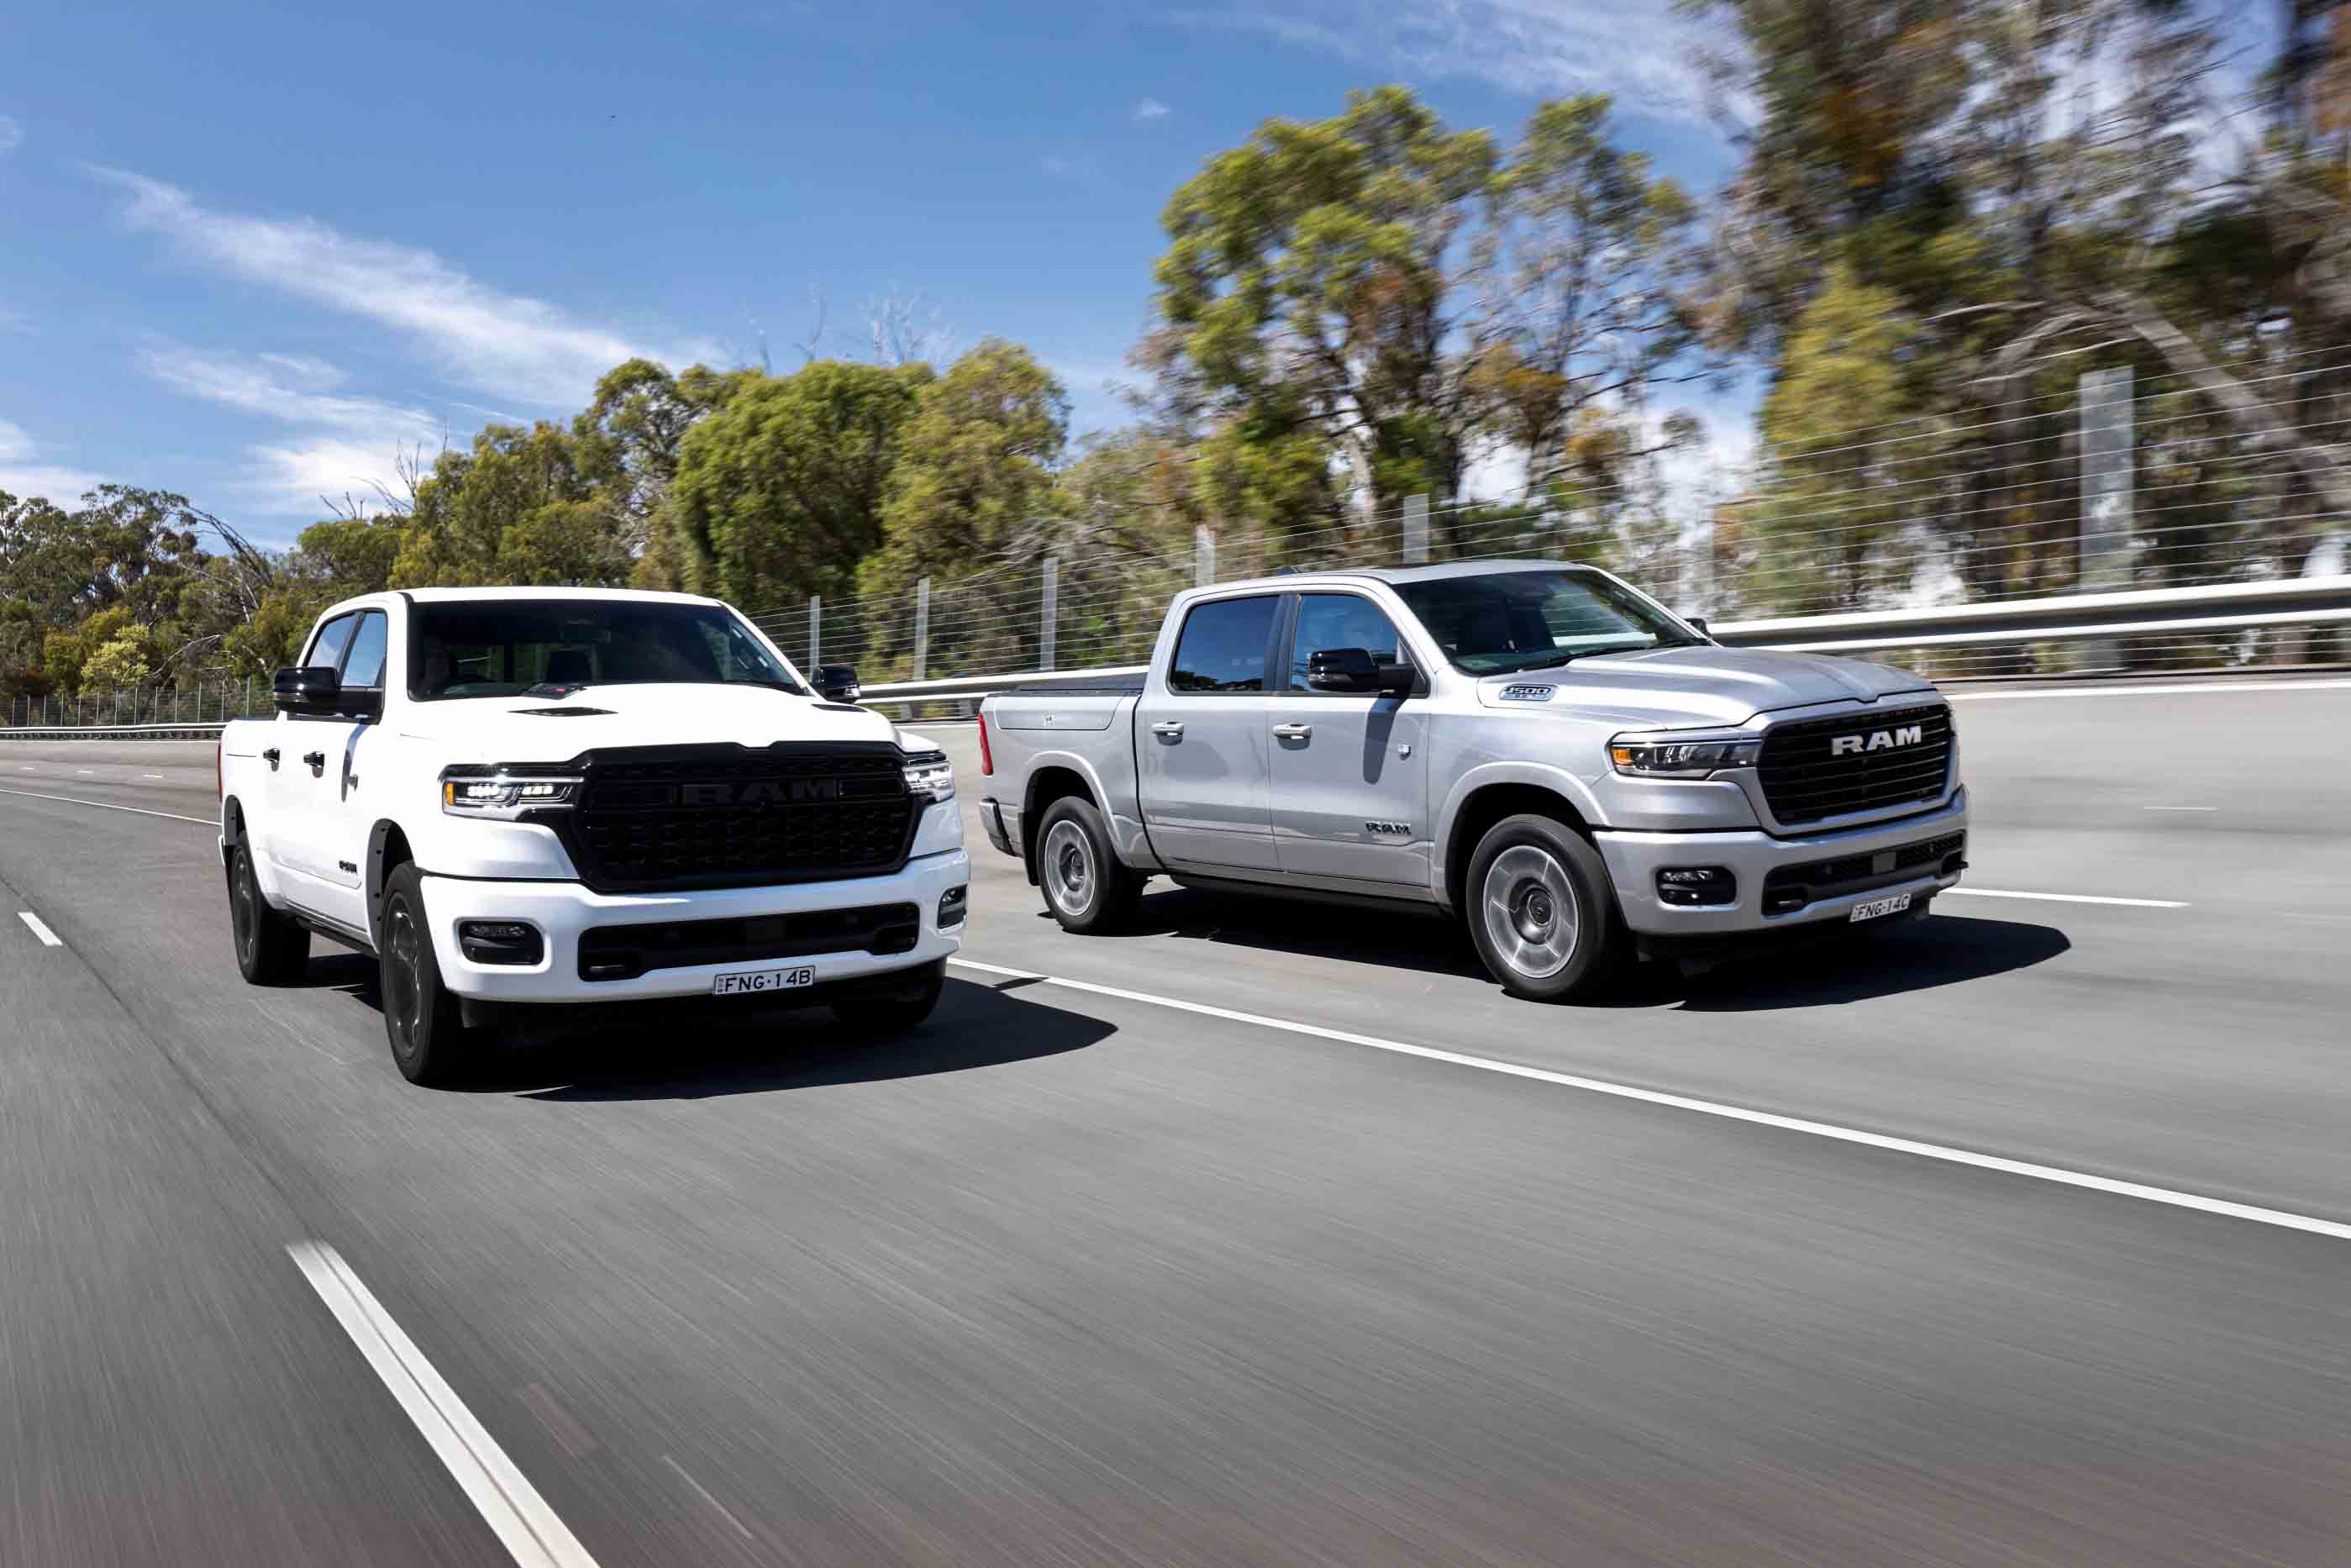
The Hemi V8-powered Ram 1500 is no more and in place of the iconic V8 now sits a new inline six-cylinder petrol engine. If you missed out on the last of the V8-powered 1500s, you shouldn’t be worried because aside from lacking that sweet V8 rumble the new Hurricane I6 engine is a beauty.
Hurricane inline-six
With a pair of turbochargers boosting the 3.0-litre mill, claimed outputs are impressive; 313kW/635Nm in standard (SO) trim and a stonking 403kW/707Nm in HO trim.
In the case of the SO that’s 7.6 per cent more power and 14.2 per cent more torque than the 5.7-litre Hemi V8, while the HO Hurricane makes 38.5 per cent more power and 27.2 per cent more torque, which is way more grunt than the naturally-aspirated Hemi V8 ever made! The outputs of the new Hurricane I6 are only surpassed by the supercharged Hemi in the wild Ram TRX model.
The differences between the SO and HO versions of the engine are more than just a simple tune. The HO has a lower compression ratio than the SO allowing for higher boost pressures, a higher-capacity fuel pump and a 6100rpm redline compared to 5800rpm on the SO.
60
Initially available in just two models while the V8 1500s are still running out, the Hurricane-powered Rams available at launch are the standard output powered Laramie Sport at $141,950 (+ORC) and the HO-motivated Limited at $159,950 (+ORC). Ram Trucks Australia (RTA) tells us that the new powertrain will become available in more variants in the near future. We always thought that the low-spec Big Horn model was the pick of the range and look forward to its return with Hurricane power.
Midlife makeover
The introduction of the Hurricane engine represents a midlife update for the DT series of Ram 1500.
Also fresh for 2025 is a new look for the front end with LED lights standard on both models, new LED tail lights either side of a power tailgate, and new 20-inch wheels on the Laramie and 22s on the Limited. Inside there’s a new 14-inch infotainment screen and a separate 10.25-inch screen for the front seat passenger.
The passenger touchscreen is able to play movies and streaming while on the move as it is not visible from the driver’s seat. A clever function gives the passenger the ability to look up and find locations on mapping apps while driving and once found can then send that map/info to the main screen for the driver.
1
The 19-speaker Harman Kardon sound system certainly adds to the streaming/video experience.
In addition to the above upgrades, the Limited model gets massaging front seats, automatic deploying side steps and the aforementioned 707Nm HO engine.
Both Ram models are equipped with heated and ventilated eight-way adjustable front seats with the heating and ventilating extending to the outer seats in the back. Of course, there’s acres of leather covering the large and comfortable pews.
The rear seat is massive and will comfortably accommodate three adults and there is a heap or storage under the back seat. The Ram’s interior feels more like a luxury car than a work truck and this will no doubt tempt plenty of buyers to step up from a midsize ute.
Safety-wise, the Limited gets all the modern features but the Laramie Sport misses out on the 360° view camera, drowsy-driver detection, traffic sign recognition, evasive steering assist, and intersection collision assist features. There’s nothing really missing there that we’d call deal-breakers.
1
More important is towing capability, which has always been a strong point of full-size trucks, and the Ram 1500 Laramie retains its maximum braked 4500kg towing capacity, while the Limited makes do with 4200kg.
Payload is never great in these trucks when you consider their size but it’s up in the new Rams to 863kg in the Laramie and 782kg in the Limited; still well short of what you can haul in most of the midsize 4×4 utes but on par with the other 1500-class trucks.
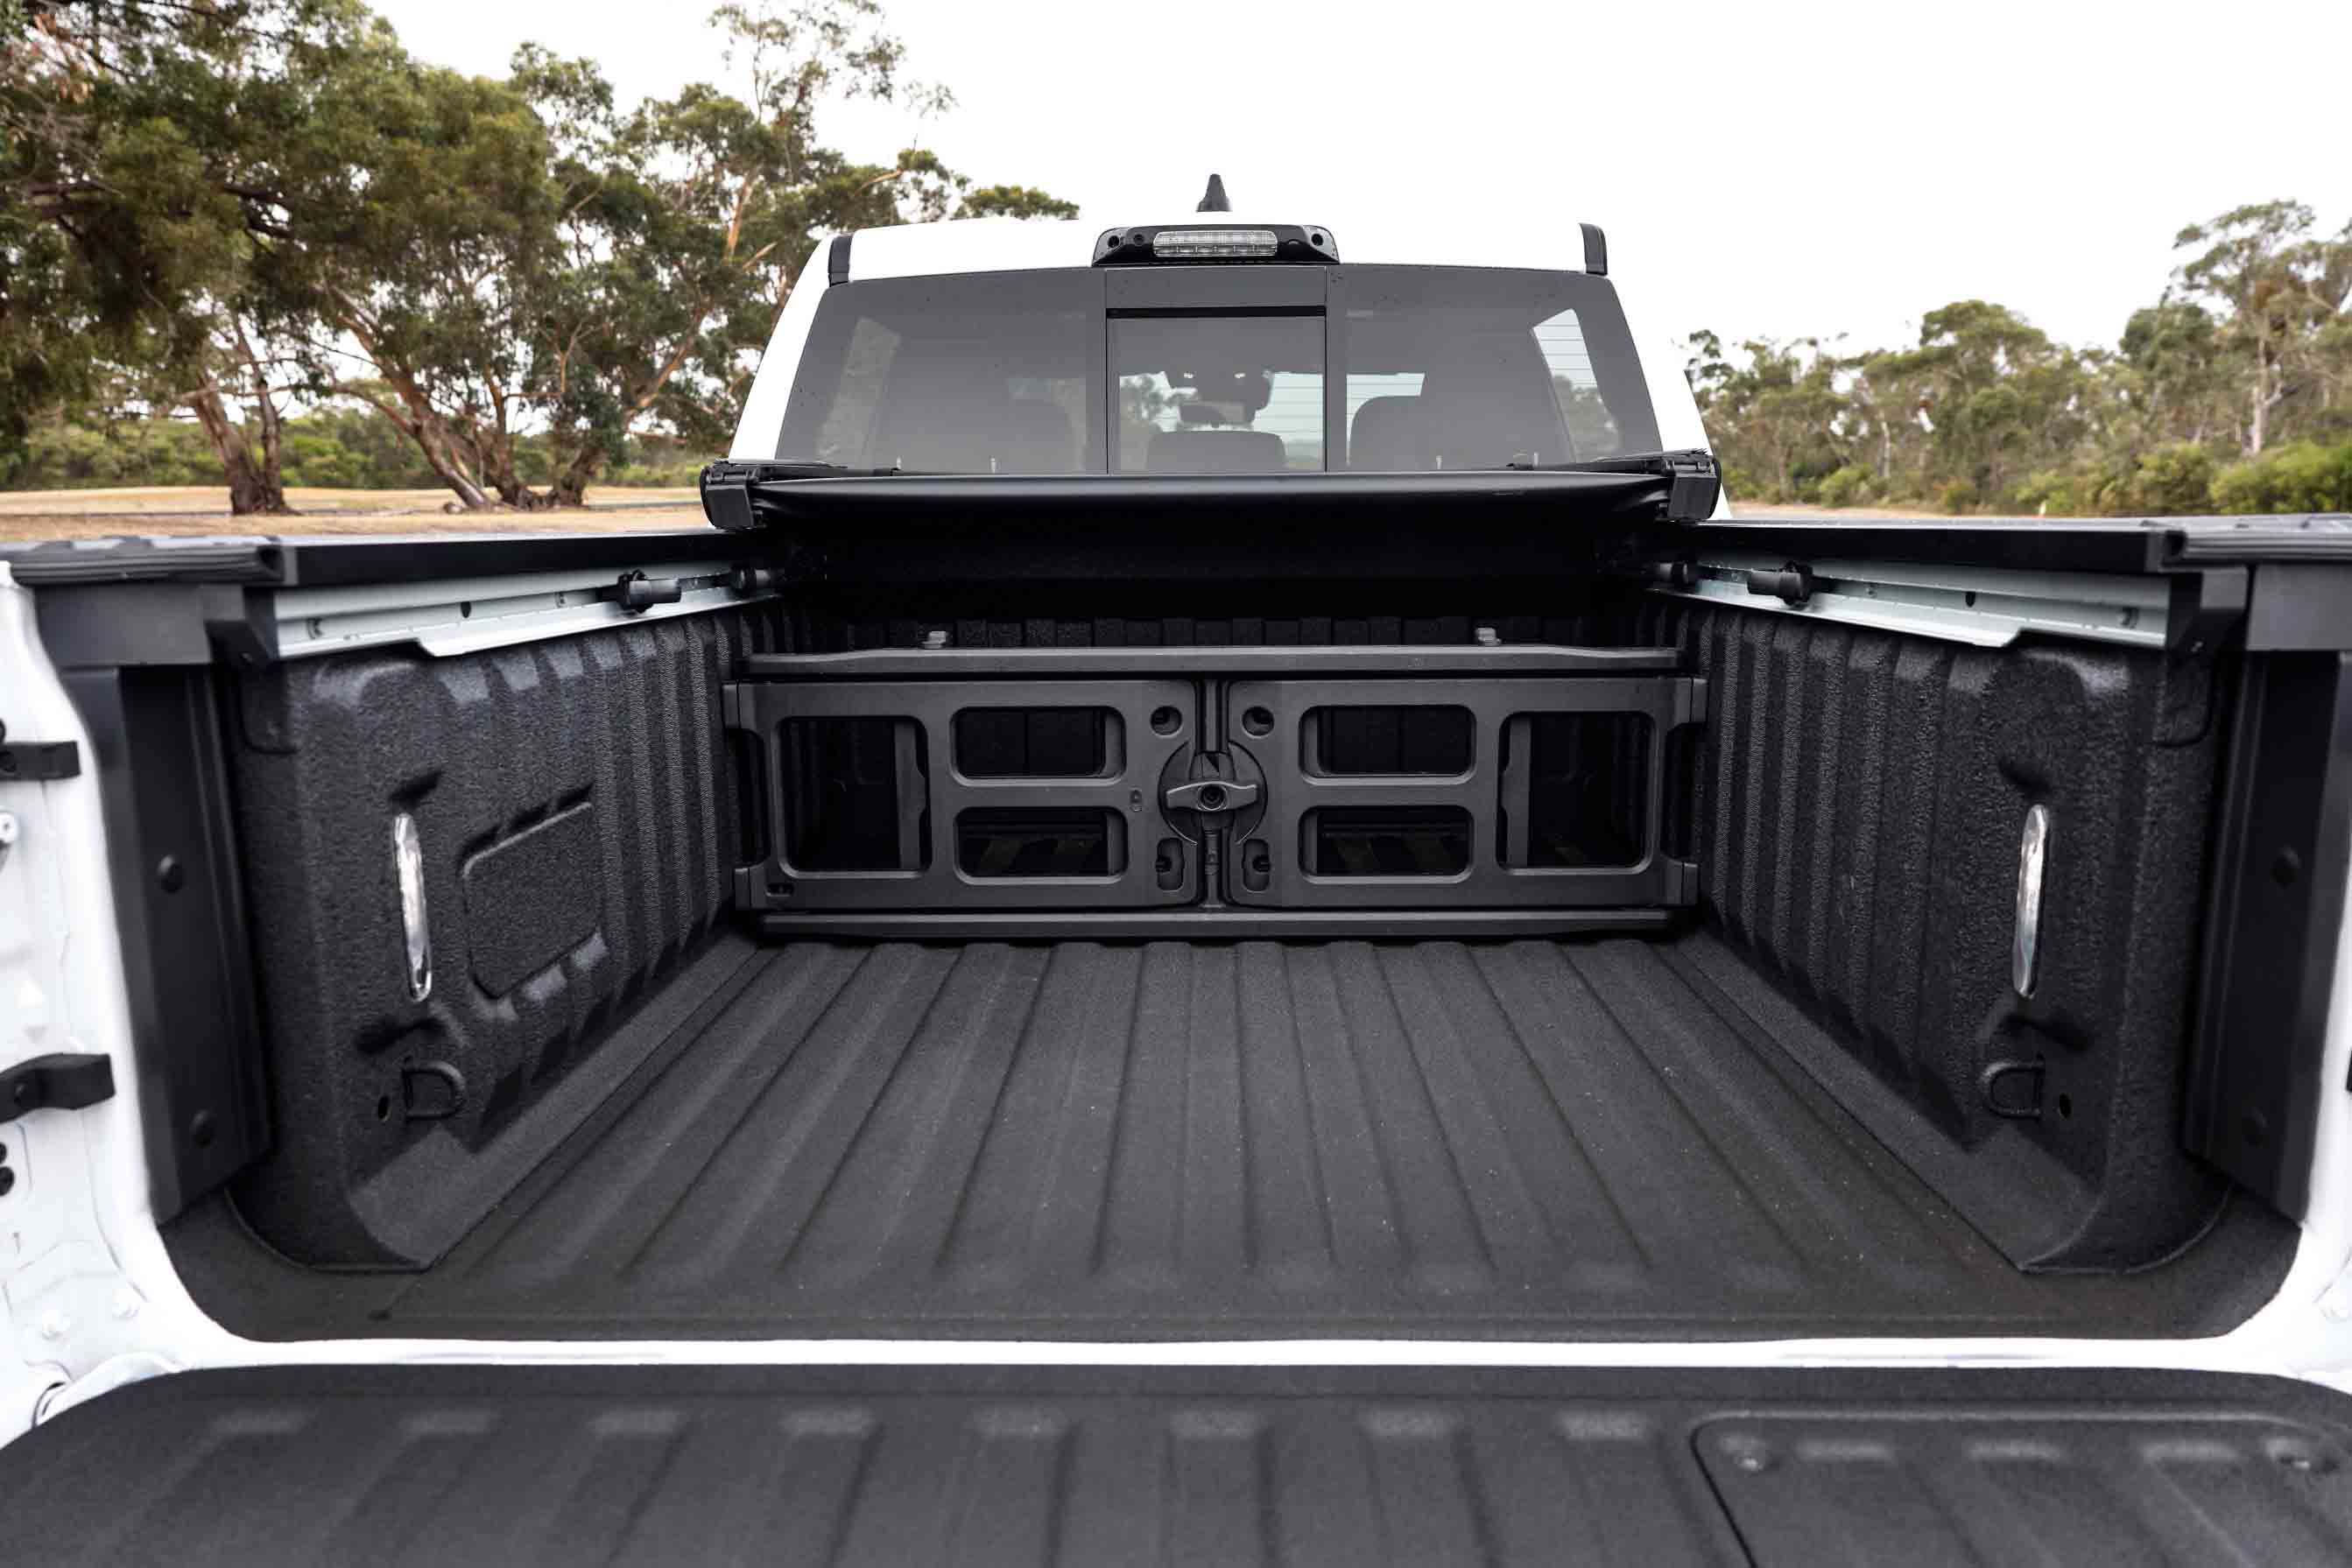
The cargo tub is huge and both models come standard with the Rambox storage system built into the side. There’s also a power-lift tailgate and a fold-down step to make accessing the tub easier. The tonneau cover is a semi-solid one that folds up against the headboard when not in use.
Proving ground: Track time
While towing and load capacities might be important to many Ram owners, RTA wanted to focus on the performance of its new Hurricane engine for the launch of the 2025 models, no doubt hoping to dispel any thoughts that it wouldn’t stack up to that of the V8 engine.
A series of 0-100km/h sprints with onboard timing equipment confirmed what the seat of the pants told us – the Hurricane powered Ram in no slouch!
The Standard Output Laramie knocks over the 0-100km/h dash in a swift mid-six seconds sprint, while the HO powered Limited cuts almost a full second off that time getting down to the mid-fives. This truck really gets up and boogies off the mark, helped by its on-demand 4×4 system sending the drive to all four tyres which were scrabbling for traction as we left the gate.
1
A drive loop around the proving ground circuit followed by a road loop demonstrated that the Ram 1500 has the chassis to match the performance on offer but importantly it demonstrated the difference between the suspension of both models.
Considering its size and mass the unladen Ram cruised admirably around the proving ground circuit, dealing with bumps and undulations as well as tightening lines of the various corners on the course.
The lower-spec models in the Ram 1500 range, the Laramie Sport included, use an all-coil spring suspension setup with IFS on the front and a live axle at the rear. The Limited gets an adjustable air-spring suspension setup which, along with its low profile sports tyres on 22-inch wheels, delivers a busy ride over high-frequency bumps and choppy roads.
No off-roading
This drive didn’t include any off road or gravel tracks but our previous experience with the Limited on this suspension and tyre combination showed it to be awful on gravel roads, transmitting all the bumps and ruts through to the passenger compartment.
The steel spring suspension on the lower grades combined with tyres that have a taller sidewall does a far better job of smoothing out such roads and would be my choice every day. The 22s might look good but they are not suited to this style of vehicle. Combined with the air suspension they ruin what would otherwise be considered a luxurious ride.
1
When RTA is looking at further models to add to the 1500 range, we’d love to see an option with all the features of the Limited but with conventional steel springs and 20-inch or even 18-inch wheels.
Ram Trucks Australia (RTA) set the agenda for the rise in full-size American pickup trucks in Australia when it started importing and converting left-hand drive Rams back in 2015. Part of the automotive vehicle and accessories giant Ateco, RTA partnered with Walkinshaw Automotive to re-engineer the LHD trucks to RHD and soon found a largely untapped market that has boomed in the years since, with RTA selling more full-size trucks in Australia than any of the brands that have jumped on their tails.
With the introduction of the Hurricane I6 engine to the range RTA should be able to maintain its strong sales, so long as buyers can get over the loss of the V8 and appreciate the better performance of the I6.
Specs
| Laramie Sport | Limited | |
|---|---|---|
| Price | $141,950 (+ORC) | $159,950 (+ORC). |
| Engine | Bi-turbo petrol I6 | Bi-turbo petrol I6 |
| Capacity | 2993cc | 2993cc |
| Max power | 313 kW @ 5200 rpm | 403 kW @ 5700 rpm |
| Max torque | 635 Nm @ 3500 rpm | 707 Nm @ 3500 rpm |
| Transmission | 8-speed automatic | 8-speed automatic |
| 4×4 system | On-demand Dual range with 4×4 auto mode | On-demand Dual range with 4×4 auto mode |
| Construction | 4-door ute on ladder frame chassis | 4-door ute on ladder frame chassis |
| Front suspension | IFS with A-arms and coil springs | IFS with A-arms and height adjustable airbags |
| Rear suspension | Multi-link live axle with coil springs | Multi-link live axle with height adjustable airbags |
| Tyres | 275/55R20 on alloys | 285/45R22XL on alloys |
| Weight | 2642kg | 2722kg |
| GVM | 3505kg | 3505kg |
| GCM | 7711kg | 7285kg |
| Towing capacity | 4.5t with correct towbar | 4.2t with correct tow bar |
| Payload | 863kg | 782kg |
| Seats | 5 | 5 |
| Fuel tank | 98L | 125L |
| ADR fuel consumption | 10.74L/100km (combined) | 11.9L/100km (combined) |
| Approach angle | 20.2 | 20.4 (at normal ride height |
| Ramp-over angle | 18.7 | 18.6 (at normal ride height) |
| Departure angle | 21.7 | 20.4 (at normal ride height) |
| Ground clearance | 217mm | 217.5mm |
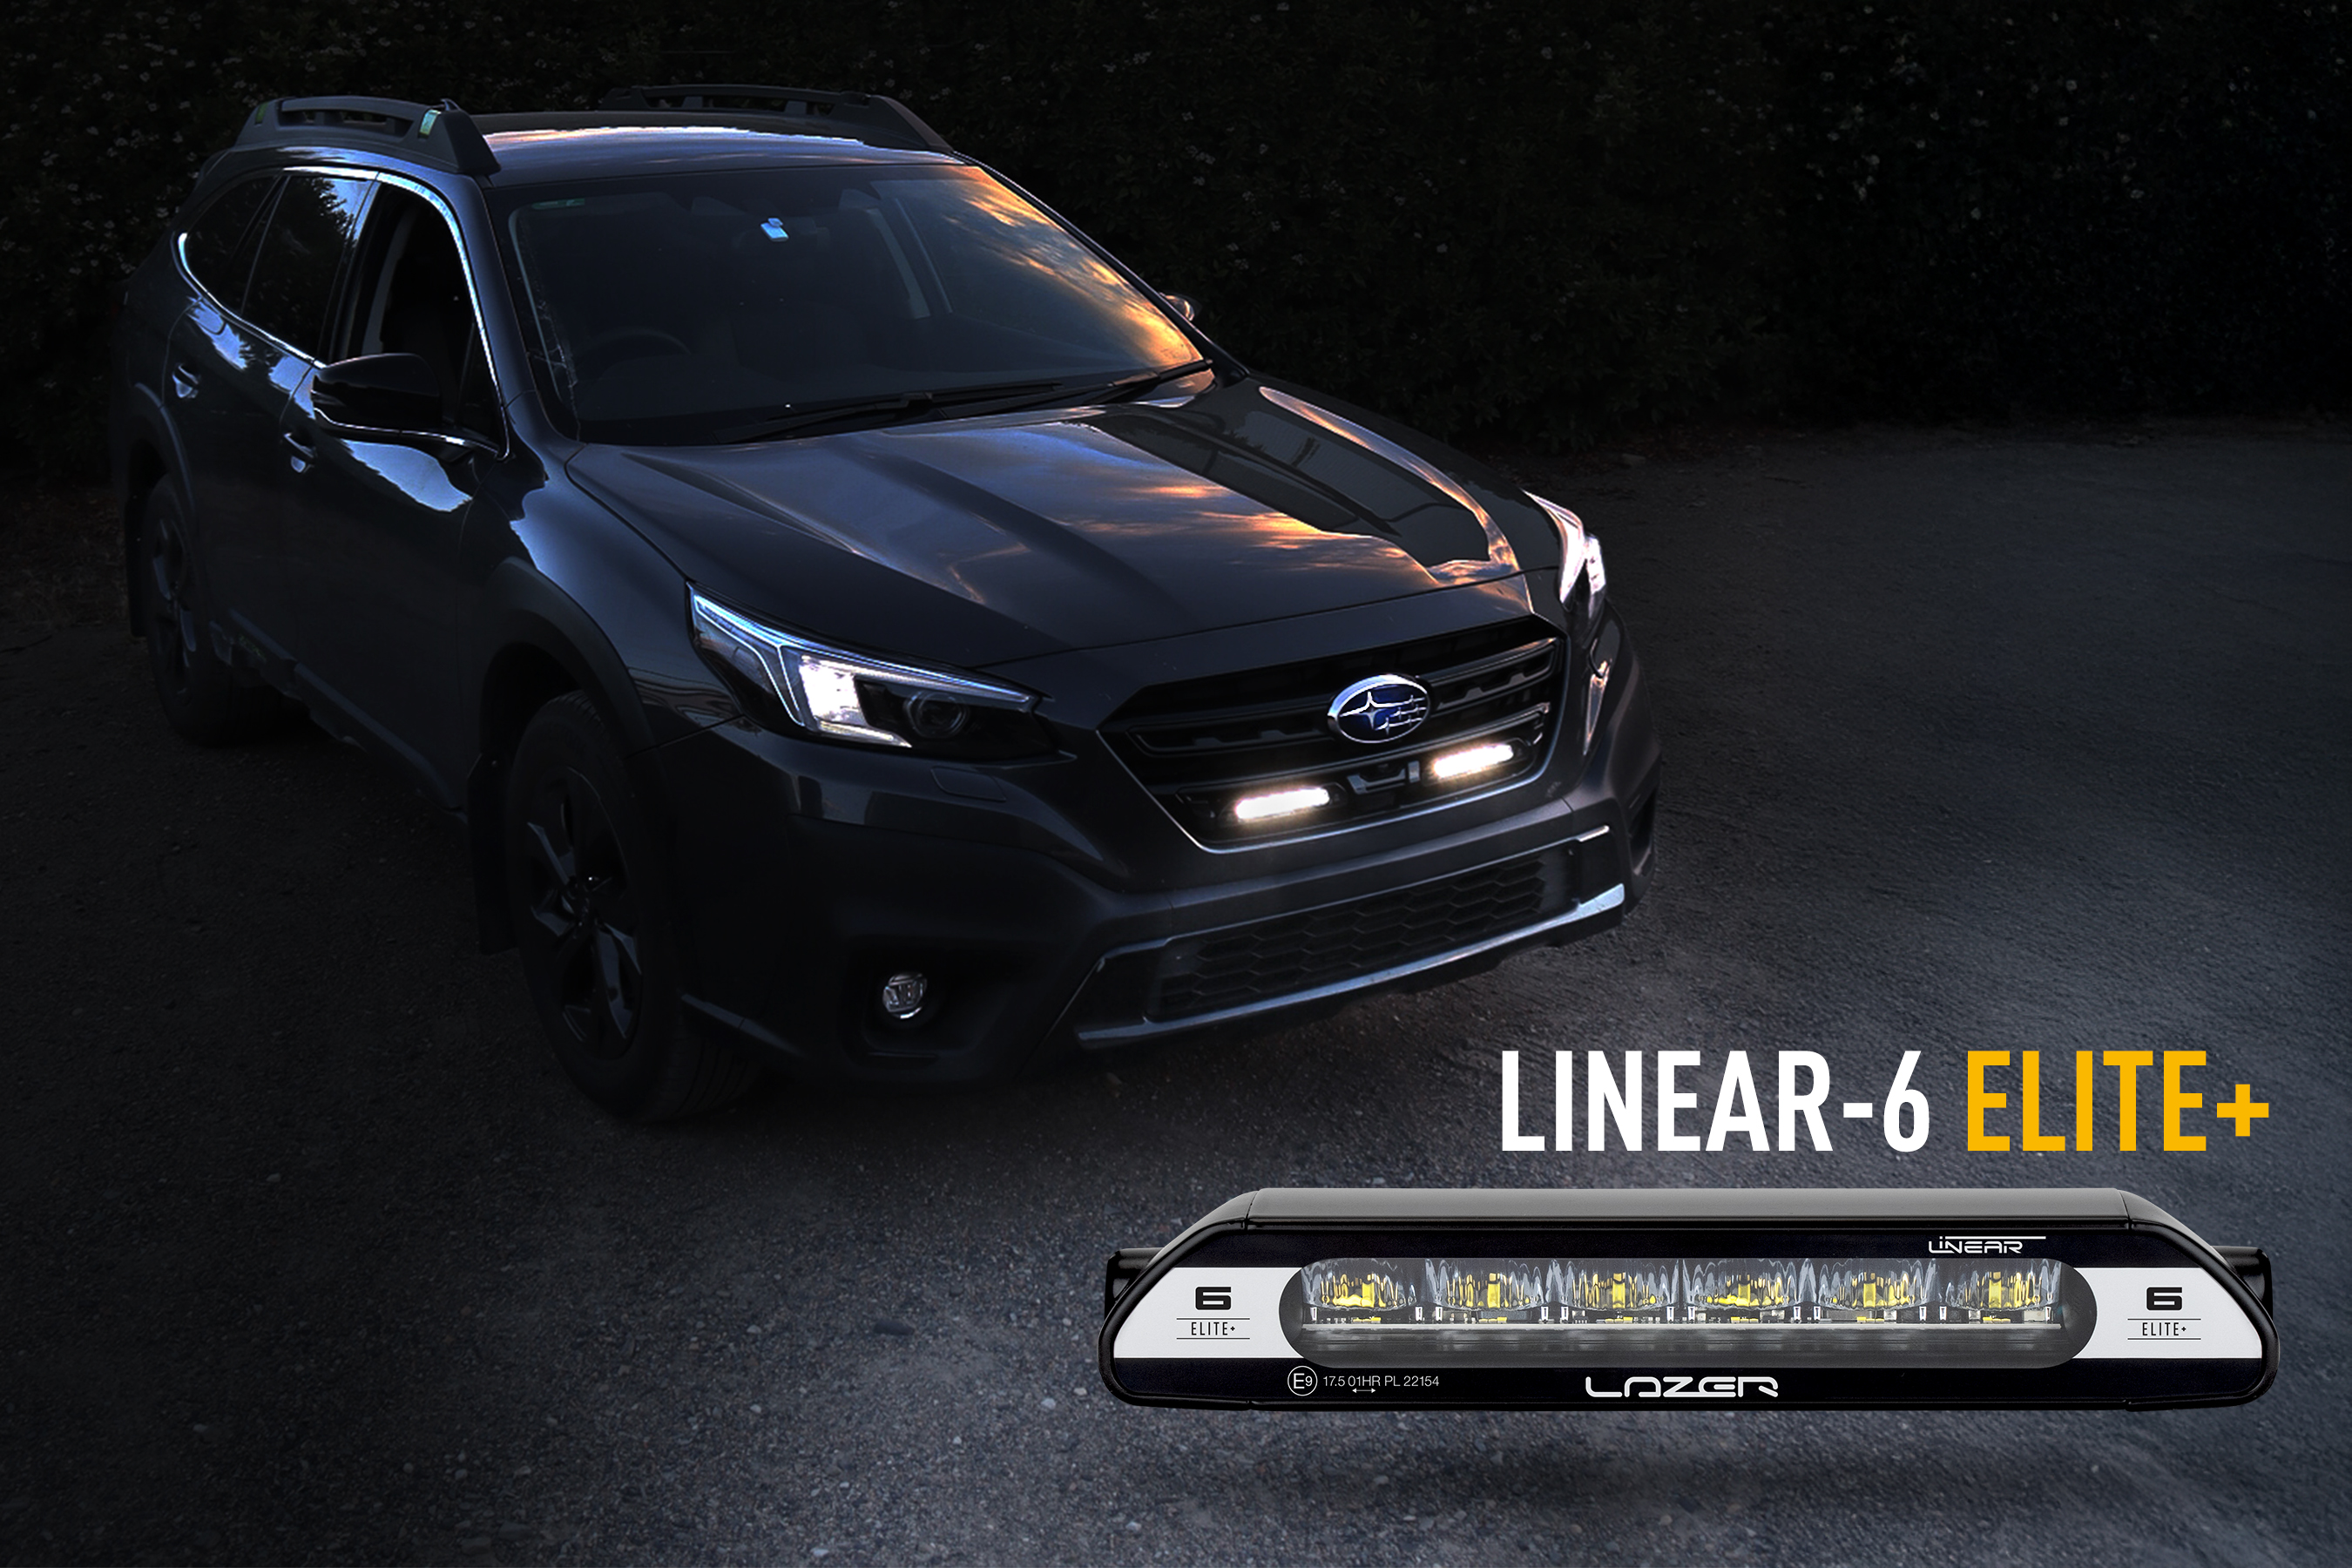
As we approach the cooler months and daylight hours shorten, it’s a great time to be shopping for a new set of driving lights for your 4×4, and the Elite+ from Lazer Lamps is an incredible option for those seeking the very best in high performance lighting.
The Elite+ range represents one of Lazer Lamps’ latest advancement in LED lighting technology. The exciting innovation in Elite+ range comes in the form of adaptive lighting technology, with the Elite+ products featuring supplemental yellow LEDs, ideal for adverse weather, alongside the highest white light output available on the market today in Australia.
1
Importantly, all of Lazer Lamps’ lights and kits are designed, engineered and manufactured in-house in the UK, which allows the company to control the build process from start to finish, ensuring the very best in the design of the lamps and their component part selection, allowing them to produce such high-quality equipment.
1
Each Elite+ light bar has four different lighting modes, which can be easily cycled through via a momentary switch: Boost Mode (white light only), Combo Mode (white & yellow), Dust / Fog Mode (Yellow Only) and Low output (white only). These modes offer the driver the functionality and versatility to have clear visibility and enhanced safety in all conditions – from dust storms and arduous off-road terrain to all-night highway touring and everything in between.

1
For Tom Howe, Operations Manager at Rock Ridge Farming and creator of the Paradise Bound platform, the Elite+ versatility is more than just a cool feature, it’s a game-changer:
“The Triple-R 24 Elite+ light bar from Lazer is in a class of its own. The multi-output functionality in the Elite+ range makes night driving across the Australian Cape York region at night far safer than with any standard LED bar I’ve used before.
“Their yellow light mode is incredible, it cuts through rain and dust like nothing else, and the way it reflects off the eyes of cattle, kangaroos, and wild brumbies gives you that extra time to react. You can spot them earlier, and that makes all the difference on remote tracks. After using Lazer gear, I wouldn’t go back to conventional LED light bars. The light quality speaks for itself.”
1
Just as important as their light output, the Elite+ range of lights are incredible in terms of build quality, component part selection and durability. Designed with CAE-optimised heatsinks, corrosion-resistant automotive grade powder top coats, and unbreakable polycarbonate lenses.
The lights also feature an IP68 rating for water resistance, and incorporate electronic thermal management for optimal performance and to preserve longevity of the LED’s. All these elements make the Elite+ lamps able to perform, withstand and last, even in the most extreme environments.
1
“The Elite+ range is our response to the demand for more intelligent, multifunctional lighting that enhances driver safety and comfort. Each light is a product of extensive in-house UK design, engineering and manufacturing, ensuring unmatched build quality and incredible lighting performance,” said Ben Russell-Smith, Lazer Founder and Managing Director.
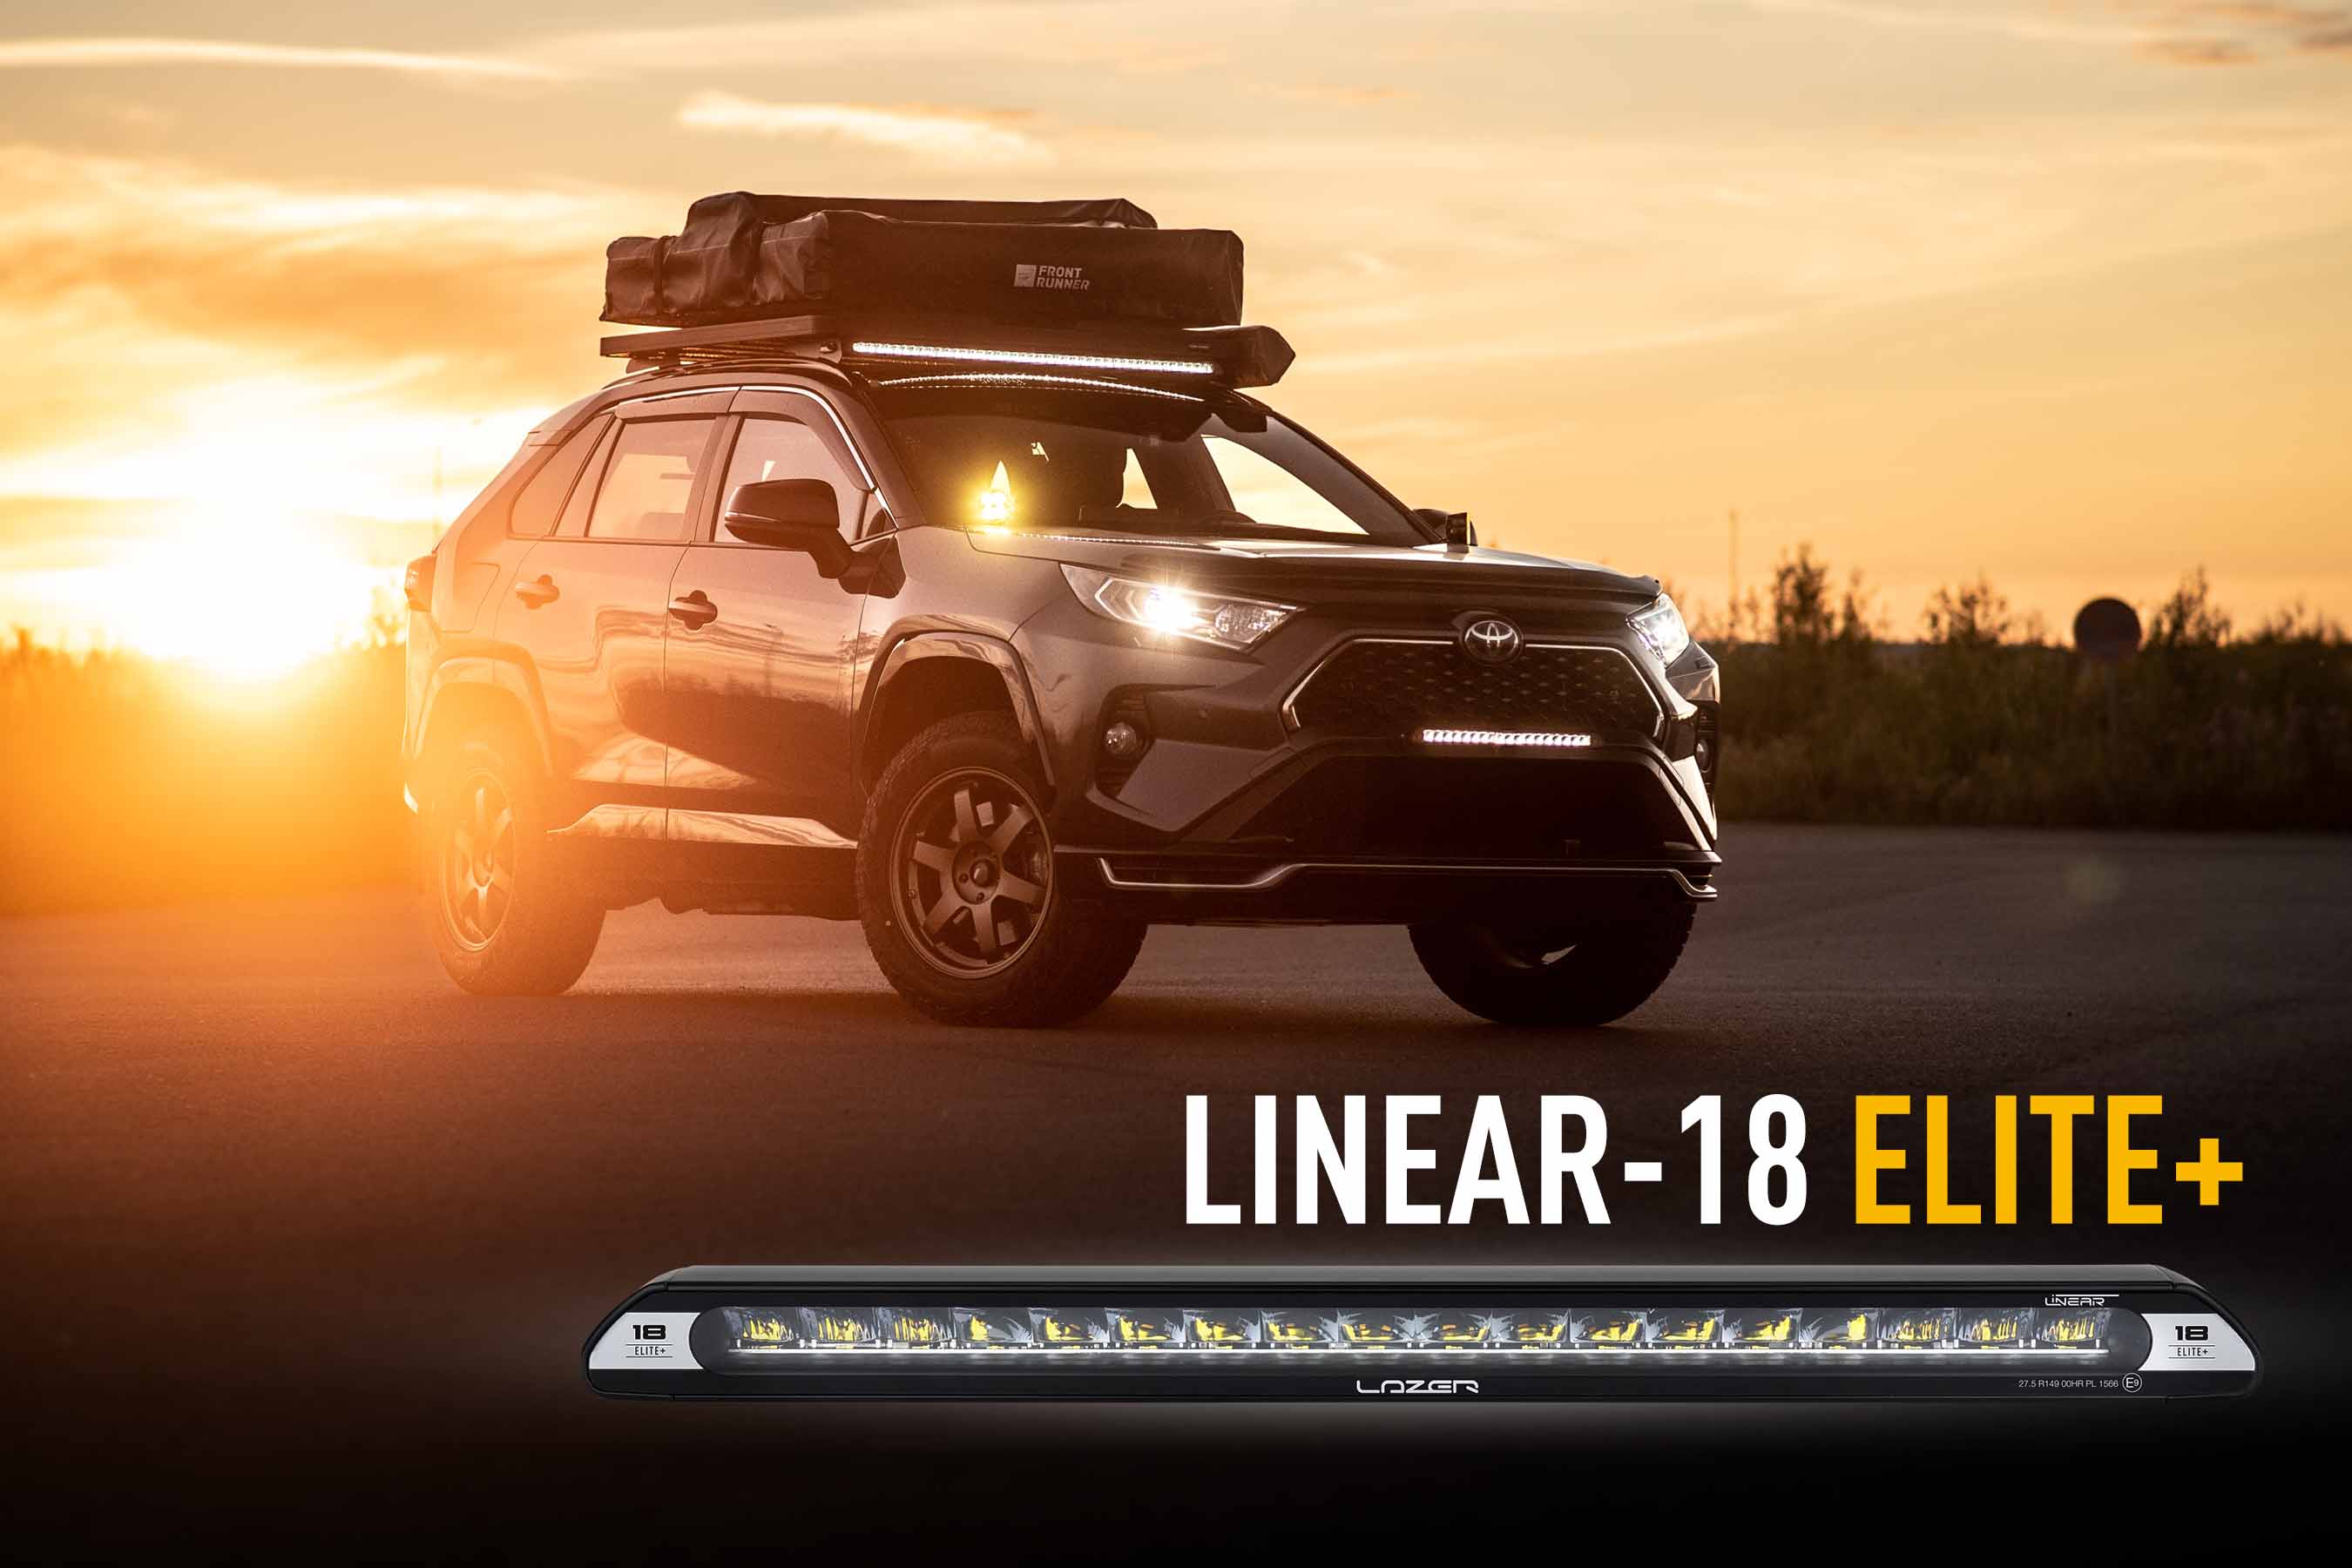
The range features the compact Linear-6 and Linear-18 Elite+, perfect for everyday road use, as well as the Triple-R series, which is known for its powerful long-range illumination and includes the Triple-R 1250 and Triple-R 24 Elite+. Let’s take a closer look at the product range 👇
Linear-6 Elite+
Consisting of 12 white and six yellow LEDs, this compact light bar features the four Elite+ modes – Boost, Combo, Snow/Fog/Dust, and Low Output. The Linear-6 produces 7100 raw lumens in boost mode, an impressive output for its proportions. Like all Lazer products it features the IP68 watertight rating and unbreakable polycarbonate lens making it incredibly durable. Its compact size makes it suitable for a wide range of applications from 4×4’s and passenger cars to buggies, ATVs, UTVs.
1
Linear-18 Elite+
A low-profile aero designed LED light bar with 36 white and 18 yellow LEDs, the Linear-18 Elite+ is highly adaptable for easy vehicle integration, with vacuum-metallised wide optics to deliver a perfectly tuned beam pattern for everyday road use. The Linear-18 Elite+ also offers the four lighting modes: Boost (14,850 lumens, white LEDs only), Combo (21,000 lumens, both white and yellow), Snow/Fog/Dust (yellow LEDs only) and Low Output Mode.
One of the most popular low profile light bars on the market today, the Linear-18 is ideal for passenger cars, 4x4s, and LCVs, known for excellent distance and spread, the Linear range is an excellent solution when either space is limited or when looking for a discreet installation that’s most likely to get noticed at night-time.
1
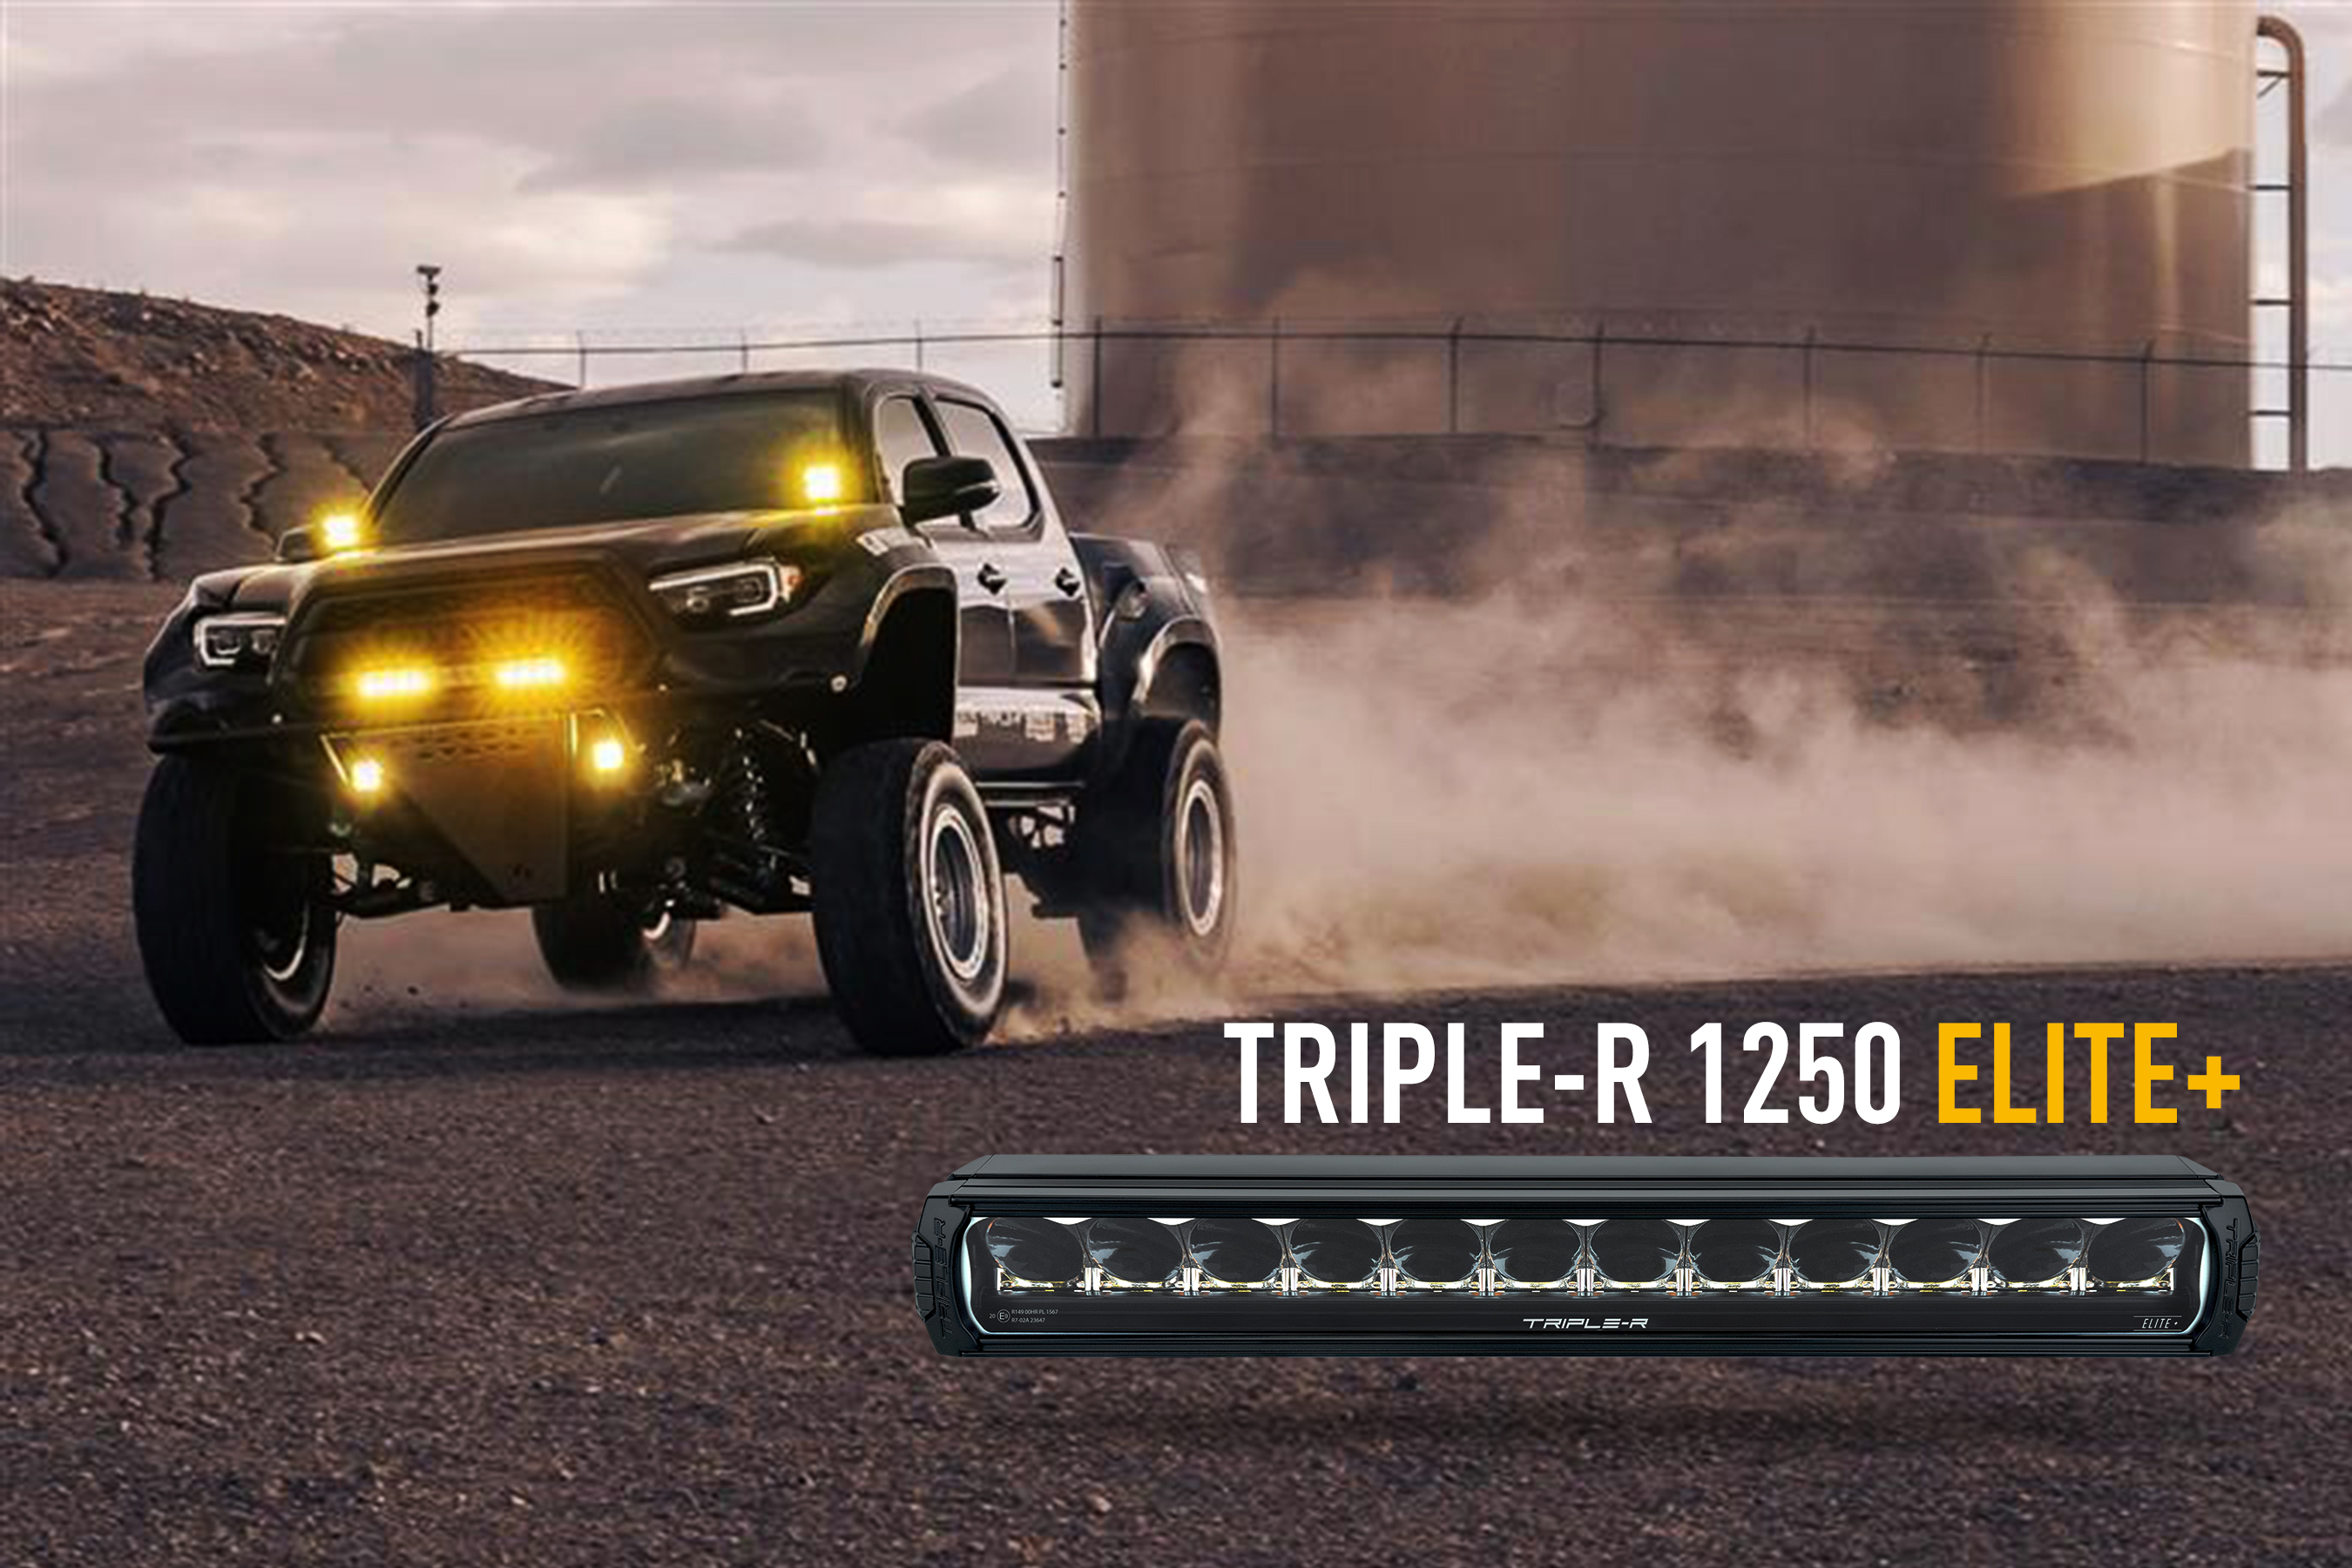
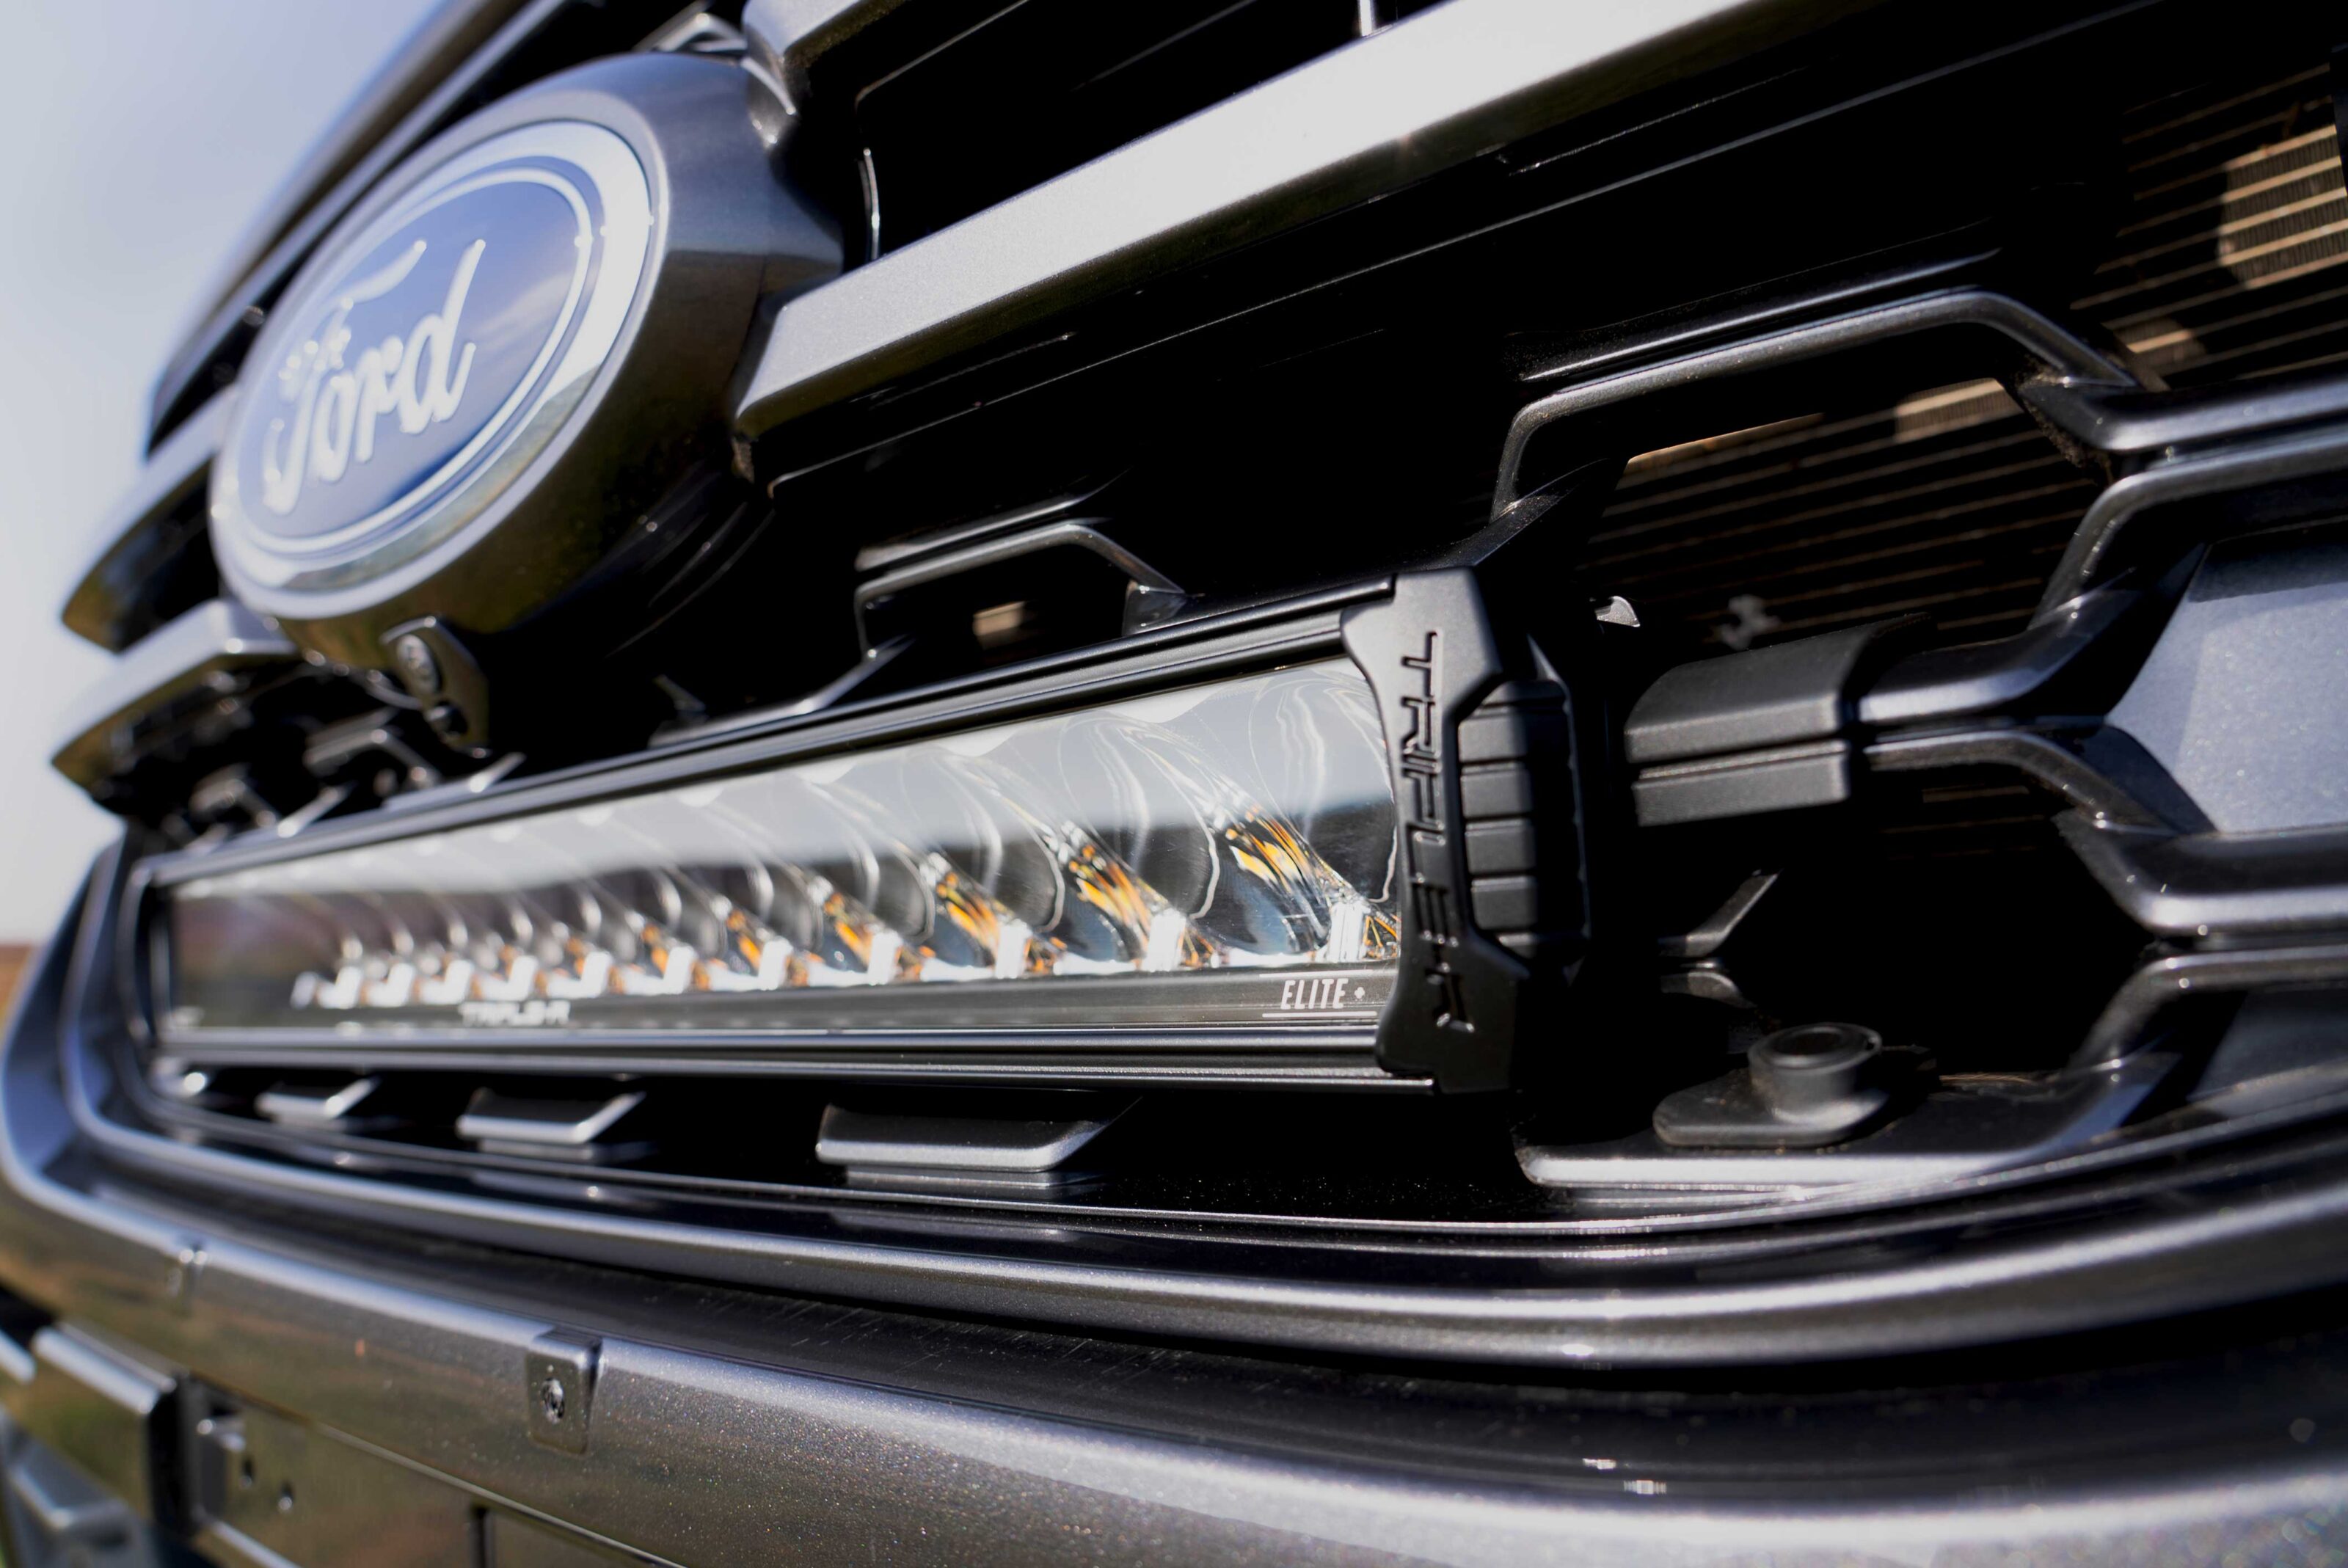
Triple-R 1250 Elite+
The Triple-R 1250 Elite+ is an incredibly powerful high-performance LED light bar, featuring power across the elite+ modes: Boost mode (12,028 lumens), Fog/Dust/Snow (9,360 lumens, Combo Mode (21,388 lumens). Featuring a number of exciting tech features from integrated white and amber position lights to a smart memory function that recalls preferred lighting modes, as well as Lazers signature build quality.
The Triple-R range offers a different, bolder aesthetic to the Linear range, ideal for those looking to make a statement, alongside valuing a more long distance focused beam pattern, as opposed to a wide horizontal / left-right spread.
1
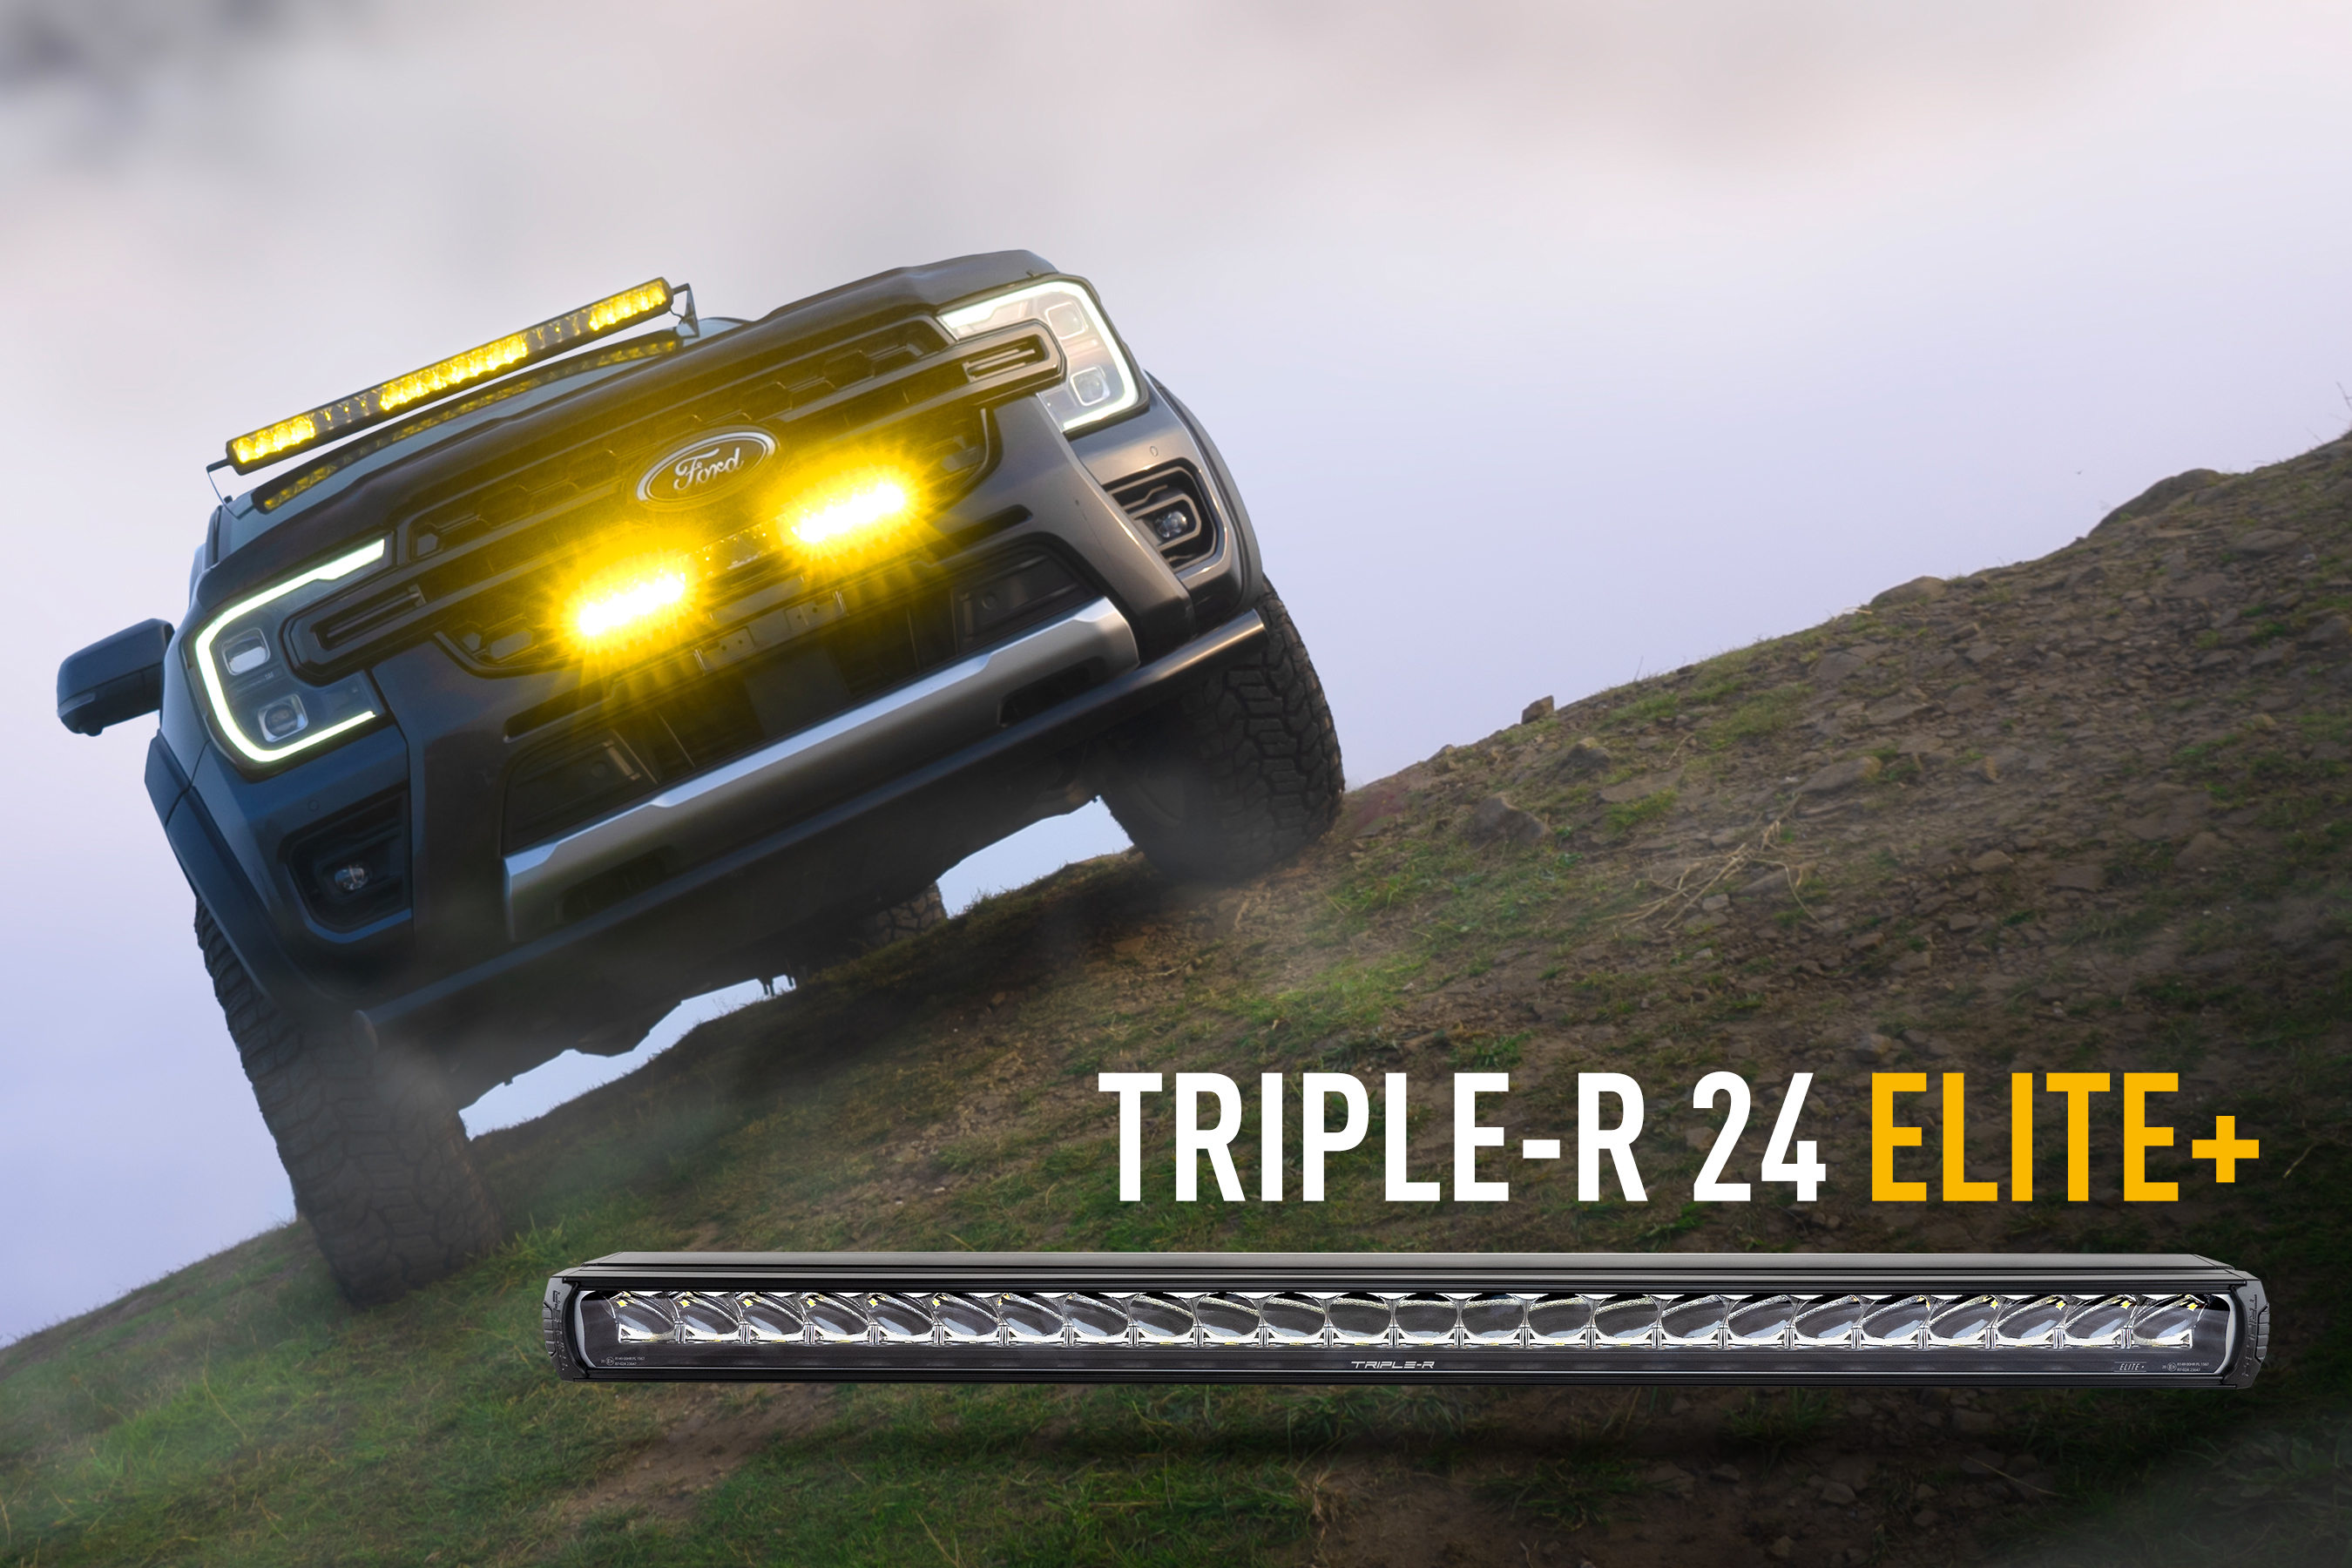
Triple-R 24 Elite+
One of Lazer’s most powerful products, the Triple-R 24 Elite+ sits at the top of the range. Engineered for exceptional illumination across all terrains and in any conditions, the imposing nature of the product is reflected in its light output performance. Featuring 48 white LEDs with a 5000K colour temperature and 40 yellow LED’s, the Triple-R 24 Elite+ delivers an incredible 34,220 lumens in Combo Mode, with 1lux delivered over 1100 metres away.
The light also delivers 24,056 lumens in Boost Mode and 18,720 in Fog / Dust mode. If you’re looking for a big and bold statement light bar, the Triple-R 24 Elite+ is truly unrivaled not only in terms of performance but also build quality and durability.
1
Lazer Lamps also manufactures a range of Vehicle Integration Kits, including innovative Grille Integration kits and Roof Mounting solutions, to help facilitate the installation of its lights to specific popular vehicles. The precision engineered integration solutions provide a simple, clean and professional install. However please note, if there is not a specific kit for your vehicle, it does not mean an install is not possible. Lazer has a large network of dealers and approved fitters across Australia to help: lazerlamps.com.au/dealer-locator
1
Lazer Vehicle Integration Kits that include Elite+
- Ford Ranger Wildtrak (2023+) Grille Kit – Triple-R 1250 Elite+
- Ford Ranger (2016-2022) Linear-18 Elite+
- Ford Ranger Raptor (2018 – 2022) Triple-R 1250 Elite+
- Ford Ranger (2016+) Roof Mounting Kit – Triple-R 24 Elite+
- Isuzu D-Max (2021-2022) Mounting Kit Linear-6 Elite+
- Land Rover Defender (2020+) Grille Kit – Linear-18
- Land Rover Defender (2020+) Mounting Kit – Linear-6
- Land Rover Defender (2020+) Mounting Kit – Linear-18
- Land Rover Defender (2020+) Roof Mounting Kit
- Nissan Navara (2014-2021) Kit
- RAM 1500 DT Series – Limited (2019-2023) Grille Kit
- Linear-6 Grille Kit suitable for Toyota Hilux (2021+)
- Toyota Hilux (2015+) Roof Mounting Kit (without Roof Rails)
- Grille Kit suitable for Toyota RAV4 Hybrid (2019+)
- VW Amarok (2010+) Roof Mounting Kit (without Roof Rails)
- Subaru Outback (2020-2022) Grille Kit
The Elite+ range is backed by Lazer Lamps’ comprehensive five-year warranty on all models and with a Lifetime Lens Guarantee, these are products you can have confidence will last for years, in even the harshest environments.
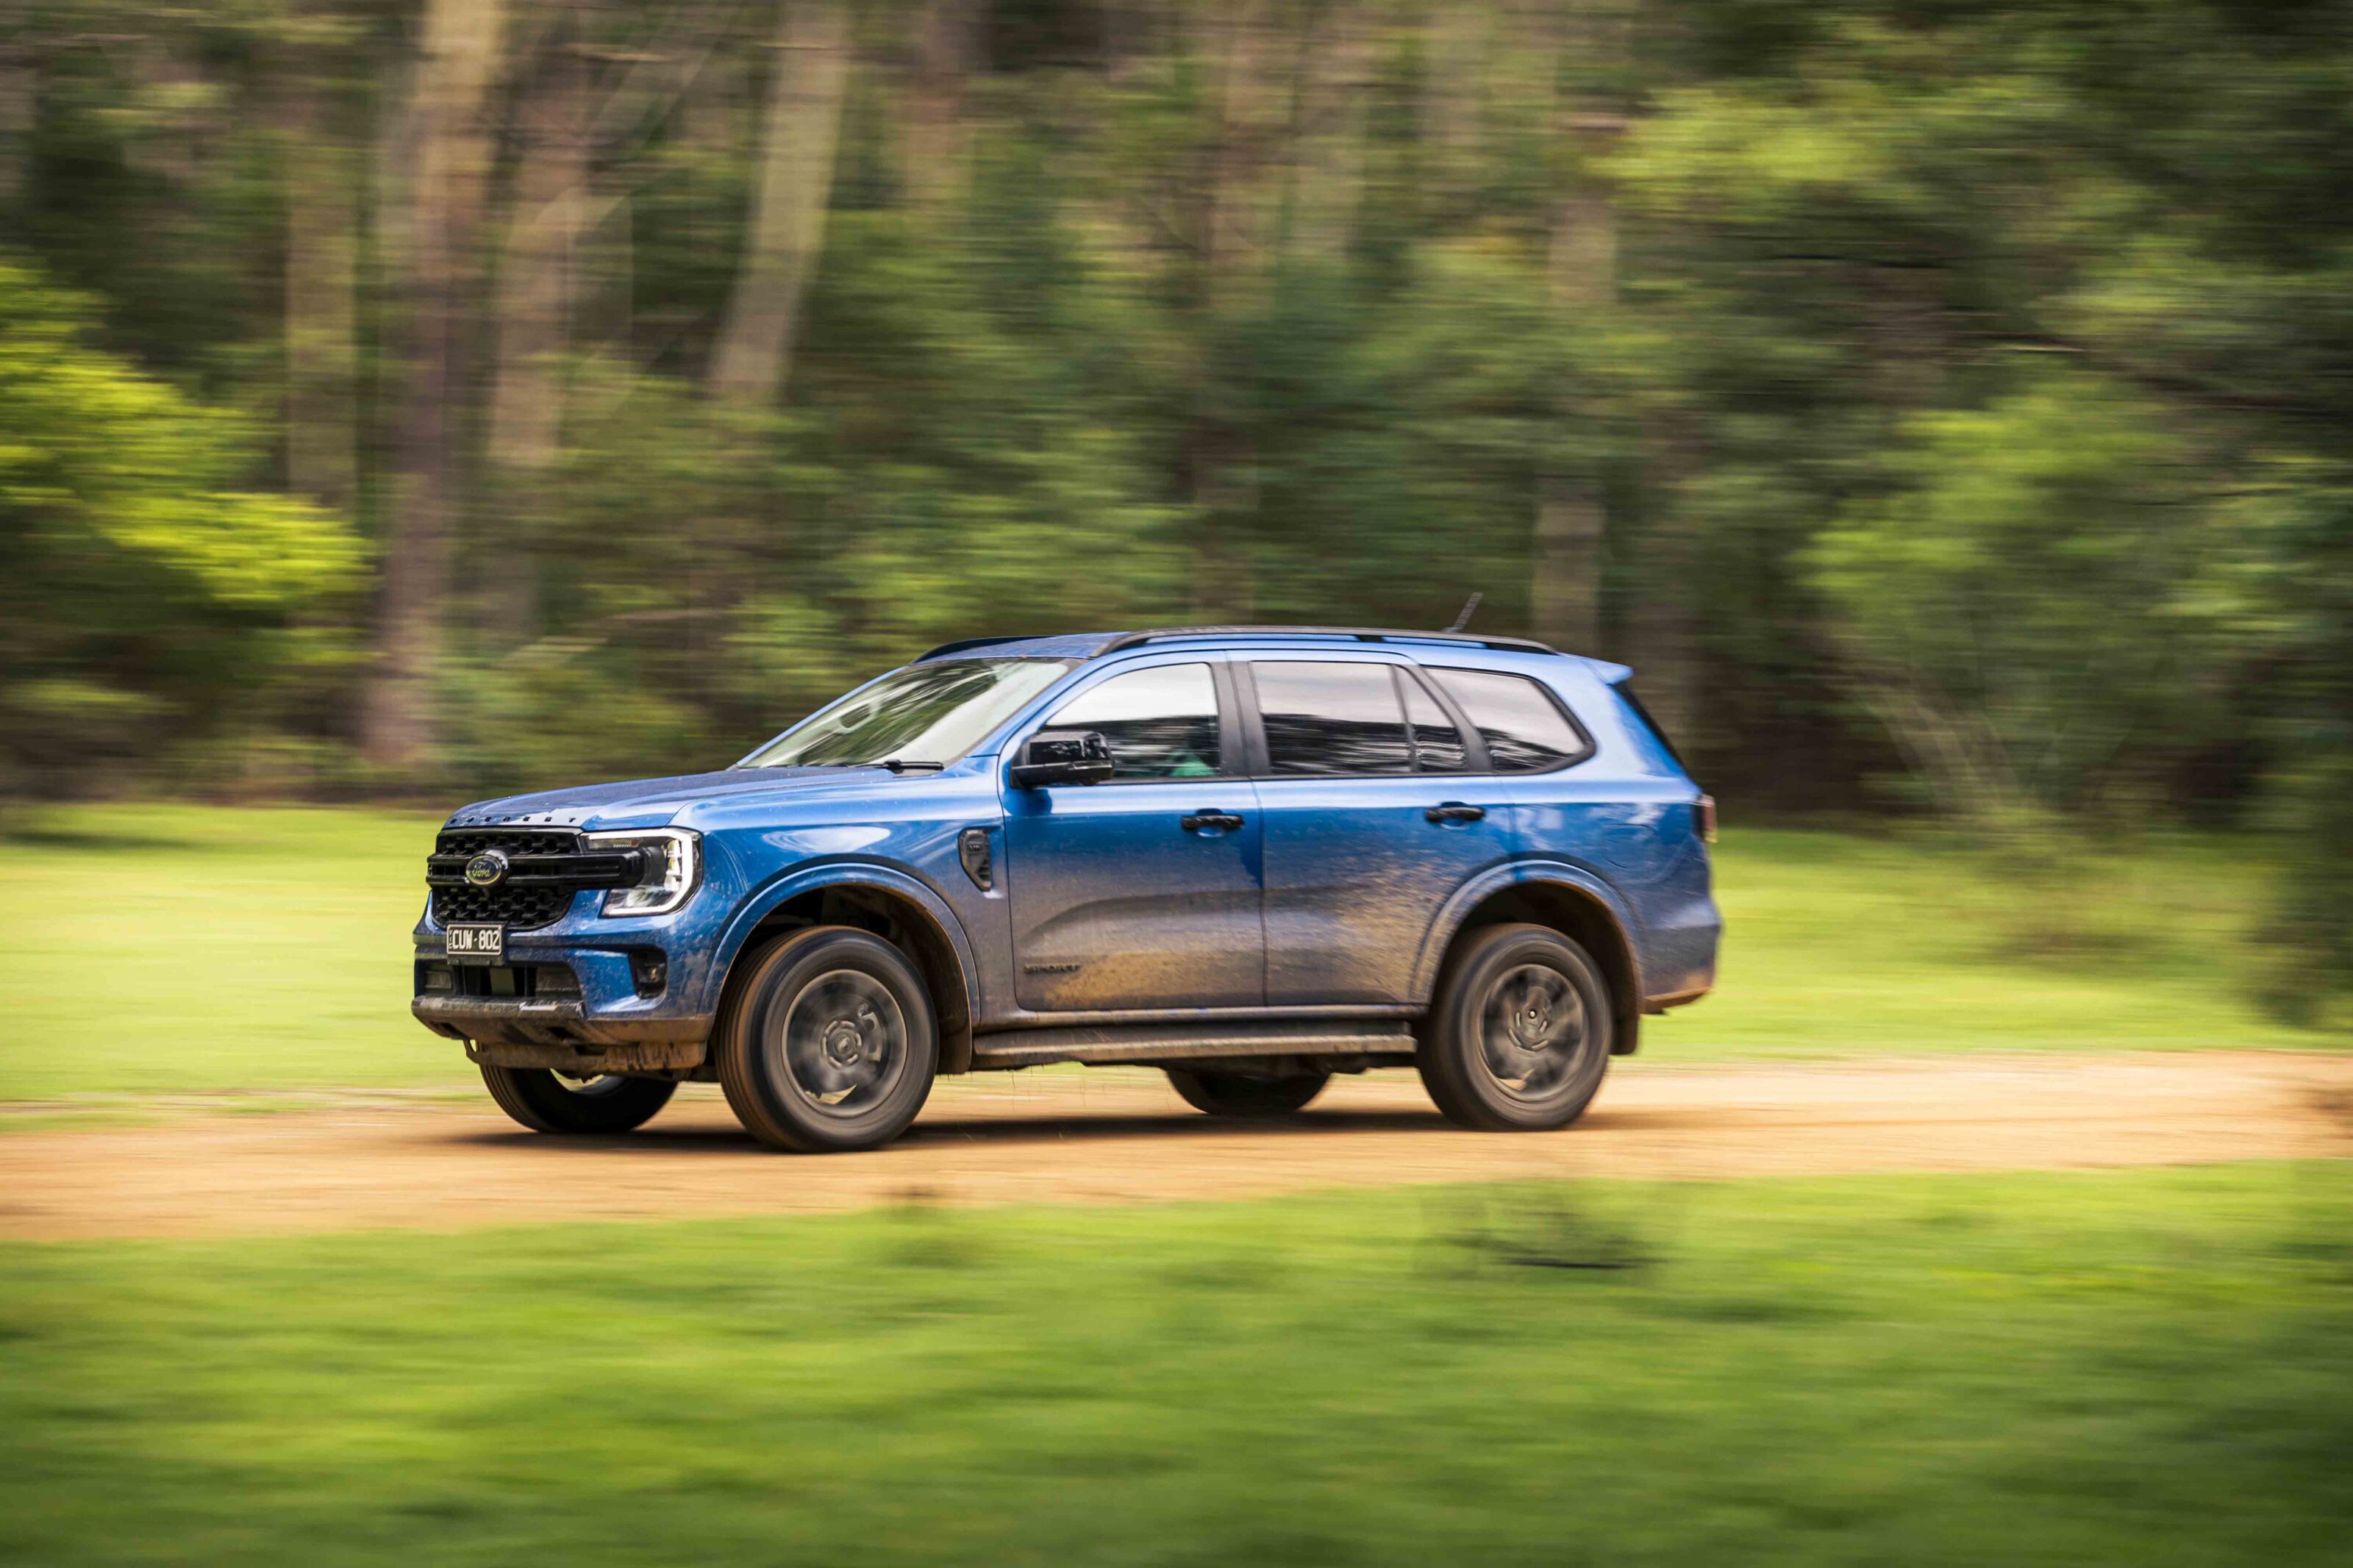
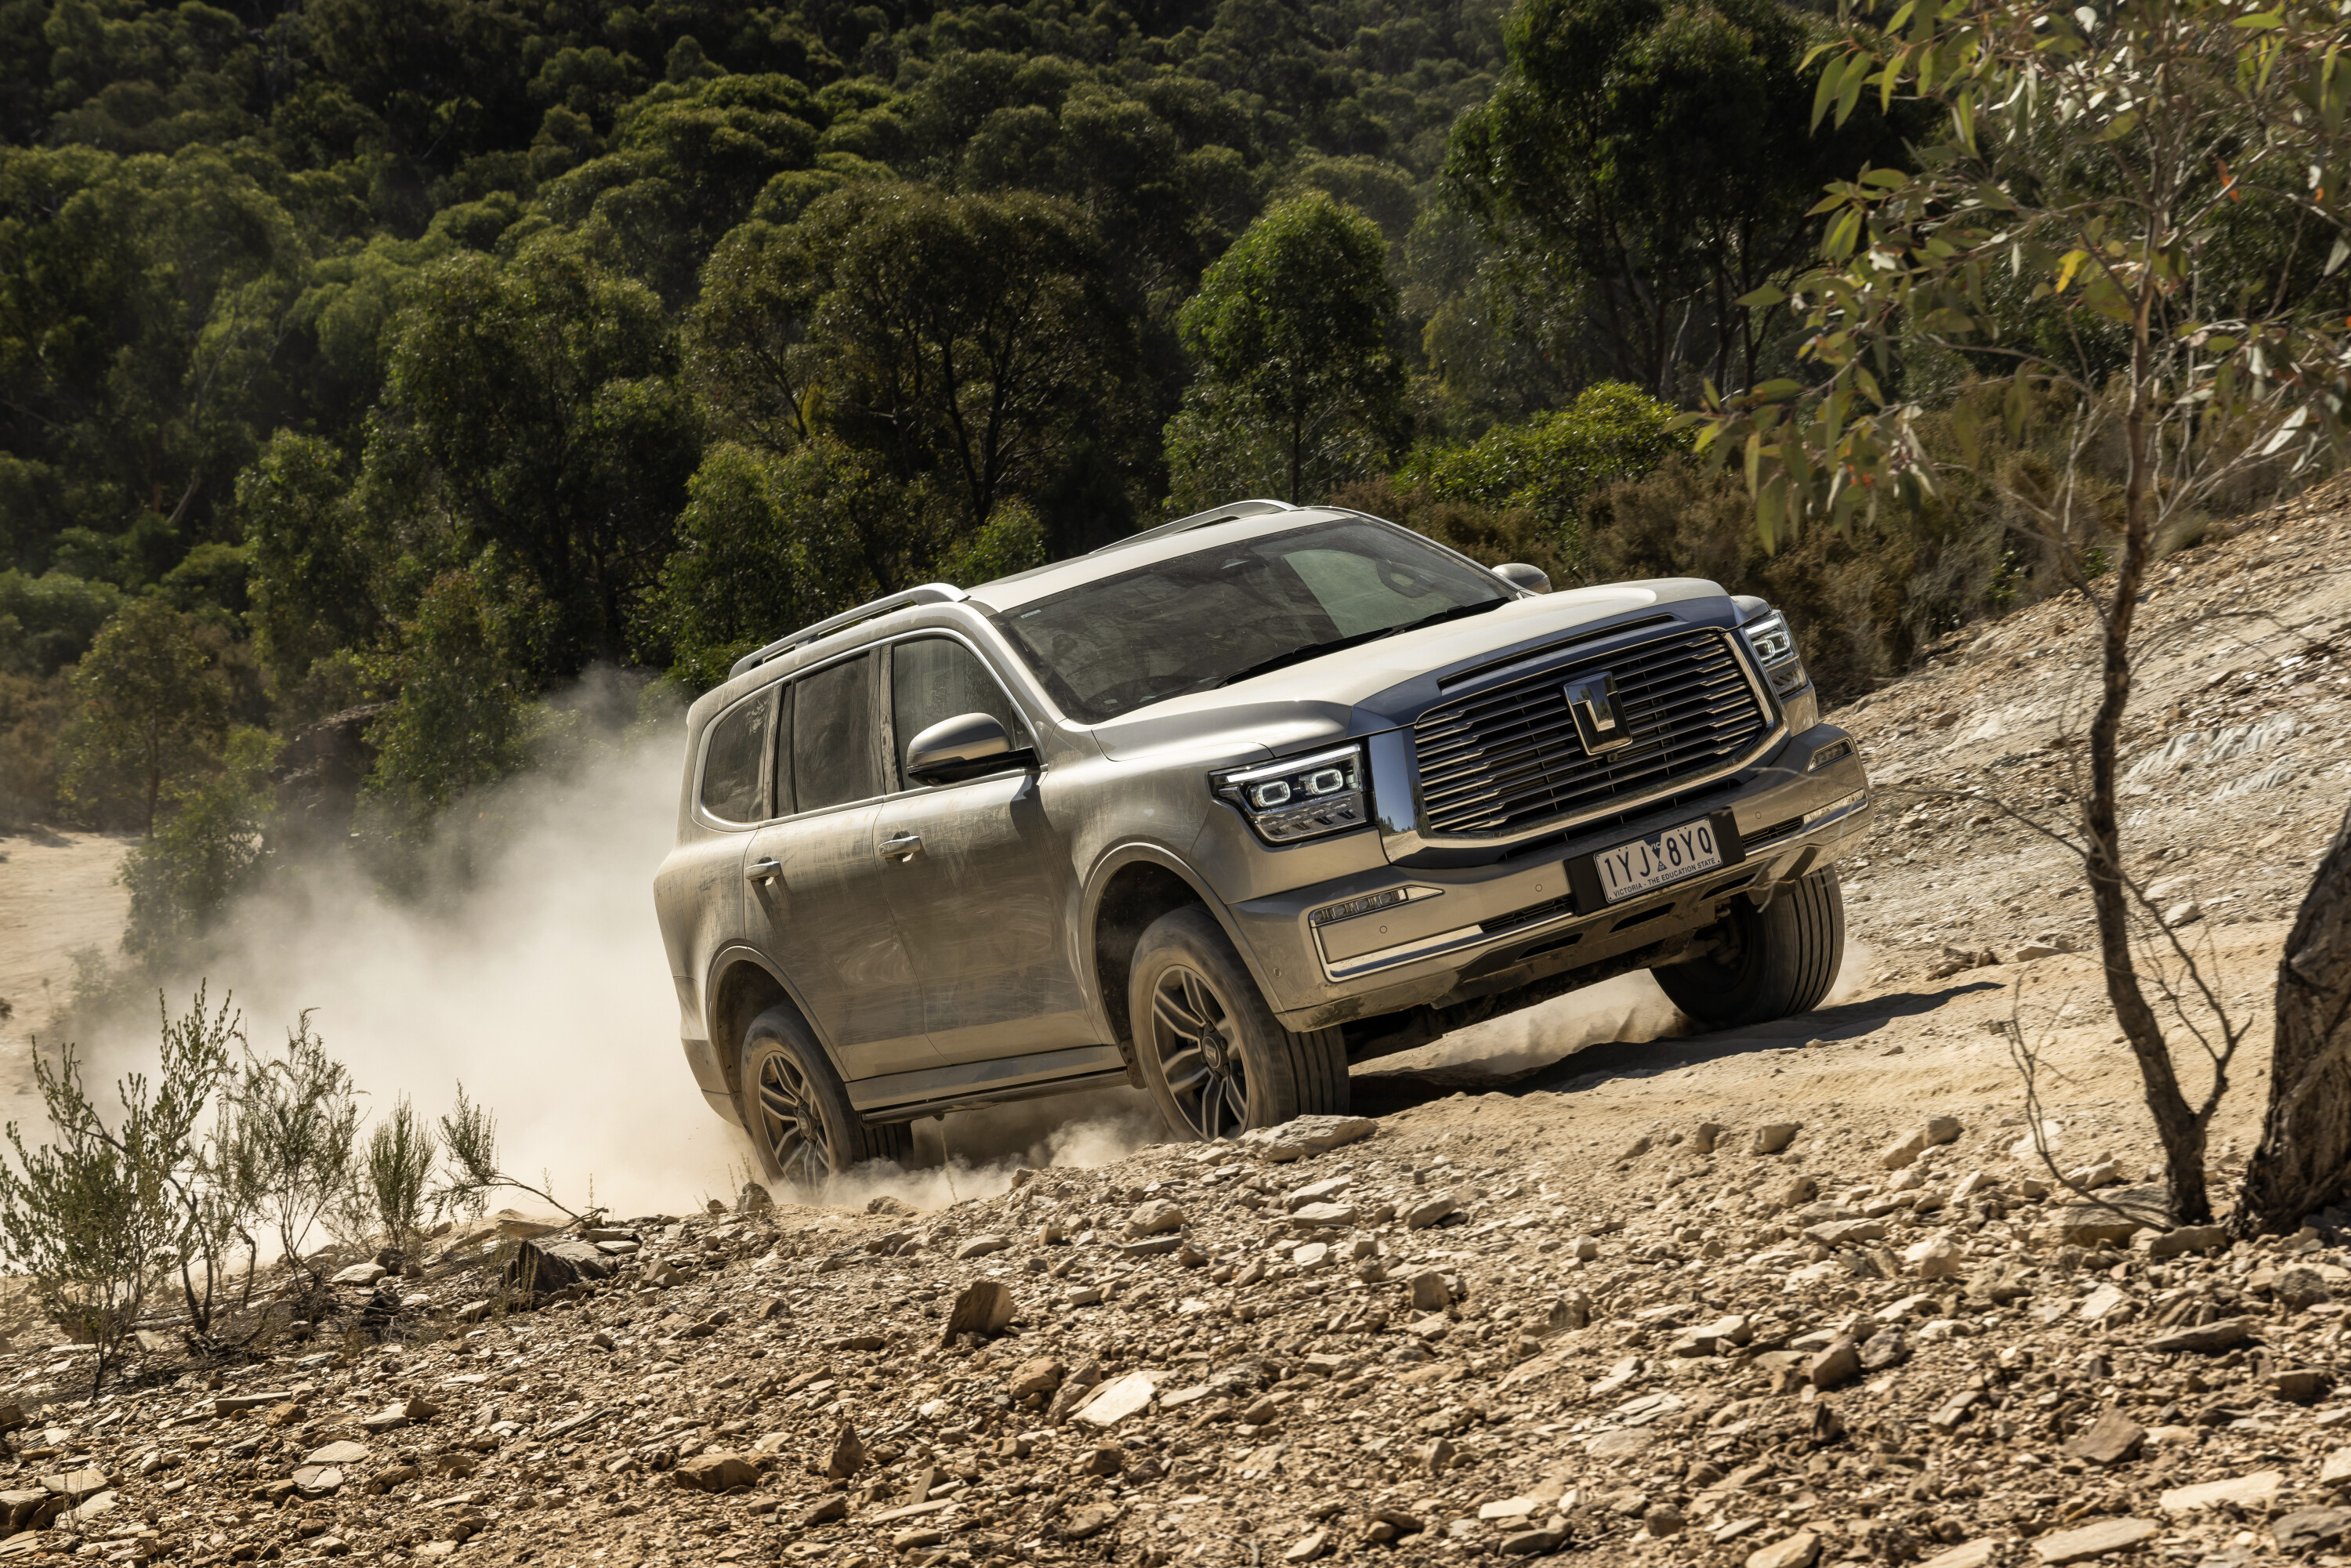
It’s business as usual for the Ford Ranger and Toyota HiLux at the head of the new 4×4 sales charts for the month of March.
Ford got a total of 4687 new 4×4 Rangers out to customers for the month; and the HiLux continues to do well, with 3360 units finding new homes despite it being an ageing model.
The BYD Shark 6 again outsold established players in the ute segment such as the D-MAX, Triton, BT-50 and Navara, selling 2810 units for the month. This positions it as the fourth best-seller overall for the month and the sixth best-selling 4×4 year-to-date.
Toyota’s 250 Series Prado was again the best-selling 4×4 wagon with 2871 vehicles sold, ahead of the Ford Everest which finished the month with 2100 sales. These two popular wagons maintain third and fourth on the YTD sales charts for 2025.
While the Prado and HiLux continue to do well for Toyota, the hero of the brand, the LandCruiser 300 Series, continues on a slow burn with just 199 units leaving showrooms in March. The Nissan Patrol again outsold the 300 with 710 sales, and with updates to the big Nissan coming in May, it should continue to find new buyers before the Y63 lands later this year or early in 2026.
The other slow-moving Toyota is the Tundra pick-up, with just 85 units sold. However, it still outsold the F-150 which only moved 69 units – the Chevrolet Silverado and Ram 1500 sold 257 and 211 pieces respectively. The team at Ram Trucks Australia are looking to gain ground from this month with the arrival of its new Hurricane engine and the improved performance fuel efficiency it brings.
While the BYD Shark has turned the budget ute segment on its head as it competes with the biggest players in the segment. The GWM Cannon moved 827 utes, the LDV T60 397 and the JAC T9 just 117. The ageing SsangYong Musso continues to be our favourite at this end of the market and it soldiers on with 196 sales in March.
When you look at combined numbers of 4×4 and 4×2 models, the Ranger continues to lead the race over the HiLux – however, in between these two utes, the Toyota RAV4 is still selling strong, showing that Australians still prefer utes and SUVs for their new cars.
| Best-selling 4x4s in March 2025 | |
|---|---|
| 1. Ford Ranger | 4687 |
| 2. Toyota Hilux | 3360 |
| 3. Toyota Prado | 2871 |
| 4. BYD Shark | 2810 |
| 5. Ford Everest | 2100 |
| 6. Mitsubishi Triton | 1739 |
| 7. Isuzu D-MAX | 1621 |
| 8. Isuzu MU-X | 1420 |
| 9. Mazda BT-50 | 1024 |
| 10. Toyota LC79 | 843 |
| Best-selling 4x4s YTD (as of March 2025) | |
|---|---|
| 1. Ford Ranger | 12,462 |
| 2. Toyota Hilux | 9253 |
| 3. Toyota Prado | 8411 |
| 4. Ford Everest | 4986 |
| 5. Isuzu D-MAX | 4891 |
| 6. BYD Shark | 4836 |
| 7. Mitsubishi Triton | 4032 |
| 8. Mazda BT-50 | 3197 |
| 9. Isuzu MU-X | 2919 |
| 10. Toyota Land Cruiser 79 | 2304 |
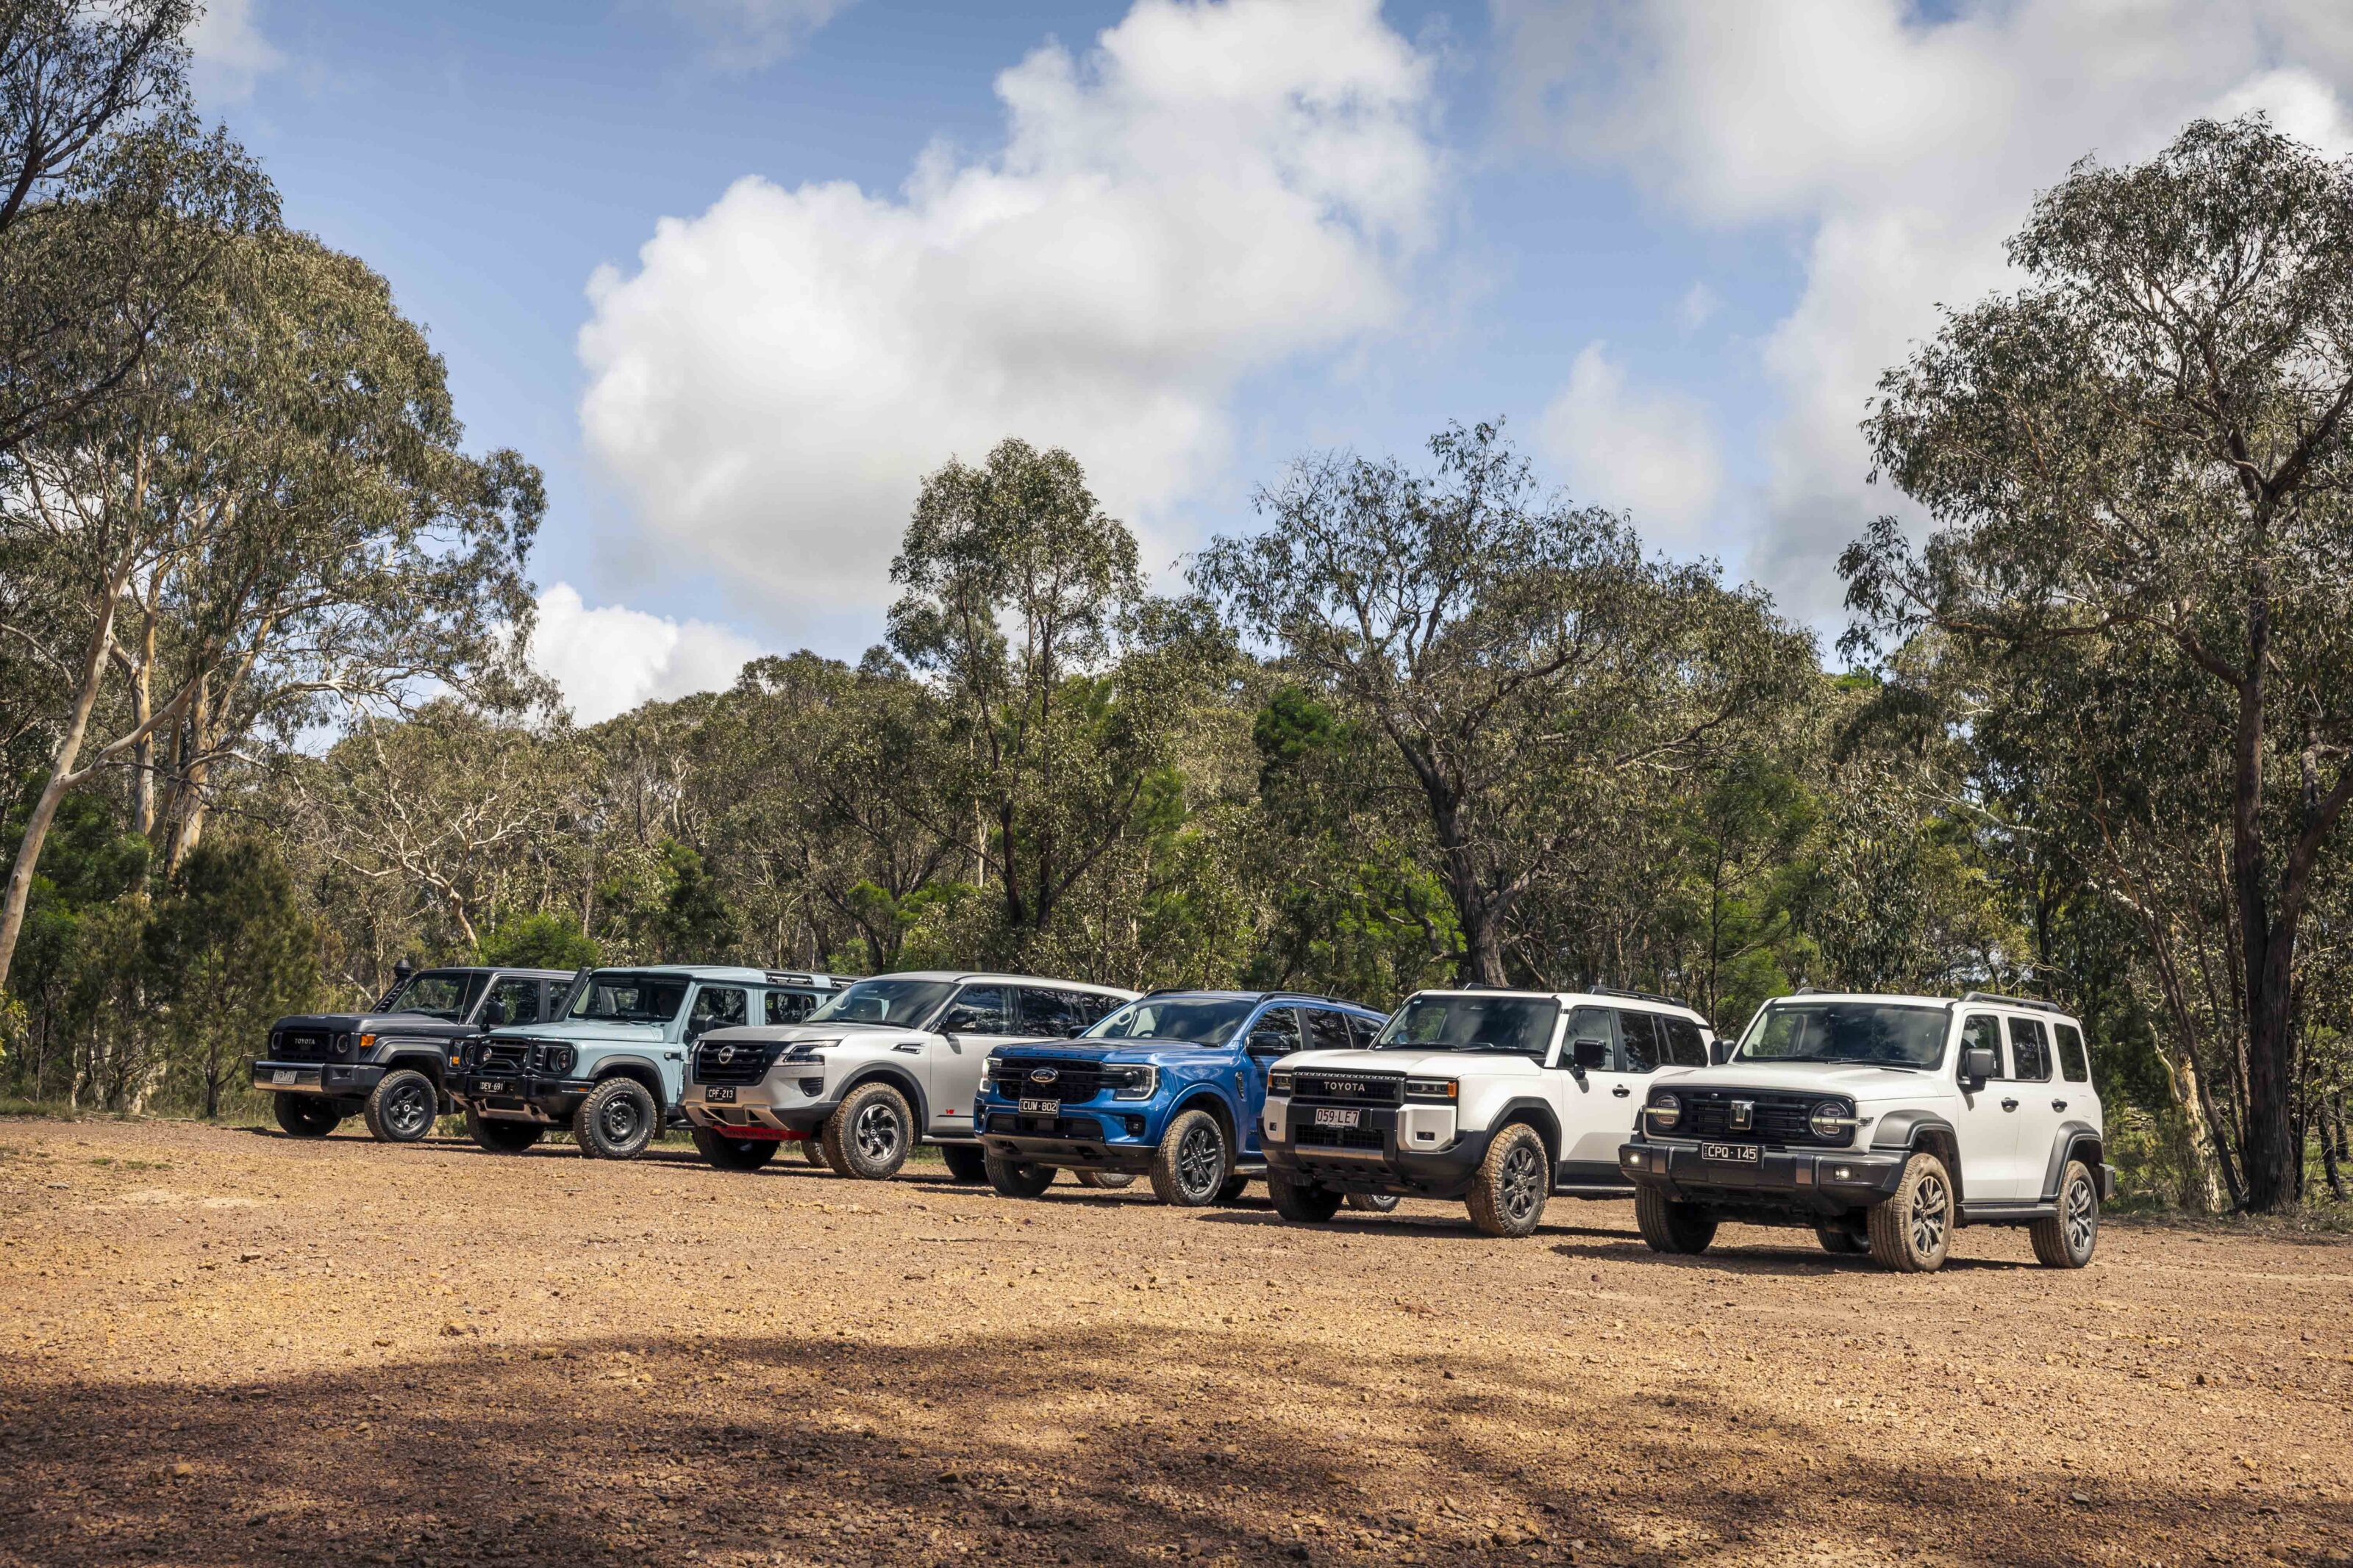
We pulled together the best new 4x4s of recent times to see which is worthy of the 4X4OTY title. Here’s how each of the six contenders fared during the testing process 👇
- Ford Everest
- GWM Tank 300
- Nissan Patrol Warrior
- Ineos Grenadier
- Toyota LandCruiser Prado
- Toyota LandCruiser 76 Series
Ford Everest
The Ford Everest topped the Toyota Prado as Australia’s best-selling midsize 4×4 in 2024 and rightly so as this second-generation model offers a comprehensive package as a family touring wagon.
Admittedly, this was while Toyota was running out its stock of the old Prado but the Everest still has a lot to offer and deserves the sales title. At $76,590 (+ORC) the Everest Sport V6 we had on test is cheaper than all but the lowest grade 250 Series Prado GX meaning that it should be able to remain competitive in the sales race with the new Toyota in 2025.
The Everest Sport is a premium offering with leather seats, large multimedia screen, full suite of safety functions and a dual-range transfer case with multiple drive modes and a locking differential in the rear axle.
13
Its biggest selling point is its V6 diesel engine which, while relatively heavy on fuel use, offers refined performance and ability that nothing else short of a much more expensive LC300 can beat. The engine might be long in the tooth but it gives the Everest a level of performance that few other vehicles in the segment can match and significantly one of those is the 250 Series Prado.
The 4X4OTY testing showed many of the characteristics of the vehicles that we have noted during previous testing. Specifically for the Everest is that its ETC is slower to react than that in Toyotas which set the standard, and this allows the tyres to slip before traction control cuts in to arrest the slippage. As a result of this hesitation, the Everest scrabbles for traction in areas where other vehicles get through smoothly, so it really needs its locking rear differential to make it through.
The Everest’s off-road drive modes are also important here as we found that leaving it in the automatic setting or the wrong mode for the conditions has a negative effect on performance. This was evident when driving through the wombat holes where some drivers were making a meal of the sloppy conditions. Selecting the ‘Mud/Ruts’ drive mode certainly made a difference here as it sharpens up the ETC performance. Still, the RDL was needed for the best results.
12
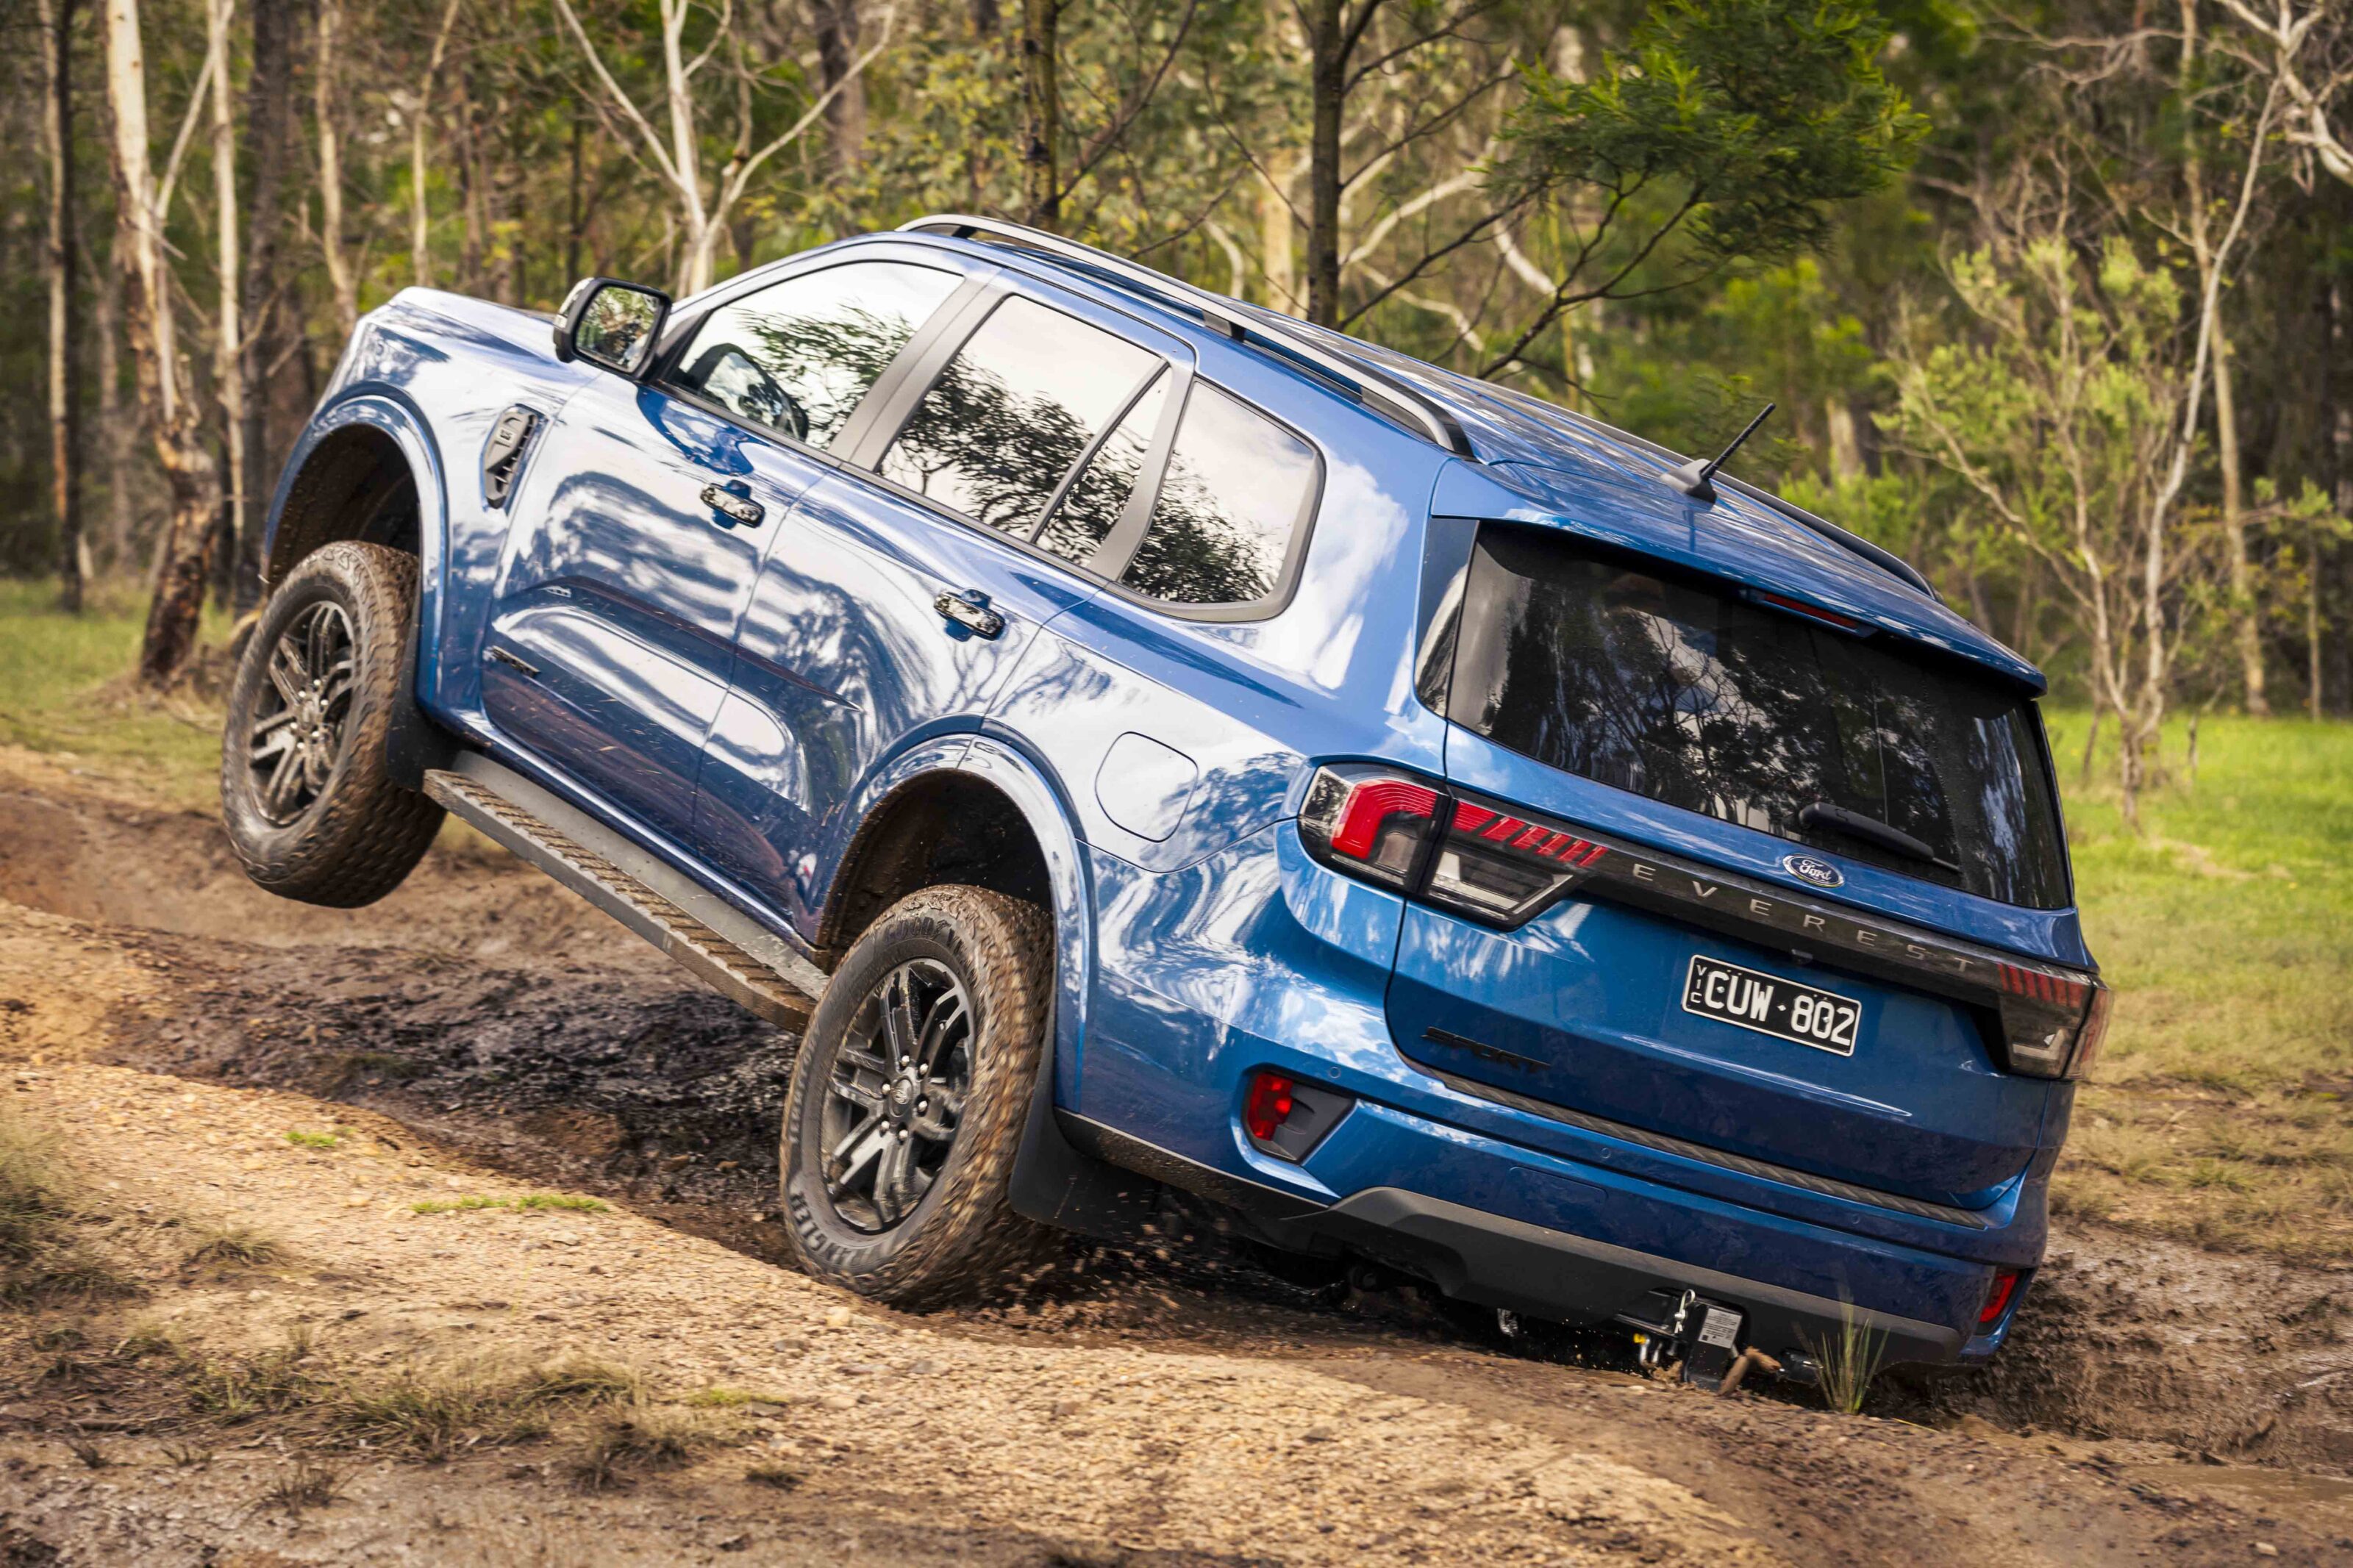
The Everest also revealed itself to be the lowest vehicle among our contenders, bottoming out on occasion when negotiating obstacles.
It was a similar story on the hill climb where some drivers couldn’t get the Ford up the most challenging hill, but selecting the more aggressive drive mode and using a light throttle eventually got it up there.
An annoying feature on the Everest compared to some of the other 4×4 vehicles in the Ford range – all of which use a similar if not the same system – is having to select the off-road screen to activate the RDL while other Fords have it at the touch of a button.
The Everest’s strong points are its well-equipped and generally functional cabin and its on-road performance. The seven-seat cabin delivers space for family travels and the third-row seats fold flat into the floor when not in use to make the most of the storage space.
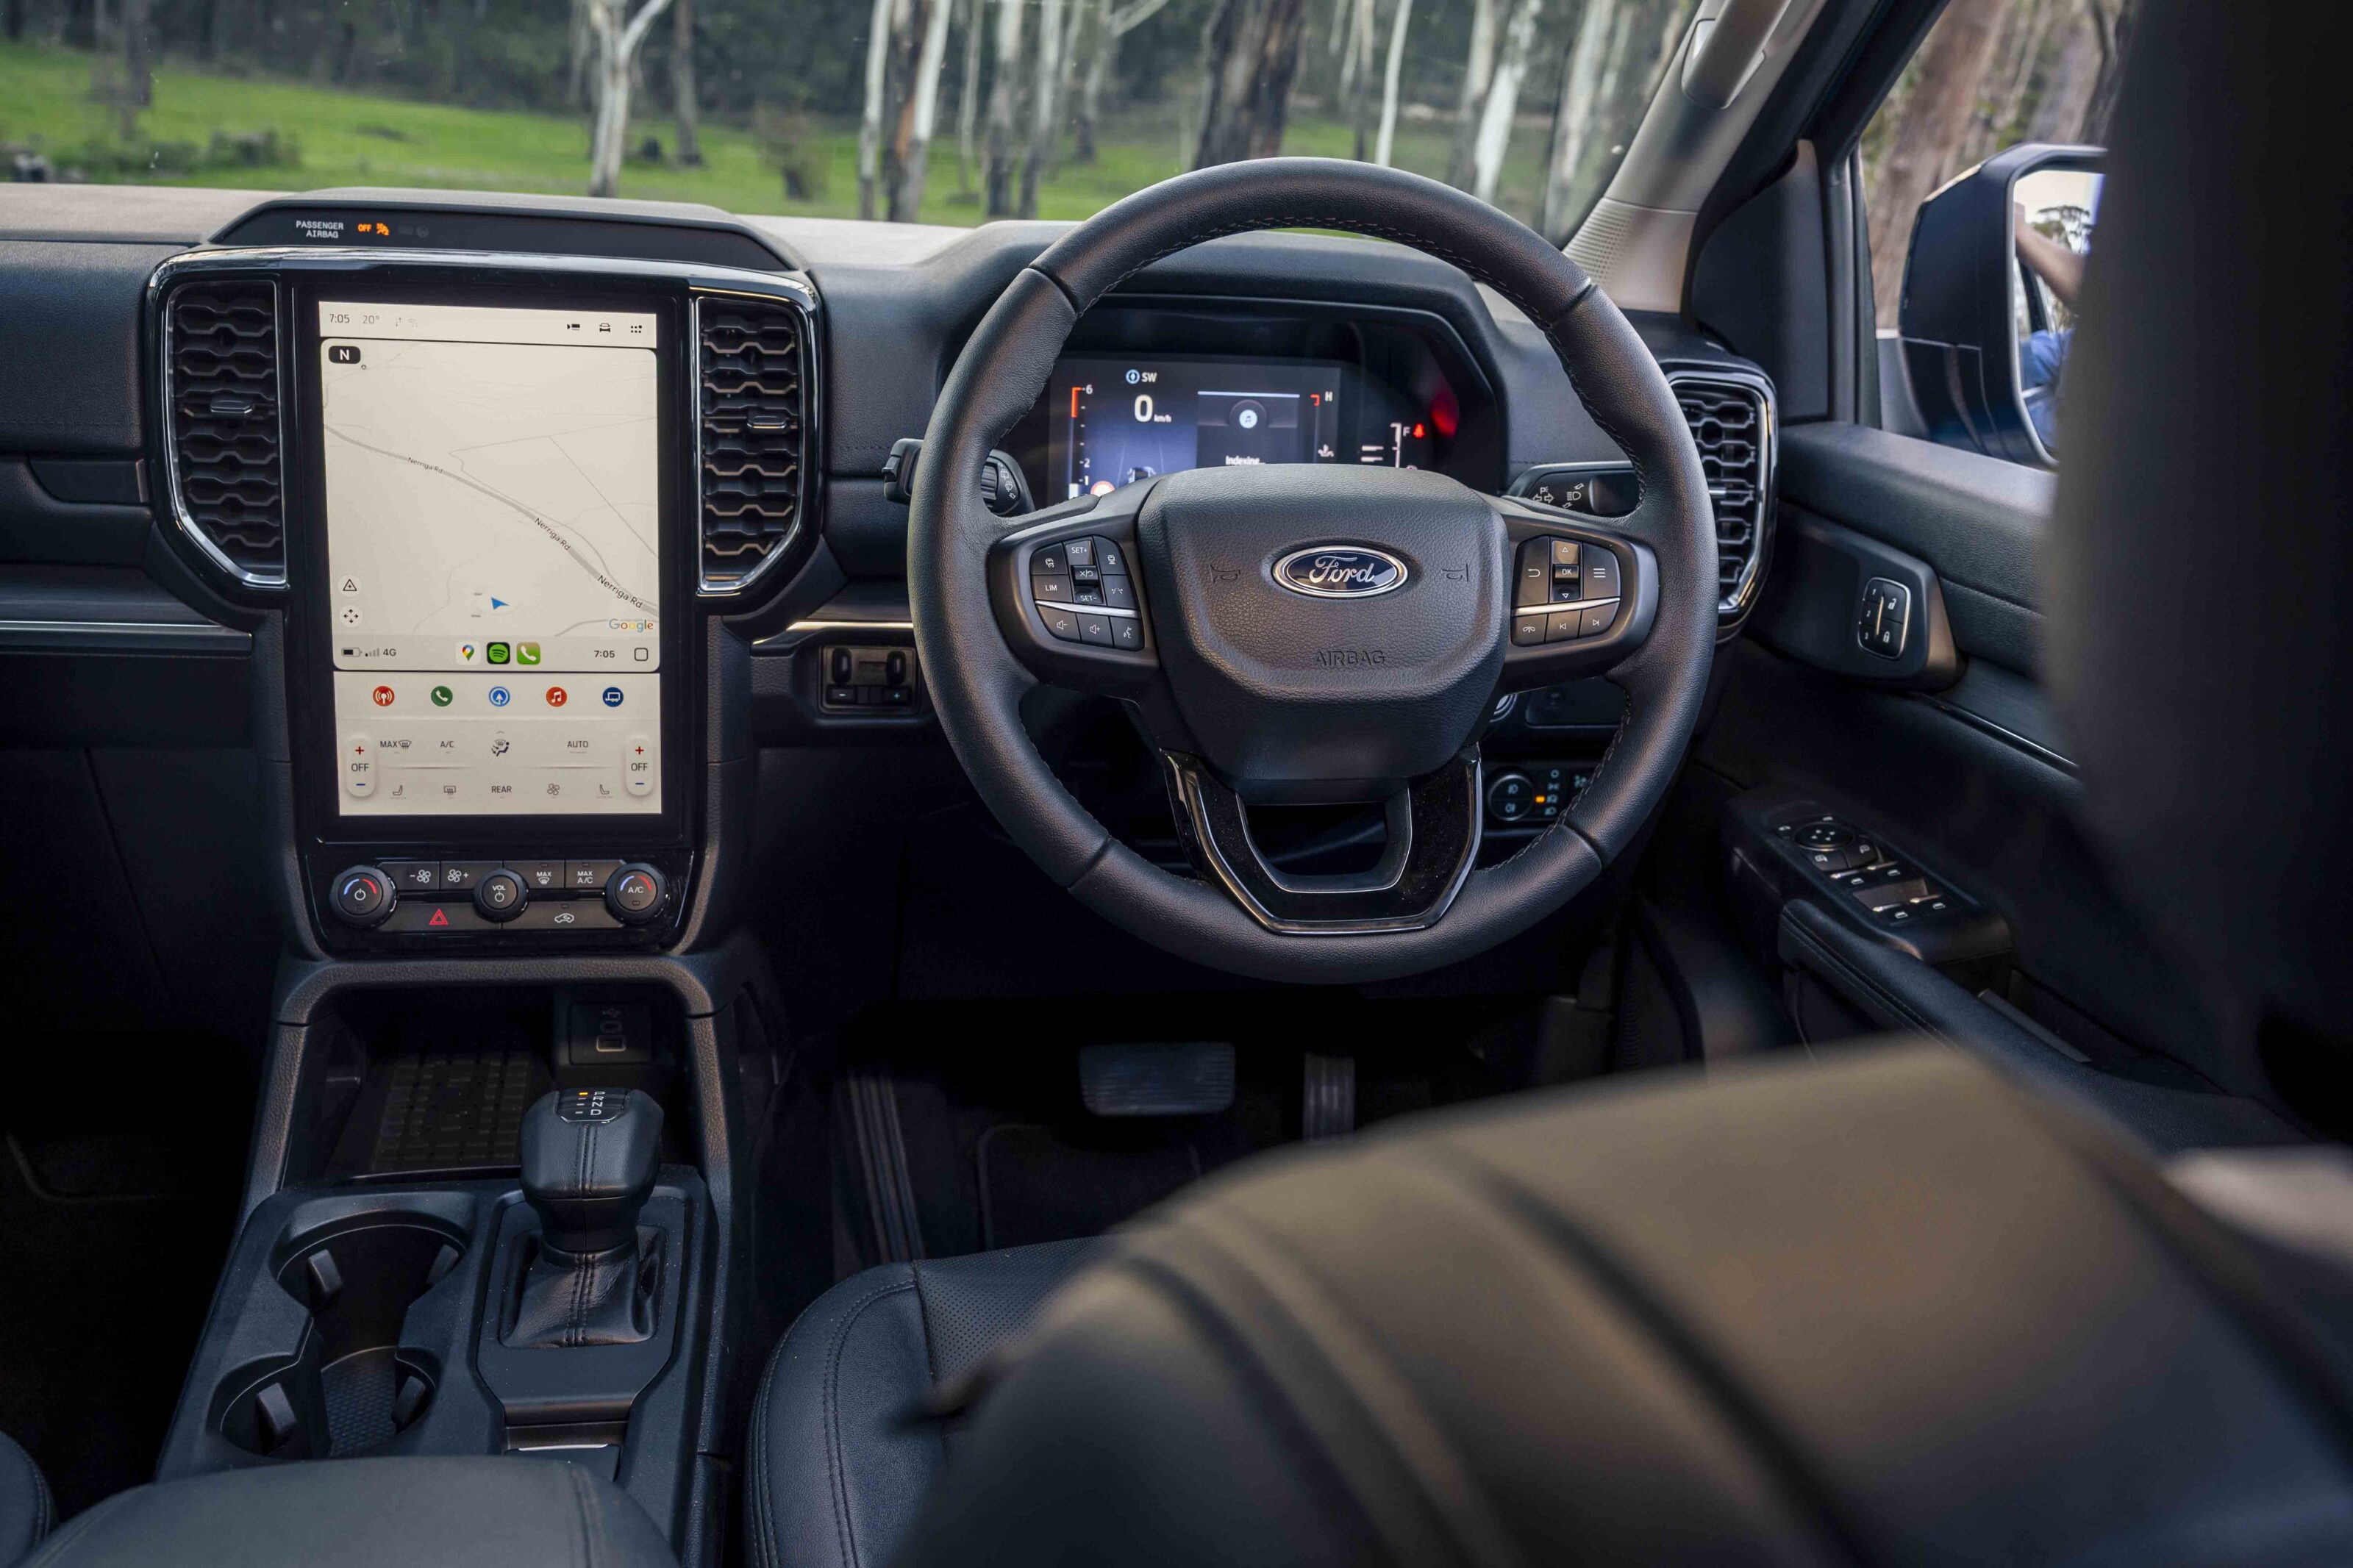
1
The large vertical multimedia screen is easy to read and use, and retains manual controls for cabin temperature and volume control that are easy to use without taking your eyes off the road.
The on-demand 4×4 system gives the driver on-road 4×4 traction which is great when driving on gravel roads and over crook surfaces. The suspension is beautifully dialled in for Australian road conditions making the Everest an excellent touring wagon.
Dave Morley said of the Ford, “Lacks a bit of suspension flex compared with this bunch, but in isolation it will take you wherever you want to go.” Ron Moon added, “Less intimidating in size than others in its class, the Everest has everything that most people will aspire to.”
| Ford Everest Sport specs | |
|---|---|
| Price | $76,650 +ORC |
| Engine | V6 diesel |
| Capacity | 2993cc |
| Max power | 184kW @ 3750rpm |
| Max torque | 600Nm @ 1750-2250rpm |
| Transmission | 10-speed automatic |
| 4×4 system | 2wd, 4×4 auto, and dual range locked 4×4 |
| Crawl ratio | N/A |
| Construction | 5-door wagon on separate chassis |
| Front suspension | Double wishbone IFS, coils |
| Rear suspension | Live axle, multi-links, coil springs, Watts linkage |
| Tyres | 265/60R18 on alloys |
| Kerb weight | 2492kg |
| GVM | 3150kg |
| GCM | 6250kg |
| Towing capacity | 3500kg |
| Payload | 685kg |
| Seats | 7 |
| Fuel tank | 80L |
| ADR fuel consumption | 8.5L/100km |
| On-test fuel consumption | 16.7L/100km |
| Approach angle | 30.2 |
| Ramp-over angle | 21.9 |
| Departure angle | 23 |
| Ground clearance | 226mm |
| Wading depth | 800mm |
GWM Tank 300
As the lowest priced vehicle in our group of finalists, the Tank 300 Ultra promised a lot of bang for bucks… and it delivered in spades.
Capable compact 4x4s are few and far between these days and the GWM Tank is a welcome addition as it fills a void in the market. The 300 is available in two grades of specification with either a 2.0-litre turbo-petrol engine or the same engine with hybrid EV assistance.
Now GWM has also introduced a diesel option just in time for our 4X4OTY testing, adding the 2.4-litre turbo-diesel engine from the 2025 Cannon into the mix, and that’s what we have here in Ultra trim. Great Wall’s diesel engine makes a claimed 135kW of power and 480Nm of torque, and it’s backed by a nine-speed automatic transmission.
13
In $51,990 Ultra trim, the Tank is well equipped with leather accented power seats, a full list of ADAS and safety features, and a premium feel.
Despite being relatively compact in size the Tank 300 Ultra features a traditional body-on-frame construction with an IFS front end with coils and a live-axle rear with coils, with lockers front and rear, and high and low range in the transfer case.
On test, the Tank 300 impressed our judges from the outset with its premium interior and the way it tackled the wombat hole track and hillclimbs at Great Divide Tours with relative ease.
4X4OTY judge Dex Fulton, who drove the Tank down to Braidwood for the start of testing, said afterwards, “The Tank offers a lot for relatively little, and while it absolutely shines off-road (thanks to twin lockers and a fairly short wheelbase) and is decent on-road, where it’s really let down is by its engine which just doesn’t have enough poke.”
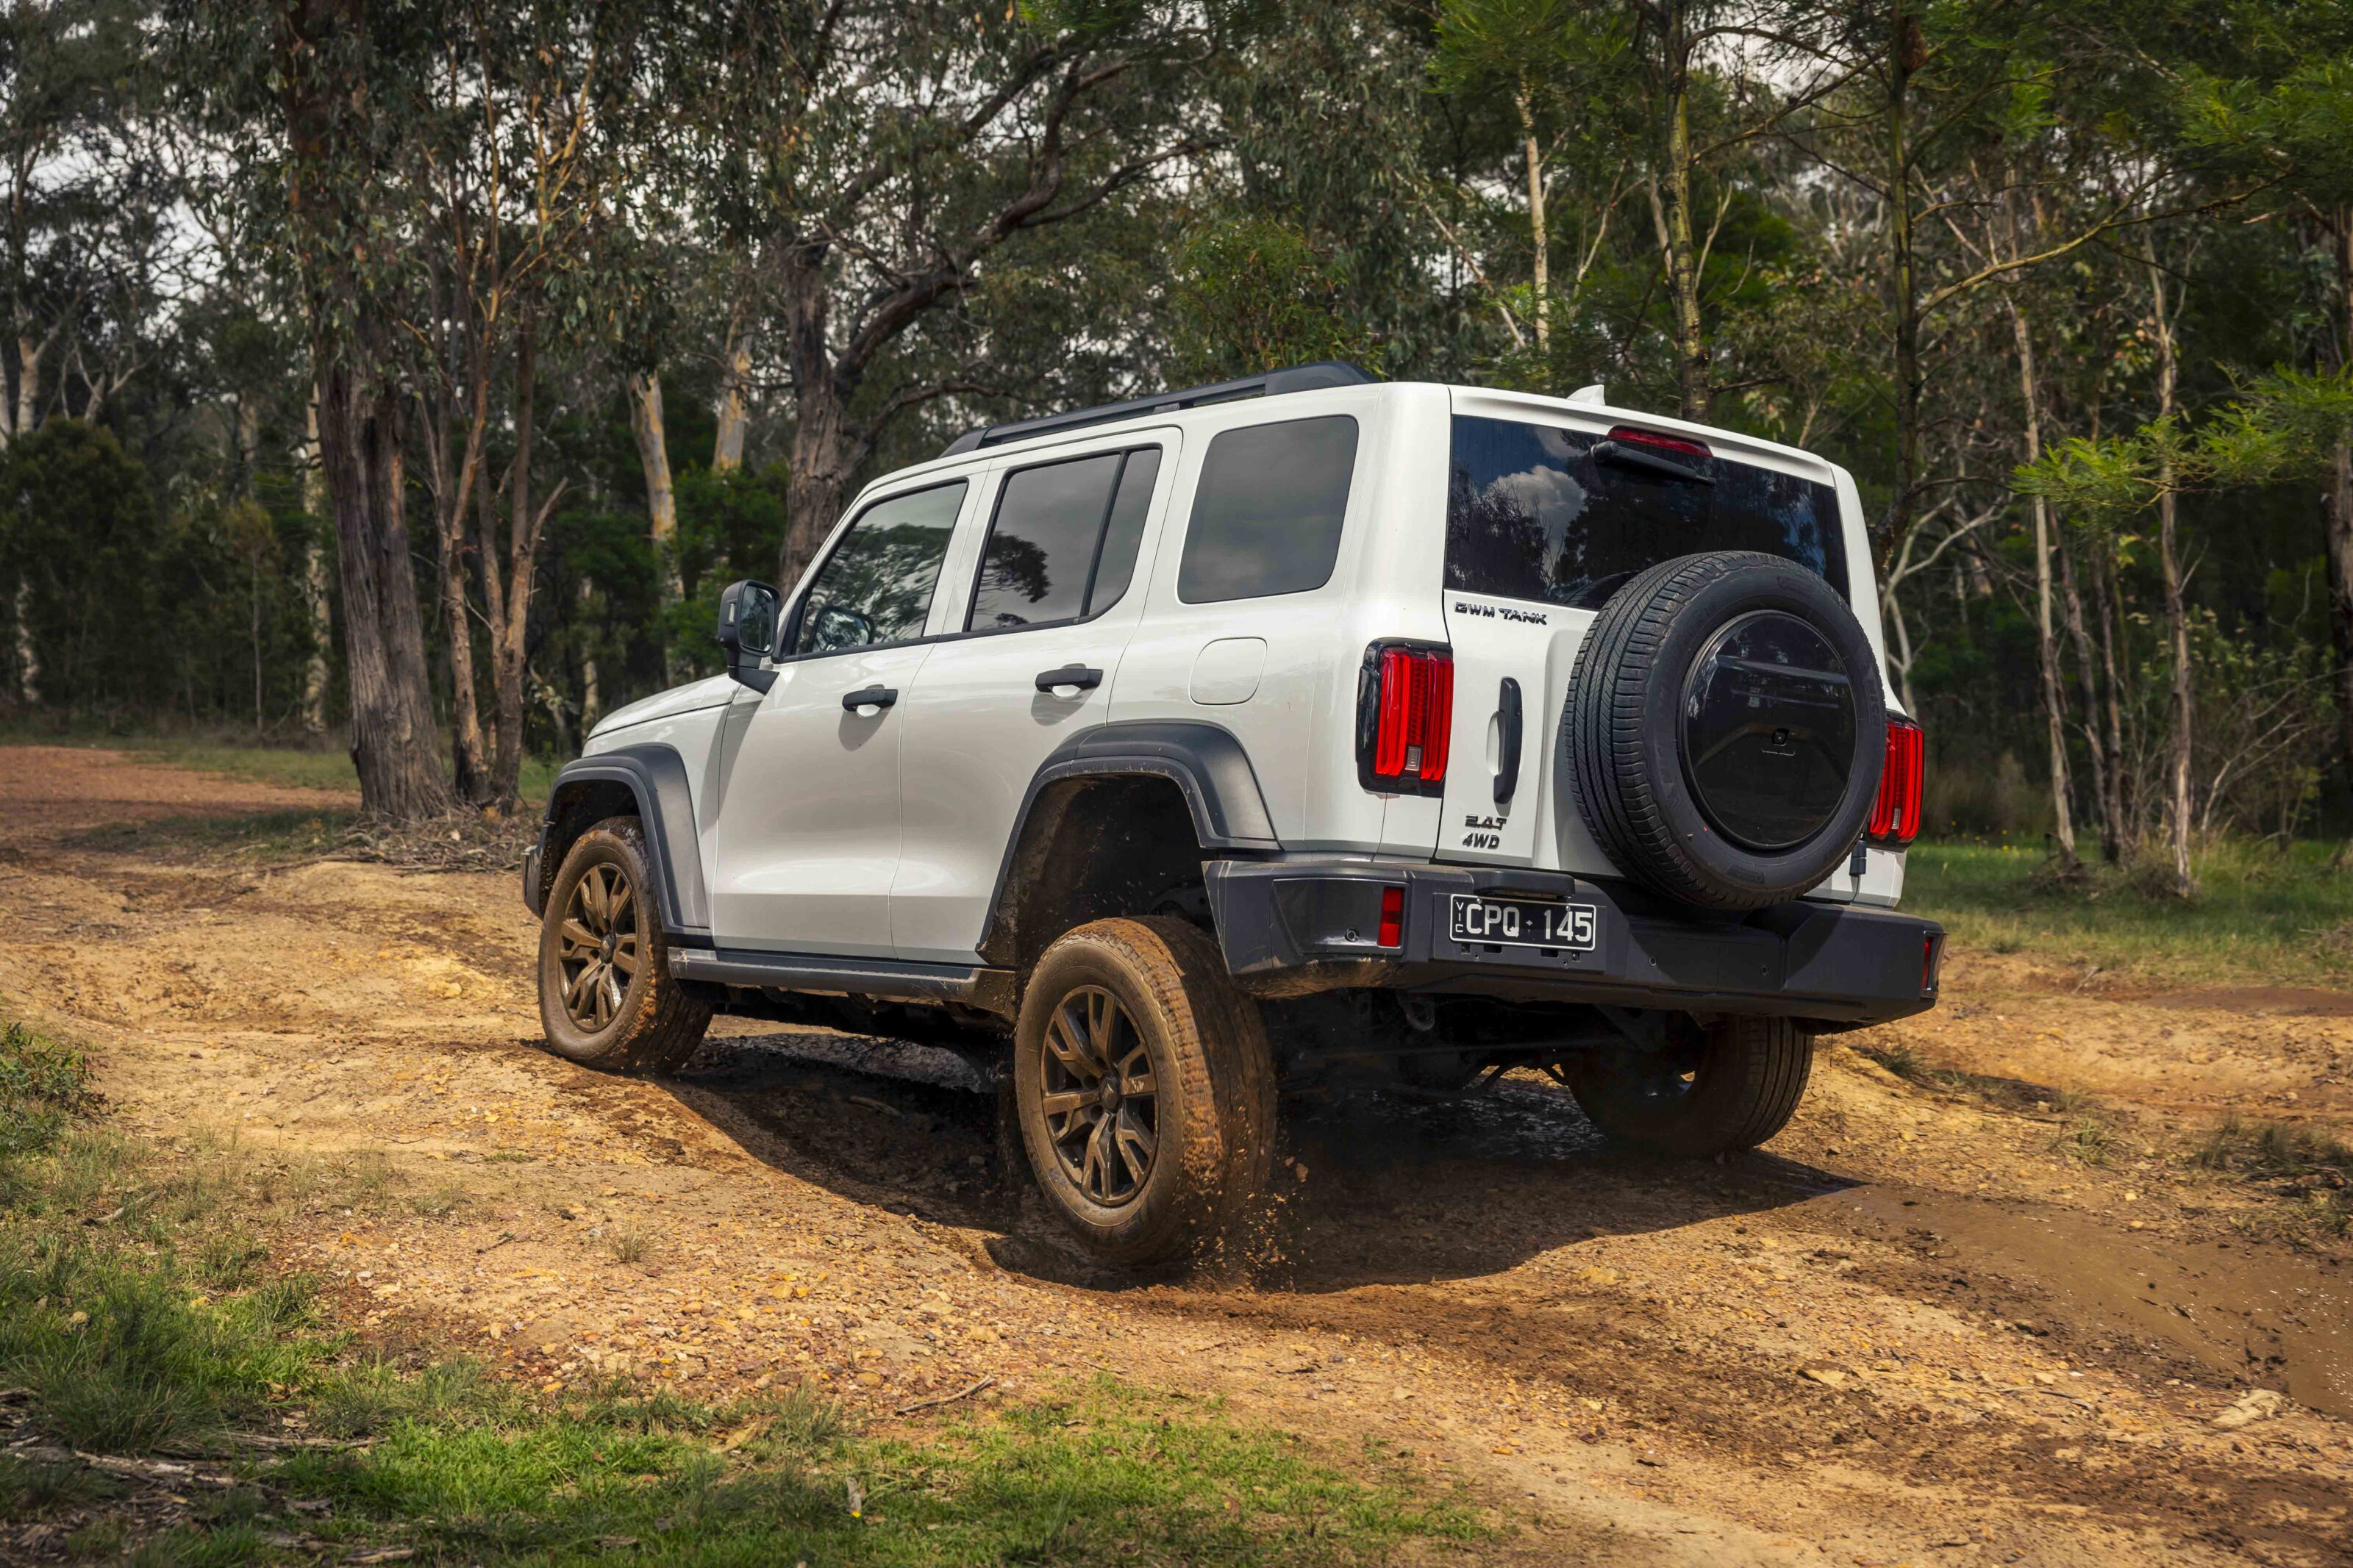
14
That lack of power was noted by a few of our drivers and came to the fore when the Tank failed to make it up that challenging hill on Merricumbene Fire Trail. As it climbed the engine sounded as if it was being held back, not revving or accelerating enough to create the speed to clear the crest. Whether that was the traction control holding it back or the transmission not shifting when the engine redlined in low range is unknown, but the result was that the Tank was the only vehicle to need assistance during our test drive.
Nevertheless, Ron Moon reflected many of our sentiments about the vehicle saying, “The Tank surprised with its comfort and offroad ability.”
| GWM Tank 300 specs | |
|---|---|
| Price | $51,990 drive away |
| Engine | I4 diesel |
| Capacity | 2370cc |
| Max power | 135kW @ 3600rpm |
| Max torque | 480Nm @ 1500-2500rpm |
| Transmission | 9-speed automatic |
| 4×4 system | On-demand dual-range 4×4 |
| Crawl ratio | N/A |
| Construction | 5-door wagon on separate chassis |
| Front suspension | Double wishbone IFS, coils |
| Rear suspension | Live axle, multi-links, coil springs |
| Tyres | 265/60R18 on alloys |
| Kerb weight | 2313kg |
| GVM | 2552kg |
| GCM | N/A |
| Towing capacity | 3000kg |
| Payload | 446kg |
| Seats | 5 |
| Fuel tank | 75L |
| ADR fuel consumption | 7.8L/100km combined |
| On-test fuel consumption | 16.6L/100km |
| Approach angle | 27.2 |
| Ramp-over angle | 23.3 |
| Departure angle | 21.3 |
| Ground clearance | 227mm |
| Wading depth | 500mm |
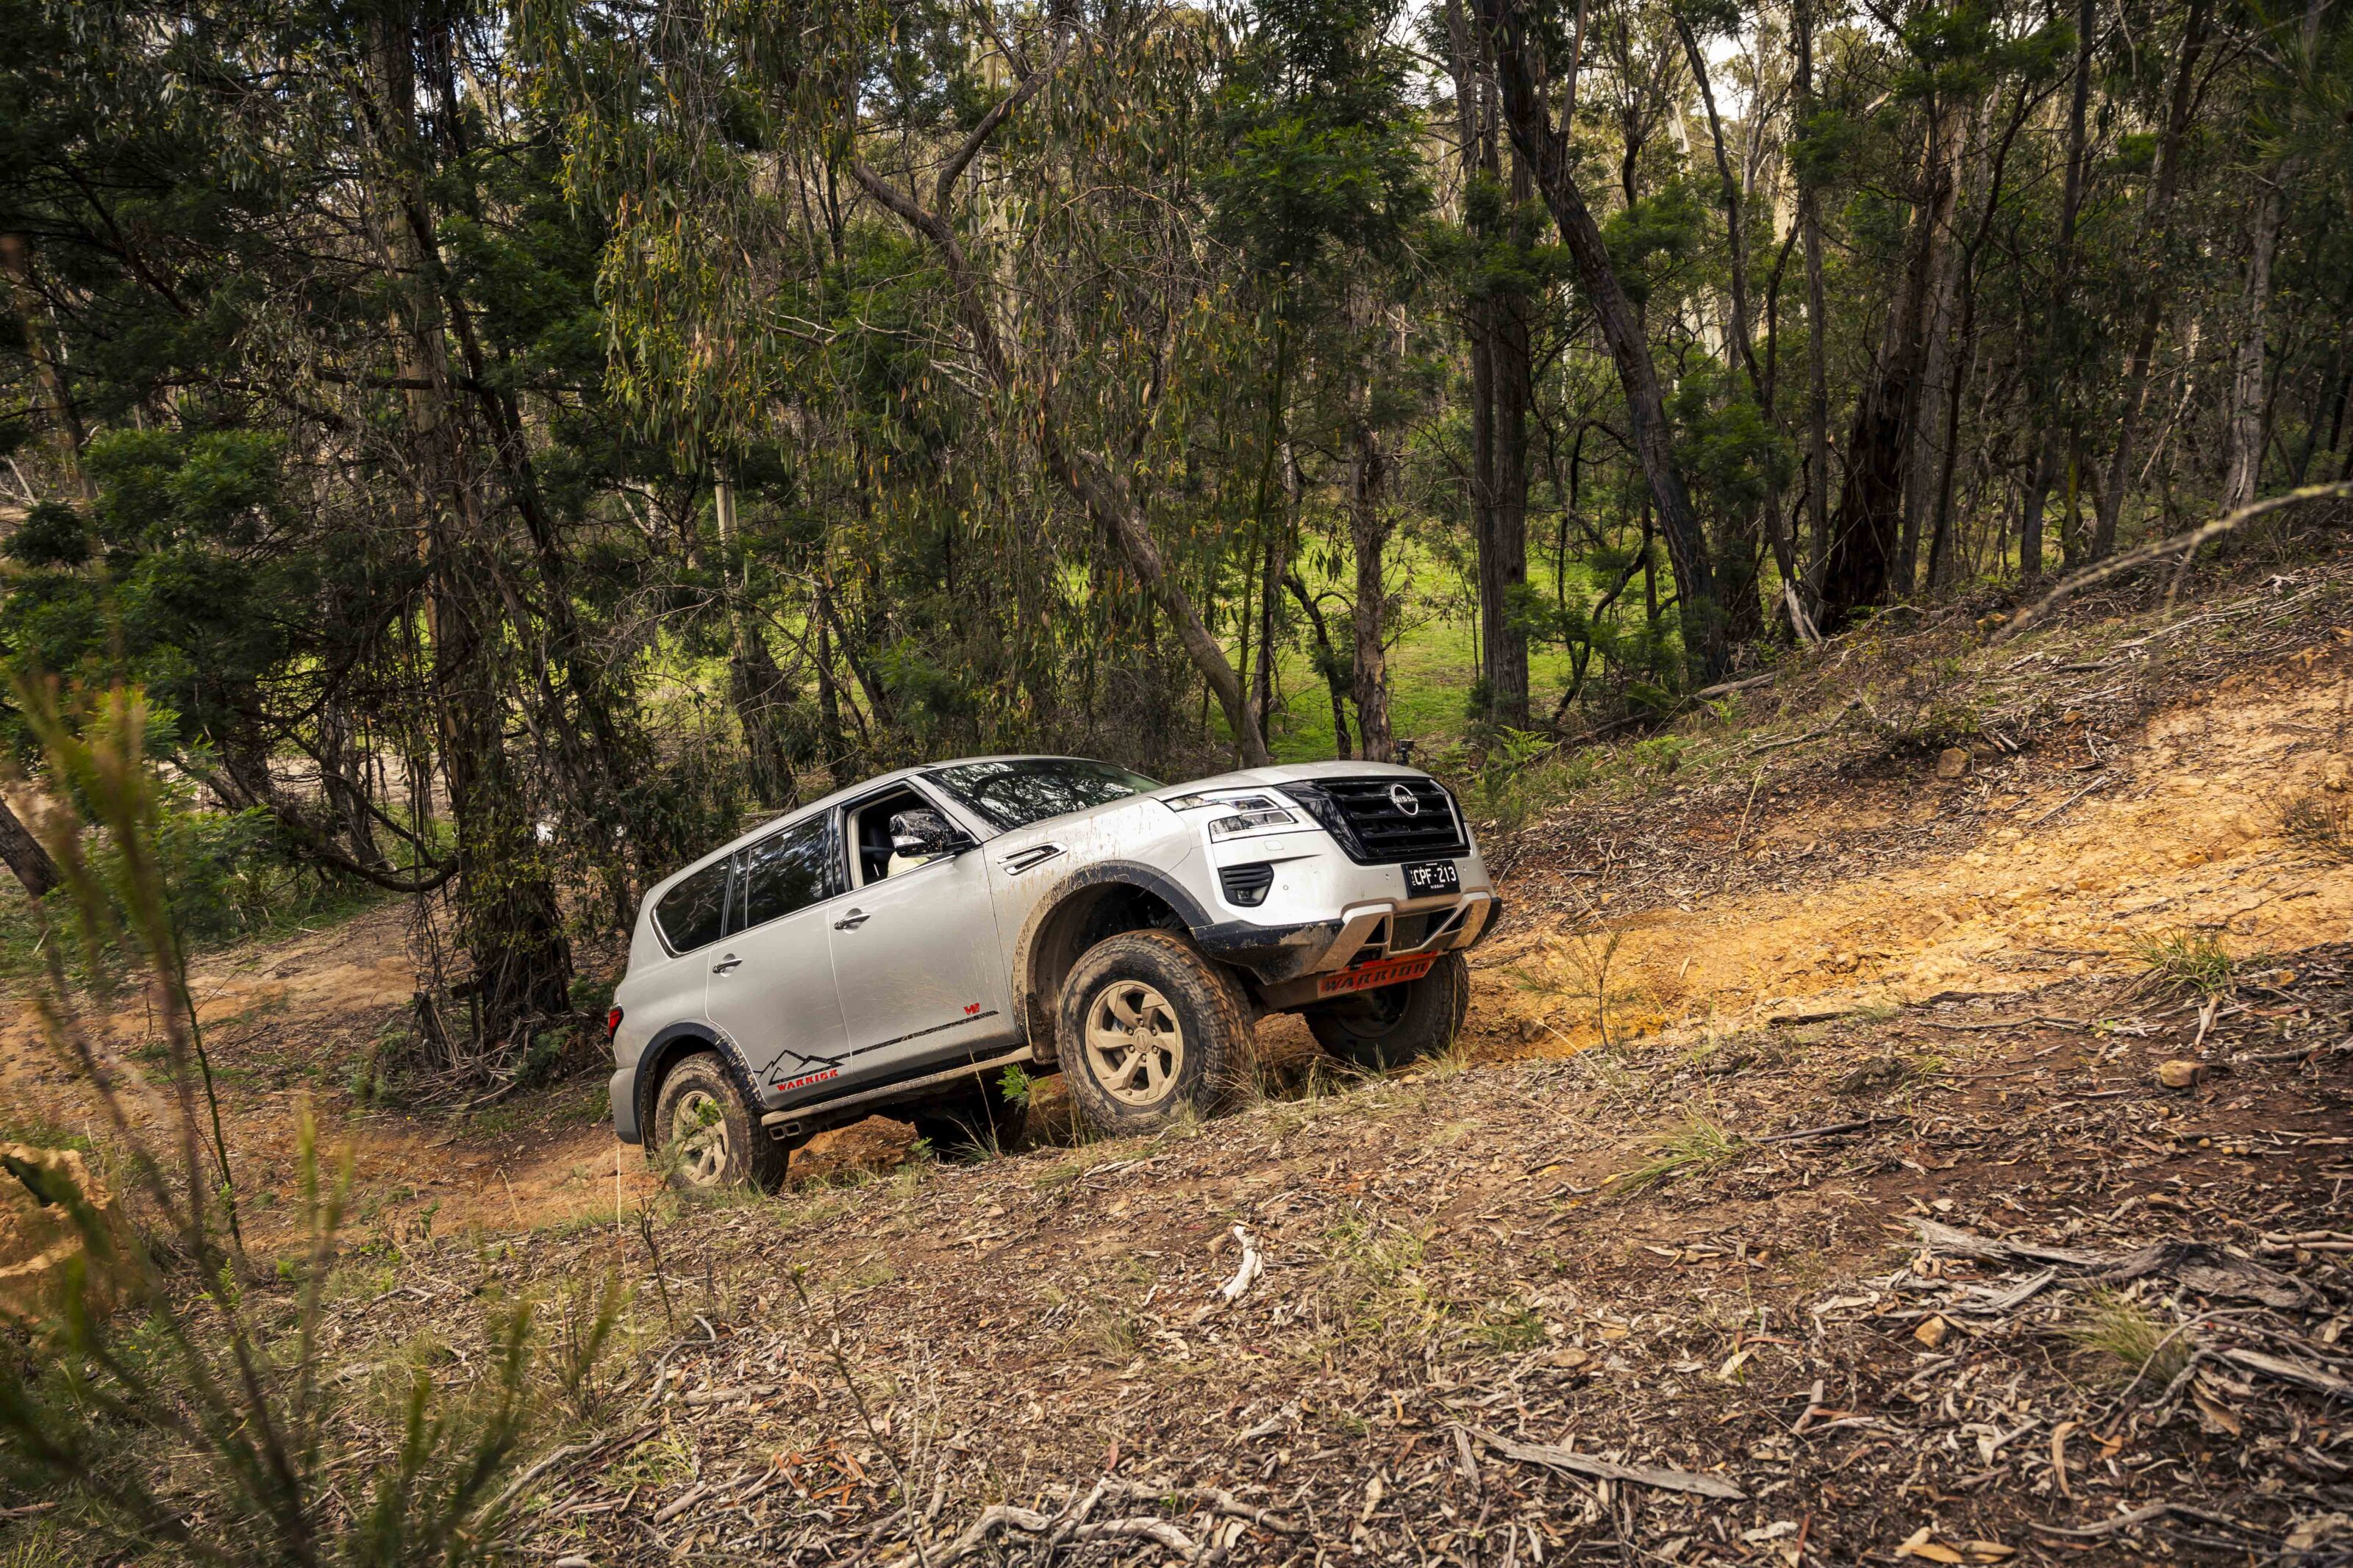
Nissan Patrol Warrior
If there was one vehicle in this group that really put a smile on the dial of the judges, it was the Nissan Patrol Warrior.
Dave summed up the big Nissan saying, “Proof that evolution can sometimes trump novelty. Beautifully resolved in all the important areas, especially the driveline. Brilliant off road and super capable on the highway. Only the relative lack of tech lets it down a bit, but that’s simply because the platform is so old. Huge value for money.”
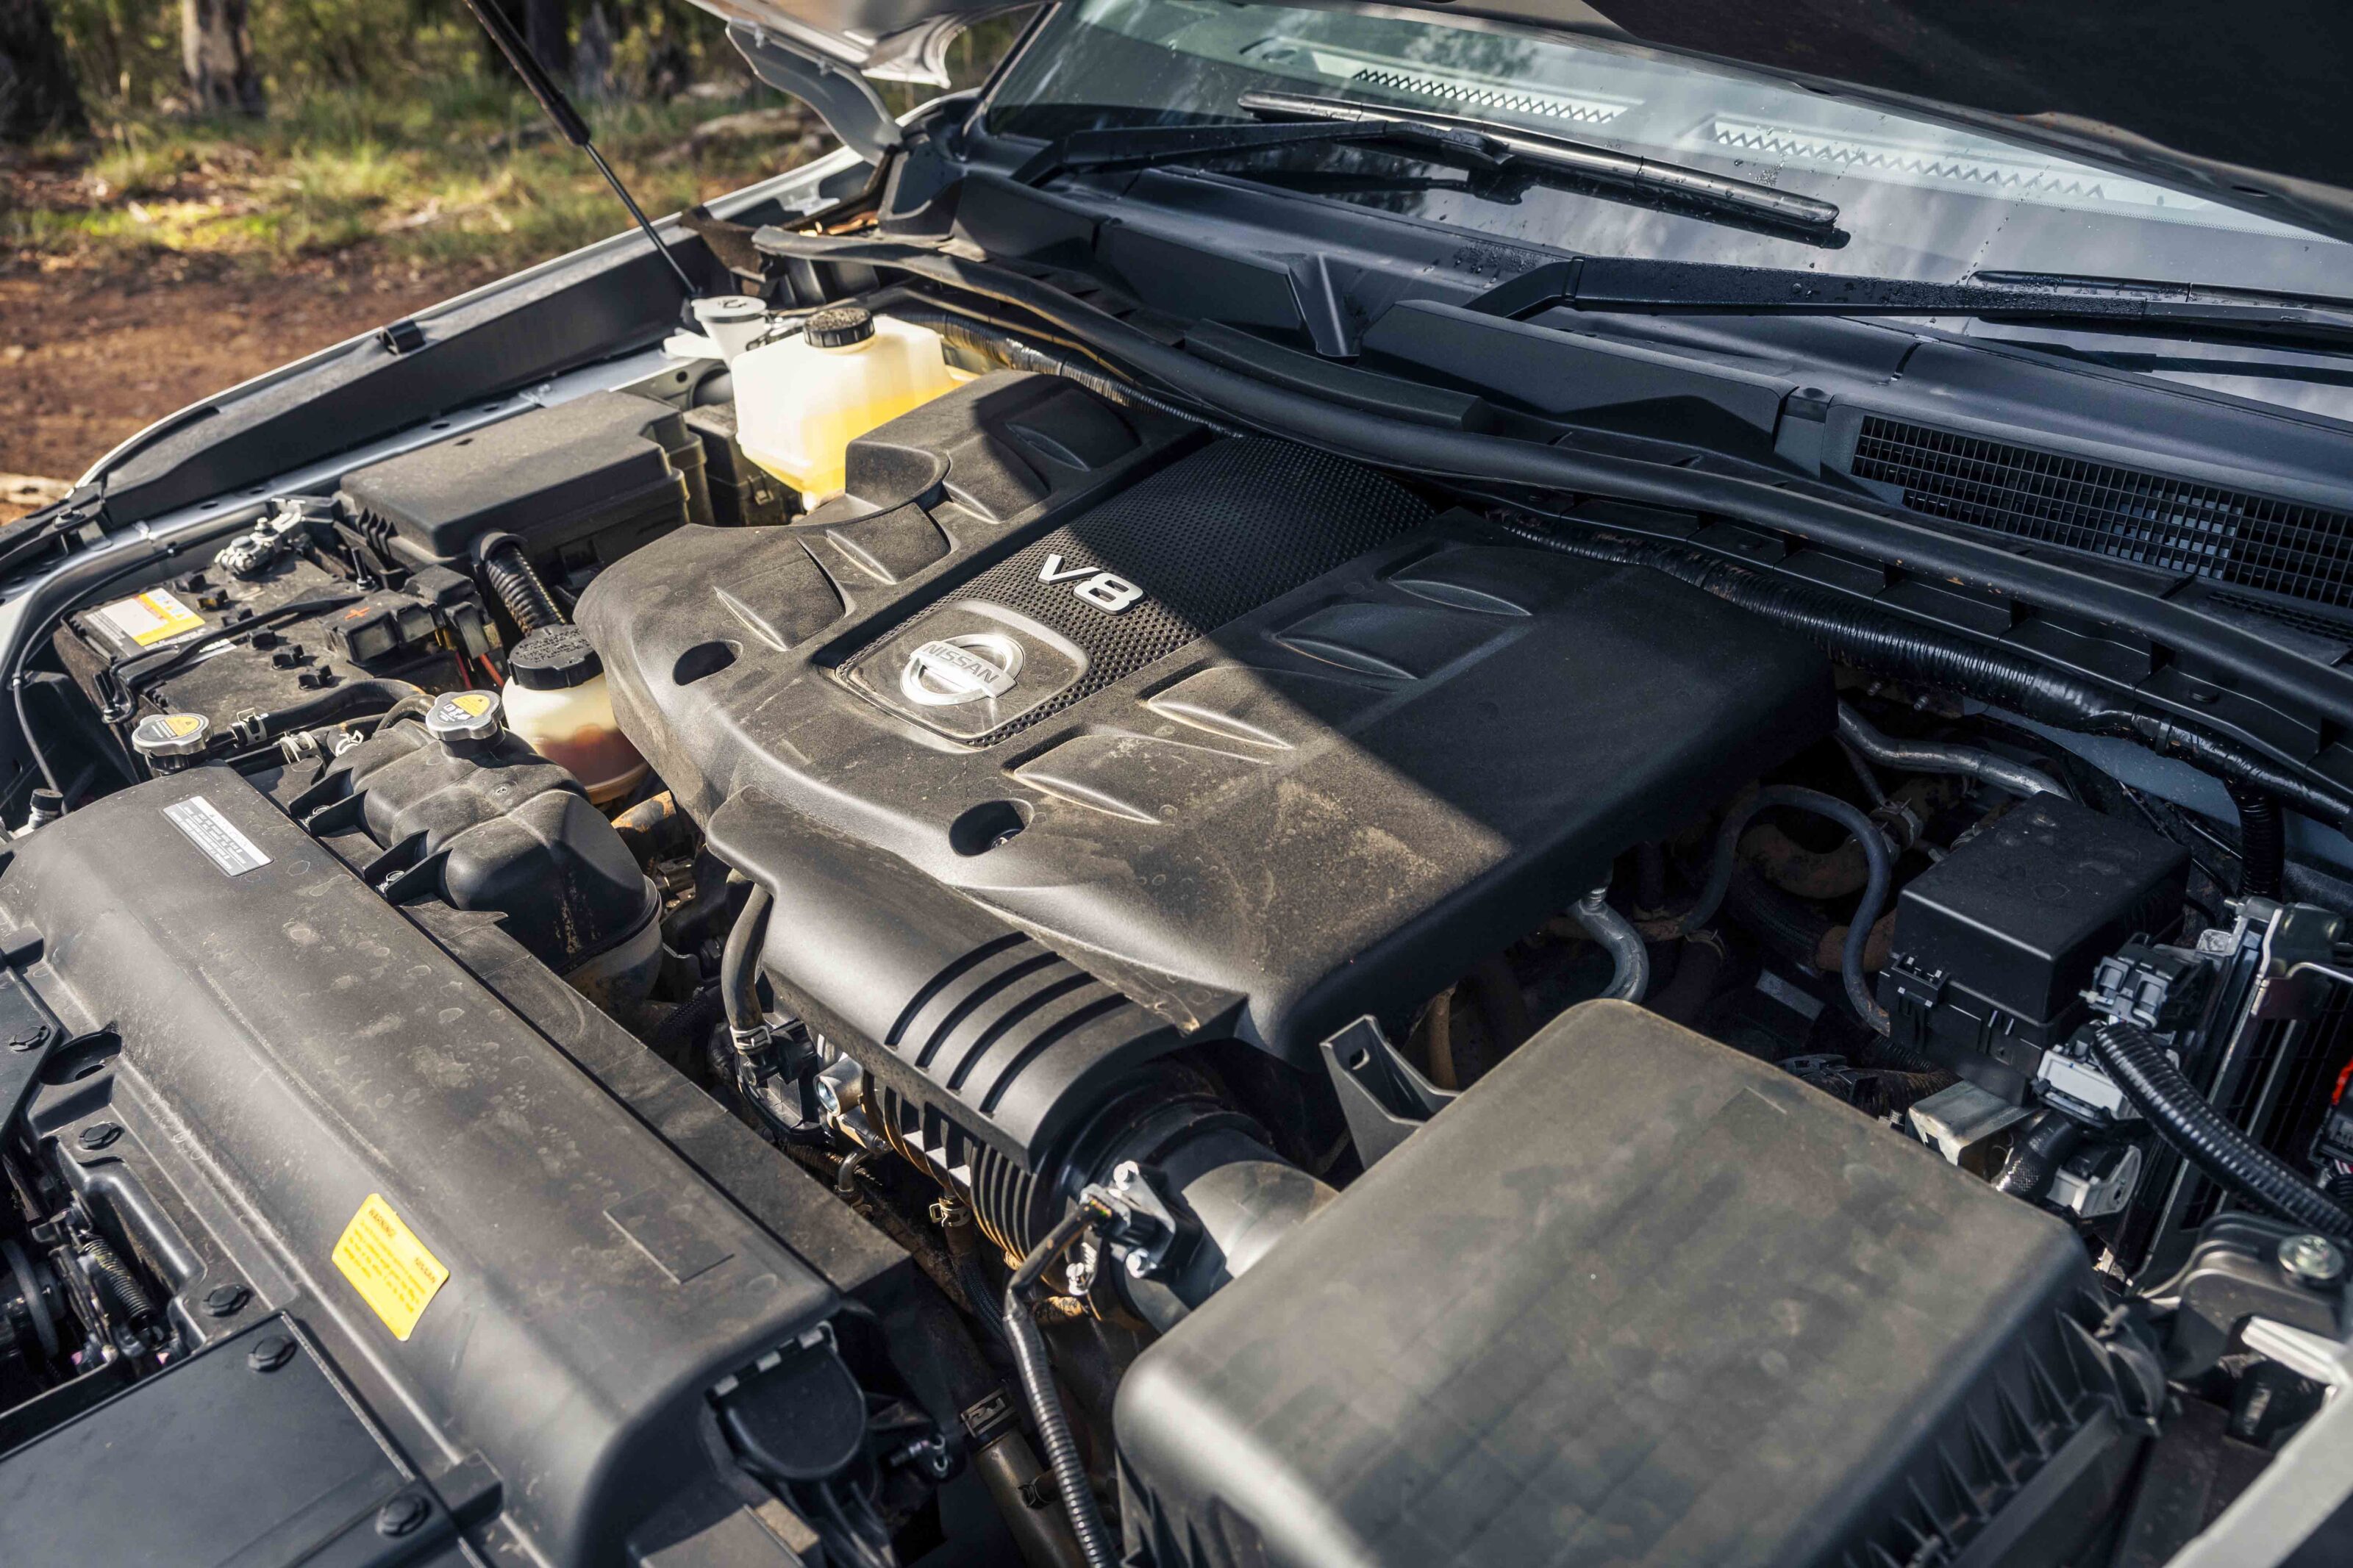
The comments on the Warrior were positive across the week of testing and it was surprising that it didn’t score as well as expected. It is a capable and comfortable 4×4 wagon with proven credentials, the biggest and most comfortable interior by far, and a stonking V8 engine that will be sorely missed when the new Patrol arrives in 2026.
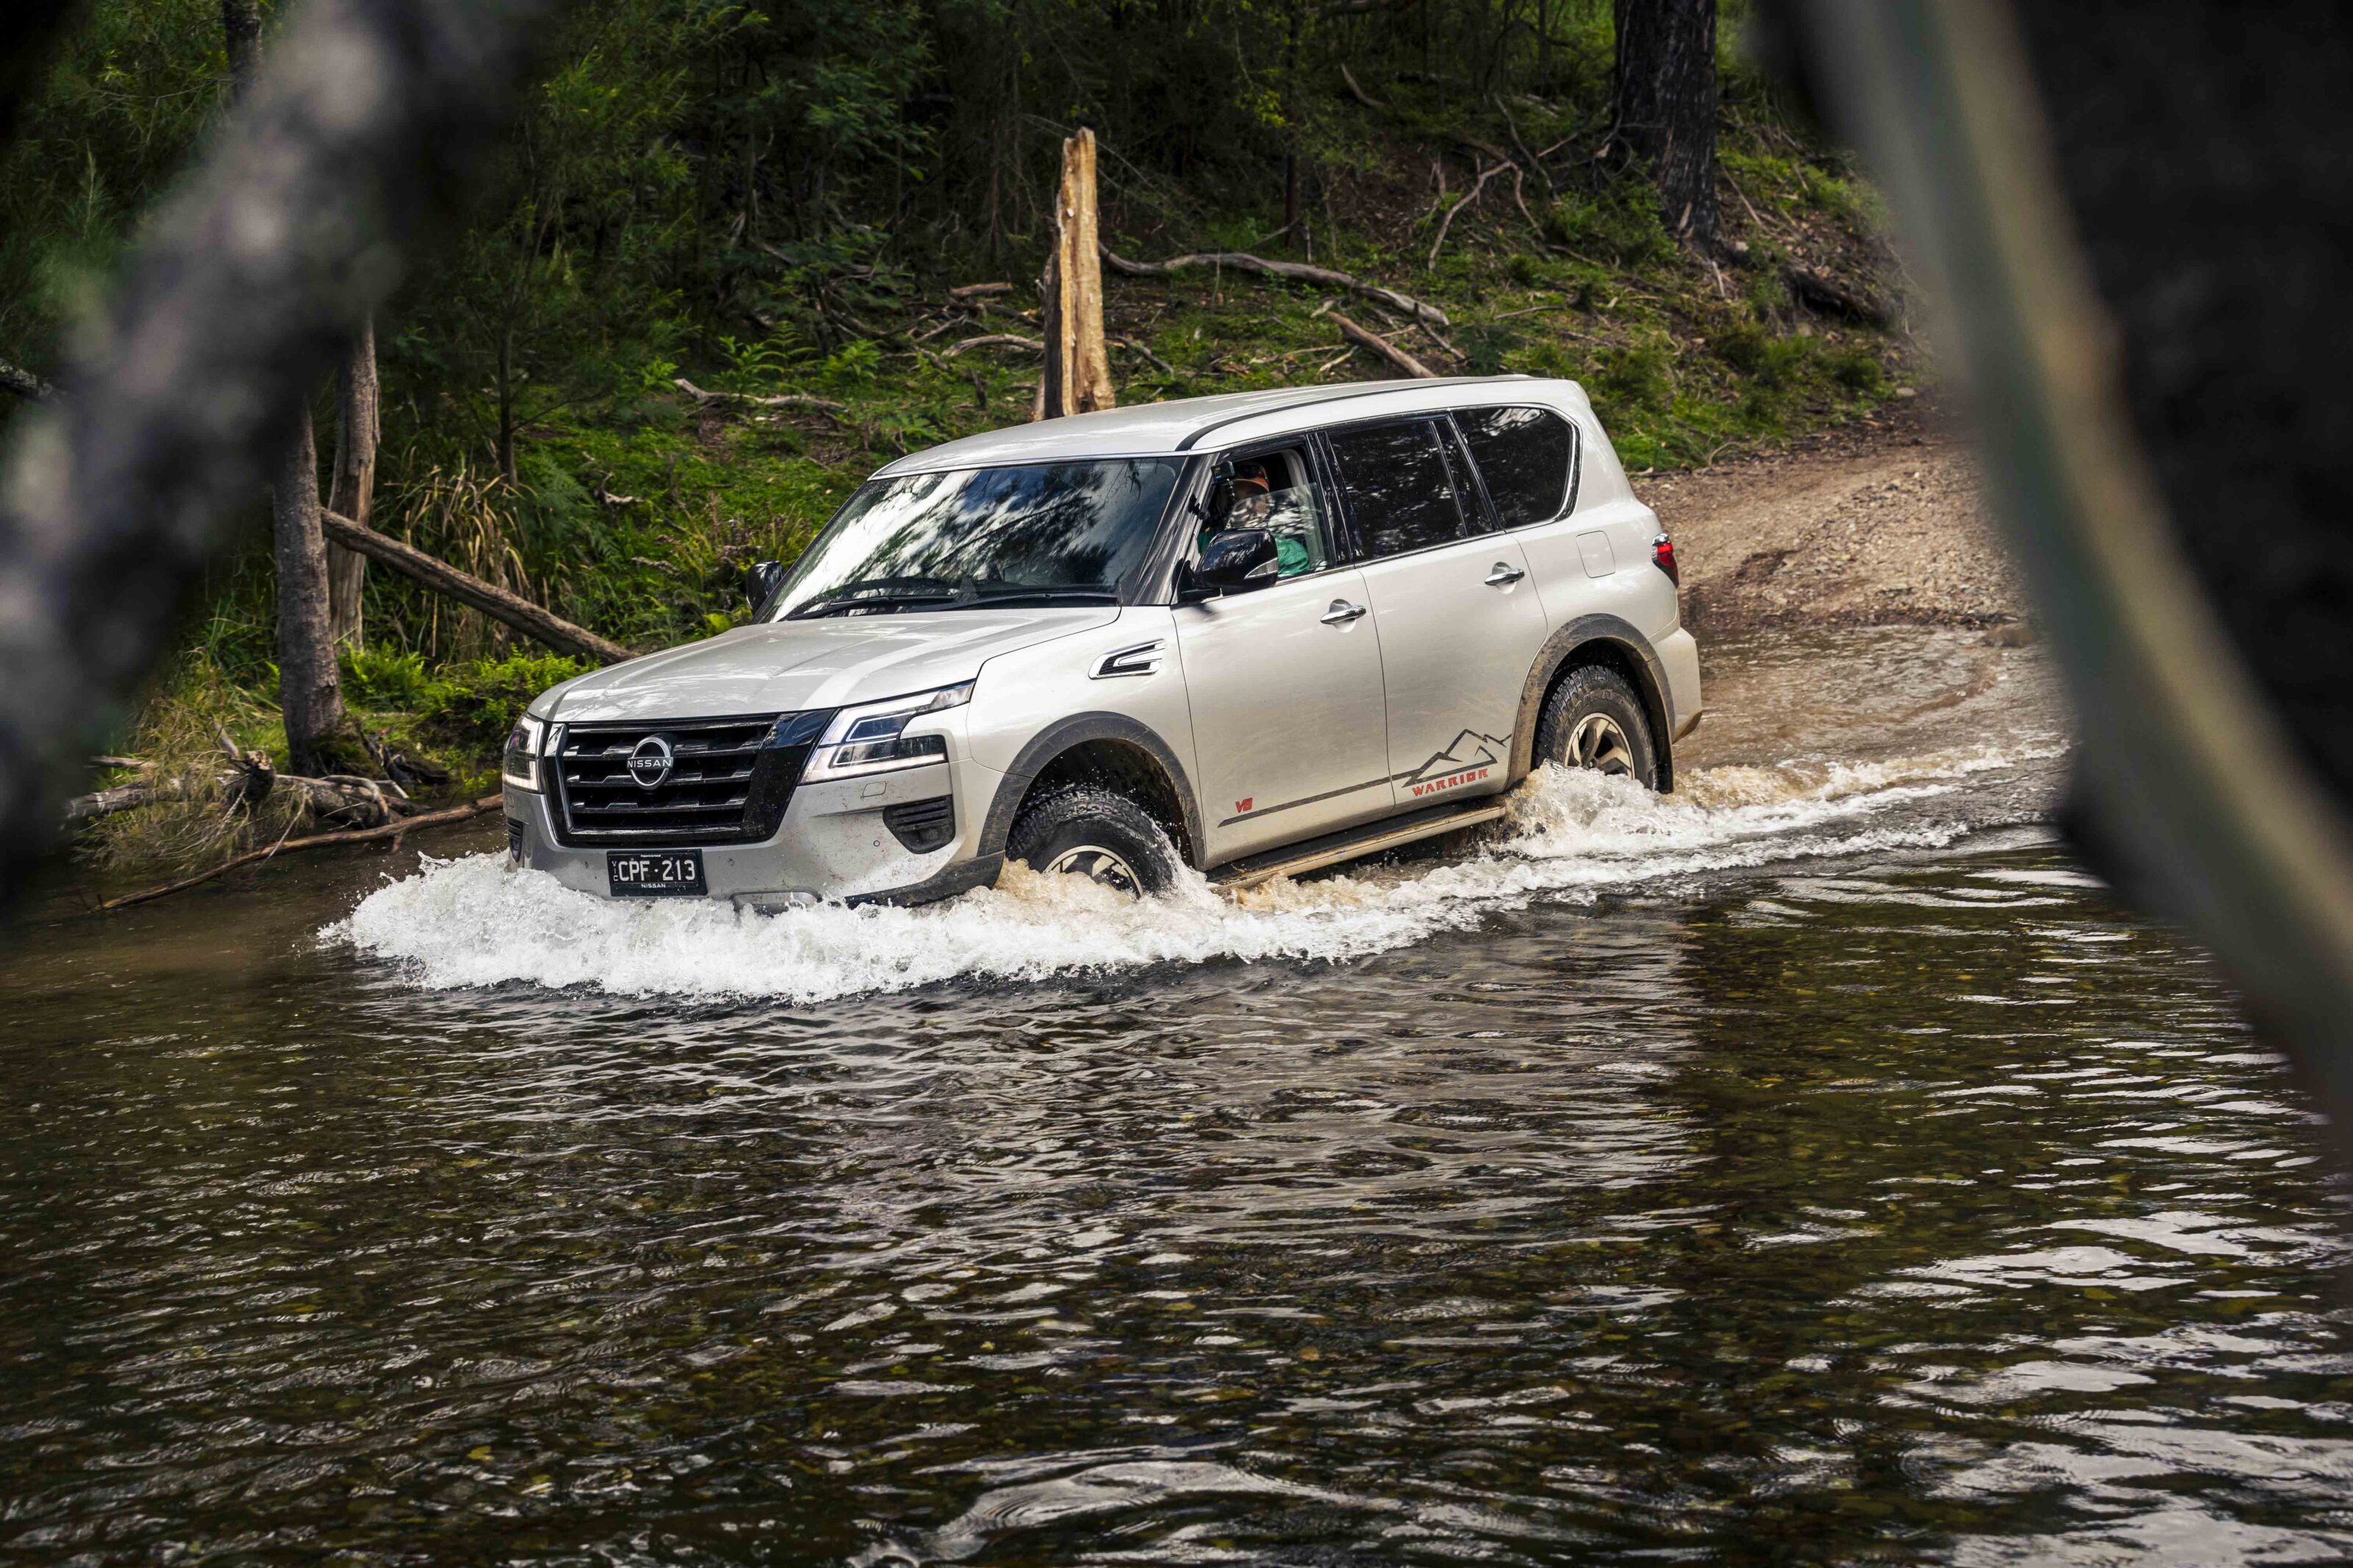
4
The Patrol might be getting on in age and is set for replacement at the end of 2025 but Nissan has done a stellar job by teaming up with Premcar to build a more focused and refined Patrol in the Warrior.
Premcar engineered a package that adds improved suspension, higher ground clearance, all-terrain tyres and a bi-modal exhaust system that lets the V8 roar when you put your foot to the floor. Combine these enhancements with interior trim upgrades in what is already a relatively luxurious cabin and the Warrior becomes a better mousetrap in all aspects of its design.
The Warrior made light work of the wombat holes and hill climbs but showed its age in the time its ETC takes to engage compared to the newer wagons, instead using its reserves of grunt to get it up and over obstacles. The Patrol has a rear diff lock as standard but add an aftermarket front locker to a Warrior and it would be virtually unstoppable.
20
The high levels of performance continue on the road where the Warrior is surefooted and stable on both sealed and gravel tracks. You sit high in the Patrol and it feels tall on its raised suspension and taller tyres, but never unsettled in any conditions. In fact, it feels ready for anything, anytime.
The age factor is again evident inside where despite Premcar’s efforts and a multimedia upgrade last year, the dash looks old and lacks some tech that new vehicles have standard, while the new multimedia system sits way too low in the centre stack. But the Patrol Warrior provided the most comfortable cabin among all the vehicles tested and it offered the most space for both passengers and cargo.
Dex said, “Easily the comfiest touring vehicle on test. The tweaked suspension, despite being independent all-round, soaked up everything we threw it at and the power (and sound!) from the V8 would get an easy “bloody mongrel” out of Alf Stewart.”
| Nissan Patrol Warrior specs | |
|---|---|
| Price | $101,160 +ORC |
| Engine | V8 petrol |
| Capacity | 5552cc |
| Max power | 298kW @ 5800rpm |
| Max torque | 560Nm @ 4000rpm |
| Transmission | 7-speed automatic |
| 4×4 system | 2WD, on-demand AWD and dual range locked 4×4 |
| Crawl ratio | 43.96:1 |
| Construction | 5-door wagon on a separate chassis |
| Front suspension | IFS, coil springs and HBMC |
| Rear suspension | IRS, coil springs and HBMC |
| Tyres | 295/70R18 on alloys |
| Kerb weight | 2884kg |
| GVM | 3620kg |
| GCM | 7000kg |
| Towing capacity | 3500kg |
| Payload | 736kg |
| Seats | 8 |
| Fuel tank | 140L |
| ADR fuel consumption | 14.4:1 combined |
| On-test fuel consumption | 16.3L/100km |
| Approach angle | 40 |
| Ramp-over angle | N/A |
| Departure angle | 23.3 |
| Ground clearance | 323mm |
| Wading depth | N/A |
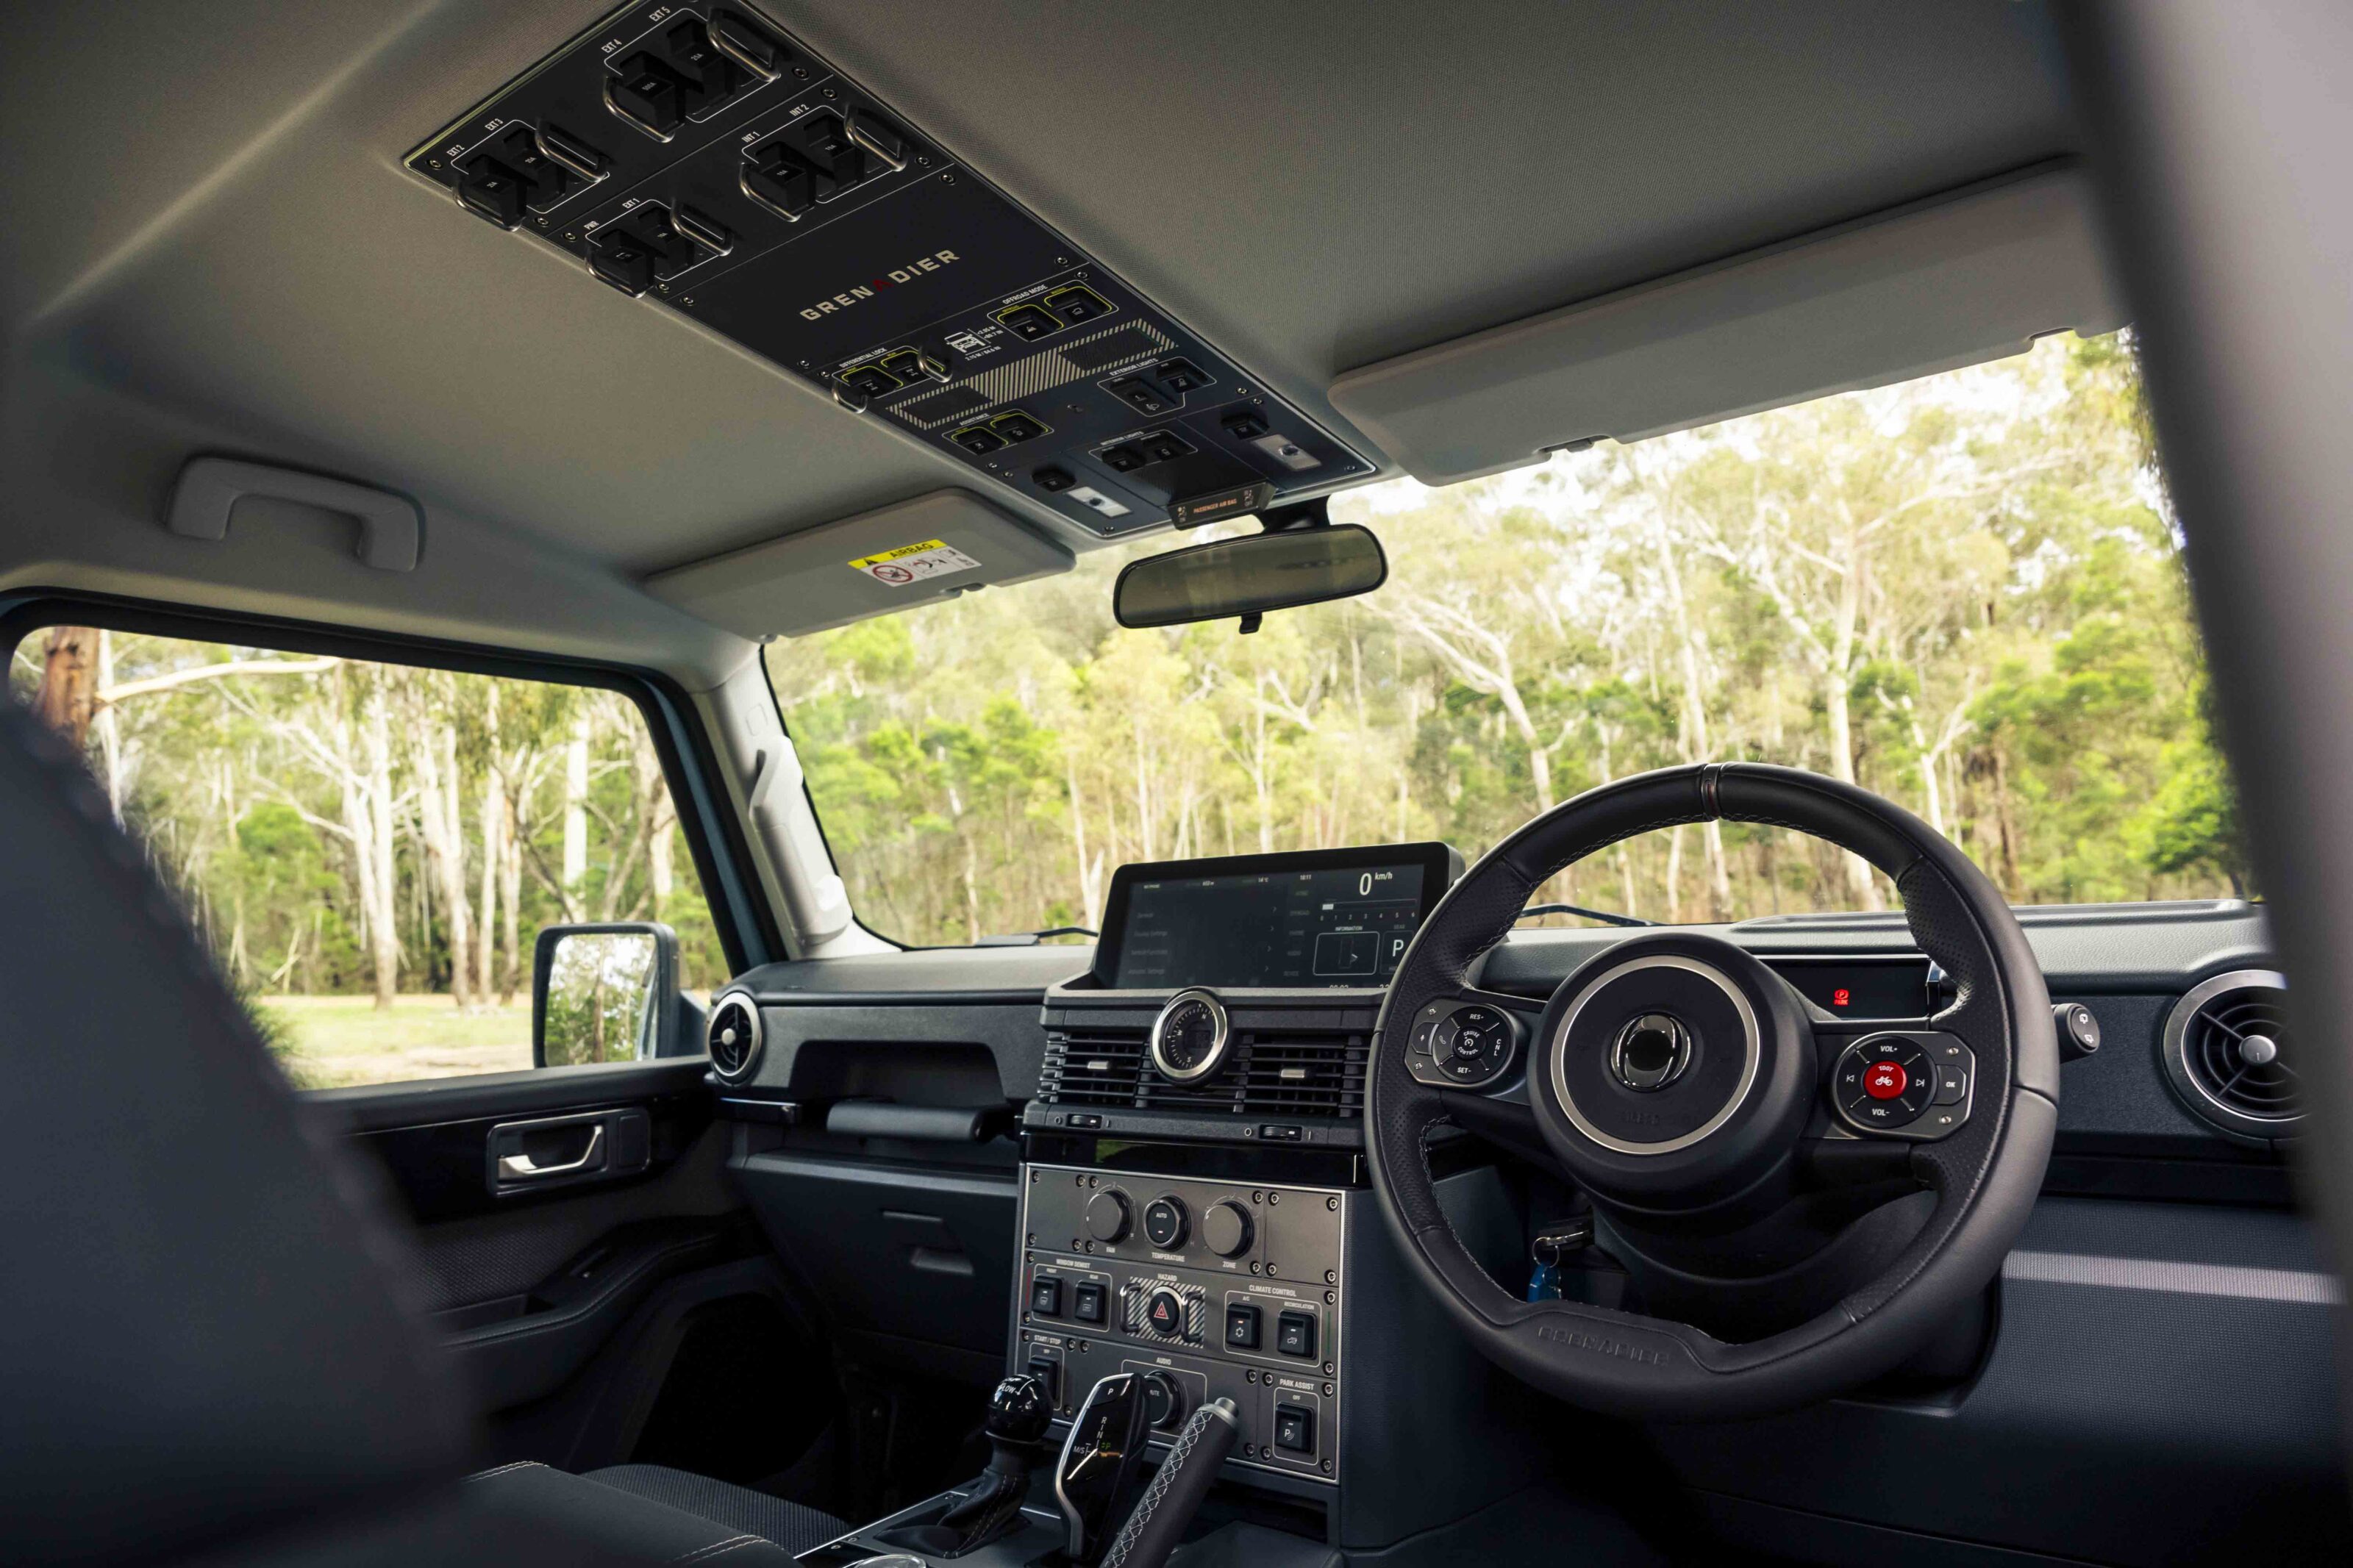
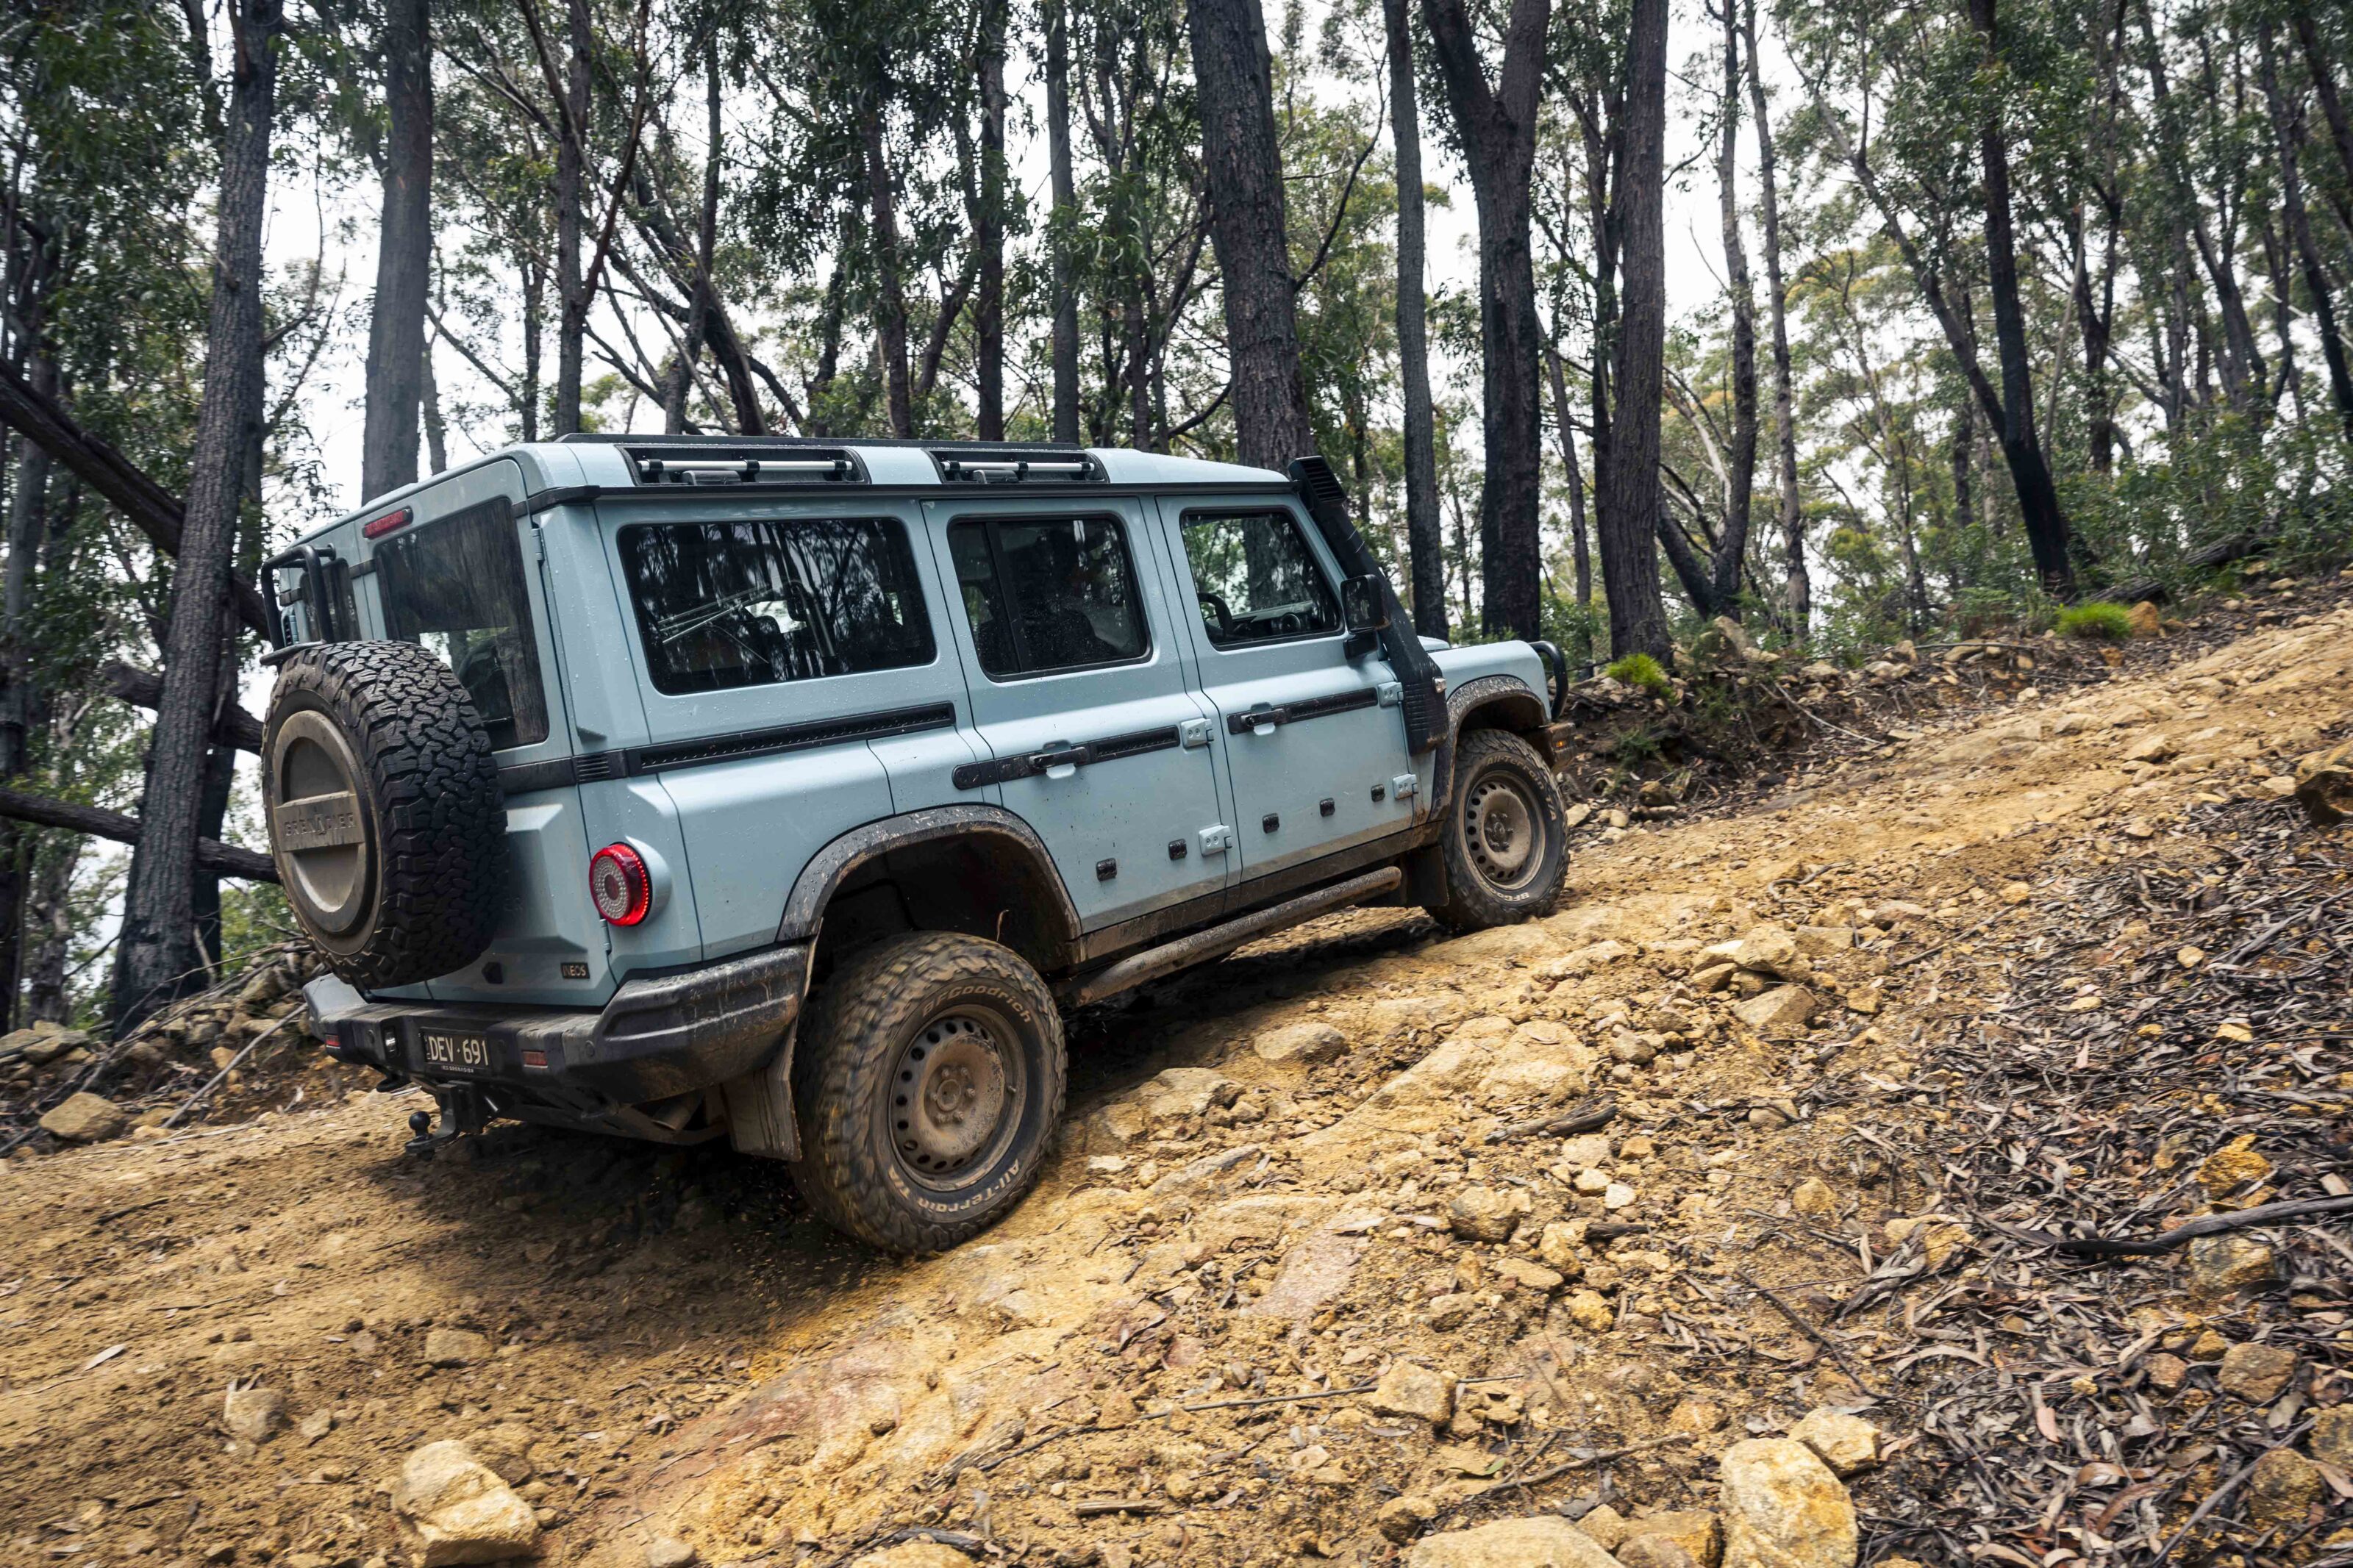
Ineos Grenadier Trialmaster
To the group of four-wheel drivers that made up our judging panel, the Ineos Grenadier promised the most out of all our finalists.
A practical body on a separate chassis with lockable live axles suspended by coil springs and driven by a powerful six-cylinder diesel engine – it reads like a wishlist for any off road enthusiast or person working in remote terrain.
The Grenadier is also the only true, all-new vehicle here, coming from a new brand to the automotive world and starting from a clean sheet of paper – or pub napkin, as the story goes. Yet for something starting from a clean sheet design, the Grenadier has too many compromises from being instigated as an alternative for the old Land Rover Defender Classic.
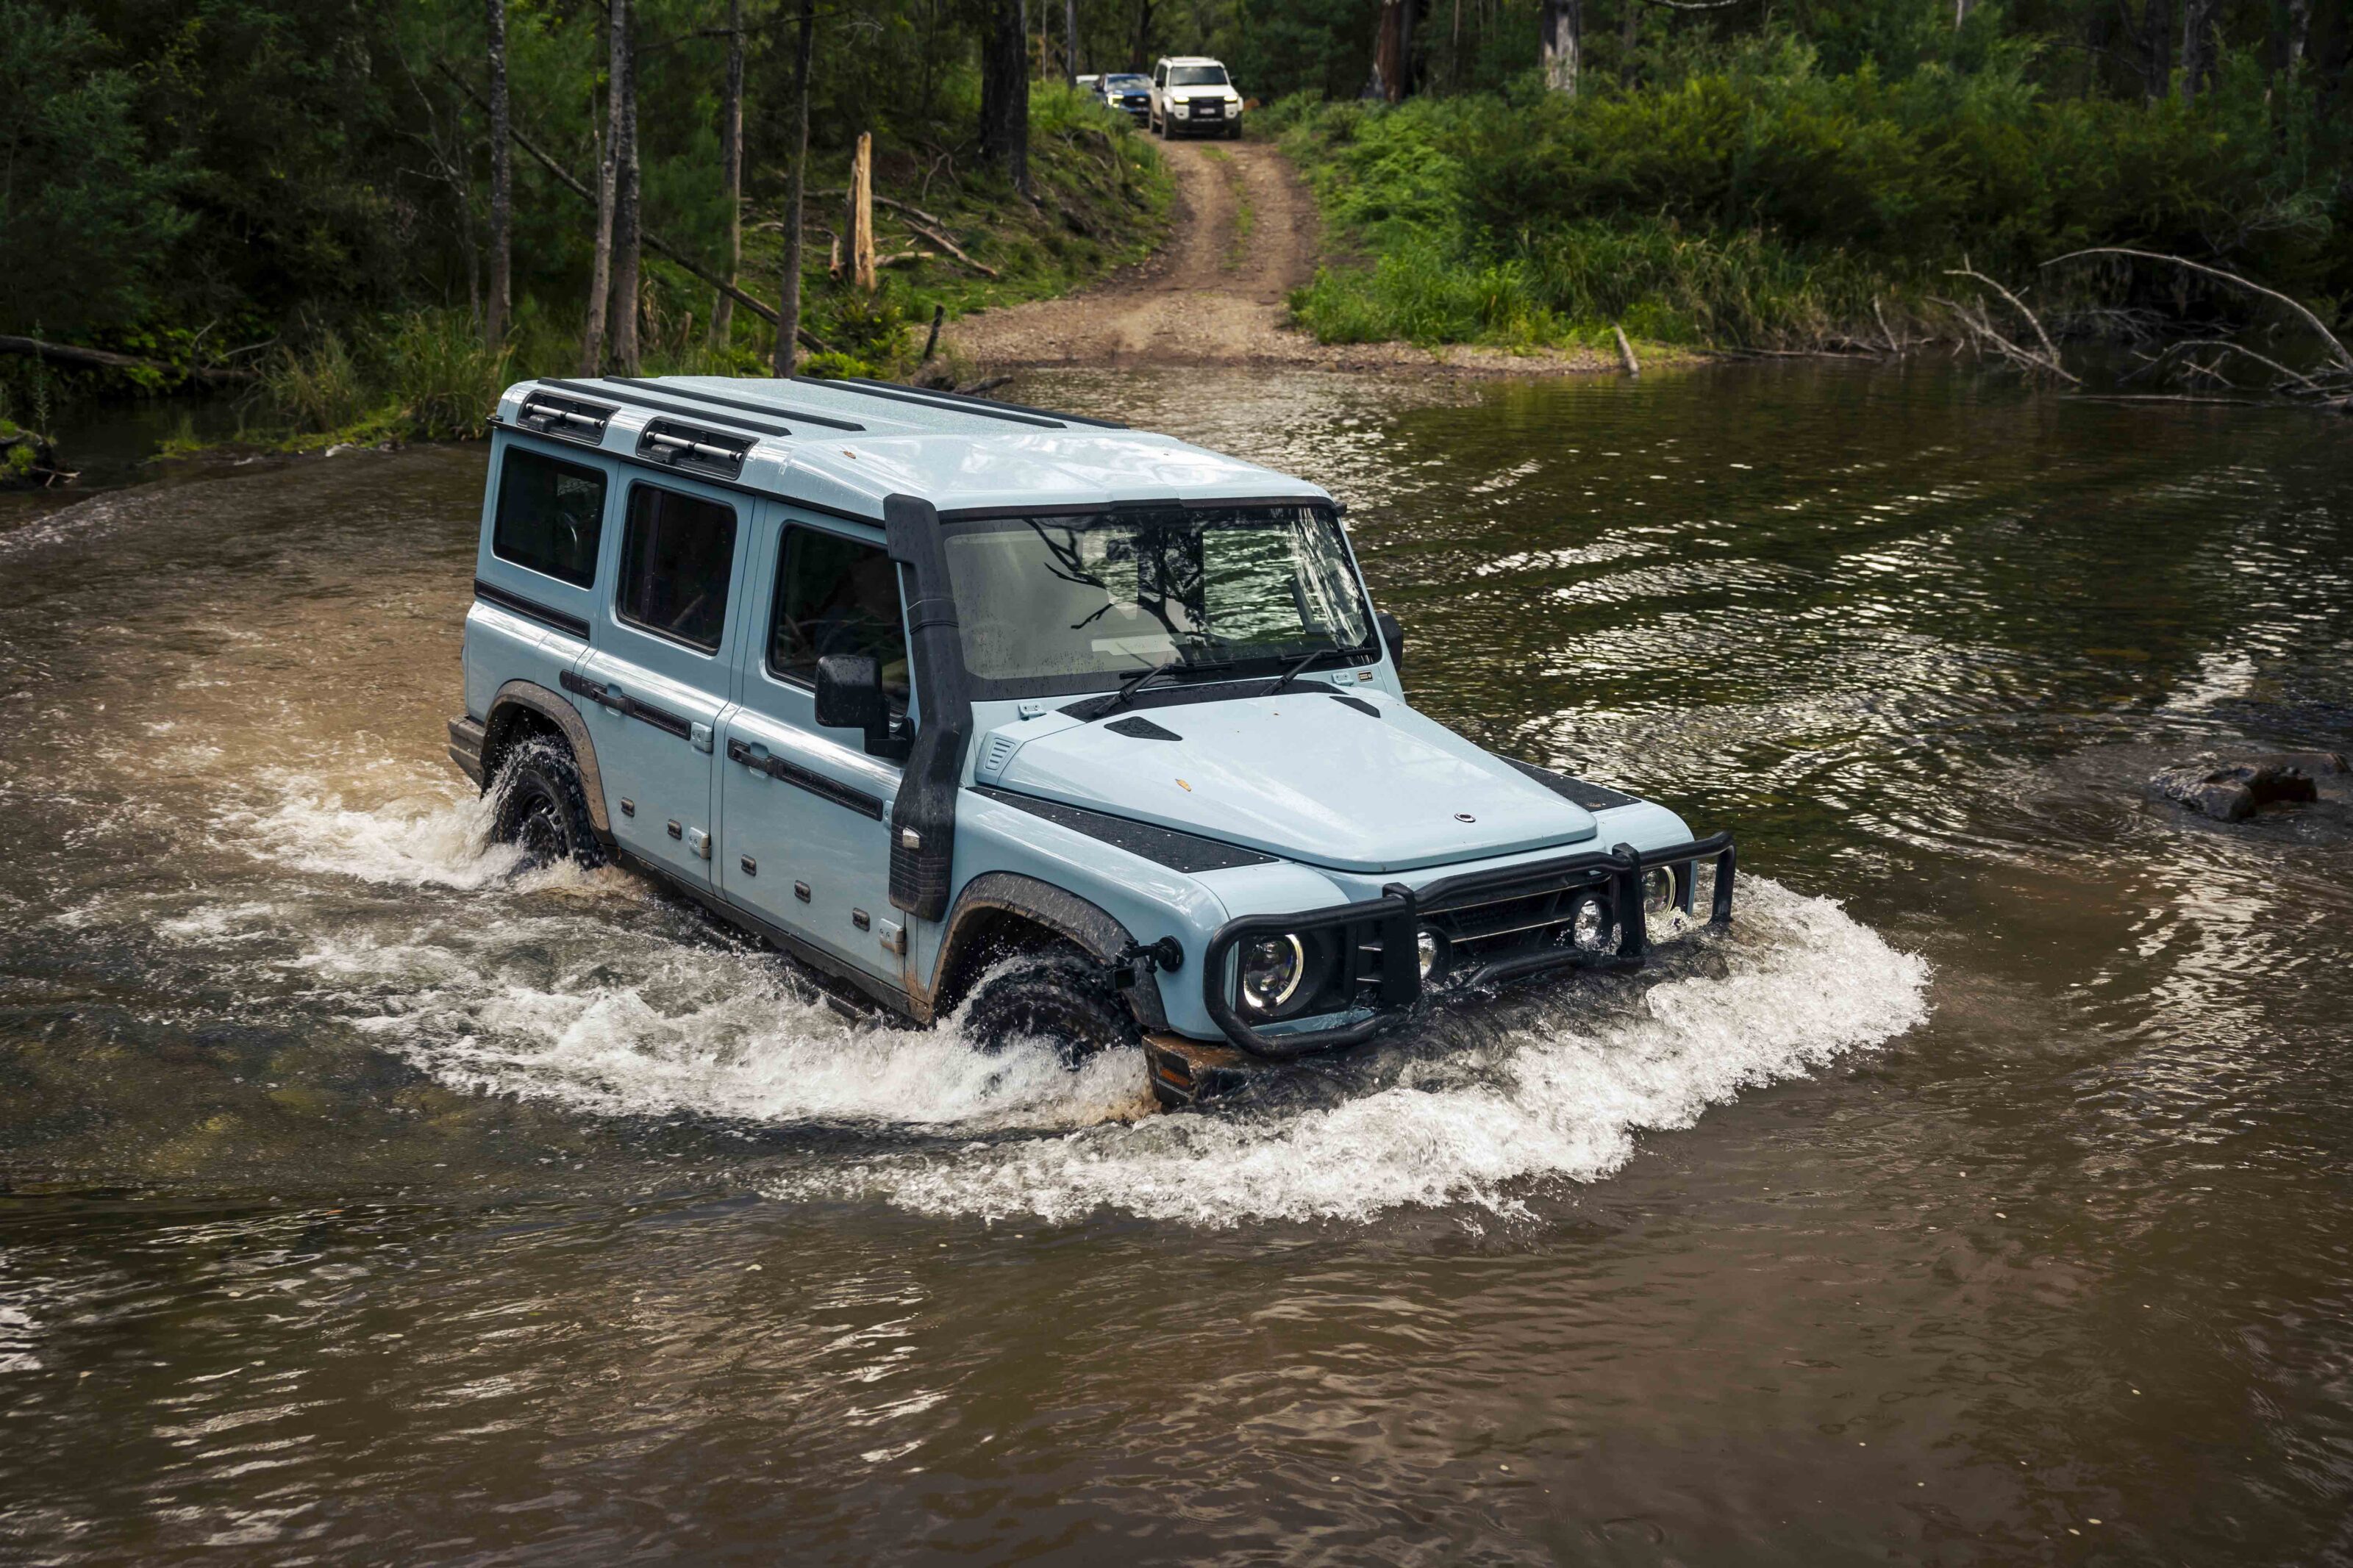
14
There were no complaints about the chassis and driveline in the Grenadier with the BMW-sourced inline-six diesel punching out plenty of grunt through a clever ZF transmission and triple locking differentials. It’s a mechanical package that feels bulletproof and ready to take on any terrain and conditions. As such it made light work of the obstacles and hillclimbs at the Great Divide Tours facility. Even with just the centre diff locked the Grenadier easily conquered most of the terrain, and any time it became more challenging it was only a matter of locking the rear and/or the front diff to get the job done.
But this is where the Grenadier became challenging for our drivers; the interior of the Ineos is a cramped and busy place in which to operate. The buttons for the lockers are placed up on the roof console along with the switches for auxiliary equipment and off-road mode. The buttons do have little metal loops next to them, and I’m sure that eventually, after enough use, you’ll be able to find them by feel without having to look up for them, but it really shouldn’t be that difficult.
Plenty of vehicle manufacturers tell us that ‘you will get used to it with time’, but we shouldn’t have to, especially on a new vehicle that has been designed from scratch as is the case with the Ineos Grenadier.
17
There are many niggly little things that make driving the Grenadier more of a chore than it should be, as much as we wanted it to be simple and easy.
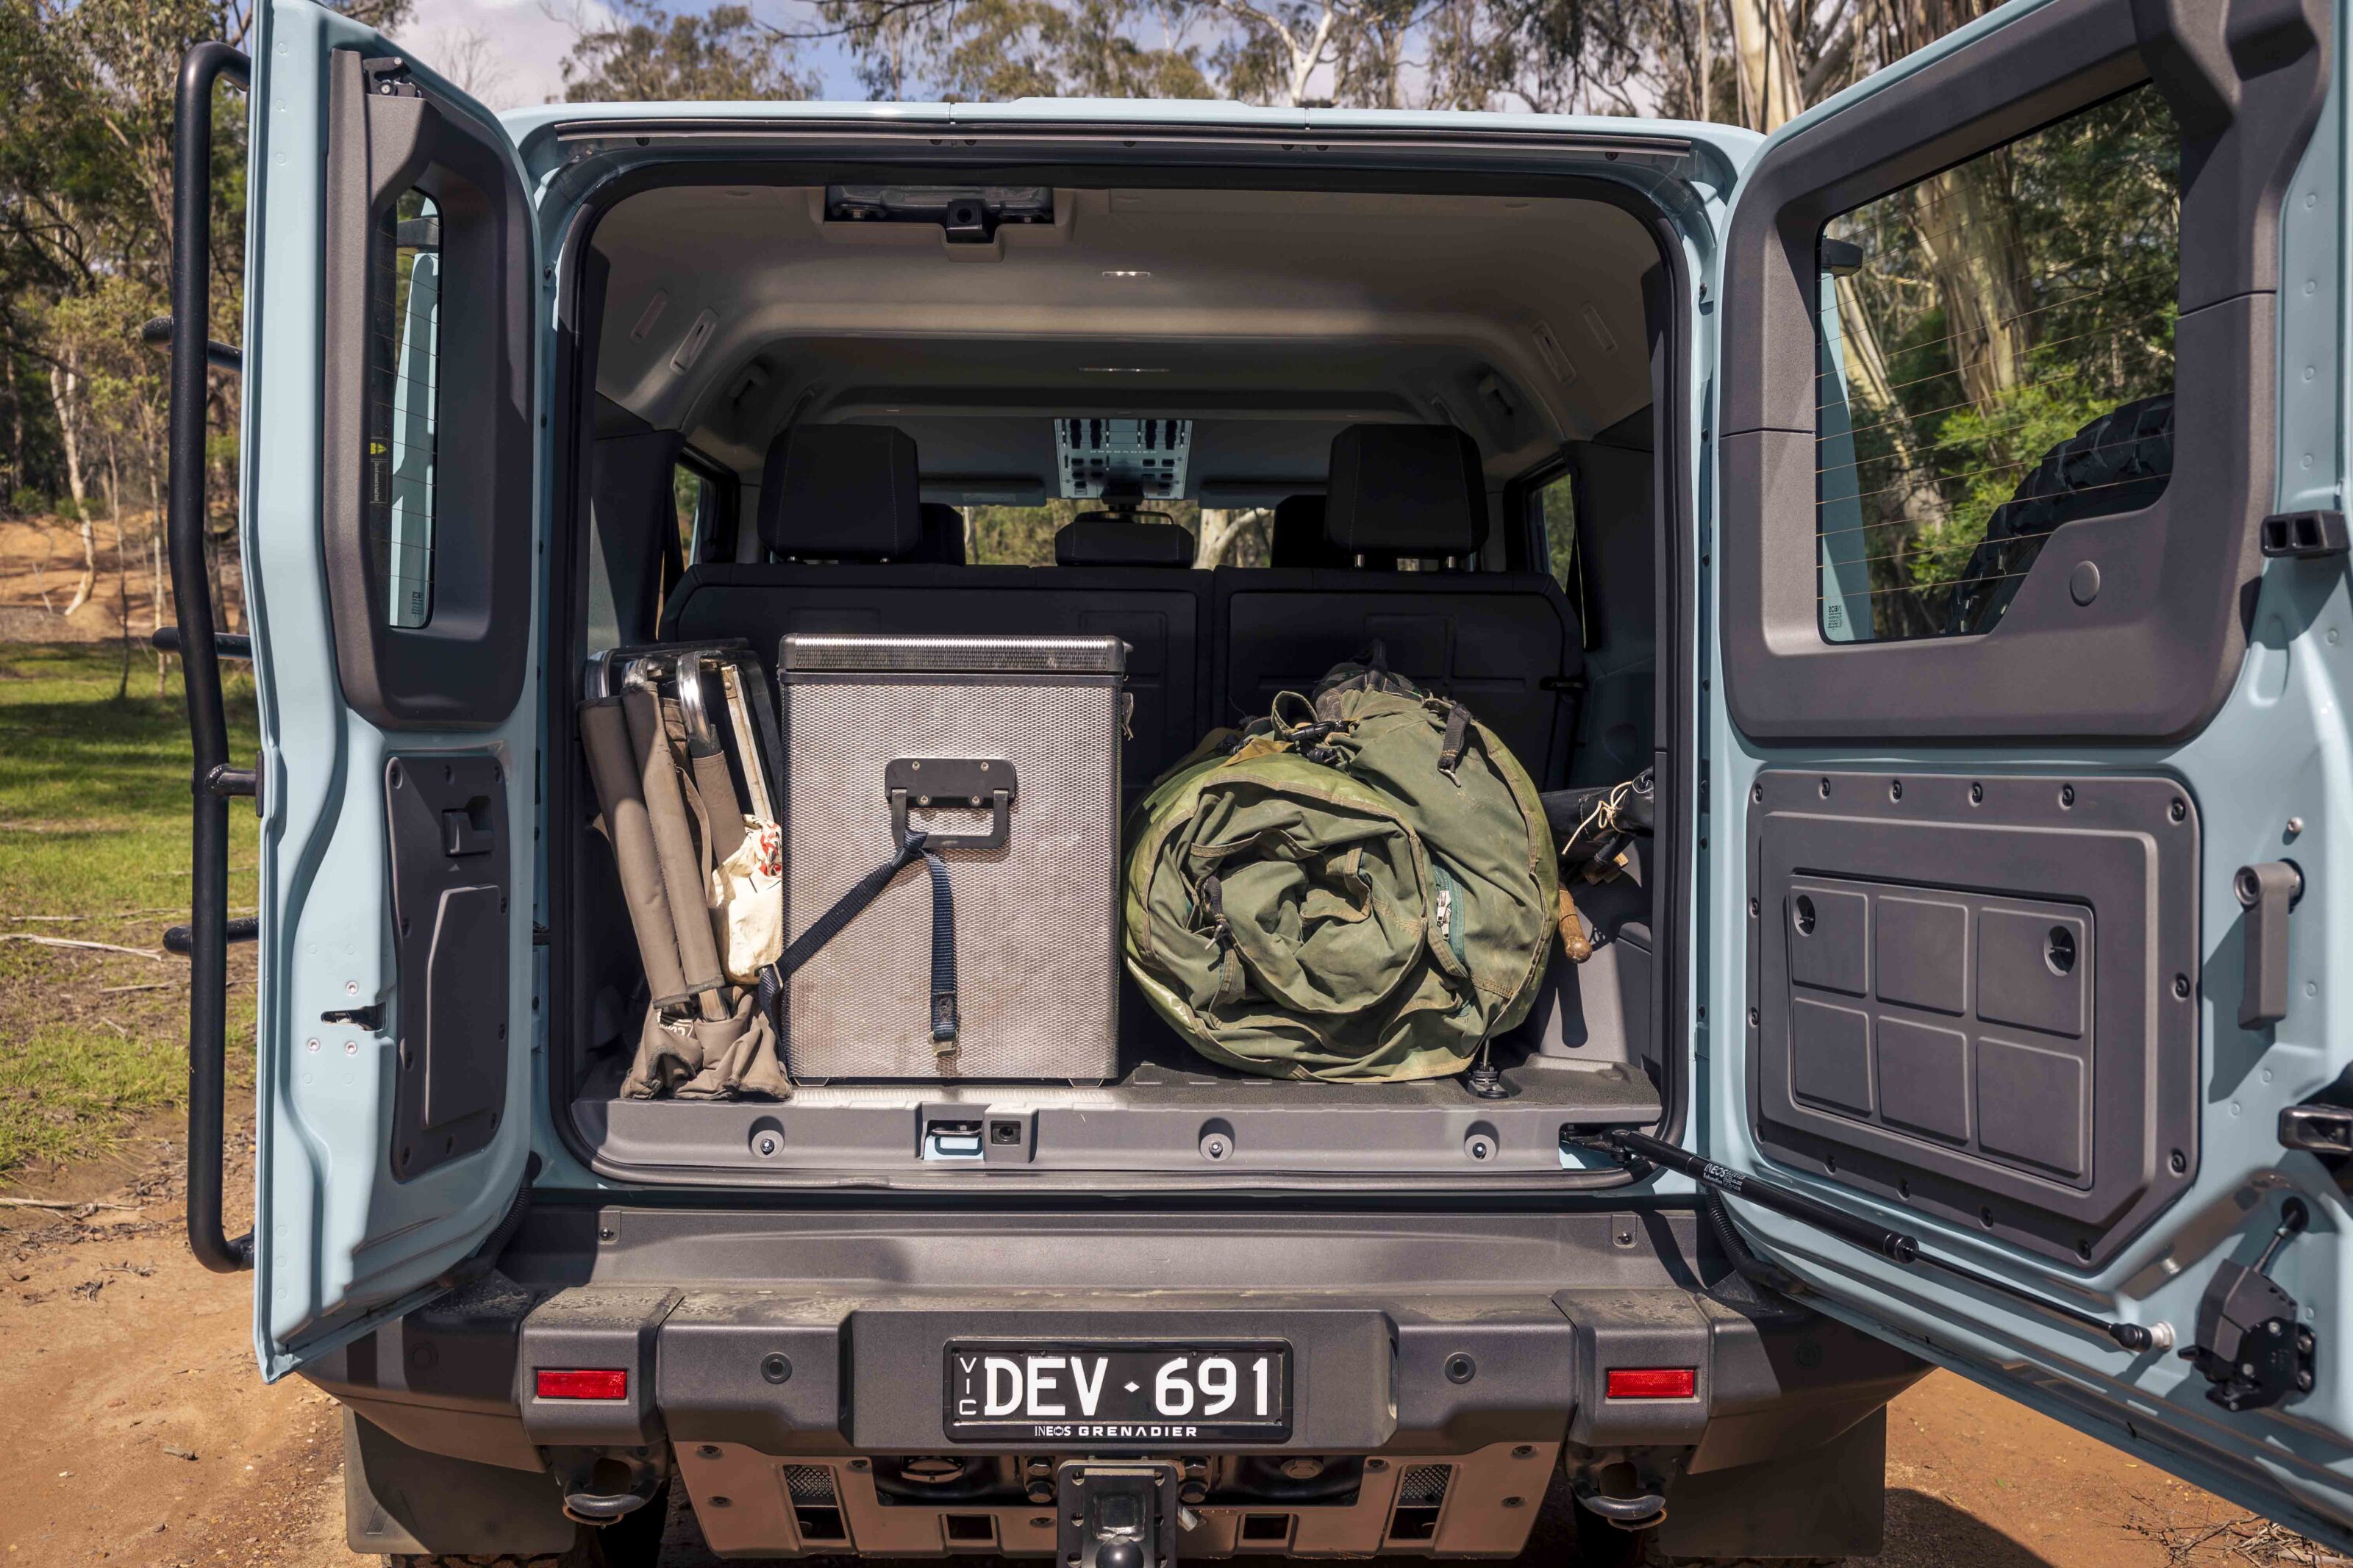
As well as the built-for-purpose driveline and chassis, there are plenty of little things to like about the Grenadier; the standard fitment front and rear lockers, the Trialmaster spec’s dual-battery system under the back seat, the prewired roof panel for accessories like auxiliary lighting, the nifty mounts down the sides of the vehicle for attaching/securing accessories, and the pre-wired auxiliary switches are all useful additions to any off-road going 4×4.
The fact that the Grenadier was the only vehicle on test with a dual-battery system meant that it carried a fridge in the back for us, and it was able to be secured there using the standard tie-down points.
Dex noted, “A great idea has lost something between being drawn on the back of a bar napkin and making it into reality. The driver’s seating position is awkward; the switchgear takes some (a lot of) getting used to; the ride is agricultural compared to the others here.”
3
While great off road and on gravel tracks, the Grenadier’s on-road manners aren’t perfect and, while you might point to its live axles as a reason for this, the LandCruiser 76 doesn’t suffer from such ill road manners. The odd feeling of the Grenadier’s front end has been noted by many testers, not just us.
Dave said of the Grenadier, “Gorgeous driveline and absolutely fit for purpose, but I have doubts about how the front end is set up to be both slow steering yet still twitchy at speed.”
Ineos is obviously on to something with its Grenadier vehicles which are a welcome addition to a market in which 4x4s are generally getting softer, but there’s room for improvement and we’re sure that will come with time. For a first-time effort from an all-new automotive brand, the Grenadier is an impressive vehicle and we look forward to seeing future refinements.
| Ineos Grenadier Trialmaster specs | |
|---|---|
| Price | $123,000 +ORC |
| Engine | I6 diesel |
| Capacity | 2993cc |
| Max power | 183kW@3250-4200rpm |
| Max torque | 550Nm @1250-3000rpm |
| Transmission | 8-speed automatic |
| 4×4 system | Full-time 4×4 and dual range locked 4×4 |
| Crawl ratio | N/A |
| Construction | 5-door wagon on separate chassis |
| Front suspension | Live axle, coil springs, 5 links |
| Rear suspension | Live axle, coil springs, 5 links |
| Tyres | 265/70R17 AT |
| Kerb weight | 2718kg |
| GVM | 3550kg |
| GCM | 7000kg |
| Towing capacity | 3500kg |
| Payload | 833kg |
| Seats | 5 |
| Fuel tank | 90L |
| ADR fuel consumption | 10.5LL/100km |
| On-test fuel consumption | 17.5L/100km |
| Approach angle | 36.2 |
| Ramp-over angle | 28.2 |
| Departure angle | 36.1 |
| Ground clearance | 264mm |
| Wading depth | 800mm |
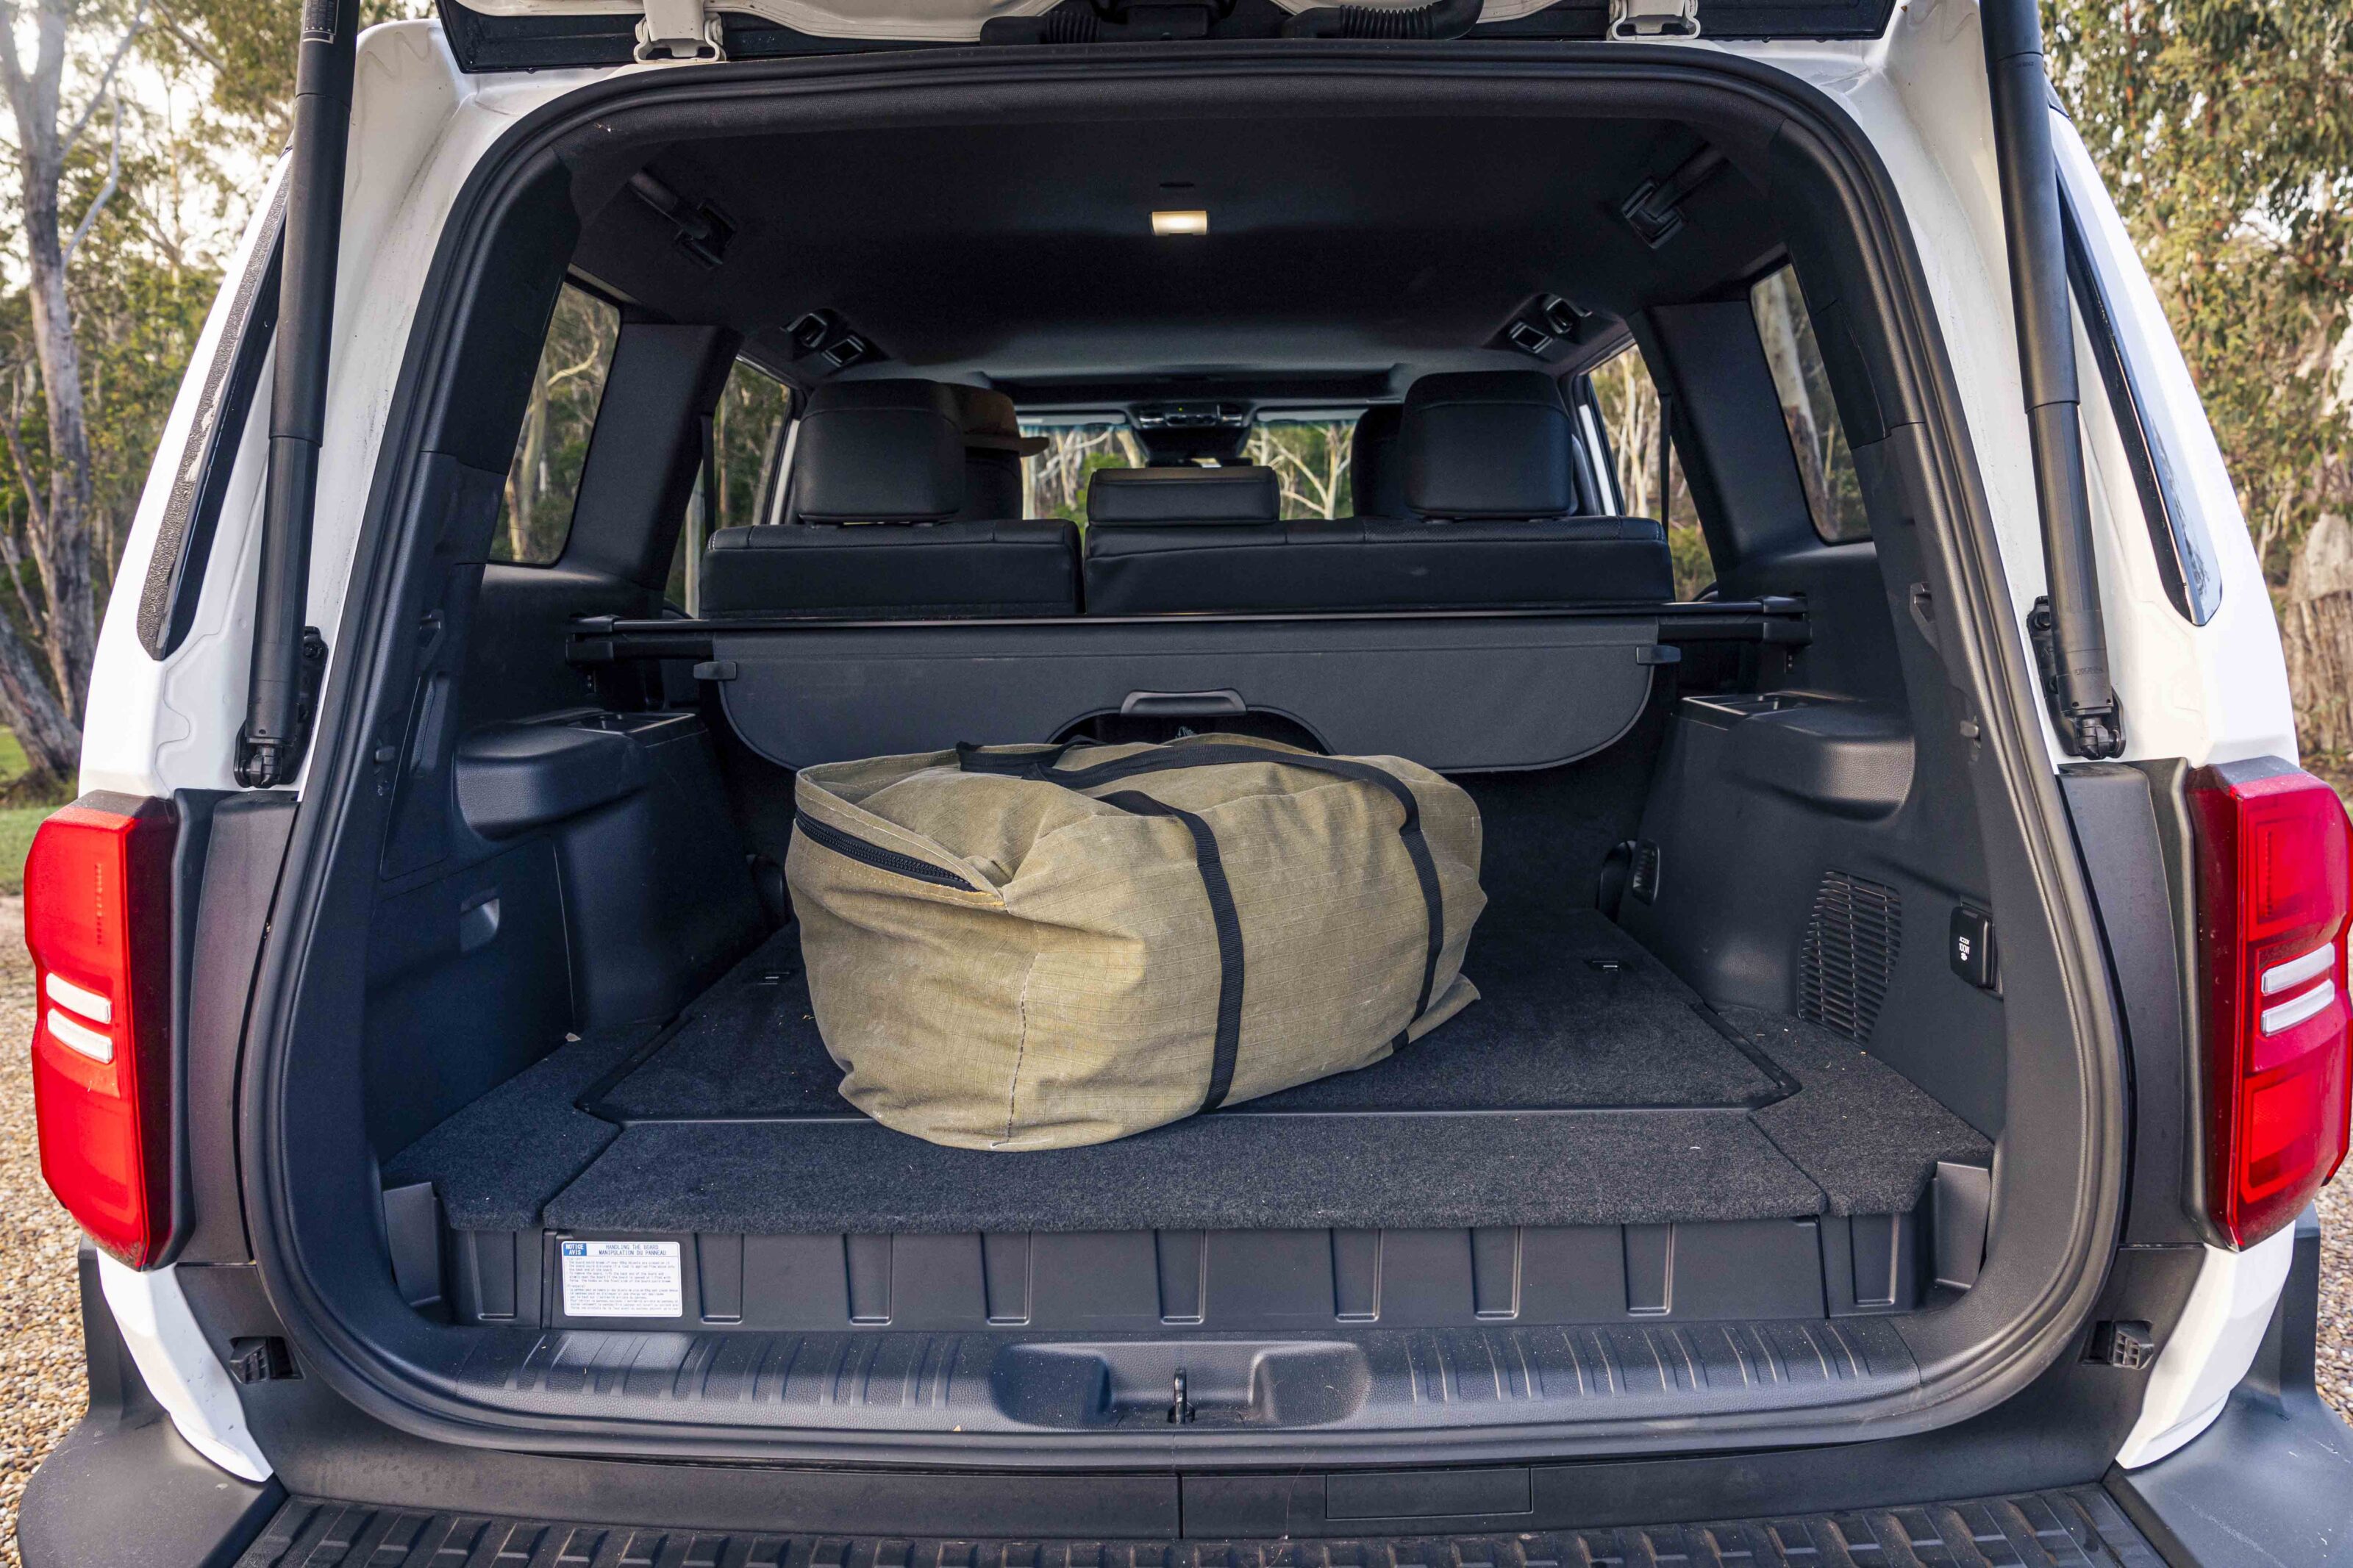
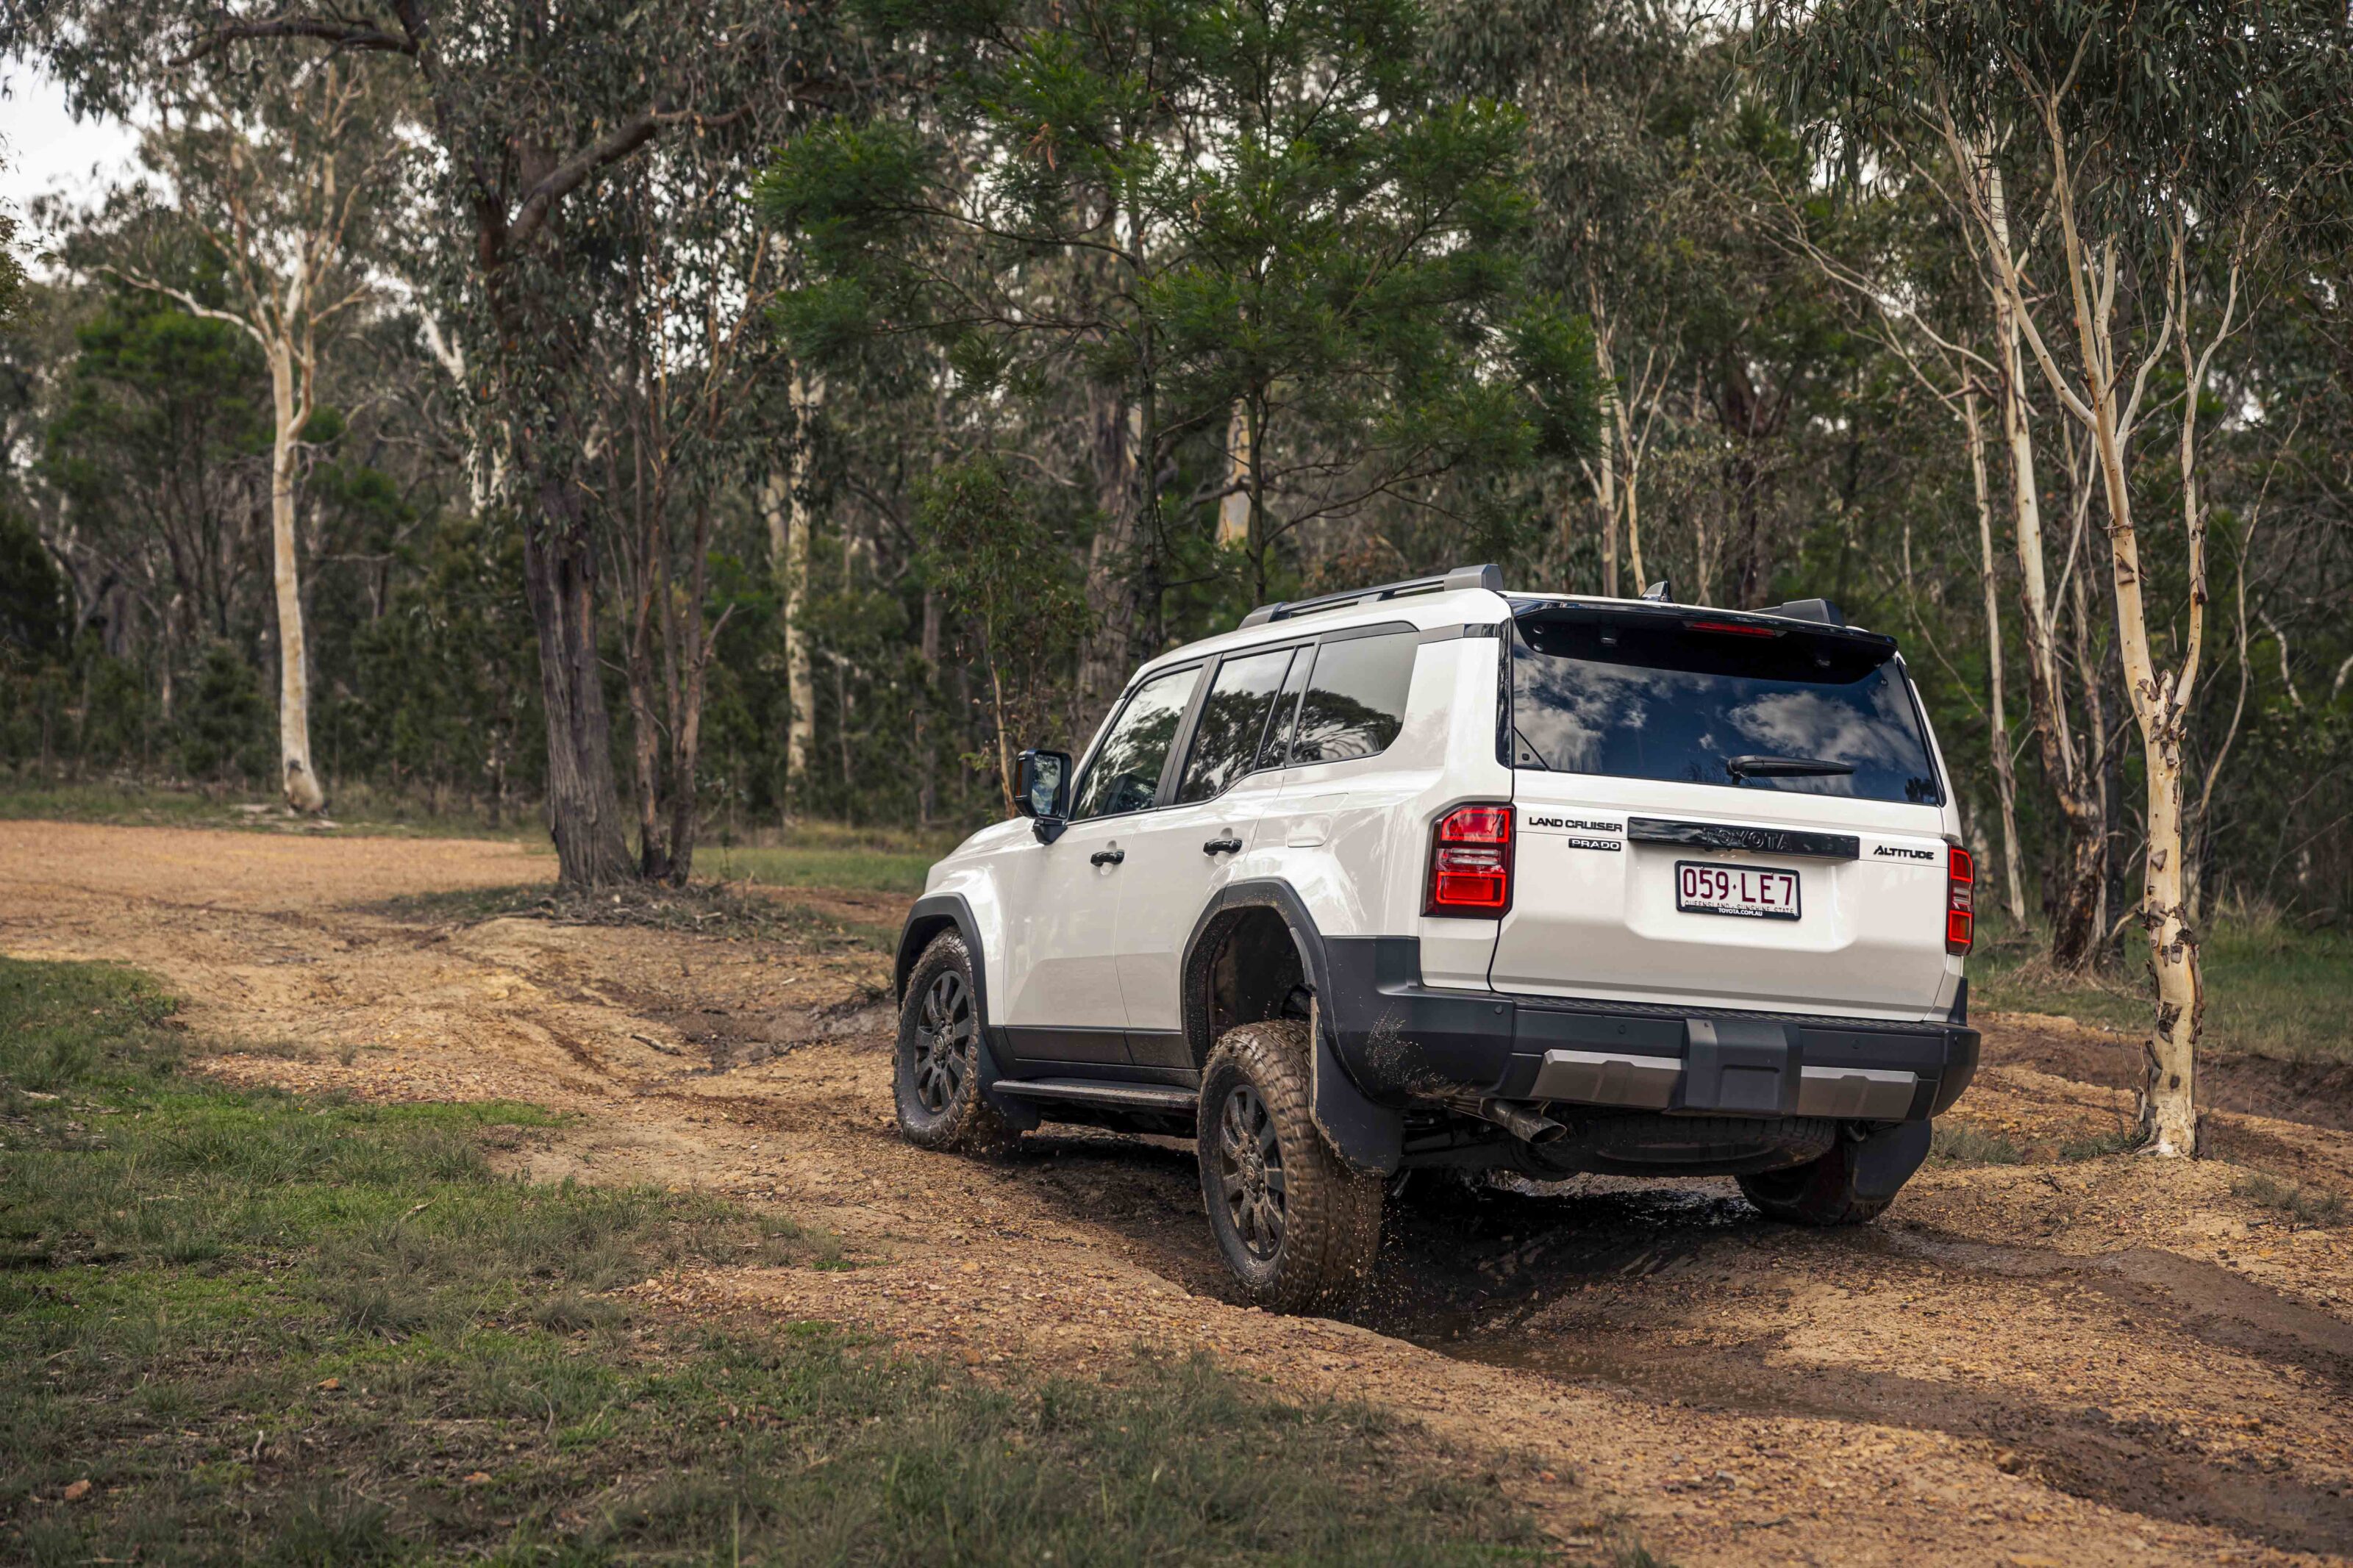
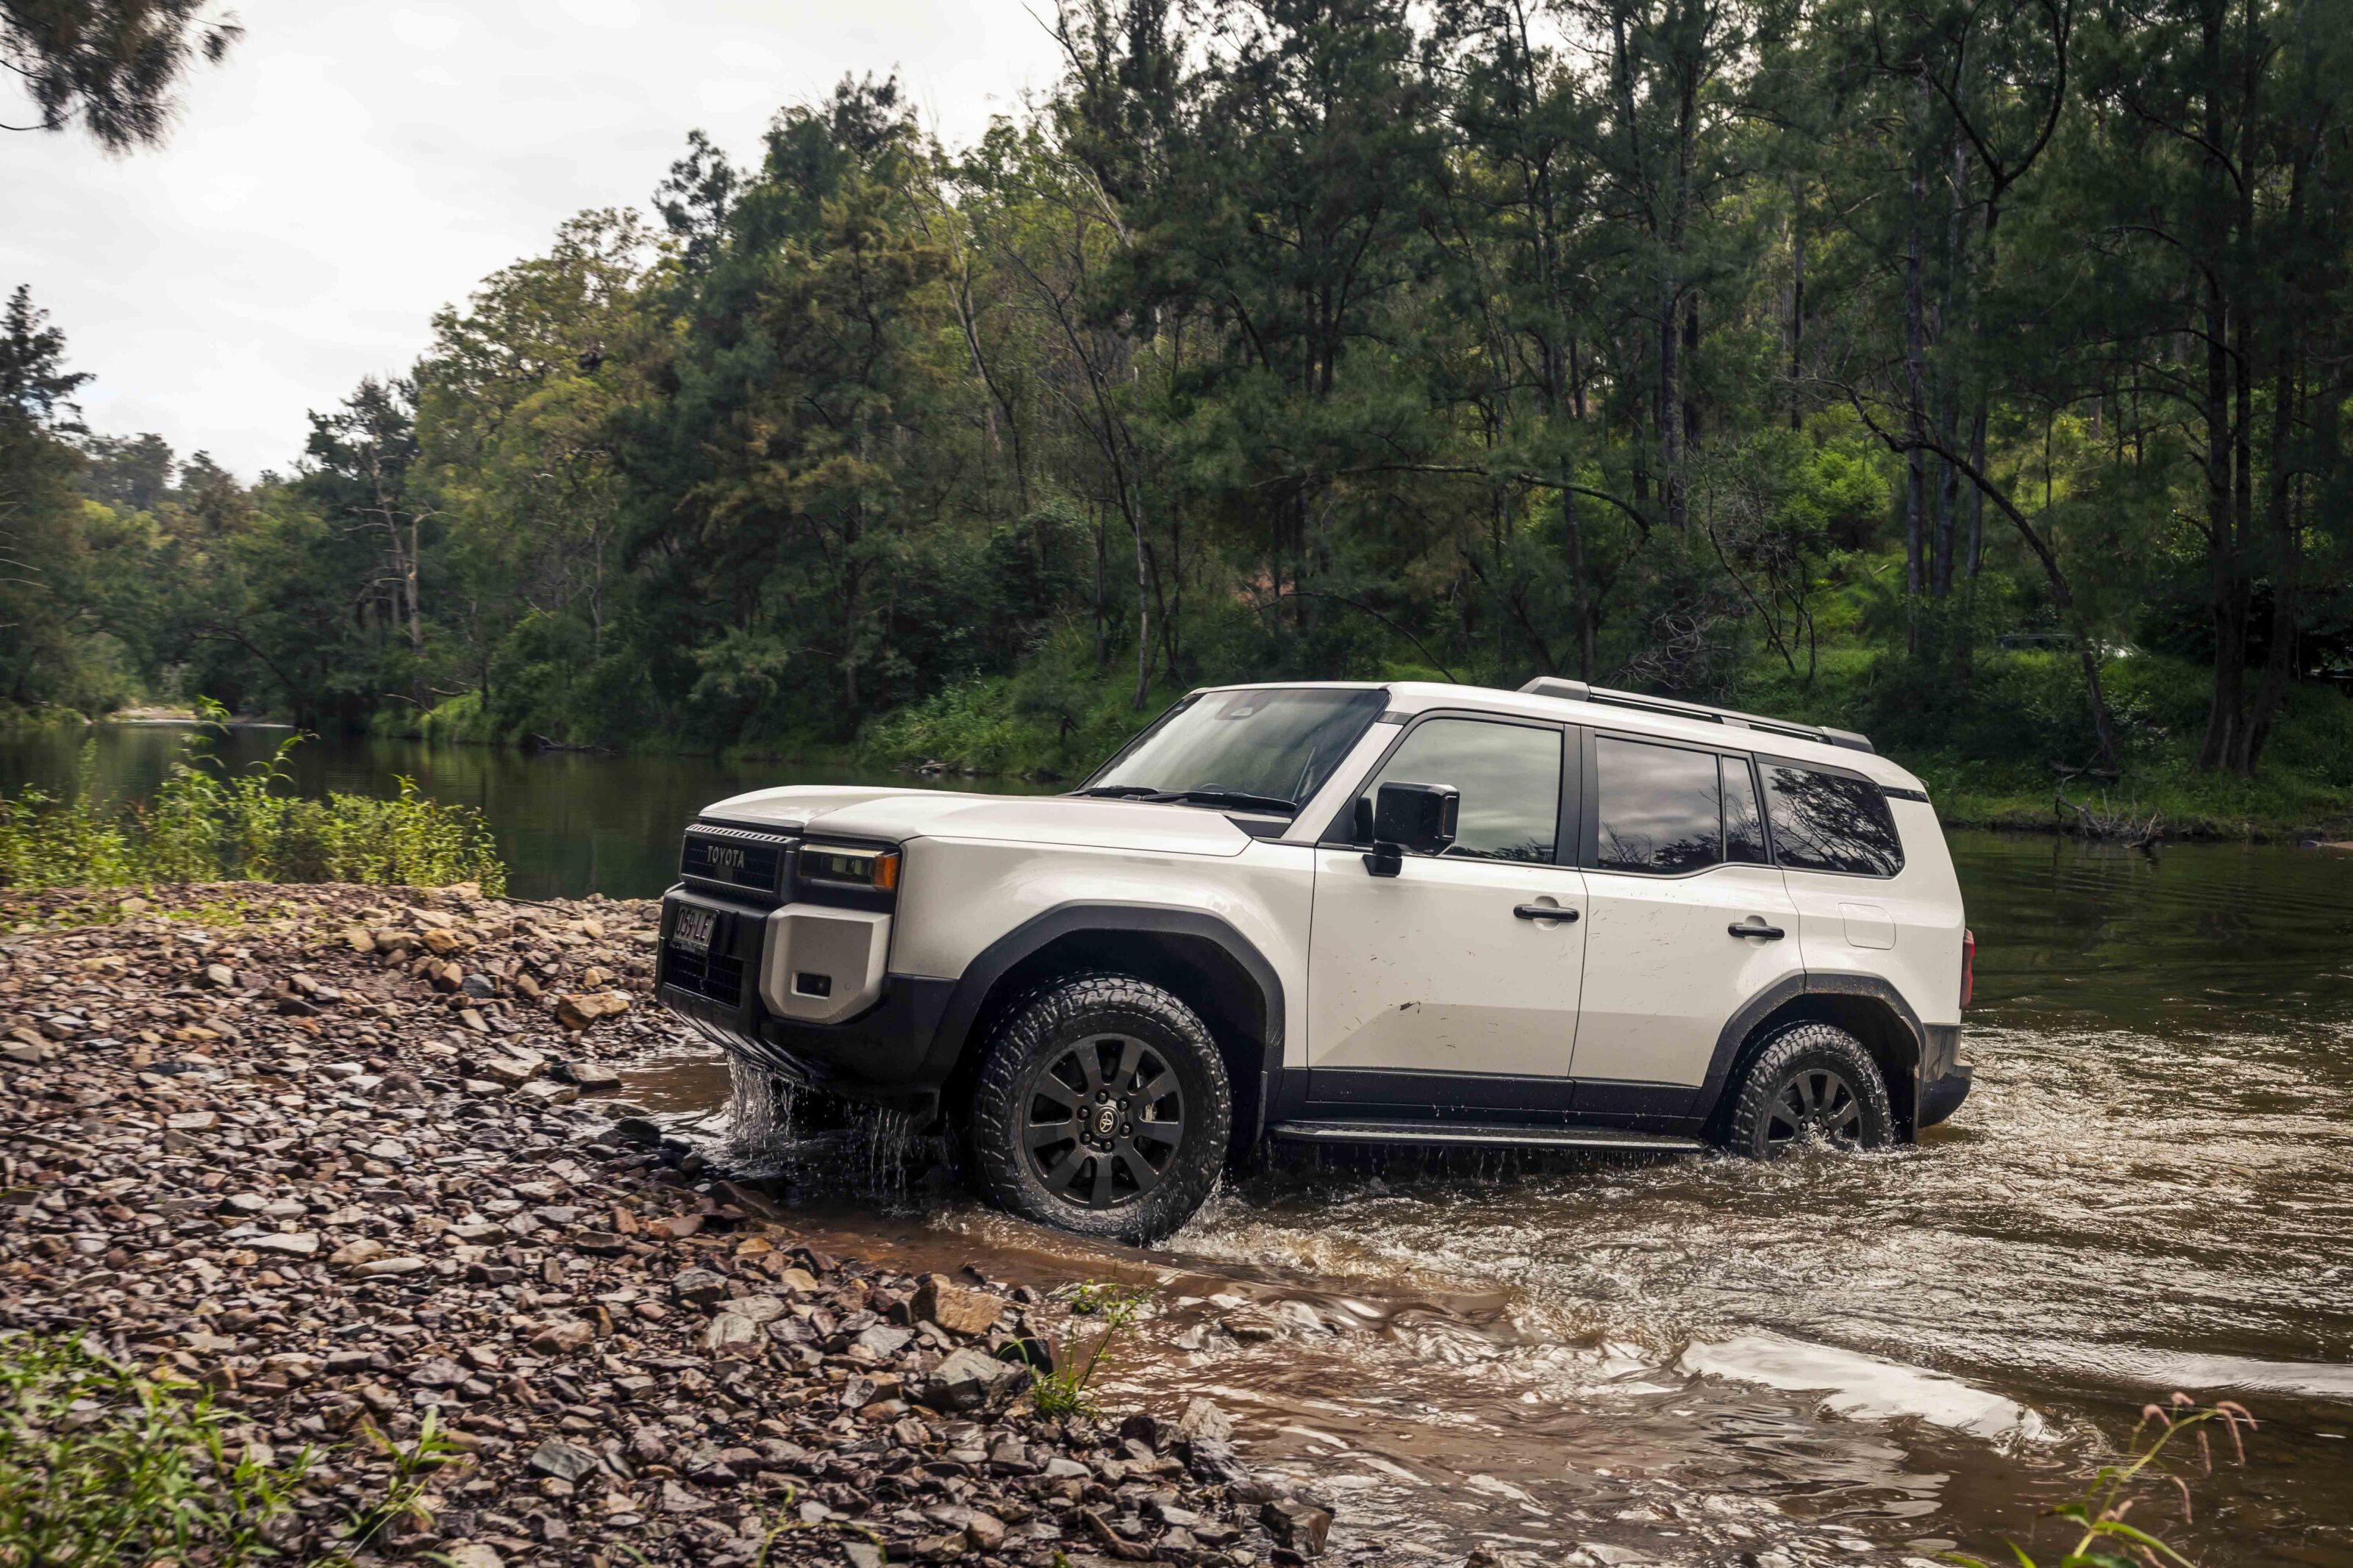
Toyota LandCruiser Prado Altitude
The most highly anticipated new 4×4 launch of 2024 was definitely the Toyota Prado 250 Series.
A long-time favourite wagon of families and off-road adventurers, the Prado has been a best-selling midsize wagon for decades. Thankfully, the new model isn’t a let down. The 250 Series sees the Prado grow in size, stature and price but it comes to a market hungry for just such a vehicle.
The Altitude model grade was best suited to our drive thanks to its all-terrain tyres on 18-inch wheels, rear differential lock and disconnecting front sway bar, but we also chose it as it is one of only two variants in the range to be offered with just five seats, and the third-row seating on models thus equipped impinges on cargo space more than we would want in a touring 4×4 wagon. We would have also considered the entry-level Prado GX for this test as it’s also a five-seater, and it’s the most affordable model in the range making it better value for money.

11
The new Prado continues to be the benchmark for midsize touring 4×4 wagons. It might be bigger than before but it still falls into that midsize bracket along with the Ford Everest and Isuzu MU-X, and being the newest vehicle to market it has plenty to offer the family traveller.
The bigger cabin of the 250 means there’s plenty of room inside for adults and passengers, and the dash is well laid out and easy to use without missing out on any features. Inside you’ll find a 12.3-inch multimedia screen that is compatible with wireless Apple CarPlay and Android Auto, Bluetooth connectivity and cloud-based inbuilt satnav; a panoramic moon roof; leather-accented seat trim with eight-way power adjustment, power lumbar support memory for the driver; and four-way power adjustment for the passenger seat.
There’s a 12.3-inch digital instrument cluster which only comes in the high-spec grades, as does the refrigerated console, the power-adjustable steering column and the JBL sound system kicking out the jams through 14 speakers. The Prado had the most comfortable, best laid out and equipped cabin of all the vehicles tested, whether you were driving on the road or off it.
15
Along with the rear locker, disconnecting front away bar and dual-range transfer case, the Altitude comes with multi-terrain selector with modes for rock, sand, snow, etc, as well as Crawl Control, which does an incredible job of maintaining steady progress over and up obstacles and tricky tracks without any application of the throttle by the driver. Crawl Control does this for you while distributing drive to the wheels with the most traction, making easy work of rough tracks; it really is one technology that even old school four-wheel drivers will appreciate.
The Prado’s 2.8-litre turbo-diesel engine makes a claimed 500Nm and it provides plenty of power for highway and off-road driving, but performance is best described as adequate rather than scintillating. The new eight-speed automatic transmission is quick to kick down and respond to a floored throttle, and the engine pulls well with that familiar four-pot diesel rumble. It doesn’t offer the performance or the refinement of Everest’s V6 but the 2.8 gets the job done.
The 48-volt mild hybrid system that is now part of the drivetrain does very little from a driver’s point of view other than display a range of lights and graphs on the dash. More significant are the restrictions it places on the rear cargo space and the ability to fit an auxiliary fuel tank under the back. Thankfully the Prado still carries 110-litres of good ol’ diesel in its single tank.
4
Whether you use the Prado for running around town or touring our wide brown land, the 250 Series is a very well executed 4×4 wagon that will tick all the boxes for many Australians. The compromises brought on by the packaging of the 48-volt system are the major blemish on its otherwise excellent design, but one we’re already seeing work-arounds for from the aftermarket. Whether or not all the upgrades to the 250 Series will be enough to justify the higher prices across the Prado range will be up to the buyer’s budget.
After driving the Prado Altitude, Ronny said, “Refinement, performance and comfort at a new level on road with impressive off-road capability.”
Dex sang its praises as well, saying, “I would not hesitate to hop in this thing and drive straight to the Cape and it’s equally at home on daily or towing duties. It seems to be a love it or hate it car, and I’m in the former camp. Fight me!”
Dave piped in with, “The absolute all-rounder of this lot. Great in the bush and safe, comfy and techy enough to be a daily driver. An excellent highway car, too. The Prado has finally earned the LandCruiser badge. A bit exxy, though”.
| Toyota Prado Altitude specs | |
|---|---|
| Price | $99,990 +ORC |
| Engine | I4 diesel |
| Capacity | 2755cc |
| Max power | 150kW@ 3000-3400rpm |
| Max torque | 500Nm@ 1600-2800rpm |
| Transmission | 8-speed automatic |
| 4×4 system | Full-time, dual range |
| Construction | 5-door wagon on separate chassis |
| Front suspension | IFS, wishbones, coil springs |
| Rear suspension | Live axle, coil springs multi-link, Panhard rod |
| Tyres | 265/65R18 on alloy wheels |
| Kerb weight | 2595kg |
| GVM | 3200kg |
| GCM | 6600kg |
| Towing capacity | 3500kg |
| Payload | 605kg |
| Seats | 5 |
| Fuel tank | 110L (17.4L Adblue) |
| ADR fuel consumption | 7.6L/100km |
| On-test fuel consumption | 15.9L/100km |
| Approach angle | 32 |
| Ramp-over angle | 25 |
| Departure angle | 17 |
| Ground clearance | 221mm |
| Wading depth | 700mm |
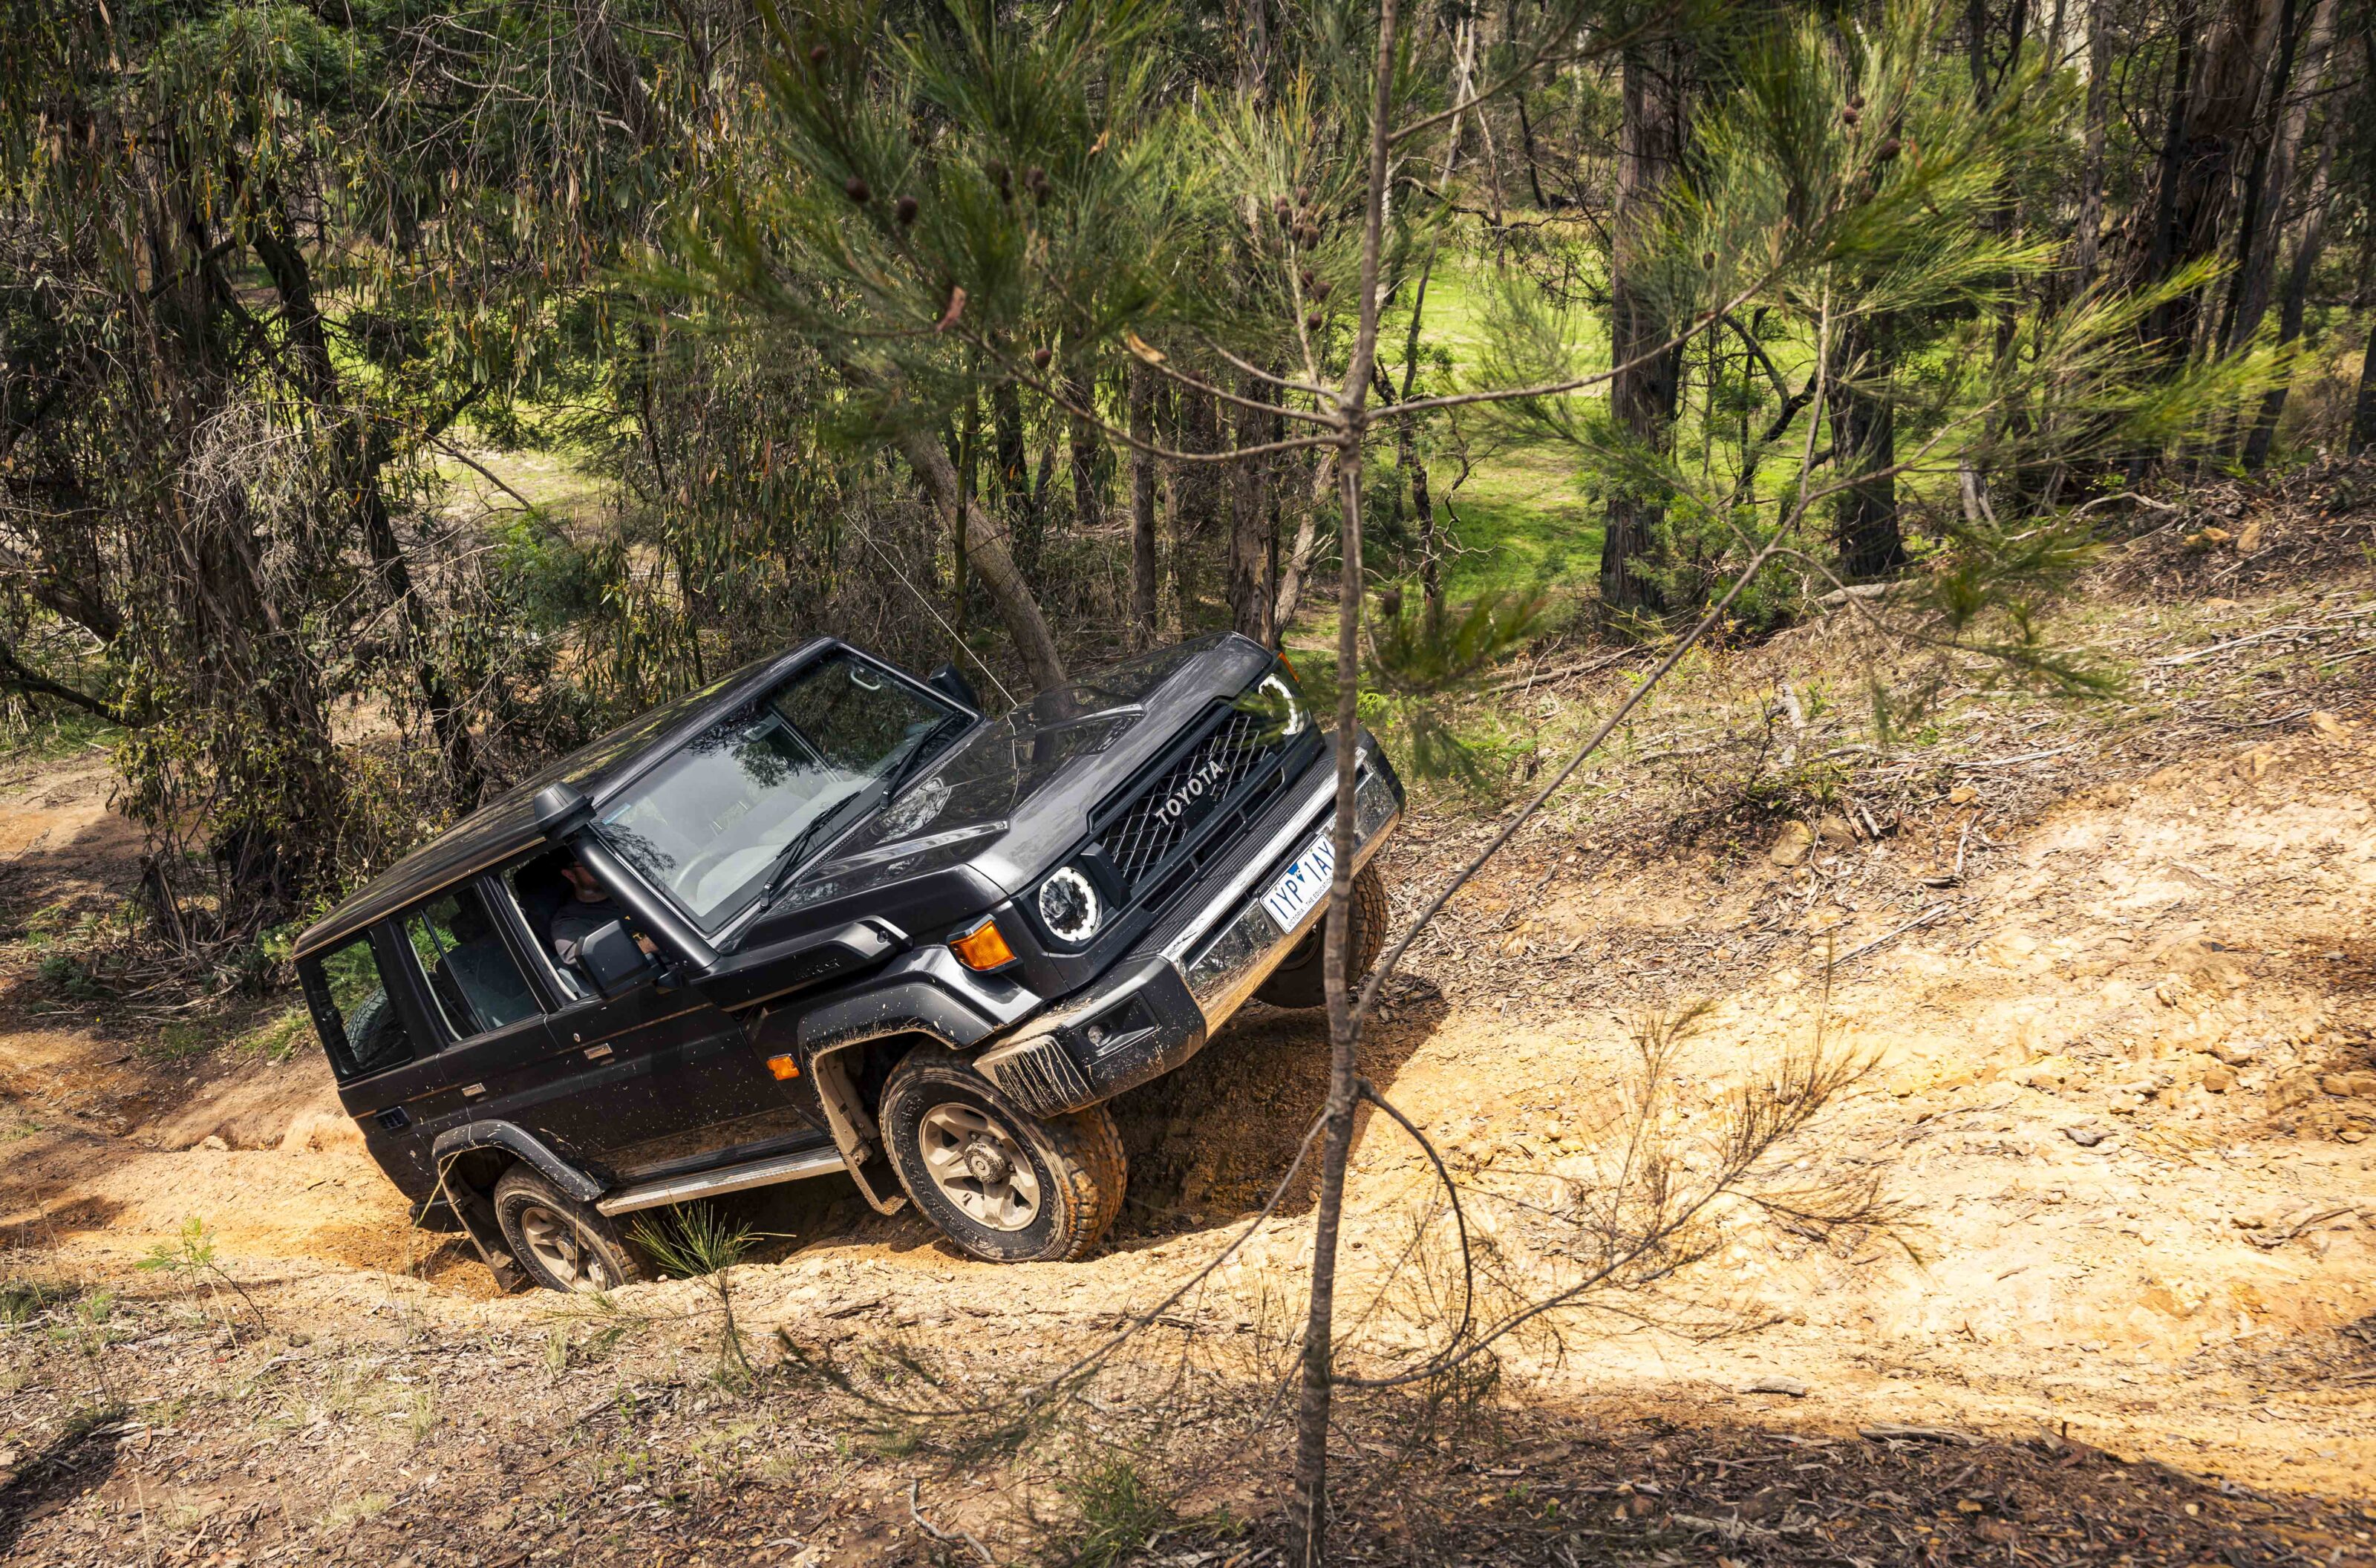
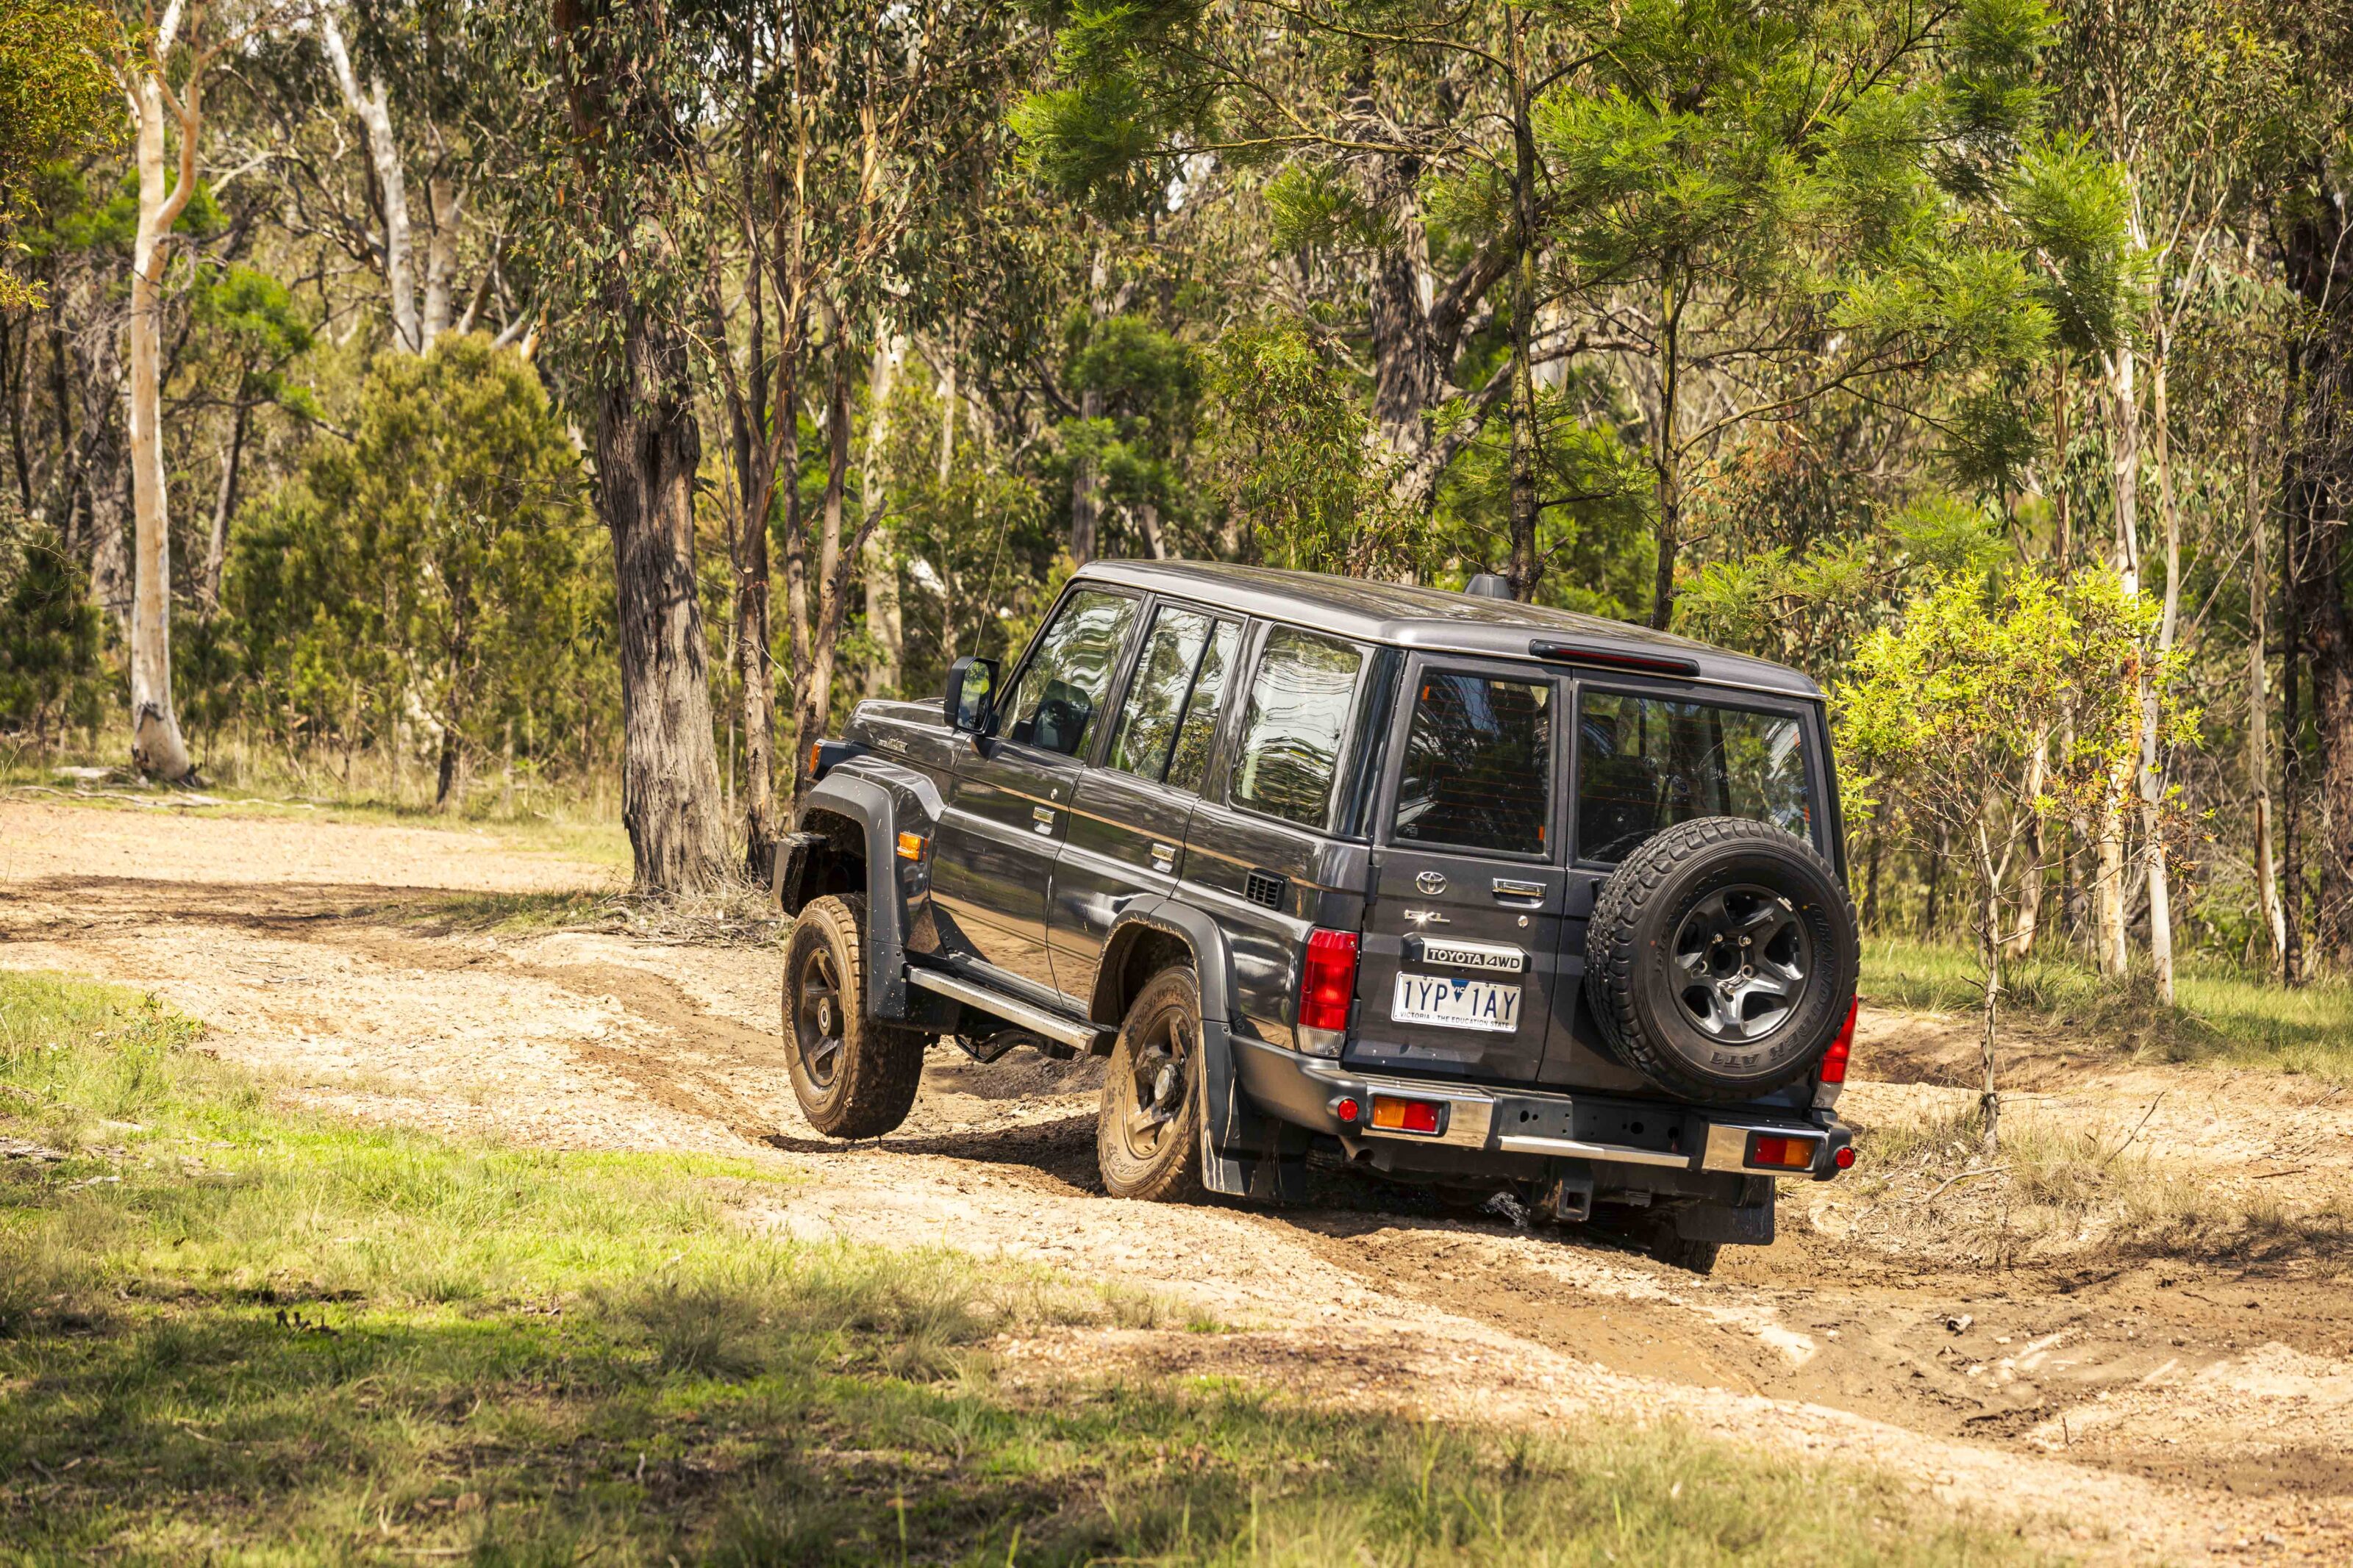
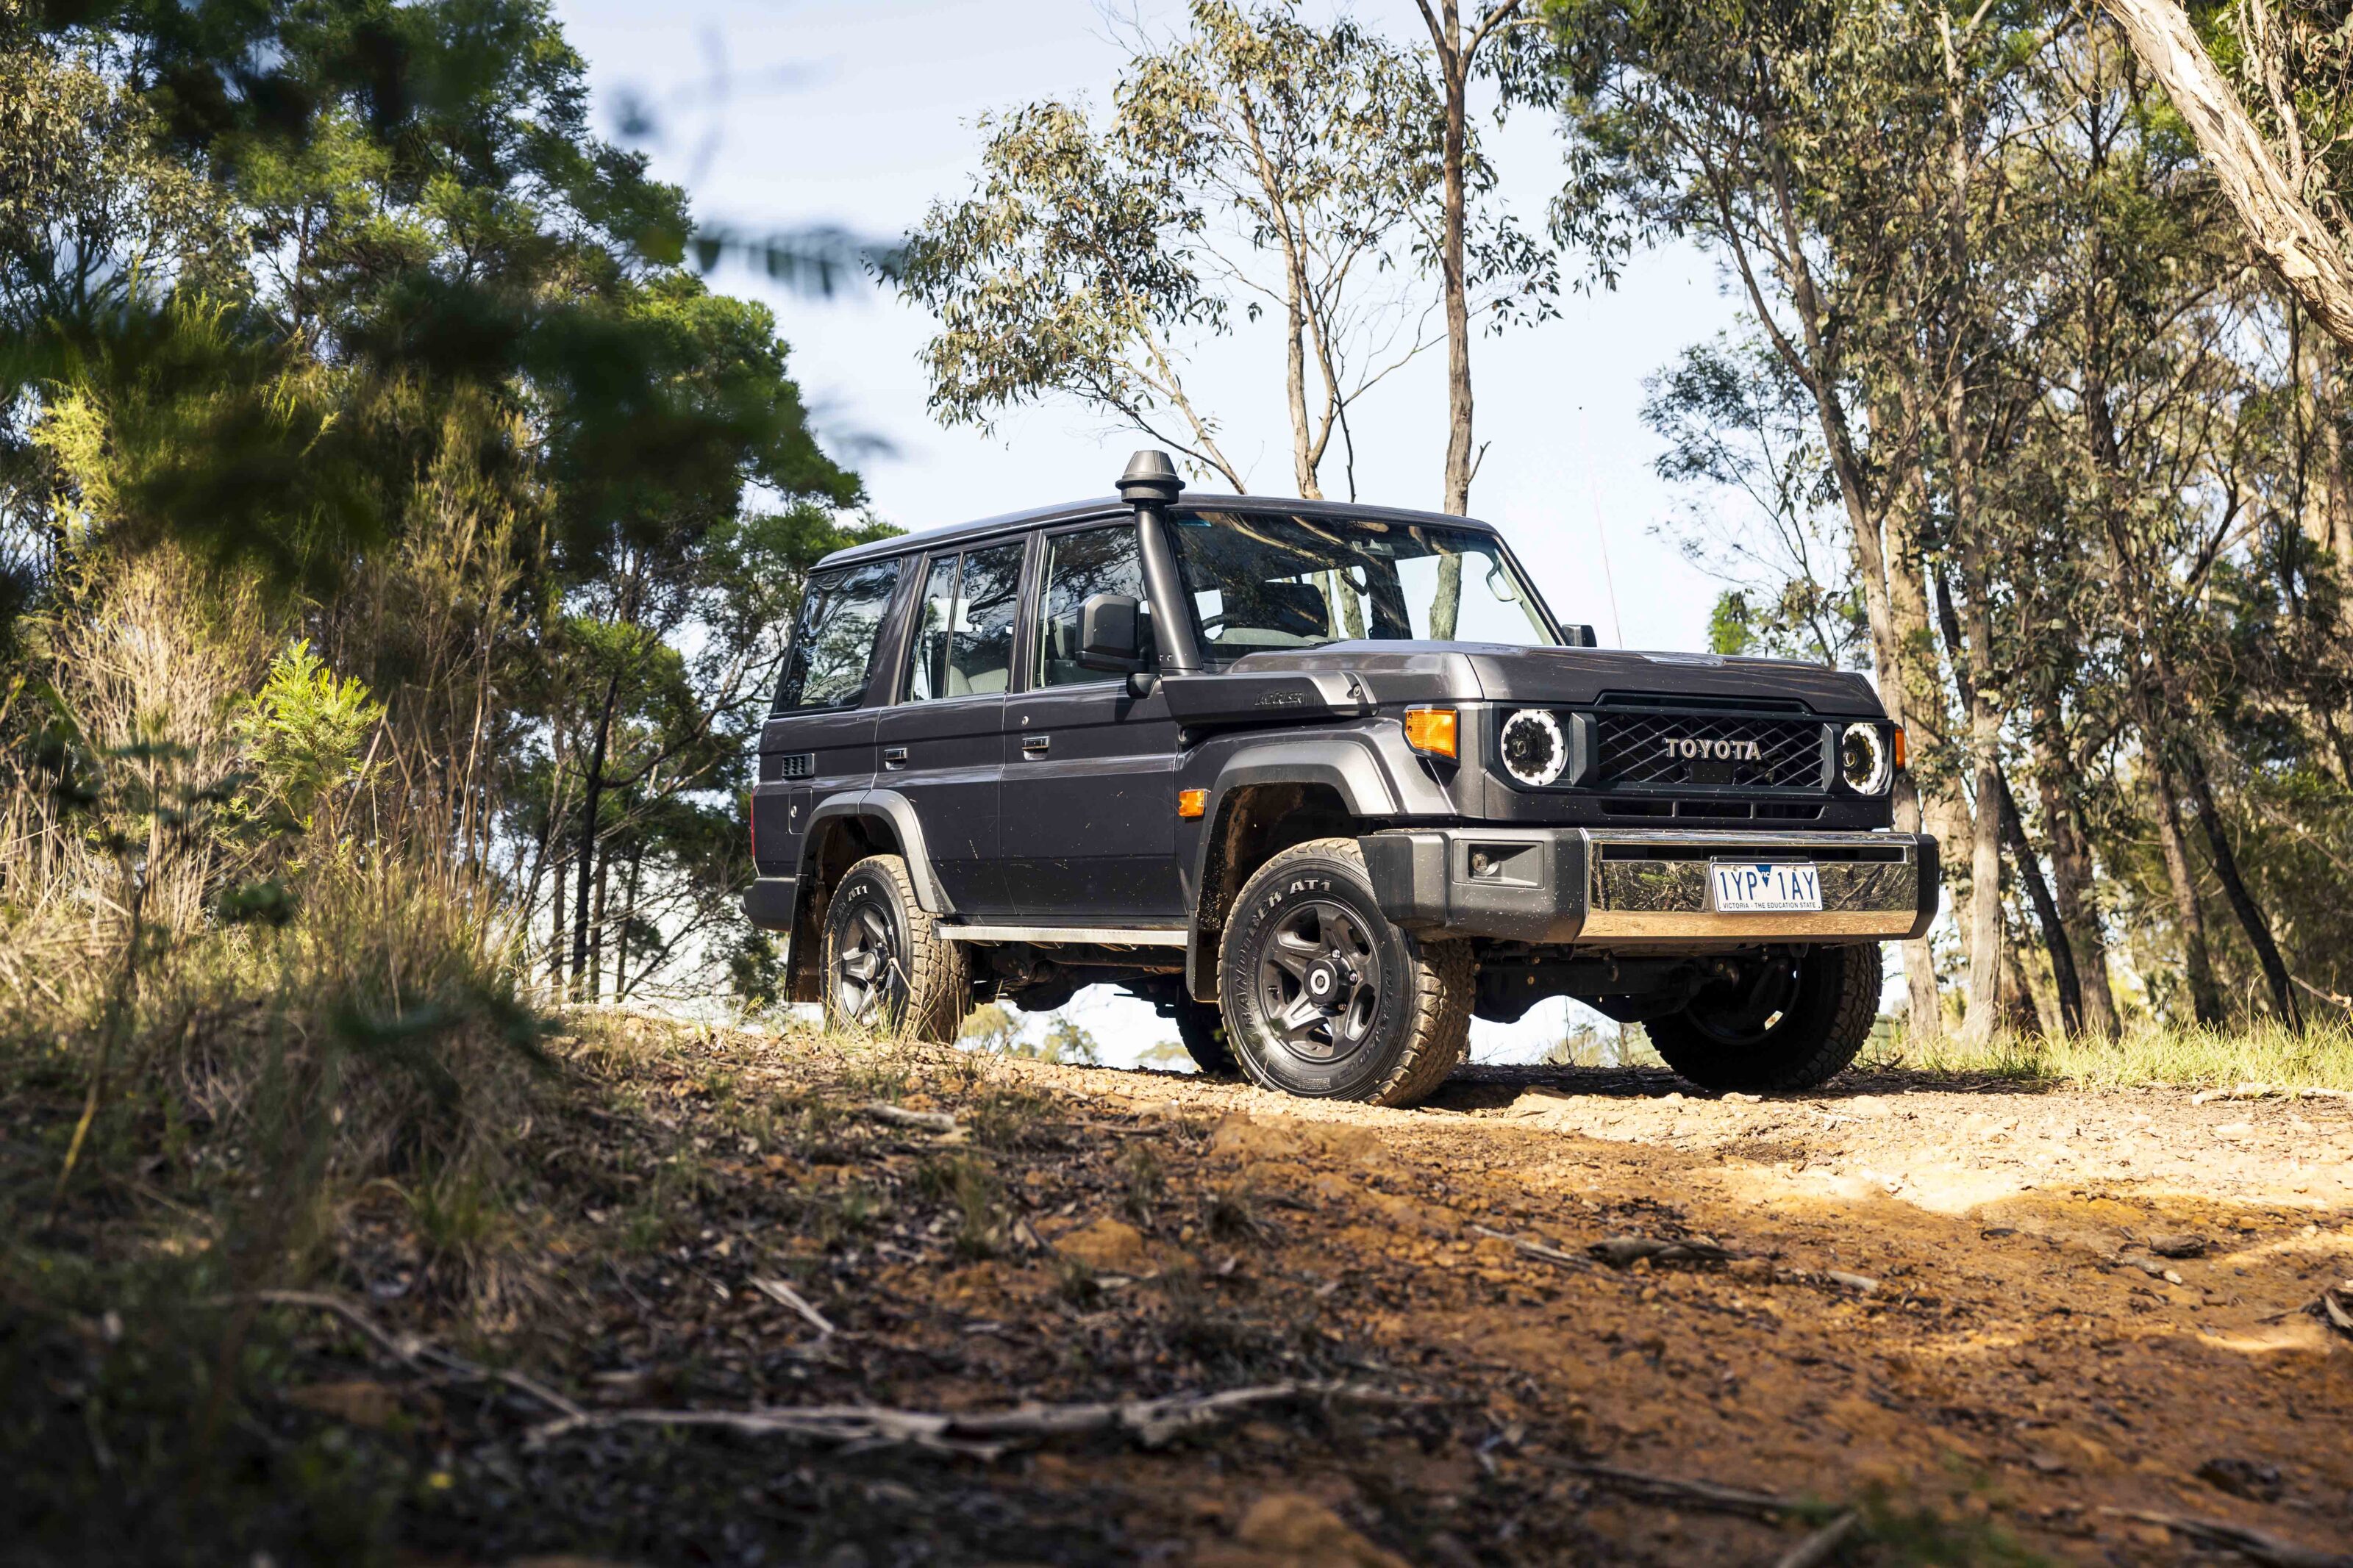
Toyota LandCruiser GXL GDJ76
While we mentioned the evolution of the Patrol Warrior over several years, in the case of the LandCruiser 70 Series that applies seven fold. The 70 Series has been evolving for 40 years and the changes made to the range in 2024 were wholesale.
The latest evolution is centred around adapting the 1GD-FTV 2.8 engine to the 70 to keep the well-aged model in line with emissions regulations that the diesel V8 simply wouldn’t be able to meet. The changes also introduced an automatic transmission to the range for the first time in decades. And the thing is, the four-cylinder engine and the auto transmission make the 70 better to drive than the V8 ever was in standard form.
The 2.8 engine is the same one found in the Prado 250 Series, the HiLux and the Fortuner… sans any hybrid interference. The auto slushbox is a six-speed Aisin unit that is well matched to the 2.8 engine. The new powertrain also heralded a fresh front-end design for the 70, and a smattering of new features, but it was really all about the engine and gearbox.
8
The LC76 wagon tested here in GXL trim was chosen for its front and rear locking diffs, power windows and cloth trim. As ever, the 76 remains a basic , no frills workhorse that gets on with the job, and that job is now easier for more people thanks to the new driveline.
Aside from the 1GD/auto powertrain and new tech under the skin, the only other changes are cosmetic. Toyota has doubled-down on the retro look with the revised front end reverting back to round headlamps ,albeit now with LED DRLs, a taller bonnet over a revised grille and lower venting that replicates the earliest 70s, and an upper vent atop the grille that is very reminiscent of the 40 Series.
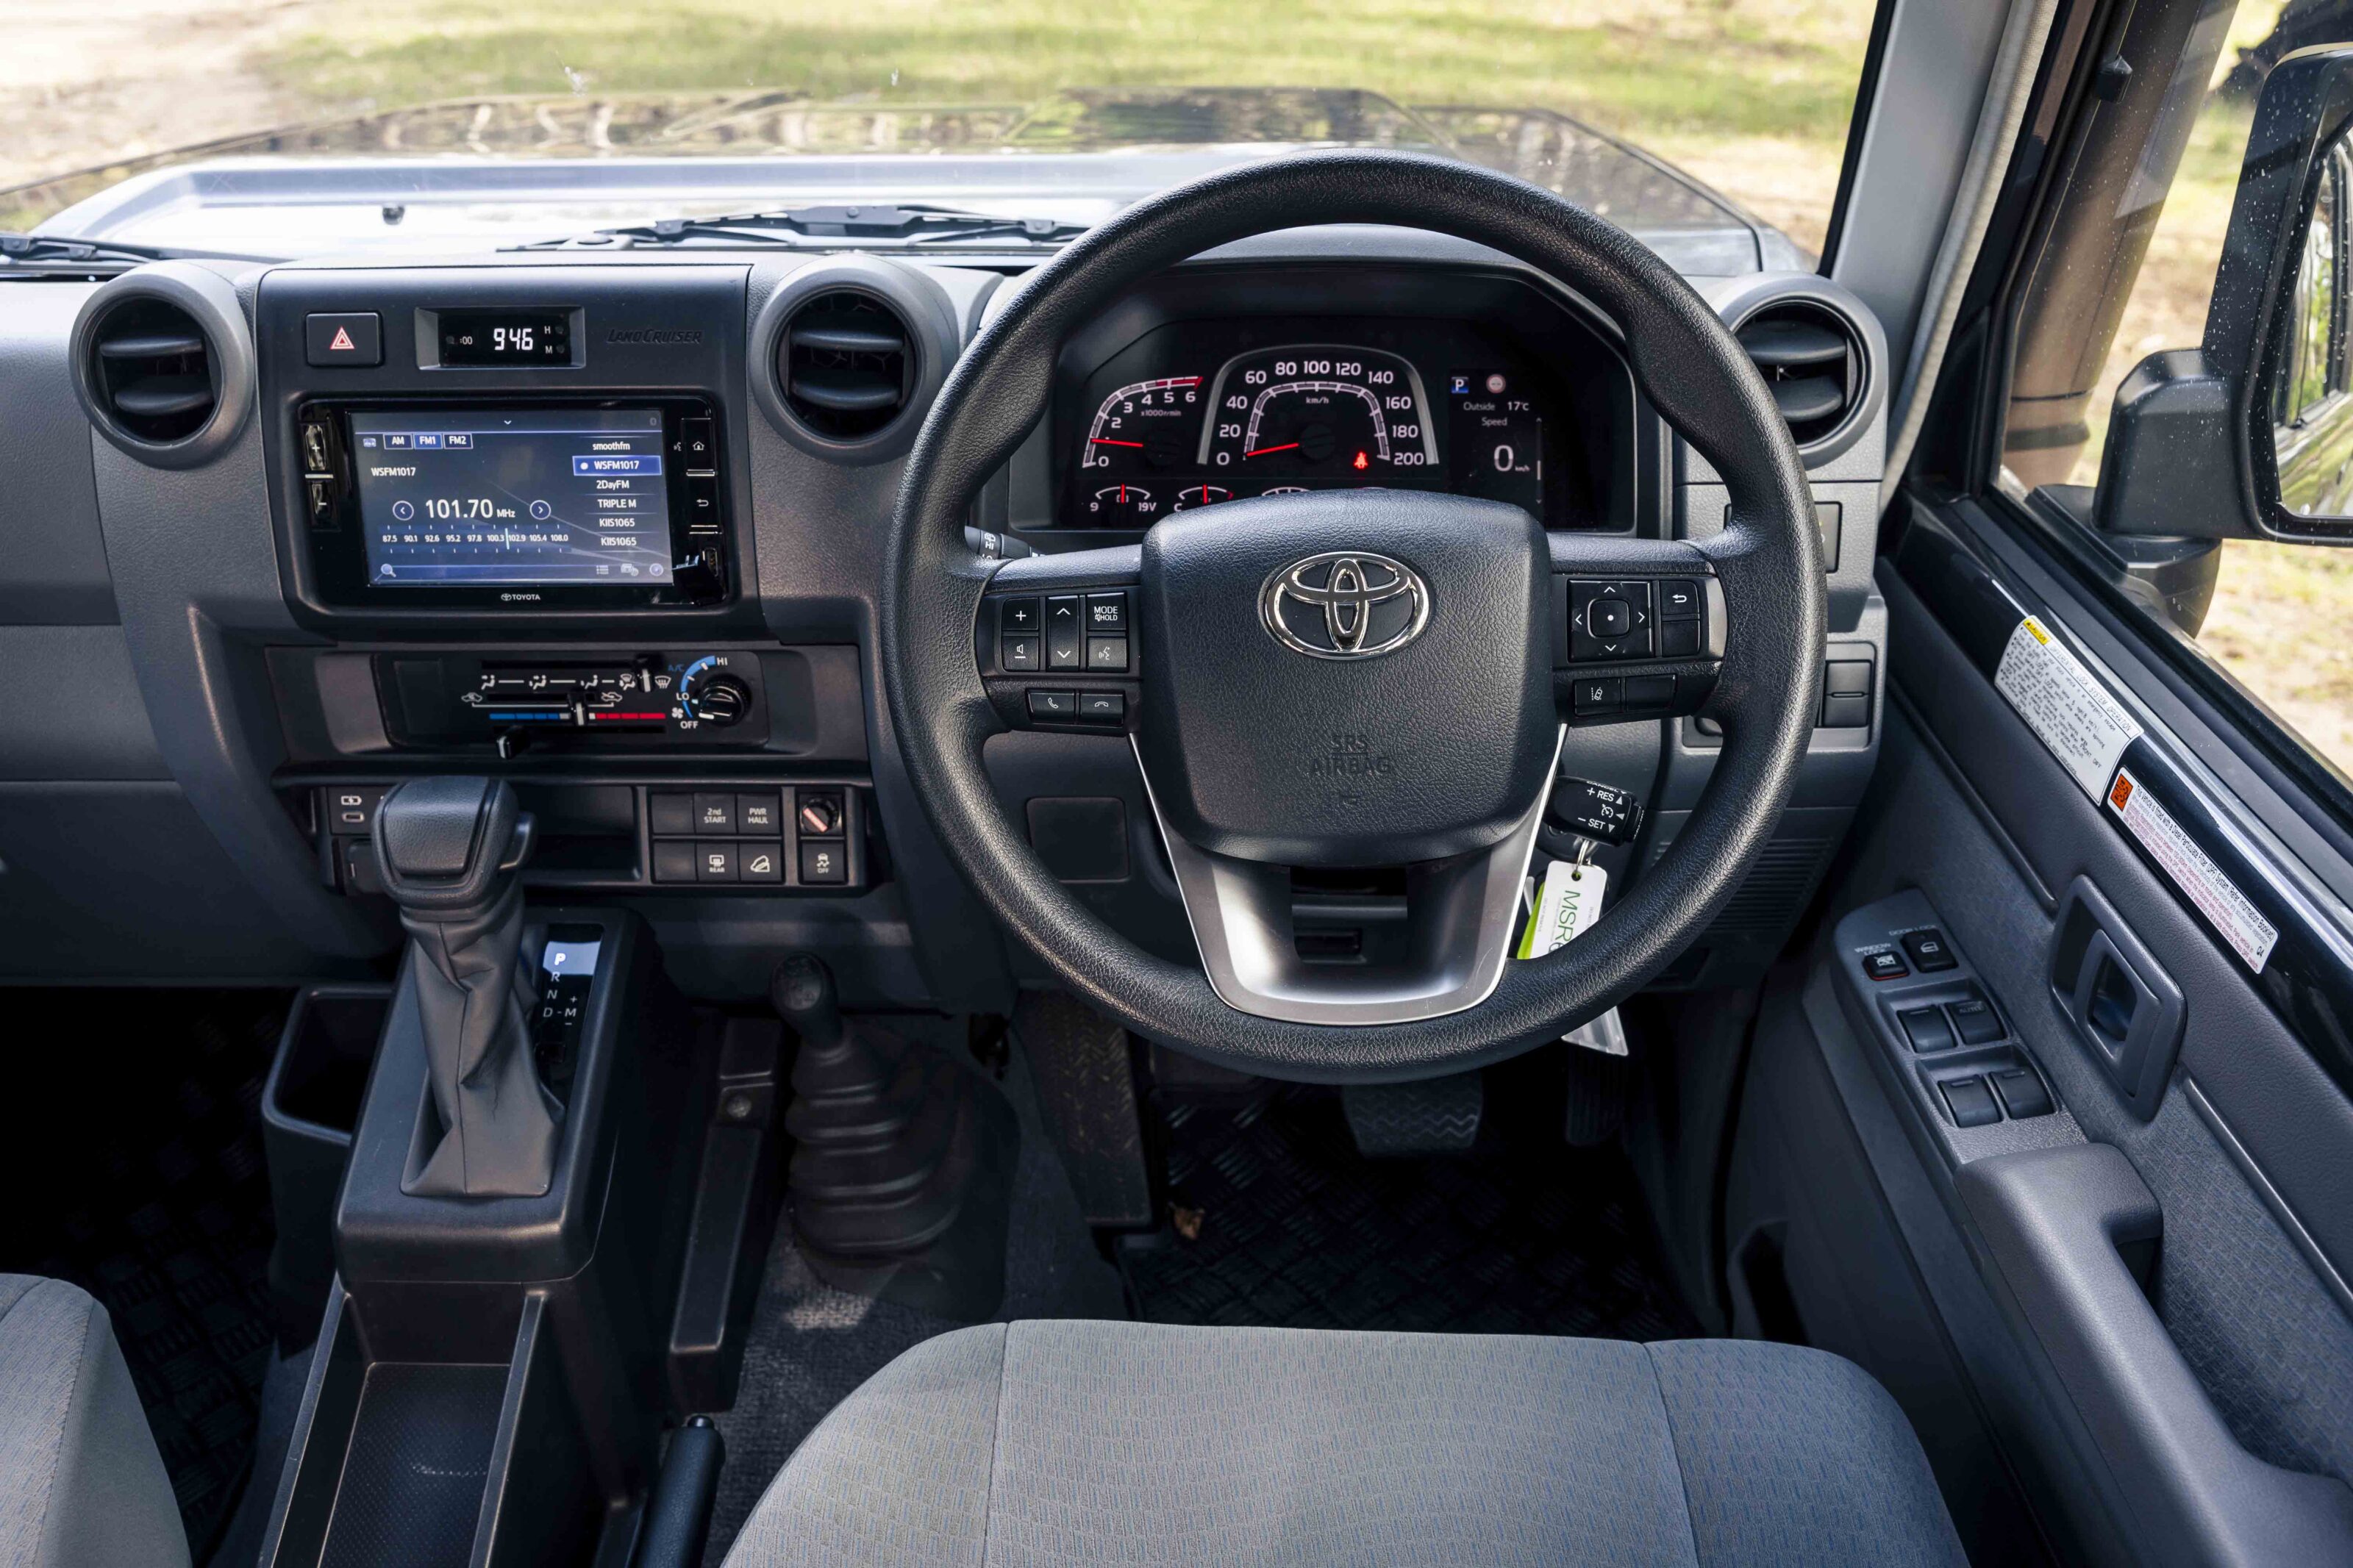
Inside there’s a new gauge binnacle that also has a retro 40 Series vibe but includes a 4.2-inch information display with a digital speedometer, a new 6.7-inch infotainment screen, and a new steering wheel with more control buttons than before. Air-conditioning and cruise control are standard as are front and rear differential locks on GXL models (optional on lower grades).
15
The 70 Series scores a bit of safety tech as well, but nothing like what you will find on all-new vehicles like the Prado and Everest. On the 70, Toyota’s Safety Sense system includes a pre-collision system with day and night pedestrian and daytime cyclist detection, lane departure alert with steering assist that works on the brakes and not directly on the Cruiser’s hydraulic power steering, speed-sign recognition, auto high beam lights, ABS, electronic stability and traction control, driver and front passenger airbags (but none for rear-seat passengers), downhill assist control on auto models only, and a reversing camera (only the four-cylinder/auto 76 wagon).
The LandCruiser 70 Series remains a very agricultural vehicle and its 40-year old architecture means that integrating the latest safety systems is a huge challenge for the engineers, but many 4×4 tourers will appreciate the lack of interfering safety tech. Having said that, the 76 does give you the occasional chime to warn you to keep in your lane, but that’s about it.
Evolving a vehicle over 40 years has allowed Toyota to get it right, and it has kept it simple with the 70 Series. The dash might hold a new gauge screen, but the infotainment (if you could call it that) screen is very basic. There’s now mapping, but the image from the reversing camera is below average and the sound system is simply woeful.
4
While short of luxury and convenience features, the 70 Series makes up for it with purpose-built functionality and capability. In a world of new 4x4s that try to be all things to all people, the 70 sticks to its roots and focuses on capability you can depend on, no matter what the conditions or terrain.
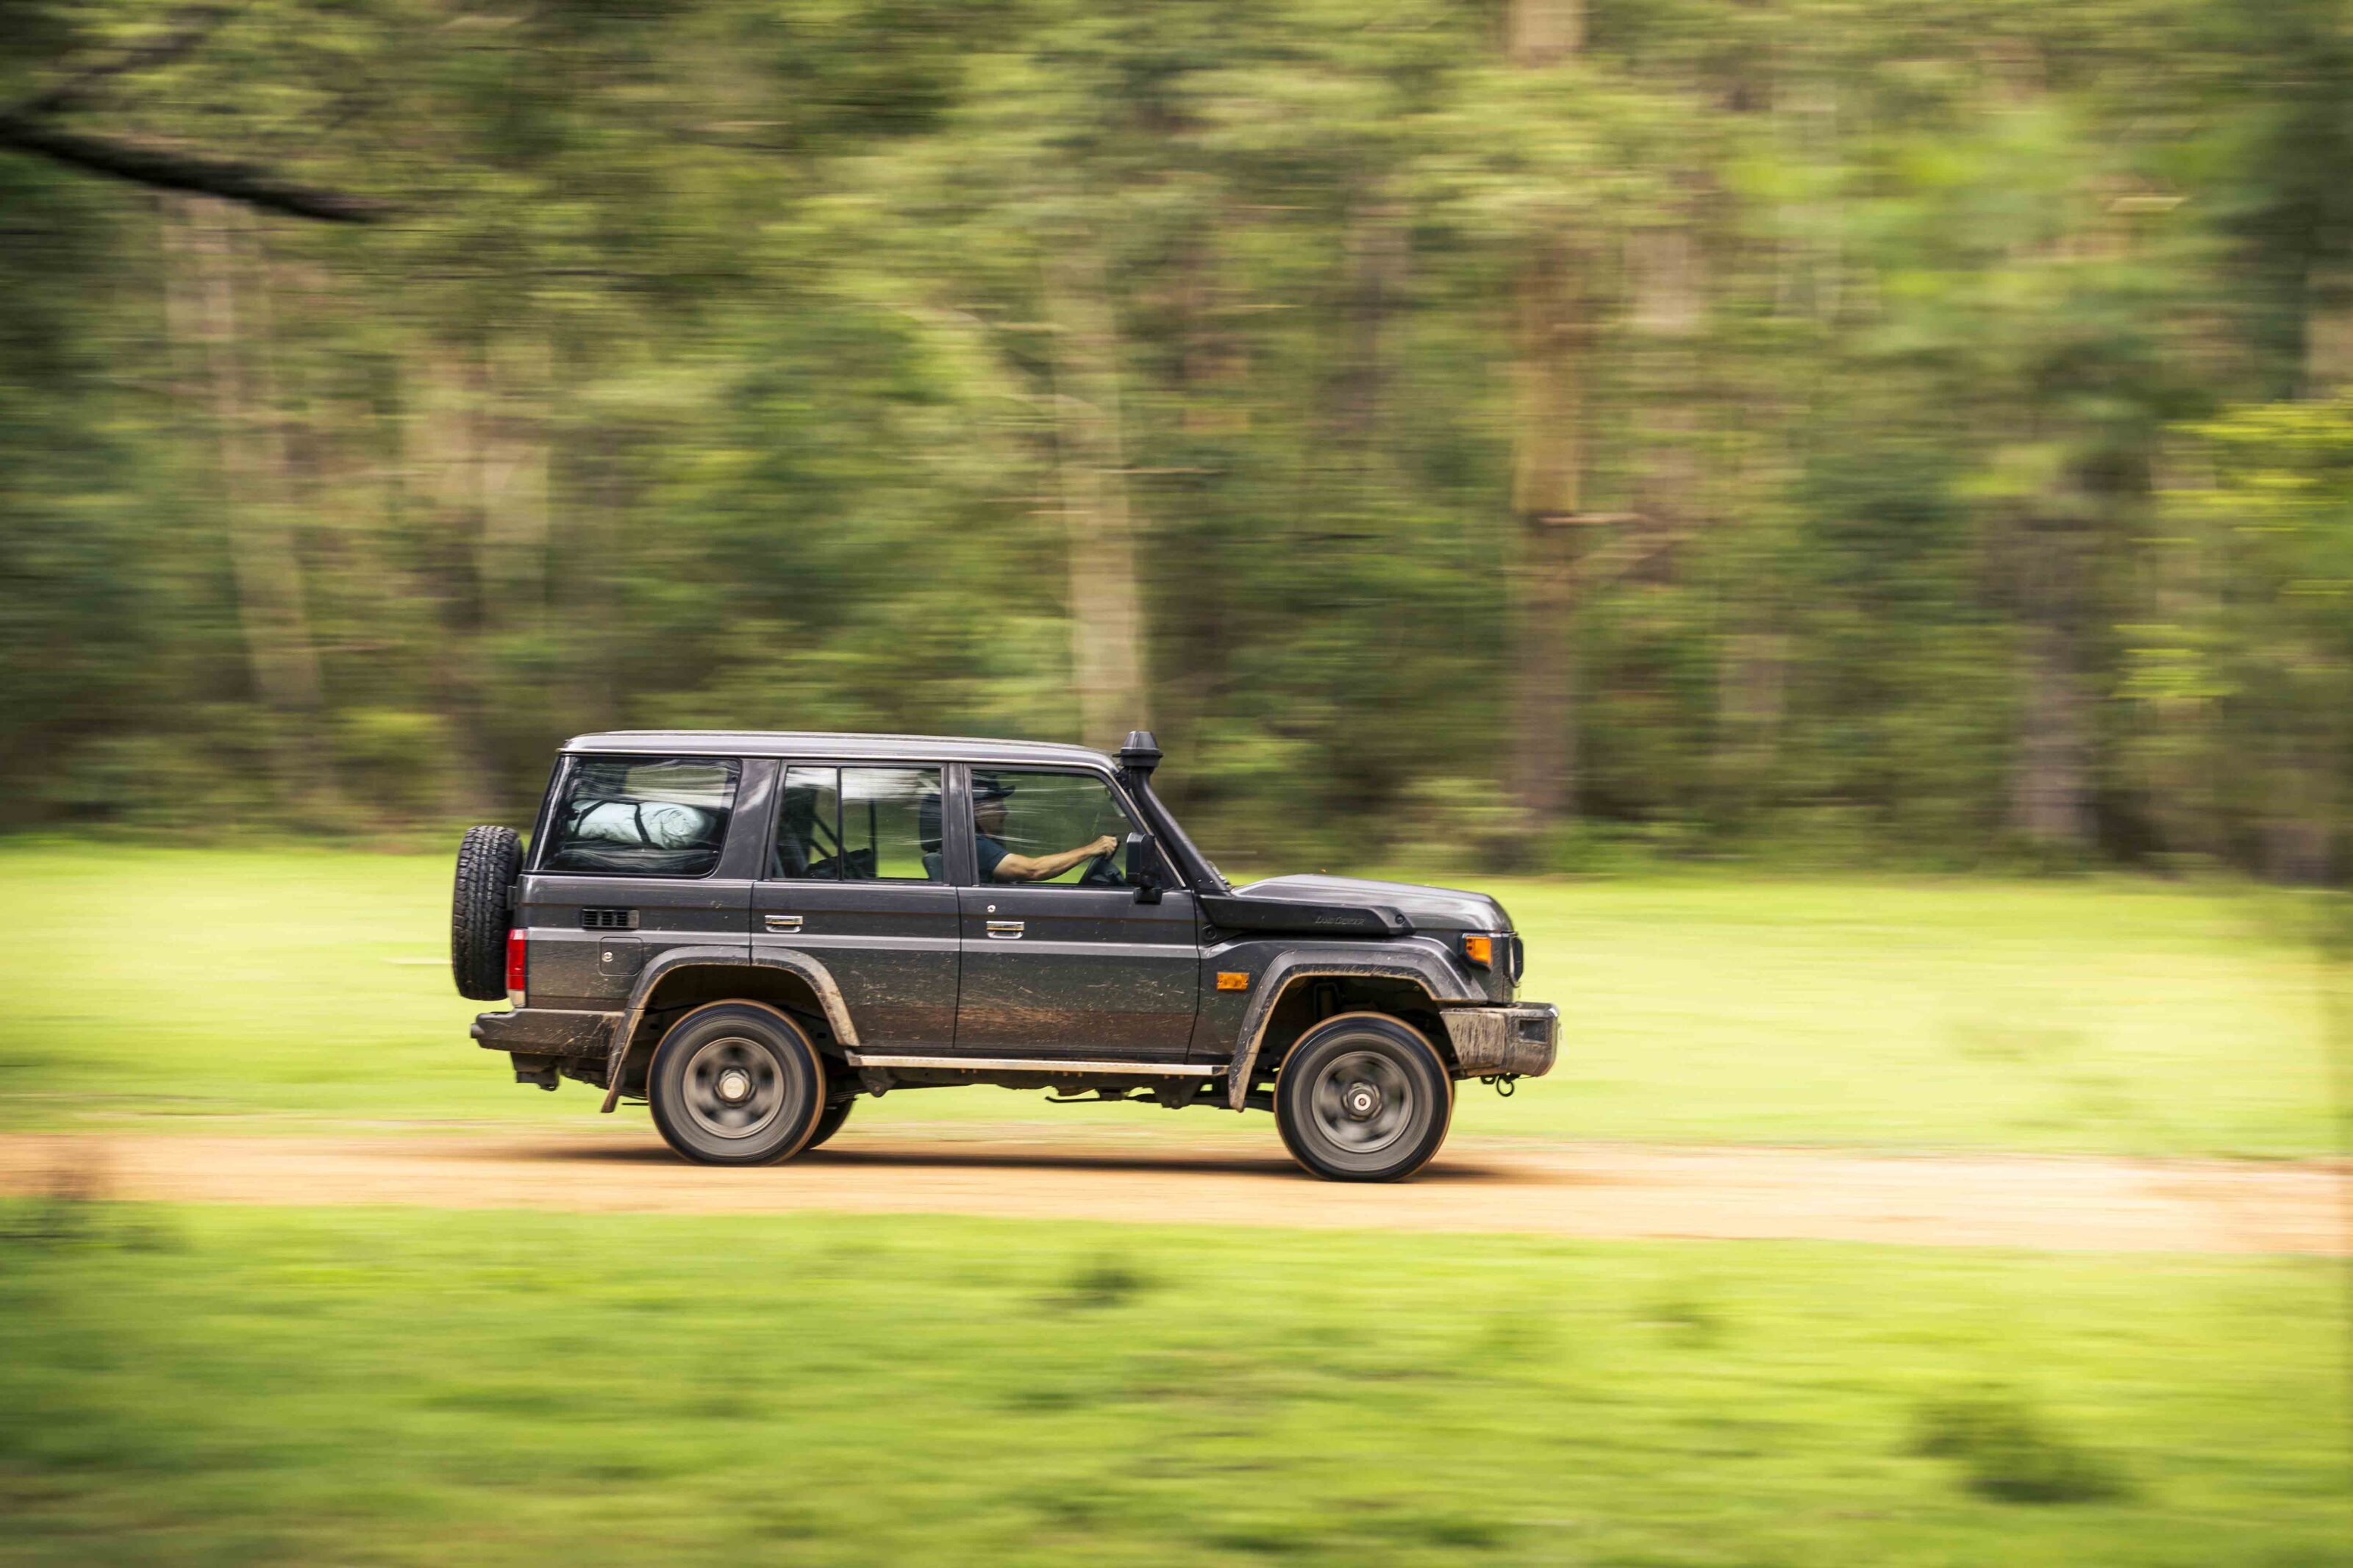
With unrivalled ground clearance and locking diffs just a simple twist of a dial away, the 76 is near on unstoppable in the bush. Visibility out of the 40-year old cabin is fantastic and the relatively small dimensions of the wagon make it easy to get around in the scrub and in the shopping centre carpark. It takes a day or two of familiarity before you get used to how manoeuvrable it is.
The cargo space is simply a square box with few protrusions to limit your load. The back seat folds forward or is easy to remove totally to make the most of that cargo space. Functionality at its best!
4
It’s this level of functionality and off-road capability that allowed the LC76 to score so well with our team of drivers. 4X4OTY is judged by a team of four-wheel drivers, not soccer mums, and we’re sure the result would have been different if it were, but we make no excuses for that. We are 4X4 Australia, after all.
Ron Moon loved the 76 saying, “What a difference a new – well new to the 70 Series – engine and a gearbox makes to this venerable workhorse… and in the wagon it works exceptionally well.”
Both Dex and Matt said this is the vehicle they would buy from the group, with Dex adding, “The auto is what the 70s have been missing since day one. It makes an already capable tourer into an easy daily driver and family wagon. I didn’t love or hate the 2.8L; the diff locks make hardcore tracks a possibility.”
Dave wrapped it up saying, “Old school for sure, but still a relevant vehicle. The new driveline is a belter and probably shouldn’t be as good as it is. The vastly improved fuel consumption and offer of an automatic gearbox also makes the live axles and prehistoric cabin design somehow less problematic. Brilliant in the scrub!”
| Toyota LandCruiser GXL GDJ76 specs | |
|---|---|
| Price | $79,800 +ORC |
| Engine | I4 diesel |
| Capacity | 2755cc |
| Max power | 150kW @ 3000-3400rpm |
| Max torque | 500Nm @ 1600-2800rpm |
| Transmission | 6-speed automatic |
| 4×4 system | Part-time, dual range |
| Crawl ratio | N/A |
| Construction | 5 door wagon on separate chassis |
| Front suspension | Live axle, radius arms, coil springs |
| Rear suspension | Live axle, leaf springs |
| Tyres | 265/70RR16 on alloys |
| Kerb weight | 2300kg |
| GVM | 3510kg |
| GCM | N/A |
| Towing capacity | 3500kg |
| Payload | 1210kg |
| Seats | 5 |
| Fuel tank | 130L |
| ADR fuel consumption | 9.6L/100km combined |
| On-test fuel consumption | 15.1L/100km |
| Approach Angle | 33 |
| Ramp-over angle | N/A |
| Departure angle | 23 |
| Ground clearance | 290mm |
| Wading depth | N/A |
Our testing was never going to be on a racetrack or in shopping centre carparks. To test the contenders, we go touring just like our readers do; on and off road, sealed and gravel roads, high and low range driving, up hill and down dale.
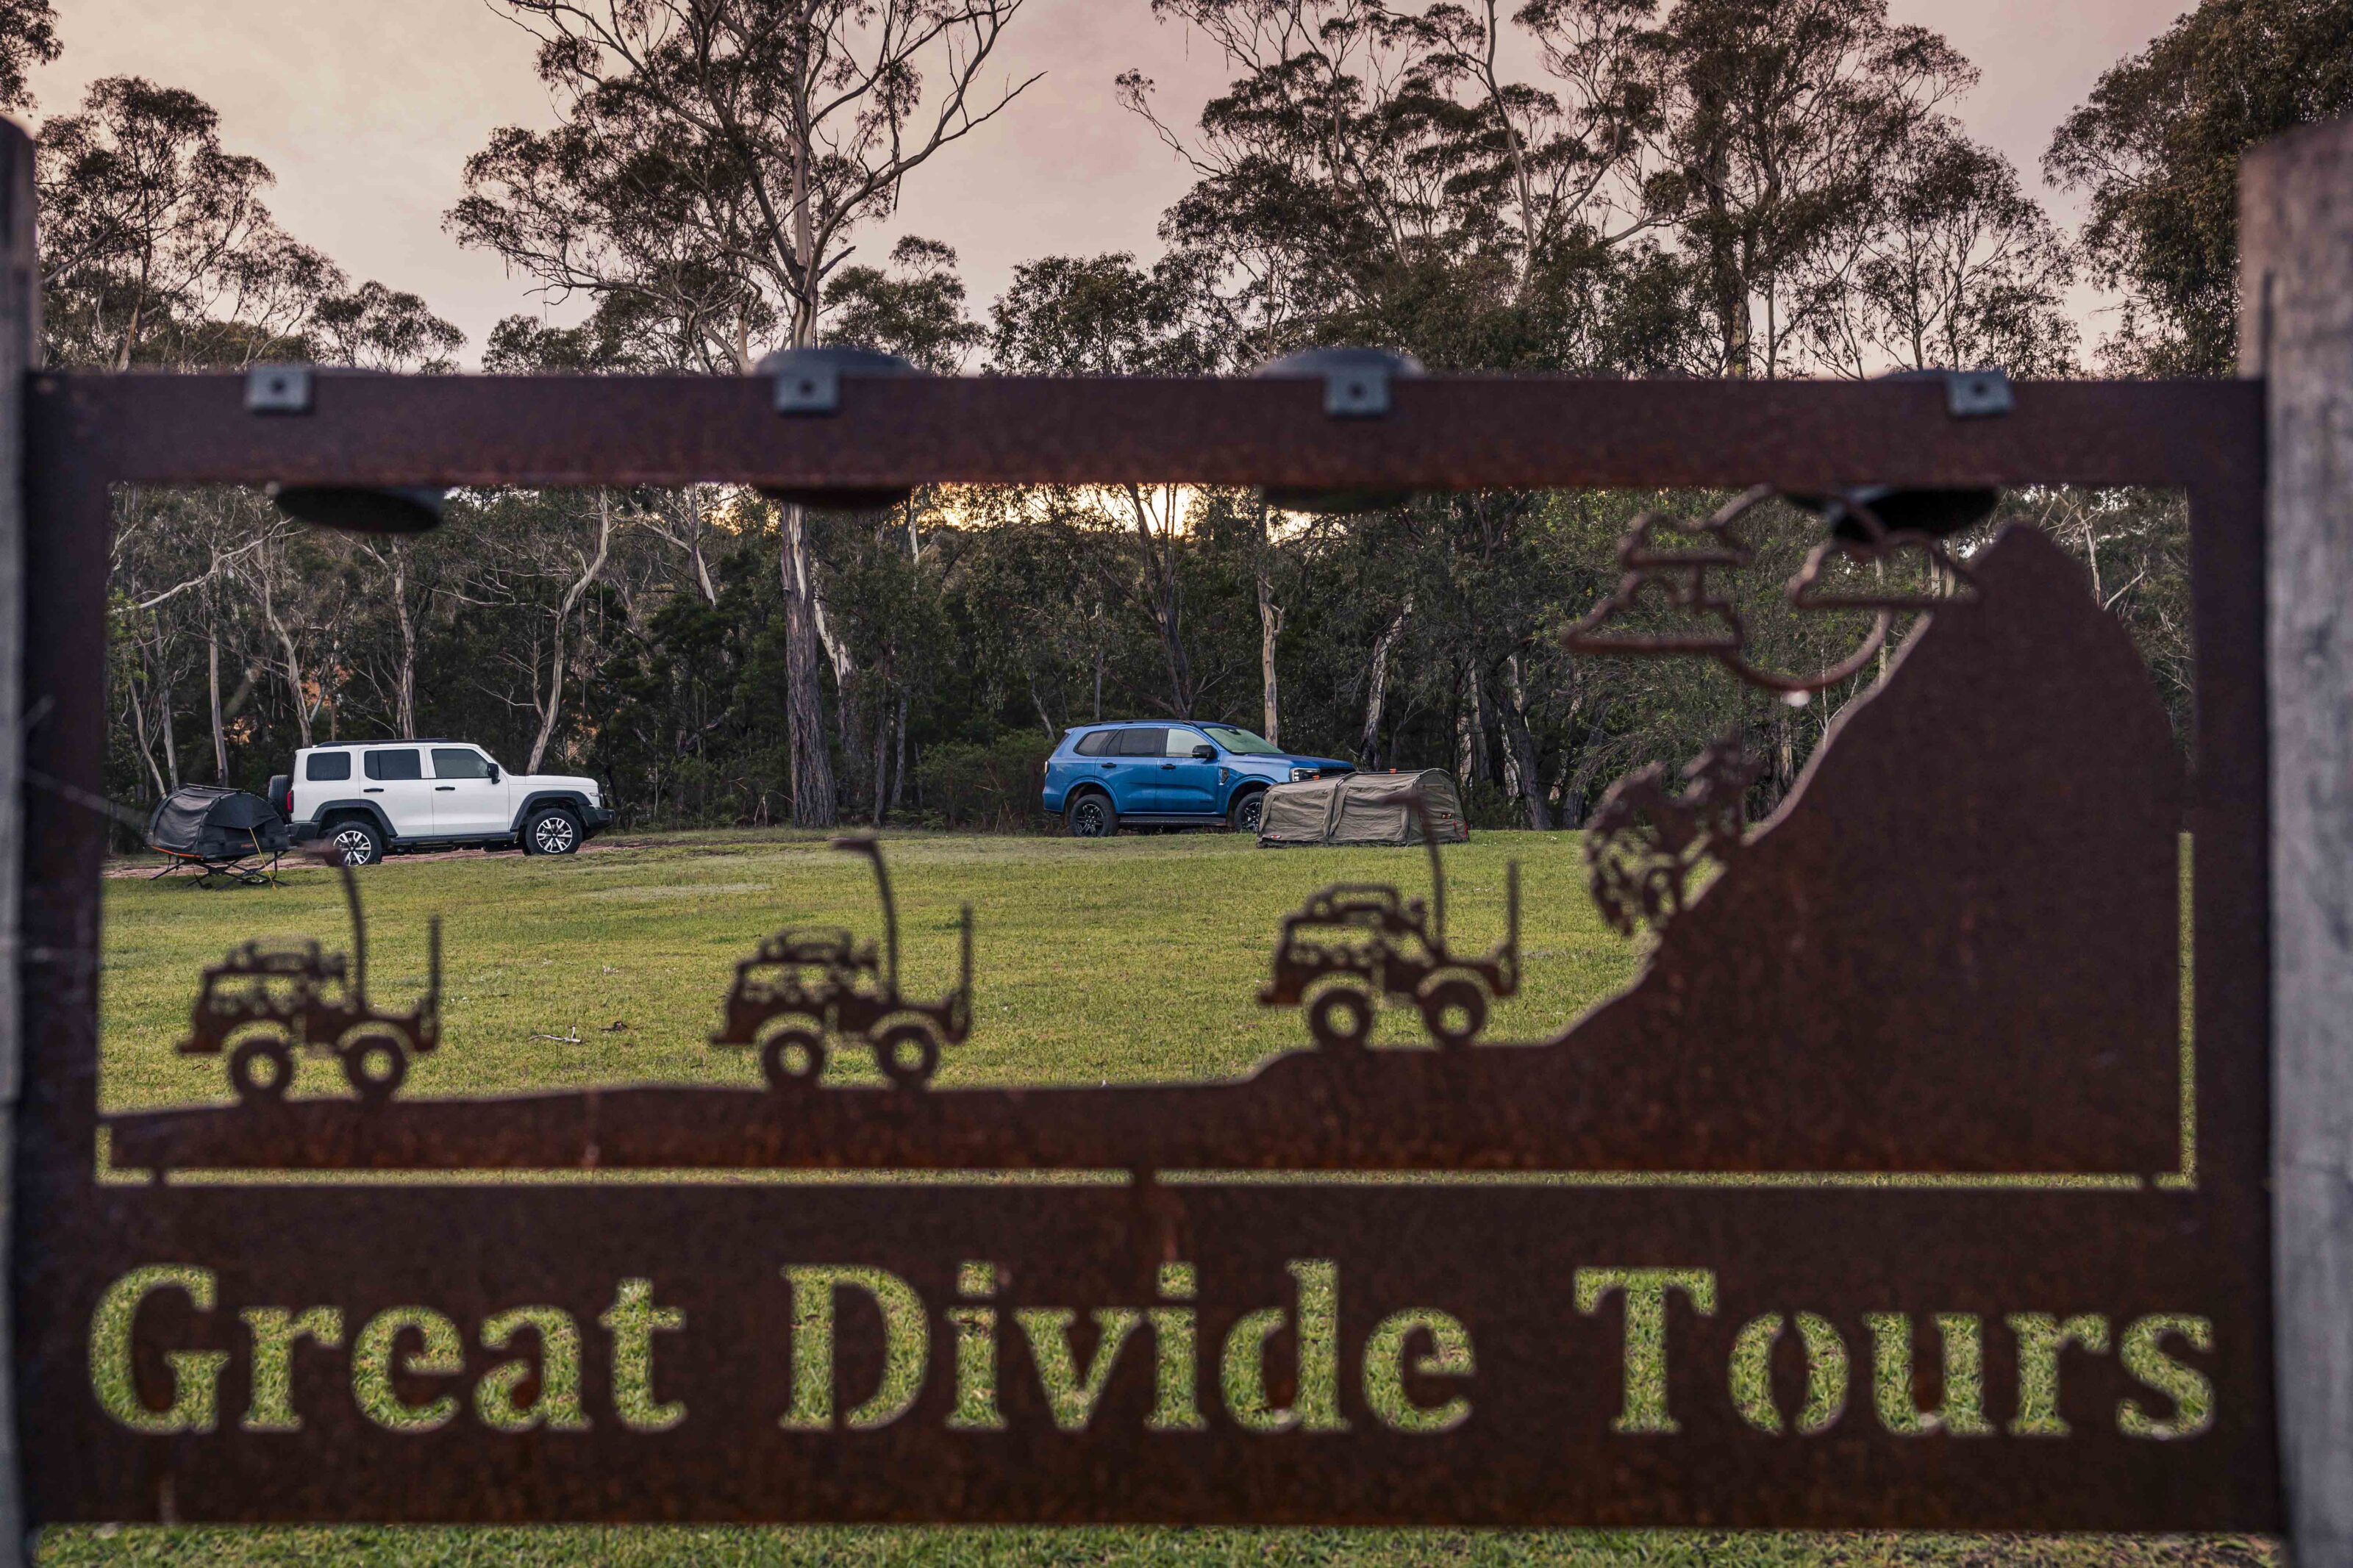
Wanting to use some set tracks and obstacles, we started our testing at the Great Divide Tours (GDT) off-road training ground near Braidwood in NSW. GDT has been conducting 4×4 tagalongs and driver training for more than 30 years and its facility at Braidwood is specifically designed for four-wheel drivers ranging from complete amateurs to experienced drivers.
For us, the GDT facility provides tracks designed to test the tractive ability of a vehicle and we are able to repeatedly run each of our contenders over the same sections to see how they perform and compare. This is something that is very hard to replicate ‘in the wild’ on bush tracks, so having this access to the GDT facility is most valuable.
The wombat holes track sees vehicle wheels drop into deep holes across diagonally opposing wheels. The track is over a mild incline and gives a great indication of how well a vehicle’s tractive systems perform, including electronic traction control and locking diffs where fitted. It also gives us an idea of any clearance issues that a vehicle might have on uneven ground.
The hill climbs at GDT similarly put the tractive ability of a vehicle to the test with uneven and loose surfaces on hills of various lengths, gradients and conditions. Significantly, there are hills here that not all of the test vehicles will conquer using a specific line so it allows us to experience the ability of the vehicles time after time on the same challenging track.
1
From the Great Divide Tours facility, we set off for some 4×4 touring just like owners of these vehicles would do. The roads south of Braidwood gave us the chance to experience the vehicles on sealed and unsealed roads at both high and low speeds. As we headed into the forest and the roads turned to gravel, the bends got tighter and twistier, giving the vehicles a chance to display their dynamics, visibility and control.
On arrival at our camp at Dry Crossing, a walk of the river revealed the water level to be around 650mm to 700mm, so chatter in camp revolved around if we could get these showroom stock 4x4s across the river the following day, bearing in mind the rated fording levels for each of them.
A walk across the river the next morning showed that the water level had dropped overnight so the call was made to make the crossing. It was still heart in the mouth stuff as the water was as deep as you’d want to risk it with standard vehicles. Thankfully they all made it across without drama.
1
The crossing dropped us on to the Merricumbene Fire Trail. This track across the Great Dividing Range covers close to 140km of steep climbs and descents in a classic High Country environment to the stunning Bendethera Valley. The view and flora change constantly as the altitude varies crossing the mountains and ridges, making this a remarkable 4×4 trek.
The variety of road surfaces and conditions also changes dramatically, again testing the tractive abilities of the vehicles and also the way they ride and handle on these classic bush tracks. The drivers swapped through the vehicles every hour or so allowing each to get a good feel for the six contenders.
The vehicles handled most of the tracks with relative ease until one particular climb had us rethinking our route. The convoy was travelling behind the tucker truck (a Y62 Patrol) and we watched on as it climbed a steep hill as light rain started to fall. Right at the highpoint of the climb the back of the heavily laden Nissan skipped sideways, but a heavy right boot ensured the Patrol just made it over the lip.
3
Following in the LC76 with the lockers engaged I took the same line but when the back jumped out the standard tyres clogged with mud and lost traction. This required a slow and careful reverse back to the base where I dropped more air out of the tyres and directed the other drivers still there to do the same, as the track was getting wetter and slipperier.
With lowered pressures and taking a different line the Cruiser crested the hill and was followed by the others; all but one vehicle making it. The Tank required a snatch-pull to get over the crest after several attempts.
The rain held off as the trail continued to climb and drop before finally descending into Bendethera Valley where we camped for the night, with discussions around the campfire focused on how the vehicles were performing in the steep and slippery terrain.
From Bendetherawe had a climb back out of the valley to the west before airing-up for the road drive to Cooma and our final destination.
MORE
4X4 of the Year
The 4×4 of the Year award is the longest running and most acclaimed accolade for new off-road vehicles in the country, spanning more than three decades of the best off-road vehicles to come to the market.
Over that time the award has gone to the biggest marques in the industry including Land Rover, Mitsubishi, Toyota, Nissan, Jeep and Ford, with judging from some of the most respected and well-travelled writers in the industry.
4×4 of the Year is back in 2025 and, as we have done in the past, we whittled down the field of eligible new vehicles based on our testing and reviewing all the possible contenders over the past few years.
This allows us to select just six finalist vehicles to take part in a week of testing and evaluation, where we score each vehicle against the established criteria to find a winner.
1
4×4 of the Year criteria
Value for money
Judged according to a vehicle’s equipment level, safety features and price relative to its direct competitors. Just because a vehicle has a high price doesn’t mean it’s not good value in the same way a cheap car doesn’t always represent good bang for your buck.
Breaking new ground
Refers to advancements in technology and design. How a vehicle has raised the bar in the class it fits in and taken 4x4s to a higher level. If a vehicle has the latest safety features, worthy engine technology or an advanced driveline, it will score well here.
Built tough
This refers to how strong a vehicle is and how well it will cope with the rigours of tough off-road driving environments. Will it be up to the task of carrying loads and outback travel, or fall apart at the first hurdle?
Bushability
This is how well a vehicle is equipped for off-road travel. Suitability of the standard tyres for rough roads, touring range, available accessories and underbody protection are just some of the factors considered here. Is this a vehicle you would choose to drive around Australia the rough way, or is it best left to the suburbs?
Doing the job
Judged according to a vehicle’s design brief. Does a luxury vehicle have all the latest in comfort and convenience features and do they work in the real world? How well a ute carries a load, or a seven-seater accommodates a family, will all come into play here.
1
How it works?
We’ve split the six wagon finalists down the middle based on awarding best vehicle costing less than $80,000 and best costing more than $80,000.
Over the decades, the 4X4OTY award had been split over various price brackets as the prices of new vehicles continued to get higher, and also between 4×4 wagons and utes as the technology and features of each varied over time.
For its 2025 return, we’ve also split the field between wagons and utes, with the former making up this first test and the workhorses to be judged later in the year.
At the end of a week of testing both on and off road, our team of testers – Matt Raudonikis, Dave Morley, Ron Moon and Dex Fulton – score each of the vehicles against each of the five criteria to give each car a score out of 50. The car with the highest combined score wins, nothing else comes into the outcome.
1
The contenders
Ford Everest Sport
The second generation (for Australia) Ford Everest has been with us for three years now but wasn’t released the last time we did a 4X4OTY test. In those years the Everest has become the best-selling medium-size 4×4 wagon in Australia outselling the previously unchallenged Toyota Prado which, in its defence, was between models as the 150 Series ran out and the 250 Series came on line.
But the Everest rides high on its merits delivering a solid and spacious family wagon with a choice of five- or seven-seat configurations, four-cylinder and V6 diesel engines, a capable chassis and drivetrain, and an easy to live with interior. We chose the Everest Sport as our finalist for that sweet V6 engine and high level of comfort and features while not breaking the bank on purchase price.
An interesting side note; when 4×4 Australia gave the 4X4OTY award to the first-generation of Everest back in 2015, it was the first time that a Ford vehicle had ever taken the title.
1
GWM Tank 300
This is the first time we’ve had a vehicle from Great Wall Motors in 4X4OTY and with the Tank 300 it’s a well-deserved inclusion. The Tank 300 is a small wagon similar in size to the Jeep Cherokee so it fills a void in the market for buyers who don’t want or need a bigger 4×4, but for whom a Suzuki Jimny wouldn’t cut it.
As a smaller vehicle it’s priced accordingly but doesn’t miss out on features, while its front and rear lockers and relatively light weight make it an impressive rig in rough terrain. Our request for a Tank test vehicle came as GWM was introducing its new diesel-fuelled model of the 300, and it’s this vehicle that we have on test here in Ultra specification.
1
INEOS Grenadier Trialmaster
It’s not often that an all-new brand comes into the specialised 4×4 market, let alone one built on a traditional ladder frame chassis with live axles and coil springs front and rear, and genuine off road credentials. This made the Ineos Grenadier one of the most talked about new vehicles of 2024 and one that was on the shopping lists of many buyers.
Available in three model grades with the choice of petrol or diesel engines, we’ve gone with the Grenadier Trialmaster diesel as it is the best equipped model for off-road touring in Australia.
An as-tested price of $124,356 makes the Ineos the most expensive vehicle among our finalists; will the Grenadier have the firepower to live up to its price tag and high expectations?
1
Nissan Patrol Warrior
The Nissan Patrol Y62 might be one of the oldest vehicles on our test but it’s the one that consistently puts ear-to ear smiles on the faces of our drivers. So why is it here? The Nissan Patrol Warrior is a new variant of the Y62 co-developed by private engineering firm Premcar to improve its overall off-road performance; and the results are a huge success.
With more ground clearance, improved suspension, taller all-terrain tyres, a host of styling and comfort upgrades, and a bi-modal exhaust system bellowing the sound of that sweet V8 engine out the side, the biggest wagon in our field was a favourite.
1
Toyota Prado Altitude
From the oldest vehicle in the field to the newest, the 250 Series Toyota Prado has been one of the most highly anticipated new models of the last couple of years, only arriving late in 2024. The 250 Series is almost all-new with the engine being the only major component carried over from the old model, and even that has changed with a 48-volt mild hybrid assistance system.
In the five model 250 Series Prado range, the Altitude is the variant targeted the most at off-road touring with all-terrain tyres on 18-inch wheels, a rear locking differential and a disconnecting front sway bar all adding to its capabilities in the rough. Also important is that the Altitude only has five seats so the rear cargo area is left without the hugely compromised third-row seats taking up valuable space.
1
Toyota LandCruiser 76
While we’re talking about the age of vehicles, the 70 Series Toyota LandCruiser is certainly the elder statesman of the new-car fleet, marking 40 years in production last year. The model’s ongoing evolution and improvements have kept the 70 Series current and it is one of the most rugged and off-road focused vehicles money can buy today.
A new driveline was fitted to the 70 Series range in 2024 with Toyota’s venerable 1GD 2.8-litre turbo-diesel slotted into the engine bay and backed by an automatic transmission for the first time in decades.
We’ve got the GDJ76 GXL LandCruiser here on test; it’s simple, basic and capable but has it got what it takes to be our 4X4 Of The Year?
1
What’s missing?
With only six positions available among our wagon finalists, there had to be some worthy exclusions.
The toughest one to leave out was the Lexus GX550 Overtrail as it impressed us immensely when we drove it back in 2024. But with two other Toyota products already in the mix and one of them being the more popular Prado that is based on the same platform as the GX550, the Lexus narrowly misses out.
It’s a similar story with the LandCruiser 300 Series which won the best wagon accolade the last time we did 4X4OTY. But when we compared the LC300 GR Sport with the Patrol Warrior in 2024 the Nissan came up trumps and so earned its place over the Cruiser.
GWM’s Tank 500 is a midsize 4×4 wagon with a touch of luxe that you could say competes with the Lexus GX but at a lower price. It was on our reserve list but we felt the more rugged Tank 300 would better represent the GWM brand amongst the other 4X4OTY contenders.
1
The previous generation of Jeep’s Grand Cherokee won 4X4OTY a few years back and a new generation of the model was launched since we last conducted the test. But the new Grand Cherokee has lost all the things that made the previous model so appealing and one of Jeep’s best ever selling vehicles in Australia, so sadly ruled itself out this time around.
Like the LandCruiser 70 Series, the Jeep Wrangler got a new turbocharged four-cylinder engine in 2024 but it wasn’t enough to get the iconic model into this year’s list of finalists.
Land Rover vehicles have been well represented among our 4X4OTY winners in the past and in recent years LR has made changes and refinements to its engines across the range but there’s been nothing significant since the new Defender arrived on the scene; we wait in earnest. Models like the Range Rover and Range Rover Sport, as great as they are, have become too luxurious and high priced to be serious 4X4OTY contenders.
MORE
4×4 of the Year
The Nissan Navara PRO-4X Warrior is set to expand its international presence, with the Premcar-developed hero ute to launch in South Africa by the end of April 2025.
The joint collaboration between Nissan Australia, Nissan South Africa and Premcar will see the PRO-4X Warrior arrive in South Africa with a number of significant changes tailor-made for the South African market.
These changes include a new chassis tune optimised for South African roads, consisting of newly engineered and developed suspension springs and dampers; Warrior-style 17-inch alloy wheels; Maxxis RAZR all-terrain tyres suited to local conditions; a unique front bumper bar design and assembly; wheel arch flares; and Warrior-branded front seats. It will remain powered by the 2.3-litre twin-turbo diesel engine producing 140kW and 450Nm.
1
“We launched the Warrior by Premcar program in 2019 with the Navara N-TREK Warrior, a vehicle that immediately resonated with our passionate Navara owners, and set new benchmarks for a locally enhanced ute in Australia,” said Andrew Humberstone, Vice President and Managing Director of Nissan Oceania.
“We then saw the international potential which was first realised with the introduction of the Navara N-TREK Warrior in New Zealand, sharing the same refinements as the Australian model. We’re thrilled to see this Australian initiative now launch in the South African market with the Navara PRO-4X Warrior. As any Warrior owner in Australia can attest, South African drivers are in for something special.”
1
To ensure the venture runs smoothly, will expand its operations by setting up a joint venture with South African local firm, AIH, with all remanufacturing to be conducted at a Nissan production facility in Rosslyn, South Africa.
“While the vehicles will of course be slightly different, the end result will be the same; a ute that feels perfectly suited to South African conditions, and one that broadens capability without ever sacrificing comfort,” says Premcar CEO, Bernie Quinn.
“This isn’t just important for us, but for the Australian automotive manufacturing industry across the board. We’ve known that Australia is home to some of the brightest automotive minds on the planet, and we can’t wait to show the world what we can do.”
We’ve been agonising over the decision for the better part of two hours, and I can procrastinate no longer.
Brad, Josh and myself have half walked, half swum the Pascoe River, crossing more times than I can count, and it’s finally my time to bring the Gladiator across the sizeable flow of water.
As I inch down into the current while simultaneously spooling in the winch line I run through the list of reasons I really don’t like this crossing. Firstly, it’s deep. Wading across proved the main channel to be up to my belly button, and when I stepped in the occasional hole it quickly nudged my armpits. Comparing this to the bonnet height of the Gladiator, I fully expect to rely on my snorkel for this one.
Secondly, the riverbed is littered with large boulders, making the bottom extremely uneven and unpredictable.
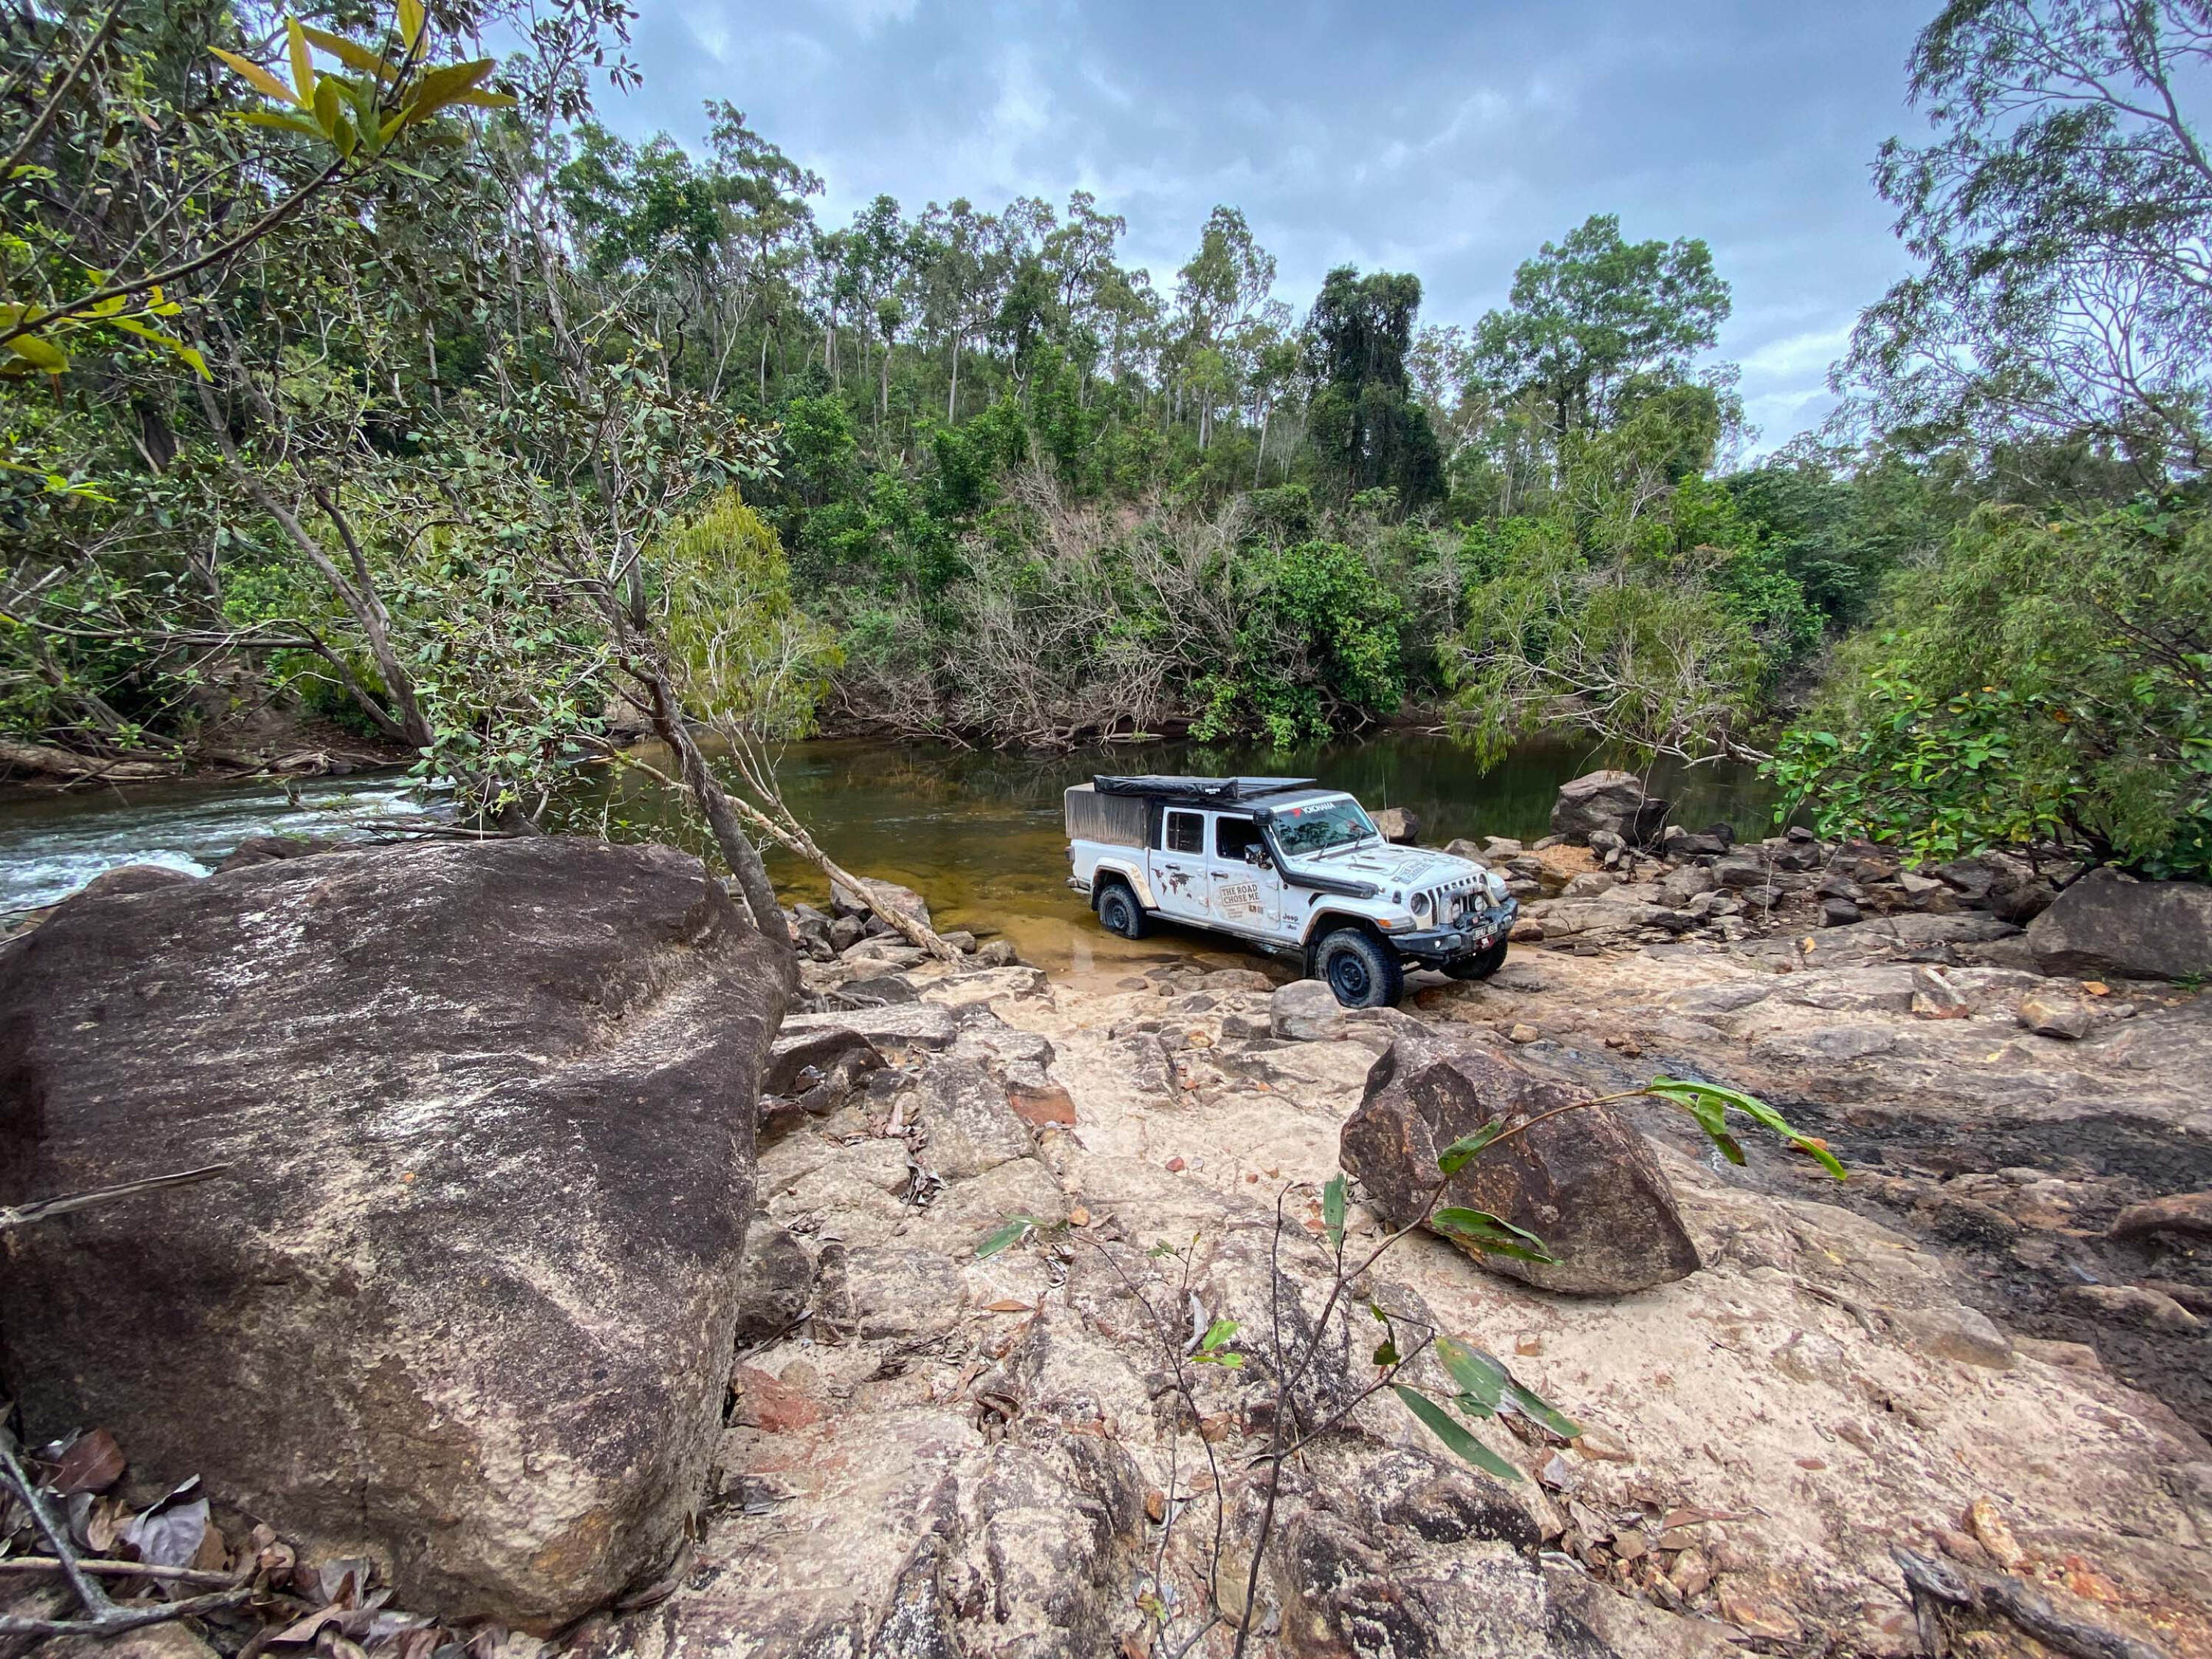
1
Though we have tried our best to scout the best line through the boulders, and even moved a few around, the sunlight and the fast flow make it very difficult to see through the water from the driver’s seat. Any of the larger boulders could easily hang up a diff or lower control arm, stranding me in the deep water.
Thirdly, the river is really flowing. This is by far our biggest concern, and we are all worried about the possibility of the water pushing us downstream, over a row of boulders and into much deeper water.
We’re hoping to avoid this at all costs, and I keep the winch line so tight it actually moves the Jeep. I’m really hoping the tension on the line will at least keep the nose of the Jeep pointed in the right direction.
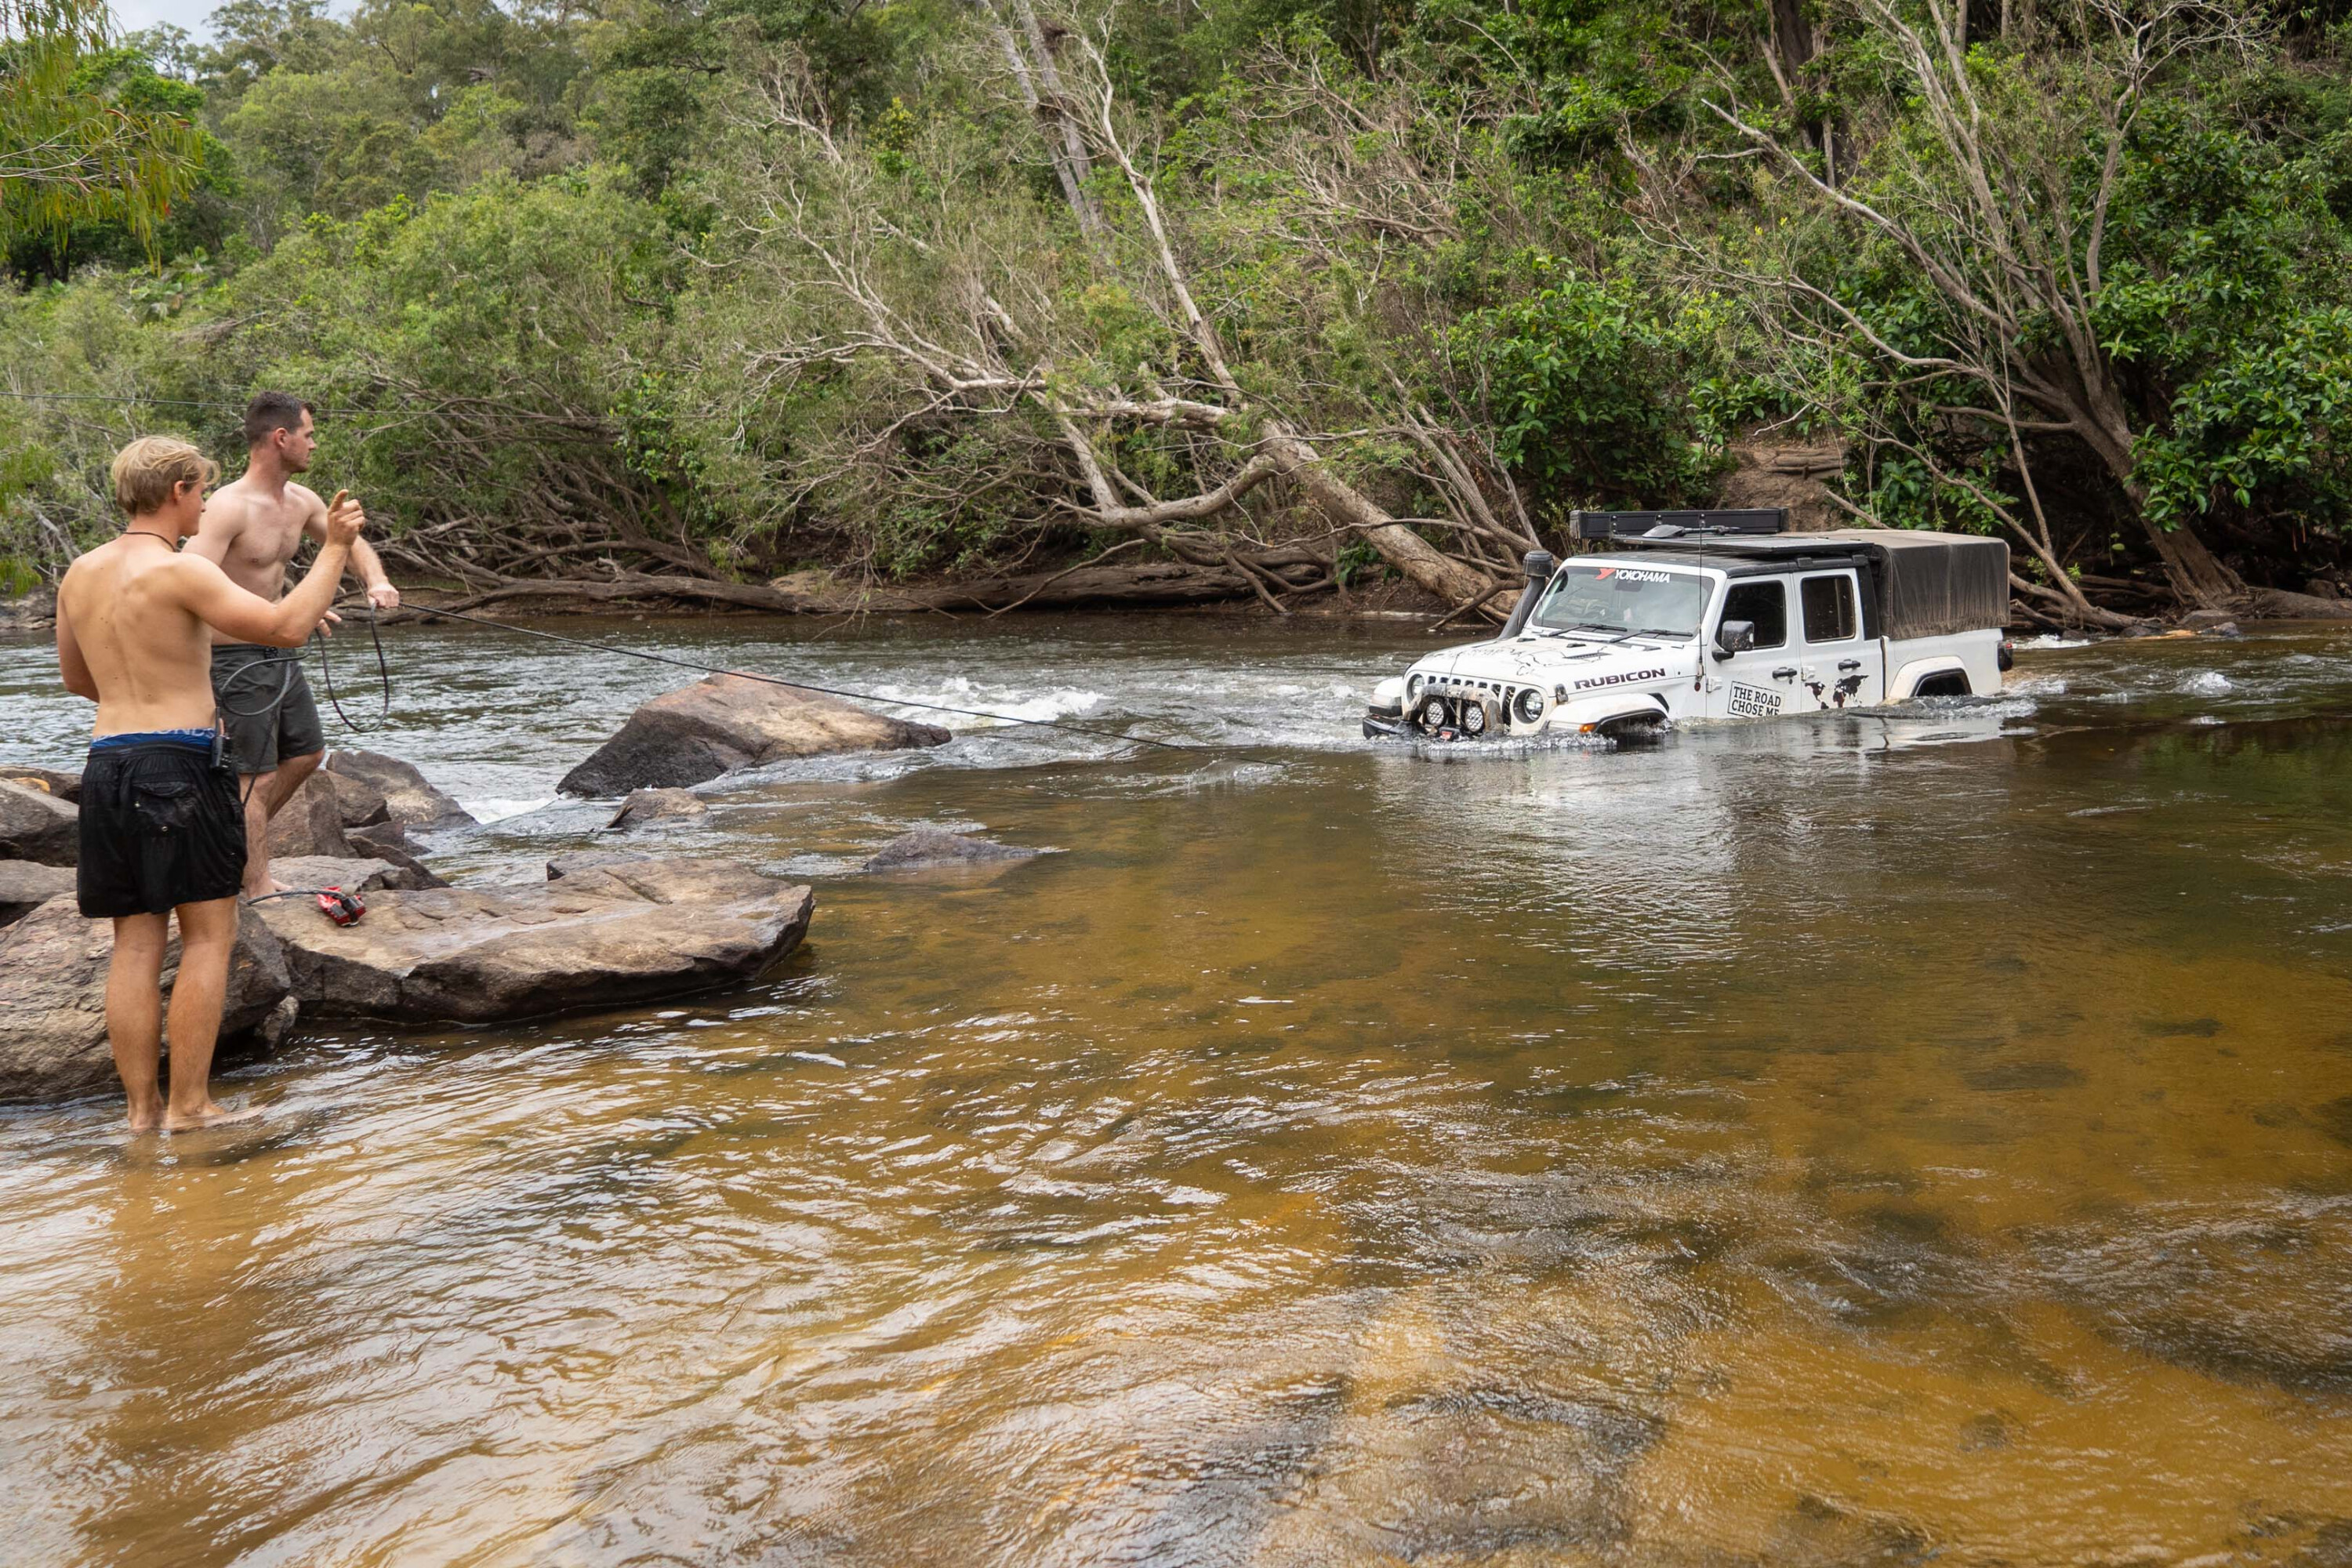
1
Finally, there might be crocodiles in this river. I don’t just mean little freshies, either, I mean their much larger and toothier salty cousins. It’s insane this is the last reason I don’t like this crossing, but that is an honest review of the situation. The depth, boulders and flow are more concerning at this point in time than man-eating crocodiles.
I inch forward over a few more boulders and can hear nothing other than sloshing water as it slowly begins to flow up and over the front of the bonnet.
1
The Frenchmans Track
Pushed through the jungle and scrubland, Frenchmans Track was probably built in the 60s to access the Iron Mountain Range during a rush of gold mining exploration.
To this day Frenchmans remains as one of the more challenging four-wheel drive tracks in Far North Queensland, only a stone’s throw from the northern tip of the Australian continent. Traversing the entire track involves crossing two major rivers, the Pascoe and the Wenlock, which change in depth and flow dramatically over the seasons.
Even during our visit in the ‘dry’, when it isn’t supposed to rain much, the depth of the river can change by several feet in a matter of hours.
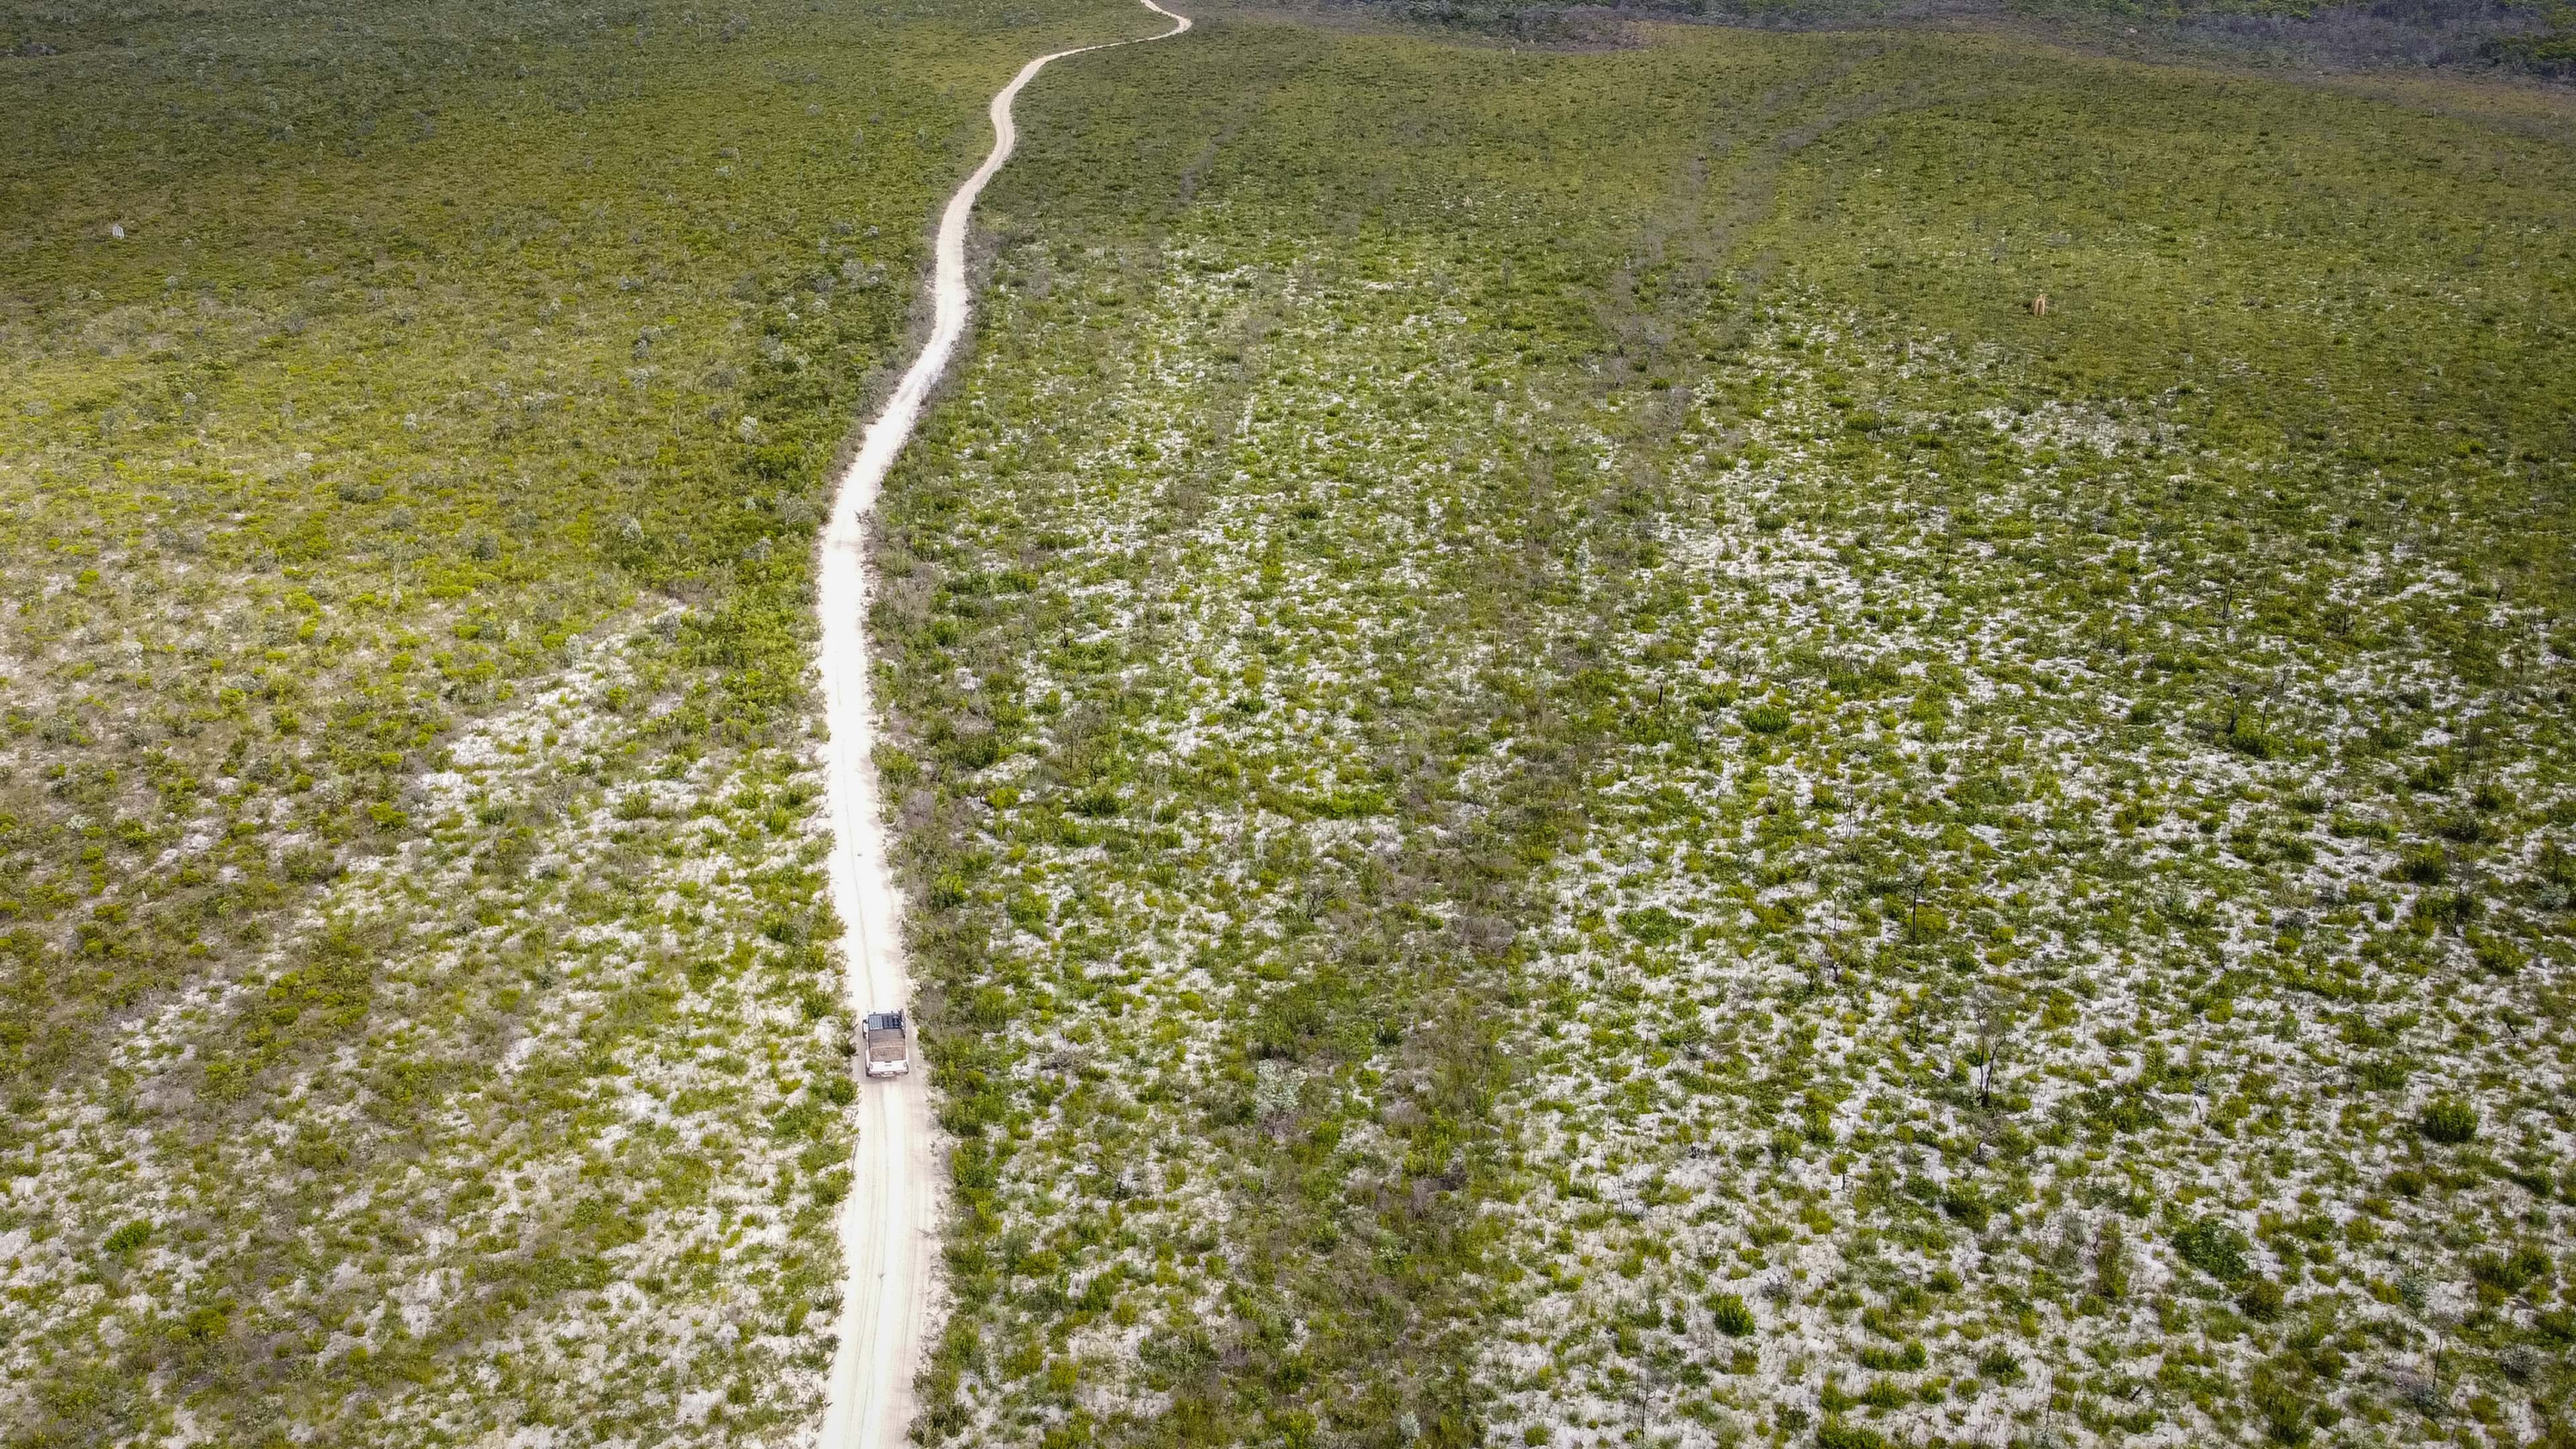
1
Only the most well-equipped vehicles tackle Frenchmans, and it would be foolish to attempt this one solo. With safety and vehicle recovery in mind, we team up with Josh and Georgie in their Troopy and Brad and Kristy in their very flexy GU Patrol ute.
We last tackled the CREB Track together, where Josh demonstrated he has no fear of monster wheel lifts, and Brad demonstrated his love of using his right foot. No matter what happens on this one, I am certain it won’t be boring.
We rendezvous at stunning Chilli Beach in Iron Range National Park, one of Australia’s most isolated and northerly beaches. At only 12 and a half degrees latitude south, we’re so close to the equator that this part of Australia looks like a tropical paradise, complete with white sand, turquoise ocean and an abundance of palm trees laden with wild coconuts.

1
Unfortunately, at these tropical latitudes we also have to contend with the local inhabitants: monster saltwater crocodiles and deadly jellyfish. It’s a sad irony that the more tropical and stunning northern Australia becomes, the more deadly the water is.
Though the air and water are both at perfect bath temperature, the water is absolutely off limits, and we all stay well clear to give the salties a wide berth.
On a happier note, after a short walk along the white sand I have a handful of perfectly ripe coconuts, and with the help of a metal stake I husk them in a few minutes each. Soon we have a heaping pile, and we take turns drinking the delicious milk.

1
And while the milk is delicious, I have always loved the firm white flesh, and soon I have an enormous zip-lock bag stuffed full. Keeping it in the fridge provides the perfect road snack during these hot and sticky days, and I stash plenty more husked nuts in the back for good measure.
In the late afternoon the wind whips up a fury, so we move back into the shelter of the tropical jungle to camp, and right at dusk Georgie spots a family of cassowaries scratching around in search of dinner, complete with a fuzzy little black and white chick.
It is extremely rare to spot cassowaries in the wild, especially with chicks.
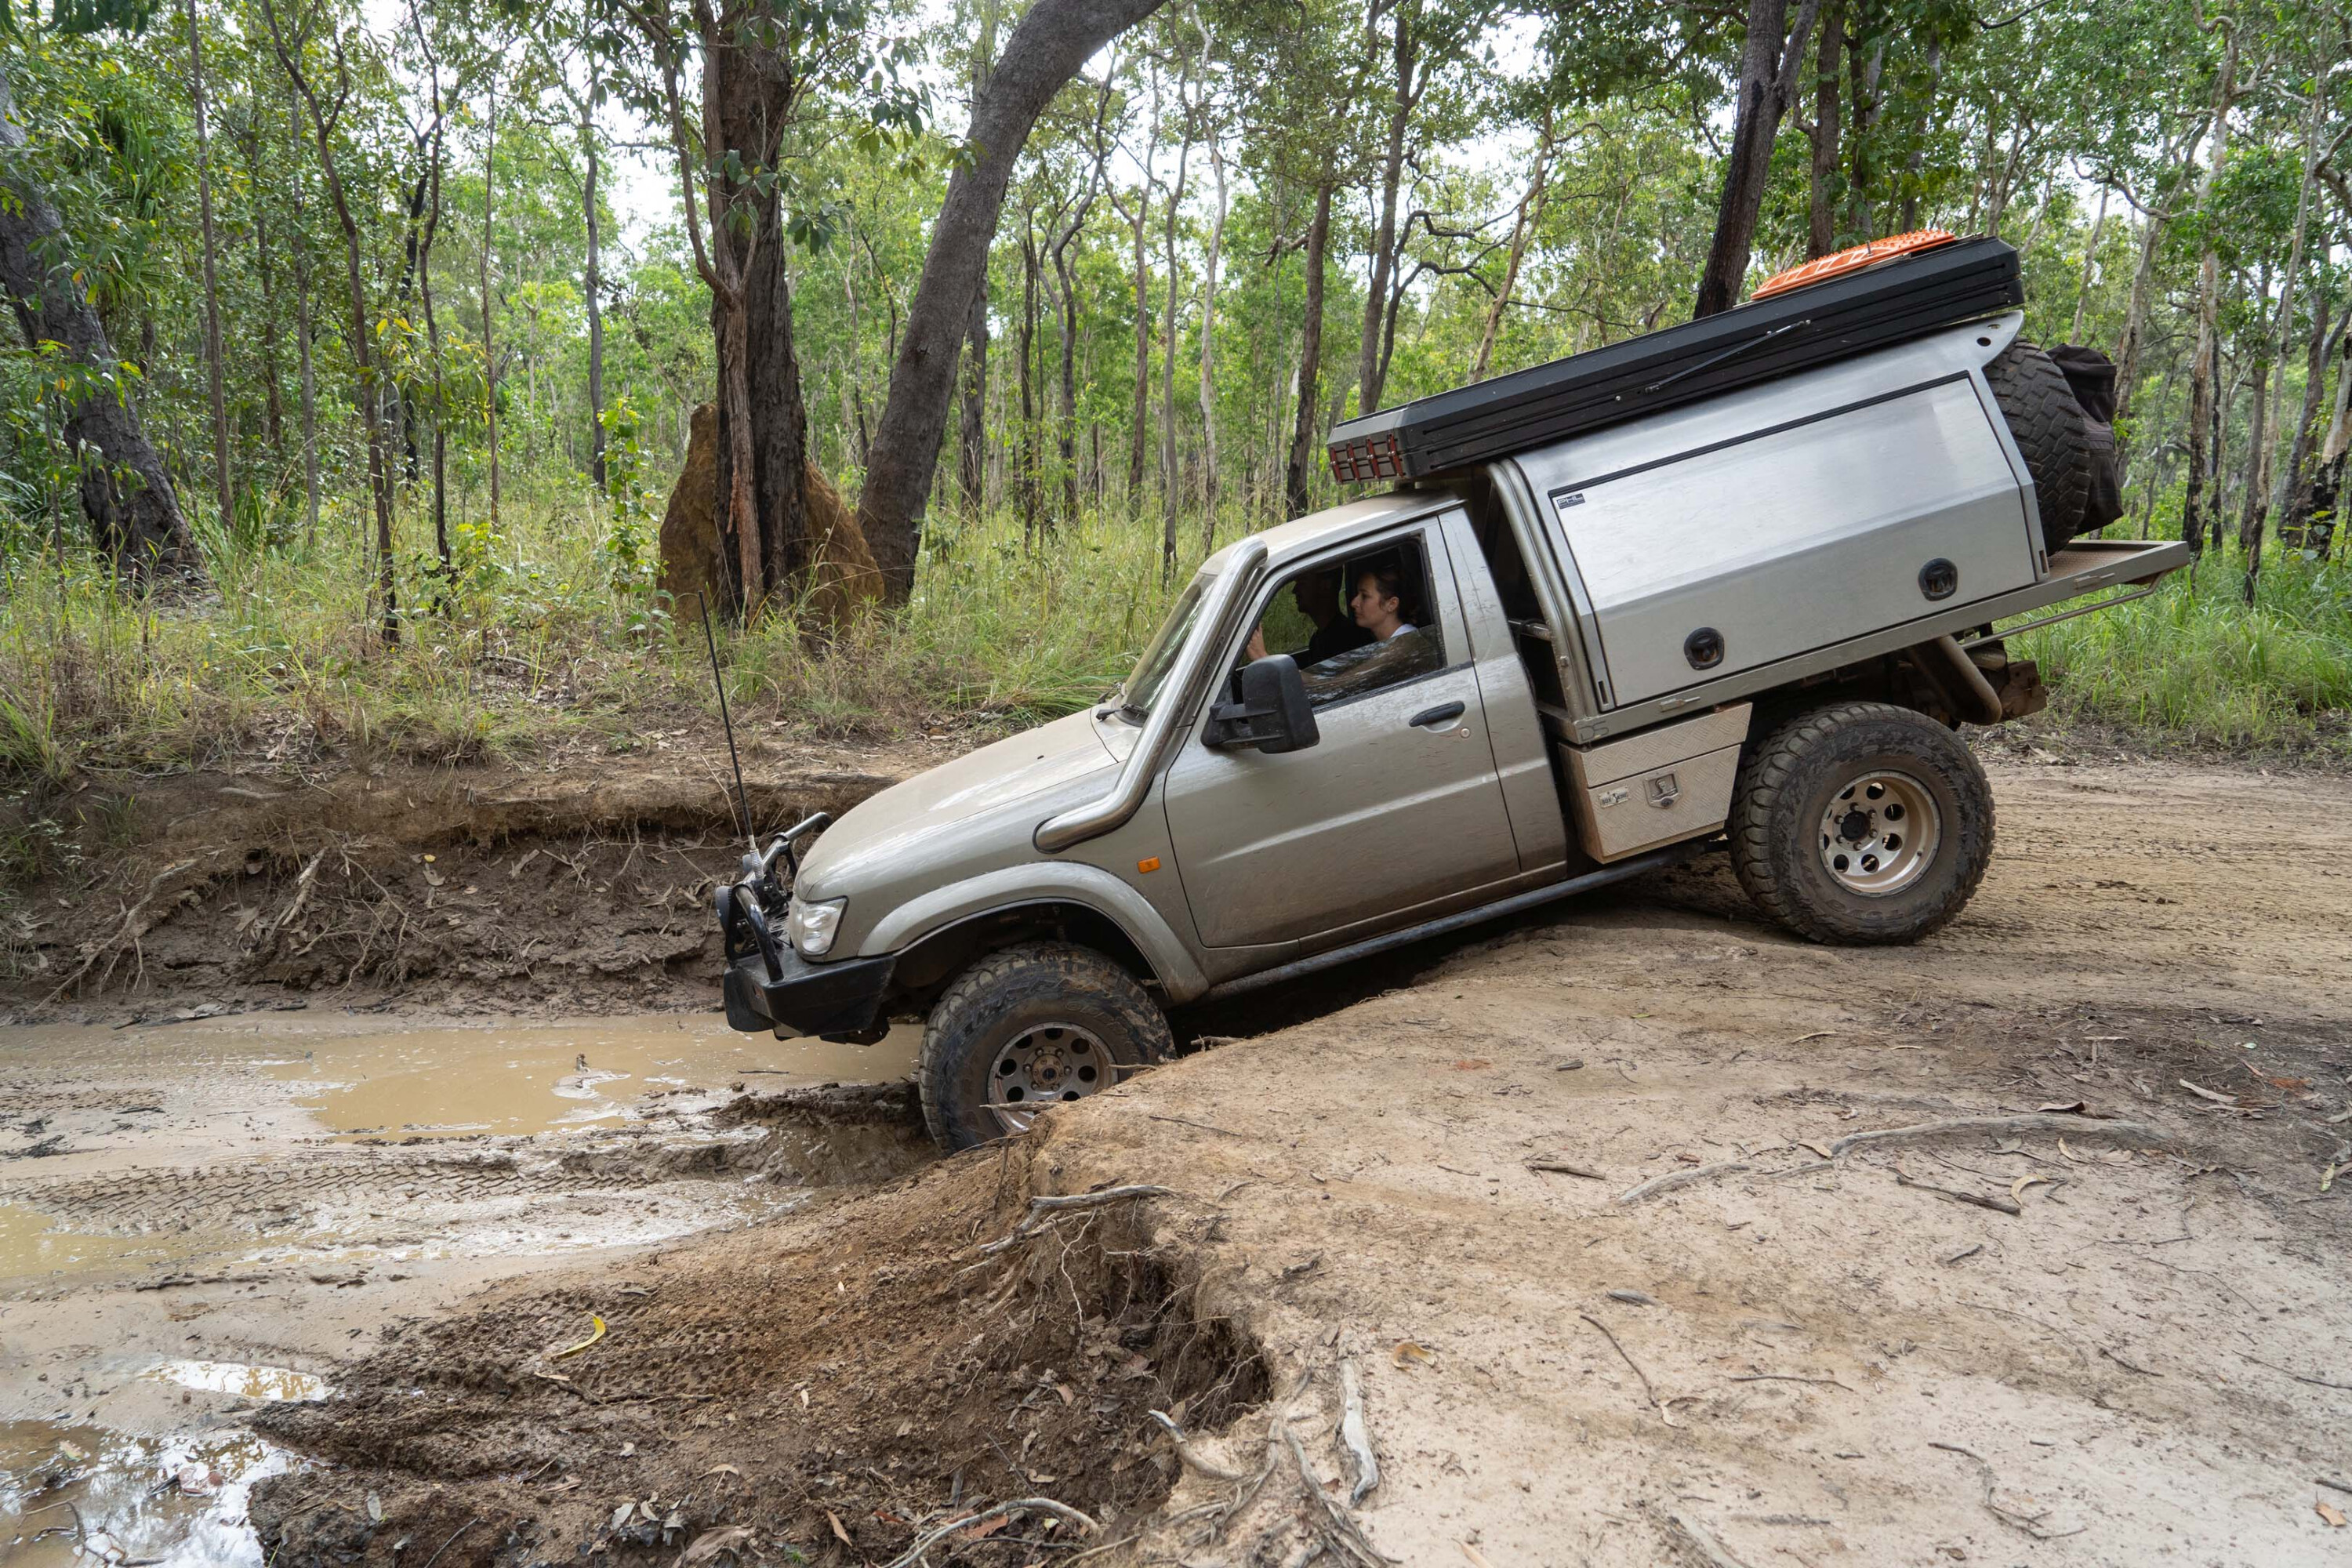
1
On The Trail
After airing down and a quick team meeting, we make good progress for the first couple of hours through large wombat holes and deeply rutted sections of track. On the straighter sections the track is badly corrugated, forcing us to keep the speed down.
The jungle gives way to dry and dusty scrubland with commanding views over the Iron Range mountains. As we move deeper into the track we begin to encounter enormous grey termite mounds.
These towering dirt columns are often taller than me, and are built by billions of termites to serve as their home high above the seasonal monsoon rains. The architecture of these mounds has been studied for decades, and they are built perfectly oriented to the points of the compass to maximise cooling and minimise heating from the sun.
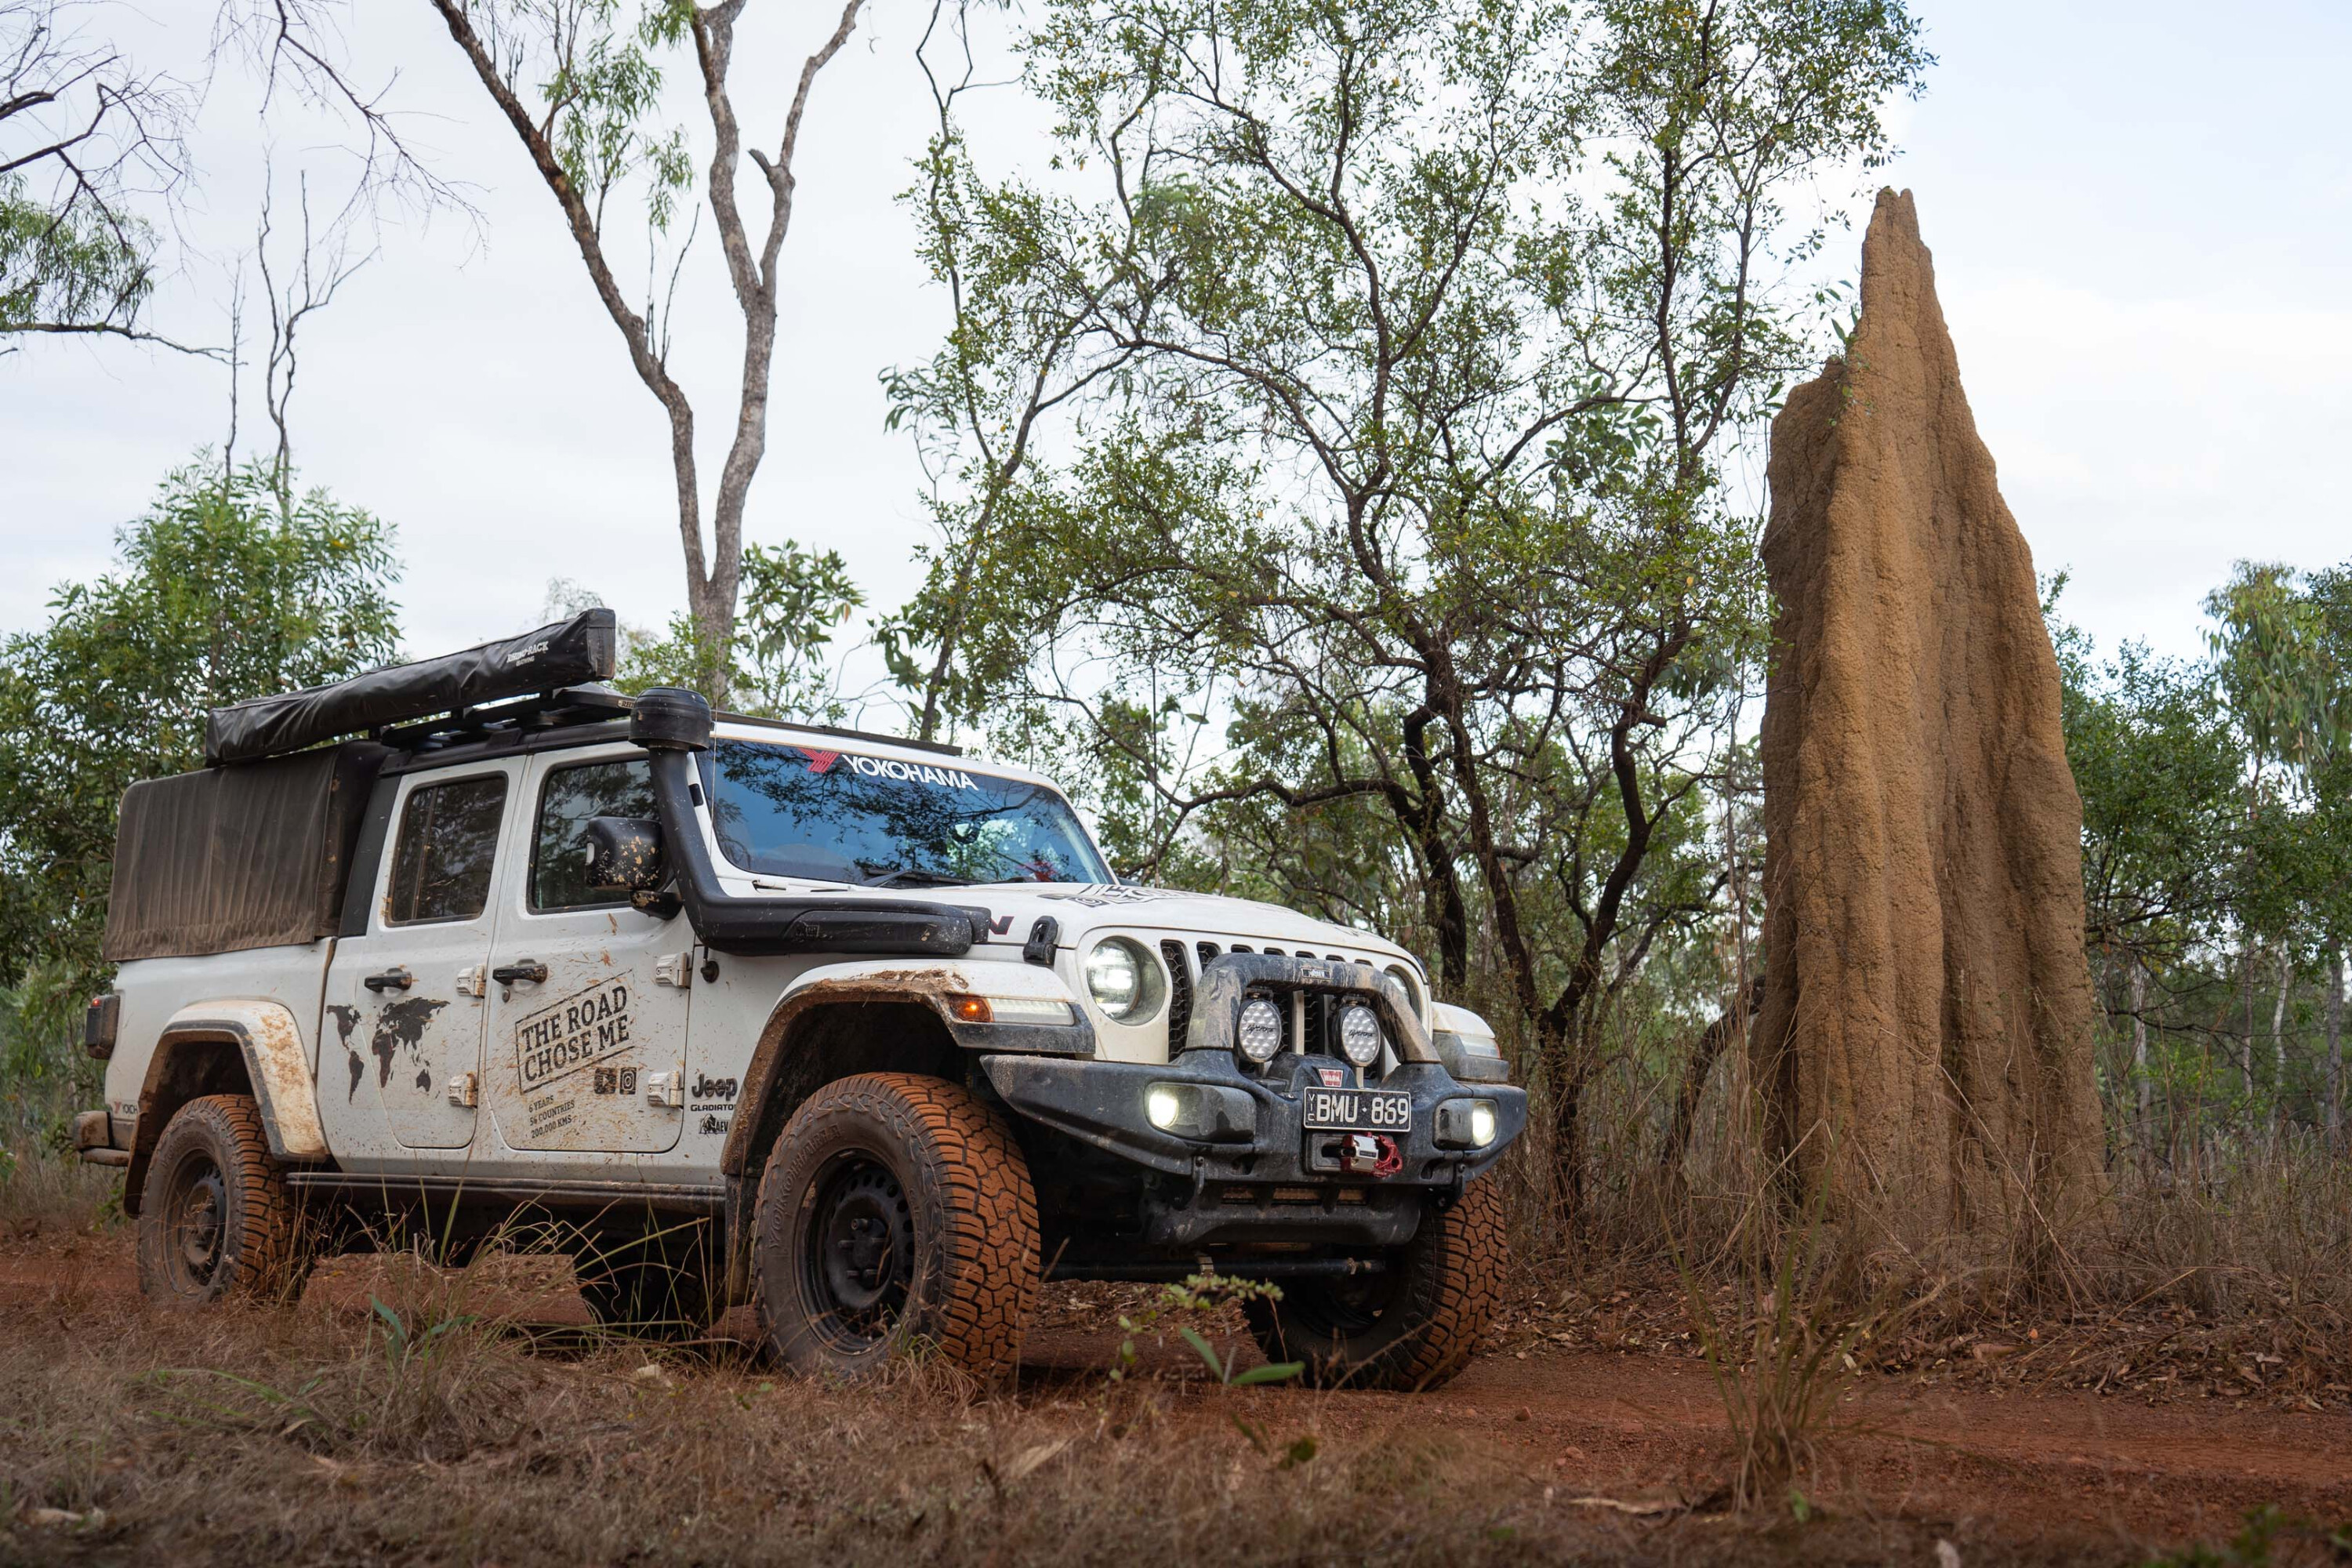
1
Across Northern Australia termites build their nets in a variety of designs, each perfectly adapted to the particular environment in which they are located.
The deeply rutted sections of track and large wombat holes are the perfect opportunity to show off the immense flex of the Gladiator, and with Katie at the wheel the big Jeep easily crawls through every obstacle while the cab barely tilts. It’s fascinating to watch the three vehicles take identical lines and come through with very different results.
While the articulation of the Jeep allows it to crawl forward with all four wheels always finding traction, the big Troopy can barely keep even two wheels on the ground, and more than once has to reverse and take a different line for fear of a roll over.

1
We drop down a series of very rutted ledges, signalling our arrival at the mighty Pascoe River. In flood it is a rainy torrent many metres deep, and at very low water the rocks are exposed and it’s possible to walk across without getting wet feet. In either of those two extremes the decision to cross or not would be easy, and basically makes itself.
As we wade into the river, we quickly realize the decision we have to make sits somewhere in the infinite grey zone of maybe we should and maybe we really, really shouldn’t.
Josh and I are both reluctant to risk our vehicles, but Brad does not want to turn tail and backtrack. Eager to keep us moving forward, we all make a pact. Brad volunteers to go first, but if he makes it across relatively unscathed, we must follow.
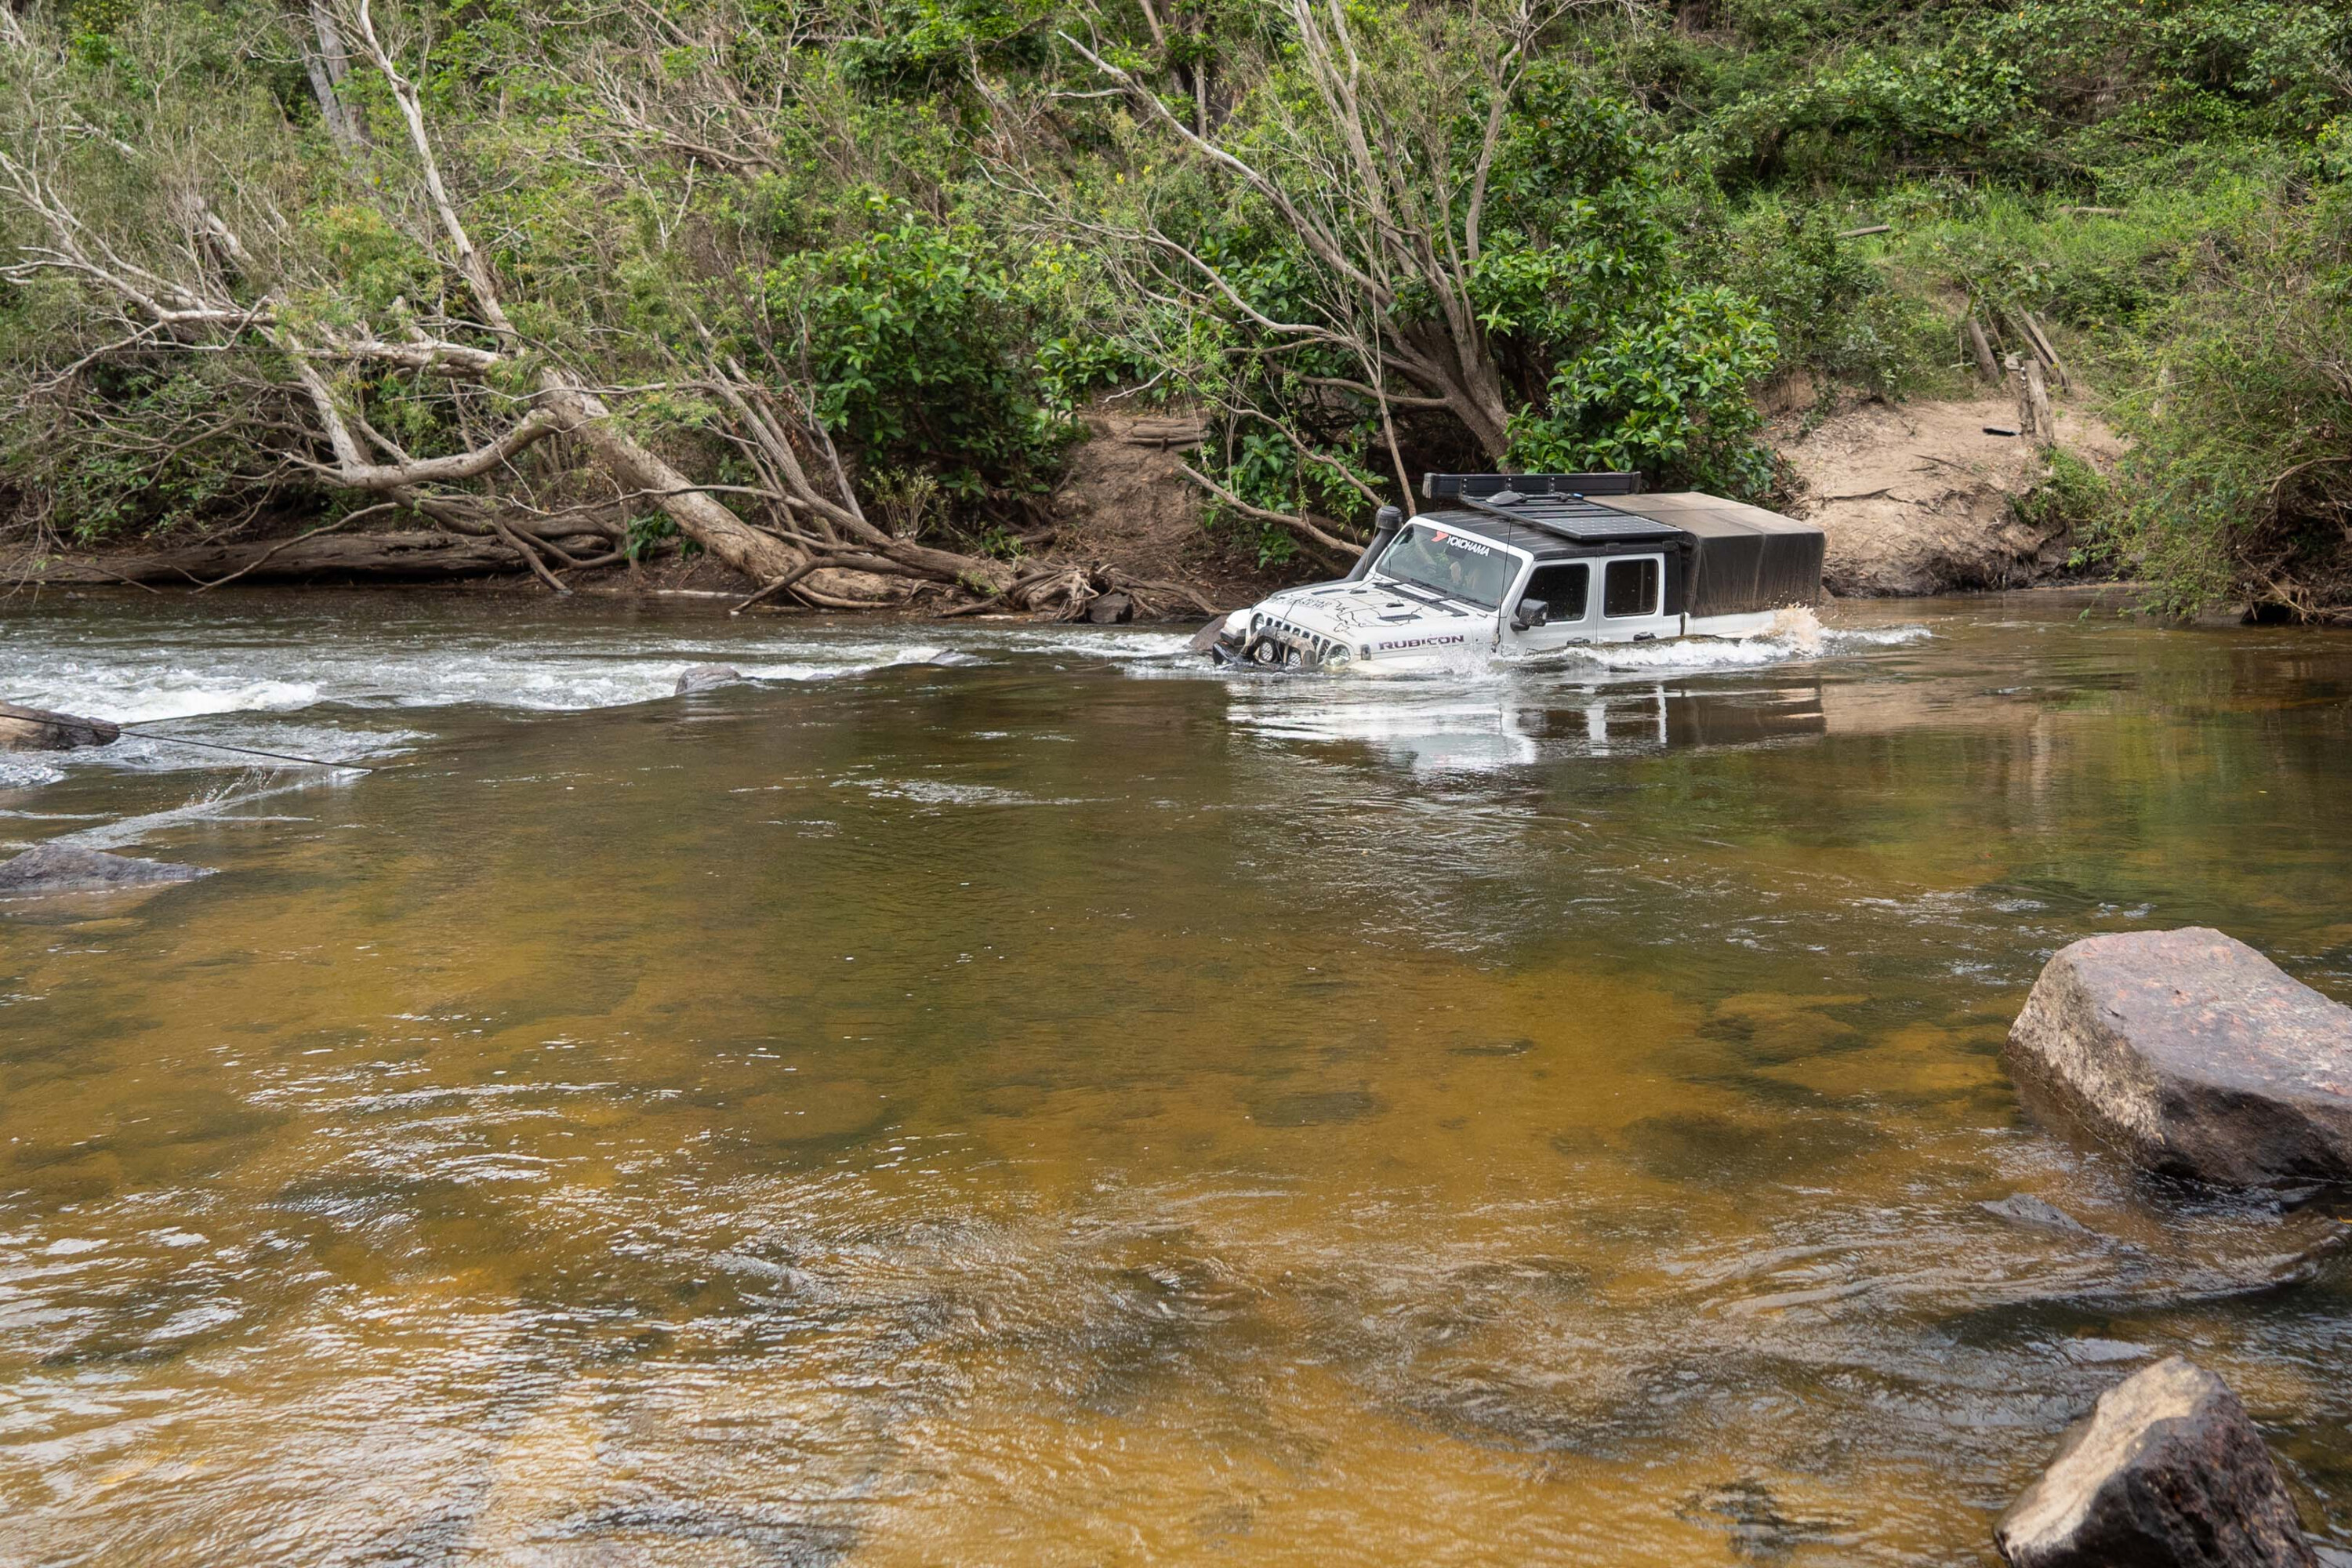
1
Swapping the order of the vehicles in the severely rutted track turns into a low-range 4×4 challenge, and after reversing as far as I can possibly go, Brad is barely able to squeeze up to the front of the line.
Josh wades across and secures Brad’s winch to a solid tree on the far side, and will act as spotter while also pulling in the winch line if it’s not needed. I’m at the rear of Brad’s truck with Josh’s winch spooled out and ready – if the signal is given I will jump into action and pull Brad’s truck backwards out of the river. After running over the plan multiple times and with everyone in place, the time is now.
Brad eases into the flow, and just as the depth starts to be a serious concern he uses his patented right foot technique and in a matter of seconds has crawled over rocks and out of the deepest section before soon reaching the far bank in one piece.
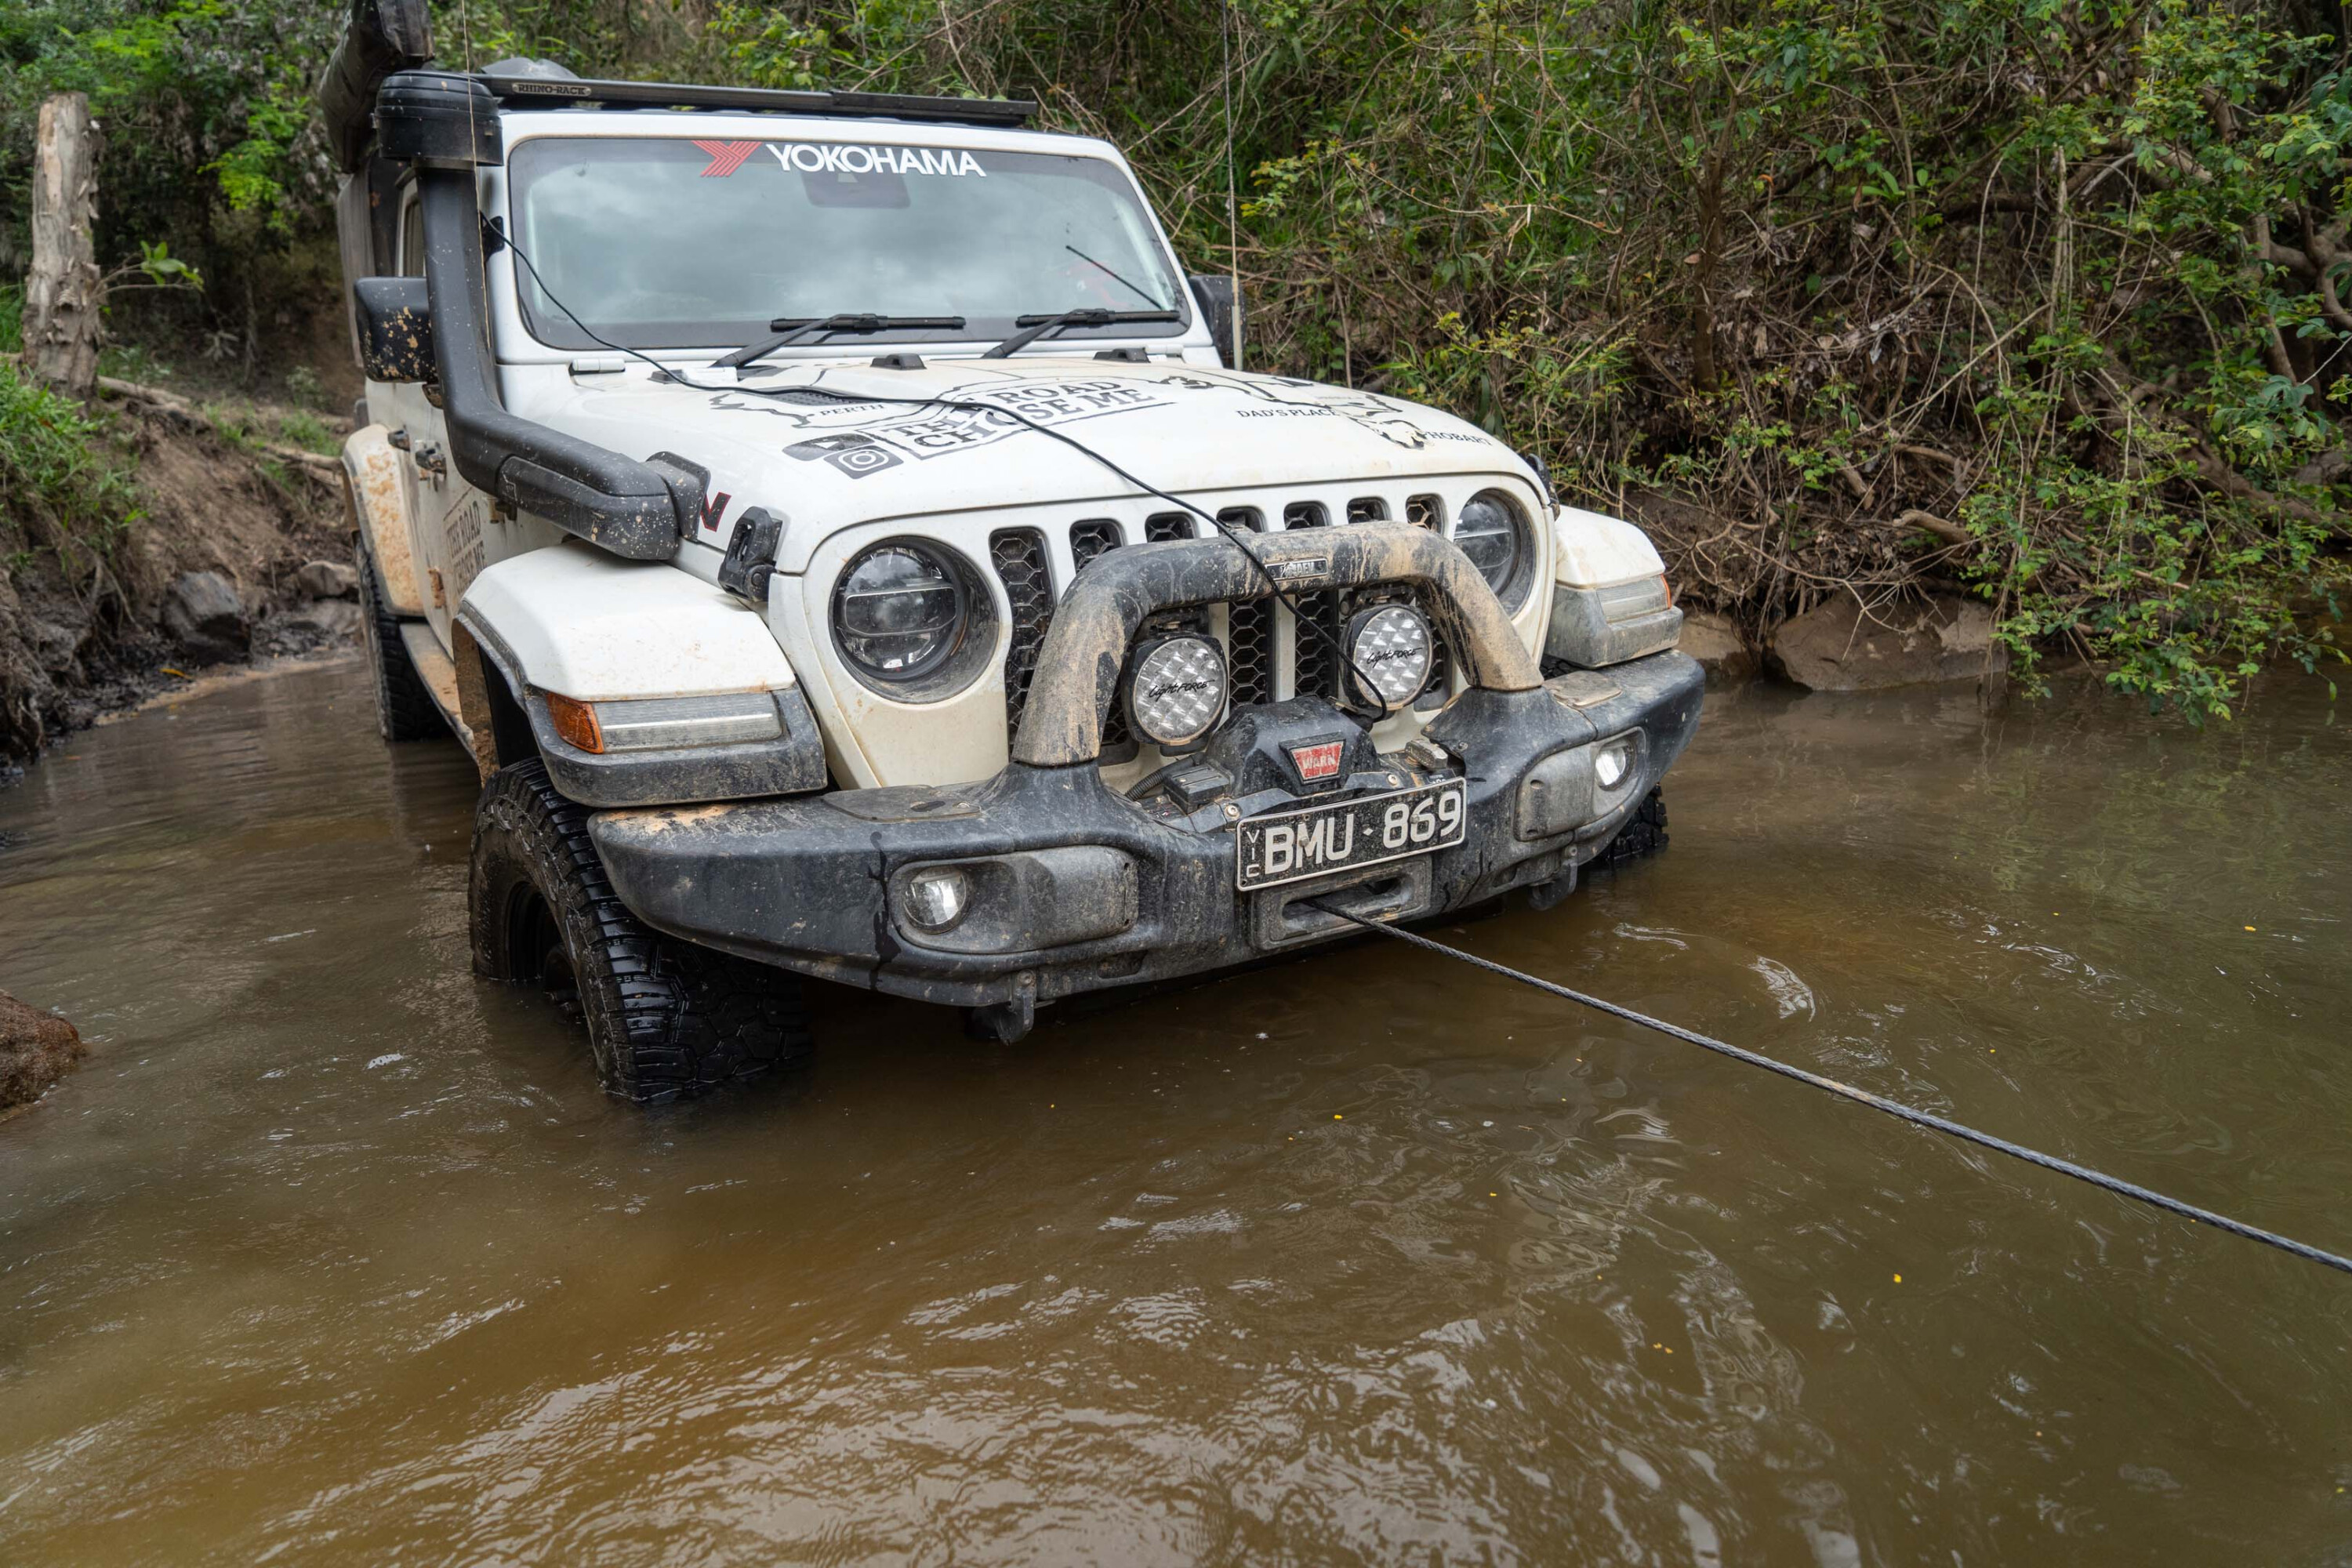
1
While Josh and I are relieved everything went to plan, our adrenaline quickly begins to peak, because Brad’s successful crossing means we have to go next.
After resetting all the winch ropes, Josh lines up and soon a repeat performance plays out and he slowly inches into the water before rapidly moving up and out of the deepest section. From my vantage point at the rear the crossing looked straightforward, though later in the day Josh and Brad confirmed the fast flowing water nudged the LandCruiser sideways and it was a battle to keep it moving in the right direction.
Being last in the lineup means there is no backout plan for me, no matter what happens I’m committed to pushing through. I let the winch pull the Jeep for the first three or four feet, and just as the river starts to flow over the front corner of the bonnet I use a little throttle to climb up onto the biggest of the rocks.
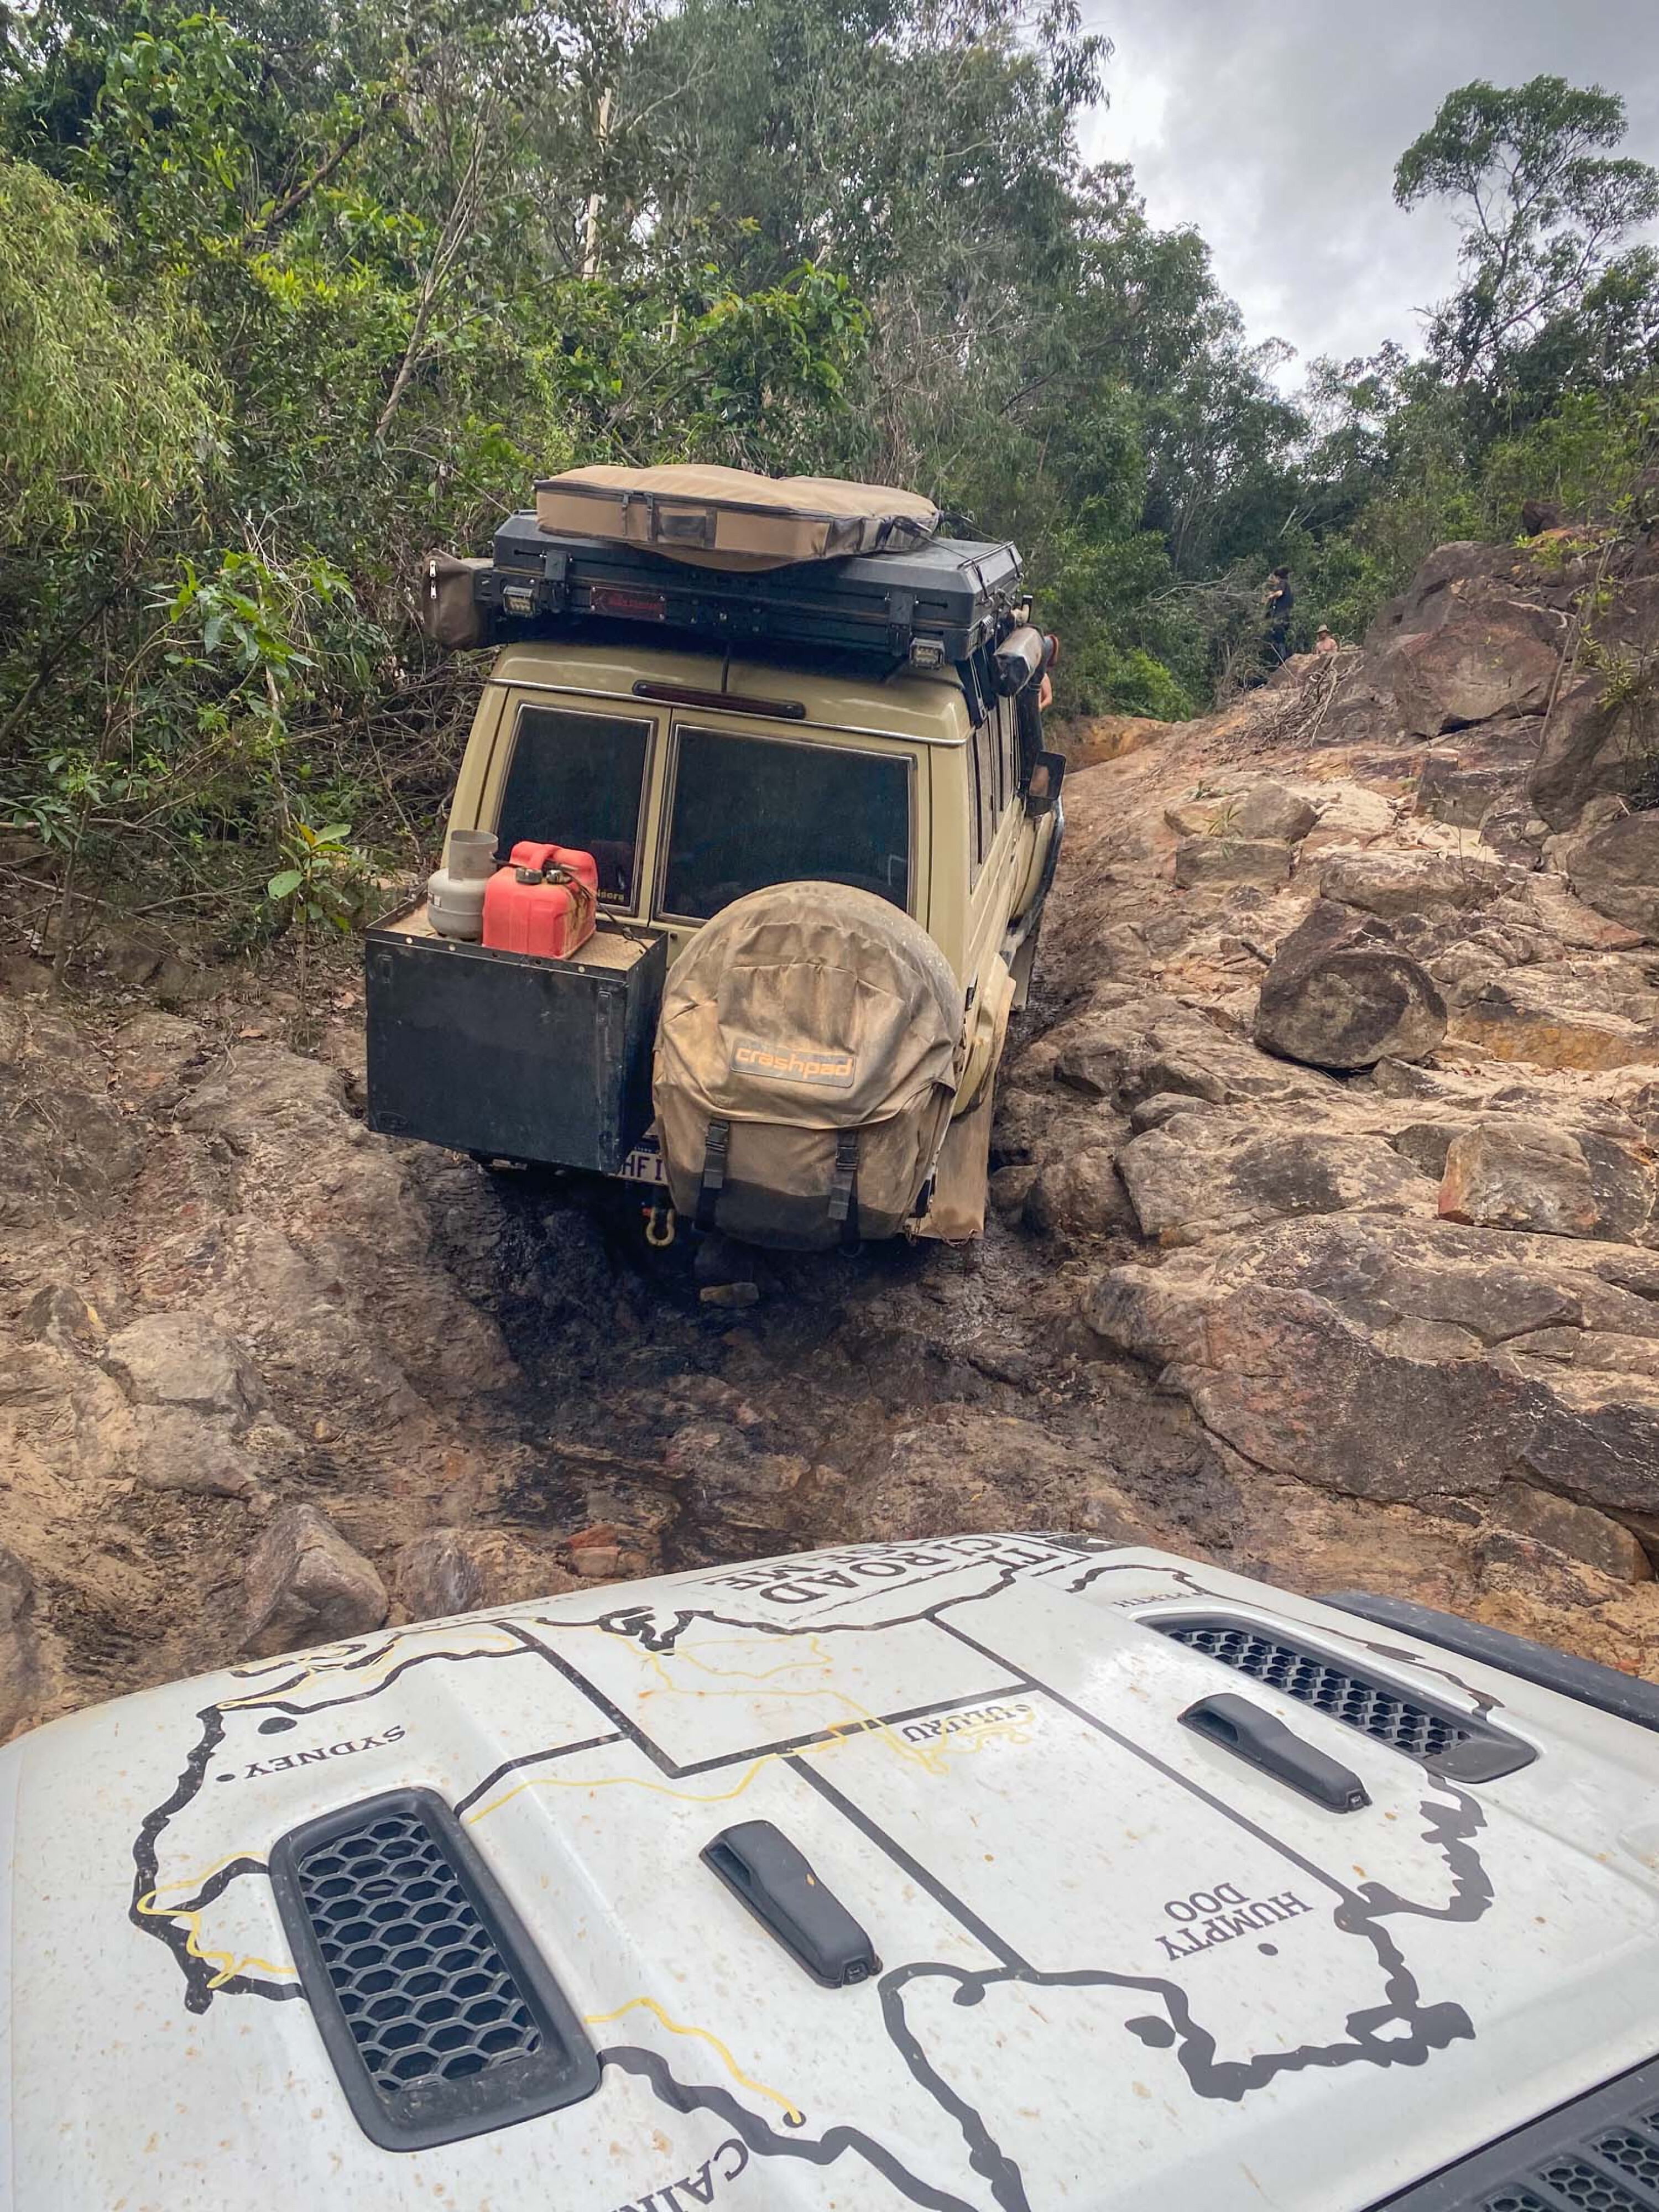
1
In low range first with both diff locks I have no trouble with grip, and I move forward up and onto the larger boulders with ease. I don’t feel or hear any undercarriage bangs or scrapes, and soon Josh is working overtime to pull in the winch line as I drive confidently through the river, arriving at the far bank unscathed, grinning like mad.
With a GoPro stranded on the far back I wade back through the water solo, and can’t stop thinking about crocs the entire time. When we were all in the water the danger seemed somehow less real, but all alone I feel particularly vulnerable.
Coming back for the final time I move as quickly as I can, trying to keep my nerves under control.

1
Mudholes and washouts
After all the excitement we stop for a hasty lunch above the river before continuing on, feeling proud to have cleared such a large obstacle. With little idea of the track that lies ahead, we’re all certain we don’t want to turn tail and retrace our steps across the Pascoe.
As we push further north the vegetation continues to change, permanently leaving the tropical rainforest behind for dry and dusty red dirt that is caked on all the trees and plants that line the track. We tackle the occasional mud pit and soggy section, and all manage to keep enough forward momentum in the sticky stuff.
Later in the afternoon we arrive on the banks of the Wenlock River, which we quickly see is much wider and shallower than the Pascoe.
1
This river is a little lower and a little swampier, and I can’t help feeling it looks a little more like croc habitat, so we all stay back from the bank and decide not to walk this one first.
In the vehicles we enter the soft sand one at a time before driving along the riverbed for a hundred meters. The bottom is very firm, and none of us has any trouble leaving the water before tackling a short and steep climb up and out of the riverbed.
The shadows grow longer as we tackle the final wombat holes and corrugations, before bursting out onto the Peninsula Development Road just as the sun kisses the horizon. As we air up and share high fives, the already stunning orange and red dirt road flashes into a stunningly bright display of colour.
1
An adventure to remember
While dreaming of an Australian adventure I planned to tackle the hardest four-wheel drive tracks of my life, and Frenchmans was everything I dreamed of.
I pushed my personal limits, successfully fording the most technical river I have attempted. Experiencing how the Jeep handled the severely rutted and washed-out track was confidence inspiring, with all four wheels almost always glued to the track.We worked together as a team to overcome the challenges in our path, and I’m extremely happy with how well we communicated, planned and then safely executed each obstacle.
1
I’m always thankful to spend time with people who approach difficult situations in the same careful and analytical manner as me, though I certainly learned a thing or two from Brad’s slightly more gung-ho approach.
Tackling Frenchmans with friends meant I could push harder than I’m comfortable with when out solo, and it also made for a lot of laughter and good times. If you ever find yourself in Far North Queensland, I highly recommend you take the detour and have a crack at Frenchmans.
Fast facts
- The Frenchmans Track is 179km long from Archer River Roadhouse to Moreton Telegraph Station
- There is fuel at the Archer River Roadhouse and Bramwell Junction RoadhouseThe best time to travel is May to October
- There is camping at the Archer River Roadhouse and Moreton Telegraph Station
- For navigation grab the Hema Cape York Atlas and Guide, and Hema Cape York Map