Ever wanted to turn a cheap, old 4×4 into an absolute champion?
Well, that’s exactly what a Queenslander did to the 80 Series Land Cruiser on the cover of 4X4 Australia’s December edition, on shelves now.
Want to know how the new Hilux really drives off-road? How about the new Fortuner? Maybe you’d like to see the Prado face off with the Everest? You’re in luck – we’ve got all that covered in the December issue.
Oh, it also has a bonus LowRange DVD and a 19-page Xmas gear guide packed with all the latest and greatest kit. And what about the second part of our ‘Loaded Lux’ giveaway? Yep, we’re still kitting out a 2010 Hilux for one lucky reader! Come on. It doesn’t get much better than that.
…as always, the mag has the latest news and events, stats and figures, as well as the industry’s most respected names.
Grab your copy of 4X4 Australia from newsagents or subscribe in electronic or print format.
In the meantime, here’s a sniff of what else is inside:
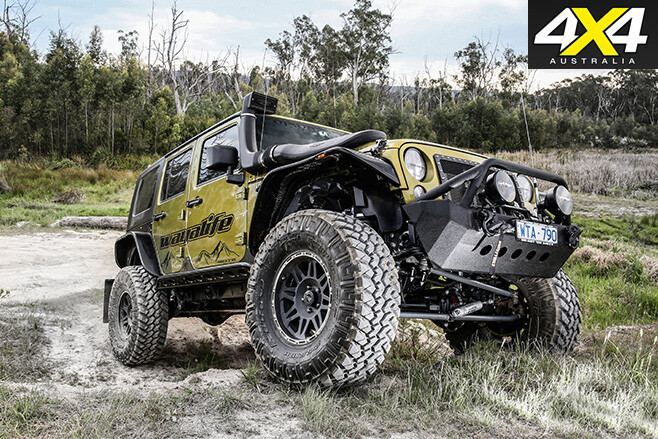
Custom Jeep Wrangler Unlimited
‘Speedie’s V6 Jeep Wrangler didn’t live up to his name. So he supercharged it and added a bunch of other mods.
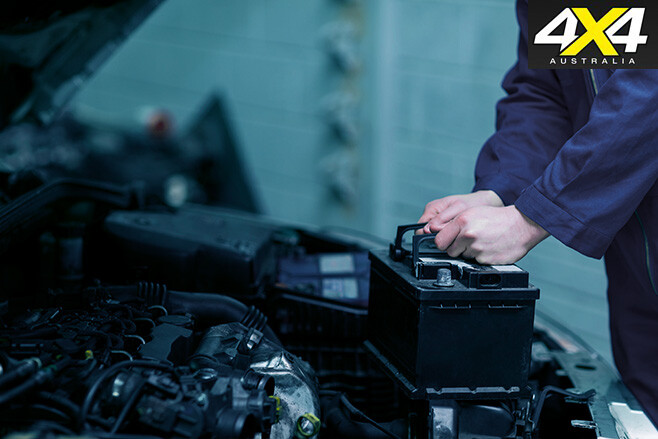
Batteries for beginners
Batteries – where would we be without them? Check out 4X4 Australia’s guide to battery basics.
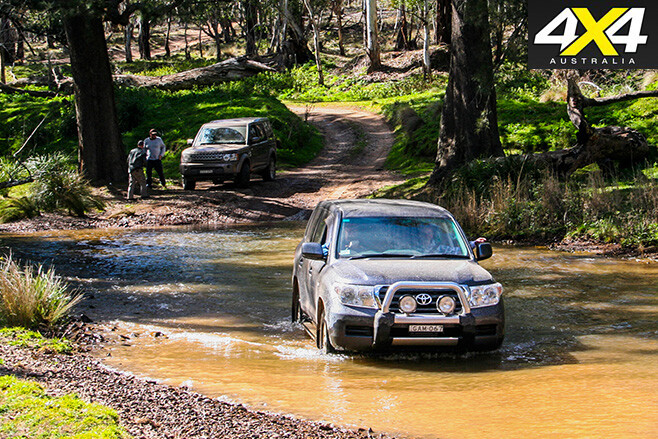
Turon River, NSW
Turn those frowns upside down with a trek to Turon National Park!
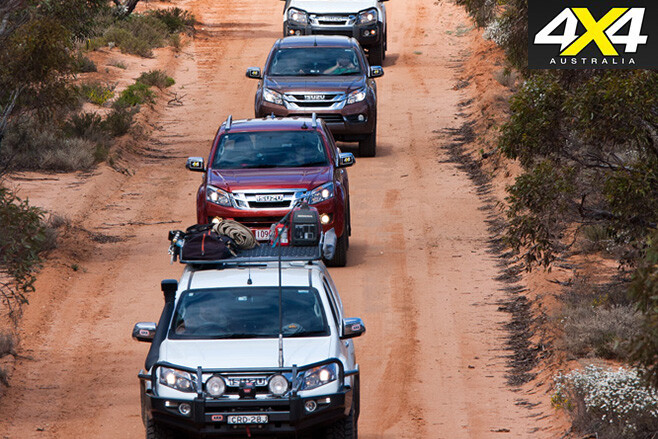
Outback, NSW
Wet weather couldn’t dampen the spirits of a Drive 4 Life convoy that saw clients of disability service provider Northcott head bush in 10 new Isuzu Utes.
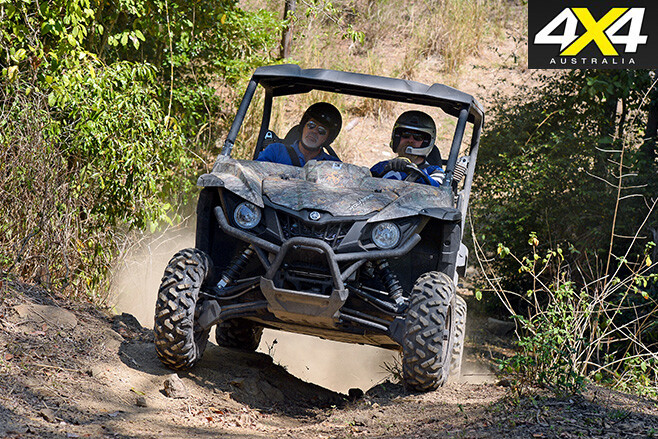
Yamaha ROVs
Yamaha has upped the off-road ante for 2016, with a new range of vehicles for work and play. These things are serious fun.
Christmas in Corner Country (last but definitely not least)
The late Kelly Theobald wrote about Christmas in the outback before she tragically passed on.
With the recent edition of John Rooth to the 4X4 Australia team, our December issue will also include a bonus DVD for you to enjoy!
In association with Roothy’s LowRange, we proudly offer you the opportunity to grab ‘Episode 2 – How Low Can We Go?’ (RRP $14.95) bundled with our December issue – on sale 12/11/15!
Check out the trailer below for a sneak peek of this awesome adventure and grab the mag in store!
No, Mitsubishi hasn’t redesigned the gaudy chrome nose on its latest Triton just months after its release.
We’re not sure that it shouldn’t, though.
This is Fiat’s take on the Triton and it’s called the Fullback. Basically, it’s a rebadged MQ Triton with the same 2.4L diesel engine and the choice of auto or manual gearboxes. Only the double-cab 4×4 Fullback was shown at the unveiling in Dubai this week.
Fiat Chrysler Automobiles (FCA) has said that the Fullback will be for international markets but there is no confirmation yet if and when it will come to Australia. If it does, it will join the likes of the Toyota Hilux, Ford Ranger, Holden Colorado and Triton in the hotly contested one-tonne ute segment. The Fullback could be just the vehicle to give FCA a contender in that segment, where it currently has none.
Countries like Australia and South Africa are mad for 4×4 one-tonne utes and are equally nuts for rugby, so the Fullback moniker should resonate with them, although you might say that Fiat missed a prime launch opportunity with the Rugby World Cup being held last month.
Also last month, Fiat pulled the covers off its Toro small ute, which is being built in South America for markets there, but it is a light-duty truck built on the Jeep Renegade platform. The rebadged Triton would be a proper one-tonner with real off-road capability. FCA Australia is still thought to be keen on the RAM 1500 pick-up for Australia some time down the track, but that vehicle is currently not made in right-hand drive (RHD). A semi factory-backed full-size RAM 2500 goes on sale here later this year – it’ll be imported, converted to RHD, and distributed here via Ateco Automotive.
Four-wheel driving and fishing go together like fish and chips.
That’s why most four-wheel drivers will bite at the chance to attend the annual Moreton Island Fishing Classic competition. It’s the perfect excuse to explore the island’s many tracks and, of course, to throw in a line or two.
Situated 40km east of the Port of Brisbane, the island is about 38km from north to south, is eight kilometres across at its widest and, most importantly, has about 420km of tracks, all of which you need a 4×4 to drive (there are no sealed roads on the island). But that doesn’t mean the island is difficult to drive.
In fact, it’s perfect for the novice four-wheel driver, with plenty of single-direction tracks and sand driving that’s challenging enough to be fun. The fishing is all right, too.
Moreton off-roading
Getting to Moreton Island takes more than an hour on a ferry. This should give you plenty of time to grab a coffee and drop your tyre pressure before you drive down the ferry ramp on to the sand of one of the island’s most picturesque spots, the famous Tangalooma Wrecks.
From there you can head north along the beach and take in the sites of the calm and clear waters of the island’s west, or you can cut across the island using Middle Road – which starts near the Tangalooma Wrecks and was originally built to carry supplies across the island during WWII.
Middle Road can also take you to the dunes where you can go sandboarding. If you don’t get bogged, you can follow the road all the way across and it will take you the island’s eastern side, facing the Pacific Ocean. This side of the island has several camping grounds, strong surf and plenty of gutters to chase fish. So it’s worth a look.
From there you can head north if you’re keen to take on some of the deeper water crossings up towards North Point. You’ll need to check the depth before crossing them during high tide, though, as some creeks, such as Dog Creek, can be especially dangerous at high tide. Attention should be paid to tide times around the crossings, which are usually well signed.
If you want some company, Moreton Island Adventures, located at the north-west side of the island, provides guided 4WD tours. They also offer activities including sandboarding, snorkelling and night kayaking.
Moreton Classic
The annual Moreton Classic fishing competition, run by the mob at Moreton Island Adventures, runs over five days in mid-August each year and attracts more than 200 competitors.
With some 4WD industry heavy-hitters on board as sponsors this year, the Classic had more than $29,000 worth of prizes and money up for grabs. Entrant registrations ran on the Thursday with the competition open at midnight that same night. Needless to say, there were a few mad-keen fishermen out that same night chasing the fish and the prizes.
The competition rules are simple: there is a weigh-in each day from 12pm to 1pm at Moreton Island Adventures’ headquarters. Your fish must be one of the six fish listed by organisers and the heaviest of each category wins a prize that day. Kids also have their own category.
At the weigh-ins, it is always apparent that there are a tonne of regulars who attend this event each year.
Sponsors and media are not allowed to compete in the competition, but that doesn’t stop them throwing in a line for fun. The guys from EFS Suspension were especially keen, and spent the first day mapping out some gutters to chase Tailor. They then explored the island for the rest of the trip.
Being the third largest sand island in the world, it has a lot to offer 4WD enthusiasts and fishermen alike.
Next year’s event is tentatively set to run from August 25-31.
Fishing Classic 2015 winners
| Name | Class | Mass (kg) |
| Mark Sorenson | Whiting | 0.54 |
| Ian Williams | Bream | 0.76 |
| Ronnie Grobe | Dart | 0.64 |
| Graeme Underwood | Flathead | 2.18 |
| Kane Maley | Tailor | 2.48 |
| Sooty O’Shea | Mulloway | 7.62 |
Island fun
If you head north along the east coast of the island you will find a 1.5km walking trail up to the Cape Moreton Lighthouse; a picturesque spot with beautiful views of the area. From up there, you can see all sorts of marine life, from whales and turtles to dolphins and sharks.
Built in 1857, Cape Moreton Lighthouse is known as Queensland’s oldest lighthouse, while at the north-eastern tip of the island is a band of volcanic rock and sandstone that forms a break wall from the surf. Water cascades over the rocks to form a natural spa named the Champagne Pools.
One kilometre south-east of the Tangalooma Wrecks is the Moreton Island Desert. Here, bare sand dunes with patches of minerals are surrounded by thick vegetation. The steep slopes are regularly used for sandboarding.
There are also two sand hills situated right across the southern tip of the island, from east to west, named the Big and Little Sandhills. A hike up these dunes will provide you with amazing views across Moreton Bay and back to Brisbane. The Little Sandhill is easily accessible from the eastern beach and the Big Sandhill is more accessible from the western beach.
Moreton camping
The island is more than 95 per cent national park, so you will need a camping and vehicle access permit to hit the beach and camping spots. There are five basic campsites on the island, and you need to get in quick around Christmas and Easter times.
Other accommodation options include fully contained units, houses, and the Tangalooma Island Resort. Moreton Island Adventures also offers some great ‘glamping’ tents and self-contained units, with an array of amenities and huge barbecue areas. The glamping tents are a great option and are well and truly watertight.
Next year’s Fishing Classic is expected to run from August 25-26. For more information on the Classic and camping contact Moreton Island Adventures.
Phone: (07) 3909 3333. Website: www.moretonislandadventures.com.au.
For more 4×4 Explorations, check out our page here.
It was great to see a woman win the Melbourne Cup, but we like a different kind of horsepower and a different kind of cup at 4X4 Australia, and so does Australian rally driver Molly Taylor.
Molly has won a fully funded spot in the 2016 FIA World Cup Rallies, after finishing second in an all-female international desert racing competition designed to find a female crew to contest FIA’s 2016 Sealine Cross Country Rally in Qatar, to be held in April.
She was one of nine international drivers and nine co-drivers who competed in the inaugural five-day cross-country rally training and selection program, a joint initiative between FIA Women in Motorsport and Qatar Motor and Motorcycle Federation (QMMF).
“It was one of the most intense weeks of my life and I feel like I was running on adrenaline for the whole five days,” Molly says.
Molly and her rally partner Yasmeen Elmajed came second behind New Zealand driver Emma Gilmour and Lisette Bakker from the Netherlands, in first. Spain’s Cristina Gutierrez Herrero and Belgium’s Lara Vanneste will make up the third entry.
The eighteen women that competed in the event drove under the expert guidance of Jutta Kleinschmidt, the first and only woman to win the Dakar Rally, and multiple world rally and cross-country winning co-driver, Fabrizia Pons.
“So much to learn in such a short time but so exhilarating as well,” Molly says. “Being out in the desert for the first time was a surreal feeling.”
“It was fantastic to meet so many good drivers and I made some great friends. It was really special to be able to share our passion and such a wonderful experience and I know we will be staying in touch.”
The desert driving program included dune and sand training, navigation, mechanics and tactical awareness.
There were 85 applications from entrants in 39 countries before the final 18 were selected.
Stories about “the one that got away” are far too common in fishing circles.
A lot of these heartbreaking losses occur in the final few seconds of the encounter, when the fish is almost in the boat or on the bank. A great many of these tales of woe also seem to involve the use (or rather, misuse) of landing nets.
Securing a good fish with a landing net should be a dead-easy process, but it’s amazing how often it all goes wrong at that last moment. When a whopper fish eventually swims into view after an epic battle, it’s natural to experience a strong desire to heave the catch out of the water, or up onto the bank, as quickly as possible. This desire can easily lead to disaster, though.
A landing net is definitely the most common tool used to secure the catch, but many people make a mess of the netting process. The next trophy fish to be knocked from the hook by an overly enthusiastic net-wielder certainly won’t be the first.
The most important aspect of successfully using a landing net is to remember that securing a fish safely in such a device has absolutely nothing in common with catching butterflies. Forget about swooshing, swooping, dipping and scooping at a flailing, flapping fish. Instead, always follow these same three basic steps:
1. Place the net in the water so that the front of the hoop is well submerged and the back of the hoop (where the handle is connected) sits roughly flush with the surface.
2. Using the rod and line, bring the hooked fish to the net and swim it into the net head-first. If you’re fishing on your own, you’ll have to perform these actions yourself, holding the net handle in one hand and the rod in the other. If you need to reel in some more line during this process, tuck the net handle under your arm.
3. As soon as the fish’s head, and at least half of its body mass, are over the front of the net hoop and above the mesh, relax pressure on the line. Do this before you begin to lift the net from the water. This relaxation of pressure usually induces the fish to dive deeper into the net, and also relieves strain on the rod at a critical moment.
Netting fish is such an important part of the whole angling process that I’m going to run through those instructions one more time: Submerge the net, bring the fish to the net, swim the catch into the net head first, reduce pressure on the line, smoothly lift the net.
Never chase a swimming fish with a net, nor attempt to net the fish tail-first. Such efforts almost always result in disaster, because any fish can swim much faster than you can move a submerged net through water (especially one of the modern, fish-friendly knotless or mesh varieties, just like the very-popular Shimano Environets).
The fish almost always evades capture if chased from behind with a net, often breaking the line or shedding the hook in the process.
Up to a certain point, a larger net with a wider hoop is easier to use and more efficient than a smaller net. Even a big landing net stops being useful, however, when dealing with fish over about 15 or 20kg. For better or worse, most of us don’t encounter too many fish that big.
If you’re an eternal optimist (like most anglers) you can always carry a gaff to deal with the real monsters. We’ll look at using those in a future instalment.
Looking after your vehicle recovery equipment should be a priority if you want it to last.
And, it’s a good idea to do preventive maintenance before and after each season so that your recovery gear continues to perform year-in, year-out.
Maintenance isn’t as simple as putting your recovery gear under the high-pressure hose while washing down your 4×4. In fact, you’ll find that’s exactly the wrong thing to do with some bits of kit. So, with that in mind, here’s a few pointers to keep your gear good to go for when you need it to work first time.
Hand tools Most of us have at least a shovel and an axe lying about, while some of us have more than our fair share. But there are plenty of stories of people snapping handles whilst bogged up to the axles, or arriving at camp to find the axe head has wriggled its way free of the handle.
Despite first impressions, it’s not always poor workmanship that causes this. Generally, it’s because the tool has been neglected (bolted to the roof racks) and has become as dry as the Simpson!
All this is preventable Step 1: Give it a clean: Start with a good wash and a bit of scrubbing to remove any mud and grit from the blades and handles. Pat dry with an rag or towel, and then set aside overnight so it dries completely to avoid trapping moisture in the nooks and crannies.
Step 2: Remove the rust: Use a wire brush to scrub away any rust that has accumulated on metal parts. While a wire brush attachment to a drill can make the job easier, you want to remove the rust with as little wear-and-tear as possible so that your tools don’t become thin and weak over time.
Step 3: Sharpen it: No, we don’t mean turn it into a zombie apocalypse weapon, just restore the edge the tool had when it was new. To do this, smooth out nicks and burrs to re-establish its clean edge with a file. On axes, you’ll need to follow this up with an appropriate sharpening stone.
Step 4: Remove splinters: Rub down the wooden handle with medium-grit sandpaper to remove splinters and weathered finishes. While fiberglass handles don’t splinter (as much), when they fracture the tool is useless until you get home. A wooden handle can be more easily repaired or replaced on the run.
Step 5: Apply oil: Using a clean rag, apply oil to both the metal blade and the wooden handle. If you really love your tool, use a penetrating oil like TMT or Ballistol. Wipe off any excess and let it soak in to avoid dust accumulation. The oil will help prevent rust and condition the wood to keep it from absorbing water. It will also help to prevent cracking. After the handle has dried, apply a second coat of oil to the handle if needed. Fiberglass or composite handles will only need a good cleaning.
Look ahead Just because you’ve cleaned it once doesn’t mean you should ignore it for another 12 months. At the end of every trip, spend a few minutes to:
Rinse off mud and soil with a garden hose. Clinging wet soil is the main cause of rust on hand tools.
Wipe tools dry with a rag or towel, or let them dry in the sun while you finish unpacking. Don’t attach tools back onto the vehicle (roof rack) until you’re heading back out on the road.
Hang tools up rather than standing them on their edges to prevent rust (absorbing moisture from the concrete).
Periodically apply a light coat of oil.
High pressure risks Never use a high pressure hose on a snatch strap, tree protector, tow rope or synthetic winch rope. Doing this penetrates grit deeper into the fibres creating undue wear-and-tear and thus shortening its life. You also risk it breaking while you’re using it, and odds are you won’t have a spare.
Some suggest that cleaning on a gentle cycle in the washing machine is a good option. We reckon that’s over-doing things and could damage both the strap and the machine. So keep it simple by following these steps:
Step 1: Rinse: When returning from the scrub, soak the strap in a bin of water and rinse off the muck.
Step 2: Hand wash: Do this in the same bin with clean water and using soap. Remember it’s composed mainly from nylon, so consider a gentle plant based, non-chlorine, non-phosphorus based detergent.
Step 3: Rinse: Do this in clean water until the water runs clear from the gear.
Step 4: Inspect for damage: If you see any broken stitches or strands, then replace the strap. If your synthetic winch rope has any stiff sections then repeat processes 1-3 to ensure it’s not melted or fused. When in doubt, chuck it out (re-purpose or recycle it)!
Step 5: Air dry: Put it out under shade, as prolonged UV exposure will damage the strap or synth rope.
Hi-lift Jack Hi-Lift jacks are pretty straightforward to maintain and, if done correctly, they’ll give you many years of service.
Step 1: Clean it with air pressure, water pressure, a stiff brush or a combination of all of the above.
Step 2: Lubrication: Use penetrating oil like TMT on the bar, climbing pins, shear bolt, springs and pitman pin. Do not use motor oil or grease as it will collect dust and bind components, including the climbing pins, in the holes of the bar.
Step 3: When not in use, store it with the handle in the upright position with the reversing latch locked in the up position. Store in a dry place, preferably indoors, with a protective cover.
Creeping winch Creeping winches require periodic servicing. While there are some great servicing manuals online, you’re best placed to get an authorised Griphoist mechanic to service your Tirfor (if you’re not up to speed). Regardless, between services, there’s routine maintenance that we all need to do – particularly to ensure that it remains undamaged and stays properly lubricated.
Step 1: General wipe down of the outer casing.
Step 2: Check for casing deformation or damage or any loose parts/missing casing screws. Severe deformity requires casing replacement and may indicate the need for a full service.
Step 3: Check that the spare shear pins are held in the power stroke lever under a plastic end-cap.
Step 4: Inspect anchoring hook and safety lever for damage and replace if necessary.
Step 5: For normal lubrication, squirt SAE 90–120 through the openings of the casing. Then let it soak through whilst operating the forward and reversing lever.
Step 6: When in doubt, dip the Tirfor into a cleaning solvent that does not attack nylon or rubber. Shake it vigorously and then turn it upside down to drain it. Next, apply ample lubricant as per step five.
Step 7: Clean the steel wire rope with a wire brush and wipe down with a hessian rag. Periodically oil it.
Shackles, Chains & Blocks We all know that we should use blocks, shackles and chains that have a safe working load. And, we know we should use them accordingly. Like everything else we rely on, however, they should be cleaned and inspected regularly. Don’t overlook them just because they look tough and hard-wearing. With proper maintenance and care these bits of kit will last you a lifetime.
Step 1: Hose them down and use a stiff brush or a pressure cleaner to remove any mud and dust.
Step 2: Wipe them clean and let them air dry in the sun.
Step 3: Inspect their condition and shape for distortion, surface blemishes, wear and fractures:
– Stretching (elongation) means they are being overloaded. – A bent hook or shackle indicates excessive side-loading. – All pins, nuts and screws must be straight and all screw pins must be able to be completely seated. – Replace hooks/shackles that are bent, show excessive wear by more than 10 per cent of the original diameter, or have an elongated eye or pin holes. – Most snatch blocks require lubrication, of the central pin, with grease periodically. – Double check the safe working load (marked on the side body) to ensure you’re working with the right kit.
The Bottom line Every time we conduct a recovery, we’re using equipment under load which can maim or kill.
The risks involved can be reduced by utilising the bits of kit in the manner for which they were designed, and using correct techniques.
With regular maintenance and inspection, we can ensure that our recovery gear performs as we expect – every time.
For more information and tips on Gear, check out our page here.
The sound of a power-steering pump that’s low on fluid is not a nice one.
In fact, it’s awful, reminiscent of Jim Carrey’s ‘most annoying sound in the world’, as heard in the classic 90s comedy, Dumb & Dumber.
But at least, like Carrey, the compromised power-steering pump is loud and annoying enough to grab your attention, as I found out in the rich-red heart of South Australia earlier this year.
I was on Lake Gairdner – a dry salt lake – racing at the annual Australian Speed Week when my Hilux’s pump began to squawk. Luckily, I was carrying a couple of litres of transmission fluid, so I simply topped up the pump.
But the noise returned two days later. Sure enough, there was fluid dripping from the driver’s side steering-rack boot. Hmmm. Not the best time or place for a steering-rack leak. To cut a long story short, with a four-litre bottle of transmission fluid on board, I managed to limp my Hilux 1800km home by topping-up the power-steering fluid every 100km – it soon became every 75km as the fluid loss steadily worsened closer to home.
I told myself how lucky I was. Had I not noticed the horrible squeal and the lack of fluid, the pump could have been destroyed in the middle of nowhere, resulting in a long and expensive recovery/tow. Checking under the bonnet every hour, or so, on my way home across South Oz and NSW became my own version of ‘Stop, Revive Survive’.
Once home, I bought a second-hand steering rack at my local 4WD wreckers and installed it, with the Hilux still on the driveway. That was around $500. With a trip to Melbourne looming, it was important to have a wheel alignment done.
My pre-trek check before the South Oz adventure had revealed oil on the rear drums and brake shoes, which were getting quite thin. So while at the mechanics I had new rear-wheel bearings, seals and brake shoes installed. Another $1100.
Jack, the fella who did the work, reckoned that I was lucky to have gotten the Hilux home, because of the looseness in the rear wheel bearings.
Sure, with 330,000km and plenty of adventures under its wheels, my Hilux is at the age where components will need attention. But hopefully that will be the last of the big-buck bits that need replacing for quite a while.
Fans of the Mitsubishi Pajero should be worried.
Mitsubishi has hinted that traditional big, heavy off-road vehicles might become too much trouble once tough new emission restrictions come into force in Europe in 2020.
For a company that openly sees its future in SUVs, that’s a big statement, and if you were the cynical type, prepared to join the dots, you might think that the current Pajero will be the last of its type from Mitsubishi.
Speaking to 4X4 Australia at the Tokyo Motor Show recently, Mitsubishi president and CEO, Tetsuro Aikawa, refused to confirm plans for a new Pajero, despite the current model being more than 15 years old. But he also fell short of confirming the model’s global demise, saying that the “current Pajero will continue for some time.” How much time the brand can stretch the Pajero platform, or what will likely happen once it reaches its limit, he wouldn’t say. But if you look at the signals the company has been giving, it might just be that future Mitsubishi off-roaders will be electric- or hybrid-powered vehicles.
“Weight and fuel economy are the big issues (for off-road vehicles),” Mr Aikawa confirmed.
“Tighter emissions for Europe come into force in 2020, so rather than a Pajero type of vehicle, people will be looking for lower emissions and better fuel economy. So electric vehicles come into focus.”
Meanwhile, the other hint is in the next new model from Mitsubishi, which will be a compact SUV to slot in between the current ASX and Outlander line-ups. Though based on the Outlander platform, the new model would be closer in concept to an ASX, but would involve a more luxurious specification.
Mr Aikawa confirmed there would be a plug-in hybrid, a petrol version and a diesel version of the unnamed newcomer. The plan at this stage is to launch the new compact SUV on to global markets in 2017.
If nothing else, this is an indication of where the brand has elected to put its tight development resources. And tight they are: Mitsubishi is looking for a development partner to create the successor of the Lancer small sedan and hatch range, but despite admitting to talks with Renault, there are no plans to develop a new Lancer.
“A C-segment (Lancer-sized) sedan is not a priority. It’s very hard to find a (development) partner. If we could find a partner, we could develop a new model, but right now, we can’t find that partner.”
Clearly, investing the billion-dollar-plus budget to develop a new, big off-roader that can’t even be sold into Europe is not on Mitsubishi’s radar.
Back in February 2014, we reported from the 2013 Tokyo Show that it could be 2017 before we saw a replacement for the ageing Pajero and it would most likely be a plug-in hybrid vehicle based on the GC-PHEV concept on display at the time. Mitsubishi Product Planning chief Ryugo Nakao told 4X4 Australia that despite the efficiency, “We will make sure we will conserve the ability of Pajero expected by customers.”
Two years on, in the face or looming emission regulations and budgetary constraints, it seems that Mr Nakao may not be able to keep true to his word.
Time will tell, but the future of big, heavy off-road vehicles doesn’t look good.
When is a Mitsubishi Challenger not a Challenger? When it’s a Pajero Sport.
This is the newest Mitsubishi off-road wagon, a vehicle that will go head to head with the likes of the Toyota Fortuner and Isuzu MU-X when it hits the Australian market in December.
Being based on a Triton ladder-chassis, it could almost be called a ‘Challenger’ – but it’s not. The new Triton-based wagon will be called a ‘Pajero Sport’, both here and in markets around the world, hinting at what might soon become of the traditional Pajero.
The vehicle uses the chassis and driveline of the new Triton, meaning it has a 2.4-litre turbo-diesel four-cylinder with 133kW of power and a solid 430Nm of torque. The engine uses an alloy block, a move that has reduced weight but forced a rethink of the compression ratio, now 15.5:1. Mitsubishi is not alone in this move – Mazda’s alloy Skyactiv diesels use even lower compression ratios.
The big shift away from the Triton’s driveline is to ditch that vehicle’s five-speed auto in favour of an eight-speeder.
The Triton’s leaf-sprung rear end is also replaced by a coil-sprung set-up with two trailing links and a Panhard rod for lateral location of the live rear axle.
Mitsubishi’s proven Super Select all-wheel-drive set-up is used, making the vehicle rear-drive in normal situations, with settings for four-wheel-drive high-range, high-range with the centre-diff locked and low-range all available via a rotary knob on the centre console. The rear diff can also be locked independently.
The electronics that operate via the traction-control and ABS braking can also be tailored depending on the surface being covered. There are settings for sand, gravel, mud and snow and rock, altering how much wheel slip is allowed.
Some of the calibration work for this set-up was carried out in Australia, so we’ll be keen to take it into the bush and test it locally.
The Pajero Sport has plenty of ground clearance (281mm) and good approach and departure angles.
Not much is being said about the specifications of Aussie models yet (or their prices and options), but we can tell you that the seven-seat option on the Pajero Sport in some markets will not be coming Down Under. Mitsubishi says this is because it already has a seven-seater in the Outlander and Pajero, but it could also be a function of the side airbags not covering the third-row seats, something that other makers have copped flak for in the past and could prevent the Pajero Sport from obtaining a five-star safety rating.
The Pajero Sport is bigger inside than the Challenger it effectively replaces and the seats, front and rear, are very good with decent support and comfort. Our only complaint would be that, like many vehicles on a ladder chassis, the floor is quite high and there’s no under-floor storage in the luggage compartment.
The heaviest version of the Pajero Sport weighs in at 2070kg, and the towing limits is 3100kg with a braked trailer.
Our drive of the vehicle in Japan recently included only a tricky little off-road track that showed mainly that the suspension had lots of travel. Beyond that, you could feel that the electronics definitely contributed to the available grip and, at one point, where we had the axles crossed up, the vehicle became a little confused for a second or two before sorting itself out and grunting over the moguls in question.
What we can’t tell you is how the engine, suspension, brakes and comfort stack up on road. But first impressions are positive enough that we’ll be the first to grab a new Challenger – sorry, ‘Pajero Sport’ – when it lands before the end of this year.