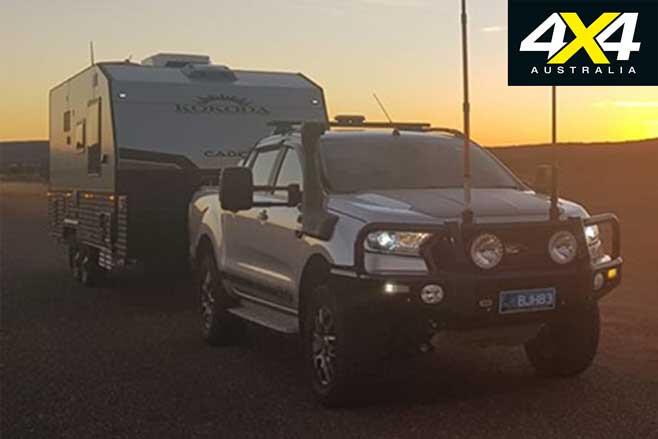
The Readers’ Rigs feature in the September 2019 issue of 4X4 Australia features a huge variety of 4×4 wagons and utes from our enthusiastic readers.
To get involved, post a pic and a description of your rig on our special site here or post it to our Facebook page and stand a chance to win an ARB High Output Air compressor valued at $335.
2008 NISSAN GU PATROL: WINSTON HAWKE (4×4 Australia Readers’ Rigs Winner of the Month)
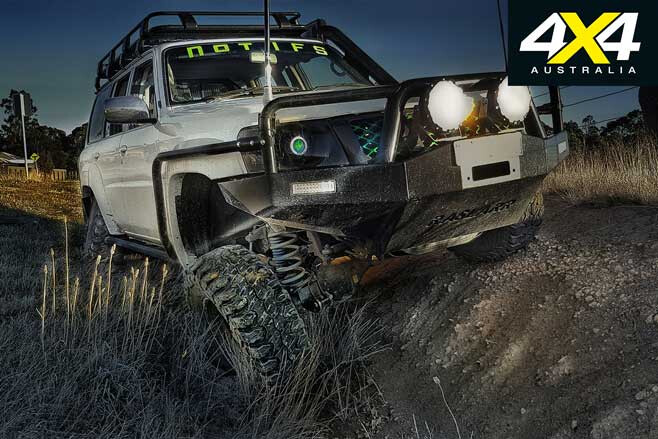
IT’S STILL a work in progress. Since last December it’s had a fair bit thrown at it: Superior 4-inch Hyperflex kit with five-link radius arms; Raslarr bar work; 4-inch snorkel; sheetmetal front bar, scrub bars, side steps and rear bar; Aurora Custom headlights; Stedi Type-X 8.5-inch driving lights; Gladiator X Comp 35/12.5/17 tyres; OCAM rack with the Darche Eclipse awning; and Titan drawers with a Waeco CF40 fridge. My best runs have been through Tallarook, and an unnamed track beside the reservoir near Warragul Rocks.
TOYOTA LAND CRUISER 79 SERIES: KAZ SMART
IT HAS every option from ARB 4×4 Accessories thanks to Gary and the team at ARB Jindalee.
2018 TOYOTA TUNDRA: PETER BAILEY
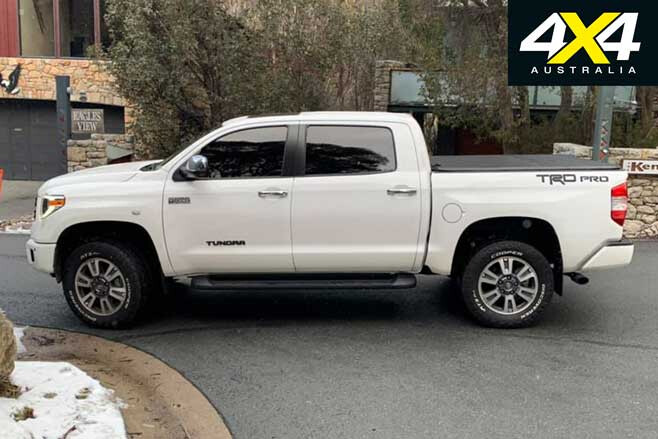
MODIFICATIONS include ARB OME BP-51s, LINX, airbags, full tray slide with fridge, custom light bar, Alpine Halo9, Cooper tyres, and plenty more.
LAND ROVER DISCOVERY D3 V6: LEE MERRILEES
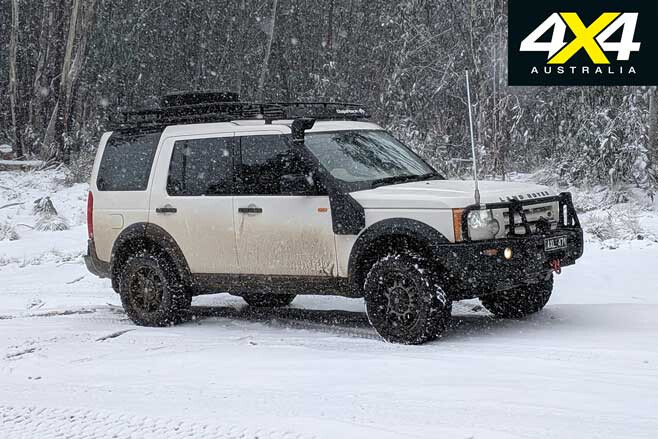
THE MODS so far: Brown Davis 110lt auxiliary tank; Baja Expedition roof rack; ARB bullbar; Runva winch; Safari snorkel; 17in alloys; Maxxis Bighorns 764s; a dual-battery system; Llams Height Controller for a 2in lift; and ICOM UHF. Favourite four-wheel driving is chasing snow and checking out the Victorian High Country huts.
2010 NISSAN X-TRAIL T31 SERIES 3: MARCUS MCNULTY
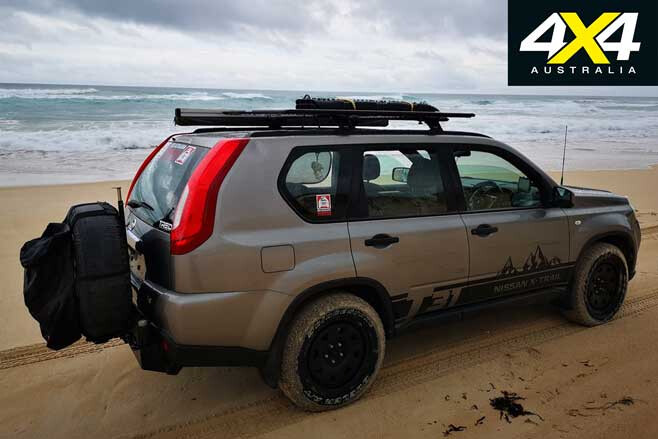
THIS IS Bertha. I have modded her out with a 40mm Pedders lift; 17-inch steel rims; Bridgestone D697s; three ASFIR bash plates; Rhino-Rack Vortex crossbars, steel mesh tray and awning; spare wheel carrier; ECB nudge bar with spotties and light bar; and Oricom radio. Best locations include Holland Track, Lennards Track, Mundaring Powerlines Track, Ninghan Station, and Black Point to Jasper Beach.
FORD RANGER FX4: BRENAINN HALL
WE travel anywhere where there is no phone service and plenty of dirt. Kit includes: ARB Summit bullbar, front bash guard, recovery point, underbody protection and compressor; fuel catch can; dual batteries; Redarc DC-DC charger and Tow Pro Elite; GME XRS-370C UHF, 4705B aerial, 4702B aerial; RFI aerial drop-down mount; Lightforce HTX spotlights; Clearview mirrors; Safari snorkel; OME 2-inch lift with springs and shocks; Wildtrak roller shutter; Rhino quick-mount roof bars and cargo tray; Yakima Front Load bike holder; Cooper S/T Maxx tyres; roof racks; MaxTrax; and an iDrive throttle controller.
IT WAS a very sad day in the 4×4 world when, in 2016, the uber-popular Nissan GU Patrol was discontinued. The venerable off-road workhorse – in both wagon and tray-cab ute form – had been a firm favourite of experienced Aussie tourers for many years.
For the real hardcore Patrol fanatics, it was even harder to let go, and that’s why you still see plenty of these tough trucks kicking around in the most remote parts of Australia. Not so common, though, are Patrol utes with a ‘ute-style’ rear tray and a beefy six-cylinder Cummins diesel, like this big bopper built by Guy and the team at Patrolapart, in Lilydale, Victoria.
As the name suggests, Patrolapart is a one-stop Nissan Patrol specialist shop and the ute was built as a promotional vehicle for the business. It’s also very comfortable when put to work as a fully-fledged touring rig – a fitting result after 18 months of work during down-time by the team.
A difference that counts
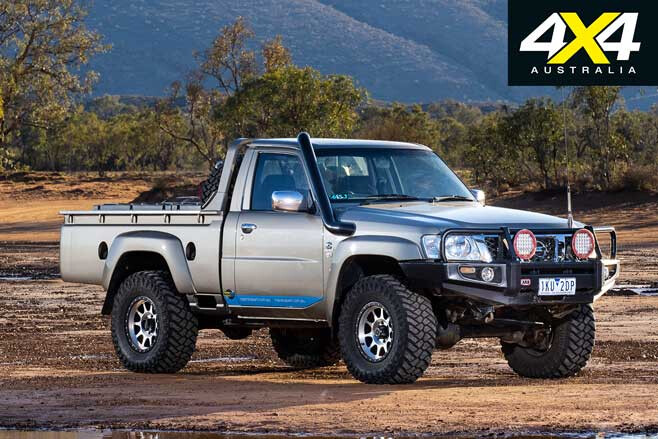
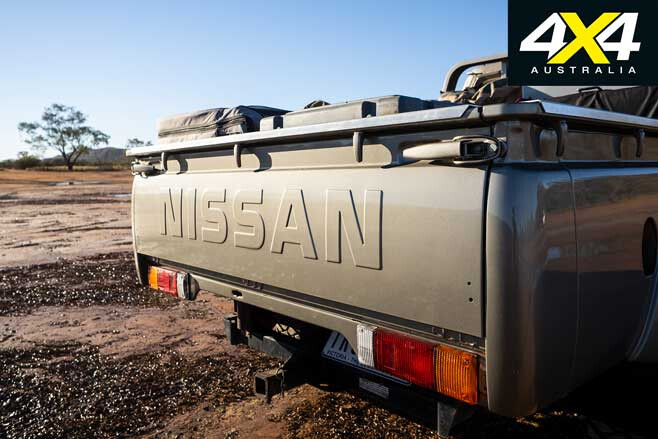
LOOKING at how well that rear tub tray fits in with the big Nissan’s silhouette makes you wonder why it wasn’t made available to Aus-based Patrol ute buyers back when it was on sale. Guy and the team saw it on some Japanese-based Patrols (it was factory-fitted over there) and thought it’d make the Patrol stand out visually from the rest of the many thousands of Patrol utes on Australian tracks, and, with a few additions, it was a relatively straightforward fit.
“They come as just a bare tub when you import it,” Guy says. “So we imported the flares and the other bits and pieces, to make it fit and finish it off.
“We weren’t expecting it to look quite as good as it does. We thought it would be a little bit of an eyesore, but it came out really good. We’re really happy with it.”
The tub, as it turned out, was the easy part of this build. The Patrolapart team was keen to up the grunt factor on what was – when they first got hold of it – a stock-standard 3.0TD Patrol. Not an earth-shaking powerplant by any means, but the guys had the perfect solution: a 325-horsepower (242kW) 827Nm Cummins 5.9-litre turbo-diesel six-cylinder engine, the powerplant they knew would resolve any power and performance issues for the Nissan workhorse.
The engine is the ISB variant – the second generation of the popular American diesel – and it is also one of the physically largest straight-six diesel engines on the market. Even allowing for the Patrol’s voluminous engine bay, it was a time-consuming and tricky path to ensure the Cummins could be shoehorned inside – it really is a monster – with a lot of component shuffling.
“Everything needed relocating,” Guy laughs. “All sorts of different bracketry had to be shifted around and we had to play with everything under there. It was a pretty massive job and a really tight squeeze in there.”
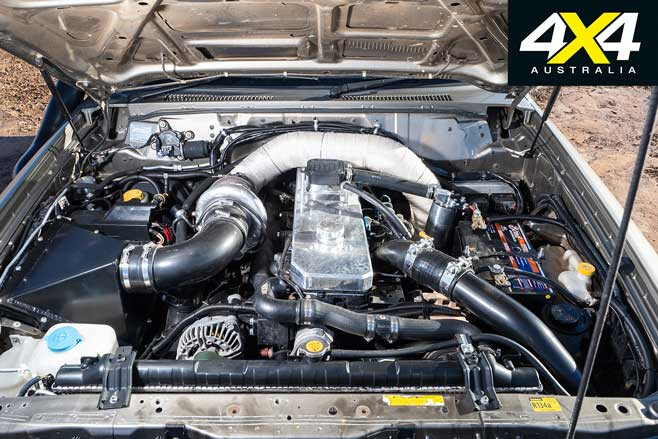
The stock Patrol radiator stayed, and backing the big mill at the moment is a stock GU Patrol five-speed manual gearbox; but the Patrolapart team has plans to slot in an Albins five-speed as a replacement.
Adding extra air to the big Cummins is a custom Fusion Fabrications four-inch stainless steel snorkel, with gases expelled via a custom exhaust. Fuel is pumped through effectively thanks to an AirDog II-4G fuel pump, which is a common fitment to Cummins engines. This pump is claimed to improve the fuel burn as it enters an engine’s cylinder courtesy of its patented air-separation system, which helps eliminate fuel spray pattern disruption that can be caused by air entering the system.
Sensible decision pay off
WHEN the Patrolapart team first decided to do this build, an after-hours project was in mind. Not only did that extend the time taken, but it also allowed for some parts that weren’t initially available for the engine conversion to become so. It also allowed them to focus on ensuring the vehicle fulfilled its role as a great promotional vehicle for the business.
To this end, they were determined to make the vehicle seem ‘attainable’ in terms of the mods done, and they focused on ensuring nothing was too extreme in the build. After all, it not only had to look good at the business premises, it also needed to be seen out and about doing the job.
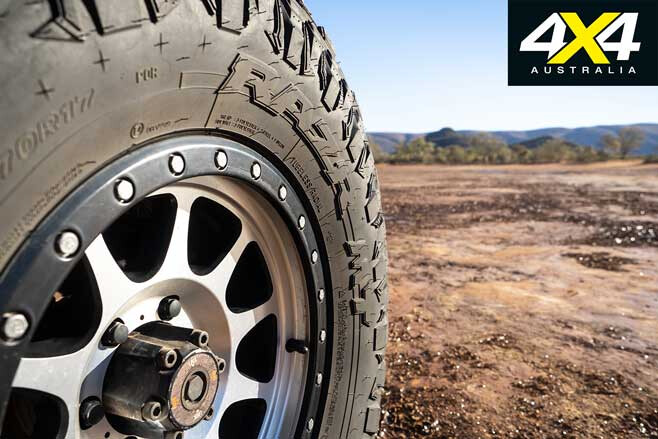
This common sense, subtle approach is evident in the Patrol’s suspension setup. It’s nothing fancy or over the top, it’s just designed to get the job done and with consistent reliability. The KONI dampers and Ridepro springs offer a three-inch lift and combine with heavy duty control arms and Patrolapart’s own beefed-up swaybar links. Adding more ground clearance is a set of 17-inch alloys shod with Maxxis RAZR LT315/70 R17 rubber.
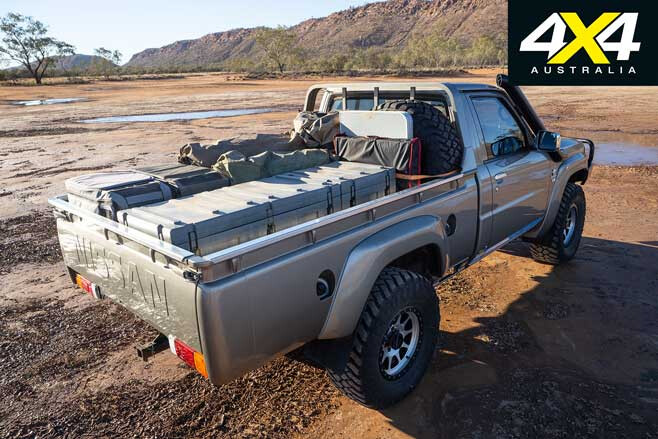
Cummins diesel engines can be pushed to punch out even more serious grunt than stock, but the team just went with a ‘base tune’ and has reaped the overall performance benefits as a result. This includes a very impressive 14 to 15L/100km on Guy’s recent trip to the Finke Desert Race in the NT. With its twin 90L fuel tanks (accessed via the two factory-fit fuel fillers on the driver’s side of the tub), those figures mean the big rig gets more than decent touring range on top of the extra performance.
Centre of attention
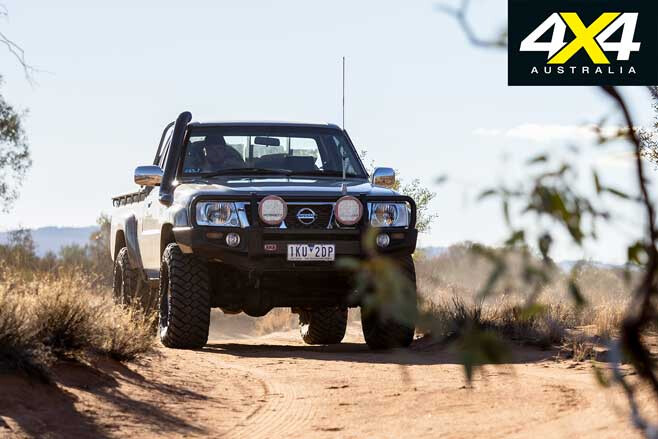
ONE OF the most appealing things with this Patrol ute is its purposeful yet understated appearance, with only the rear tub catching the eye of fellow tourers – something Guy experienced plenty of when he took the Patrol to Finke. “It got a lot of attention,” he laughs. “We’d pull up somewhere and everyone wanted photos of it.”
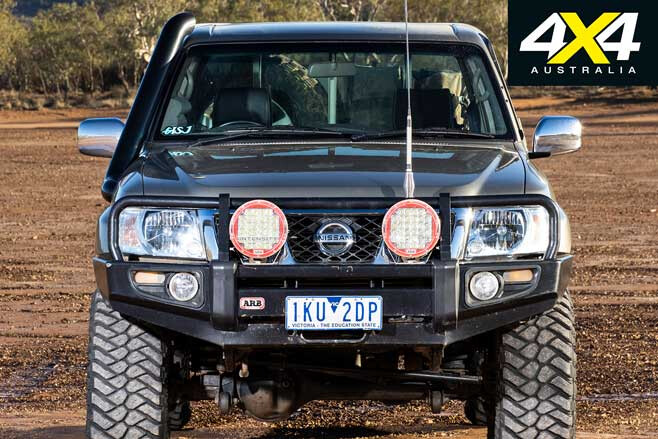
The low-profile appearance is, again, thanks to the smart and subtle approach, with only a few visible external additions such as the ARB bullbar fitted with ARB Intensity lights that hint at this rig’s capability. There are no front or rear lockers, instead the Patrol does with its rear LSD and all that on-tap articulation.
The interior, on the other hand, has benefitted from Guy’s decision to retrofit a late-GU Patrol interior, to replace the drab grey plastic of the original. The driver and passenger now enjoy the comforts of full powered leather seats and a full leather trim interior.
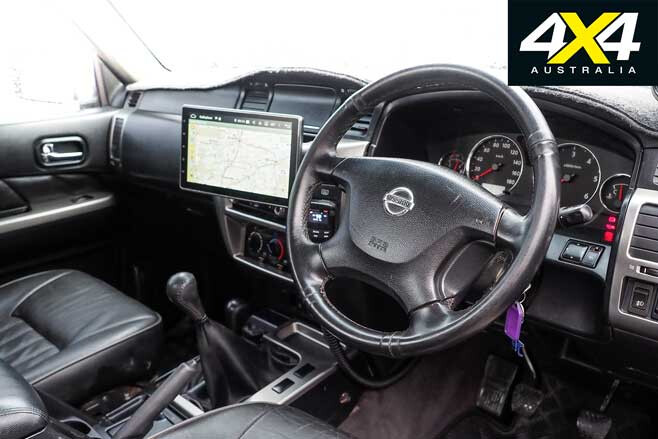
Also added inside is a Polaris head unit that has OzExplorer and Hema navigation software fitted and – for essential bush comms – a new GME XRS UHF radio. Keeping all the electricals humming along – and allowing for those longer trips away when a fridge/freezer and plenty of gear is onboard – the Patrolapart team fitted a dual-battery system in that spacious rear tub tray.
Since the Patrol has been out and about in public – and perhaps, not surprisingly – the rear tub has caused a small commotion, with a number of Patrol ute owners asking how and where they can get it from, as well as asking about the trim upgrade.

Of course, there’s also plenty of interest in the engine transplant, which isn’t surprising. As Guy states, “those Cummins engines are bulletproof” – and he’s spot-on. Add that rugged powerplant to what has always been considered one of the toughest touring vehicles around, in the form of the Patrol, and any potential customers would be guaranteed an awesome return on investment. The end result after throwing down some dosh is a super-reliable, tough and powerful tourer that is be more than capable of taking you to the ends of the earth and back again.
NARVA Australia recently added new products to its aftermarket catalogue. Here we’ve taken a closer look at the brand’s heavy duty RV USB flush-mount sockets, as well as its multi-colour ALS head torch.
HEAVY DUTY RV USB FLUSH-MOUNT SOCKETS
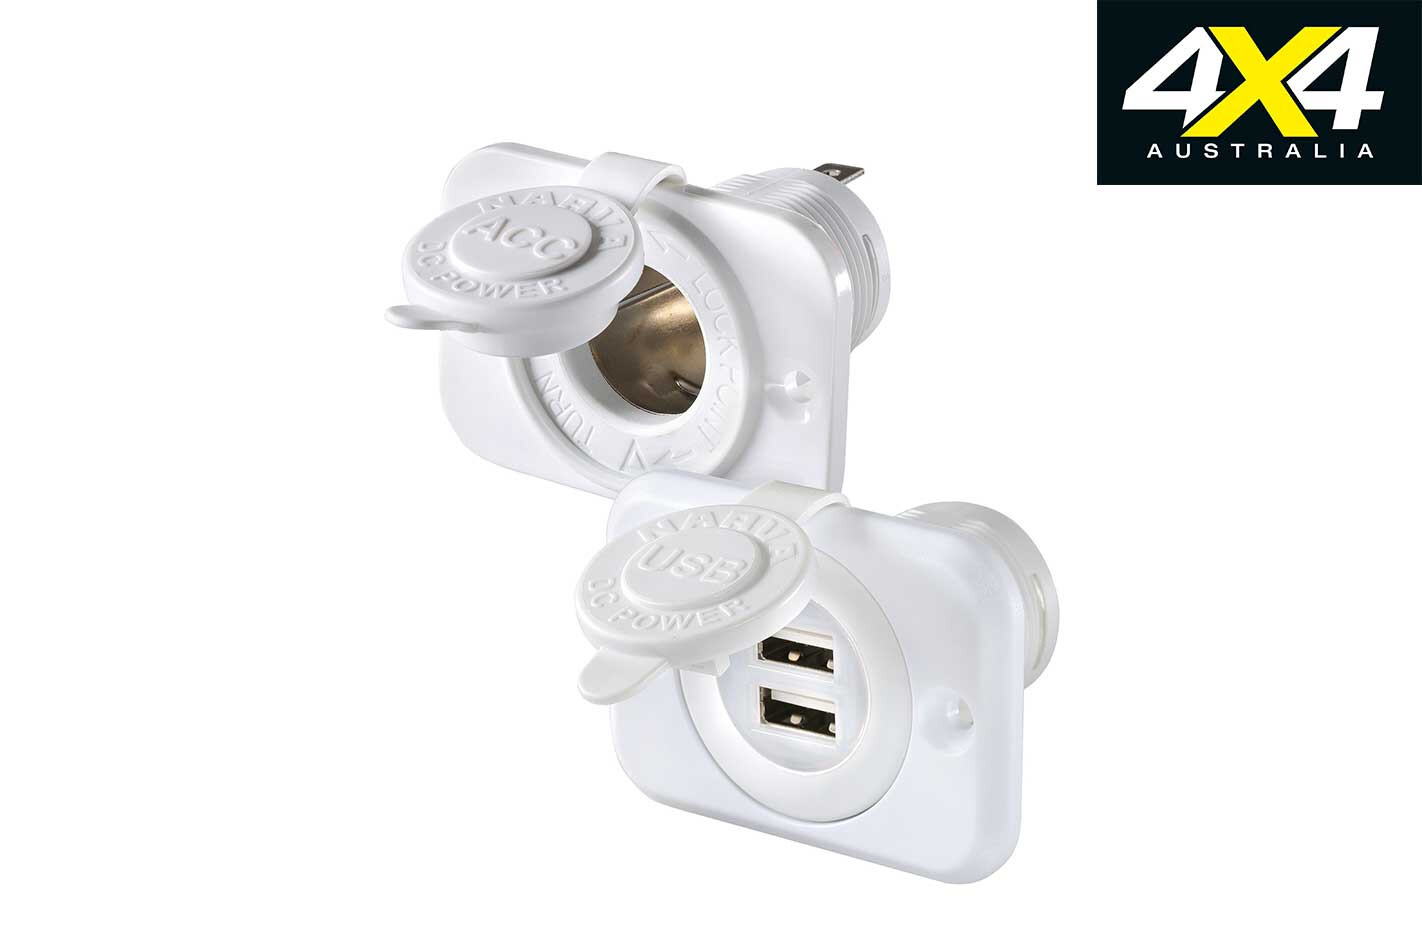
Narva has increased its already impressive range of heavy duty RV (HDRV) products with its new accessory and dual USB flush-mounted sockets. The sockets offer a tough hard-plastic construction and are perfect for either external or internal fitment to marine and RV applications.
Both models include a dustproof cover to protect the socket and also feature a surface-mount plastic housing. You have the option of installing the socket with and/or without the mount, depending on whether you want a flush factory appearance or not.
Available in either black or white, 20Amp at 12V and 10A at 24V, with the USB socket offering a 5V output at 2.5A, with the assurance of reliable safety and performance when charging/recharging accessories and devices when you’re touring. The HDRV range is built for the task of daily operation and, thus, long-term performance.
MULTI-COLOUR ALS HEAD TORCH
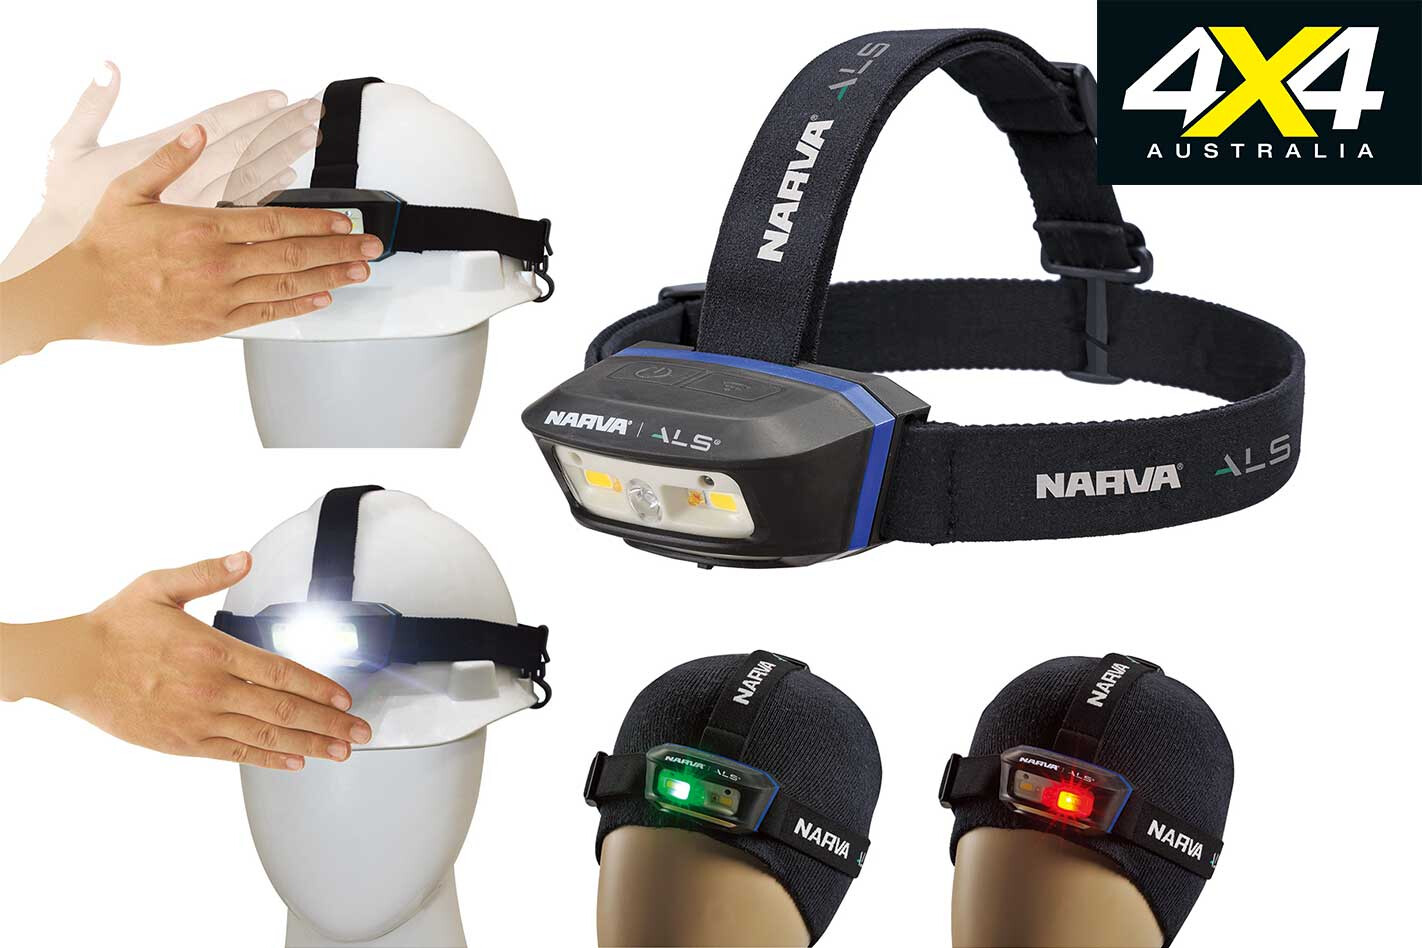
Narva has added a new multi-function rechargeable head torch to its ALS (Advanced Lighting Systems) range with powerful white, green and red LED light outputs. The head torch features two COB (chip on board) LEDs that produce a claimed 180 Lumens on flood beam with a 120° beam angle.
A secondary arc shaped COB LED provides the option of a lower intensity (120 Lumens) flood beam, while a spotlight function provides 150 Lumens and is claimed to illuminate objects up to 60m away. The red and green light outputs add functionality; Narva says the green light is suited to navigating and map reading in the dark as it provides good illumination without causing the user to lose their night vision, while the red light is ideal for close-quarters camping as it’s less likely to disturb neighbouring campers.
The lamp component is magnetised and can be easily removed from the fully-adjustable helmet clip headband and used as a handheld torch. Other features include motion activation, a glow in the dark locator, brightness memory, IP65 dust and water resistance and an included 240V USB charging lead. Oh, and it’s covered by a two-year warranty.
RRP: $179 More information: www.narva.com.au
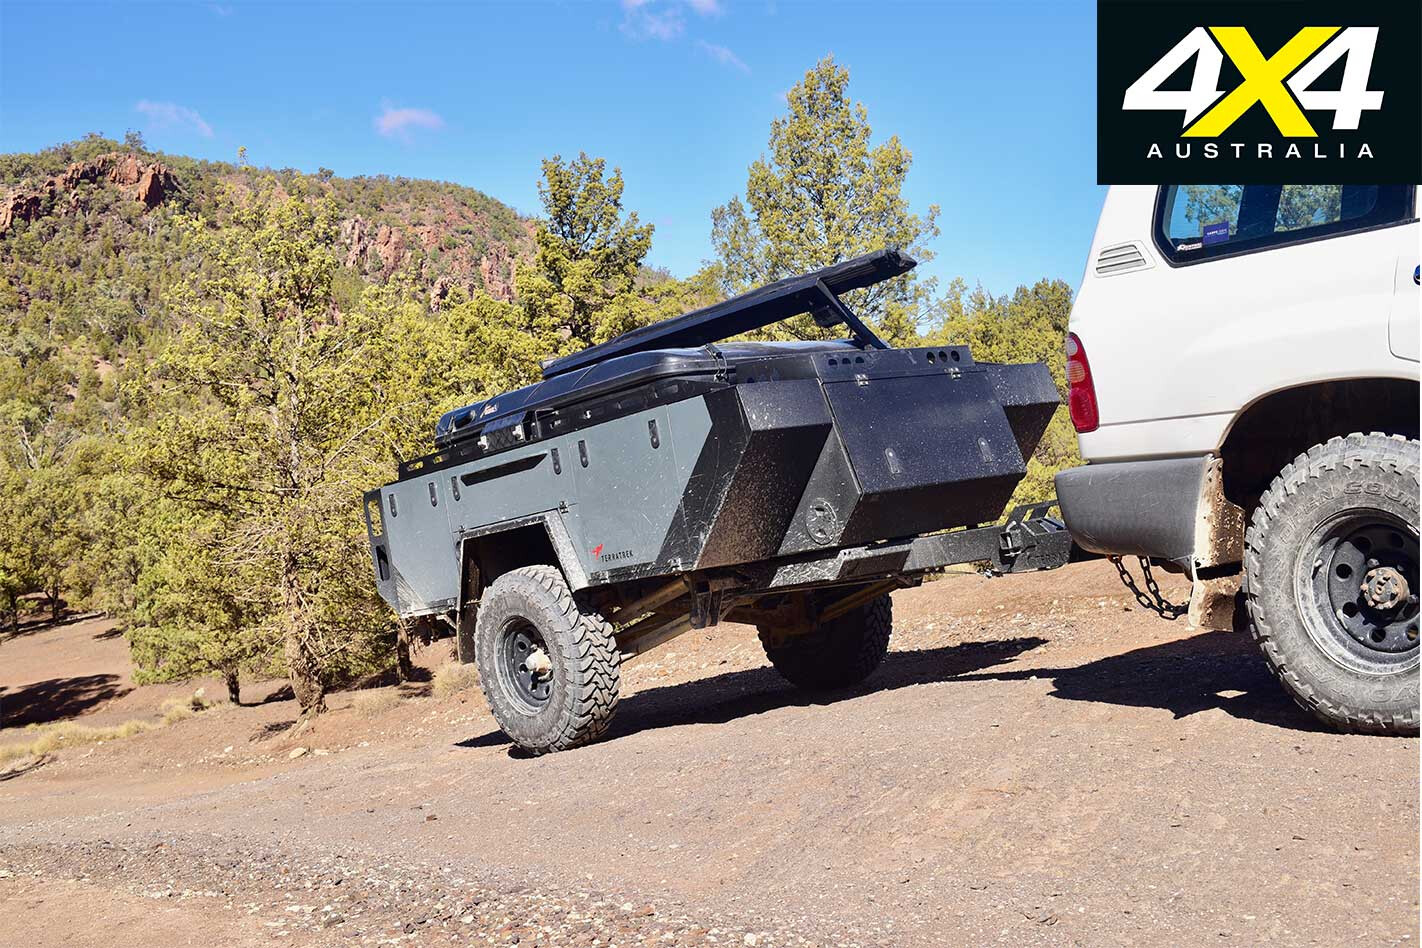
WE WERE in the Flinders Ranges on some of my favourite outback tracks, towing a new camper trailer behind a non-turbo-diesel Cruiser. We were looking for steep country or rough creek crossings that’d put the camper to the test, but we couldn’t find anything rough enough to stretch the limit of the Terra Trek Expedition camper we were hauling.
Terra Trek Australia (TTA) is an Australian company based in Murray Bridge, South Australia, with a background in geological mapping and professional touring and guiding in Outback Australia. They know a thing or two about what makes a good, tough and capable trailer, as well as the features any trailer needs to survive long-term expeditions in the backblocks of the country.
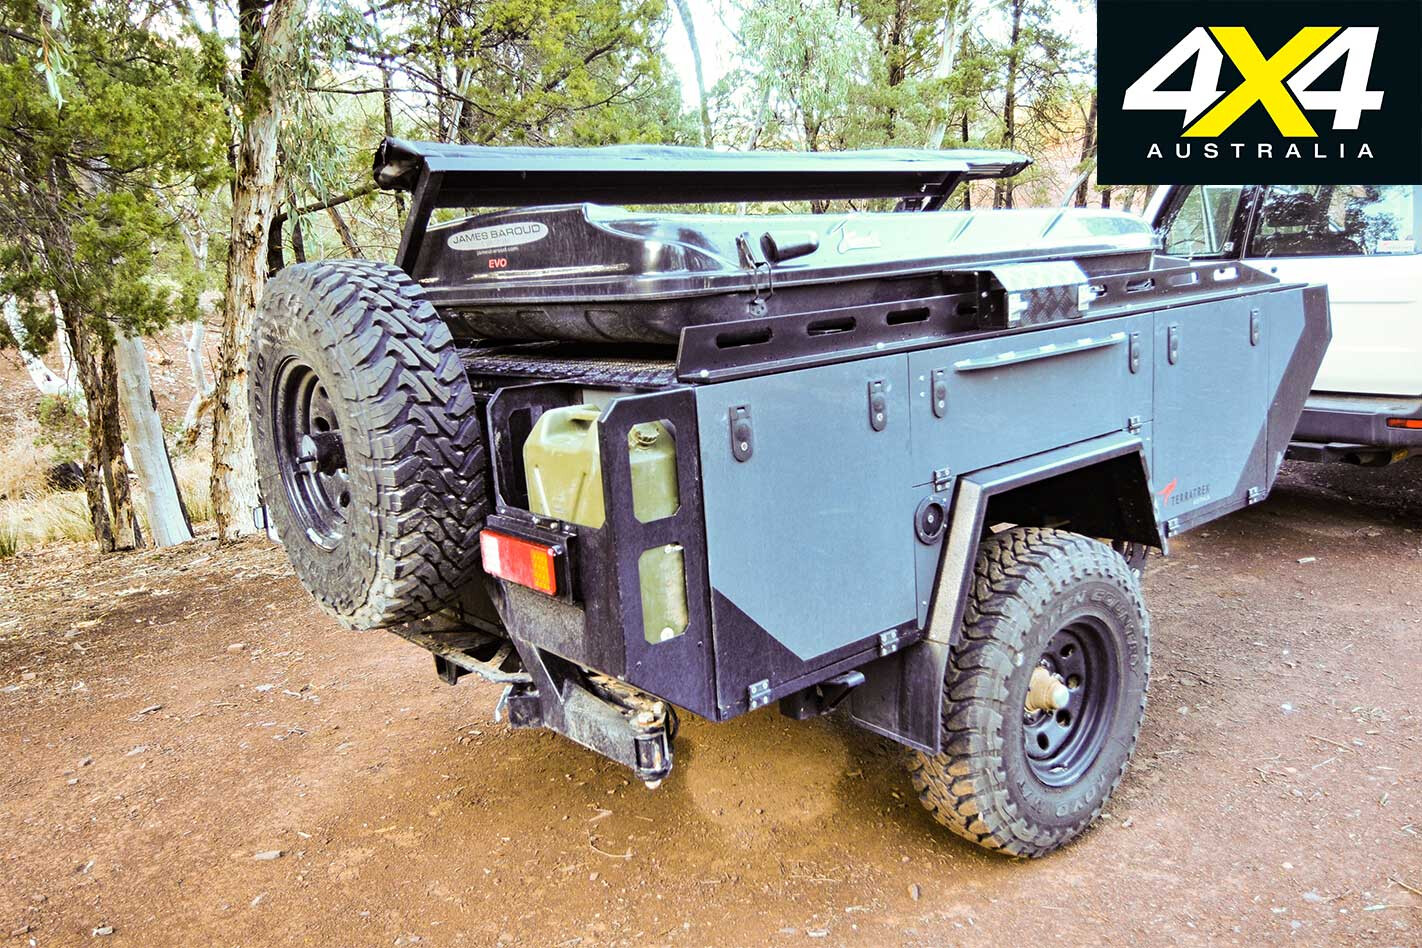
Designed and manufactured in Australia, the Terra Trek Expedition camper was created for seriously remote travel, exuding outstanding off-road capability while offering a quick and easy kitchen set-up and a mammoth amount of storage.
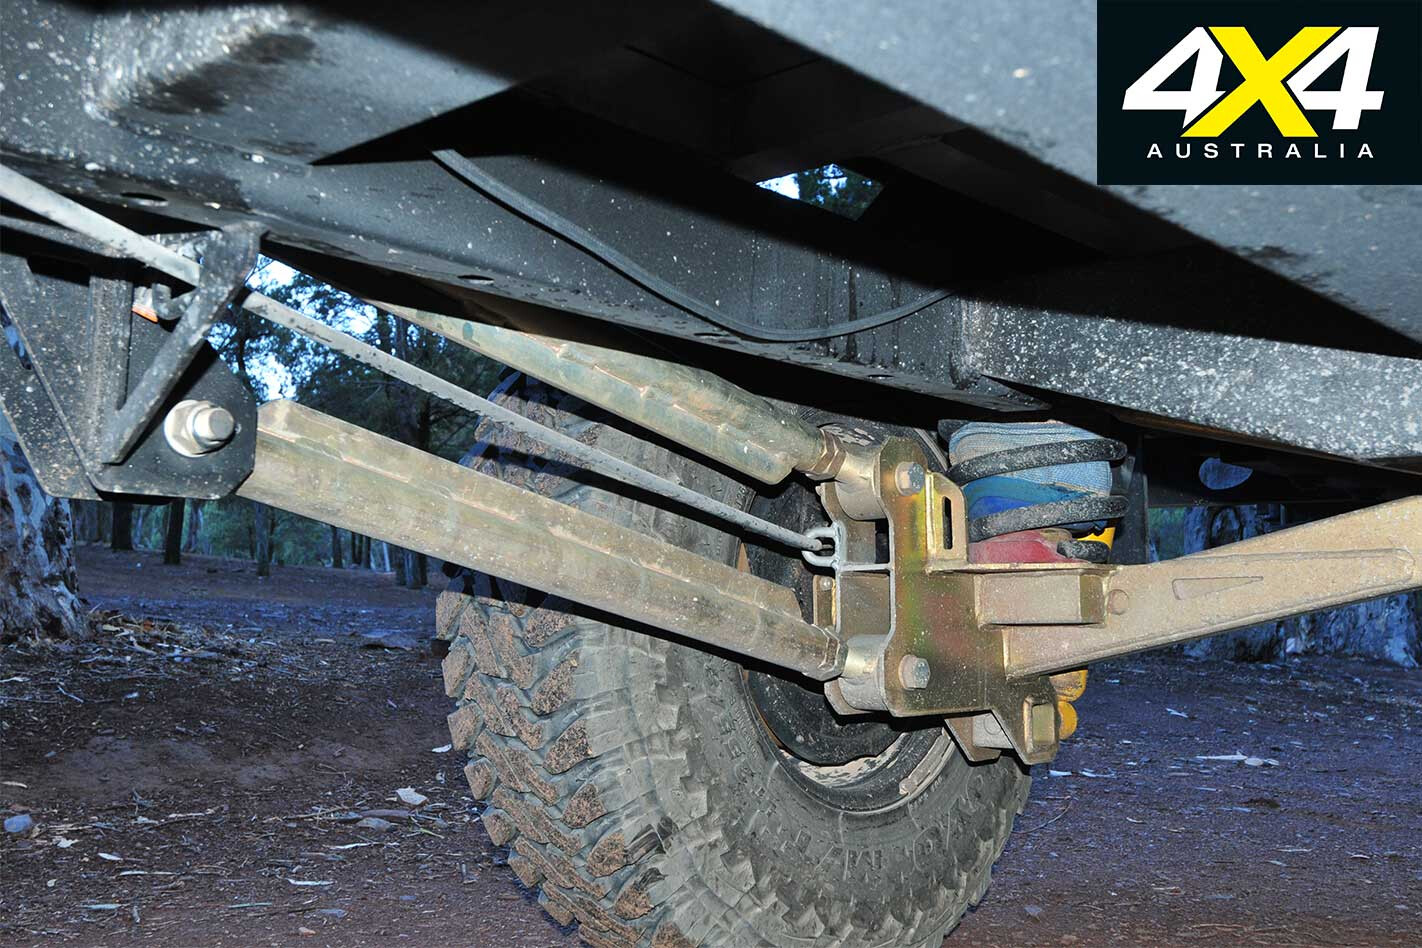
Built on a tough, laser-cut RHS, military-style, fully galvanised chassis with a single-beam draw bar with grab handles, it sits on a swing-arm, independent long-travel suspension with Superior Engineering adjustable parallel control arms using Land Cruiser bushes, all backed up by OME coil springs and shocks. Airbag helper springs complete with airlines for external pump up, are also standard. You can option this up to OME BP-51 shocks and/or an Airbag onboard kit for inflation or deflation of the airbags. Needing more, you can add an ARB twin-compressor setup.
There’s a Cruisemaster DO35 tow hitch, heavy-duty jockey wheel, Dexter 12-inch electric brakes with heavy-duty bearing kit, and 16×8-inch steel rims topped with 285/75R16 Toyo Open Country MT tyres. The spare wheel can be carried on an optional chassis-mounted swing-away carrier, complete with gas strut to keep it under control. There are also two fully rated Hi-Lift jacking points and a rear hitch recovery point built into the chassis as standard.
The fully floating alloy body is 2mm or 3mm thick and is fully painted inside and out with automotive two-pack paint of your choosing. All the doors feature top-quality latches, gas struts, hinges and rubber seals, while there are two dedicated jerrycan holders down the back end and two lockers up front that each hold 4.5kg gas cylinders. A 150-litre inboard stainless steel water tank comes as standard fare.
The stainless steel slide-out kitchen features a large work area and has a built-in sink and mixer tap, with the cold water plumbed to the tap and the hot water plumbed ready for the optional gas water heater. Instead of a built-in cooker or hot plate, the Terra Trek comes with a more flexible and heat-producing Coleman HyperFlame FyreKnight stove. We use this style of stove regularly and they’re damn good.
Above the kitchen bench is a 40-litre Evakool drawer-type fridge, while beside the bench is a cutlery drawer along with massive pantry drawers. On the far side of our test rig we had an ARB Elements fridge/freezer, while this side of the camper features another huge storage area. A Supa-Peg 2.5m x 2.5m awning covers the kitchen area if and when required.
There is a choice of tents, with either Terra Trek’s custom-made unit or, as was fitted to the test rig, a James Baroud Evasion hard-shell tent. These are one of the very best hard-shell campers around and are quick and easy to erect and collapse. If desired, the rooftop tents can be replaced by a boat rack that can carry tinnies up to 3.9m long. You’ve got even more storage at the back in the centre of the camper to carry tents and/or an outboard motor. In fact, you have a mammoth 2400 litres of storage space.

As we have come to expect from the top-of-the-line campers on the Australian market, there is a host of electronic goodies. While our test rig had an impressive setup, all future TTA models will have Redarc BMS and TVMS units with 120amp/h AGM included in the price. Additional batteries and lithium upgrades are also available, and all have inputs for solar power.
There are eight switchable LED cabin lights, two USB charging points, water-monitoring gauges and circuit breakers, along with Anderson plug points for fridges and the like. There’s a host of other features and small details too long to be detailed here, but they’re the result of years of outback travel and they work in remote places.
On the road the camper towed effortlessly behind the tow rig and, weighing in at just 990kg, would be easily towed by any of the dual-cabs on the market. With a payload of 810kg you can easily carry extra fuel or water for those long outback expeditions, which this trailer would be ideally situated for. Adding to the favourable weight characteristics of the Terra Trek Expedition is the overall compactness of the camper. Just 4.1m long from tow hitch to jerrycan holders, and with a width of 1.82m, it will sit snugly behind any of the dual-cab rigs on the Australian market.

Its relative short towbar – just 2.65m from coupling to the centre line of the axle – makes the trailer follow extremely closely to the track of the tow vehicle, no matter how tight the turns become. In regards to the single-beam drawbar used instead of the more normal A-frame you find on most trailers; you can pull a tight turn with this setup and nearly jack-knife the trailer at 90 degrees to the tow vehicle, without any trouble or binding of trailer metal on tow-vehicle metal.
There are very few suspension systems around that perform as well or as comfortably as this swing-arm setup that’s reminiscent of another Aussie-made award-winning suspension system, albeit with some significant changes. This allows the trailer to glide over severe corrugations or through the nastiest of washouts with ease and comfort, and it keeps the wheels in contact with Mother Earth in the most severe off-road conditions.
Once at your favoured destination, everything in the trailer is easy to get to and easy and quick to set up. I particularly like the use of the Coleman camping stove, which gives it a flexibility most camper-trailer stoves don’t have. The fitment of the drawer-type fridge close to the kitchen area also works extremely well.
The camper with its standard inclusions costs $44,990, while the options we had – a change of tyres, the spare-tyre carrier, a lithium battery upgrade, an ARB fridge and an MSA 60-litre fridge slide – added another $4700, taking the all-up cost to just less than $50K.
That may seem a lot for an expedition trailer, but not for one as capable, tough and everlasting as this unit. Made in Australia from the very best material with the best features and options, it will travel behind you with ease and for many years of hard outback abuse. I love it.
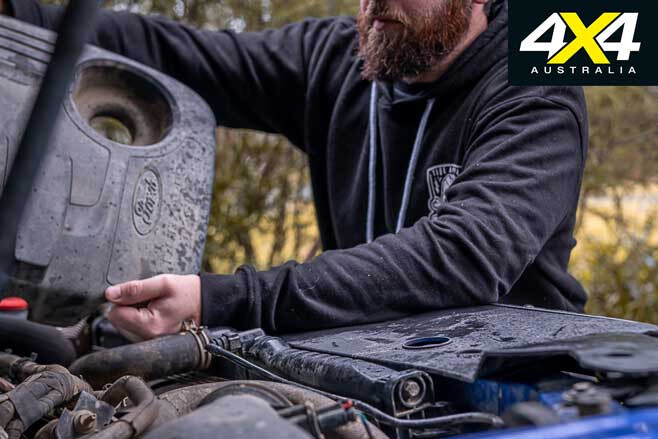
ROLLING the 4WD into the shed, popping the bonnet and laying out the hand tools is a sure-fire sign you’re in for a day of Man versus Machine: fighting against your pride and joy to make it do something it’s never done before and, in many cases, something it was never designed to do in the first place. Despite the seemingly endless amount of money manufacturers pour into the R&D of late-model 4x4s, the reality is they very rarely get things exactly right.
So, in the ever-pressing matter of making diesel 4x4s meet restrictive emissions laws, manufacturers are constantly looking at means to drop all sorts of pollutants, and the results aren’t always pretty. We’ll be going through the ins and outs of carbon build-up and how it affects your 4×4 and run through a step-by-step guide on how to get your engine breathing freely again and ensure it stays that way.
TWO’S A CROWD
THERE’S a variety of things spewing out your exhaust, and each one requires a different approach to minimise the harmful effects. You remember major cities being under a constant haze of smog through to the 1990s? It’s caused in no small part by NOx, a catch-all phrase for the various oxides of nitrogen that combustion engines produce as a by-product.
They’re relatively easy to fix, though, by slightly lowering the combustion temperatures below the point where NOx can form. A few decades ago manufacturers figured out that by rerouting a small proportion of spent exhaust gases back into the intake, the inert gases would replace a small amount of oxygen; just enough to drop intake temps and stop the vehicle producing smog. The reduction in power was negligible and the effects on air quality massive. The only real downside is the fine exhaust particles would apply a thin coat of carbon on the intake.
A completely unrelated issue inside an internal combustion engine was the small amount of oxygen that can squeeze past the piston rings on compression cycles, which pressurised the engine block and forced oil out past the seals.
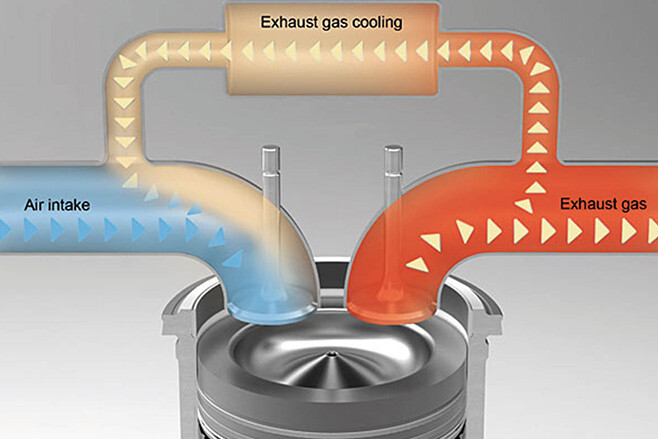
Originally, it was just accepted that engines would leak some amount of oil. Adding a breather to the top would stop the seals blowing out but redirect the oil-air mixture through the engine bay. When engines needed to operate underwater, a closed system was introduced that’d take the oil-air mixture and plumb it back into the intake. The only real negative was a thin film of oil on the inlet.
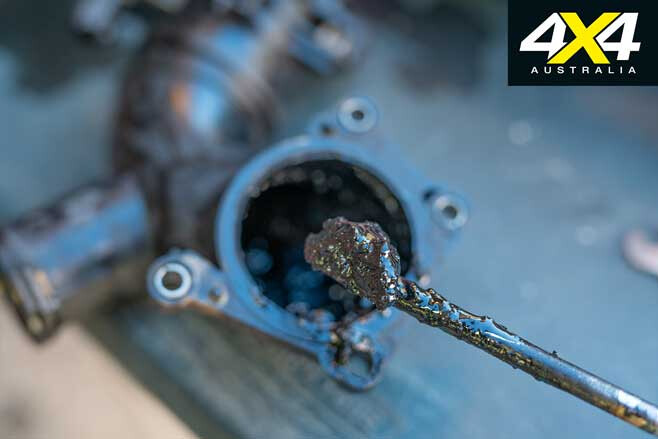
The problem is, when the two combine they turn to sludge; thick, cancerous, caked-on sludge. Sludge so thick it can take the better part of a weekend just to get it out. Let’s begin.
Step 1
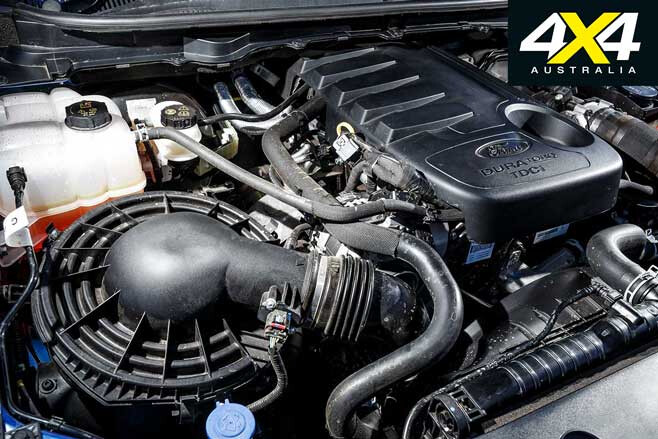
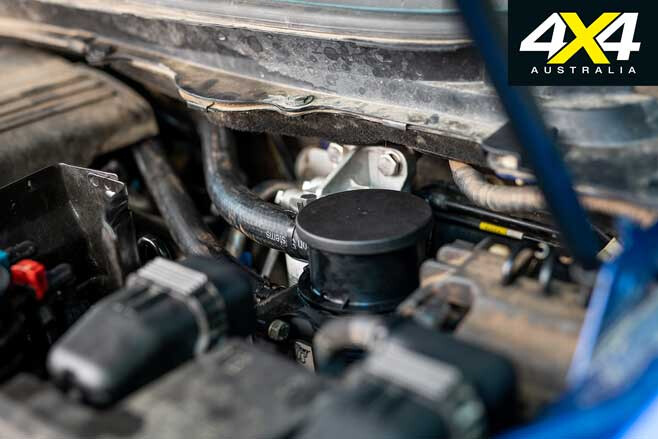
BEFORE we could even begin accessing the intake side of our engine, we needed to ascertain exactly where the exhaust gases and blow-by would meet. The blow-by is easily identifiable by looking for a hose running from the top of the engine cover to the air-intake system somewhere.
On our 2016 Ford Ranger the hose ran to just behind the air-box, meaning anything between that hose and the cylinder head would be covered in oil. From here we located the exhaust gas recirculation system; a steel pipe running behind the head, through a cooler and into the intake was what we were looking for. At this point the two pollutants would meet and our problems would begin.
Step 2
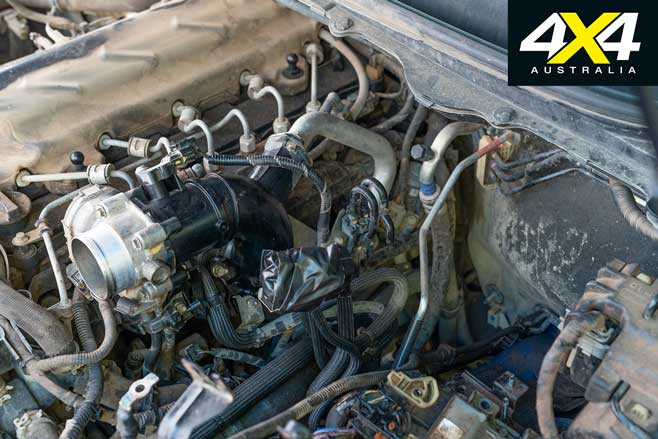
MODERN 4x4s have a lot of stuff crammed in the engine bay. It means accessing anything more complicated than the oil cap becomes an operation of military complexity. After identifying exactly what we’d need to remove, we needed to actually get access. Rather than risking snapping vulnerable plastic components we instead removed nearly everything from the intake side of the engine bay.
This necessitated removal of the battery and fuel filter system. In typical fashion the fuel filter bracketry was held on beneath the fuse box and ECU, turning a quick job into a few hours of swearing and busted knuckles. If it was easy everyone would do it, right?
Step 3
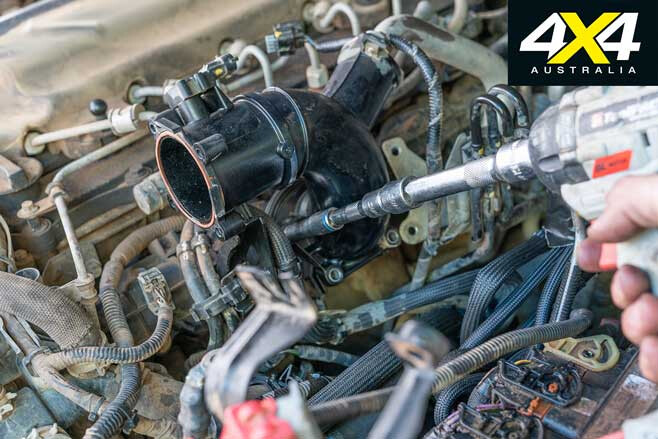
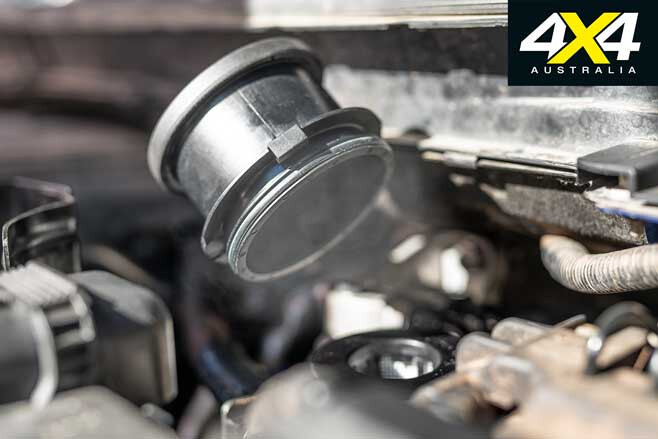
ONCE we’d given ourselves access, we needed to remove the affected components. As you can see here where the two meet, the otherwise harmless build-ups combine drastically and reduce the volume of air you can move through the intake, and reduce power in the process.
In our case, the affected pieces were relatively simple. A small section of piping, the throttle body and the intake manifold itself would need to be removed. To completely remove the intake manifold we also needed to remove the EGR pipe. Ours used Torx drives, so ensure you’ve got the right tools before you start pulling things apart.
Step 4
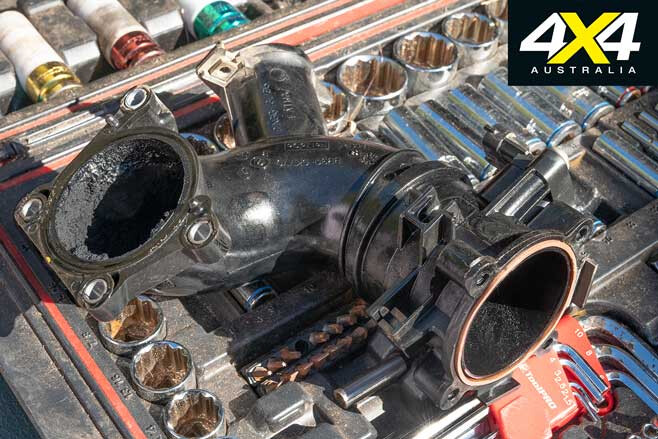
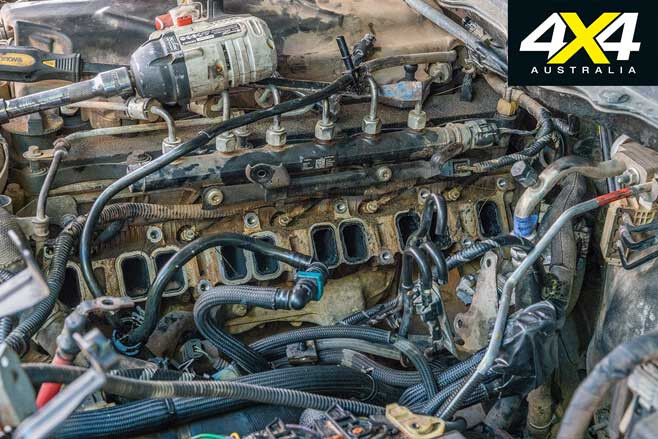
PERFORMANCE guys familiar with the benefits of porting and polishing heads for improved airflow would be cringing at these images. Just 5mm around the edge of a 100mm intake pipe is a huge 19 per cent restriction on area and, as a direct result, how much air can be pushed through the engine.
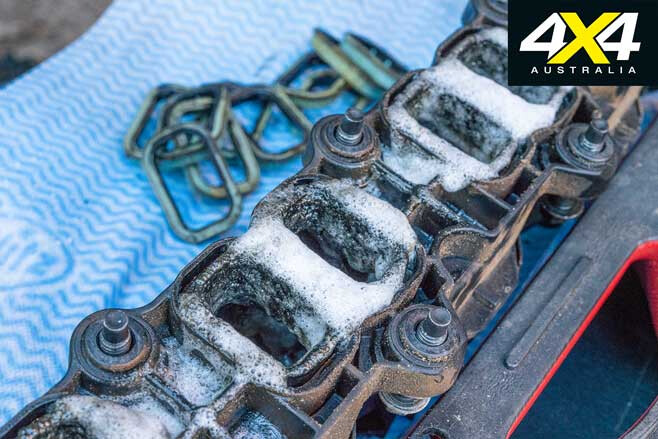
There are a few techniques people recommend to remove the carbon build-up, and we figured we’d start with the old housewives tale of oven cleaner. We weren’t allowed in the kitchen so instead settled for a camp table in the driveway and a few cans of oven cleaner liberated from inside the house.
After soaking the insides of the intake manifold for hours we headed inside to congratulate ourselves on a job well done, with plenty of celebratory beers and back-patting.
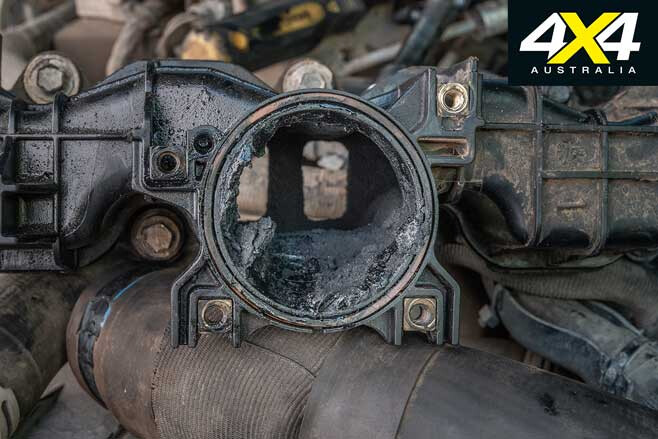
Step 5
WE WERE wrong. The oven cleaner, while somewhat effective at dissolving the carbon build-up, wasn’t anywhere near powerful enough to break it down to wash out. With just the surface of the build-up breaking down, and up to 10mm in some corners, we called in the heavy hitters. A spoon from the kitchen and an old toothbrush we probably won’t use again … maybe.
The next hour was spent scraping the now paste out of the manifolds, before a final soaking of oven cleaner was able to break up the remnants. If you’re doing this yourself, don a pair of rubber gloves and dig in with a spoon beforehand. Solvents are best used as a final clean rather than tackling the full build-up.
Step 6
WITH the dreaded carbon build-up cleaned out of the intake system, simply reverse the process to reinstall the individual components. Most cold-side gaskets in modern 4x4s are reusable so won’t need replacing. If your gasket has swollen since removal, boiling water can be used to temporarily shrink them enough for reinstallation.
For the science nerds at home doubting this, the long chains of molecules in rubber react different to most others, contracting and tensing when heat is applied and relaxing and expanding when cooled.
Step 7
WITH everything reinstalled, prime the fuel system two to three times before firing it up. Air bubbles can form in lines if you’ve had to remove them to gain access to the manifold, and they’ll need to be pushed through. If you’ve done a thorough job of removing the contaminants your engine should spring into life spritelier than ever.
Ours not only immediately had noticeably better acceleration off the line, it also pulled harder at speed with the restrictions gone. We’ve even picked up a 1.2L/100km fuel saving, too, showing just how much the clogged inlet was choking things up.
Step 8
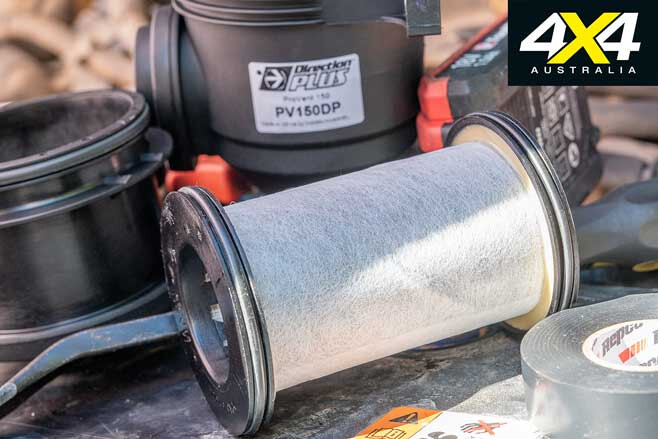
BEFORE we could get started with the nitty gritty we needed to find where the catch can was going to live. We went for a twin kit from Direction Plus that included a ProVent 150 catch can as well as a secondary fuel filter that’d alert us to any water contamination.
The arrangement filled essentially the only free space left, so look at options available for your 4×4. Typically kits will provide the most efficient system, but if you’re driving a 1973 Lada Niva you may need a generic kit and a bunch of cable ties.
Step 9
WITH the catch can mounted securely in place, the positive pressure line from the top of the engine was tapped into, routed around the back of the head and plumbed into the catch can. From here, the oil-misted air runs through a cartridge filter that separates the oil, before depositing it into the internal sump of the can.
Step 10
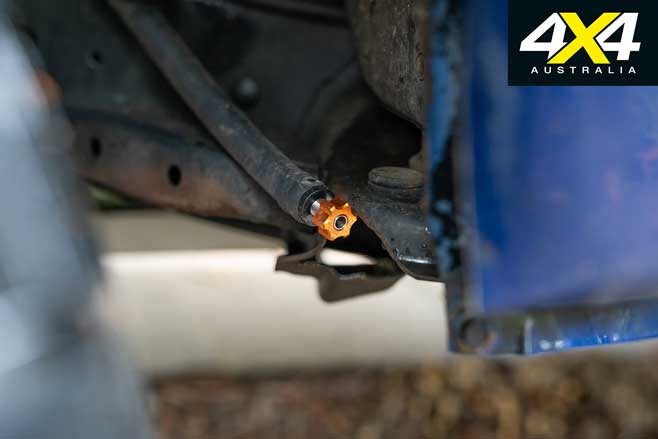
OF COURSE, that oil needs to go somewhere and can’t build up inside the catch can forever. Beneath the can is a length of hose with a tap on the end. We chose to run the hose down inside the passenger-side wheel-arch for easy access.
Every few thousand kays it’s as simple as pulling the hose out of the frame rail, opening the tap and pointing the spent oil into a container. For those looking to complicate their lives, the drain can be plumbed into your engine’s sump for a closed system that requires nothing more than periodic filter changes.
Step 11
THE FINAL step of the catch can installation was to give the now oil-free pressurised air somewhere to go. We simply ran the included hose behind the head again, before tapping into the original line and back into the airbox. The crank case can now vent as required without causing any pollution issues, or allowing an easy path of ingress into the engine on river crossings. The EGR system is still in place to reduce smog emissions, and it now passes harmlessly through the engine without anything to sludge it up.
While this DIY job is relatively straightforward, it more serves as a reminder that a catch can should be one of the very first modifications made on a brand-new vehicle. The longer you’re running without one, the more digging you’ll need to do with a spoon.
FIXING THE ISSUE
WE BUILT up that level of carbon in a little over two years. Unless you’re a masochist, chances are you won’t be keen on repeating this process every couple of years. To ensure it was a one-and-done kind of affair, we set out to rectify the issue.
Option 1: disable the EGR system. The pros are, without carbon to catch on the oil, the intake would remain mostly clear. The cons are, it’s horrendously illegal, and if we all did it Australia would look like downtown Beijing thanks to air pollution.
Option 2: remove the oil by redirecting the factory breather into the chassis rails. Without oil to stick to, the carbon should pass through the intake and out the other side. The cons are, again, it’s illegal, and it’ll leave an oil stain wherever we travel. It can also potentially cause the engine to suck water in through the hose in deep river crossings.
The decision was pretty simple. A catch can is effectively a filter on the blow-by hose, catching the pressurised air and removing the oil mist to give the carbon nothing to stick to. It removes half of the ingredients needed to cake your intake manifold in crud.
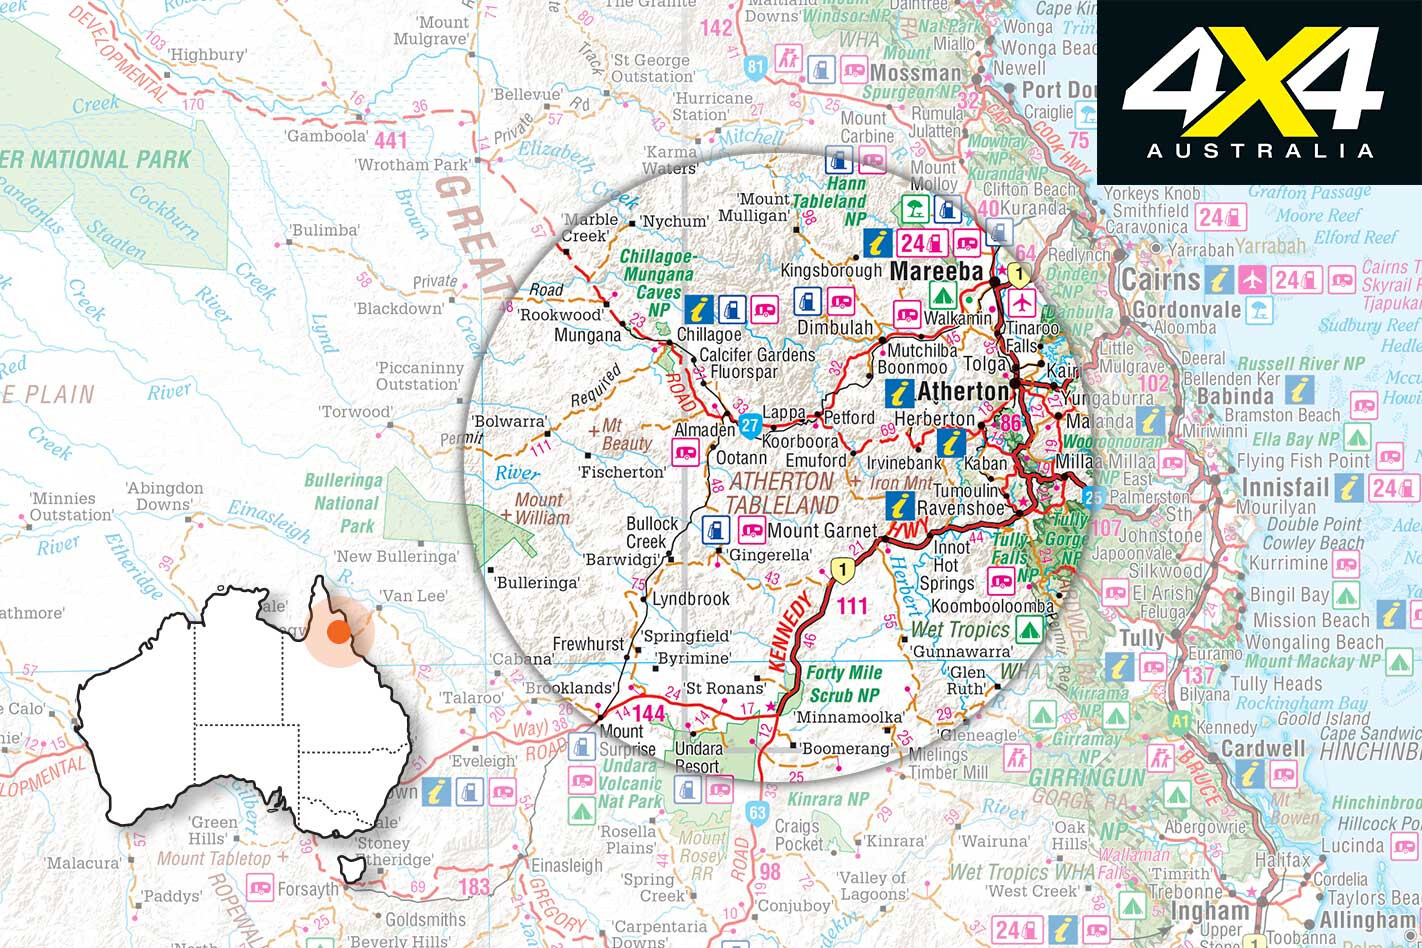
CAPE York Peninsula may be the popular choice, but there are a few amazing side tracks en route before you step into the Cape’s wilderness.
Many mining operations were active in the Great Dividing Range between Charters Towers and Palmer River to the north. While mining is ongoing, the vast majority of mines that opened from the 1870s are now closed; with mining being what it is, though, there is always something happening in one form or another.
Tracks leading to nowhere are a feature of this area; some are new and in use and others that end at abandoned mining shafts and forgotten ruins are now long-forgotten. Most are on private land and permission must be sought from local land owners before entering.
Bad things happen in this part of the country, like the vanishing of a prospector a few years ago on the lower Palmer River Goldfields. His body has not been found, but the former Palmerville station owners are doing time for murder.
There is also a saying in this country not to follow the PVC pipeline because some ‘farming’ practices are questionable… But don’t let this stop you from enjoying some of the finest wilderness tracks in North Queensland, though.
For example, Mount Surprise on the Savannah Way is noted for the amazing Undara National Park and its lava tubes. It’s not to be missed, as there is nothing else like it on the continent. It’s only a 40-minute detour to Undara via the Savannah Way from the Kennedy Developmental Road, just before entering Forty Mile Scrub NP.
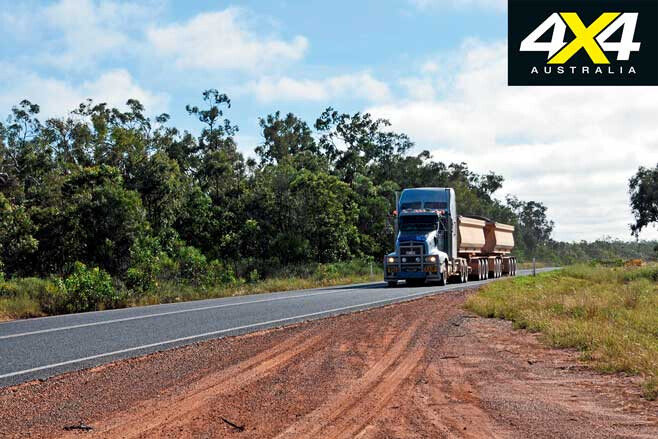
From Mount Surprise it’s a 160km trip to Almaden, located between Mareeba and Chillagoe on the Burke Development Road. The Mount Surprise link is an all-dirt road often used by 50m-long trucks north of the Tate River crossing, which haul ore or cattle from Chillagoe. It’s a true adventure drive that passes termite cities, rugged hills, stream crossings and open woodlands, via Lyndbrook Station.
A similar route from Mount Garnett to the Wheelbarrow Way is also popular with weekend explorers. Mount Garnett is noted for its hot springs, towering waterfalls – including Australia’s widest – and for being the gateway to Blencoe Falls on the stunning 4WD-only track to North Kennedy on the Bruce Highway, north of Cardwell.
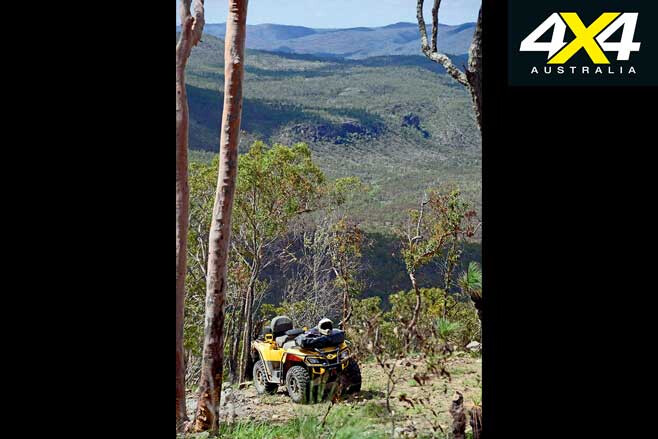
A couple of interesting routes deviate north from the Kennedy Road at Mount Garnett, and from Innot Hot Springs to Irvinebank and Herberton. Both tracks cut through cattle stations, and all gates must be left as found. There are several abandoned mines and an old town cemetery on the Mount Garnett-Irvinebank track. This is high country, with spectacular views, rugged landscapes, wonderful mountain vistas, and unique upland flora and fauna.
Another track leads from Innot Hot Springs, via Wild River Station and the Silver Valley Road to Herberton. Have a mud bath at the spring before enjoying a hearty lunch at the local pub. There are some interesting side tracks on this route; if it’s not posted you are not trespassing, unless you refuse to leave when asked to do so. In this region, with mining exploration ongoing, most tracks lead to mines and the volume of traffic on it will tell you whether it’s active.
In winter take plenty of warm bedding and clothing as heavy frosts and -0°C temperatures occur here, despite being in the tropics. Also, keep an eye open for high-voltage power lines as you near Herberton. A track follows the line and is used by local 4×4, quad and bike enthusiasts. It has some incredibly steep inclines and declines that are challenging.
Irvinebank
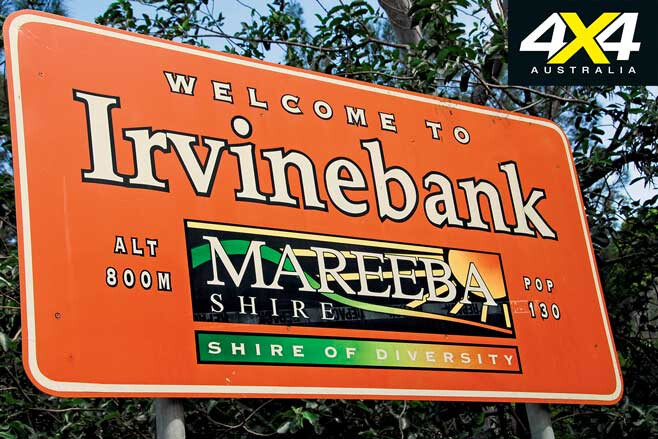
HERBERTON, situated at a 900m elevation, was the first settlement on the Atherton Tablelands. It’s an old town with many fine period buildings, historic walks and scenic views. It gets bitterly cold in winter and has a rich mining and farming history, as well as many attractions worth seeing.
Some 20km to the west is Irvinebank, a small and unique historic mining township … just don’t crash into the windmill in the middle of the road at Watsonville. If you’re looking for a nice place to relax for a drink and some comforts, check in at the Watsonville Rural Firefighters depot located eight kilometres north of the community. It has great campsites, weekend entertainment and hot showers. Plus, there’s a chance to hear tales of the wild old days from the locals.
Hard to believe when you see the village today, but in its heyday it was located on some of the richest copper and tin deposits in the country. It was first established as Gibbs Camp in 1882, but the name was changed by mining magnate John Moffat who owned the town, smelters, treatment plant and everyone else.

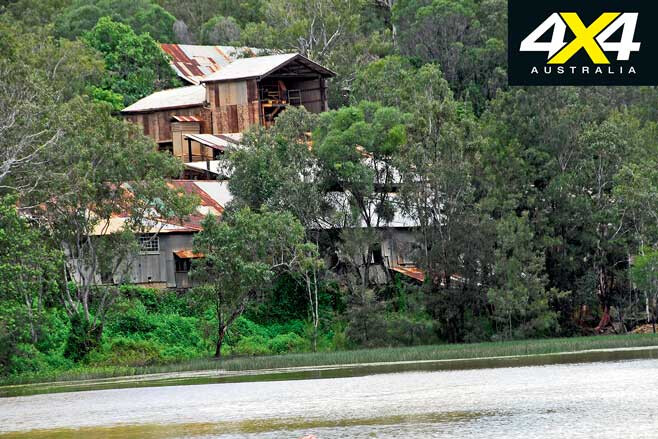
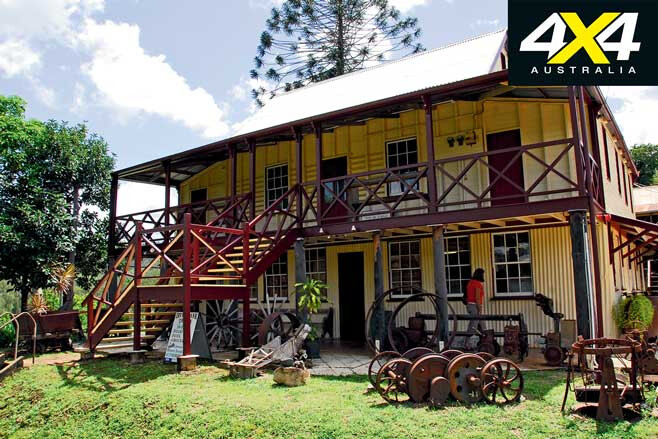
The remnants of the period still remain, with Moffat’s former home now being the Loudoun House Museum and Information Centre. It’s open every day in the dry season and well worth the effort. At the mill’s foot is a lovely lily-clad impoundment, while the retaining wall is made from timber.
The old Tramway Station is worth a look. Five trains carrying passengers, cargo and ore departed here daily for the Stannary Hills mine. Another nearby attraction is the Vulcan Hill Mine shaft frame, once the deepest mine (440m) in Australia. The Irvinebank Tavern has free camping and great meals.
Irvinebank’s sights include fine period-galvanised iron cottages, School of Arts Hall, Queensland National Bank, Tramway Station, Vulcan Mine, and the 1886 police station and courthouse. In fact, the whole village is a living museum of times past when men laboured in the mines or slaved at the Loudoun Mill treatment plant.
After work, most drank their hard-earned or gambled it away at the pubs. Fights and brawls were common, as many unionists were stand-over men who intimidated other workers for failing to join their cause.
Some of the smallest houses in the world are in Irvinebank, and people still live in them. It’s odd to see a humble, galvanised and iron-clad abode complete with a smoking wood-fired chimney having a Toyota Land Cruiser 200 parked in a garage that’s bigger than the house alongside it.
There are number of 4×4-only ring roads in the area that take you to abandoned mines and other places of interest. The area is ideal just after the wet season when all the rivers and creeks run, as they offer safe crocodile-free swimming and relaxing bush escapes.
Irvinebank was linked via the tram rail to Petford on the Wheelbarrow Way. It transported ore to the Chillagoe Smelters and coal from Mount Mulligan. The rail line is gone, but a good gravel scenic road links the village to Petford.
About 26km north is Emuford, a tin battery that remains intact. The owner has accrued an amazing collection of old mining engines, plants, memorabilia and more, but the problem is the owner is often absent. Phone John Fitzgerald on (07) 4094 8304 to see if he can show you one of the most intact tin batteries in Australia.
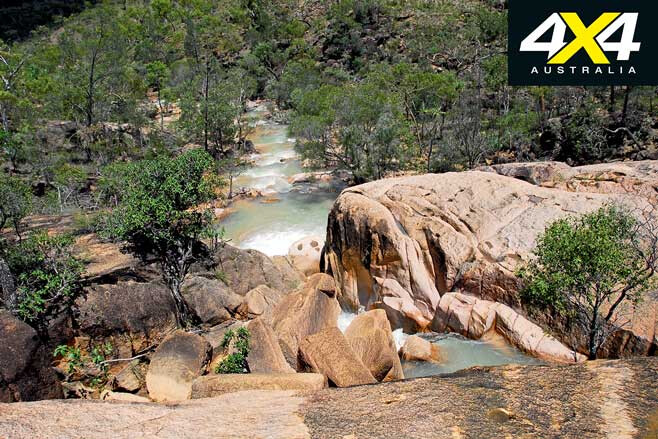
There’s a prospecting area not far past Emu Creek Bridge, with a lovely waterfall that runs for a few weeks after the Wet. It’s a nice spot to camp on the way, north or south. Petford, on the Wheelbarrow Way, is only “just up the road”.
If you want another excuse to do the Cape and want to see more of its unique wilderness, you can start by detouring from the highways well before you get there. A new adventure is waiting.
Know of any side tracks worth exploring in the Cape York area? Let us know in the comments section below.
IF I HAVE seen further, it’s only by standing on the shoulders of giants.” It’s a concept that’s been thrown around for centuries now, and it raises the idea that no man or woman alone is responsible for everything they’ve achieved.
Instead, they’re given a head start by the people who built the foundations. Neil Armstrong wouldn’t have put a foot on the moon without the Wright brothers first taking flight; Land Cruisers wouldn’t exist without the original Jeeps; and just about every popular modification on your 4×4 wouldn’t exist without the people willing to experiment and lay the groundwork.
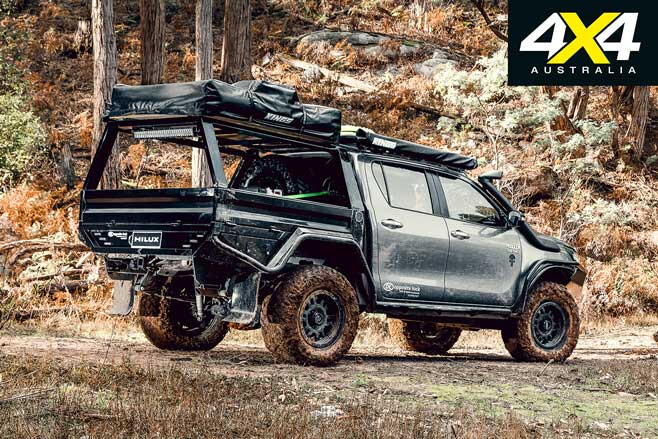
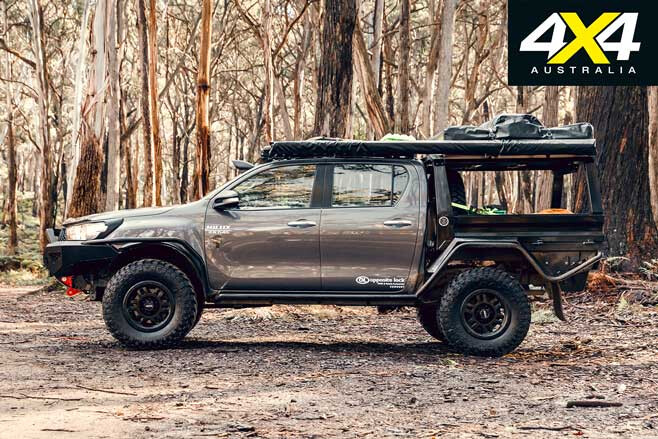
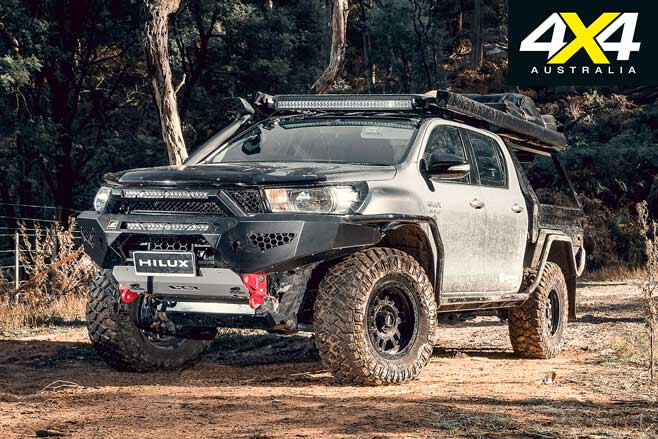
Max, the bloke who owns the one-of-a-kind N80 Hilux you’re ogling, now falls smack-bang in the middle of the pile of giants. Over the last 15 odd years he’s earned himself a reputation of being the first to roll up his sleeves and figure things out, helping create the methods that people replicate on their own 4x4s for years later.
As a result, when the time came to step up from his wild N70 Hilux into the new N80 platform, Max, and a bunch of industry contacts he’s made over the years, were all too ready to get to work.
Like most 4x4s, Max’s Hilux rides on a solid foundation that ties the whole build together. “I’ve always been an advocate for keeping IFS vehicles low,” Max tells us. “Improvement in approach and departure angles will give you more benefit than lift, in order to run larger tyres.”
In keeping with that theme the front of the Hilux now sits just 50mm above standard ride height thanks to a combination of high-end gear. The big player is the Monster Rides/KSP Matrix struts. Despite just two inches increase in ride height, they’re wrapped in progressive coils and fully adjustable dampening to get the ride quality dialled in. A pair of Monster Rides/KSP upper control arms help keep things in alignment, while the Phat Bars diff drop gets the CV angle back near stock for maximum strength.
The rear end takes that low and stable approach to the next level. Rather than swapping in an off-the-shelf leaf-spring arrangement, Max has had the load leaves in the stock spring pack reset to handle a little more weight; while 75mm extended shackles bump ride height up 25mm over stock. They’re paired with a set of three-inch-longer Rekon rear shocks, which give the Hilux an OEM ride with extra flex and load-carrying ability thrown in the mix.
With the extra increase in ride and height, Max set out to make the most of it. Starting from a solid foundation, Max yanked the factory diff gears out of both ends and replaced them with 4.8-ratio gears from Nitro Gear, a serious upgrade from the 3.9 the ’Lux rolled off the production line with.
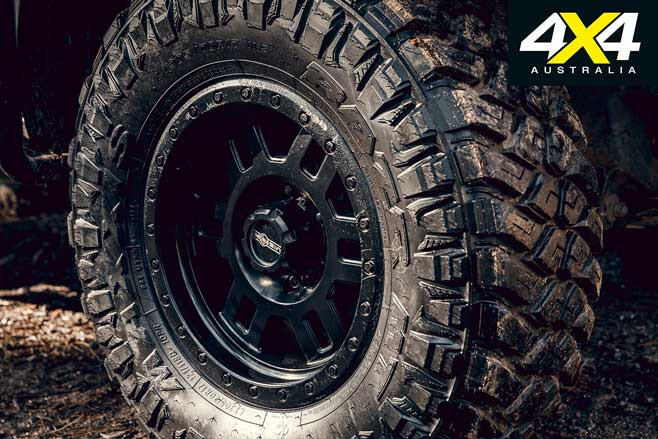
The front gear set has also been wrapped around a Harrop ELocker, giving Max twin-locked capability at the push of a button. The new driveline components allow the 2.8-litre turbo-diesel to effortlessly spin the 305/70R17 Maxxis RAZR tyres on each corner (that’s a 34.1 x 13 x 17 for those playing at home). They’re wrapped around gunmetal grey 17 x 8.5 0-offset alloy wheels, giving the Hilux that cooler-than-cool dark running theme.
There’s no such thing as a free lunch; and with Max trying to stuff as big a tyre in the guards as possible while keeping the Hilux low, eventually things would start fouling. To make the ’Lux live up to its full potential he reached for the grinder and set to work.
“I’ve never been scared to get a grinder onto a new vehicle,” he told us. “Low centre of gravity is where it’s at. The suspension works better and off-camber stability helps in the harder off-roading we have in Australia.”
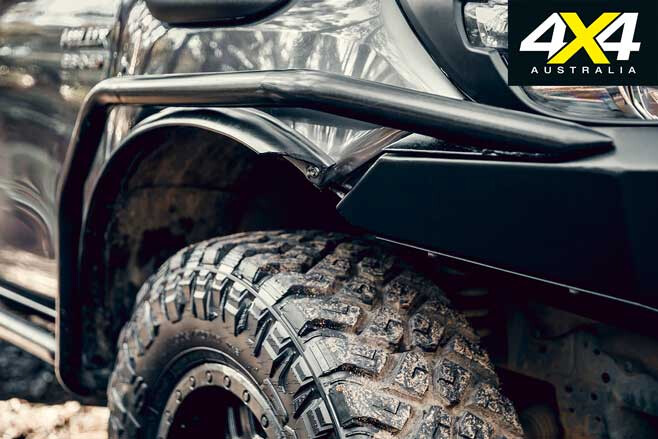
Starting from the front, Max started sculpting back the Hilux’s front guards with the 1mm grinding disc. The front edge was pushed 20mm further out, 25mm of clearance was added on the upper edge, with a huge 35mm cut off the guard’s rear edge. Max then made a new inner liner to keep debris out of the door jam, painted her up, and installed a set of schmick 55mm Ambassador Industrial flares to tie the whole look together.
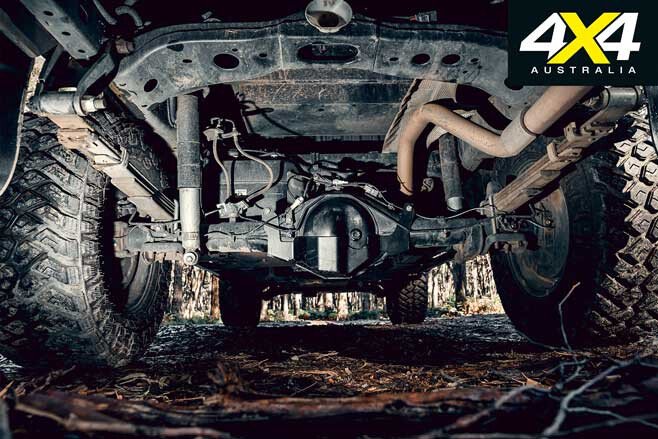
Moving underneath and it becomes all too obvious this Hilux is built for serious off-road work. Starting from the front, 5mm-thick steel plates have been built from scratch by the guys at Phat Bars in Queensland’s south-east. They protect the engine’s sump, transmission and transfer case from wayward rocks and trip-ending tree stumps.
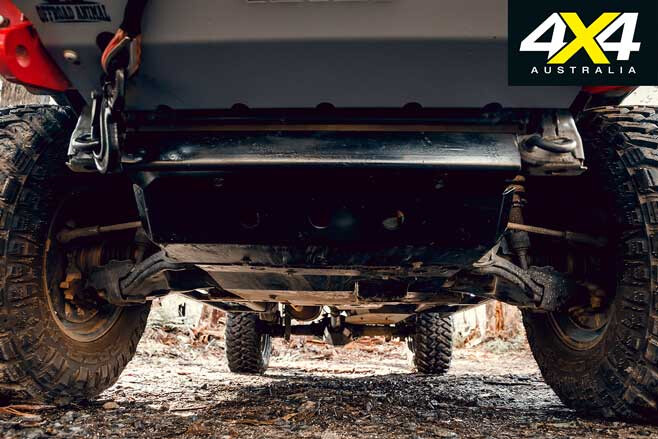
Moving rearwards, Max had Lethal Customs fabricate a 5mm-thick replacement steel skid plate to protect the fuel tank. Finally, Max teamed up with the guys at Performance Suspension Racing to build a Tacoma-inspired rear diff centre and pinion guard from 6mm-thick steel, protecting the diff itself and the uni joints from off-road damage.
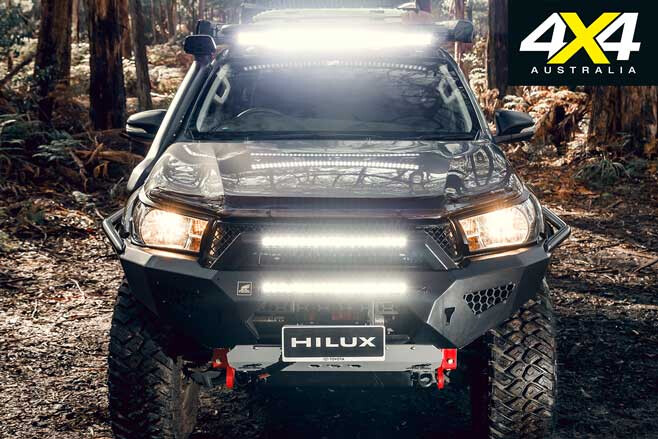
Up front the choice was obvious, with Max’s long-time friend David Fitzpatrick starting a new venture as Offroad Animal (he was previously behind Uneek 4×4). The ‘Predator’ bar currently fitted was 3D-modelled and designed off Max’s Hilux, so it fits bang on. It houses two Stedi LED light bars as well as the Runva 13XP winch.
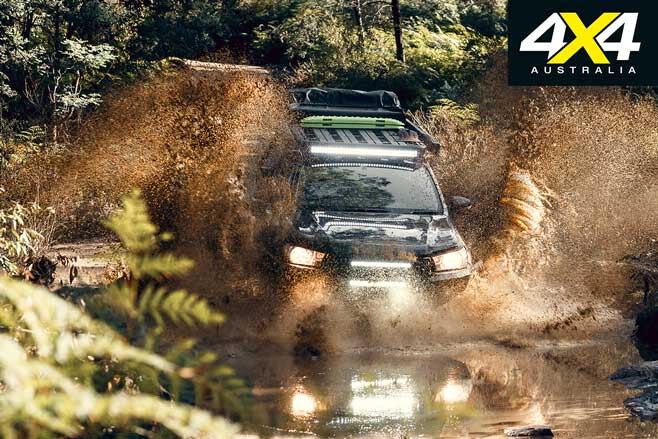
Phat Bars rock sliders protect vulnerable sheetmetal, while the prototype N80 backbone system from Rhino-Rack holds the flat rack in place, as well as a 42-inch LED light bar and two roll-out awnings.
On the tail-end Max put the Lethal Customs team to work again. After countless back-and-forth discussions about how a touring tray in the tight Victorian tracks should look and perform, work finally got under way. Leigh, the main man at Lethal, got to work turning Max’s ideas from paper into reality.
The hit list was a hard one to stick to: it couldn’t sit any wider than the body of the Hilux; it couldn’t extend any farther than the chassis rails; it needed to house the spare tyre as low as possible while still protecting it; and it needed to have plenty of hidden storage for recovery gear.
After a few weeks of fabrication and a test fit or two, the tray was finally on the Hilux and a smile on Max’s face. Leigh’s welder came out one more time after the tray was fitted to tie the tray and front bar into the rock sliders, with reinforcing in the tray giving Max peace of mind he can put the Hilux in situations that’d eat up a lesser rig.
Swing open the battleship-grey doors and Max’s build philosophy really starts shining through. Like the outside, it’s built for a purpose. An iDrive unit allows him to dial in throttle response depending on the conditions, and a screen-mirroring unit allows the factory entertainment unit to display his mapping software for an eagle-eyed view of the terrain. It’s strangely fitting that in such a cutting-edge 4×4, old-school simplicity gives such good results. If you’re after a seriously capable rock crawler or tourer, the right modifications are far more important than all the modifications.
The math behind gearing
IT’S SAFE to say you probably didn’t pay much attention to maths class in high-school; we didn’t either. But maths plays a larger part in 4×4 land than most people expect. The harsh reality is, no matter how much power the latest and greatest 4x4s make, it’s not enough to get the job done.
In fact, it’s not even enough to get them off the line. Using the gearbox, transfer case and diff gears, manufacturers are able to give your engine mechanical leverage to move things down the road. As an example, 4th gear in most manual gearboxes is 1:1, anything under that the engine is doing multiple revolutions to make the gearbox spin once.
Try taking off in 4th, it won’t go well. Even from there, that 1:1 ratio going through the gearbox is given a huge advantage through the diff gears before putting power to the ground. In this Hilux the factory ratio was 3.9:1, meaning the driveshaft spins 3.9 times for every one time the wheels move.
By changing to a 4.8:1 ratio Max has changed his final drive ratio by 23 per cent, improving low-down performance. Think of it like permanently dropping down a gear and it clarifies why it’s such a good modification on- and off-road.
THE TAKATA airbag recall has struck again, this time affecting a total of 34 MY2007-08 Chevrolet Silverado 2500/3500 and GMC Sierra 2500/3500 pick-ups.
With the Takata airbag recall, the problem lies with the airbag inflator – “as it gets older, a combination of high temperatures and humidity can cause the airbag inflator propellant to degrade,” the ACCC recall report says.
If a defective airbag is activated, metal fragments may propel out of the airbag cushion and cause serious injury and even death to the vehicle’s occupants.
For a full list of affected vehicles, click here.
The recall report says owners of affected vehicles should contact the supplier, Victorian American Imports, by calling (03) 5176 0600, to organise free-of-charge reparation.
The affected vehicles were sold nationally between December 1, 2006, and August 1, 2008.
A recent report by the FCAI said that from the three million vehicles affected by the Takata recall, 2.28 million cars have been rectified. To date, Takata airbags have been associated with at least 26 deaths and more than 300 serious injuries.
For more information on Takata airbag recalls, visit: www.productsafety.gov.au/recalls/compulsory-takata-airbag-recall
PAUL Kelly will headline an epic 2020 Big Red Bash, with the iconic event to take place in front of the 40-metre-high Big Red sand dune from July 7-9.
Known widely as Australia’s largest outback event, the Big Red Bash, located 35km from Birdsville, has grown exponentially year-on-year, with more than 9000 pundits attending a sold-out 2019 event headlined by Midnight Oil.
Festival organisers are expecting the 2020 event to again be a sell-out, with Paul Kelly to be joined by some iconic Australian musicians including Tim Finn, John Williamson, Kate Ceberano, Ian Moss, Shannon Noll and Dragon.
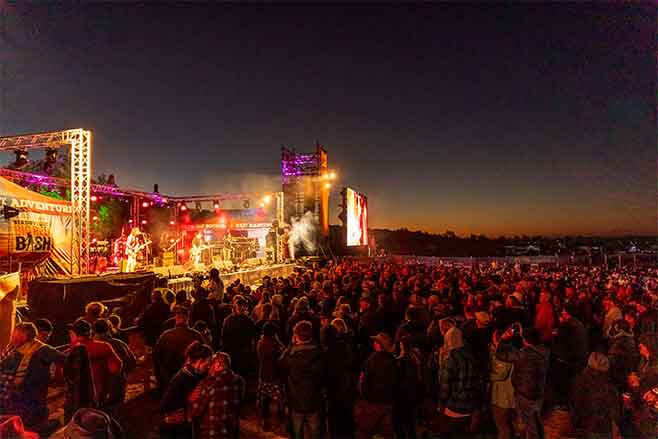
“We’ve put in a lot of work to produce a 2020 line-up that screams iconic Oz Rock and classic Australian and Trans-Tasman music,” said Greg Donovan, Big Red Bash Founder and Organiser. “This year, we have a total of 20 acts – more than we’ve ever had, which allows us to extend the hours of performance and offer even more entertainment for festival-goers.”
The Big Red Bash is a family-friendly event, with free entry on offer for kids less than 11 years of age.
Tickets for the 2020 Big Red Bash will be on sale from Thursday, September 19, at 9am. For info, head to www.bigredbash.com.au
JEEP has added the limited-run Upland to its Grand Cherokee range, with the new model priced from $61,450.
The Upland is based on the lower-spec Laredo model but receives exclusive equipment typically found in the higher-spec Limited, Trailhawk and Overland models, including an 8.4-inch touchscreen.
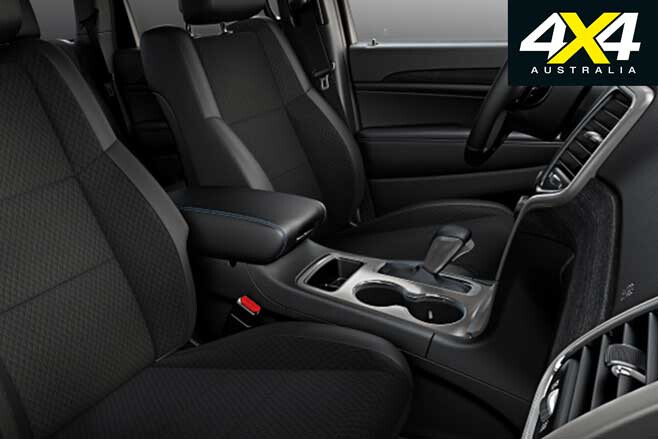
While the vehicle’s powertrain and underpinnings remain unchanged, the Upland receives unique ‘Desert Sky’ blue accents both inside the cabin and around the exterior badges. Blue stitching on the centre armrest console, the steering wheel and on the side door armrest marries up with the blue accents inside the cabin.
The Upland also gets 20-inch five-spoke black alloy wheels wrapped in Goodyear All-Terrains, and gloss black finishes on the roof rails, daylight opening molding, side-mirror caps, fog and tail lamp surrounds, lower front applique and 4×4 badge.
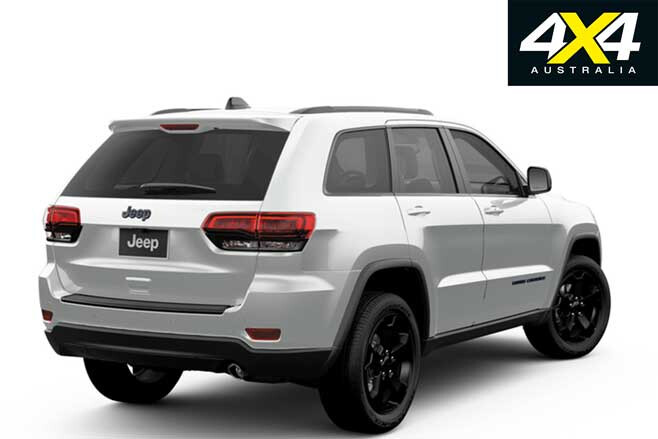
The Grand Cherokee Upland utilises the 184kW/570Nm 3.0-litre turbo-diesel V6 that runs through an eight-speed automatic transmission, the same powertrain found in the Laredo, Limited, Trailhawk and Overland models. As is the case across the range, the Upland has a towing capacity of 3500kg.
For on- and off-road work, Jeep’s Quadra-Trac II 4×4 system is paired with a two-speed transfer case.
The exclusive run is limited to just 44 units, with the Upland now available in Jeep dealerships.