CONSUMERS who purchased Adventure Kings Neoprene seat covers between January 3 and March 7, 2019, have purchased a defective product, though they’ve probably already figured out for themselves there was a problem with the seat covers.
Why? Well, the product was packaged incorrectly and only contains seat covers suitable for installation on one side of the vehicle, rather than separate driver side and passenger side covers. So anyone who’s installed the seats should’ve (ahem) tweaked that something was amiss.
While it mightn’t seem like the most serious of recalls, an incorrectly fitted seat cover could inhibit airbag deployment.
The Neoprene seat covers (specifically, Batch 6323 – the label can be found stitched into the seat cover) were supplied by Outdoor Supercentre and were available at many 4WD parts and accessory stores right across Australia.
If this recall impacts you, de-robe your front pews and complete the online repair/warranty form found here: https://service.4wdsupacentre.com.au/returns
A full refund or a replacement product will be offered.
OPTIMISING 4×4 storage space is a vital part of the touring lifestyle, and opting for quality roof storage not only opens up boot/tray space but it makes life so much easier when there’s distance between you and suburbia.
We’ve taken a closer look at a Jerry Can holder to suit the Yakima Lockn’Load Platform roof-rack system, as well as the recently launched Rola Titan Tray.
Yakima Lockn’Load Jerry Can Holder
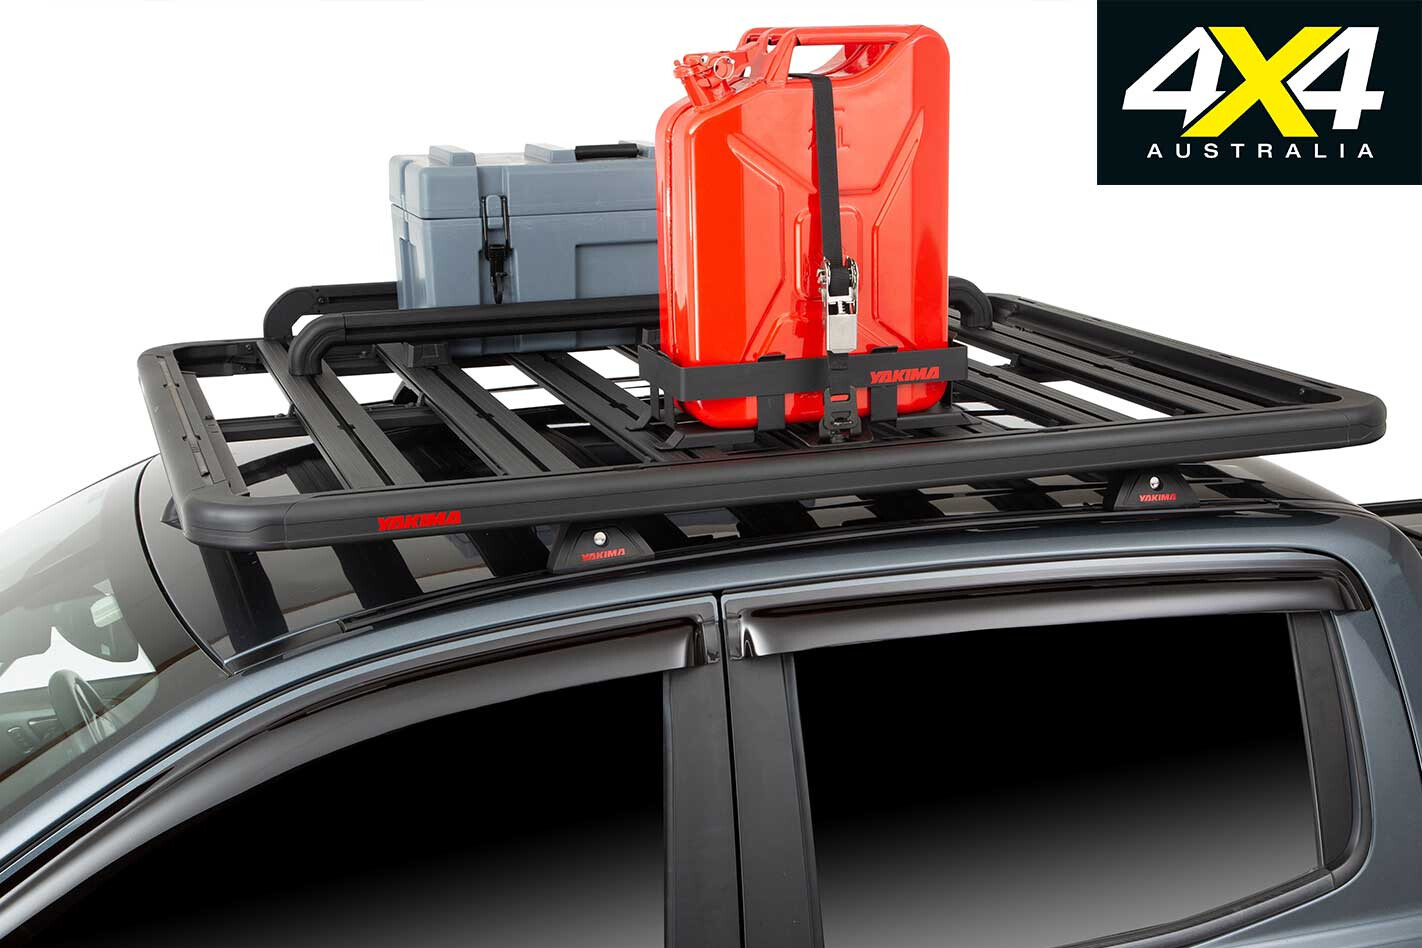
YAKIMA continues to punch out top-notch gear for its highly regarded Lockn’Load Platform roof-rack system, with this new jerrycan holder the latest piece of kit in the ever expanding range of accessories.
The holder has been specifically designed for the Lockn’Load Platform and can be used to store 10- and 20-litre jerries. The holder can be used with either plastic or metal jerrycans and it features a robust powdercoated finish to ensure it is up to the roughest treatment when out bush.
Included with the kit are the holder and a ratchet strap. Another nifty design idea for this holder is the low height of the base cage; this allows for easier loading – always welcome when you’re trying to wrestle 10 or 20kg of full jerrycan up on to the roof.
RRP: $129.00 Website: www.yakima.com.au
Rola Titan Tray
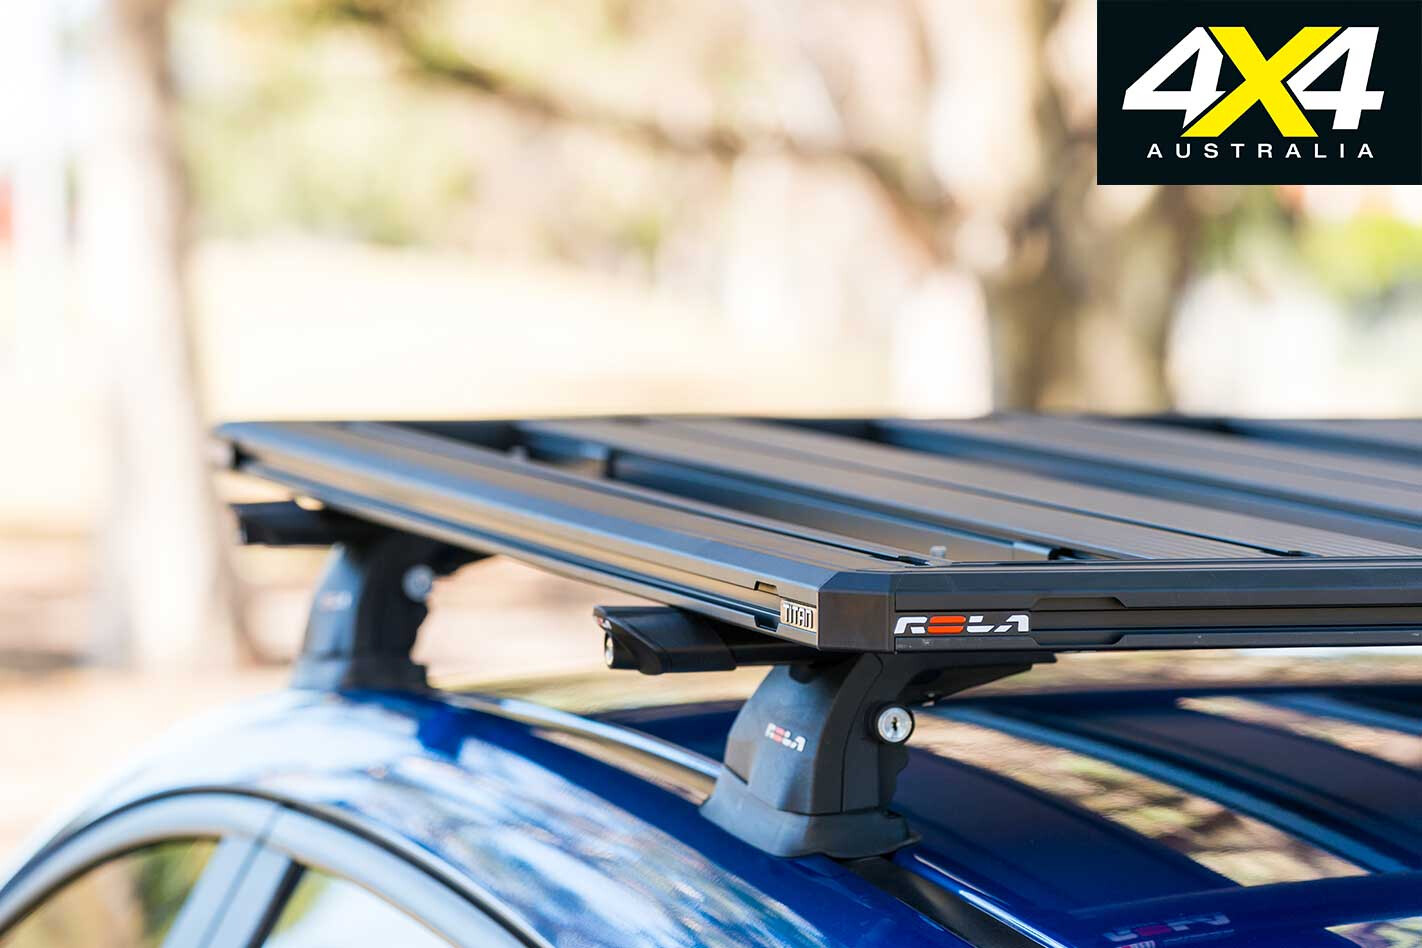
ROLA has just released an improved version of its highly regarded Titan Tray. The all-new Titan Tray includes a unique design offering more strength and robustness than before, while retaining its light weight and aerodynamic profile.
The new version of the Titan Tray has a carrying capacity of 300kg (vehicle roof-load capacity dependent), thanks to a mitred corner design and reinforced panels. There is the option of using bolt-through Titan Rails for additional tie-down points as well as increased load stability.
The accessory channels mean you can customise the Titan Tray for different types of adventures, thanks to the ability to easily add Rola and other popular branded accessories (bike carriers, for example).

The tray’s slide-in mounting brackets can be placed inbetween any plank on the tray, providing flexibility to securely attach the Titan tray to most popular roof racks with an accessory channel. Add in anodised aluminium with stainless steel fixtures, and the Titan Tray will last years.
RRP: From $499 (available in four sizes) Website: www.titantray.com.au
WE’LL SEE the new Land Rover Defender before the end of 2019, but we very much doubt it will continue to be the rugged, simple and purposeful off-roader that served the company for close to six decades.
Instead it will fall in line with the rest of Land Rover’s vehicles, being a luxury SUV, albeit one with more off-road usefulness than anything else in the brand’s range.

At the same time that JLR has been working on its new Defender, a vehicle that is closer to the original Land Rover is also being developed.
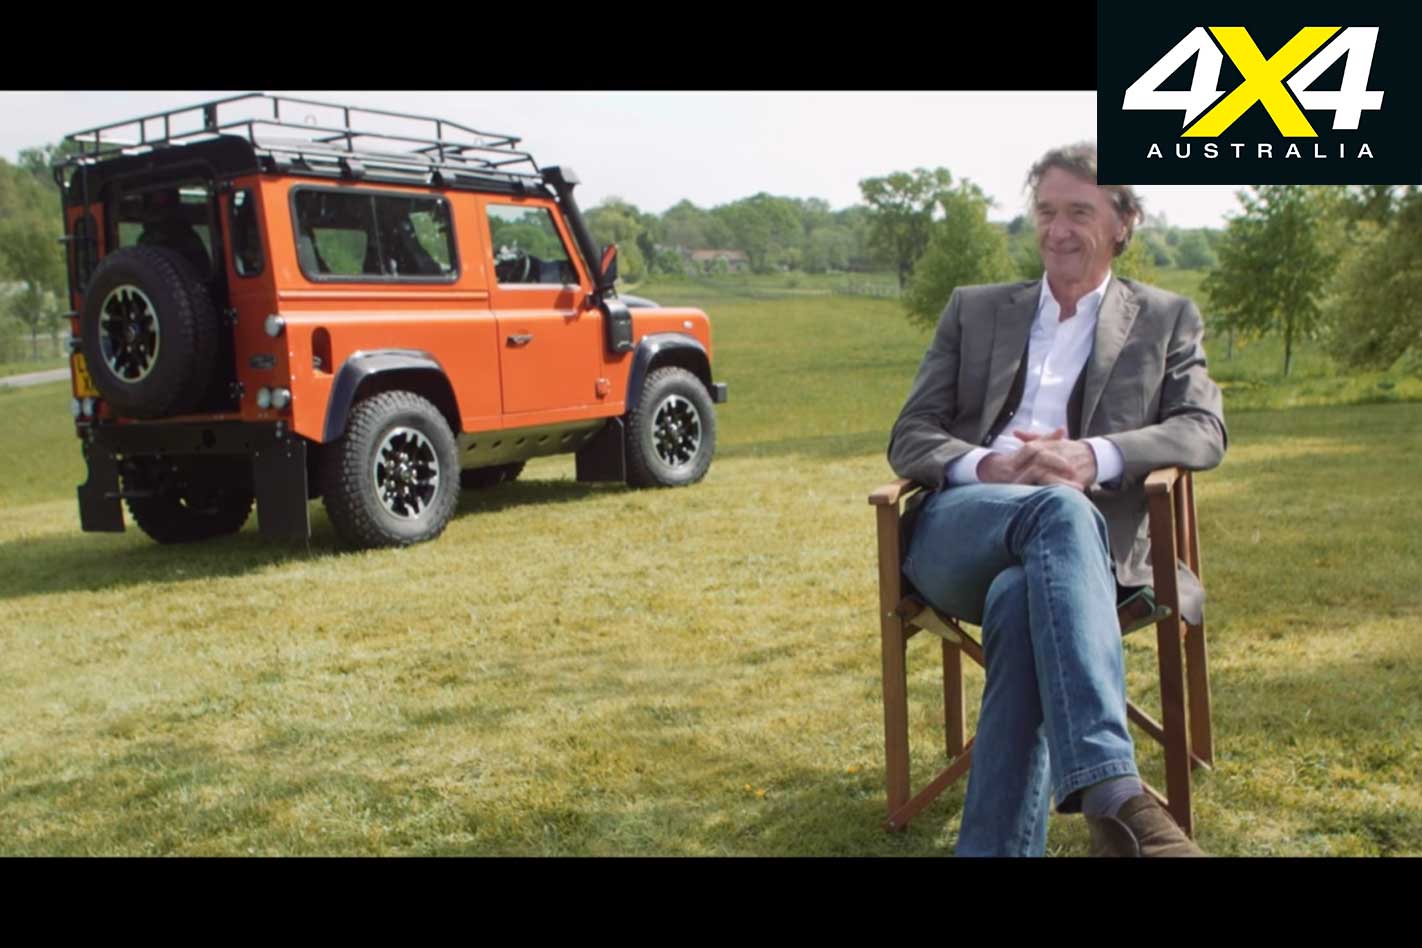
British chemical engineer and billionaire, Jim Ratcliffe, made headlines shortly after JLR announced it would cease producing the Defender as we knew it, when he attempted to buy the vehicle from JLR – including the name and production facilities – so that his company INEOS could continue to build it. JLR said no to the idea, so Ratcliffe has gone out on his own.
Since then INEOS has spawned INEOS Automotive and commissioned German engineering firm MBtech to develop its vehicle, which is now known as Projekt Grenadier. MBtech was once a part of Mercedes-Benz before it was sectioned off, and now it works on large-scale engineering projects for numerous auto companies from its headquarters in Stuttgart.
In another German link, INEOS Automotive has just announced that BMW will be supplying both the petrol and diesel powertrains for Projekt Grenadier; although, there have been no further details as to what those powertrains will comprise. That’s interesting, as the previous Land Rover Defender also used engines from BMW in some markets around the world.
Ratcliffe’s plan has always been to produce an off road-vehicle that remains true to the Land Rover’s original design; a simple, no compromise off-roader that can be used by utilities, NGOs, exploration companies, militaries and recreational drivers anywhere in the world. Think Land Rover, Jeep and Land Cruiser and you’re heading in the same direction as Projekt Grenadier.
Ratcliffe has said he hopes the vehicle will be built in Britain, but is yet to confirm a production site. If plans progress as hoped by INEOS, Projekt Grenadier will be in production and on sale in 2021, with production expected to reach 25,000 units annually.
Bush travellers’ tastes and expectations have changed since Trakka kicked off as little more than a backyard business in 1973.
This feature was originally published in 4×4 Australia’s July 2009 issue
Trakka’s founders, Sally and Dave Berry, liked bush travel and discovered that there was a market for vehicles that were kitted out to make bush living easier. One of their earliest conversions was done on the LandCruiser TroopCarrier, a vehicle that combined a spacious interior and rugged dependability.
Since those early days Trakka has moved on to bigger things, but the company continued to build Bushman conversions on successive generations of Troopies. However, demand slackened as the venerable Troopie lagged behind newer machines’ performance levels.
Then came the 78 Series, with 4.5-litre V8 diesel power and the inquiry rate at Trakka went up. It was time to redesign the Bushman and Trakka’s general manager, Martin Poate, described the process:
“Today’s bush travellers have different expectations from those who bought the original Bushman. Back then, it was okay to squeeze a cooking area and a dinette under the pop-top sleeping area, but we felt that design was too cramped for today’s buyers.
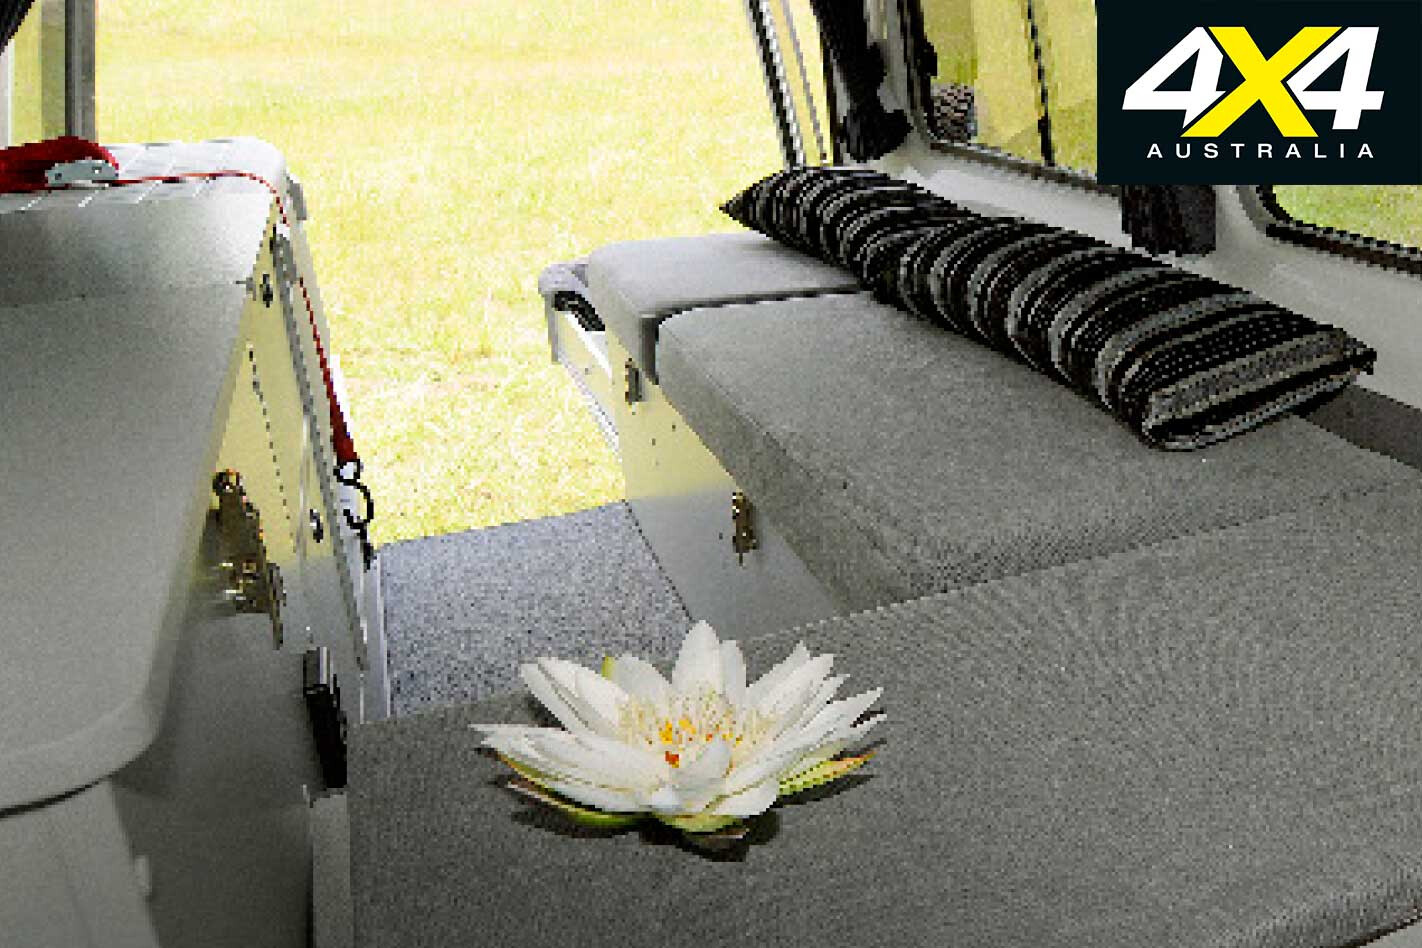
“This new layout puts the emphasis on outdoor cooking and sitting, with the interior reserved for storage, sleeping and backup seating in the event of really bad weather.”
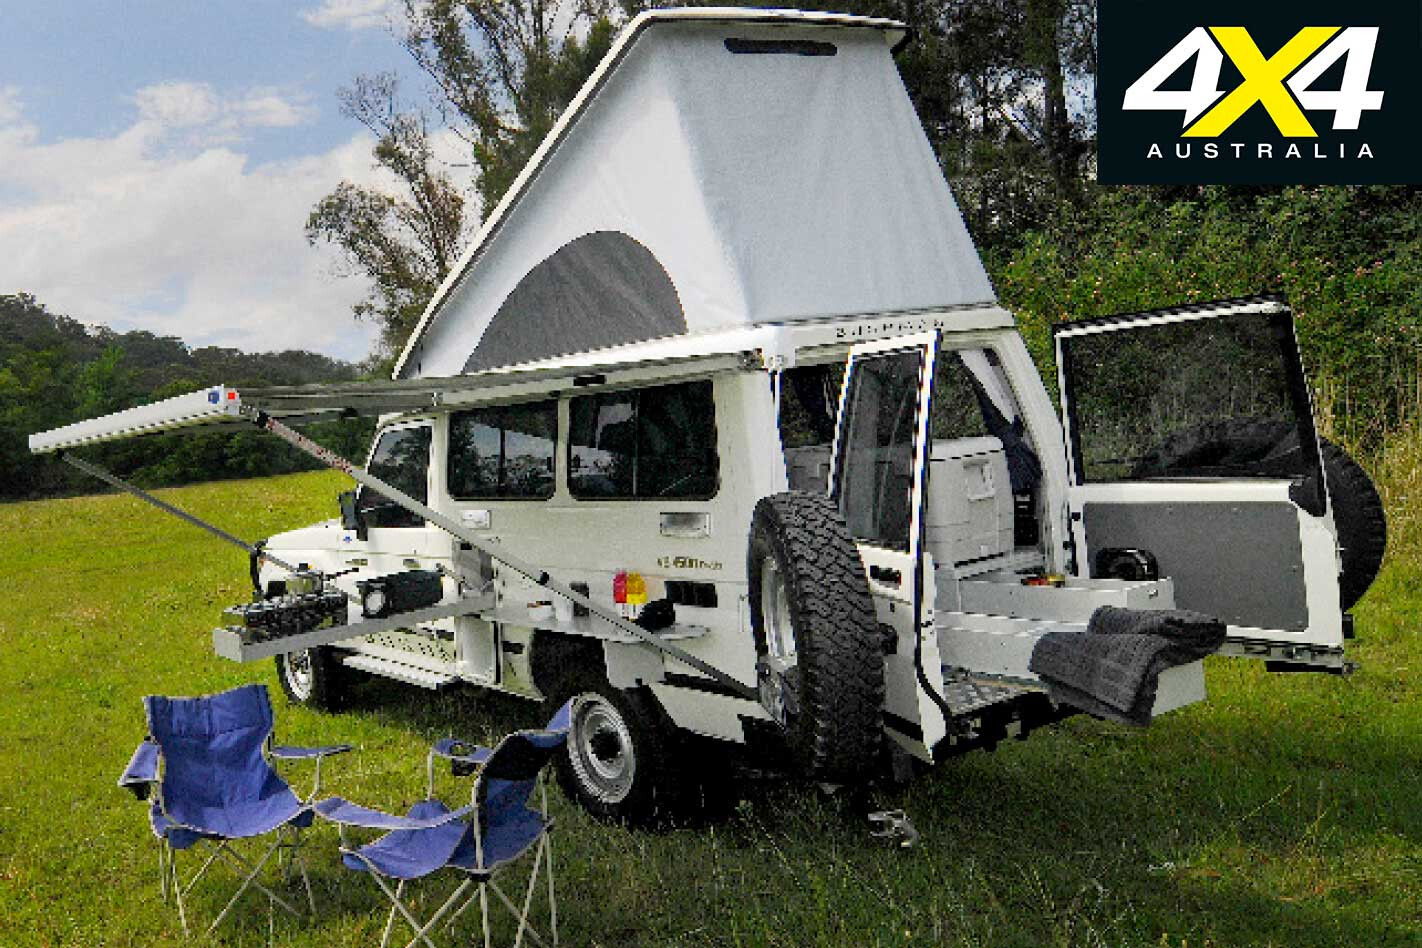
To that end the new Bushman comes standard with a side-mounted, roll-out awning and there are optional rear and side awning extensions that further increase the shade area. The kitchen, consisting of a portable two-burner metho stove, flexible tap with hot and cold water pressure supply, and a wash basin, rolls out from the side of the vehicle.
Two long, deep drawers roll out through the rear doors and a practical work bench clamps to the vehicle side. Even the 12-volt chest-type fridge is portable, lifting off its cradle at the rear doors.
The interior is primarily a storage area, with cabinets and drawers, but the tops are padded and upholstered, making a cosy living space when required. The high density foam bed can be left made up when the roof is lowered. Gas struts take the work out of raising the bed and the roof, even with the optional 125W solar panel bolted on top.
Insulated curtains are fitted to all the windows and there are removable screens on the sliding panes. A fly mesh rear door screen is an option.
Durability has long been a Trakka hallmark and the company is confident the use of pressure-laminated euro-plywood for the cupboards and drawers will ensure years of trouble-free bush travel.
The Bushman comes standard with a 70-litre fresh water tank, 100 amp-hour deep-cycle battery, outdoor shower point, 240V plug and 12-metre extension lead, two 12V outlets, six-amp battery charger and battery condition gauge. The house battery charges when the engine is operating and when the vehicle is plugged into 240V power.
The Bushman options list includes window tinting, a diesel space heater, a portable loo, drinking water filtration and a bicycle rack.
Driving & Camping
The Toyota Troopie is a bush legend and the new model extends the marque’s horizons, with improved ride quality and awesome V8 diesel performance. With optional factory diff-locks a Troopie will go where most fear to tread.
The principal limiters on the Troopie’s abilities are the difference in front and rear wheel track and the fitment of old-fashioned split-rim wheels and skinny, 7.50R16 tubed tyres. We’d suggest budgeting for a pair of rear wheel arch flares and modern wheels and tyres.
The Trakka Bushman rode beautifully on-road, with the additional weight of the Trakka inclusions taking the natural harshness out of the rear leaf suspension. Handling was limited by the tyres, but most Bushman owners won’t be fanging around corners anyway.
Vision was good and the bucket seats gave reasonable comfort and support. The V8 diesel is a delight and doesn’t seem to suffer from the excessive oil consumption that the twin-turbo version in the LandCruiser 200 Series seems to.
The Troopie’s single-turbo 4.5-litre pulls strongly in all gears and delivers around 12-14L/100km economy, giving the Bushman excellent touring range from the Troopie’s 180-litre tanks.
Setting up the Bushman for camping is simplicity itself. The roof pushes up with little effort, the awning cranks smoothly and the kitchen slides out with fingertip control. You can be sitting down with a refreshing beer or G&T in five minutes. Importantly for many bush travellers, packing up the Bushman is just as rapid, taking the hard work out of overnight, roadside stops.
For long-stay camping, stage two involves setting up the optional shade extenders with poles and guy ropes.
The outdoor-living concept has made the new Trakka Bushman an ideal backblocks touring camper. However, it’s a shame some of the outdated Toyota running gear doesn’t match Trakka’s innovative conversion treatment.
Pricing
The standard Bushman is priced at $96,000 and you can up-spec with the following options: Porta potti $190; rear Sunblocker $490; water filtration system $350; roof-mounted solar charging system $2200; diesel room heater $2490; bicycle rack $450; window tinting $495; two reading lights $250; front and rear diff-locks $2735; rear door flyscreen $330.
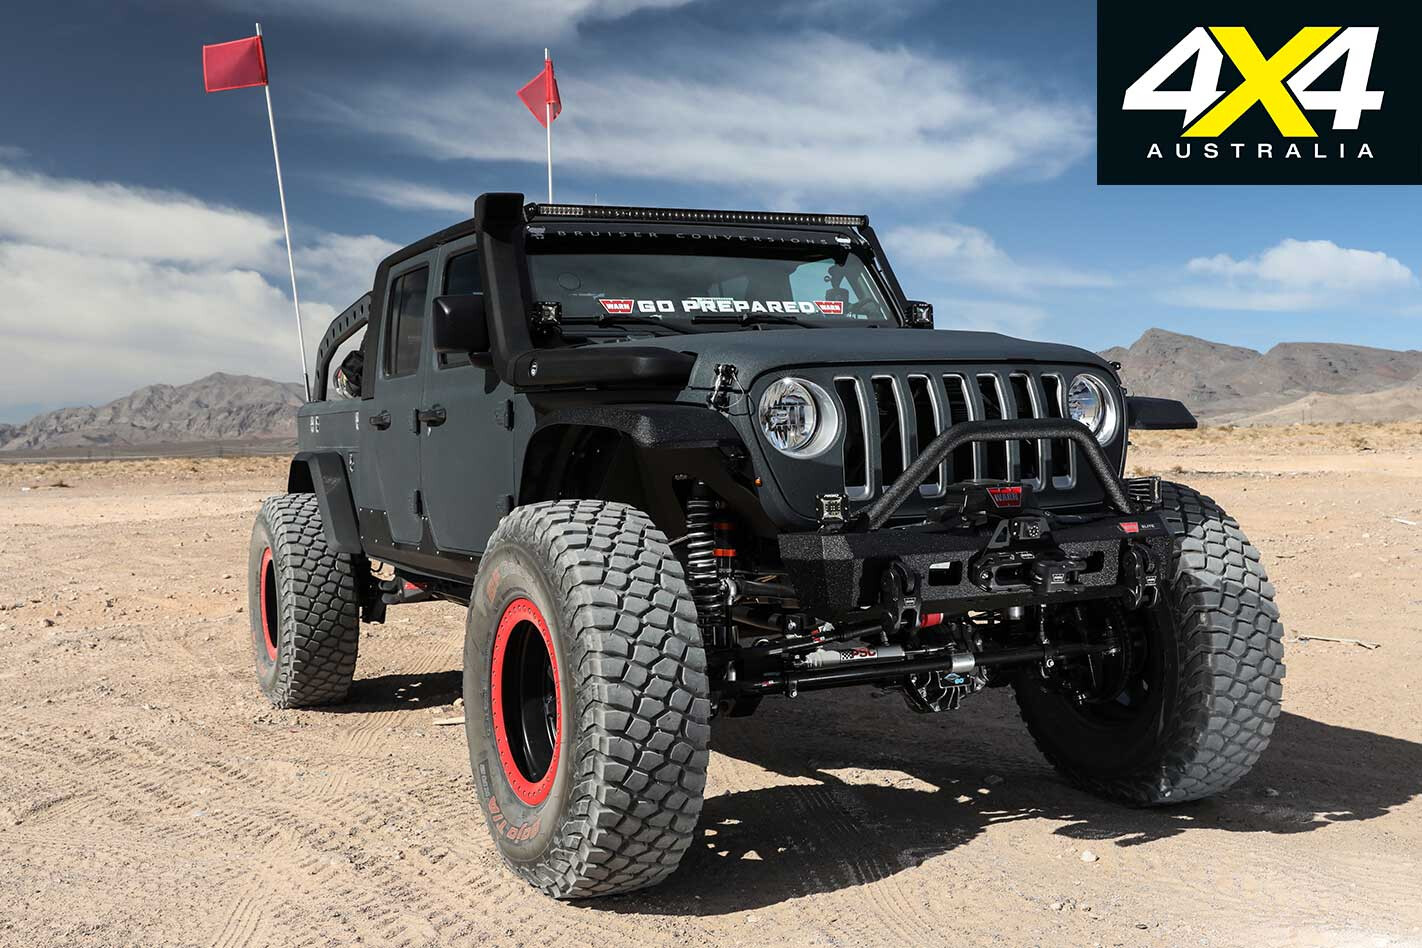
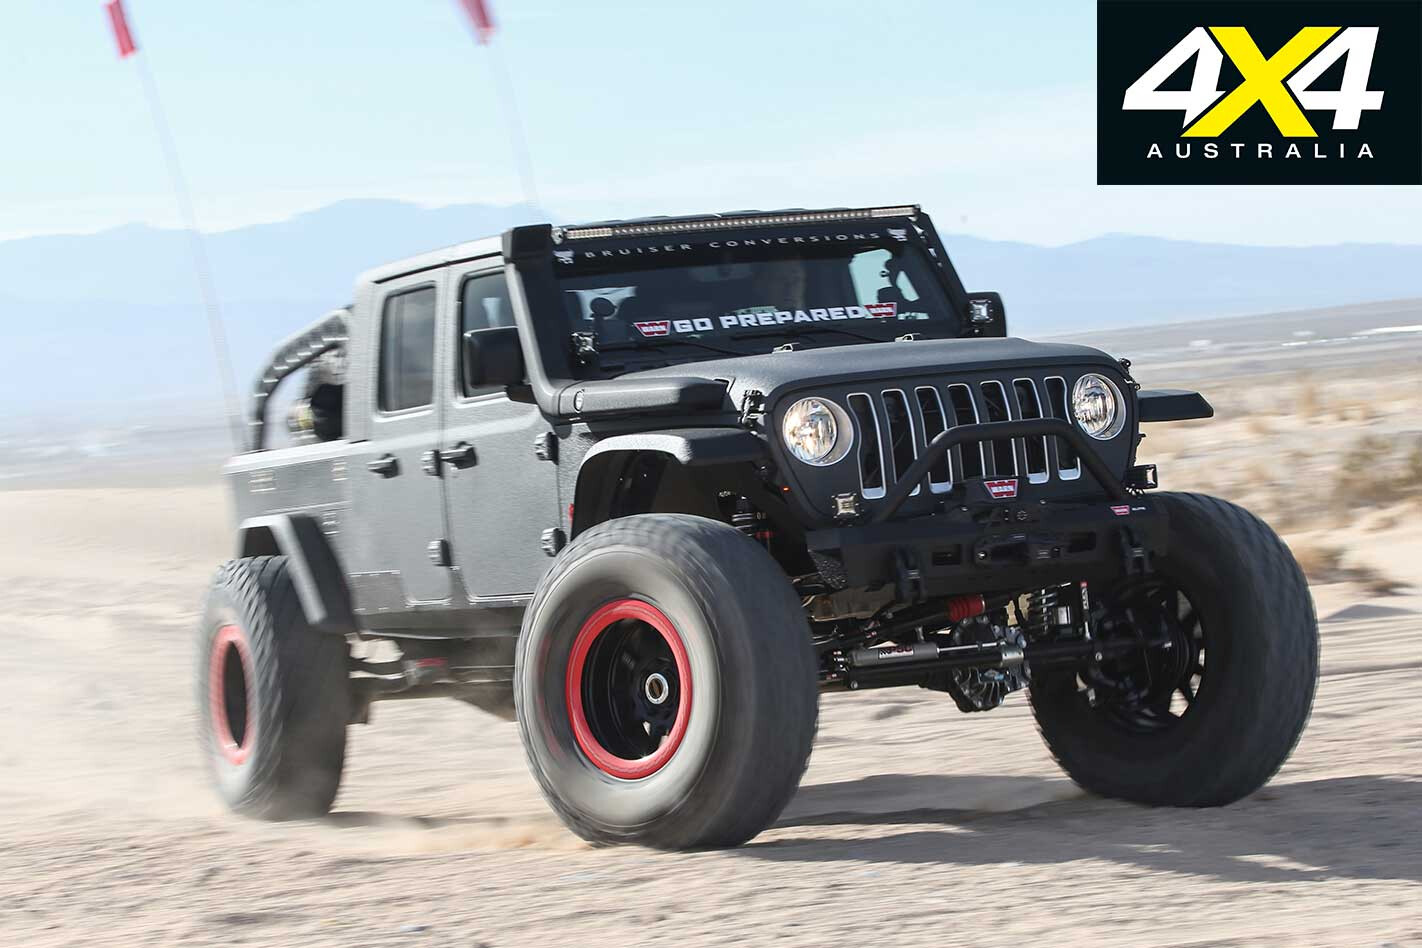
THERE’S always someone who thinks they can improve on what is ‘the standard’. Some fail while others such as Jarret Crawford of Bruiser Conversions (BC), the team behind this off-road monster Wrangler, more than succeed.
The JL Wrangler is new and, in standard form, already a formidable off-road vehicle, but Bruiser Conversions’ ability to reinvent this 4×4 icon in a seriously awesome way makes it nigh unstoppable. The company has been converting Wranglers of the past few eras (starting with the TJ, then the JK) for years now, transforming them into the ultimate expression of a desert-ready rig.
This JL Crew is the latest version of a long line of previous Bruiser Conversions (err … Bruisers), with the previous-gen JK Wrangler copping the conversion treatment and reborn as a dual cab ute, a super cab (single), or an open-roof, four-door wagon version appropriately dubbed Overlander. This has continued with the JL Wrangler.
The Bruiser Conversions’ success story revolves around both wheelbase extensions and engine conversions, with the new JL Wrangler having the option of being fitted with the full turnkey installation of a juicy LS3 V8 donk, which is exactly what Jarret and the team did with this cracker example of Jeep’s finest.
Sliced & Diced
JARRET took delivery of this JL Wrangler Sahara in July last year, soon after its official launch. No sooner had it arrived in the Bruiser Conversions workshop it was stripped down to allow for the wheelbase extension process, which meant cutting into the body directly behind the rear seats.
“We quickly modified it by stripping it down to the bones and then whipped out the cutting tools,” Jarret says. “There’s no turning back once you get to that point!”
He’s right, and, yeah, it’s enough to make a hardcore Jeeper cry. However, there was a definite method in the team’s madness, and they soon got stuck into creating a new bulkhead that would enable what was left of the body to be transformed into the truck cab you see here.
The team’s dedication to quality is evident in the prebuilt jig used to ensure all panel gaps matched the standard vehicle when it came time to put the Wrangler back together.
Along with panel cutting, the ladder-frame chassis also receives the cut-and-stretch treatment; the JL Crew boasts a 3530mm wheelbase, up from the original Wrangler four-door’s 3010mm. This stretched wheelbase is achieved via extensive fabrication work, including fabricating a triple clamshell that is strengthened then welded in. An additional six bolts are added to ensure it is as strong, or stronger, than standard.
The Chaser
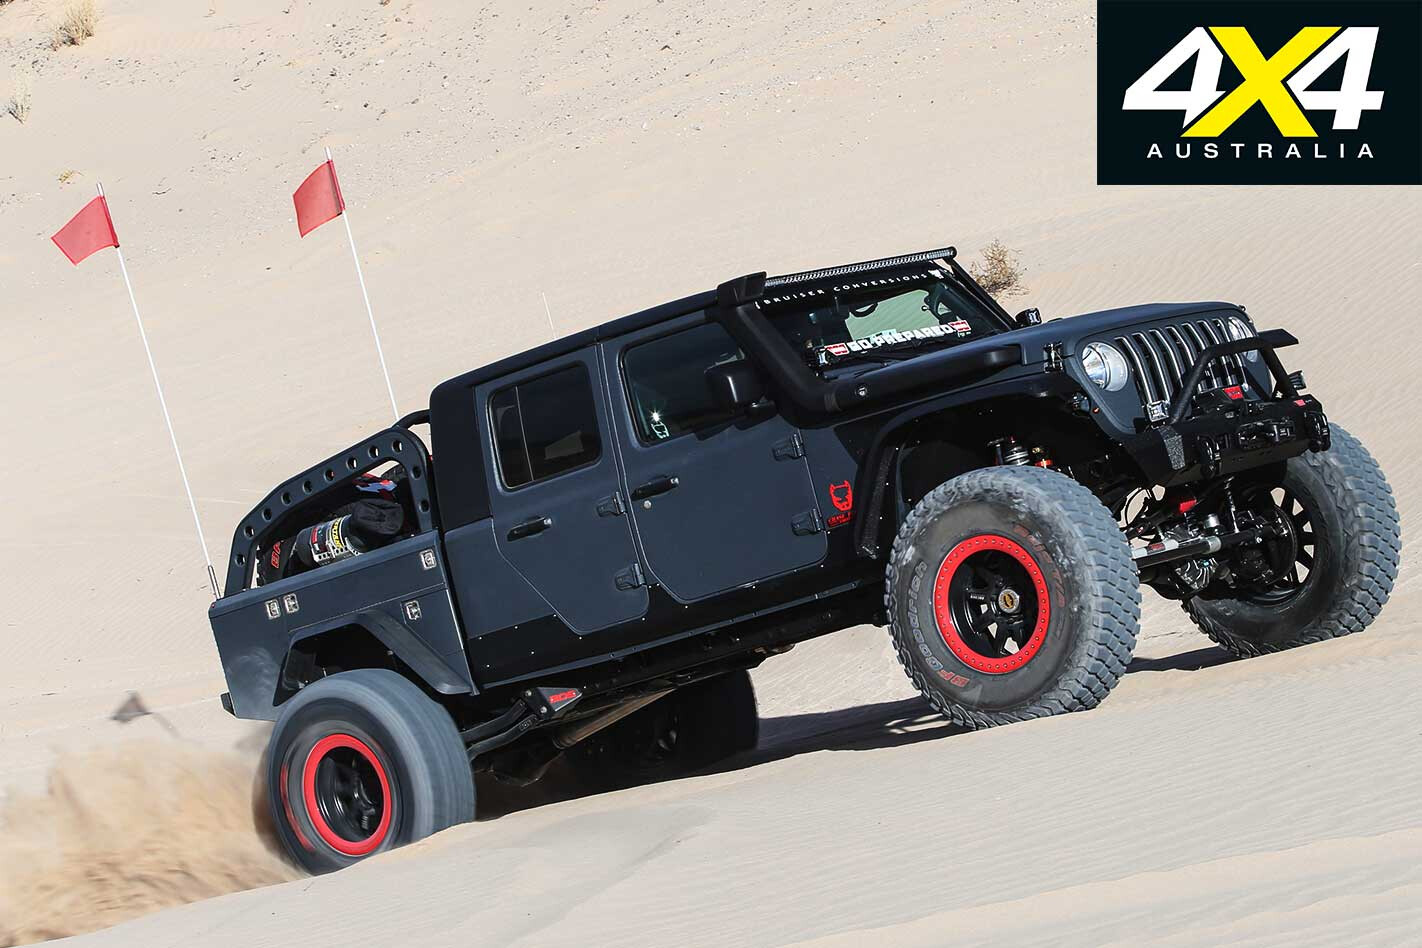
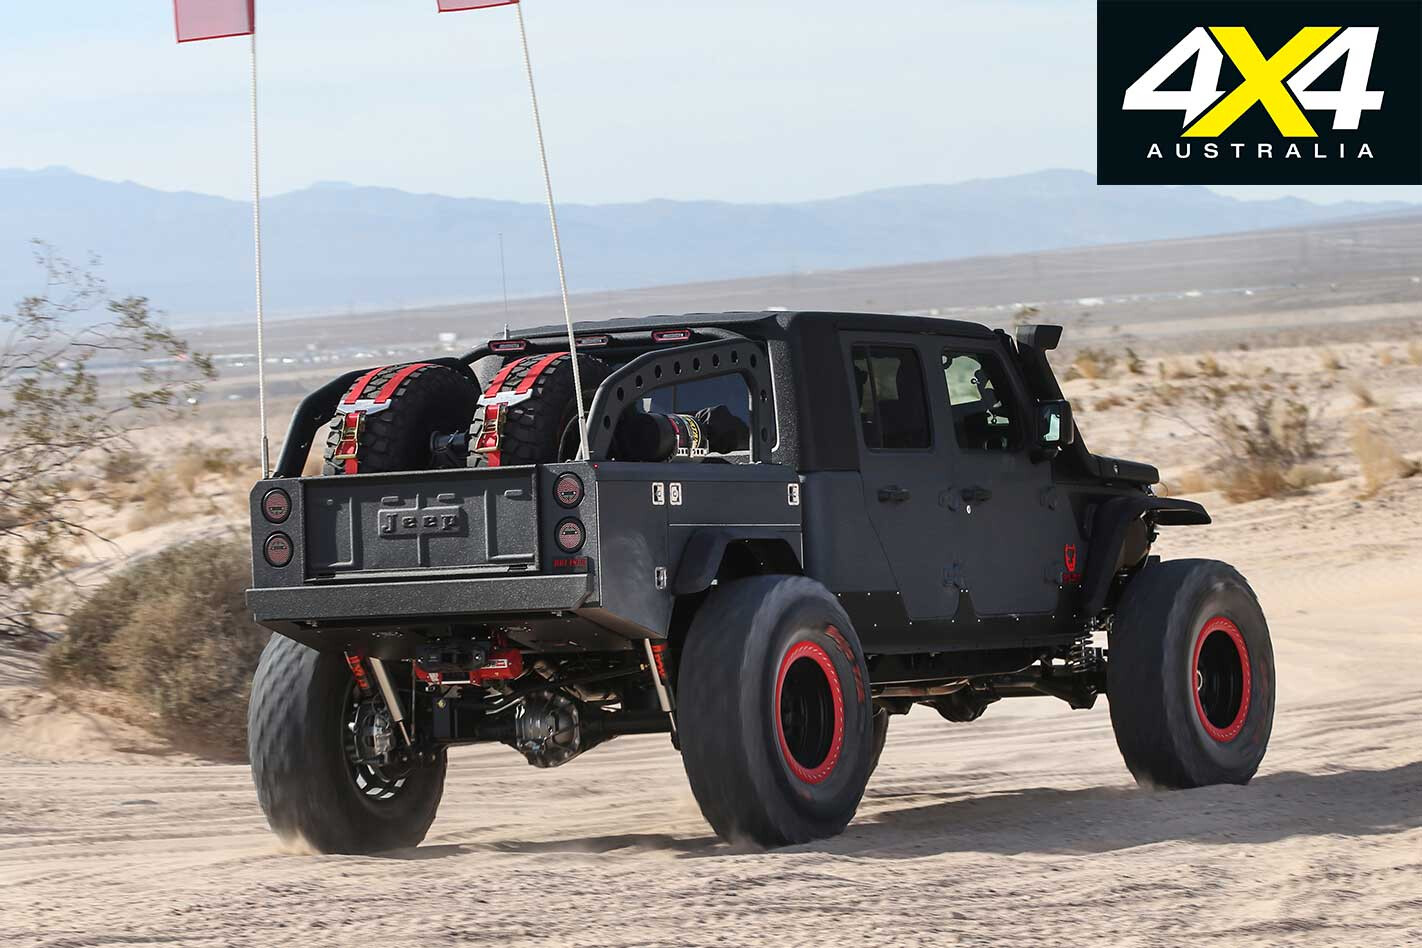
THIS tough-as dual cab Wrangler is modelled on a chaser truck, vehicles designed to tow desert racing rigs to events and be able to ‘chase’ the team’s race vehicle while carrying plenty of spares and tools – in other words, they’re the workhorses of the desert-racing scene.
“Once the frame stretch was completed, the fab shop started on a custom, high-departure angle utility bed to serve all of the potential needs as a chase truck,” Jarret says.
To this end, BC fitted a customised ute tray out back and attached two Power Tank PT-10 CO2 tanks for tyre inflation, an auxiliary fuel tank, water tank, a portable arc-welding system, power inverter, compressed air bulkhead (powered by a twin ARB compressor), loads of schmick Snap-on tools, and two spare 37-inch KOH Ultra 4 Beadlock wheels shod with BFGoodrich Baja T/A KR2 42×13.50R20LT rubber.
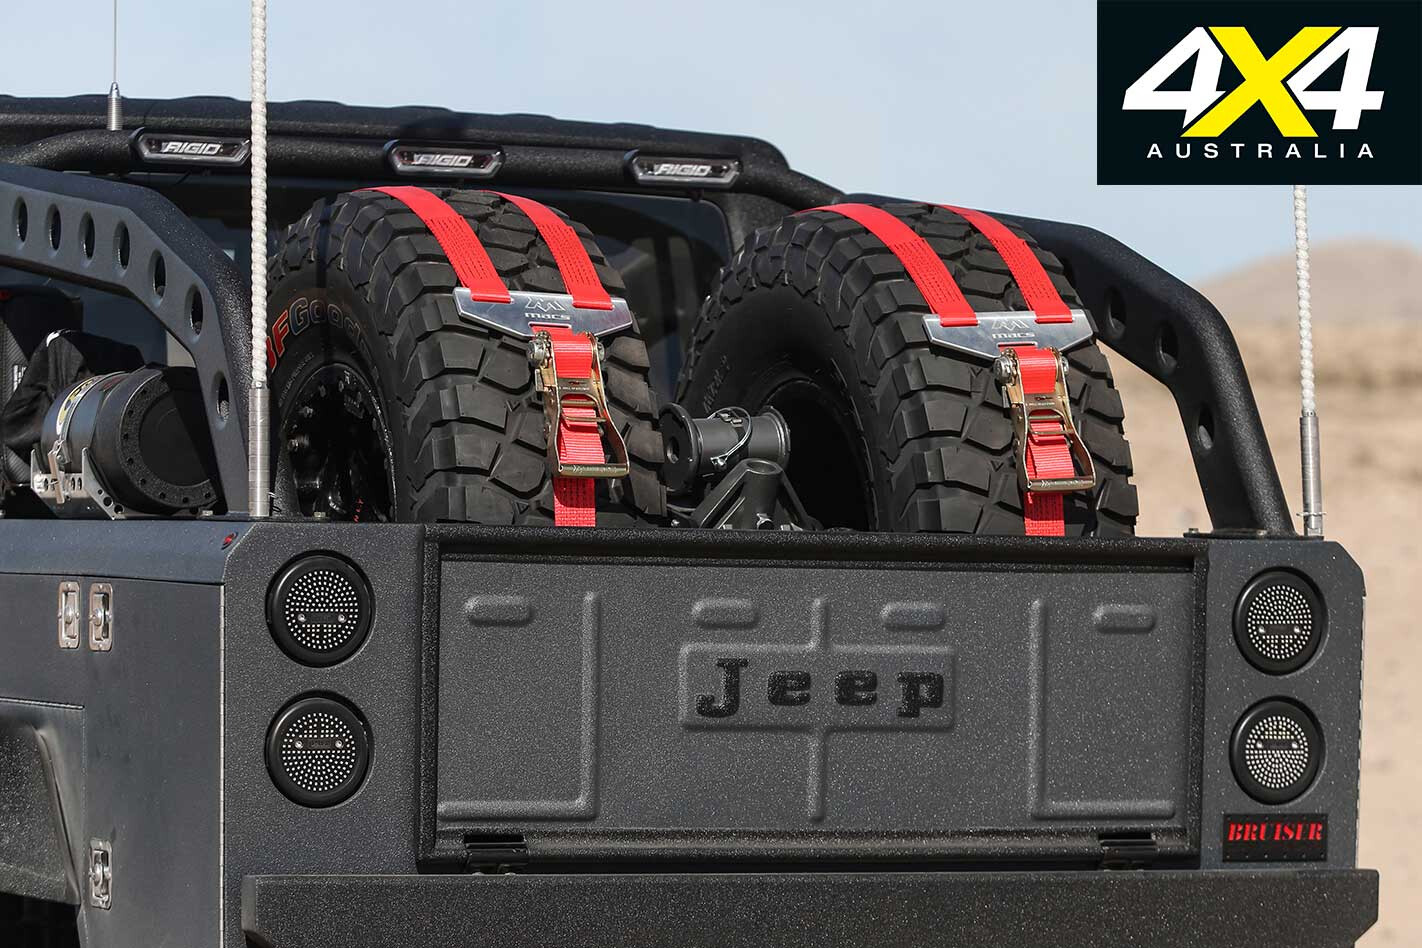
The tyres signal their intended purpose via the stamped lettering on the sidewall: “For racing purpose only”. To keep those big hoops rolling – and to minimise any chance of failure – a set of Dana 60 axles were fitted, with Eaton E-Lockers shoehorned in. There’s also a set of Warn manual-locking hubs at the front end.
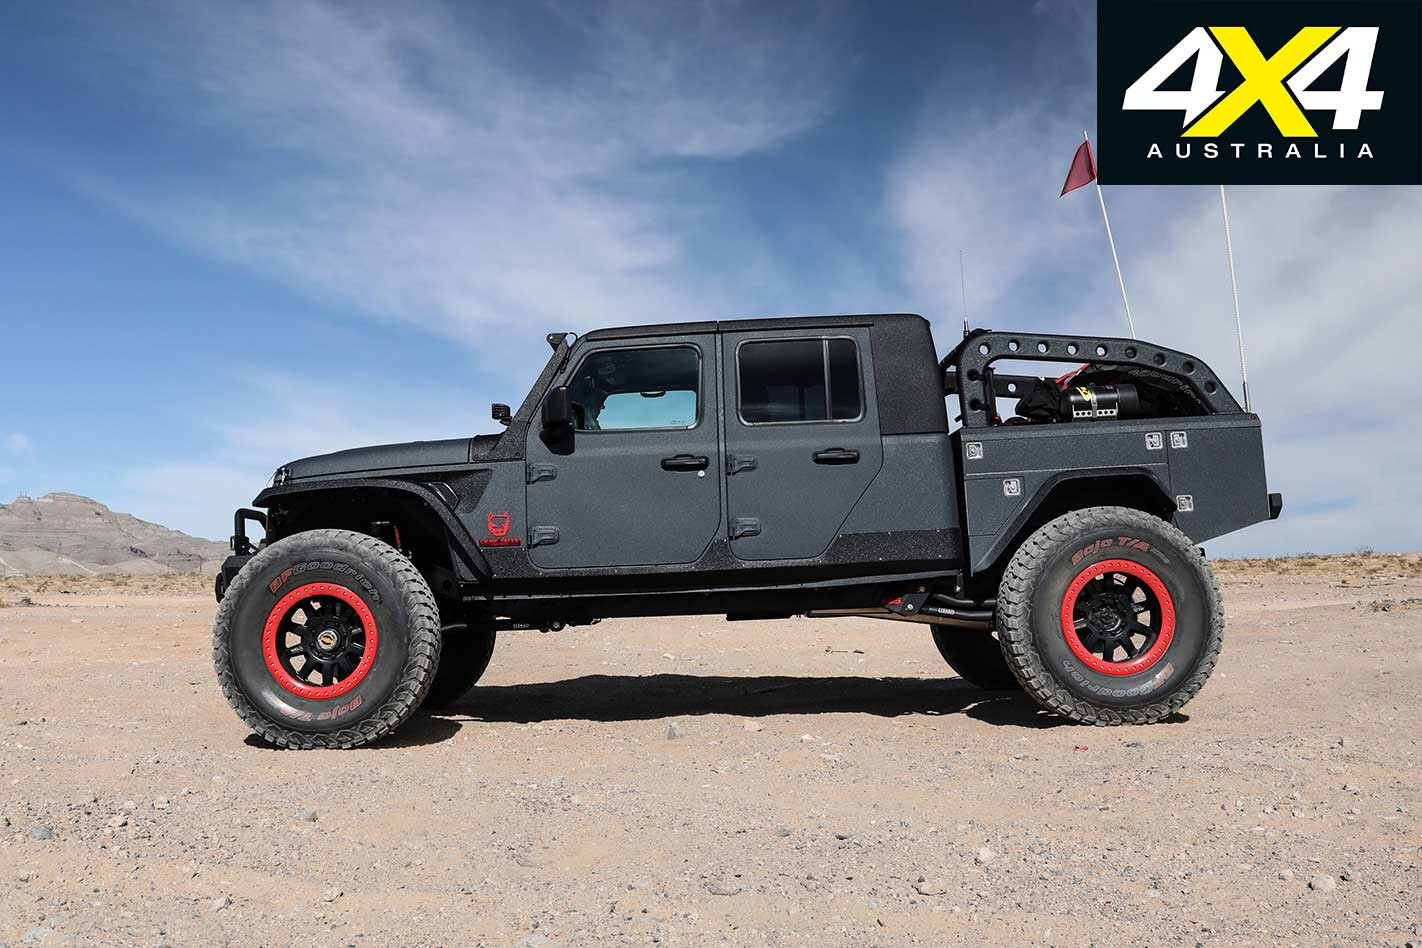
The Wrangler already has a super-short front overhang, and the tray’s profile follows suit. Ensuring all that gear stays in the tray and the driver can chase at speed, Bruiser Conversions fitted a BDS Long Arm kit (six-inch), with a JKS coil-over conversion up front and Fox 2.5-inch dampers at the rear. This thing is heavier than standard, so a set of six-inch BDS JK coils and Air Lift suspension airbags were fitted.
You’d think such a cumbersome-looking rig would be hard to steer, but Jarret and his team took care of that via a mix of Steer Smarts Yeti steering components and a modified JK Wrangler steering box.
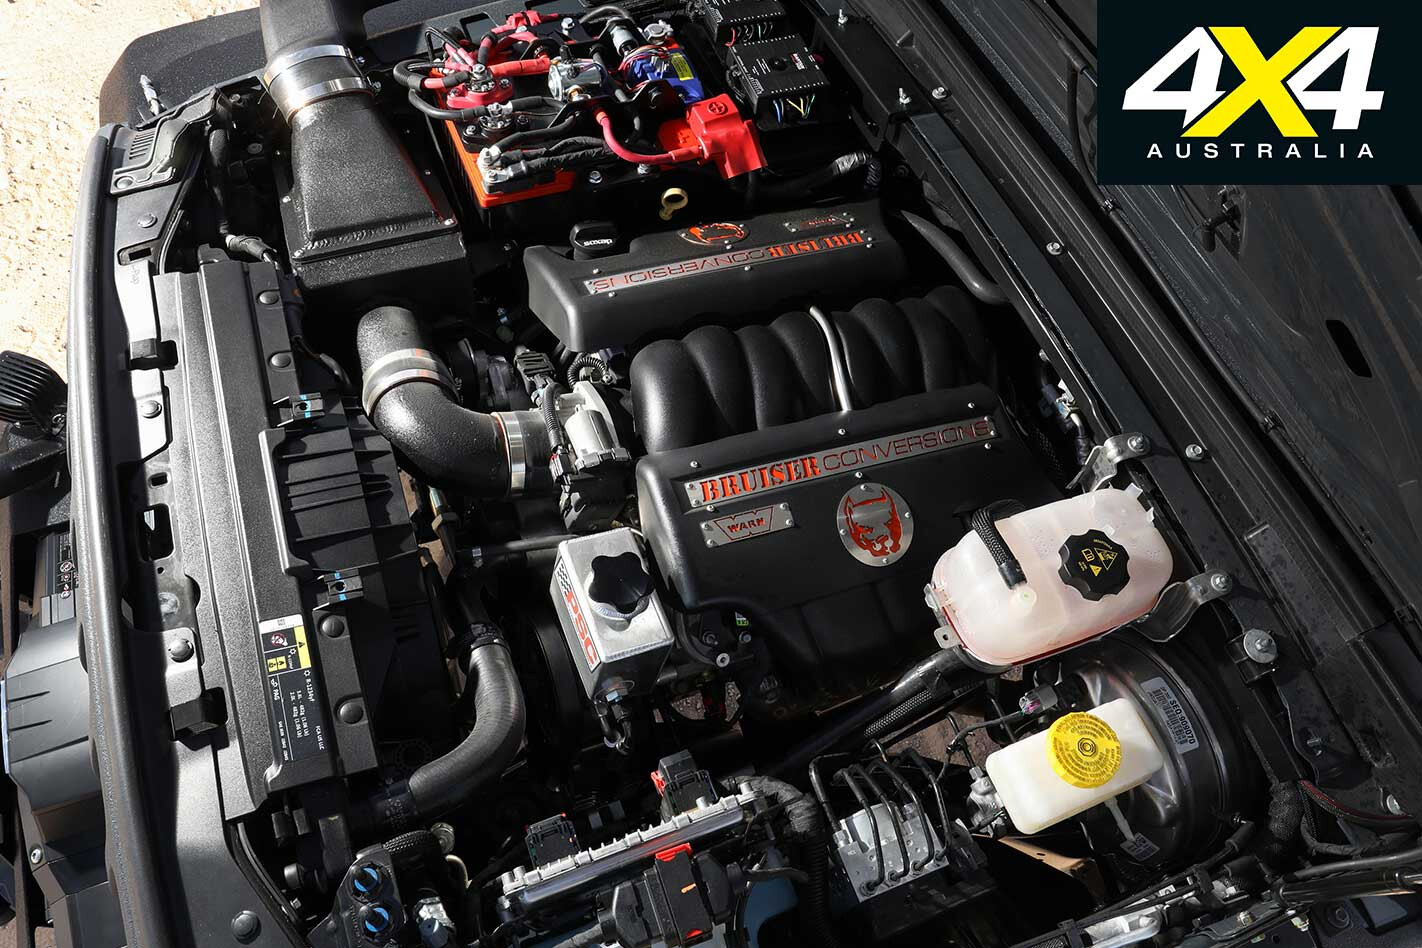
There’s nothing quite like the sound and performance of a sweet LS3 V8. Bruiser Conversions have been fitting this popular donk into converted Wranglers for years now, and this one is no exception. With 335kW/610Nm matched to a ZF eight-speed transmission, the drivetrain is pretty much bombproof.
The team use the factory radiator and ensure all the signals and software tied up with the engine management system work as per factory spec for these conversions. The only other tweak to the drivetrain is a set of JE Reel 1350 driveshafts. Tough enough for ya?
Those Extra Touches
THIS rig is no show pony; it has been built for serious off-road driving and includes all the expected additional features needed for optimum reliability and maximum fun.
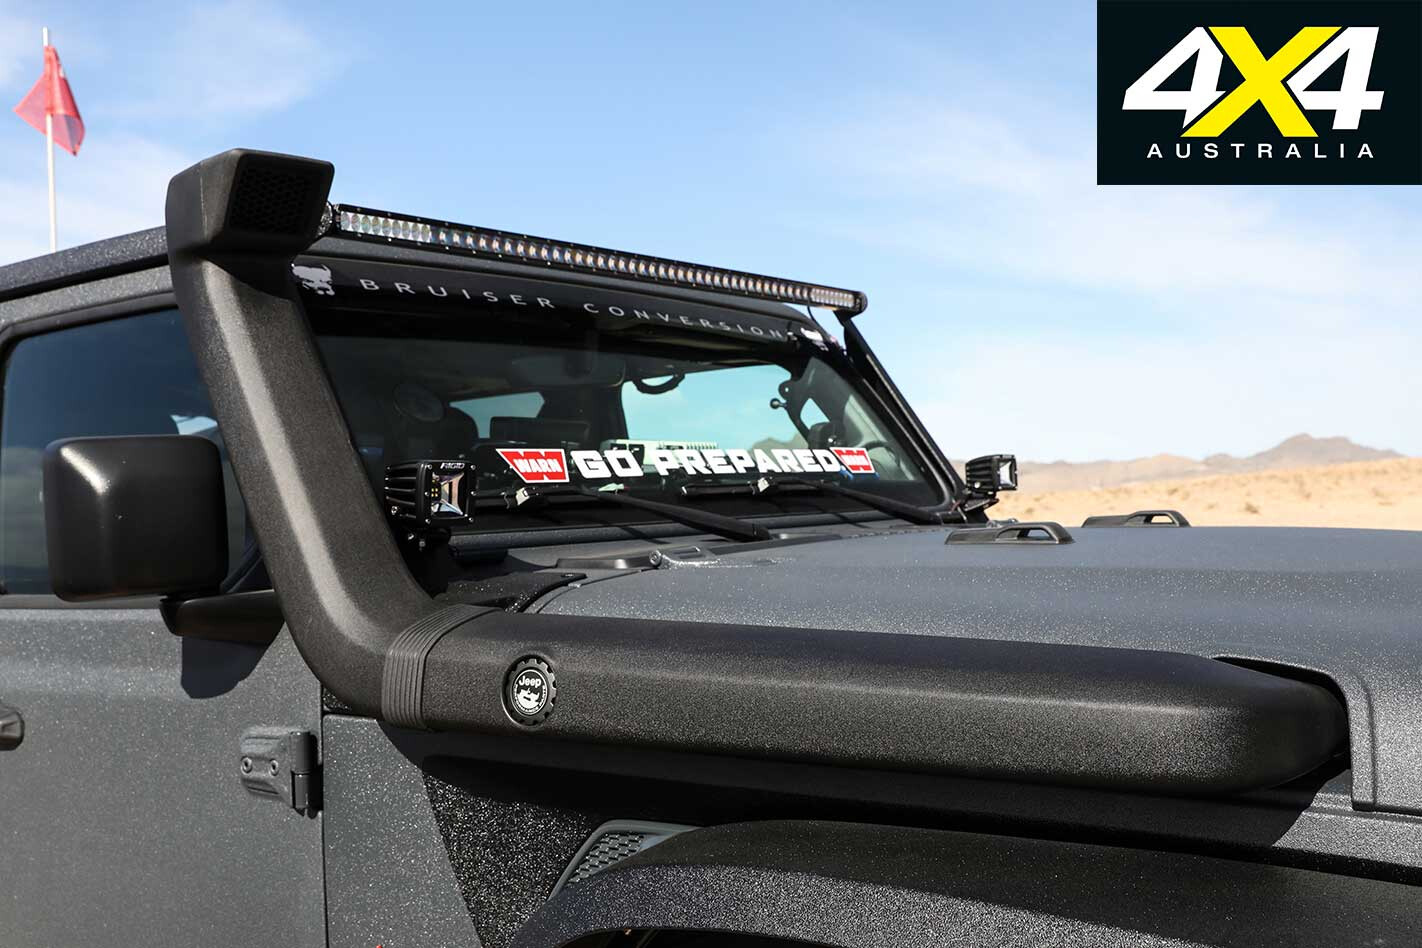
There’s a Genesis dual-battery setup that uses two AGM batteries, all of which fits snugly inside the engine bay (note the cool custom Bruiser Conversions logos on the engine cover). Clean air is accessed via a factory Mopar snorkel which can be ‘switched off’ courtesy of a neat custom airbox that houses a K&N air filter; the airbox has a removable plate designed to keep air-intake temperatures low and thus not use the snorkel if not necessary. Another neat feature is the second bulkhead that houses the JL Crew’s air compressor setup.
The ute tray includes a reverse-mount Warn winch, LED lights combined with Max-Bilt Trail LED rear lights, and a quick-disconnect setup for fitment of more LED strips. The impressive roll bar houses more lighting – three Rigid Industries chase lights – and the provision for a radio antenna.
The cabin is a mix of standard Jeep (it’s all refitted once the body, chassis and electricals are sorted), with the seats copping custom leather covered with embroidered Bruiser Conversions logos. The dashboard is covered in goodies including custom grab handles and a SPOD Bantam touchscreen, which takes care of myriad functions including lighting and fuel transfer from the auxiliary tank.
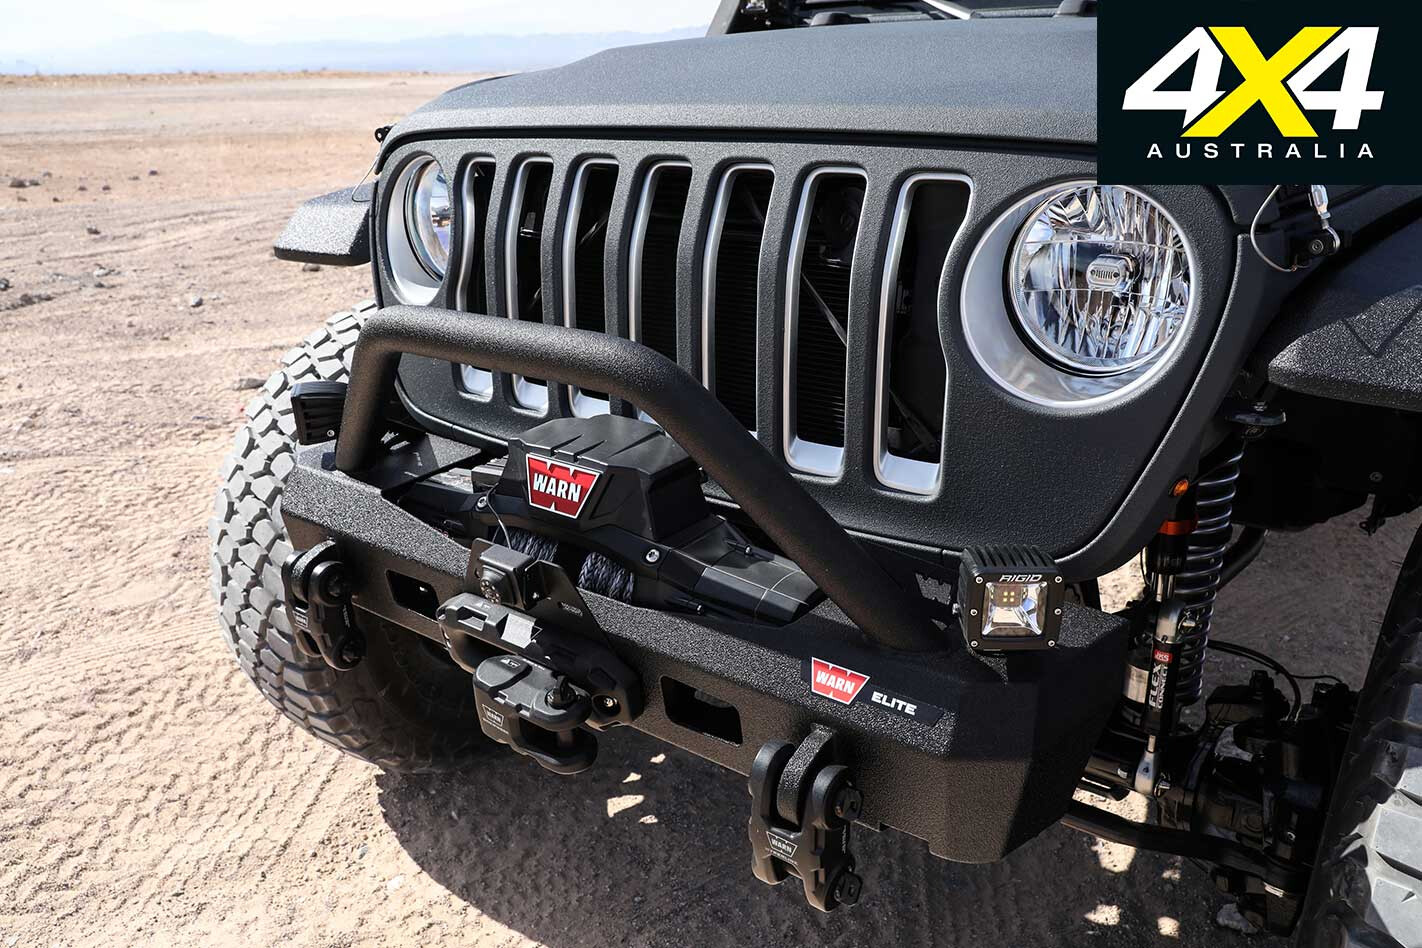
Even the Warn Zeon 12-S winch hanging off the front can be remotely controlled from the cab, in this instance via a Warn Platinum remote housed in a 67 Designs mount (beside a mobile phone mount from the same company).
Another impressive addition is the Brandmotion JK camera system, designed to give an all-wheels view for the driver. This system had to be adapted to the JL Wrangler and mods include a fairlead mount for the camera up front, fitment of factory fender tabs for the angled cameras up front, and a trick rejigging of the factory JL reversing camera that now sees a custom reversing camera mount (housing a rear camera) sitting beside it. A Magellan TRX7-CS GPS, complete with all the US comp tracks (think: KOH and Baja), ensures any chase undertaken by the team in this beast will be short and direct.
The Bruiser Conversions work is bloody impressive; a combo of custom panel work (fenders, that cool rear tray and the JCR half-doors), excellent and well-proved engineering (that sweet LS3 looking like a factory-fit), and the ability to tweak numerous aspects of a vehicle, shows this type of high-end customisation of a 4×4 is achievable and highly desirable. I wonder if they’d be up for creating an Aussie outback variant?
THE COOPER S/T MAXX rubber on my Troopy has (unfortunately) seen more bitumen than dirt roads of late. Tackling the 800km return trip from home to Sydney on a monthly basis, combined with tripping into town to front the school principal every time one of my boys gets into strife, is certainly not what either the Troopy or the aggressive all-terrain rubber is best at.
Hopefully my boys’ enthusiasm for camping and exploring our local bushlands help to clarify that we are indeed using the big, boofy 4×4 responsibly and not just slashing about the mud for the fun of it.
Cooper claims these relatively aggressive all-terrains are to be used 50/50 on road/sand and dirt/mud, and they’ve handled everything with ease to date; plus, I’ve had zero punctures and only slight chipping, both to be expected considering the gnarly tracks we tackle.
However, they aren’t the quietest all-terrains on the market. While they certainly don’t emit muddie-type drones, they are louder than most road-oriented rubber. Keep in mind that a Troopcarrier doesn’t have the best sound-deadening characteristics, so plenty of road noise will infiltrate the cabin compared to something like a 200 Series.
To increase sidewall strength the Coopers feature extra plies and the latest Armor-Tek technology, while a fancy new chemically bonded silica tread compound improves grip and longevity. Remember, the larger the gaps in the tread (the voids) the larger the rocks or stones the tyre will pick up and toss out.
On-road grip in the dry is fine, but wet-weather grip isn’t the best. Perhaps the silica and natural rubber compound mixture could have an extra squirt of ‘sticky’ thrown in. They aren’t terrible, they’re just not as good as a dedicated on-road 4×4 tyre.
Given the 70 Series’ mismatched wheel tracks front to rear, I fitted 25mm offset rims to the rear (making it 50mm wider than the standard rear end) to partially correct the Toyota-designed mismatch.
Combined with the wider-than-standard tyre width, to help overlap the front tyre tracks with the rears, this has resulted in far less negative effect in sand. The problem is when I rotate my tyres (which I don’t do often enough) I can only swap from left to right, not front to rear.
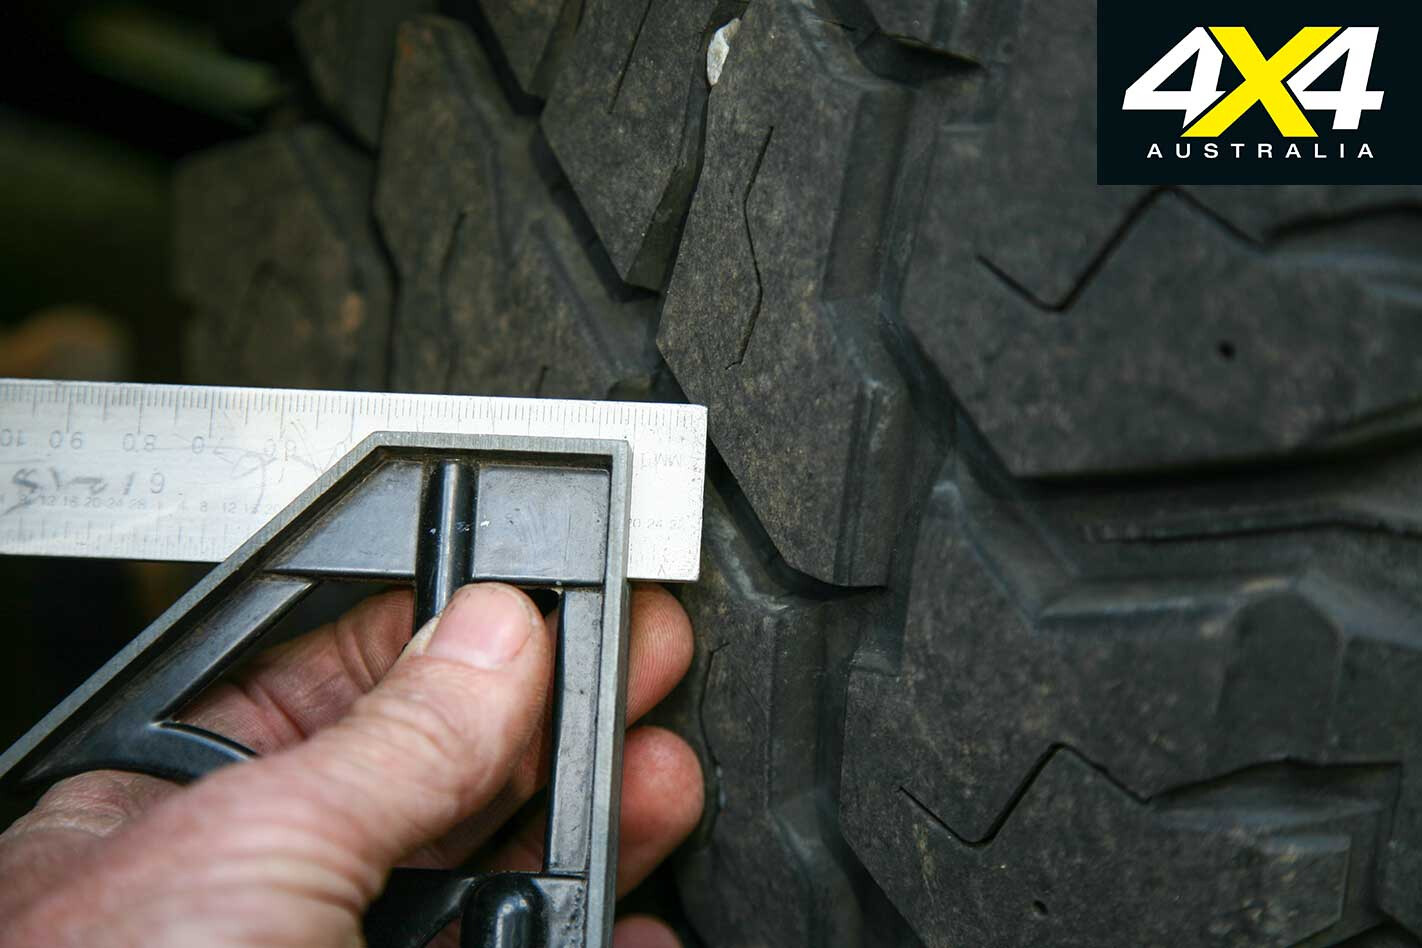
The downside to this is the power-driven rear tyres are wearing faster than the front tyres, especially as the tyres age. To put it in context: with 40,000km of wear my front and rears both measured 10mm (there was 15mm from new or 14.7mm quoted by Coopers). After 50,000km my fronts are 9mm (not bad) while the rears are down to 6mm.
I could remove the rubber from the rims to help with rotations, but that ain’t going to happen. Perhaps the faster wear is related to the timing – I chipped and upgraded the exhaust on the Troopy for more power, and the extra acceleration might be causing minor increases in wear rates. Or perhaps it’s derived from towing a caravan over a few thousand-kilometre trips. I’m clutching at straws here and can’t really prove what has happened.
Would I go another set? Without wanting to lose the off-road ability or tough looks, I’m happy with the on-road handling of the big bus. So I’d have to say yes to putting on another set.
It was the chance to experience truly remote exploration; a small team of 4×4 vehicles on a reconnaissance mission with the aim of extending the NT’s famous Binns Track farther north, linking this gigantic off-road route to the Top End’s spectacular Litchfield National Park.
As with any tale of adventure and exploration – and even in this modern tech-laden age – the recce trip was exciting, challenging, and a little bit heartbreaking for 4×4 Australia’s crew. But for those on the expedition, it’s still counted as one of those ‘trips of a lifetime’. This article was originally published on the January 2010 issue of 4×4 Australia.
Cecil Madigan, Ludwig Leichhardt, and Burke and Wills. All famous names linked to exploratory adventures centred on forging new paths across this massive country and now – take a deep breath of disbelief – joined by Walker, Newham and Stafford.
I know, I know, it’s reaching the limits of outrageousness to make such a statement. But, after spending some time in the Northern Territory’s more remote regions, part of which was undertaking a reconnaissance trip focused on extending the NT’s 2191km Binns Track, Brad Newham, John Stafford and I experienced just a taste of the epic man-against-nature struggle so prevalent in the glory days of these famous pioneers.
All big adventures start small, and this one was no different. I had been planning an off-road epic into the NT for some time and had been in contact with John Stafford (senior industry development officer, Destination Development, Tourism NT), the man behind the Binns Track’s latter stages of development.
The original idea behind the Binns was to finish at Litchfield National Park, around an hour south-west of Darwin, finishing a trans-Territory off-road journey that would begin at Mt Dare, in SA’s northern Simpson Desert. What our tourers eventually found was a track that started at Mt Dare but finished slightly short of the mark – at Timber Creek – after a final off-road trek through rugged Gregory NP.
Brad, Michael Ellem (Offroad Images) and I completed the Binns Track in 2008 (see 4X4 Australia Aug, Sept and Oct 2008 issues) but were left with some tantalising words from John regarding the eventual extension.
When I rang John for assistance with my latest trip he barely had the chance to get the words out about a potential reconnaissance of the missing leg of the Binns, before I was shouting down the phone that we’d be there – no matter the time or place.
The prospect of being modern-day pathfinders brought out the latent explorer in me, and I spent all of 10 seconds convincing Brad Newham to accompany me. After all, in this day and age of a near fully mapped and catalogued planet, the opportunity to play explorer couldn’t be missed.
The 21st century incarnation of those hardy early explorers has a much easier time of it when setting up an expedition.
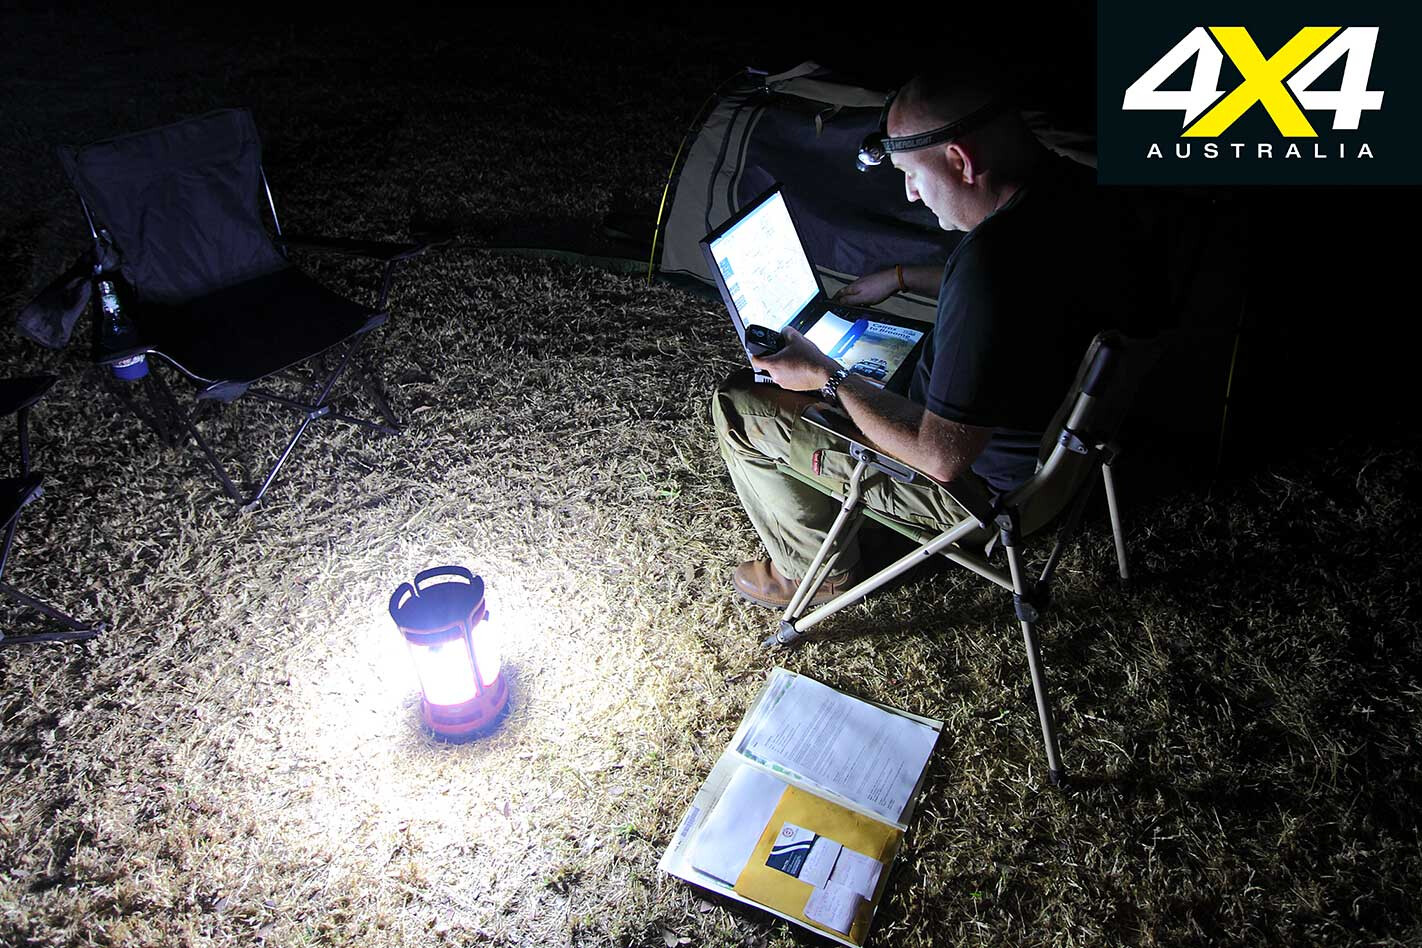
During planning, a flurry of emails containing Google Earth overviews, GPS waypoints and enlarged topographic maps of forgotten station tracks, passed between Sydney, Elizabeth (SA) and Alice Springs – such is the world of the modern-day adventurer.
Excitement built as phone calls were made discussing possible obstructions – river crossings, overgrown tracks and any pastoralist/land-title concerns – countered by the obvious potential of John’s mapped-out route.
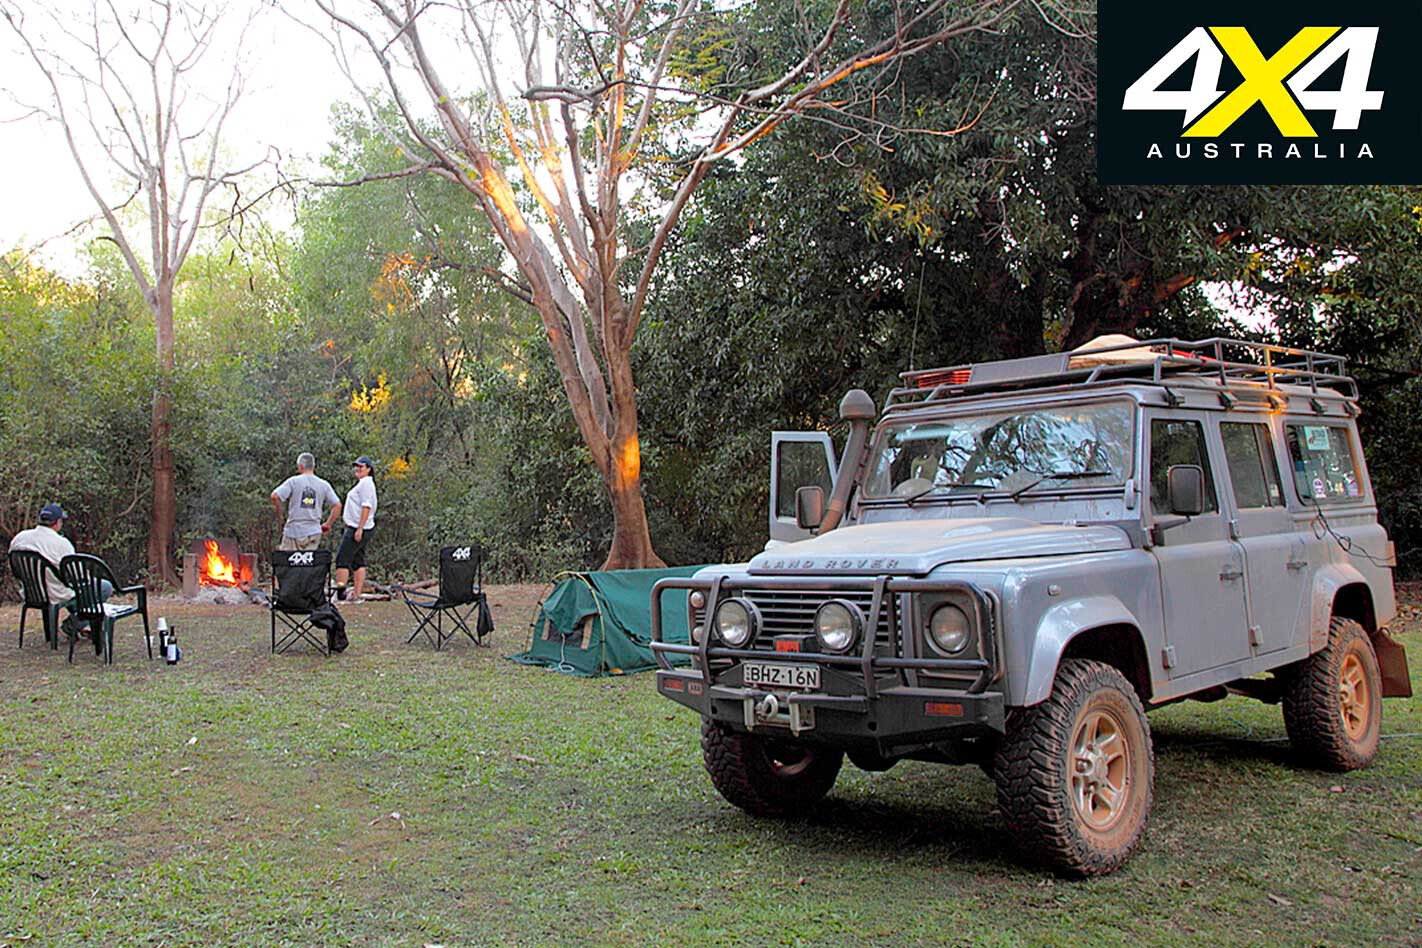
While John sorted the navigational aspects, I organised 4X4 Australia’s transport. A super-capable off-road vehicle, with plenty of clearance and high load capacity, was a must, so a Land Rover Defender Td4 was shipped to Brad’s ARB Elizabeth workshop for fitting out with a number of trip-essential accessories.
Getting there is half the fun, according to some. However, after months of organising and anticipation, the 14-hour drive from Elizabeth to Alice Springs was decidedly low-key. Passing the time was easier, with Brad and I reminding each other that it would only get better! And it did, as soon as we arrived in Alice Springs. John, his wife Blythe and daughter Ellie offered us a top Territory welcome and a much-needed bed for the night.
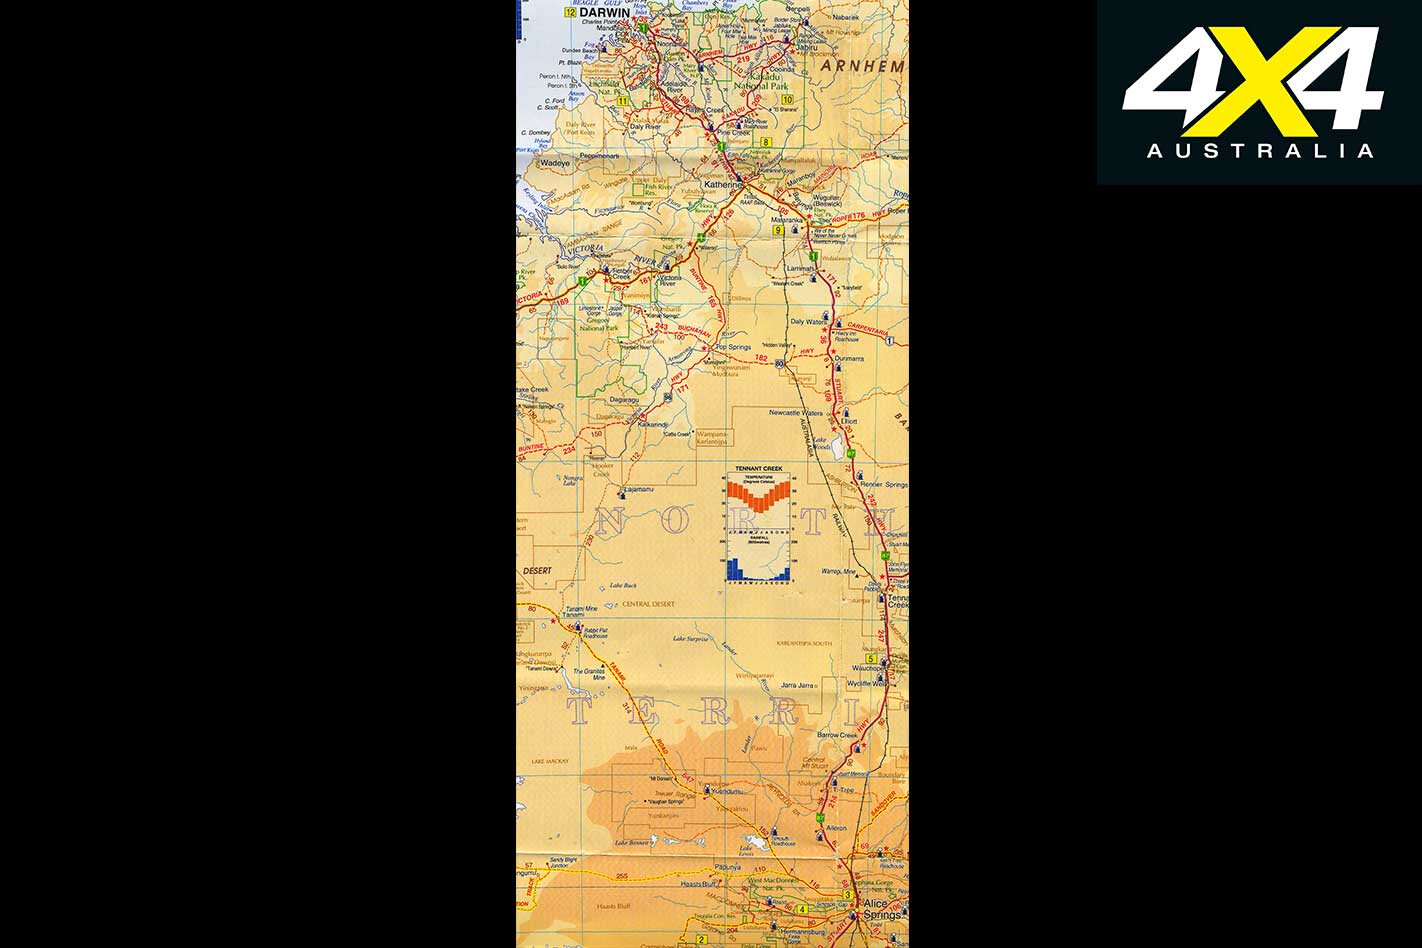
The Binns Track’s missing link is from Gregory NP to Litchfield NP. With travellers currently finishing at Timber Creek, the logical extension is from Flora River Nature Park, north-east of Gregory NP. John’s intended route went north from Flora NP, through pastoral properties and Aboriginal land along rough, overgrown tracks to the Oolloo Crossing, at the Daly River, which brings travellers out just south-west of Daly River community.
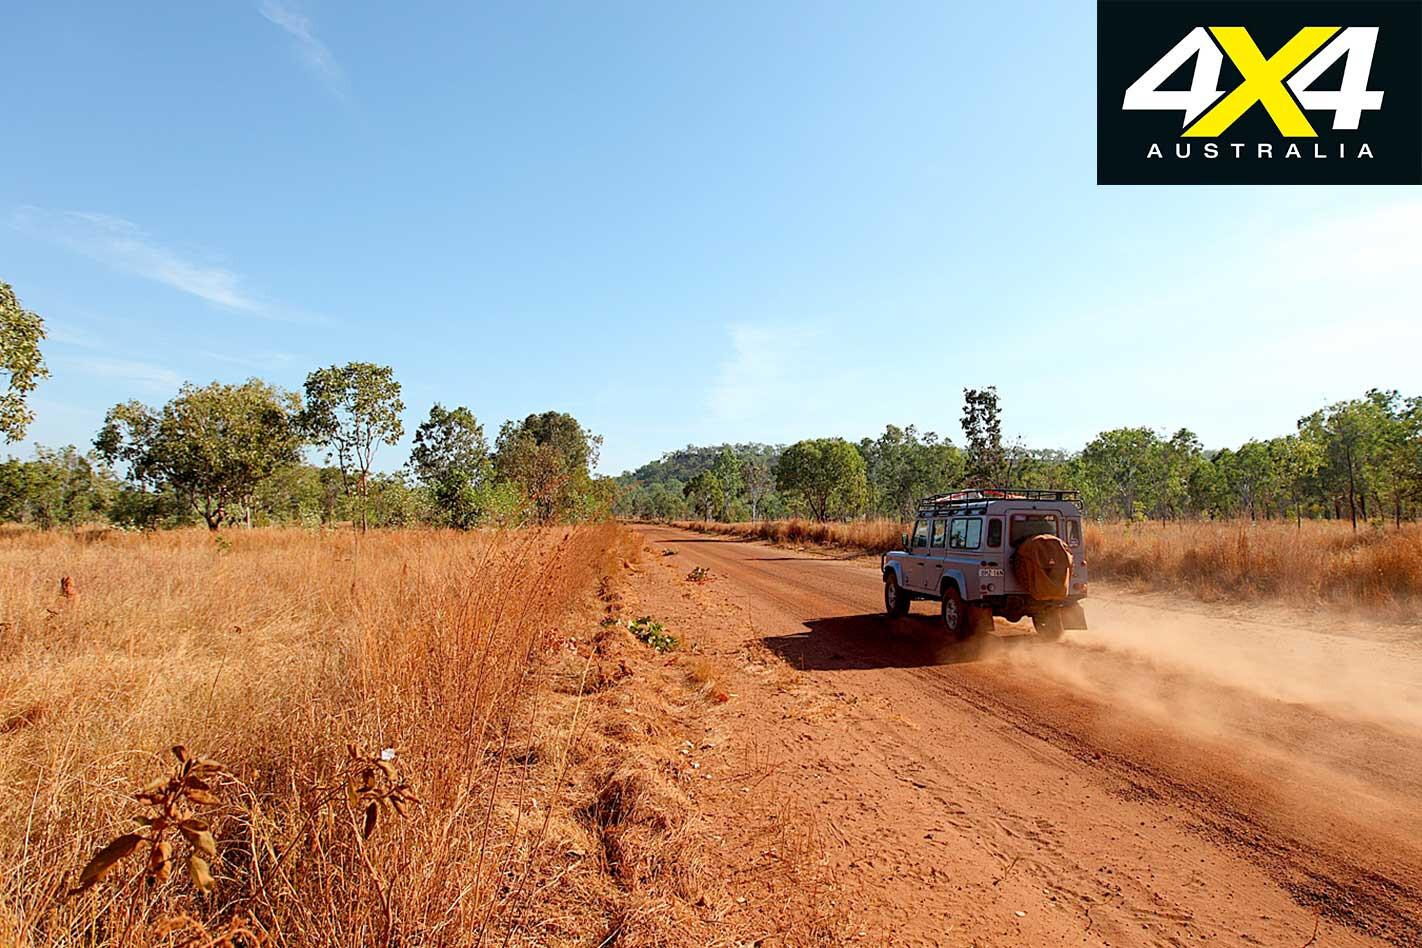
Rather than endure any more of the Stuart Highway’s monotony heading north, we took the off-road option: the Tanami Road. The Tanami is an Australian off-road icon that has undergone a slow transformation. Gone is a significant amount of the infamous corrugations, replaced with bitumen for long sections.
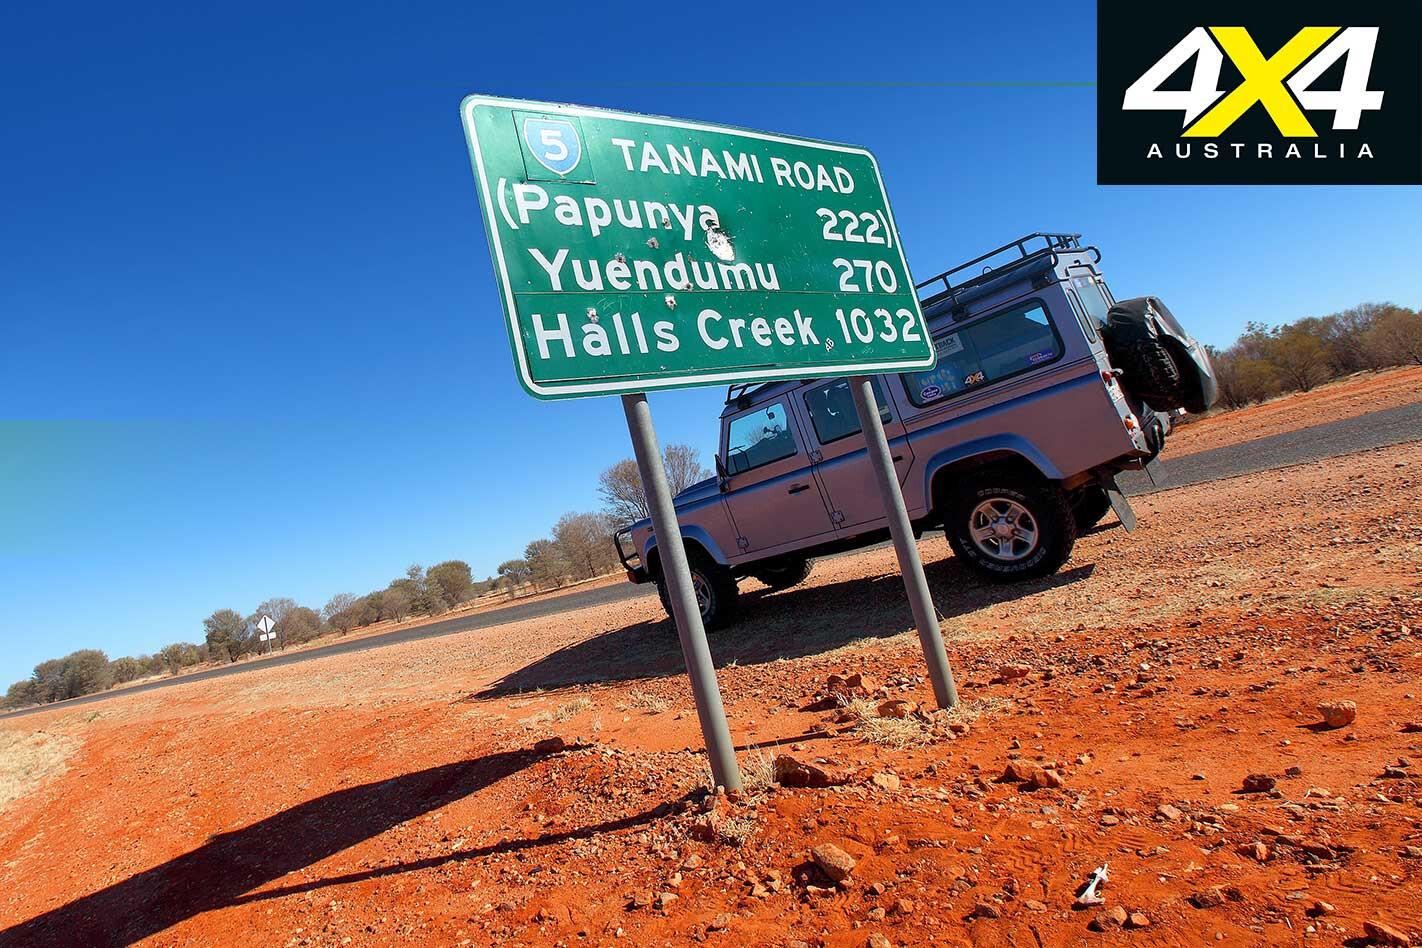
This civilising of the Tanami hasn’t taken away its attraction of being the quickest route to WA, or stopped it from offering some unique outback experiences. We had only travelled around 100km when we sighted a lone camel munching on some trees alongside the track.
It was the first photo op for me and gave Brad and John the chance to drop tyre pressures. Camel pics and tyre pressures sorted, we were soon on our way to our first stop of Tilmouth Roadhouse for a quick tour through its art gallery and a look at its impressive facilities.
Our plan from here was to continue along the Tanami to Rabbit Flat, before turning right onto Lajamanu Road and continuing north. The best laid plans, as we know, can come a cropper, and for us it was the realisation that the Defender’s 75-litre fuel tank just ain’t big enough for long-distance journeys. We had to drop our speed, reaching Rabbit Flat Roadhouse just before dusk for a refuel.
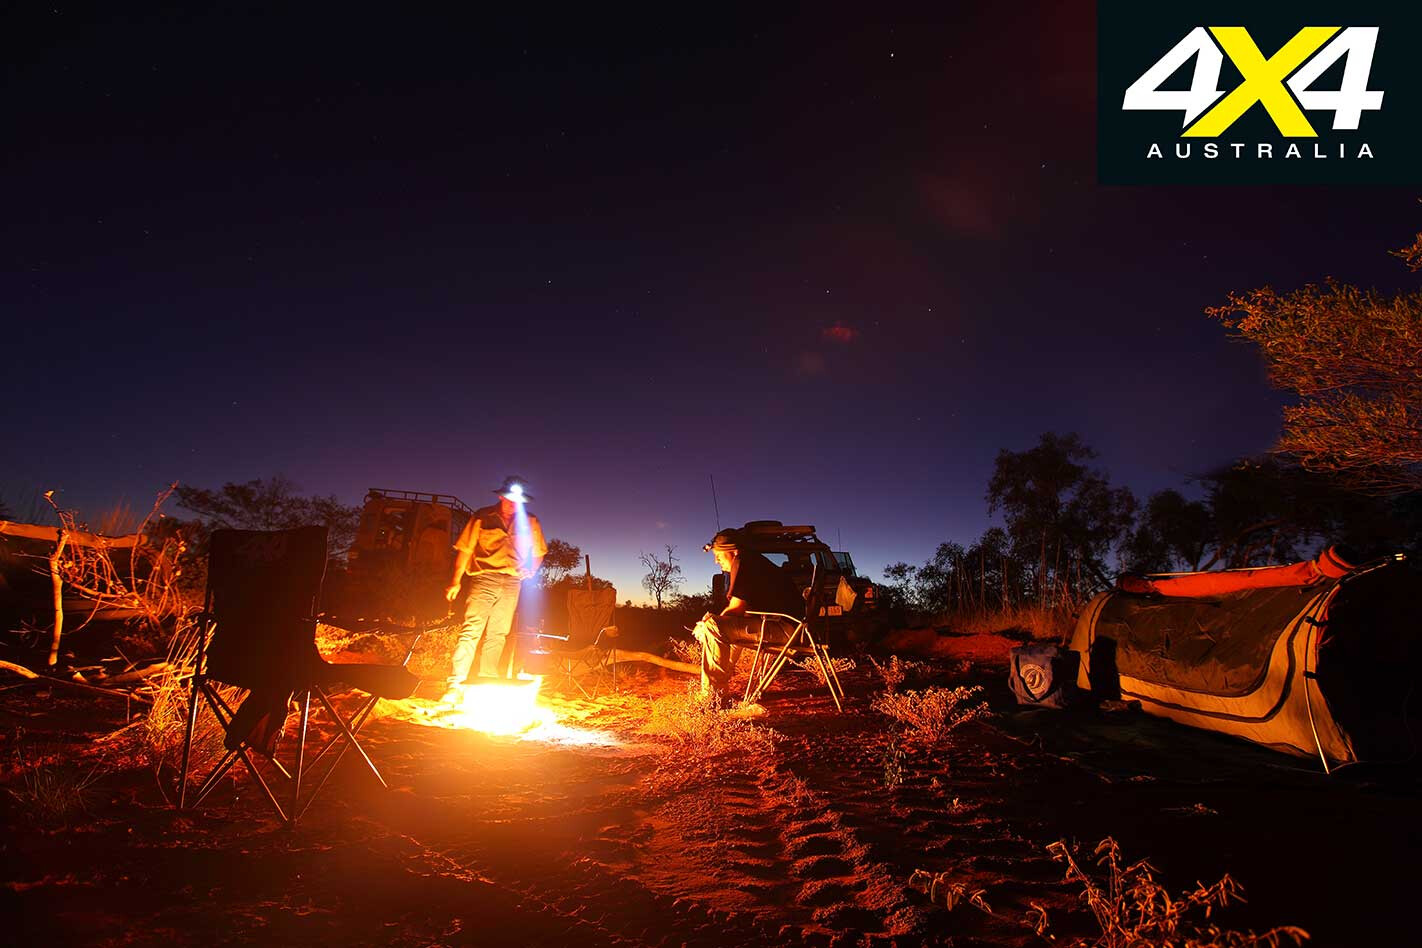
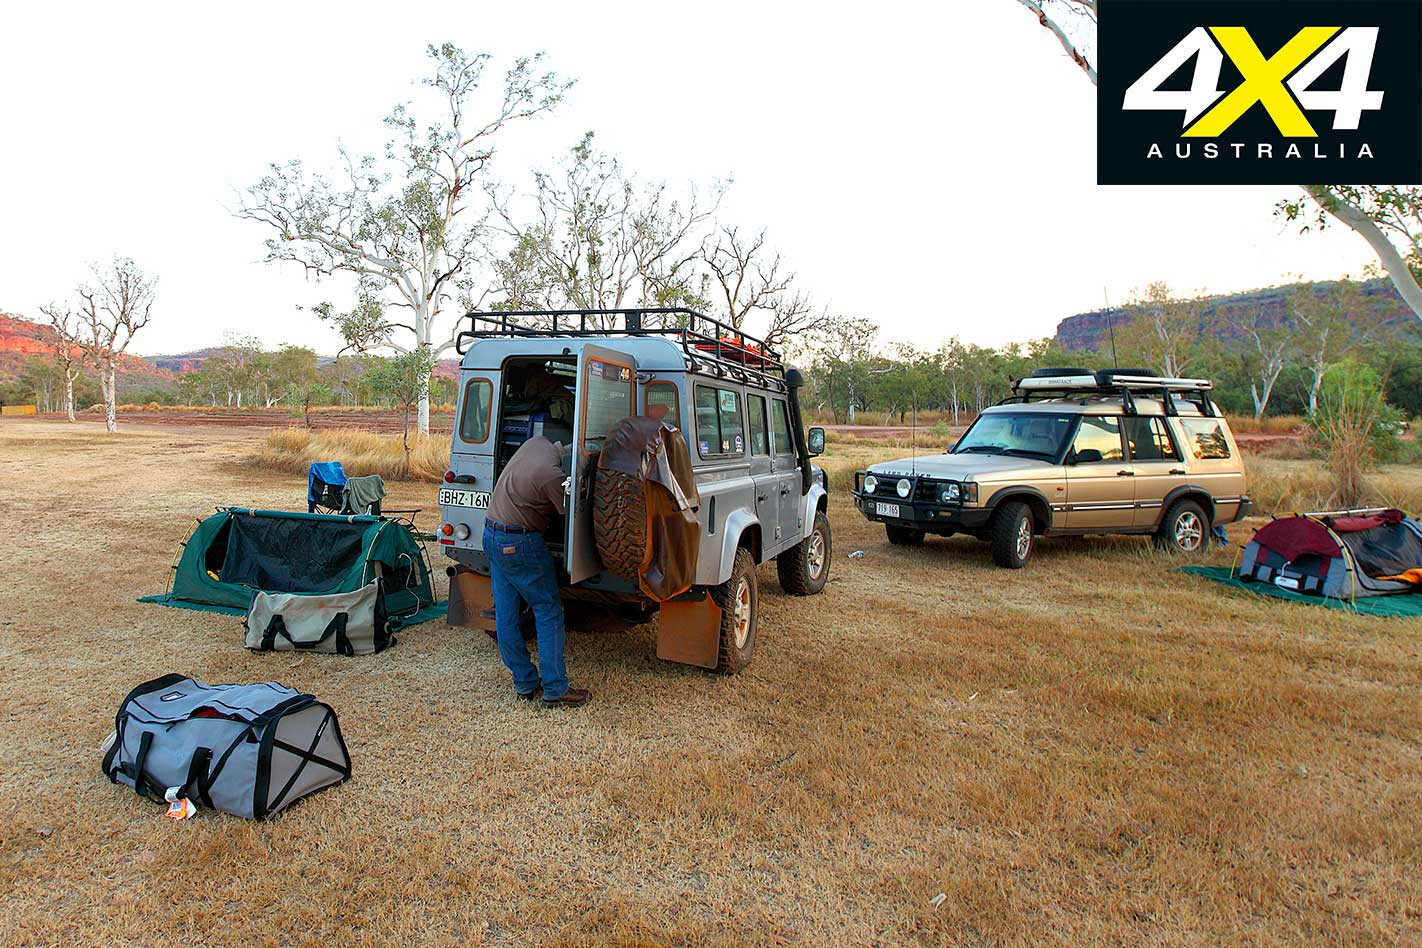
It is always hard to convey to people a remote desert campsite’s unique appeal, but that night’s stopover, just off the Tanami, ticked off all the highlights: an impressive light show in the sky, courtesy of a multitude of stars; a warm fire; cold beers and great company. Fuel worries were soon forgotten.
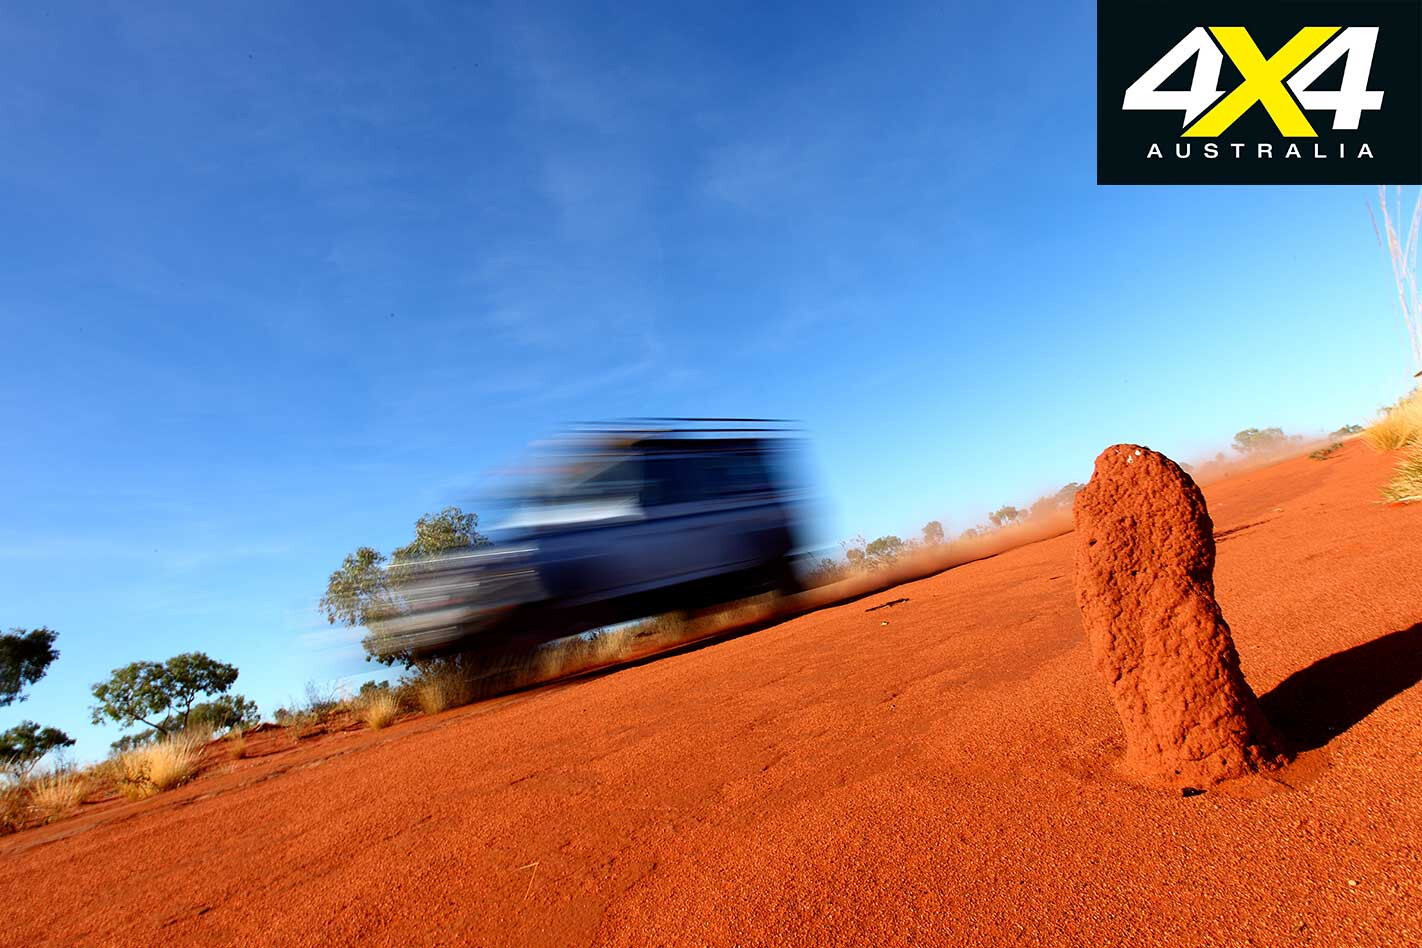
The Tanami Road was great, but a wee bit crowded with other traffic; we still craved that isolation synonymous with desert travel. Turning north onto Lajamanu Road our patience was rewarded; we encountered only two vehicles while passing through some spectacular desert country, dotted with rock-covered hills.
We had not realised that most community fuel depots would be shut on Sundays – the word ‘research’ comes to mind – and, once again, we had to rethink our fuel strategy. After passing through Lajamanu, we struck it lucky at Kalkarindji, where the general store was open and diesel was available.
From here, it was a straightforward journey along wide roads to Top Springs, where we paid an exorbitant amount to top-up the Defender. From Top Springs we continued along the Buntine Highway before joining the Victoria Highway and making tracks to the well-appointed Victoria River Roadhouse for a cold beer, shower and feed. And yes, it was in that order.
The plan from here was to head to Flora River NP to meet up with Greig Taylor, of the Northern Land Council, who was joining us on the recce as part of the proposed route travelled through Aboriginal land.
We arrived earlier than expected, so took the chance to do a preliminary scout around the immediate area’s station tracks, stopping to have a quick yarn – and confirm our route – with three station hands working on some fencing.
John’s main concern at this stage was the initial crossing of the Flora River but, after travelling along some rugged station tracks to reach the river, we soon dismissed our concern as the water was barely wheel-rim height – the proposed route was looking good. We returned to Flora River NP to meet Greig, had a quick briefing, and returned to the station tracks that would lead us, eventually, to Dorisvale Station homestead.
Google Earth, sat-nav and paper maps are fantastic, but they still don’t tell the real story when it comes to terrain you may encounter. Satellite mapping can often be out of date and tracks that were current at the time of mapping may no longer be so.
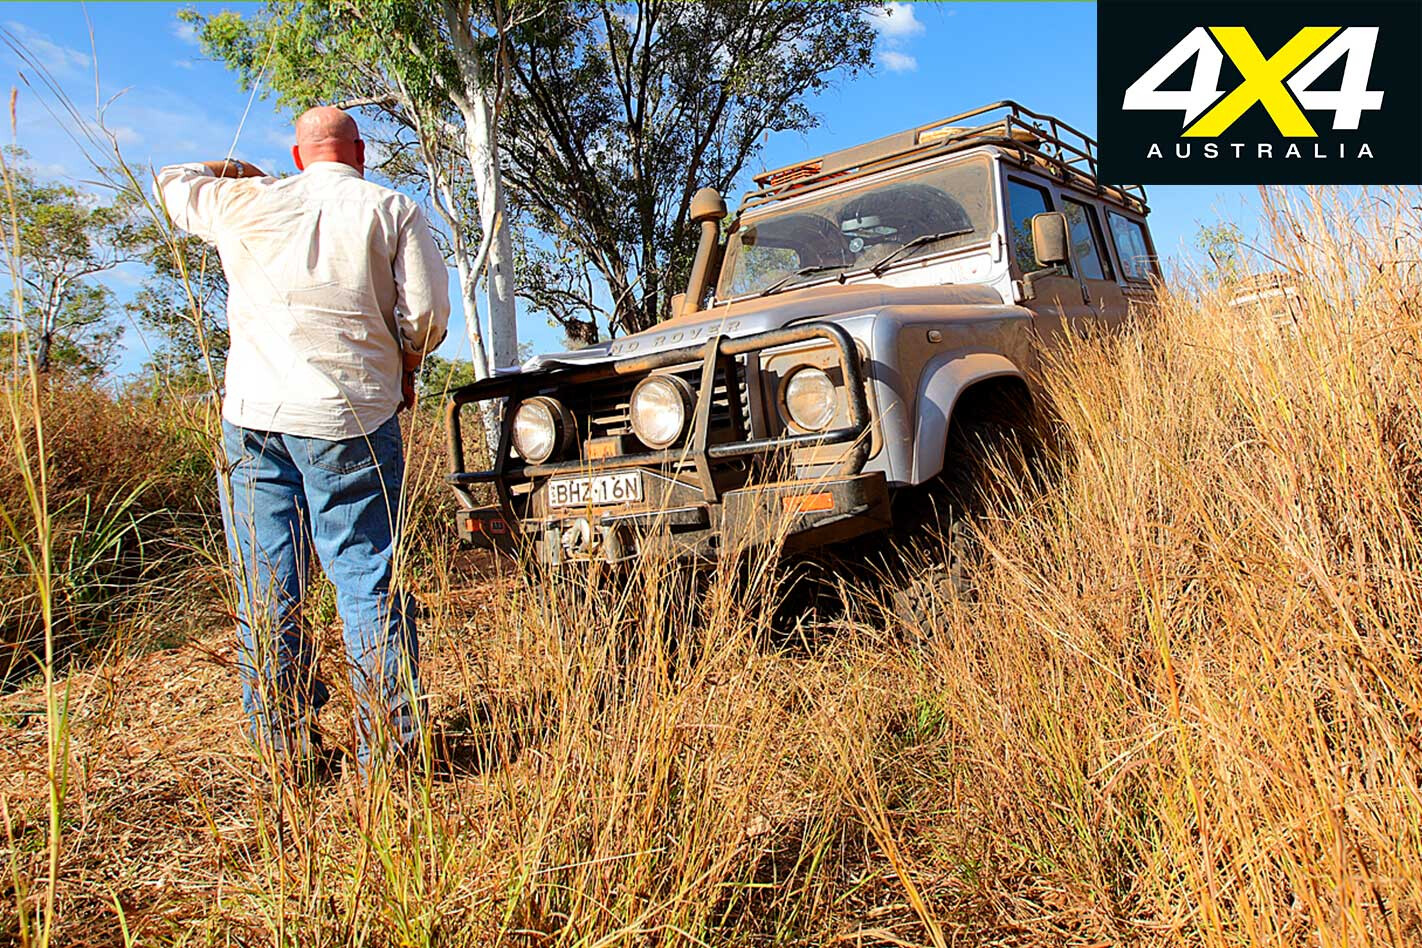
We had been following a sparse track along fence lines for a couple of hours, with some steep pinches testing traction levels as the vehicles fought for grip on the loose, rocky climbs when we reached what we thought was our point of return.
We were down in a small valley, next to a dry creek bed, in vehicle-high grass, puzzling over a track that existed in the digital world – it was on our VMS Touring 500 GPS unit – but had physically given up the proverbial and disappeared from the landscape.
The deep, dry creek bed in front of us had no visible track around or through it, and a three-metre high wall on its other side, topped by the ubiquitous tall grass. It was our first serious obstacle and, after scrambling across the creek bed, we still couldn’t see where the track went. The GPS said it was there and also showed one that ran along the riverbed adjacent to our position.
After much head-scratching, Greig tramped the long way around and through the dry riverbed, scrambling up and into some even taller grass, and then across an old fence to find faint twin tyre indentations. There wasn’t much room to manoeuvre – the three vehicles leaned precariously over the steep drop-off as they negotiated the tight access point – but we were soon on track again.
As we continued north, the overgrown landscape gave way to more open terrain, following the track as it snaked between creek beds and boggy, potentially vehicle-trapping swamp areas. It was here we spotted one of the Territory’s most infamous and destructive residents: a feral water buffalo. The stand-off between us and the lone bovine lasted for only a couple of minutes – and a few photos – before it sauntered off.
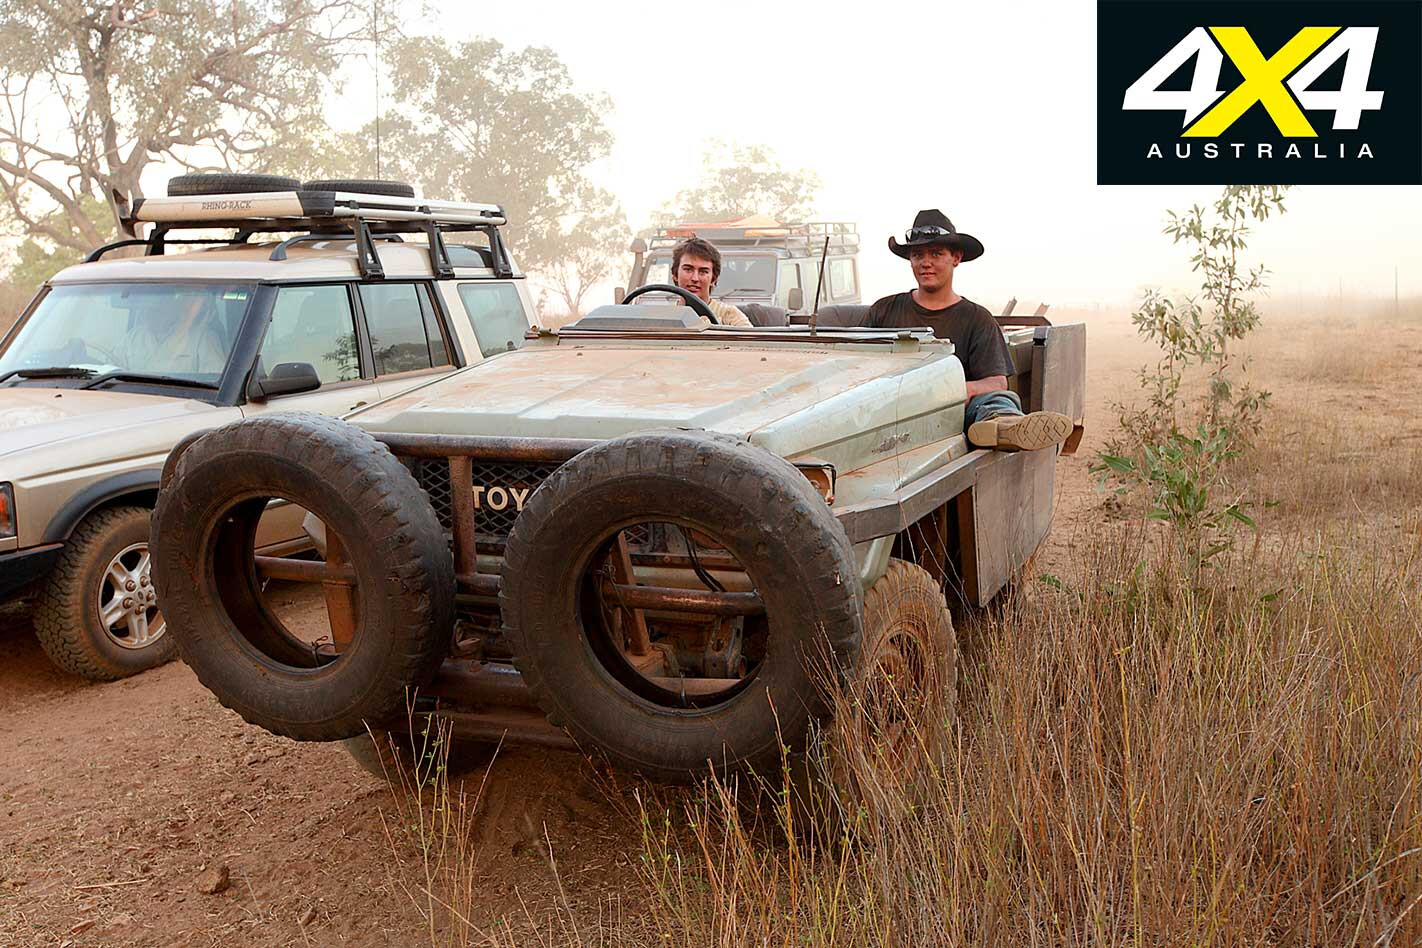
Country hospitality is a given in the outback, and so it was when we dropped in at Dorisvale Station for a quick hello, and were immediately offered beers and a hot meal. The station was preparing for muster the next morning so, not wanting to be an annoyance at this important time, we begged off from dinner and followed one of the station hands in a bull-catcher to our own private camping oasis – a site perched between two creeks.
It had been a hard day for drivers and vehicles, but we knew tomorrow’s 40-odd kilometres would contain the crux of the trip: the Oolloo Crossing. The tracks we were keen to follow hadn’t been used for years, so we were expecting more route-finding and trip-finishing challenges before we reached Oolloo Crossing.
We tracked north the next morning, running parallel for a lot of the way with Jinduckin Creek. The terrain shifted from dense forest to dusty, dry sections and then to more open areas where the flora was in the first throes of regrowth after the annual burn-off.
The tracks were barely visible, resulting in the Defender, with its GPS showing each track, acting as the rudder for John’s lead Landie. Most of our creek crossings were dry but moderately challenging – the damage the wet season causes was clearly evident – with two deeper ones, just before we reached track’s end at Oolloo Crossing, taking some careful wheel placement to cross.
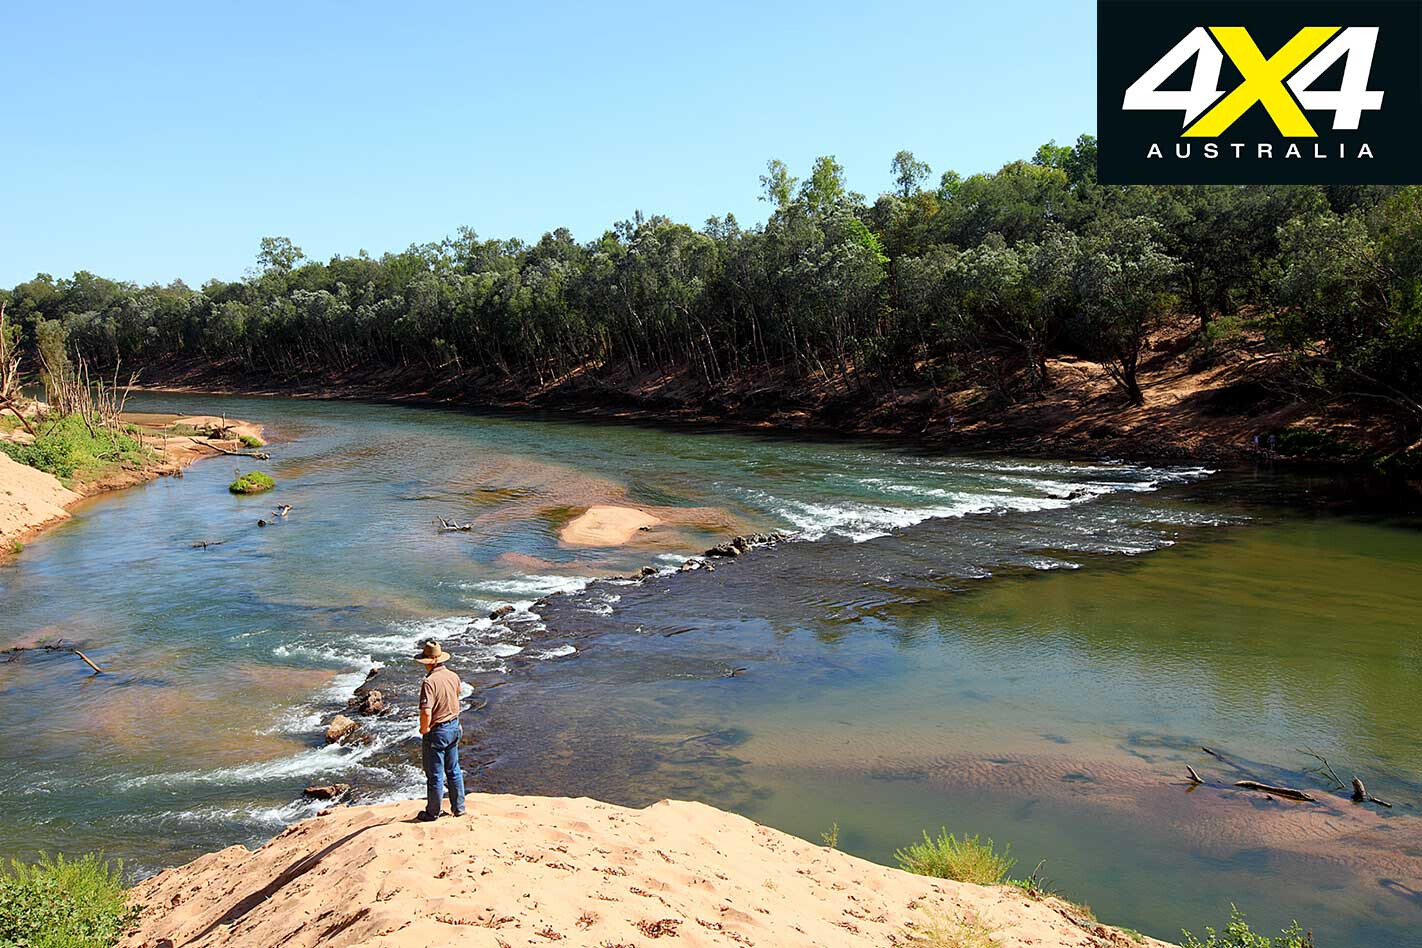
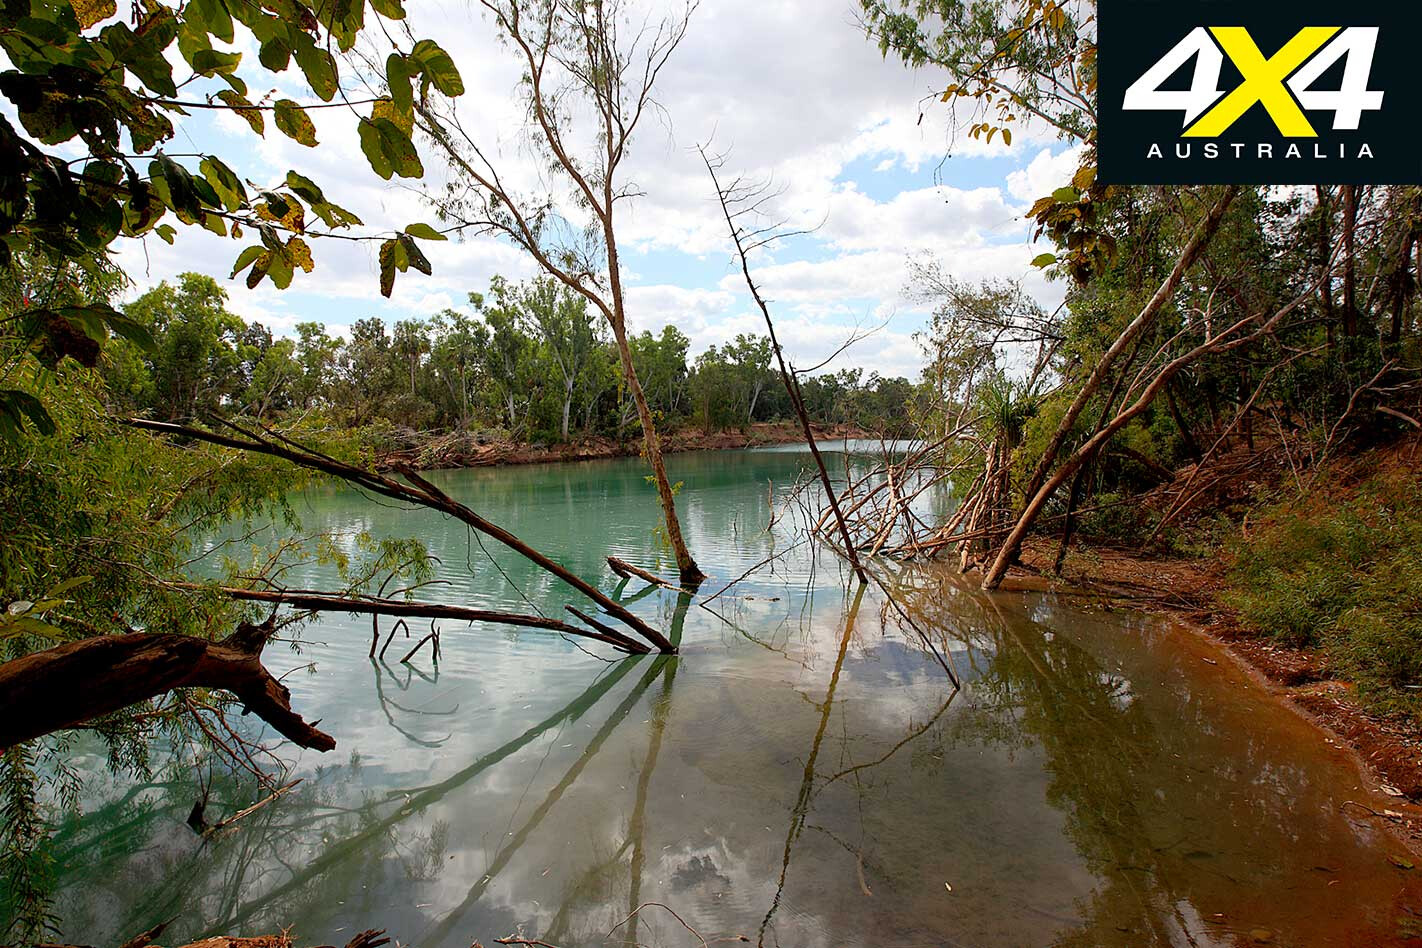
After a couple of hours we were there; our convoy edging down the cutting toward a wall of trees that looked like they had been flung about by some high wet-season floodwaters. Jumping out, we continued on foot, clambering over a huge sandy riverbank to stand well above our final destination.
The ford at Oolloo Crossing was still there alright; it was just around five metres below the vertical, sandy riverbank we now stood on. Disappointment – there was no way a sustainable track could be built to withstand the Daly River’s might during the wet season – merged with admiration of the brute force of nature.
Even with the latest navigational technology, super-capable vehicles and plenty of experience, the territory’s ageless – and powerful – landscape had defeated us. John, ever the optimist, muttered something about future plans for a track on the other side of the river, starting way back south, but for us, this abrupt end to our exploratory foray meant our path-finding journey was over – for now.
An adventure is never over until you get home – or back to Dorisvale Road in our case. Somehow, on the return journey, we managed to lose Greig. He was leading on the way back (we’d hung back to keep clear of his dust) and, as we entered some boggy terrain, the last radio call we got was, “Can you guys still see me?” At that stage, we could – just; his white roof was visible in the distance through a dense stand of trees. However, another few kilometres along the track and he disappeared – no radio communications and no white Troopie.
For modern-day explorers it was a tad embarrassing. We returned to Dorisvale Road where, after a half-hour wait, the white Troopie appeared, with Greig intact – and only slightly embarrassed. He’d followed another of that area’s myriad tracks and had nearly ended up in a swamp. I am sure the ghosts of explorers past would be shaking their heads.
The recce had ended in disappointment but we were keen to finish off the future Binns Track so, after farewelling Greig, we continued north to Daly River and Mango Farm Tourist Resort for our rendezvous with Matt Grooby (Tourism NT’s industry development officer – indigenous tourism), who was going to spend the next week with us as we ventured farther north and west.
It was surreal being back in civilisation – although we soon adapted after diving straight into the showers, plugging in our power-dependent gear and cracking a coldie. Then, it was off to an even more welcome realignment with the modern world: a feed of barramundi and a few more beers – at the Daly River pub.
The focus for our next day was initially going to be barramundi. Matt had organised a couple of tinnies to get us out on the Daly River, and throw a line in. However, after half an hour with no bites or nibbles, we decided croc spotting was a lot more fun.

The Daly River is renowned for having one of the highest concentrations of estuarine (saltwater) crocodiles in the country and we weren’t disappointed – some of them were massive, and demanding plenty of respect. This was something Brad failed to recognise when I asked him to move just a little bit closer to a particularly large one, only to hit a sand bank and stall the boat engine.
As we drifted ever closer to the bank – and a croc – the term ‘ageing fast’ took on a whole new meaning and I could hear some pretty frantic clicking of the start button as we continued floating forward.Fear aids exaggeration, I guess, but it seemed like an eternity before Brad selected reverse gear, we both simultaneously barked a nervous laugh, and the tinnie was moved back to a safer viewing distance.
Our afternoon at Daly River was spent with Agnes Page, a member of the Daly River community, who is heavily involved in developing indigenous tourism in the area. Agnes offered a fantastic insight into her land and the plans the community has (read “A Country Welcome” below).
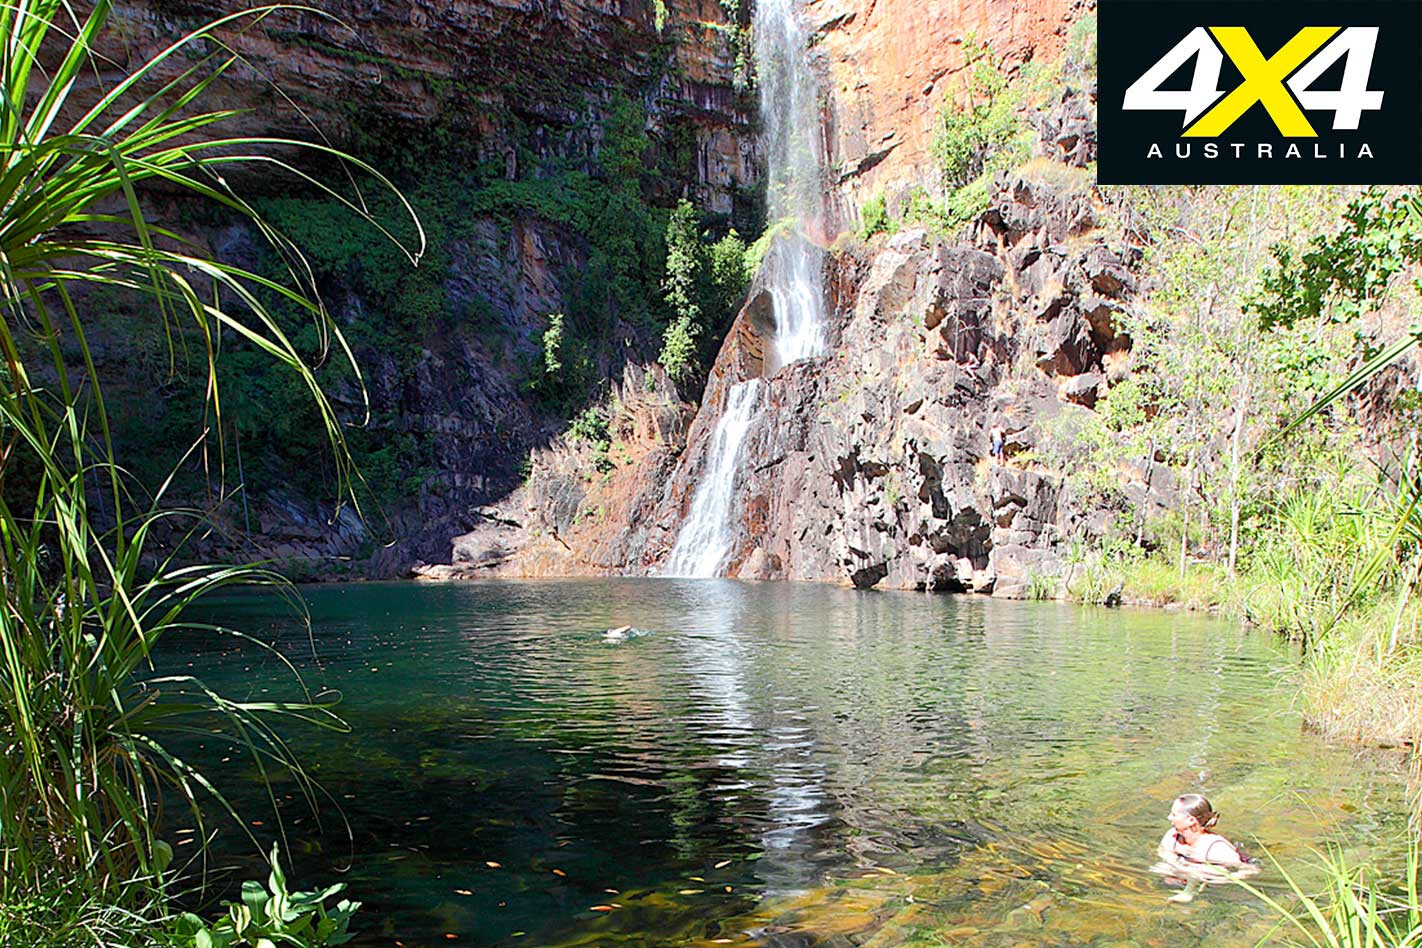
Litchfield NP is slated to be the Binns Track’s final leg and it really will do this epic trip justice. We entered the park the next morning from its southern end and tackled numerous water crossings. We stopped off for a swim at spectacular Tjaynera Falls, checked out historical Blyth Homestead, stood in awe beside huge termite mounds, and even helped out a German backpacking couple who had bogged their Mitsubishi Delica at one of the crossings. A final stop at Litchfield NP’s northern end to check out a massive collection of termite mounds was a great finish to an action-packed week.
Sitting in Corroboree Park Inn’s bar, over a couple of beers later that night, Brad and I had a chance to reflect on our jam-packed first week. The recon trip stood out most – and we knew we’d get another crack at the Binns extension – but it joined the sublime desert camping and Litchfield NP’s truck-load of attractions as great examples of why the NT has such appeal for off-road tourers: you get a lot of everything!
And for us, the adventure was only half-finished. With remote, rarely visited Top End locations still to come – not to mention the chance to experience the indigenous culture so prevalent in the region – we knew it would be unforgettable.
A Country Welcome

In being sprayed on the stomach and head with water out of a stranger’s mouth – without complaint – may seem odd, but it was all part of a traditional welcome to country by Agnes Page, from Daly River. Agnes grew up on the Daly River mission, before training as a teacher. She soon sought a new challenge and moved to Cooinda Resort, in Kakadu NP, where she worked in the Warradjan Cultural Centre.
She later trained as a Yellow Water Cruise skipper and became mildly famous – and received the Premier’s Award – for the rescue of two fishermen who had capsized their boat in the croc-infested waterway.
Agnes returned home to teach pre-school children in Daly River, and is now developing a tourism business. This revolves around providing cultural immersion experiences for visiting high school students from Victoria and NSW.
Agnes also hopes to expand this to general visitors and, after spending a day with her being shown around some of the more out of the way locations in and around Daly River, there’s little doubt she will continue to be a home-grown success story.
I REGULARLY travel where there’s no phone reception, sometimes by myself, so I had been contemplating purchasing a satellite phone for some time but was put off by the initial purchase price and the monthly expense of sat-phone plans.
I could’ve bought a basic PLB (Personal Locator Beacon) but I wanted to have the ability to easily and quickly send personalised messages when I was out travelling to let interested parties know I was okay. Of course, I also wanted the ability to instigate a rescue operation if everything wasn’t okay, such as in the event of a medical or some kind of catastrophic mechanical emergency.
When I spotted the Garmin inReach Mini online, I was intrigued; here was a two-way satellite communicator that cost much less than a sat-phone to purchase and operate, yet allowed for texting from anywhere in the world. Better yet, by downloading an app and connecting to my phone via Bluetooth, it would be super-easy to use.
The Garmin inReach Mini retails for $499; although, some online retailers offer a discount. I got mine from Wild Earth’s eBay store for just $460 and, although I initially subscribed to Garmin’s $55/month Recreation Plan, I’ve since downgraded to the basic $25/month Safety Plan due to my recent infrequent travel schedule.
The Device
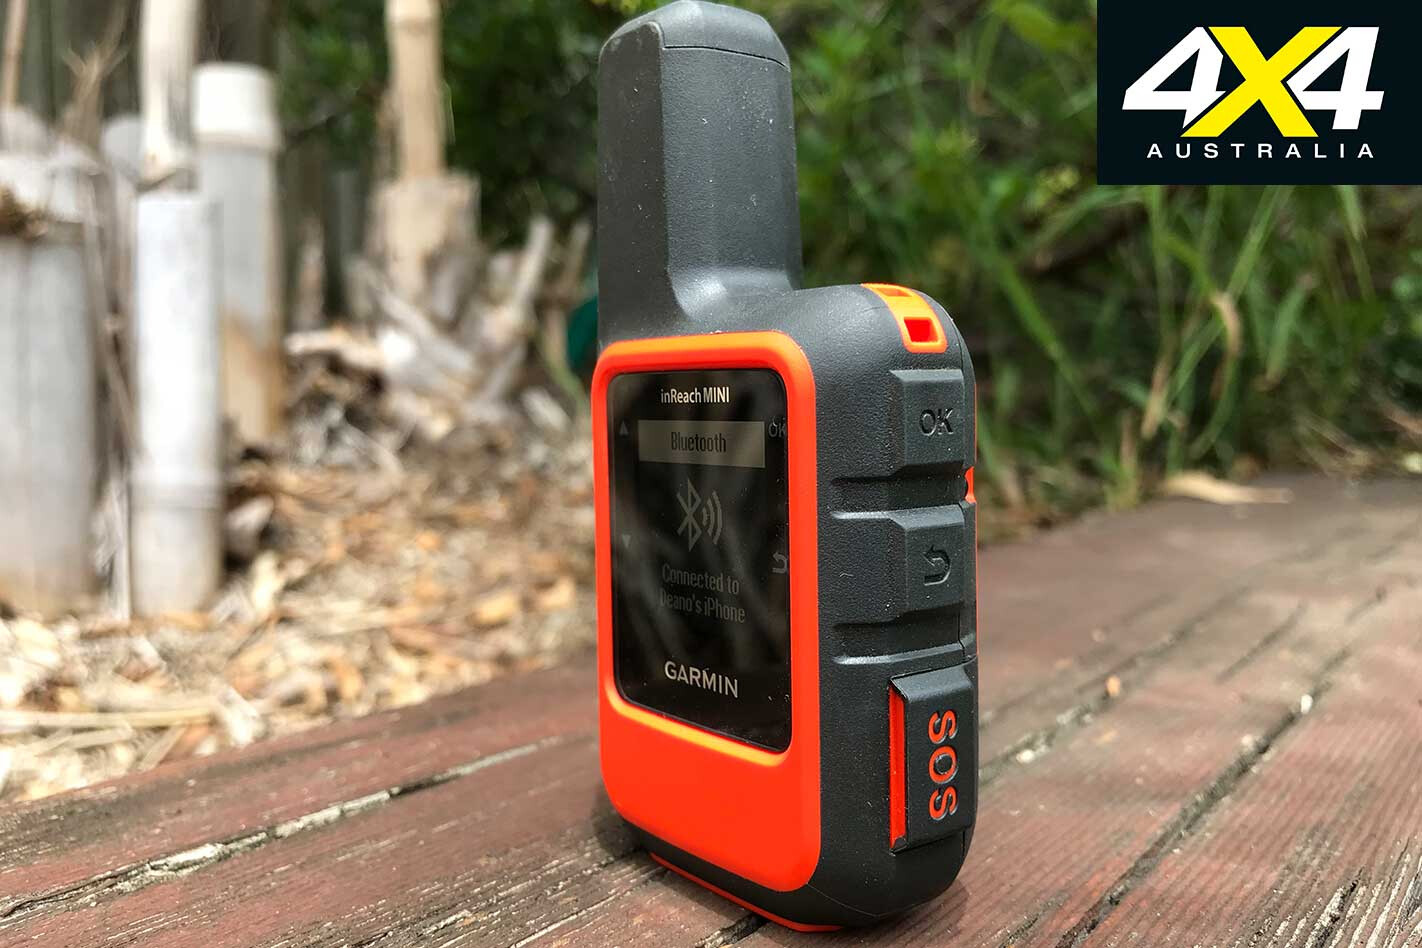
THE Garmin inReach Mini uses the Iridium satellite network, which offers worldwide coverage so long as it has a clear view of the sky. The device is small, lightweight and rugged, measuring 99mm x 52mm x 26mm and weighing just 100g.
An IPX7 water rating ensures the inReach Mini can endure extreme weather conditions and the tough outer case is bright orange so, despite its diminutive size, it’s easy to find. It’s also supplied with a carabiner clip so it can be attached to your belt or a backpack, or stored in a specific spot inside your vehicle until you need to use it.
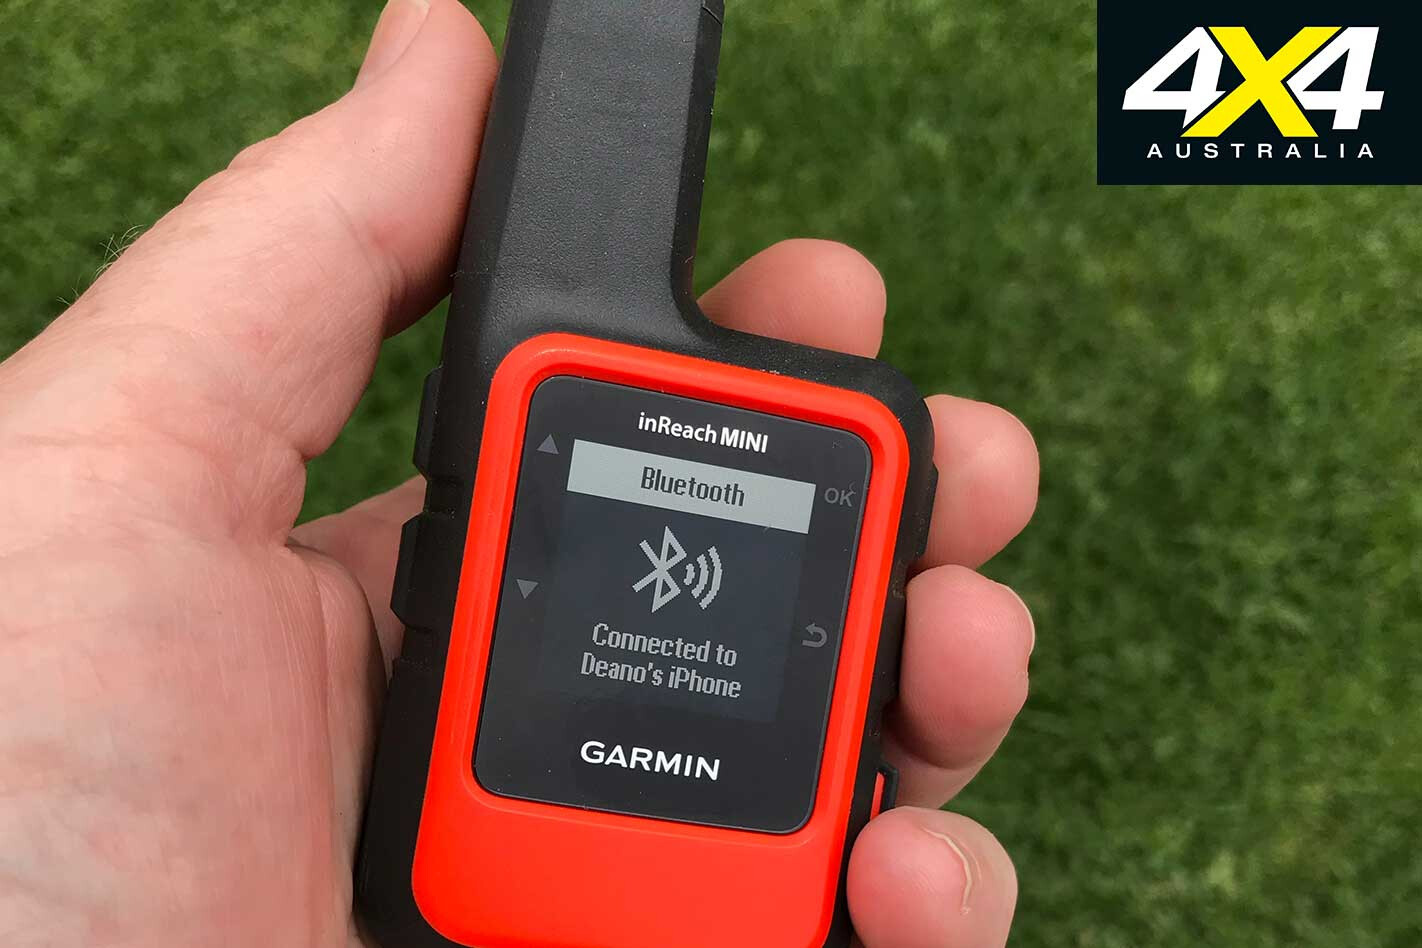
The inReach Mini has an internal lithium-ion battery that can be recharged using any micro-USB cable. Battery life is an impressive 50 hours with 10-minute tracking intervals activated, and up to 20 days when run in power-saving mode. The battery level is clearly displayed on the device’s LCD home screen, as is the time, date and Bluetooth status.
Send and Receive
PRIOR to using the inReach Mini, users need to choose and set up a subscription plan at explore.garmin.com, of which there are several annual contract plans as well as casual monthly plans. The next step is to take the device outside, turn it on and wait for it to start communicating with the Iridium satellite network.
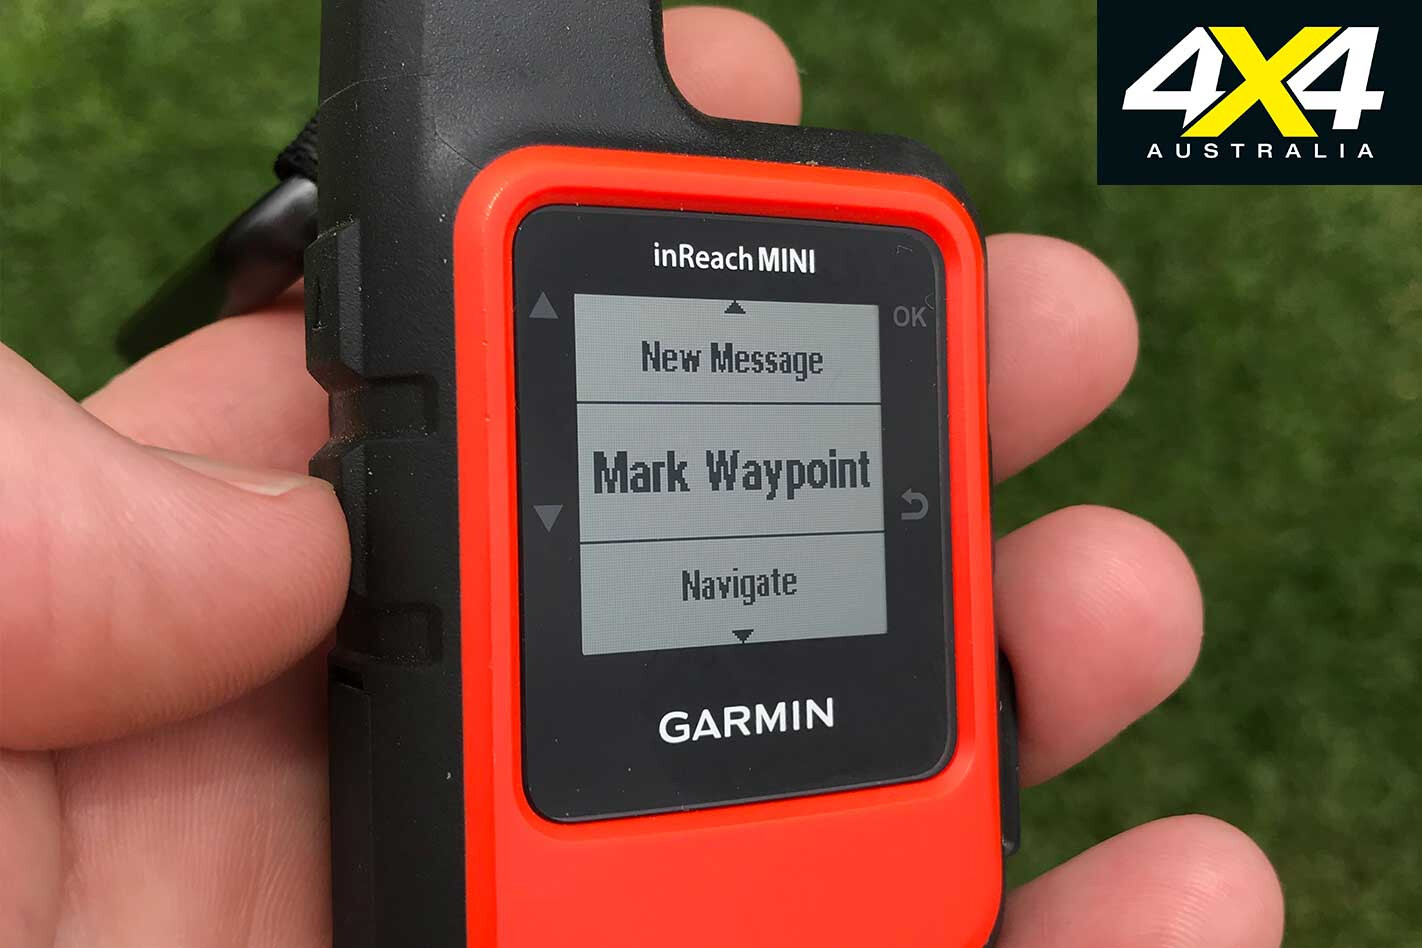
As well as the on/off button, the inReach Mini has up and down keys on its left side and OK and Back keys on the right side. You can use the up/down buttons to scroll through pages on the device including: Messages, Mail Check, Tracking, Location, GPS status and Bluetooth status.
Press OK when on the Messages page to access preset messages that are already loaded on the device, or you can key your own preset messages into the Garmin website and upload them to the device. Alternatively, texts can be sent using a compatible Apple or Android smartphone once the Garmin Earthmate app has been installed and the phone connected to the inReach Mini via Bluetooth.
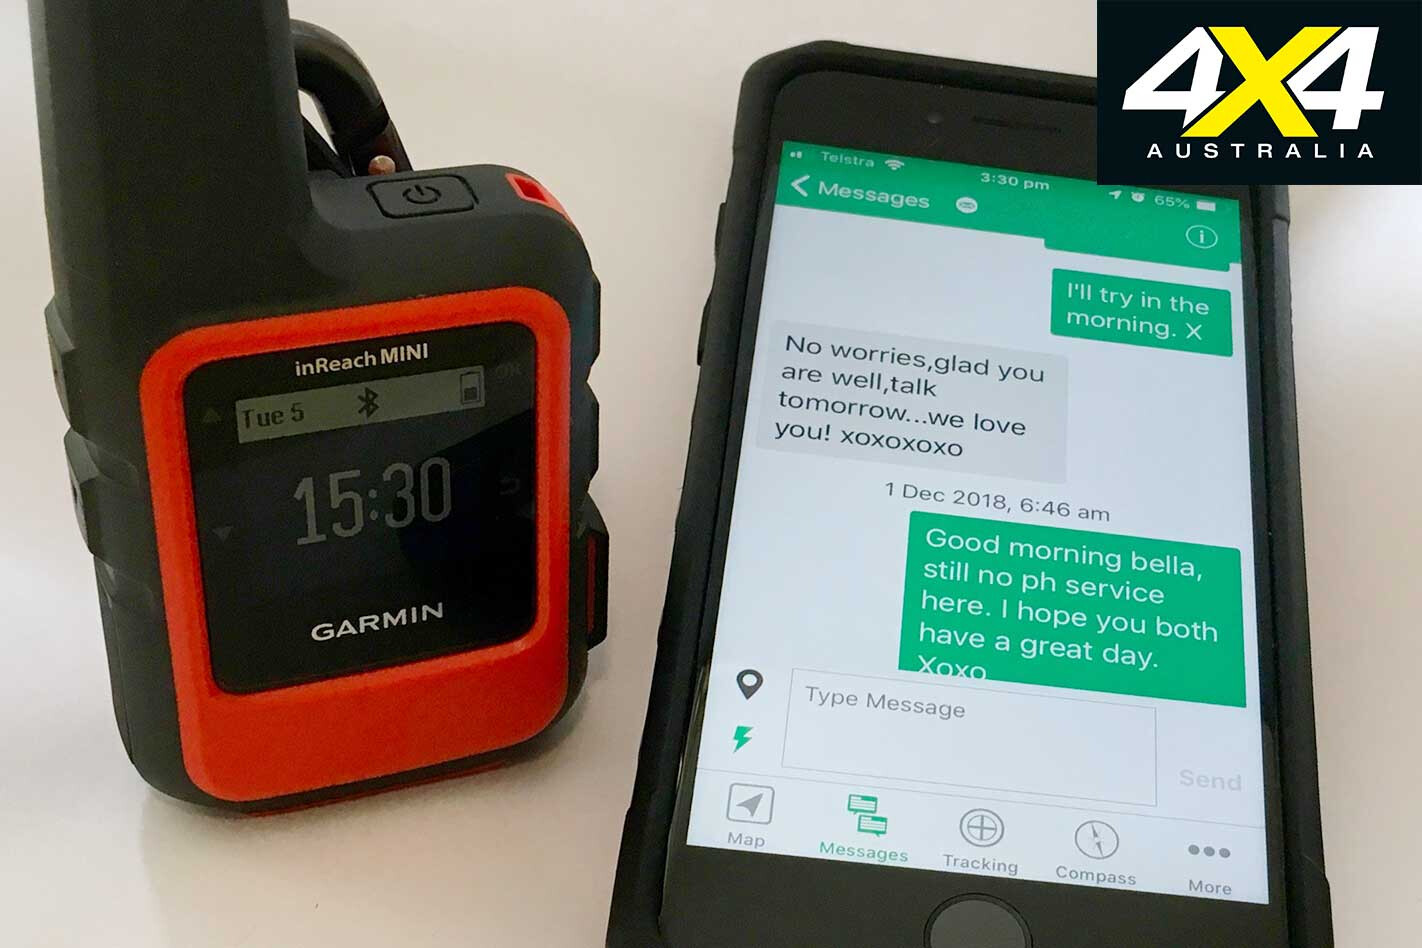
To send messages from a phone via the Earthmate app, ensure the Bluetooth connection is up and running (once set-up it connects automatically to your phone when in range), select your message recipient, key in your message and hit send. The person you send the message to will receive a message with a link that will take them to a website on which they can then reply to your message. It’s not quite as instant as sending a traditional SMS, but it’s still a convenient way to communicate.
You can also track your location using the Earthmate app; it displays your position, speed, heading and elevation. You can also choose for other people to access this information. The Earthmate app can also provide information such as waypoints, routes, history, weather and SOS.
SOS
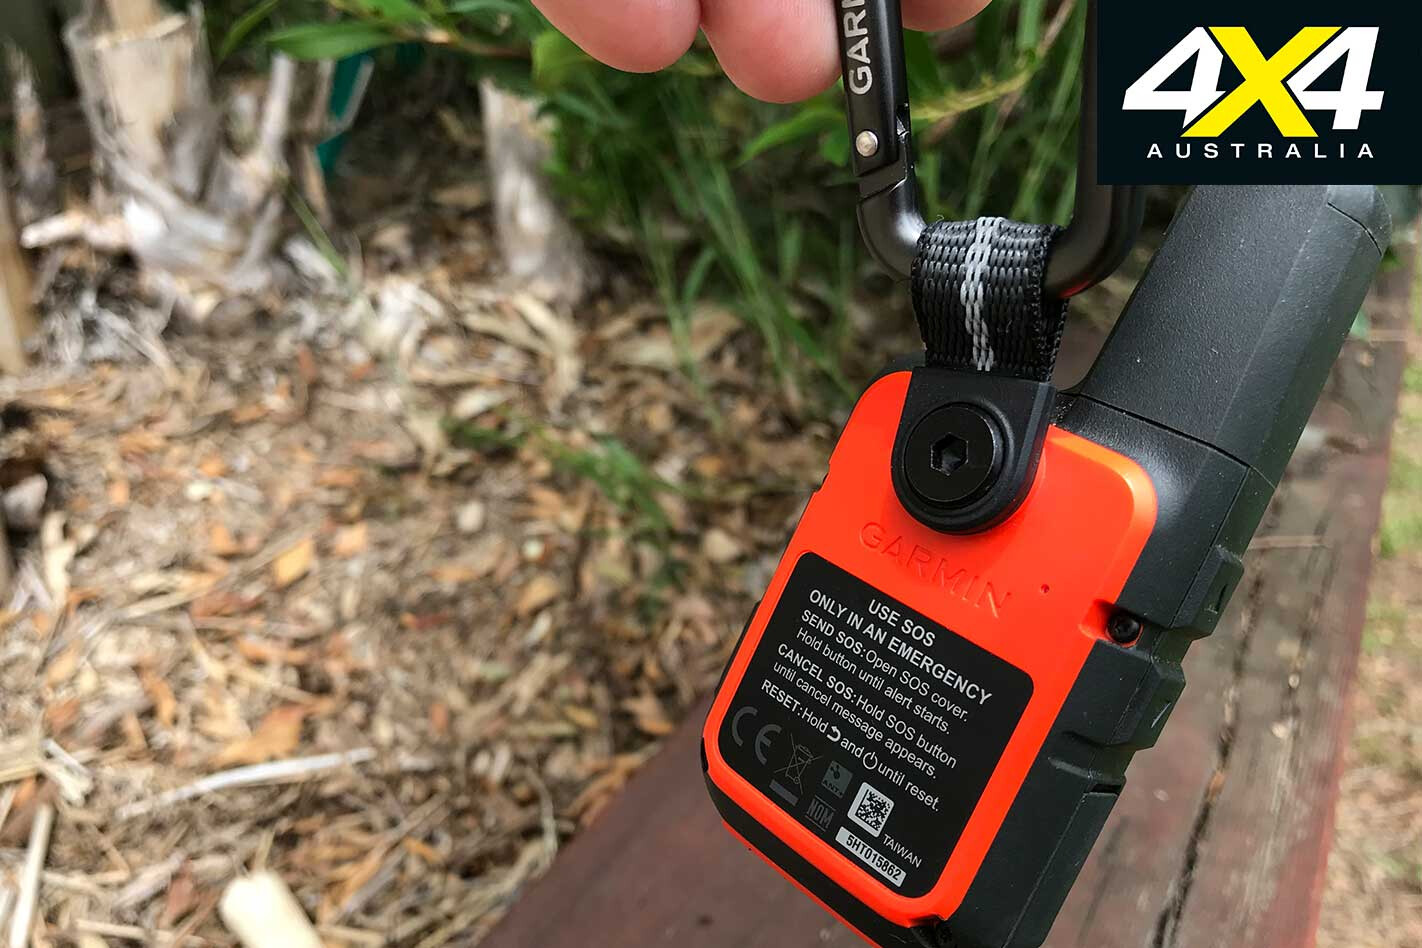
IN THE event of an emergency, there’s an SOS button that can be accessed by flipping open a clearly labelled cover on the right side of the device.
Once the SOS function has been activated, the inReach Mini will send an interactive SOS to the GEOS 24/7 search-and-rescue monitoring centre, which in turn will alert emergency responders in your area and send you a confirmation to let you know that your message has been received. It will also update you on the status of the response team, and the two-way messaging capability of the inReach Mini also allows you to communicate the nature and status of your emergency to rescuers.
Despite being located under a cover, if you need to cancel an SOS alert, simply hold down the button until a ‘cancel’ message appears on the screen.
The Plans
THERE are several Iridium satellite subscription options ranging in price from $25 per month to $149 per month, and these can be suspended indefinitely if you don’t plan on travelling for a period of time.
On a casual basis, the basic $25 per month Safety Plan includes unlimited SOS messages, 10 text messages per month and unlimited preset messages. If you want the device to track your route it will cost 0.15c for each point.
The casual $55 per month Recreation Plan includes unlimited SOS messages, 40 text messages per month, unlimited preset messages and unlimited tracking at 10-minute or greater intervals.
The casual $99 per month Expedition Plan includes unlimited SOS, text and preset messages, and unlimited tracking at 10-minute or greater intervals, which is upgraded to unlimited tracking at two-minute or greater intervals on the casual $149 per month Extreme Plan.
Users can save money by subscribing to an annual contract, and plans can be easily set-up or changed at explore.garmin.com
RATED Available from: garmin.com.au RRP: $499 (with Iridium plans from $25/month) We Say: Reliable; easy to use; plenty of options.
A few weeks ago, Land Rover invited 4X4 Australia on a trip to the UK for a technical presentation on the 2010MY Discovery, Range Rover Sport and Range Rover Vogue for the June 2009 edition of 4X4 Australia. As you know, England is a bloody long way from Oz, especially for a one-day presentation that didn’t even include a drive of the new vehicles.
This feature was originally published in 4×4 Australia’s July 2009 issue
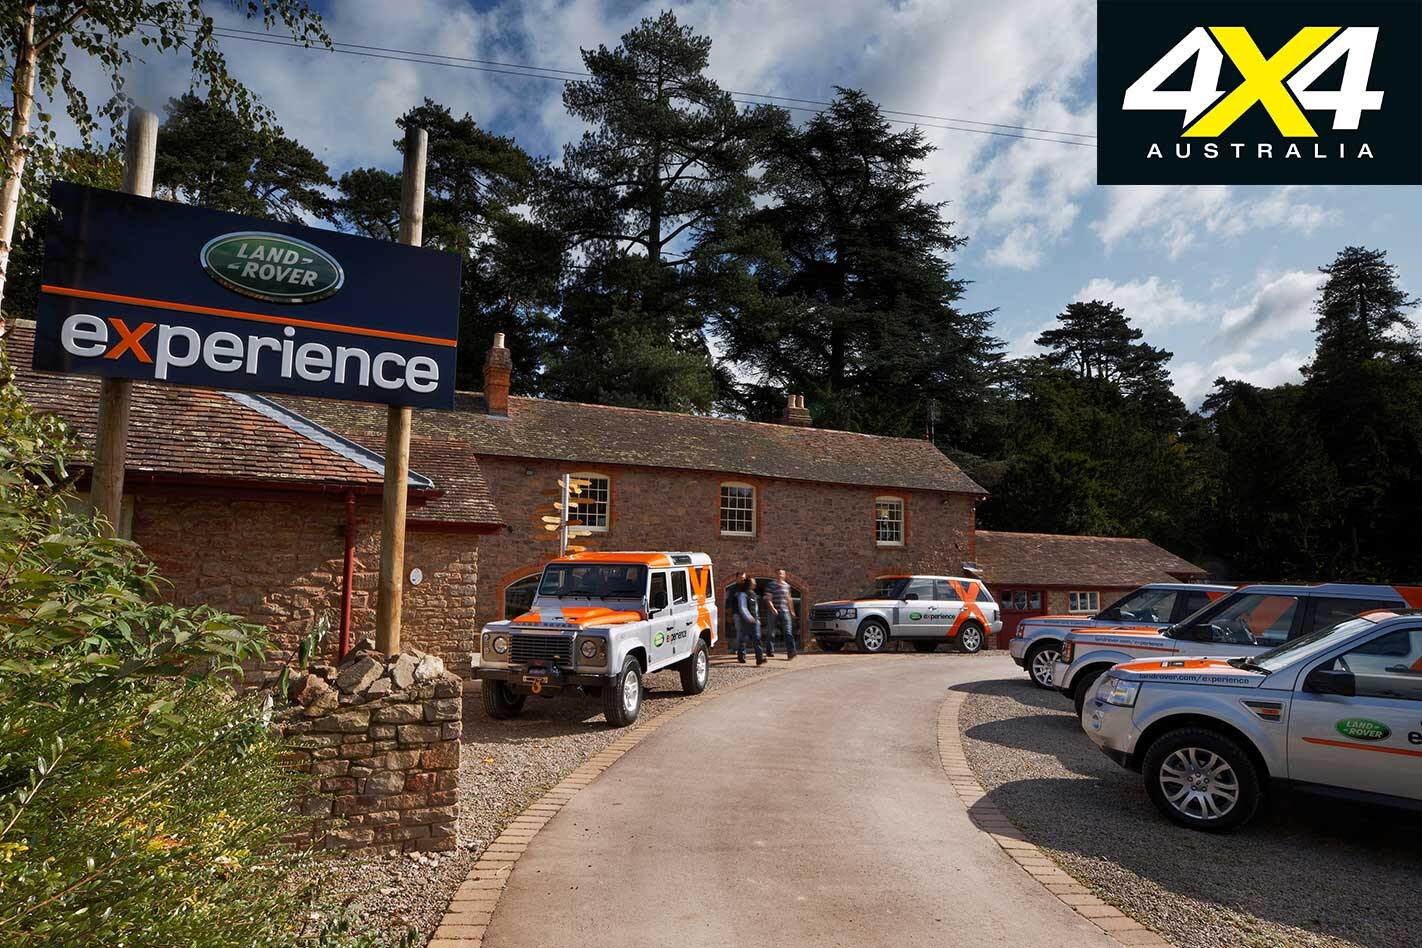
So to entice the Australian journo contingent to the other side of the world, Land Rover expanded the schedule to a mammoth two-and-a-half days on English soil. This would include a tour of Land Rover’s Solihull manufacturing plant, a drive of the new Freelander TD4_e, an off-road driving course around Eastnor Estate, a night at Eastnor Castle and the chance to drive a bunch of old Landies from the Land Rover Experience Heritage Vehicle collection.
Despite the brevity of the trip, five nights away from home with only two nights on the ground in Old Blighty, as a Landie-fan from way back, I was as happy as a pig in mud … and Eastnor Estate has plenty of mud.
Eastnor has been used for many years as a secret test facility by Land Rover and it’s here that all prototypes and new models are put through a rigorous off-road test regime. It’s also the home of the Land Rover Experience, a worldwide (except Australia) operation from Land Rover that facilitates driver-training and off-road adventures for owners of the British marque.
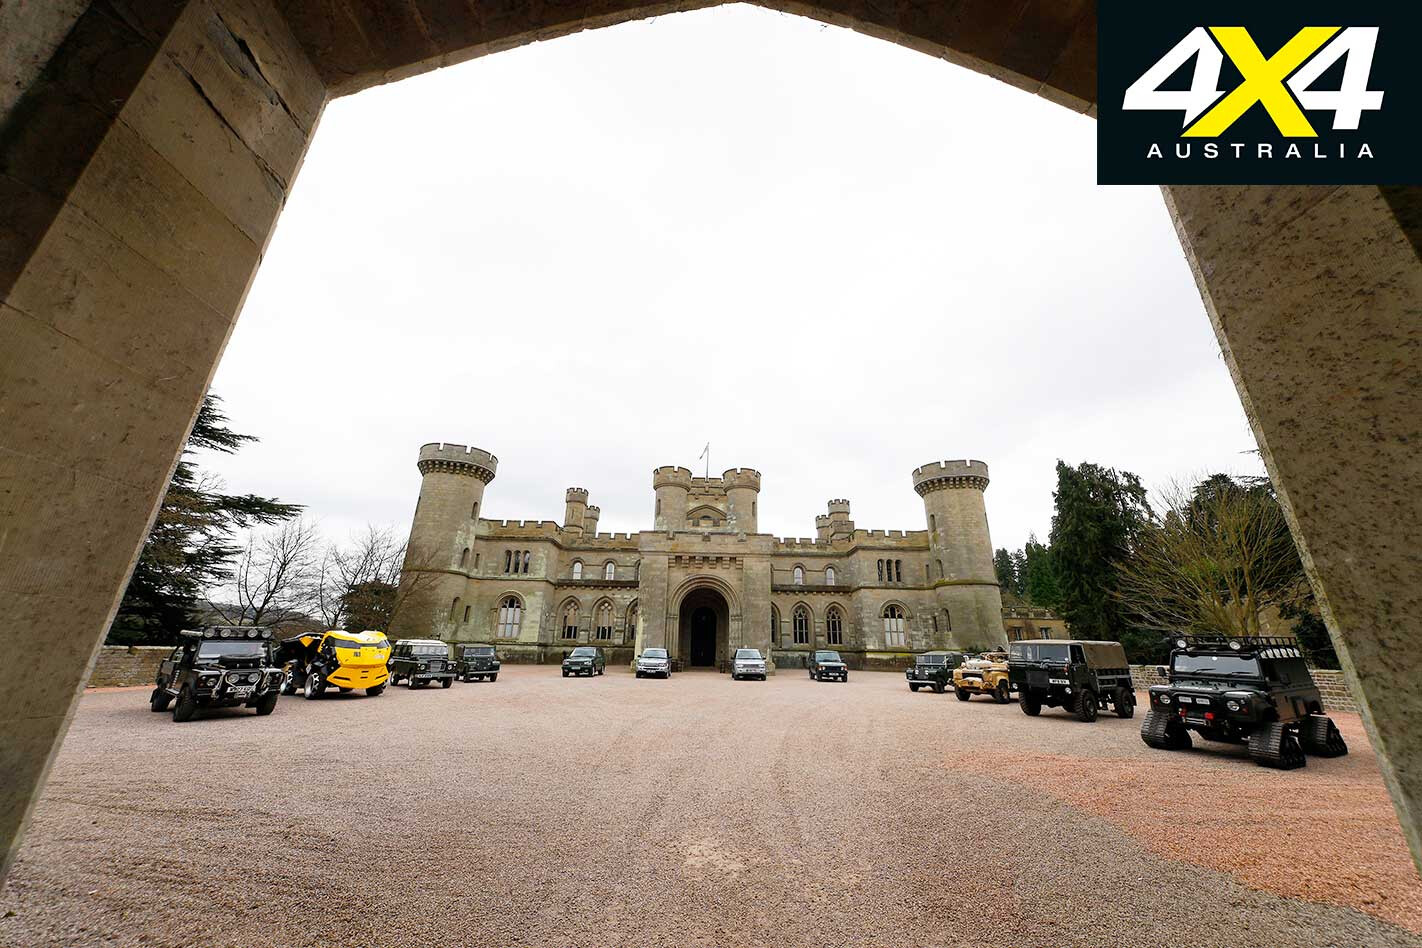
The grounds of Eastnor Estate, located in Herefordshire, cover more than 2000 hectares on which there are 48km of carefully managed off-road tracks. As we ambled up the long driveway to the estate, it was impossible to be underwhelmed as the imposing Eastnor Castle came into sight.
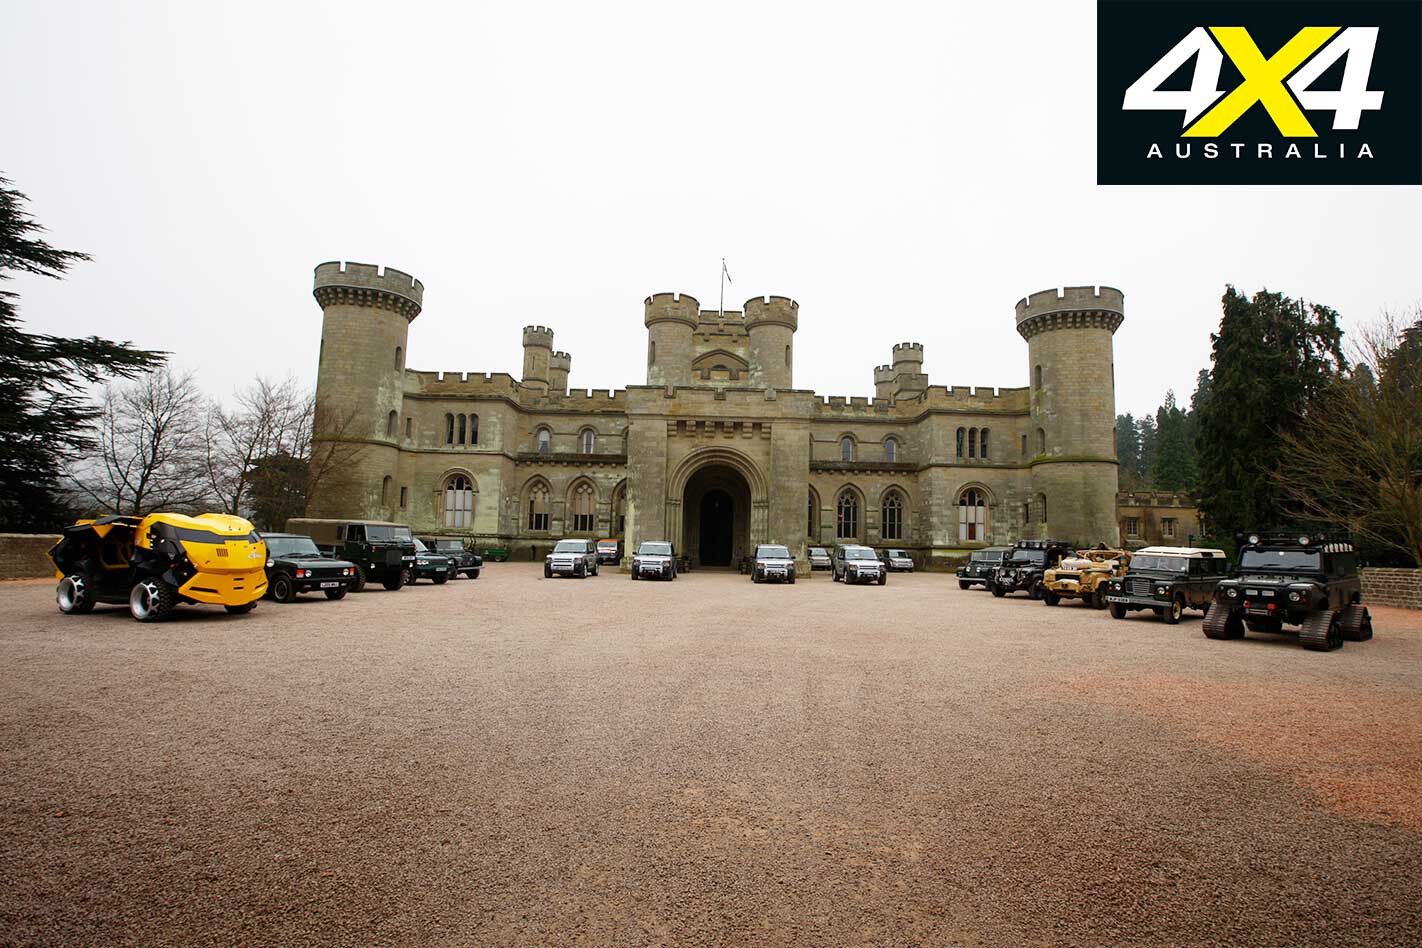
And carefully lined up in the forecourt was a collection of old Landies ranging from a restored Series I and a mint Range Rover Classic through to a fully kitted-out SAS Defender and Lara Croft’s V8 monster, as seen in the Hollywood blockbuster Tomb Raider. I began to salivate at the prospect of driving these vehicles later in the day, but first we were directed to the castle’s Octagon Saloon where bacon sandwiches and cups of tea awaited us. Who said this job was tough?
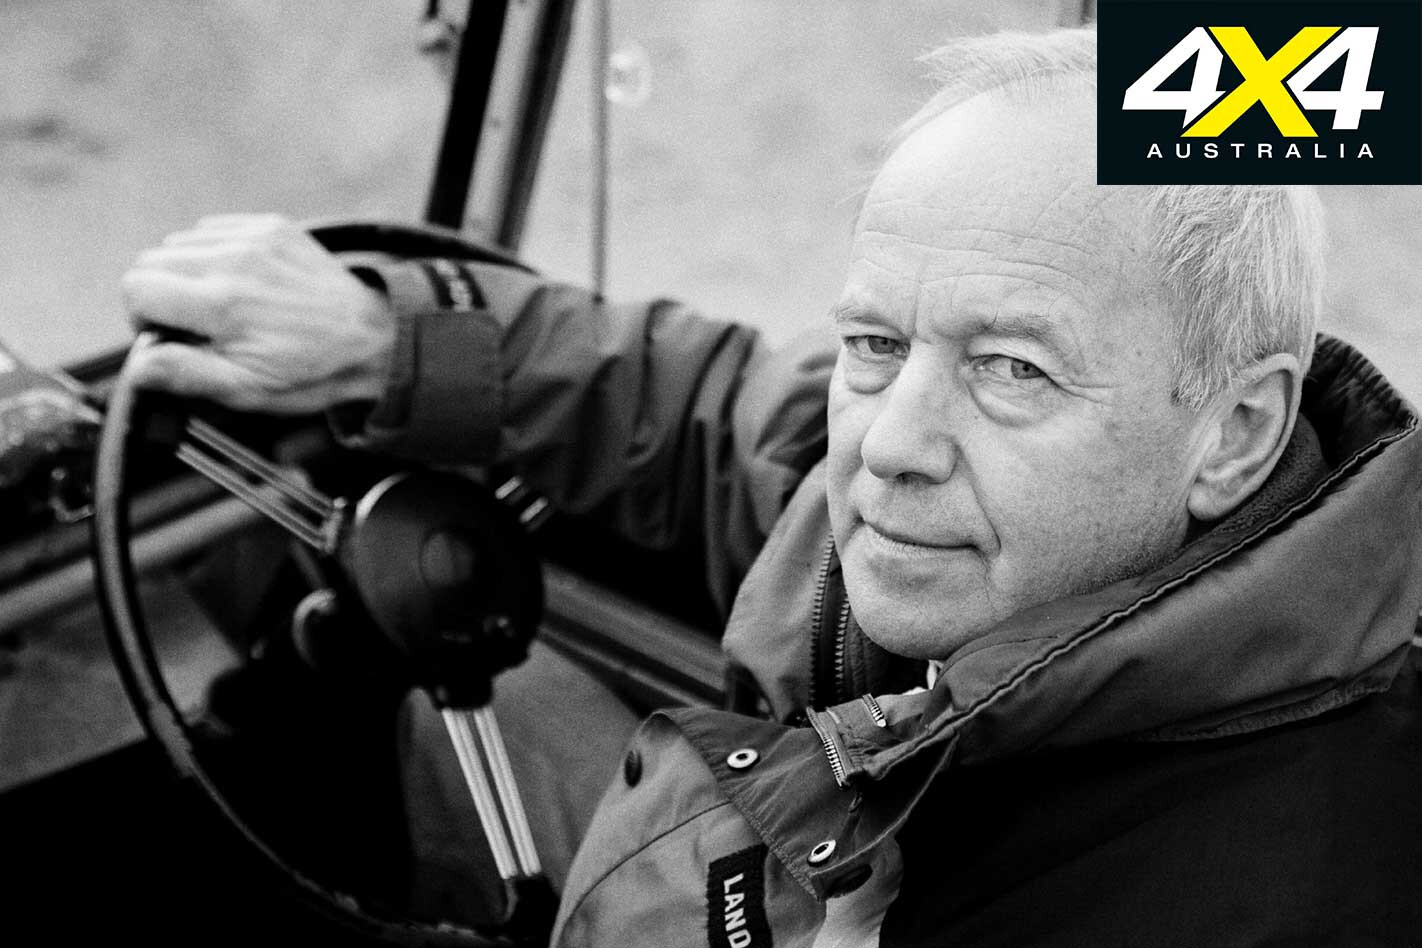
It was here we met Roger Crathorne, aka Mr Land Rover, who was to be our off-road guide for the day. Roger was born in Lode Lane, a mile from the Land Rover factory at Solihull, in 1947 and he began working there in 1963. His current role with Land Rover is that of development engineer and he probably knows more about the brand and its vehicles than just about anyone else in the world.
After brekky we met the rest of the LR Experience crew, had a short briefing and were shown to the fleet of Discovery 3s we were to drive around the estate.
Other than the addition of a Warn winch up front, all of the Discoverys used by Land Rover Experience are standard, right down to the road oriented tyres. This gives paying customers the chance to experience just how capable their own Discoverys are in off-road situations.
LR Experience offers a wide range of options for customers at a number of locations. The company also offers three levels of off-road driver training courses (introductory, intermediate and advanced) as well as winching, vehicle recovery and trailer-handling courses. Oh, and it also runs corporate and group events.
On many of the four-wheel-drive vehicle launches I’ve been to, the off-road driving loops used by vehicle manufacturers are either specifically designed or carefully researched so that they make certain models look good. After all, the last thing a company wants is for a bunch of journos to come away from an off-road drive questioning the off-road capability of a vehicle.
But Eastnor Estate, which has been used solely by Land Rover for a number of decades, is different. The tracks are tough and, although maintained, are variable depending on the weather and how often they’ve been used immediately preceding each drive loop.
Although the sky was unusually blue and bereft of clouds – I thought it always rained here – there had been quite a few downpours over the previous few days. What started as a gentle climb along a smooth gravel road across open fields soon degenerated into a slippery mud-fest through steep and deeply rutted tracks on a heavily wooded hillside.
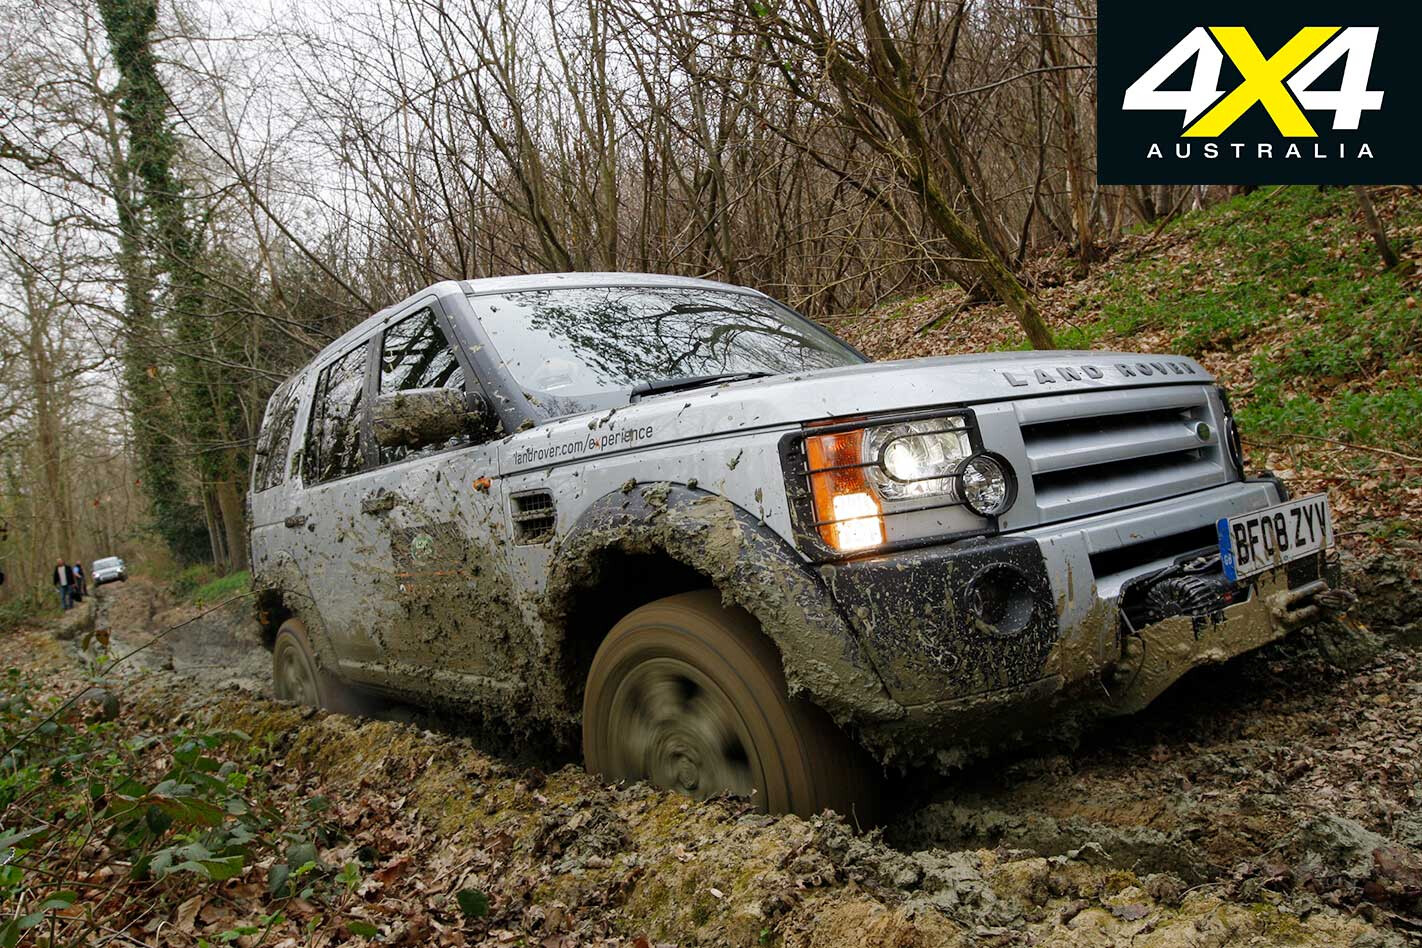
Appropriately, we were instructed to select the mud and ruts program of the Disco’s Terrain Response 4X4 system.
I’m happy to report that I wasn’t behind the wheel when our Discovery’s forward progress was halted by a particularly rutted climb. A mate of mine, South African journalist Patrick Cruywagen, was the ineffective pilot of the Disco at the time.
A tow rope was brought into play to extract our Disco. I asked Roger Crathorne why the LR Experience team didn’t use snatch straps and he replied that they’re too dangerous, due to the immense forces built up as they stretch and then contract again. I’ve seen snatch straps fail in the past and it ain’t a pretty sight.
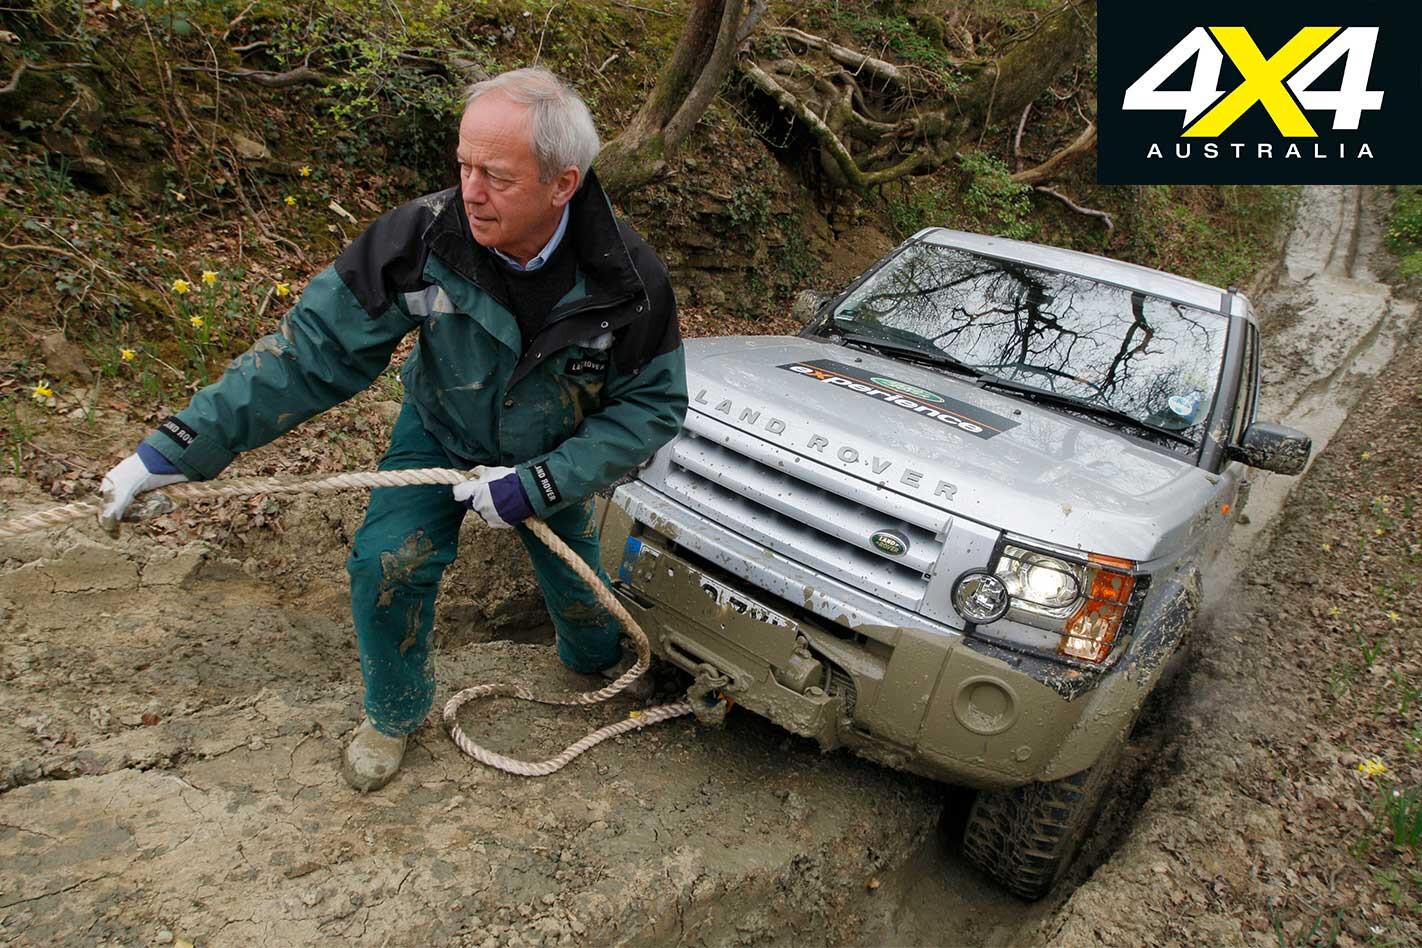
Roger claims that a gentle tug with a quality tow rope is enough to get out of most situations – if more is required, the vehicles’ Warn electric winches are brought into play.
Quickly tiring of my goading, Patrick insisted that I have a turn peddling the Disco through the slime. I reckon I lasted a solid 10 minutes before I, too, succumbed to the mud. This was obviously a good chance for the LR Experience crew to perform a winching demonstration and we were soon on the move again.
What the LR Experience off-road driving course on Eastnor Estate displayed was how effective the Discovery 3 is in tricky off-road conditions. In fact, it went everywhere the lead vehicle – a Defender 90 – went and only got stuck where the Defender couldn’t get through.
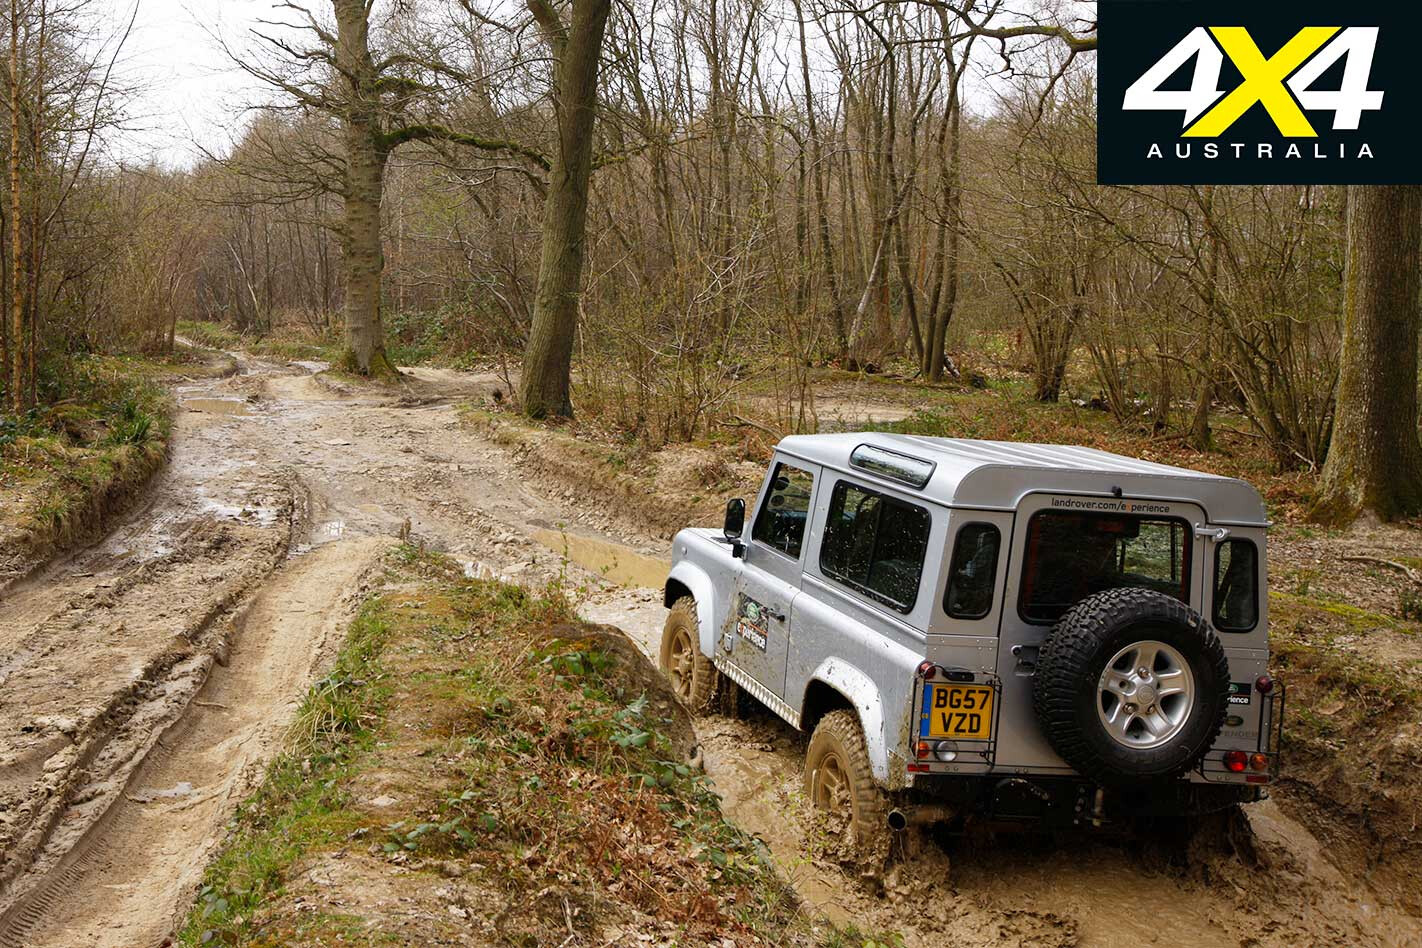
If you’re a bit of a Landie fan, or just want to do some off-road driving the next time you’re holidaying in the UK, then I can strongly recommend the Land Rover Experience at Eastnor.
Not only will you get to play in the mud, you’ll also meet a bunch of very experienced and friendly off-roaders.
Life in Eastnor Castle
Built by Baron Somers (later 1st Earl), between 1810 and 1824, Eastnor Castle was designed in an Edward 1st medieval fortress style. Around 250 men, working day and night, were employed in the first six years of construction. It cost £85,923.13s, approximately £8.5 million today (A$17.4 million), to complete.
In the following years, the castle was updated by the 2nd and 3rd Earls, but by 1939, the traditional aristocratic way of life at Eastnor Castle had come to an end and the castle was offered to the Australian High Commission in case it needed to leave London after the Blitz.
After the war, the family restricted themselves to the smaller, private rooms and much of the castle fell into disrepair due to a lack of funds. James and Sarah Hervey-Bathurst inherited the castle from James’ mother when she died in 1986, and a laborious restoration began.
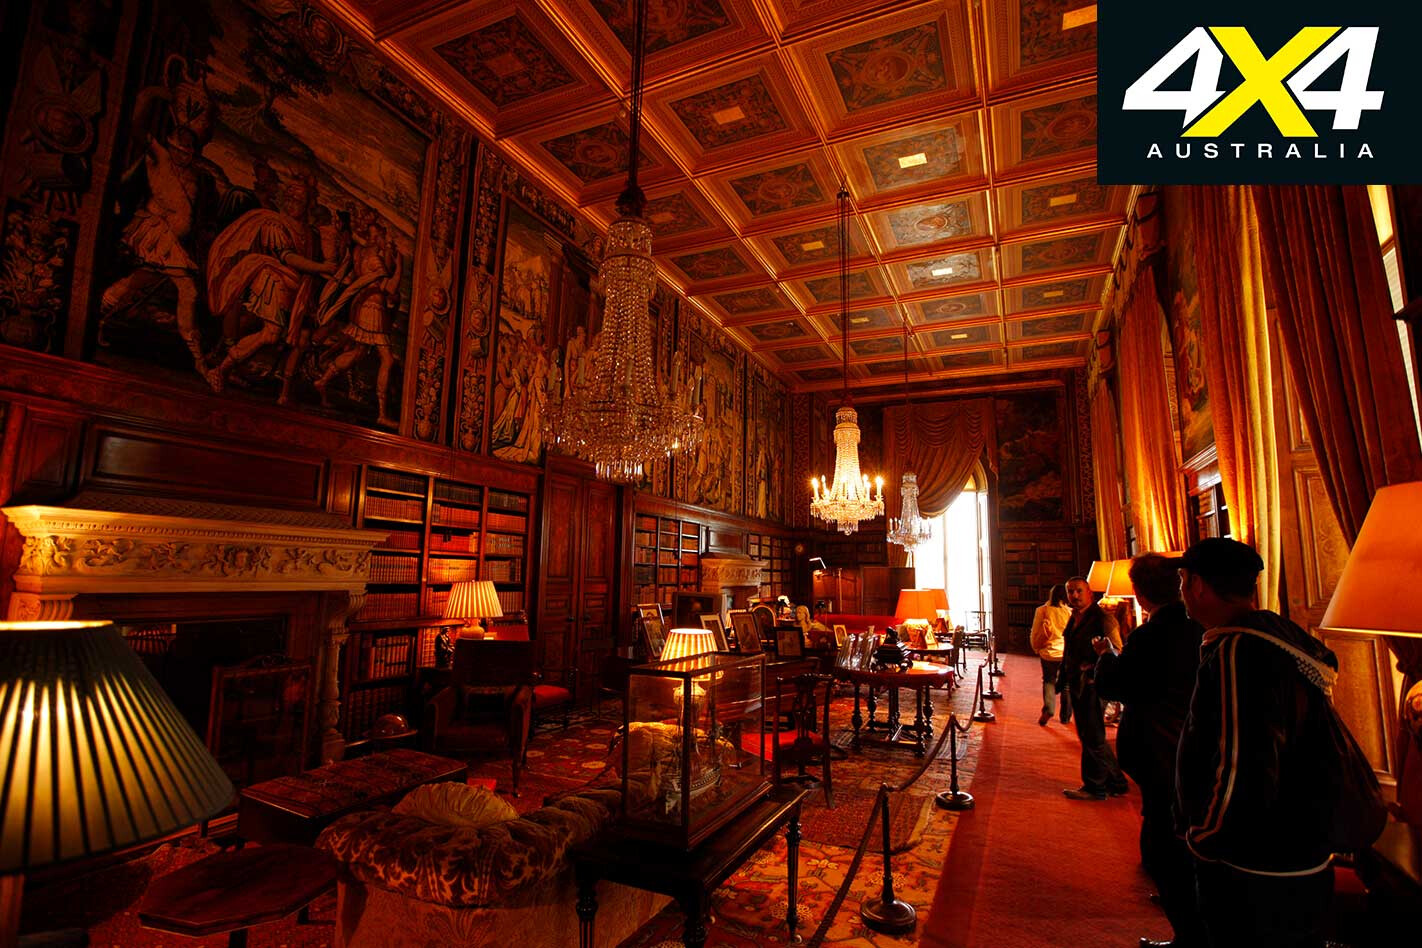
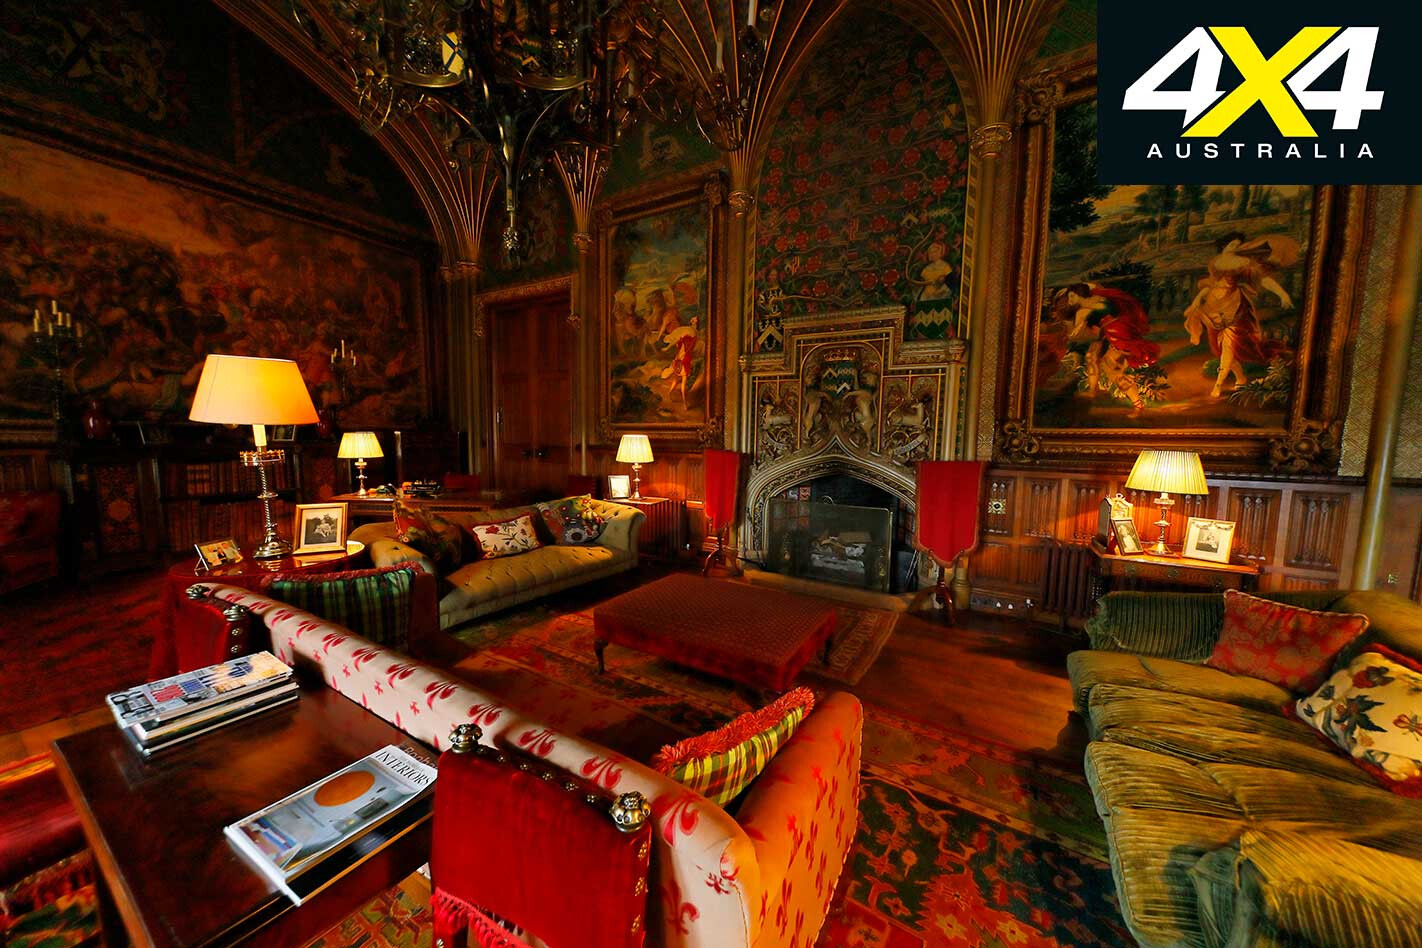
The highlight of the Great Hall is its grand scale and decorated statues, stuffed animals and family portraits. Off to one side is the Red Hall which is packed with half of the Metrick Collection of medieval armour from Goodrich Court near Ross-on-Wye.
The huge and elaborately decorated dining room is dominated by a long table and is used today for corporate and private functions. Equally impressive rooms include the Gothic Drawing Room, Turret Room and Octagon Room, the last with a fantastic view over the lake in front of the castle.
Inside Land Rover’s Solihull Factory

As well as off-road driving adventures, Land Rover Experience offers tours of the company’s Solihull factory where you can watch Defenders, Discoverys, Range Rover Sports and Range Rover Vogues being built. The Freelander is built at a separate facility at Halewood.
This Solihull tour gives a great insight into the complexities of modern vehicles and how all of the parts come together. And there are big differences between the way different models are constructed.
The Discovery and Range Rover Sport, which share a common platform, are built in the same area of the plant. As the chassis moves along the production line, suspension components and brakes are fitted and the engine, transmission and other driveline components are secured in place.

All of the body panels are stamped on site and, once they’ve been put together and painted, they move along the production line and eventually meet up with the completed chassis. It’s amazing to see the chassis and body bolted together; the whole automated process takes only a few seconds.
The dashboard and seats are then positioned by hand and the doors go on. All of the parts are bar-coded so the right components end up in the right vehicle.
The Range Rover Vogue, which is a completely different vehicle built with a monocoque (combined body/chassis) construction, is made in a separate part of the plant that is also heavily automated.

The construction of the Defender, on the other hand, is very labour intensive. As there are so many variables in body styles and chassis lengths – 90-, 110- and 130-inch wheelbases and single-cab, dual-cab, wagon and van bodies – Land Rover says it’s easier to continue to “build it by hand”.
Once you’ve completed the tour, you can spend your hard-earned at the on-site Experience Centre on T-shirts, scale models, adventure gear and just about anything else a Landie fanatic would want.
Land Rover Experience Heritage Collection
I’ve owned a couple of old Series Land Rovers in the past but they weren’t mint examples like these in the fantastic Land Rover Experience Heritage Collection.
I felt like a kid in a toy shop when I laid eyes on these beauties and, other than the Judge Dredd City Cab, based on a 101 Forward Control, I was allowed to drive all of them!
Land Rover Series I
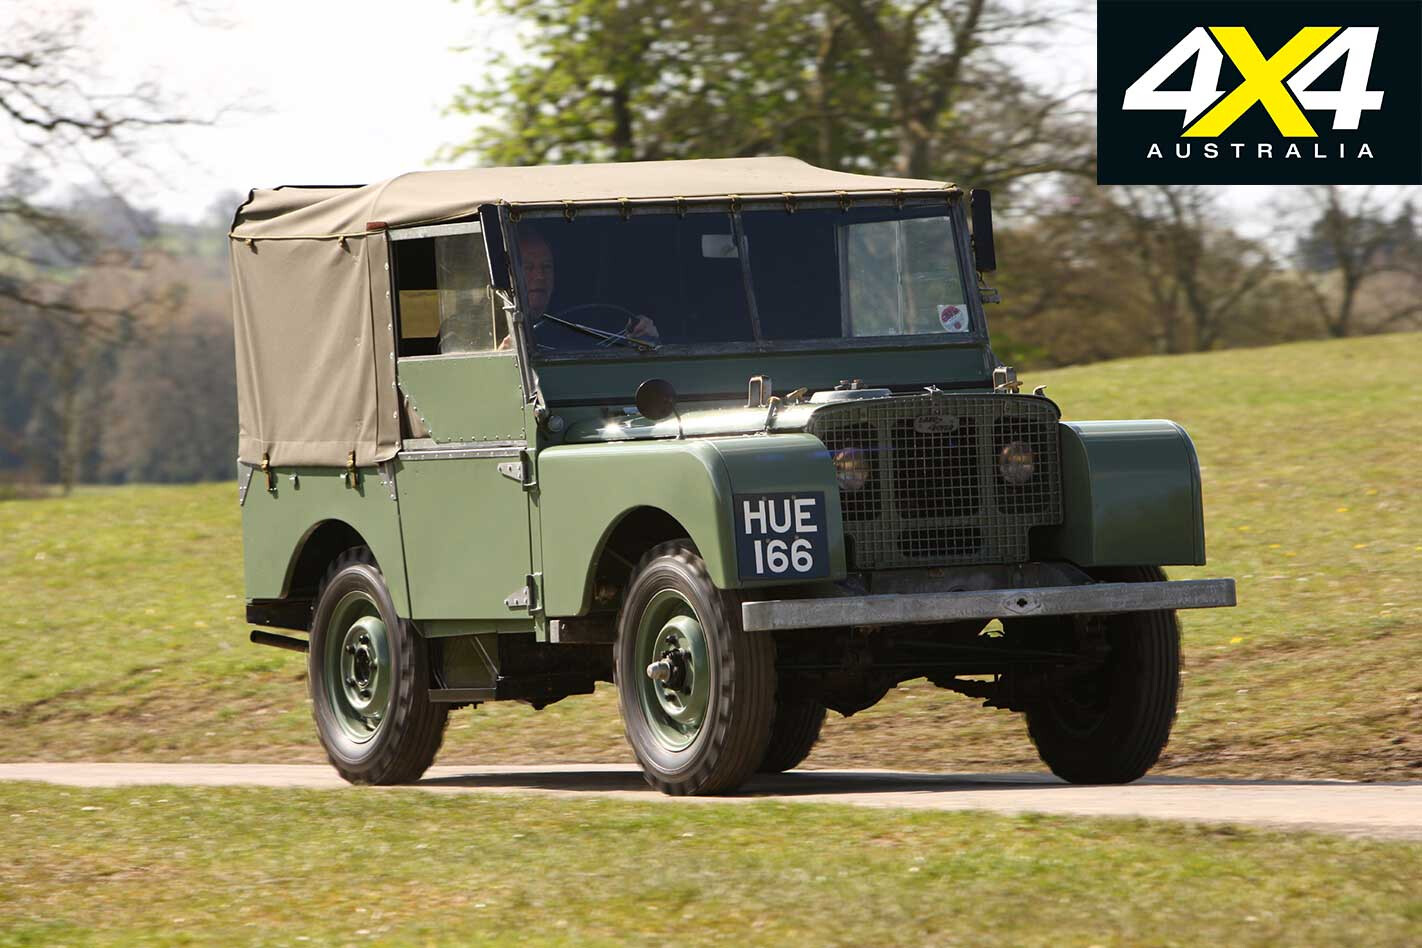
Built in 1949, this rare 80-inch wheelbase Series I was among the very first 15,000 Land Rovers built. It initially saw service with the British Armed Forces and years later was restored by a fellow named Ken Wheelright.
The Series I was acquired by Land Rover Experience in 2003 and it has since been extensively refurbished, both mechanically and aesthetically, with the original specification being adhered to as much as possible.
Land Rover Series I Specs Engine: In-line, 4-cylinder, 1.6L Power: 37kW @ 4000rpm Torque: 108Nm @ 2000rpm Suspension (f & r): live axle, semi elliptic leaf springs
Land Rover Series III
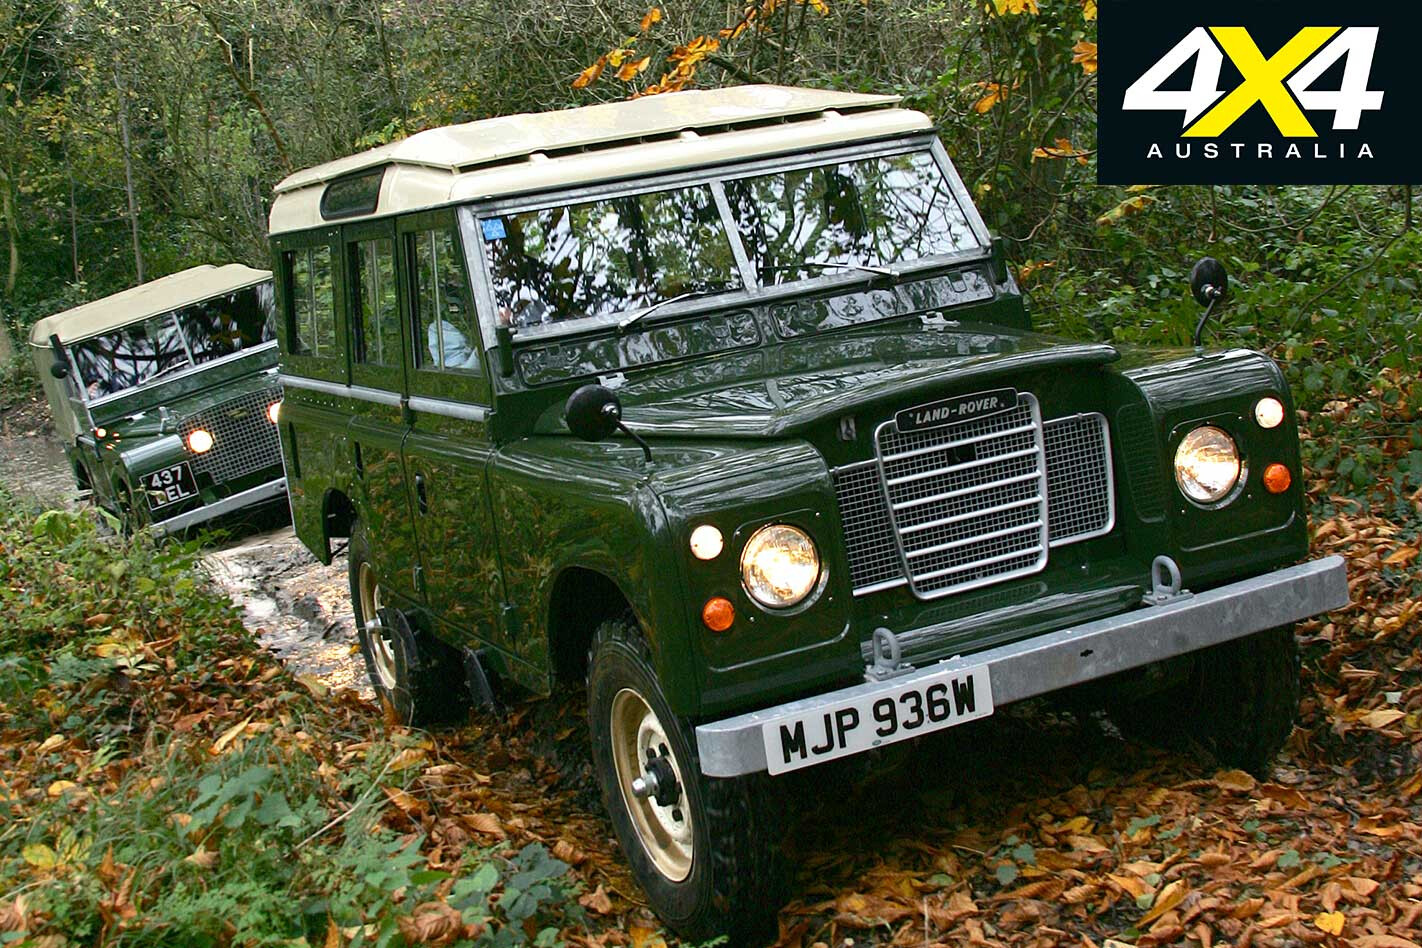
This 1981 Series III Station Wagon, with safari roof and alpine lights, is in such good condition that it looks like it was just driven off the showroom floor. On closer inspection, there are some signs of wear and tear on the interior trim, but the restoration process is continuing.
One of the vehicle’s previous owners partook in the Solihull Experience and was delighted to find the wagon in such capable hands.
Land Rover Series III Specs Engine: In-line, 4-cylinder, 2.25L Power: 57kW @ 4250rpm Torque: 168Nm @ 2500rpm Suspension (f & r): live axle, semi elliptic leaf springs
Land Rover 101 Forward Control
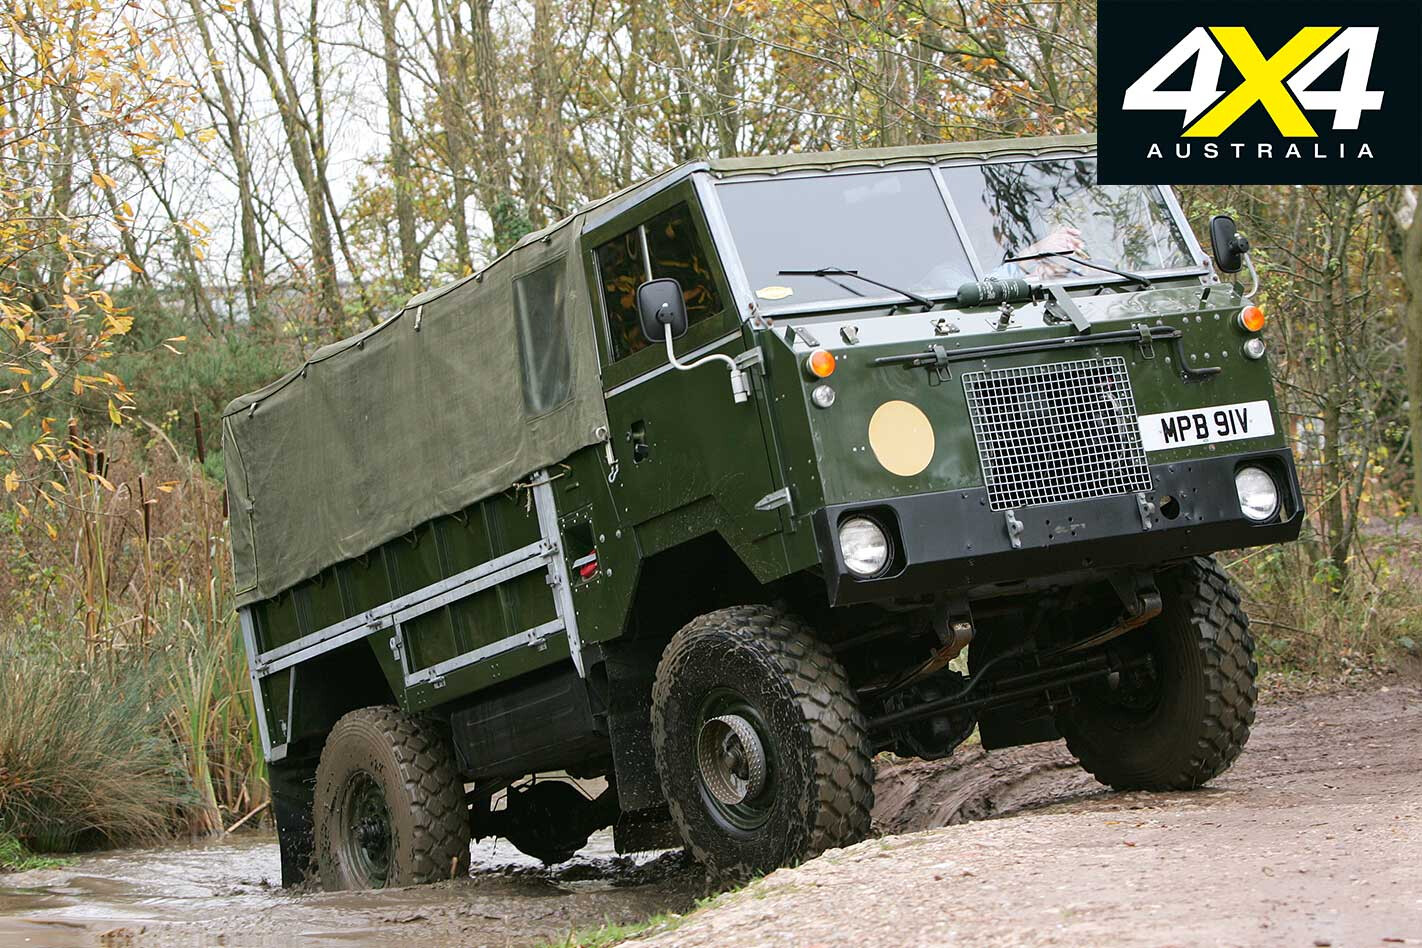
This 101 FC was originally supplied to the British Ministry of Defence (MOD) in 1975 as a gun tractor. It also featured a drive system for a powered trailer, effectively making it a 6X6 when the trailer was hitched up.
The 101 is in such good condition because, as soon as it was supplied to the MOD, it was placed in storage. It was sold to an American collector who intended to ship it to the US, but changed his mind. It has only 500km on the odometer.
Land Rover 101 Forward Control Specs Engine: 90 degree V8, 3.5L Power: 87kW @ 5000rpm Torque: 230Nm @ 2500rpm Suspension (f & r): live axle, semi elliptic leaf springs
Land Rover Defender SAS Desert Patrol
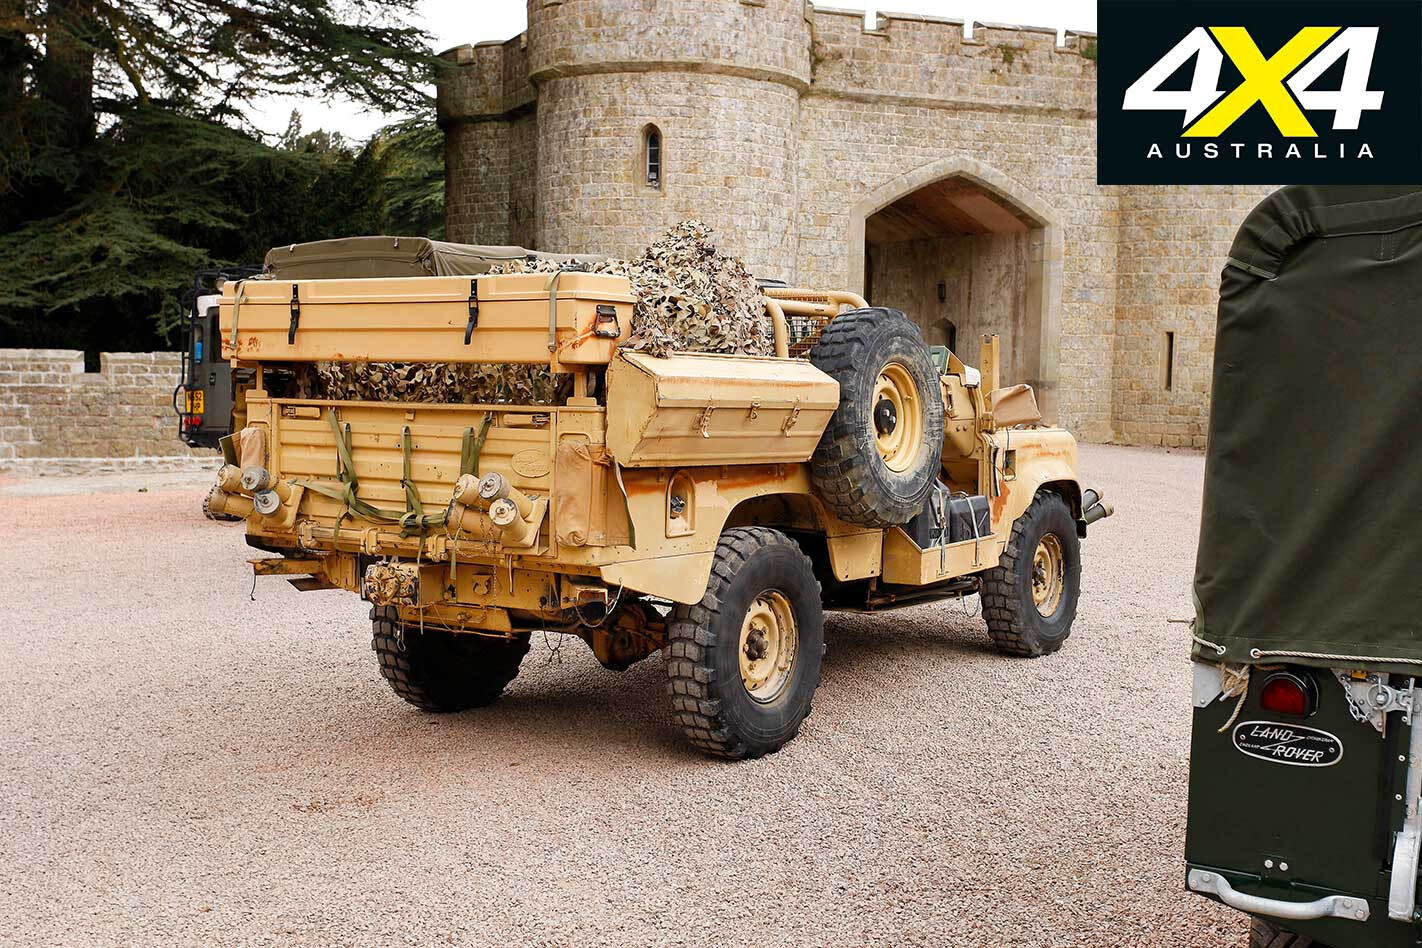
This SAS specification Defender is on permanent loan to the Land Rover Experience Heritage fleet on the proviso that, upon eventual disposal of the vehicle, it must be returned to the SAS at Hereford for scrapping.
Built in 1986, this example has seen military action in Afghanistan and Iraq. It’s kitted out with a host of recovery gear, camouflage items and gun racks. Unfortunately, when I got to drive it, no guns were actually fitted.
Land Rover Defender SAS Desert Patrol Specs Engine: 90 degree V8, 3.5L Power: 100kW @ 5000rpm Torque: 254Nm @ 2500rpm Suspension (f): live axle, coil springs, Panhard rod, anti-roll bar Suspension (r): live axle, coil springs, A-frame, anti-roll bar
Judge Dredd City Cab
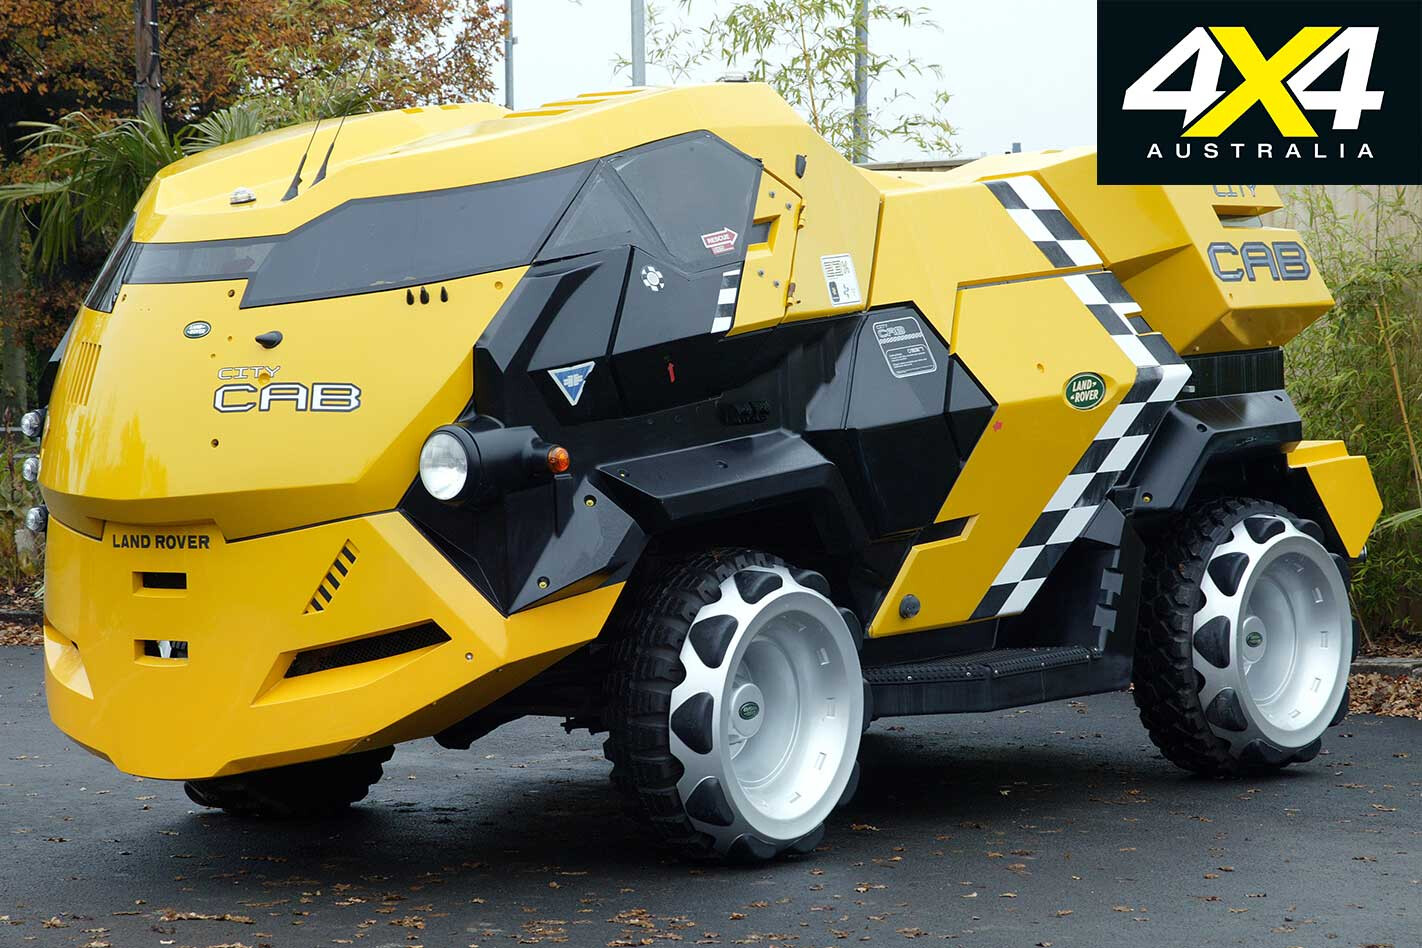
Despite its futuristic looks, the city-cab built for the Sylvester Stallone movie Judge Dredd is based on an old 101 Forward Control. This was the only vehicle that we weren’t allowed to drive, as it’s almost impossible to see out of the small windows from the driver’s seat.
In total, there were 31 vehicles, in various stages of conversion, used throughout the shooting of the film. The design brief was for a city-cab set in the year 2139 capable of carrying six people.
Judge Dredd City Cab Specs Engine: 90 degree V8, 3.5L Power: 87kW @ 5000rpm Torque: 230Nm @ 2500rpm Suspension (f & r): live axle, semi elliptic leaf springs
Range Rover Classic
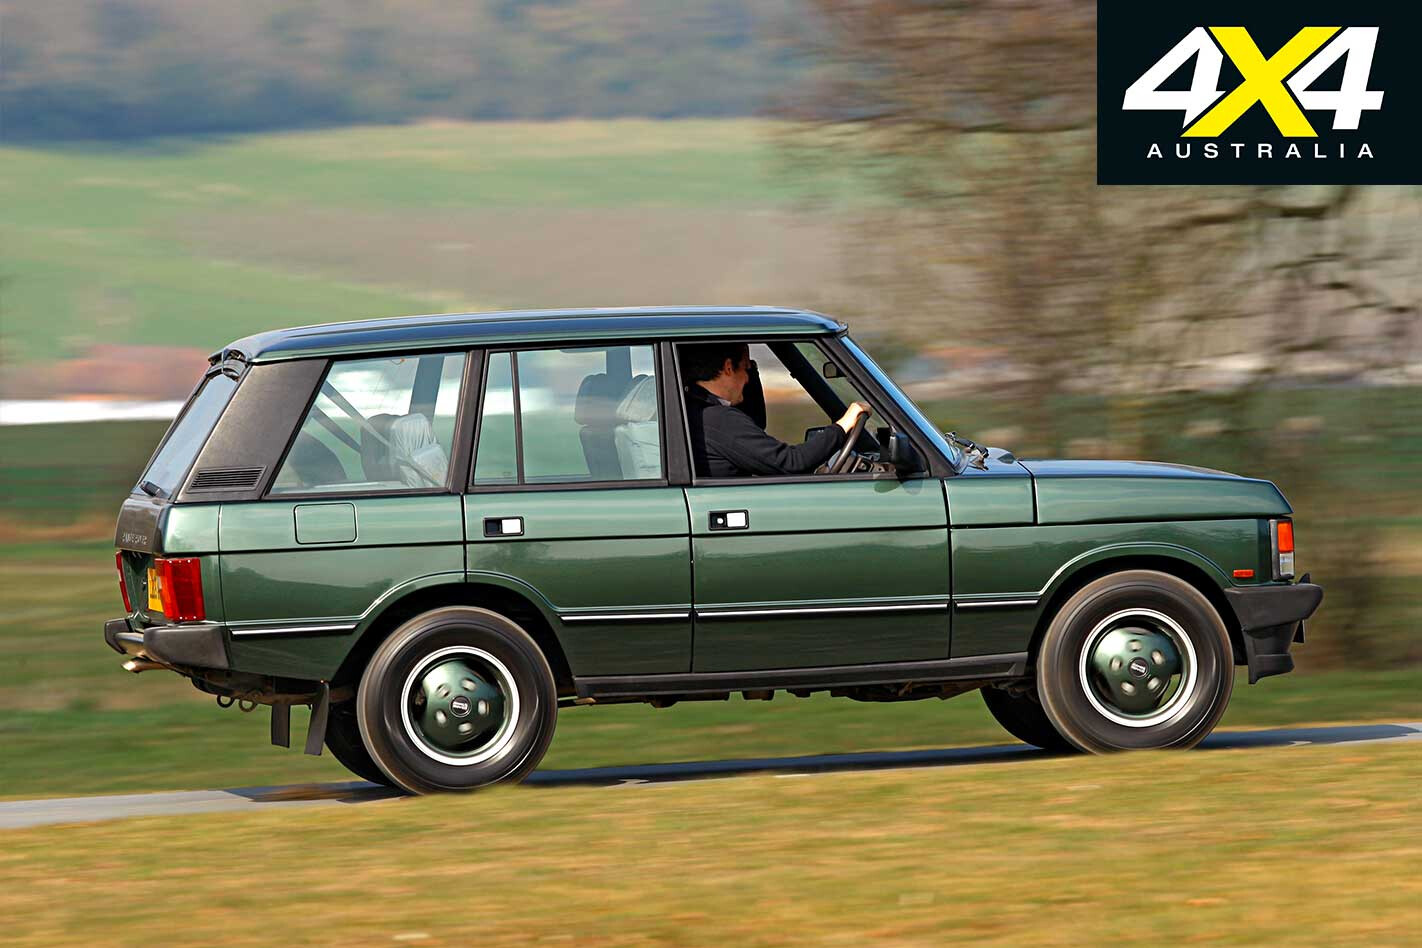
I might be showing my age here, but I remember the launch of the Range Rover Classic, the final version of the original-shape Rangie, in Australia in 1995.
This stunning UK-market example was built in 1993 and has been on the Heritage fleet since 2003. It has undergone a major body rebuild, from the chassis up, which was undertaken by Land Rover’s Vehicle Operations at Gaydon. This exercise cost a tidy £15,000 (A$30,500).
Range Rover Classic Specs Engine: 90 degree V8, 3.9L Power: 138kW @ 4750rpm Torque: 319Nm @ 2600rpm Suspension (f): live axle, coil springs, Panhard rod, anti-roll bar Suspension (r): live axle, coil springs, A-frame, anti-roll bar
Tomb Raider Defender
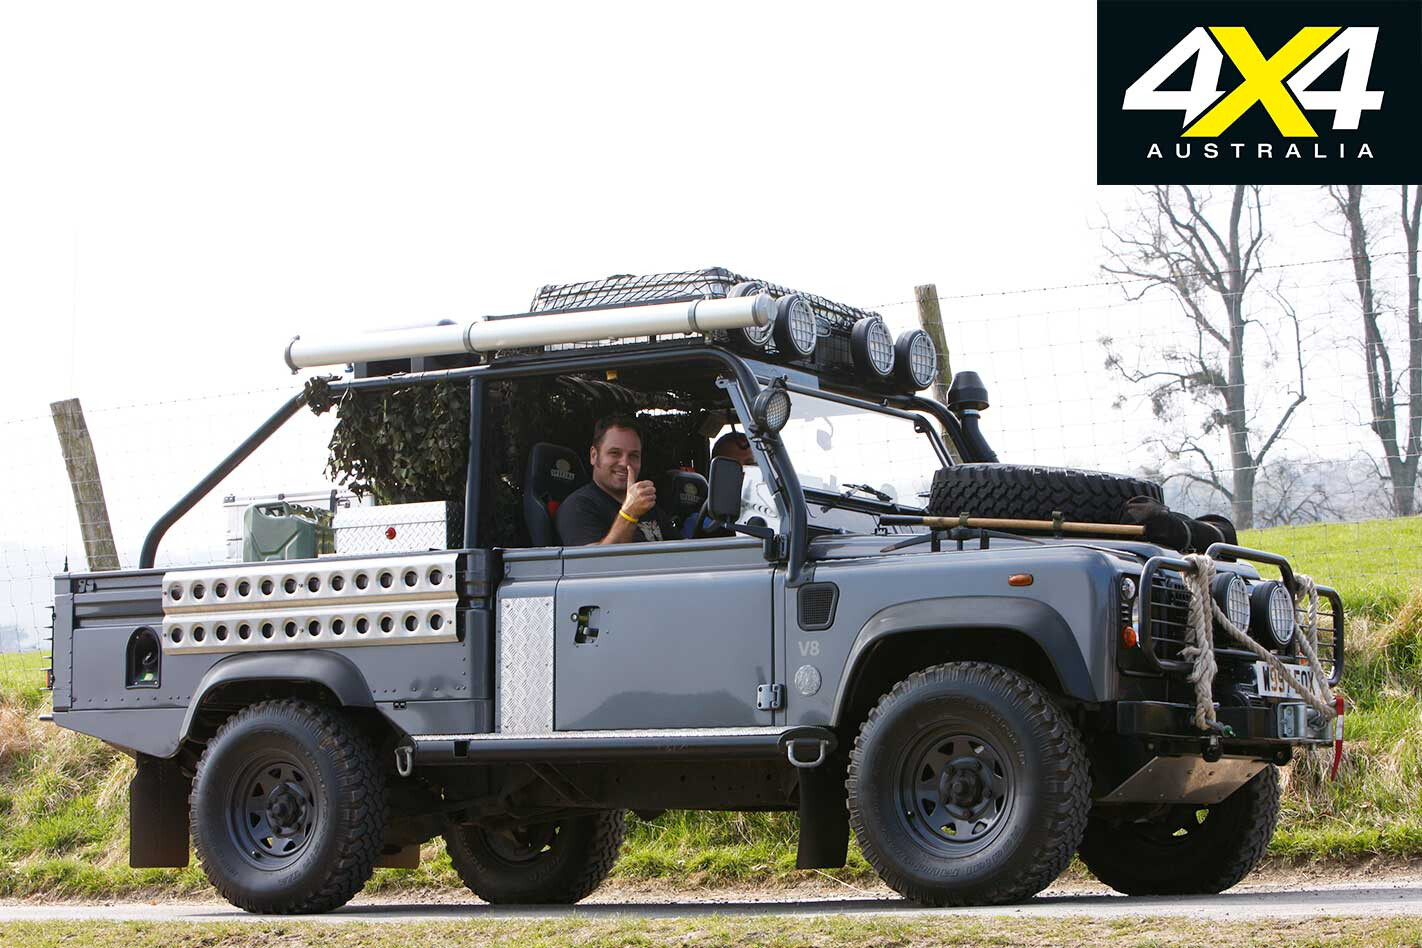
One of the three vehicles built by Land Rover Special Vehicles for the movie Tomb Raider, starring Angelina Jolie, this monster is built on a Defender 110 Pick Up. While many of the special ‘features’ are non-operational, the Defender is powered by a 4.0-litre V8 mated to an automatic transmission.
It is surprisingly easy to drive although forward visibility is hampered by the low seat height and bonnet-mounted spare wheel – Angelina must be taller than me!
Tomb Raider Defender Specs Engine: 90 degree V8, 3.9L Power: 136kW @ 4750rpm Torque: 339Nm @ 2600rpm Suspension (f): live axle, coil springs, Panhard rod, anti-roll bar Suspension (r): live axle, coil springs, A-frame, anti-roll bar
Defender 4 Track
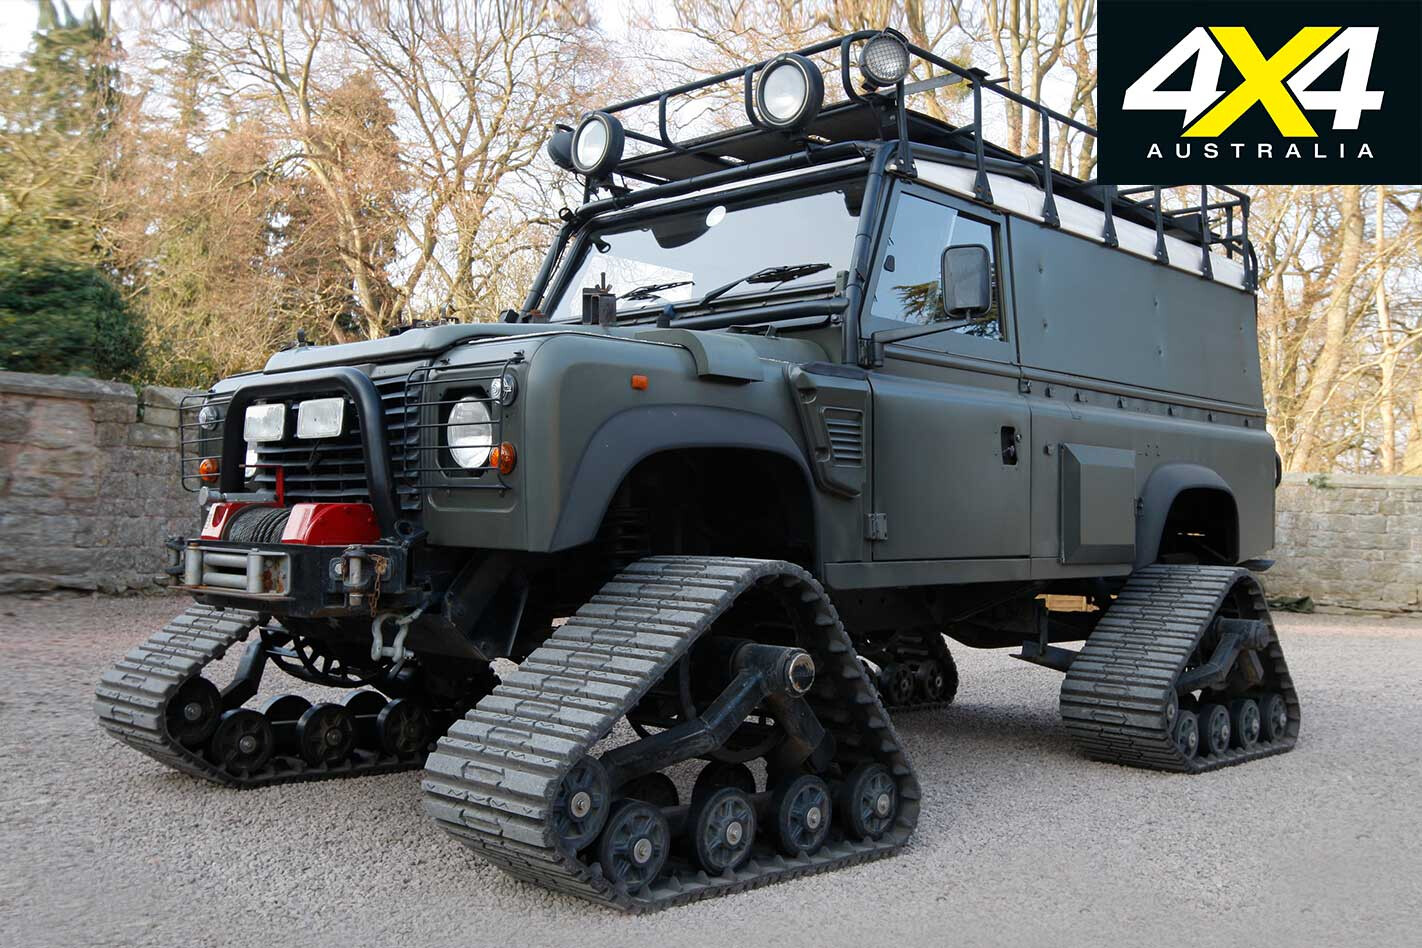
This amazing Defender was prepared to this unique specification for Sir Ranulph Fiennes’ Transglobal Expedition. The plan was to cross the Bering Straits using vehicular motive power only.
On land these tracks were used and on sea the vehicle had a pontoon floatation device and paddle blades. The 4 Track is based on a Military Specification Wolf 24V derivative of the Defender. Driving it is a real challenge as there’s no power-steering.
Defender 4 Track Specs Engine: In-line 4-cylinder, 2.5L TDI Power: 80kW @ 4000rpm Torque: 264Nm@ 1800rpm Suspension (f): live axle, coil springs, Panhard rod, anti-roll bar Suspension (r): live axle, coil springs, A-frame, anti-roll bar
FOR MOST 4×4 owners, adding extra lighting to improve night vision is a huge benefit for comfort, confidence and safety. There have been significant advancements in headlights and driving lights recently, especially with HID (high intensity discharge) and LED (light emitting diode) technology. These two tech types have taken the helm from QH (quartz-halogen) bulbs we’ve had since the 1970s.
Designed with glass-reinforced bodies, polycarbonate lenses (and covers) and a stable mounting system, Narva’s range of Ultima LED driving lights are ideal for touring use. Here, we’re looking at a combination pack of Ultima LED 175s that – as the name implies – are approximately 175mm diameter and include one pencil and one broad-beam lamp. They’re a perfect fit for many touring wagons and dual cabs, with 225s available to fit larger vehicles.
DIY set-up is pretty simple, especially with the matching Ultima LED wiring harness (included in the Narva kit) providing foolproof plug-and-play installation for the varying voltages and circuit types of today’s cars, 4x4s and trucks.
If DIY isn’t your thing professional installation will take around two hours and cost a few hundred bucks, in addition to the price of the lights and wiring. Many people leave it to the pros, especially if a frontal protection bar is being installed to a new or just-bought vehicle.
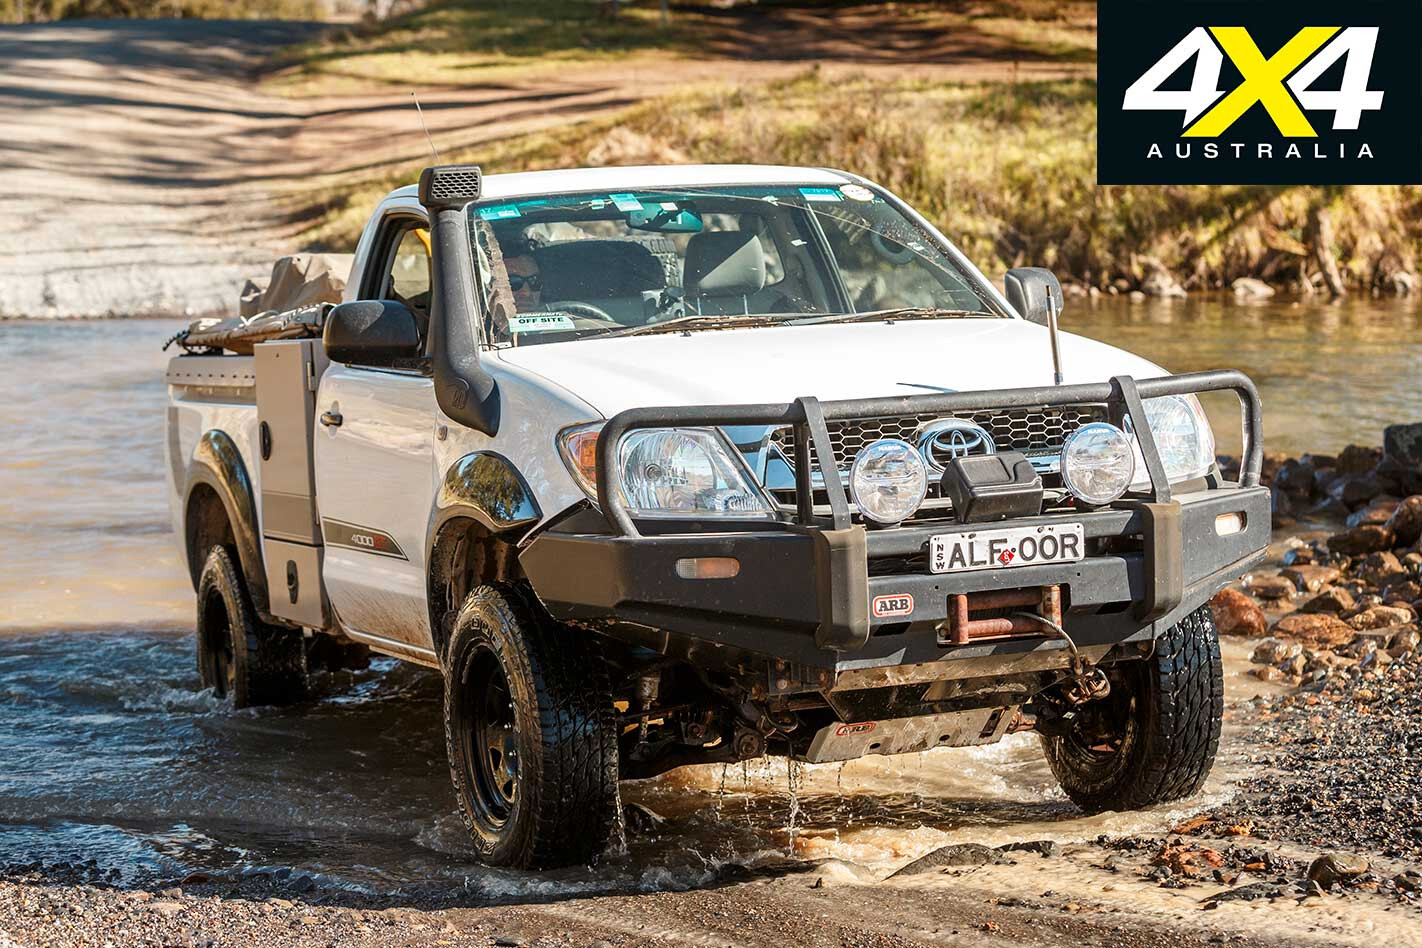
Here’s what’s involved in installing a set of Narva Ultimas to a typical touring 4×4 – in this case, a 2005 Toyota Hilux.
The package
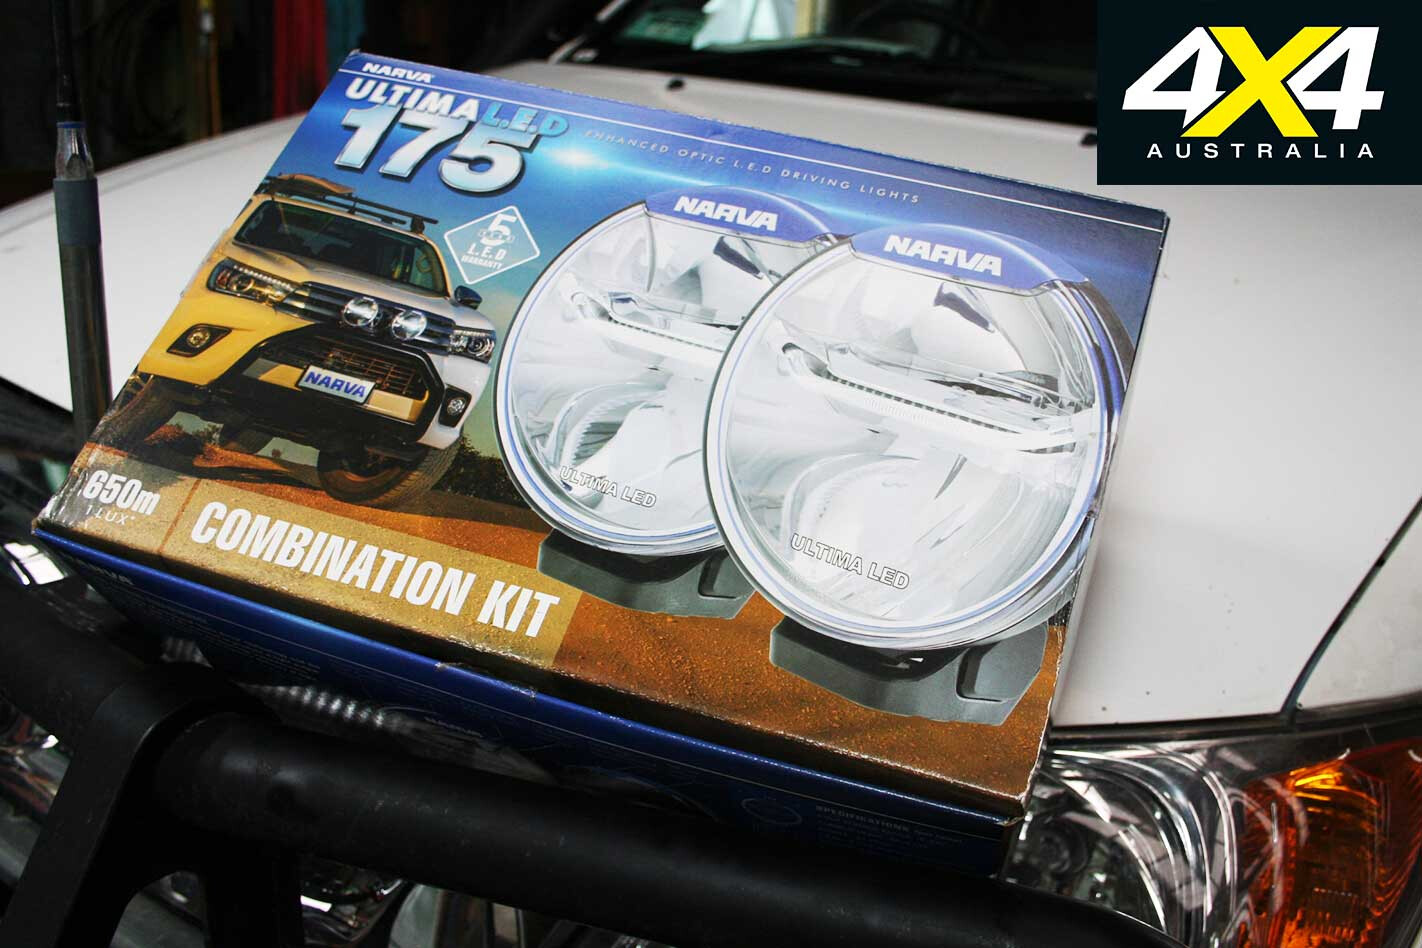
Narva’s Ultima LED driving lights are available in singles or, in this combination, two lamps and a matching wiring harness. The light’s variable voltage (9-33V), as well as the plug-and-play harness which detects various vehicles’ switching systems, makes installation simple.
Step 1: Wiring Harness
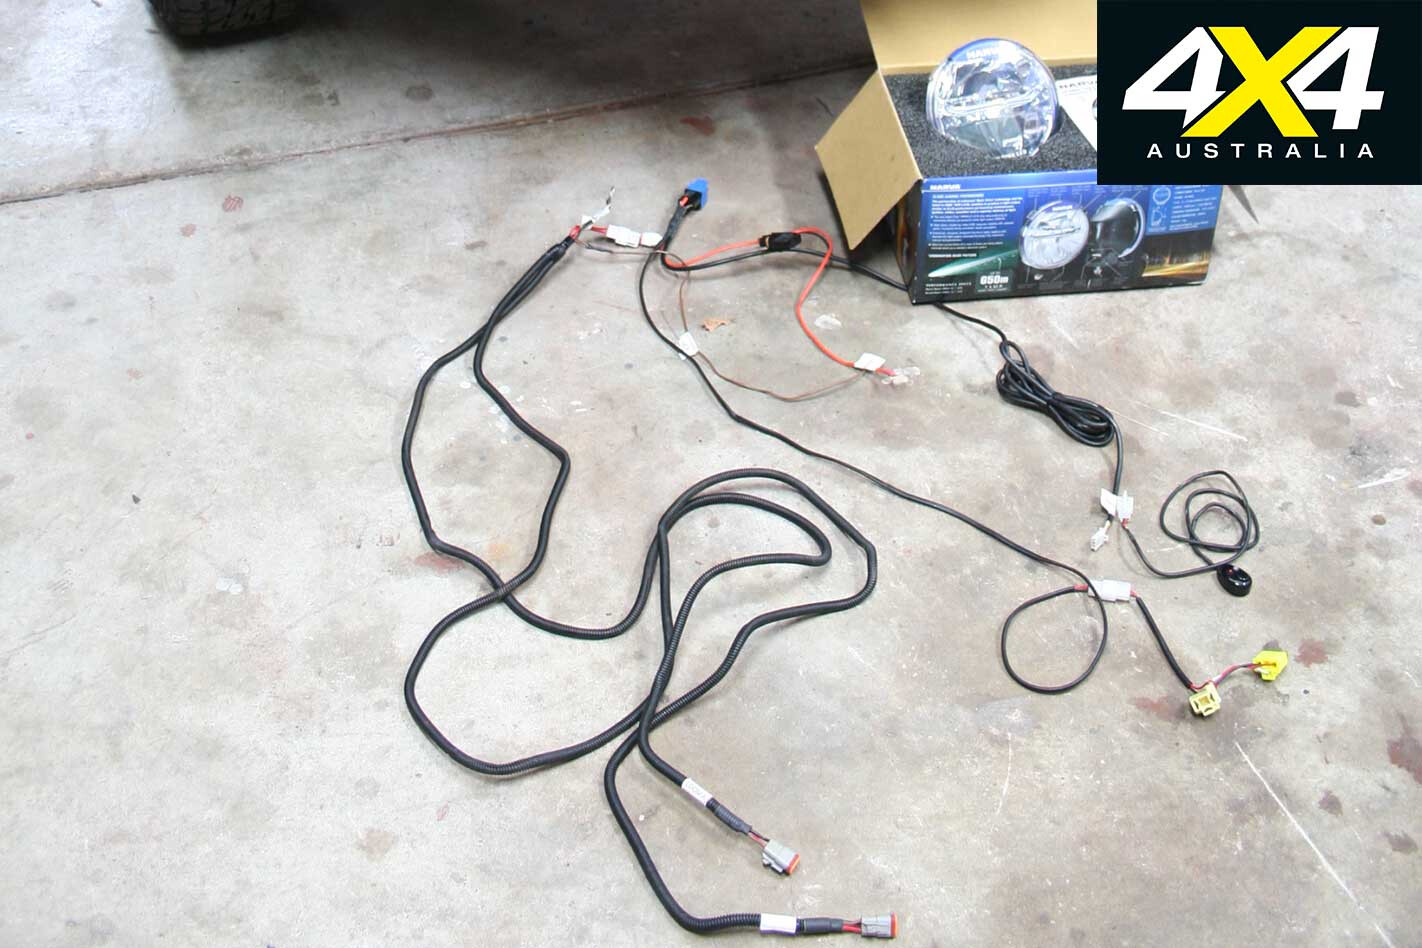
Begin by laying the wiring harness on a floor or bench, to plan routing and installation in the engine bay. Removing the grille will often make access for routing the wiring harness from the lights back into the engine bay much easier.
Step 2: Placement
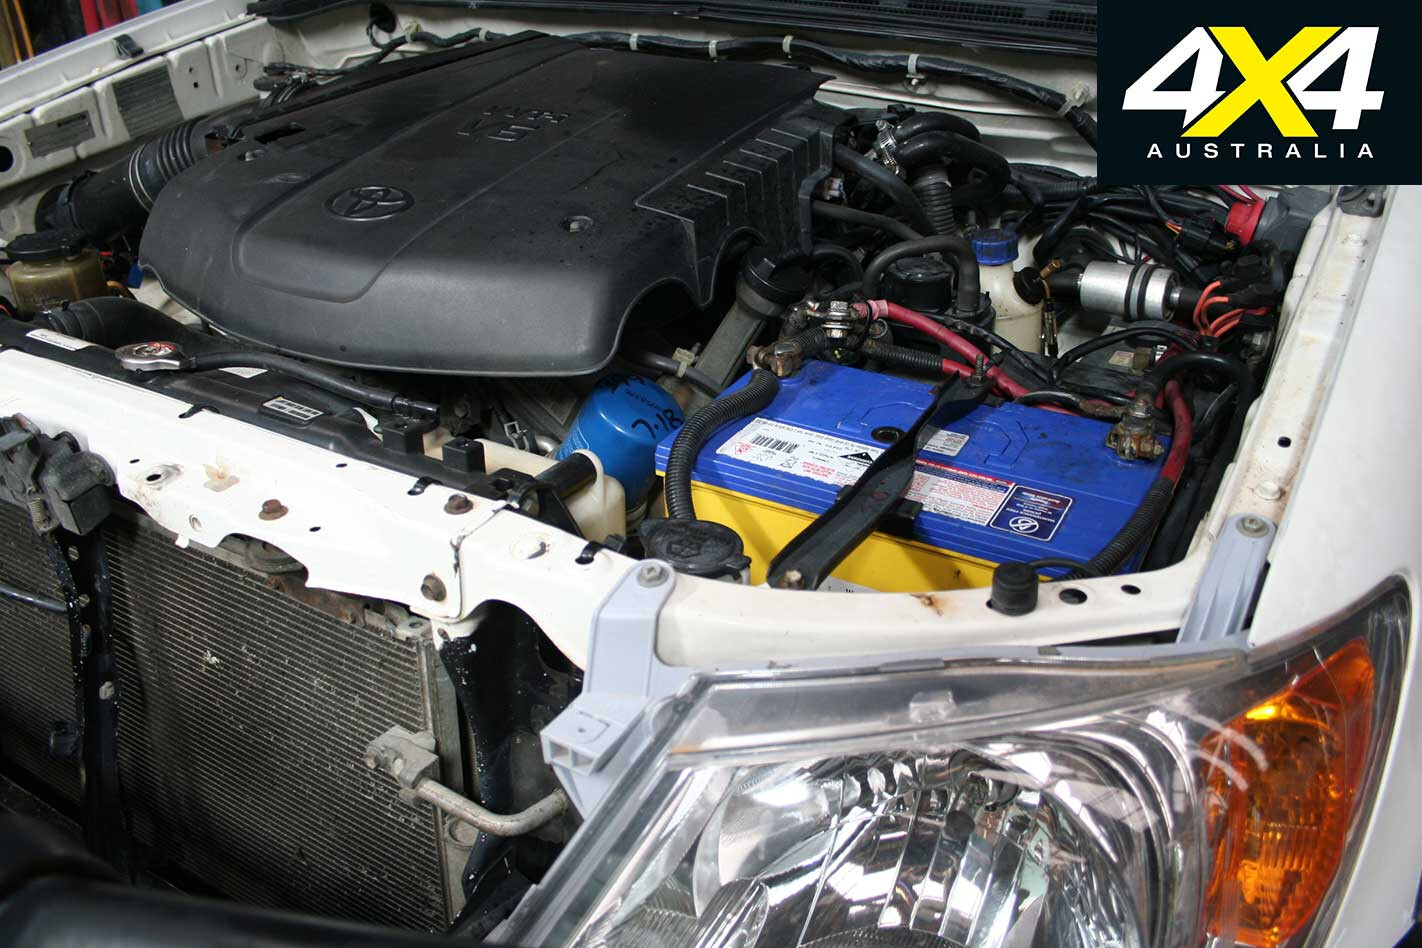
My 4.0-litre V6 petrol Hilux has an EFI LPG and dual-battery system hardware installed on the passenger/battery side of the engine bay. As such, it’s busy with wiring and relays, so I decided to install the Narva harness on the other side of the engine bay.
Step 3: Holed up
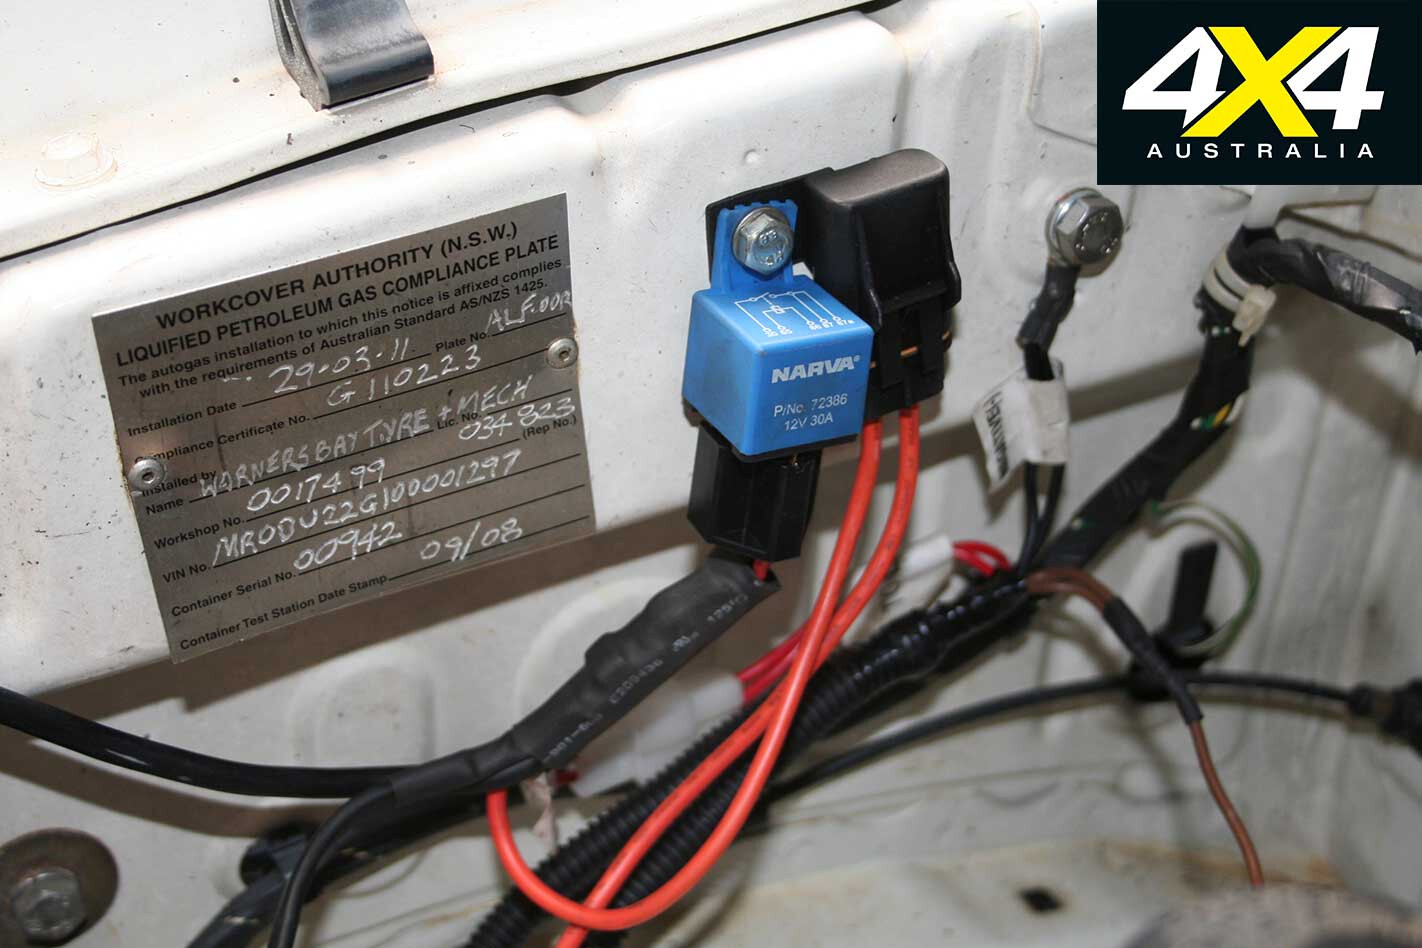
To make installation super-easy, some redundant mounting holes in the Toyota engine bay were used to install the relay and fuse. Always choose a location high, dry and away from any moving parts, and one that allows hassle-free future servicing and parts replacement.
Step 4: Looms
To feed the lights, the Narva harness has two well-shielded loom sections that were routed to the front protection bar. It’s good practice to follow the vehicle’s standard wiring routes where possible and to ensure the loom doesn’t run over sharp edges or close to hot exhausts.
Step 5: Wiring Grommet
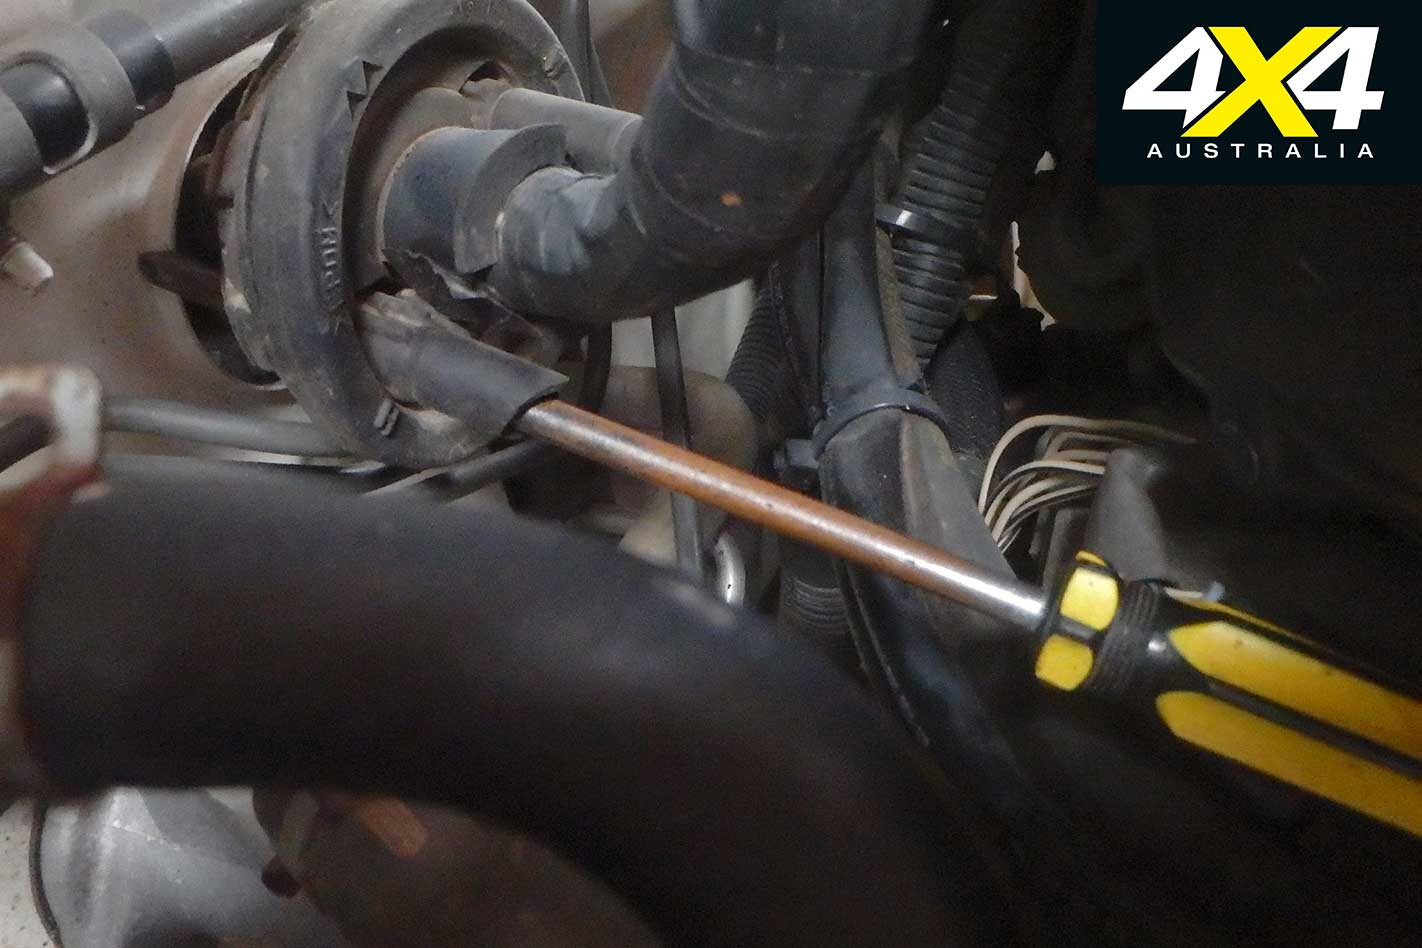
The switch must be in the cabin, so the switch supply loom must pass through the firewall. This Hilux has spare ports in the vehicle’s main harness grommet. Some vehicles require a hole to be drilled and a grommet to be installed.
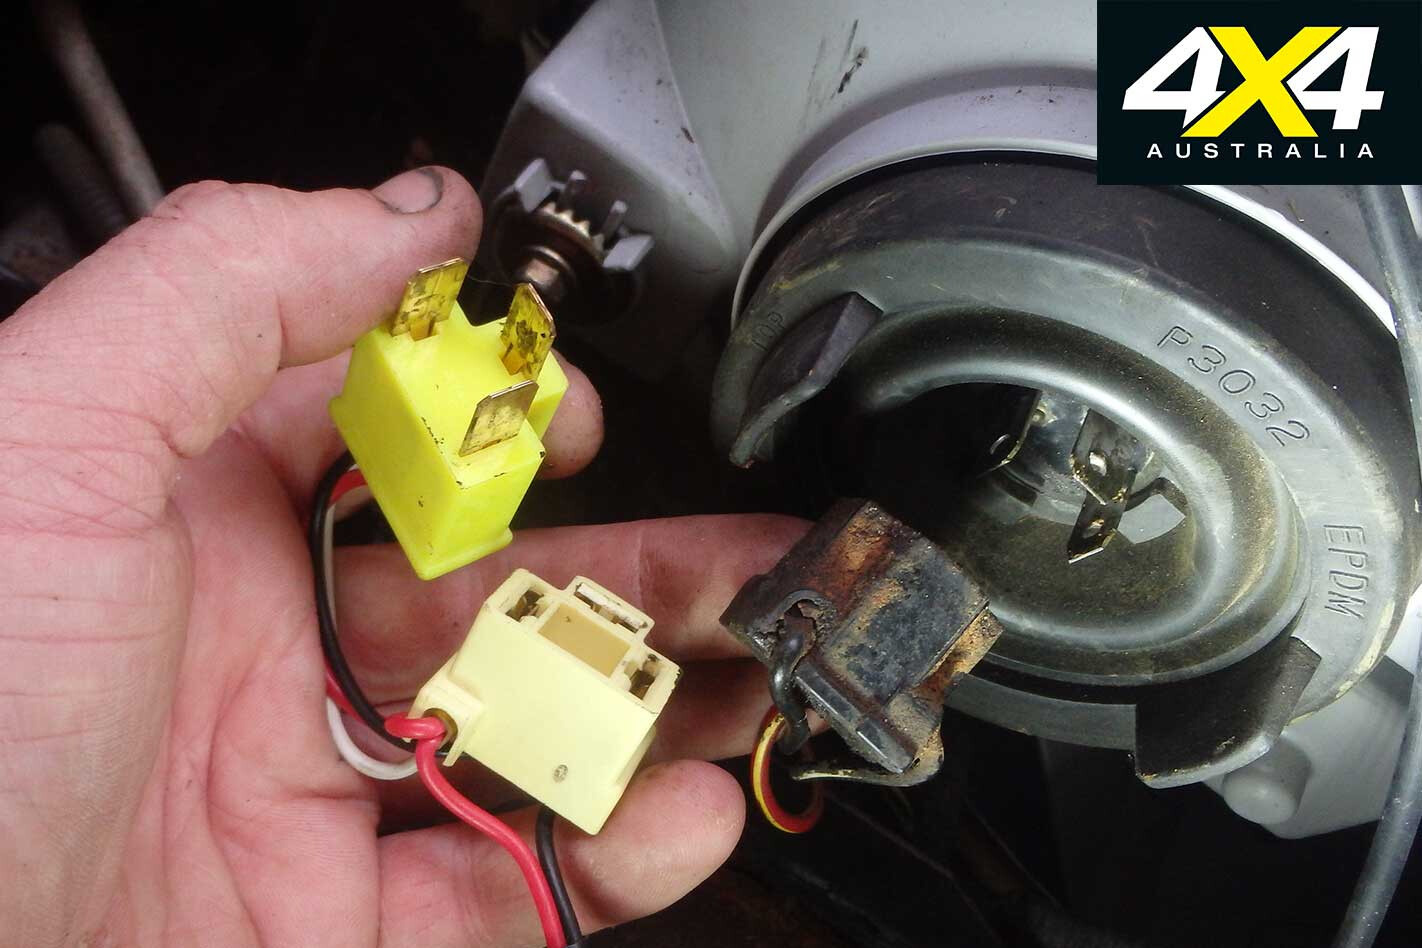
Step 6: Switch Plug
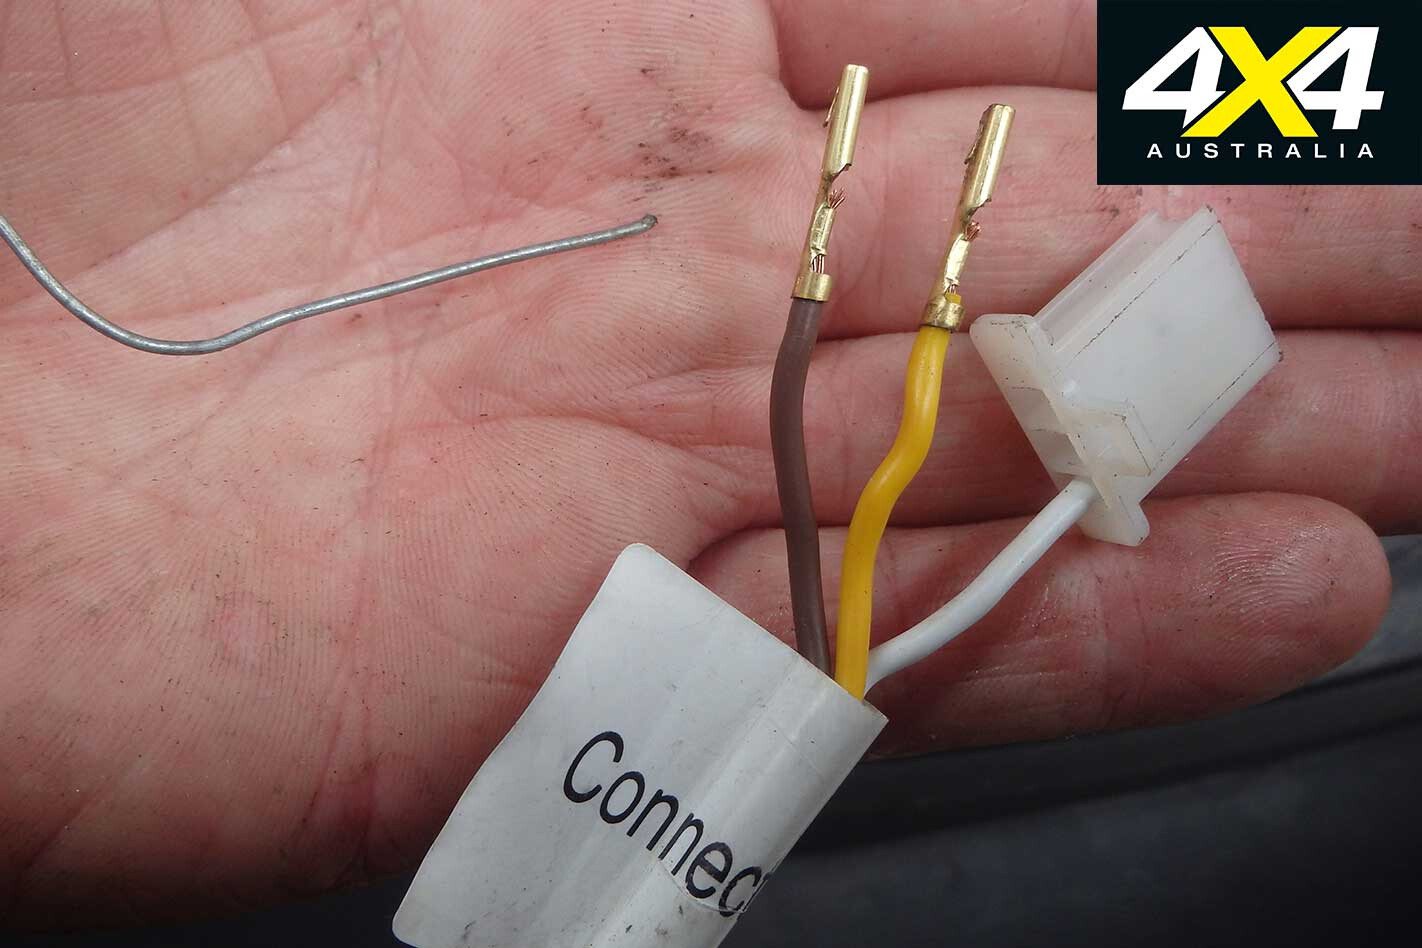
To allow the loom to be fed through the Toyota’s existing loom grommet, the switch plug was temporarily disassembled (florist’s wire can help with the removal of the plug’s brass pins). The individual wires were taped together and poked through the grommet to behind the dash.
Step 7: Be-Switched
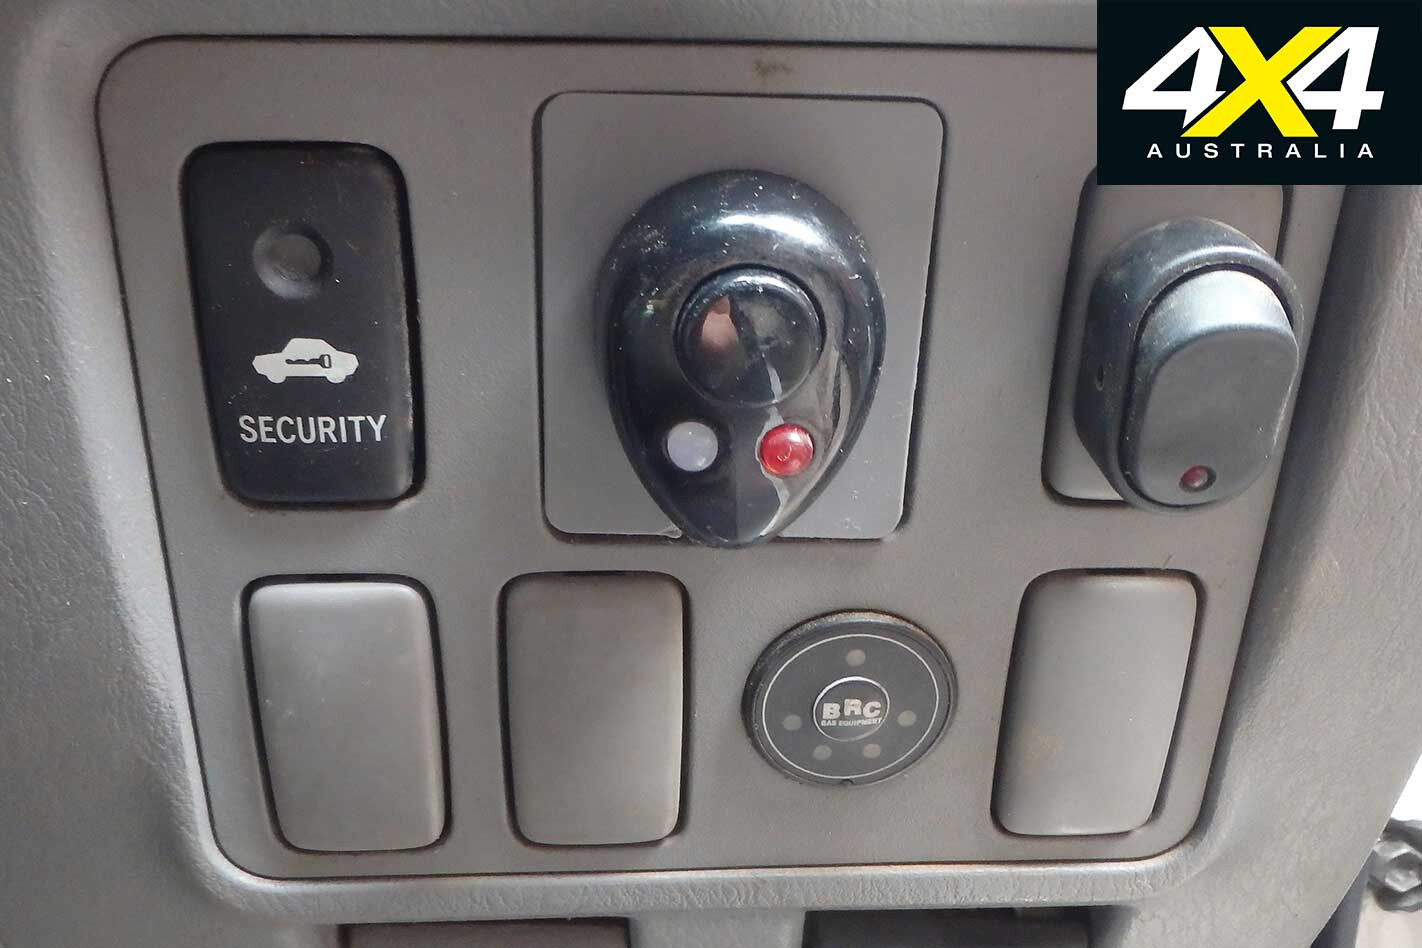
Most vehicles have a few spare dash-blanking plugs ideal for installing accessory switches. The glue-backed Narva switch was easily installed after clearing the bottom edge of a blanking plate for the loom; behind the dash, the loom was routed and tied high above the stop-and-go pedals.