Custom 4x4s
Gallery 1
Richard Edmunds moved machinery, tools and raw materials into his garage. He emerged 8000 hours later having created a masterpiece.
This article was originally published in 4×4 Australia’s November 2012 issue.
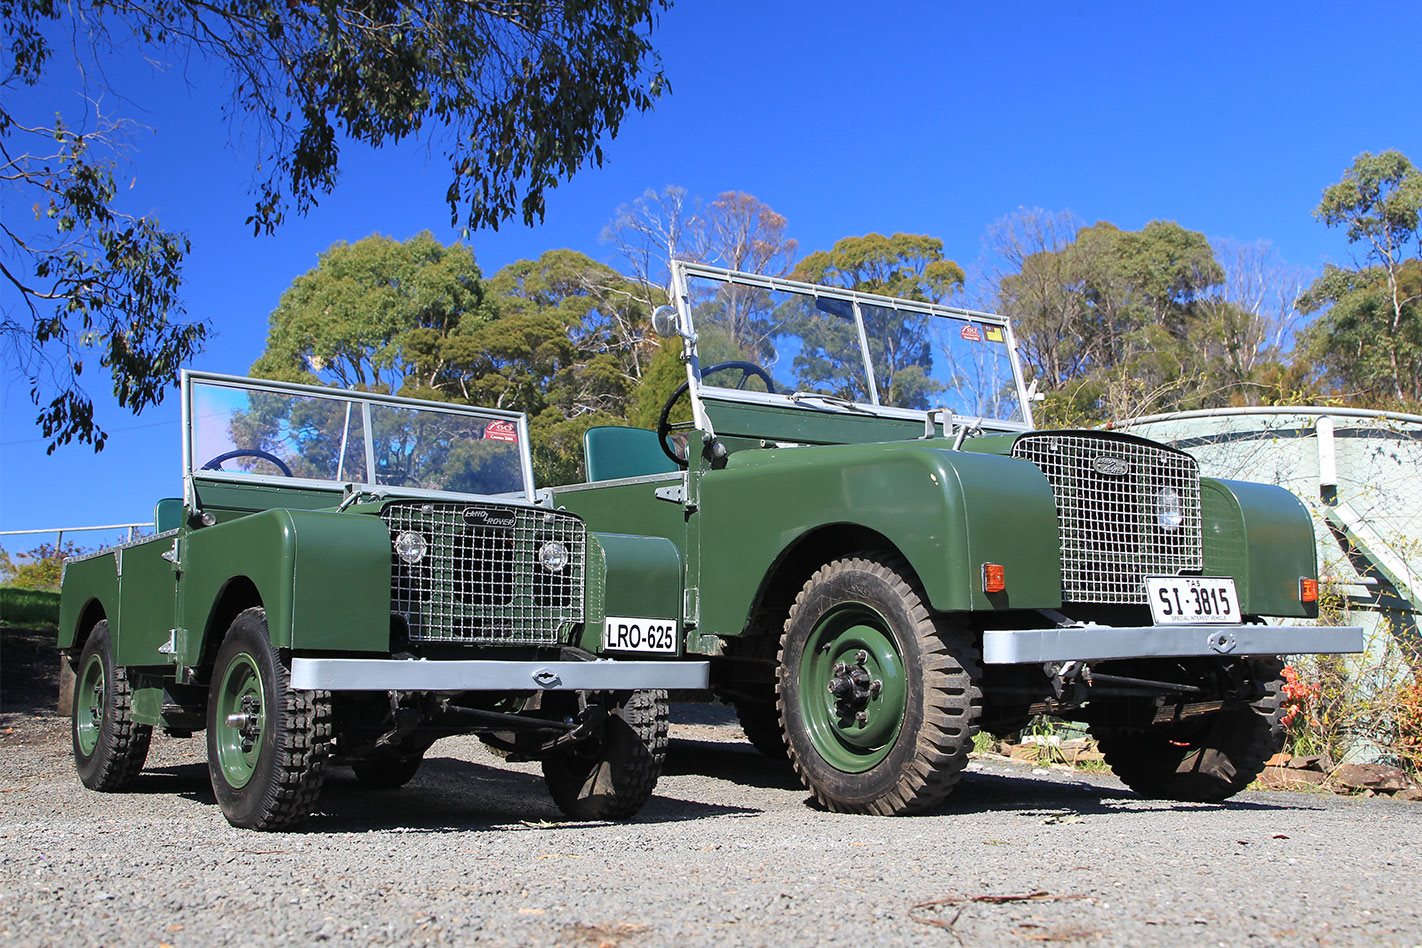
When we heard that some bloke had made a working, scaled-down version of a Series I Land Rover we pictured a dishevelled character rummaging through scrap yards and second-hand lawnmower shops to gather a pile of parts. Then forcing these components together with Frankenstein-like precision and dressing them up to loosely resemble a vehicle recognised only by its badges. That couldn’t have been further from the truth. We had no idea what we’d stumbled across.
Richard began his career as an apprentice in a railway workshop. He graduated as a fitter and turner and went on to run his own engineering company. When he retired he decided he needed a project to keep him out of trouble and, being a long-time Land Rover enthusiast and owner, he decided to build a five-eighths scale Series I Land Rover.
Now, this is where it becomes really interesting. Surely the easiest way to achieve this goal would be to research smaller vehicles to source the engine and running gear, then make up a body to house it all? Not for Richard. He was going to do this the only way he knew how – the right way.
He already owned a tired Series I, so his plan was to pull this down and take measurements as he went, convert the measurements to five-eighths scale then blend his wisdom with his skills and make everything from scratch.
To begin the journey, Richard built his own furnace and cast an engine block and gearbox housing out of alloy. He wasn’t happy with the block as it was too porous and the water jacket wasn’t up to his standards, so instead he machined it from a solid block of alloy. He cast his own white metal main and big-end bearings and took a round billet of high-tensile steel and machined the crank and camshaft.
To balance the crank Richard used a low-tech yet accurate method. He placed two knife edges on his work bench and laid the crank journals at 90 degrees across them. The heaviest part of the crank would rotate to the bottom. Dimples were drilled out of the heavy side and the process was repeated. The front pulley, flywheel and clutch assembly – which were also made from scratch – were then assembled onto the crank and balancing began again. This task alone took a full day.
He could have made the valves and springs, but opted instead to save time and buy some Briggs and Stratton units and modify them to fit by shortening the valve shank. Flywheel pressure plate, clutch housing, pistons, con rods and everything else were all made, weighed and balanced and, as you would expect from an engineer’s handiwork, the engine pieced together with no major headaches.
The gearbox received the same exacting treatment. Richard chained himself to his machinery again and cut and ground a new set of gears and shafts which were then assembled into the gearbox he’d cast.
To complete the engine and gearbox Richard had endured 12-hour days of machining for almost four months and was now thankful to be able to turn his attention to the chassis. He chose to make this out of alloy as it is light, easy to work and has plenty of strength. While fabricating this he also kept himself busy by tackling the body work which was all done by hand using nothing more than a folder, guillotine and wooden formers.
Richards’s house is near the top of a hill and the spectacular view from his workshop across Tasmania’s Tamar River and the surrounding countryside must have kept him going as it was back to the machining again to create the diff components, which were all made from raw materials. The exception was the crown wheel and pinion, as Richard particularly wanted to use helical gears which run quieter than straight-cut. He couldn’t make these at home, but he did know a guy with a box full of spares. After half a day of measuring and matching, he dug out a pair which once belonged to a Honda Ag bike and the build continued.
To form a rolling chassis Richard bought some 10-inch alloy trailer wheels, cut out the middle and made up some Land Rover look-alike centres and welded them in.
Ordinary tyres were purchased and the treads were filled with a rubber solution. Richard then cut Land Rover profiles into them to look like the originals. The result was perfect but with time and use the rubber fell out in all except the spare which still sports ‘original-look’ treads. Richard said: “With hindsight, I would have scrubbed the tread back then sealed on a rubber band [similar to a re-cap] and then cut the tread pattern in.”
Brake drums were cast and shoes were made and these were taken with the clutch plate to a local workshop to have brake pads and clutch linings fitted. Richard did construct his own brake master cylinder, but it was difficult to work so he settled for an off-the-shelf unit designed for a trailer. Wheel cylinders finished the brake system.
With the build nearing completion, it was now time to run the engine. To do this, the engine was removed from the vehicle. A belt was used to link the flywheel to a motor from a garden mulcher and the heart of this creation gained life and began to beat. The engine was re-fitted and the finishing touches were added. The vehicle started on its first attempt and the fruit of Richard’s labour drove under its own power without a hitch.
It’s a big pat on the back if we change a head gasket and everything goes to plan, so we find it nothing short of phenomenal that Richard can build a whole engine and a gearbox – in fact, a complete vehicle. It’s also astounding that it all works as though it just rolled off some production line and yet Richard is so calm and humble when he talks about his achievement.
MORE
custom reviews
When we first met Richard and saw the vehicle in his garage, we began pointing at components and asking “did you make this?” The answer was always yes, and it soon dawned on us that we were asking the wrong question. So we saved us all some time and breath and asked him what he hadn’t made.
The short answer was the crown wheel and pinion, valves and springs, points, alternator, master cylinder, carby, electric fuel pump, starter motor (but just the motor – he made the casing and the pinion) and the front lights. So apart from a handful of bits, Richard made everything from measurements, calculations and raw materials.
For our money, this puts him firmly in the ‘brave and genius’ category. The only question remaining is, why?
The answer is simple. Richard loves a challenge and, in his own words, “when you retire you’ve got to have something to do during the day”.
So with that project complete, it surely won’t be long before Richard’s hands are busy again, and who knows what will roll out of his garage next time?
One thing is for sure, when and if that day comes, we’ll be there to bring you the story of another amazing journey.