Electronics & Gadgets
Gallery 1
THE brakes of a 4×4 are great until you slap an extra tonne or two on the back, which is why most states require any trailer that weighs more than 750kg to have its own braking system.
It’s a good bet that, unless it’s a box trailer with a roof-top tent, any camper trailer will be close to double the weight limit and come fitted with electronic brakes. All well and good, except without a controller on your 4×4 they’re next to useless.
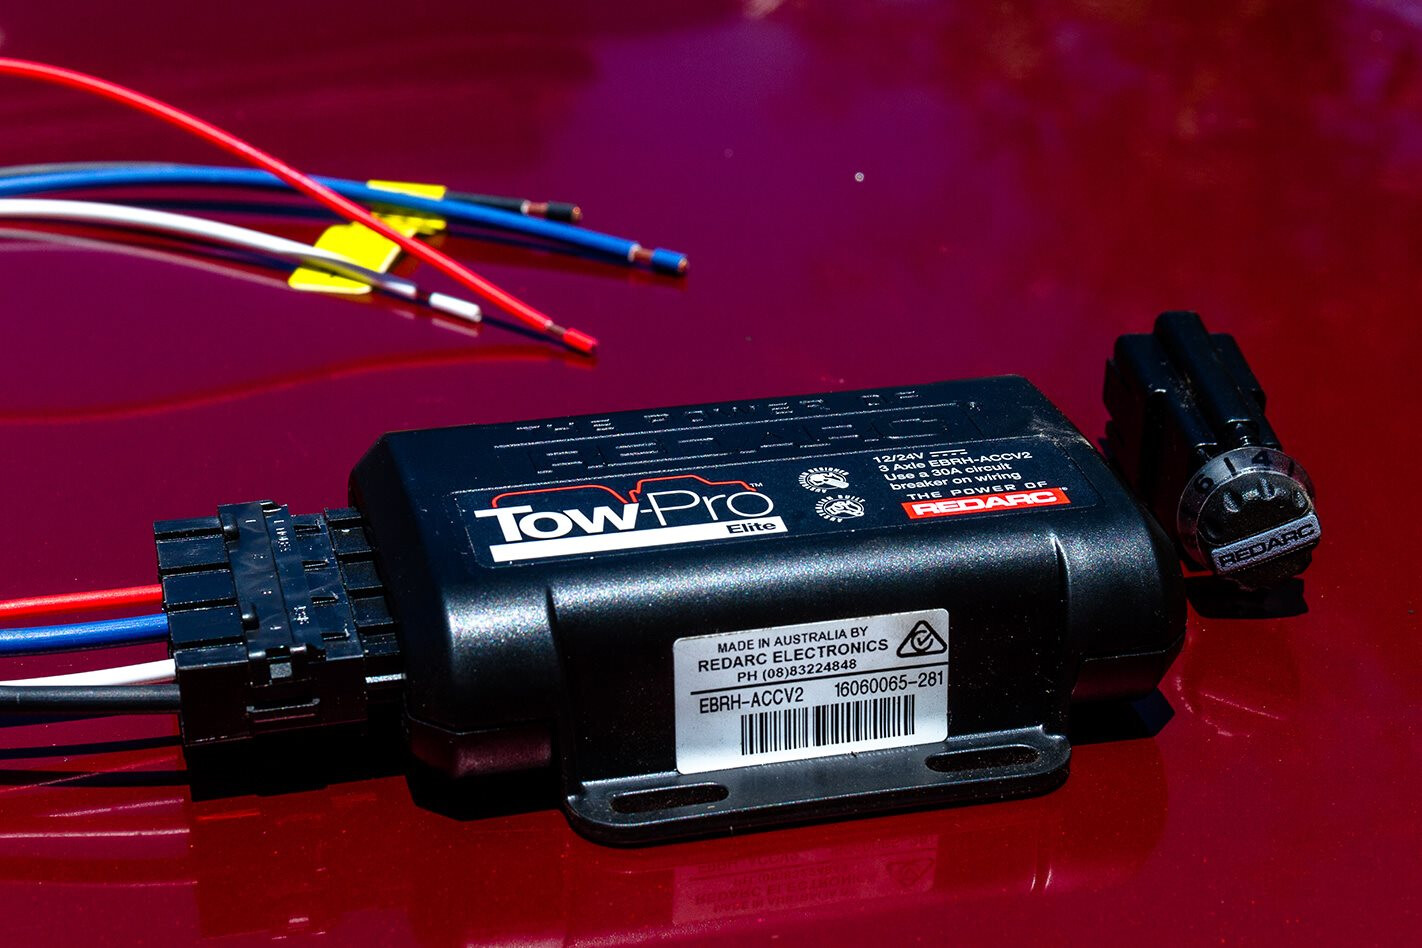
To give our 60 Series LandCruiser a bit more versatility, 4X4 Australia busted out the soldering iron and installed the Tow Pro Elite from Redarc. Here’s how we did it.
1. CIRCUIT BREAKER We optioned our controller with a 30A circuit breaker kit. We started by physically laying out every component to see where things would and wouldn’t work. The driver’s side kick panel fitted perfectly, with enough length for each cable and a secure mounting position for the module.
2. POWER CABLE With the module in place we set about mounting the fuse in the wiring kit and feeding the power cable through the engine bay and into the cabin. A small incision in an existing firewall bung protects the cable from cuts. The kit comes with a crimp and heat shrink to join it onto the module’s wiring loom.
3. THREE TAILS With the power sorted (but not connected to the battery) three more tails in the wiring loom need connecting. The white tail needs a solid earth – we connected it to a nearby bolt through the body. A second tail needs to be soldered and spliced into the sensor on the brake pedal. If you have a more complex 4×4 it may be easier to run a longer cable and tap into a tail-light to get the signal.
4. BLUE CABLE In a standard 7-pin trailer plug the brakes are controlled by the blue wire. We soldered and heat-shrank a 5m length of matching-size blue cable to the tail at the module. We ran it along the kick and sill panels through to the rear to ensure it was protected along the way.
5. TURNING DIAL With the main wiring sorted it was time to mount the dial. This needed to be in an easy-access location. This model operates in automatic mode 90 per cent of the time, but in tricky off-road situations manual operation is the key. We replaced an unused dial on the dash near the steering wheel with the included template and connected it to the module. We can now control the brakes on any trailer we’re legally allowed to tow. The entire installation took less than an hour.
Follow 4X4 Australia on Google
Get more 4x4 news, reviews and gear stories from 4X4 Australia in your Google feeds.