Opinion
Gallery1
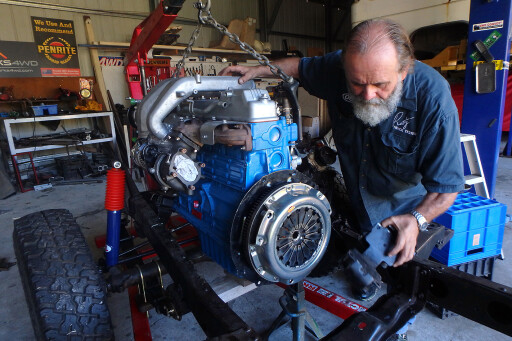
THE build on Milo 2 continues, and as parts get bolted on I can almost feel the roar of the old girl coming back to life.
What began as a replacement for my poor, old ’83 Toyota, Milo, has turned into endless lessons in new techniques and products, and I love every minute of it.
This is the thing about a truck rebuild as opposed to just buying one. There’s a sort of intimacy involved here, an understanding that comes from researching, planning, sourcing and bolting on bits that eventually all come together to be the vehicle.
It’s exciting, fun and I recommend it to anyone who can find the space to play. Why? Because when you’ve finished it you’ll have learnt things that can’t be learnt any other way. And someday they might just keep you alive (more on that later).
 You’d be amazed at how many ‘father and son’ or ‘grandad and granddaughter’ projects I hear about in my travels. So many people have got something old on the go these days you have to wonder if it’s a backlash against automotive products becoming too techno-centric for the skills of us mere mortals.
Understanding a vehicle starts with understanding the parts; just as an essential component of good driving is understanding what’s happening behind the pedals.
All this occurred to me while I was fitting up the new clutch to Milo 2’s 12HT motor, because my first ‘major automotive repair’ was chucking a new clutch in a Hillman when I was about 14.
It was all done with the car in the air on logs and a set of farm spanners that were mostly BSF Whitworth sizes; the old British bolt size that’s somewhere between metric and AF. There’s not much you can’t do with teenage enthusiasm and a hammer.
But it took about a dozen goes to get the clutch plate centred enough to be able to slip the gearbox on without doing damage.
 Lying underneath the car – hoisting that dirty old lump of iron off my chest so it could hang off the bolts until it finally jiggled over the first motion shaft – gave a bloke plenty of time to think he might just take it easy on the clutch in the future because it sure was a bugger to replace.
Once you’ve replaced a clutch plate you’ll never hold a vehicle on a hill by slipping the clutch again; you’ll never ‘ride’ the pedal because you’ve got a lazy foot; and there’s every chance you’ll not bother with unnecessary things like wheelies and burnouts, either.
Every time I see some kid smoking it up, I know straight away the most serious mechanising they’ve done is pulling the backing off stickers.
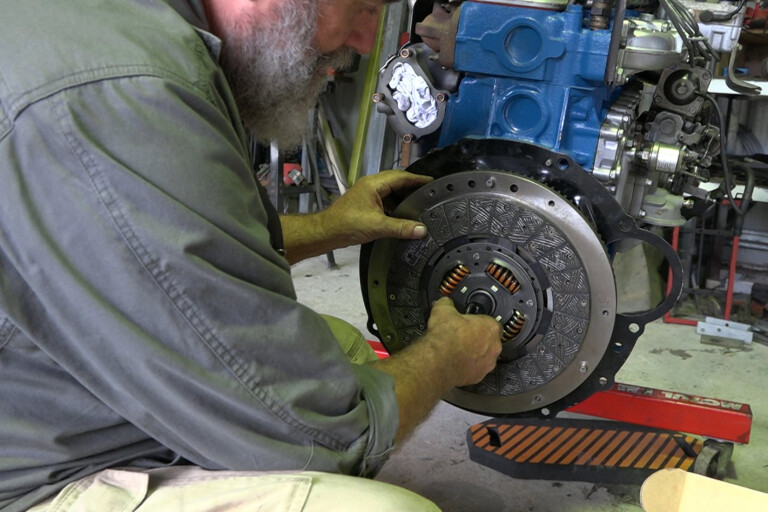
Things have come a long way in the last 45 years – the new Terrain Tamer heavy duty clutch came ‘complete’. There was a new clutch plate, of course, featuring much heavier duty linings and improved springing, but it came with a new pressure plate, too.
It’s that combination – stronger springs squeezing denser linings to the flywheel – which is the essence of clutch improvement. Obviously it’s going to hold under pressure much better than the standard component, but with improvements in materials thanks to technology it’s now possible to fit a much better clutch to an old vehicle. Think about how many times you change gears in a day of driving, and this is one improvement you’re going to notice constantly.
 The kit also came with the little bearing that supports the gearbox first motion shaft in the back of the flywheel. If you ever hear a screaming noise from deep within the drivetrain that disappears when you put your foot on the clutch, it’s this little and often forgotten bearing.
Terrain Tamer supplies one so you don’t forget to replace it. It’s the old case of ‘you’re in this deep so you’d better replace anything else that might need it’. The bit I loved most, though, was the plastic motion shaft dummy Terrain Tamer supplied, which meant I only had to bolt the pressure plate to the flywheel once because the plate was guaranteed to be centred.
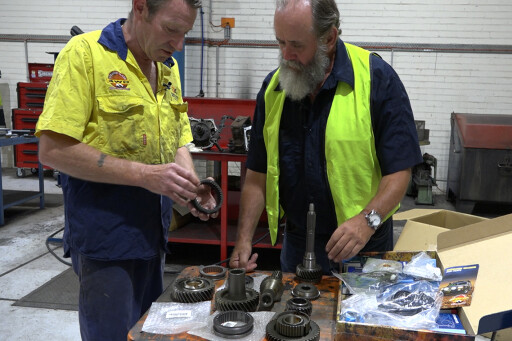
So with a much stronger motor running through a much improved clutch, it was time to think about gearboxes. Once again I was off to Melbourne to Terrain Tamer HQ where Dave, who’s been building gearboxes for the past 25 years or more, was putting together the five-speed from the original 60 Series we purchased to grab the motor.
MOREopinions
He did this using improved parts – when you’ve been in the Toyota parts and repair business this long you know what can be improved – and a lot of meticulous construction.
Yes, I went straight for a set of Marks Adaptors transfer case gears this time because I know how much they improved control in the original Milo. The ratios I chose add about 10 per cent road speed in high range – to suit more horsepower and easier cruise speeds – and reduced low range by about 30 per cent.
That means the low range gears are true crawler gears now, with fifth low range being slightly lower than first high range for a true ratio spread. Phew, run out of space again. I’ll have to tell you about the lifesaving potential of building your own vehicle some other time. Got to go, got spanners to spin!
Please enable JavaScript to view the comments powered by Disqus.
COMMENTS