Gear
Gallery1
During a creek crossing, water in the wrong place can very quickly convert your vehicle’s engine to scrap metal.
This article was originally published in the October 2014 issue of 4X4 Australia.
That can be very expensive and inconvenient if you’re holding the steering wheel of a 4WD. That’s one reason why a snorkel is a terrific accessory for any touring 4x4. It lessens the chance of your engine sucking in water during a creek crossing by raising the air intake height.
Also, many vehicles draw their engine’s intake air from the front inner wheel-arch, so relocating the engine’s air intake away from the churning motion of the tyres can drastically reduce the amount of dust the air filter has to cope with.
For some older vehicles, breathing cooler air from outside the engine bay, therefore away from the radiator and other hot components, can help with drivability, economy and efficiency.
The Australian-made TJM Airtec snorkel kit is manufactured from UV stable, high density polyethylene – which is pretty much indestructible.
Individually crafted for each vehicle type it retails from $430 to $620 plus fitment, depending on the car. TJM stockists can install it, however a competent enthusiast can DIY in a few hours.
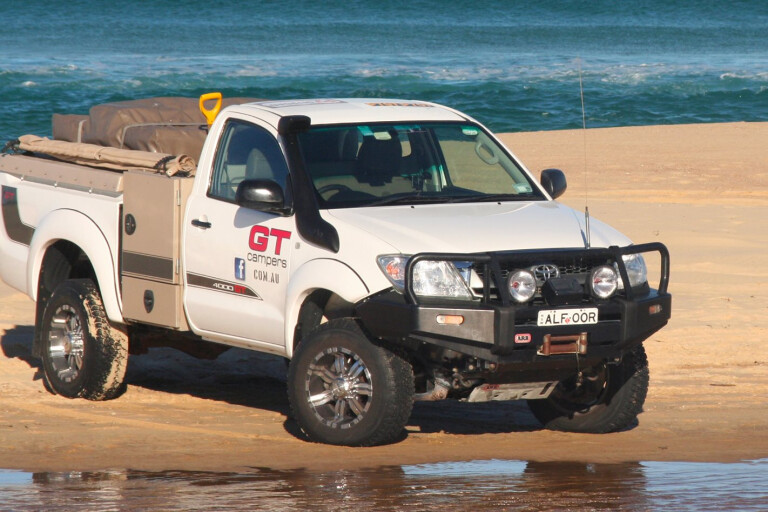
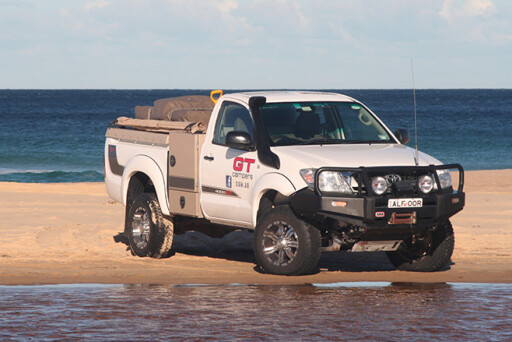
A good quality snorkel is a must on any outback adventure.
 1. TJM’s Airtec snorkel kit arrives ready for installation, though basic and specialist tools are required. The kit includes the down-pipe (mounted on the vehicle A-pillar), the duct that pipes air to the standard air cleaner housing, plus fittings/clamps and instructions.
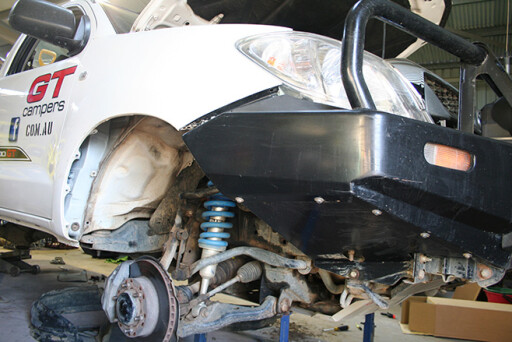 2. The vehicle must generally be placed on chassis stands, with one wheel and wheel-arch splash guard removed, to allow access to the inner guard area. Splash guards may be held in place by screws, bolts, plastic plugs or by one-use-only metal rivets.
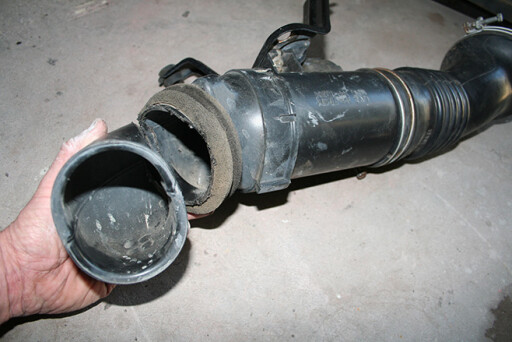 3. This 4.0-litre V6 petrol Hilux has its air intake in the inner guard piped to the air cleaner housing in the engine bay. This pipe is temporarily removed and its air intake bell-mouth cut off to accept the snorkel kit’s duct, that will be installed above the splash guard.
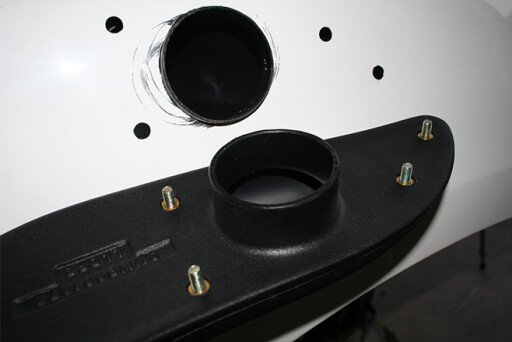
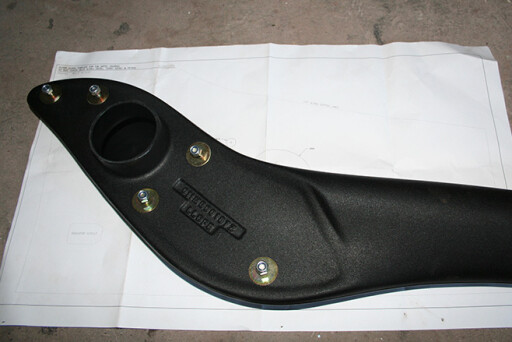 4. The back of the snorkel reveals the air delivery hole that enters the under-guard area and the threaded nutserts that are used to hold the snorkel to the outer surface of the vehicle’s front guard. Accurate location of these holes is critical.
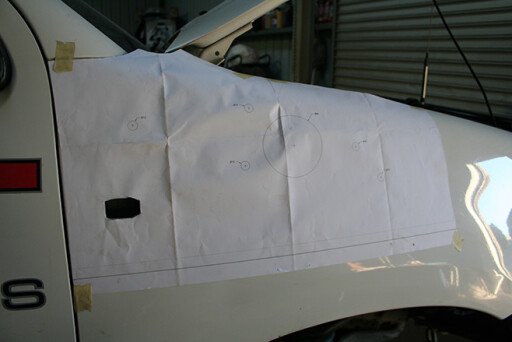 5. The TJM Airtec kit includes this that accurately marks the position of the breathing and installation holes for the snorkel. Unfolding it, cutting it to shape and laying it on the mudguard shows precisely where these holes must be drilled.
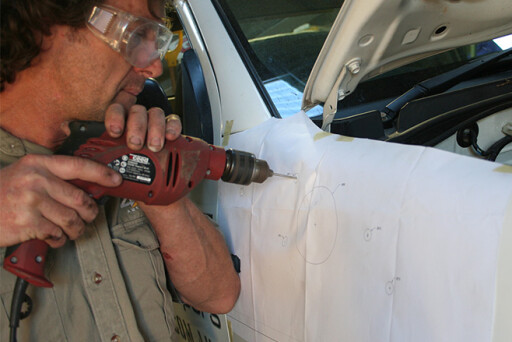 6. A small drill bit is used for pilot holes before each hole is drilled to its correct size using larger drills and a hole saw. These holes will vary depending on the vehicle, but for this Hilux the hole-saw for the air duct around 100mm.
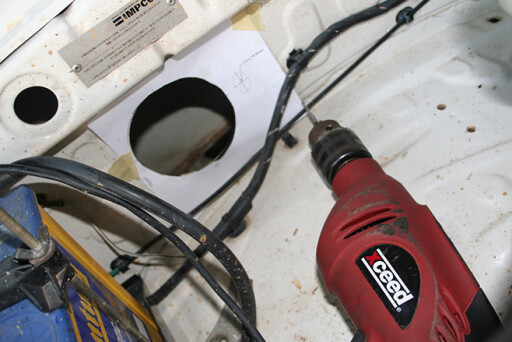 7. Another installation hole is required in the engine bay adjacent to the air duct hole. This 13mm hole is needed for the bolt to retain the duct that pipes air from the base of the snorkel through the inner guard to the now-modified air intake pipe and air-cleaner.
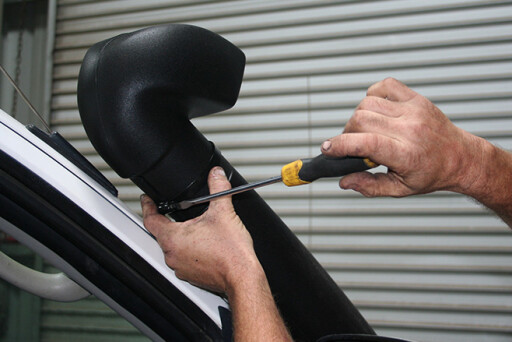
 8. Now the fun begins! The duct must be fitted in the inner guard so its entry/snorkel end pokes out the guard’s surface and its delivery end into the engine bay adjacent to the air cleaner. The studs are screwed into the snorkel’s nutserts. Yes, I did stumble with the hole saw.
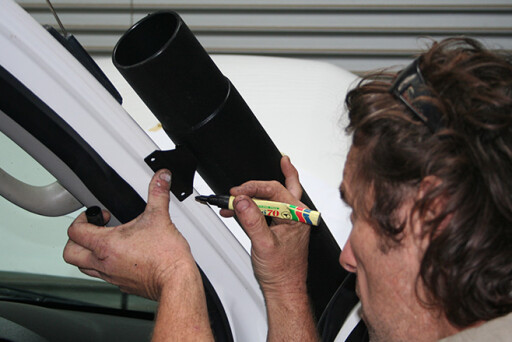 9. The TJM snorkel is supported on the A-pillar with a small bracket and two screws into the door jamb. The two screws’ location is found by test-assembling the snorkel, then marking and drilling pilot holes. Self-tapping screws, with a hit of rust preventive compound (eg Lanotec), are used during final installation.
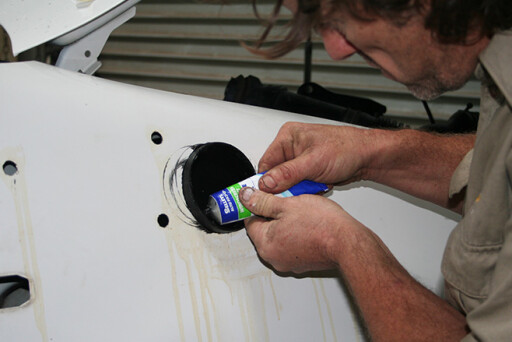 10. After the test-fit, rust preventive is sprayed onto any bare metal (paint can also be used) and a fat bead of silicon sealer is laid in the mouth of the joining pipe. It’s essential that plenty of goop be used to properly seal the snorkel to its intake pipe for a water – and dustproof join.
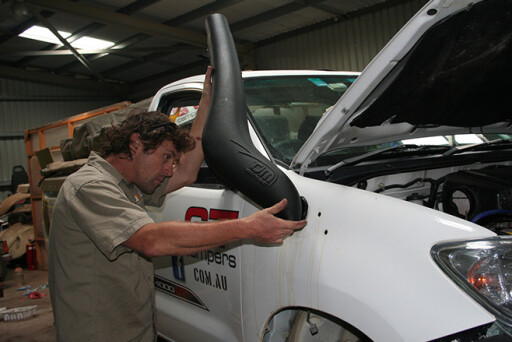 11. After the sealer is applied, the snorkel is installed on the vehicle by inserting the outlet to the joiner pipe and aligning to the A-pillar. Then the five supplied Nyloc nuts and washers are installed on the studs high inside the inner guard, resulting in a permanent mating of the snorkel to its duct.
 12. Cap its engine end and fill the snorkel with water to find and rectify any leaks. The final task is to install the intake ram. With a snorkel fitted, a vehicle faces less risk when crossing creeks and breathes cooler, cleaner air in hot and dusty outback conditions.
FILTER FIDDLERS
You’ll sometimes see people in campsites removing their air cleaner element to clean it. “Not a good idea,” reckons GUD Automotive’s (manufacturer of Ryco filters) Engineering Manager, George Dearden. “Tapping an air-cleaner element on a hard surface can damage the element and compressed air can remove light resin-based filtering media and blow holes through pleats. The damage is tiny – but it’s there.
Also, dust can contaminate the inside surface of the element and unseen dust can drop – or be blown – into the engine’s intake during the time the element is removed. That doesn’t occur if the filter is simply left in place.” So, despite what you hear around the campfire, don’t chance it.
 CROSS WITH CARE!
Although it’s an asset when crossing a creek, a snorkel is not a magical device – it doesn’t alter the vehicle’s quoted water-crossing depth (or wading depth) specified by its manufacturer, allow a 4x4 to float or make it immune to water damage.
Mechanical components such as the axles, gearbox, starter motor and alternator are all likely to be damaged by water and sediment or mud during a creek crossing, especially if the vehicle becomes stuck. And if water enters the cabin, there’s potential for a lot more damage, especially to electrical items.
Want more DIY advice? Check out how to replace car brakes
Please enable JavaScript to view the comments powered by Disqus.
COMMENTS