Gear
Gallery7
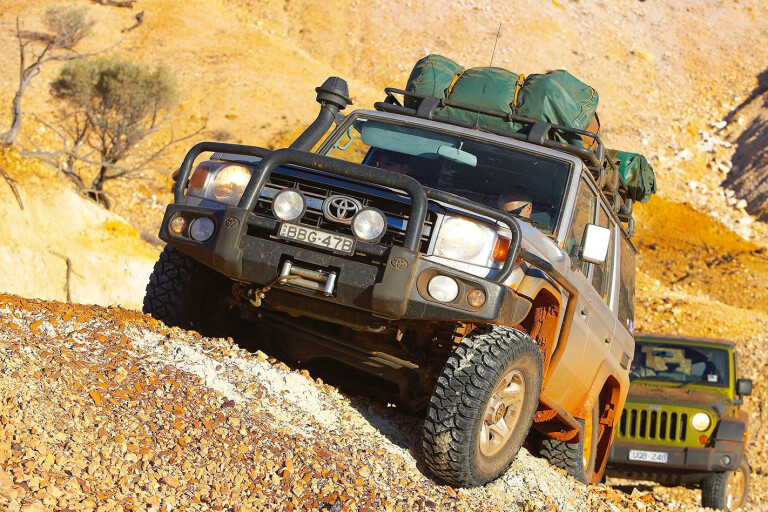
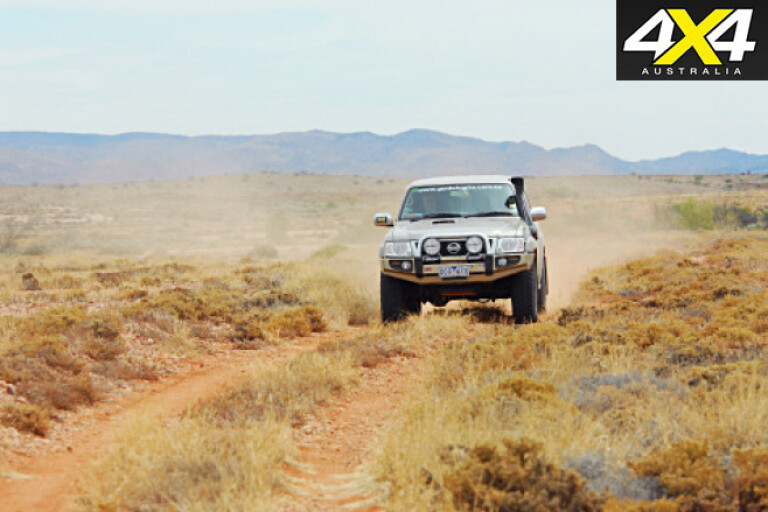
A REMOTE-area 4x4 excursion requires special preparation. Here’s what you need to consider when preparing for a 4x4 road trip in Australia, be it big or small.
With everything we try to fit into our lives, it’s easy to forget a routine vehicle service. Rotating tyres, checking fire extinguishers, maintenance of recovery gear, and everything else that comes with owning a four-wheel drive usually takes a backseat to life’s distractions – at least until it’s time to go on a trip.
7
While our vehicle may just be a mode of transport from day to day, once we set off for our favourite camping or fishing destination, it becomes our safety vehicle. Remember, injuries that may be readily treatable in built-up areas could be lethal when you are hundreds of kilometres away from the nearest treatment centre. Ensuring you’re prepared is easy, and can prevent you becoming a statistic in the Australian bush.
Trip prep can be daunting when you first start thinking of all the things you need to tick off your list: vehicle readiness, navigation, the destination itself, health and safety, and ‘all the gear’ you think you may need. By allowing plenty of time and breaking your trip prep down into different groups of essentials, you’ll have more time to enjoy an epic experience.
7
1: ESTABLISH HOW MUCH TIME YOU HAVE
THE first thing you need to figure out is how much time you have and what destination fits in that timeframe. There’s no use planning a Kimberley adventure if you live on the eastern seaboard and only have four weeks off, as it’s logistically impossible. It’s tempting to set yourself some long driving days to get there, but don’t – driving long distances each day and trying to adhere to an unachievable schedule will cause loads of stress, tiredness and more than a few arguments, turning the wished-for trip of a lifetime into a living nightmare. Our advice is to cut your ‘usual’ daily driving time in half, or at least chop a third off it; then you can enjoy the journey to that destination and stop to check out things along the way, whether it’s a side-trip to a particular natural highlight, or just a park for the kids to play in to let off some steam.
2: CHOOSE A DESTINATION
THIS brings us to choosing the destination, a decision that will govern what (if any) specific mods you may need for your vehicle. That could be the fitment of mud-terrain tyres if you’re going somewhere with particularly rugged tracks, additional fuel storage if you’re heading into more remote areas, or season-specific camping gear and clothing. Once you have a destination sorted, the best part of trip prep begins: pulling out the maps and planning your route.
3: PICK A ROUTE
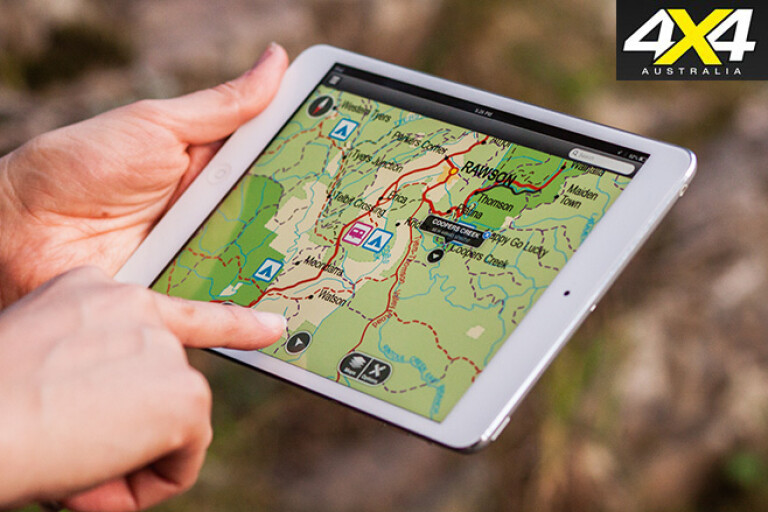
IN THE age of Google Earth, GPS and mapping apps on smartphones, it can be easy to dismiss old-school paper maps as non-essential for route planning. This would be a big mistake, as paper maps of varying scales offer a far larger impression of the area you will be travelling in, as well as the distances involved in relation to where your destination is and where you’re coming from.
For most tourers, Hema Maps’ range of maps is always the first go-to point. Hema covers the entire country (indeed, the world) with its maps and offers numerous maps based on popular destinations such as the Vic High Country, the Red Centre, Cape York and the desert country. These maps are accurate and chock-full of information including fuel stops, local highlights, and road conditions and warnings. Spend plenty of time with paper maps to rough out your itinerary, and make sure it is not too ‘tight’ in terms of time or potential overnight stops – and don’t forget to take those maps with you. A GPS and/or smartphone are brilliant for navigation once you’re under way, but they can malfunction or run out of power. By taking paper maps you’re covered for all eventualities; plus, paper maps are a great distraction for young kids (giving them a map to follow is a great way to educate and entertain when travelling).
Once the route is sorted, fuel stops marked and potential side-trips noted (either on the map or, better still, in a journal), photocopy the marked-up map or write out the itinerary, and give family and/or friends a copy so someone else has an idea of where you may be during your trip, in case of emergency. Also ensure you have a good comms setup – a UHF radio is great, but a sat-phone is better.

4: ARM YOURSELF WITH KNOWLEDGE
IT'S important to be armed with knowledge, but always remain humble because complacency and bravado can get you into trouble. Obtain a reliable survival guide appropriate to Australian conditions. Books such as these are best kept in the glovebox so they are close at hand when you need them. They are no good if you’ve left them on a shelf at home. They are also great around the campfire to teach your kids and partner some survival tips. It can also be good fun, like looking for the Southern Cross and finding south. It’s just as important for those travelling with you to have survival skills in case of an emergency.
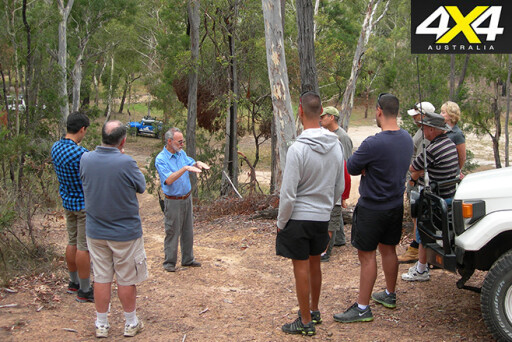
5: IMPROVE YOUR 4X4 SKILLS
DRIVING in isolated environments takes a lot of skill. In most government/military sectors, preparing individuals to undertake 4WD responsibilities involves a minimum 16 days of training, including 125 hours behind the wheel covering various situations. This focus on ‘up-skilling drivers’ recognises that simply having a driver’s licence doesn’t mean you understand your vehicle and how to use it properly. There are several approaches you can take to develop your off-road driving skills, including a number of commercial and private trainers who can provide a great deal of assistance. Find out more from your local 4WD clubs.

6: BUY A PLB
BEFORE you set off, buy and carry a personal locating beacon (PLB) and have it registered. This has to be the most simple and important step that any of us can take towards ensuring the safety of ourselves and our loved ones when we travel.
7: PREPARE YOUR VEHICLE
MOST cars spend the majority of their time on the tarmac, but if you’re heading away, plan for your worst-case scenario regarding the type of terrain and distances you may need to travel. As a minimum, stick to routine servicing schedules as per the manufacturer’s specifications and maintain a program of routine checks between services. By doing so, you’ll have a better maintained vehicle that will perform more effectively, economically, and capable of getting you out of trouble.
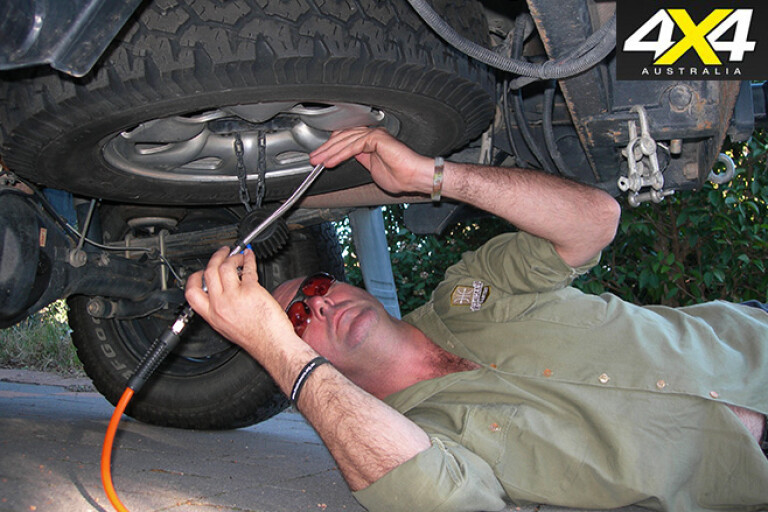
Before you do anything with your vehicle, get a thorough check-over from an experienced 4x4 mechanic – preferably one you know has worked and advised on touring rigs. Make sure you mention where you are going, as a big desert trip will offer different challenges to a rig compared to an east coast-mountains journey. A mechanic will check over all the essential mechanical items on your rig and advise on any spare parts you may need to take with you (from extra hoses and fluids to the ubiquitous gaffer tape). They’ll also advise on any mods you need for the trip, such as a second spare wheel/tyre and an up-to-date recovery kit. They should check over the outside of the vehicle for any potential problems, too: worn roof-rack brackets, dust inside door hinges and seals that causes excessive wear, tired suspension (and worn tyres), and any loose fitments such as driving lights. They’ll also replace/replenish all fluids.
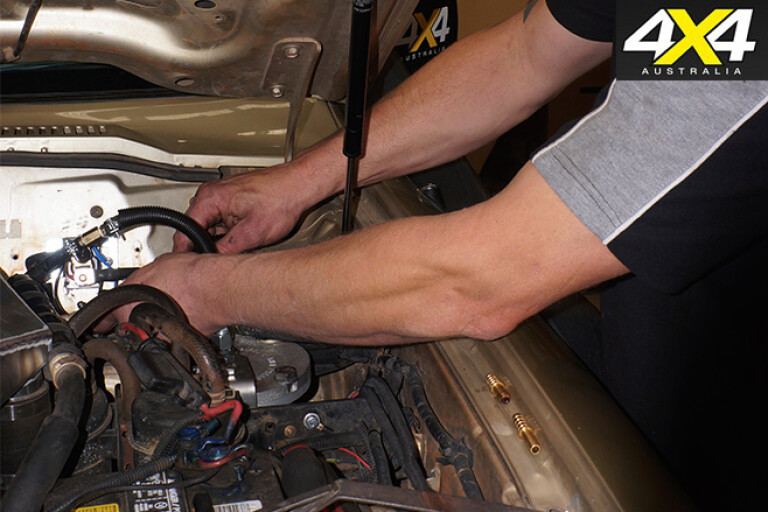
As with a mechanical check, an electrical check is a must, so book in to see an auto-electrician so they can give your vehicle’s power set-up a thorough pre-trip check and recommend any spares needed or essential tweaks. If you’re going truly remote you’ll need a reliable power source – a dual-battery setup or a power pack – and an experienced auto-electrician can advise and fit the appropriate set-up. Regardless of which of these you choose you’ll need a way of replenishing power, so a portable solar set-up is an essential addition. With camp lighting, fridge/freezers and various electronic gadgets to keep powered, you don’t want to run out of juice.
Checking over your vehicle doesn’t finish once the trip starts, and you should perform daily checks on things such as fan-belt tightness, radiator levels, brake and engine fluid levels, tyres (both for wear and the correct air pressure), the security of your roof rack (corrugated roads may have loosened nuts and bolts), battery levels, door seals and dust ingression. It sounds a bit over the top, but this level of scrutiny can nip any potential problems in the bud and keep your four-wheeler running as sweet as the day you left home.
7
8: PACK SMART TO MAXIMISE SPACE
CARGO space and cargo capacity will have a big influence on what you pack for your trip, especially if you plan on keeping everything in-vehicle. A roof rack and a cargo barrier inside the rear of your vehicle will ensure optimum storage (plus passenger safety, in regards to the cargo barrier). However, check your vehicle’s roof-load capacity and pay attention to your vehicle’s GVM rating, as you will find it easy to exceed both limits by the time you pack yourself, your family and all your gear inside the vehicle. Even though they add weight, we’d consider fitting a cargo drawer set-up for bigger trips, purely for the fact they keep food and cooking/camping/fishing gear organised and out of the way.
The other option for the cargo area is a few space cases. Pelican, ARB, Rhino-Rack, Ironman 4x4 and others make tough, dustproof, lockable boxes, and you can do the same as per the cargo drawers and allocate a box for certain gear (sleeping gear, lighting, kitchen, etc.). The appeal of these is, once you’re home, you can pull them out again and repack for the next trip.
MOREBuyers' Guide
For additional fuel capacity, look at adding a few jerry-can holders to your roof-rack or, better still, fit an aftermarket rear bar that has one or two jerry-can holders. It seems excessive but these bars also offer improved rear departure angles, and some models can combine jerry-can holders with a spare wheel holder; plus, these carriers can be removed from the bar when not needed. Long-range fuel tanks are another option, but you’d have to do plenty of remote kilometres away from refuel sources to justify the price.
When packing gear in and on top of your vehicle, put heavy stuff down low in the cargo area, with light gear (duffel bags, sleeping gear, etc.) on top of it or on the roof in a weatherproof bag. The main caveat with using a roof rack is the unavoidable increase in fuel consumption, owing to the taller profile of your vehicle. This is a small price to pay for the convenience (and increased cargo space) of a roof rack. Also leave ‘breathing’ space around the fridge/freezer when packing, so the compressor runs fine and those beers stay cold.
If towing a camper trailer or caravan then you’ll have oodles of storage space for all these items mentioned, but, as with the vehicle and the roof rack, ensure you’re still aware of the load limits. Lighter is always better in regards to packing your rig and/or camper trailer – less weight means less effort to move, which means better fuel consumption.
7
9: PREPARE FOOD AND POWER
ON SOME off-road journeys you get to live the dream of cooking over an open fire with a steel-plate barbecue. However, the reality these days is that, with fire restrictions and the lack of available firewood, a portable stove is a more convenient camp-kitchen option. Gas-fuelled, fold-up, multi-burner stoves (Coleman’s two- and three-burner stoves are near bombproof) are easier to transport and take up minimal space in your vehicle (take a few extra gas valve connectors, just in case). The gas bottle can be easily secured to your roof rack, and kitchen gear and accessories can easily be stored in cargo drawers and/or a space case.
All this talk about cooking brings us to the biggest challenge of any off-road adventure: keeping food and drinks fresh and cool. For a long-weekend trip we’d still go for a cooler, with a number of brands (such as Pelican and EvaKool) producing products that keep ice for long stints. For longer and more remote trips we’d opt for a portable fridge/freezer. In terms of size/capacity, the best bet is to get the biggest one that’ll fit in your vehicle without sacrificing too much cargo space. For a family of four, a 50-litre fridge would be the minimum for a week away from resupply points. Engel, Waeco, ARB, EvaKool, Opposite Lock and Ironman 4x4 are some of the most popular fridge/freezer brands. With these units you’ll need a reliable power source, and a power pack combined with solar panels or a dual-battery set-up (again, with solar panels for recharging if stationary for more than a few days) are the two options. Both are well-proven and reliable.
10: PREPARE CAMP ACCOMMODATION
IN TERMS of camp accommodation, keep it simple, convenient and light in weight. A simple tent, a tall (10cm-thick mattress) self-inflating air mat and a three-season sleeping bag is often all you need for any trip. A four- to six-person tent will pack up relatively compact and can easily be thrown up on the roof rack.
Camp lighting options are numerous these days and include the tried-and-true gas-powered jobbies through to hi-tech LED lighting that’s now considered the most popular option. Gas lights use gas bottles via an additional attachment, which means you may need a bigger gas bottle. LED lights draw low power and can be bought in the form of head torches, hand torches, lanterns, or the ever-more-popular strip lighting. However, as with anything electrical, you will need to power them via – ideally – portable solar panels. Both gas and LED lighting work well, so it will ultimately come down to personal choice.
Whether your hobby includes fishing, hiking, cycling or paddling, there’s a carrier or cargo solution. Most roof-rack systems have additional extras that allow fitment of a canoe/kayak/bike, which is another reason to fit one. Just remember when fitting gear up top – especially valuable stuff – there are locks for both the rack/carrier and the canoe or bike. The best thing about these carrier systems – and indeed, roof racks – is they aren’t permanently fitted; so once you’re trip is finished, you can easily remove these from your vehicle.
11: DAY-TO-DAY PREPARATION
PREPARATION doesn’t stop the moment you lock up the house and leave town. It’s something you have to do every day of your trip.
First parade is a military term that refers to a series of checks a driver should conduct every day: prior to, during and at completion of the use of the vehicle. These are known as first parade service (before you start driving), halt parade service (at each long stop) and last parade service (when you’ve finished driving for the day).
A successful trip is one where you get to your destination and back safely while enjoying yourself. Understand the terrain you’ll cover, keep your vehicle well maintained and understand your potential vulnerabilities. By maintaining and using your vehicle properly, you will not only prolong its lifespan but also ensure you and your loved ones remain safe.
- FIRST PARADE SERVICE
(1) Check the winch (if fitted) and ensure it is disengaged.
(2) Before starting the engine:
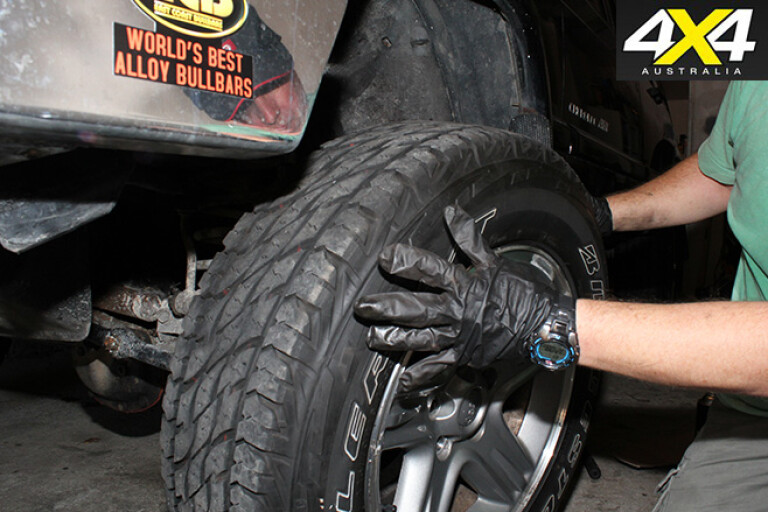
(a) check the wheels for security, and the tyres for wear and correct pressure; and
(b) check that the fuel, oil, coolant, battery levels, and clutch and brake fluids are correct.
(3) After starting the engine, listen for unusual noises.
(4) Check everything that turns on, flashes, beeps and swishes.
(5) Check that the fuel and oil gauges are operational.
(6) Clean the windscreen, external mirrors, lights and reflectors.
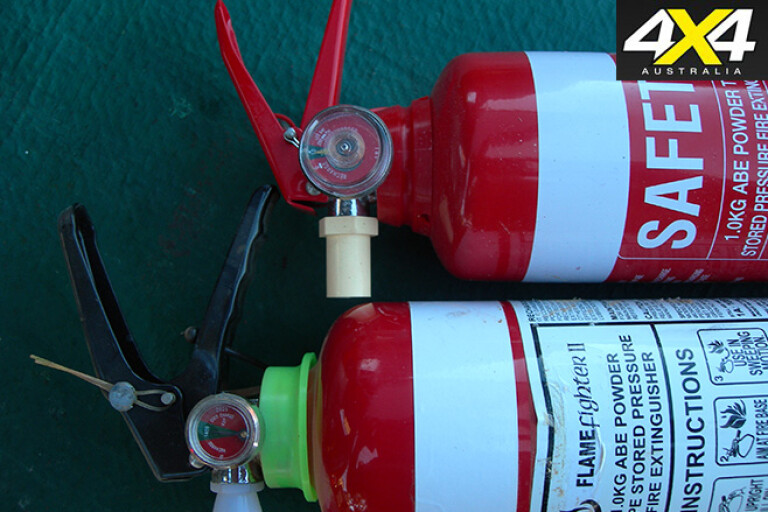
(7) Check fire extinguishers, first aid kit and tool kit.
(8) Check spare tyre and changing equipment.
(9) Adjust all mirrors.
(10) Check for steering, handbrake and footbrake faults.
(10) Complete any other requirements specified within the vehicle user handbook.
(11) Fix any defects/deficiencies before you step off.
- HALT PARADE SERVICE
(1) Check fuel, oil and coolant for leaks.
(2) Check the tyres and wheel nuts.
(3) Check hubs and brake drums for overheating.
(4) Check the stability of the load, canopy, ropes and trailer.
(5) Check all lights and indicators.
(6) Clean the windscreen.
- LAST PARADE SERVICE
(1) Check the coolant levels.
(2) Refuel and top up oils and lubricants.
(3) Check the vehicle lights and indicators.
(4) Clean the vehicle.
(5) Clean out the interior and the load compartment.
(6) Ensure that the winch (if fitted) is disengaged.
(7) Complete any other requirements detailed in the vehicle user handbook.
(8) Identify and fix any defects/deficiencies ASAP.
7
12: CHECK THINGS REGULARLY
CHANGE the oil every 5000km regardless of what the service manual advises. Constant short-trip driving, poor quality oil, poor air flow and contaminated oil all contribute to the creation of ‘oil sludge’. This sticks to the engine like cholesterol sticks to arteries.
Check water levels regularly. The use of coolant, rather than water in the radiator, will delay corrosion. But the anti-corrosion properties break down over time, which is why mechanics recommend routine coolant change.
Keep tyres at recommended pressures. This can help reduce fuel consumption by 10 per cent or more on the highway. But ensure that pressures are adjusted for the actual terrain to avoid punctures and to improve ride. Remember, a lower tyre pressure may need to be set at the start of the day to ensure maintenance of appropriate pressure when the tyres heat up.
Keep a constant speed. This will reduce tyre wear and mechanical fatigue.
Check vehicle towing specifications. Overloading a vehicle places undue stresses on the engine, towbar and chassis.
Keep an eye on the brakes. City driving, driving in hilly areas and towing reduce their effectiveness (and lifespan).
Check a spare tyre’s pressure and accessibility. Also ensure that the sidewalls of spare tyres stored under the vehicle body are not damaged. Include a can of inflating foam and/or tyre puncture plugs to help get you back on the road.
13: THINGS TO REMEMBER
OBTAIN up-to-date detailed maps showing water sources and nearest communities.
Have a compass, GPS and PLB and know how to use them.
Always inform someone where you’re going, what route you plan to take and when you expect to reach your destination.
Have your vehicle undergo a major service before you leave on a big trip, and tell the mechanic your plans. He may have some suggestions for you.
On long journeys, have two complete spare wheels, extra petrol, engine oil, fan belts, filters and spare keys.
Carry water in a number of containers (in case of leaks).
If your vehicle suffers a breakdown or gets bogged, stay close to it because your vehicle will be easier to spot from the air in case of a search. Don’t set out for help unless you irrefutably know where you’re going and know you can get there.
Don’t rely on mobile phones to call for help. A reception signal may not exist where you’re going. Have a PLB and a car-mounted CB radio and/or satellite phone.
7
14: POST-TRIP PROCEDURE
IT MAY take a few trips but you will soon get a ‘trip system’ in place that contains a number of steps, such as these detailed here, which you can work through before each adventure to maximise smooth-sailing. Then there’s the bummer of having to return home, which can sound like a real pain in terms of having to unload gear. However, if you incorporate this process into the whole trip plan then it will feel like a matter of course and will save you loads of time and stress before the next trip.
Our post-trip procedure is always the same: unload the vehicle; send the kids into the backyard to keep them occupied; go through each space case/cargo drawer and note what items need replenishing or cleaning; then pack each of these away. This is where, again, having drawers or space cases that contain certain items make it very easy. For example, we know the ‘kitchen box’ will need emptying and all the utensils and items washed before re-storing back in the box. Plus, we have more space cases set up in our shed so that we can simply throw all the sleeping gear into the marked case once they have been aired and dried. It sounds a bit boring but it saves plenty of time when we start planning our next trip, as we know where everything is and we know it’s all ready to go, without fuss. This also means we can, instead, concentrate on having a cracking time on that next big adventure.
Please enable JavaScript to view the comments powered by Disqus.
COMMENTS