Electronics & Gadgets
Gallery1
IF YOU keep your food and drinks in an ice box or light your campsite with a kerosene lantern, then this article is definitely not for you. However, if your 4x4 is fitted with all manner of mod cons (whether gimmicky or necessary), then setting up a complete 12-volt power system needs careful consideration.
A dual-battery system should be one of the first must-have items to fit to any touring 4x4. Sure, there’s the obvious powering of the fridge, but a second battery has many more uses. Plus there are new charging options to consider.
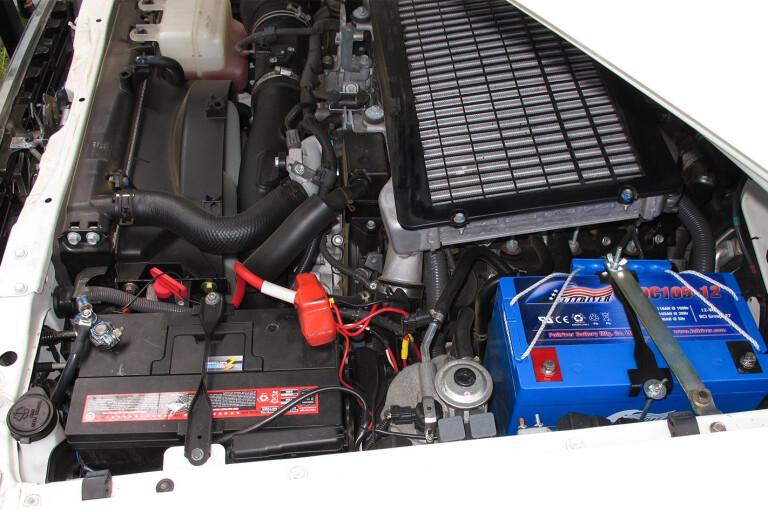
For my Troopy I initiated the project with a second battery tray from Piranha Off Road Products that accepts a standard N70Z-sized battery carcass. It would have been nice to go larger-capacity, but that’s all that would fit under the bonnet of the Cruiser – plus the larger they get the heavier they become. The tray arrived with all mounting hardware and instructions, and it easily fit on the passenger side directly behind the standard battery (just in front of the firewall).
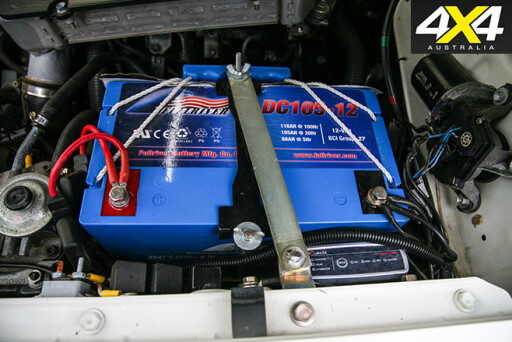 I’ve had a good run from Fullriver AGM batteries before, so decided to stick with the brand. This time I opted for a DC Series and a 105-12B model rated at 105Ah. It weighs in at a hefty 30.2kg and incorporates M6-bolt-style terminals.
POWER IN
THE strength of the tray and the quality and longevity of the battery are important factors, but the big decision was which charging system to implement. For this, I chose a recently released Projecta Intelli-Charge 25A DC/Solar Battery Charger, which incorporates a ‘solar in’ wire to allow efficient battery charging from a solar panel.
 The charging unit is suitable for ‘smart’, ‘dumb’ and traditional alternators, it has a 25-amp, three-stage switch mode, a simultaneous automatic charge system for solar and alternator, and the ability to choose the correct charging profile to suit your chosen battery type (AGM, wet cell, calcium or gel).
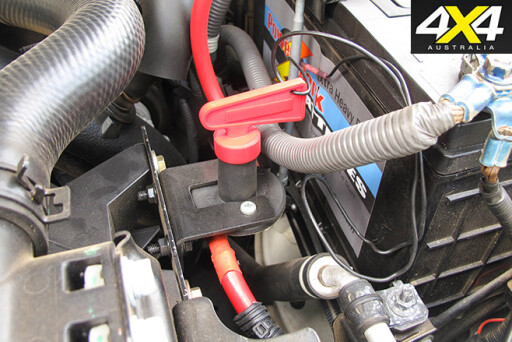
I thought I wouldn’t take advantage of the auto selecting mode for alternator and/or solar charging, as I don’t have a solar panel fitted permanently on the roof, but it has come in handy as I’ve mounted an Anderson plug on the bullbar. So the under-bonnet system doesn’t need to be touched when I plug or unplug the solar panel, which is out in the sun while I’m parked in the shade – beauty! The charger unit incorporates tiny LED lights to indicate which charging source is being used, which puts my mind at ease knowing it’s working as it should.
Other than setting the battery type on the front panel, there’s nothing else to this smart charging system – set it and forget it.
 While I opted for under-bonnet mounting (it can take the higher heat), the unit can be fixed pretty much anywhere within your 4x4, plus it’s IP67-rated as well as shock- and vibration-proof. For what it’s worth, I’ve fabricated a small bracket to fit the unit between the secondary battery and the inner mud guard. It’s a tight squeeze, but I can still preview the lights on the face if need be.
POWER OUT
WITH the power source and power management taken care of, the next job was to work out how to expend all that energy via 12- and 240-volt outlets. Given the expansive use my Troopy has to take on – charging the kids’ electronic toys on the run, charging work cameras and computer gear, and running all manner of 12-volt gear for testing – I picked through the Narva catalogue for all I needed, under the pretence of ‘the more outlets the better’.
 The left-hand of the dash features a rather useless-sized pocket that seems perfect for nothing more than a few dozen business cards, provided you don’t drive up a steep hill and allow them to slide onto the passenger’s lap! So, a flush-mount ciggie and dual USB outlet was screwed straight over the top of it. At a later date I’ll be making a custom centre console to house switches, gauges and power outlets, but for now I’ve mounted two ciggie plugs.
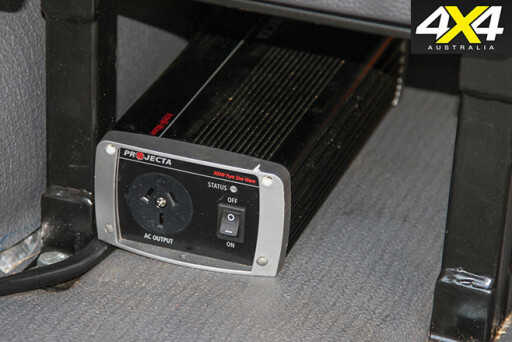
Behind the third row of bucket seats I’ve flush-mounted three ciggie outlets (for rear passenger and camping use) and a merit plug for direct power access for the 12-volt fridge. These are hardwired directly to the auxiliary battery for constant use. Also hardwired is a 300W Projecta pure sine wave inverter that’s easily accessible from the rear cargo area.
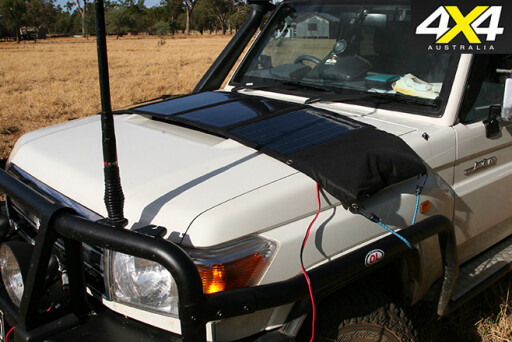
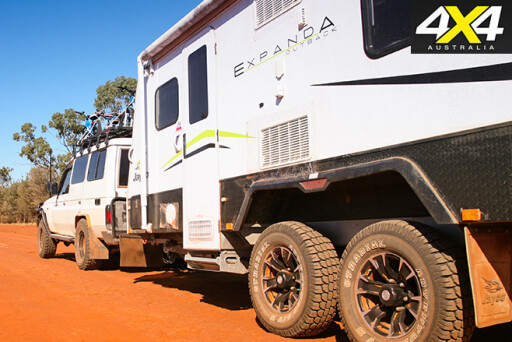
The rear bumper bar houses a 50-amp Anderson plug that plugs into my camper trailer to charge on-board batteries. I’ve connected the ‘solar in’ wire of the Projecta charging system with another Anderson plug and tucked it in behind one of the upright posts of the Opposite Lock bullbar, so it’s easily accessible and doesn’t require lifting off the bonnet to plug the solar panel in. Both Anderson plugs have a rubber cap to keep dust and water out when not in use.
 The foldable Projecta solar panel came with alligator clips, so I cut them off, installed an Anderson plug and reinstalled the clips. This way the panel can be used via my on-board charge system with the Anderson input plug or via the alligator clips onto my camper trailer battery.
Given I kept the FYRLYT Nemesis 9000 driving lights from my last Cruiser, I had my local sparky wire up a custom heavy-gauge driving light loom complete with 12W to 24W converters to tackle these 24V halogen driving lights.
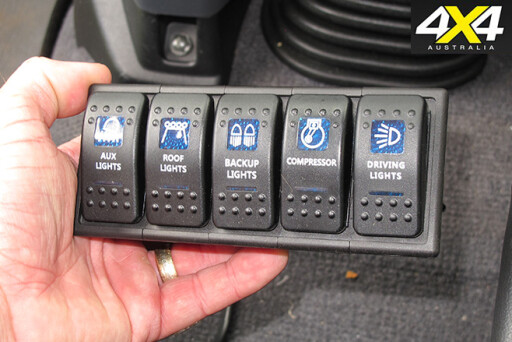
I have future plans to install camp lights, an on-board compressor and various other lighting, so I fitted a bank of five Narva toggle switches. These things are beaut, as you can utilise as few or as many switches as you like by making up a bank that then slots into your dash, console or any other panel. I have gone for five switches, but I’m not sure what I will run off them – just future-proofing the system.
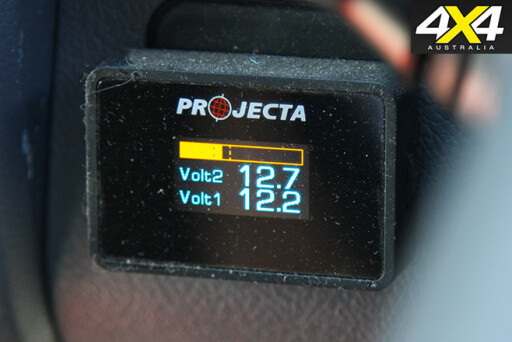
 To keep track of what each battery is charging and discharging, I’ve popped a Projecta dual-battery volt meter into the dash next to the steering wheel. The meter has a bar graph and digital readout to within 0.1 of a volt for each battery. It also incorporates a user-set audible alarm to warn of over- or under-charging.
Given the need to tow my own camper trailer, heavy loads including a Kubota tractor, a tandem box trailer, and various caravans, I figured the 3500kg tow-rated Troopy needed as much help as possible to help pull up without over-stressing the brakes. For this, a Redarc Tow-Pro electric brake controller was installed.
 The main body of the Redarc unit fits neatly under the dash and out of the way of my knees. Hence it doesn’t take up any real estate on the fast-filling dashboard. The only tell-tale sign of this Redarc system is the small rotary dial fitted to the dashboard. Since fitting the unit, Redarc released an ‘Elite’ version, which eliminates the initial calibration process the standard version needs. To read the full specs of both units visit: www.redarc.com.au.
There are plenty of set-ups that are fancier, more technical and more comprehensive than what I’ve installed, but my set-up will do everything needed for personal and work-related use. Plus it’s reliable, simple to use, maintenance-free and will enable (almost) endless power usage. I’ve gone overboard with a few of the centre console switches, but that’s for ease of adding accessories at a later date, so all up the system is future-proof and will return many 12-volt benefits out on the tracks and campgrounds.
 Thanks
The installation would have taken me an age to complete by myself, so I delegated the huge job to my local sparky at Camden Haven Auto Electrical in NSW.
RATED
Available from: www.piranhaoffroad.com.au, www.projecta.com.au, www.fullriver.com.au, www.narva.com.au
We say: A must-have to power accessories.
Please enable JavaScript to view the comments powered by Disqus.
COMMENTS