
VINYL wraps have become very popular over the last few years, we’ve even had few Street Machine covers featuring fully wrapped cars.
This article was first published in the February 2013 issue of Street Machine
One of the leaders in this field is 3M, with its Designer Wrap 1080 vinyl product. The ever-expanding line-up incorporates a rainbow of colours along with a range of striking textures, including brushed metal finishes and textured carbon-fibre looks.
To help promote the product and professionally train installers, 3M’s Australian distributor, Motoractive, has built a special training facility at its Sydney headquarters. Street Machine was invited along to watch instructors Alex and Nathan demonstrate how easy and versatile the Designer Wrap product is to apply.
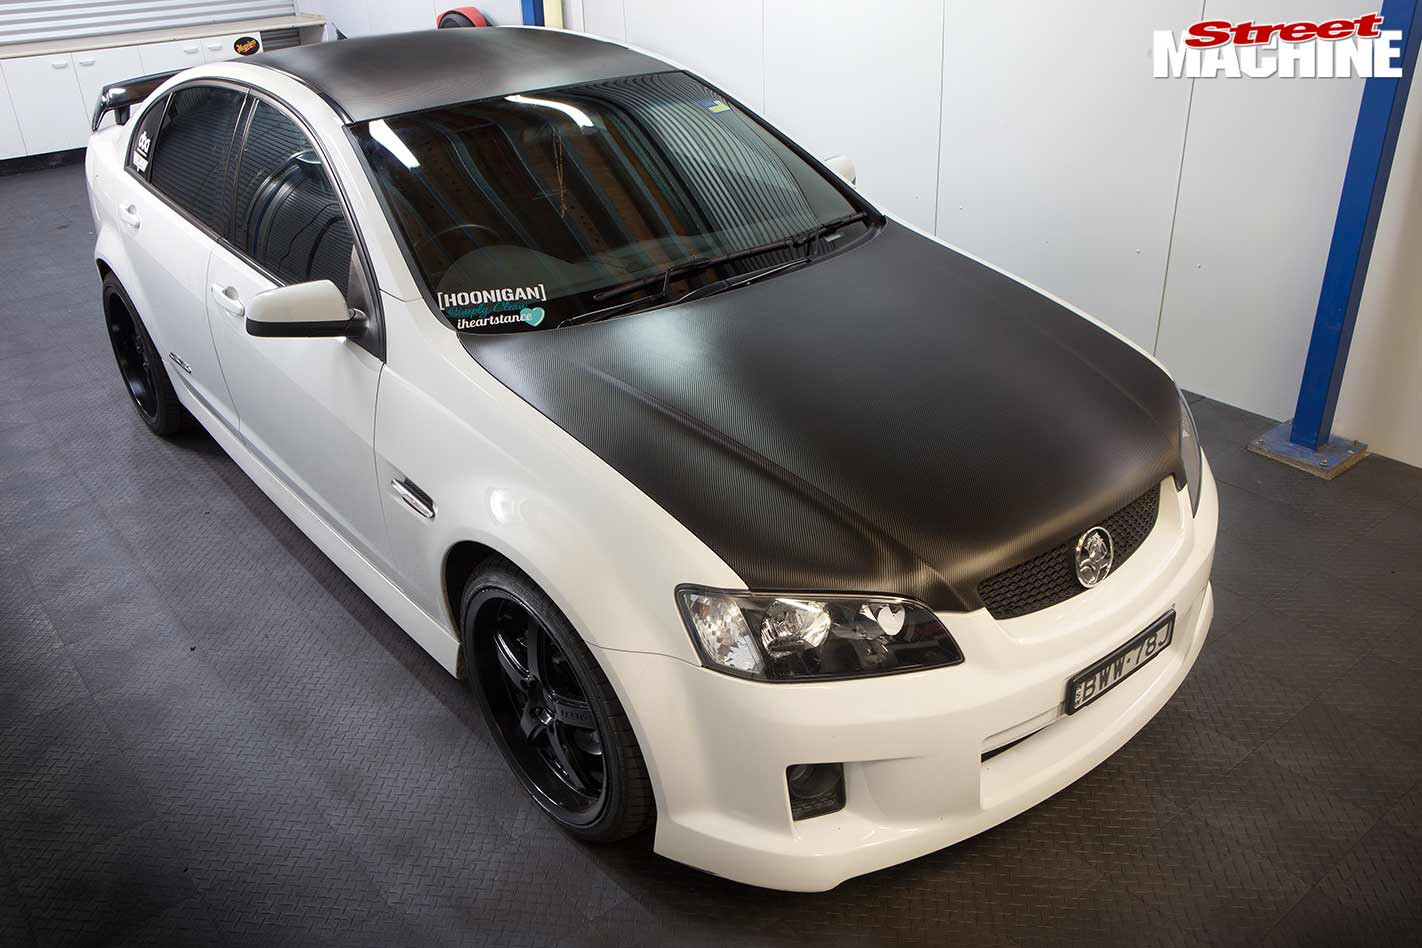 The donor car for this demonstration was a white VE SS that’s getting the carbon-fibre look over the boot, bonnet and roof.
STEP-BY-STEP:
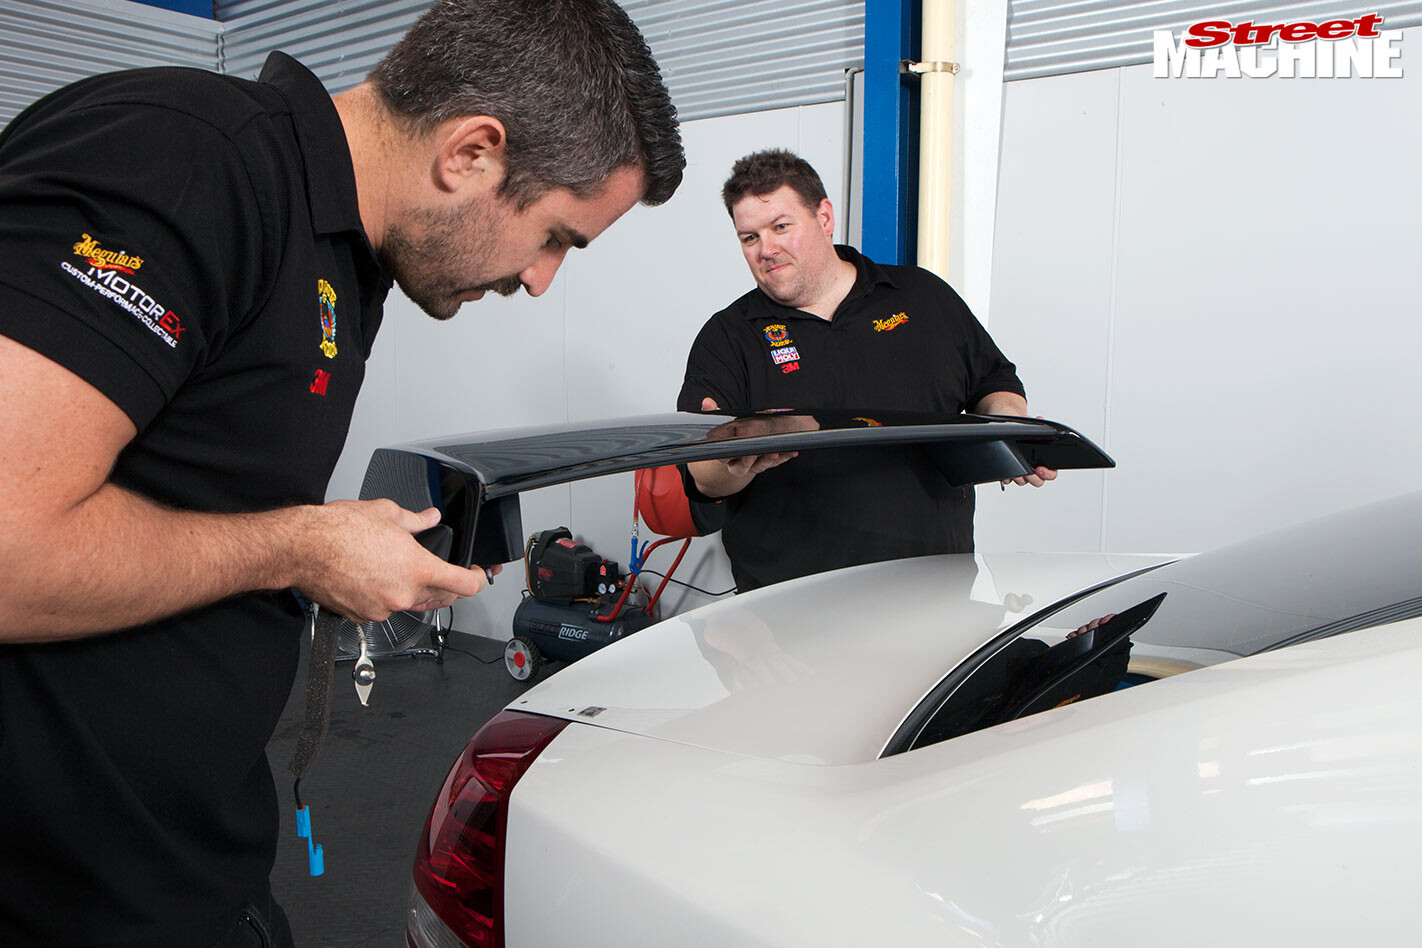 STEP 1. Wrapping can be undertaken with zero disassembly. However, the more you strip, the better the result will be, especially in areas with high-contrast colours where any little gap will be obvious. For this installation, the SS’s boot spoiler, roof aerial and roof gutter moulds were removed. If in doubt on how to remove any trim pieces, hit the internet as there’s a wealth of good ‘how to’ videos out there.
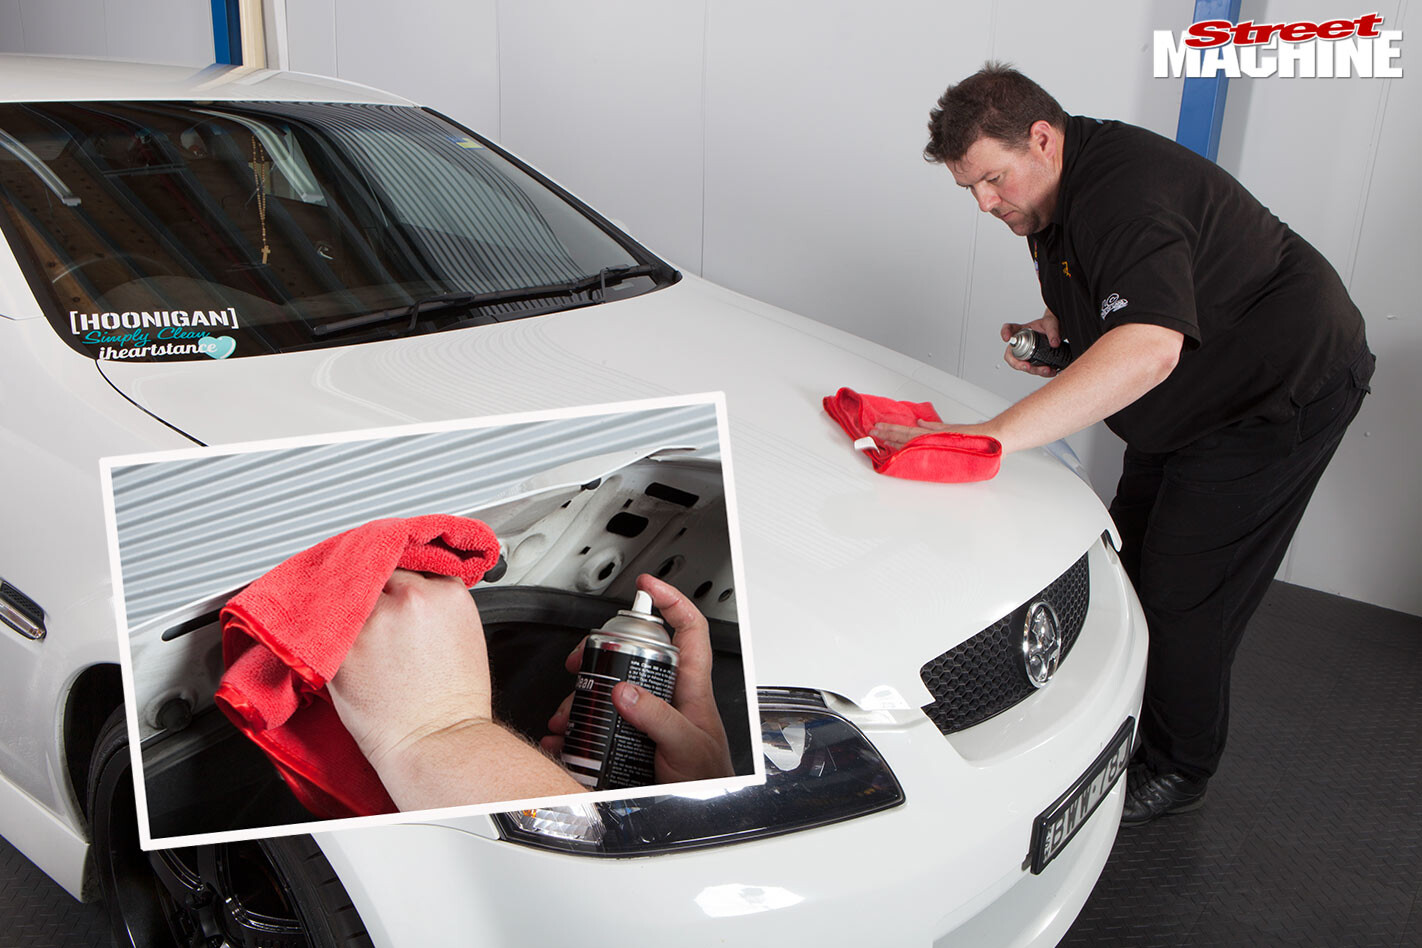 STEP 2. The surface must be scrupulously clean, including under the edges. Give it a thorough wash, then meticulously clean it with wax and grease remover, followed by isopropyl alcohol (rubbing alcohol) on a microfibre towel. Stonechips, huge scratches and blemishes will all show through the wrap but being 100 per cent water-sealed, the film can be applied directly over freshly repaired, unpainted surfaces.
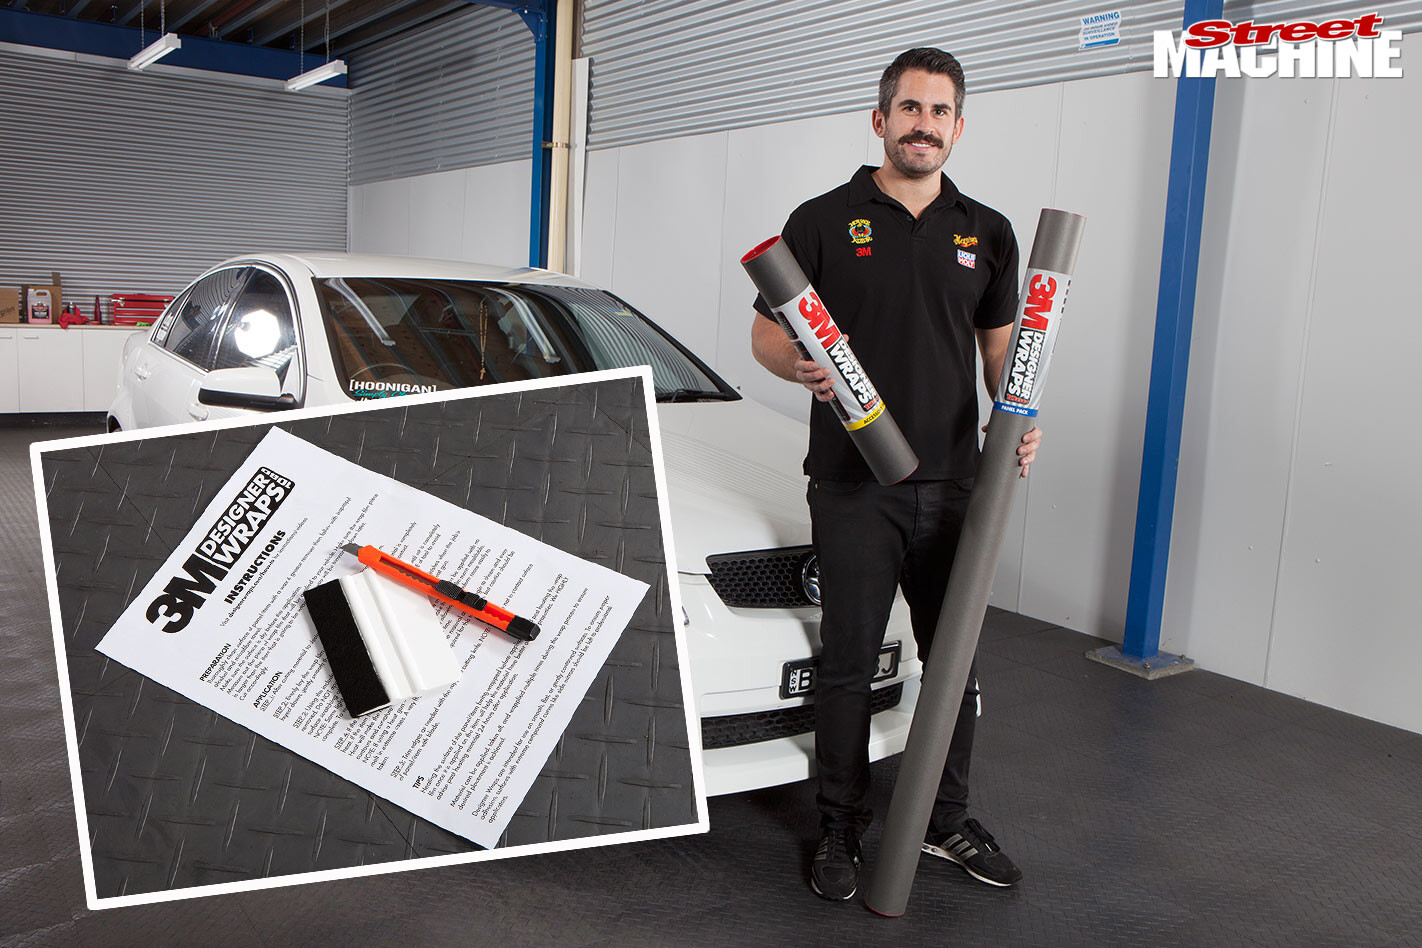 STEP 3. As well as bulk rolls for professional use, 3M offers two retail packs for enthusiasts and beginners. The Accessory Pack is for smaller jobs and contains one 0.5×1.52m sheet, while the Panel Pack contains a larger 1.8×1.52m sheet, which is generally big enough to cover a bonnet, boot, turret, etc. Both retail packs include an instruction sheet, snap-blade knife and a plastic applicator with a felt-padded edge.
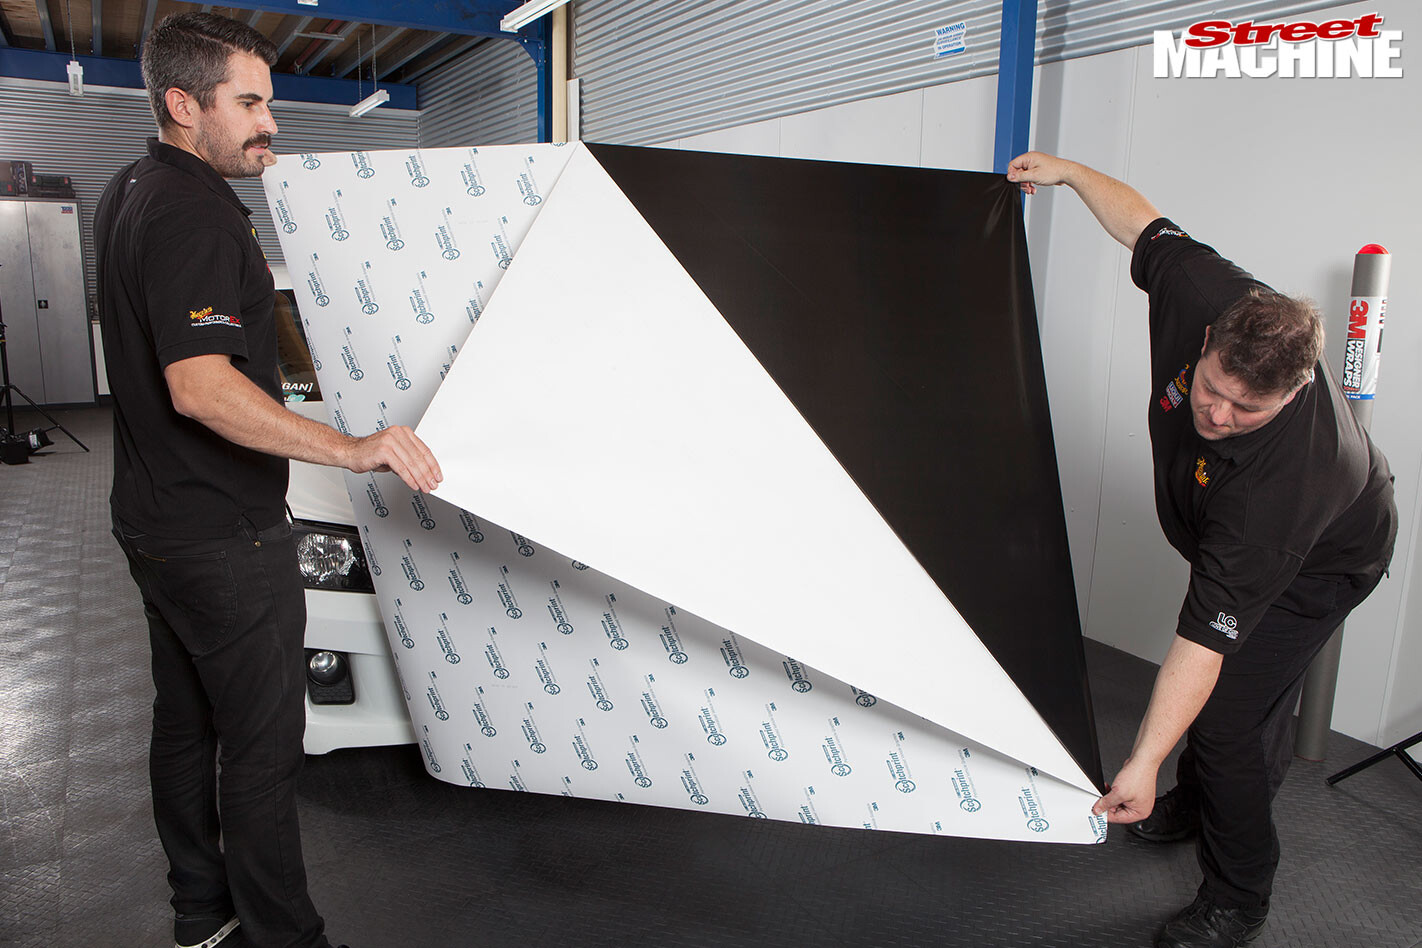 STEP 4. An additional set of hands helps on small jobs but bigger tasks are definitely two, three or even four-man operations. Work indoors to get the panel warm (not hot) and so the wind doesn’t blow the lightweight film about. The wrap becomes electrostatic once the backing is peeled off, so floating debris will be attracted to the sticky side of the film, which will result in unsightly bumps in the finished job.
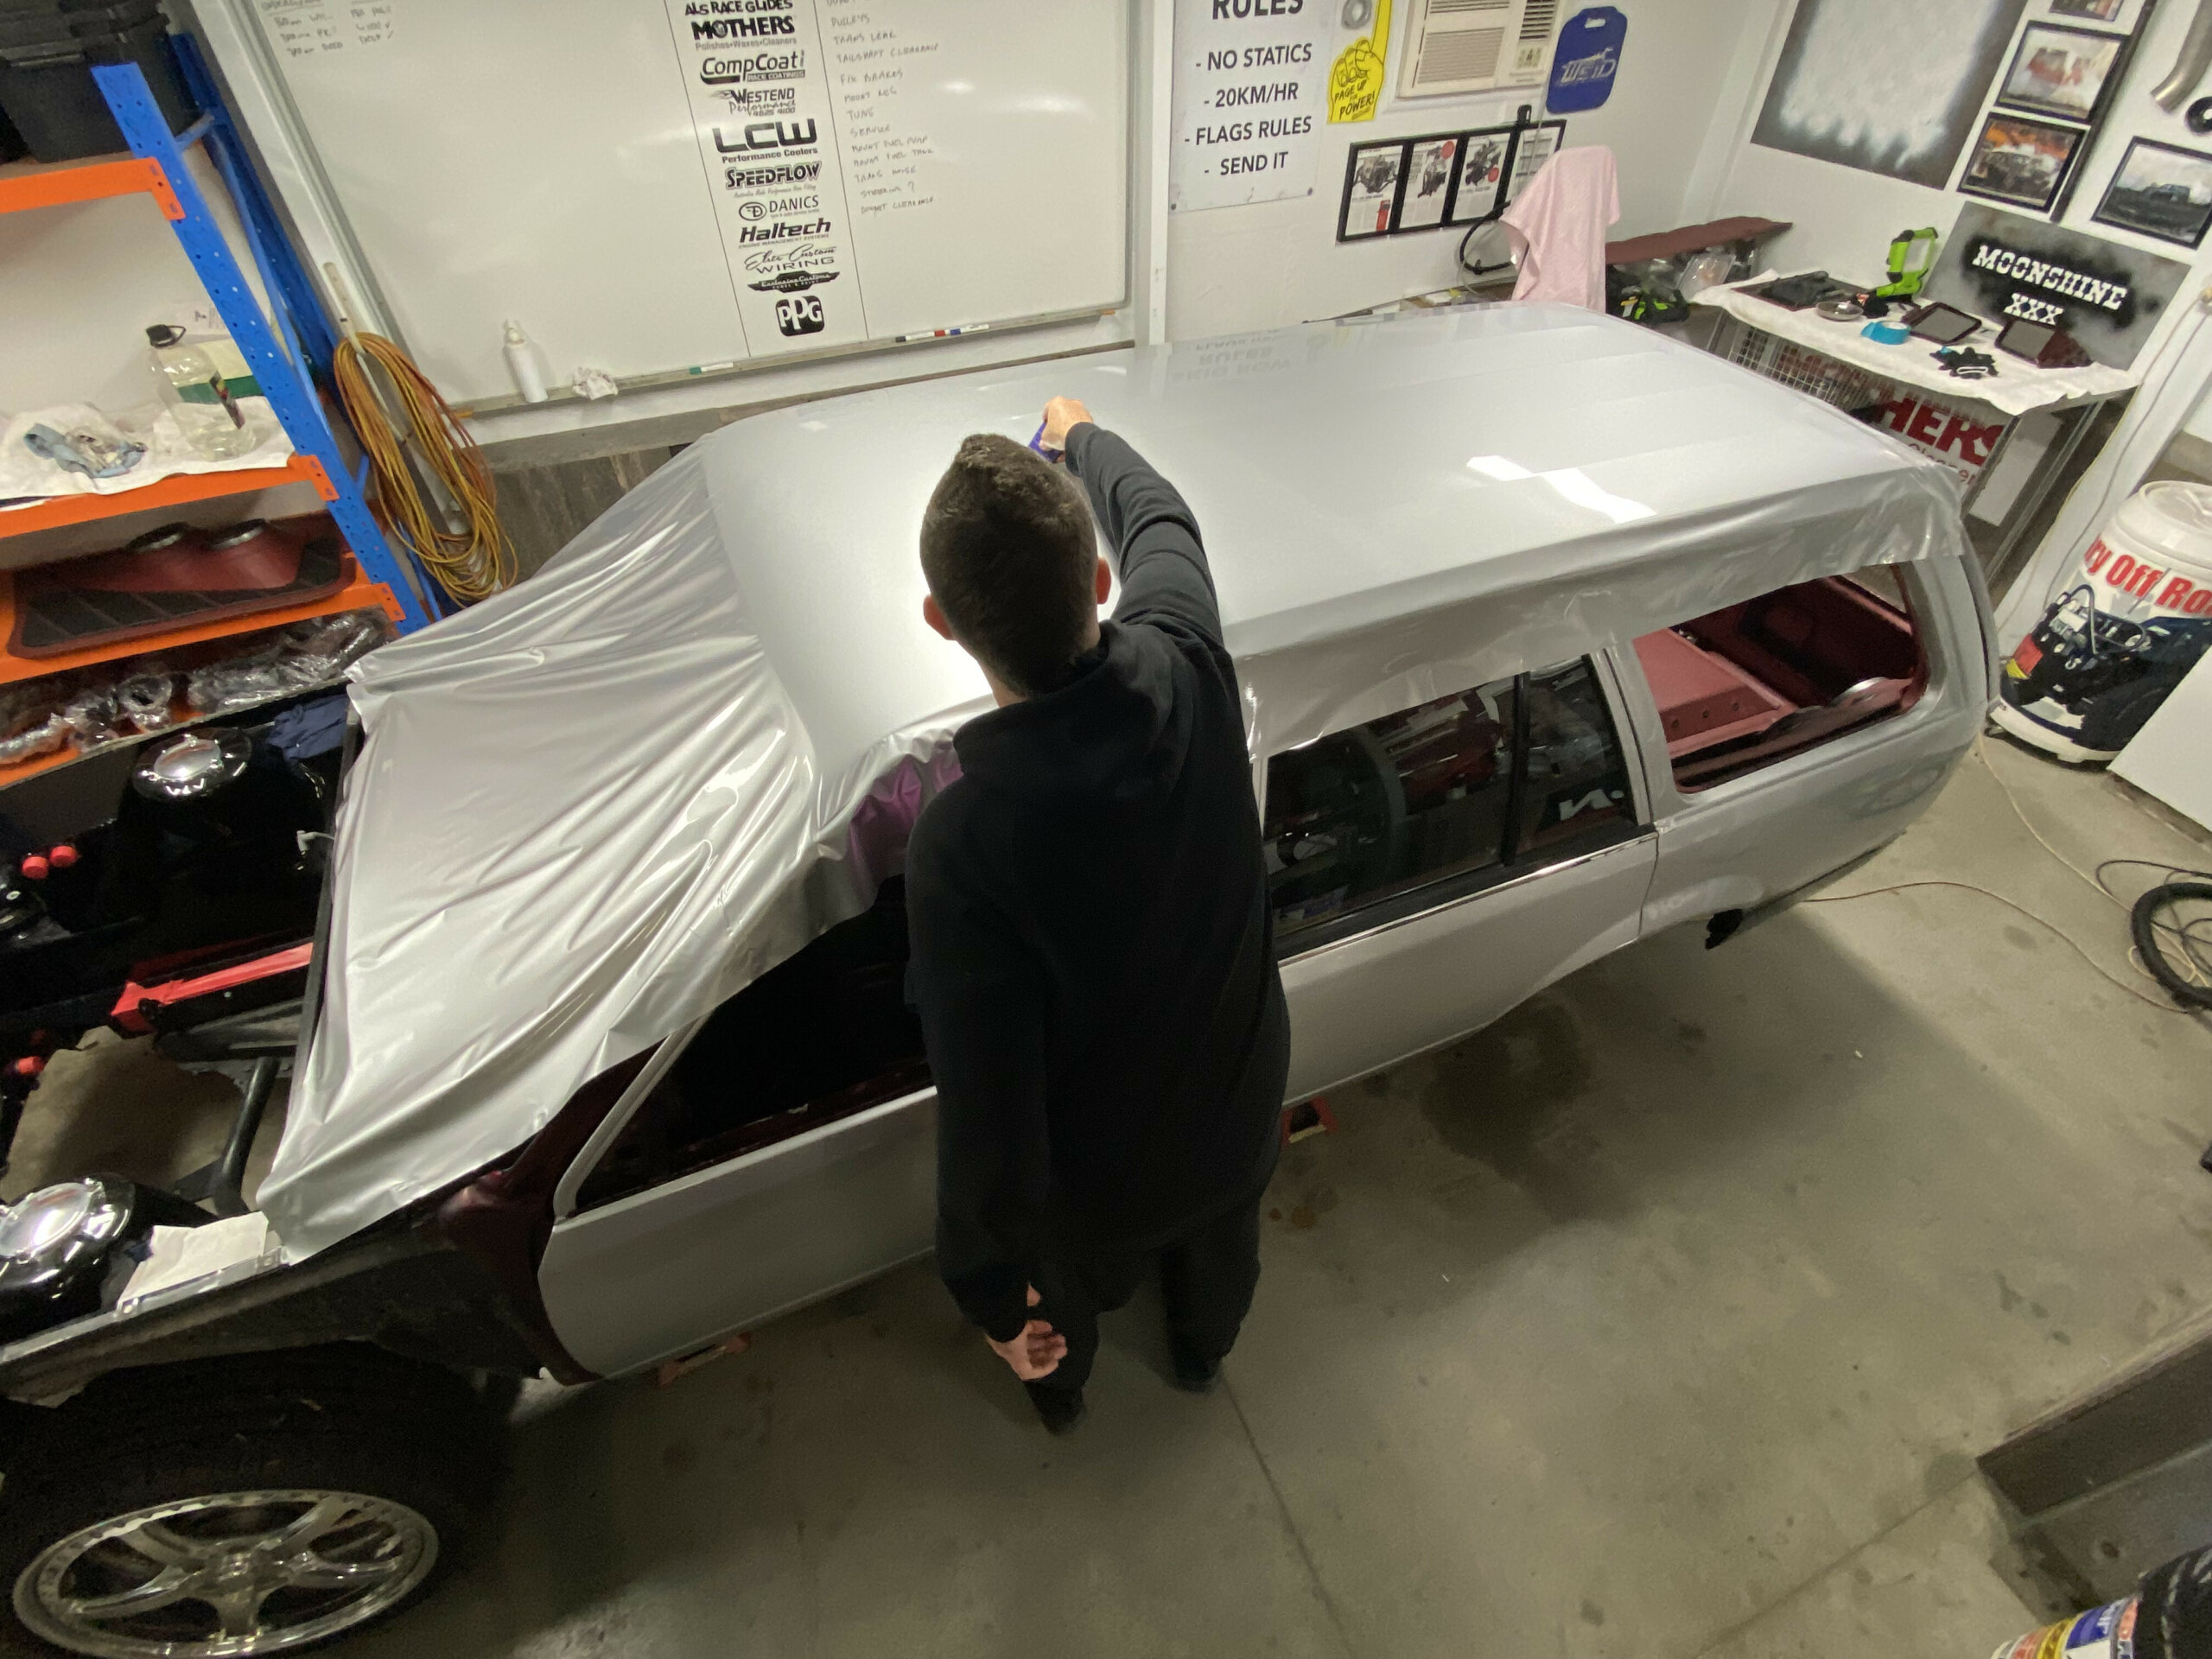
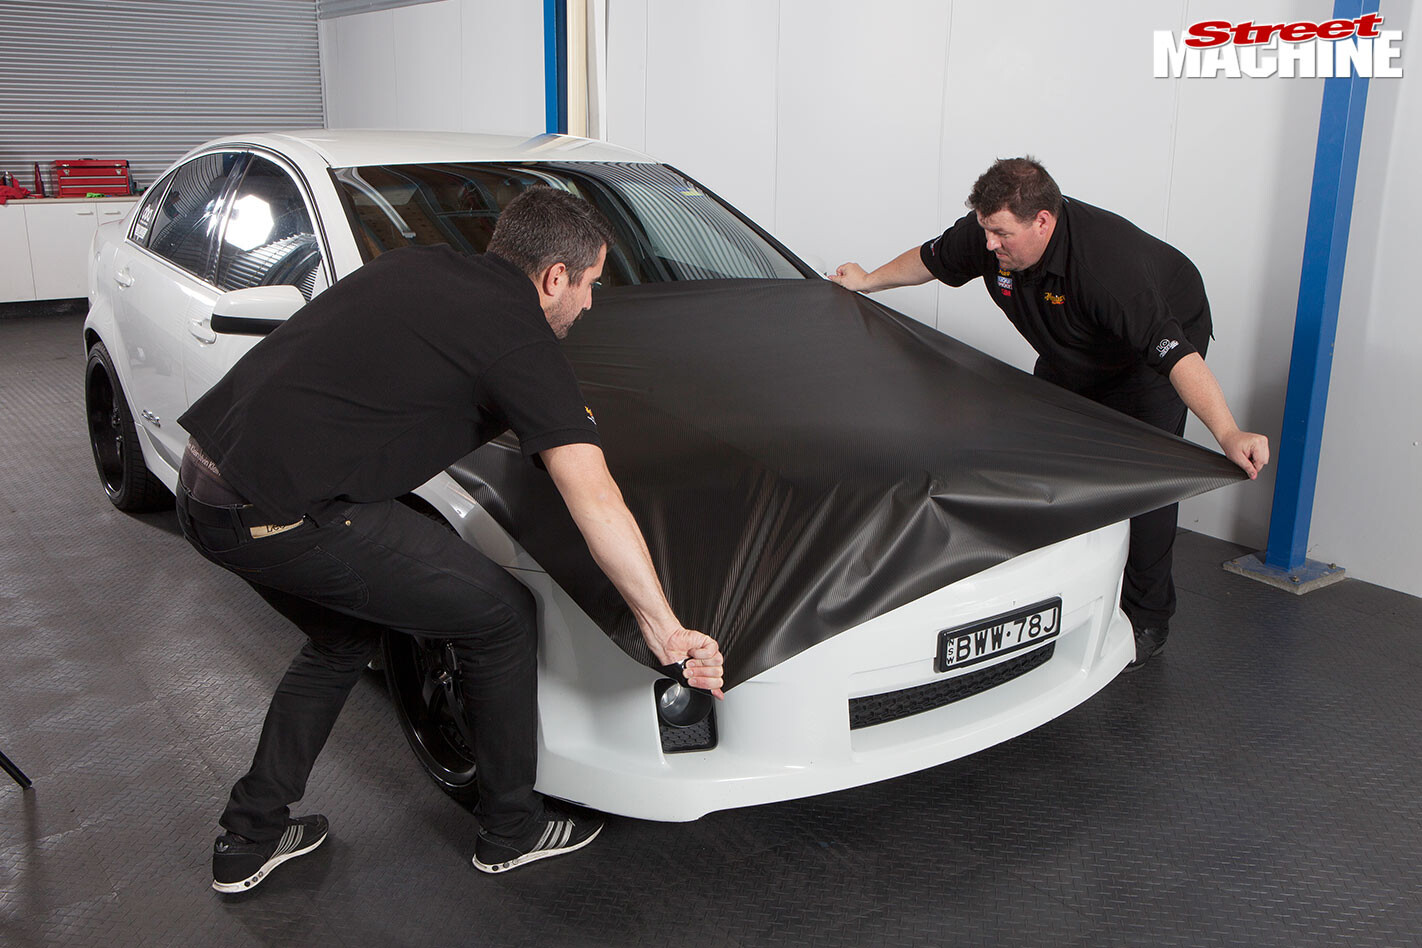 STEP 5. Big panels can be done on the car but smaller pieces should be removed for wrapping. The better you initially lay the film down, the easier it is to achieve a wrinkle and bubble-free finish. On the SS’s bonnet, Alex and Nathan stretched the film taut as they laid it down. Always check the sheet size is adequate and determine the correct orientation prior to peeling off the backing.
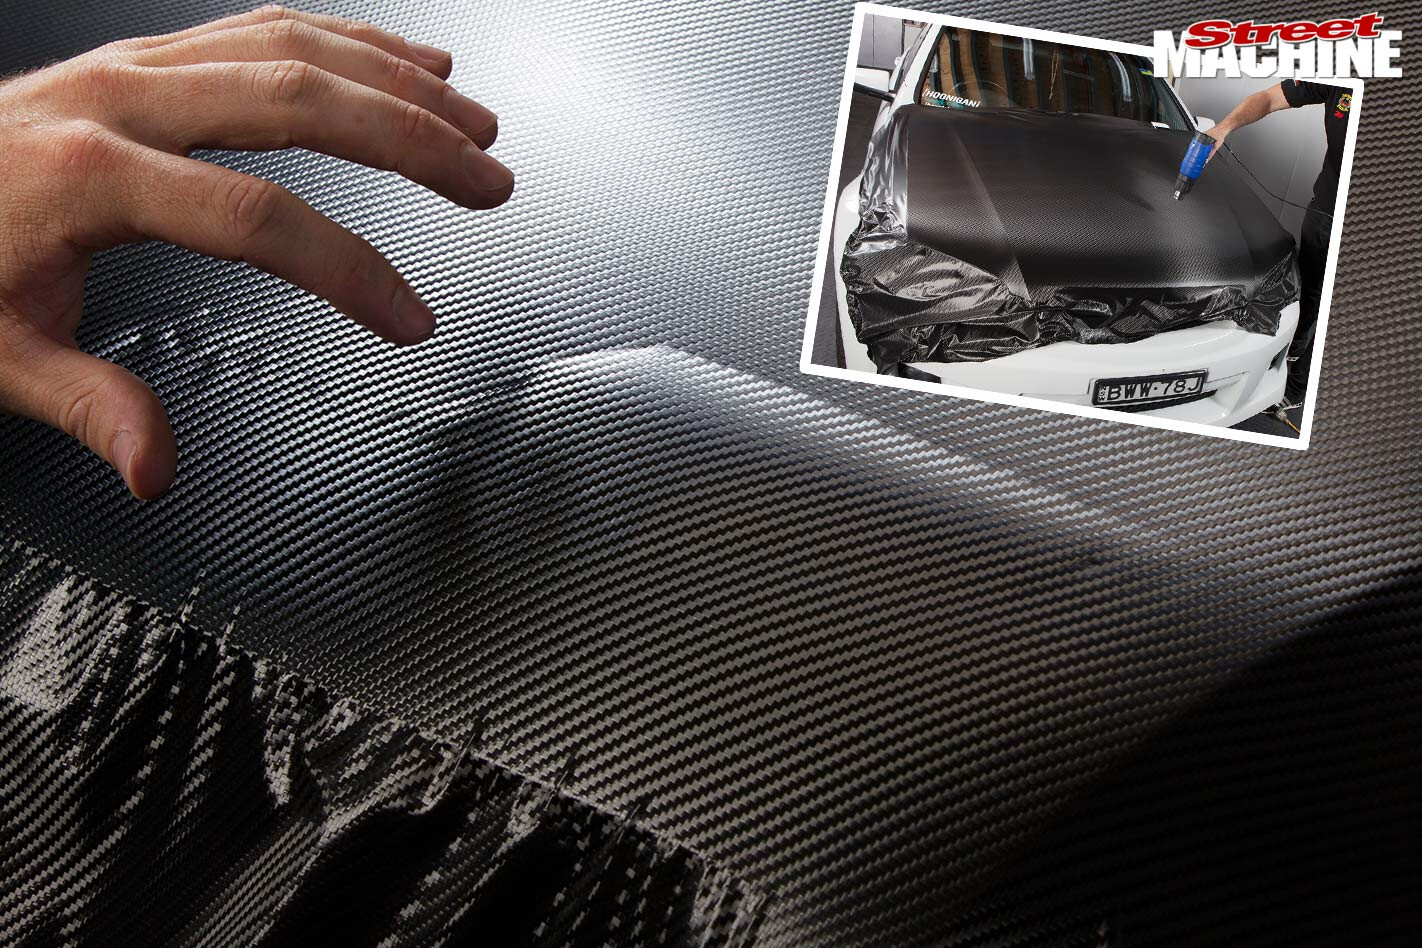
 STEP 6. 3M knows sticky stuff and the adhesive backing is extremely high-tech. It has minute release channels that allow you to remove air bubbles trapped under the film. It also has ‘slip’ — lay it on the panel and it will slide over the surface. Even when lightly tacked down it can be pulled up repeatedly without issues. It doesn’t take full hold until pressed on firmly, at which point it should not be re-lifted.
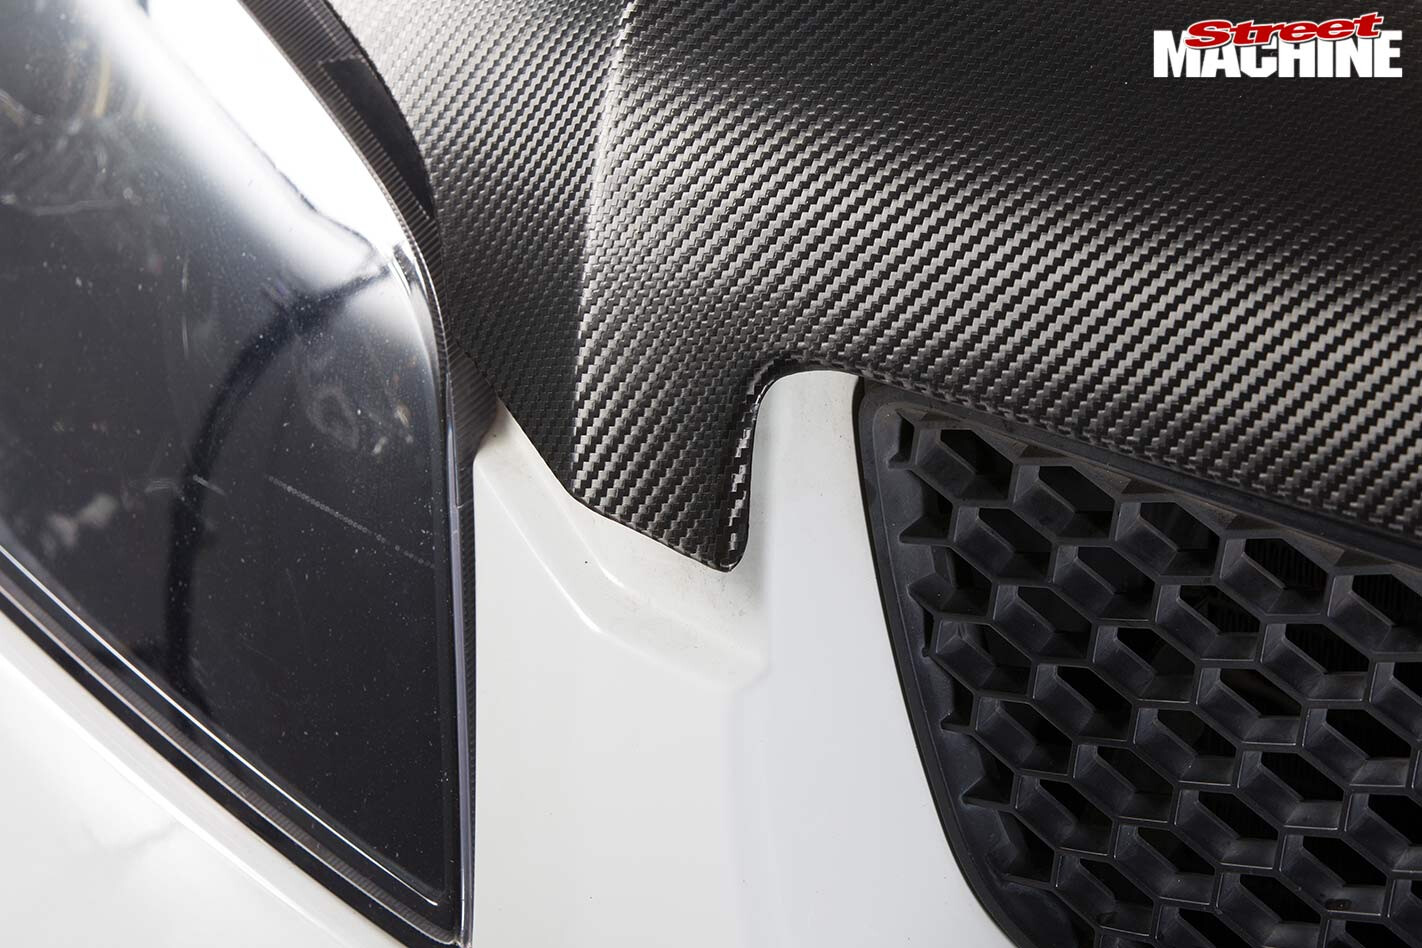
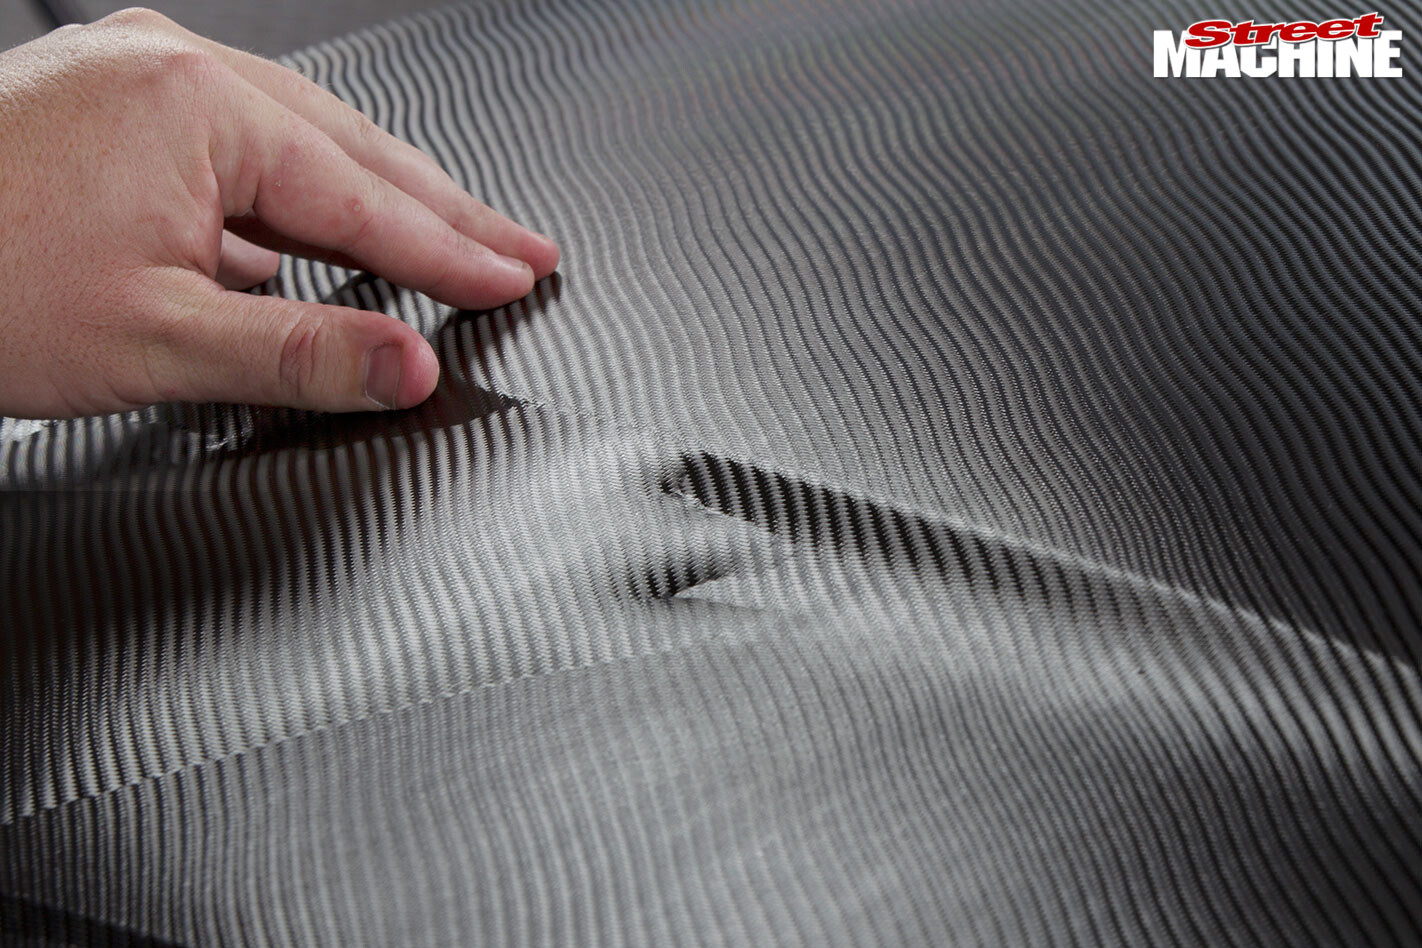 STEP 7. Notice how the wrap bridges this recess in the bonnet. The film’s natural stretch allows it to be easily worked into recesses like this. When doing this, keep in mind where and how the film will ‘gather’. Here, working forwards would be problematic but working from the top of the ridge towards the edge is quite effective. Getting the material as smooth as possible before starting to work it simplifies the job.
 STEP 8. To show how big a bubble can be removed, the boys deliberately created this huge blister. The trick is to progressively tap it out with your fingertip. It is possible to squeegee it out with the applicator but this risks creasing the film, which is harder to remove. Once the surface is fully contacted, run over it with the heat gun; this promotes adhesion and causes any trapped air to pop up as visible bubbles.
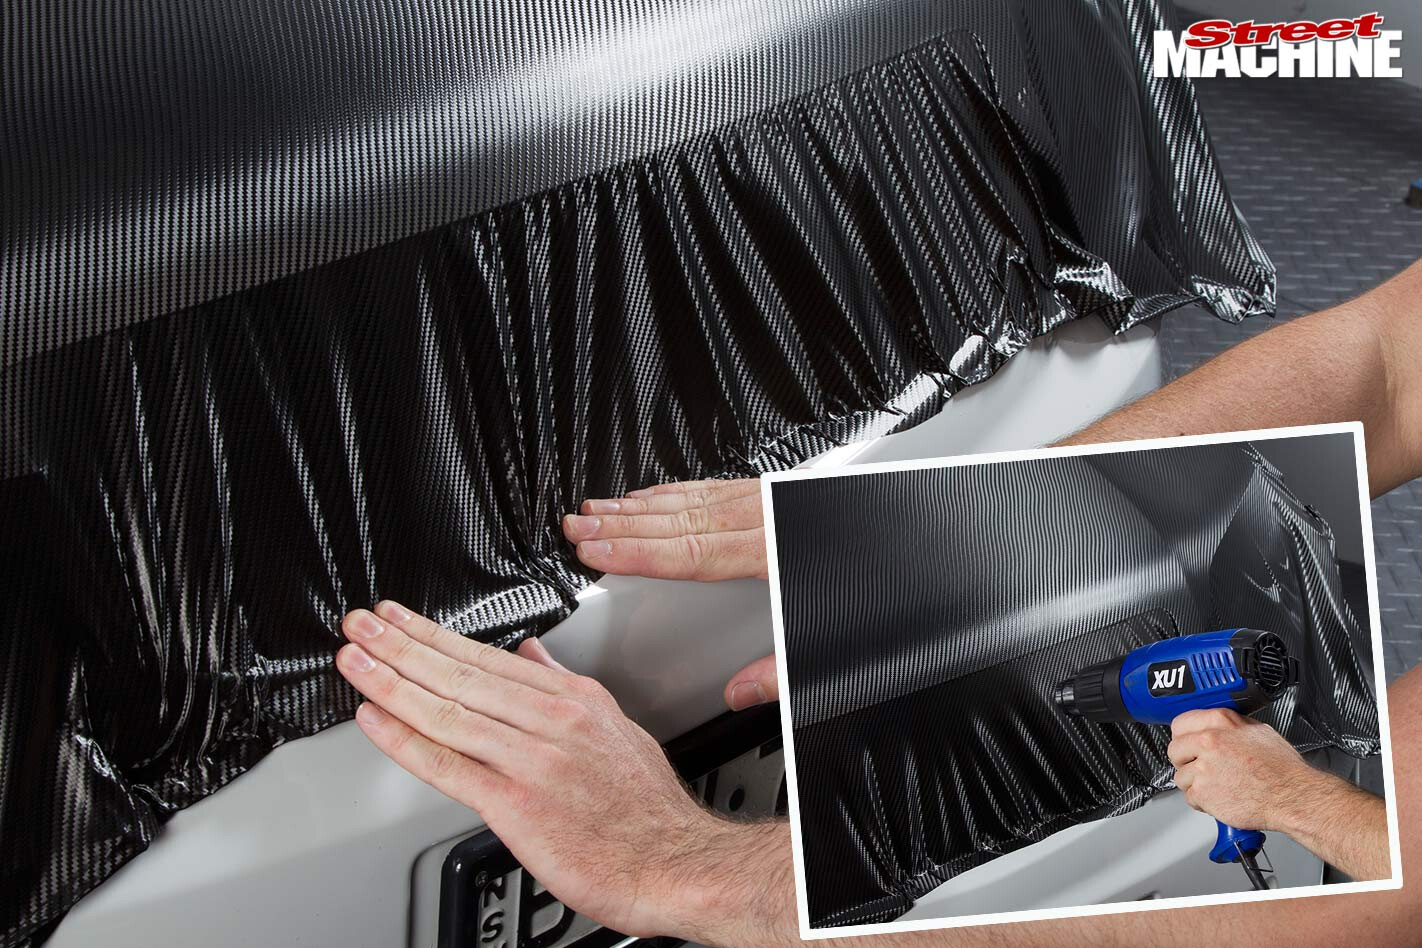 STEP 9. Note the gathered film under the front lip of the bonnet. This would transfer to the underside if not smoothed out. To eliminate it, pull the film taut by sticking it to another part of the car (top of the bumper bar in this case), then run over the edge with a heat gun and the film’s memory will make the gather disappear. Practice on a piece of scrap to get a feel for how much heat you can apply.
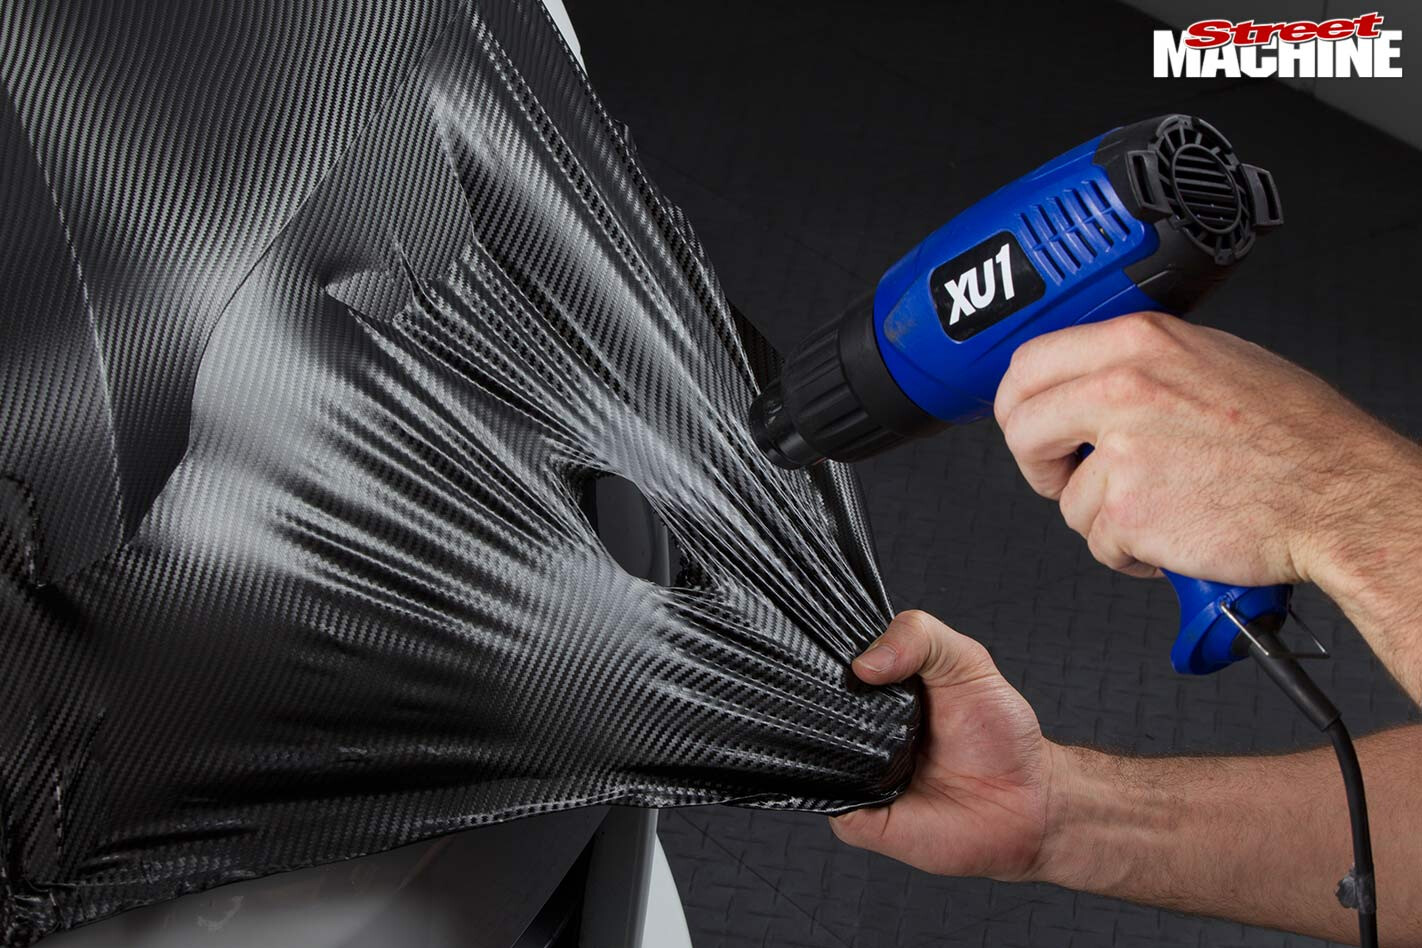 STEP 10. The previous step required holding the film taut while heating it but you should never simultaneously pull and heat the film as you’ll burn straight through it, as shown. The film holds the heat for a while, so the technique is to heat then stretch. Applying excessive heat will make the film sheen and even melt. Once laid down, however, its heat resistance becomes much greater; as good as paint.
 STEP 11. For a neat finish, wrap the film over the edge where possible. This seals off the air channels and prevents any more trapped air from being released — hence the importance of heating the upper surface prior to wrapping the edge. For this final step, trim off the excess film bar a flap of about 25mm. This makes the film easier to manage. The factory seam was used as a guide to attain a nice, straight final cut.
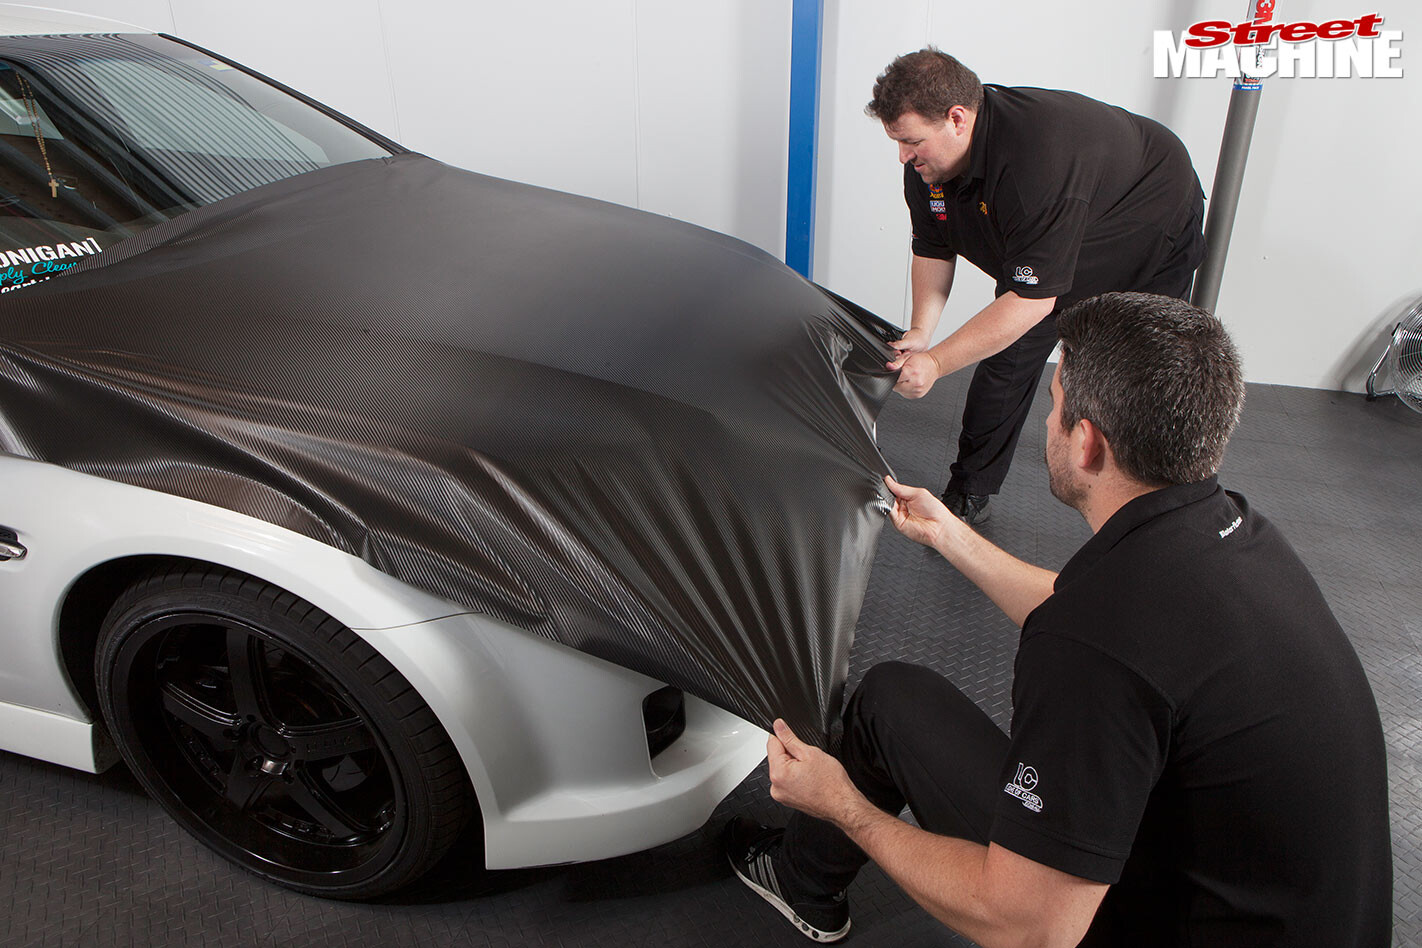
 STEP 12. Do the main areas first; start in the middle and work out towards the edges using only the padded edge of the applicator. Be mindful of where you’re likely to end up with an excess of material (gather) that will be challenging to eliminate. While the film can be heated and stretched to mould into voids, there are limits. With practice, achieving a nice finish like this will become second nature.
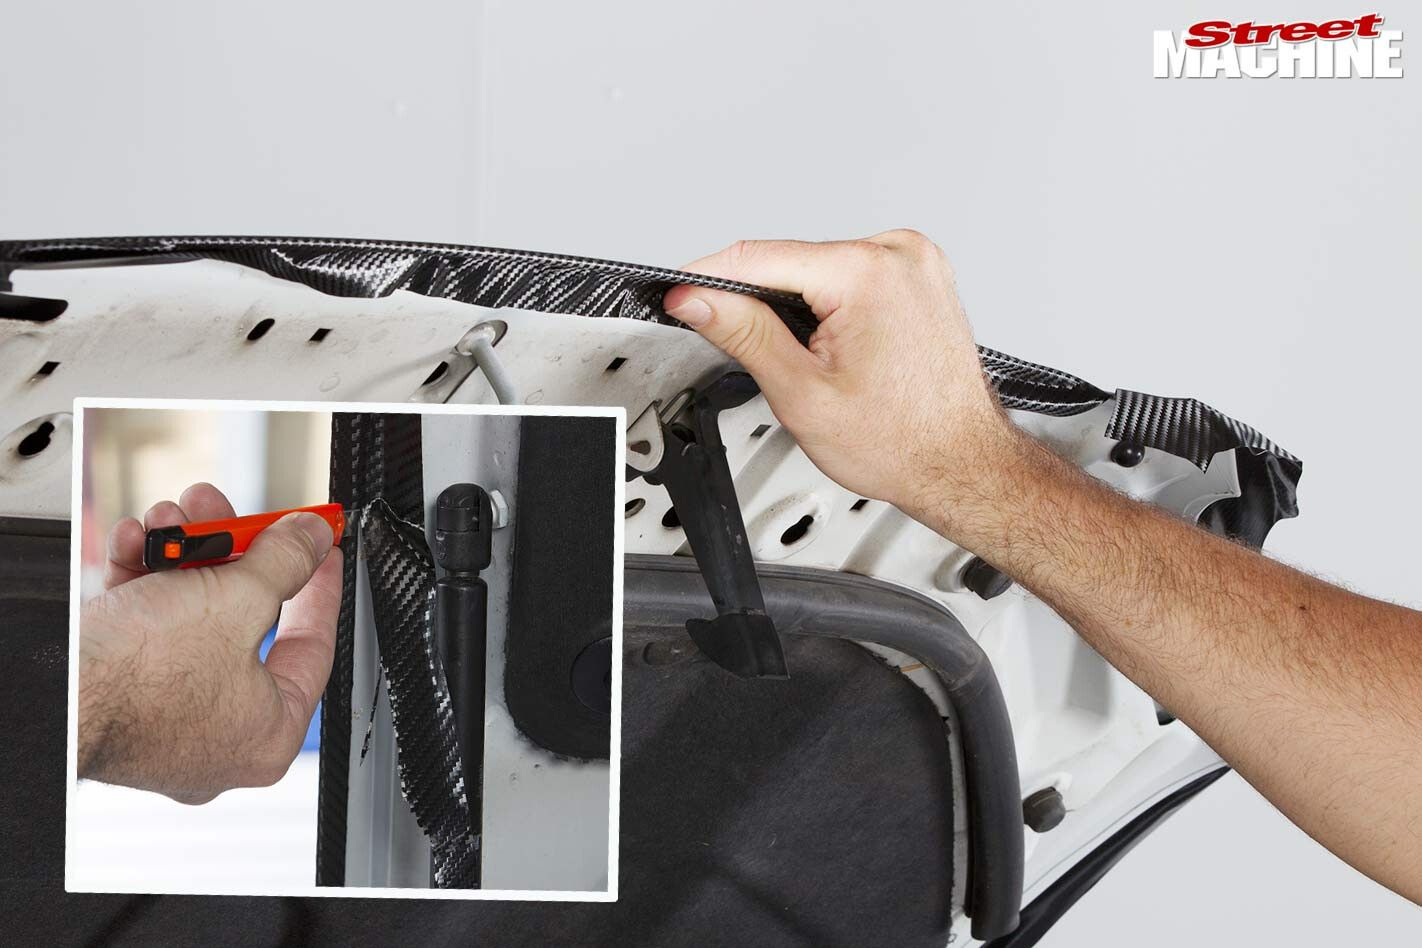
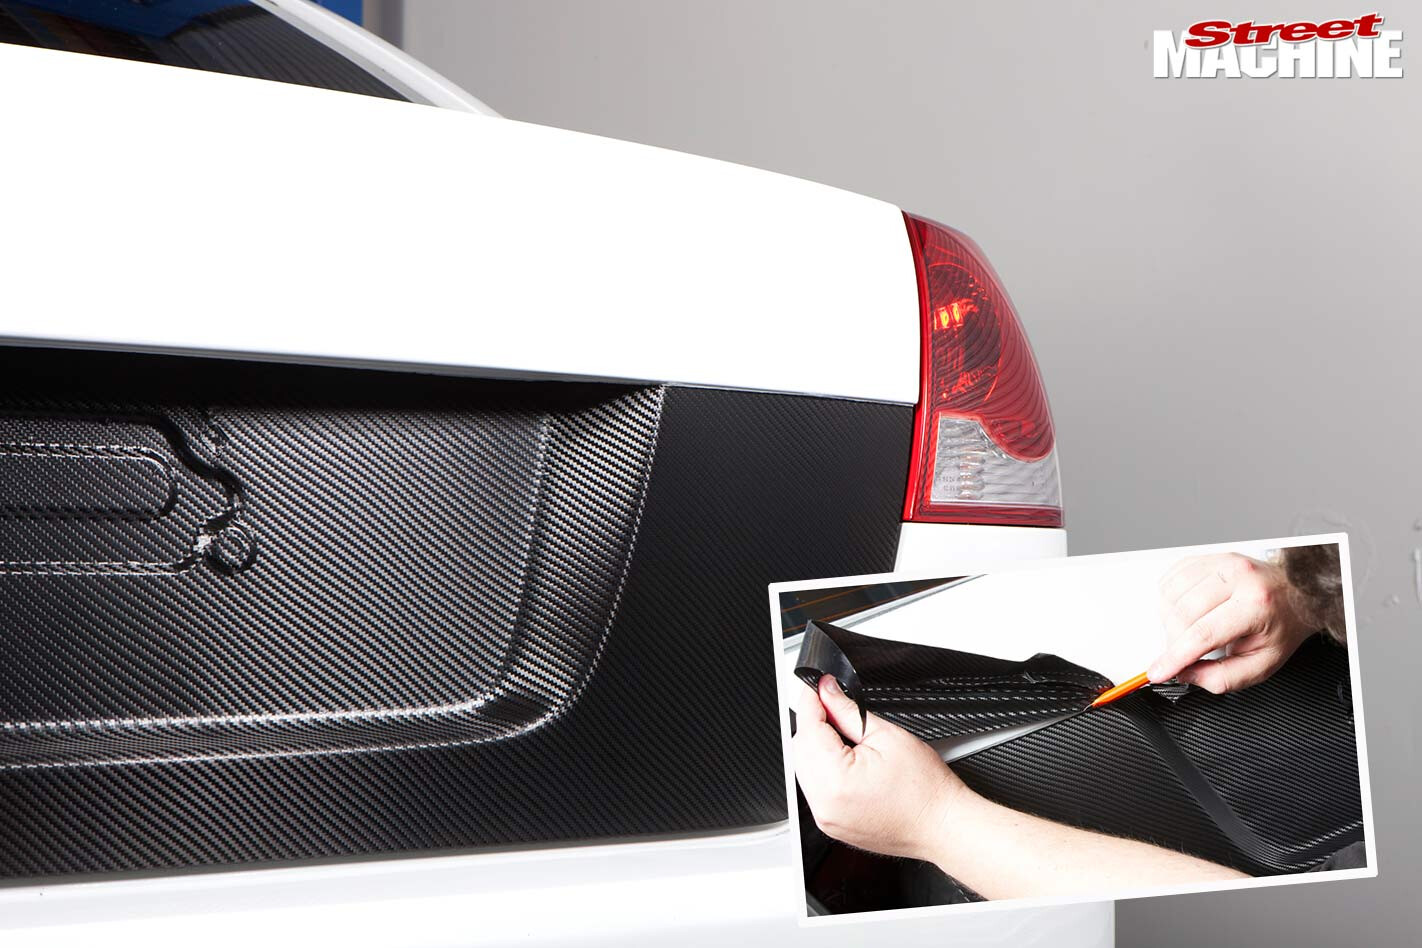
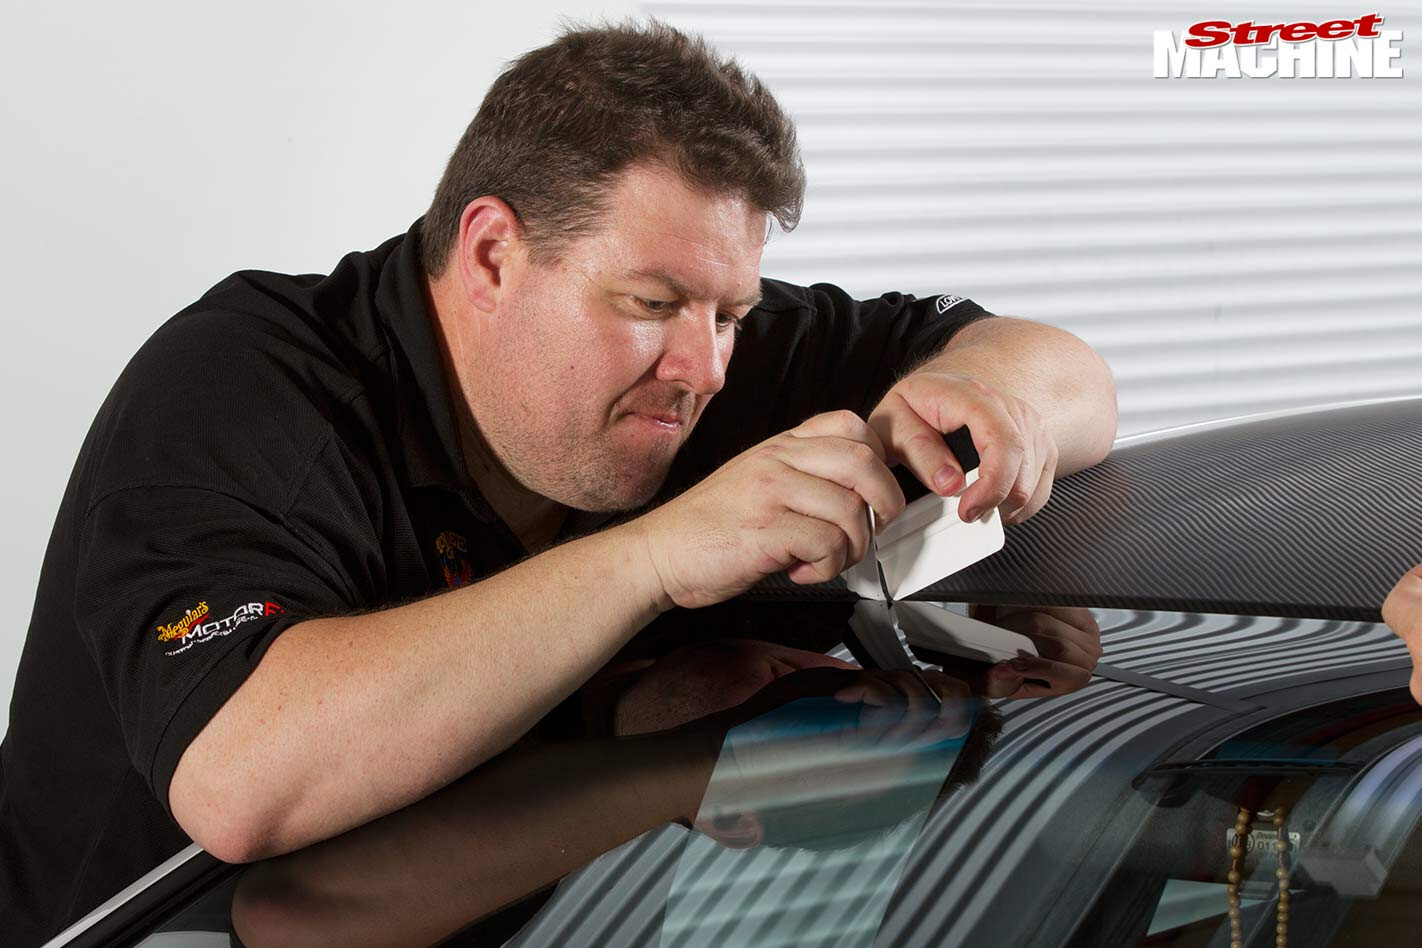 STEP 13. The applicators are multipurpose; they’re ideal for smoothing and pressing the film down so that it makes definitive contact. Here, Nathan is using one to delicately lever the window rubber back away from the body while using a second applicator to push the remaining 5mm flap down into the slot. Keep your applicators clean; even the tiniest piece of grit in the applicator’s padding will leave marks in the film’s surface.
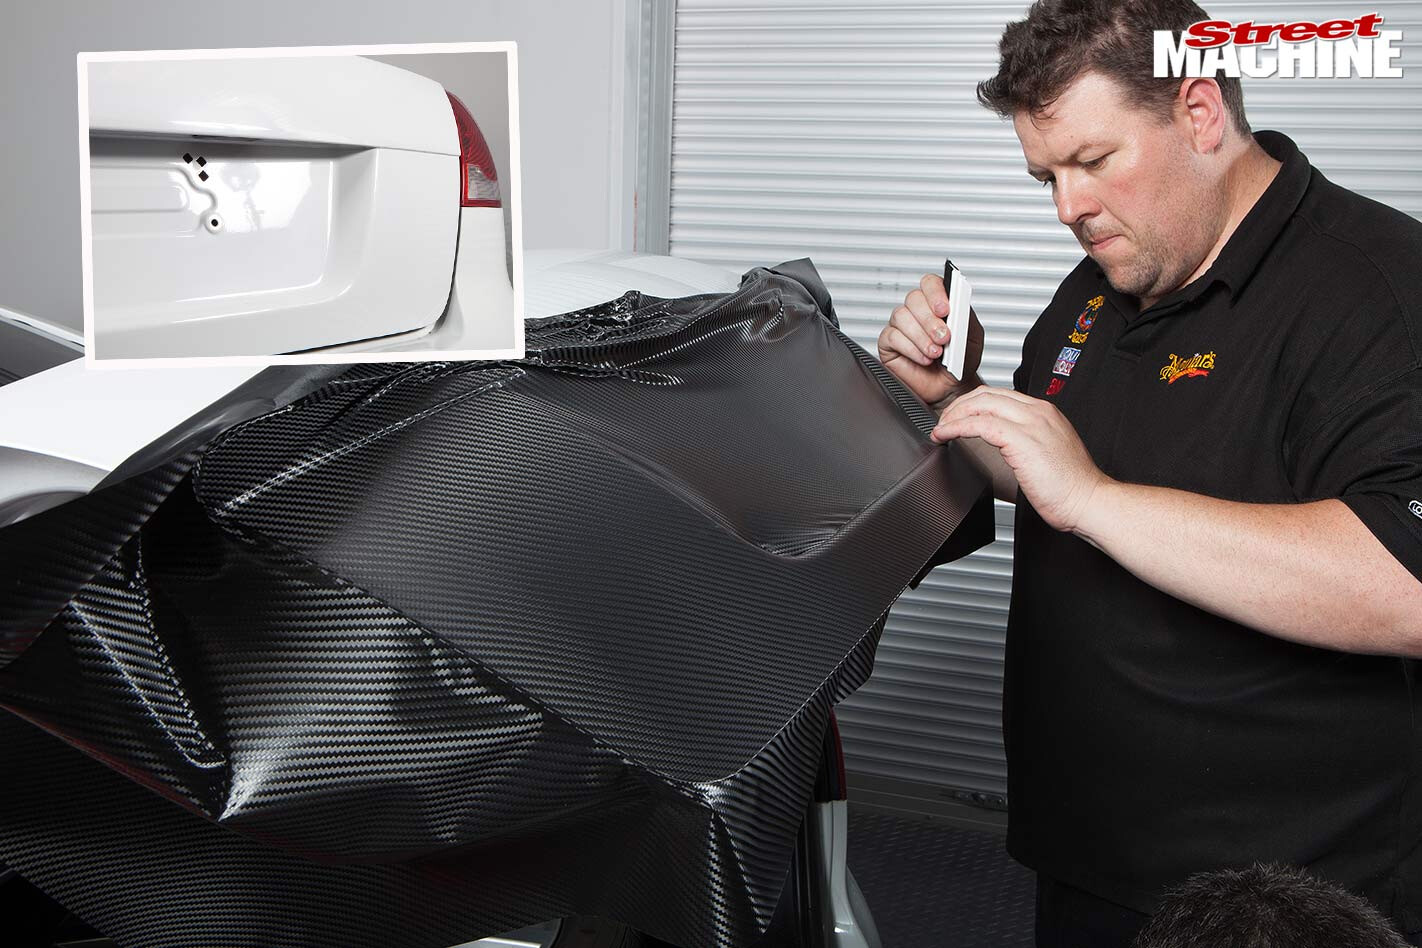 STEP 14. At room temperature, the film has about 30 per cent stretch; this increases when heated. That’s more than enough stretch to allow it to be moulded into deep depressions such as on the VE’s boot lid or doorhandle recesses. Notice how the film is initially stretched over, bridging the void. To begin moulding the film into the depression, start at the edges and gradually work your way inwards.
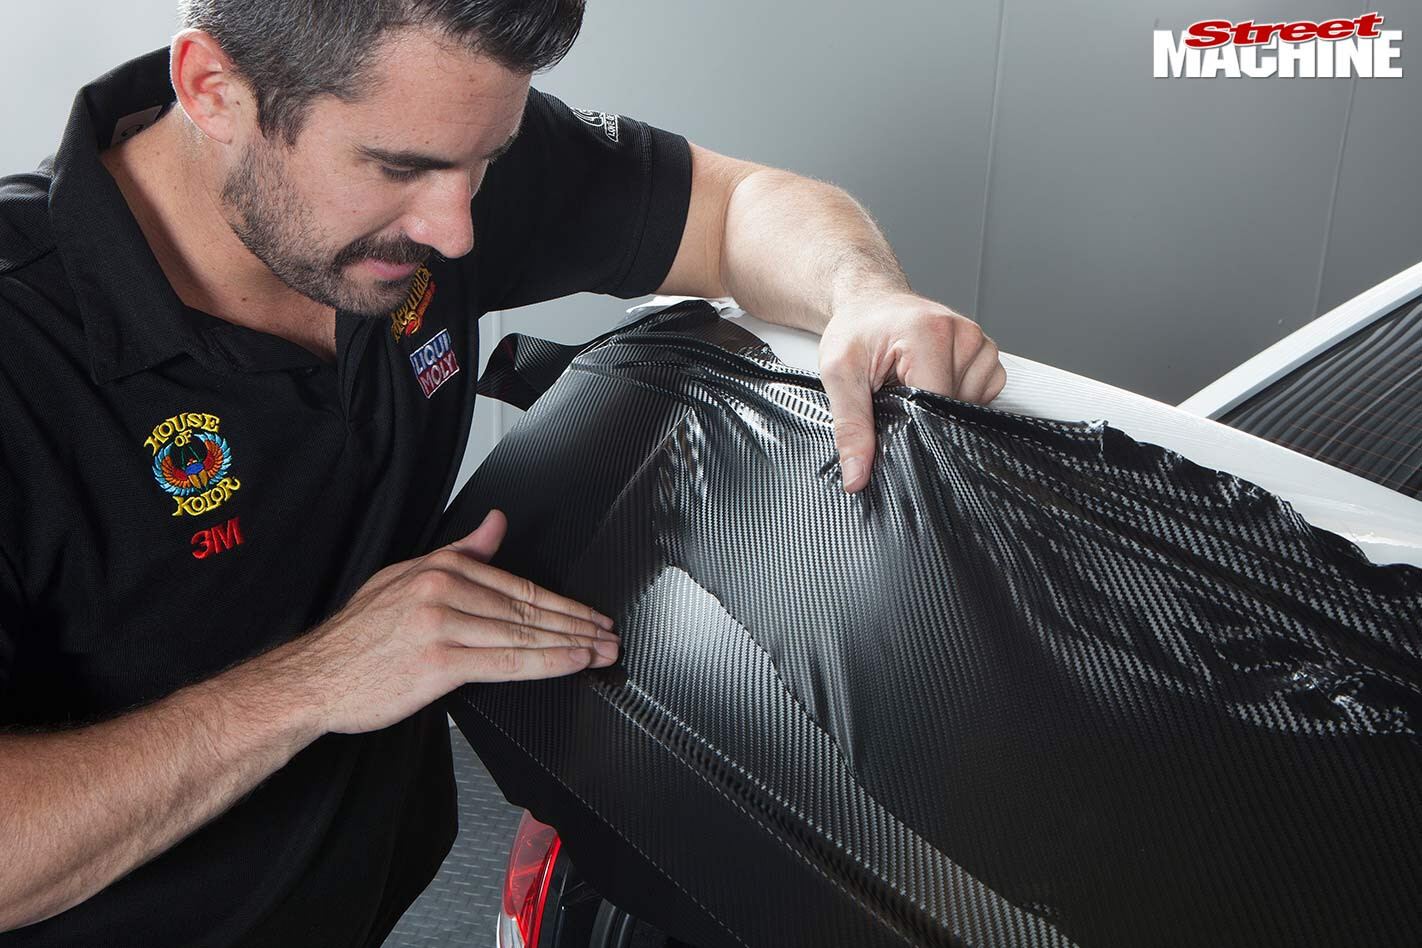 STEP 15. Patience is of the essence here. Using finger pressure, work the wrap down into the depression little by little — all the while keeping the film taut to help eliminate wrinkles and gathers. While it’s a very forgiving product, avoid lifting the material too many times in difficult areas like this or you risk distorting the material, which is especially noticeable on patterned wraps like the carbon-fibre.
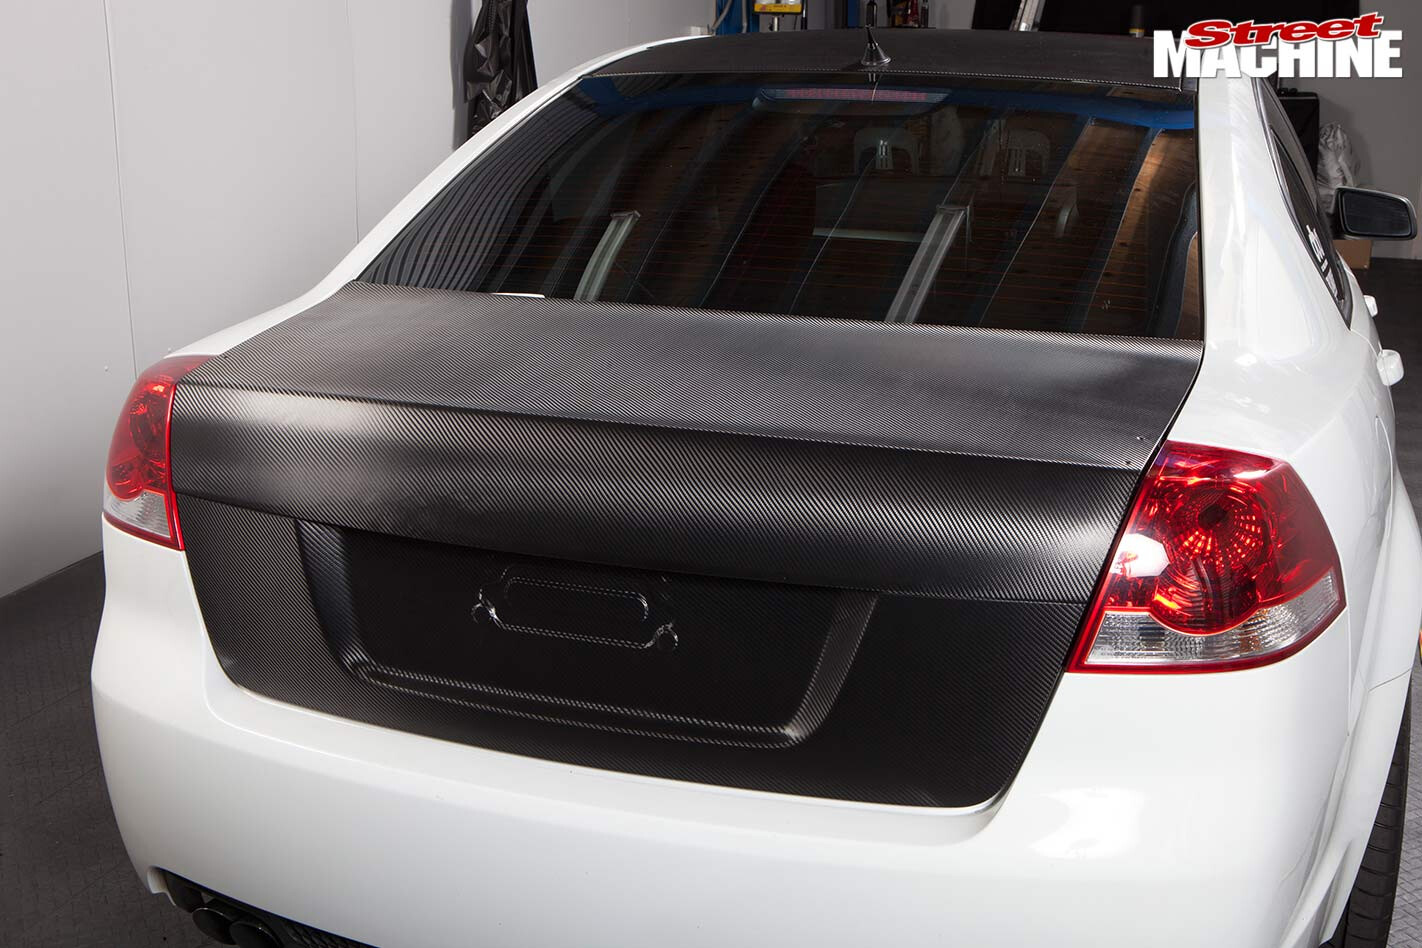
 STEP 16. Although the shape of the boot lid is tricky, the boys made it look simple. It requires a deft touch to work the film into a depression like this without distorting the material. Because of the highly structured carbon-fibre pattern, distortion here is far more noticeable than with other finishes. When trimming, use delicate pressure to prevent cutting through the paint, otherwise corrosion is likely to set in.
WRAP UP
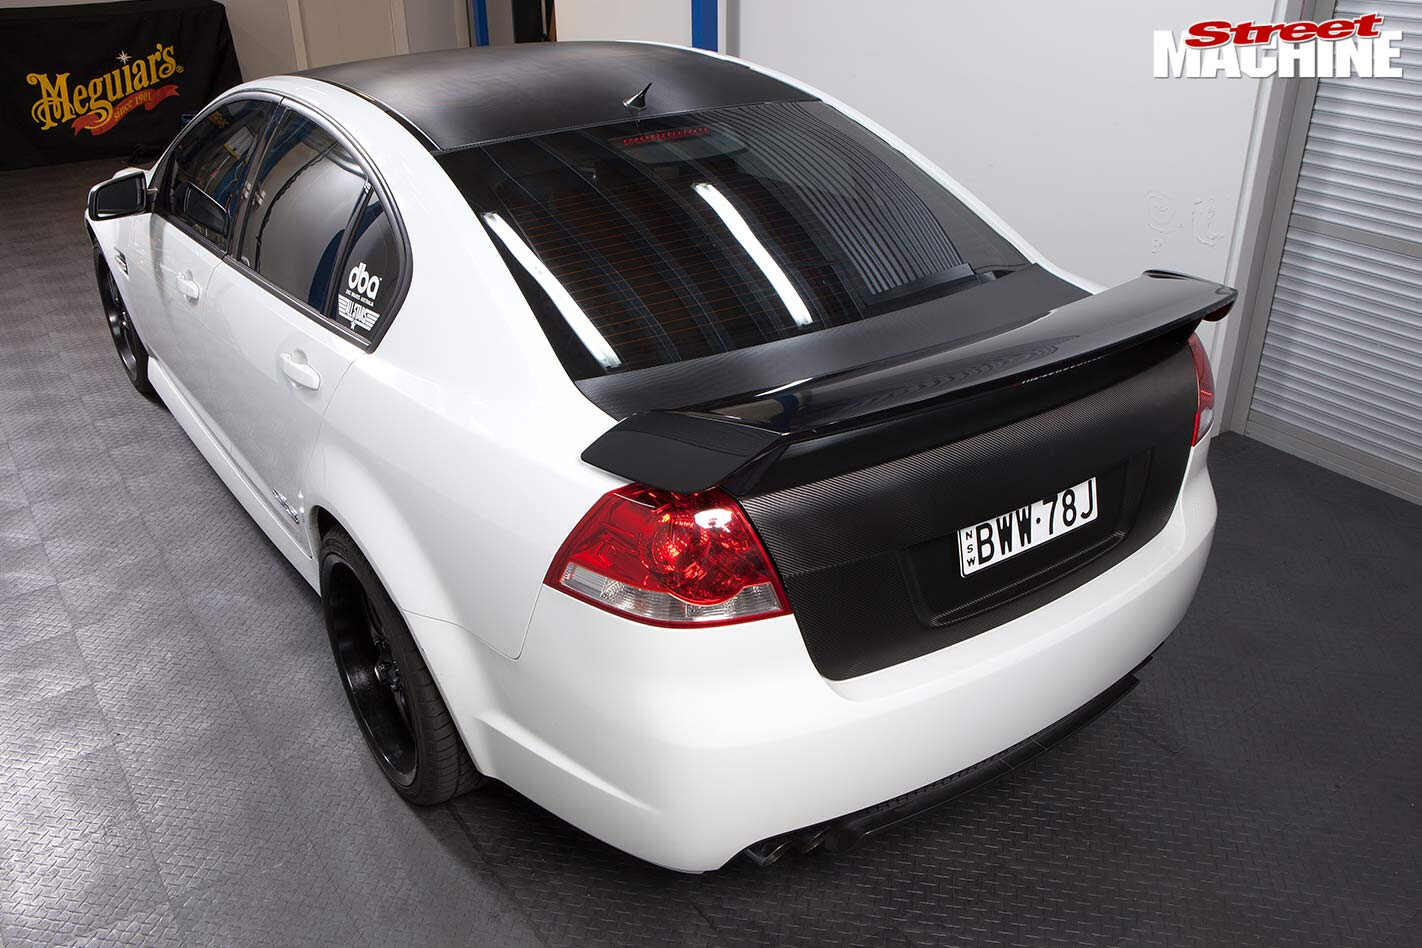 The finished job certainly gives the white SS a more aggressive appearance and the carbon-fibre looks bitchin’. With any job of this nature, practice makes perfect. Motoractive advises tackling smaller, simpler jobs before taking on a bigger operation like this — a full wrap is a whole lot harder again.
For more hints and tips, check out www.designerwraps.com.au. Two big no-nos when using 3M’s Designer Wrap is allowing the adhesive backing to touch itself and creating creases when using the applicator; both are extremely hard situations to rescue.
Also, the more you stress (stretch) the film, the more the adhesive thins out and that can compromise longevity.
 Application can leave fine marks in the surface as it scratches easily when heated, but these can be removed via the deft application of heat — once again, practice on a piece of scrap.
Finally, clean away any glue residue and fingerprints with something like Meguiar’s Ultimate Quick Wax. As for washing and ongoing care, all of the wraps should be treated the same way you would look after a painted surface.
Comments